

HardHead
-
Posts
18 -
Joined
-
Last visited
Content Type
Profiles
Forums
Articles
Gallery
Downloads
Events
Posts posted by HardHead
-
-
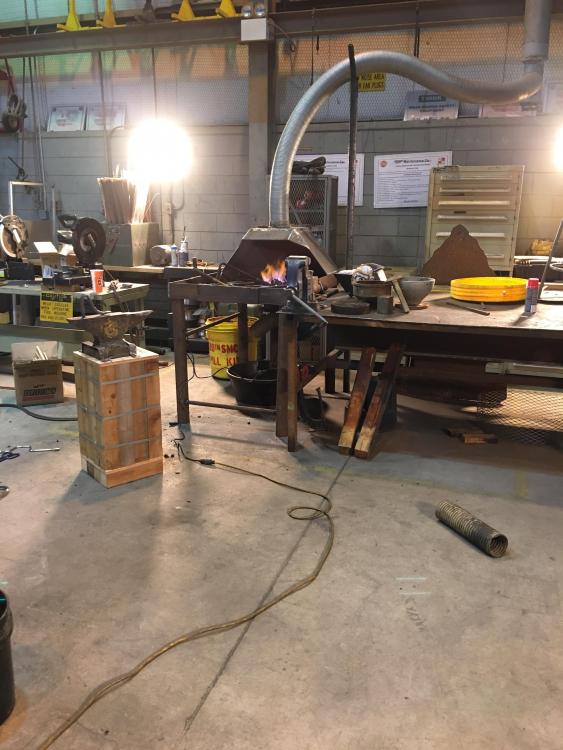
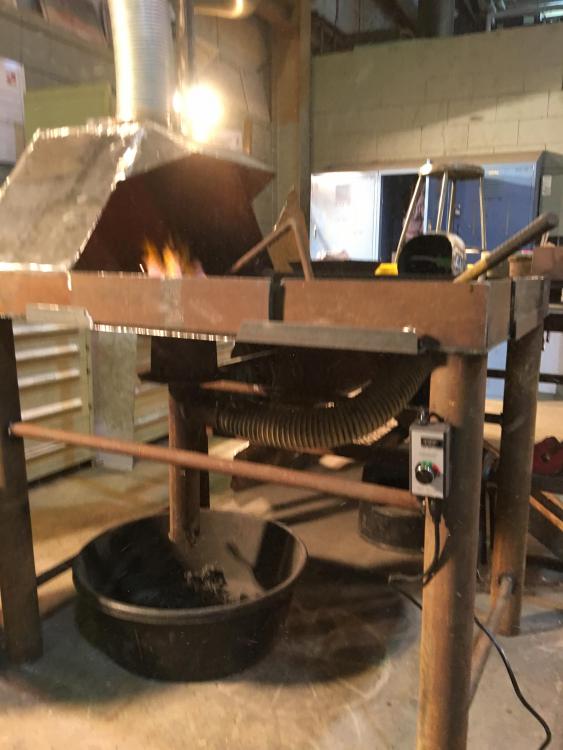
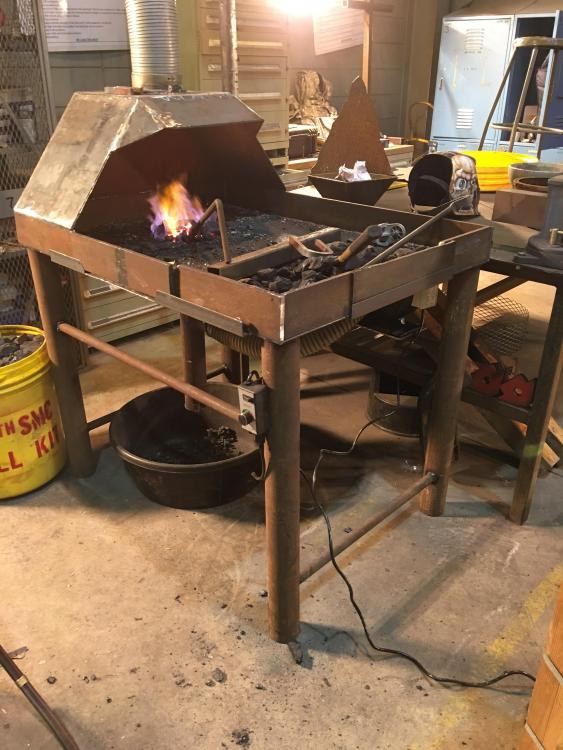
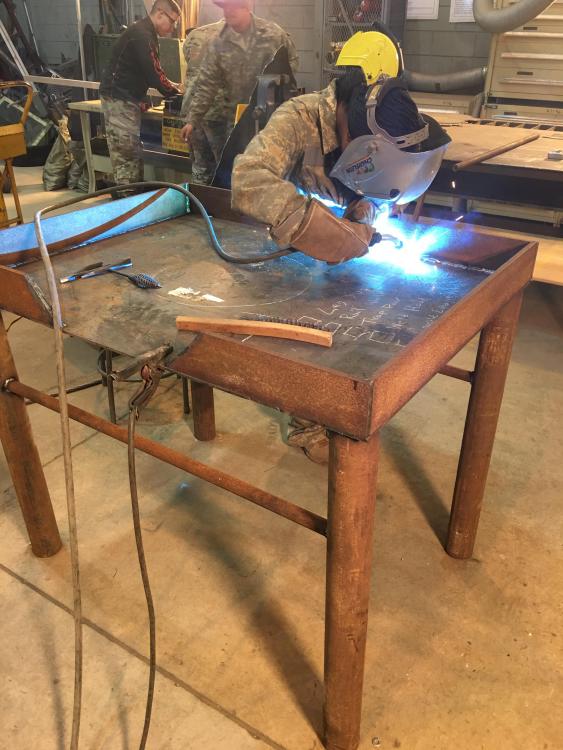
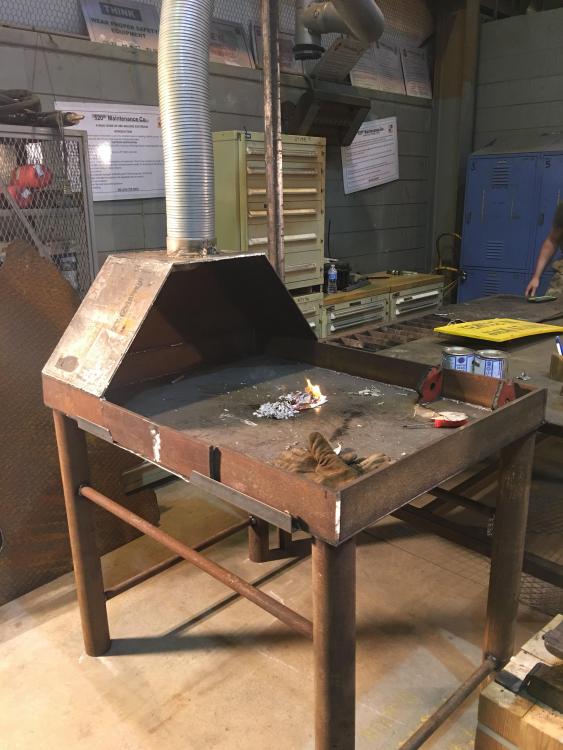
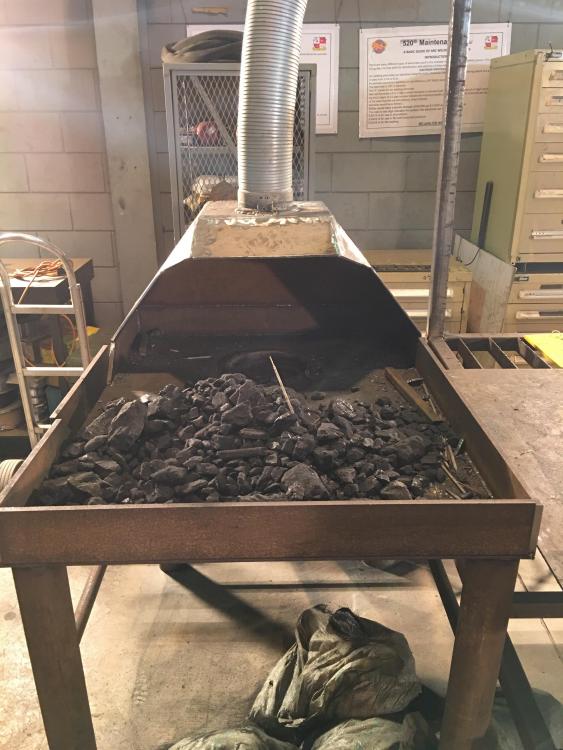
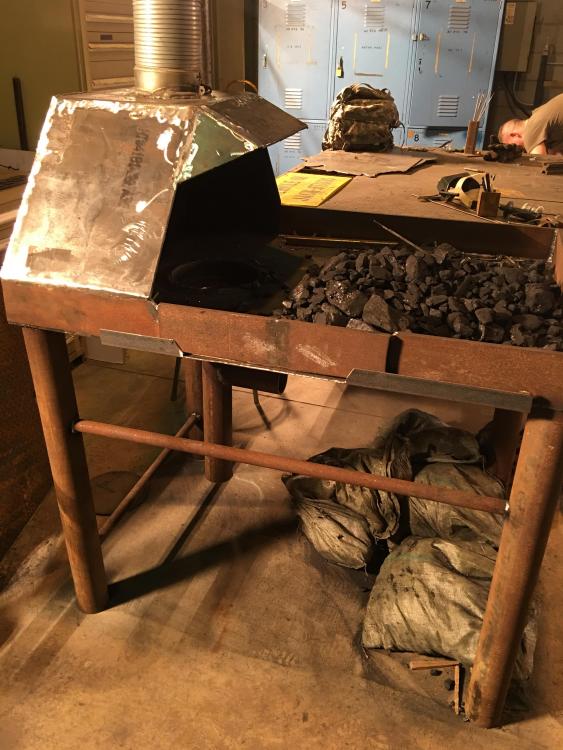
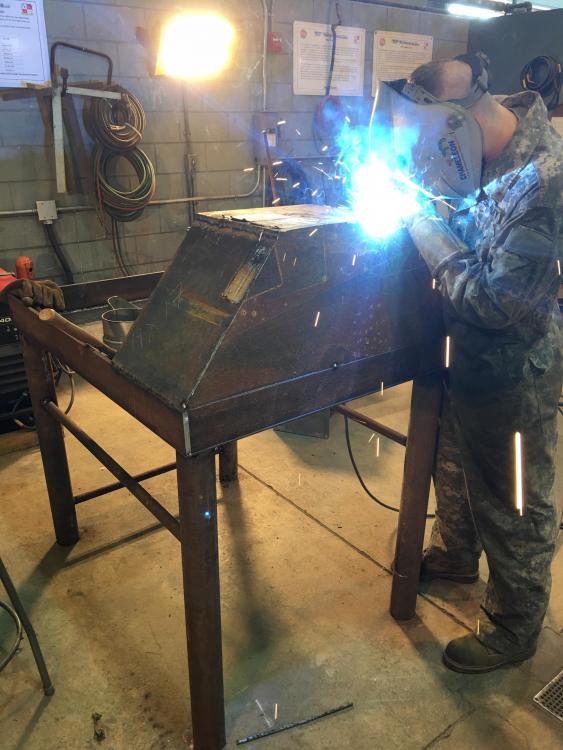
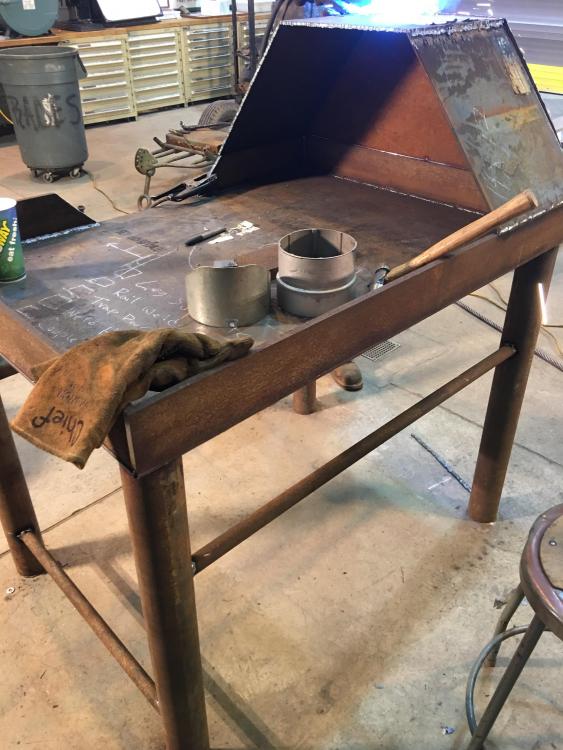
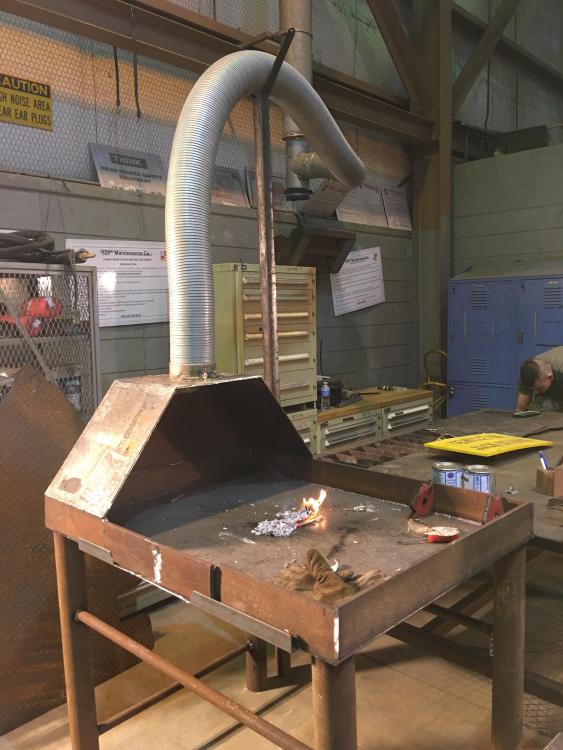
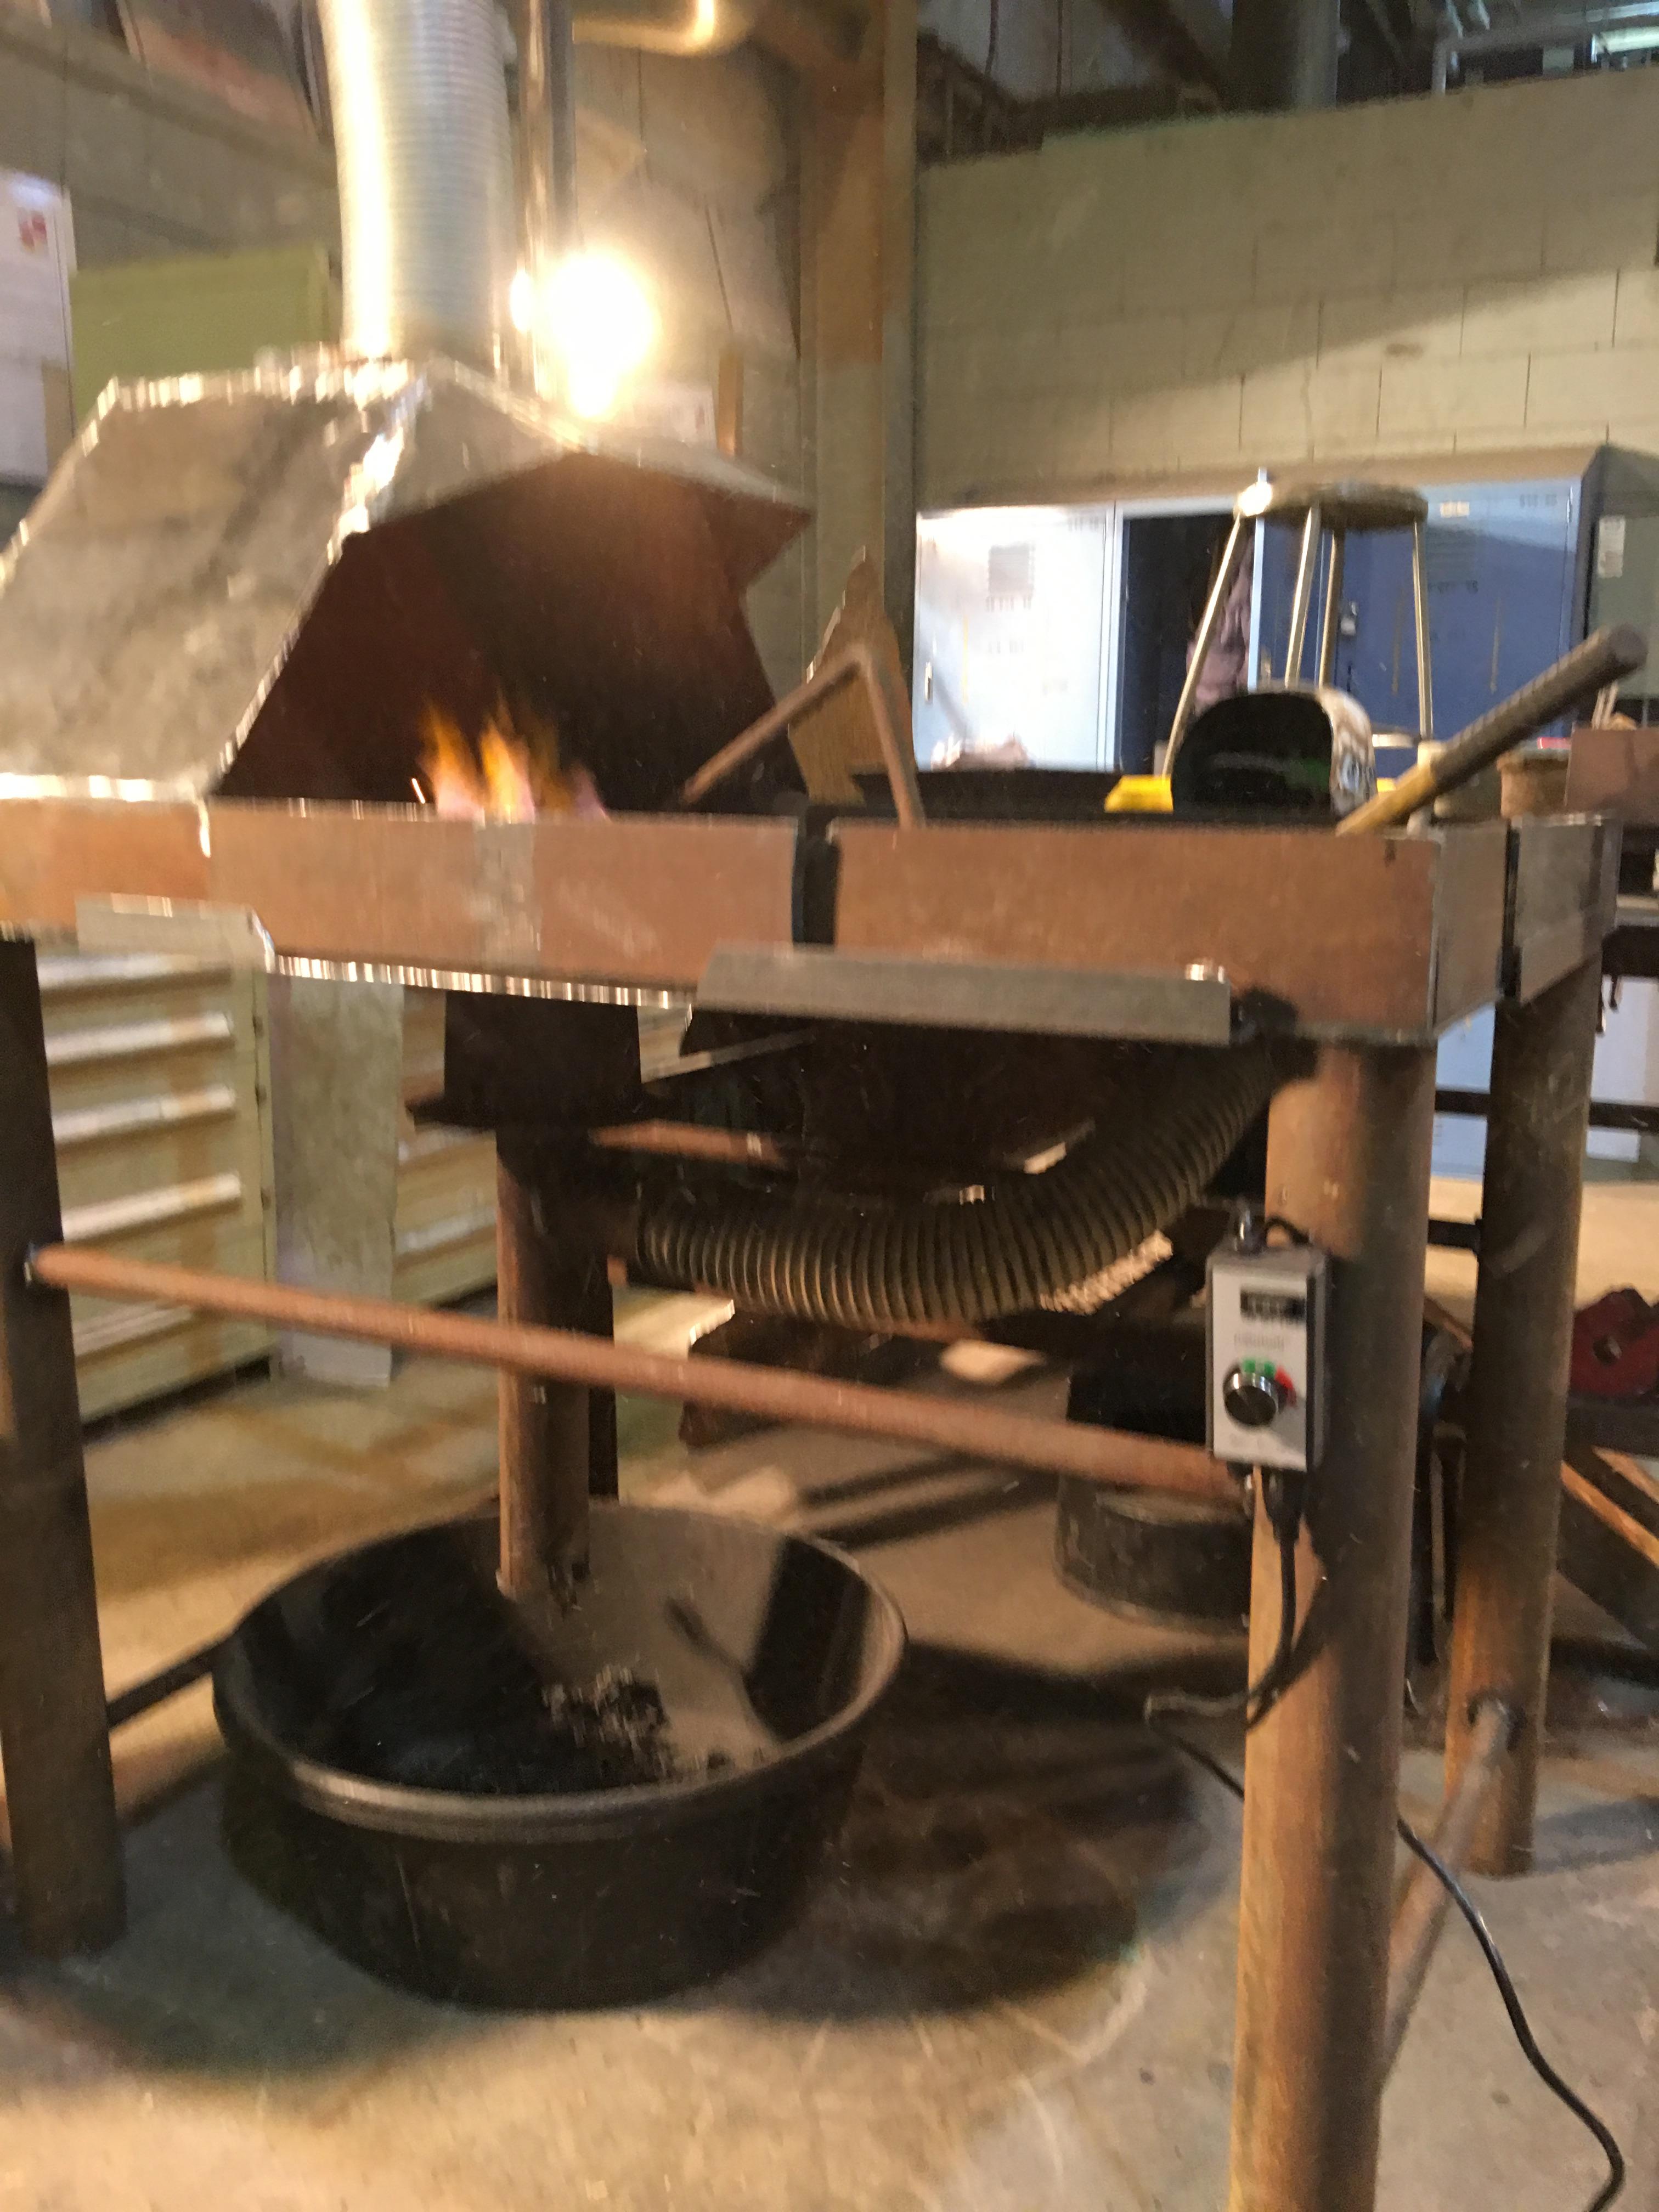
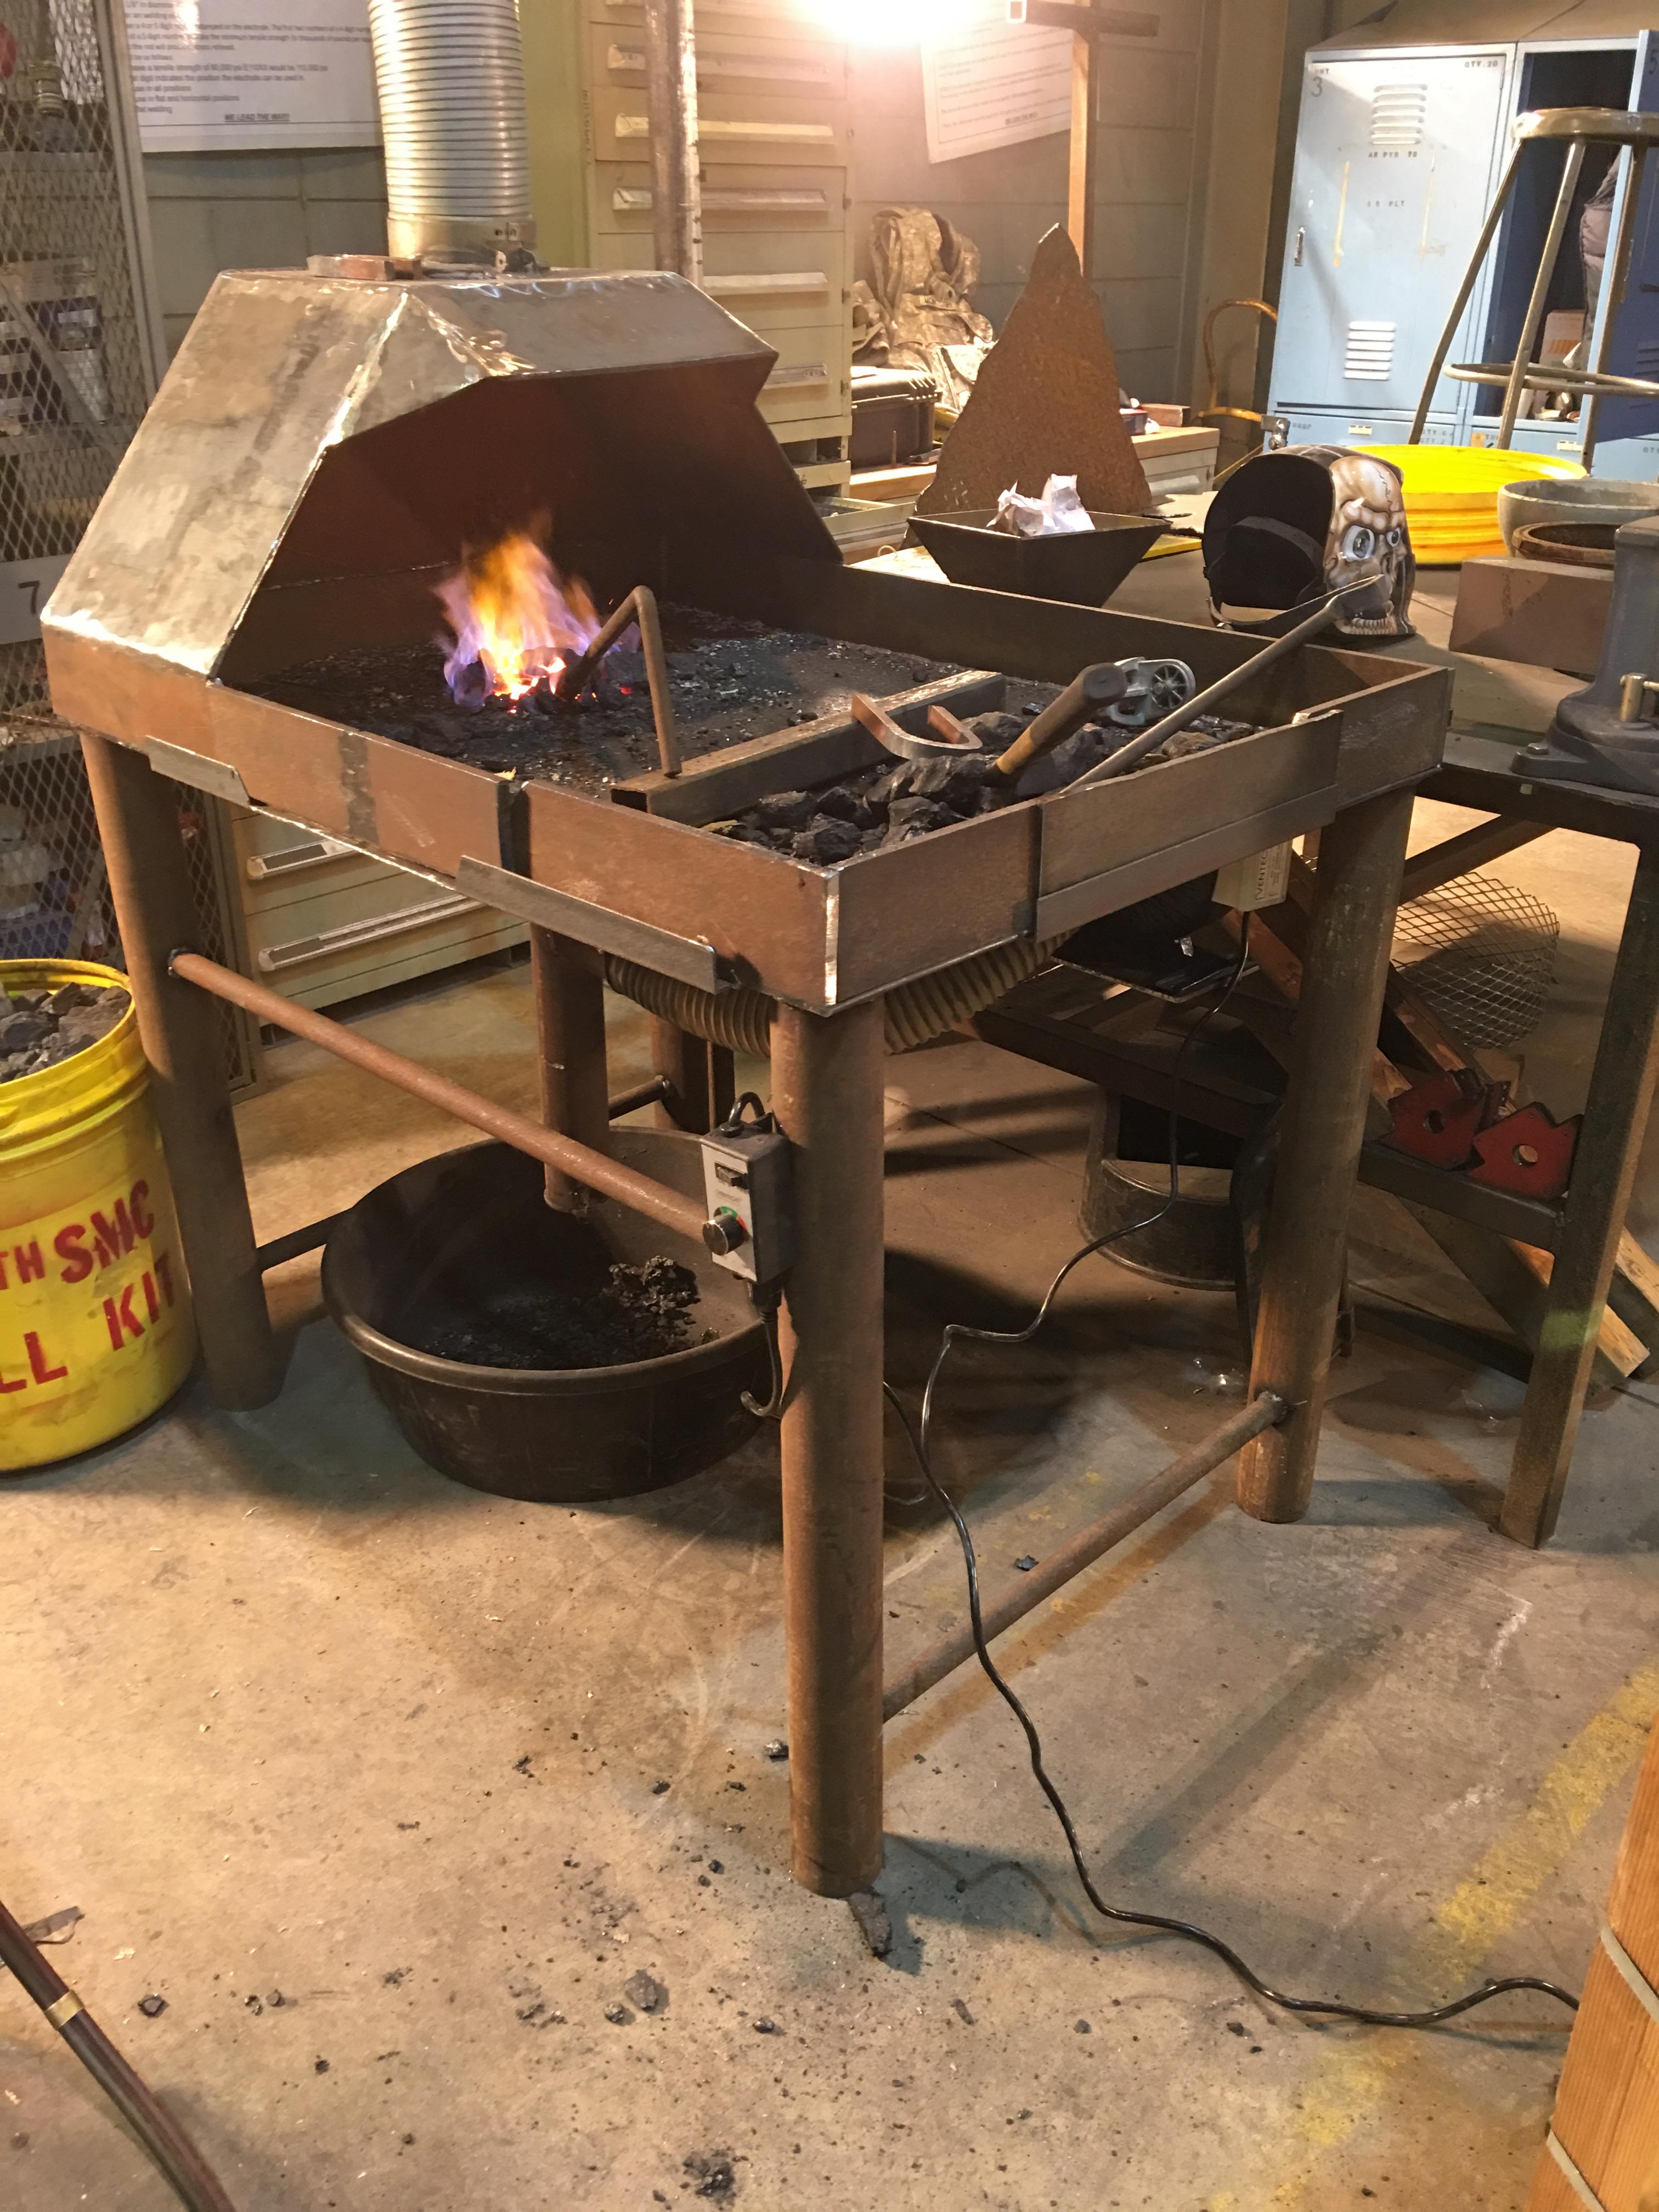
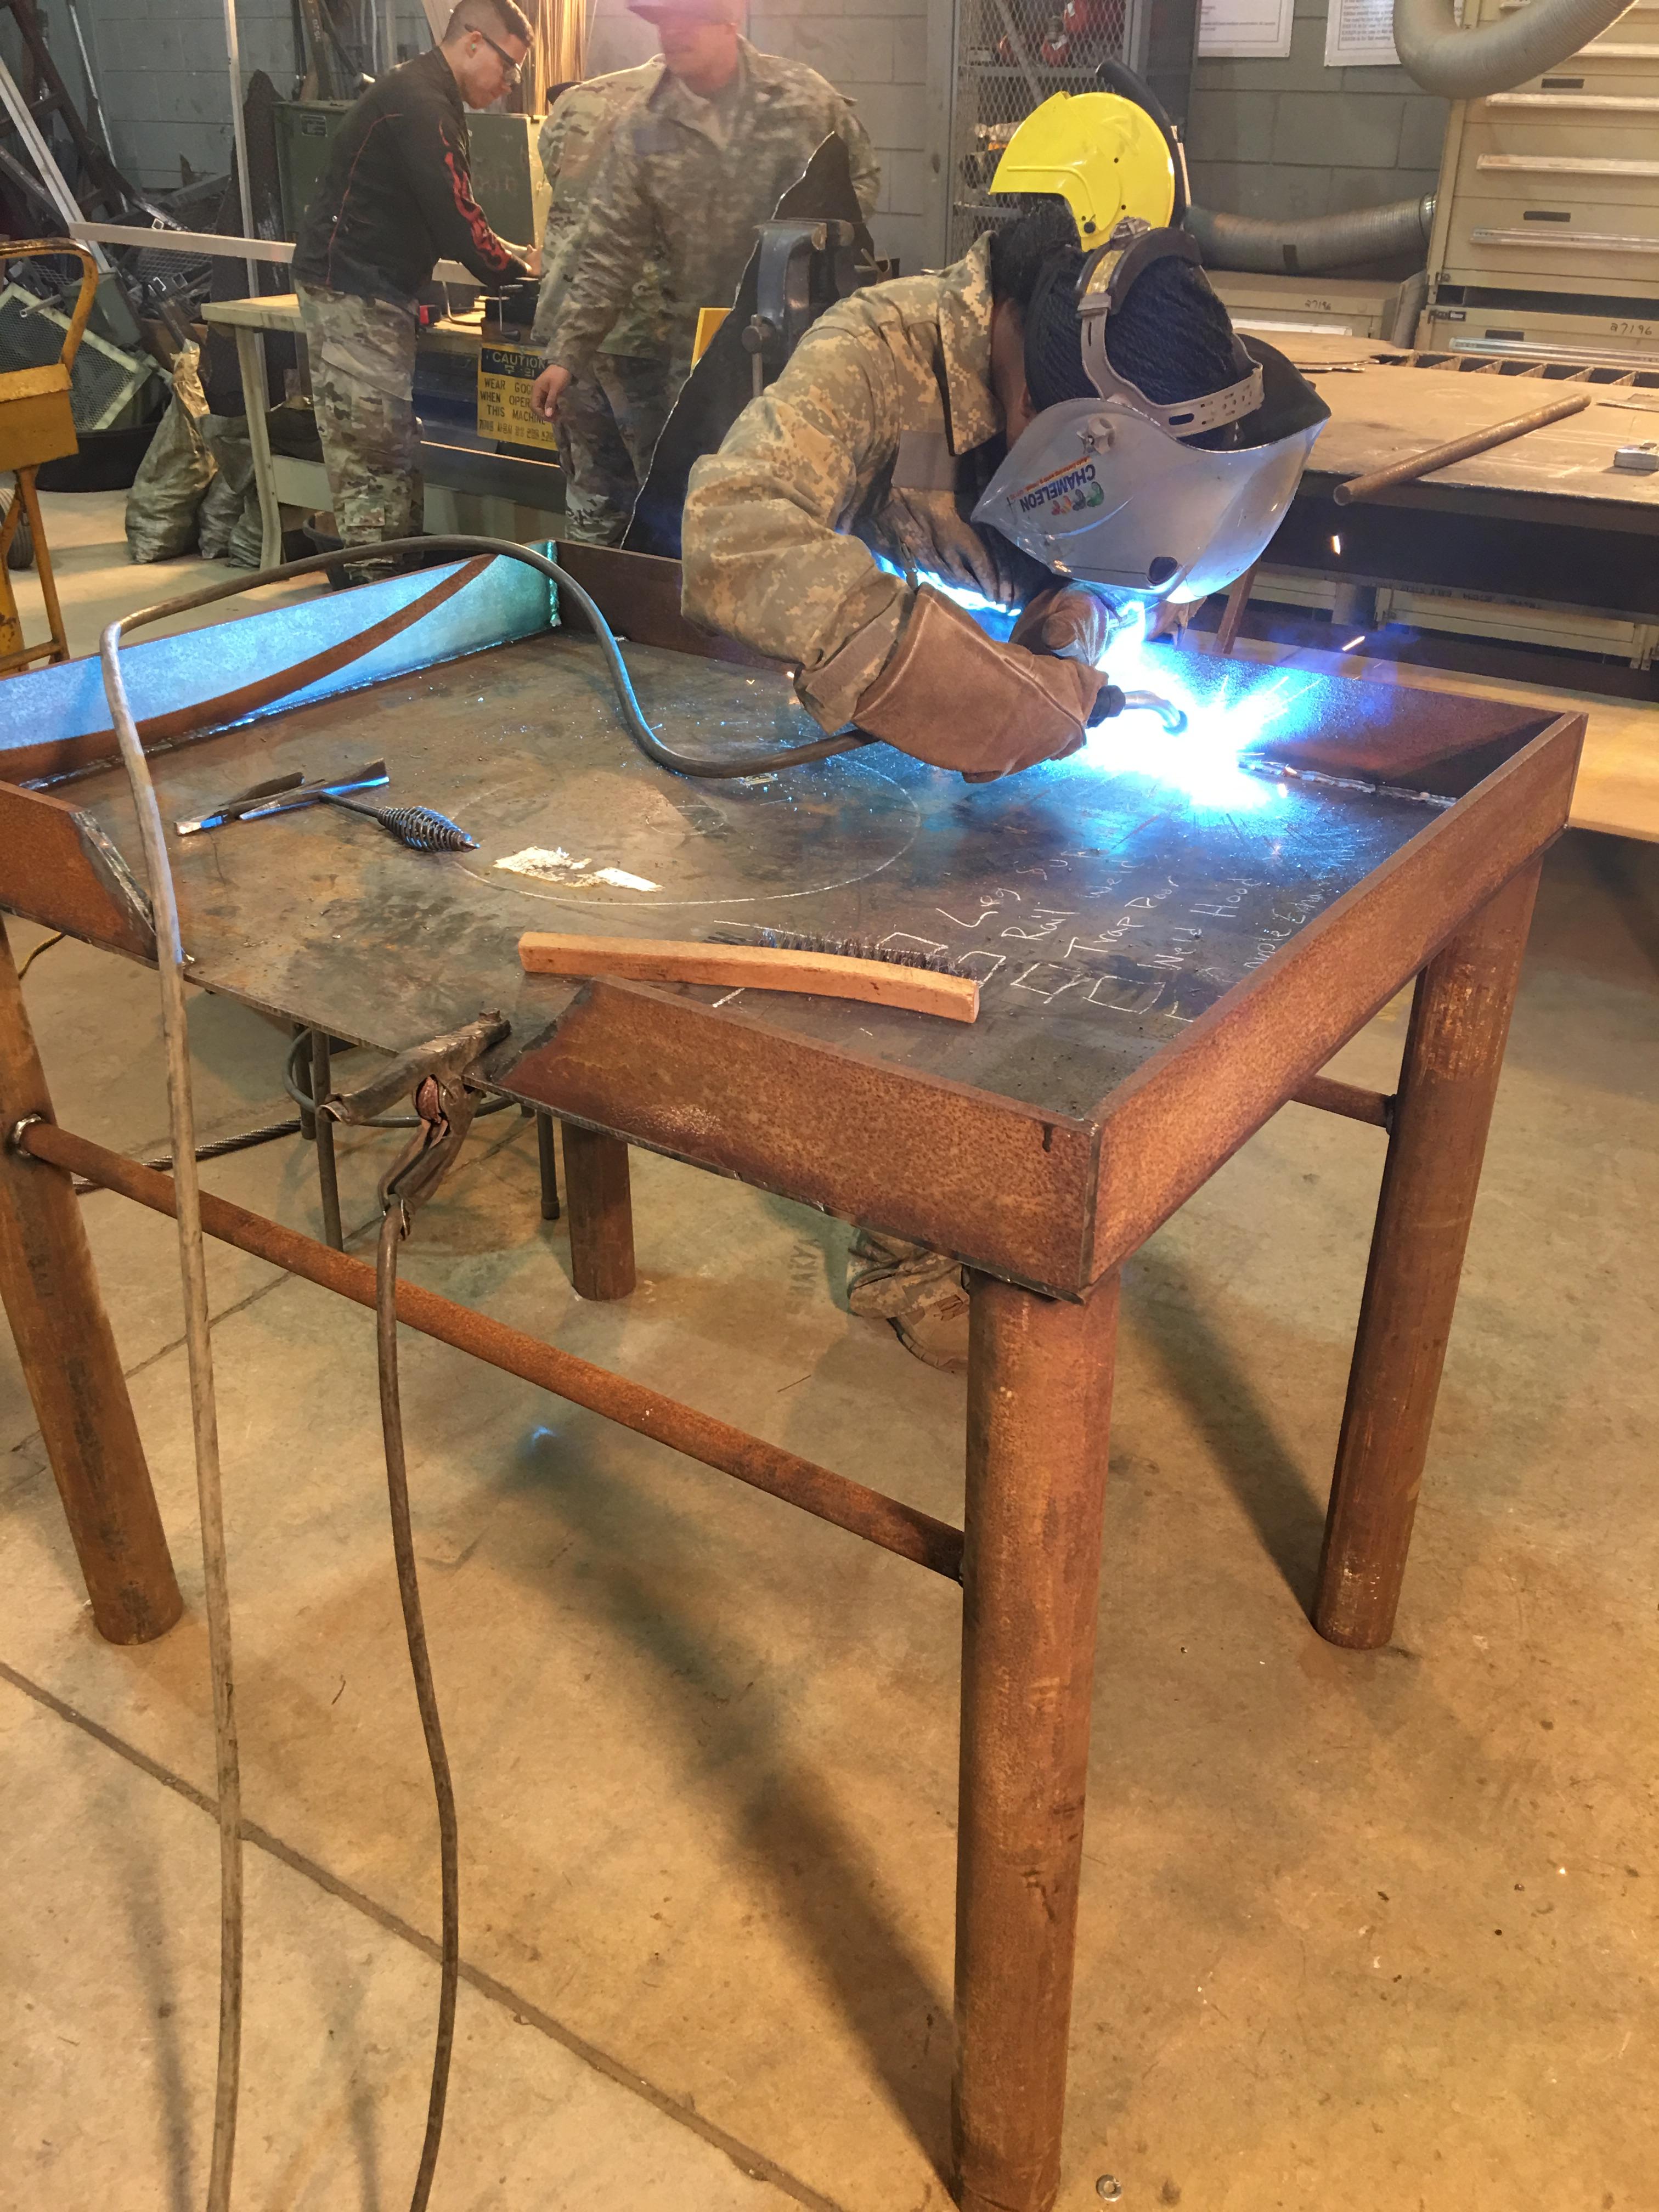
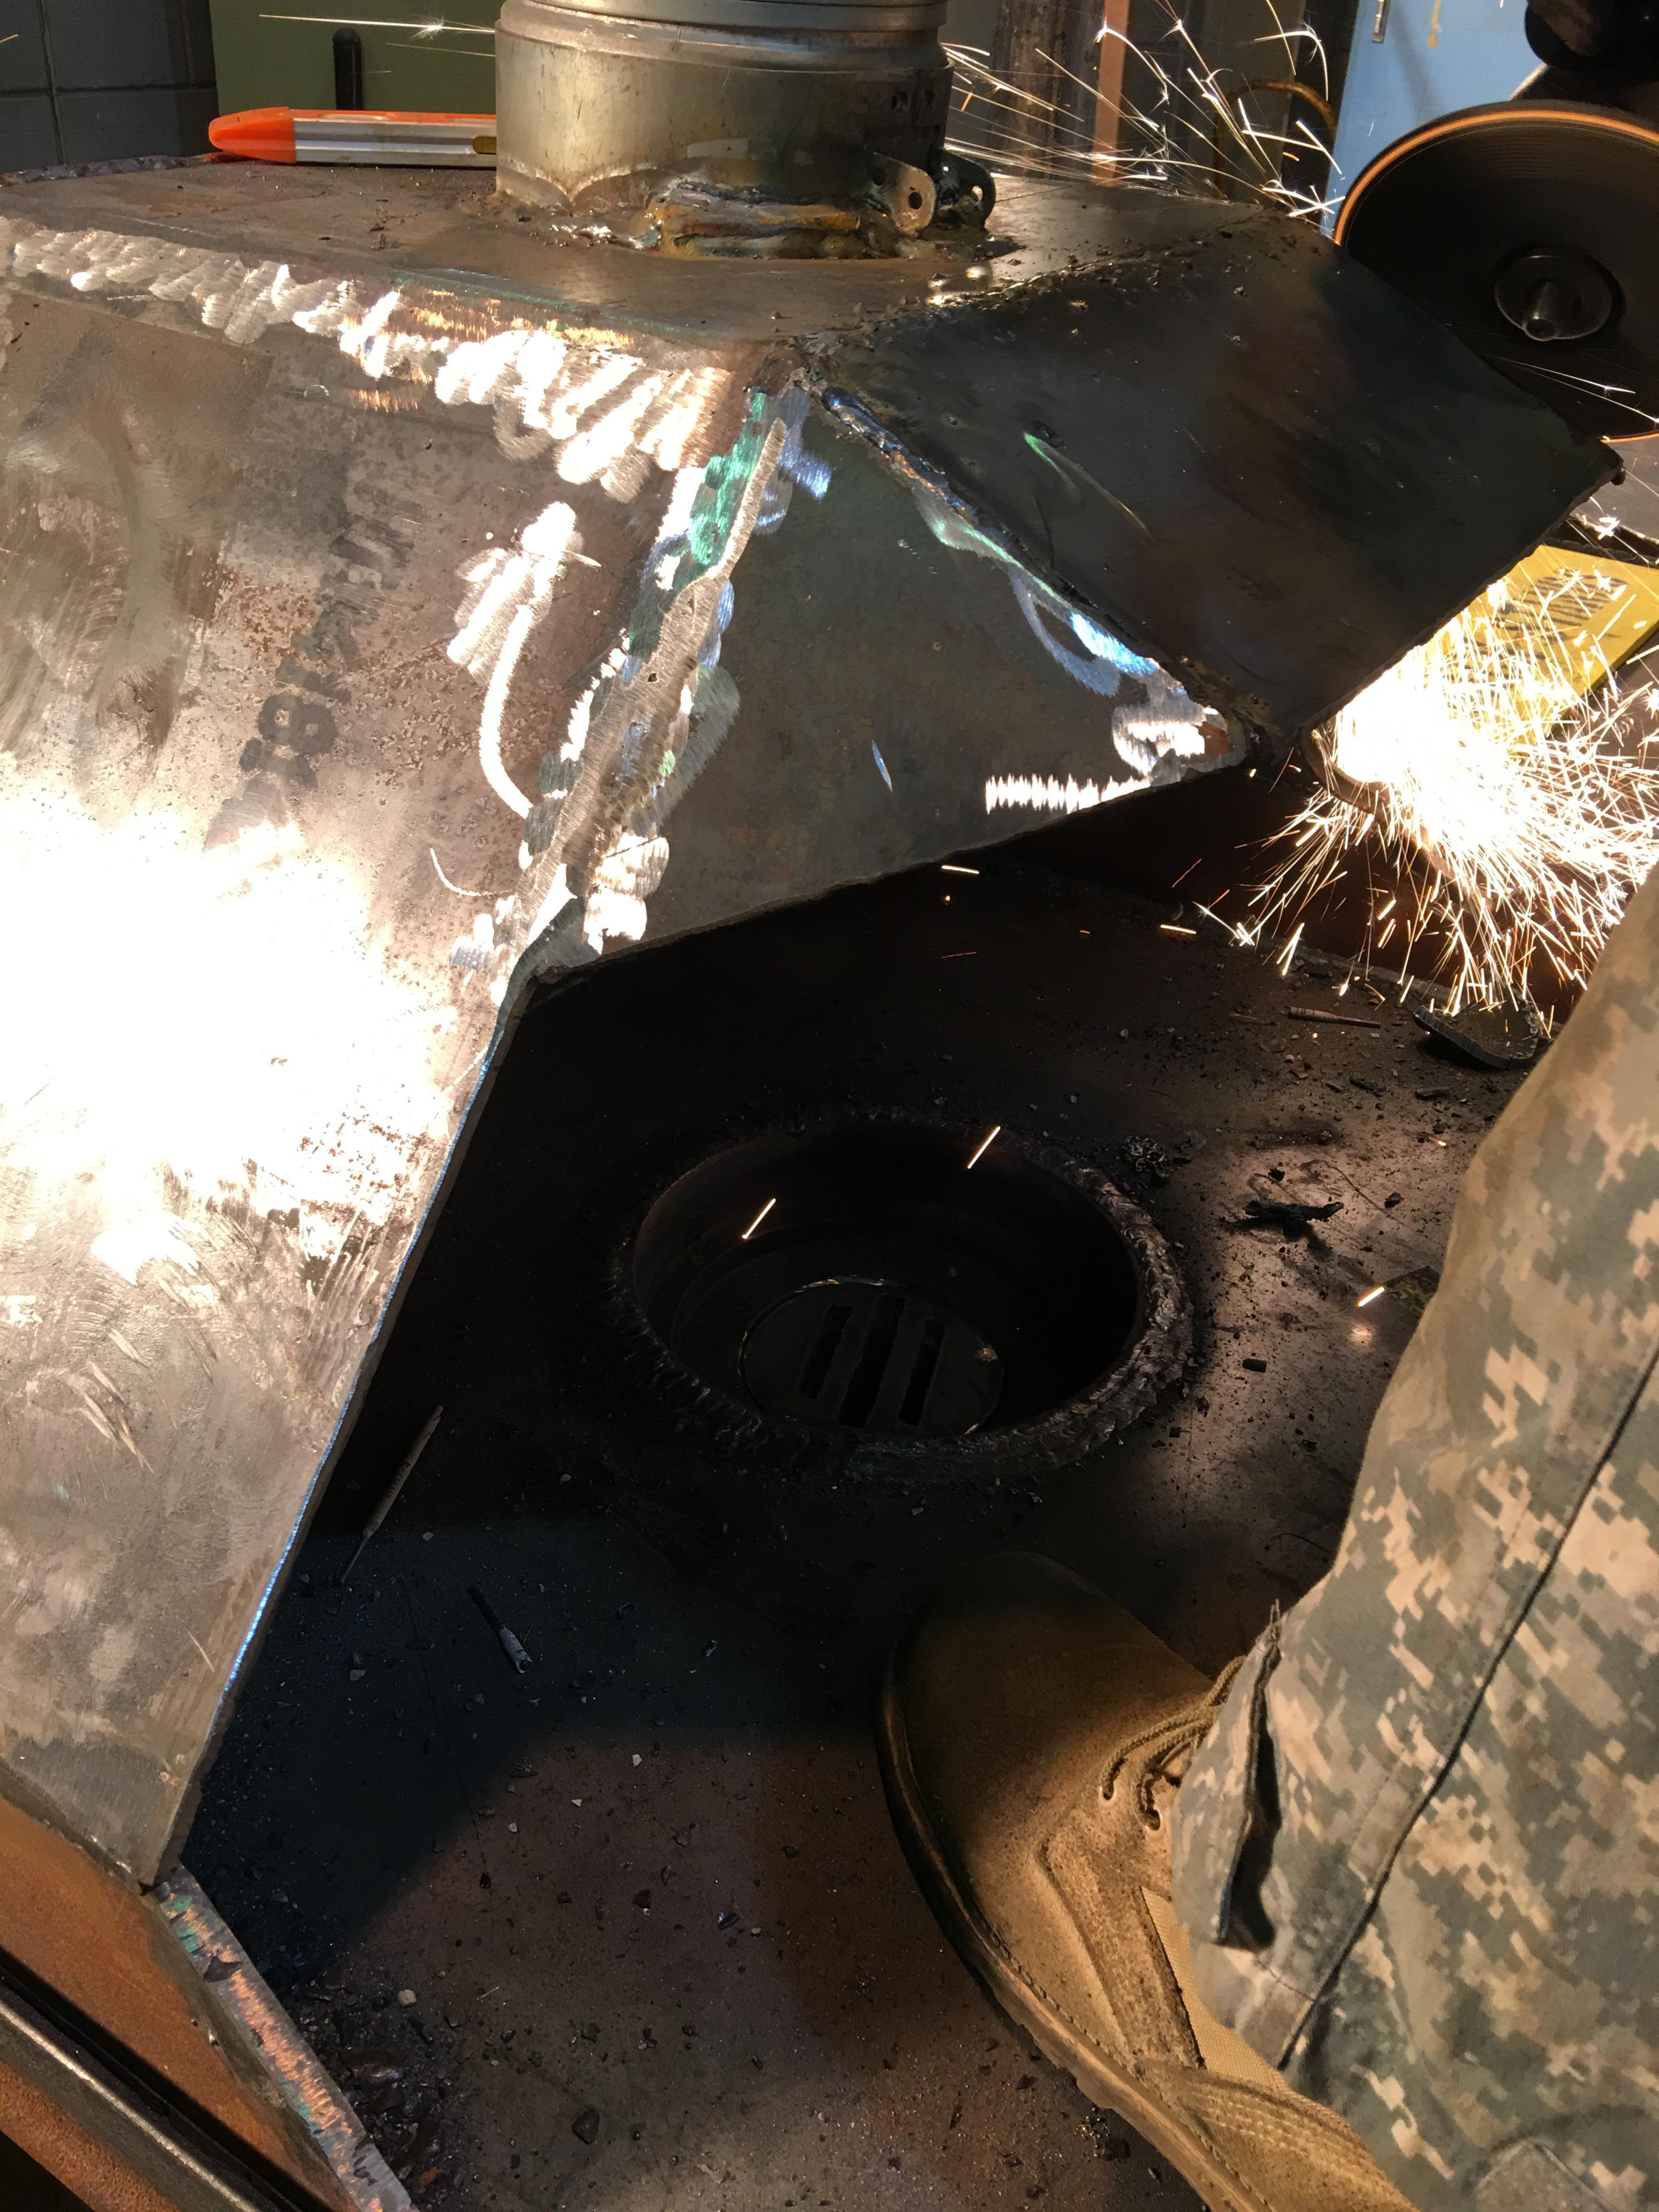
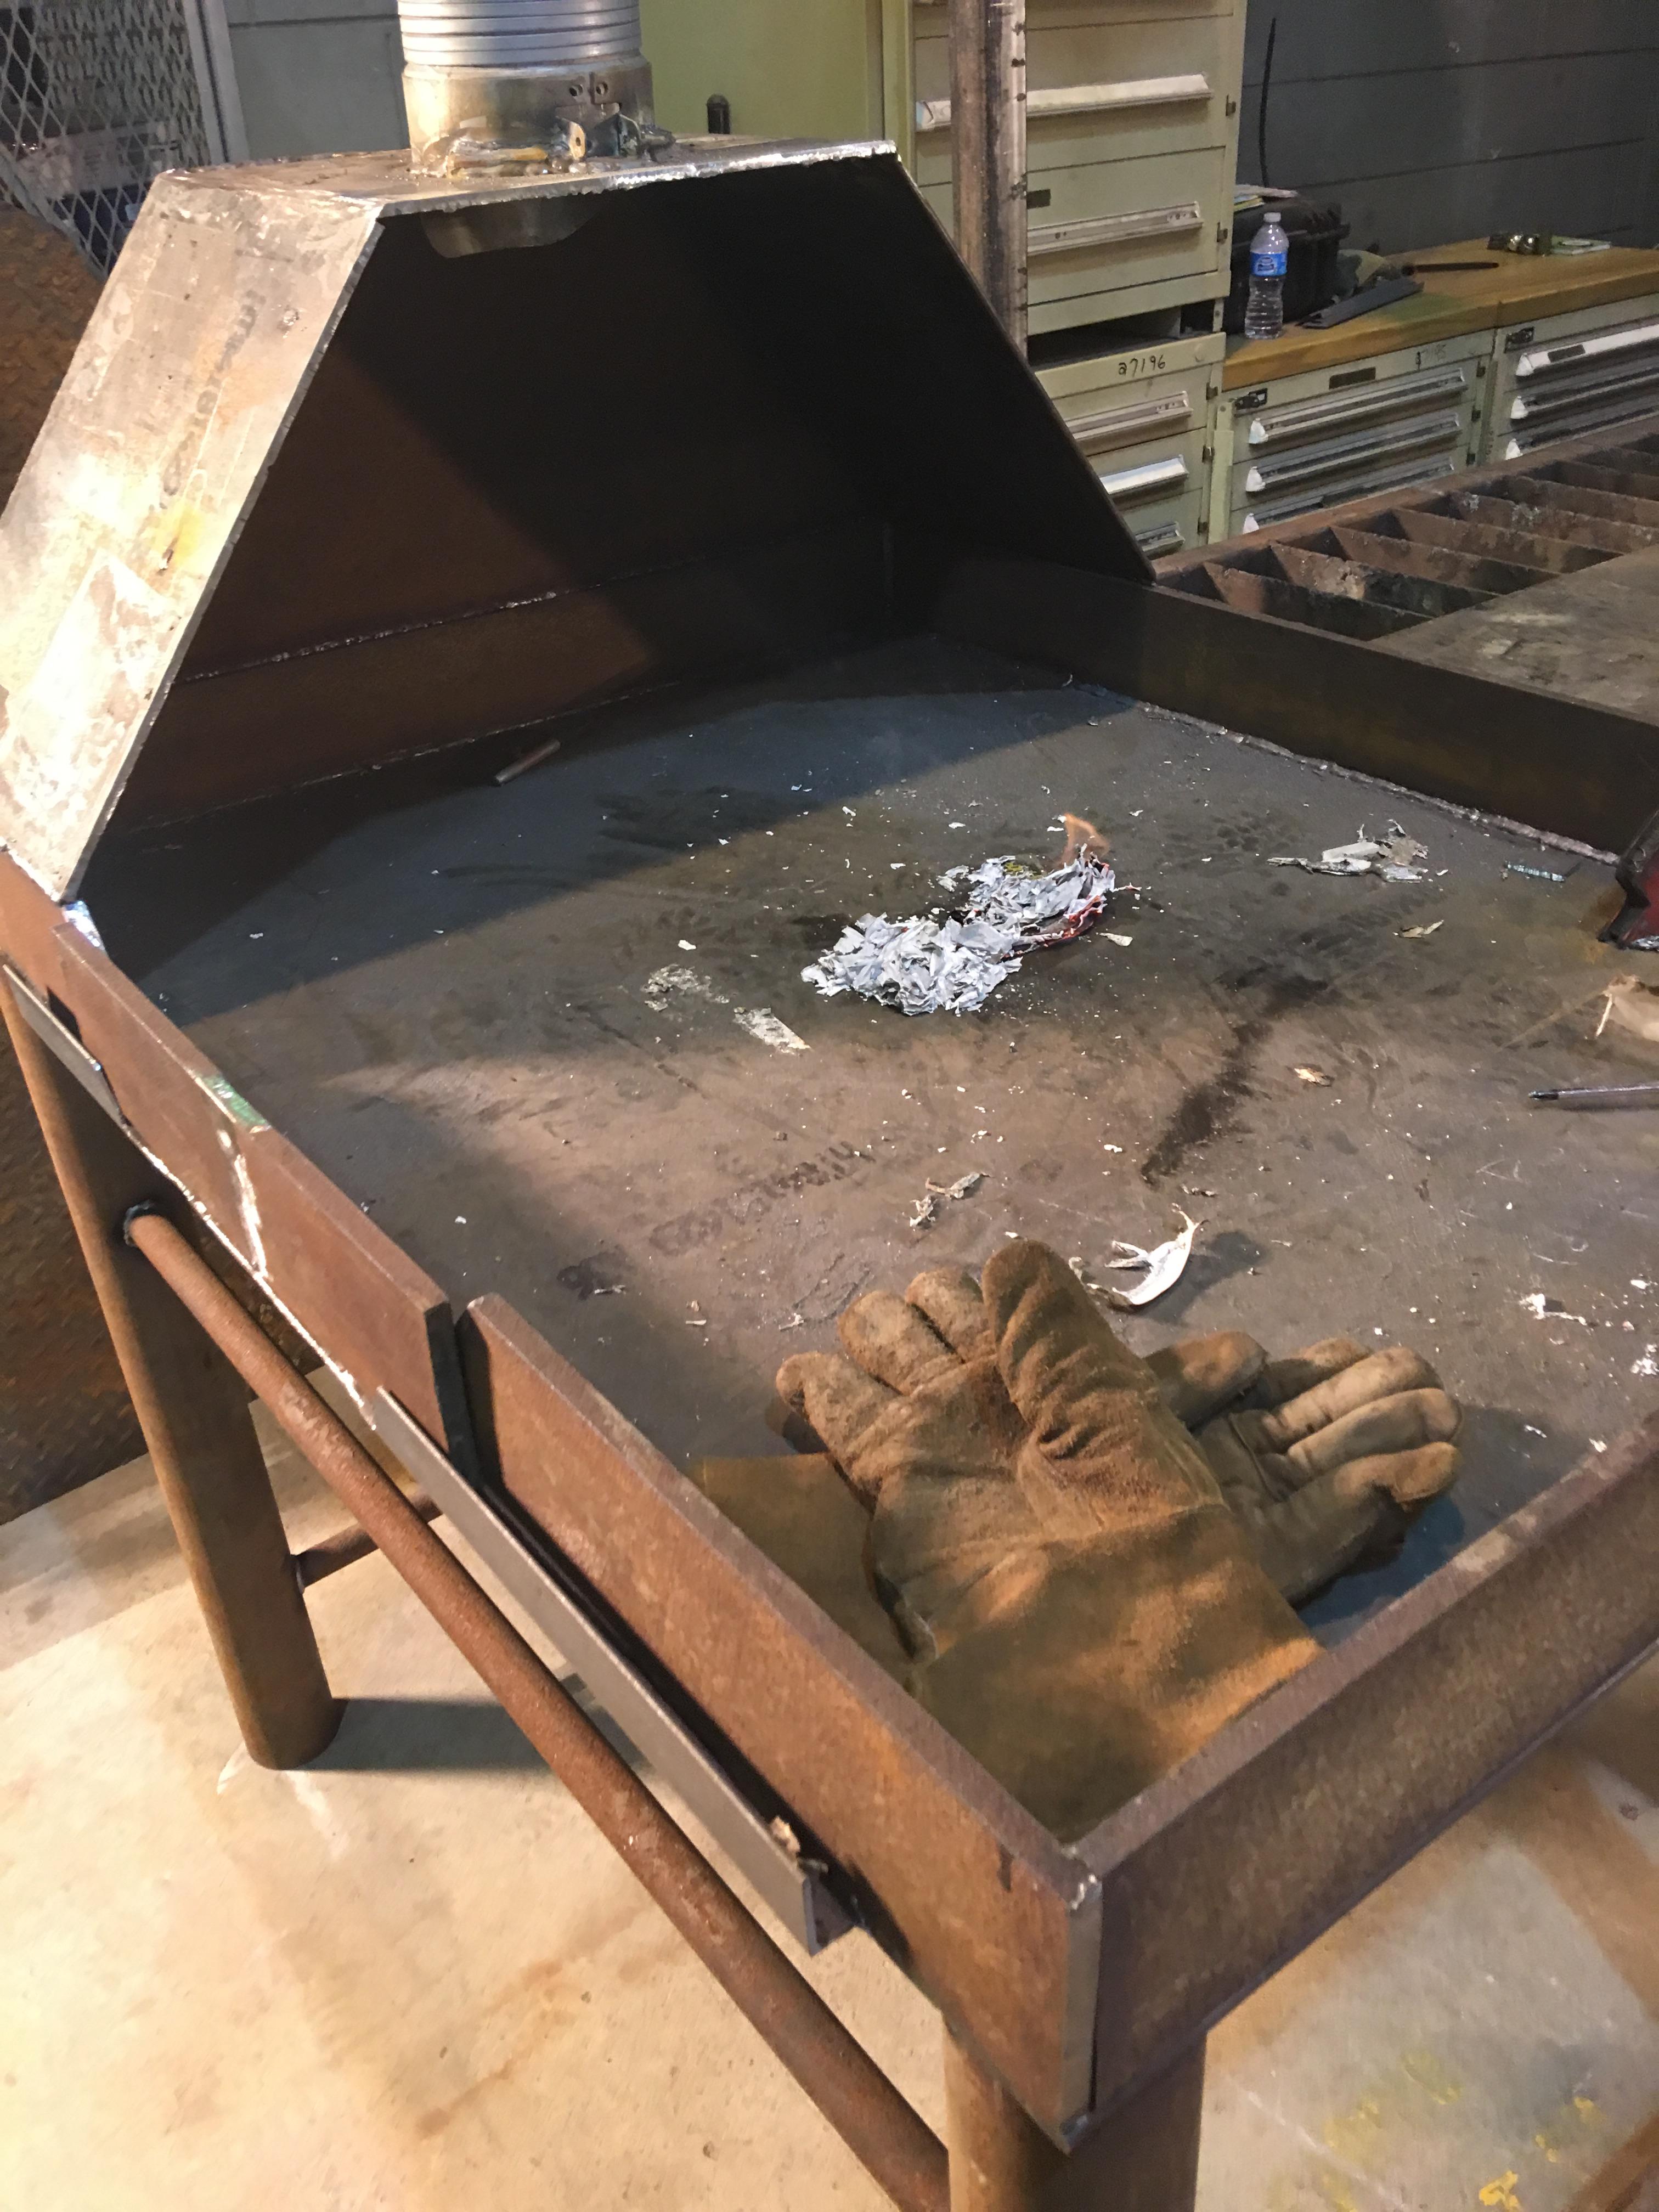
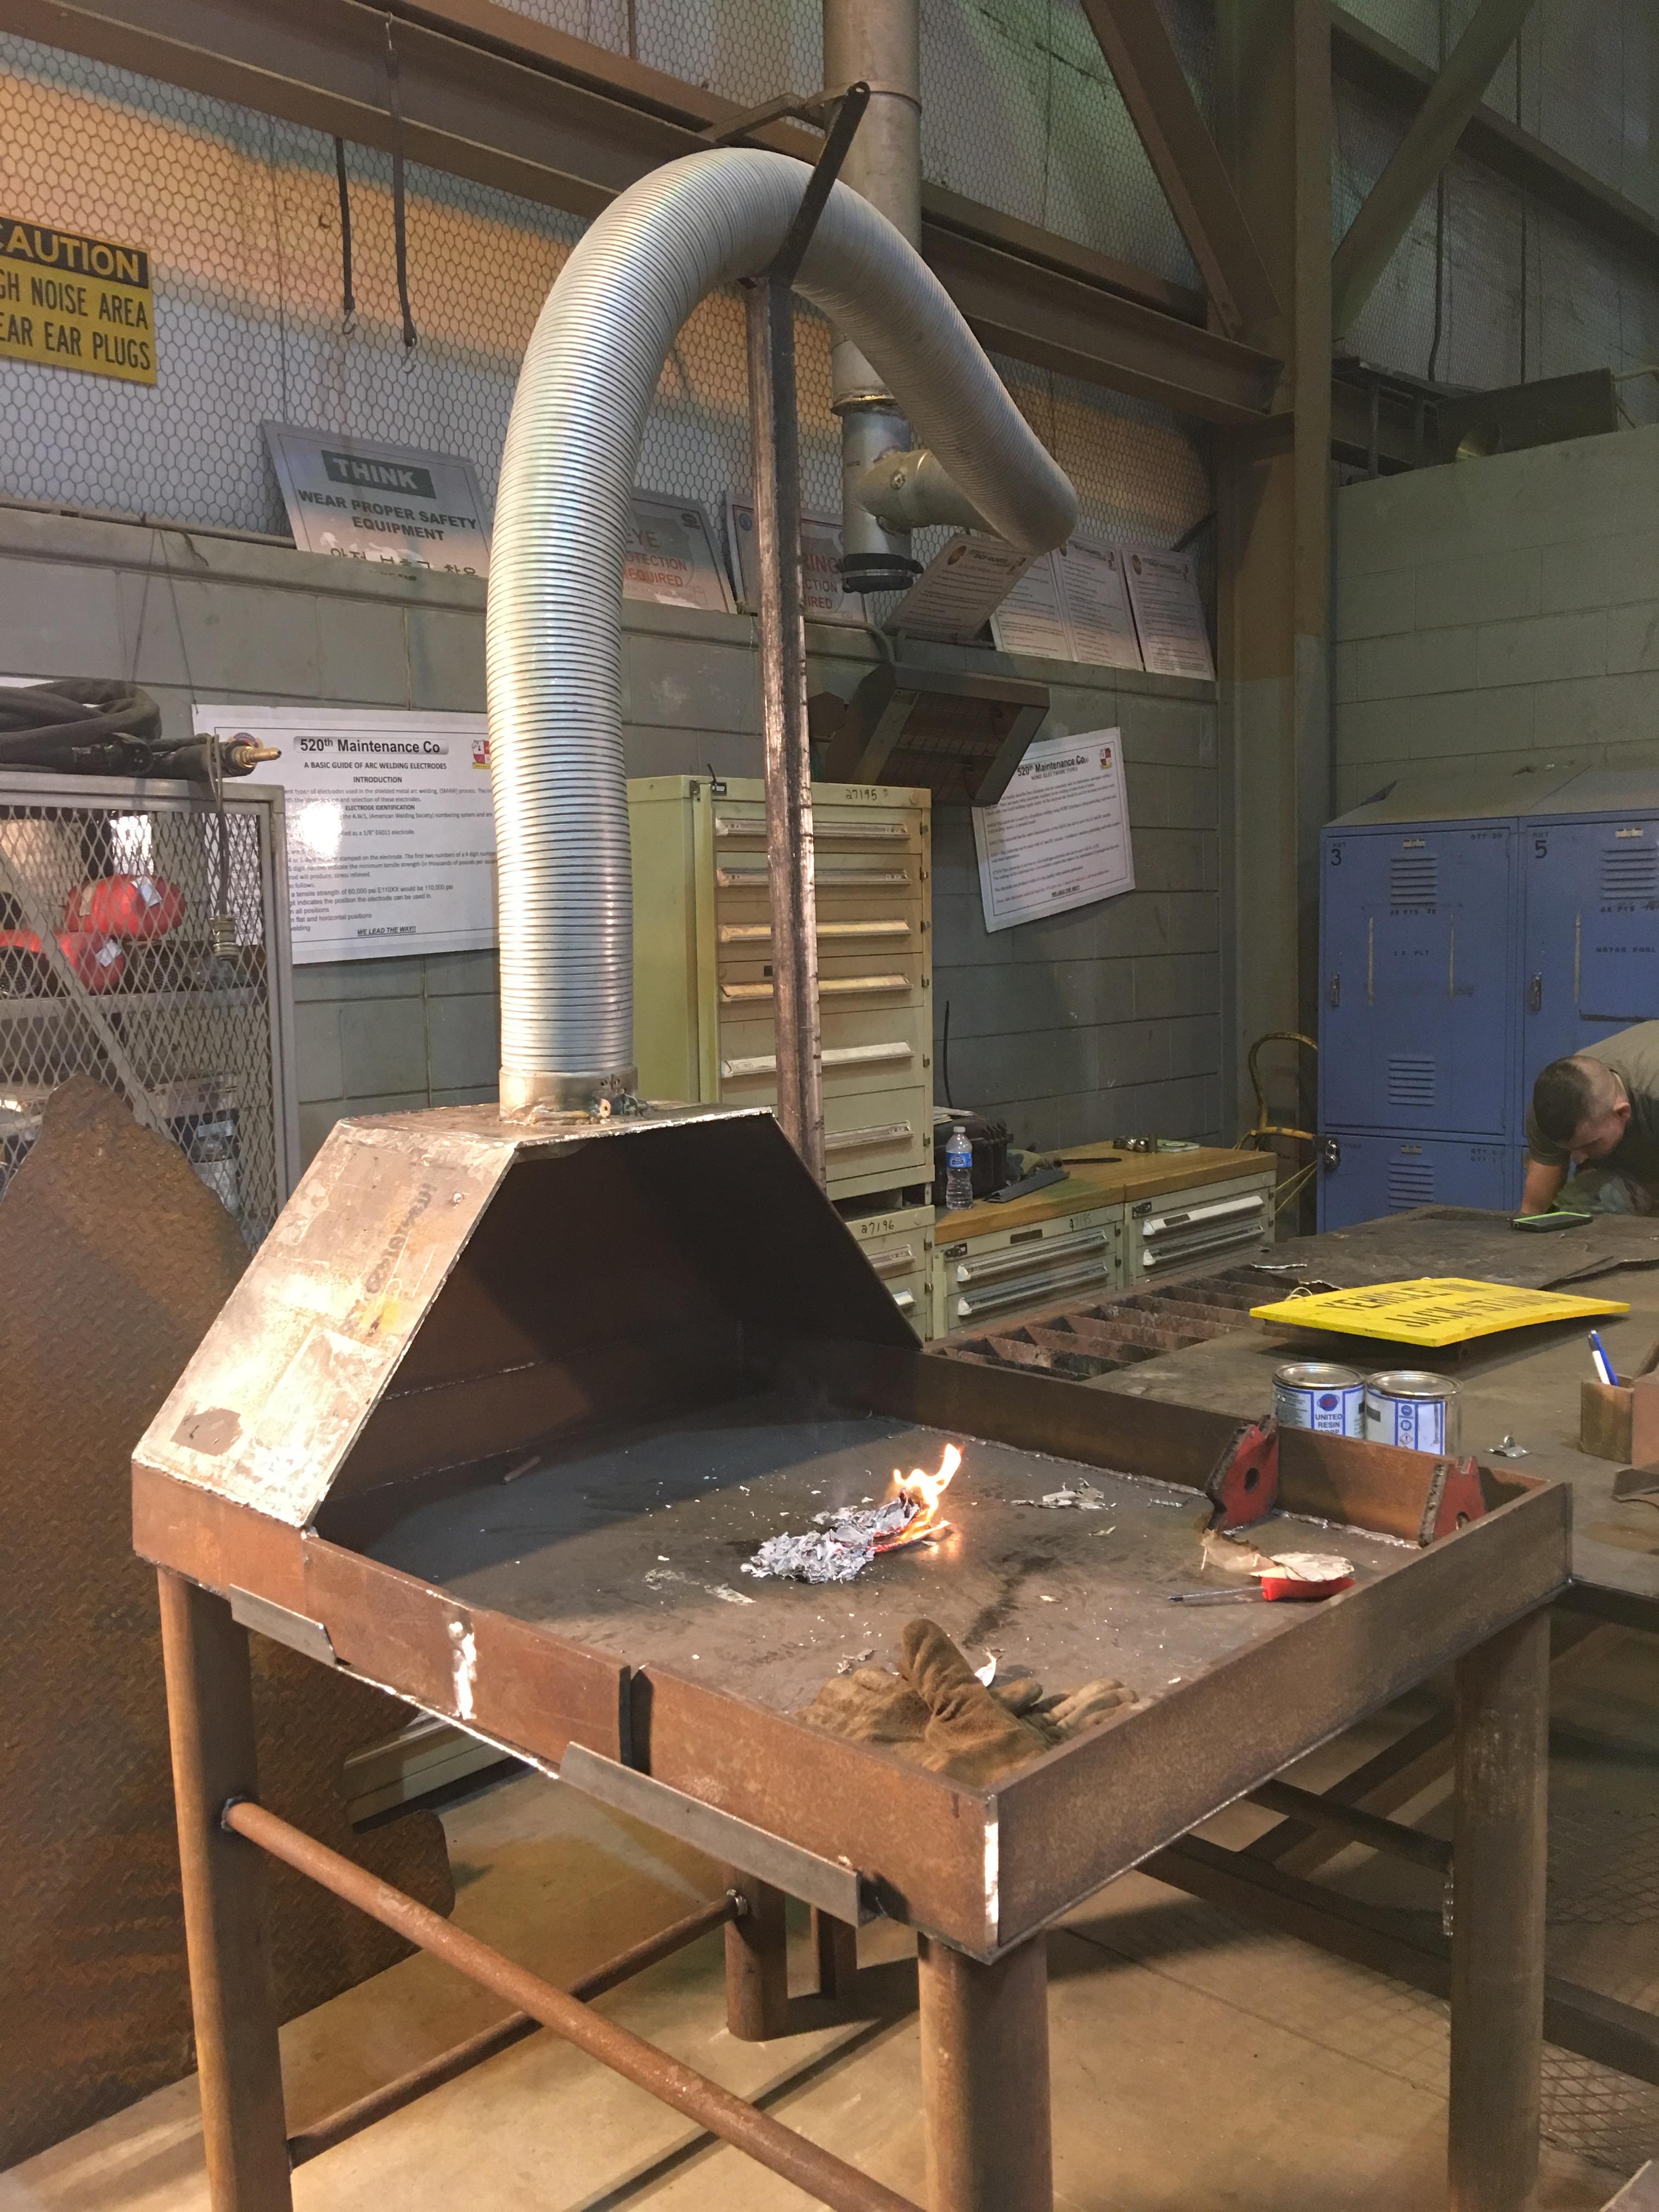
Ok the forge is complete. The Ventec blower came in yesterday. I thought I was buying an US made product but it was made in china.... It works great, the variable speed is worth the money alone. Added the access door to the end of the table as suggested. I will wait until the need arises to do a mouse hole. The forge is amazing, I have used it three times and have had no issues. The vaccum is awesome, Absolutely no smoke/fumes make it outside the hood. No stress or heat cracks in any welds. I intentionally burned a white hot fire in it with the blower on full blast to heat test the forge. No issues yet. All in all I'm very satisfied with my forge. I do wish it was lighter though, that way I can move it around the shop when needed. May put locking casters on it. The other scrutiny I have with it is I need to add something to hold my iron up when it's in the fire. In some cases the iron was too heavy to just put the end in the coal and have it stay put. I need something to support the other end. Maybe some sort of swinging arm.

-
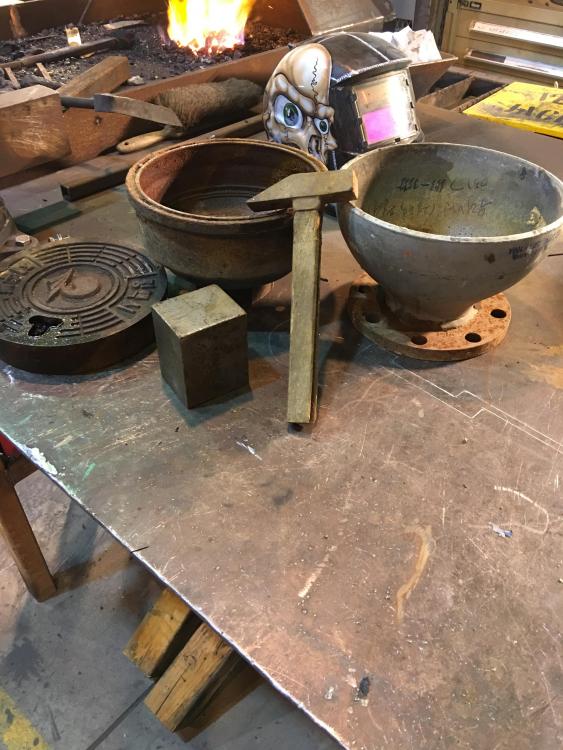
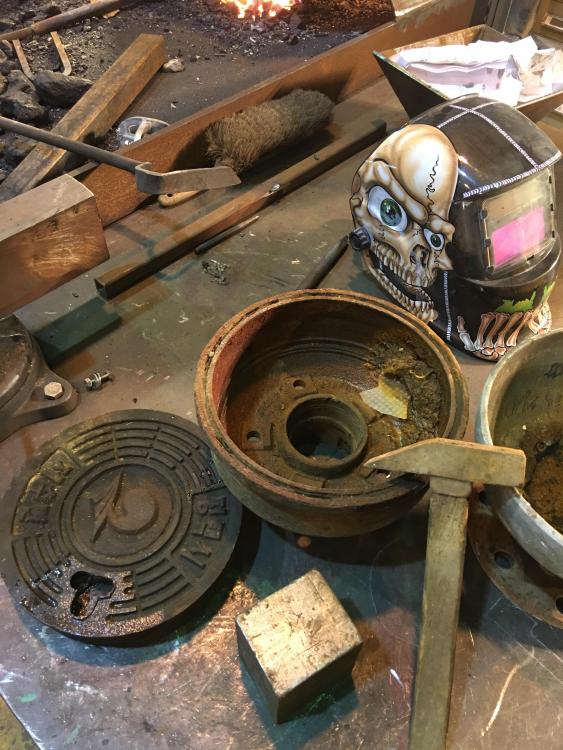
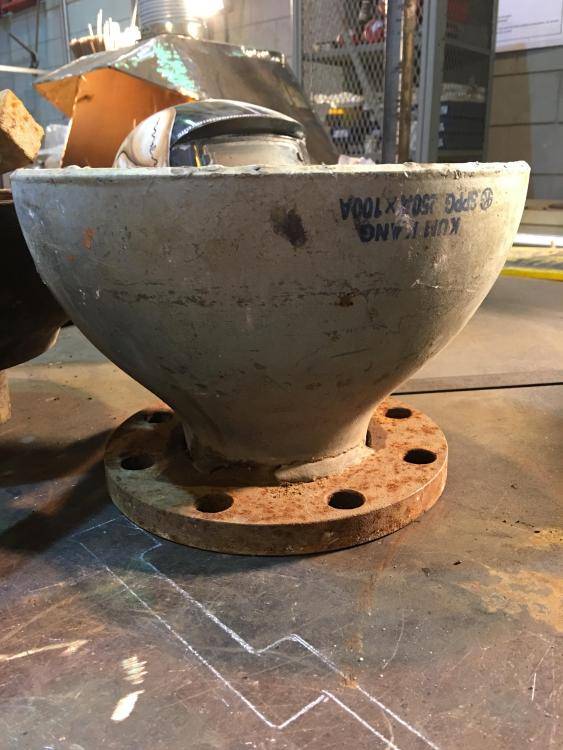
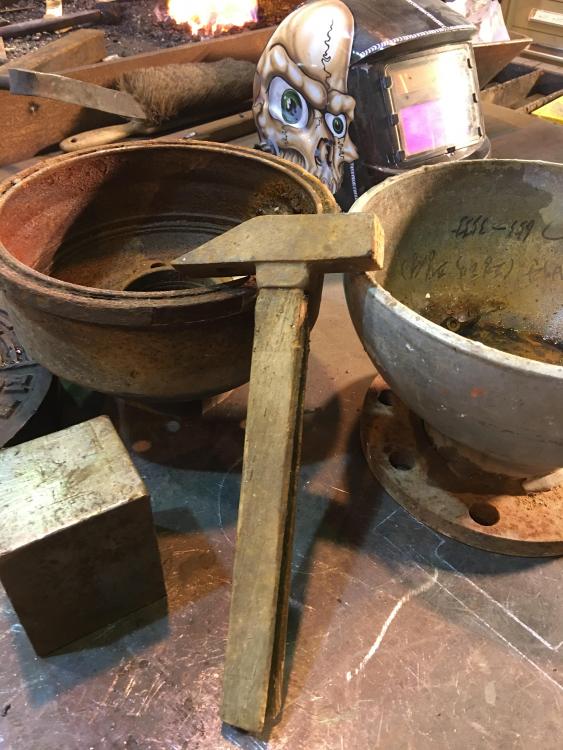
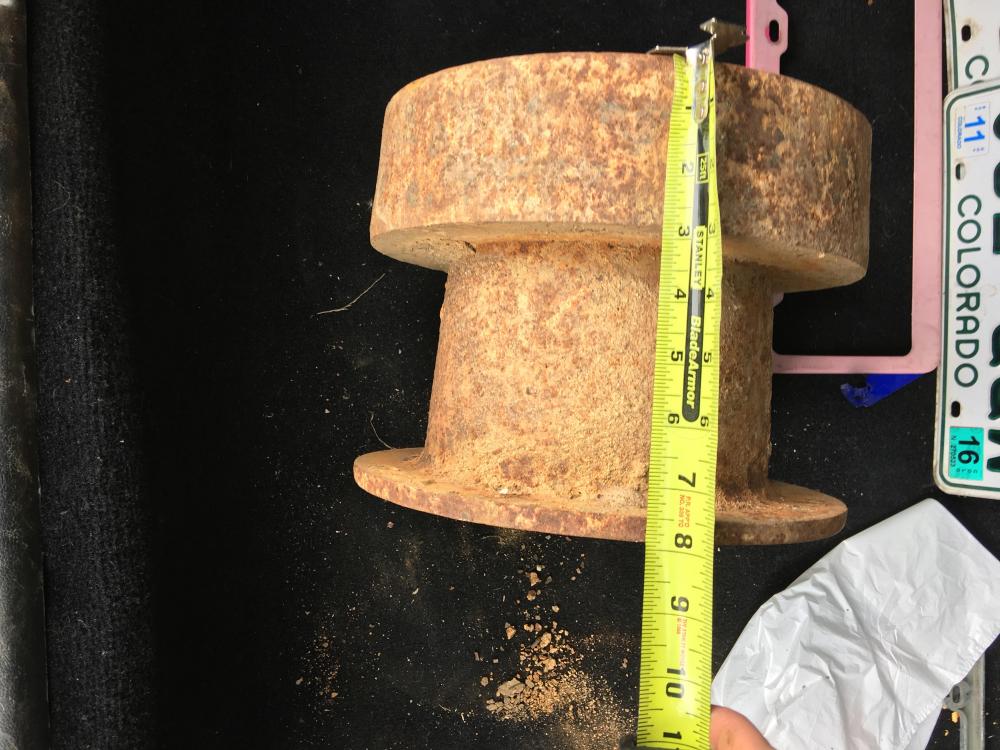
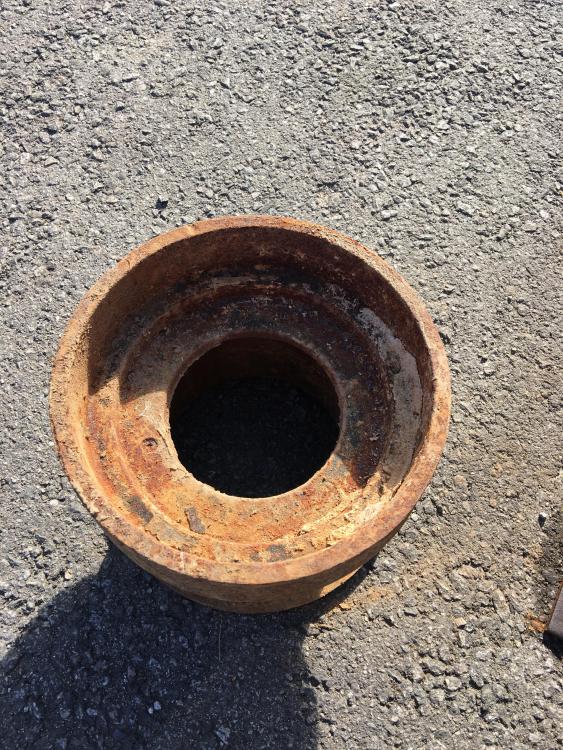
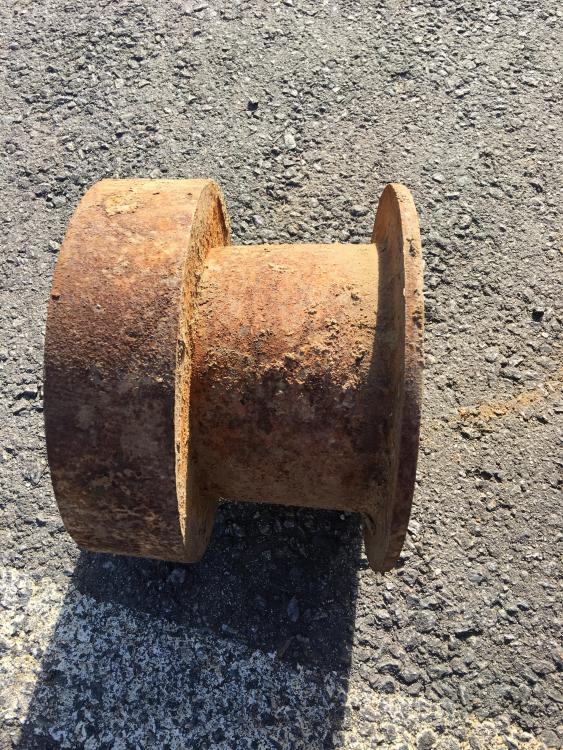
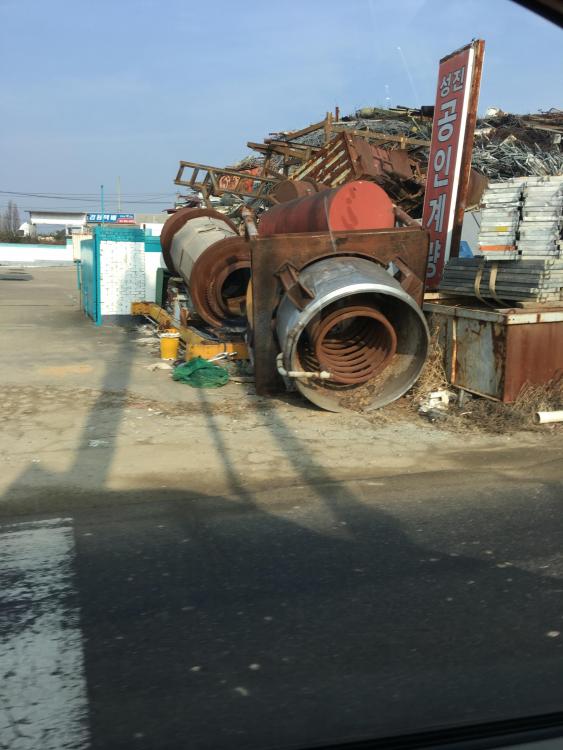
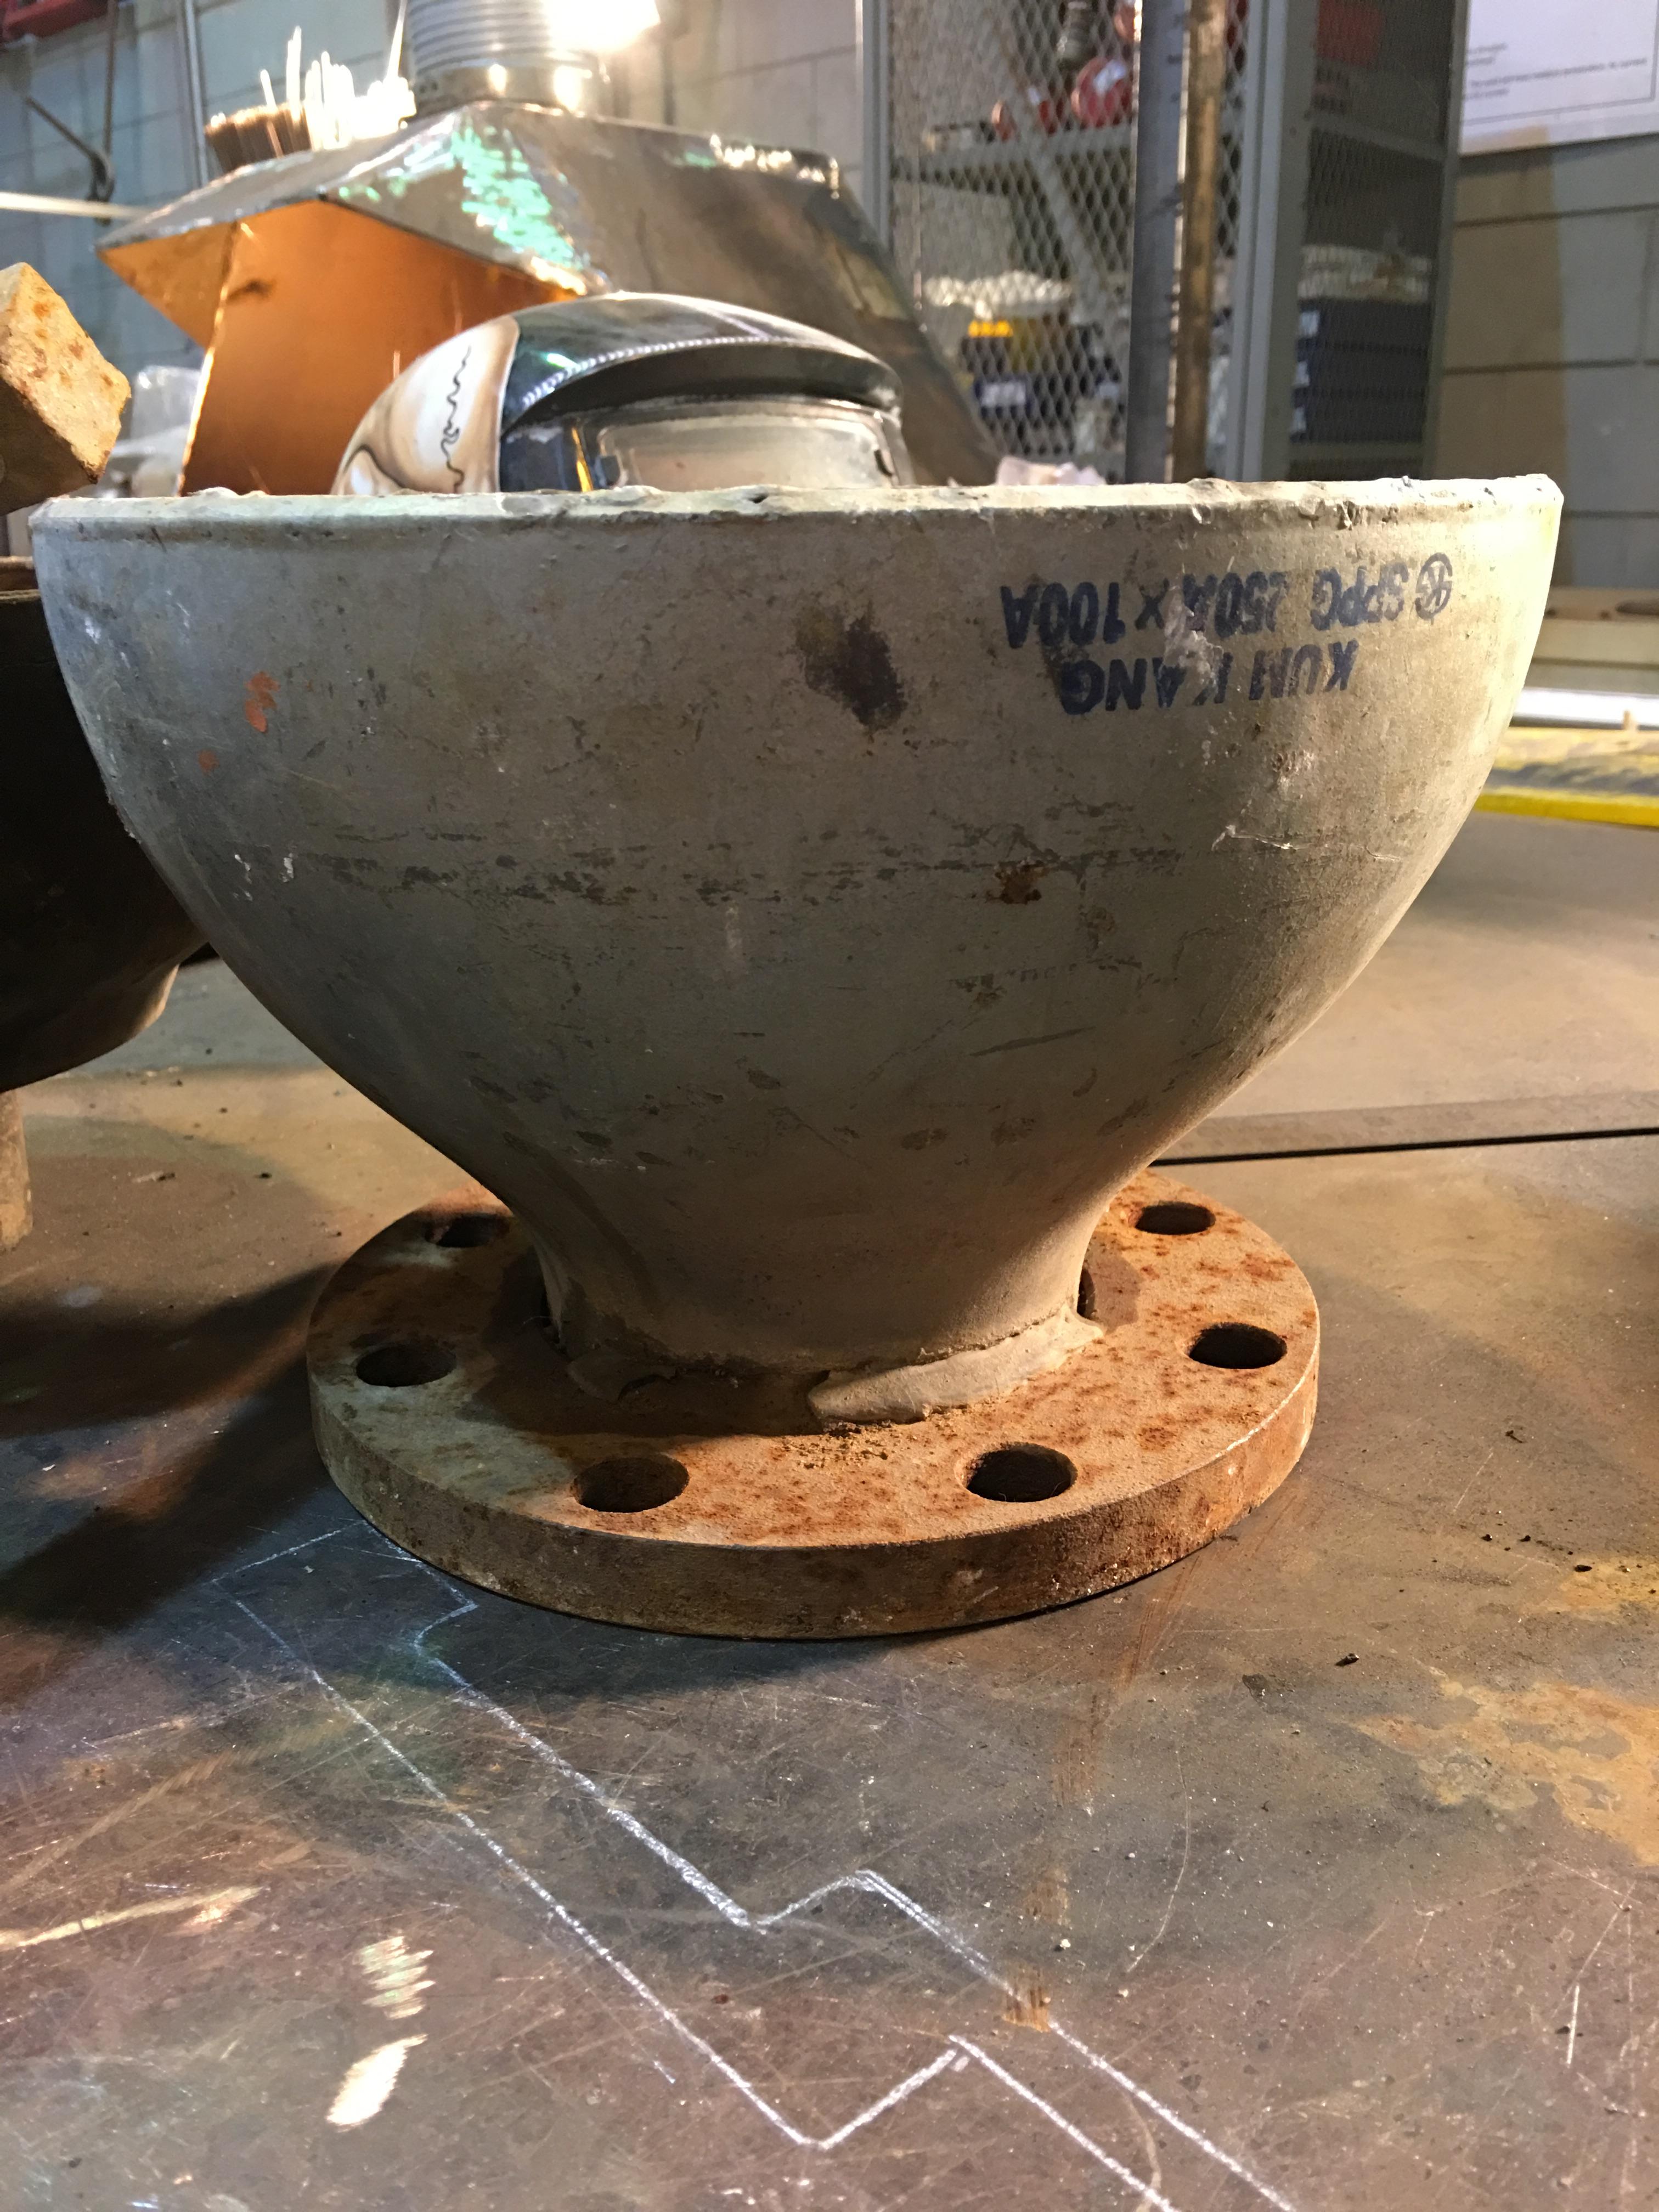
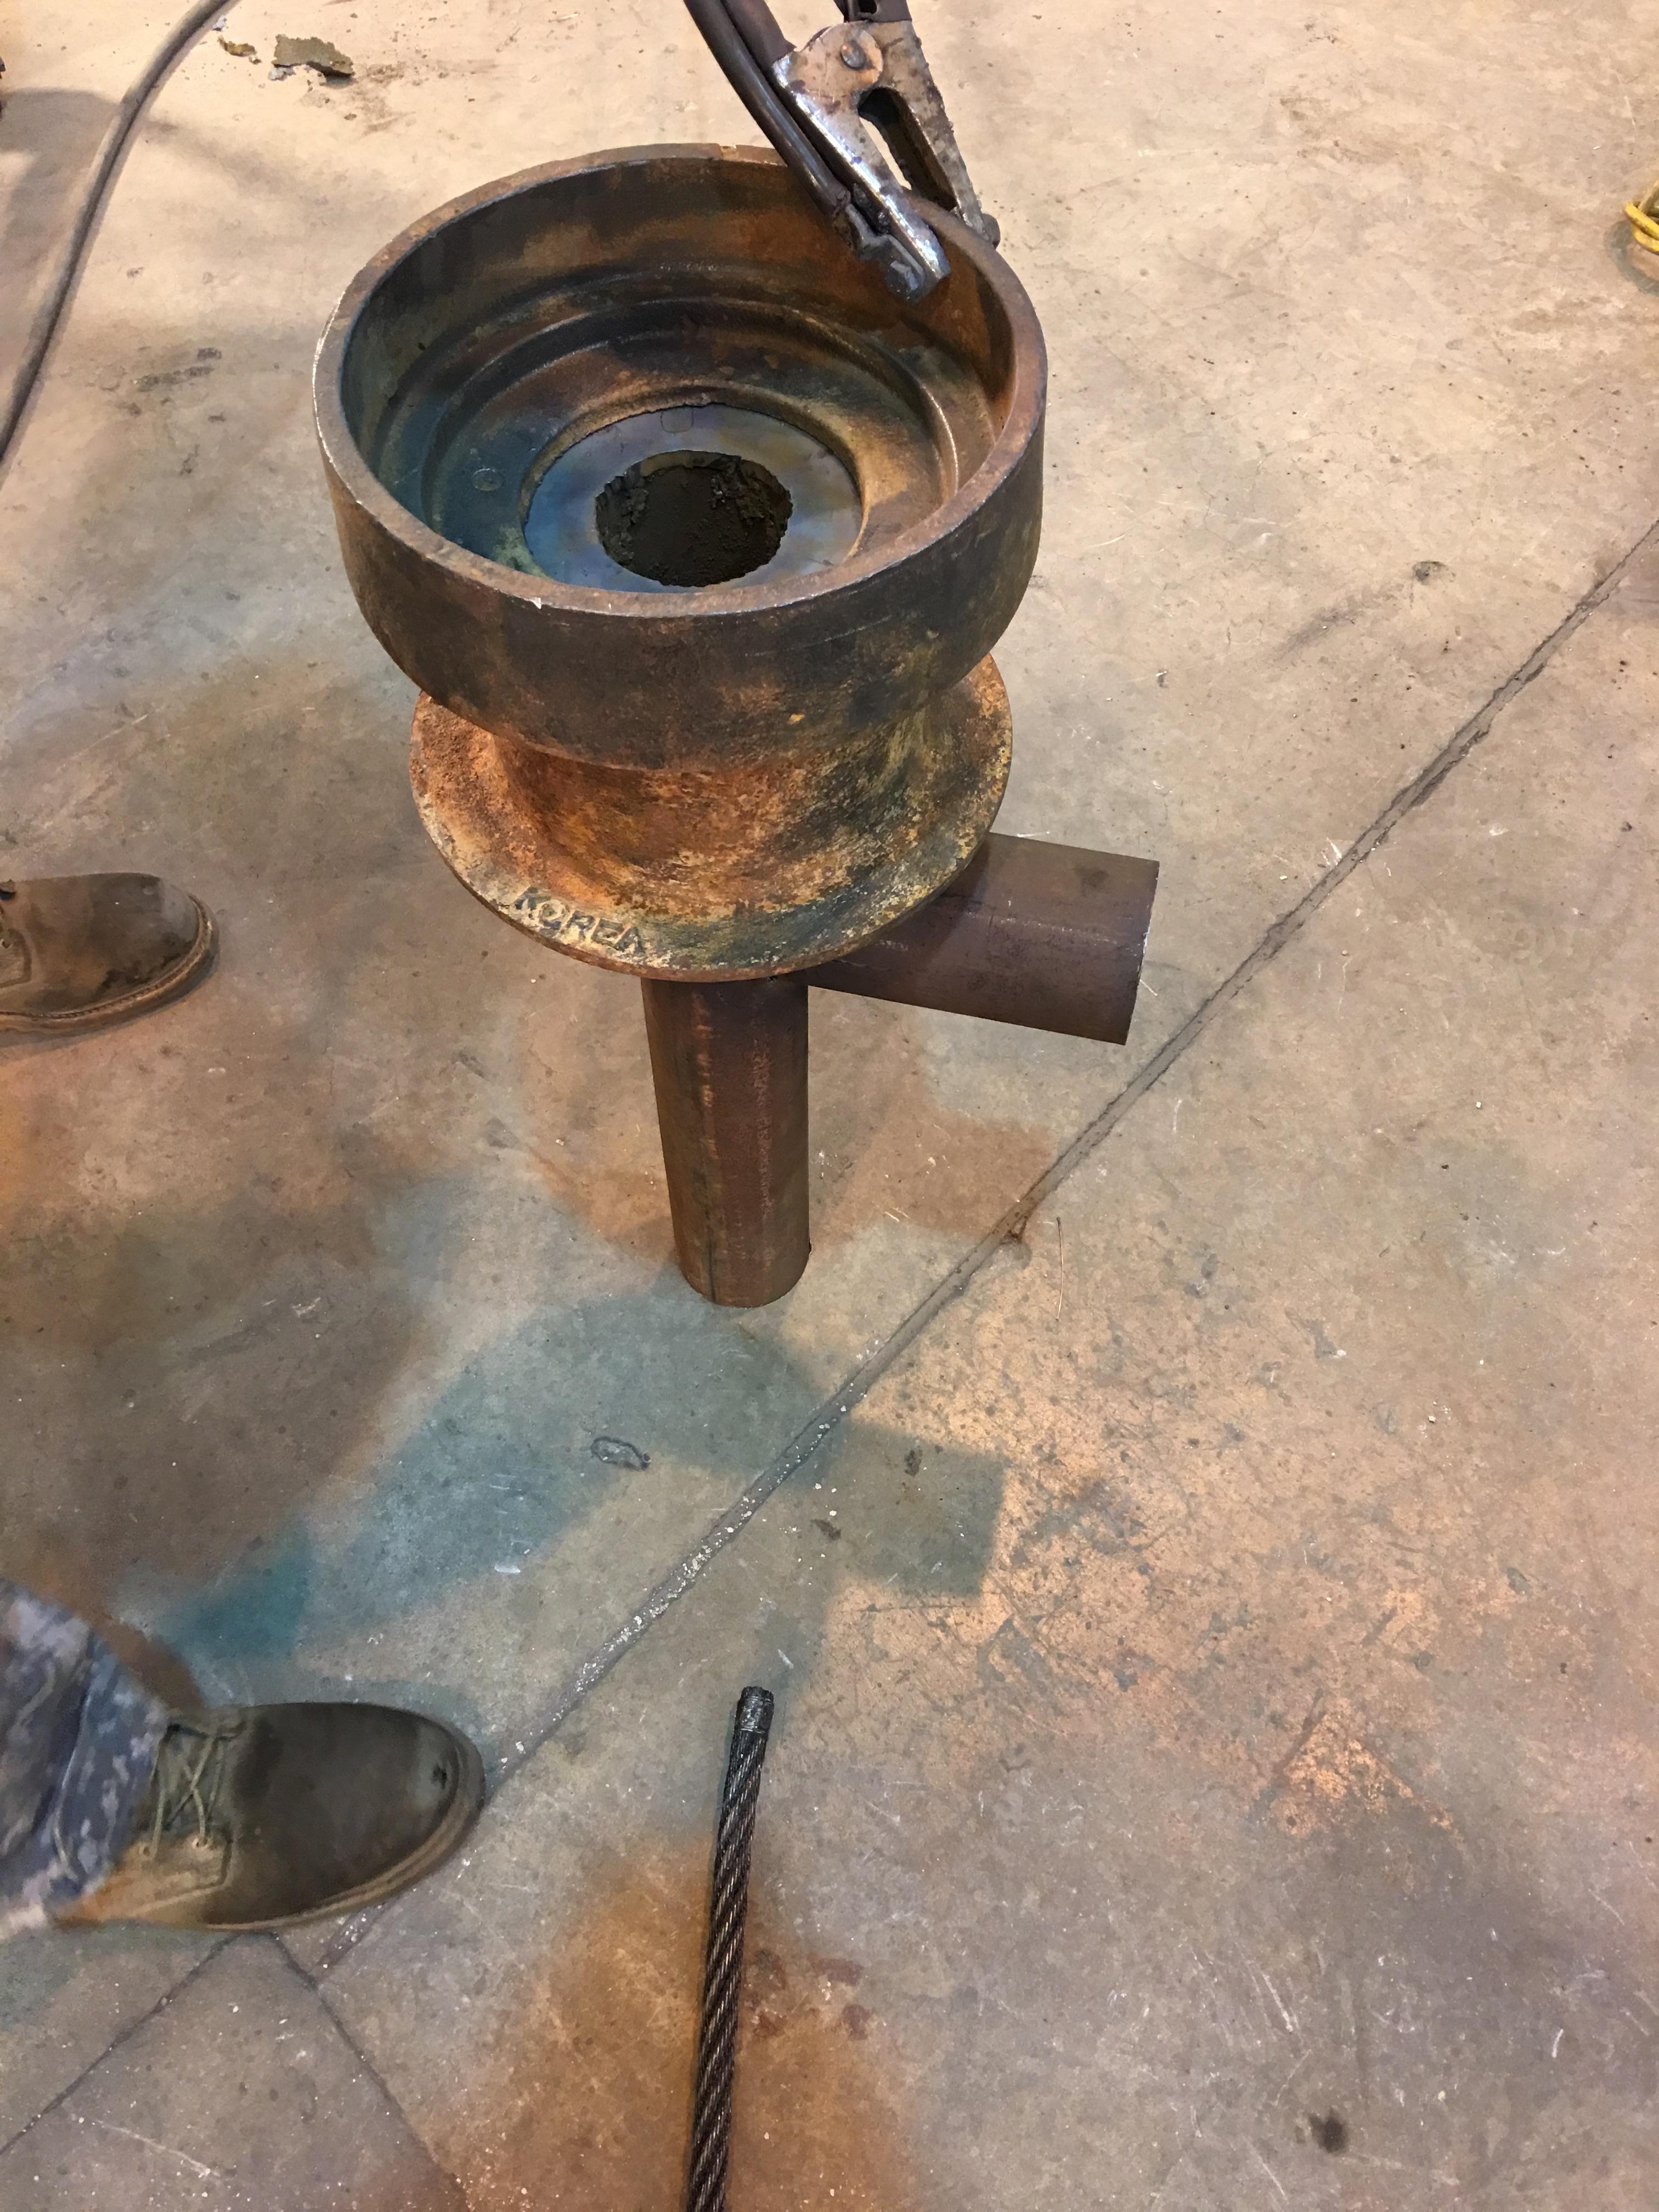
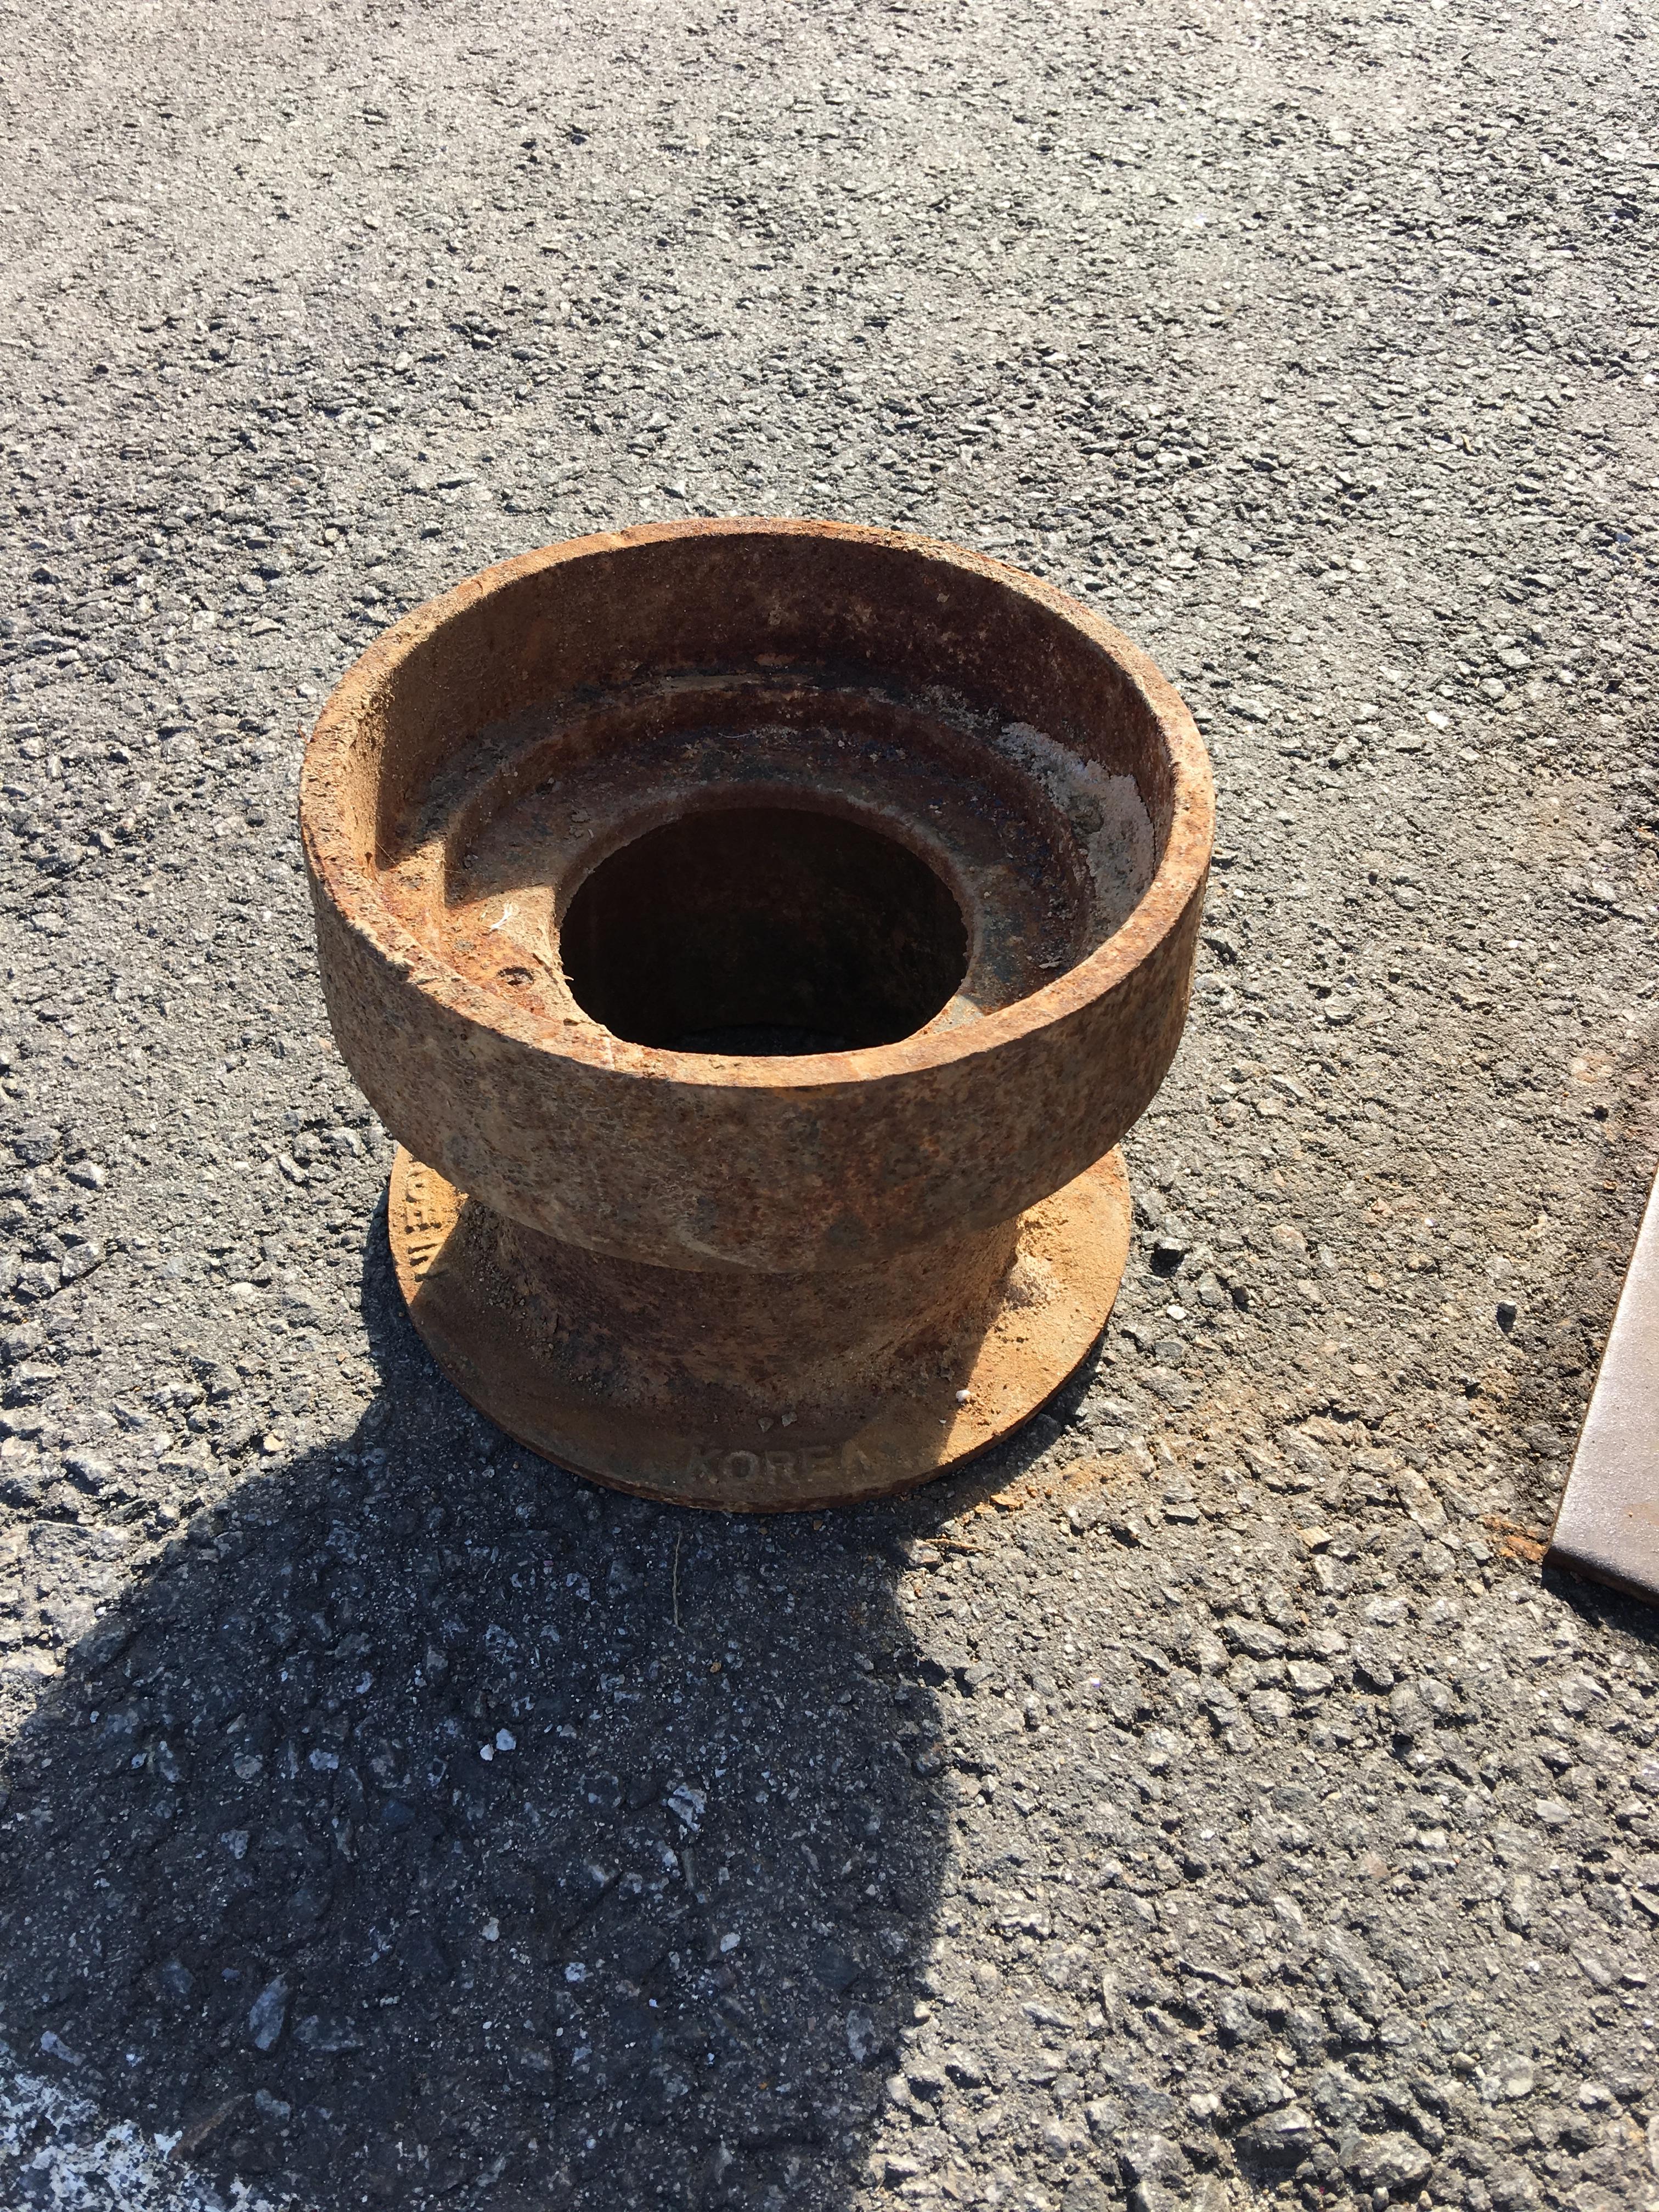
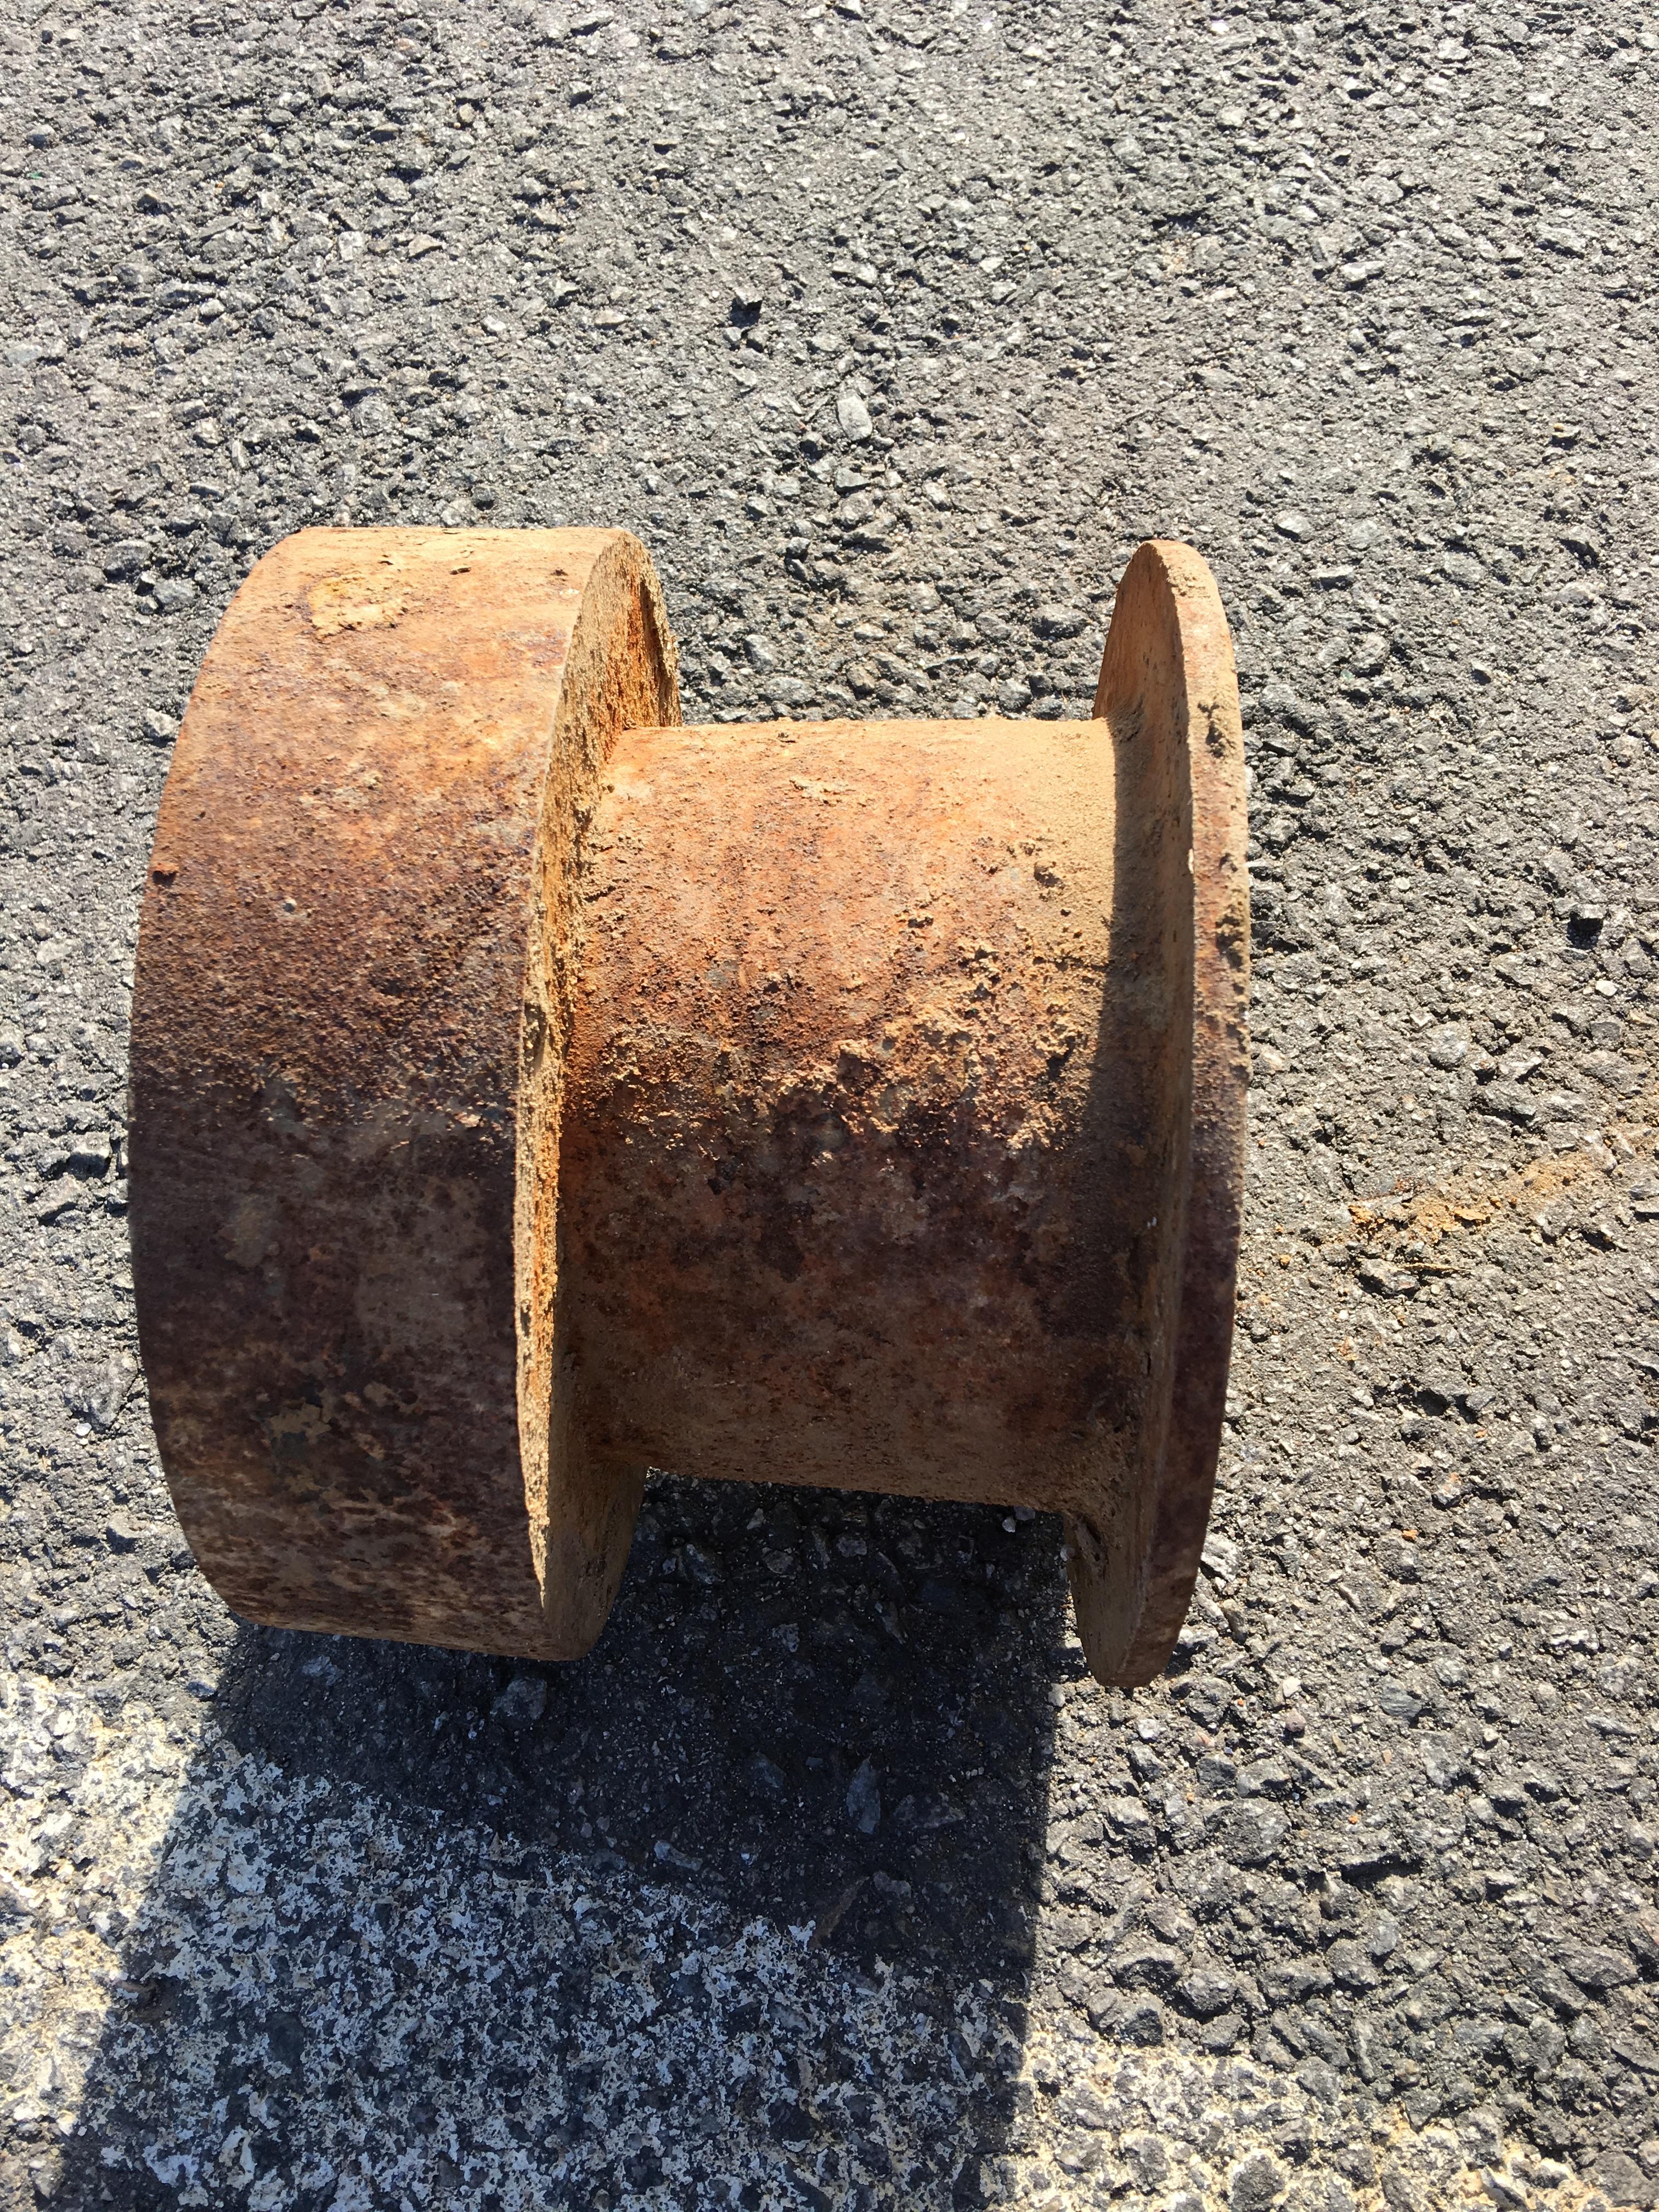
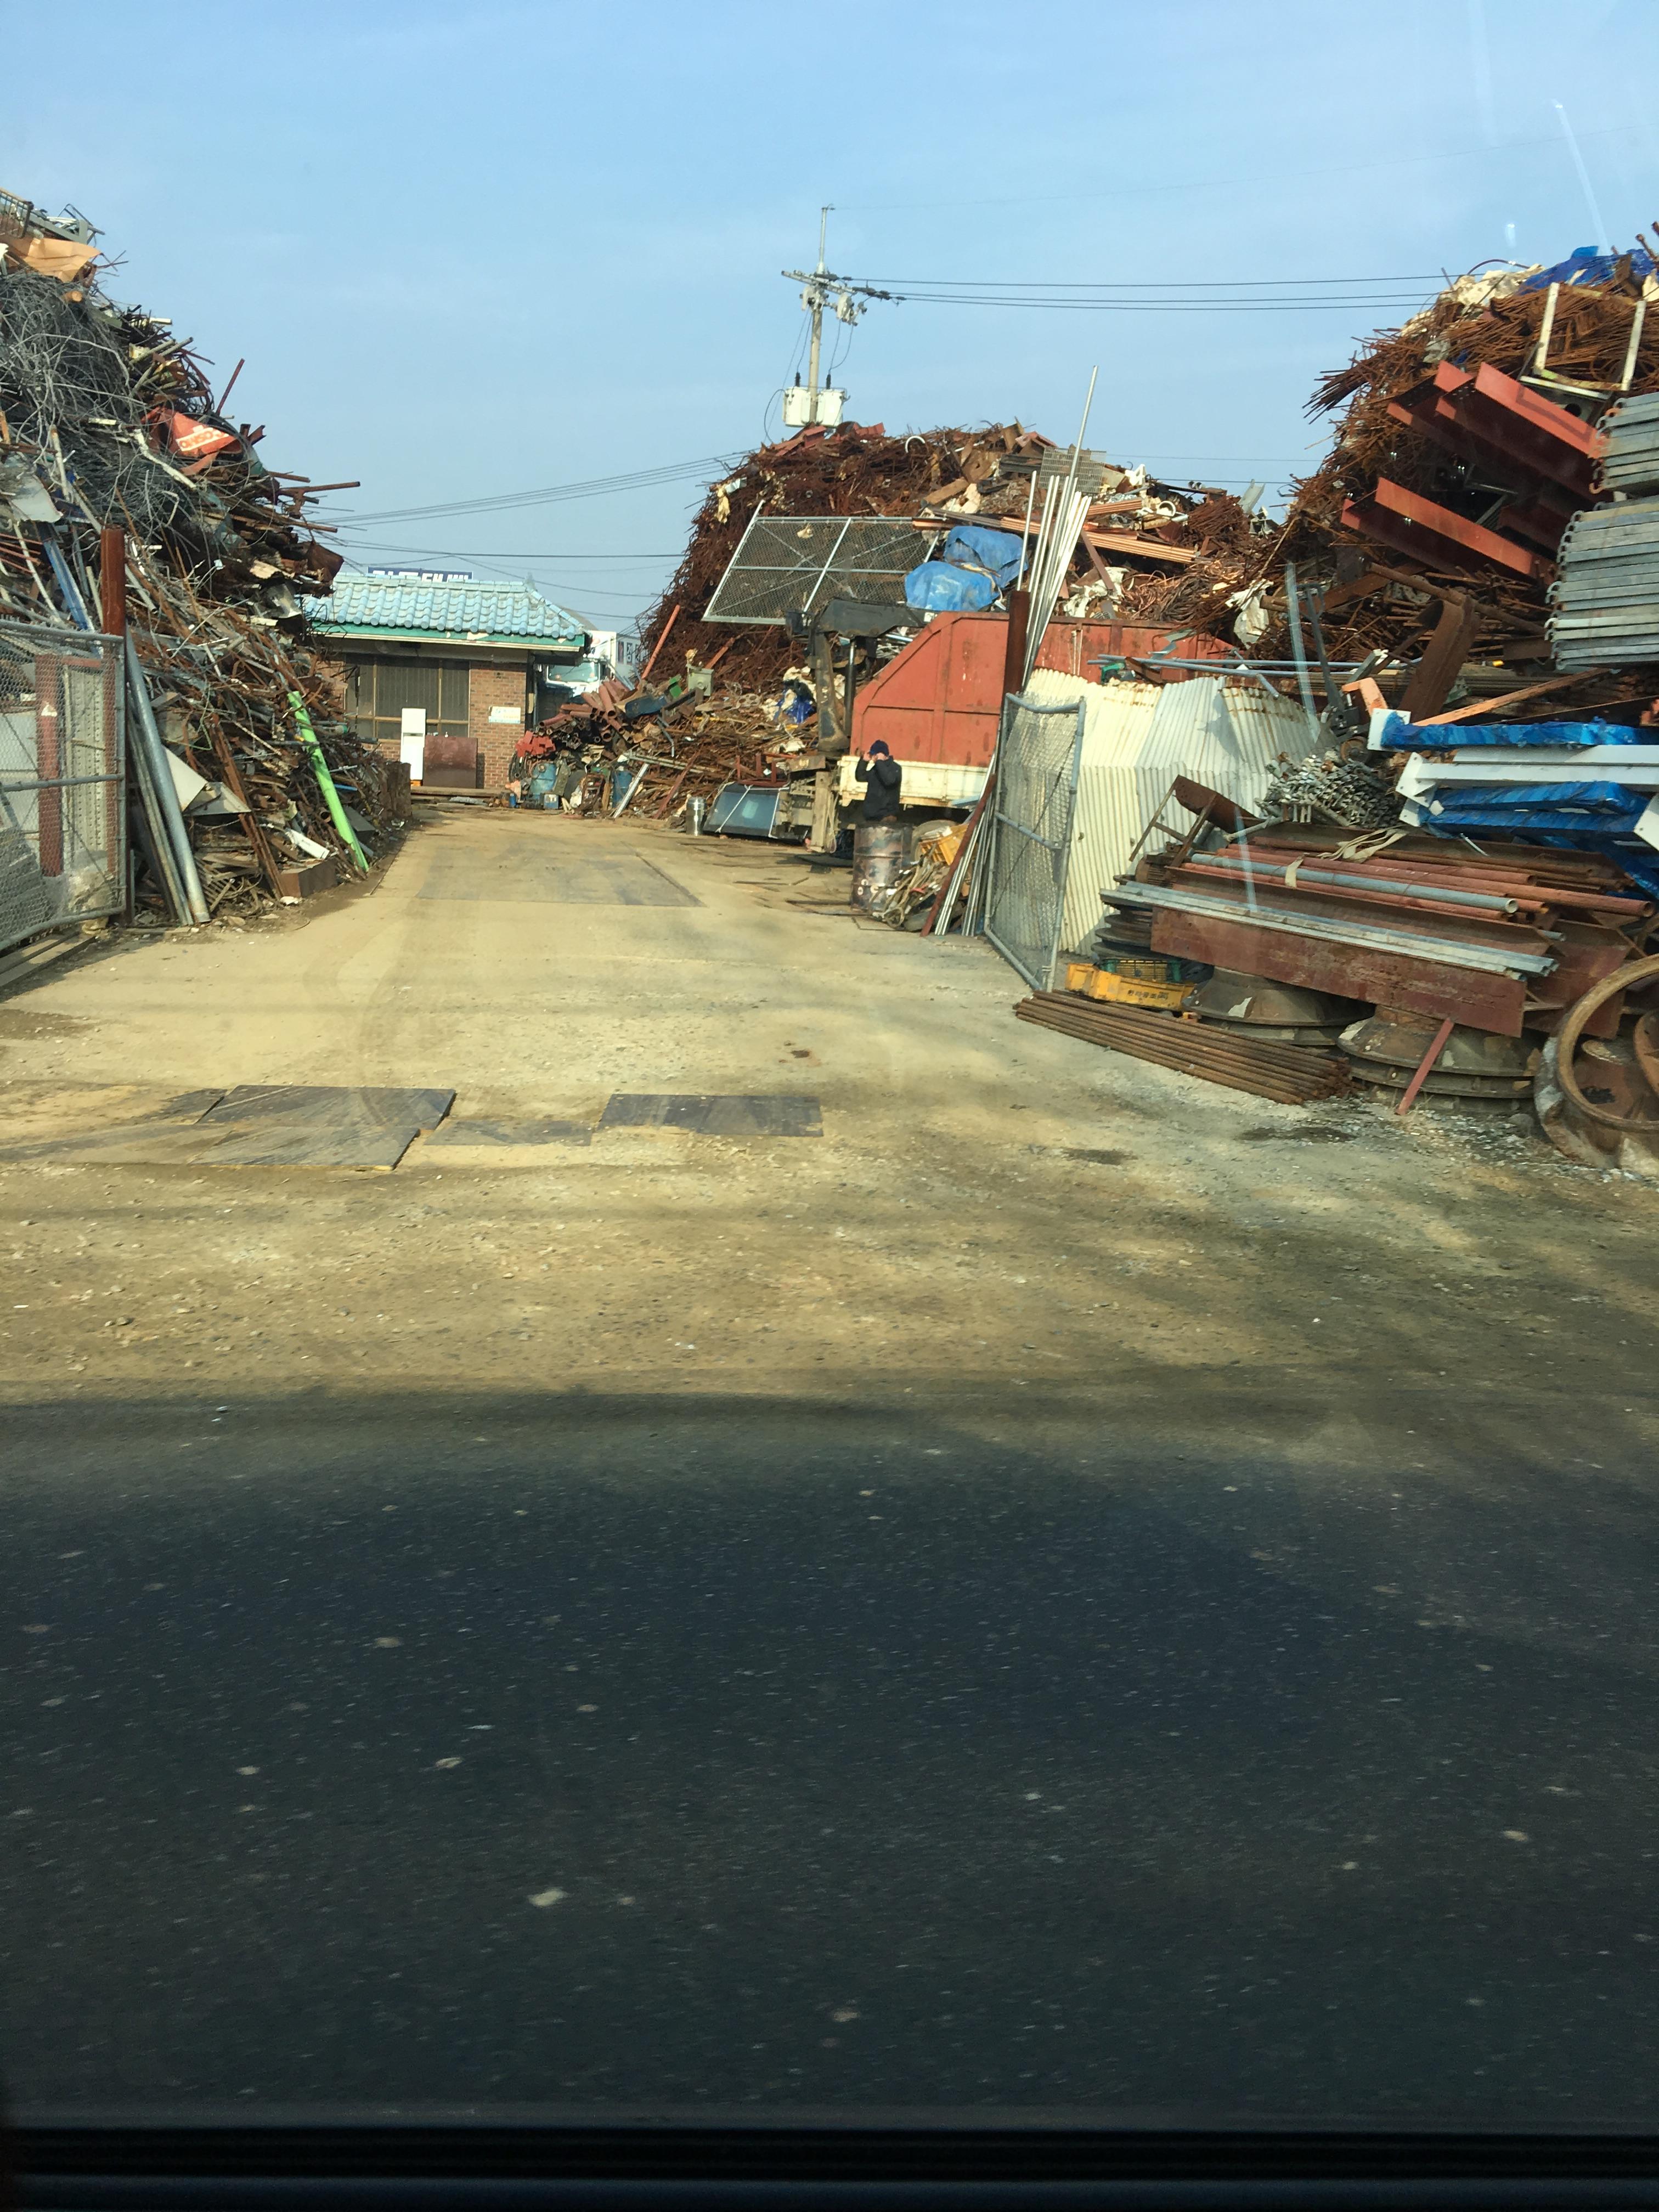
Stopped by the scrape yard in South Korea again. This time I was granted access to "other areas" of the yard. I found 5 pieces. One Korean utility hole cover, like the ines you see in the road. It will probably end up as wall art when I get back to the states. Next item was some sort of brake drum. Then I found the strange bowl looking piece. It has rusted iron flange welded to what I believe to be galvanized steel, not sure though. Have no clue right now what I will use it for. Next item was a simple solid steel block, roughly 3x3x4. Im thinking of making some sort of 90 degree swage with it, maybe two. Then I found a ratty old hammer that was rotting away at the bottom of the mountain of metal.
I also got a 6' piece of 1/4" round stock and a 6' piece 1/8" round stock.
I got all 7 pieces for $10.

-
23 minutes ago, Charles R. Stevens said:
So can we say it is a "milspec" forge?
I suppose that you could! Haha although I have had many military items that were junk. Hopefully you meant the contrary!
")
-
7 hours ago, Dave51B said:
Hardhead, I see a lot of camo in these pics. I will assume you are in the military.....sooo, thank you for yer service ! The only problem I see...(and it may be camera angle) is you firepot is under the hood. Maybe I'm wrong, but will you be able to heat a 5' piece of stock in the middle over the sweet spot of your fire? If not perhaps a mouse hole door in the back of the hood will solve that problem. Nice build, I would be happy to fire that up and test it for you. Just a small distance problem......... Life is Good Dave
Dave,
Thanks for the reply. Yes I'm in the military in South Korea. My guys and I run a Allied trades shop here. The fire pot is under the hood, so will definitely have to add the mouse hole to do longer pieces. How big of a hole do you suggest? Should I make it so I can close it when not in use? Thanks again, I will update as we do more.
-
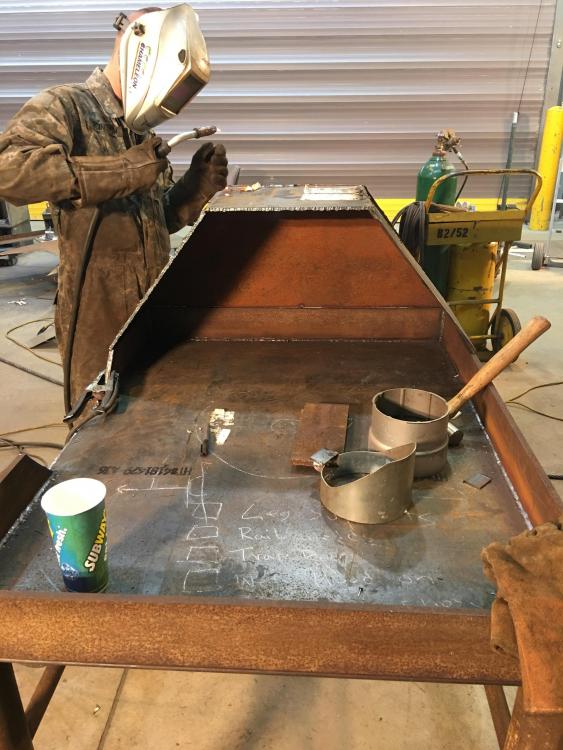
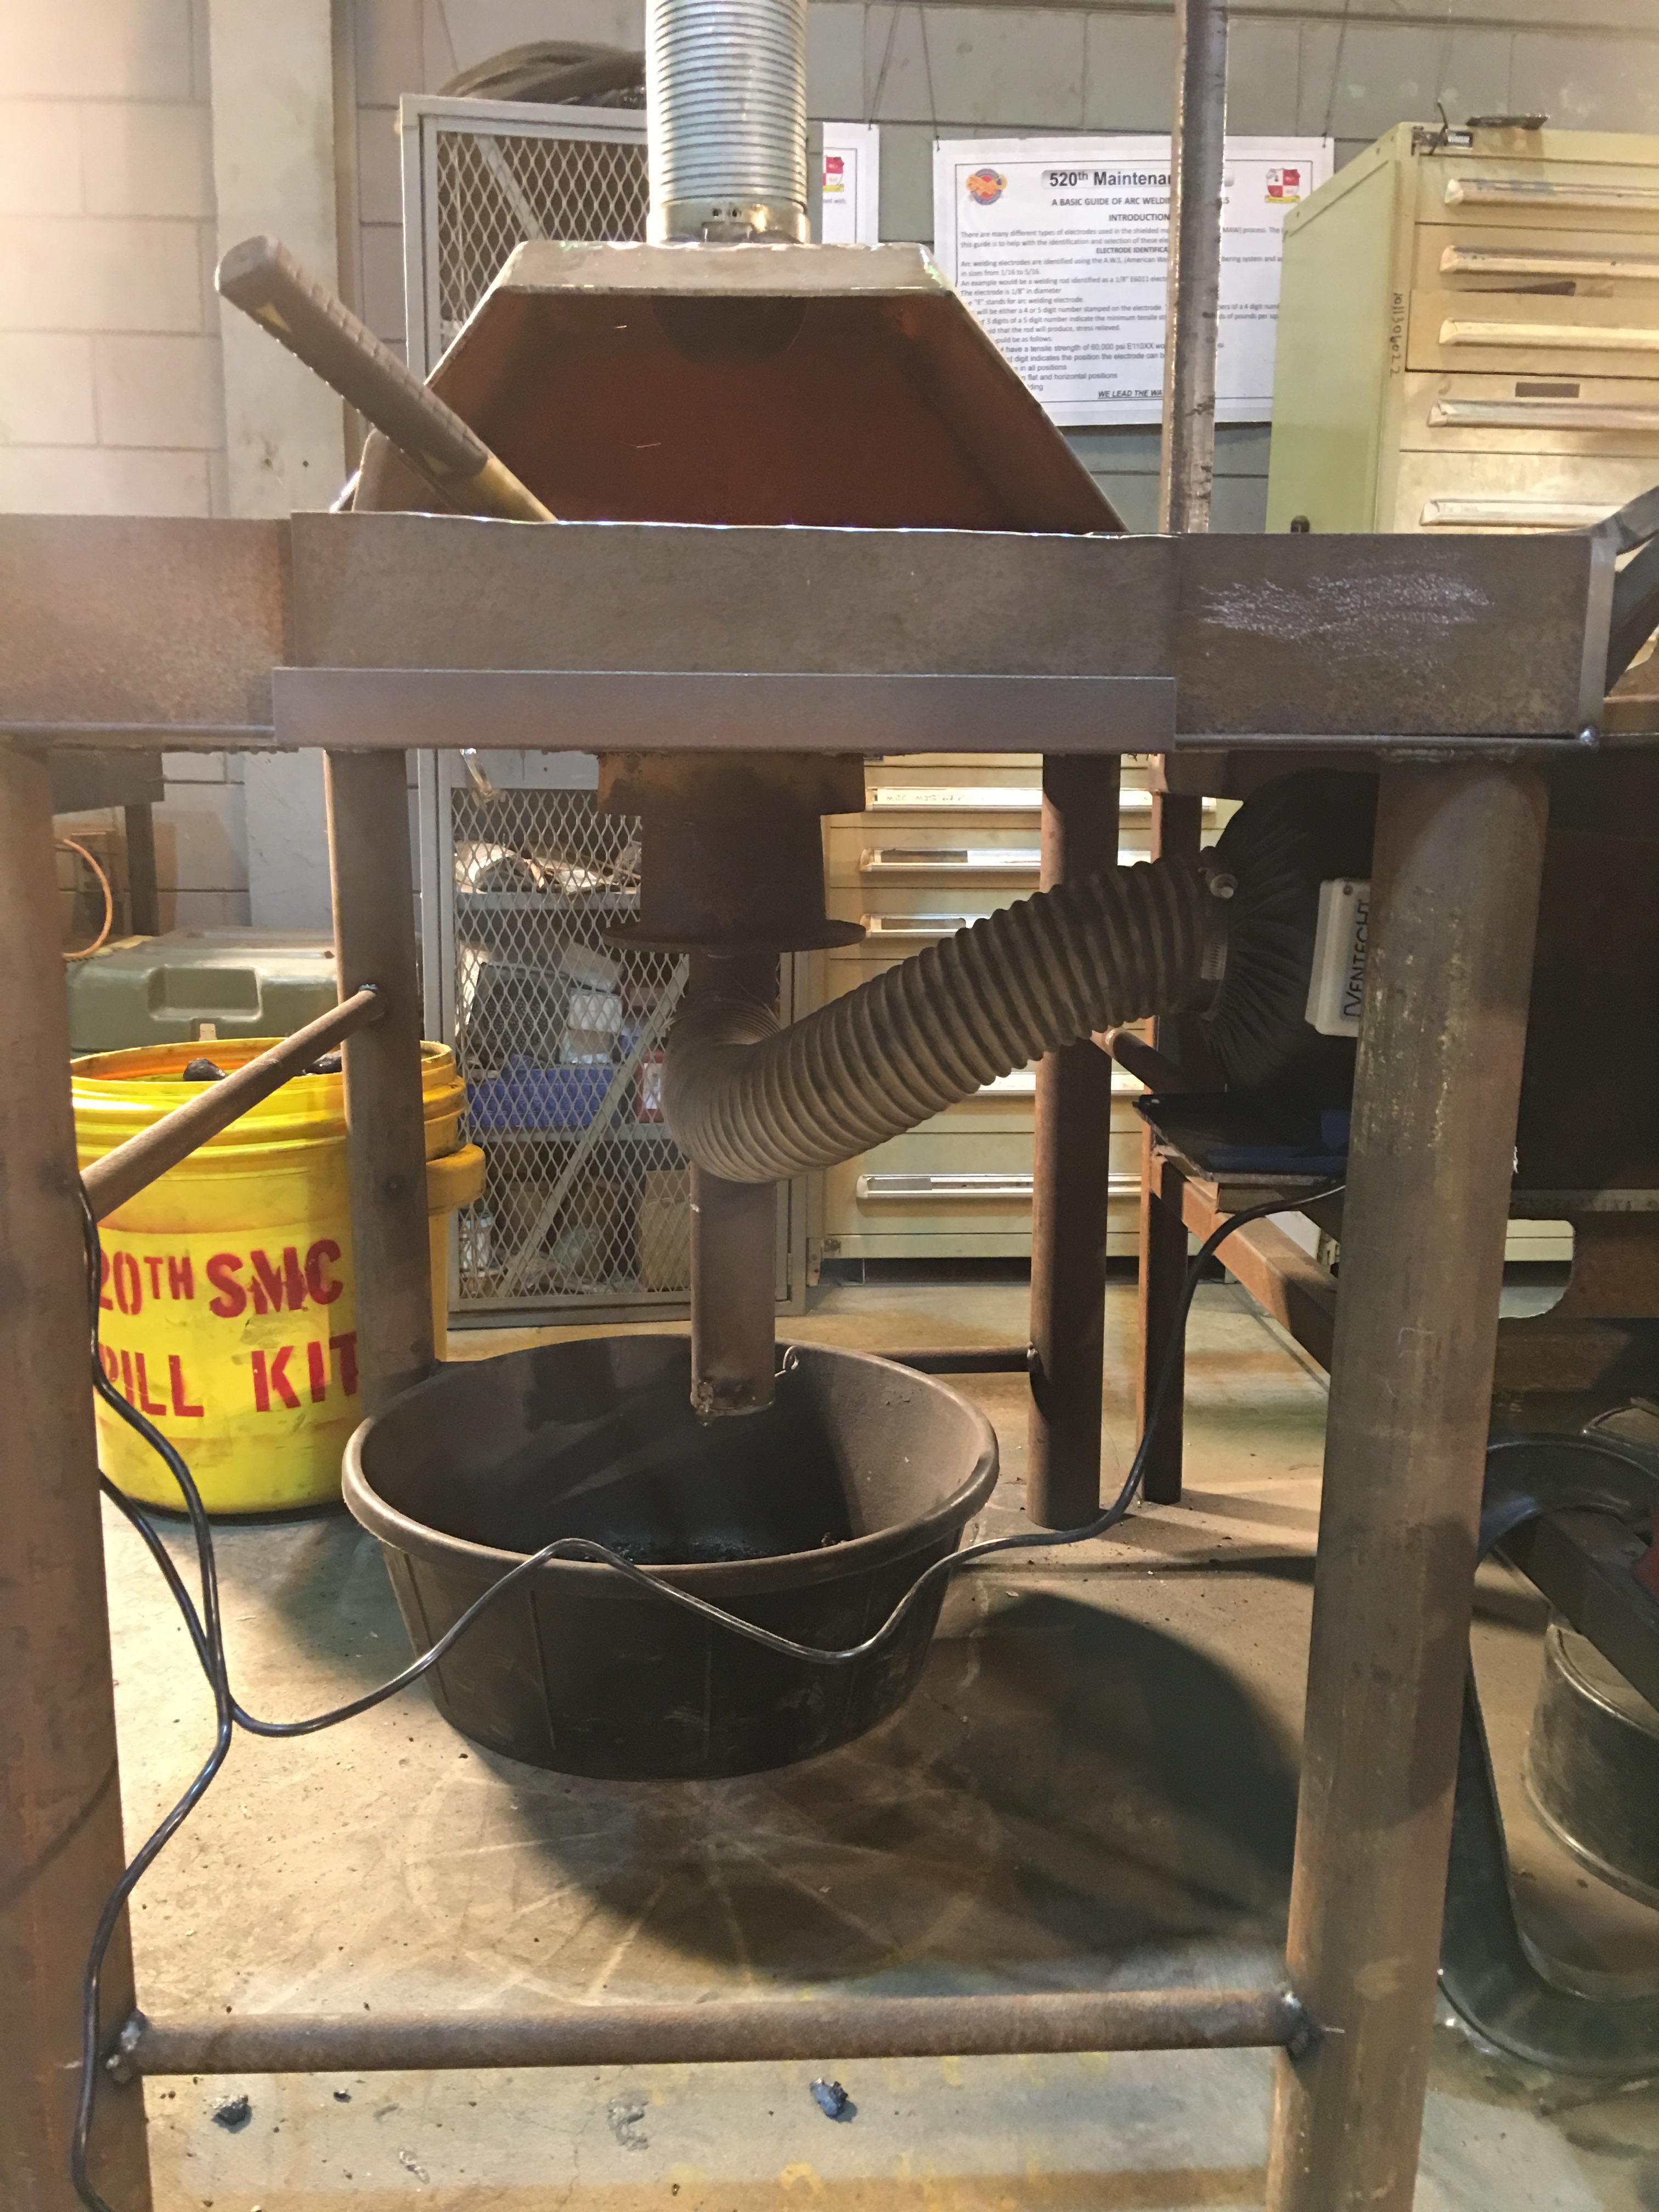
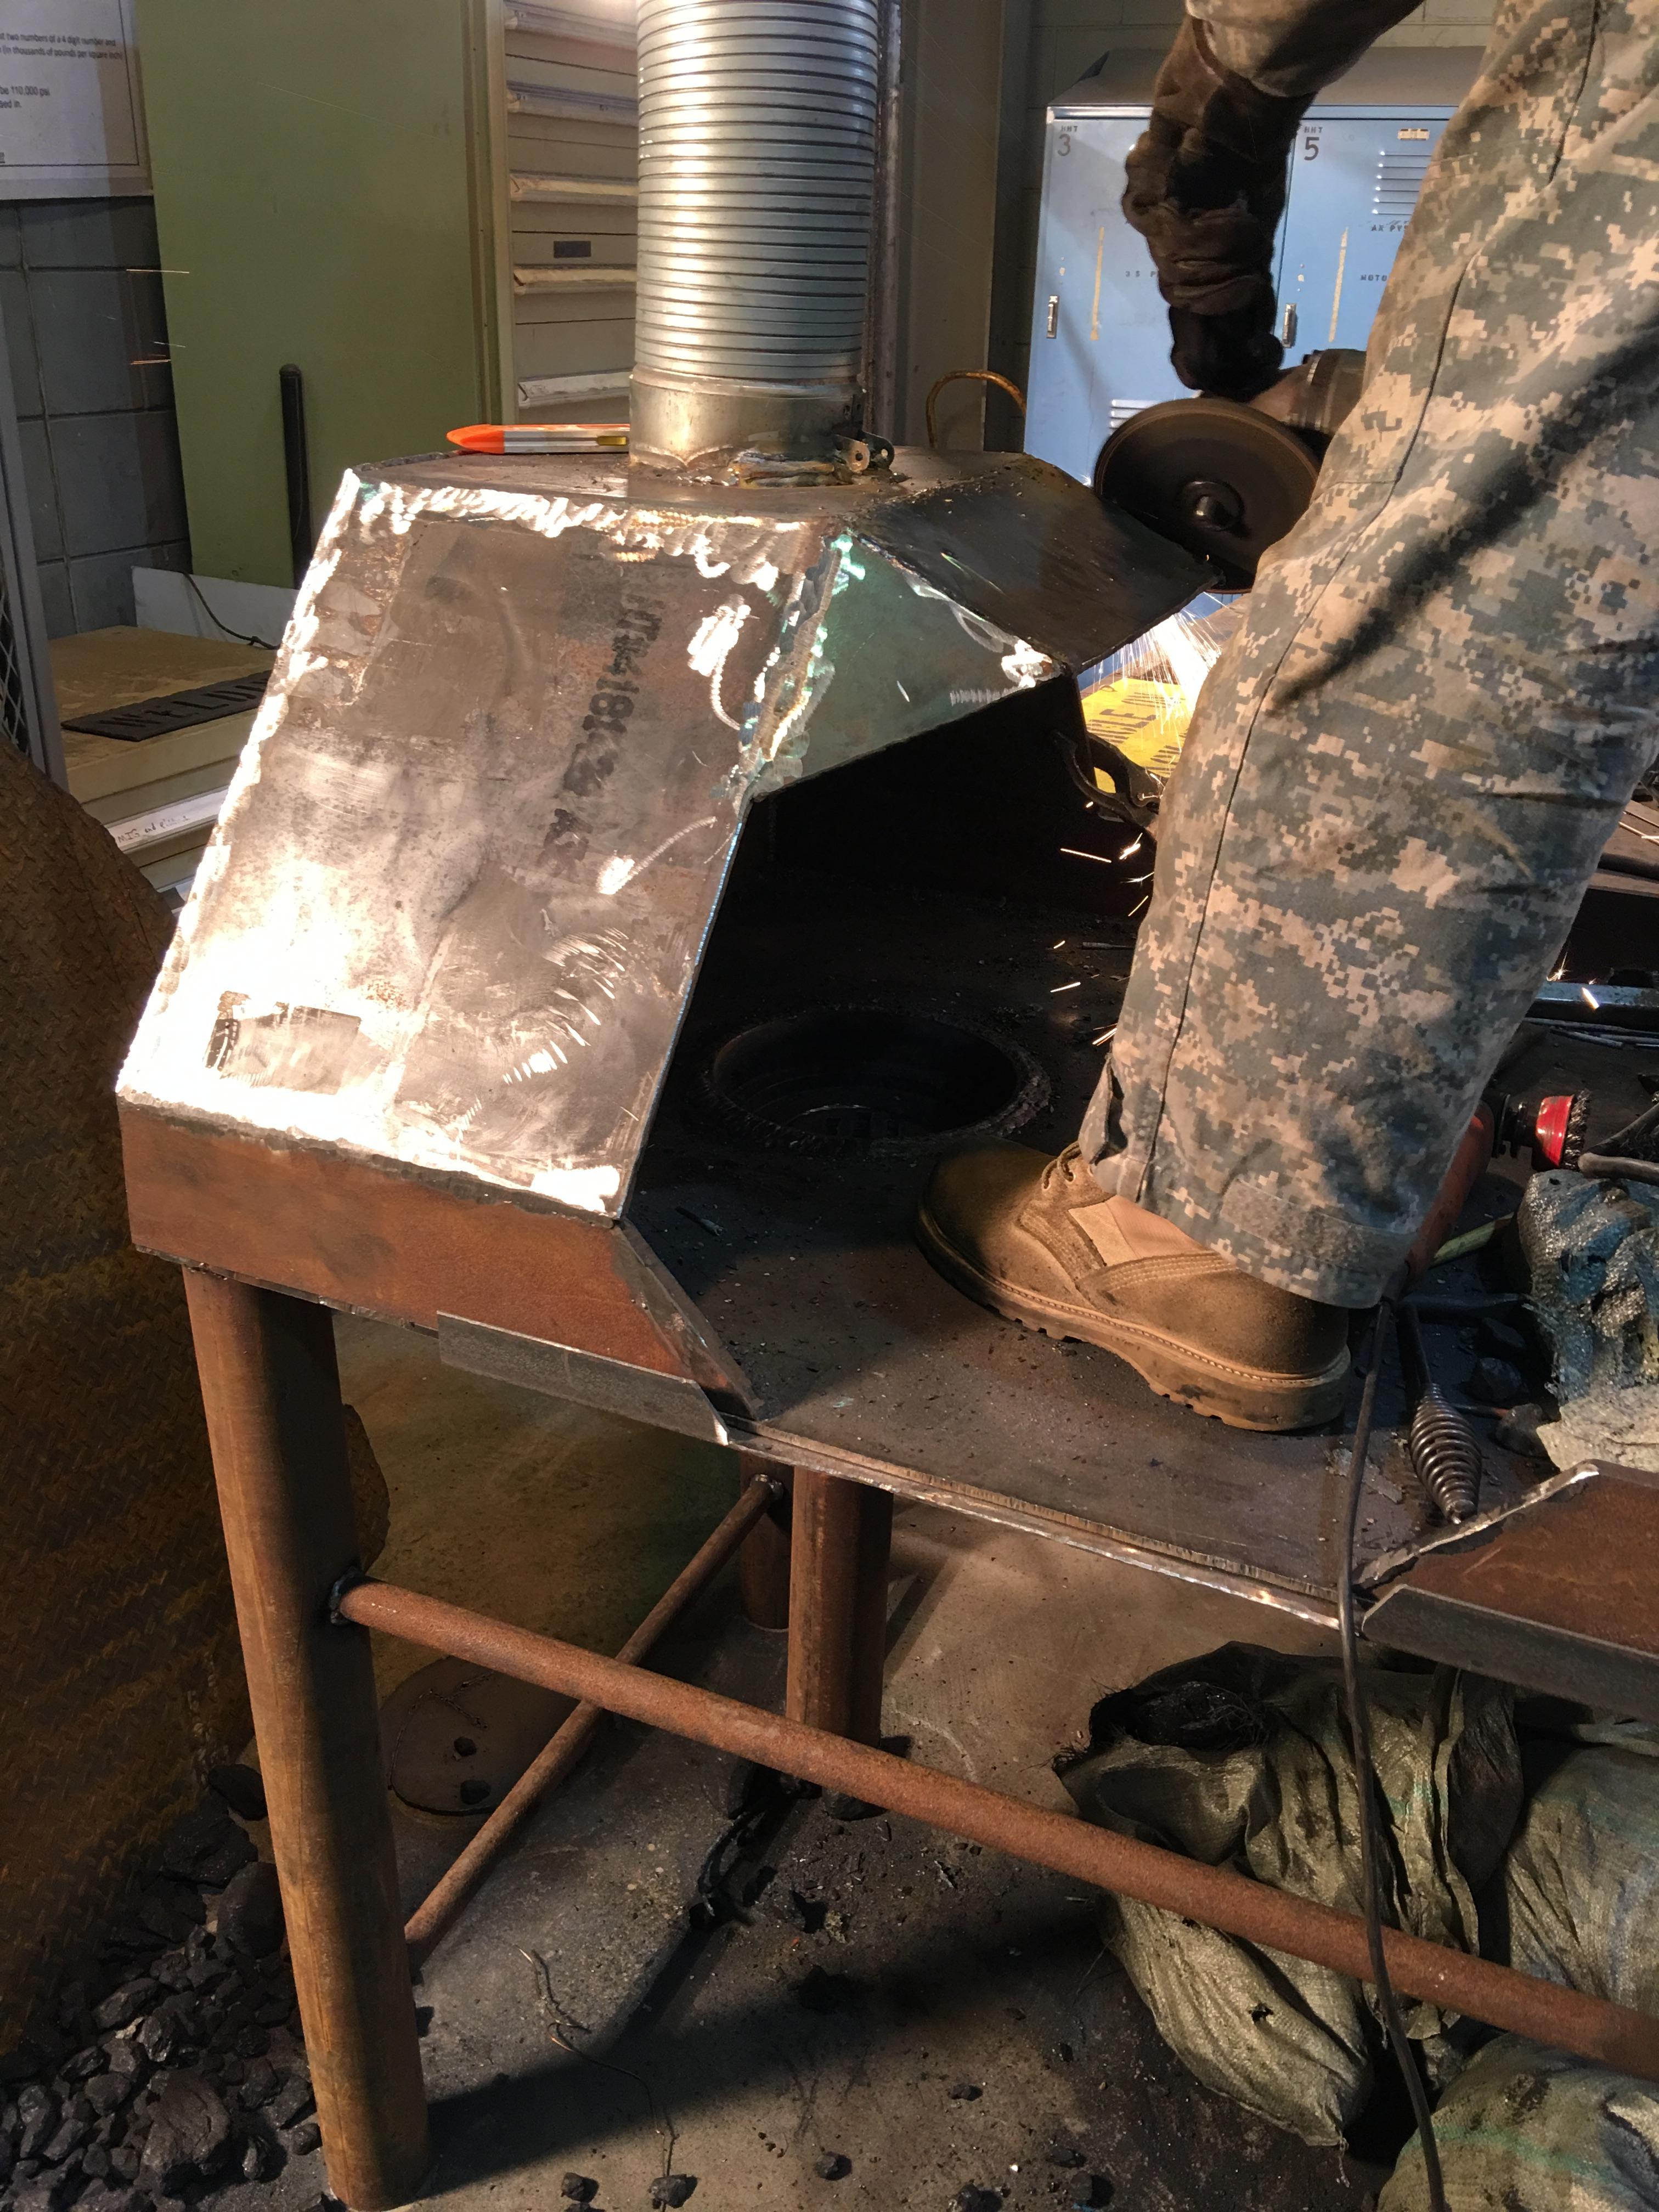
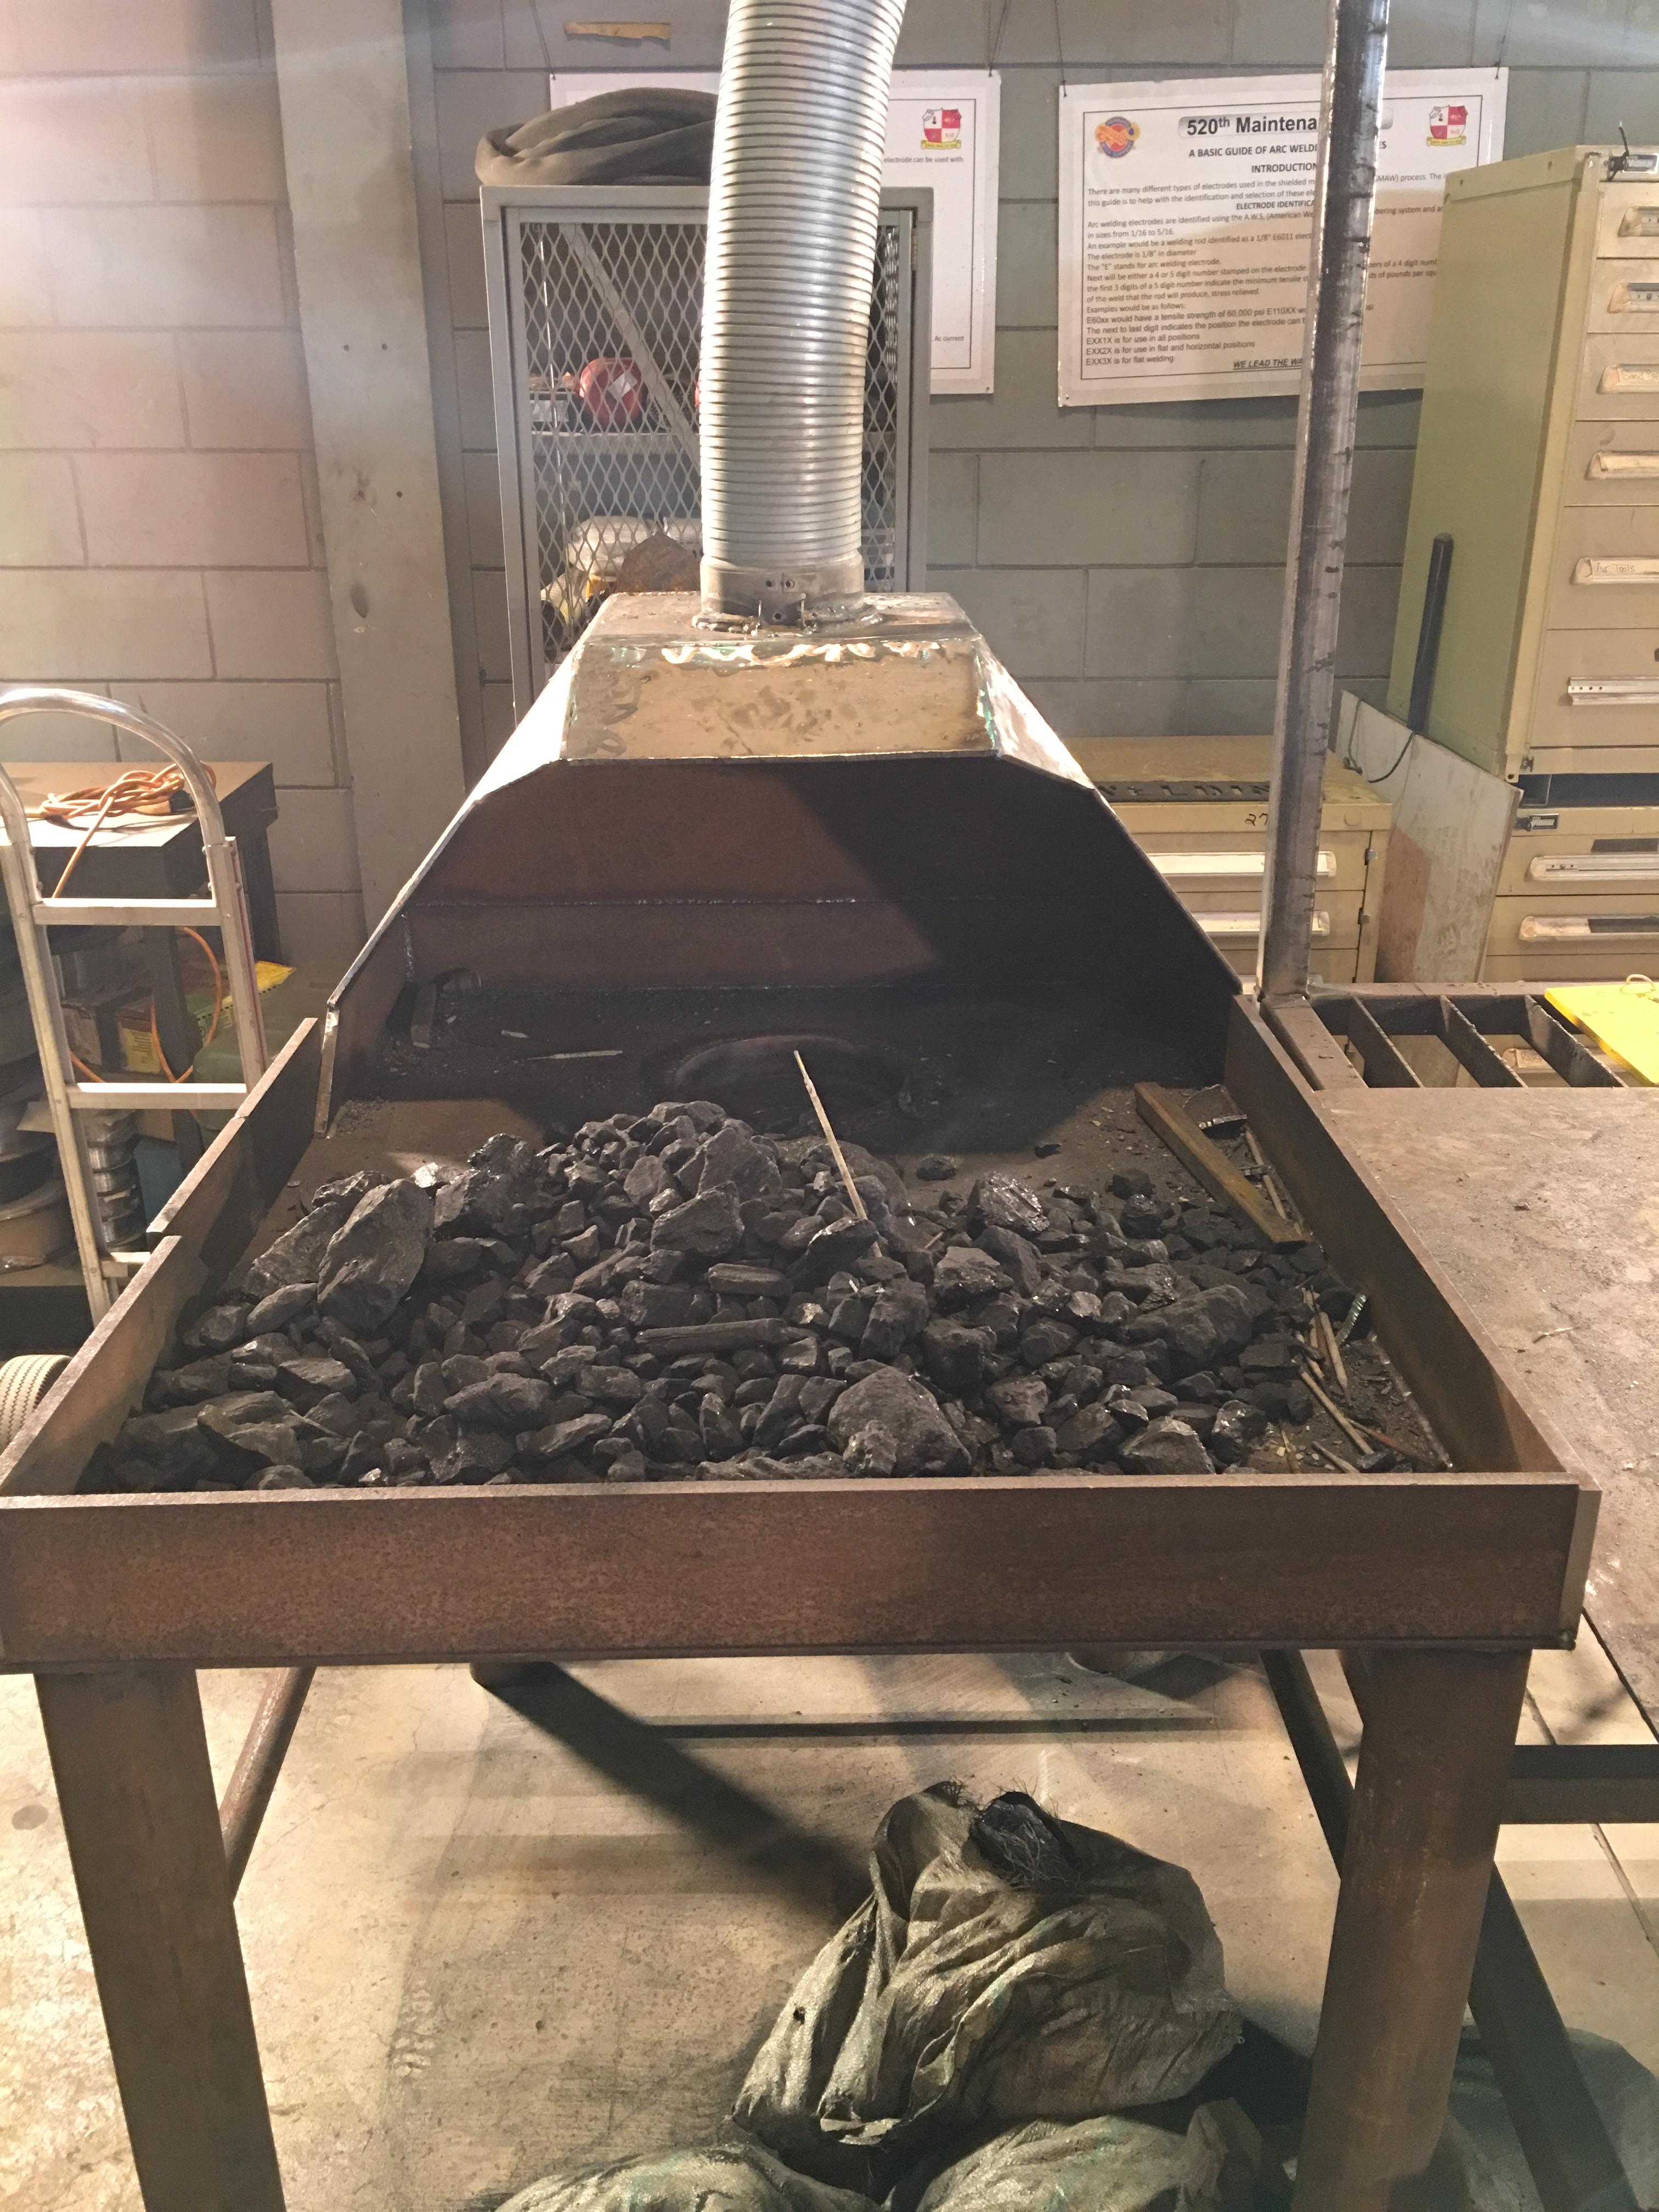
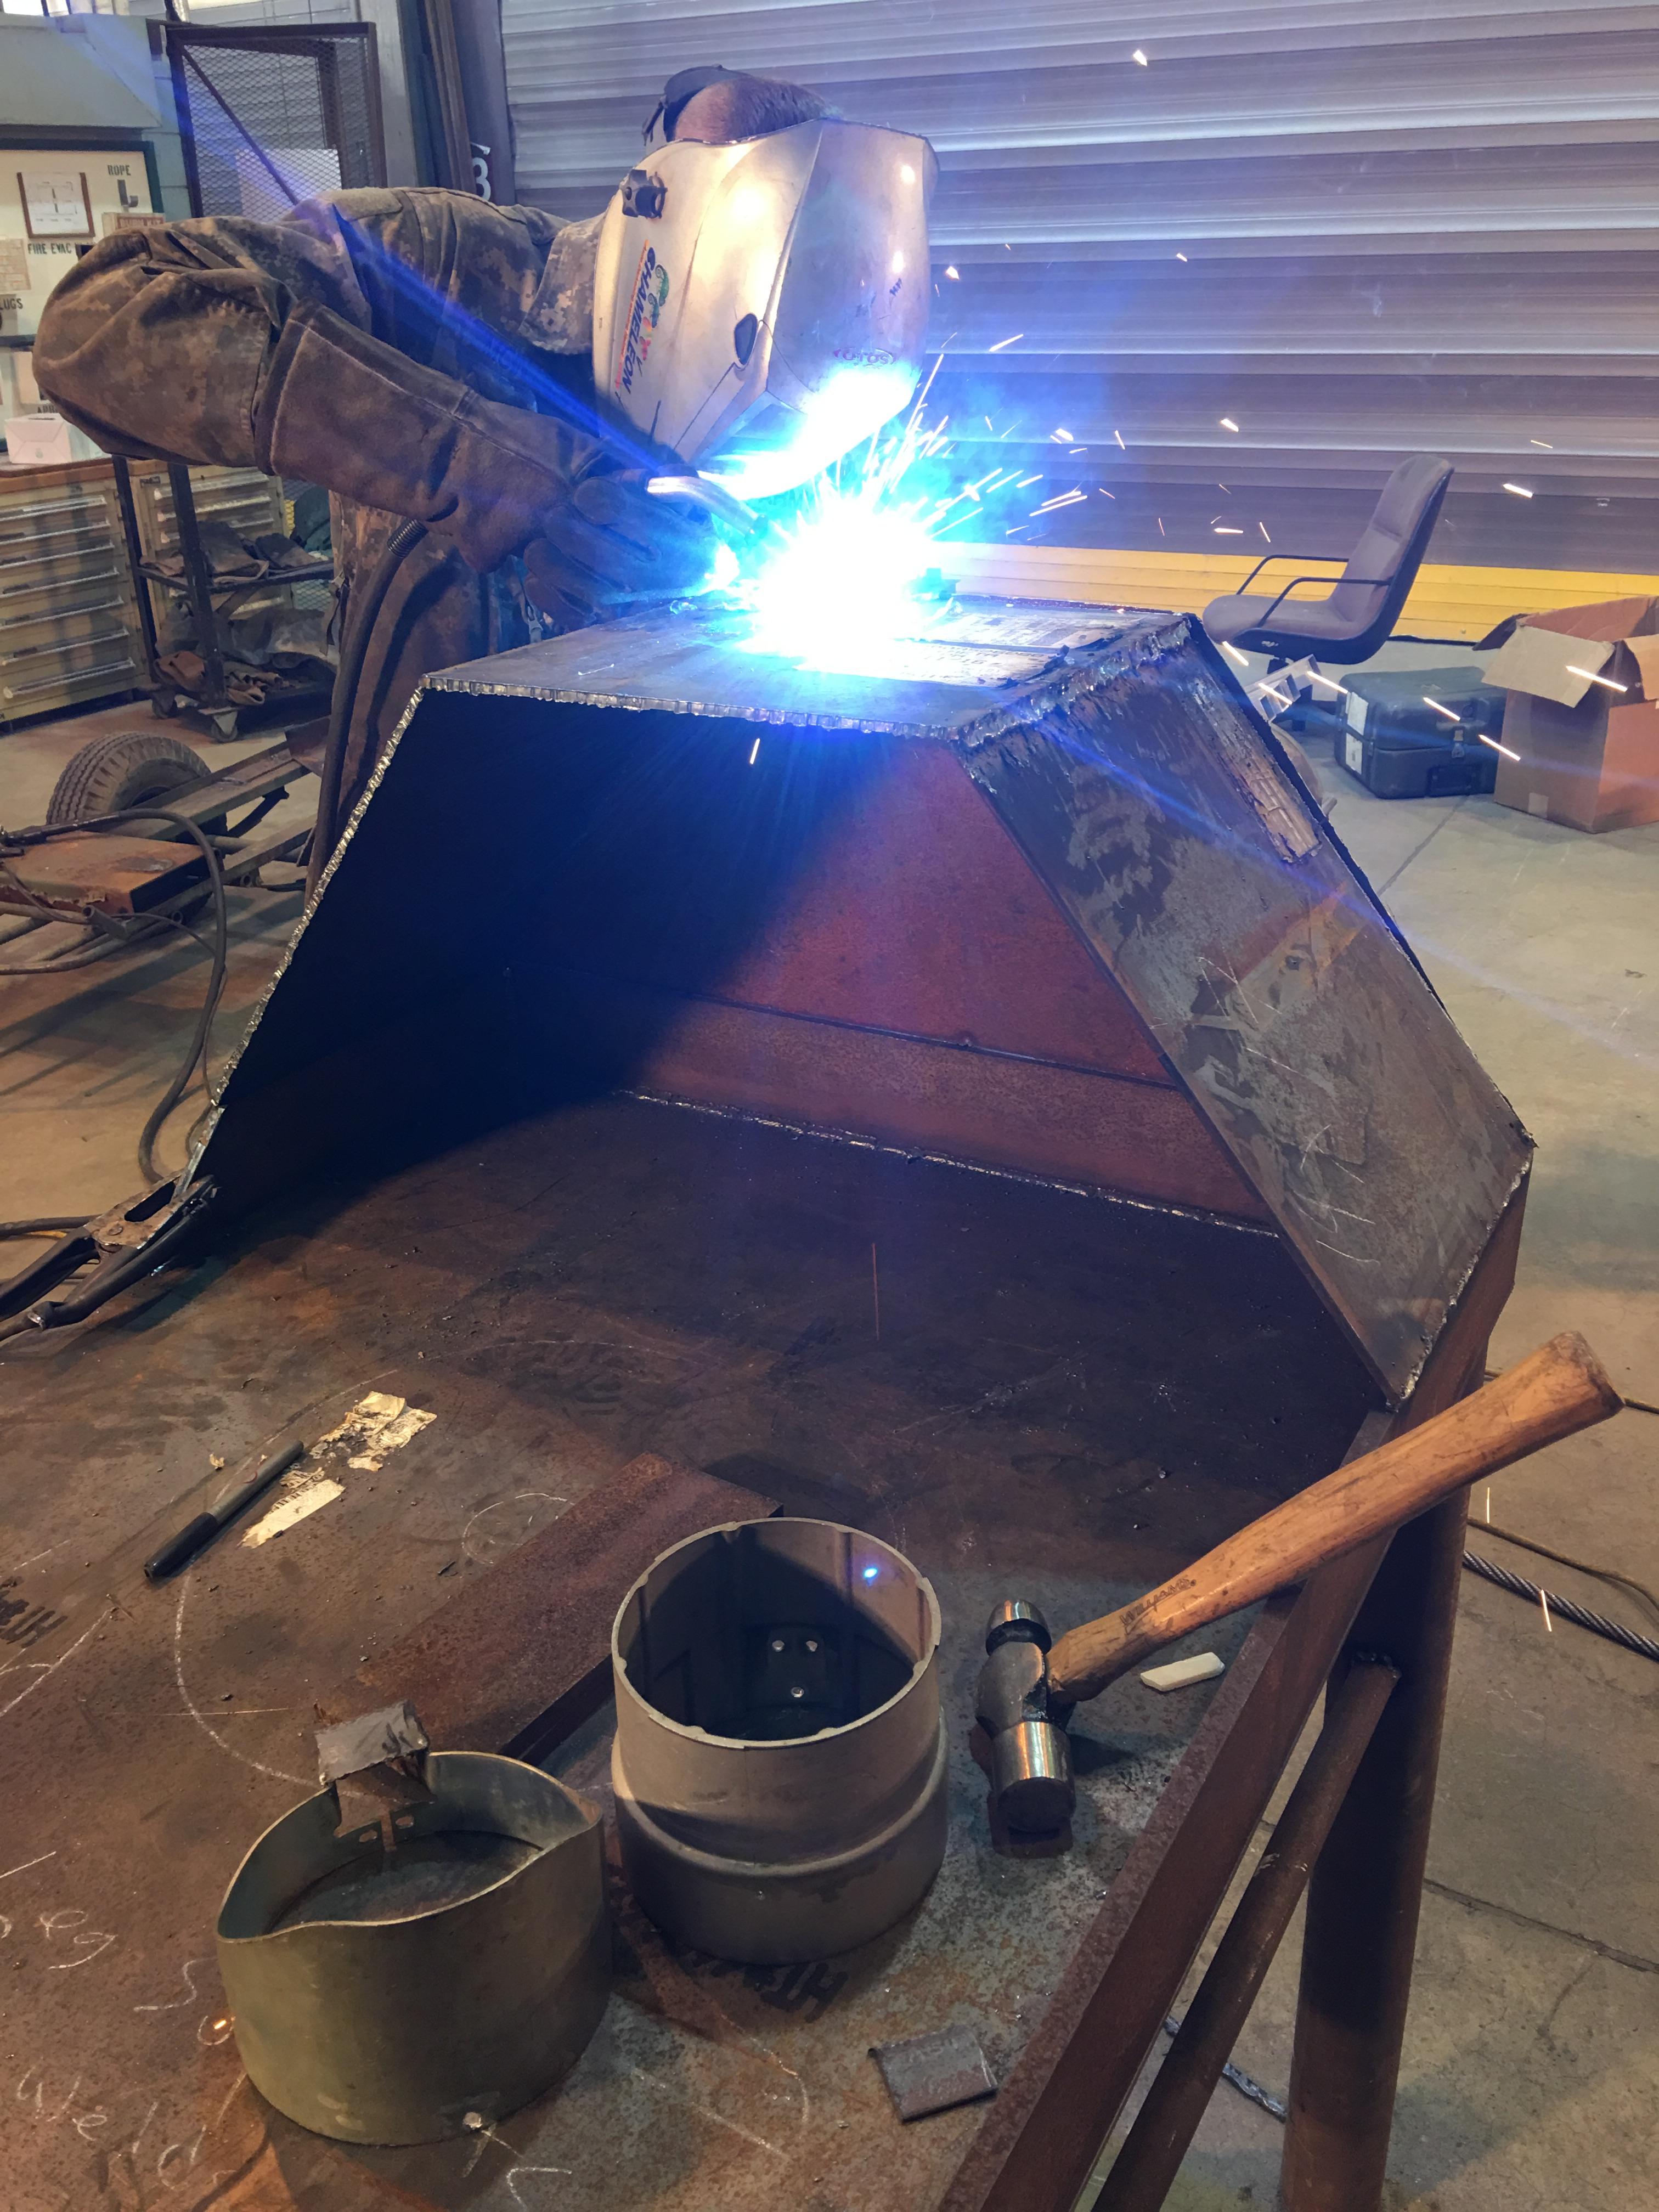
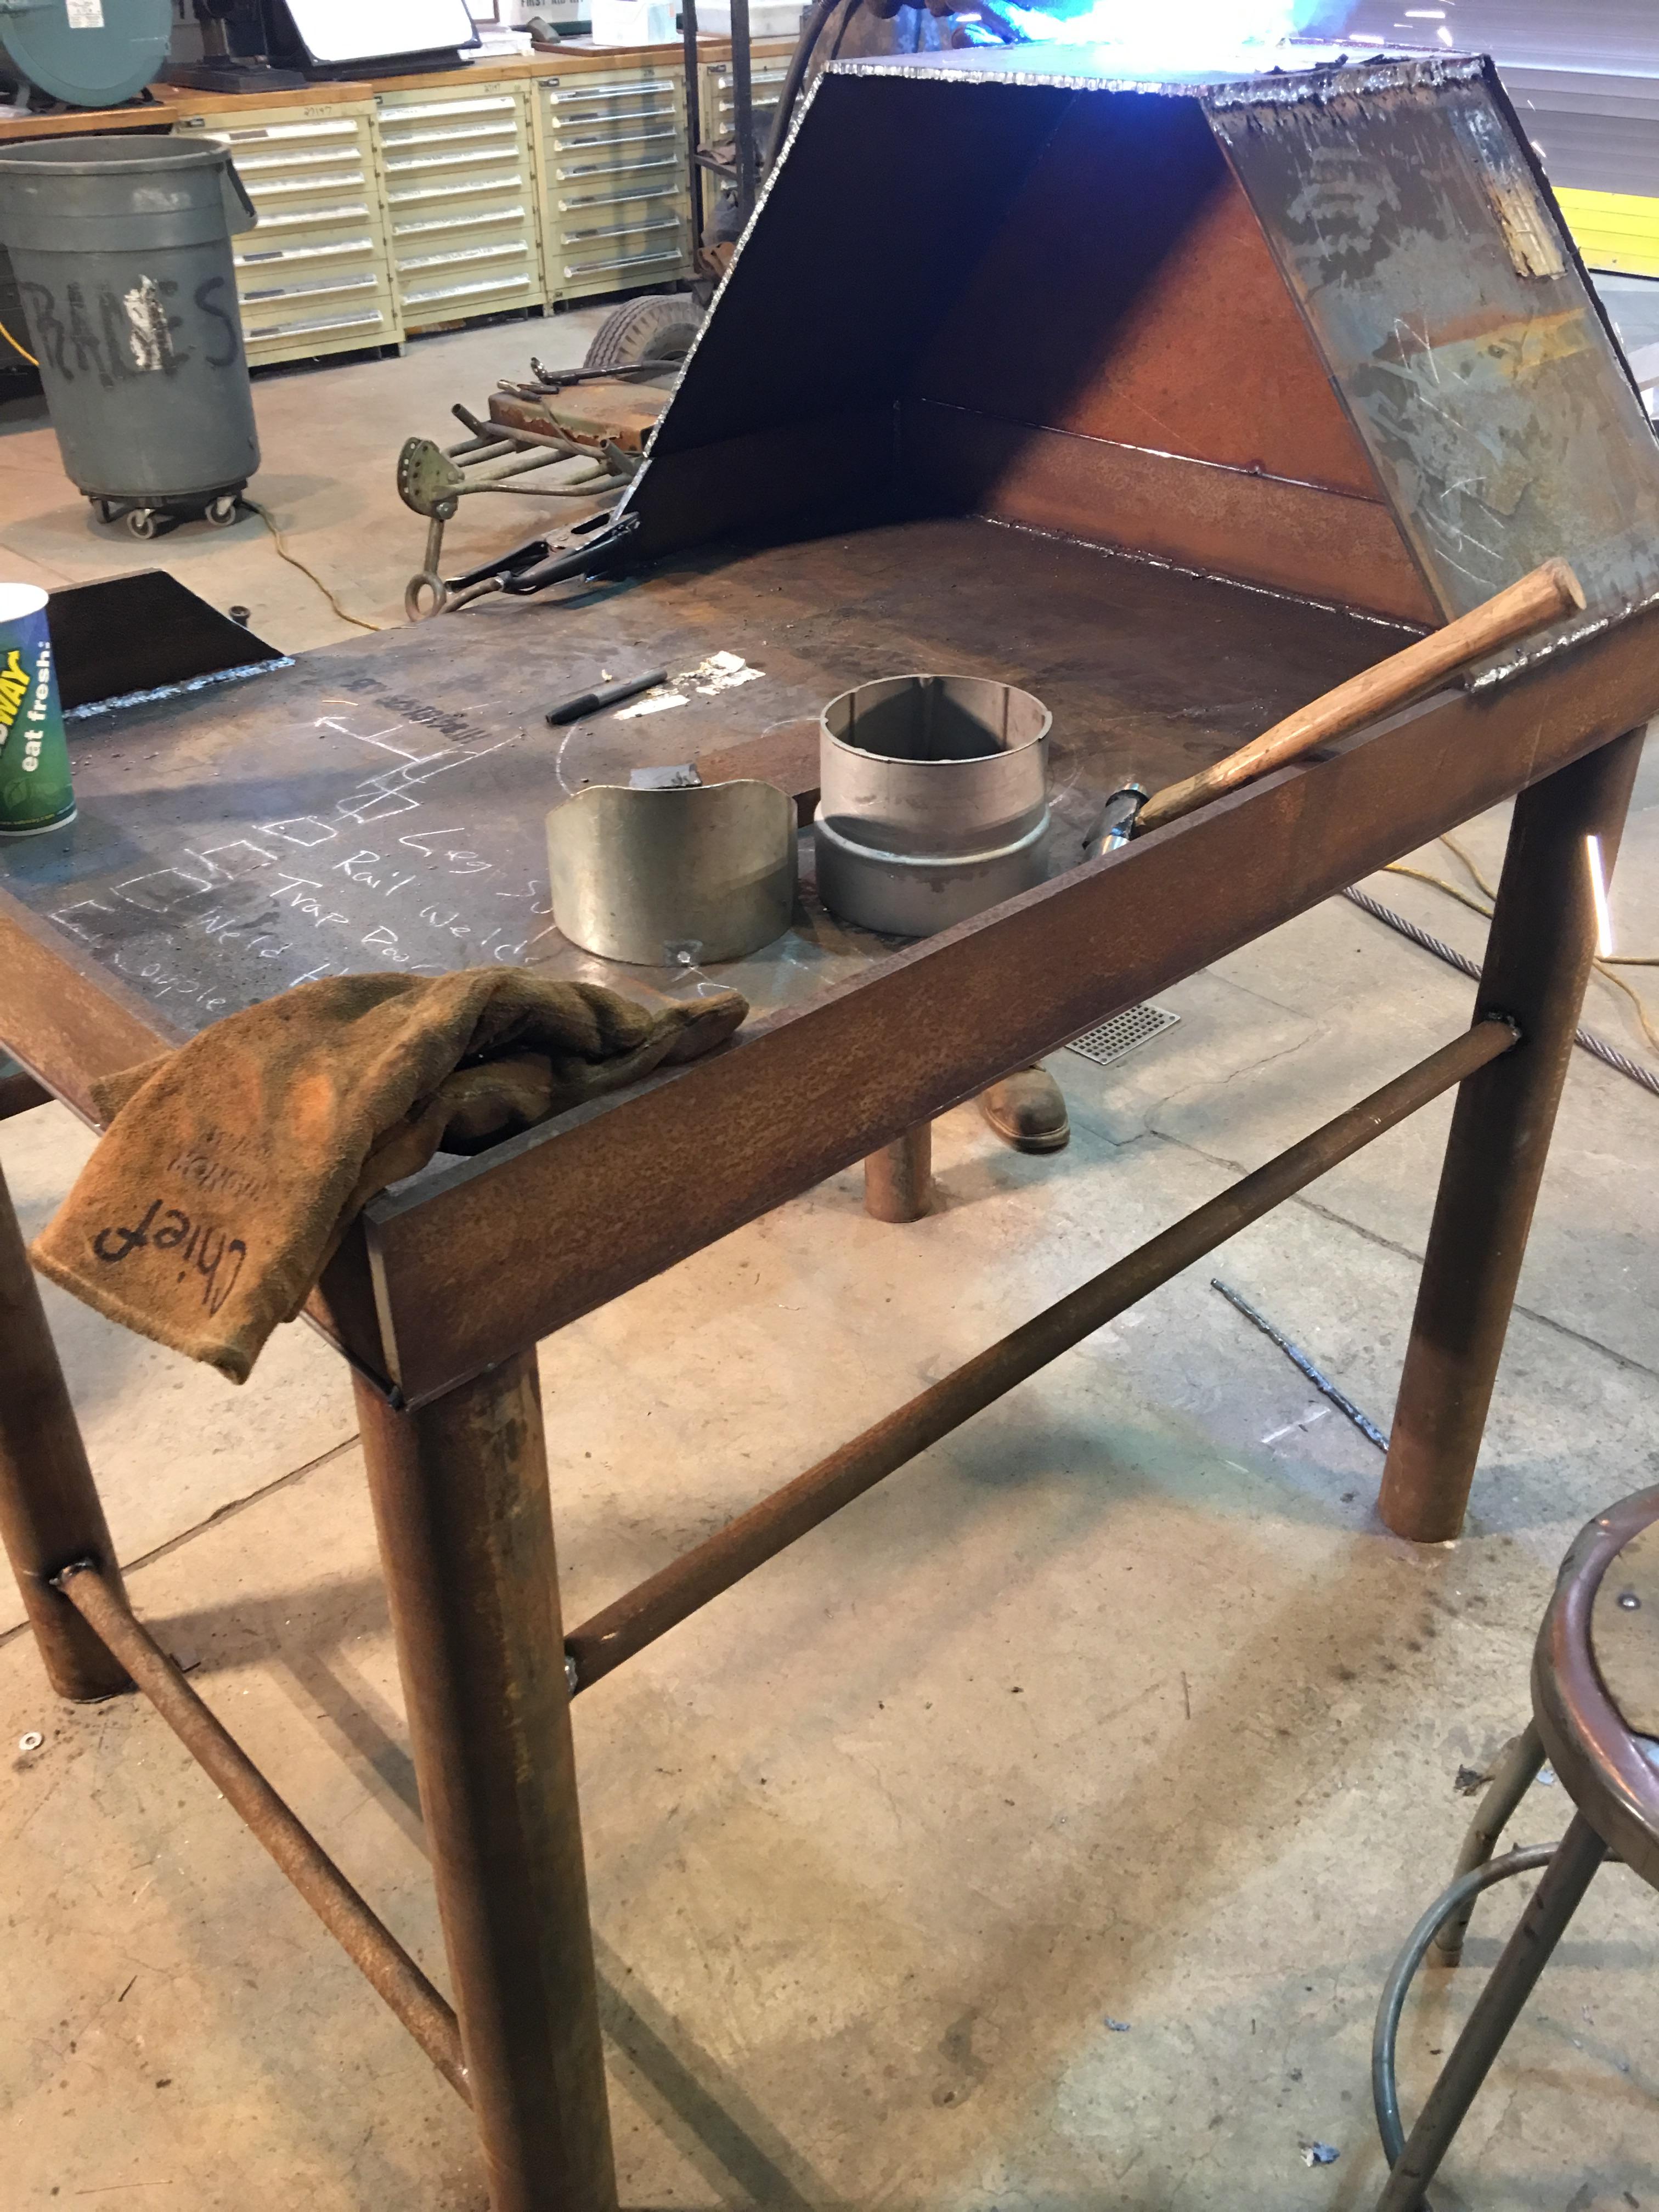
Those of you who read the newcomers thread may have seen a couple pics of my forge already. I wanted to post this thread to show the progress and to get some tips for the way forward. Glenn, I applied what I think you meant to the hood, the downward piece and the triangles. Hopefully that will work cause it's fully welded now! Here is my materials that were used;
-1/4" sheet metal table and hood
-1/2" x 4" fences ( had a piece laying around rusting so I fugured why not)
-3.5" pipe legs
-1 1/4" round stock leg supports
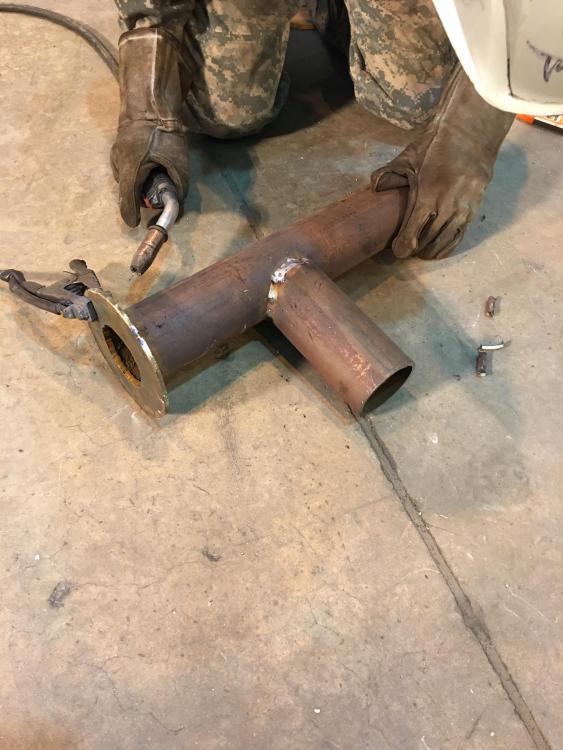
-3.5" pipe tuyere
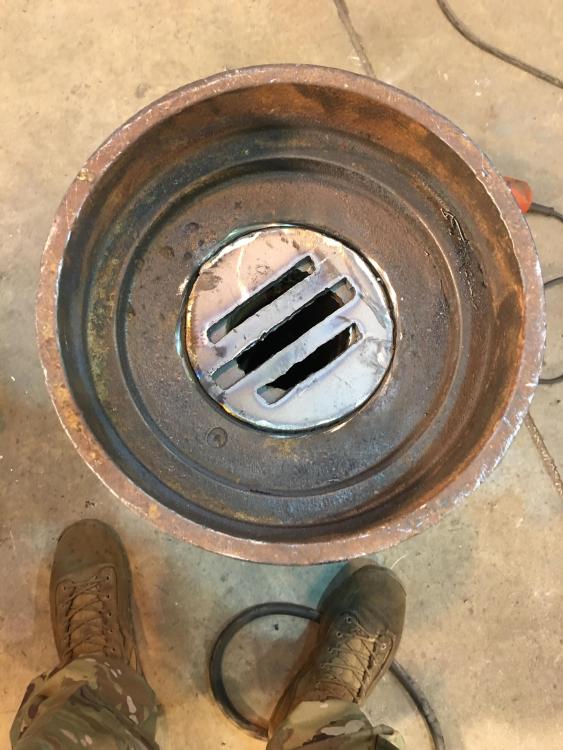
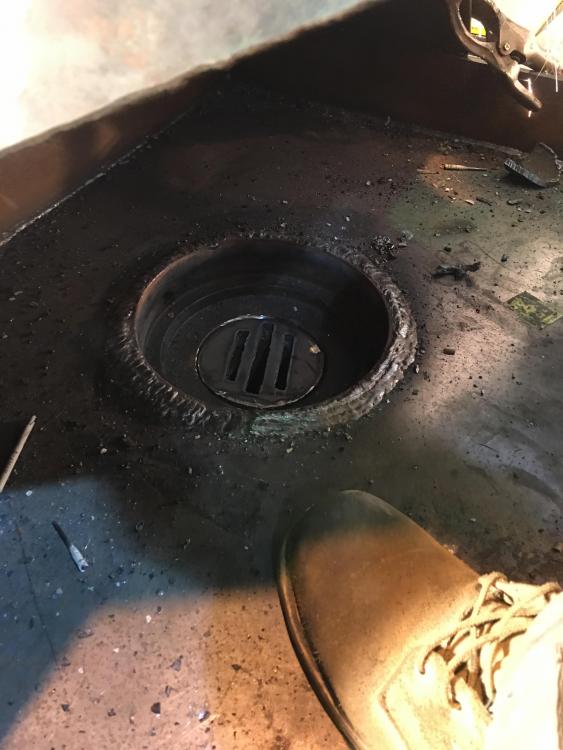
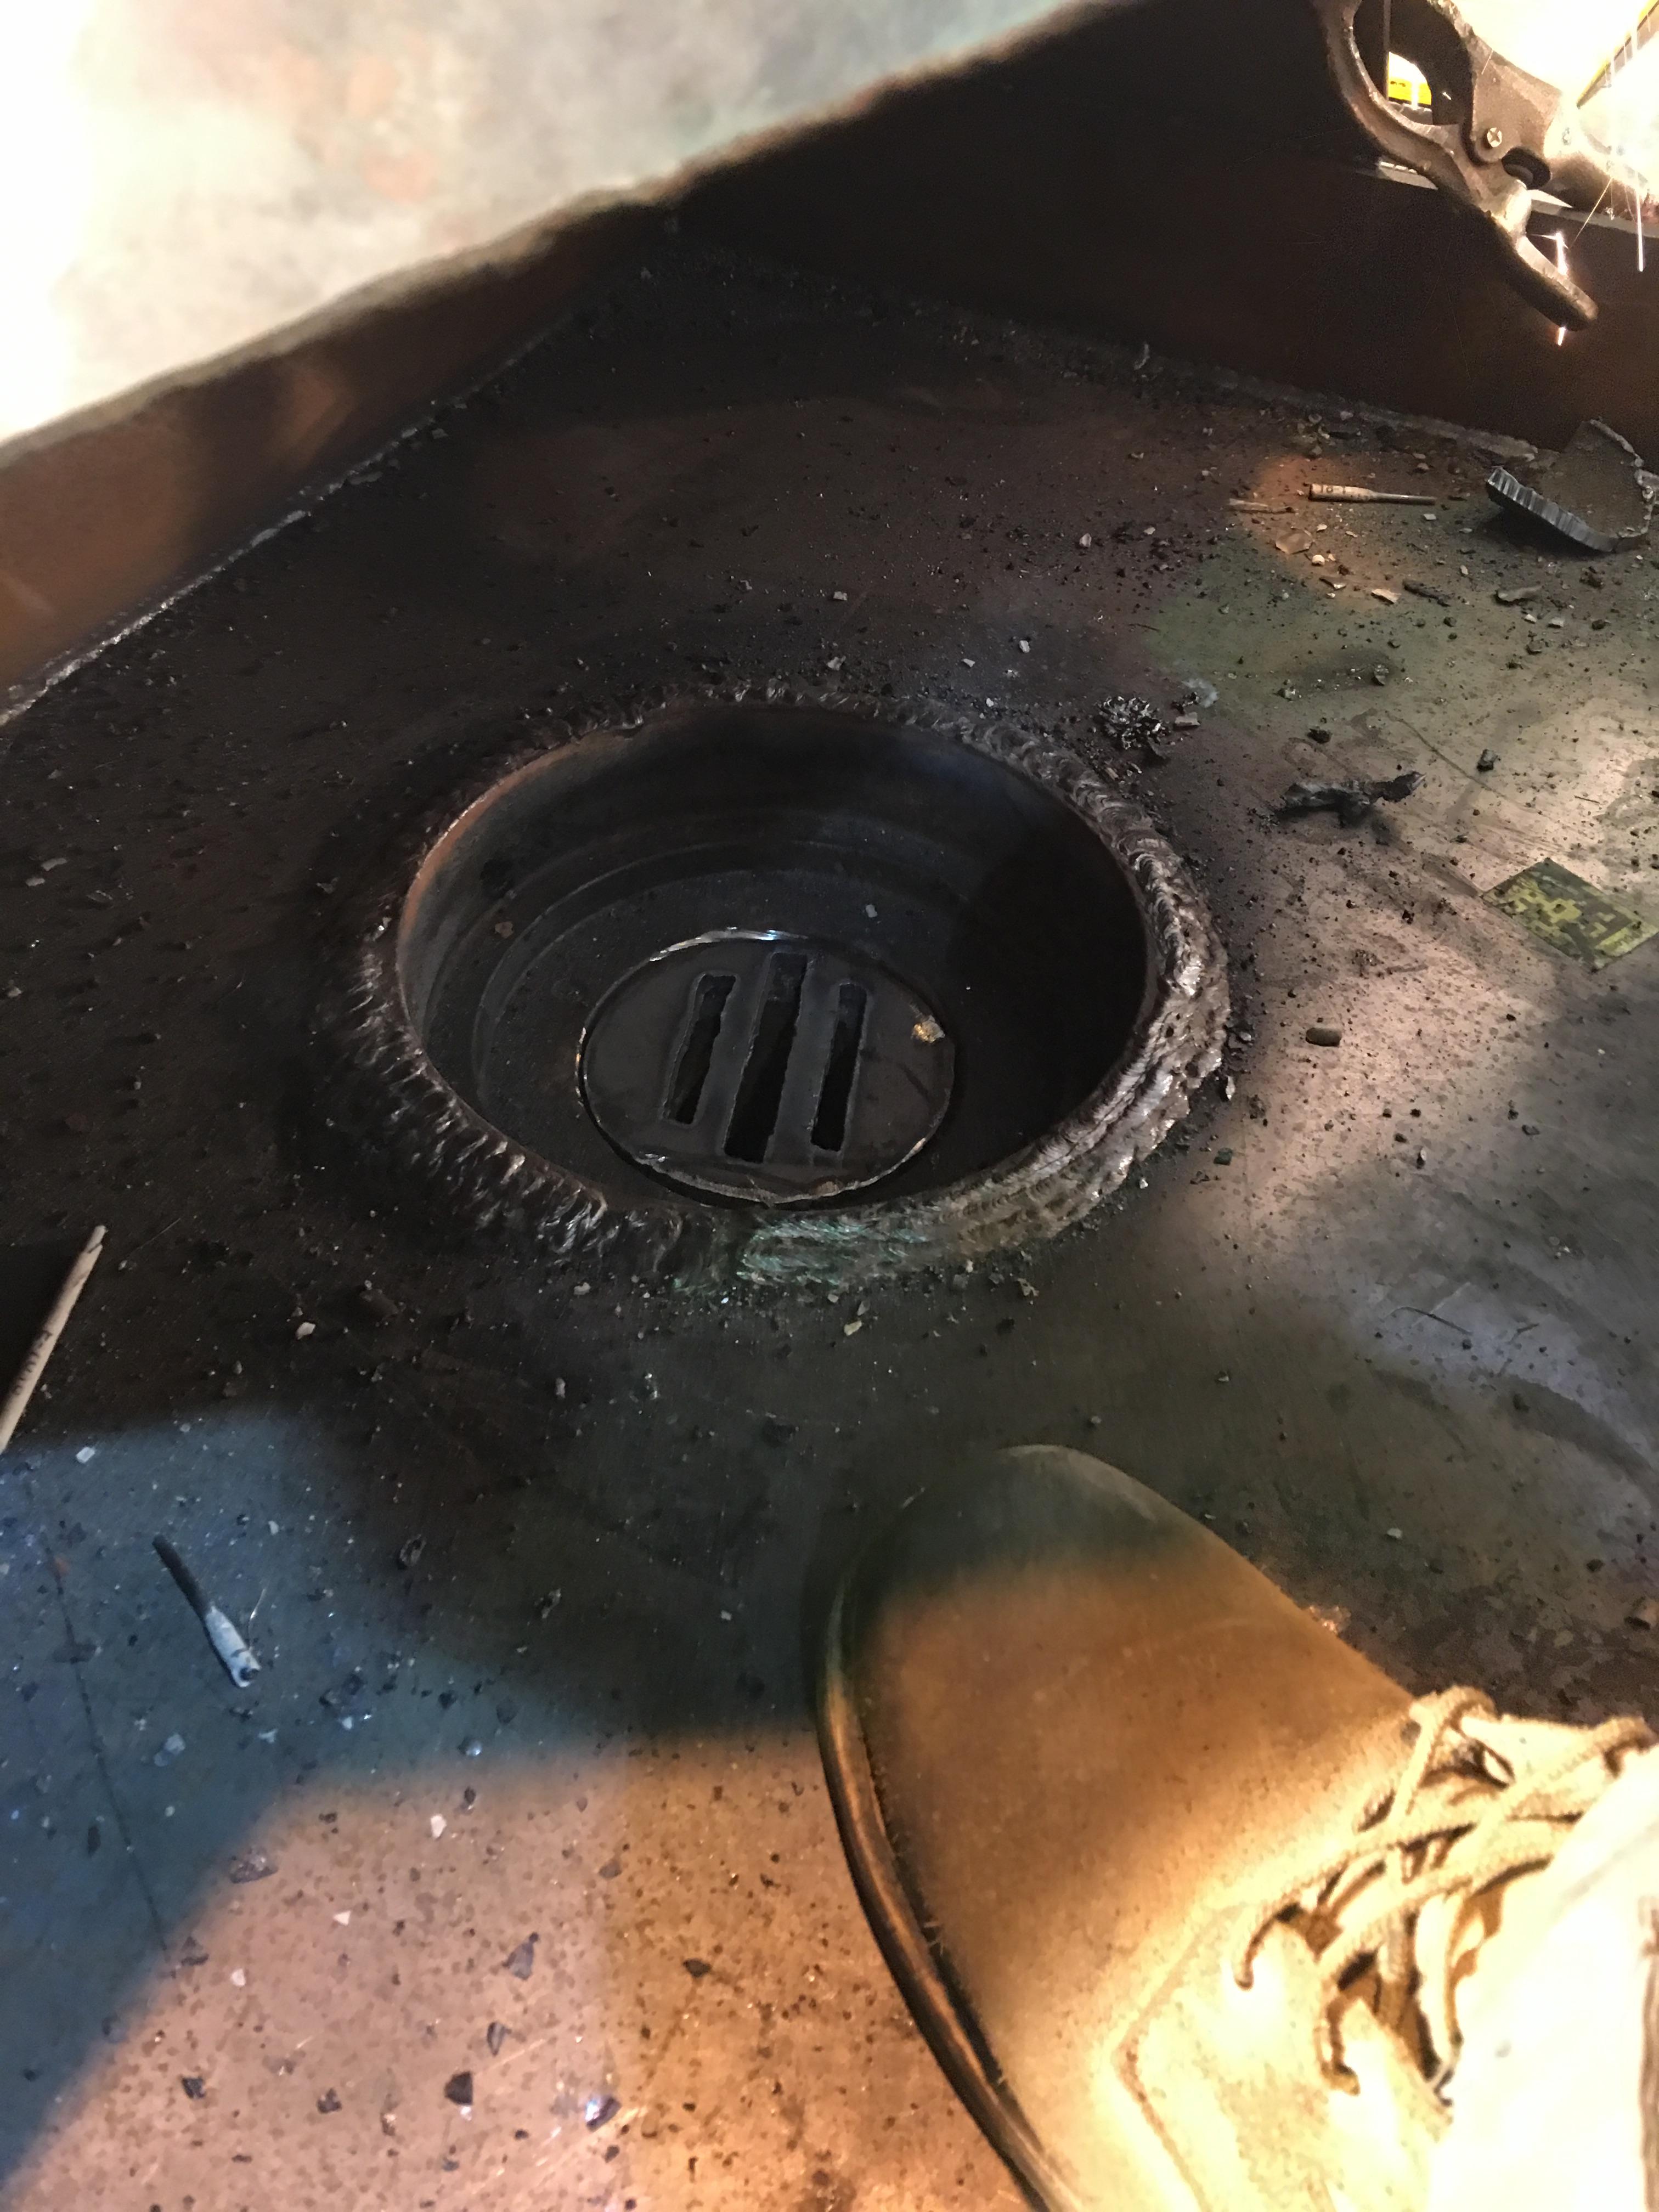
-Pot was found in a scrap yard, 1/4" thick round pot. 10" dia. 3" deep.
-1/4" sheet metal grate
-chimney is tied to 8" or 9" (can't remember) industrial vaccum designed to vaccum welding fumes. It's super strong and pulled smoke afrom a fire I made all the way at the end of the table.
-Blower is Ven Tech 190 CFM Variable speed with control box (not installed yet, it's in the mail!)
- Painting it in high temp black
Anyway, I gave it my best shot based off what I have read in books and input from you all. Take a look and let me know if I'm on the right track.


-
4 hours ago, ThomasPowers said:
I beam makes a lousy anvil; very loud and too much give. Solid chunks like fork lift tines, large shafting, etc work much better especially if you orient them so that the mass is underneath the hammer face.
I'm glad you mentioned that, I believe I saw a set of forks there!
-
Rmartin2,
this has nothing to do with your post...sorry. But your picture helped me solve a mystery! So I'm new to forging , very new. I run an Allied trades shop and have a beat up anvil in the shop, it's missing a whole corner of the anvil, it's been painted over a 100 times. Since I got interested in forging I got curious about the manufacturer of my anvil but the only part the manufacturer stamp visible anymore was what I thought to be LOAN and the arm and hammer. When I saw your avatar it clicked! What I was seeing was LCAN!! So now I know it's a Vulcan anvil. Haha
-
Searched "blacksmith forums" in google.
-
39 minutes ago, JHCC said:
That yard is a terrific find, and it's great that you've struck up a good relationship with the yard manager.
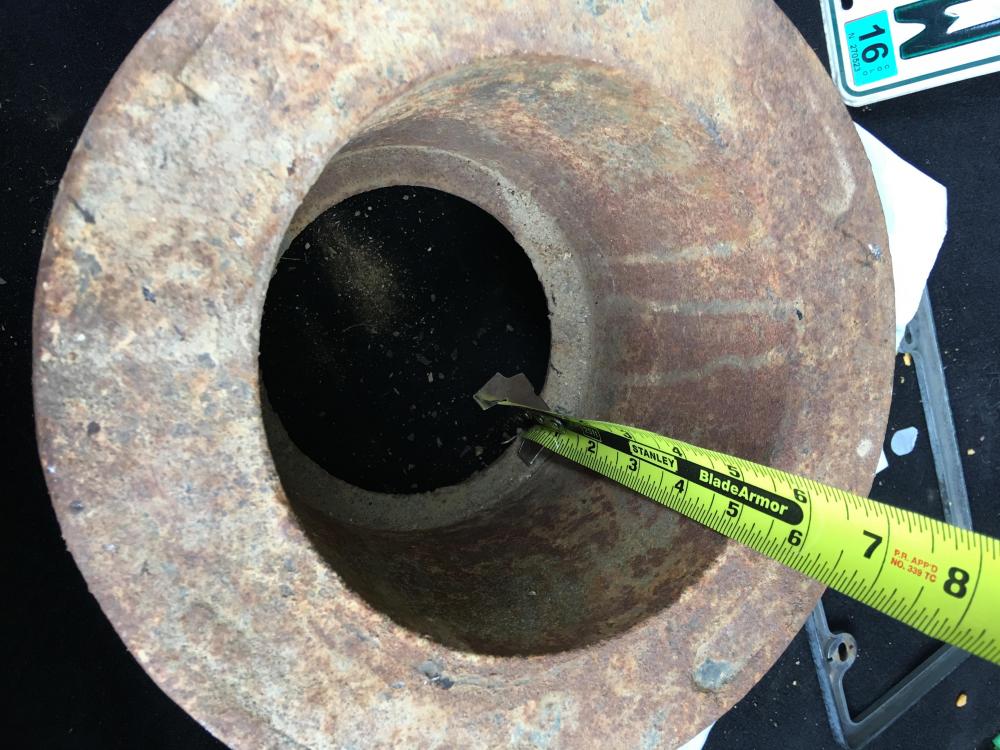
The piece you got might work for a firepot -- remember, it doesn't have to be terribly deep. How big is it?
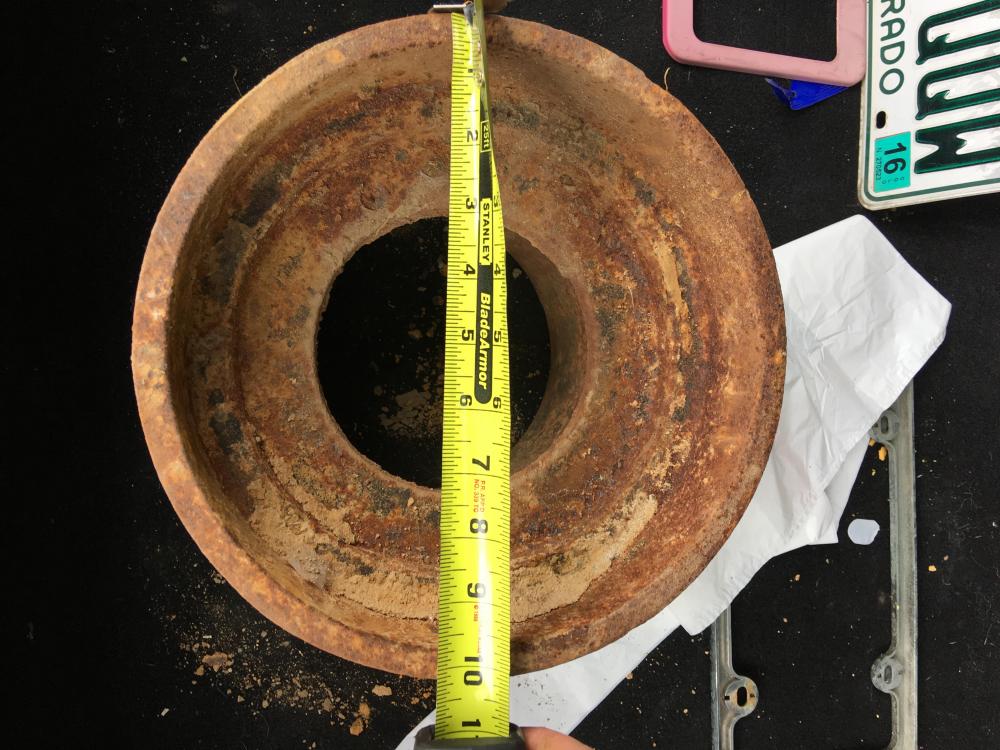
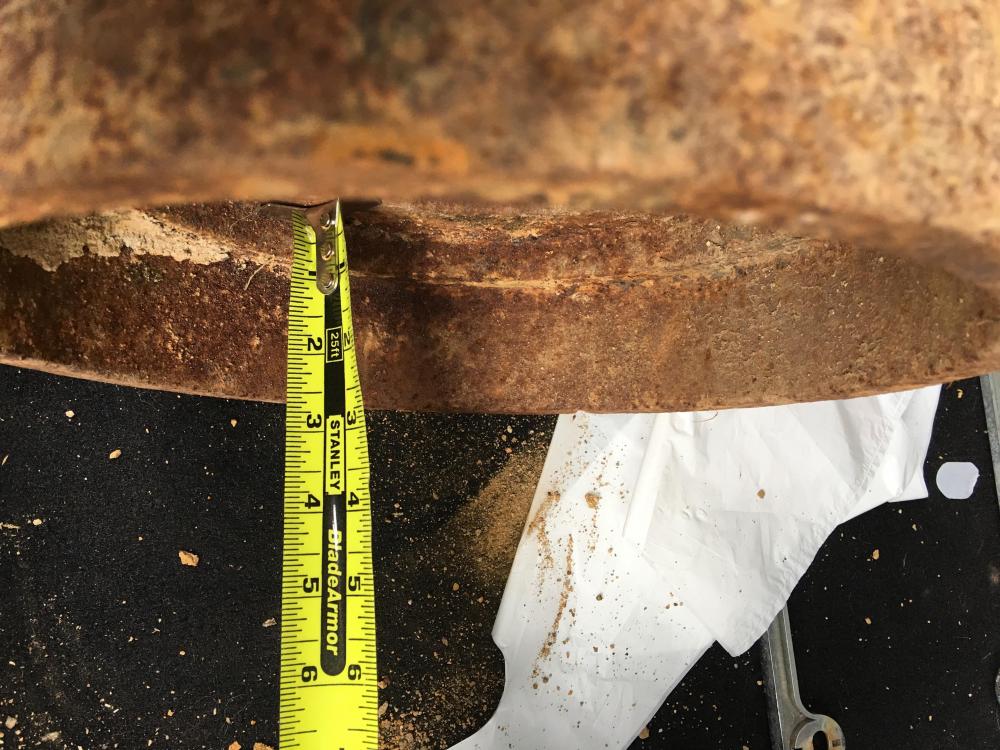
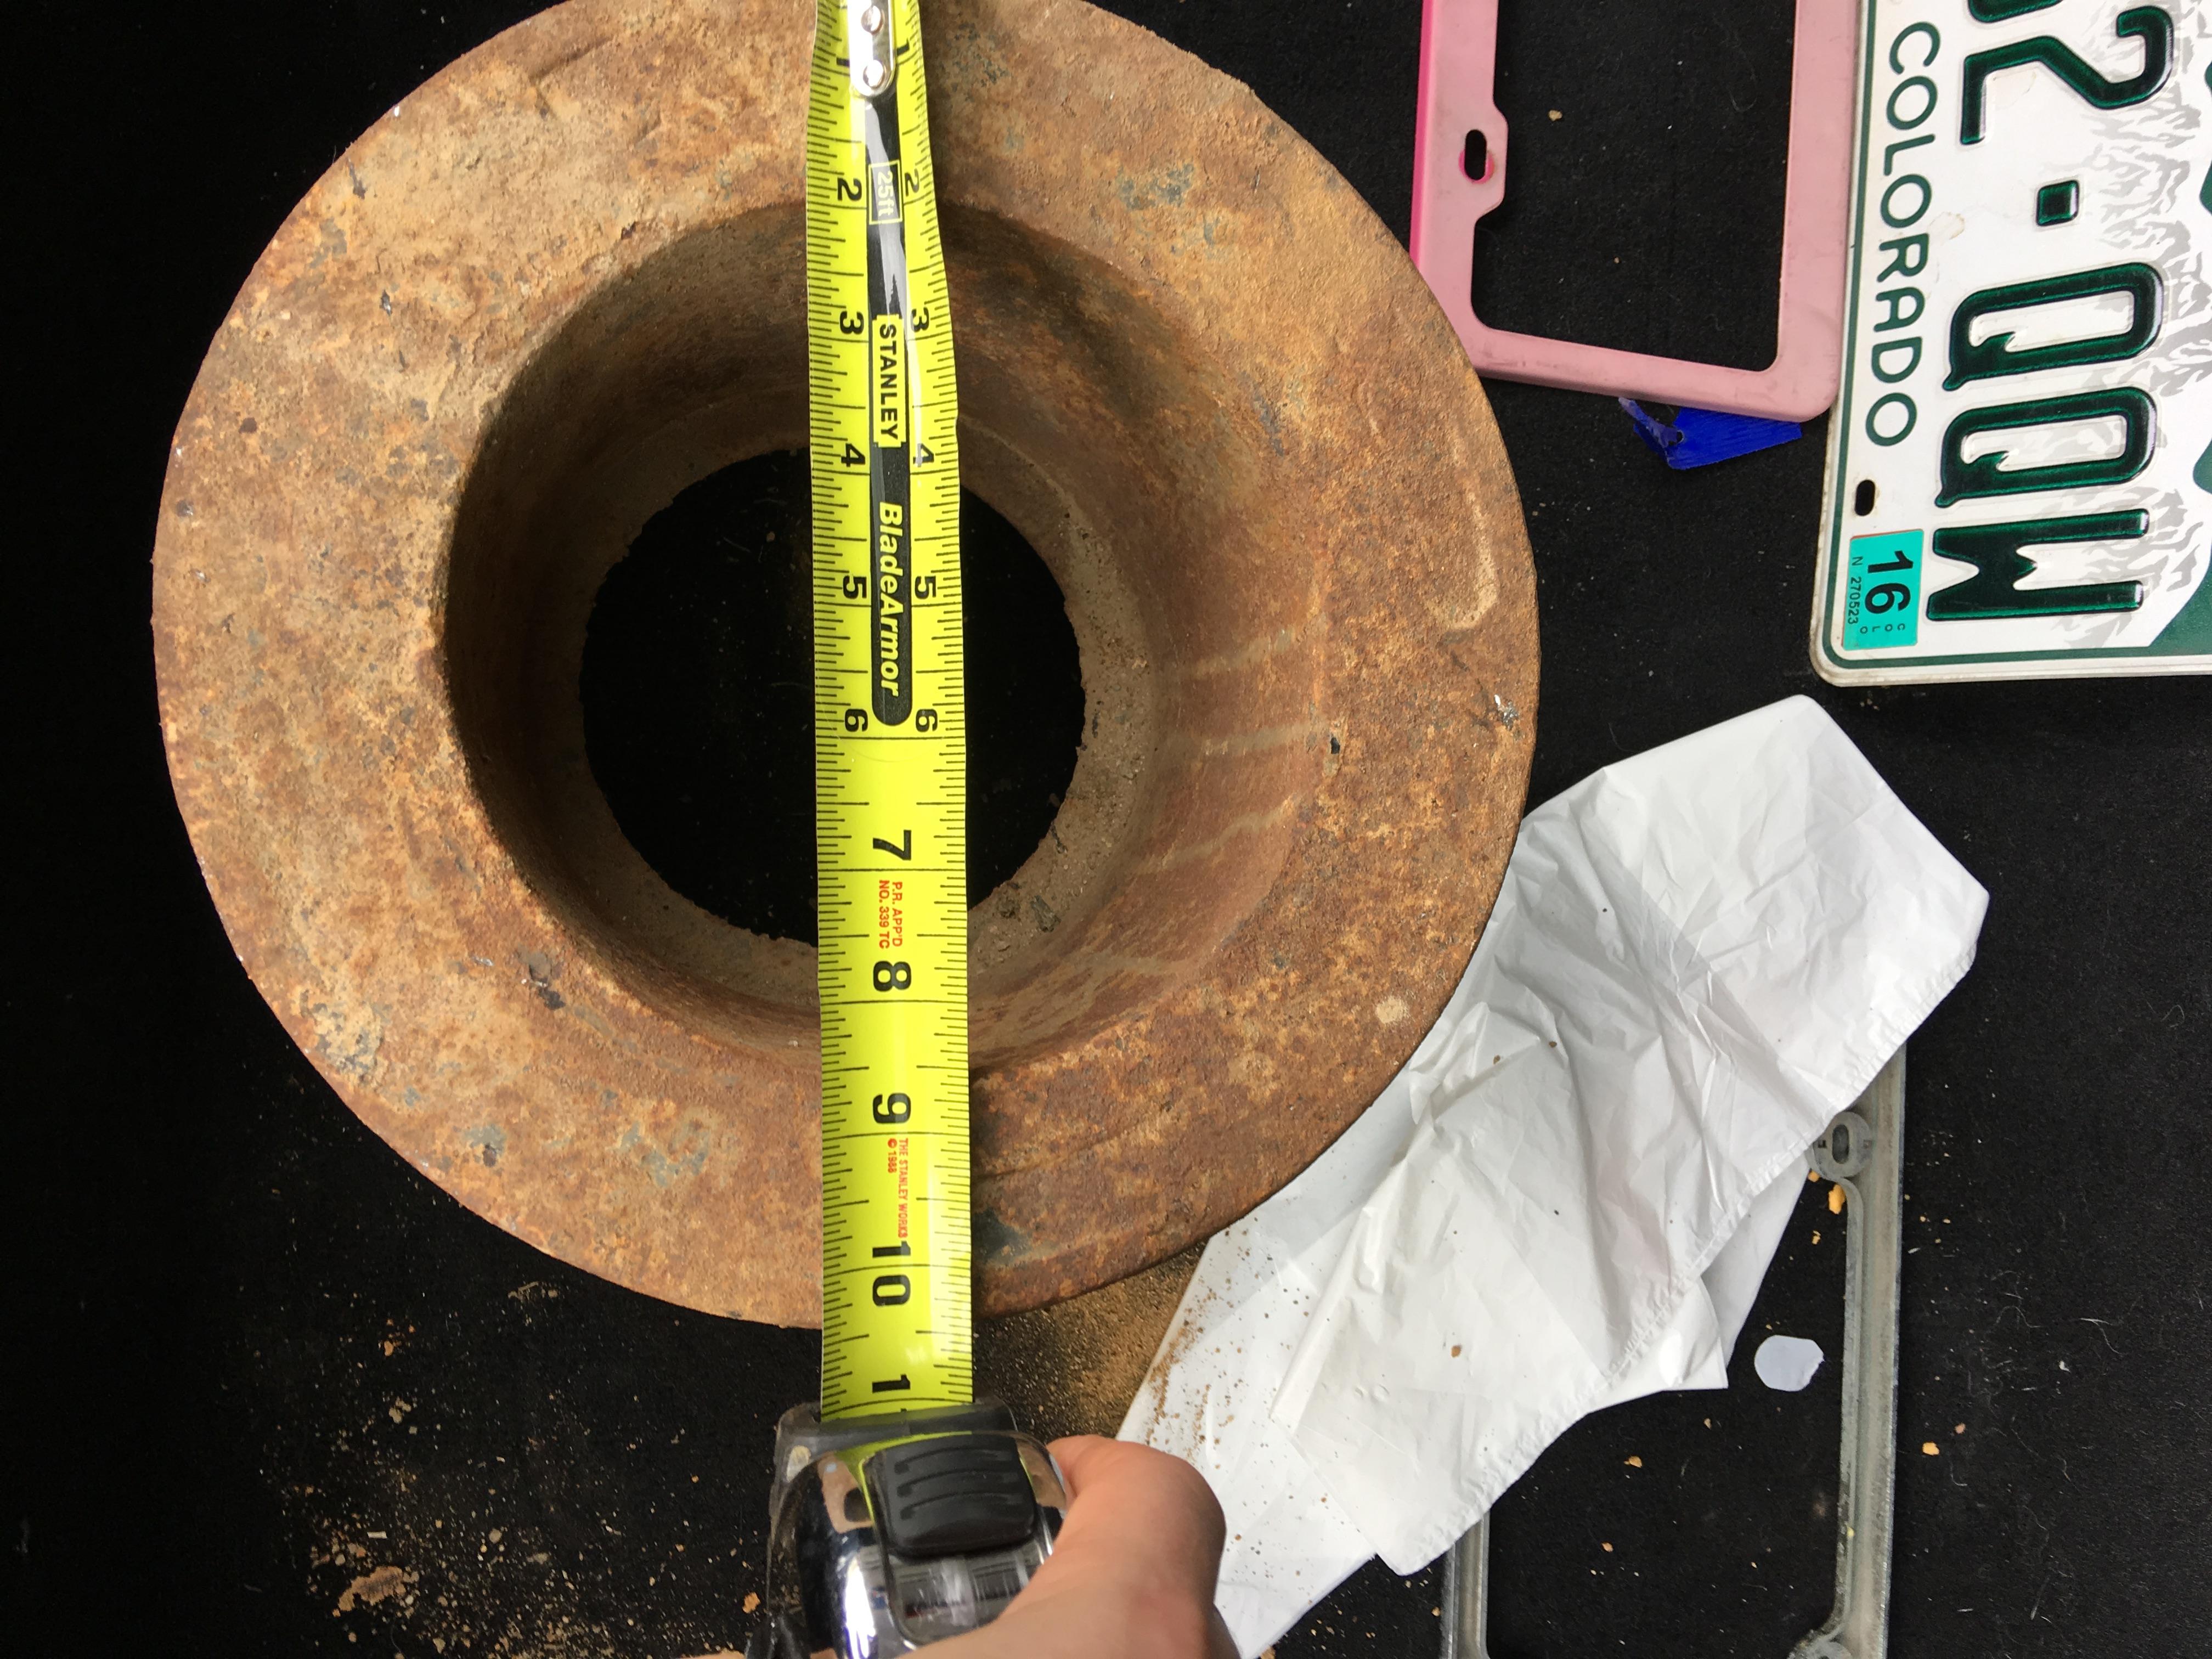
Here is a couple pictures with it measured. Could possibly use it either side of it. 2 3/4" deep on the shallows end and 5" deep in the other end but much narrower.
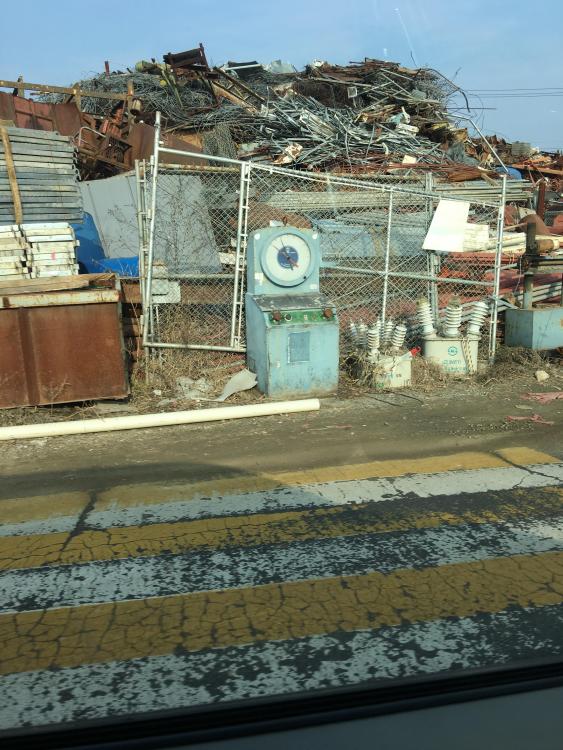
I also visited another yard not too far away. The old Korean woman who owned it also allowed me to stomp around and dig through it. Then I realized she was using me! Everything I found and wanted to buy, all of the sudden she needed it for something and wouldn't sell! I thought it was funny and kinda made me think that's exactly how I would be if I were running it! I found a pretty amazing piece I was going to use as an anvil. It was a solid 10" x4"x6" block that was in pristine condition but she wanted to keep it. Dang it!

-
2 hours ago, Gergely said:
Hi, and welcome HardHead!
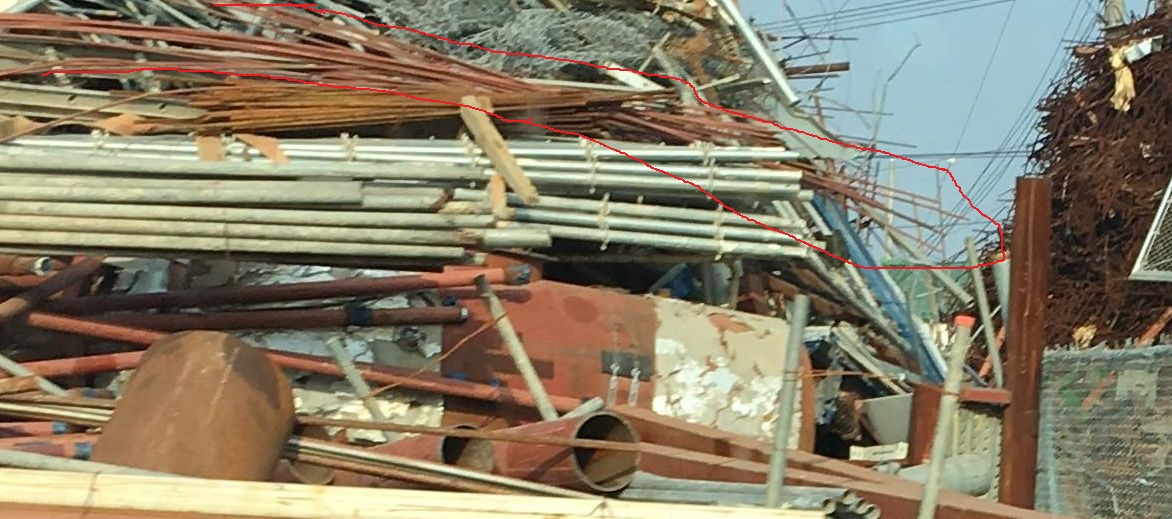
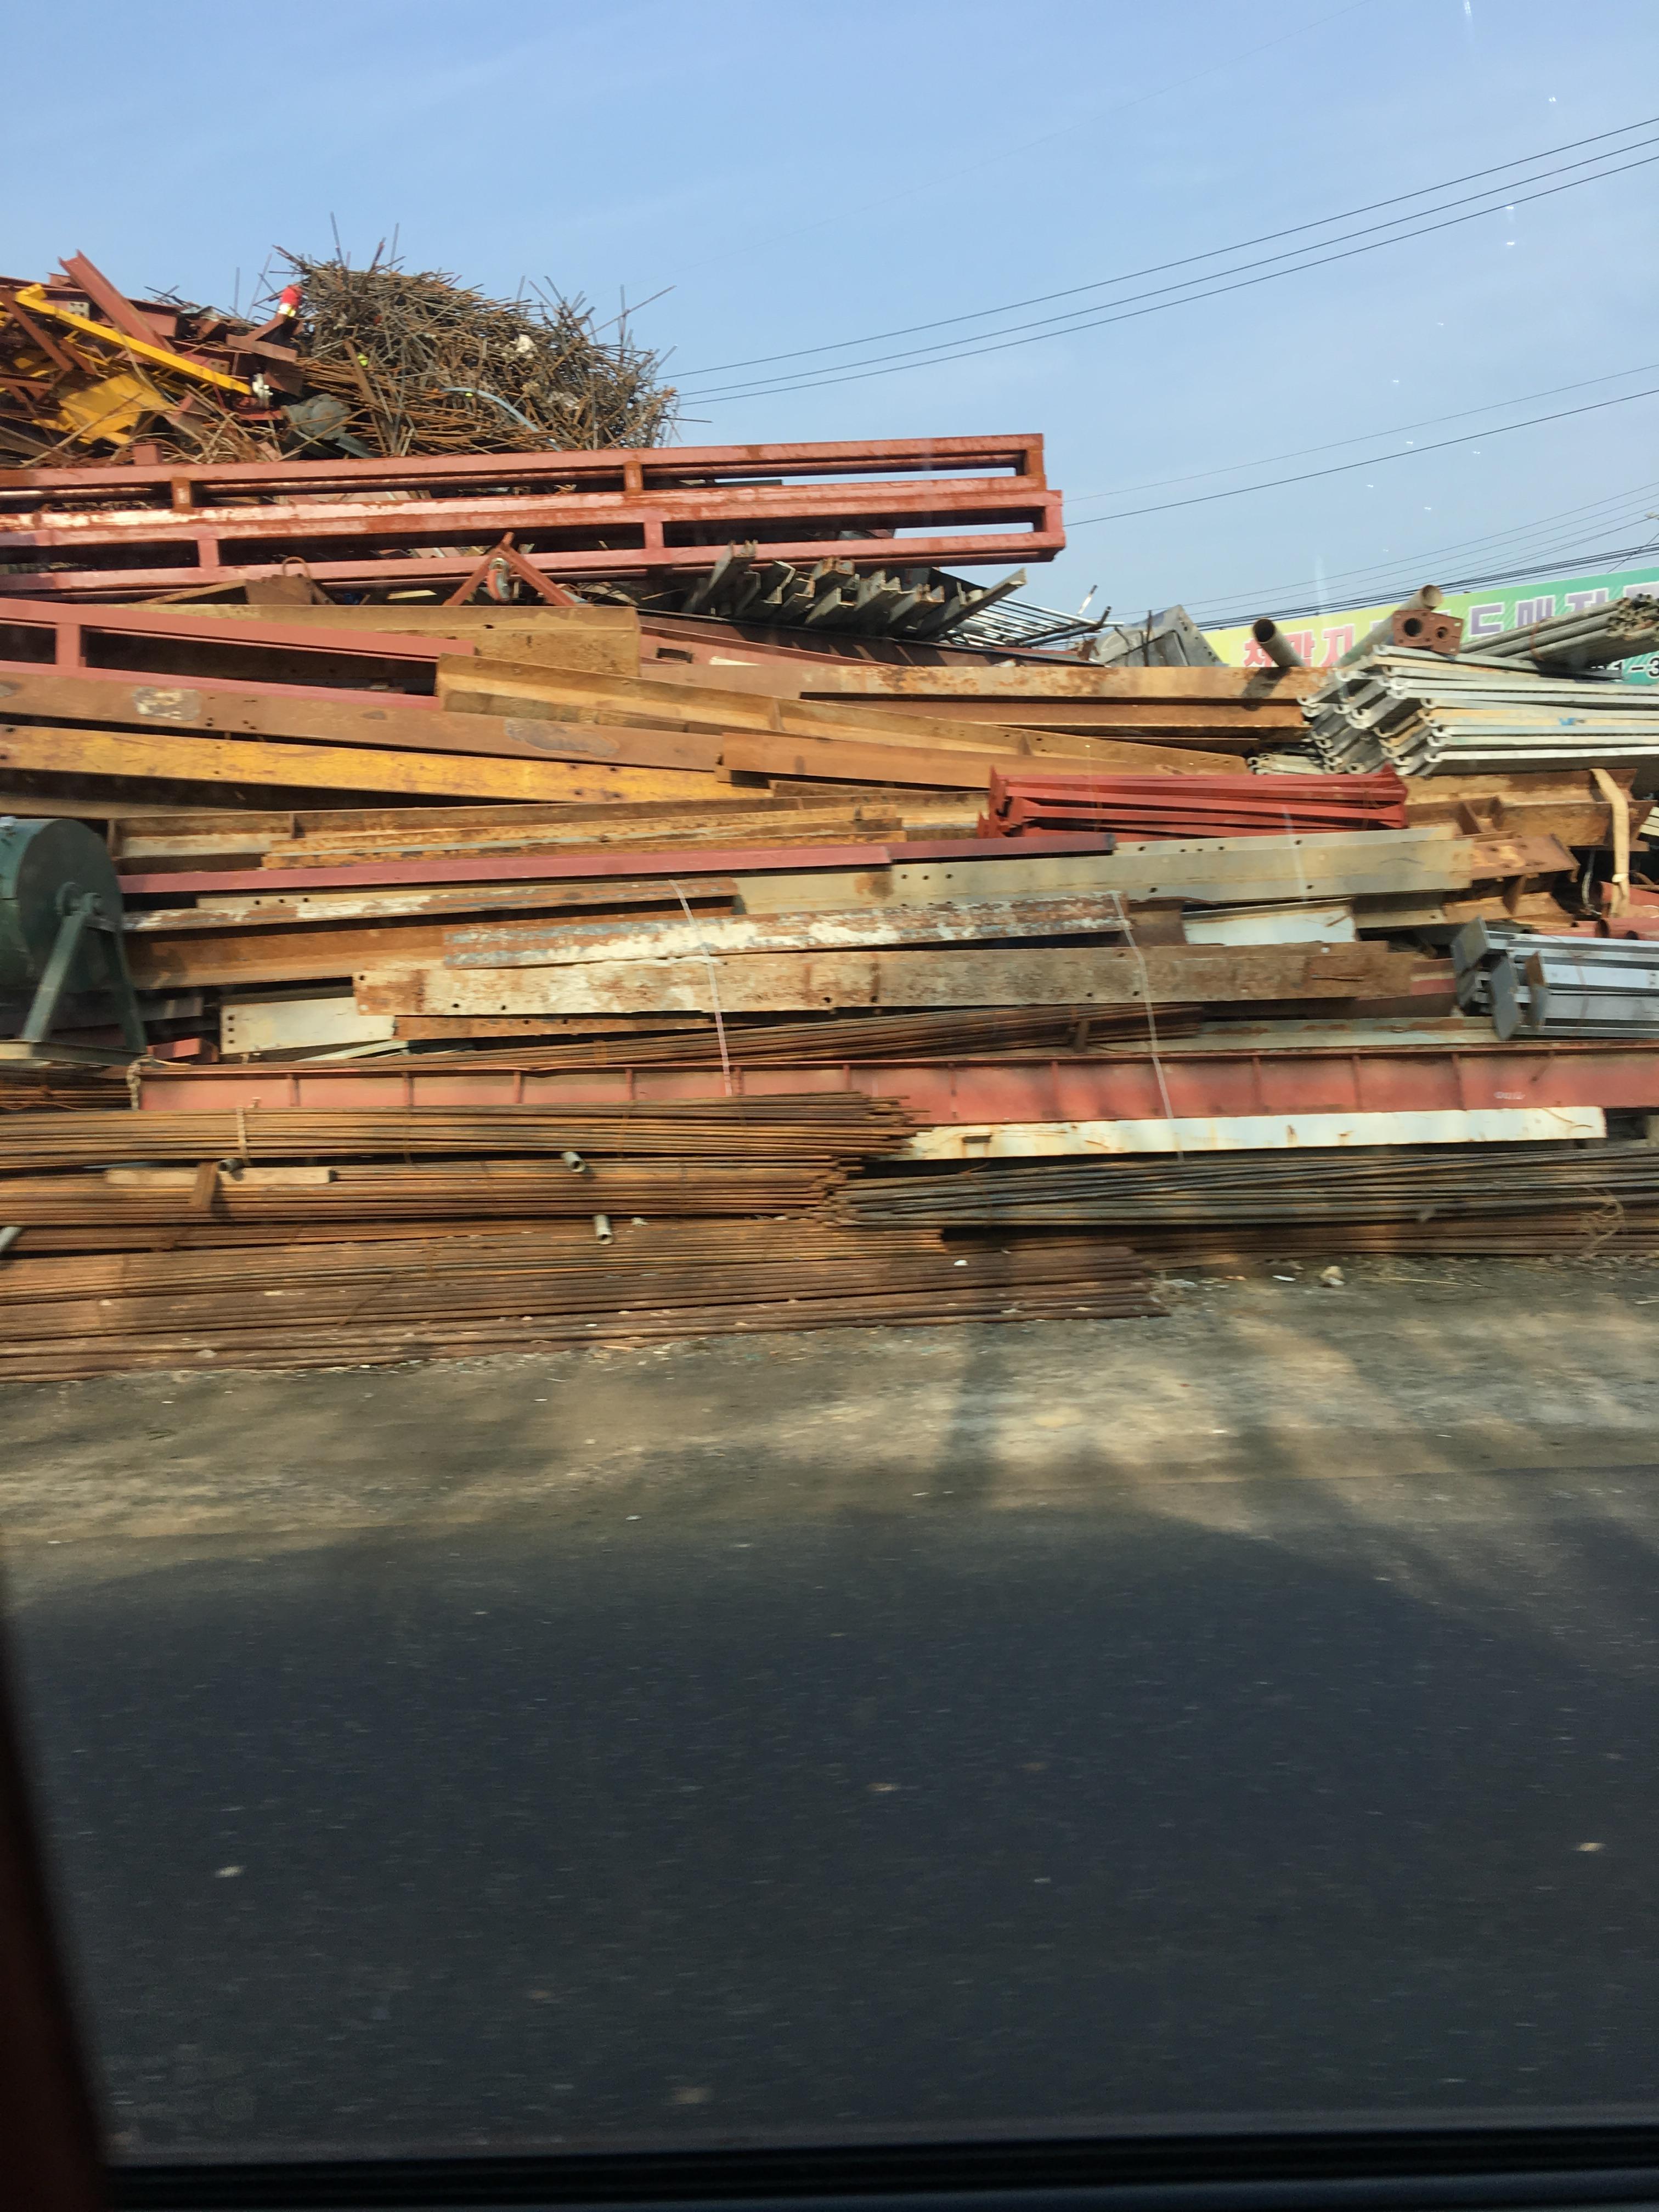
Aren't scrapyards the best?! I could fill a truck in a place like the one you pictured
If I were you and the yard people let you buy stuff, I'd pick 3 pieces of those reddish stock marked on the picture. It looks like it's not too thick for hand forging. It also looks to be in 6m long sections which may mean it's likely some simple structural steel (= easy to forge). It's painted which means it's not rusted to death (although rust IS our good friend, as it means no poisonous surface). You have to remove the paint, do it with caution.
Having ~18 meters of that stock enables you to practice basic forging techniques and make some stuff out of it. If you can find some 8-12mm square stock that's gonna be good, too.
For starter tool steel I'd buy some new stock. 18-20 mm dia round 4140 (= 42CrMo4, 1.7225, SCM440H) will serve you good for all hand tools.
Have fun!
Oh, just one more word: Srapyard rule nr1: If you haven't took it you won't find it anymore.
Best wishes:
Gergely

Gergely,
thanks for the knowledge. I'm going to head there today!
Ok so I went and checked that scrap yard out. The Korean man was very friendly and he let me crawl all over and under looking for stuff. The red bars you mentioned in the pic were rebar, which I have plenty of already. There was a lot of serious heavy duty pieces there! I'm talking huge industrial furnace stacks, 4 ft man hole covers that were 1.5" thick, GIANT I-beams. He has a 4 foot section of I bear that is 12" wide, 3/4 thick and has manufacture cross supports under the beams that he was going to sell me for 10,000 won (roughly $9.00), I'm thinking of using it for "my first anvil". It had a couple holes in it already that could be used for punching. I didn't grab it yet because I wasnt sure. I did pick up the piece below for 5,000 won (roughly $4.00). In considering fashioning it for my pot for my forge since I don't have one yet. My concern though is it may not be deep enough. If not, I'm sure I will find a use for it!


-
1 hour ago, ausfire said:
And with unknown steel make sure your PPE is in order. Some nasty stuff may be lurking there.
Yes this was a important post ny made in the book too.
-
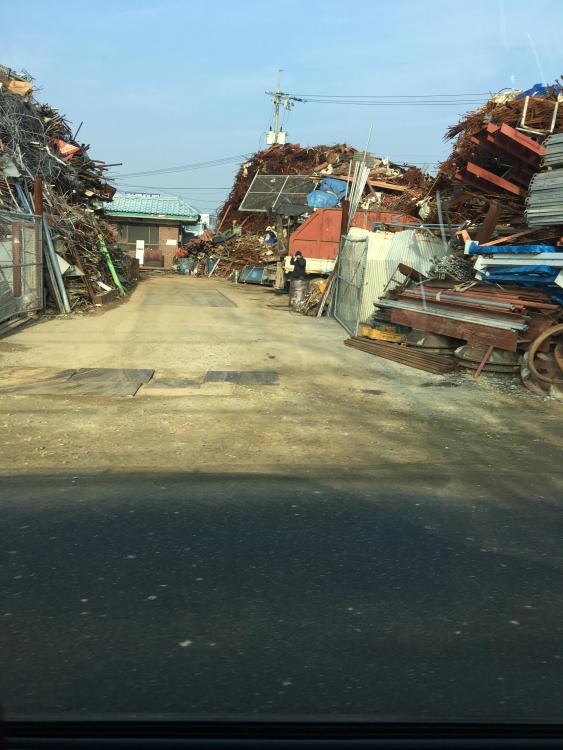
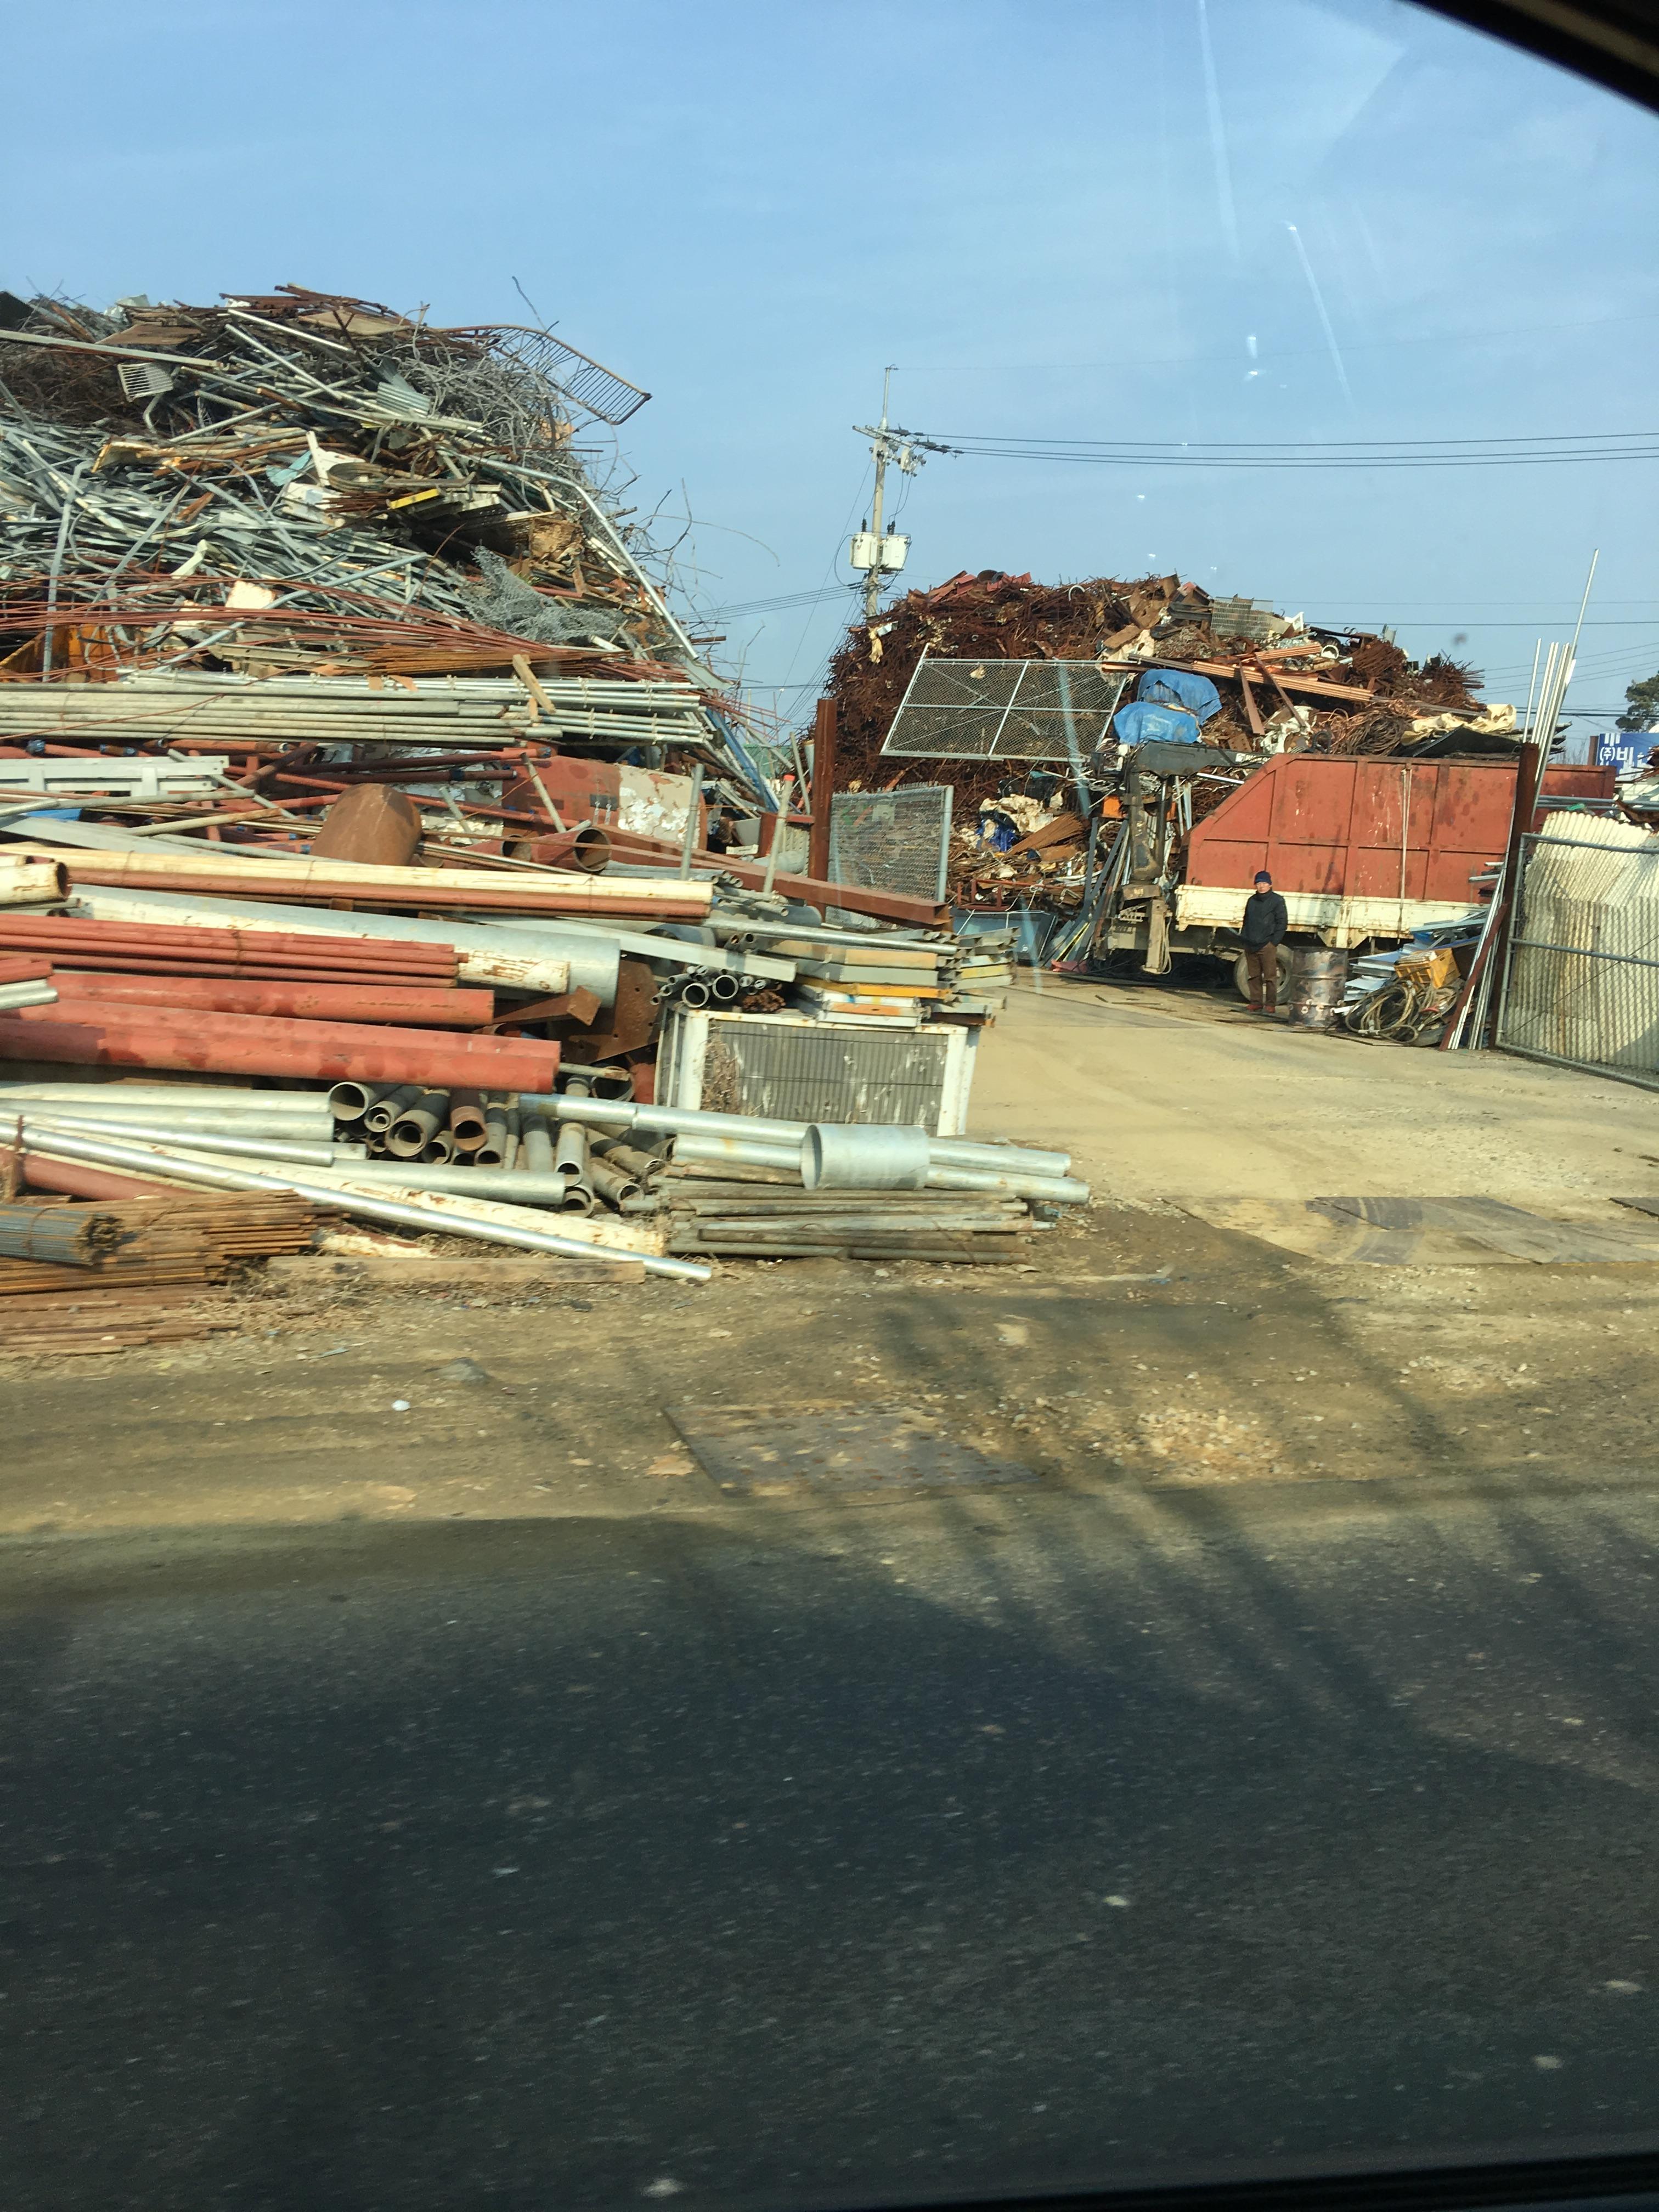
I'm reading a blacksmith beginners book right now. It mentioned that repurposing metal from salvage yards and recycle yards is a great way to get metal cheap. Then I realized that with in a mile of my apartment here in Korea are two promising yards! Does anyone else go to these types of places to get good metal? Below are some pics of the yard I found, unlike in the states, Koreans like to build up instead of horizontal. Could be there for a while!


-
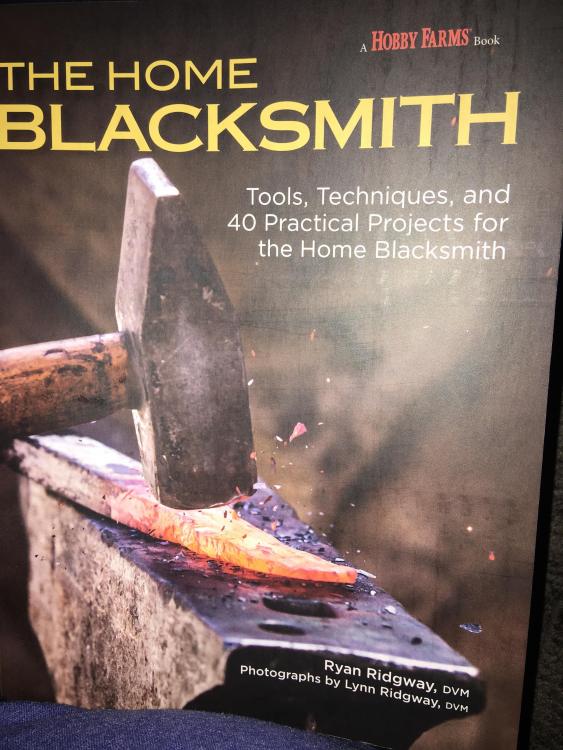
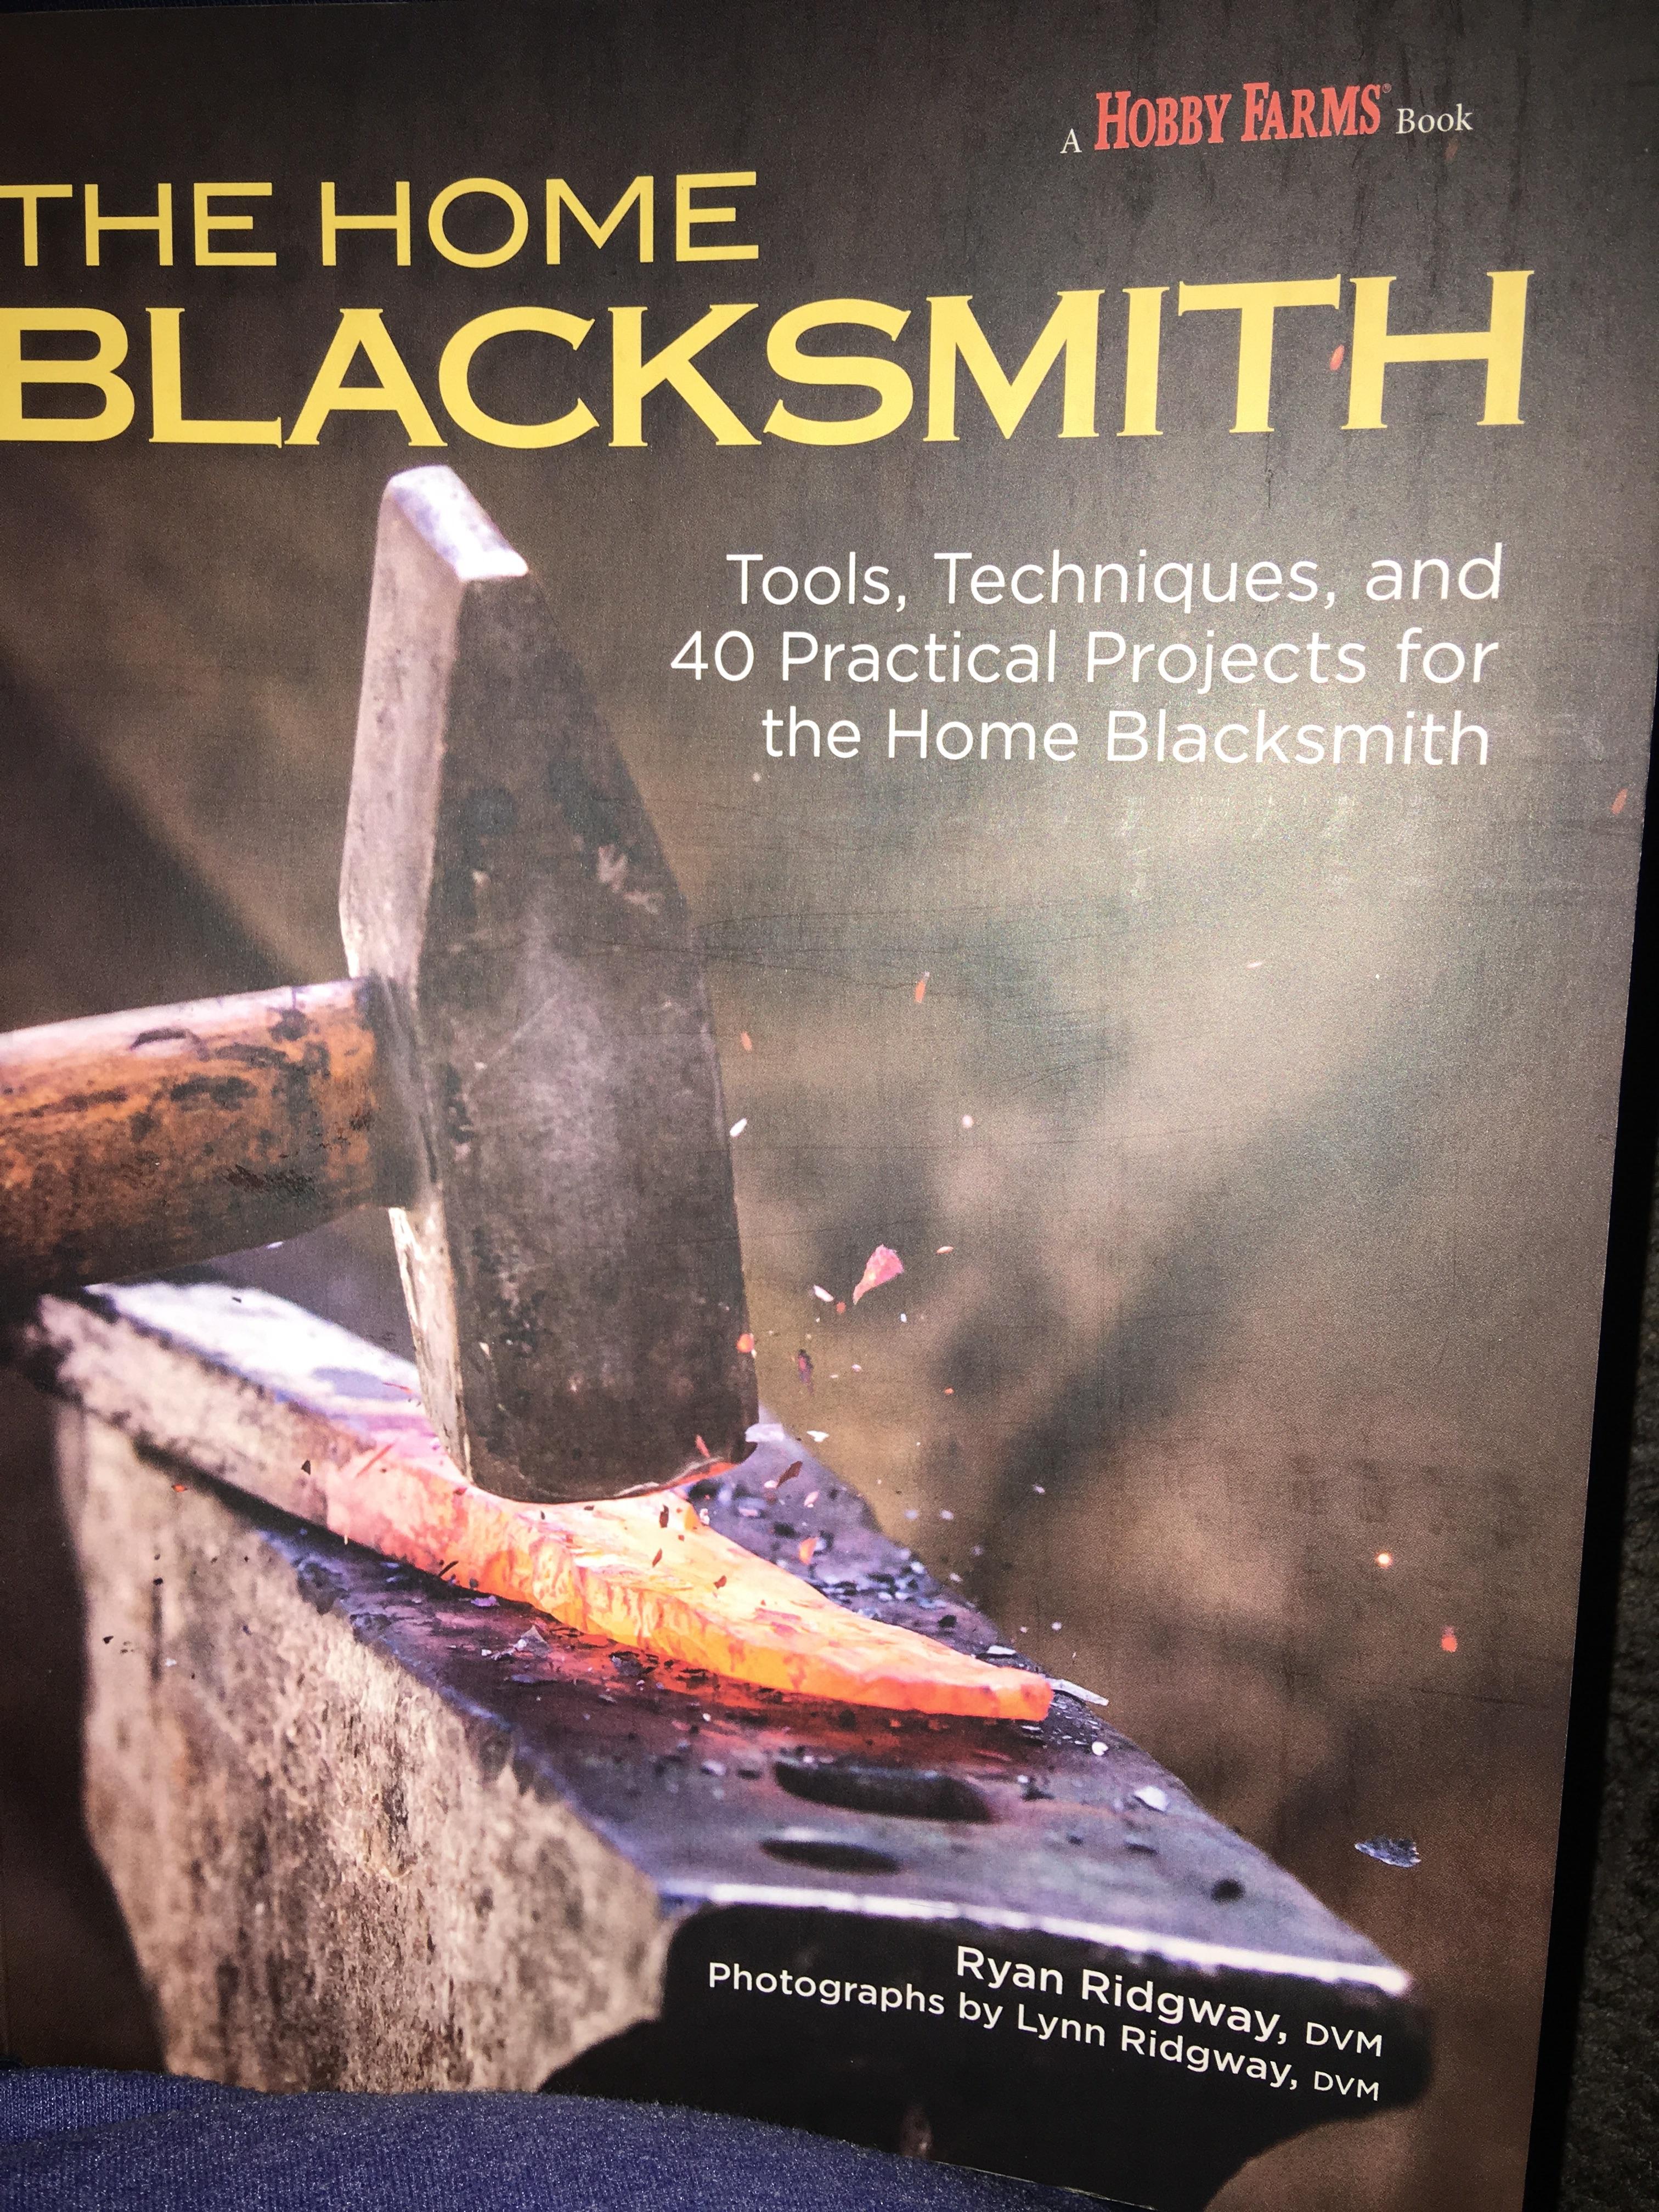
Just got this book today and already love it. As a total noob I appreciate the "dumbed down" intro and step by steps. I really enjoyed the glossary. It finally explained a lot of those word you folks were using!

-
11 hours ago, Glenn said:
Ash tube below the tweere should be large enough not to clog and have enough volume to hold a quantity of ash. Here anything above 2 inch diameter (3 inch is better) and about 12 to 16 inches long works well for our coal.
Thanks again Glenn! My ash tube is being made from 3.5" tube that is 1/4" thick. It's not in the pics , it was being made off camera. I purchased a 190 CFM variable speed blower off Amazon as a starter blower. Some of the reviews mentioned they used it for their coal forge so I figured I would try it. It's a Ventec VT IF-4-B. I'm headed in to the shop now, going to start applying those recommendations!
-
Hey Glen thanks for the info. My chimney is tied to a industrial vaccum. I wasn't sure if you could tell from the pictures. Does the chimney ideas you mentioned apply with a vacuumed chimney?
-
2 hours ago, RobbieG said:
is there any reason you didn't include a matching one on the other side? It might be useful to have if you are heating the middle of a long piece.
Hey thanks! In the plans I drew up there was a matching one. However, when we started it my guys talked me out of it based on where we wanted to place it (next to our work bench). But definitely have the option of adding It later.
-
Hello all!
Brand new to the craft, I know nothing but metal is hard and when it comes out of the fire it's hot! I've been watching YouTube videos non-stop for a few weeks now. I have fallen in love with the idea of blacksmithing. So I did what all noobs do, watched a YouTube video and started making my own forge! Expect many questions from me fellas!
Pics of my forge are below. It's not done yet. Still waiting for the pot and fan to arrive here in Korea. I picked up ~100lbs of pure coal on the Korean market for roughy 15 American dollars. It's in huge raw cut chunks so I assume inneed to crush them down?


My First Project...A Forge
in Solid Fuel Forges
Posted
RobbieG,
The current ash catch is a heavy duty rubber drip pan. I would be extremely surprised if it caught fire, point taken though, we already have plans for a metal tray but haven't started it yet. I will have to read Glenn's post on fire shape. I know I have experienced a couple pieces exceeding critical point by pointing it down, other pieces seemed like they needed to be deeper to get it to a forging temp. I'm working on making a hammer from a axel from a 5-ton truck. That steel is extremely hard, I couldn't even mark it with a punch when it was cold. I had to take the grinder to it just to scratch the metal to mark the center point! That piece I had to bury it in the coals to get it hot enough. Thanks for the pointers, I will take them and add em to my tool kit!