

Steel_Island671
-
Posts
18 -
Joined
-
Last visited
Content Type
Profiles
Forums
Articles
Gallery
Downloads
Events
Posts posted by Steel_Island671
-
-
Thanks everyone for the great advice! I read up on everything and learned a lot. Happy forging!
")
-
On 2/17/2016 at 8:05 PM, Glenn said:
Read up on the business section of the site. It has information you should consider.
Ok thanks
-
Hi everyone! I just wanted to ask how I can price items. I recently forged some stuff and people liked my work and asked if I can make more and sell them. I made some of the items but have no idea how to price it. How do I calculate labor charges/materials and such in order to make a decent profit? Any help would be greatly appreciated. Thanks!
-
Ok cool. I won't be doing it anytime soon though. lol. I figured I just use it for a bit first.
-
Steve's welding here I repair LOTS !! of anvils the way to do it is like Rod Gunther wrote !!! thats how I do it
now that being said do you have a Tig welder ? once cleaned those holes can be welded with a good tool steel or spring steel rod --- or use arc rod 7018 or better 110-18 a mig is last resort ! & if 110 v NO way ! good heavy shop welder only 220 v
you still have to pre heat & post heat & cover over night cool slow !
Thanks for the info. What do I cover it with and how do cool it slow?
-
Many anvils have the base and top separate. Forge welding was the "common" method of attaching the two with arc welding being a fairly recent one on some American anvils. If you can't see the join it's probably forge welded and then dressed.
I see. That's good to know. Thanks!
-
how is the base attached to the top at the waist?
It looks to be a solid piece to me. Just look at my pics. The only thing that looks attached is the face plate.
-
Well is the top a single piece or does it have a face plate welded on? Is the waist forge welded or arc welded? Is the base a single piece of cast steel? You can get closer to the date by hunting down when they made changes to the manufacturing process. However an 80 year old anvil in great shape is a whole lot better than a 160 year old anvil in poor shape.
The top has a face plate welded on. The waist is just a single piece. The base is a single piece of cast steel but has an oval impression on the underside.
-
I agree with the others, use it , and see how your items look. Remember that dents will leave raised bumps on the part, not dents. Bumps can be knocked down with the hammer.
Without a serial number the age will be between when they started business, and when they closed.
Noted. Thanks
-
You can use all sorts of tools to ease an edge. Remember a sharp corner is a bad thing with an anvil. If anything you want a radius on the edge so you don't cause issues with your steel when working half on/half off the edge with stock.
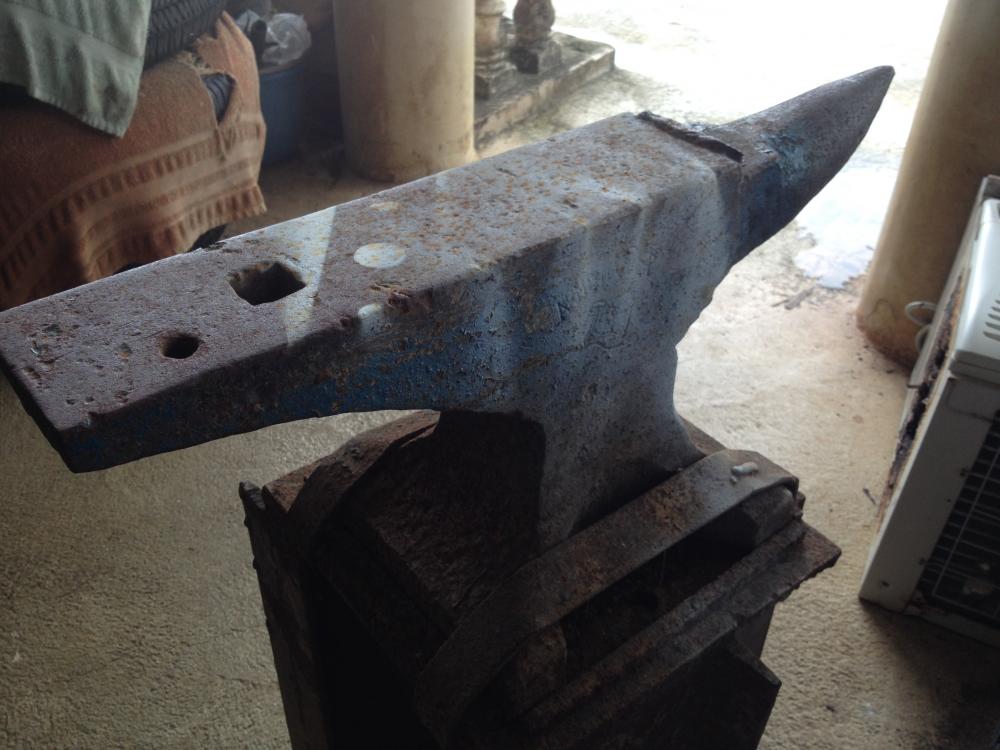
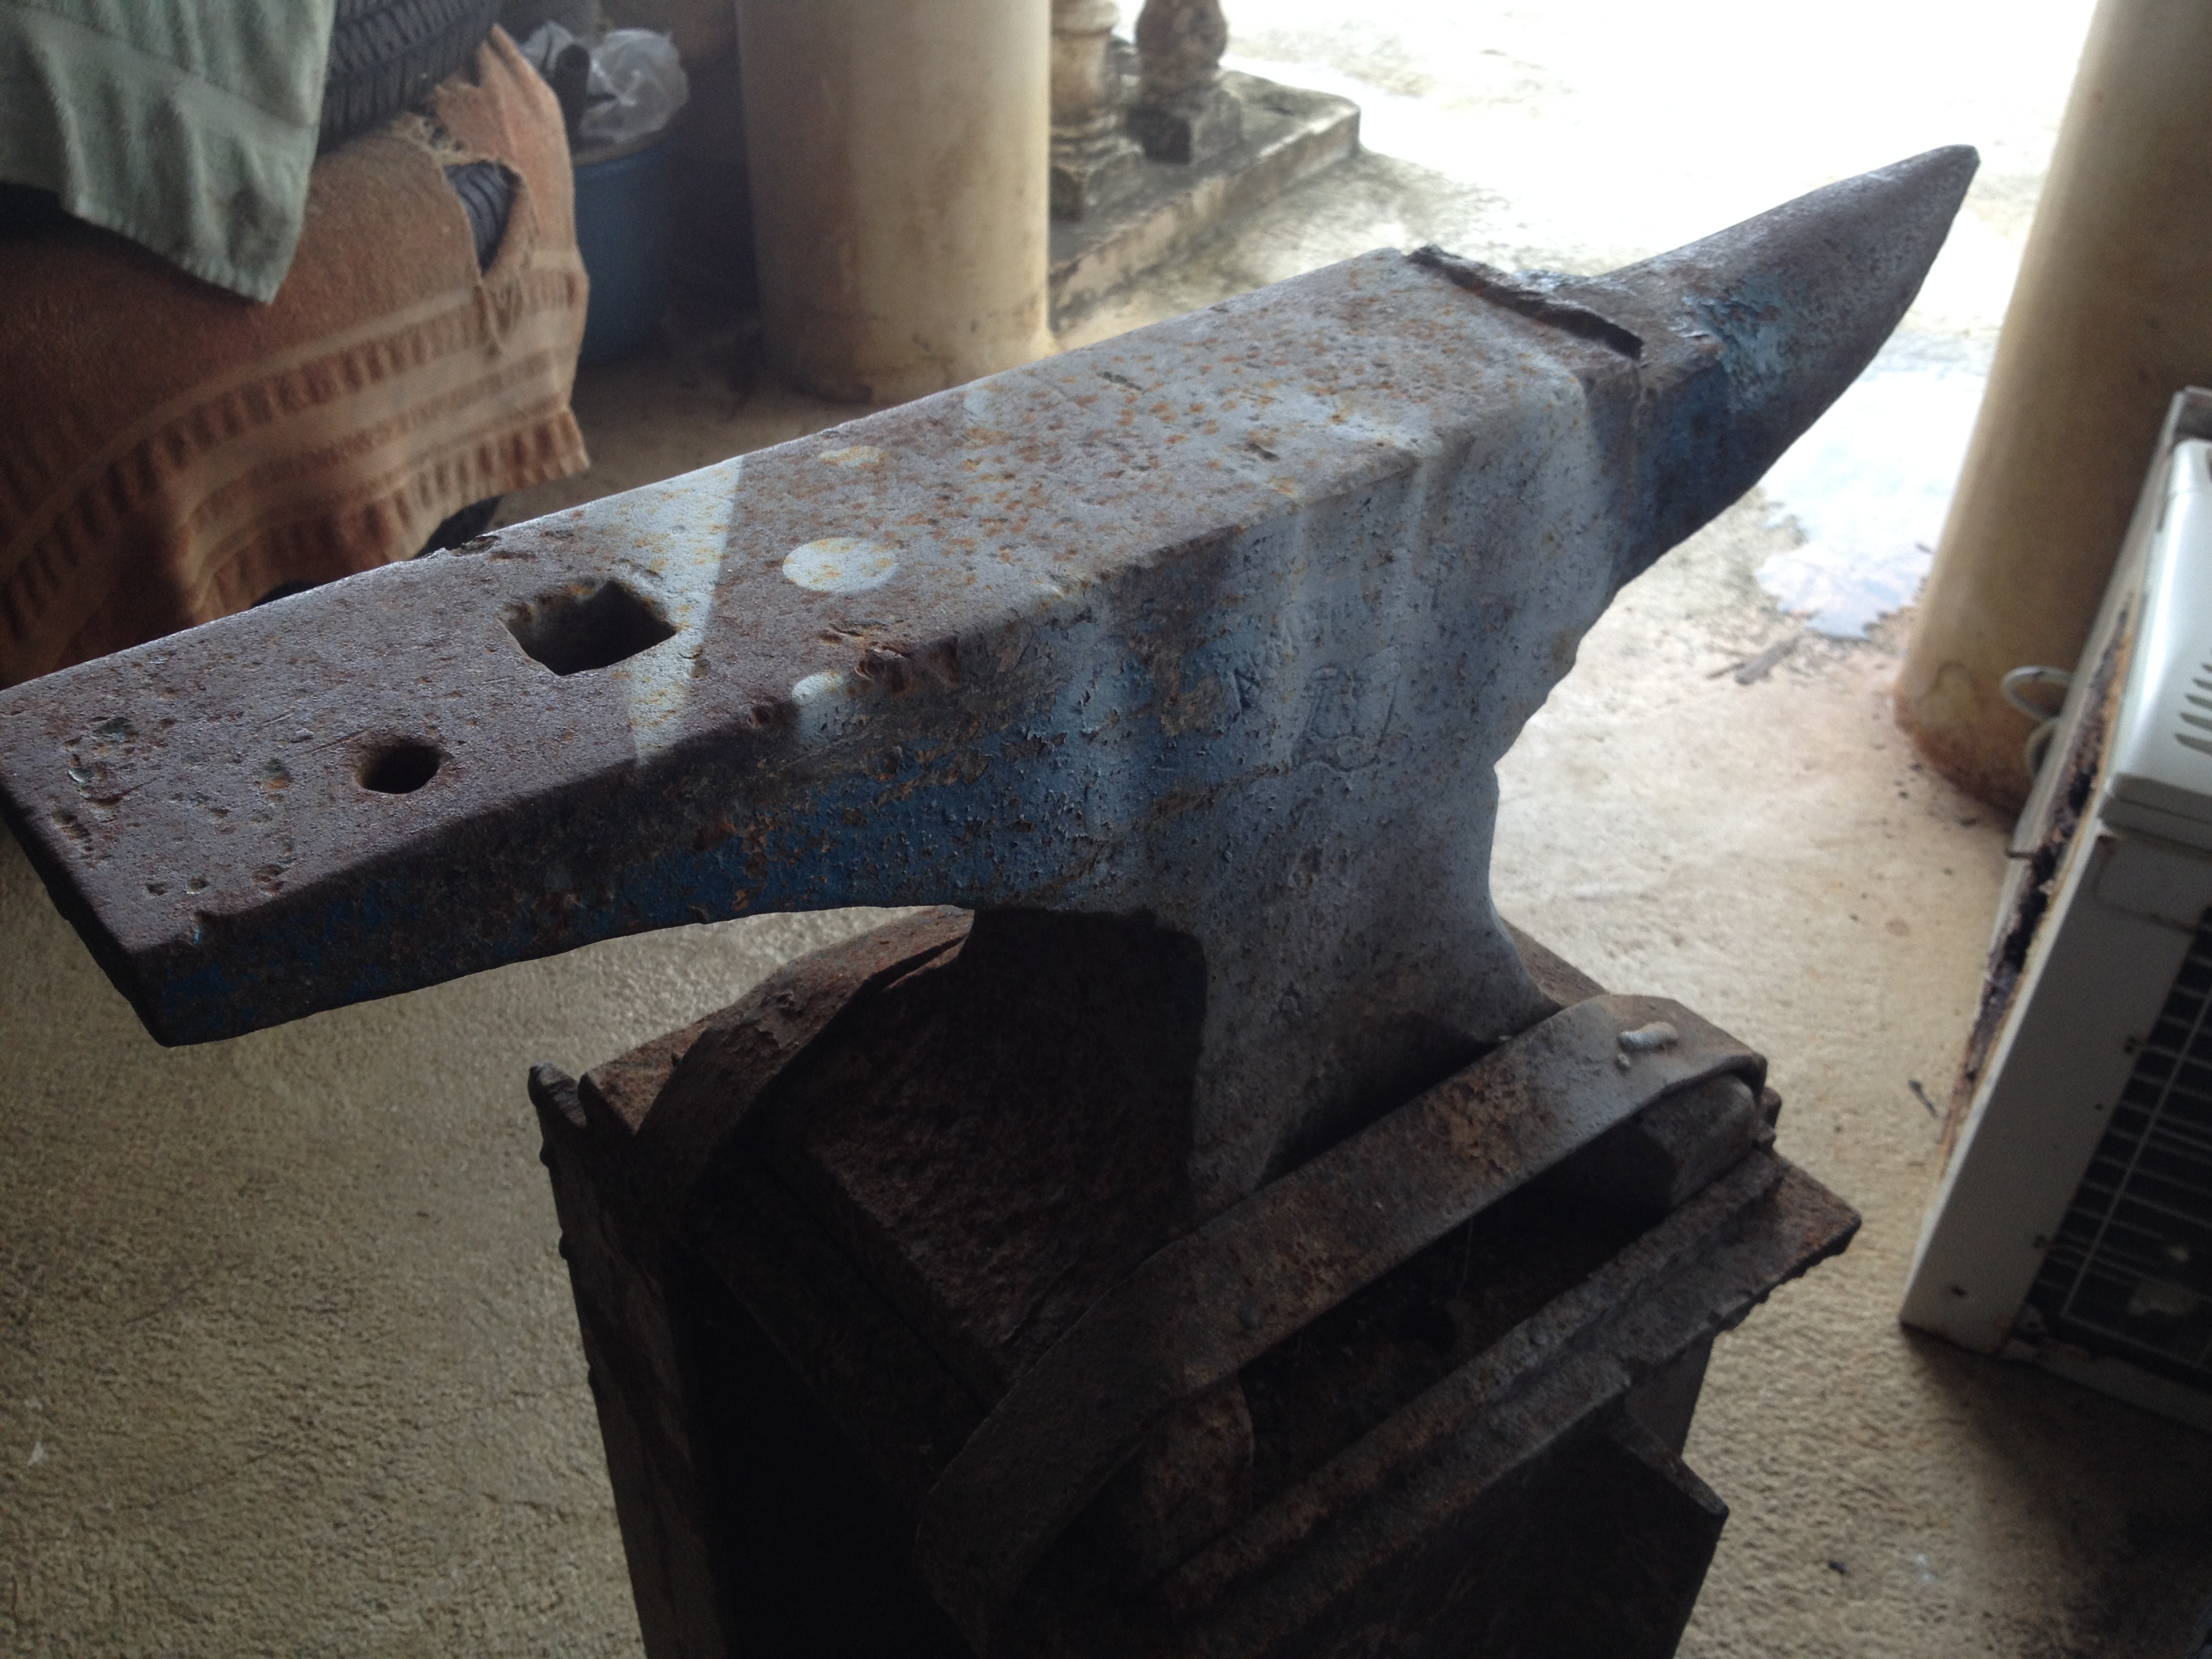
What radius you want is a personal choice. Some like a small radius, others like something larger. Some will also have different spots on the anvil with differing radius so they have a choice to work with. Your edges don't look bad at all. Certainly they are nicer than the ones on my smaller anvil and I haven't seen a need to change mine at all. Only major spot I might deal with is that big chip north of the hardy hole in your picture. if I did a lot of work over/under the heel on an edge, that area might need to be addressed some.
For curves and easing, I prefer a sanding disk/ flap wheel vs a hard disk myself as long as I don't have tons of material to remove. File may or may not work based on how hard the top face is.
That's good to know. I'll keep all of that in mind. Thanks again for all of the good info!
the number on the side would be the weight; weigh it on a bathroom scale and you have the data---probably more accurately too. If you really get excited you can stamp the weight back in on the side yourself.
I guess the numbers rotted away because they are no longer there. Probably due to the anvil being stored outdoors in the open with nothing shielding it from the elements. The previous owner really didn't give a crap about about his anvil. Hence why he sold it to me for 50 bucks. lol.
On the serial numbers, they are also no where to be found. How can I tell the age or when it was made?
-
Thanks everyone for the help!
If you absolutely must read up on the Robb Gunter method of anvil repair and do the preheat, use the correct rod, etc!
If you absolutely must read up on the Robb Gunter method of anvil repair and do the preheat, use the correct rod, etc!
I'm going to try and do this in pieces to beat the Forbidden issues. bear with me on this since long posts don't always post.
I've seen anvils in a lot worse condition. 1st question I'll ask is if your skill level is high enough that those "minor" dents and dings will cause you major issues. As you say you are new to blacksmithing, I'm going to guess the answer is no, that at this time your skills will be your limiting factor.
Nope try #2 failed
#3 As you learn, your misstrikes will damage the anvils surface. A glass smooth pristine top will be a liability at this point. When you get to the point where you aren't leaving any hammer marks on the top surface of your work with your hammer, then you are probably ready to look at dealing with your anvils face. In the mean time I'd use the anvil as is for the most part. The edges aren't in bad shape at all. just work around the few nicks that are there and if need be do a small amount of sanding to blend the edge slightly and take off maybe a sharp edge or two where you always work. Honestly in the area of the lines, I don't see any issues with the edge.
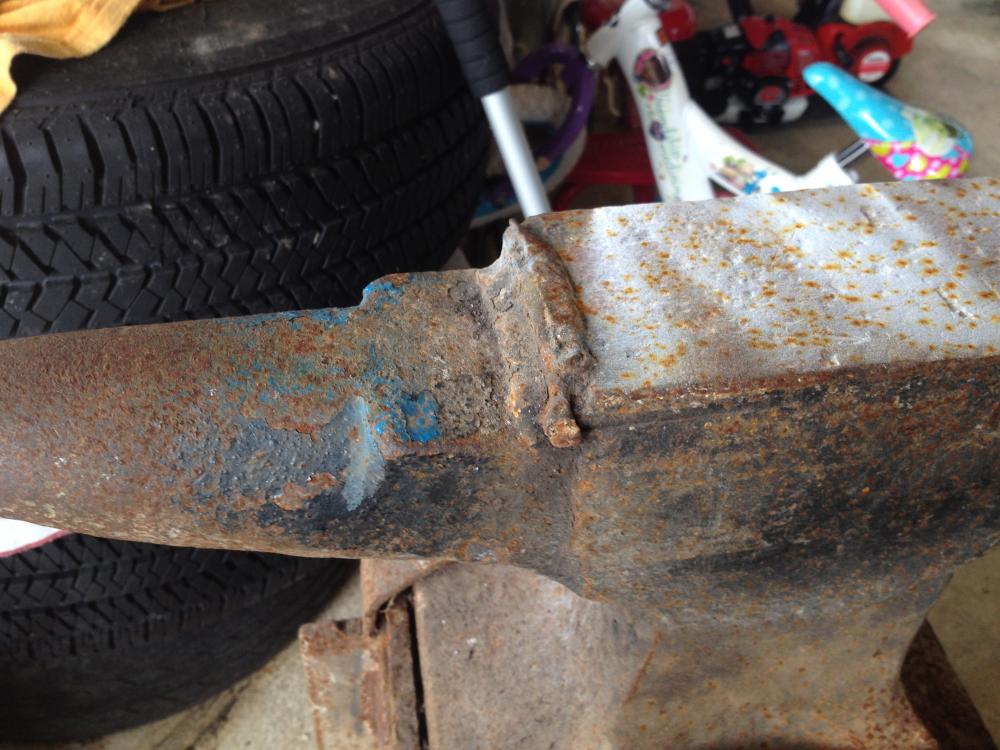
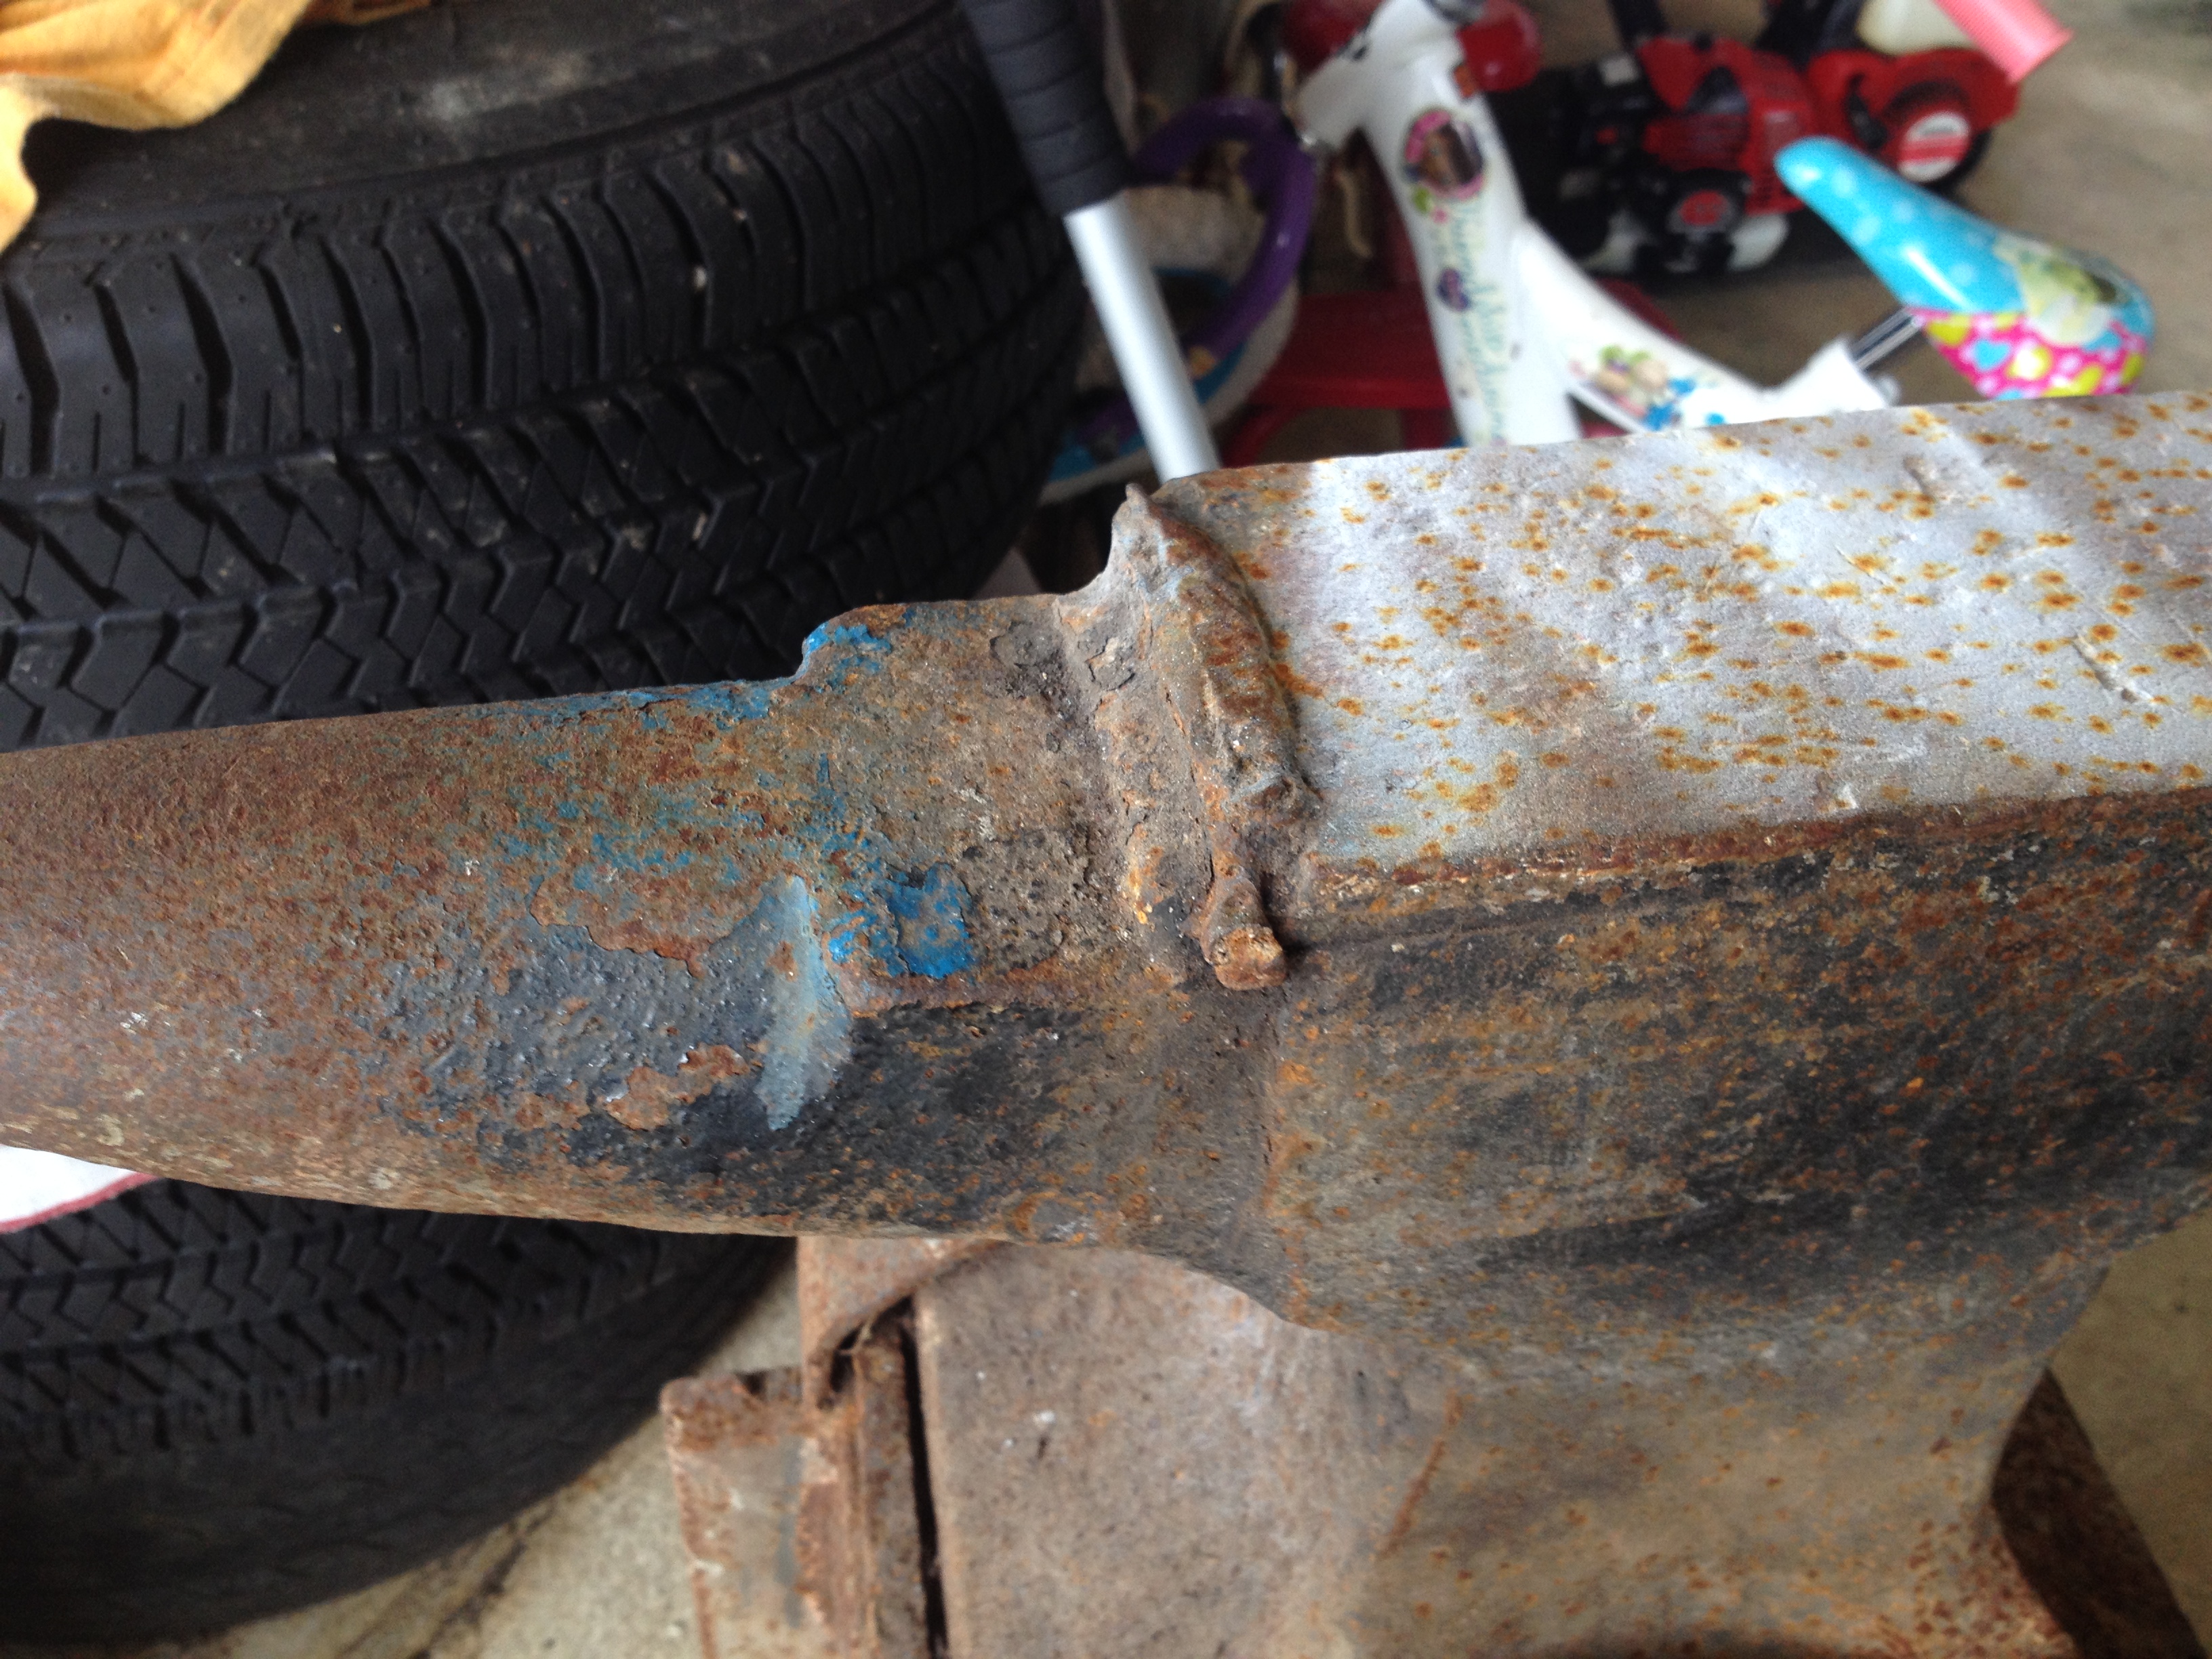
About the only area I'd address is the weld on top at the shelf, that I'd grind to flush with the top face, and maybe cut off the piece of added rebar and grind to blend. Even that I might just leave as is unless you use the step a lot for cutting or want a clean corner to use to fold and do some special operations on.
If I was going to spot repair those tiny dents, I might simply use my tig torch. That would let me do the least amount of heat damage to the top and give me pin point accuracy in the "repair". Honestly though I wouldn't do anything but use it as is. I'd wait at least a year if not two to figure out what tiny dings bothered me the most and caused the most issues with my work. In the main area, I don't see any like that at the moment. Simply beating hot metal on that face may solve a lot of what you are seeing over time.
Can I use my angle grinder to grind the edge a little? Would I have to use a sanding disc that attaches to a back plate for the angle grinder or would I use a flap disc? How about a file as well? Would that work? Thanks for the help
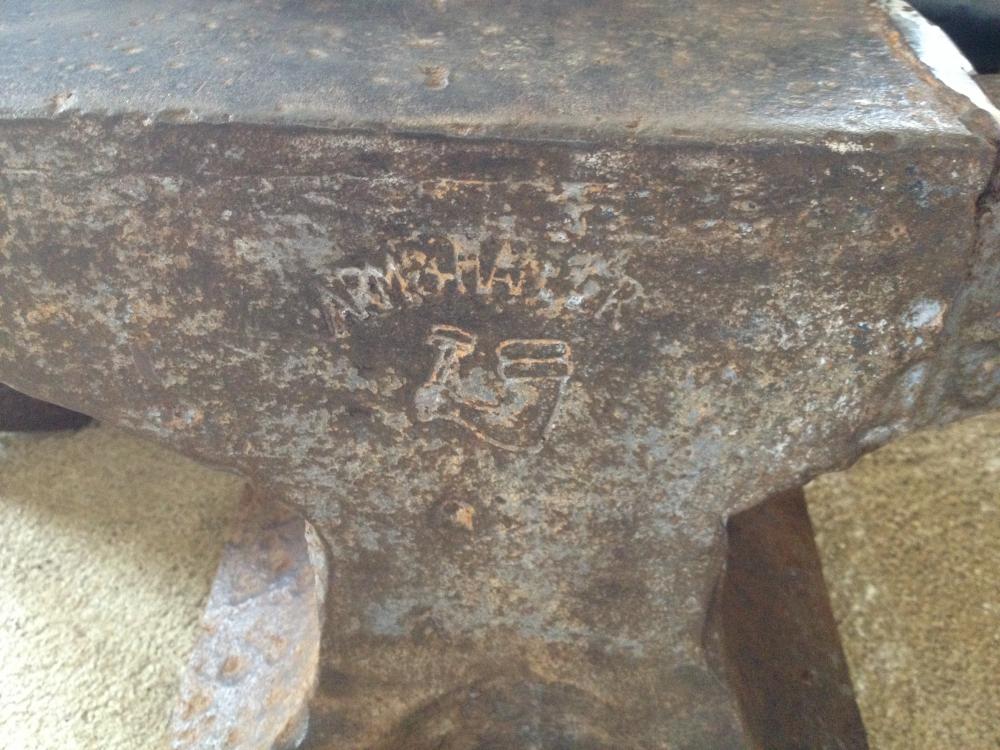
The weight is stamped under the Arm&Hammer
The serial # will be on the front ledge of the feet.
Use as is unless you have time to read up on the Gunter repair as was said.
You only really need a flat spot the size of a hammer face. You could use a piece of forklift tine or similar if you need really flat.
Thanks for the reply. There isn't a number under the logo. It's completely bank. There's also no serial number on the legs or anywhere. All it has is the name "arm and hammer" and the logo. I tried the powder trick but nothing shows up, only what I mentioned.
-
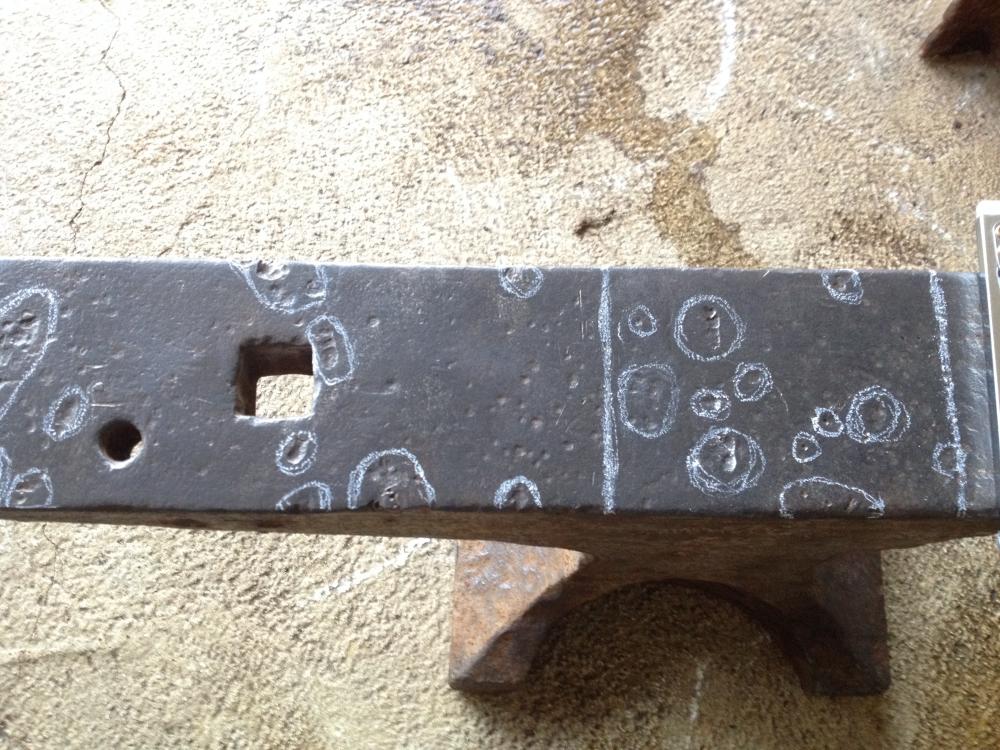
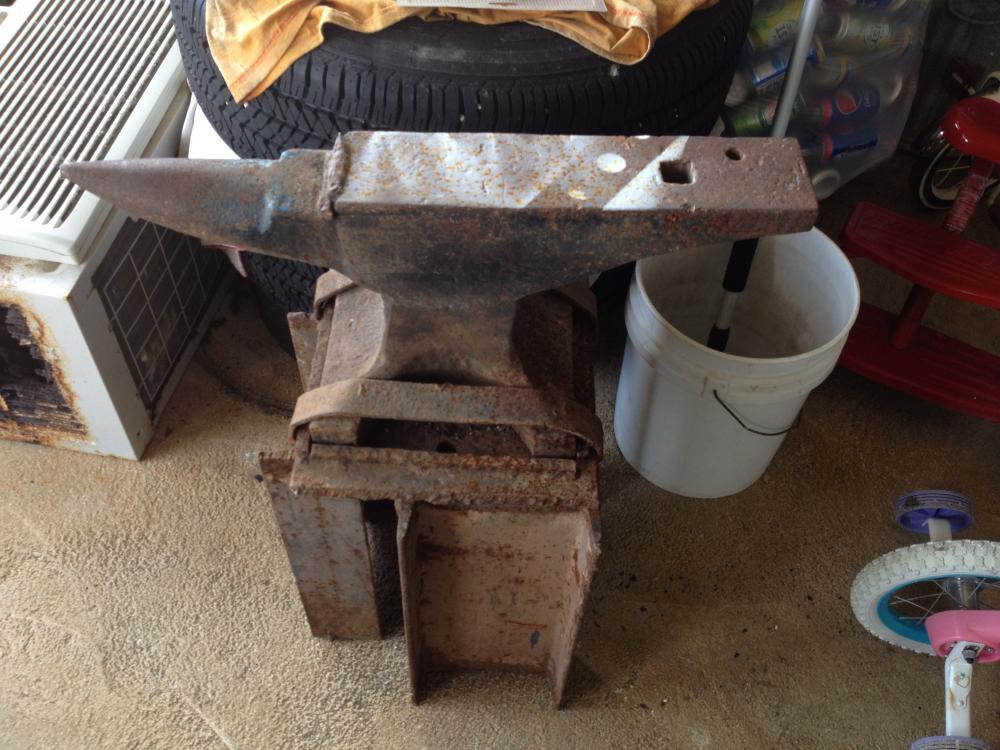
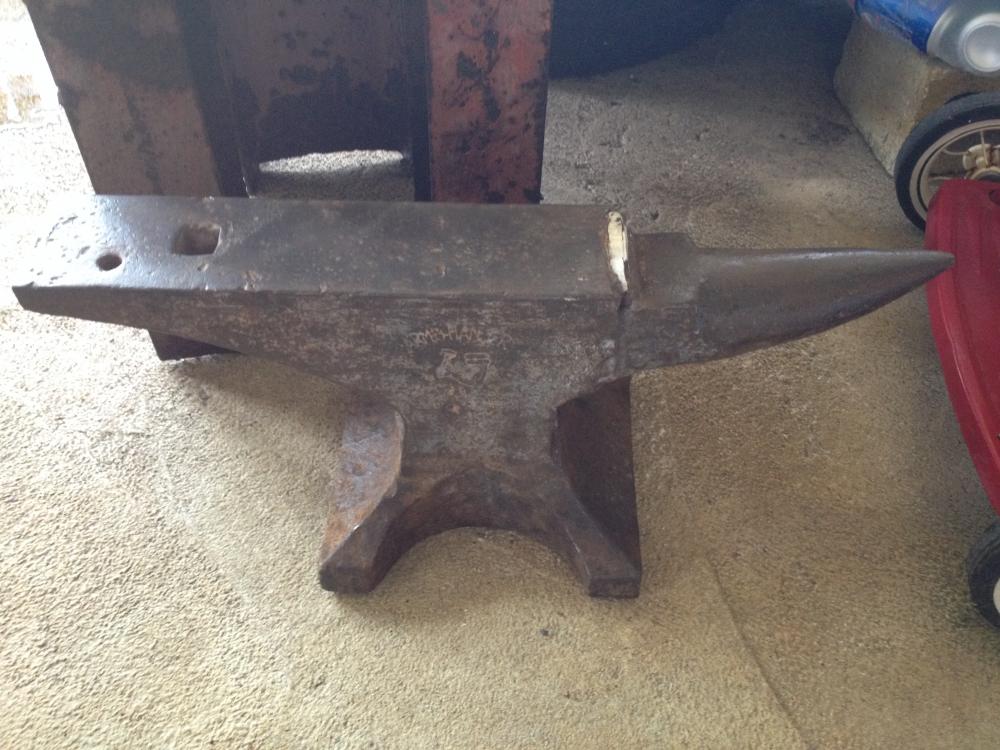
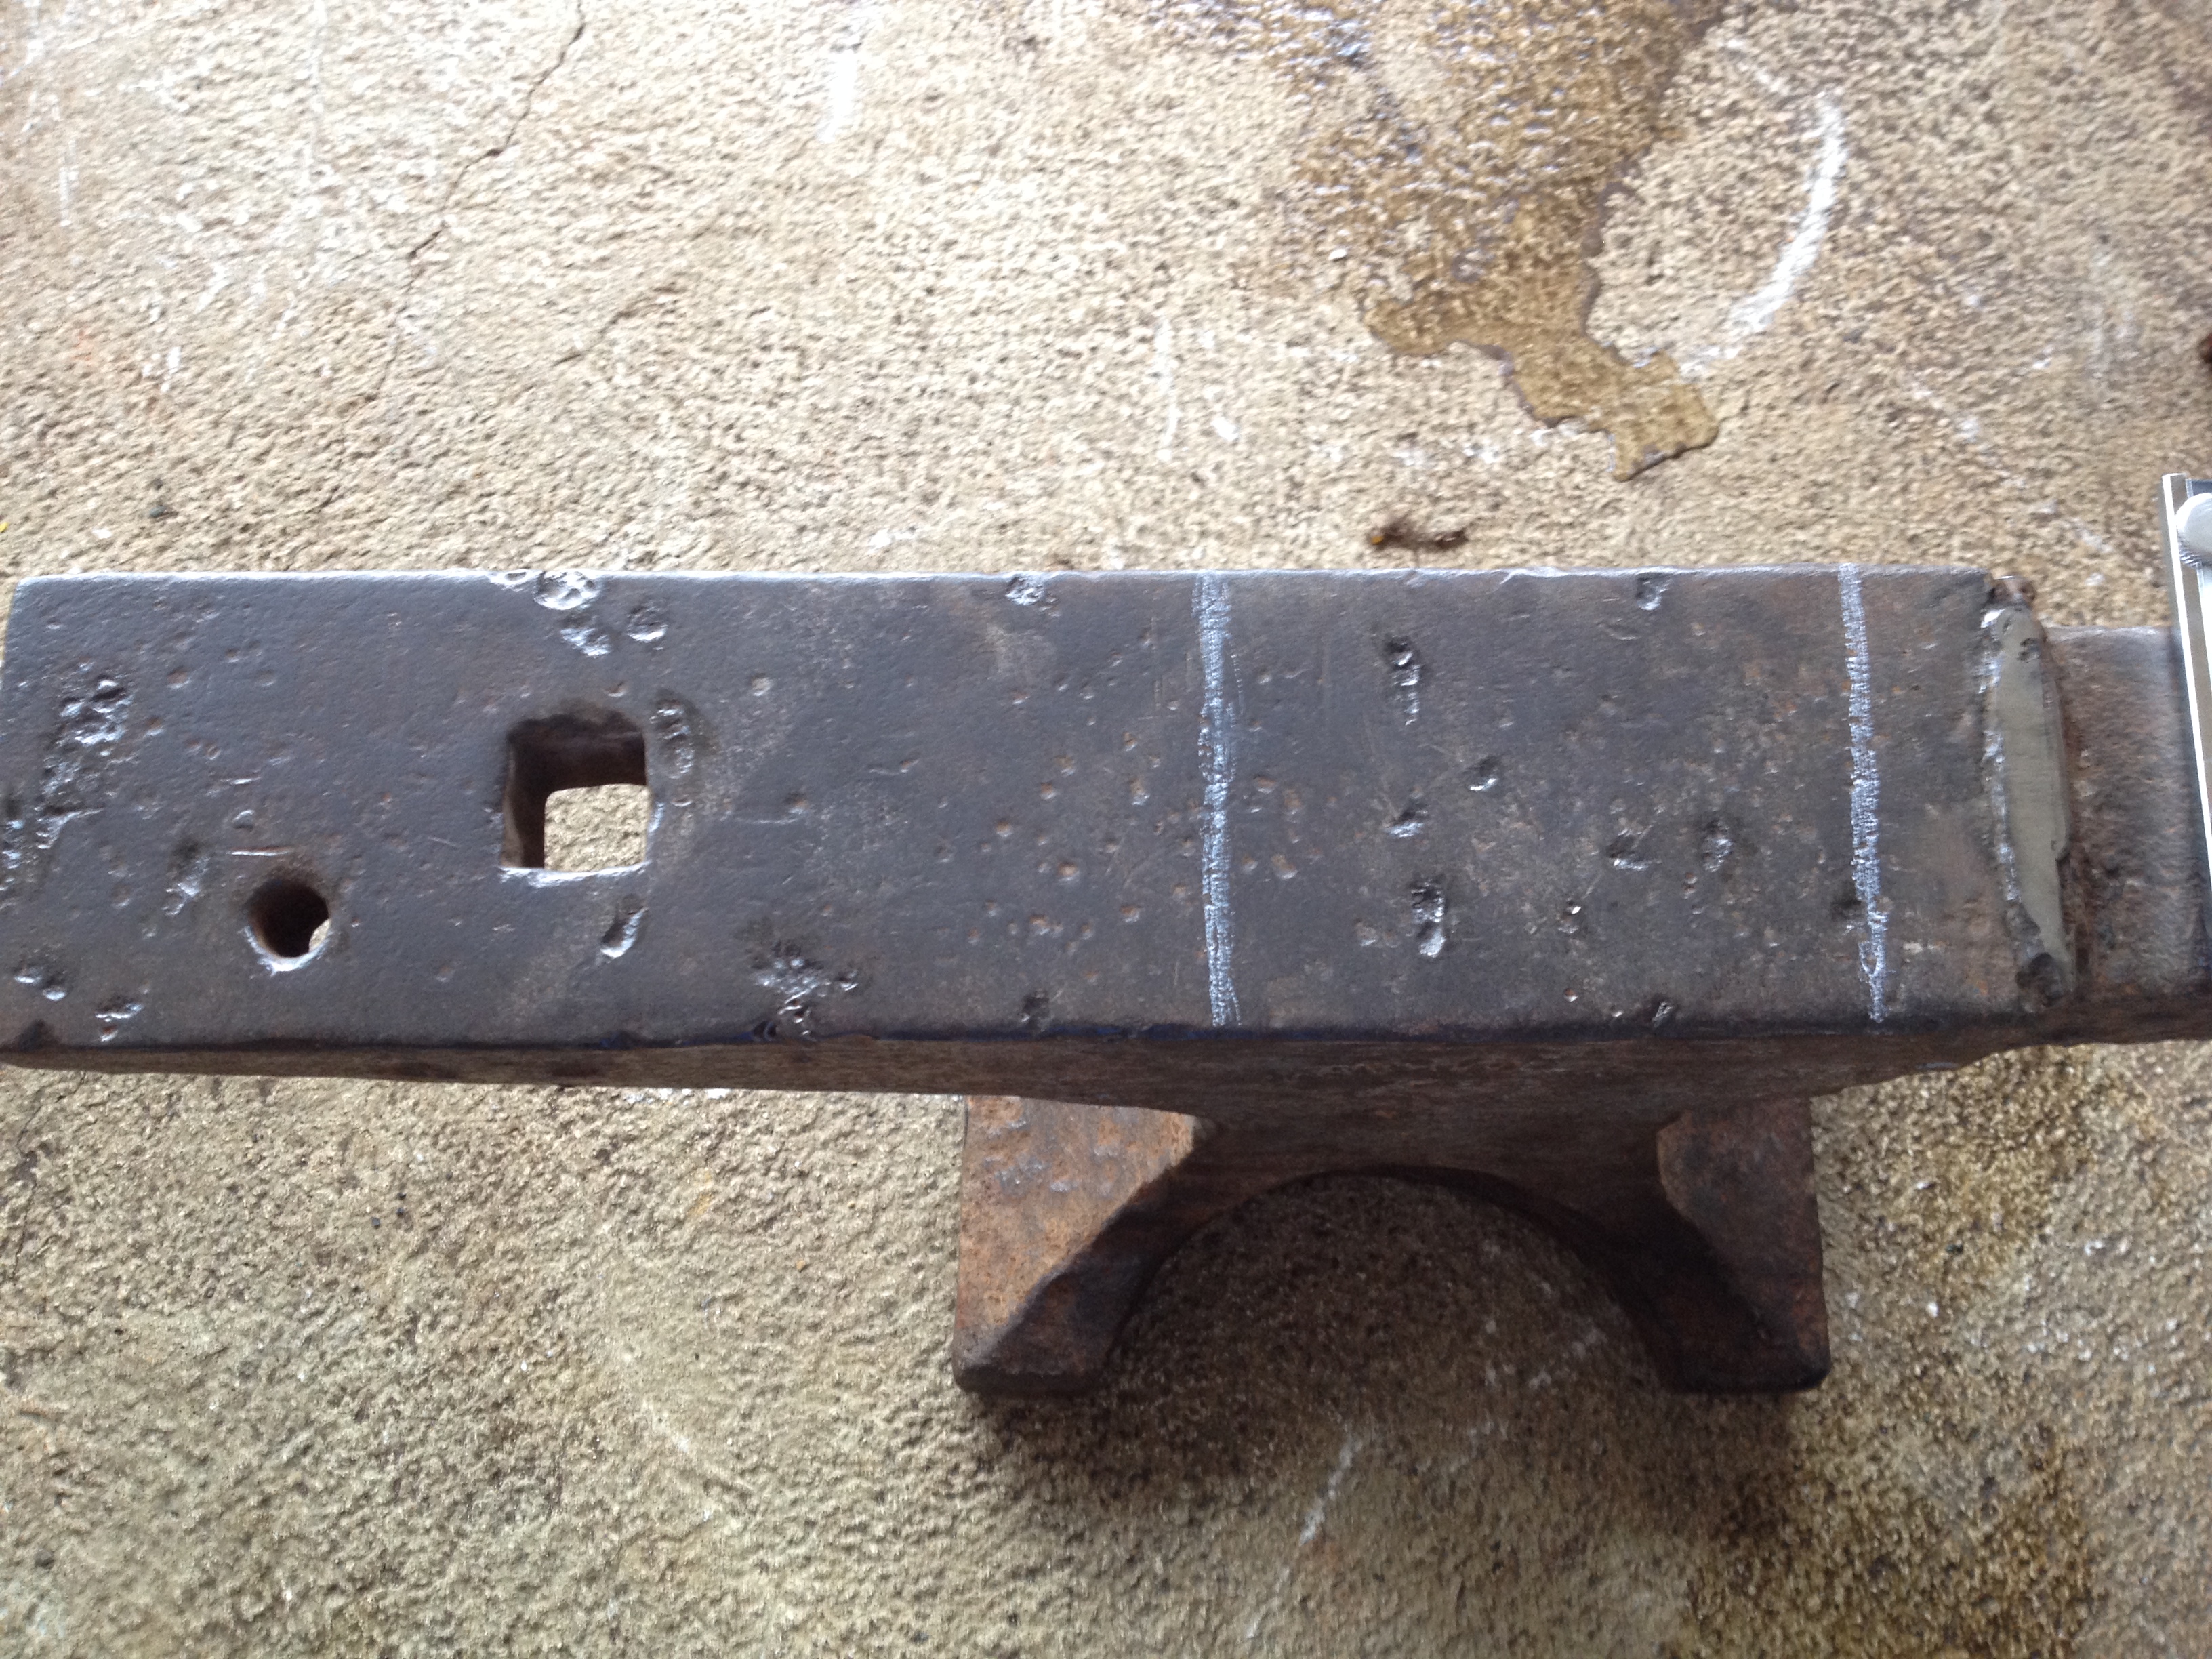
Hey everyone! How's it going? XD I've been a welder/metal fabricator here in Guam for about 10 years. I'm new to blacksmithing and need a little help. I picked up this arm and hammer brand anvil for 50 bucks but the face looks like it needs a little tune up. All I did to it was clean up all the surface rust with a fine wire wheel. There's lots of pitting and damaged edges. The ones that I circled are the really deep pits. The others are not as deep but still deep enough to give impressions on a work piece. The person I got it from was a metal worker and new nothing about blacksmithing. He used this anvil to just pound cold metal and stuff. This anvil looks like it has a steel face plate on the body. The previous owner also welded a rebar on the step for some reason. He said he did it to help with a project that we was working on. Obviously he's not a blacksmith lol. I'm pretty sure blacksmiths don't weld random things to their anvils. haha! I chopped off the rebar and ground down the weld a little. Basically, is there anything I can do to true up the face? Nothing very extensive. I just want the face to be trued up because the little pits are gonna leave tiny dents in my work. Can I fill the tiny dents with MIG weld? Would that be possible? Also does anyone know what the year of this anvil might be? There are no serial numbers and it also doesn't have the weight listed on it. Please, any help would be very much appreciated. Thanks!


Forged In Fire Tests
in Knife Making
Posted
They do in fact temper their blades. They just don't show it because it doesn't look good on tv. Just imagine that. I mean I guess they can talk a little about tempering it or cut to a short scene on the blades getting tempered but other than that, unless your actually physically tempering it with a torch or something, standing in front of an oven for an hour or so is kinda boring especially in filming it. Another note, this show is not an instructional knife/weapon making show. It's a show for entertainment. For instance the Food Network. Most of the shows don't even elaborate on the techniques of cooking. They just cook the xxxx dish and show you the end result. Some shows do in fact go into detail but those are the boring instructional stuff. Some people like that kind of thing and some don't. Of course us being the blacksmiths/bladesmiths etc. would love to watch a show that instructs in great detail what goes in to making stuff but that wouldn't appeal to everyone. Forged in fire is show is for everyone. Even my 80 year old Grandma loves the show and she knows nothing about blacksmith and such. It's entertainment! It's interesting! It's not an instructional show! So let this show open eyes in how cool, fun and interesting it is and then everything else falls into place. More and more people get curious and want to know more. It just sucks that a lot of people say, "wow they don't temper their blades? This show sucks! Dumpster diving for steel? This sucks! This sucks that sucks! Blah blah!" Be happy, be positive and don't hate.")