

Redsmith
-
Posts
22 -
Joined
-
Last visited
Content Type
Profiles
Forums
Articles
Gallery
Downloads
Events
Posts posted by Redsmith
-
-
On 12/27/2017 at 9:28 PM, Origins of Iron said:
Brand spanking new JHM Legend, 215#. Sooo nice to work on after my old, gifted 83# Trenton.

Hey Biggundoctor...I know what you mean; just got mine 3 days ago and it's sweet! I'll be bolting to the 1" plate this weekend!
-
Thanks VaughnT! Just received my copy of Mark Aspery's volume III yesterday....nothing short of amazing. I've got several blacksmithing books but none compare to the quality of this both in text and pictures. I see a lot of joinery practice in my future
 . Now I NEED the other two volumes.
-
Soooo, does the glass actually fuse to the steel under the heat? Very cool BTW!
-
Awesome work, forging anatomy is a special talent as far as i'm concerned. What size bar did you begin with and, did you use a power hammer? That just looks likes some pretty big stuff to move by hand (no pun intended) and hot cut without w/o machine assistance.
-
Just wanted to add my thanks for this tutorial Vaughn. As a newbie I'm drinking it all in, and learning from all the seasoned metal smiths who are willing to share their knowledge is greatly appreciated!
-
Here you go Jasent, don't be too hard on a newbie now
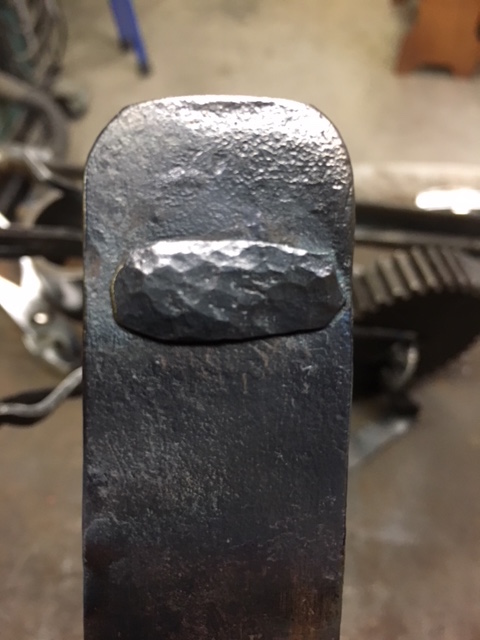
. it's 1/8" joined to the punched 1/4" material. The bright spots on the shoulders is where the metal upset a little as I drove it down a tad to tighten up the joint before peening the tenon. I could've done done better with the symmetry of the peen but overall I'm pretty happy making my first slotted punch and monkey tool and the way the joint came out. The joint/fit is nice and tight.
-
2 hours ago, Jasent said:
Have you gotten a chance to test it out?
Nope; I should've tried it out on a test piece yesterday but I got caught up in other projects. After I take the wifey to the movies today, I'll give it a go.
2 hours ago, Jim Coke said:As Frank mentioned the easy way to make the tool is to bend over a flat bar stock than weld in side pieces to match your tennon. I still have the ones that I made years ago. Have fun...
Thanks Jim, I'll be making the 1/4" x 3/4" this way next weekend. Running out of my vacation now and back to work tomorrow

-
Thanks Frank, I think I'll give that a try for the larger monkey tool and see how it holds up.
-
On 12/25/2017 at 3:15 PM, Redsmith said:
I'll give it a go this week and post some pics of my success...or...
") Thanks Jasent.
Thanks Jasent.
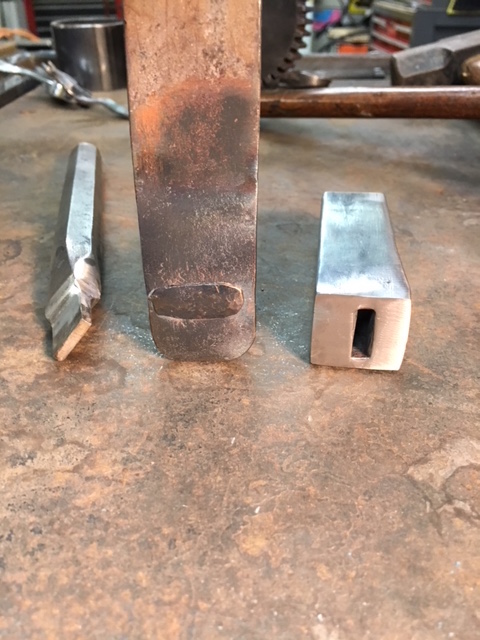
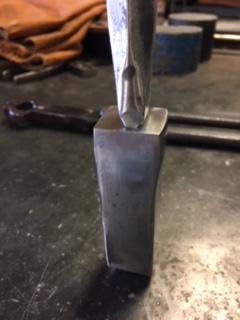
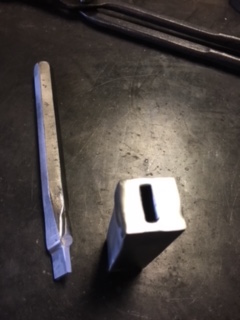
So...here's my morning's work of making the slotted monkey tool. I'm pretty happy with it except i got that first swat a little off center. Everything fits nicely...now to see how it works in action! The tenon size is 1/8" x 5/8". My next one will be 1/4" x 3/4" but I want to start out with a piece of 1 1/4" sq stock to have more shoulder left on the tool; all I have laying around now is the 1".
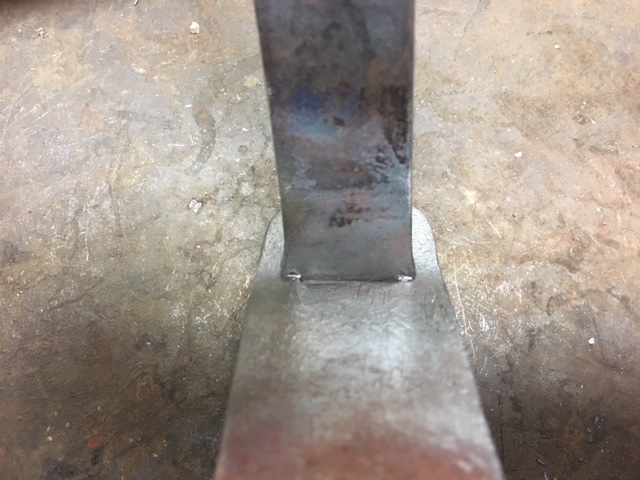
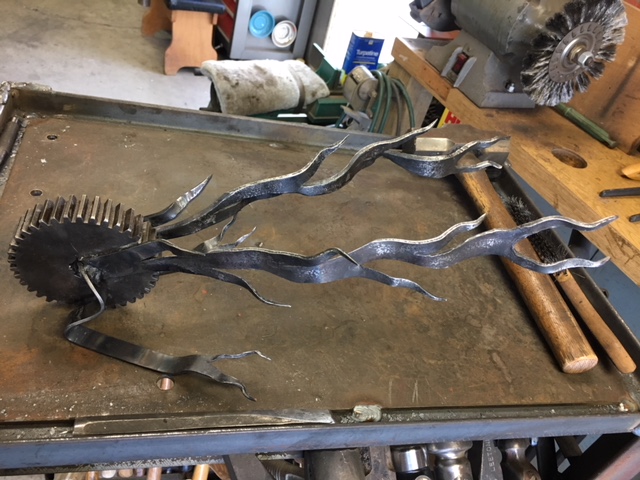
The other picture is my attempt at art
 ; I wanted a project to practice my chisel cutting and this seemed like a good way to have something to show for it in the end.
Happy Hammering!

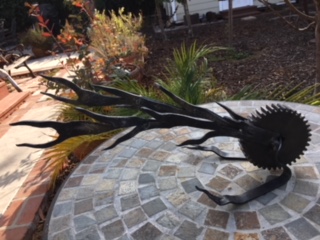
Better picture of my "sculpture".
-
You are right Ranchmanben...$60 on Amazon! But it does get a rating of 5 stars so it looks to be an investment worth buying. Thanks for the tip!
-
I'll give it a go this week and post some pics of my success...or...
Thanks Jasent.
-
Yep...just like that. Is that how you made that one...punched it hot?
-
I'm planning to do some slotted mortise & tenon joinery with flat bar and thought a slotted monkey tool would be helpful in the process. Anyone have a slick idea about how to make one or where to buy them? Unfortunately I don't have access to a machine shop and haven't figured out how to make one.
-
I've got a crappy anvil and a 1 1/2" slab of mild steel for an upsetting block. I figured I might just do as you suggested Lou, and stick it on a stump. Can't be all bad if it's truly forged steel.
-
On 10/16/2017 at 11:20 AM, Irondragon Forge & Clay said:
Good eye Biggun, I would have never guessed given the weight.
BTW: Redsmith, if you put your location in your profile you may be surprised how many of the gang are near you and could visit. Another reason is some answers are location dependent.
Great idea IDF&C...thanks
8 hours ago, BIGGUNDOCTOR said:If you want it smooth again make friends with the guys at an automotive machine shop. The one my friend worked at had a flywheel grinder that was essentially a small Blanchard. Or if they are set up for shaving heads, they could deck it for you for probably less than a regular machine shop would charge.
That plate has a lot of potential for various projects.
It could use a liitle TLC, I'll look around and see what I can find. It looks like I can make good use of it...might as well start with a clean slate...so to speak.
-
49 minutes ago, BIGGUNDOCTOR said:
I never made mine when I had my shop, I just bought them like the picture I posted. They are pretty affordable, and it sped up the process of making a die set.
Redsmith, look around some more, you may find the top piece too
Was he a machinist, or tool and die maker?
Biggun, he was an aircraft mechanic by trade by loved to learn about everything and never could pass up any good deal if he thought he'd ever find a use for it. I grew up going to swap meets and garage sales with him...now I have the disease. Great memories.
-
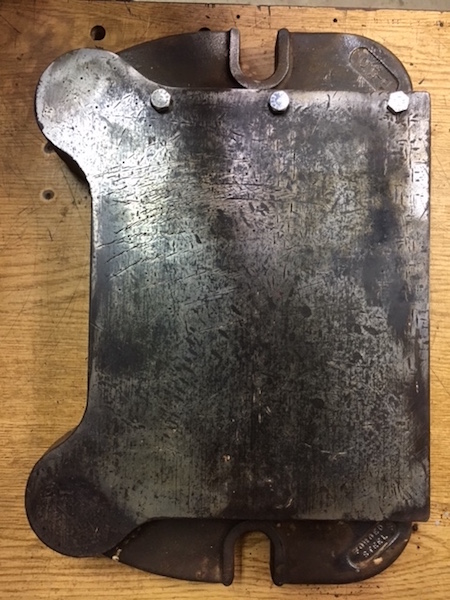
Well that's about as close as I've seen yet; good eye Biggun. There are no holes in the "ears" for alignment posts but after cleaning it up some more, I drilled the rust and dirt out of three holes along the right side which turned out to be tapped at 5/16-18. I chased the holes with a bottom tap and you can see the bolts in the holes in the attached pic.
-
It does seem odd C-1, but i'm no tractor weight expert. I did look for as many pics of tractor weights as I could find, but none looked like this one...if it is. It's an anvil now!
-
A tractor weight...I never would've guessed. Thanks for shedding some light on this one...my new bench anvil :-)
-
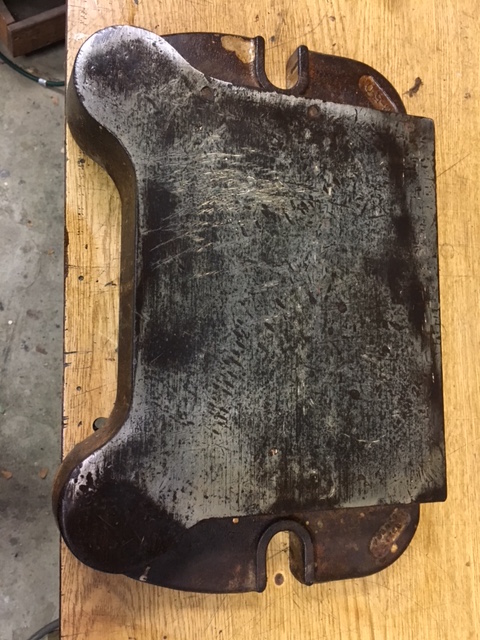
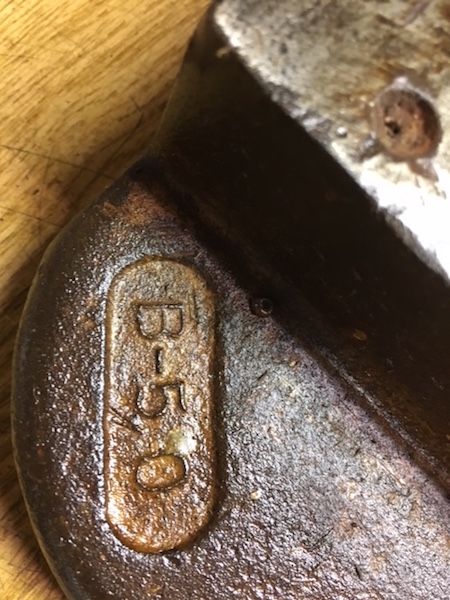
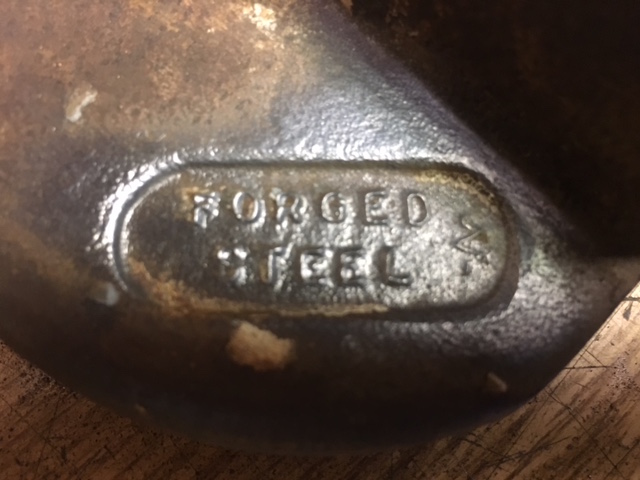
I found this in buried in my dad's garage after he passed away. It looks to be an anvil of some type. It's approximately 10 1/2" x 15 1/2" x 2 1/4" thick and weighs 75 lbs. stamped or forged into the corners are "B-50" and "Forged Steel" but no makers mark that I can find. Any info would be appreciated.
Rivets
in Blacksmithing, General Discussion
Posted
Hi Bigb,
Like you, rivets intrigue me as much for traditional joinery as for the aesthetic appeal. I just ordered 10' of #2 awg solid copper wire to make my own copper rivets because I found the cost of pre-made rivets was too high. I plan on taking a couple of pieces of angle iron and clamping them together with a very thin shim in between. Then I'll drill down through the top of the mated pair where they meet with a 1/4" bit. When the shim is removed I'll have the perfect clamp to make the rivets. Just clamp the wire between the two halves with enough sticking up and peen that portion to make the initial head. For this you can use either a header tool of your choice (diamond, round, flat, etc.) or a ball peen hammer to create the look you desire. This method of making rivets also works for mild steel rivets. Generally I use the ball peen hammer on steel rivets and a round head set tool on copper but it really depends on the "look you're going for. Since copper is so soft it's generally only used for accent rather than joinery however the steel can be used for both. BTW, non ferrous metals like copper work harden with repeated blows and become more brittle if you work them cold and they can be prone to splitting if worked too much... better if heat is applied a bit. For steel, I think working them hot is the only way to get a firm set and rigid joint whether its rivets or a tenon.