Tooln Posted June 26, 2022 Share Posted June 26, 2022 (edited) I don't post as often as I should mainly because I don't have much to post. However I have read and learned a lot from you guys and want to say thanks. Anyway a little more back story about me. I've been here about a year and retired about the same time, since retiring I've taken up knife making using a firebrick forge. I've been collecting parts and learning and finally started to build a larger forge. The body is an old air compressor tank 12" diameter and 21" long, I plan on 3 burners. I've most the parts for the burners and started on the body. I've yet to source interior materials for the forge but plan on doing that soon. It may take me a while to get it done but here's what I have so far. I'm open to comments good or bad. I'm also posting a pic of the latest knife I've made. 1095 stone washed blade, white oak handle, and python inlay in the sheath. Thanks Edited June 26, 2022 by Mod30 Resize photos Link to comment Share on other sites More sharing options...
ThomasPowers Posted June 26, 2022 Share Posted June 26, 2022 Do you need a forge that long? Propane prices will go up and heating what you don't need is just throwing money away. Perhaps cut it in half and make it so you can put them back together if you need the length from time to time? Knifemakers tend to use fairly small forges. Link to comment Share on other sites More sharing options...
Tooln Posted June 26, 2022 Author Share Posted June 26, 2022 My original intent was to use an old freon tank. But then this became available. I plan on more than knife making and this way I know I'll have something large enough. Link to comment Share on other sites More sharing options...
Mikey98118 Posted June 26, 2022 Share Posted June 26, 2022 Okay, it is long. However, you did a very nice job on that door. The door will help you in a lot of ways, not least of which is in the installation of your refractory layers. IF you either use a high alumina kiln shelf for the forge floor, or use Morgan's high insulating K26 bricks, coated with something like Plistex, or a thin coating of Kast-O-lite 30, and then very carefully smoothed, you can create a suitable surface on which to move an internal baffle wall back and forth; this will allow you to use one, two, or all three burners, and not have to see your fuel money go to waste. Link to comment Share on other sites More sharing options...
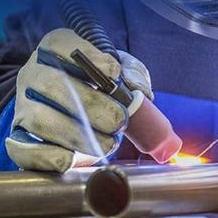
Tooln Posted June 26, 2022 Author Share Posted June 26, 2022 (edited) I do plan on putting a door on the other end also, just haven't gotten that far. Wife's projects you know. Worked on burners today. I don't think I need to explain to you guys, here are some pics. Edited June 26, 2022 by Mod30 Excessive quoting & resize photos Link to comment Share on other sites More sharing options...
Tooln Posted June 26, 2022 Author Share Posted June 26, 2022 I plan to put the burners in the forge body soon. I want to put it off center so I get a swirl out of the flame. Looking for suggestion on how many degrees off center . Thanks in advance. Link to comment Share on other sites More sharing options...
Mikey98118 Posted June 27, 2022 Share Posted June 27, 2022 At least one of those burners has a MIG tip that is out of axial alignment with the mixing tube; you might want to bend it a little bit to adjust that. There are two burner positions that do well; just beyond right angles facing down at the near edge of the floor, and about 45 degrees facing down toward the far edge of the floor. I would suggest the later position with those burners. Link to comment Share on other sites More sharing options...
Frosty Posted June 27, 2022 Share Posted June 27, 2022 Once you have them in the forge and the forge lined you'll need to tune them, they're going to run pretty rich with the mig tip jets so close to the mixing tubes. With the bell reducers as burner nozzles how do you remove the burner to tune it, unscrew the T or the brass fitting? That's okay, don't worry just be careful if you remove the brass fitting that you don't cross thread it putting it back. What size mig tip are you using? Frosty The Lucky. Link to comment Share on other sites More sharing options...
Tooln Posted June 27, 2022 Author Share Posted June 27, 2022 I'm not sure if I'll use the bell reducer. I may just flare out the liner to form the nozzle. I'd be able to unscrew either the T or brass fitting. I have a .035 mig tip. I'm open to suggestions for anything. Link to comment Share on other sites More sharing options...
Tooln Posted June 27, 2022 Author Share Posted June 27, 2022 Mickey98118 good catch on the one might tip not in good alignment. Sharp eye to catch it on the pics. Link to comment Share on other sites More sharing options...
ThomasPowers Posted June 27, 2022 Share Posted June 27, 2022 Well as I see it making it long because you may need more length in the future is rather like buying a dump truck as your daily driver because you may buy a load of gravel sometime in the future. Also, in general you don't want to heat more steel than you can work before it gets cold; so you got a powerhammer? Strikers? We see this a lot in folks that want to make swords who don't realize that heating more than they can work degrades the steel through grain growth, decarburization, scale losses. Medieval European smiths were able to forge battle swords in forges with a "hot spot" of about 6". When you want to heat the whole blade up to temp is in heat treating. (See dump truck analogy above.) Link to comment Share on other sites More sharing options...
Mikey98118 Posted June 27, 2022 Share Posted June 27, 2022 We have all seen it many times before; I just spoke up first. Frosty would have got it if I'd missed. Link to comment Share on other sites More sharing options...
Frosty Posted June 27, 2022 Share Posted June 27, 2022 I'm not a fan of bell reducers for nozzle flares. Lots of guys make them work but they have to be tuned to work well. You have to tune them anyway but tuned for a bell reducer is not as optimum as for a proper flare. Trimming the liner to form the terminal flare is my favorite, it lets a proper refractory deal with being in direct contact with the flame. Your burner tube will last longer and with the mount you're using you can adjust the depth of the mixing tube in relation to the terminal flare to help tune the flame. I often just glance at pics like those above, camera angle into the air intakes can make the jet alignment look off or good when it's not. You will be trimming the mig tips to make a neutral flame but don't worry till you have them mounted in a lined forge. ALWAYS tune a burner where you're going to use it. Getting it tuned perfectly clamped in a vise doesn't mean doodly when in the forge so don't bother unless you're going to use it as a torch. Frosty The Lucky. Link to comment Share on other sites More sharing options...
Tooln Posted June 28, 2022 Author Share Posted June 28, 2022 I apricate everyone's comments as you have more knowledge on this than I will ever have. After reading through the forge & burner 101 threads till my head hurt here's my plan. Feel free to pick it apart and make suggestions. I haven't ordered any thing for the liners as of yet but have been in contact with Glenn on pricing. Here's my plan for the liner and burner placement, again I'm open to suggestions or criticisms. 2, 1” layers of ceramic wool each rigidized. A coating of refractory 3/8” Kast O Lite 30 or equivalent A IR coating ITC 100 or equivalent Kiln wash the burner flare The board is about where the floor will end up I was thinking of aiming the burner at the #1 position. Thoughts? As always Thanks. PS any members here for WI? Link to comment Share on other sites More sharing options...
Irondragon Forge ClayWorks Posted June 28, 2022 Share Posted June 28, 2022 I would suggest Plistix 700F instead of ITC100 (which doesn't work well in forges). Link to comment Share on other sites More sharing options...
Frosty Posted June 29, 2022 Share Posted June 29, 2022 Ditto, use plistex rather than ITCC-100 for the kiln wash. It's a longish explanation but ITC-100 is intended for something other than a propane forge kiln wash. That is going to have an ID of about 7 1/2" that's pretty large. What are you wanting to heat in it? Frosty The Lucky. Link to comment Share on other sites More sharing options...
Tooln Posted June 29, 2022 Author Share Posted June 29, 2022 Main use will be for making billets for knife making. Canister and stacked Damascus. Link to comment Share on other sites More sharing options...
Frosty Posted June 29, 2022 Share Posted June 29, 2022 I'd put another layer of 1" refractory blanket in the liner, it'd give you a 5 1/4" ID and 3/4" burners would be nicely too large. Your billets will run in the neighborhood of 2" sq by maybe 4"-6". You'd have a nice space around the billet for flame circulation without a lot of empty volume to dilute the flame. That's about 60% of the liner circumference surface to heat with about 52% the area. Area x length = volume. This gives each burner much less vacant space to fill so just as a WAG it should come to welding temps approx 4x as fast and use about 1/4 the fuel. Hmmm? If you want to go nuts you could put a 3" x 4" billet in it and have about 1" of space around it. Back pressure would be getting pretty high so your burners would start losing efficiency but how often do you think you'd get that silly crazy? The volume of a propane forge is the basic determining factor for burner size and number. The shape is the other if you want reasonably even temps. Building gas forges too large is sort of a modern blacksmith tradition I think almost all of us did it, some of us <sigh> still do. Your basic plan is solid and would function as currently planned. It'd just be a gas hog and not as hot as it could be. It'd still do the job but. . . Frosty The Lucky. Link to comment Share on other sites More sharing options...
Mikey98118 Posted June 29, 2022 Share Posted June 29, 2022 Your burner position is better off where it is. It will move in a very little bit, keeping the point of flame impingement on the floor, as the floor inevitably rises, as a result of placing an insulating layer beneath it. But, You also want it to miss whatever stock you are heating. The point is to allow the flame as much distance as possible before its mostly spent gases encounter steel. Why? To ensure that any super heated oxygen molecules the maximum time to combine with fuel molecules. You don't want that oxygen to combine with super-heated steel, where it burns carbon out of of its surface and makes a mess. So, why keep it aimed at the floor at all? To keep it from impinging on the wall, which is far less protected. Link to comment Share on other sites More sharing options...
Tooln Posted July 1, 2022 Author Share Posted July 1, 2022 (edited) Well I did a little more work on the forge. Both doors cut in, hinges made and installed. Real simple door latch and handle's. So far I have $12.00 into it and that was for the handle springs, everything else is scrap I had laying around. I kind of got ahead of myself when I drilled the holes for the burners. I'm going to relocate them for better burn and efficiency. Not a problem with the old ones just weld in a patch. Material for this will come from the opening I cut into the doors. I'm not going to cut those out until I get the forge lined, this way I'll know exactly where the floor will be. Slow process now as I'm waiting for ceramic wool to line the forge. I'll update the build as it progresses. As always comments or suggestion are appreciated. Edited July 2, 2022 by Mod30 Resize photos Link to comment Share on other sites More sharing options...
Frosty Posted July 2, 2022 Share Posted July 2, 2022 I call MISTAKE! The position of your handle will put your hand directly in the flame when you open the door! If you put a light bulb in the chamber and open the door the IR and flame will hit you where the light from the bulb does. You can put the handle in the center of the door so your hand is as far from the dragon's breath and has the most insulation between it and the fire. Frosty The Lucky. Link to comment Share on other sites More sharing options...
Tooln Posted July 2, 2022 Author Share Posted July 2, 2022 Frosty I do plan to cut an opening in the door. No real reason to open while forging unless the piece I'm working on is that large. If it becomes a problem cutting it off and welding it back on in another location won't be an issue. Thank you for your thoughts and concerns. Link to comment Share on other sites More sharing options...
Mikey98118 Posted July 2, 2022 Share Posted July 2, 2022 Or, you could add an idle circuit... Link to comment Share on other sites More sharing options...
ThomasPowers Posted July 2, 2022 Share Posted July 2, 2022 A trick for making that type of handle with a forge is to lathe a wooden pattern and then wrap it with the wire hot and then burn out the pattern. Yes a lot of smoke and fire while wrapping---it's a bonus! I prefer to forge baskets for that sort of thing. Link to comment Share on other sites More sharing options...
Tooln Posted July 2, 2022 Author Share Posted July 2, 2022 I'd love to have a lathe & a milling machine. I sure do miss having the use if them at work. Just behind the air cleaner is a stainless steel bat in made years ago. Link to comment Share on other sites More sharing options...
Recommended Posts
Please sign in to comment
You will be able to leave a comment after signing in
Sign In Now