Chris C Posted May 26, 2020 Share Posted May 26, 2020 I've been doing some hot metal pounding and have realized I pretty consistently strike heavy at the 6 o'clock point on my hammer. Which obviously means my anvil is too high for me. Right now it's at 32 1/2". I get reasonably consistent strikes on the chisel table, which is approximately 3/4" lower than the face of the anvil.. Okay, no problem.................just put a piece of 3/4" plywood on the floor in front of my anvil and see if that corrects the problem. If so, I'll take the anvil off my stump, flip the stump and take 3/4" off the bottom. But............................................I've read where many knife makers prefer their anvils face to be higher (some I've read have said as much as 4" higher) than for typical blacksmithing. Since bladesmithing is my ultimate goal with this "journey", I could just start over on a new stump. But wait..........I also want to do typical blacksmithing projects. I have neither the room nor the money for a second anvil. And on top of that, I have used and really want a dogs-head hammer to do my bevel work on knives and that means the face of the anvil will need to be lowered. Get's kind-a compilated! So what's a feller to do? Quote Link to comment Share on other sites More sharing options...
ThomasPowers Posted May 26, 2020 Share Posted May 26, 2020 Build a dirt floor smithy. Set anvil deeper. Excavate a section in front of the anvil and add/subtract dirt until you are at the correct height for what you want to do/use that day. Quote Link to comment Share on other sites More sharing options...
Chris C Posted May 26, 2020 Author Share Posted May 26, 2020 Good idea, only I already have my "smithy". Quote Link to comment Share on other sites More sharing options...
ThomasPowers Posted May 26, 2020 Share Posted May 26, 2020 Ok; I'll work on getting a tornado over there so you can rebuild to suit... (I used to live in OKC, started smithing in the backyard of a house originally built as a shack in the great depression from railroad packing crates. Back in the early 1980's...) I'd get your dog head hammer(s) and experiment with the height by adding a pad of plywood, 2x6s or 4x4s---I have one postvise with a layer of 4x4s in front of it for greater umph when working at it. When you decide what works best for you; adjust the anvil to suit---and maybe keep your pad handy... Quote Link to comment Share on other sites More sharing options...
Chris C Posted May 26, 2020 Author Share Posted May 26, 2020 That makes sense, thanks. (the temporary pad and dog head hammer part, not the tornado!) Quote Link to comment Share on other sites More sharing options...
ThomasPowers Posted May 26, 2020 Share Posted May 26, 2020 People change; what they want to do changes, shops should be able to change. I keep seeing folks here who want to only build *one* setup and expect it to suffice for the rest of their life. I figure it's more like cars; the car you start out with is probably not the one you will be needing later; shoot I can remember when I switched to pickup trucks and the fun of trying to get one with a bench seat so *both* baby seats could be fastened down on it in an emergency. (And later the minivan, one of the truly great vehicles for families when you can put each child on a different seat for long trips!---with an adjunct pickup for my smithing...) So no tornado? Drat I was going to see if I could get it to do my logo.... Quote Link to comment Share on other sites More sharing options...
ThomasPowers Posted May 26, 2020 Share Posted May 26, 2020 The babies I mentioned? One is now a Veterinarian; the other now has 4 sons...been a while since they rode in baby seats... Quote Link to comment Share on other sites More sharing options...
Glenn Posted May 27, 2020 Share Posted May 27, 2020 Making the anvil the correct height for you now, and the way you work now, is easy. Watch the hammer marks. Consistently strike heavy at the 6 o'clock point on the wood, means the anvil face it too high. Stand on something until you raise YOU up to the correct height for a full circle is achieved. DO NOT make anything permanent at this point. Use that height for a week (40 hours) to be sure it feels right to you. Take notes as to how thick the metal stock is, the hammer you use, your swing, etc etc. Only now consider measuring the face of the anvil from where YOU stand as it is just one more, line item, note. I read many knife makers prefer their anvils face to be higher. Quit reading and go to YOUR shop. Choose the hammer you will be using and a new piece of wood and look at the marks made on the wood from that hammer. The only difference at this point is the hammer. What do the marks tell you? Now step upon a pallet and make another set of marks. What do these new hammer and pallet marks tell you? Cardboard is about the same thickness as yout knife blade material. Another set of marks and you will find your getting closer to the anvil height you want so use that height for a week (40 hours) to be sure it feels right to you. Take notes as to how thick the metal stock is, the hammer you use, your swing, etc etc. Only now consider measuring the face of the anvil from where YOU stand as it is just one more, line item, note. You should find all this to be interesting and good practice for convincing yourself you are making progress toward anvil height for each (different) project. About now you will also realize that the body adapts to small differences and your anvil height only needs to change for large differences in the way you work. There are many variables such as metal thickness, hammer shape, design, weight, heat of the metal, time of the day whether it is the first hour of the day and your fresh, or the 8th or 10th hour of the day and your tired and not so fresh, and on and on. Your anvil in your shop, working on your project, and no production for messing around trying to get the perfect anvil height, and you learn to adjust. (grin). It is NOT about the tools, it IS about the blacksmith and what he can do with the tools at hand. Quote Link to comment Share on other sites More sharing options...
BartW Posted May 27, 2020 Share Posted May 27, 2020 My first anvil is 82 cm from the concrete floor. My second was 80 cm from the floor; and my third is 77 cm from the floor. I've moved mostly to the 77cm high anvil; but I've also moved away from knifemaking a bit lately. Quote Link to comment Share on other sites More sharing options...
Chris C Posted May 27, 2020 Author Share Posted May 27, 2020 Thanks, Glenn. I had read that info from you when first setting up my anvil height. Smashed the begeebers out of a lot of wood before deciding on my 32.5" height. But now that I'm actually doing a little forge work, I'm noticing it's a bit high. As I said, I'll start raising my standing platform and see if I can tune it in. But my original question, if I stated it correctly, was "what's a feller to do about needing an adjustable height?" Is there really a good, solid adjustable platform or do I have to go with Thomas's plan of multiple anvils? Quote Link to comment Share on other sites More sharing options...
ThomasPowers Posted May 27, 2020 Share Posted May 27, 2020 (He says that like it's a *bad* thing!) Quote Link to comment Share on other sites More sharing options...
Chris C Posted May 27, 2020 Author Share Posted May 27, 2020 Absolutely NOT, Thomas. What I meant was you seem to have anvils all over your shop unlike some of us who consider ourselves darned lucky to have one! There's no way in creation that I could afford to have anvils of different heights for different purposes. Quote Link to comment Share on other sites More sharing options...
Latticino Posted May 27, 2020 Share Posted May 27, 2020 Chris, Don't forget that 10-20 years ago anvil prices were in a whole different place. The rule of thumb back then was closer to $1/#. I wouldn't be surprised if Thomas got a number of his anvils at those prices. Of course my striking anvil, that I got relatively recently, was even cheaper, but that is just a large hunk of mild steel that I drilled and filed a hardy hole in... Quote Link to comment Share on other sites More sharing options...
ThomasPowers Posted May 27, 2020 Share Posted May 27, 2020 When I lived in Central Ohio in the 1990's I averaged about 1 good name brand anvil in very good condition a year for under US$1 a pound; It's where/when I proved in the TPAAAT. I had planned to take early retirement at 57 and open a smithing business/school and so was "tooling up" in preparation for moving out of the city and living large in the country---note almost all those anvils were bought INSIDE Columbus OH city limits, not out in the country! In Feb of 2000 I was diagnosed with Diabetes and a couple of years later I was laid off after 14 years with the company when the dot com bust hit us. This threw a major wrench in my life plans; as I would never have enough time with a company to take early retirement. I ended up taking a job with NRAO for 9 years doing software testing for the ALMA project being built in Chile, only "found" a couple of anvils during those years. When the project went from Construction to Operations and had to downsize by 50%. I asked my younger office mate/colleague if he wanted the job or should I stay on? I then went to work for Dell at an assembly factory in Juarez, writing test scripts to test the large rack mount systems we were assembling; I made it to 6 years before I was laid off there due to border issues impacting work at the factory. Only bought 1 anvil in those years, an original American Civil War pack anvil with the original wooden base that held it in use and held it inside during transport. Sold that on to the author of "Civil War Blacksmithing" for obvious reasons. I'm now working IT at a small Technical University; well known for it's explosives research and a regular on "Myth Busters"---it even has a Bladesmithing Club; so if anyone is looking for a University to go to; PM me. Note: it's a pretty tough school. My eldest daughter graduated from it and *EVERY* place she applied to for Veterinarian grad School accepted her---and Vet school is harder to get into than Med school! I'm keeping an eye out for a couple more 100 pound anvils as I seem to have 8 grandkids now and would like each of them to get an anvil they can carry around from my estate...The big ones are *nice*; but a 400+# anvil is not what anyone needs in their early adult years when you tend to move around a lot. Why I'm selling off the 248# Peter Wright I got in the hoard deal. Quote Link to comment Share on other sites More sharing options...
Frosty Posted May 27, 2020 Share Posted May 27, 2020 Another thing to think about regarding anvil height is what kind of work you're planning on doing. Bladesmithing is generally closer work than general blacksmithing so having the anvil closer to the eyes and not wanting to deliver heavy blows is THE major factor. I have a reasonably heavy piece of steel on a bench for close finish work. A dog face hammer is a "tall" hammer but the arced profile helps adjust for how that throws your muscle memory off for striking parallel blows. That means a dog face behaves like the anvil is higher because the face of the hammer is farther from the handle. Arced means the face is tilted to strike as if the anvil was mounted lower. I won't get into how I measured the curve of the center of hammer face in a swing to determine hammer face alignment for long bodied hammers. It wasn't as good an approximation as using thin wood on the anvil test method. That's for another discussion, do NOT let it confuse you if you discover the comments or discussions in another thread somewhere. Frosty The Lucky. Quote Link to comment Share on other sites More sharing options...
Chris C Posted May 27, 2020 Author Share Posted May 27, 2020 Uh, ME CONFUSED? Never happen, Frosty. I keep all my marbles in the same drawer so that doesn't happen. Quote Link to comment Share on other sites More sharing options...
ThomasPowers Posted May 27, 2020 Share Posted May 27, 2020 Sure you didn't use any with a bean flip to chase off that dog that gets in the garbage? Quote Link to comment Share on other sites More sharing options...
Chris C Posted May 27, 2020 Author Share Posted May 27, 2020 All kidding aside, I've been very fortunate out here in the woods for the past 21 years. I've only had the garbage can raided one time. Not bad for an area when "city folk" bring all their unwanted dogs to dump. As far as losing any of my marbles to "bean flippers", I'm downright selfish when it comes to my marbles. Quote Link to comment Share on other sites More sharing options...
ThomasPowers Posted May 27, 2020 Share Posted May 27, 2020 We live in a dump zone too as we can see I-25 in the distance. I've heard folks say that "farmers like dogs and so dumping them in the country is OK." I don't know where they get that idea as all the local farmers tend to shoot stray dogs on sight due to livestock issues. Our current dog is a rescue dog that showed up at our front door abused and pregnant; littered the next week, all the puppies but 1 died. She's been a nice quiet dog; will bark 1 time to be let in or out or to go in her crate for the night---she gets a treat when she gets locked in it so she wants to make sure we know when it's time! If she had gone 1 house over I probably would have found her skeleton in the arroyo later. Quote Link to comment Share on other sites More sharing options...
Chris C Posted May 27, 2020 Author Share Posted May 27, 2020 16 minutes ago, ThomasPowers said: "farmers like dogs and so dumping them in the country is OK." Yep, that mindset makes most of the folks who live out here furious. I've never understood the concept myself. And you are right, farmers tend to protect their livestock. I know I do mine. Okay, back to the subject at hand. I put a piece of 3/4" plywood on the floor in front of my anvil. It's large enough I'll be able to strike my work while standing on it. I cut some 1/4" and 3/8" thick strips off the side of a 2x4 and did some dry hammering. The marks left by my hammer were dead on centered. Kind of figured 3/4" was the "magical" measurement. I'll forge from that short platform for a while and see if my hammering improves. If so, it's "under the chopping block" for the stump base. Quote Link to comment Share on other sites More sharing options...
Glenn Posted May 27, 2020 Share Posted May 27, 2020 4 hours ago, Chris C said: what's a feller to do about needing an adjustable height? Depending on your situation in your shop, my suggestion would be to play with manually adjustment until you find the sweet spot for your physical height and what suits your way of working. Numbers to the anvil height are of little use to the 5'-0" individual, as they are to the 6'-10" individual, as they are to people with short or long legs or short or long arms. The numbers you provide are only good for your body height and your way of working. The hammer marks are a reflection of one individual, their physical height, and way of working. Think of it as the seat adjustment in a ca, how long the driver's legs and how comfortable the driver wants to be. Making your height adjustable works for YOU. This is my blacksmithing platform, this is my bladesmithing platform, and over there is the platform my striker uses when he is available. Anvil stays the same, only the platform changes. You can drive yourself nuts or you can go to work and forge. Your choice. Quote Link to comment Share on other sites More sharing options...
ThomasPowers Posted May 27, 2020 Share Posted May 27, 2020 Chris, I don't remember your stump; but could you route out a 3/4" deep area for the anvil to sit in? If you wanted it higher later you could drop a piece of plywood in or fill it with sand. Quote Link to comment Share on other sites More sharing options...
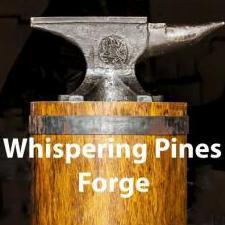
Chris C Posted May 27, 2020 Author Share Posted May 27, 2020 Thomas, I routed a 3/4" recess for the anvil to start with. It's right where I want it, but thanks for the suggestion. My guess is I'll probably flip the stump and take the 3/4" off the bottom when the time comes. I flattened both the top and bottom to "bubble level" and then cut a template of the footprint of my Fisher anvil out of a piece of 3/4" Baltic Birch and routed the recess. Unfortunately I don't have a picture of the routed out recess. Quote Link to comment Share on other sites More sharing options...
jlpservicesinc Posted June 4, 2020 Share Posted June 4, 2020 Chris what a great work area. Quote Link to comment Share on other sites More sharing options...
Chris C Posted June 4, 2020 Author Share Posted June 4, 2020 Thanks, Jennifer, but that's my forge and storage area that's adjacent to my shop. It's basically a 1 car garage that's 1 1/2 cars deep. The entire building is 36' x 40'. Quote Link to comment Share on other sites More sharing options...
Recommended Posts
Join the conversation
You can post now and register later. If you have an account, sign in now to post with your account.