cmoreland Posted February 19, 2019 Share Posted February 19, 2019 Hello folks, if it's ok with the mods I'd like to start this thread and continue posting my progress herein. Sort of a weblog, if you will. I resized the images to keep them on the smaller size but with enough detail to see what's going on. I'll start from the top, I have always been intrigued by metal and the process of working it. When I was a boy I loved swords and knives (not too uncommon of course) and I'd watch my dad take an old file and make a shiny knife out of it, using an antler or chunk of scrap wood as a handle. Later on as a teenager and into my adult life I read a lot of Tolkien and general fantasy and loved the idea of a dwarven race, living underground and being masters at the art of forging iron, sparks flying and big hammers coming down onto molten steel with muscle and fury behind each swing. They've always been my favorites in Lord of the Rings, The Hobbit etc. Much more recently my son and I randomly saw some videos on Youtube of backyard forges and hobby smithing and we both were absolutely hooked and decided this was something we MUST DO! Side note: My great uncle, as I found out today was an very accomplished master blacksmith, I didn't know him at all, but I think it runs in our blood. So my son and I set out gathering information, lurking in this forum and watching for deals around town on anything we could get to start actually hammering metal. So one day I happened to be at the local antique mall and got a tip from the owner that an estate sale was coming up and he thought they had an old anvil there. I sat at work the morning the sale kicked off full of ants in my pants then at 11am I took off like a shot and the anvil was still there! I got a really good deal for it, though it was in pretty rough shape. Talked them down from $95 to $75 for an 1888 Fisher. Not sure what the number 5 printed on it means but it can't be much more than 50-75lbs? Anyway, snagged an old bench vise and some punches and a chunk of railroad for next to nothing and loaded up. Had a huge grin on my face the rest of the day! Anvils are hard to find around here in West Texas, no doubt someone from around here might be cussin' me a bit for snagging that one the other day if they see this haha! Beggars can't be choosers and like many of us, I can't afford to order a nice 150lb new drop-forged lest I invoke the wrath and hellfury of the bo..er my lovely wife who I love a lot. Anyway, moving on! Next I'd need a hammer so I go online and look at some of the recommended models, choke a bit when I saw the price of a decent Picard and so I headed over to Tractor Supply for a temp. Just needed something that looked the part. I found a Vaughan 2.5lb at Grainger too but ended up returning it because I didn't like the longer fiberglass handle. Anyway, I don't know hardly anything about steel but googled enough to know hot-rolled steel from the welding section would be ok, but I overpaid for it. (good info in another thread here on this, thanks guys!) I figured I had a good start so I sat down and sketched out some plans and a list of things I was pretty sure I still needed. Firebrick proved to be the most difficult thing to obtain around here with the exception of the anvil, Lowes and Home Depot were both out or didn't stock it but there was a pallet of it at Tractor Supply! I bought 10 bricks (they ain't real cheap either) and the rest of my stuff was found there at TSC and Lowe's. Not wanting to wait any longer I started making the block stand for the anvil on a chilly Saturday evening and with the kids' help managed to make a JBOD forge box by Sunday afternoon. Some WIP pics: I figured I might be a bit crazy for using wood but others have done this as a little backyard forge with success so I thought I'd give it a shot. The firepot holding the heart of the fire should be pretty contained in the firebricks surrounded by packed dirt. I drilled the hole for and inserted the pipe snugly as the picture will show and put a layer of aluminum foil over the wood and then a layer of topsoil (couldn't find any high clay content soil which I heard would be best). I thought about using sand but figured I'd have a bunch of glass I'd have to deal with. Still might try it next time for reasons I'll get into later. Would LOVE some input on this. I used lump charcoal because I heard it burns cleaner and hotter and obviously I had excited and interested kiddos around for the project so figured that would be best. By the way, a shop vac without any sort of speed control was a BAD IDEA. It shot sparks 4' in every which direction when I was trying to get the forge hot. Thankfully I had hosed everything down, yard, fence, shop etc before lighting it up! I ended up sneaking into the bathroom and nabbing one of my wife's blow dryers and taping it to the pipe. *evil snickering and palm rubbing* My next post I will cover the actual lighting of the forge and subsequent thrill of hammering hot iron and some thoughts along the way. I also made my first iron thing, a hook for hanging tools out of that steel rod I bought. Stay tuned and I appreciate any and all criticism, comments and advice! I don't remember having this much raw enjoyment with anything in a long time, a long time. Quote Link to comment Share on other sites More sharing options...
HojPoj Posted February 19, 2019 Share Posted February 19, 2019 Looks like you're off to a good start, and already learned some of the lessons in what to change along the way. Charles (Originator of the JABOD) often states that a trench perpendicular to the tuyere seems to work well for charcoal, only comment I'd provide is that the width (from tuyere end to opposite wall) seems a bit too much, you may want to bring that a little closer (Yeah, I know it doesn't work well with the standard dimensions of the firebrick, maybe split one in half?). Plus, unless you're only doing stuff on the tips of the stock, you may want to reconfigure for the ability to pass stock across the fire. Quote Link to comment Share on other sites More sharing options...
cmoreland Posted February 19, 2019 Author Share Posted February 19, 2019 Thanks HojPoj! I did note that I wouldn't be able to do mid-stock heating with that configuration. Would it be ok to just do an open-top setup or would that not allow the bed to get hot enough (especially in this colder weather)? As I'll mention when I get the next part written up, the bottom planks of wood did get pretty singed, I'm guess from the bottom fire bricks. I might cut out the center and modify it for a trench like you said. That sounds like a great idea in fact! Quote Link to comment Share on other sites More sharing options...
Irondragon Forge ClayWorks Posted February 19, 2019 Share Posted February 19, 2019 2 hours ago, cmoreland said: Sort of a weblog, Great idea, the only thing I can think of is it may get moved to another section, which wouldn't be a problem and may get you more views. As far as the hair dryer for air, it needs to have a way to bleed off some of the air because charcoal needs a lot less air than it will deliver. There are several ideas in the solid fuel forges and JABOD threads. Charles (the father of them) uses a mattress hand pump with very good results. Your old Fisher anvil has a lot of life left in her. I've seen much worse still in service, hot steel will have the face shining in no time. Quote Link to comment Share on other sites More sharing options...
ThomasPowers Posted February 19, 2019 Share Posted February 19, 2019 Note: hard fire brick are NOT much of an insulator. They just won't burn at the temps they are rated for. I noticed that you seemed to think they would insulate the bottom of the box from the heat of the forge... Even packing in more dirt below the firebricks will help. Quote Link to comment Share on other sites More sharing options...
HojPoj Posted February 19, 2019 Share Posted February 19, 2019 1 hour ago, cmoreland said: Thanks HojPoj! I did note that I wouldn't be able to do mid-stock heating with that configuration. Would it be ok to just do an open-top setup or would that not allow the bed to get hot enough (especially in this colder weather)? ! I didnt see that acknowledgement of the mid-heating, but I'm not all with-it today. Generally you want a little fuel to also be on top of the workpiece, this insulates the metal and provides for a faster, more even heating. At very high temperatures like this heat loss through radiation is what dominates. The roof you made helps a little, but not nearly enough to be worth such an obstruction. If you try the trench you could just have the roof going inline with the tuyere. Also, 'trench' implies something bigger than it really is, if memory serves it's only like 4-6" wide by 8" long. Quote Link to comment Share on other sites More sharing options...
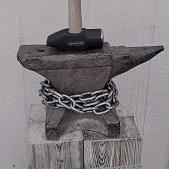
cmoreland Posted February 19, 2019 Author Share Posted February 19, 2019 Continued from above... Before I get too far, Irondragon Forge & Clay above mentioned that the ole Fisher had a lot of life left in her (which made me smile with pride for some reason), well, I forgot to mention earlier that my son and I did the ball bearing test on in the night we got it. Holding it 10" from the face I dropped a 3/4" ball bearing and it bounced back to 7" pretty consistently across the entire face. I suppose that is indeed workable from what I read! Anyway, so once we got the coals lit and the flame going the very first thing that I remember is how pleasing the sound of the forge was with air current... Look at that! You can see the wee heart of the fire almost...BEAUTIFUL!!!! As warned by experts, lump charcoal does tend to spark like the 4th of July until it burns red - Heating up the steel rod for the first hammer stroke, my next project will be some homemade tongs btw - Here's a short video of my first hammerstrokes, felt great! The metal cooled rather quickly after being out for a minute as can be seen in the video but seemed pretty easy to taper at least. My son was beside himself with excitement and loved how the slag fell off after coming straight out of the forge - Yours truly working on the taper as the sun went down - So, I decided on making a hook for some tools to screw into the forge box there...but what I ended up with was something that looked like a prop from a Saw horror movie, it kinda freaked my wife out but I sure was proud of it. Once I had the end tapered and bent around the horn of the anvil I used a hacksaw to cut the rod to length and forged the other end flat, and with my son holding it over the Pritchel hole, I gave the punch two solid whacks and it was through. Then I hammered it out a bit more to clean it up and this is what I ended up with - Not too shabby for my first project I guess, I think I'll file the tip off so it doesn't look so menacing and mount it to the box and hang my next project on it...homemade tongs! So, the cheap hammer I bought withstood a night's worth of folks hammering on hot iron. My son had some friends over and I had a buddy there too and we all got in time over the anvil until it got too late to continue. TSC hammer was in pretty good shape! I'm trying not to get too attached to it but I can't help it, she's my first now and well, you know how it is... Cooling her down... So earlier I mentioned something about using the top soil. Ugh let me tell ya, after tearing it down I could hardly stand the smell of the dirt. Very, very pungent odor in the soil. I need some advice before the next session - what can I use in that box instead of top soil? Sand? Clay-rich soil? I hear there is a Charles around here that originated the JABOD box, would love to pick his brain Also, the bottom planks of wood got pretty toasted and black. I assume I need to move the bricks and tuyere up a bit away from the bottom next time. Then again, not sure if the foil was a good idea or a horrible one. Thank you guys for reading and I'll keep this thread updated! Next up is tongs! A cool pic to end the first day with, and I'm a God-fearing man and so I thank the good Lord for the opportunity to harness a bit of His elemental forces for a while. My son is asking me every day when we can fire it up next. EDIT: ThomasPowers, you answered my last question before I even posted it! haha, nail meet hammer etc. I will keep that in mind. Those bricks got HOT! Quote Link to comment Share on other sites More sharing options...
ThomasPowers Posted February 19, 2019 Share Posted February 19, 2019 Cheap clay kitty litter, the really cheap stuff, no fancy additives; just clay. And sorry but the JABOD predates Charles by several centuries! Note that scale will burn right through the tops of your son't sneakers---get boots or make leather spats! Burns on the top of the foot are unpleasant---so I've been told....a friend of a friend, urban legend----stop looking at those sneakers in my trash can!!!! Quote Link to comment Share on other sites More sharing options...
cmoreland Posted February 19, 2019 Author Share Posted February 19, 2019 Haha! I'll bet! I didn't even think about that. I have two pair of steel toe Wolverines sitting in my closet. Such was my excitement I guess. I'm being a bad example there and didn't have my safety goggles on either. So just the kitty litter? Nothing to mix in with it then? Sounds too good to be true but you won't hear me argue it! Quote Link to comment Share on other sites More sharing options...
Irondragon Forge ClayWorks Posted February 19, 2019 Share Posted February 19, 2019 Mix some builders sand in with the kitty litter then add water (not too much) and let it sit for about a day. Then work it like potters do (called wedging) like kneading dough. If it's too stiff add a little water & wedge it again. Those fire fleas are an indication of too much air. Quote Link to comment Share on other sites More sharing options...
ThomasPowers Posted February 19, 2019 Share Posted February 19, 2019 Me I'd use it straight and gradually work in the wood ash and let ambient moisture help. Quote Link to comment Share on other sites More sharing options...
cmoreland Posted February 19, 2019 Author Share Posted February 19, 2019 (edited) I'll probably toy around with both idears. I just read Charles' JABOD thread and a few others here again and I think I'm going to try angling my tuyere downward about 15 degrees and reducing the size of the fire pot. I did have to constantly feed charcoal into the box by the time it was hot forging temp but that's probably like you said too much air burning it up too quickly (also causing the fire fleas, a term I'm using from now on ha). There's also the 'trench' idea that I might do to give me more room under the bottom fire brick, if I understood that comment correctly. BTW is there a good book that encompasses all the steel types for blacksmithing as well as just an all-around good reference book? Ordering this apron today - [Commercial link removed] Edited February 20, 2019 by Mod34 Commercial link removed per TOS Quote Link to comment Share on other sites More sharing options...
ThomasPowers Posted February 20, 2019 Share Posted February 20, 2019 Well there are the ASM Handbooks; last I checked they were 36 volumes at about US$300 a volume. Perhaps you could refine your request a bit? Can you suggest a book that describes all cars ever made? I myself only have a few of the older volumes like one on Heat Treating of steel alloys. Most good knifesmithing books will list the most common alloys for knifemaking and giving their properties and working requirements. For general blacksmithing a knowledge of mild, medium high carbon steels will suffice, for historical work pre 1850's: wrought iron, blister steel, shear steel and crucible steel.... TL;DR == No! Quote Link to comment Share on other sites More sharing options...
cmoreland Posted February 20, 2019 Author Share Posted February 20, 2019 (edited) Whoa! I didn't know those existed. Definitely out of my price range. I guess I was thinking more along this line [Commercial link removed]. Edited February 20, 2019 by Mod34 Commercial link removed per TOS Quote Link to comment Share on other sites More sharing options...
cmoreland Posted February 20, 2019 Author Share Posted February 20, 2019 (edited) ThomasPowers, I ordered the Complete Modern Blacksmith, saw that you had made some positive comments about it waay back in the day (09 was the post I saw on here). Also ordered me a leather apron today, I'll be getting some plain clay kitty litter and will be ready to fire up the forge (MK II, if I can use Charles' terminology haha) this Saturday to make a pair of tongs. [Commercial link removed] Edited February 20, 2019 by Mod34 Commercial link removed per TOS Quote Link to comment Share on other sites More sharing options...
JHCC Posted February 20, 2019 Share Posted February 20, 2019 Generally speaking, tongs are NOT a beginner project, and we don't recommend people attempting them until they've got a good bit more experience with the fundamentals. One significant exception is these: Quote Link to comment Share on other sites More sharing options...
HojPoj Posted February 20, 2019 Share Posted February 20, 2019 I'll second what JHCC said. They're a little spendy, but I'd order at least one pair of commercial tongs that'll fit the type stock you'll be using most (or something that's so-so for general use, like wolf jaw tongs). This'll give you the benefit of something that you *know* will work, and also gives you something to have in your hands to dissect the process of making them and what geometries you might prefer. Quote Link to comment Share on other sites More sharing options...
Kevin Olson Posted February 21, 2019 Share Posted February 21, 2019 I get tong blanks from Kens here in minnesota. He has some bundle packs and the price is very reasonable. You have to finish forgeing them and punch or drill a hole for the rivet. I will pm you the link. Quote Link to comment Share on other sites More sharing options...
Latticino Posted February 21, 2019 Share Posted February 21, 2019 Ken's tong blanks are a little clunky, and unless you really work to draw out the reins don't have the spring to the reins that I prefer in my tongs, but they certainly do work. His rail spike head tongs are particularly good. Quote Link to comment Share on other sites More sharing options...
cmoreland Posted February 21, 2019 Author Share Posted February 21, 2019 I just realized I live a short ways from a master blacksmith - http://pecanderosaforge.com/TheAnvilsRing.php Anyone heard of R.G. Box? He forged the 6' steel roadrunner currently residing at UT in San Antonio! I spoke with Mr. Box on the phone and he's a really nice fella! Hoping he'll show me some things in person one of these days. I appreciate the advice on the tongs. I'd like to just see what I can come up with though on my anvil. No harm in a bit of practice as I'm not expecting very much. I have my trusty ole vice grips in the meantime. Quote Link to comment Share on other sites More sharing options...
cmoreland Posted February 25, 2019 Author Share Posted February 25, 2019 Well fellers, I made some tongs today. I still got the dang bottom wood too hot. Need to move the tuyere up a couple more inches. That fire brick just cooks it! I do like the kitty litter much better than the dirt. Also made my hook look a little less....evil? Doing some bottle openers next weekend! Quote Link to comment Share on other sites More sharing options...
Frosty Posted February 25, 2019 Share Posted February 25, 2019 How much clay do you have between the bottom of the fire and the wood? Contained in what almost amounts to a furnace a lot of heat will be driven downwards. That looks deep and narrow even for charcoal but it might just look that way covered over like that. Were it mine I'd have probably 4"+ between the wood and fire, be it soil, firebrick or whatever. With the fire that shape it'd be almost impossible to heat the center of a bar say 24" long. If however the fire is in a trench, say 3" wide x 4" deep and open ended with the tuyere entering in the center at 90* to the trench you have a fire shape I've used. I made a "forge" like this on top of an old kitchen table. Piled dirt on it about a foot deep and a couple around then scooped a trench through the center and stuck an old piece of pipe in from the side. Took longer to collect a couple buckets of dirt than build the forge and get a fire to working heat. It was a nice height too. You're over thinking this. Been there done that, we all do. Frosty The Lucky. Quote Link to comment Share on other sites More sharing options...
Irondragon Forge ClayWorks Posted February 25, 2019 Share Posted February 25, 2019 On 2/19/2019 at 4:20 PM, ThomasPowers said: sorry but the JABOD predates Charles by several centuries! Ah... but not on this forum. Quote Link to comment Share on other sites More sharing options...
Eventlessbox Posted February 25, 2019 Share Posted February 25, 2019 Love the adjustment to the hook. That looks great. Tongs too. Seem like it would be easy to make a second set in bit with how those turned out too. Very nice. Quote Link to comment Share on other sites More sharing options...
cmoreland Posted February 25, 2019 Author Share Posted February 25, 2019 Frosty - A scant inch or two. Not nearly enough. It didn't burn through or anything but the top of the base board got blackened. I'm going to move the tuyere pretty close to the top to give myself 4 inches or so. I'd rather have the fire more accessible anyway so I think it'll work out. Probably very right on the overthinking part. hahah it's all the new enthusiasm. I'll get logical and thus keep it a bit more simple the more I get my hands on it. No substitute for experience. Eventless, thanks man! Quote Link to comment Share on other sites More sharing options...
Recommended Posts
Join the conversation
You can post now and register later. If you have an account, sign in now to post with your account.