TastefullyPeenedIronWorks Posted April 14, 2018 Share Posted April 14, 2018 So here is where I am at; I have been forging for a few years and a very good friend recently approached me with a proposition. He is an amateur astronomer building his own telescope. He has the mirror cell ground and finished; we are working on a wooden frame to house the entirety of the telescope but the mirror cell presents its own challenge. The mirror cell needs to be mounted in a rather unusual metal bracket. He has persued the option of machining but it would be rather cost prohibitive. He has done some aluminum casting and I am quite familiar with the process and the safety equipment required to perform the task of melting metal. We do intend to make this metal bracket out of brass as he is a tall ship deckhand in his free time and he likes the overall aesthetic. We do intend to melt and cast some of the lesser alloys with this foundry. We have purchased good, reliable safety equipment but were rather fond of the idea of building a home foundry ourselves. We procured, for no cost, a solid #20 propane tank from my gas supplier and, having him bleed it thoroughly, we took it to the shop. After removing the brass valve, filling and draining the tank with soapy water (to remove any excess heavy gas) we cut it in half. Cleaned and dried the tank, sanded down the sharp edges after cutting: we have a usable hunk of metal. We cut a hole for the burner and one for a spill spout, should we have a failure in a crucible. The base of the tank has kaowool and a fire brick to give a very flat surface for the charge. After this lining was installed and a cardboard tube placed to hold the refactory we mixed and poured genuine refactory, rated to 2000 degrees. At this point in the pictures you are probably wondering what is the deal with the yellow cardboard tube, No One had “just the right size.” So, we cut it, punched a few holes and laced it up with some leftover leather to make it work. We finally duct taped a cardboard base on the bottom of the cardboard tube, and along the seams of the lacing. Doing this allowed us to keep our perfectly level fire brick base and have nice smooth foundry walls. We are a little short, as you will see in the photos, and need to mix more to finish filling the rest of the base and the lid. We intend to weld a hinge on it to keep the lid and tank together when loading, unloading, or adding to a charge. I have a few questions and I was hoping you guys could help a bit? I know I can try alloyavenue and I have searched both here and there for these answers but can’t seem to find them, anywhere. Here we go, 1. Once we get this furnace going sitting it on any surface, that surface will act as a heat sink. Will it pay if I weld a few legs on this puppy and get it off the ground? 2. (Rough calculations Ahead) Diameter is about 7.5in and height of the cavity is 8.5in yielding a total whopping volume of 1.625gal. How do I now figure out the diameter of the chimney? 3. Where the spill hole is drilled, does it make sense to weld a little spout on the outside of the tank to guide any molten metal? should the unfortunate event arise. 4. How does it look so far? Please be honest, critical, and patient as I work 2 jobs, one overnights, am getting married in June, and have a 5 year old. I will I’ll try to respond to everyone ASAP and I hope you have some great feedback for me. The guy who I am doing this project with is one of my oldest friends and my best man at my wedding. That is him in the picture I don’t photograph well. This picture failed to upload. This is the poured refactory. Quote Link to comment Share on other sites More sharing options...
ThomasPowers Posted April 14, 2018 Share Posted April 14, 2018 Well my first suggestion would be to go over to alloyavenue.com which is a set of forums dedicated to metal casting---used to be known as backyardmetalcasting; as they are focused on casting rather than a sideline here. Quote Link to comment Share on other sites More sharing options...
TastefullyPeenedIronWorks Posted April 15, 2018 Author Share Posted April 15, 2018 I have been trying there, for some reason I don’t have any posting power or privileges, I have emailed them but nothing back just yet. Besides, I am more familiar with iforgeiron, it’s an easier platform. Thank you for the response, hopefully someone can shed some light Quote Link to comment Share on other sites More sharing options...
OddDuck Posted April 15, 2018 Share Posted April 15, 2018 Just out of curiosity, are you using charcoal as your fuel? If you are, the tuyere going straight in is fine. If you are planning on a burner, it should have gone in at a tangent to the inner wall. This allows the flame to go around the crucible and heat it evenly. You don't want direct impingement of flame on crucible. As far as welding legs to it, not a bad idea, use three so it will be easier to set it level on an uneven surface. Also, if it is up off the ground, you don't have to worry about redirecting the drain hole, it will just drip out the bottom. Just make sure you are not sitting on something that will catch fire. The exhaust should be three or four inches in diameter, believe it or not. If you are using a burner you want the exhaust at least four times the diameter of the burner. Besides, you can always block the exhaust off if it seems to be letting out too much heat. Moral of the story is, don't overthink it too much. Glad to hear you have PPE, by the by. Keep trying at Alloy Avenue, might take a few tries for the admins to let you on. Good bunch of people, however, and a lot of info there. Quote Link to comment Share on other sites More sharing options...
TastefullyPeenedIronWorks Posted April 16, 2018 Author Share Posted April 16, 2018 OddDuck, Thank you for the knowledge. The furnace will be gas powered. The pipe going directly in was a minor oversight on my part. I believe the circular flow of heat is referred to as angular momentum. With a masonry bit and my drill I’m sure I can correct it with minor difficulty. I was fairly sure I was overthinking it at least a smidge. Quote Link to comment Share on other sites More sharing options...
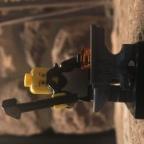
TastefullyPeenedIronWorks Posted April 16, 2018 Author Share Posted April 16, 2018 Here is the gas burner we are building. Along with being the first furnace I have build this is also the first burner. More pictures to come as things progress. Quote Link to comment Share on other sites More sharing options...
Frosty Posted April 16, 2018 Share Posted April 16, 2018 Who's plans are you using to make the burner? Frosty The Lucky. Quote Link to comment Share on other sites More sharing options...
TastefullyPeenedIronWorks Posted April 16, 2018 Author Share Posted April 16, 2018 Frosty, it is a combo of both Ron Reil’s Burner Modification found on abana and a simple build we found from, “kingofrandom,” If I have that correct. The guy I am building this with came across that one, seemed feasible. Any suggestions, pointers, tips are welcome and appreciated. Quote Link to comment Share on other sites More sharing options...
Frosty Posted April 16, 2018 Share Posted April 16, 2018 Yeah, sure do. Do NOT copy anything King of Randumb shows, many are outright dangerous. There are a number of proven burner designs and the one you're putting together isn't one. Ron's burner plans are archived on ABANA's site. Mike Porter's designs can be found online. and my T burner can be found here. https://www.iforgeiron.com/topic/43976-t-burner-illustrated-directions/ I developed the T burner to require the least shop tools or skills and still make a functional burner. Mike's burners are much better but more technically difficult to build. Until you've been making them for a while and have a good handle on how they work and why, don't try mixing and matching elements. It's easier to make them not work well than come up with an improvement Frosty The Lucky. Quote Link to comment Share on other sites More sharing options...
TastefullyPeenedIronWorks Posted April 16, 2018 Author Share Posted April 16, 2018 Frosty, Thank you for the link. I am new to burner building and have a very rudimentary understanding of the fundamentals involved in making. We will be working in the shop on Wednesday, should have some pictures up following. On another note, Holy Cow. The great Frosty the Lucky has given both time and knowledge. Quite the humbling experience for an amateur metal worker Quote Link to comment Share on other sites More sharing options...
Frosty Posted April 16, 2018 Share Posted April 16, 2018 10 hours ago, Bear Creek Iron Works said: Frosty, Thank you for the link. I am new to burner building and have a very rudimentary understanding of the fundamentals involved in making. We will be working in the shop on Wednesday, should have some pictures up following. On another note, Holy Cow. The great Frosty the Lucky has given both time and knowledge. Quite the humbling experience for an amateur metal worker HEY, cut that crap out! I'm just a guy, it's my honor and privilege to share what I've winkled out. I didn't invent the things I just tinkered the them into something reasonably easy to make. I was given the papers with the basic ratios and forms of linear and jet ejectors and corrupted them into gas burners. Tell some puns or jokes, make us smile. Just the sharing is reward enough. Well it DOES get Adim to cut me some slack so there ARE bennies. Frosty The Lucky. Quote Link to comment Share on other sites More sharing options...
OddDuck Posted April 17, 2018 Share Posted April 17, 2018 I'll second the t burner, use one myself and it works fine. I'll also second IGNORE THE KOR!!! Alloy avenue spends much time fixing "But the king of random did this..." Quote Link to comment Share on other sites More sharing options...
ThomasPowers Posted April 17, 2018 Share Posted April 17, 2018 As does IFI... Quote Link to comment Share on other sites More sharing options...
Smoggy Posted April 18, 2018 Share Posted April 18, 2018 Stepping aside from the furnace/casting technicalities, as your in good hands on that score from the replies above, what type and size of telescope is your friend building? You mention mirror cell so I'm assuming reflector but wondering how big the lens is that it needs such a 'robust' mount. There have been some extremely large reflectory telescopes build out of plywood, plastic tubing and scaffolding tube with amazing resolution restrained only by the commercial lense employed as they are generally inferior to hand made lenses. Seems to be a bit overkill given that atmospherics are the ultimate limiting factor! Unless...... .....it's a case of, 'hey this is what we do' In which case, let us know how it all pans out and good luck. Quote Link to comment Share on other sites More sharing options...
TastefullyPeenedIronWorks Posted April 19, 2018 Author Share Posted April 19, 2018 Hi, Smoggy. This is friend. The telescope we’re building is an 8 inch Newtonian, so a reflector. I’ve ground out the mirror and it’s all ready to go. The “Sudiball” base is going to be made from baltic birch but the mirror cell itself is the only bit we’re casting. Using metal for the part is much better than wood due to having fewer fluctuations in damp environments and because metal will normalize to the ambient temperature faster to reduce air currents over the mirror. A heavier mirror cell will also work to counterbalance the secondary cage. The atmospherics are certainly a consideration. There is a long history of using brass in telescopes so I wanted the design to harken to that. Here are a few pictures of the design from its creator website and the casting we hope to make. https://ix.cs.uoregon.edu/~tomc/Hobbies/Astronomy/ATM/ Quote Link to comment Share on other sites More sharing options...
TastefullyPeenedIronWorks Posted May 11, 2018 Author Share Posted May 11, 2018 Update**** We have successfully cast the remaining portion of refractory in the foundry, New, Frosty-T burner is half way there, lid has been welded and will be finished in upcoming days. Currently working on tweaking the hole for the burner due to afformentioned oversight. It felt like eating a bowl of grapes only to realize they were olives. Hope you enjoy following our build! More to come... Quote Link to comment Share on other sites More sharing options...
John in Oly, WA Posted May 11, 2018 Share Posted May 11, 2018 Is the drain hole offset from center so the plinth block won't block it when in use? Hopefully a moot point and your crucible never fails. You should angle the burner hole tangent to the inside circumference - easier to do before the refractory is fired. Helps with even heat distribution. Quote Link to comment Share on other sites More sharing options...
TastefullyPeenedIronWorks Posted May 12, 2018 Author Share Posted May 12, 2018 Hi John In Oly! Thanks you for your reply. Drain hole is off to the side, I keep forgetting to get pictures of it. I don’t quite follow, do you mean having a plinth underneath the crucible? I haven’t read much on having the crucible up off the foundry floor while heating, I suppose more reading is in order! Yay! At least I am on night shift tonight. I am filing the hole for the burner to readjust its angel. You are correct, it will definitely help with heat distribution, I don’t want that flame directly hitting my nice, new crucibles. Even, incremental heat is what we are aiming at. Quote Link to comment Share on other sites More sharing options...
ThomasPowers Posted May 12, 2018 Share Posted May 12, 2018 If your crucible is resting directly on the bottom of the furnace then there is a pathway to colder temps. If it's on a plinth then the plinth is exposed to the flame and heats up too. Simple heat conduction physics. Quote Link to comment Share on other sites More sharing options...
TastefullyPeenedIronWorks Posted May 12, 2018 Author Share Posted May 12, 2018 Thanks, ThomasPowers, Makes sense. Quote Link to comment Share on other sites More sharing options...
OddDuck Posted May 13, 2018 Share Posted May 13, 2018 Yup, you want the center of the flame (top to bottom...) to be even with the bottom edge of the crucible. Plinths are easy, make several of varying heights and try until you get the one that works right. You also want the plinth to be more or less the same size as the bottom of the crucible. Too small and it's tippy, too large and it's just a heat sink. Quote Link to comment Share on other sites More sharing options...
John in Oly, WA Posted May 14, 2018 Share Posted May 14, 2018 And when you get to the point of firing it up, put a piece of cardboard on top of the plinth before setting the crucible on it (before lighting the burner, of course). It'll keep the crucible from sticking to the plinth. And before that, some careful study of pattern making and mold making. Quote Link to comment Share on other sites More sharing options...
Recommended Posts
Join the conversation
You can post now and register later. If you have an account, sign in now to post with your account.