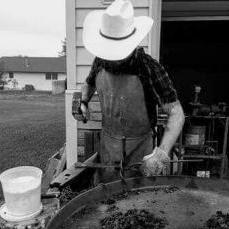
19Branden86 Posted January 18, 2018 Share Posted January 18, 2018 Almost finished with my raw wood forge. I based my design on the Whitlox forge. All I have left to do is drill the holes in the tuyere and weld a blower mount onto it. It will use a 1:32 drive hand crank blower. It's lined with kaowool and firebrick. After everything is all said and done I'm going to give everything a thin coat of Meeco Red Devil 3000 degree refractory. I know it seems like overkill but I really want all my heat to remain in the forging area and not sync into the steel frame. Quote Link to comment Share on other sites More sharing options...
ThomasPowers Posted January 18, 2018 Share Posted January 18, 2018 It's a pity you chose what I consider a bad design to copy. Least depth for maximum heat, flames, smoke for the user. Remember if you want to do any work in the reducing zone you will need straight coals piled up below your workpiece as well as above it. I would have gone with more U shaped over V shaped; though personally when I use wood I try to have a separate fire and just transfer over the hot coals as needed and so avoiding the smoke in the smithing area. I started using wood to forge with back in 1981; used to make my own charcoal too. Quote Link to comment Share on other sites More sharing options...
Charles R. Stevens Posted January 18, 2018 Share Posted January 18, 2018 Yea, I have built one too. I used full thickness bricks, the only reason for the insulation is because 1/2 thickness brick is cheaper to ship. It works ok with pieces of wood 1 1/2” square (2x off cuts cut down) but goes threw a lot of fuel and you are almost constantly adding new fuel. Fire fleas are also a problem. I have forged 1 1/4” medium carbon in it but honestly the JABOD forge with a cooking fire near buy dose a better job. The design isn’t bad for a coal heat treating forge (except for the slag sticking to the brick) but the with makes it fuel hungry for charcoal. Quote Link to comment Share on other sites More sharing options...
4elements Posted January 18, 2018 Share Posted January 18, 2018 I have also built a similar forge . I use charcoal instead of wood. I find the design problematic since the ashes slide right down the bricks and clog the tweer. it takes a lot of fire management to keep air flow adequate in the spot where you are working. I'm working on a washtub JABOB instead. Quote Link to comment Share on other sites More sharing options...
Charles R. Stevens Posted January 18, 2018 Share Posted January 18, 2018 4 elements, please post the creation of your forge. Quote Link to comment Share on other sites More sharing options...
4elements Posted January 18, 2018 Share Posted January 18, 2018 I can only post pictures from the home computer. It doesn't work with my phone. I'll do it as soon as I can Quote Link to comment Share on other sites More sharing options...
Charles R. Stevens Posted January 18, 2018 Share Posted January 18, 2018 Please do. It helps us show low cost, low tech alternatives. Some times folks have a hard time extrapolating an idea and a post with pictures, description and rescission help. The same applies to this post. It is a workable forge, it has design features that make shipping less expensive, and it can be improved. The big peice of tech is the adjustable tuyere that allowes one to limit the size of the hot spot in the fire. One needs a small hot spot for over 90% of our work Quote Link to comment Share on other sites More sharing options...
4elements Posted January 19, 2018 Share Posted January 19, 2018 OK, here's the trough forge I mentioned above. I haven't tried using wood to fire it, just charcoal. I figured that the charcoal from burning wood is what the fuel really is anyway. Like I said, I'm not thrilled with it. It isn't an exact copy of a Whitlox, I was using material from my scrap pile. The tuyere is square tube with a series of 3/8" holes and a baffle to adjust the length of the fire. Whitlox has a round tube with another tube inside with a series of milled slots matching the round holes in the outer tube. each slot is progressively longer around the circumference so rotating the inner tube opens more air holes in the outer tube. Too complicated for me to make. the air supply on a Whitlox is from the rear, which is different from mine. I didn't track cost in building it. The "V" shape doesn't allow you to make a deep fire and all the ashes slide down the slope and block the air. This may be some flaw of my own making but I don't think I'll try to improve it at this time. Quote Link to comment Share on other sites More sharing options...
4elements Posted January 19, 2018 Share Posted January 19, 2018 I am now in process of making a washtub forge. the fill is clean raw clay with sharp silica sand at about a 40% clay to 60% sand, by guess. The clay is as I dug it up and is damp enough to kneed into the sand. I am following the recommendations from the solid fuel section of this forum for various dimensions. Picture 2 is a 2 1/2" thick fire brick for the bottom of the firepot. Picture 3 is the 1" black pipe for the tuyere. I wrapped it in waxed paper to keep the clay from sticking so I can adjust it if the end burns or it needs replacing. The next three are of combining the sand and clay. Last is a tryout to see if I have mixed enough (not yet). That's as far as I've gotten as yet. So far, just the tub and the pipe have cost me anything. I had the rest already. Quote Link to comment Share on other sites More sharing options...
Recommended Posts
Join the conversation
You can post now and register later. If you have an account, sign in now to post with your account.