Charles R. Stevens Posted September 15, 2017 Share Posted September 15, 2017 Those who came before us may have lacked our technology, but they were not stupid! Lol In our arrogance we have tossed a lot of their exelent technology, often a simple saluting is the best Quote Link to comment Share on other sites More sharing options...
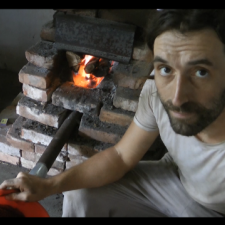
Work With Nature Posted September 15, 2017 Author Share Posted September 15, 2017 That is some great advise guys and Charles R. Stevens that about the lignin in the wood is amazing bit of info. Have seen the African axes that have a knot just behind the head. Now that would be a fun project too and I would have a good axe. But will plough on with what I got just to learn from drawing it out and seeing if I can get the proportions right. Fore sure will take some pictures as am heading to the farm now. My plan would be to wire brush it all up and get some close ups. Then spend some time grinding bits of the sleeves away that are over leaning the insert. The piece did move. Will hold my horse so on the cutting part till I get some feedback from you jlpservicesinc. Just a quick question, was that piece in the video from a propane forge or from a coal fire. The borax does keep it very clean alright. The axe head as far as I can tell did get welded together as I did feel a difference to how solid the piece got. But will get some closeups. David. Quote Link to comment Share on other sites More sharing options...
Work With Nature Posted September 15, 2017 Author Share Posted September 15, 2017 OK got a wee bit carried away with the grinding First picture is before grinding and cutting of the bolt area the rest is how it looks now. You will notice a very fine line that is around one quarter of the width of a hair, going around the weld area. Is that normal or did I mess up the weld now after all? The front part where the bolt was, needed most of the grinding, as am sure there was a gap between the pieces. This was on both sides. Still need to drift the eye, as it is a bit small, I think I made the insert too long. Am pleased though by what I may still be able to do with it. Quote Link to comment Share on other sites More sharing options...
Work With Nature Posted September 16, 2017 Author Share Posted September 16, 2017 Don't throw it away or cut it up.. It's best to have ample material rather than to little.. I can't tell from the photos which parts are welded or not.. Take some closer up pictures of where its' welded and then go from there.. besides that if you are making an ax it needs to be a lot thinner than what i could see in the photo.. Hi I uploaded the photos if you don't mind and could let me know if those welds are workable? Was planning to draw out the material into a small hatchet. Quote Link to comment Share on other sites More sharing options...
Charles R. Stevens Posted September 16, 2017 Share Posted September 16, 2017 Did you repeat the weld 3 times? You need to get what the welders call "penitration" Quote Link to comment Share on other sites More sharing options...
Work With Nature Posted September 16, 2017 Author Share Posted September 16, 2017 On 9/16/2017 at 11:51 AM, Charles R. Stevens said: Did you repeat the weld 3 times? You need to get what the welders call "penitration" I think you may be right. Did the weld 5 times with the first two perhaps not being hot enough. Piece kept sliding around. Plus I did drop the piece just before the very first weld and the insert that was up in till that point stuck in there by the bolt clamp thing came out. I used WD40, but as soon as it dropped out I got some boric acid on the piece. On the third it stuck at the back. Then spend the next two trying to close the front bit and hammering on the back as well and think I got some of the front to stick eventually but not all. That is why I ground the front away. I found some gaps that I could see with the naked eye. But to be honest I did not wack the mild steel into the spring steel as I was busy with getting the front welded and it was getting late. So ended up normalizing the piece three times. But what do I know. Thought it might be a good idea. Do you think those very fine lines are OK? They go around the entire weld. You know the dark lines between the welds. Will the weld hold. Am worried as I dropped the piece that I had scale build up from the very first weld and those may be the dark lines?. Quote Link to comment Share on other sites More sharing options...
Charles R. Stevens Posted September 17, 2017 Share Posted September 17, 2017 Welders test welds to destruction, and by cutting them apart. That's what you are doing. Buy grinding back you get to see what went wrong. Next time fold over your mild steel, and start your weld. So you have the eye at one end and a "V" at the other end, bluntly taper the legs of the "V" and form a wedge of the high carbon stock. Then weld that in Quote Link to comment Share on other sites More sharing options...
Work With Nature Posted September 17, 2017 Author Share Posted September 17, 2017 I see so you make a taper at the end of the v to create a scarf joint for it to not cut into the spring insert. Al right then as this is just a test on how my weld is doing I will convince myself under those circumstances that it is alright to further draw out the piece and see if that will work. Thanks for getting back to me on it. Quote Link to comment Share on other sites More sharing options...
jlpservicesinc Posted September 17, 2017 Share Posted September 17, 2017 One other thing of note.. if you have 2 or more pieces and they are different thicknesses (like the thick center section and the 2 other sections) when you weld them and forge then down you can actually get a shear because the metal will move just about at the same rate.. which means if it's all ready thinner than the main sections as you work it it can become to thin.. By welding the eye first and then inserting the steel bit and welding that you will help to avoid the problem from the get go.. (Unless you are welding Damascus billets Ideally a forge weld needs to be welded 2 to 5 times to blend and get to the final shape) A scarf and the weld takes this into account and a well thought out weld will be placed in such a way to offer the maximum effectiveness of the weld but also used to create the strongest joint.. It's certainly possible to make forge welds on some pretty whacky places problem is in use they will fail as they were not engineered or implemented in the correct way.. Weld scarfs and placement of the weld is nearly as important as the weld itself.. Quote Link to comment Share on other sites More sharing options...
anvil Posted October 31, 2017 Share Posted October 31, 2017 On 9/17/2017 at 5:05 AM, jlpservicesinc said: Weld scarfs and placement of the weld is nearly as important as the weld itself.. A kindered spirit! My addition would be to work your skill level up to where you can make the smallest possible scarf and get her done in one heat and do it to dimension! You may not be able to do this for every type of weld, but the theory ought to apply to every weld,,, or hammer blow for that matter. Quote Link to comment Share on other sites More sharing options...
jlpservicesinc Posted October 31, 2017 Share Posted October 31, 2017 1 hour ago, anvil said: A kindered spirit! My addition would be to work your skill level up to where you can make the smallest possible scarf and get her done in one heat and do it to dimension! You may not be able to do this for every type of weld, but the theory ought to apply to every weld,,, or hammer blow for that matter. Way back in the day this was a " Goal oriented skill set task and desire".. Eventually I learned that while it is possible to get a one heat weld and finish a lot of it depended on the type of material, scarf, air temperature, anvil temperature, Hammer temperature and material cross section.. There is a ratio where smaller pieces will finish up just fine in the one heat, then there is a dead zone (at least for me) where it takes 2 heats or even 3 and then you get back up to a size where 1 heat happens and is easy.. 1"+ sized stock.. Anyhow I wanted to mention if you work in the summer in arizonia vs winter outside in Massachuesetts will determine a lot on just what you can get done in one heat.. All the video How to's were filmed last winter on some pretty cold days.. If you have watched the videos not once was the slack tub not frozen solid.. Temps were in the 15F-25F range no heat and no electricity.. I was pre heating the anvil.. Quote Link to comment Share on other sites More sharing options...
anvil Posted November 1, 2017 Share Posted November 1, 2017 20 hours ago, jlpservicesinc said: " Goal oriented skill set task and desire".. Im at 9000' in the rocky mountains, or was for 35 years, so i doubt cold is an issue. Many frozen slack tubs when i forgot to dump it. preheating the anvil was a daily task. Learned early and never forgotten. I have never pursued this for those reasons. Its simple economics... a big scarf takes more forge welds,more work to make, and more work to forge back to the original cross section. When doing a "by hammer in hand" large project with hundreds of forge welds,,, not being able to fw to dimension and with the fewest number of heats can be the difference in a profitable job and just breaking even or worse. Its even more critical when dealing with tool steels where minimizing all work is the goal in order to preserve carbon or limit carbon migration. The rest of your list is spot on and must be known in order to do this. the key is to gain the experience to know how many heats are needed for your particular application To add a few inches to a half square bar is a one heat and done job. To fw 6" of damascus takes more welds. 2-3 welds is reaonable. To lay on a new bit on an old broad axe takes me the same. Besides, isnt the reason for gainining all this experience to make blacksmithing as easy as possible so we can beat hot iron til we see the grass grow from the bottom up? Quote Link to comment Share on other sites More sharing options...
jlpservicesinc Posted November 1, 2017 Share Posted November 1, 2017 On 11/1/2017 at 1:51 PM, anvil said: Nice. And yes I think we'd forge together splendidly. Why did you feel you have to repeat everything already said just for a one line comment, many people have to pay for bandwidth, and this only runs that bill up higher Quote Link to comment Share on other sites More sharing options...
anvil Posted November 2, 2017 Share Posted November 2, 2017 I think we would. And a joy it would be. As for the rest(the light colored text), consider that is for those who may not have a clue as to why we strive to be efficient. Quote Link to comment Share on other sites More sharing options...
jlpservicesinc Posted November 2, 2017 Share Posted November 2, 2017 On 11/1/2017 at 2:25 PM, jlpservicesinc said: Why did you feel you have to repeat everything already said just for a one line comment, many people have to pay for bandwidth, and this only runs that bill up higher Because I don't always know when something should be included or not and as to when is which or which is when.. I thought you are supposed to quote when it' a direct reply? This is a fuzzy area as I have found context can and often does get misconstrued here. So when to quote? Quote Link to comment Share on other sites More sharing options...
JHCC Posted November 2, 2017 Share Posted November 2, 2017 11 minutes ago, jlpservicesinc said: So when to quote? Generally speaking, quote when you need to make clear what you're replying to. Delete photos from quotes unless there is a specific detail that you need to refer to and that's hard to describe. This is my opinion, not official IFI policy. Seems to work pretty well, though. Quote Link to comment Share on other sites More sharing options...
anvil Posted November 2, 2017 Share Posted November 2, 2017 As a mere mortal blacksmith that is far more complex than making 5 right angle bends and a forge weld all to dimension and doing 40 to match... . Sample for ~80' of railing. Note the tulip for the right angle bends etc. The whole piece has many forge welds and this is a 2'wide section repeated side by side. Quote Link to comment Share on other sites More sharing options...
jlpservicesinc Posted November 3, 2017 Share Posted November 3, 2017 Sweet work.. Nice and clean.. How long did you take for you to make up the sample? I used to love that kind of work.. Been many years since I did anything like that.. Just beautiful.. Love to see more.. PM me your website.. Love to take a look.. Quote Link to comment Share on other sites More sharing options...
anvil Posted November 3, 2017 Share Posted November 3, 2017 It was my first major railing. Took about a few weeks + on the sample. Took not quite a year on the railing. I had a little help... Francis Whitaker made all the collars. No website, semi-retired and building my dream shop,,, stone, iron log. Here's the rail. The cool part was the transition from flat rail to bevel rail. On the next landing the tulip detail was dead centered and transitioned from 34 inches to 28 or so inches. Thanks! Quote Link to comment Share on other sites More sharing options...
jlpservicesinc Posted November 3, 2017 Share Posted November 3, 2017 Very nice work.. Seeing this type of work makes me want to be a better blacksmith.. It's why I like the old videos and books so much.. Quote Link to comment Share on other sites More sharing options...
anvil Posted November 3, 2017 Share Posted November 3, 2017 I have some more pics you might like under "problem solving- fire screen. One of my favorite pieces. Quote Link to comment Share on other sites More sharing options...
bluerooster Posted January 1, 2020 Share Posted January 1, 2020 What about clay and straw? Quote Link to comment Share on other sites More sharing options...
Steve Sells Posted January 1, 2020 Share Posted January 1, 2020 what about it? Quote Link to comment Share on other sites More sharing options...
jlpservicesinc Posted January 1, 2020 Share Posted January 1, 2020 Quote Link to comment Share on other sites More sharing options...
ThomasPowers Posted January 2, 2020 Share Posted January 2, 2020 No Thank's I'm full. Quote Link to comment Share on other sites More sharing options...
Recommended Posts
Join the conversation
You can post now and register later. If you have an account, sign in now to post with your account.