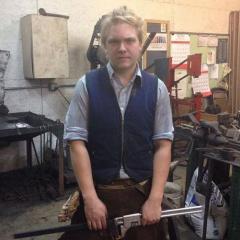
boraeili Posted November 25, 2016 Share Posted November 25, 2016 Been on a tool making kick lately and ive been wanting a rounding hammer, 4140 with a walnut handle, 3lbs. Quote Link to comment Share on other sites More sharing options...
Kevin Olson Posted November 25, 2016 Share Posted November 25, 2016 I think that looks like a pretty good 2nd hammer. Tell us exactly how you heat treated it. Quote Link to comment Share on other sites More sharing options...
Lou L Posted November 25, 2016 Share Posted November 25, 2016 What Kevin said. Nice hammer. I would love a debate about heat treating hammers. I have plans to make a rounding hammer next spring and would ferret away every scrap of information. Quote Link to comment Share on other sites More sharing options...
Frosty Posted November 25, 2016 Share Posted November 25, 2016 Man, that's a nice looking hammer. Well done. Frosty The Lucky. Quote Link to comment Share on other sites More sharing options...
Kevin Olson Posted November 25, 2016 Share Posted November 25, 2016 More pics too. We love pics Quote Link to comment Share on other sites More sharing options...
Gorō Posted November 26, 2016 Share Posted November 26, 2016 It's all about the quench and temper that makes and breaks the hammer, ithat has a lovely handle Quote Link to comment Share on other sites More sharing options...
Mark Ling Posted November 28, 2016 Share Posted November 28, 2016 how I would go about heat treating a hammer. Heat up only both of the two faces, not the cheeks, by flipping it over in the fire. Once up to critical temperature (depending on the alloy) I would quench in water. With the cheeks not being hot, the hammer will then cool quicker. Or at least that's what I've heard. Then I would stick two hammer eyed drifts in the forge; one in the sweet spot, and one off to the side. once one was hot (a bright yellow) then I would stick it in the eye of the hammer, and let it cool. Once it is down to a dull red, I would grab the other drift that was heating up in the forge, and replace it. I would continue that until the face of the hammer was a straw color, and would quench. While it is tempering would be the time that I would apply a hot oil finish. Littleblacksmith Quote Link to comment Share on other sites More sharing options...
51 Papy Posted November 28, 2016 Share Posted November 28, 2016 Just did my first hammer and heat treated this weekend. Brought the whole head up to non-metallic in forge, quenched in veg oil until just warm to touch sanded the faces and tempered in the oven at 475 for an hour x 2. Got to a med-dark straw ( or that's what it looked like to me). It is now resting in linseed oil with new handle soaking. Metal was mistrey steel. Got it from the machine shop it was a hardened threaded end off large equipment. Rebound off the post anvil was about 90%. No mark on the hammer face. It sure would be good to hear how everyone else does this. Papy Quote Link to comment Share on other sites More sharing options...
ThomasPowers Posted November 28, 2016 Share Posted November 28, 2016 Typo: Non-Magnetic; heating metal up to non-metallic would be impressive! Quote Link to comment Share on other sites More sharing options...
rockstar.esq Posted November 28, 2016 Share Posted November 28, 2016 I'm curious if tempering with a drift is better or worse than tempering with an oven. I struggled with my first attempts with larger stock because I didn't get it hot all the way through. I mistakenly thought it wouldn't glow unless it was completely up to temperature. I don't know if the center of a hammer head would completely harden in an oil quench. I suspect it takes too long for the center to cool. I seems like the oven would give more uniform results especially with hammer heads that aren't symmetrical to the handle eye. Quote Link to comment Share on other sites More sharing options...
JHCC Posted November 28, 2016 Share Posted November 28, 2016 If nothing else, drift-tempering should give a graduated temper, with the faces harder and the center (around the eye) softer. Quote Link to comment Share on other sites More sharing options...
ThomasPowers Posted November 28, 2016 Share Posted November 28, 2016 There you go assuming that "uniform" was *better*; hard face soft body is better than it all being at the same hardness. For one thing it allows you to use a harder face as you don't have to worry about the body cracking. Commercially made tools tend to be uniformly hardened and tempered as that is easier and so cheaper---not better! Quote Link to comment Share on other sites More sharing options...
JHCC Posted November 28, 2016 Share Posted November 28, 2016 2 minutes ago, ThomasPowers said: There you go assuming that "uniform" was *better* Actually, uniform is better for "non-metallic" hammers. Quote Link to comment Share on other sites More sharing options...
ThomasPowers Posted November 28, 2016 Share Posted November 28, 2016 Well the non-metallic faced hammers, rawhide faces with a cast iron body are not uniform but work very well indeed for certain tasks like armouring where the old saw is: "Hard hammer soft form, Soft hammer hard form" As that allows you to shape the metal without dinging it. Quote Link to comment Share on other sites More sharing options...
JHCC Posted November 28, 2016 Share Posted November 28, 2016 That's for normalized rawhide; hardened and tempered rawhide is a different story. Plus, you have to be very careful as to whether you're using oil-hardening or water-hardening rawhide. Quote Link to comment Share on other sites More sharing options...
ThomasPowers Posted November 28, 2016 Share Posted November 28, 2016 Can kiln drying be considered a tempering process? It definitely is a heat treatment and tempering does not always make things softer if you consider the ageing of Aluminium alloys for instance...(and it's not even Friday yet!) Quote Link to comment Share on other sites More sharing options...
51 Papy Posted November 29, 2016 Share Posted November 29, 2016 11 hours ago, ThomasPowers said: Typo: Non-Magnetic; heating metal up to non-metallic would be impressive! Yep. Darn it can't even blame that on spell check. I did heat part of a piece to non-metallic last weekend...went to get it out of the forge and it was gone. Thomas are you saying that heating the drift and tempering is your choice way of doing this job? Also, as a rule of thumb and somewhere for us new guys to start, what color. light straw dark straw. I think in reading Frank said baby possum ear blue? Having a starting point would be great! And, while we are on the subject, the knife guys seem to do multiple tempers. Is that needed on hammers? Papy Quote Link to comment Share on other sites More sharing options...
ThomasPowers Posted November 29, 2016 Share Posted November 29, 2016 temper colour depends on alloy, intended use and users preference. And yes I generally draw temper from the eye out; either with a propane torch or a heated drift or both! I often do multiple tempers; though hammers are usually not so critical use items as a blade. If I cannot proceed directly from the quench to the tempering I may use an oven to do a uniform temper at a lower temperature than the final temper I am planning. Leaving a quenched but untempered item around is a double purple no no in my shop! Quote Link to comment Share on other sites More sharing options...
51 Papy Posted November 30, 2016 Share Posted November 30, 2016 Thanks Thomas Quote Link to comment Share on other sites More sharing options...
boraeili Posted December 8, 2016 Author Share Posted December 8, 2016 On 11/24/2016 at 7:12 PM, Kevin_Olson said: I think that looks like a pretty good 2nd hammer. Tell us exactly how you heat treated it. whoops haha, forgot i posted this on the forums.... i got both heads up to critical temperature and then i quenched it in a brine quench instead of just plain water. On 11/27/2016 at 6:36 PM, littleblacksmith said: how I would go about heat treating a hammer. Heat up only both of the two faces, not the cheeks, by flipping it over in the fire. Once up to critical temperature (depending on the alloy) I would quench in water. With the cheeks not being hot, the hammer will then cool quicker. Or at least that's what I've heard. Then I would stick two hammer eyed drifts in the forge; one in the sweet spot, and one off to the side. once one was hot (a bright yellow) then I would stick it in the eye of the hammer, and let it cool. Once it is down to a dull red, I would grab the other drift that was heating up in the forge, and replace it. I would continue that until the face of the hammer was a straw color, and would quench. While it is tempering would be the time that I would apply a hot oil finish. Littleblacksmith i just used a heat treating oven for the temper, but the actually heat treating i just used a coal forge to get it up to temp... dunno why i did it that way now that i think about it. On 11/25/2016 at 7:08 AM, Lou L said: What Kevin said. Nice hammer. I would love a debate about heat treating hammers. I have plans to make a rounding hammer next spring and would ferret away every scrap of information. thank you. i need to make some slot and punching hammers in this next week or so.. power hammers make a world of a difference haha. Quote Link to comment Share on other sites More sharing options...
ThomasPowers Posted December 9, 2016 Share Posted December 9, 2016 Would that be "faces" instead of "heads" or is there a second hammer not in that picture? Quote Link to comment Share on other sites More sharing options...
Recommended Posts
Join the conversation
You can post now and register later. If you have an account, sign in now to post with your account.