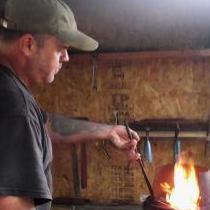
TwistedCustoms Posted April 5, 2016 Share Posted April 5, 2016 This was a project I've been wanting to do for a while. It is an attempt at a fish spear but as the photos show the barbs were elusive. I experimented with several different ways of forging the barbs and kept burning them off. If I make another one I'll cold work the barbs with files. This was my first attempt at forging a rolled socket. It's not perfect but it did turn out.....functional. My hat's off to Anyone who does this on a regular basis. Hammering out the fish tail and trying to maintain uniform thickness and symitry is tedious. This was a fun afternoon and I will probably try it again. I really want one with barbed tines! Specs.... Coil spring so..5160ish? Hardened the tines at non-magnetic and quenched in canola oil, tempered at 400 for two one hour cycles. Quote Link to comment Share on other sites More sharing options...
Rashelle Posted April 5, 2016 Share Posted April 5, 2016 This is on my list of projects to do. Something you might try is when you draw out your tines leave material at the ends, a blob in effect. Use that material to make the barbs and the point of the tine. Hope that made sense. Quote Link to comment Share on other sites More sharing options...
Frosty Posted April 5, 2016 Share Posted April 5, 2016 The way we were taught to make a gig barb goes like this. Spread the tip like it was a wide screw driver. Grind or chisel I suppose, one half off. Bend it back on itself in the direction it's leaning. Grind the point and sharpen the outer side of the barb. We left the inside of the barb as forged, the rough edge holds better than smooth. It's fast and REALLY easy. They make really effective fish and frog gigs. I admit I never made one heavier than 5/16" rd. and it was plenty to spear dolphin (no, not Flipper) Dorada I believe is the other name, tasty TASTY fish. I used to free dive off the channel islands in California and mounted my trident on a 6' dowel, broom handle dia. I made it so it'd float if I lost hold, that way I wasn't tied to a large fish that decided to sound. That gig's tines were IIRC about 4" +/- long with an overall spread of about the same. I drilled the handle about 10" deep inserted the shaft and secured it with hose clamps. That way I could take it apart so it'd fit in a sedan, heck even my vette if the roof was off. Frosty The Lucky. Quote Link to comment Share on other sites More sharing options...
TwistedCustoms Posted April 5, 2016 Author Share Posted April 5, 2016 37 minutes ago, Rashelle said: This is on my list of projects to do. Something you might try is when you draw out your tines leave material at the ends, a blob in effect. Use that material to make the barbs and the point of the tine. Hope that made sense. Makes perfect sense! "blob" is trade lingo in my shop! Frosty....I tried several times as you described and found it to be one of those deceptively easy things meaning, if you have mastered it, piece of cake, if not...... Forged the point and folded it back. At that point I had a nice barb with no primary point. When I attempted to pick up a heat to reforge the new point I kept burning off the barb.I will practice on some small diameter garage door springs before I attempt it again on a work piece! Quote Link to comment Share on other sites More sharing options...
Rashelle Posted April 5, 2016 Share Posted April 5, 2016 From the "blob" on the end, chisel in the barb and then chisel or grind the edge/point. Forgot to put that part in earlier. Frosty is much better at wording things. Quote Link to comment Share on other sites More sharing options...
TwistedCustoms Posted April 5, 2016 Author Share Posted April 5, 2016 Frosty.... I'm multi tasking too many things. After re reading your post I see the operative term is "grind" the primary point, not forge. I'm a little slow on the uptake but I get it. Good info, Thanks. Thank you Rashelle. I just posted a correction regarding my mis-reading of Frostys post. I got so hung up on the idea of forging the barbed point I had tunnel vision. Grinding the primary point makes a lot more sense. Quote Link to comment Share on other sites More sharing options...
Recommended Posts
Join the conversation
You can post now and register later. If you have an account, sign in now to post with your account.