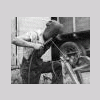
territorialmillworks Posted January 19, 2015 Share Posted January 19, 2015 This forge started out as a N/A 3 burner 5"H X 11"W x 16"L" brick pile forge. It worked well in that I could reconfigure the soft fire bricks for larger work like scrolls and bowls. I tried several different styles of burners but they ran rich trying to get the BTUs I needed. This led to building another ribbon burner. The burner face is 5" X 8" with (20) 5/16" metering tubes made from steel brake lines and brazed into the baffle plate to insure no leakage. The air flow is controlled by a butterfly valve which gives a more linear adjustment than a ball valve which gives a proportional adjustment. This makes tuning more accurate and a lot easier. The mixing tube for injecting the propane into the air supply was made from a brass nipple that was plugged and drilled with (3) 1/16 inch holes. The fitting was marked so that it could be oriented to face upstream when screwed into the 2 inch air supply pipe. It was at this point that I screwed up. I had inserted the mixing tube down stream of the butterfly valve. The back pressure from the valve caused the gas to collect and exit from the intake baffle on the blower. Simply put, the gas has to be injected upstream of the valve yet still far enough away as to get a good mix before entering the burner plenum. Glad I didn't have to learn that lesson the hard way. This burner will run on 1 to 2# PSI. But I found that setting the regulator at 5# allows for more precise control using the needle valve. The regulator, needle valve and butterfly valves have reference marks which helps when first lighting a cold forge. The forge takes about 5 minutes to warm up before fine tuning the gas/air mix. Results: 20 perfectly neutral burner flames with absolutely no dragon's breath. Forge welding without flux, quiet operation and a lot less gas. The large flame front really helps when working on large pieces. Quote Link to comment Share on other sites More sharing options...
SJS Posted January 19, 2015 Share Posted January 19, 2015 Sounds fabulous, rock on:-) You gonna start making them for all your friends right??? ;-) Quote Link to comment Share on other sites More sharing options...
John Ditt Posted January 19, 2015 Share Posted January 19, 2015 Thank you for the research and development. Quote Link to comment Share on other sites More sharing options...
ironwolfforgeca Posted January 19, 2015 Share Posted January 19, 2015 ?? looks like the top part can be lifted higher & more bricks can be add to forge for Lg stuff am I seeing that right & if so is there some kind of holding track or something to hold the top lid up wile adding bricks ??? I am looking to build another forge for big stuff soon witch can be adjusted size wise looking for Ideas :) Steve Quote Link to comment Share on other sites More sharing options...
ThomasPowers Posted January 19, 2015 Share Posted January 19, 2015 Are your upstream and downstreams referring to direction of air flow? "down stream of the butterfly valve": to me this means between the butterfly valve and the burner plenum and I don't see how the gas then gets upstream through the butterfly valve to leak at the blower? Also where is the exhaust going if you have no dragon's breath which to me includes a neutral burn exhaust gasses and not just rich burn occurring outside of the forge? Quote Link to comment Share on other sites More sharing options...
territorialmillworks Posted January 19, 2015 Author Share Posted January 19, 2015 The forge is bolted to the table. The left side has an 8" piece of 1 1/2" square tubing welded to each leg. Setting in each "pocket" is a piece of 1 1/4" tubing which is welded to the frame of the roof. An 1 1/4" piece of tubing is welded between these 2 pieces setting in the pockets. A small bottle jack under this cross member allows the roof to telescope enough to rearrange the bricks. The genesis of this idea goes to Frosty from a post several years ago. You're right Thomas,....never could get that righty tighty thing clear in my arthritic brain. What I should have said was that I originally placed the gas metering tube between the blower and the butterfly valve. The partially closed valve restricted air flow to the point where the air/gas mix backed up and escaped from the blower intake dampener. Relocating the metering tube midway between the valve and the plenum eliminated the problem. Properly tuned ribbon burners provide a complete fuel combustion and eliminate any visible dragon breath. Quote Link to comment Share on other sites More sharing options...
ThomasPowers Posted January 19, 2015 Share Posted January 19, 2015 ok that clears it up for me! One of my "intro to smithing" lessons is to wave my arm in front of the forge burning the hair off it to show them that the "dragon's breath" is still there even when you can't see it---impresses the newbies. (Though I'm waiting till one of my Dr's notices that there is a curious pattern in my arm hair...) As for upstream and downstream I think of it as if you tossed a "chip" in the water which way would it flow---downstream. I still have been known to twitch my fingers figuring out right and left---I write with my right hand and so holding an invisible pencil.... Quote Link to comment Share on other sites More sharing options...
Recommended Posts
Join the conversation
You can post now and register later. If you have an account, sign in now to post with your account.