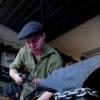
Gundog48 Posted June 15, 2013 Share Posted June 15, 2013 This is what I've been up to today, made some wall hooks! These took me 30 minutes per hook which I hope to speed up with a little practice, I'm thinking countersunk brass screws to attach them to the board (which was a piece of cheap timber which needed a load of sanding, may get some better stuff to save time!) or I may have a go at forging some nails which would be a lot more traditional and may make the flat area look a lot nicer! Quote Link to comment Share on other sites More sharing options...
SoCal Dave Posted June 15, 2013 Share Posted June 15, 2013 Very nice. Uniform shape to the hooks and nice smooth scrolls. Quote Link to comment Share on other sites More sharing options...
Frosty Posted June 15, 2013 Share Posted June 15, 2013 Looks good, nicely matched and well formed. I found punching for the counter sink before punching or drilling the screw hole works very much better than doing it second. I very much prefer screws for working hooks, nails, especially hand forged nails WILL work loose. If however you twist the nails they will hold longer, they'll still work loose but will hold longer. OR you could clinch them on the other side of the mounting board, that works nicely. Good inexpensive lumber for projects like this are shipping pallets, they're often high quality hard wood, oak, maple, etc. and sometimes tropical hardwoods like teak and such. They ca be a PITA to clean up but usually look very nice as backing boards. Watch out for oil stains when you pick pallets, oil and chemical stains can be invulnerable stains, sometimes hazardous. Frosty The Lucky. Quote Link to comment Share on other sites More sharing options...
Gundog48 Posted June 15, 2013 Author Share Posted June 15, 2013 Thanks for the input everyone! The wood was in the same sort of condition as those used on pallets, but I'm fairly certain it's a softwood, I think it's supposed to be used on fencing. Either way, it was cheap and did the job- made it easier to sand down I guess! I burnt it and sealed it with teak oil. Considering the hooks are only held in by one screw, I think a good tight screw would be the best option- I can get brass ones rather cheap. Although I was thinking of cheating and using a nail but dropping some epoxy into the hole to hold it in place. I have an almost infinite supply of Plexus which is unbelievably strong, so that could be an option to make sure it stays tight! Quote Link to comment Share on other sites More sharing options...
BIGGUNDOCTOR Posted June 15, 2013 Share Posted June 15, 2013 If you are looking to attach them to a board, why not use a decorative rivet? Find someone with a planer, or jointer to knock the rough wood down first before sanding. In a pinch a belt sander with a rough belt will do the job too. Quote Link to comment Share on other sites More sharing options...
John B Posted June 15, 2013 Share Posted June 15, 2013 This is what I've been up to today, made some wall hooks! These took me 30 minutes per hook which I hope to speed up with a little practice, I'm thinking countersunk brass screws to attach them to the board (which was a piece of cheap timber which needed a load of sanding, may get some better stuff to save time!) or I may have a go at forging some nails which would be a lot more traditional and may make the flat area look a lot nicer! You could use round head black japanned screws or square head coach bolts to secure them, are the holes punched or drilled? Can't see any evidence on the pics, someone's got their finger in the way. Quote Link to comment Share on other sites More sharing options...
windancer Posted June 16, 2013 Share Posted June 16, 2013 Nice work on the hooks. The thirty minutes will go down as you do more work with them. Hooks are good because of all the skills you must use to get them from stock to hook. I usually make a batch of hooks once a month or so. Dave Quote Link to comment Share on other sites More sharing options...
Gundog48 Posted June 16, 2013 Author Share Posted June 16, 2013 I had a go at a different style today and managed to get it down to just over 15 minutes per hook! Still need to work on how I'm going to attach it- I'm going to get some brass screws, square headed bolts as suggested and try forging some nails and see what looks best. The first one I tried went a little wrong as the scroll wasn't uniform with the others, so I used it to replace a cheap plastic hook, I countersunk the hole and just used a normal screw with a black painted head and it looked pretty smart, so that's always an option! Quote Link to comment Share on other sites More sharing options...
Walnut Square Iron Posted June 16, 2013 Share Posted June 16, 2013 Nice looking hooks. Sometimes the fasteners can bring the project together. I find brass screws a bit soft and have had the heads tear up if the hole going into the wood is not pre-drilled to the right size. I just did some small projects recently and used round head screws(slot head), dinged up with a ball peen hammer. I heated them up, wire brushed and put some beeswax on them. The color almost matched the forged piece. Epoxy in the hole never hurts to give added strength. Quote Link to comment Share on other sites More sharing options...
Camero68 Posted July 2, 2013 Share Posted July 2, 2013 Good looking hooks, smooth and clean. Great work also on the twist. Quote Link to comment Share on other sites More sharing options...
bosox Posted July 2, 2013 Share Posted July 2, 2013 I was wondering. How do you guys achieve equally same curves on your projects that involves twisting and curving? Anyways, that is absolutely amazing. Quote Link to comment Share on other sites More sharing options...
Frosty Posted July 2, 2013 Share Posted July 2, 2013 There are a number of methods, my most basic is a chalk drawing on the table top. Establish how much stock you need, measure the bar, make the piece and measure what's left. This'll get you close to the right amount to use. Then cut a number of blanks. I twist first for a couple reasons: it really helps to control length, # of turns and makes correctional tweaks much easier. Second it makes for nicer transitions from twist to smooth piece. Forge any tapers and note beginning point and finish length. Turn finials and bend hooks. As a general rule do the thicker sections first. If you do the points and finials first the thin sections are a lot more likely to burn. Another method is to make a jig. there are some really simple ones using angle iron and round stock on, two each clamped in the vise gives you a die to turn two hooks consistently. This type jig is easily adjustable, loosen the vise and slide the rd. in or out. It also makes a nice bending fork. This type jig has as many uses as your imagination can come up with. Of course you can do it all by hand and eye, but it takes practice, sometimes LOTS of practice. <grin> Frosty The Lucky. Quote Link to comment Share on other sites More sharing options...
bosox Posted July 3, 2013 Share Posted July 3, 2013 Thanks for explaining Frosty. That's very helpful. Now I understand. Honestly, I am not good in anything about forging but I really find it very interesting. Curving and twisting seem to be a tough job for me. Quote Link to comment Share on other sites More sharing options...
Doug_ Posted July 27, 2013 Share Posted July 27, 2013 Nice Hooks Gundog48 , Very Cool twist . :) :) Quote Link to comment Share on other sites More sharing options...
Recommended Posts
Join the conversation
You can post now and register later. If you have an account, sign in now to post with your account.