

rawtiron
-
Posts
203 -
Joined
-
Last visited
Content Type
Profiles
Forums
Articles
Gallery
Downloads
Events
Posts posted by rawtiron
-
-
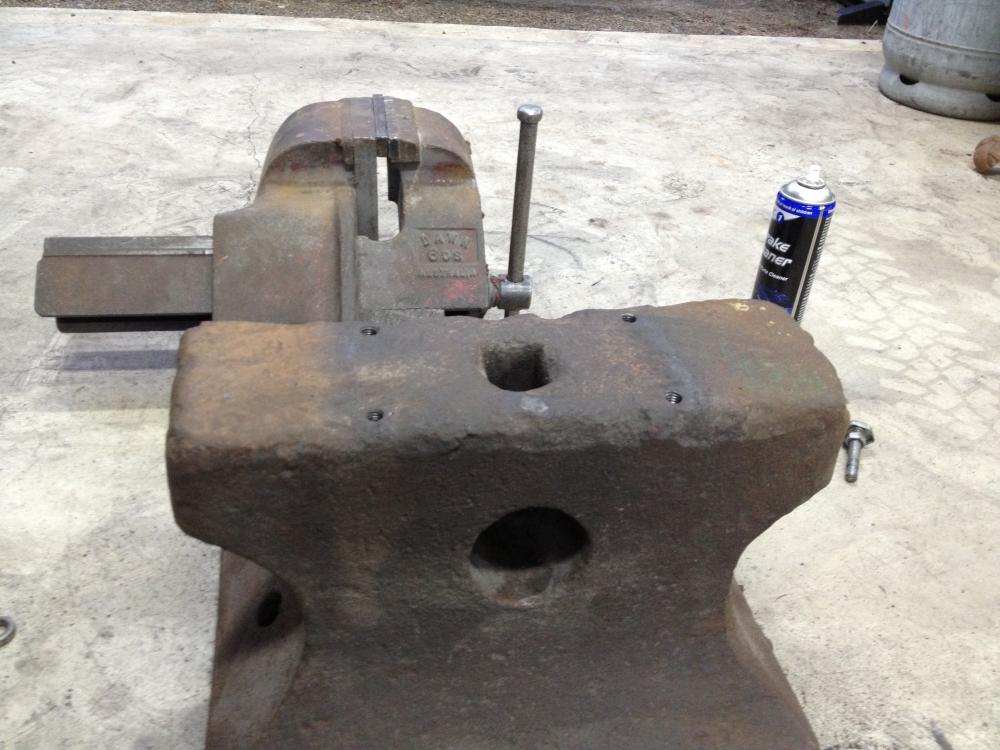
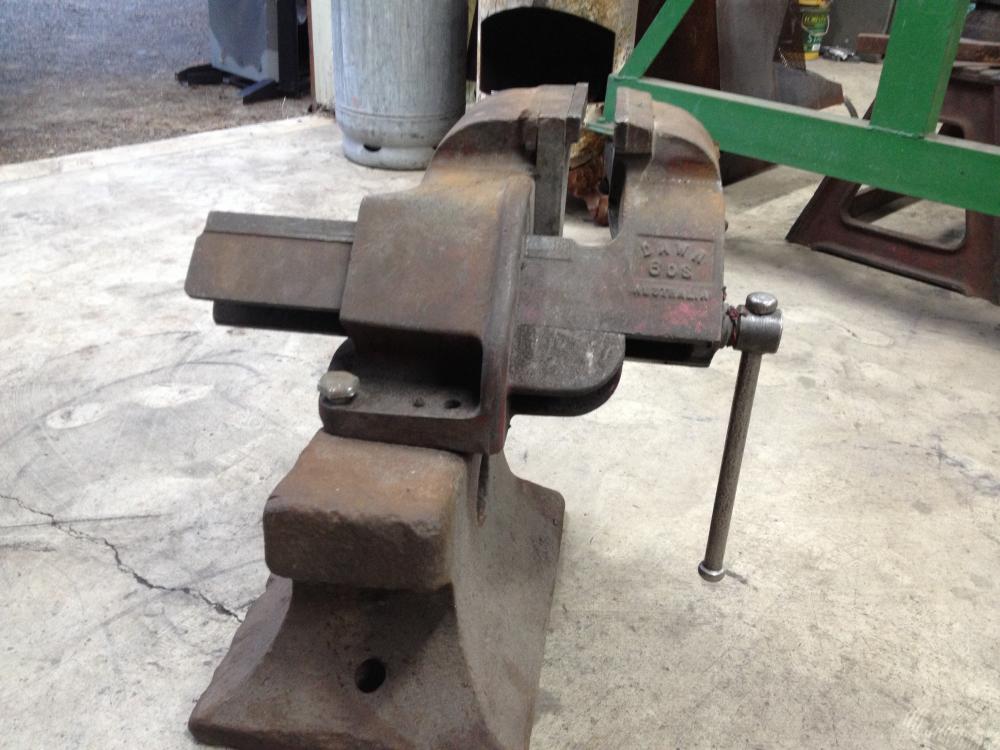
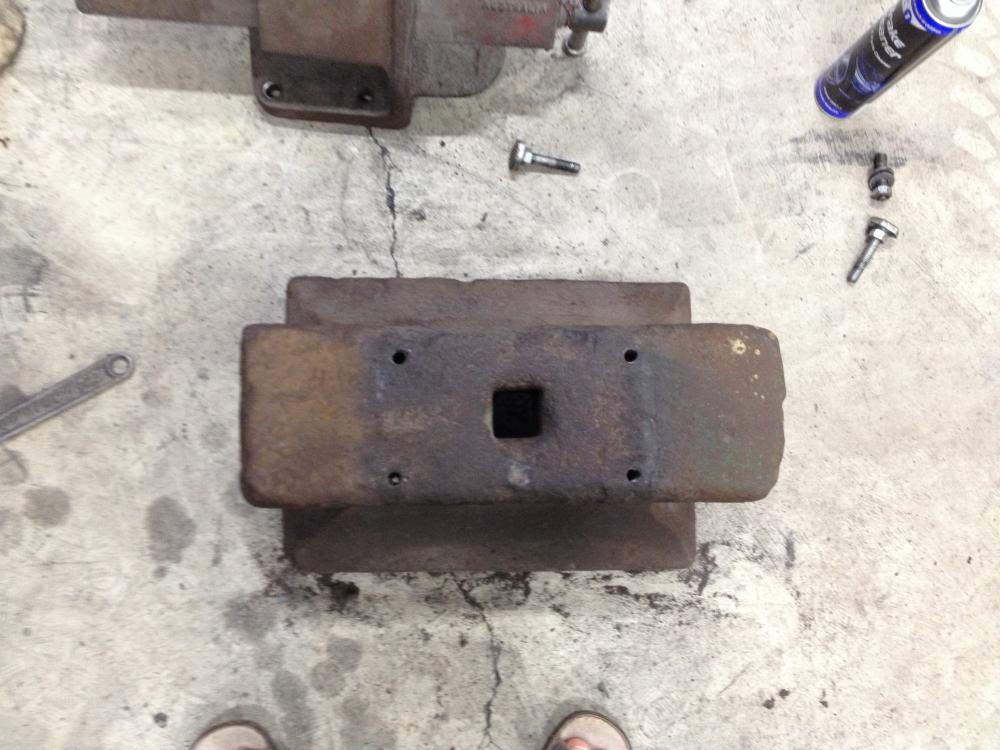
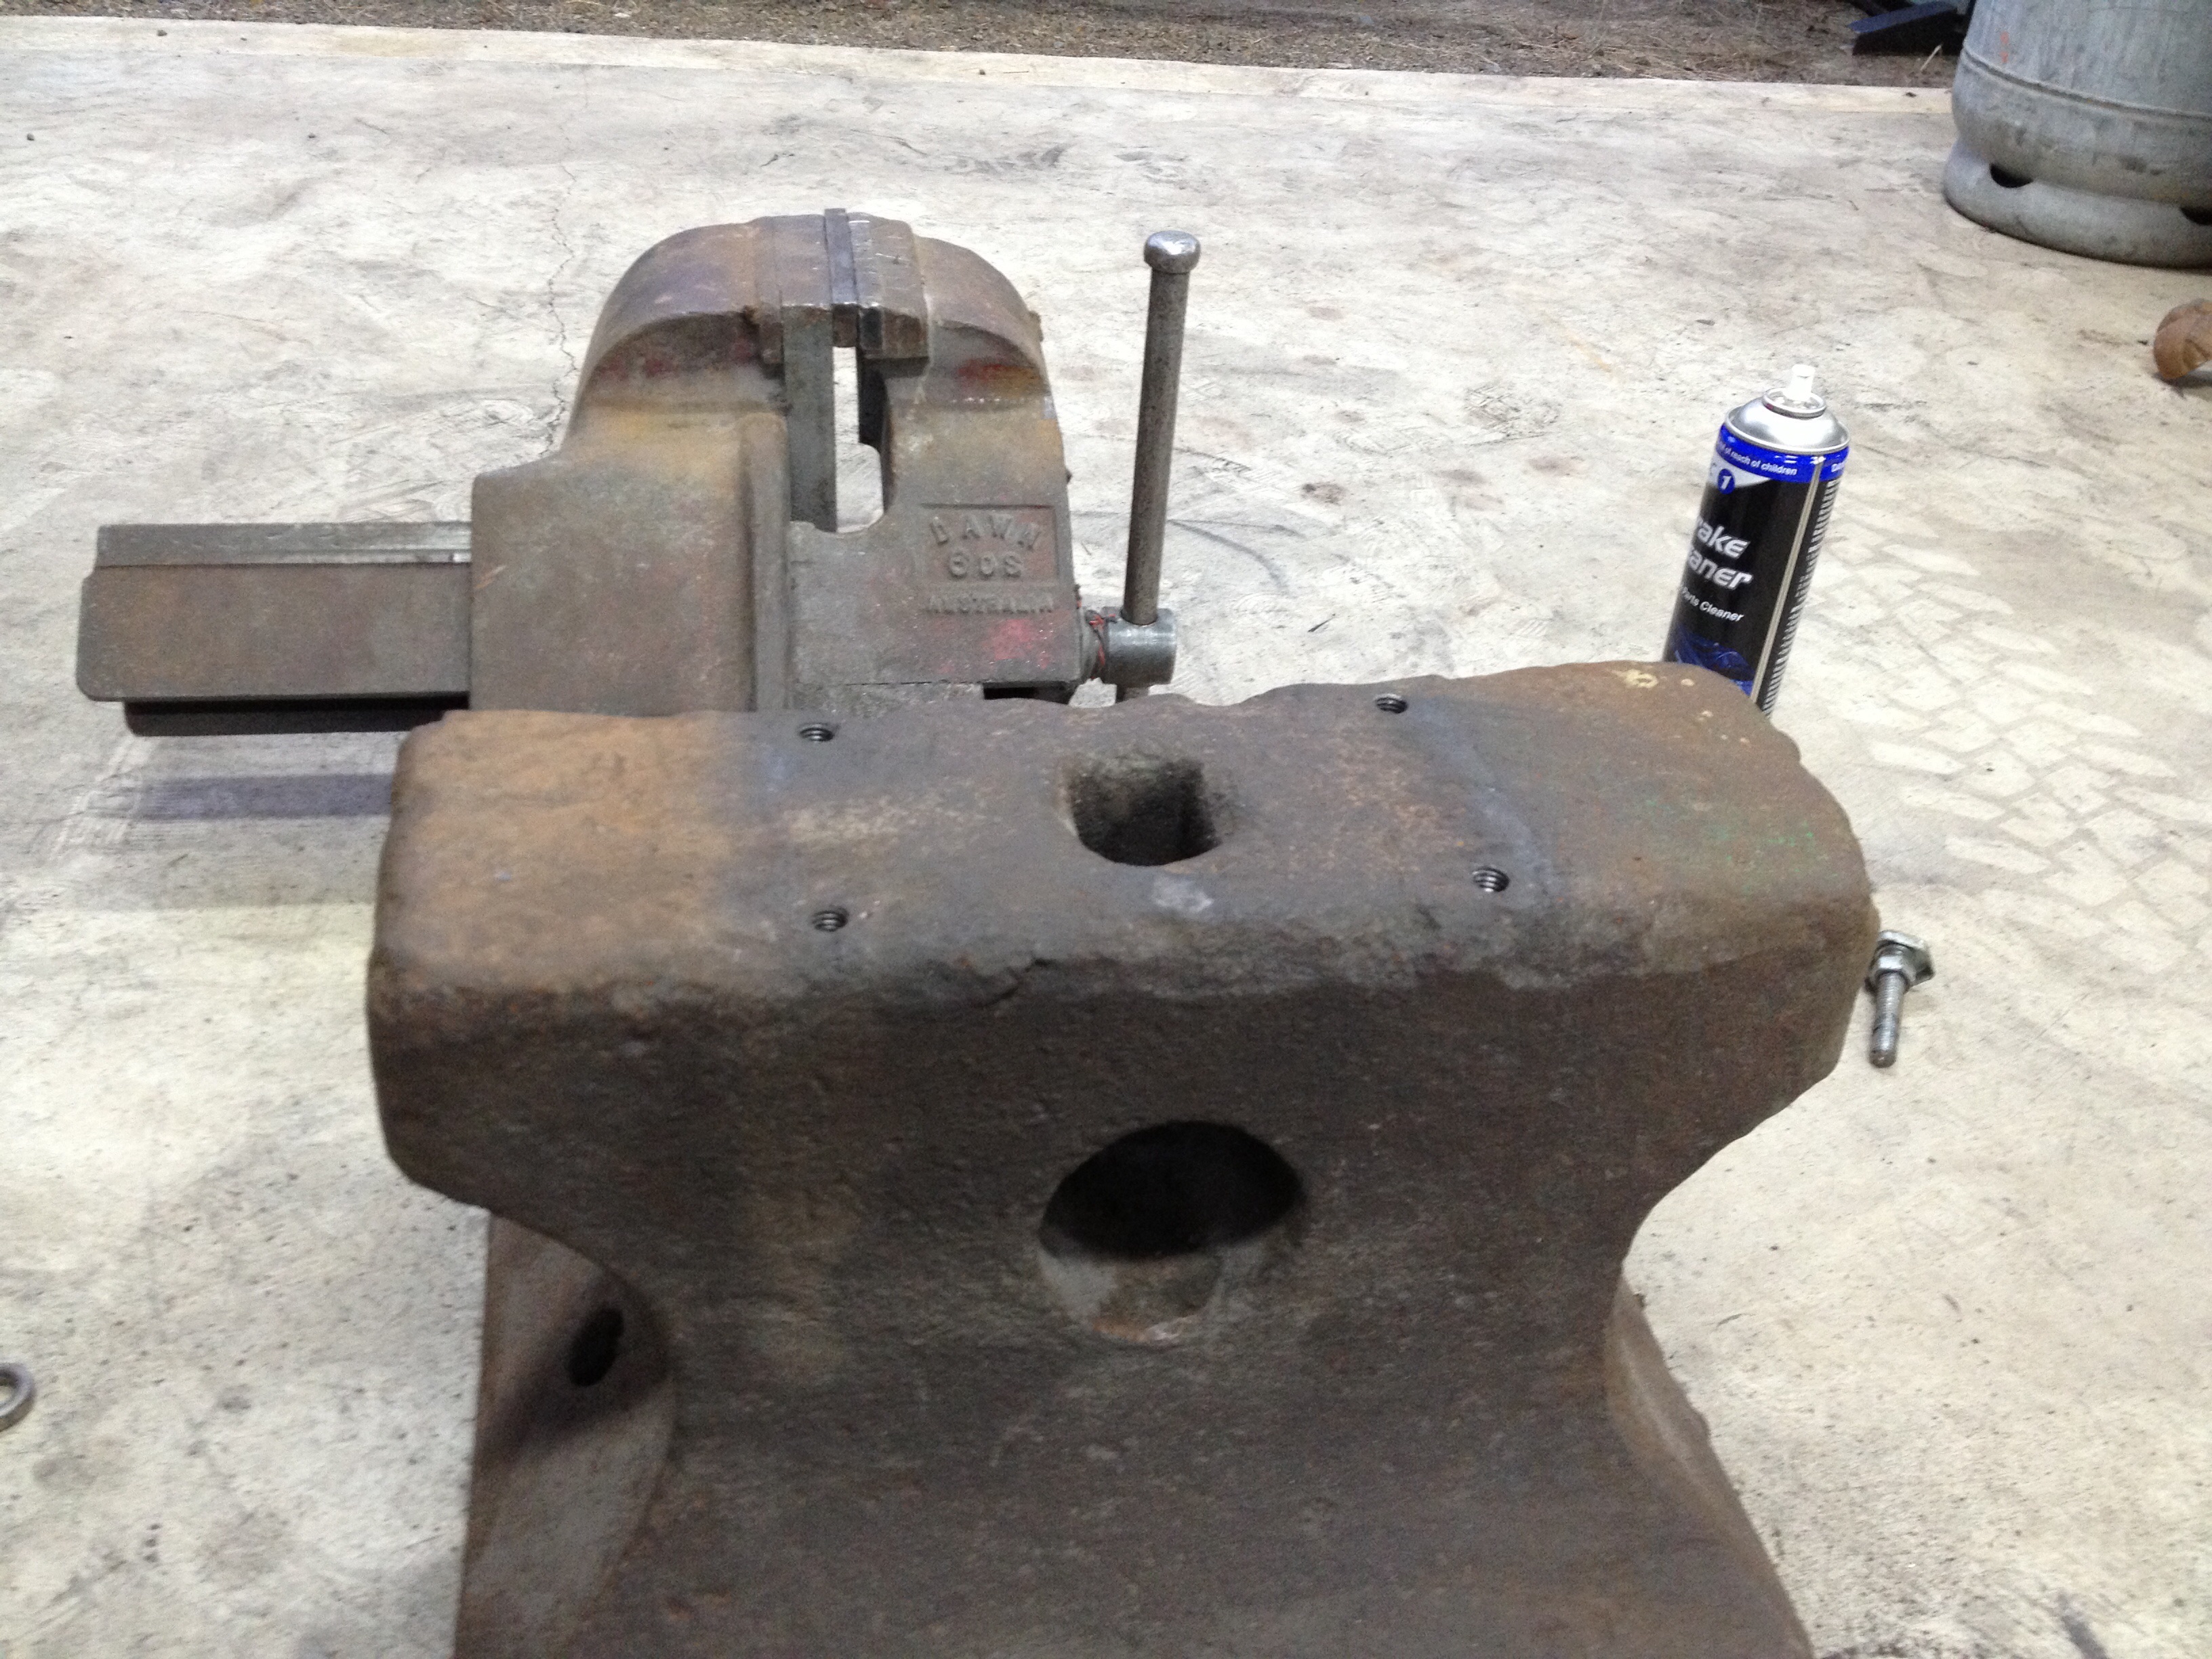
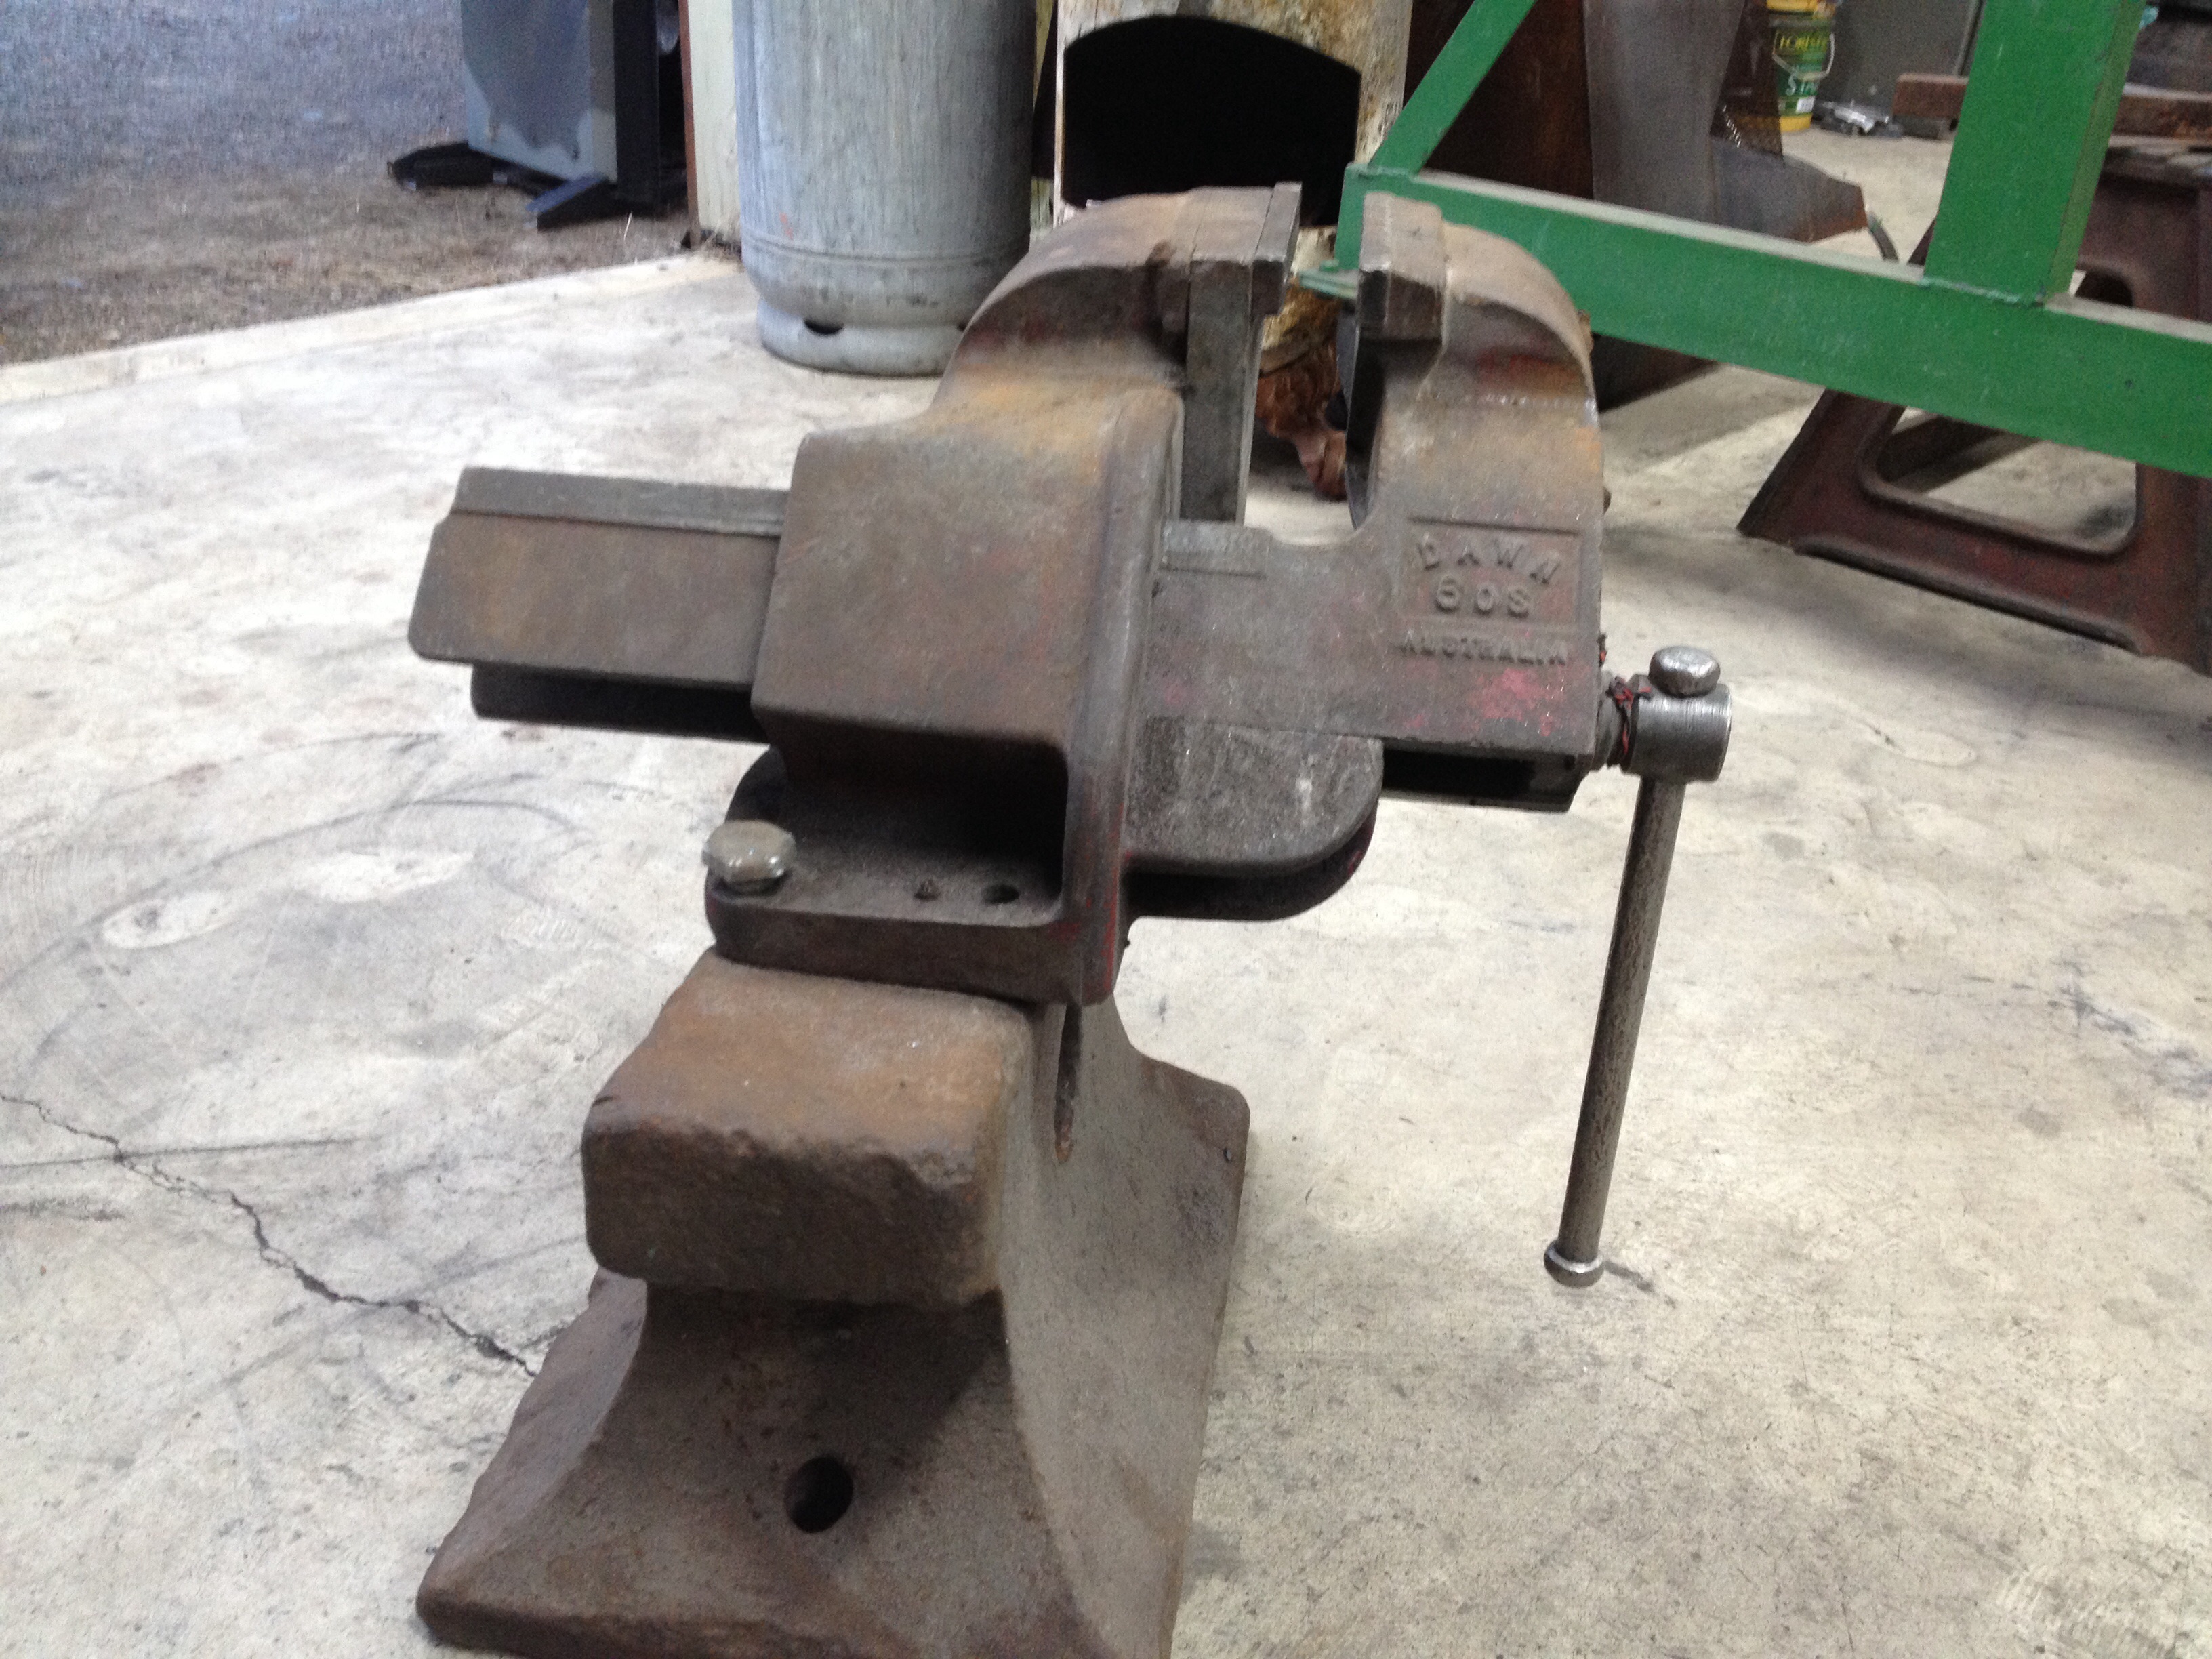
I picked this up a year or 2 ago for $150. Some cleaver person decided to mount a vice to it!
I can't see any markings on it and it is very chipped/pitted.
Any info would be appreciated.
Jason
-
It's just a bell housing with a shaft and 2 pulleys.
Dads not too keen on giving up the other one with the clutch setup.
He does have other engines of that size that have clutches and gearboxes, so I'm going to see what I can adapt as this housing has the holes in it for a release fork.
This came off a wind rower or combine and they had a lever to tension the belt which might work too.
Do you have any photos of the flat belt setup Alan?

-
Picked up the engine today, turns out its a 55hp.
Finished cleaning the tup up and refitted it to check the clearances, 0.009"- 0.011" with a feeler blade up the side, throughout the bore, top and bottom of the tup, without the guide wedge in place.
And the piston has 0.016".
Seems good for the 0.001" per inch rule.
Jason

-
Thanks guys.
I found this article just now.
http://www.olddominionblacksmith.com/uploads/forged_rockdrill_bits.pdf
Just heading out to practice my one handed golf swing.
Jason -
That's great, thanks everyone.
So if the bits were feet long, how was this used?
We're the forged tips attached afterwards?
Jason -
I picked this up with some power hammer tooling last month.
The guy gave this one to me and has several others like it in different sizes, larger then this.
It'll probably be obvious once someone id's it.......
Any information would be appreciated.
Thank you,
Jason

-
How are you holding up over there Alan?
Looks like you're going to need to crank the fire up....
Jason -
Sorry to hear that Alan, I was oblivious to it all over here.
I've just been online to check it all out, bit of a mess you've got!
You certainly appreciate having insurance at times like this.
Jason -
Here's what I've got.........
Flywheel has 105 teeth
Motor gear has 21 teeth
105 / 21 = 5
5 x 150 bpm/rpm (as per that good blokes spec sheets) = 750 motor rpm
Sound right? I think so.... -
The motor plate looks to have been removed a long time ago, but I'll have a measure up and see what I come up with.
I'm a fair way off getting all this set up as I have a pile of hardwood poles in the way, to be used on other projects around the property and some earthworks to be done, but it's good to get everything together and ready for when the time comes.
Thanks,
Jason -
Looks like I can get that hyspin 100 here ok.
I've sent Mike an email regarding his engine so look forward to hearing from him.
Bit of an update.........
I spoke to the 2nd owner of the hammer the other day (I bought it off the third) and he has the motor mounting plate and is looking for the original manual.
He put a tender in for it when the Napier Hatbour Board closed their workshops, it was used for repairs to the dredge creating the harbour itself.
He said this was 25 odd years ago and he used to have it sitting on display in his shed, then parked it outside when the shed was used for other things.
So it's sat idle for a long time.
I have also scored a 1960s 47hp International Harvester petrol engine from my father who collects this stuff (IHC only).
It was used to power a combine harvester and is fitted with a large V belt pulley.
It's got a stuck valve and needs a few minor things to get it going by the look of it and its fitted with a radiator and 12v electric start.
Any idea what rpm the electric motors run at?
Just to give me a starting point.
Jason -
The tig brazing worked a treat!Jason , I would put in a disk to cover the 'whole' plate, to the upstand, yes you would need to make two holes to go over the two existing holes. I recon that your existing piece is brittle so as with glass if you have a hole in it where the edge of the hole isn't smooth when you stress the glass it starts to 'crack' at a 'chip/fracture
Thanks Ian
-
Maybe I've got this wrong/misunderstood Ian......
My first thought when you said 'disc' was to make it slightly smaller dia than the cover and tig braze it on the outside and drill the holes through it and blend it in. I've got up to 6mm plate lying around.
That would not work with the thickness half the dia rule.
Can you please explain it further for me.
Thank you,
Jason -
Jason, thanks on the reply, for the repair that you have done I would have added another disk on top and welded it all round with 'bronze' wire as an effective braze! I love the 'bronze' as you use a tig torch but get the usefulness of brazing using a wire that melts and flows real easy.
Hi Ian,
I'll give it a go in a few days when I'm back out there, just been focused on the crack!!
I've got some silicon bronze filler wire there.
So still preheat it etc? And as far as the disc goes, 2-3mm thick?
Thank you,
Jason -
No problem Ian, we may all learn something here.Alan, not wishing to hijack the thread but here we are! The 312 wire? I've had a roll lying around and never had a use for it? I've always tough of the 309L as the 'go to wire' how much better would you rate the 312?
Sorry for the small side track Jason, even though I don't have an alldays I've enjoyed this thread.
A friend of mine who is a fitter/welder/turner (I am none of these) introduced me to it a few years back and I've only used it a few times. (Welded some corten legs to a very tough plough disc for a brazier and it flowed and welded beautifully)
I've never welded cast iron before but it seemed to ok. It still cracked a little but then was ok when I went back over it and has held well for what I'm needing as it only holds a handle to turn the valve (and keeps it original). I'll drill and bolt it, if the weld ever fails.
I did weld the other rear cover on the hammer (opened up a crack as I loosened the bolts) but that kept cracking through the weld as it cooled but has held on the end ok. I preheated it an post heated it.
Happy New Year!
Jason
-
Wondrous stuff that 312, I use it for repairing all sorts.
I initially used Castrol Massey PH which I presumed stood for power hammer. But they no longer make it. So I have subsequently been using 46 grade hydraulic oil. I use 32 in the Reiter hammer and the 46 which is what I use in the telehandler and forklift hydraulics. I can't remember whether it is ISO 46 or sae 46 of the top of my head. I am away for a few days and will look it up when I get home.
Maybe Ptree will advise if you are lucky.
To add further confusion I have just remembered I also had Hydraulic oil with a
90 or 100 number. Aargh!
AlanI use Airvane 2100 (e201) which was a match for the vintage oil spec on the side of my 300 . Ill go out and get that spec for you as well when im next in the forge.
Great, thank you.
It looks like that 46 grade oil is readily available here but I'll wait to hear from you.
Happy New Year!!
Jason -
Thanks a lot to you both, I feel bit easier about all now.I would agree with Alan . It looks to me like you have a clean hammer.
There is no point fiddling if it ain't broke....
I cleaned up the bore of mine with 200 grit sand paper to remove lose rust and then washed the rust dust away with thin oil and cleaned the surfaces with rags . Did the ram and the front bore and then took the back cylinder to dead bottom and did same on that giving it a good wash through with thin oil.
You can also walk the drive wheel around (literaly standing on top of it) to get some oil pumped to all the bearings before you start it up properly.
I replaced all of the valve springs on mine.
If you manage to free up the bypass valve without damaging it you are doing a better job than me. The valve is very usefull for giving you low powered blows as you can run the machine at partial power ( partial vaccumm) great for punching flattening and the like.
Make sure that you measure the dead bottom depth of the ram as it sits Down upon the wedge . I gave mine a coupe of inches safty margined when working out the anvil and hammer mounting heights. I also put a safty line on the ram with slitting disk at 1" above dead bottom as there was no mark on the ram to indicate this. Some hammers do have a mark.
Good luck with the instilation, these are great hammers . Your 200 is certainly more modern than mine as my one has manual oiling.
I would really advise exhausting the air out of your building as is is so unbelievably noisy if you don't ( hard to think kind of noise).
There's is no movement in the bearings that I can feel with the pry bar under the flywheel.
The decompression valve was rusted solid so I drilled out the pin on the handle and managed to work that almost off and the pin broke, so I tigged it back on with 312 wire. So far so good.... I then heated up the housing and freed the valve. It all cleaned up ok after that.
Here's some photos of the tup clean up.
I scraped it like you suggested Alan which got the looser rust off and then went over it with a brass wire wheel which made a huge difference then a light sand. There are some deeper rust pits in (not unexpected with what it looked like to start with) but I'm happy with how it's coming along.
What grade oil do you guys run in these?
Jason


-
Thank you again Alan.
Do you think it's worth removing the piston and big end bearings?
It all looks so clean (can't see the crank journal of course) and from what I can see of the rings through the valve at the back, they are clean also
Or is it best to check it all anyway? Just in case...
Jason -
Do you have the bigend torque settings Alan?
Still not sure if I need to delve into that area or not, did you see my post/pictures above?
Thank you,
Jason -
good site re alldays etc.
http://home.tallships.ca/mspencer/shop/alldays2.html
Thanks Bob, I found this site recently too. Some good info and pictures.
Jason -
Thanks for that info guys, I'll look into it further.
My thoughts for running a combustion engine were to also power a large compressor for the shop when needed.
I'll look at all avenues though, as I'm a while away from powering it up.
I pulled the back plate off and removed the rotary valve this morning.
I see what you mean by the engineering Alan, it's a work of art!
I used a bar and pins to turn the flywheel as I had the piston soaking overnight, and it took 2 revolutions before I could turn it by hand.
The oil pump works great too.
There is some grey matter around the main bearings on top of the crank area which may be from the thrust washers? Or dropped down from the piston/bore?
There is rust around the main bearing end cap where the gasket has failed over many years.
I'm wondering how far to strip this down, there seems to be no play anywhere?
The piston has a very slight amount at TDC and there is no wear lip in the bore, just what's looks to be a repair maybe to a pit/defect from when it was cast, it just looks shinier the the bore.
Both bores have light surface rust but the machining is coarser than I'm used to with car engines.
What's the best method of removing it? Light emery and an oil, which would mean the piston will need to be removed.
It seems to be more in the pits of the bore which I guess won't matter anyway?
The valve looks ok, just small pitting and stains from water over the years.
Let me know what you think.
How's that yellow snow going Alan?
Another hot day here.
Thank you,
Jason


-
And out it comes!!
I soaked it with trans fluid and turps, tapped the bottom of the tup back and forth and side to side, jacked and released till the fluid started dripping then tapped it on top with the sledge and a block of wood.
Flushed the mixture through it a couple of times and waited about 2 hours. Got the jack on it and away it went, so I moved it about 10mm up then down to free the suspected rust and out it came.
The bore looks good (a few vertical surface scratches) and as you can see the piston will need some work to the lower half.


-
Merry Christmas everyone.
A few more progress shots.
Both bores look in good shape.
The piston has some what I guess are casting imperfections in the top.
The tup is seized solid, I've had a 20 ton bottle jack on it with reasonable pressure but no movey movey.
Even whacking it down with a block of wood and a sedge it won't budge.
Its about 50mm (2 inches) above the wedge so I'm guessing it's either rusted in the lower part of the bore where water could've got in around the wedge nuts or jammed.
I've loaded it with penetrating oil so hopefully that frees it up or I'm unsure where to go with it.
Jason


-
That's an awfully nice looking hammer and you got tooling to boot and all at scrap value! You have got to start buying lottery tickets... that lucky star seems to have found you big time. :)
Hi Ian,
I paid a bit extra for the tooling but still very good value.
The guy kept the anvil and swage block and still has a pile of top and bottom tools.
I've spent enough at the moment so will see if he's still got them after the new year.
They were all sitting in a big box outside for years, but a wire wheel fixes that.
Jason


Hi from New Zealand
in Introduce Yourself
Posted
Hi, I live nearby.
Sent you a PM last night.
Just reply to that if you'd like to catch up.
Jason