Steeler
-
Posts
102 -
Joined
-
Last visited
Content Type
Profiles
Forums
Articles
Gallery
Downloads
Events
Everything posted by Steeler
-
[ They certainly are awsome and big. Are those brass pins peeking through the two halves of the hinges? I'd like to see the doors that they are for. Thanks for posting.
-
Ornamental Ironwork drafting?
Steeler replied to Bryce Masuk's topic in Blacksmithing, General Discussion
Bryce, thanks for asking this question! As a relative beginner, the answers that address your question directly are very helpful for me. I don't intend to copy other people's work, but I may study it if I see elements that appeal to me. I find that I need a starting point for my design and the formulas for spirals and involutes adds to my options. I won't leave it there though. I can't seem to ever let things alone. I will change and modify the plan until I am happy with it and only then go to the forge. -
Thanks Dave. I didn't know that such a thing existed. I've been able to remove them so far by fiddling, picking and proding for long periods of time. I think with careful use of a broken tap extractor, a lot of lost time and frustration can be avoided. It's a good day when I learn something new. Steeler. :)
-
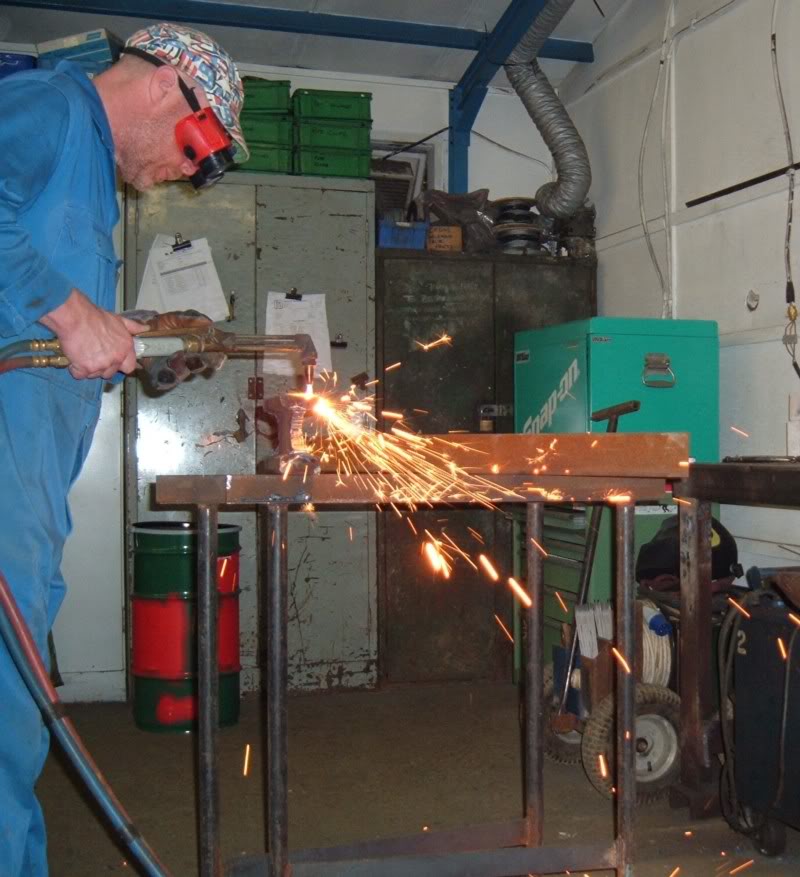
My second favorite toy. Also known in some circles as a "hot wrench" Steeler

-
Hey Jake, Thanks for the tips and photos about punching. It makes perfect sense to me and now I gotta try it out. I am a learner and punched my first hole yesterday instead of taking it to the drill press. That may not seem significant to those of you with lots of experience, but this 60 year old felt like a kid again with a new toy . Thirsty for knowledge,Steeler. :)
-
Pellethuntr, charcoal has been used for forging iron for centuries. I have been using soft wood charcoal that I have gathered or made myself and I can get welding temperature with it. Your results may be different according to your forge and air supply. Some brands of BBQ charcoal work well and maybe somebody that uses the product can give the specifics. I started the first fire in my home made forge in a ceremonious fashion. I started with an invocation to the spirits of fire and the patron saint of blacksmiths. Then I struck sparks with my home made steel striker on a piece of chert to get my charcloth and tinder lit. I progressed to a small wood fire and then pushed the charcoal up agaist and around it to get it going. This may be more info than you need, but it was so much fun, I just had to tell it. The way I look at it, my charcoal comes from my own labour, and small bits of wood to start the fire are plentiful everywhere, so being the independent and thrifty kind of person that I am, this is how I do it and my cash outlay for charcoal and starter is zip. Resourcefullness is an admirable quality. Steeler.
-
I live in the Cariboo Region of BC and have so far had no success in finding a reasonable source of blacksmithing coal here. Home Hardware can order in coal from Ontario that originates in West Virginia, but the shipping is $25 per 50lb bag! I have watched several long BC coal trains headed overseas (and hoped for a lengthy stop on a siding or a spill) but no dice. The feed and ranch supply stores here don't have a clue. If anyone reading this can help steer me in the right direction I would be very appreciative. Steeler.
-
Good things come to those who wait
Steeler replied to IanR's topic in Anvils, Swage Blocks, and Mandrels
-
I would like some ideas about how to make the best use of these two massive iron lumps. The 11.25” diameter round slug is flame cut out of 2.75” thick steel plate of unknown type. The rectangular piece is 4” X 8” X 48”. It is made up of 5/8” steel plate filled with cast iron. I can just barely lift one end of it. I have been toying with the idea of making a hardy hole in the slug to keep my anvil clear. What would you do? All suggestions would be appreciated. Serious, humorous, whacky or weird are OK. Steeler
-
I am building one of these for myself today and after seeing your photos I am simplifying the build. Thanks for posting. Pics to follow. Steeler. :)
-
Thomas, I was thinking about that myself. Thanks for the input. I'll stop thinking about it and do it. It could get uncomfortable hot if the fuel in the bin got lit up. Steeler.
-
Nice anvil. I like your stand for the support directly under the anvil and the half pipes on each side that provide clearance for long workpieces and space to plant your forward foot close to the anvil and avoid bending your back while you work. I think I will build a similar one. Thanks. Steeler.
-
Reefera4m, That's a good looking cut off hardy. On the bending hardy, I can imagine how handy the quarter inch holes and round horizontal bar would be. I left my tools to air harden after welding since I don't expect to be trying to work any cold steel on them. Time will tell me if they need to be hardened and tempered properly. Thanks for replying. Steeler.
-
Thomas, cheap? Me too but I prefer to call it "thrifty and resourseful". Making the most of what you have at hand is a definite skill and I suspect a common trait among blacksmiths. (one cheapskate to another) Steeler. :P
-
Stiletto anvil 25” long, 10.5” tall, 9” X 10” base Half inch thick face, 4” wide, 1” hardy hole, half inch pritchel hole Strong rebound and clear ring By the parting line on the base, I think it’s cast steel By the dividing line under the tail, I think it was forge welded on 124 stamped on the off side seems about right for the weight The serial number 21569 appears on the right foot below the horn The Stiletto trade mark on the off side is dinged up but still discernable This trade mark is the same as the old Stiletto Cutlery Co. and is now in use by Stiletto Tools that manufactures high end hammers and pry bars for the building trades Baker & Hamilton est. 1849 in California and once the biggest hardware distributer west of the Mississippi sold Stiletto merchandise. They also had a manufacturing facility. Did they make anvils? If not, who made my Stiletto anvil? Most likely makers from responses to a previous inquiry are Trenton or Arm & Hammer I’m thinking that there must be other anvils like this out there. All comments, guesses and factual info is most welcome Thanks for making this site so great. Steeler.
-
Wow those are great looking tools! I'm inspired. Steeler. :)
-
Thanks for the feedback. IanR, I got the idea for the fuel bin from this site. Very convenient to use. Bill Roy, I am a self taught welder and I have to grind most of my welds to make them look decent, but my stuff seems to hang together OK even with rough use. With more practice; I may not need to grind off so much in future. A front mounted switch to control the blower would be a big improvement. Thanks. I have visions of using a hand crank blower in future, especially if I do any demonstration work. I see myself sharing what I learn about this noble craft. IanR, Thanks for your comment. I have been gradually getting interested in smithing as the next logical step from welding and fabricating, and now I'm jumping in with both feet. It's gotten into my blood now and I look forward to learning everything I can about it. If this works out the way I think it will; I will be at it as long as I can still wield a hammer. Thaks guys. Steeler. :D
-
Cool! :)
-
That really is a huge chisel! Nice work. Once again I'm inspired. I am seeing more and more potential in good steel that is usually scrapped or discarded. Thanks, Steeler.
-
[it took some work to weld that stuff in the scrap pile into a working forge but it paid off. I fired it up for the first time yesterday on softwood charcoal with an old hair dryer for air and am pleased that it could reach welding heat. I was inspired to do this build by what I have seen and read on this site. Thanks to all of you that have contributed. Any comments, suggestions or criticisms are welcome. Steeler.
-
Let me think over your offer Paul42'. I don't like to make snap decisions. CurlyGeorge, I've tried 'em all now, and they work good. I have lots of experience with improvising, but having the right tool for the task at hand makes the work a pleasure. Can we ever have too many tools? Nah!! Rob Browne, I never thought about that. I hogged off the high spots from my welding with a really coarse cup grinding wheel without considering the need for a smooth surface. Thanks you guys. Steeler. :)
-
When I'm done with my brake drum forge for the day; I put a salvaged wok lid over the fire pot. When the oxygen under the lid is used up; the charcoal stops burning. Works well for me. I think that just about any metal cover that seals decently would work. Best regards. Steeler. :)
-
Hello, and thanks to all of you that make this site so great. I have been greatly encouraged by your advice and comments to get more involved in this noble craft of blacksmithing. I have made a few accessories for my anvil and would like to share a photo of them. The hot cut and 3/8" fuller are recycled, discarded excavator bucket teeth. The bending hardy has a base made from a 1" slice of RR track. Any comments, criticism welcome. Thanks again. Steeler. :D
-
Need ideas for R&R rail anvil unlimited rail!!
Steeler replied to Robar's topic in Anvils, Swage Blocks, and Mandrels
Thanks for posting that 'newbladesmith'. Lots of good ideas and info there.