NguyenHoang
-
Posts
20 -
Joined
-
Last visited
Content Type
Profiles
Forums
Articles
Gallery
Downloads
Events
Everything posted by NguyenHoang
-
Copper is harder to melt than I expected
NguyenHoang replied to NguyenHoang's topic in Copper Alloys
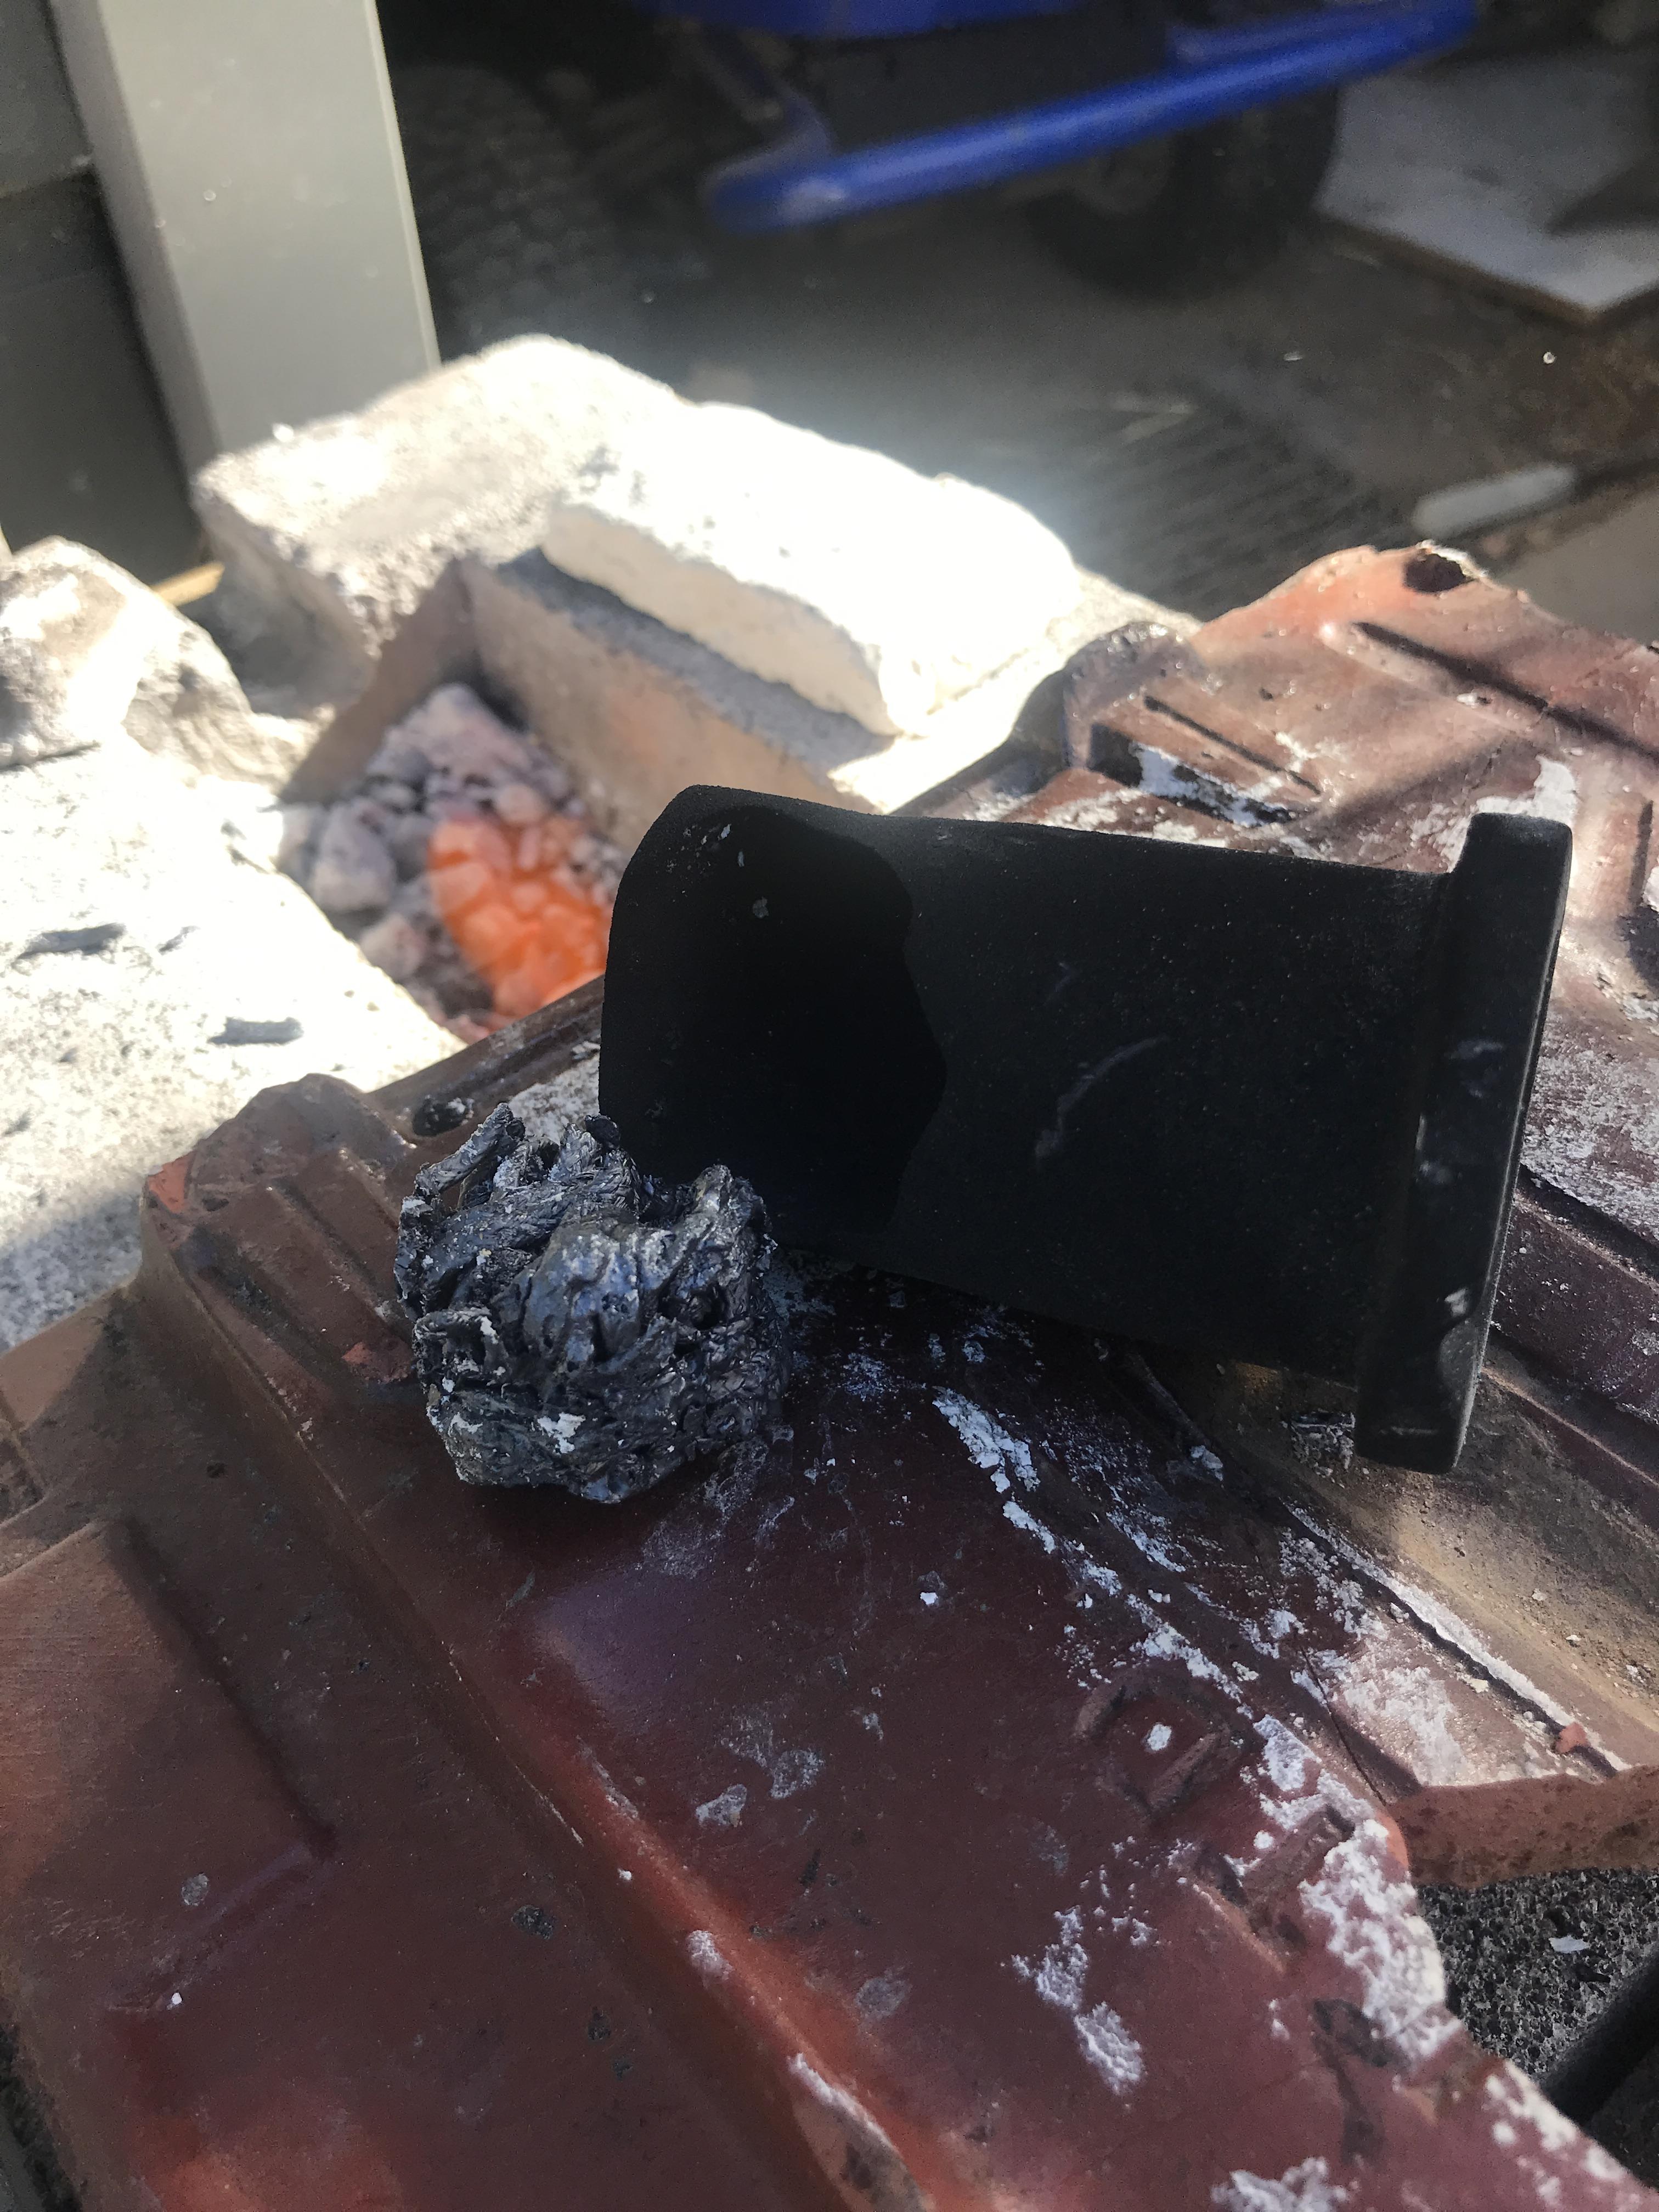
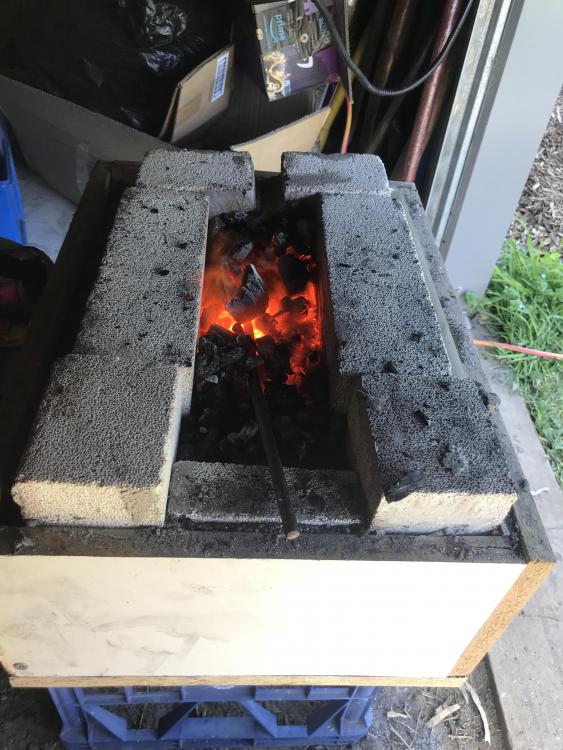
Yeah exploding crucibles was my main concern. The graphite crucible was heated slowly to remove any moisture, the little homemade ingot mould was twice fired and then slow heated as well. The forge (A JABOD) was converted to a 'furnace' with just an opening at the front and the rest surrounded by fire brick, just to keep the heat in and to stop anything from flying out (mainly charcoal, for what ever reason the charcoal I bought likes to violently explode). It was fun regardless, I am just curious about the weird steel copper baby that I created, I have no Idea what happened there. -
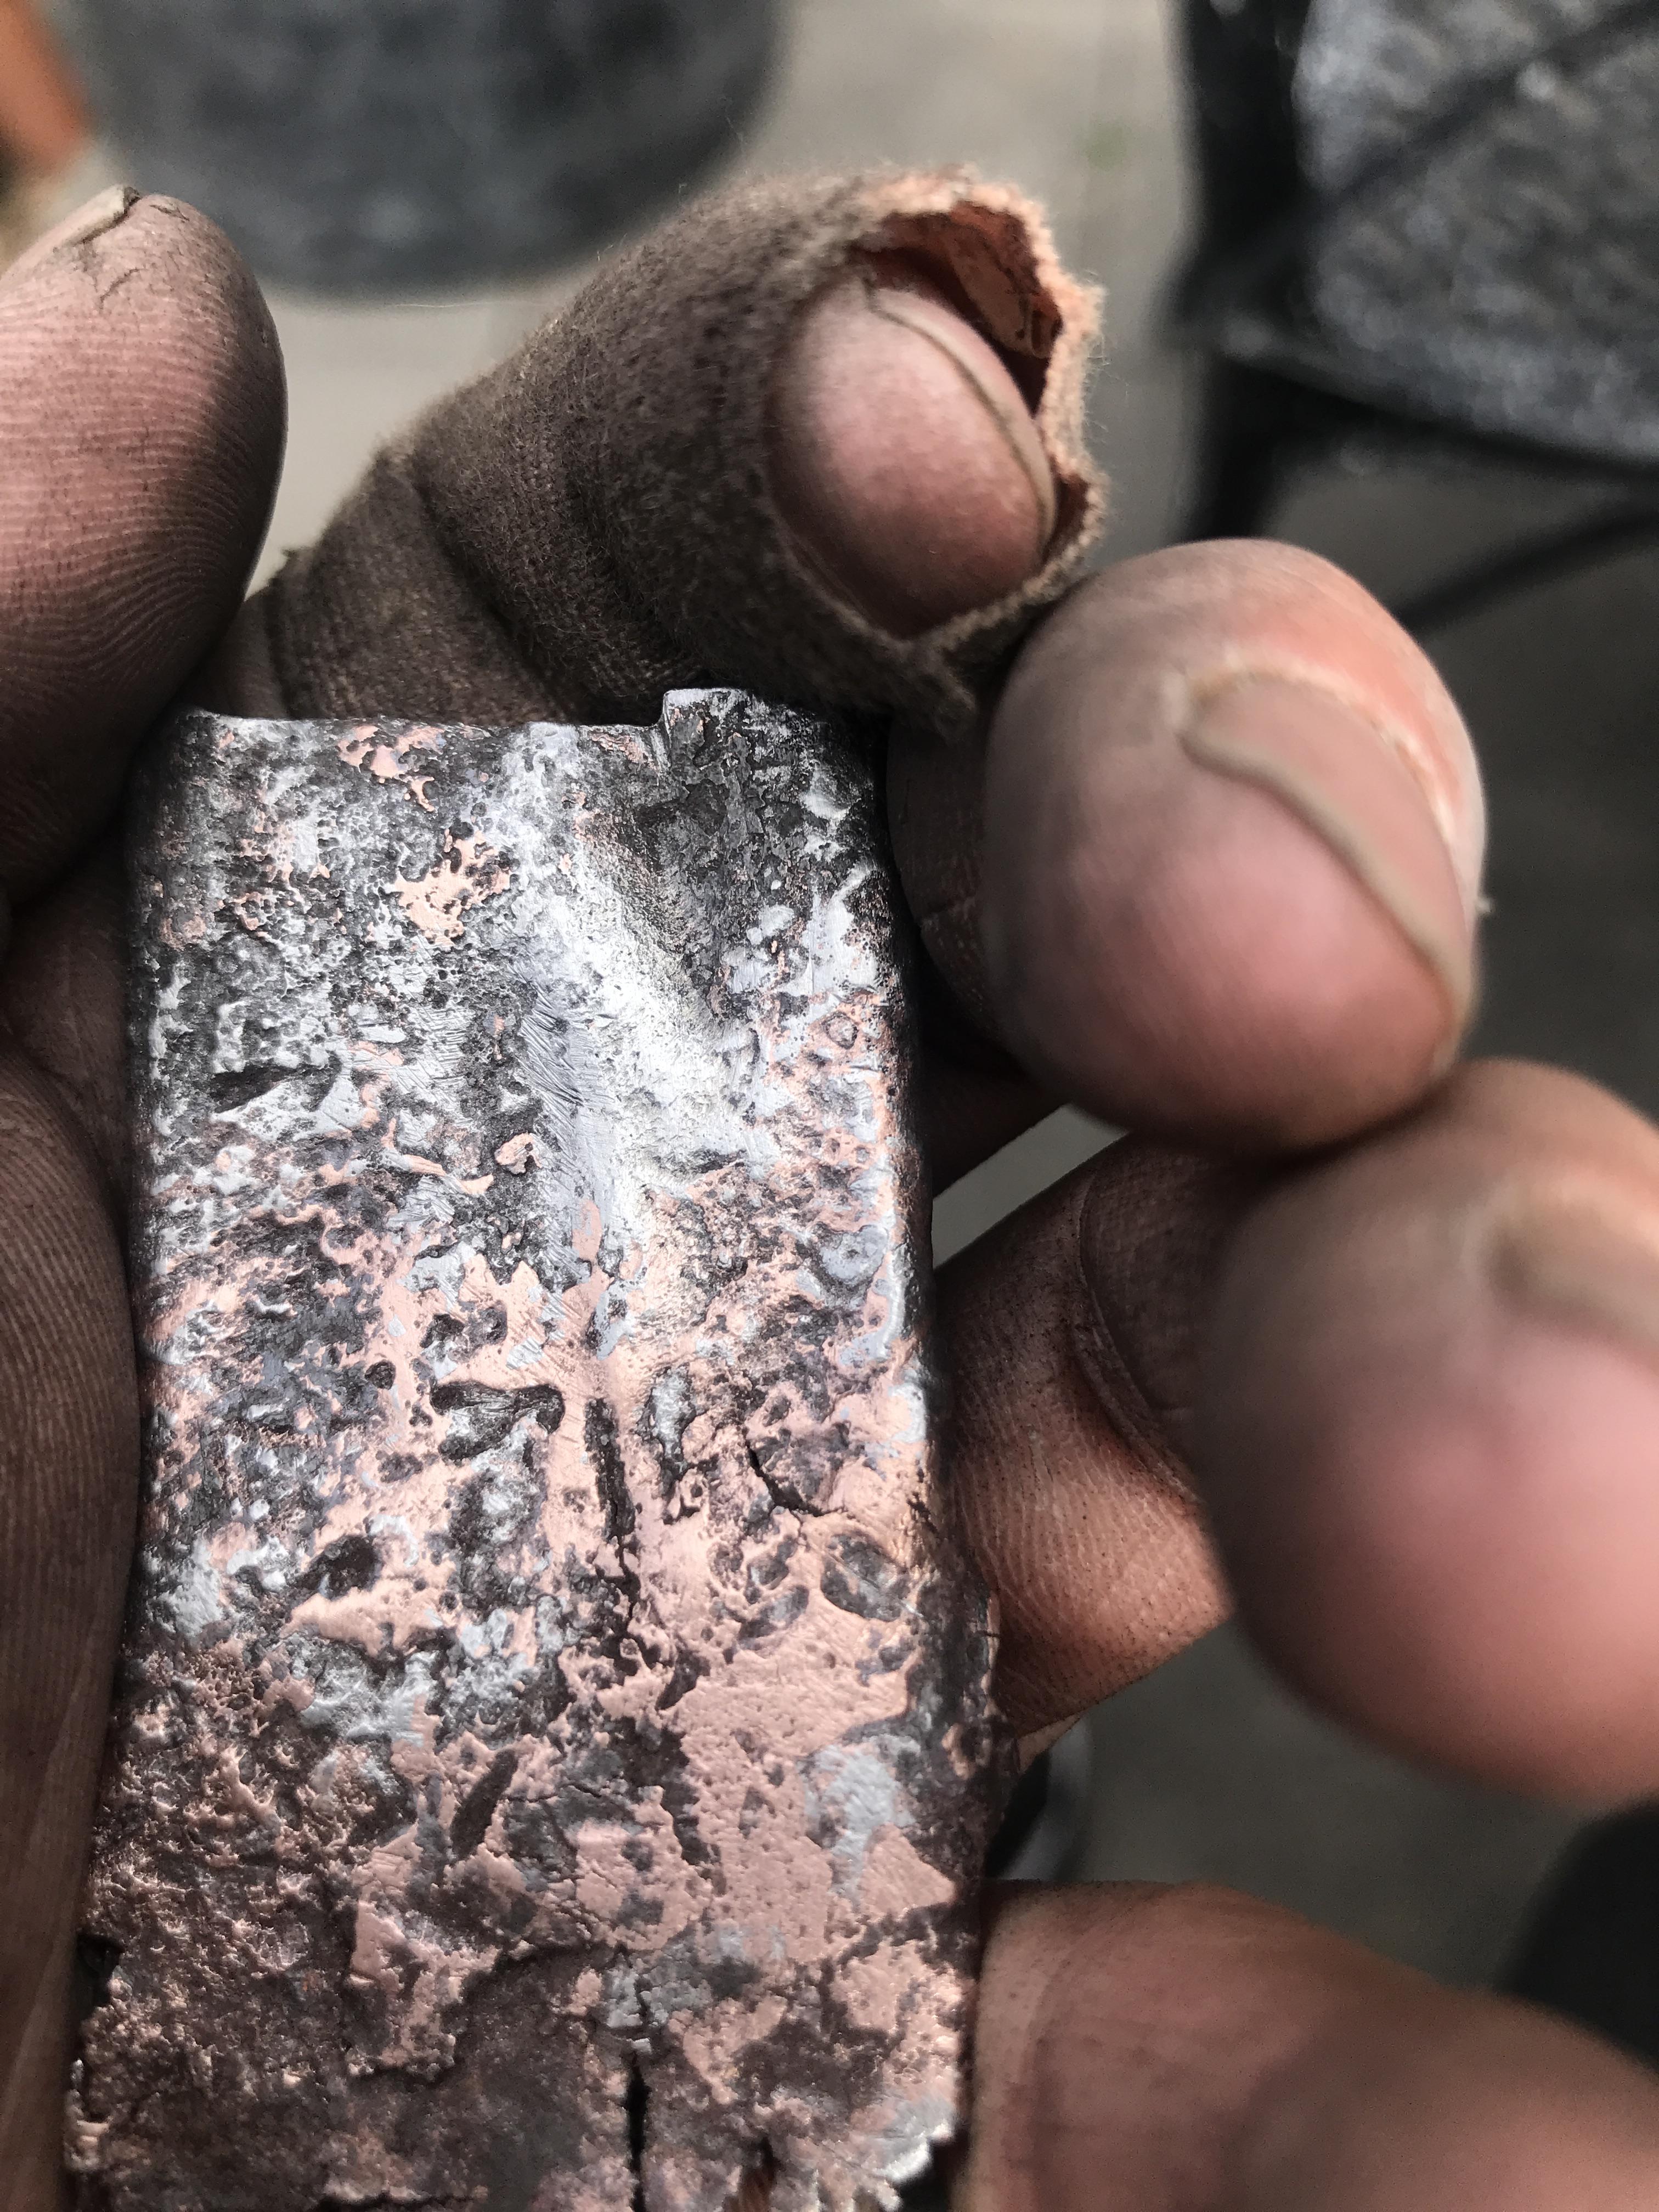
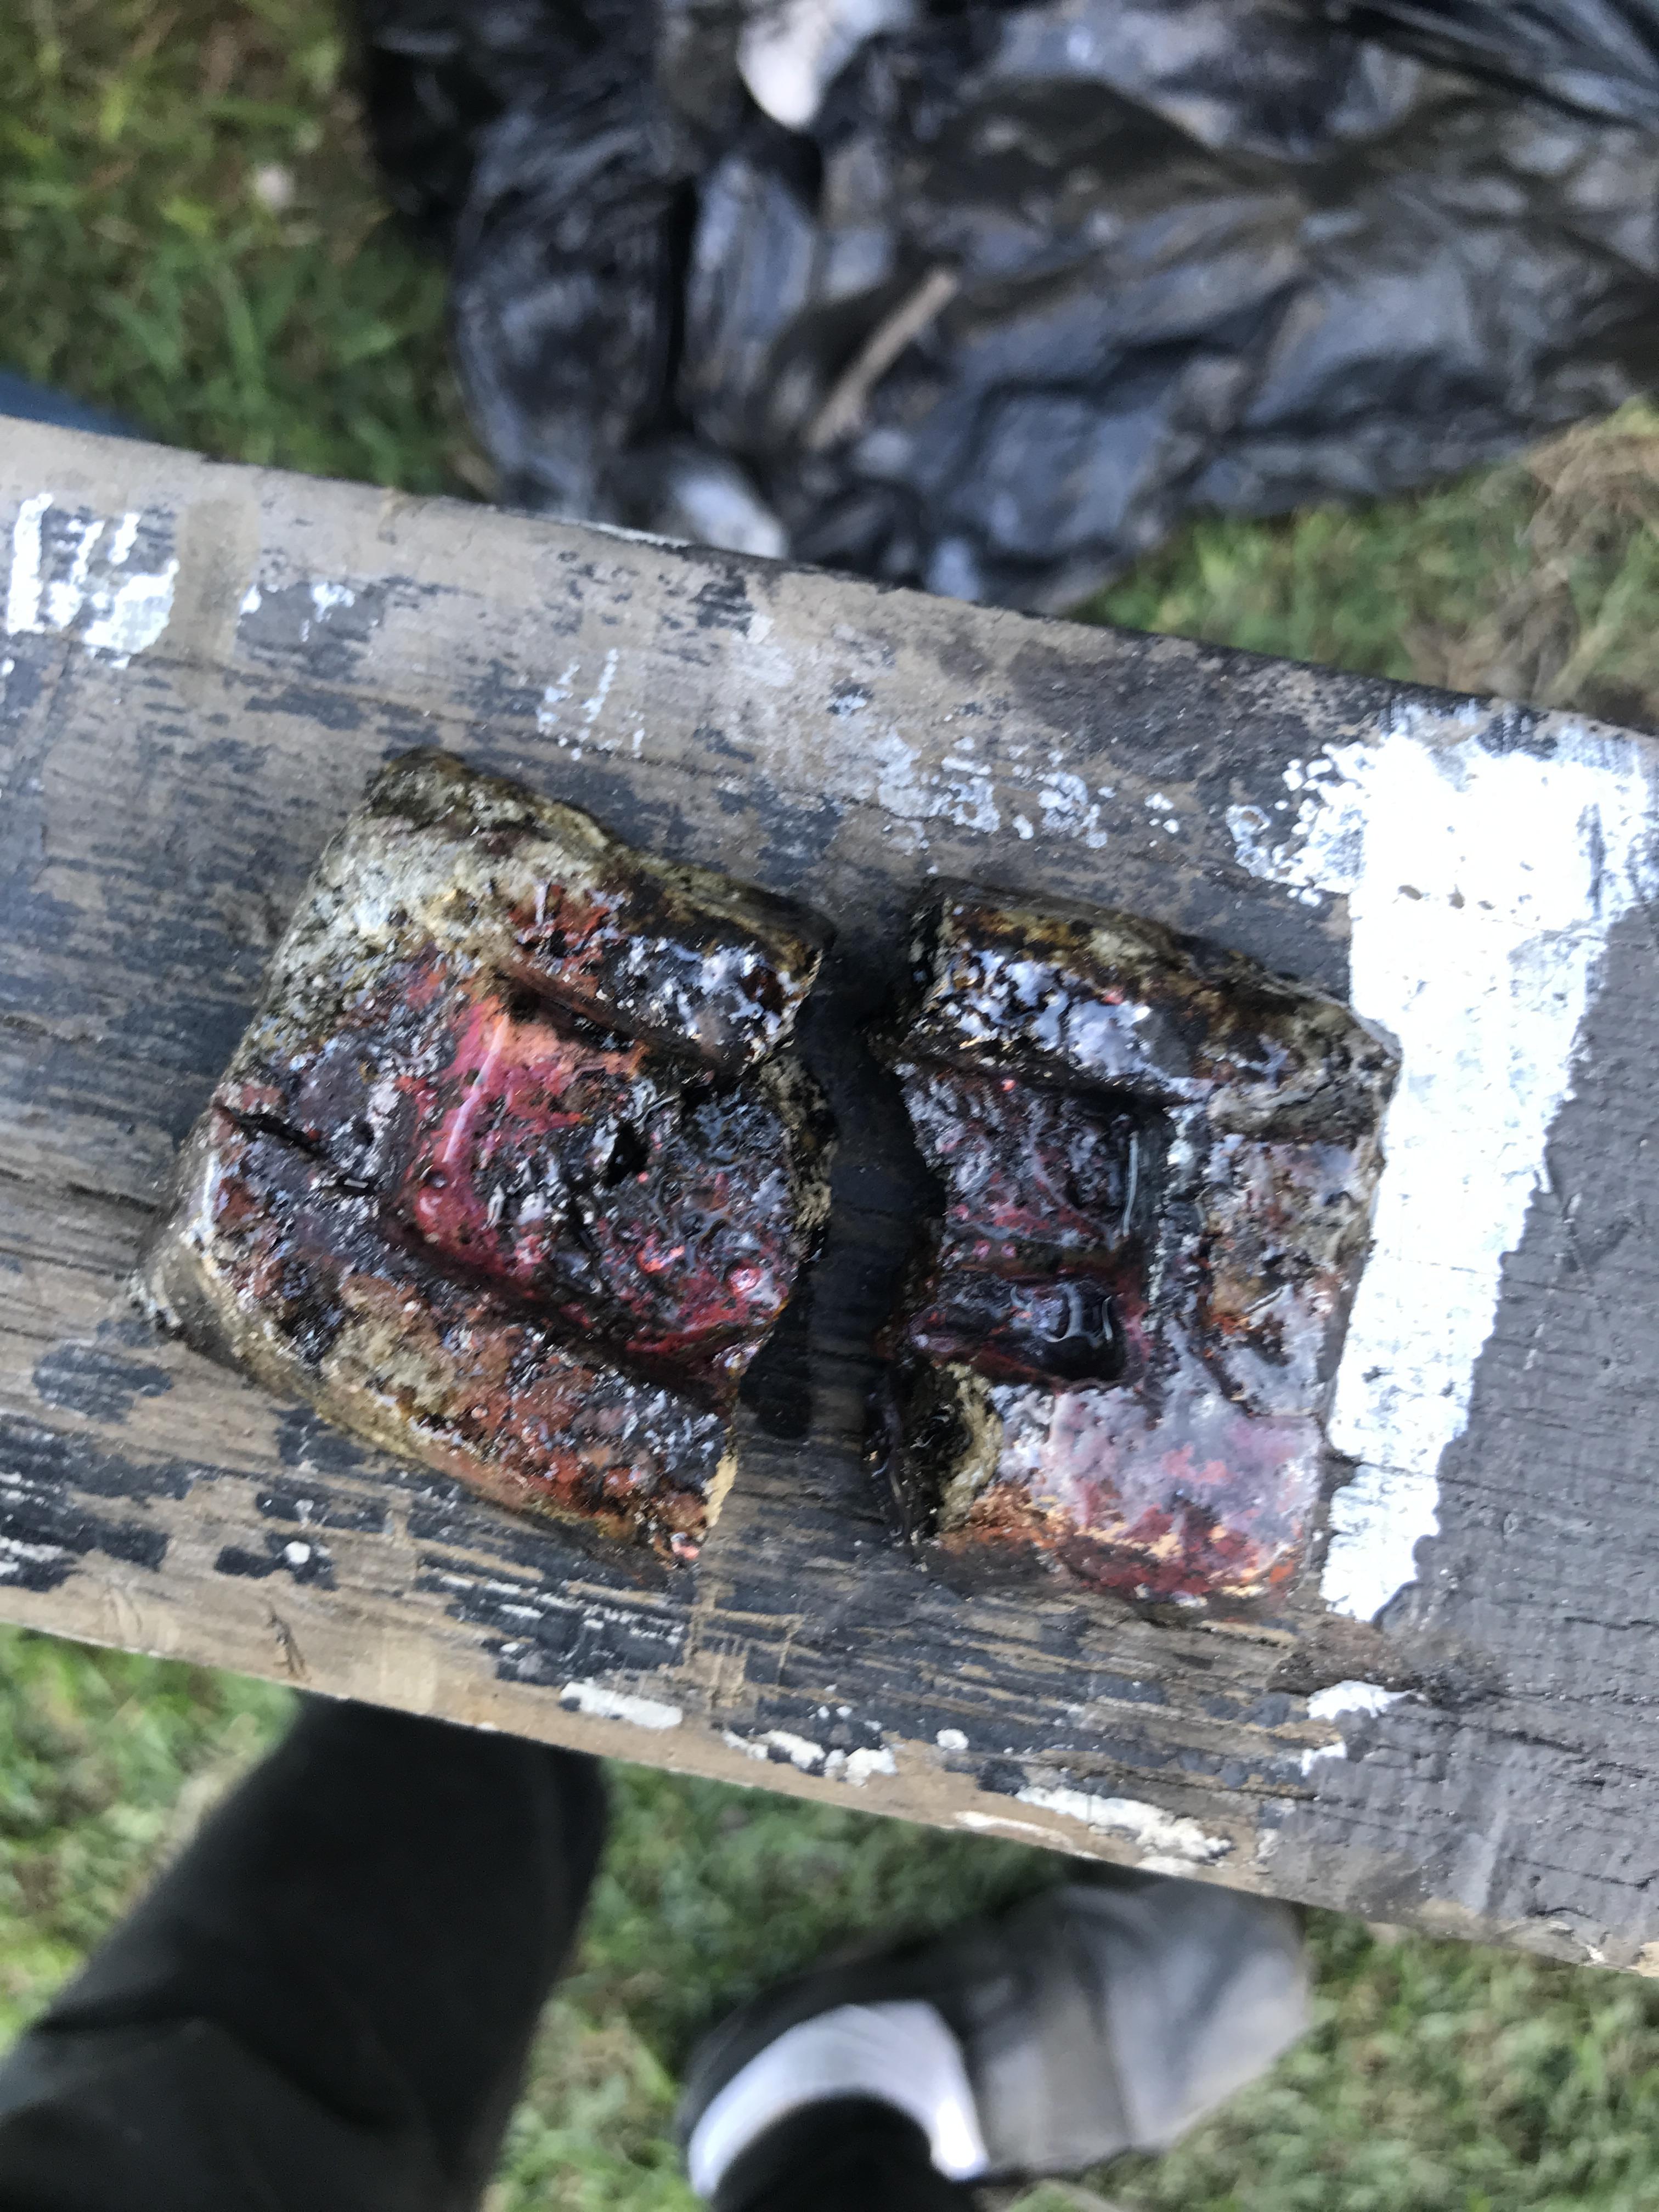
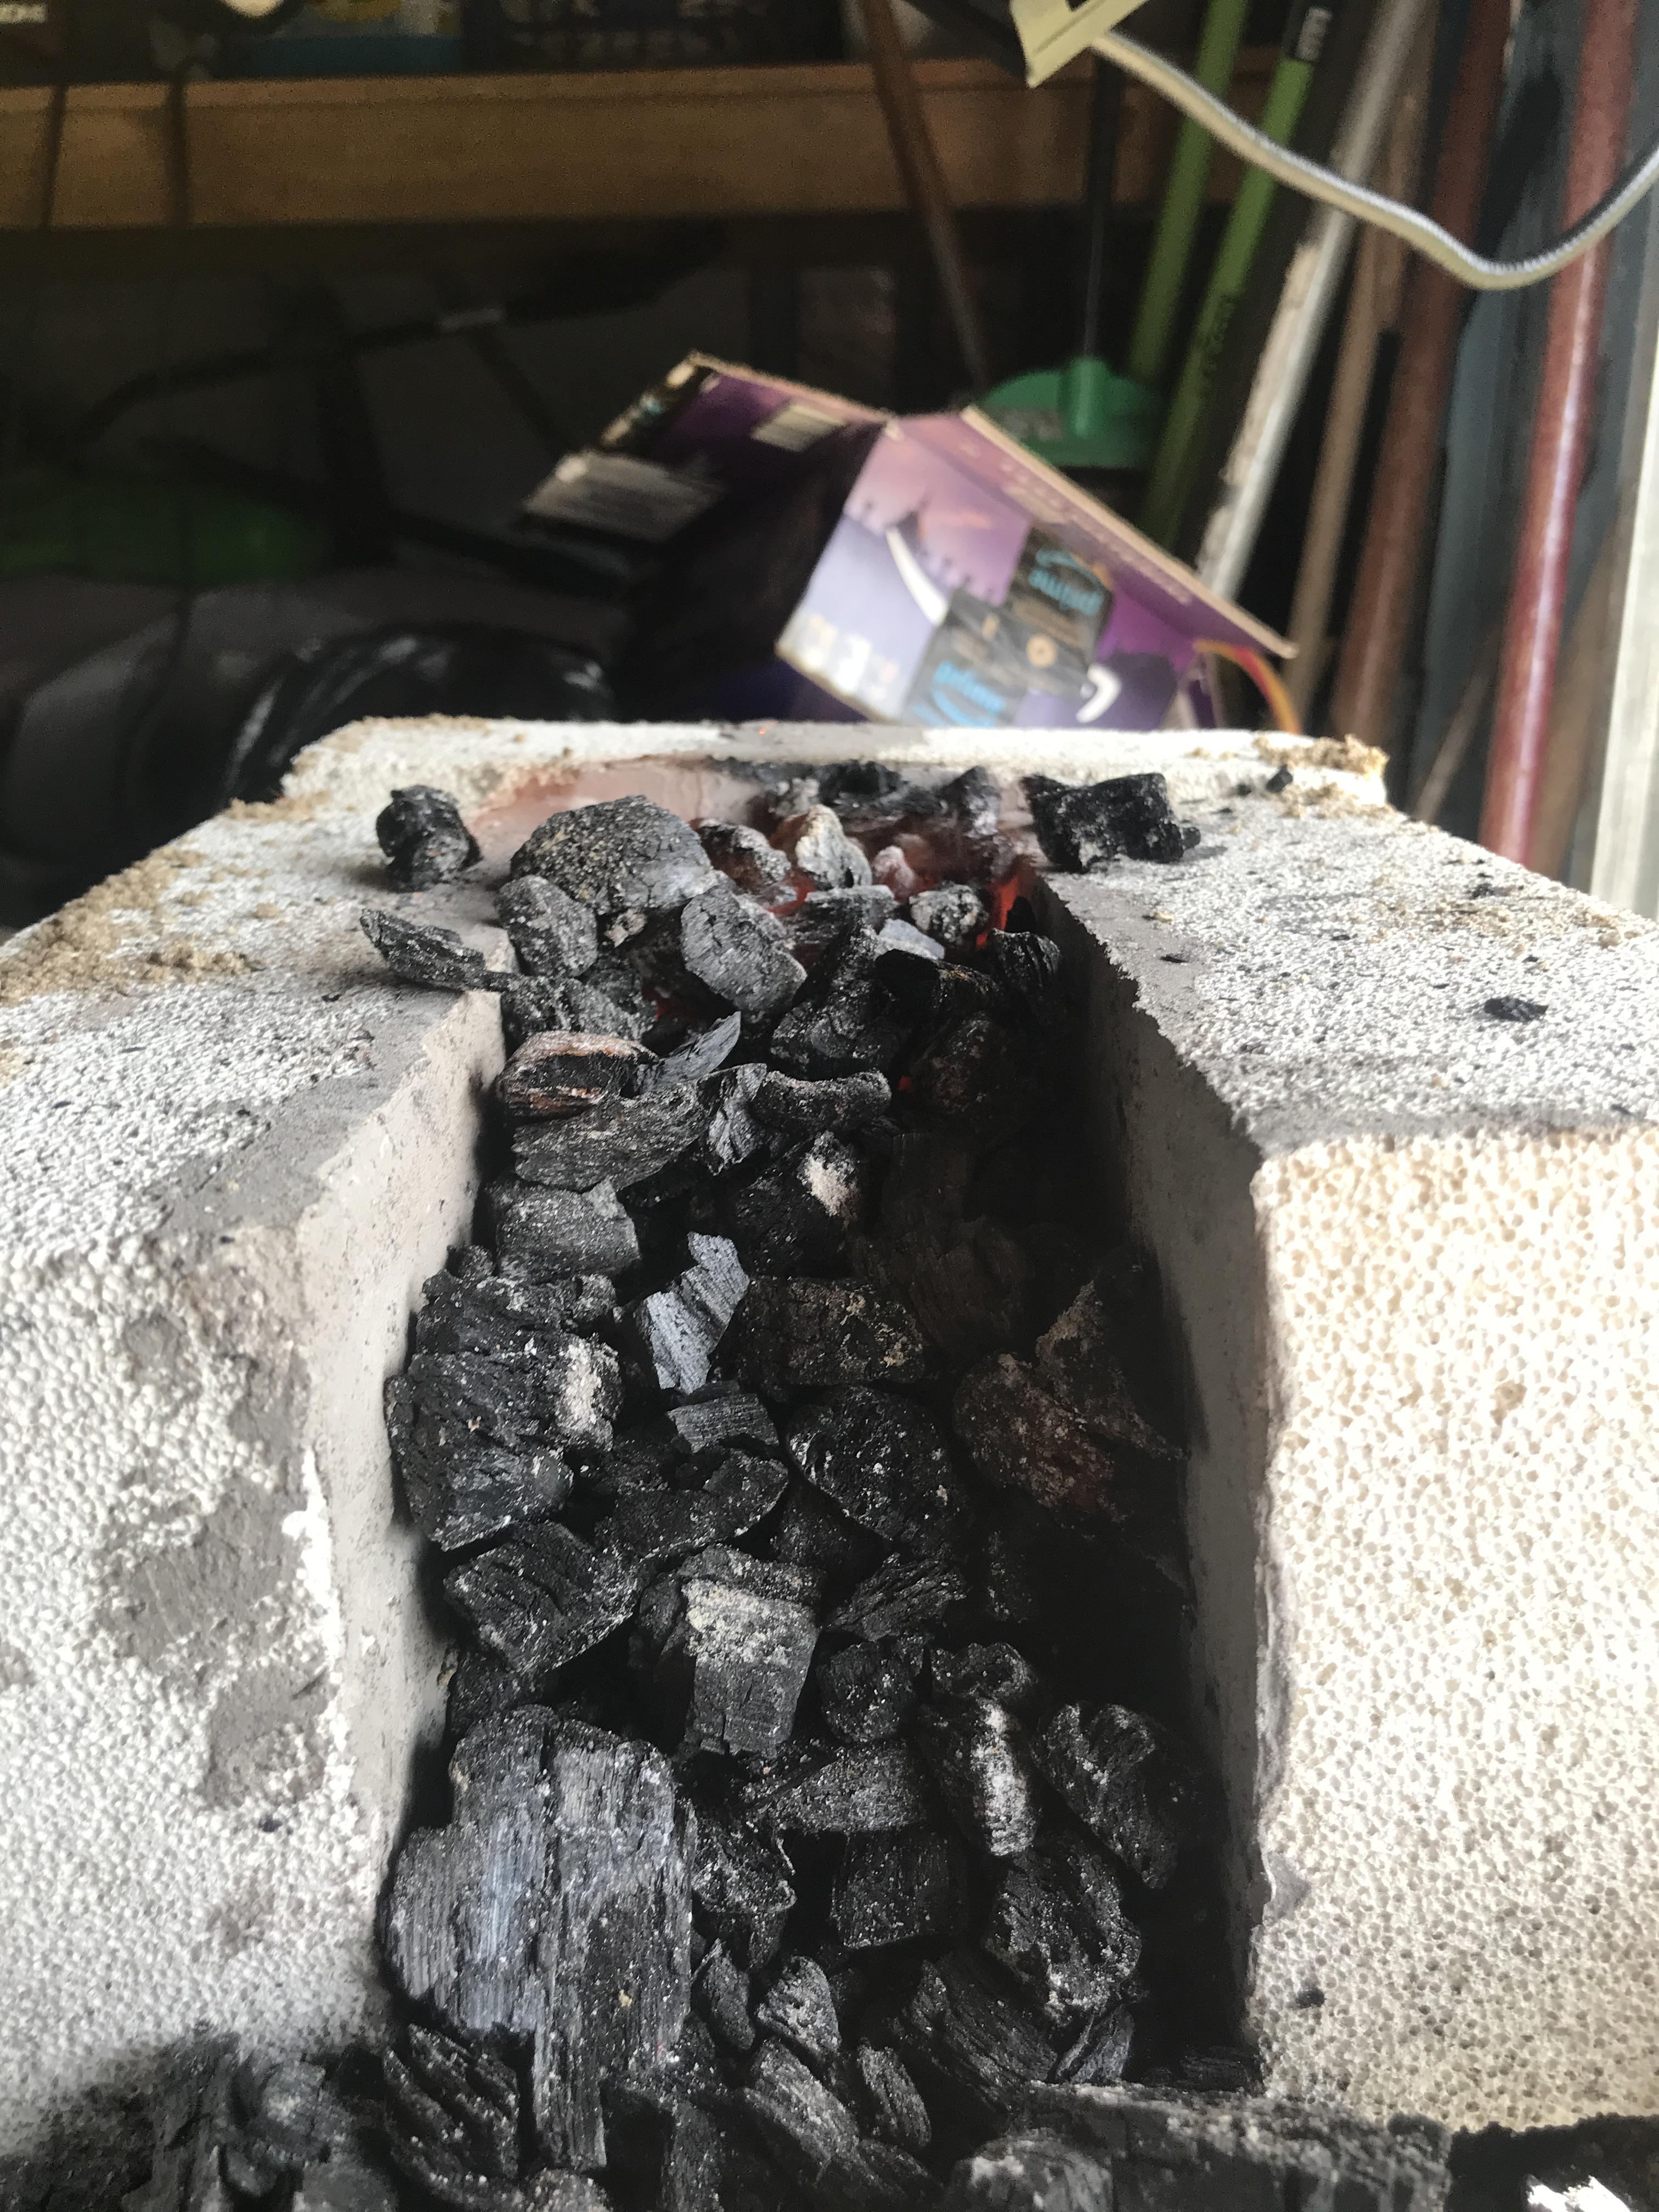
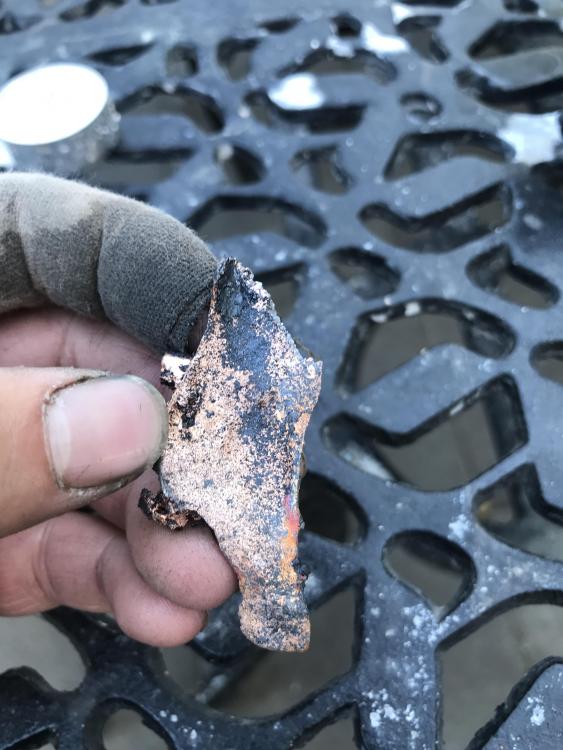
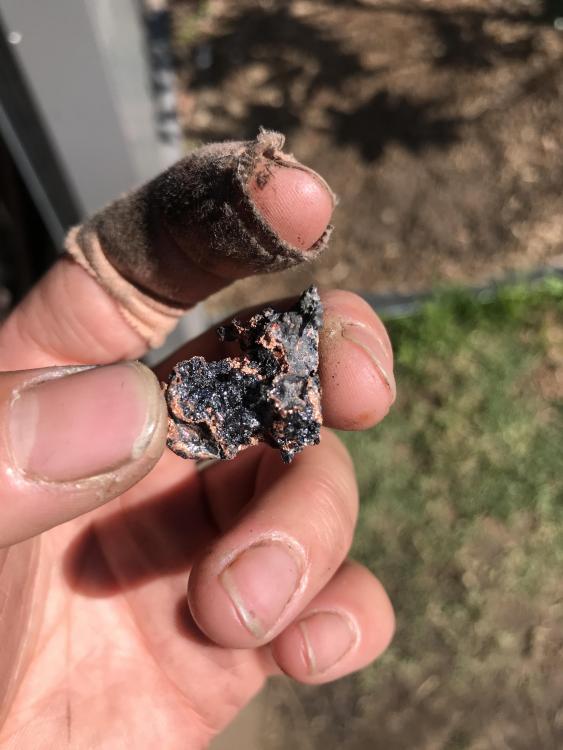
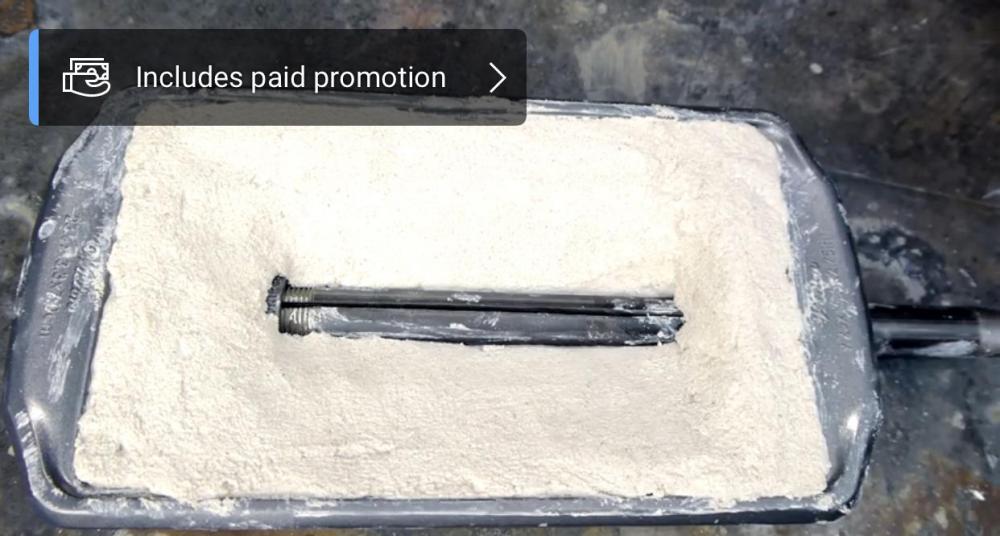
Hey, hope everyone enjoys this little story of me getting mentally destroyed by copper I thought it would be fun to try melt down some copper to use for fittings for some knives. Using a charcoal forge, turned more into a furnace, I placed some stripped copper wire in a graphite crucible, aaaaannnnnnd…. the crucible either shattered or just completely eroded before the copper got hot enough (I warmed up the crucible slowly over 20-30 minutes to avoid temperature shock). Copper 1, me 0 tossed the copper into the forge to see what would happen, it melted and I got some rough looking copper. I took the crucible, cut off the base, ground down the sides so that the base and the crucible sat flush, and covered it in high temp refractory mortar. Placed the copper in it once it cured and hit it directly with a propane torch, aaaaaaannnnd… nothing. It probably needed something more insulating. Copper 2, me 0. placed it in the forge again. It survived longer than the new graphite crucible. However the graphite completely eroded within 30 minutes without the copper melting. With no surface to hold onto, the refractory didn’t look too safe to use so I binned it. Copper 3, me 0. I took a steel pipe. Forged the ends shut and then folded it up to create a little steel crucible. Aaaaaannnnnndd…. the copper refused to melt… until the steel melted and formed some abomination of steel/copper . The break in the steel was at the bottom yet somehow the copper traveled all the way up the pipe? Copper 4, me 0. Not willing to be defeated but with nothing else to use, I took my homemade ceramic ingot mould, copper inside and left it in the forge. Aaaaaannnnd…. it actually worked this time (kind of). The ingot had large pores in it rendering it unusable so I threw it back in aaaaannnnnddd… yep the mould cracked before the copper melted this time. so I made a little bowl from some mild steel, placed the copper it in and watched and waited for the copper melted and yep you guessed it… The bowl nearly melted completely, save for a few pieces, taking the copper with it. I don’t know if I just looked away at the wrong time but I swear the copper only melted when the steel started to melt. I am now inclined to believe the melting point of copper > tungsten (joking of course!)


-
Need some tips and tricks on building a charcoal forge.
NguyenHoang replied to NguyenHoang's topic in Solid Fuel Forges
I learnt my lesson after ruining a nice piece of 1075 just by smashing it with a hammer (my first post on here was about that ). Next chance I get I’ll try reduce the diameter of the pipe on the forge side. -
Need some tips and tricks on building a charcoal forge.
NguyenHoang replied to NguyenHoang's topic in Solid Fuel Forges
I didn't think of that to be honest! (only a few weeks in so far so my brain doesn't think like a blacksmith.... yet)\ I'll give it a go with the spare 25mm pipe that I have and see if I can reduce the opening to 3/4inch / 19mm -
Need some tips and tricks on building a charcoal forge.
NguyenHoang replied to NguyenHoang's topic in Solid Fuel Forges
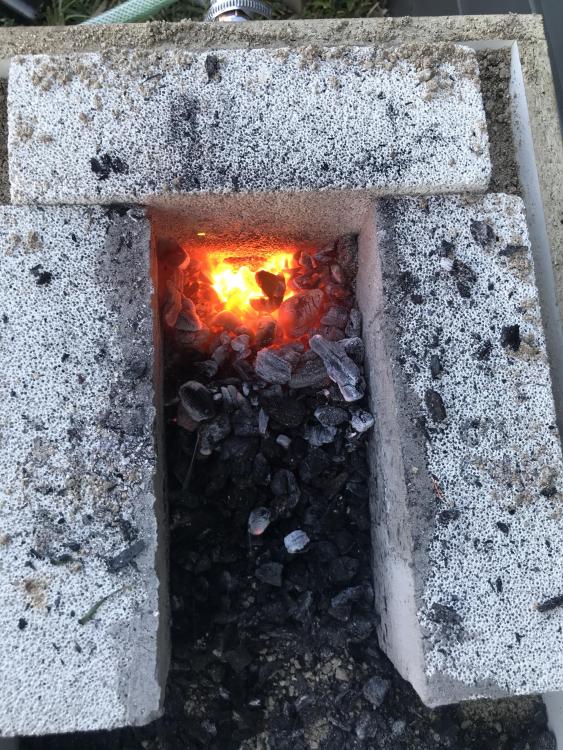
Unfortunately I don’t have any smaller diameter pipe on hand at the moment I have changed the tuyere positioning to the side now and have made it more of a trench and it seems to be a lot better now, the fire spreads out much more evenly and longer than before.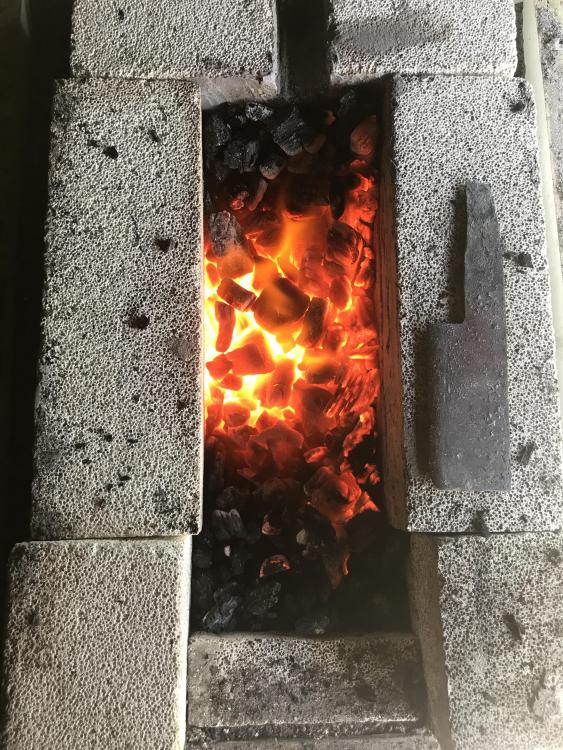
-
Need some tips and tricks on building a charcoal forge.
NguyenHoang replied to NguyenHoang's topic in Solid Fuel Forges
Hey so I gave it and other crack before making any big changes. All I did was make the length of hose shorter, push the tuyere in through the firebrick by about half an inch and moved the side walls in so it was a little more narrow. It was better but still encountered the same problem from before where the fire or hot part was only confined to the front half. I stacked charcoal up to the top as well

-
Need some tips and tricks on building a charcoal forge.
NguyenHoang replied to NguyenHoang's topic in Solid Fuel Forges
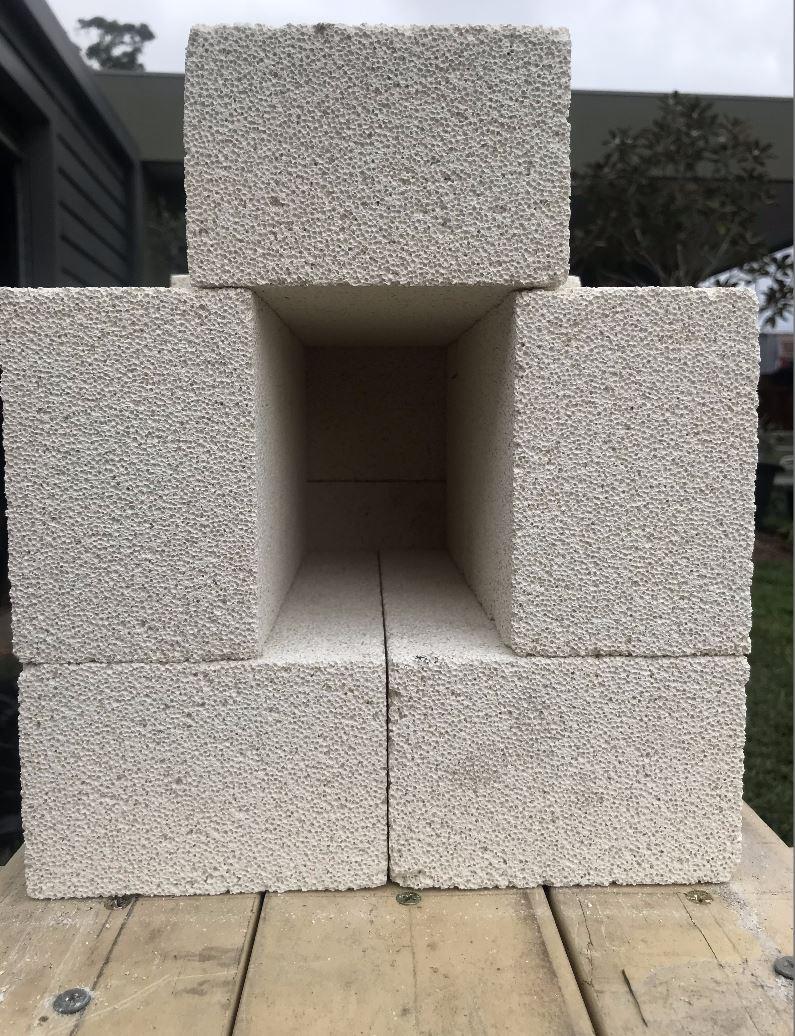
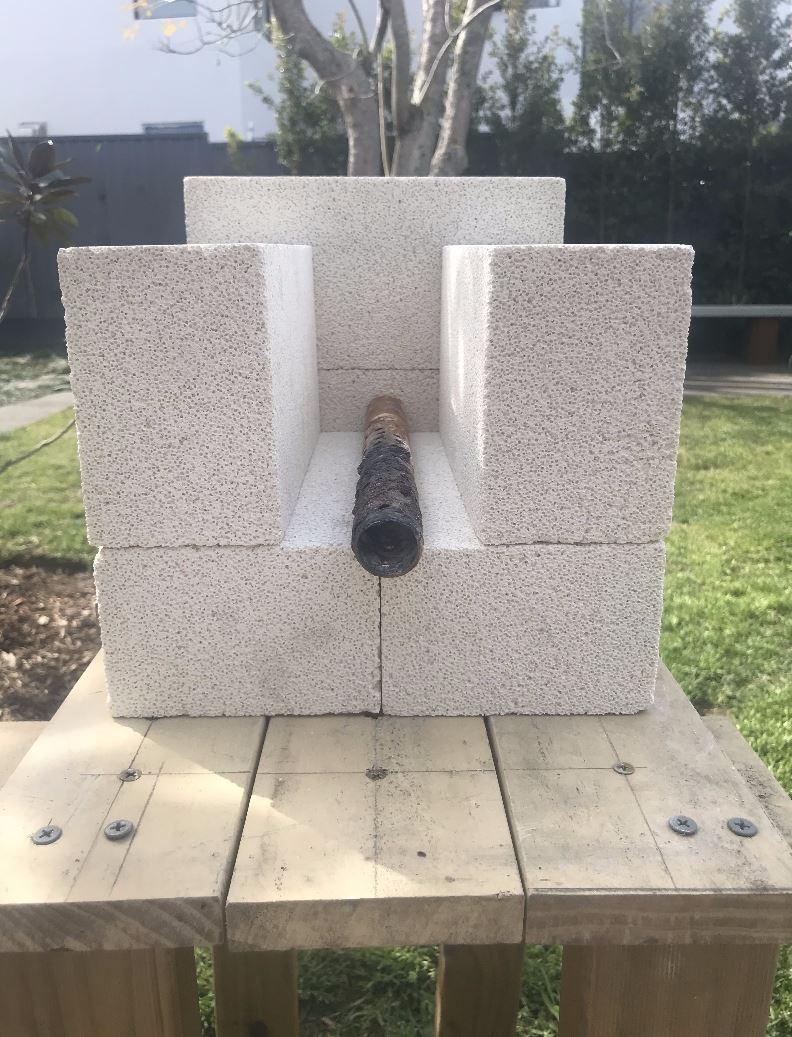
Frazer I'm not too sure why I switched the Tuyere, in the last configuration that I had (coming in from the side) the entire base of the brick was glowing so I will likely go back to that design. I did have a lot of charcoal in there (nearly reaching the top the entire length of the brick. I was going crazy with the hand crank blower trying to make the fire longer so I burnt through quite a bit. I was thinking of creating a trench by cutting the fire brick diagonally (like a miter cut). I definitely want to remove the back brick so I have more room. I was thinking of cutting the back fire brick either in half or cutting it in 3rds and using a 1/3 piece of the brick as a back wall just to hold the sand back. If I do this, I can push the two side bricks back and If I cut the side bricks diagonally, I can use the cut off pieces to extend the trench. I hope what I'm saying makes sense with this horrible paint diagram. I would use the offcuts (coloured in red) from the two side bricks to extend the trench and maybe add the offcuts from the back firebrick(coloured in yellow) to prop up against the front wall to protect the wood from the heat. The Tuyere will come in from the side (haven't decided which side yet, the blower might block it on the left side and the blower will be a pain to move so the pipe will likely go over the blower kind of like in the picture and the hose will wrap back to connect or I'll place it on the other side and use a longer hose. Glenn The pipe is 25mm or approximately 1inch in diameter and 17cm / 6.6inches in length. I will definitely raise the Tuyere a little bit higher, having it on the bottom didn't work too well as the hottest part of the fire was located just in front of the Tuyere quite deep down. My goal is to put the Tuyere on the side and raise it slightly (and potentially angle it down a bit as was mentioned earlier).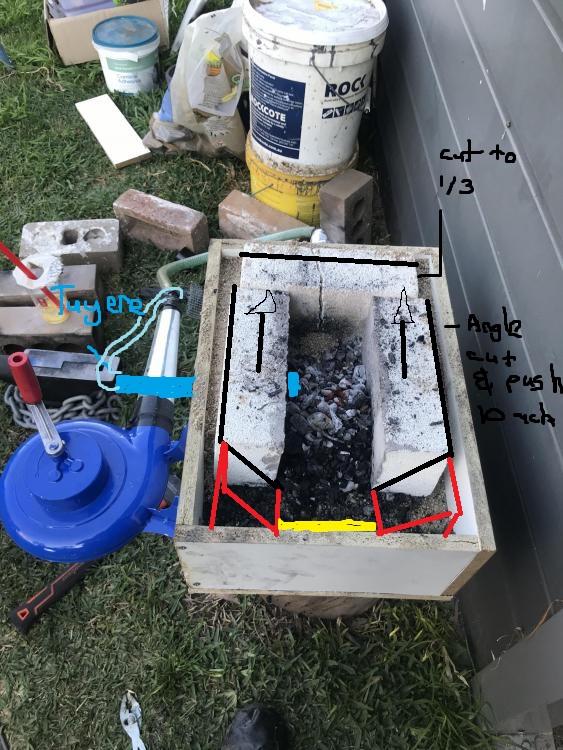
-
Need some tips and tricks on building a charcoal forge.
NguyenHoang replied to NguyenHoang's topic in Solid Fuel Forges
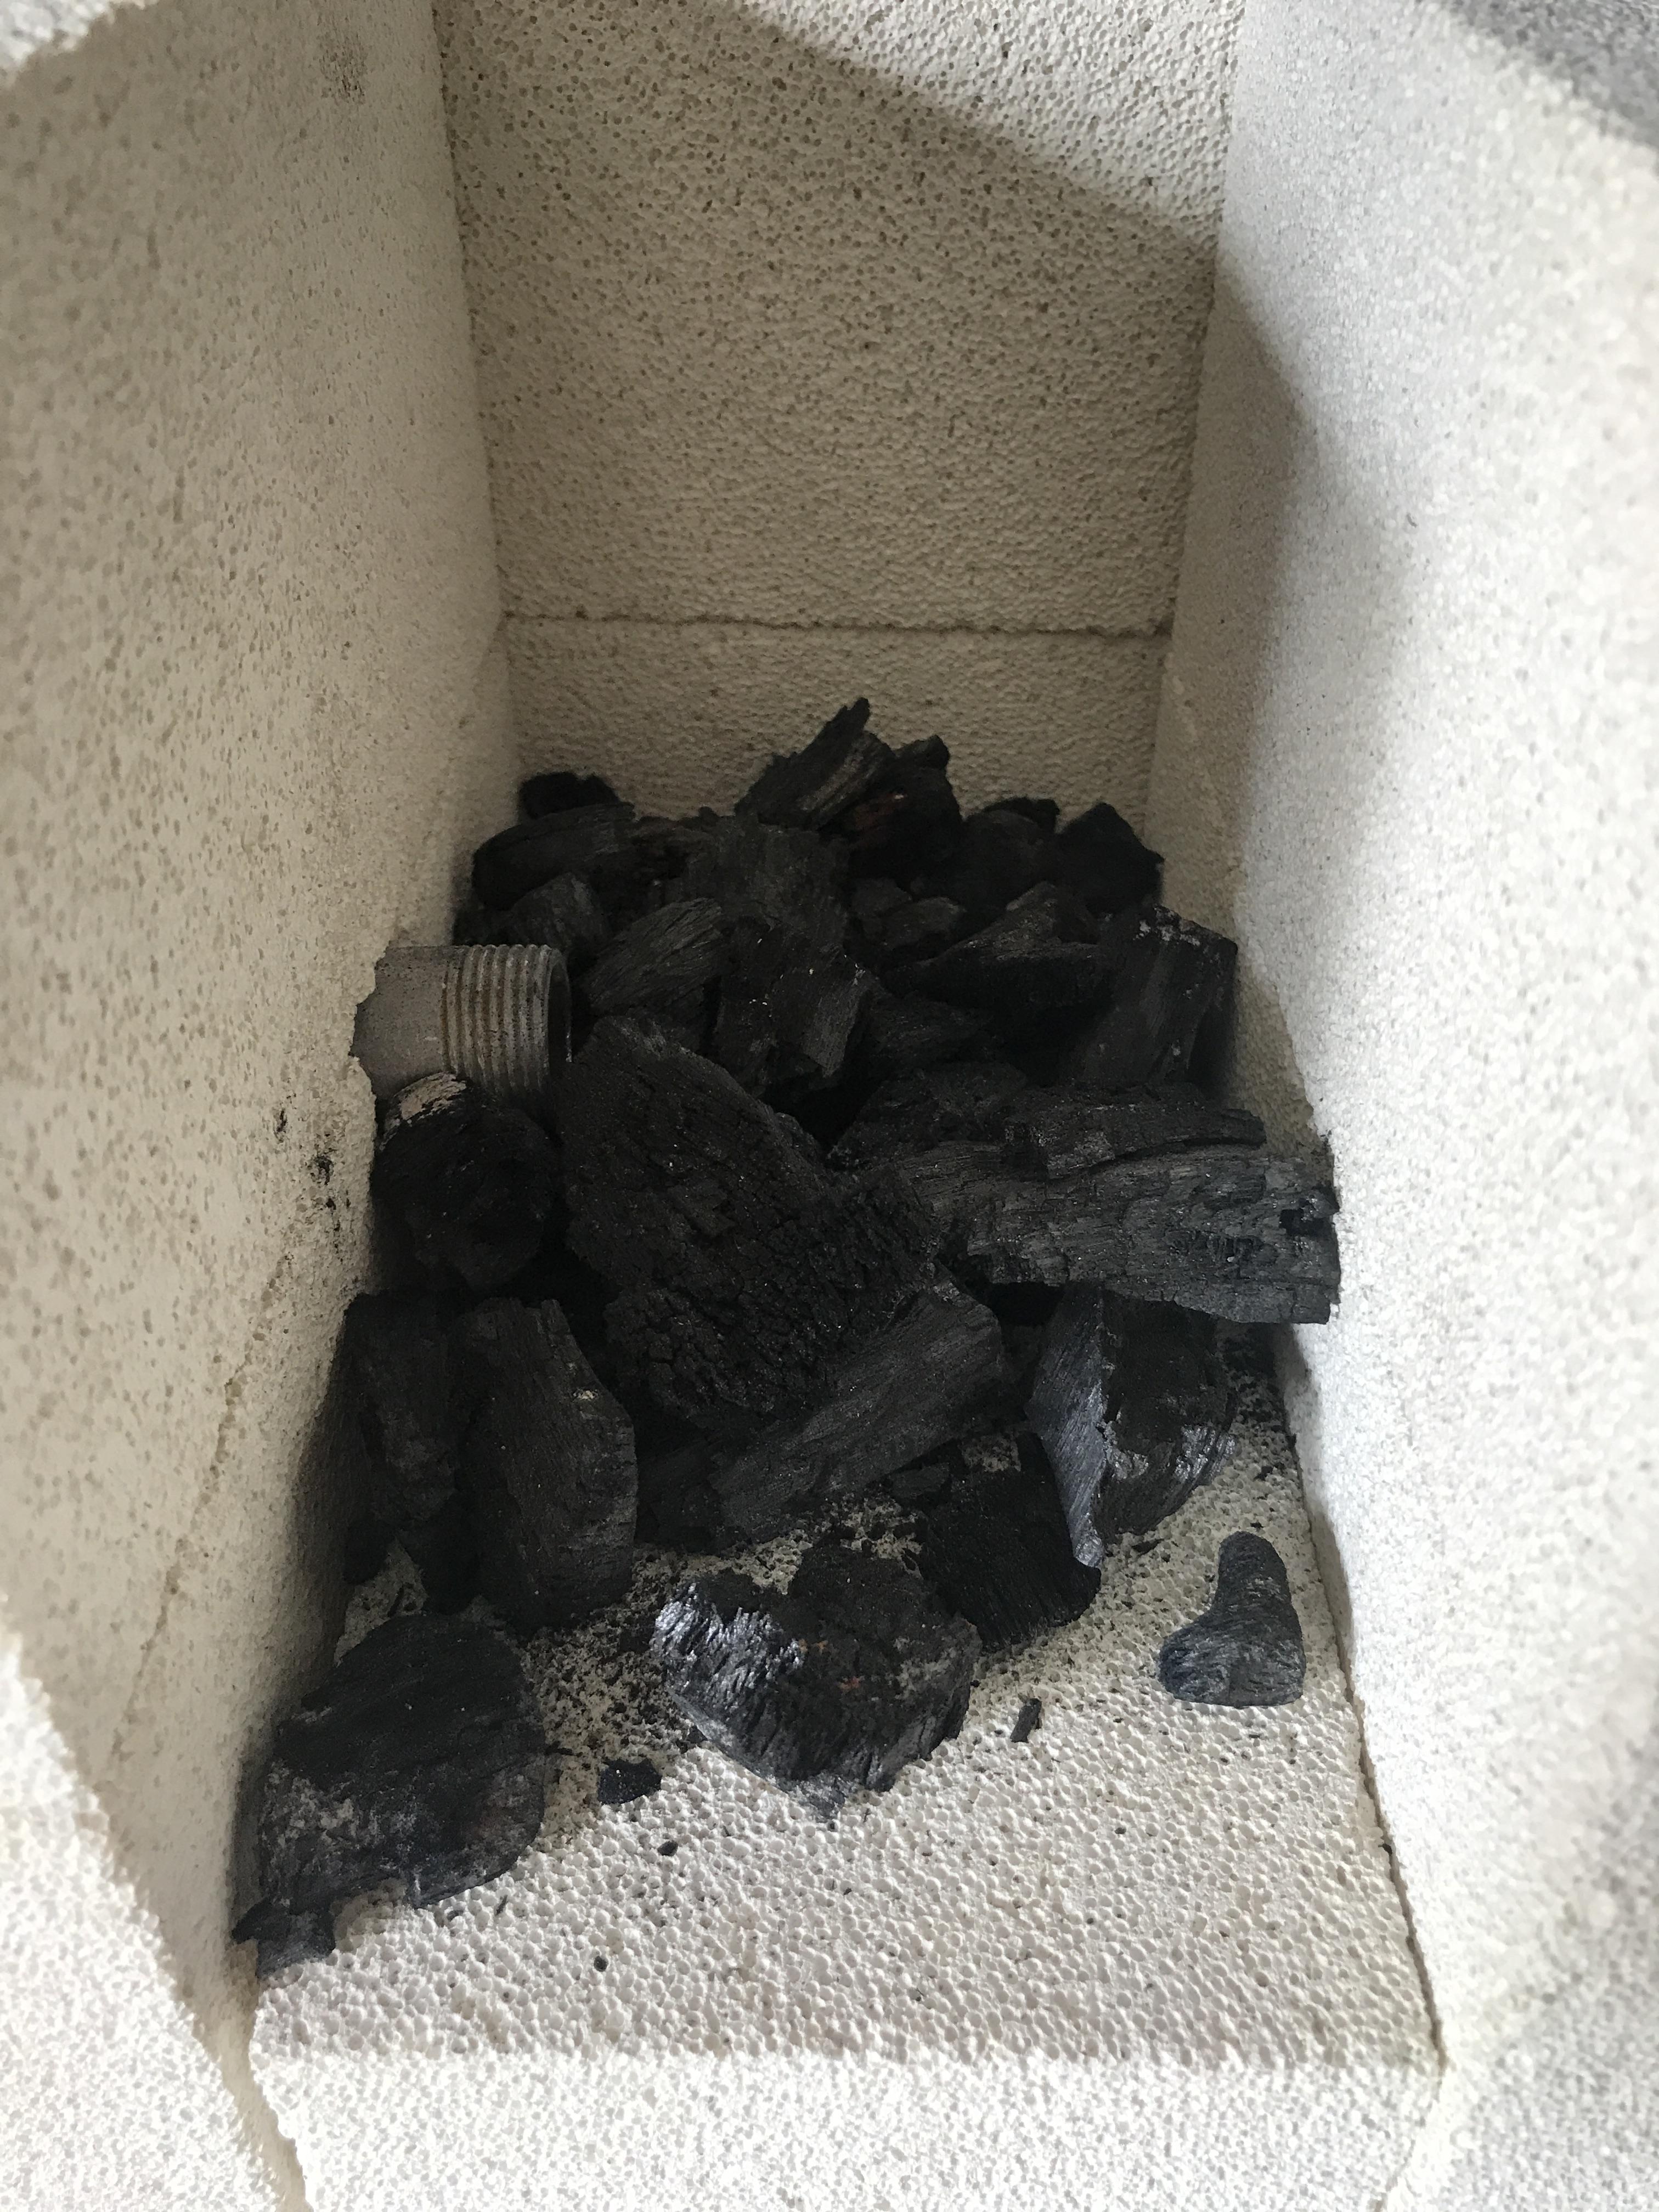
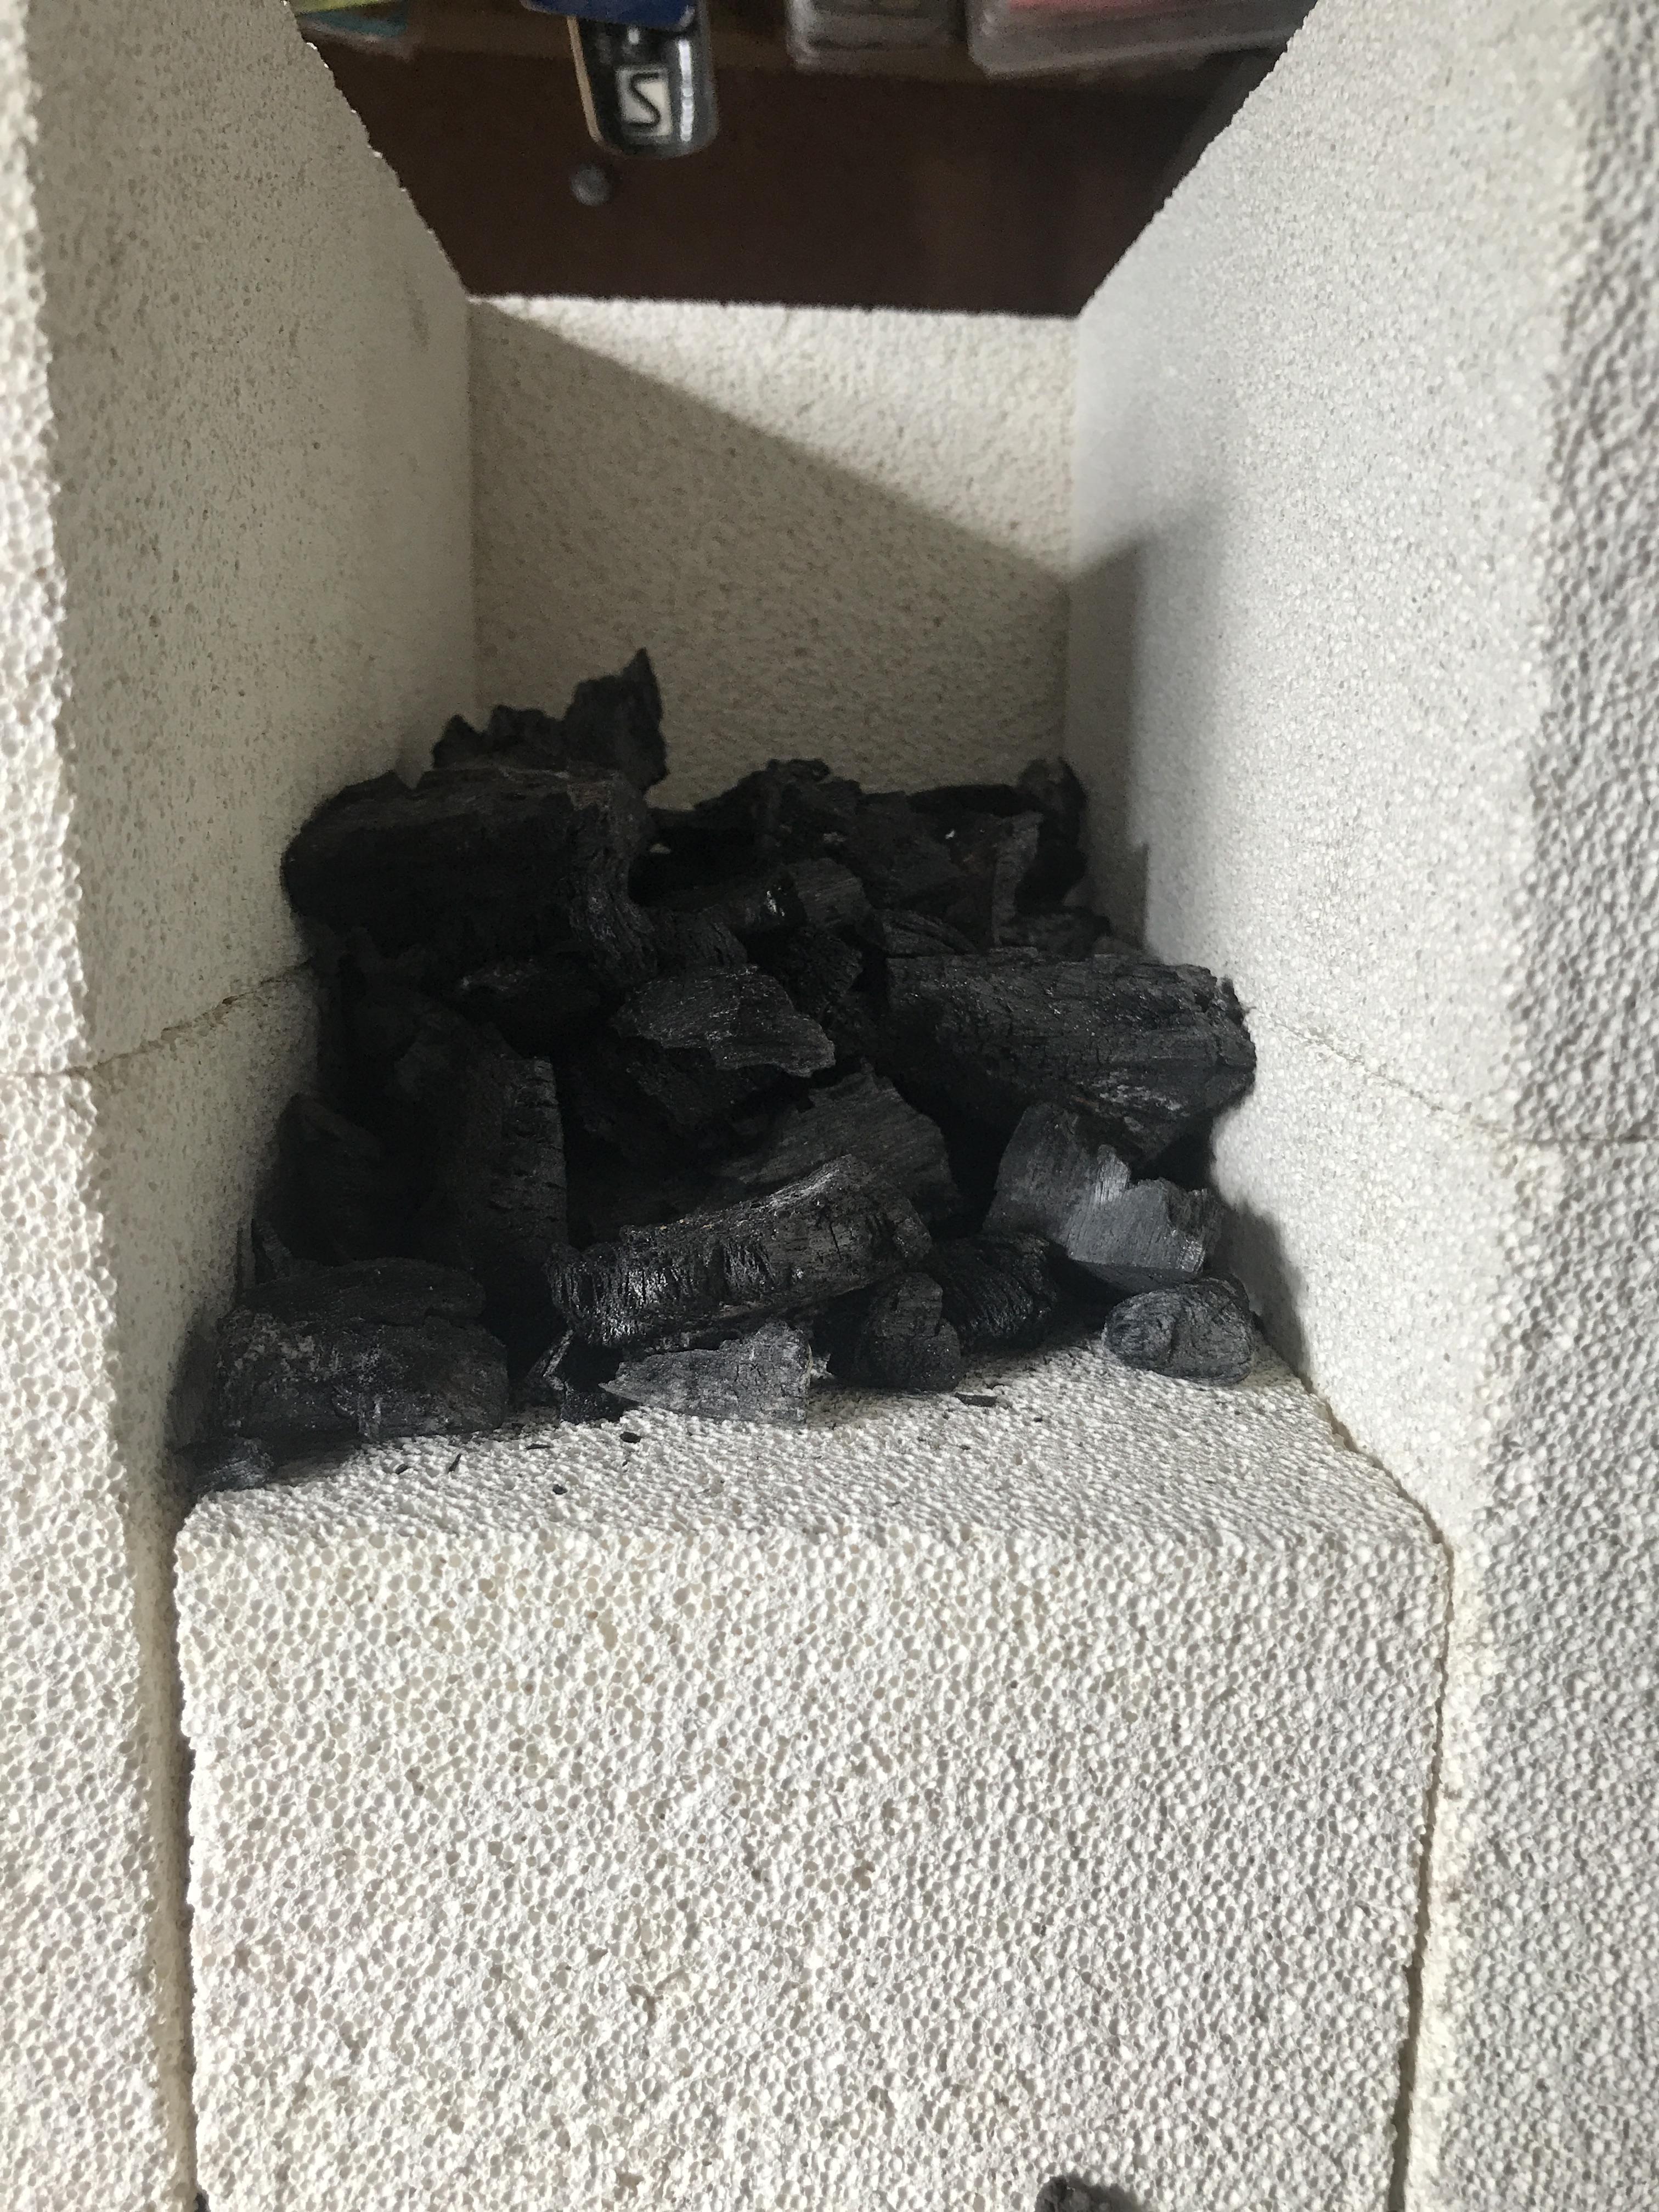
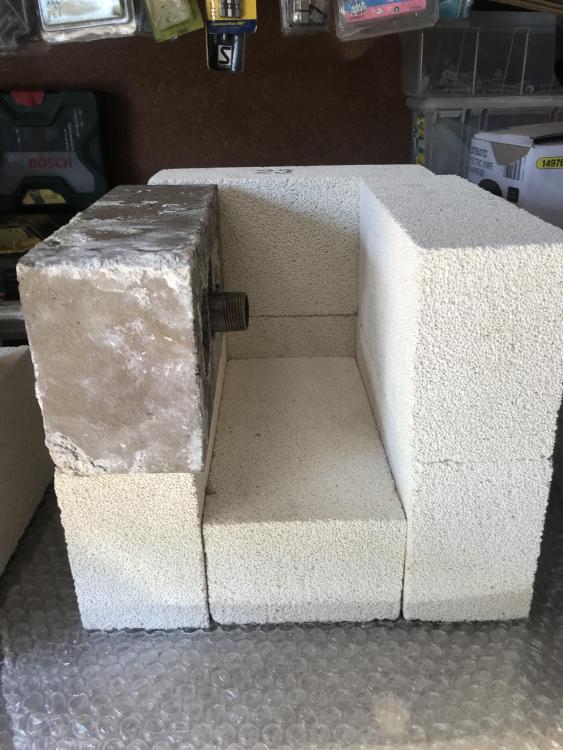
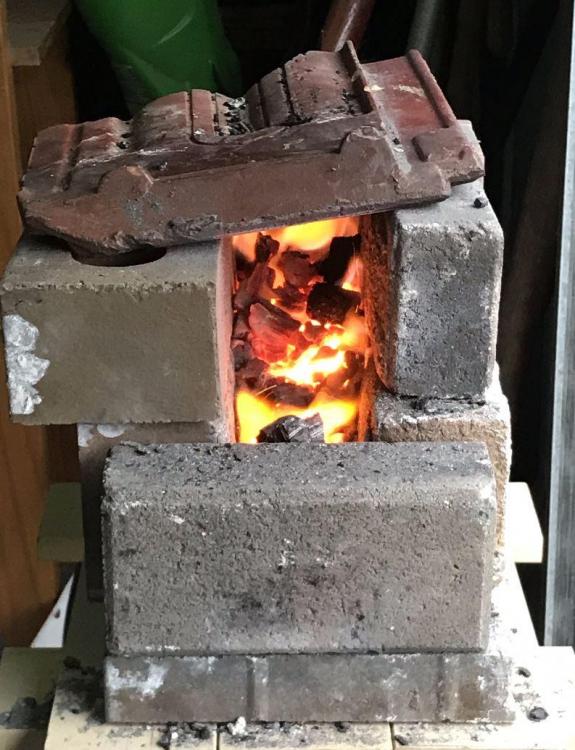
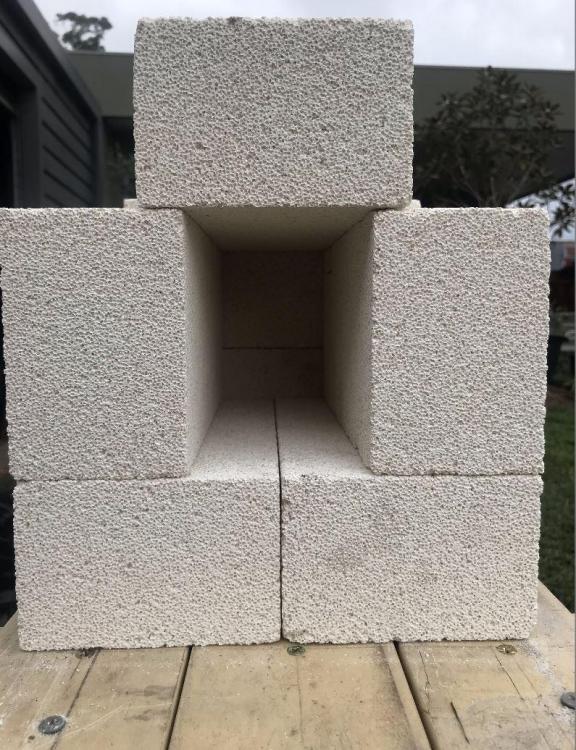
Hey, little update here I decided to go with a JABOD design and so far I like it a lot. It’s filled with sand and small charcoal bits instead of dirt. It’s a lot smaller than most JABOD’s out there as I really wanted the portability to move it around the backyard. The hand cranked fan also works great and I attached it to the side of the box so it all moves as one unit. I honestly don’t know if this will work but I attached a copper/aluminium heat sink from spare laptop parts to the pipe tuyere at the back of the box to hopefully keep it cooler so the hose doesn’t melt. I ran it for about 1 and a half hours and the heat sink got plenty hot but I really don’t know how useful or effective it is. the only problem that I have into now is the fire is basically limited to a small area near the tuyere. I have the tuyere sitting basically flush with the firebrick as frosty suggested but I also made it so the tuyere is basically on the floor. I tried my best to get the fire to extend further out but it refused to get any bigger than that. Any recommendations on how to get the fire to be more elongated? I tried heating up some steel to test but it only reliably heats up about an inch. Sorry for so many questions everyone but I really appreciate all the help you guys have given me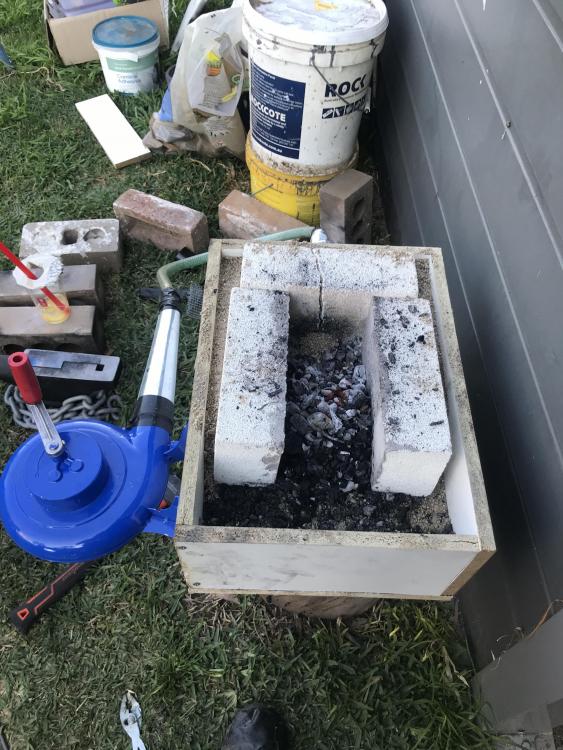
-
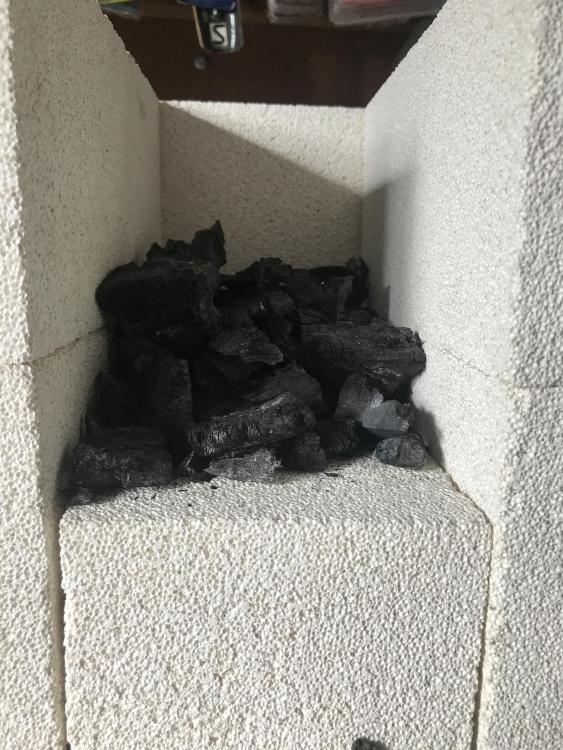
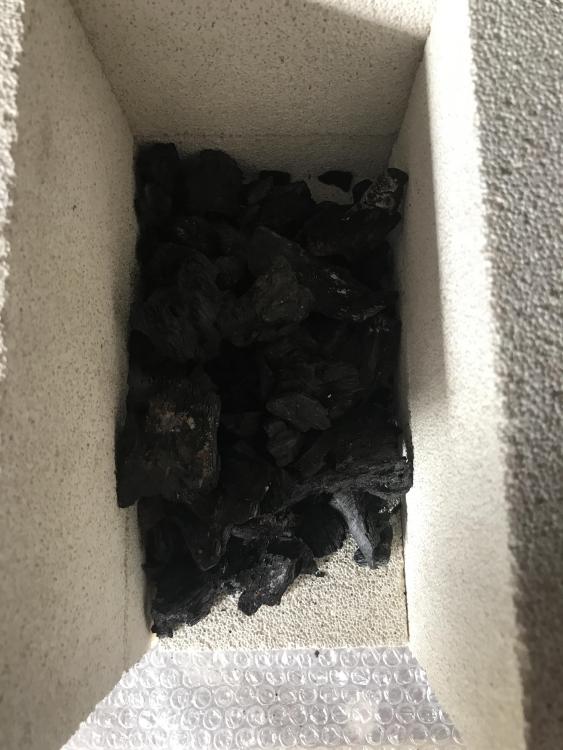
I'm glad I was wearing the respirator then! (hope it did its job). Threw the piece away and all the charcoal that was in the forge with it just incase.
-
Need some tips and tricks on building a charcoal forge.
NguyenHoang replied to NguyenHoang's topic in Solid Fuel Forges
Ah I see, I fired it up and boy it was significantly stronger than my original forge, the whole base was basically alight. I was able to take it apart as others have suggested in this thread, a JABOD would be much better! But I'll keep that in mind pnut, I'll see if I can put the tuyere basically touching the floor in my next build -
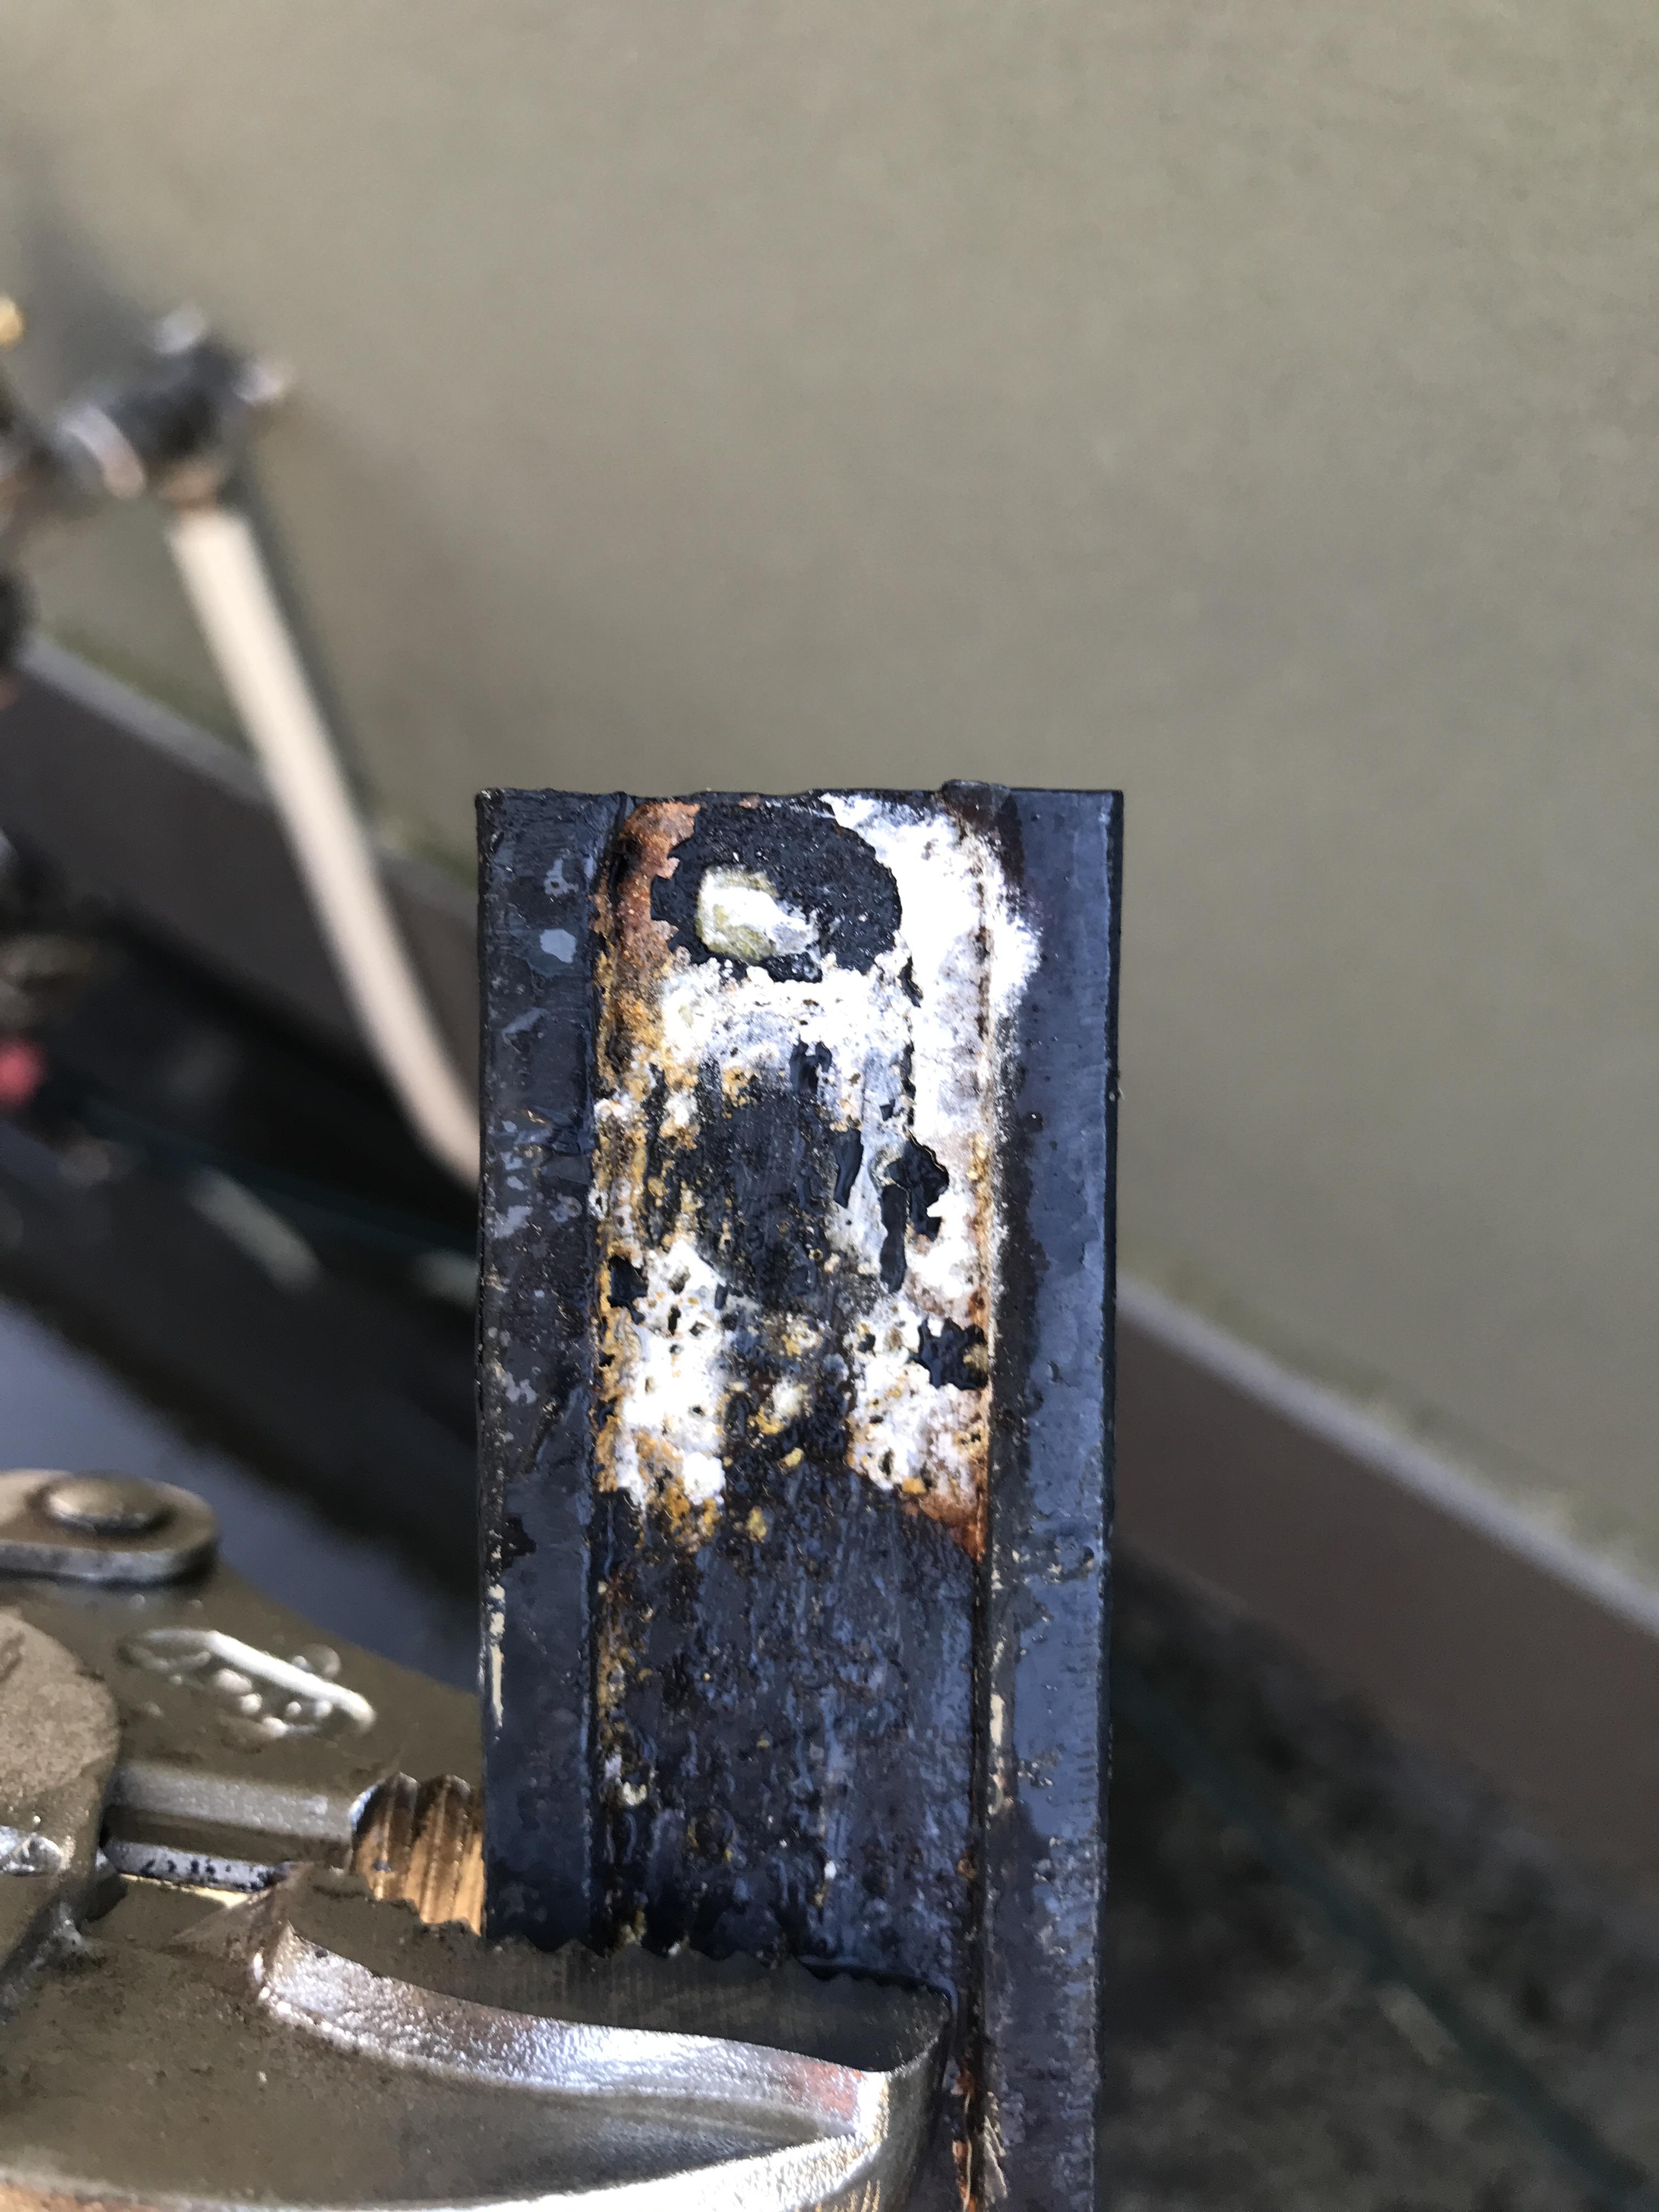
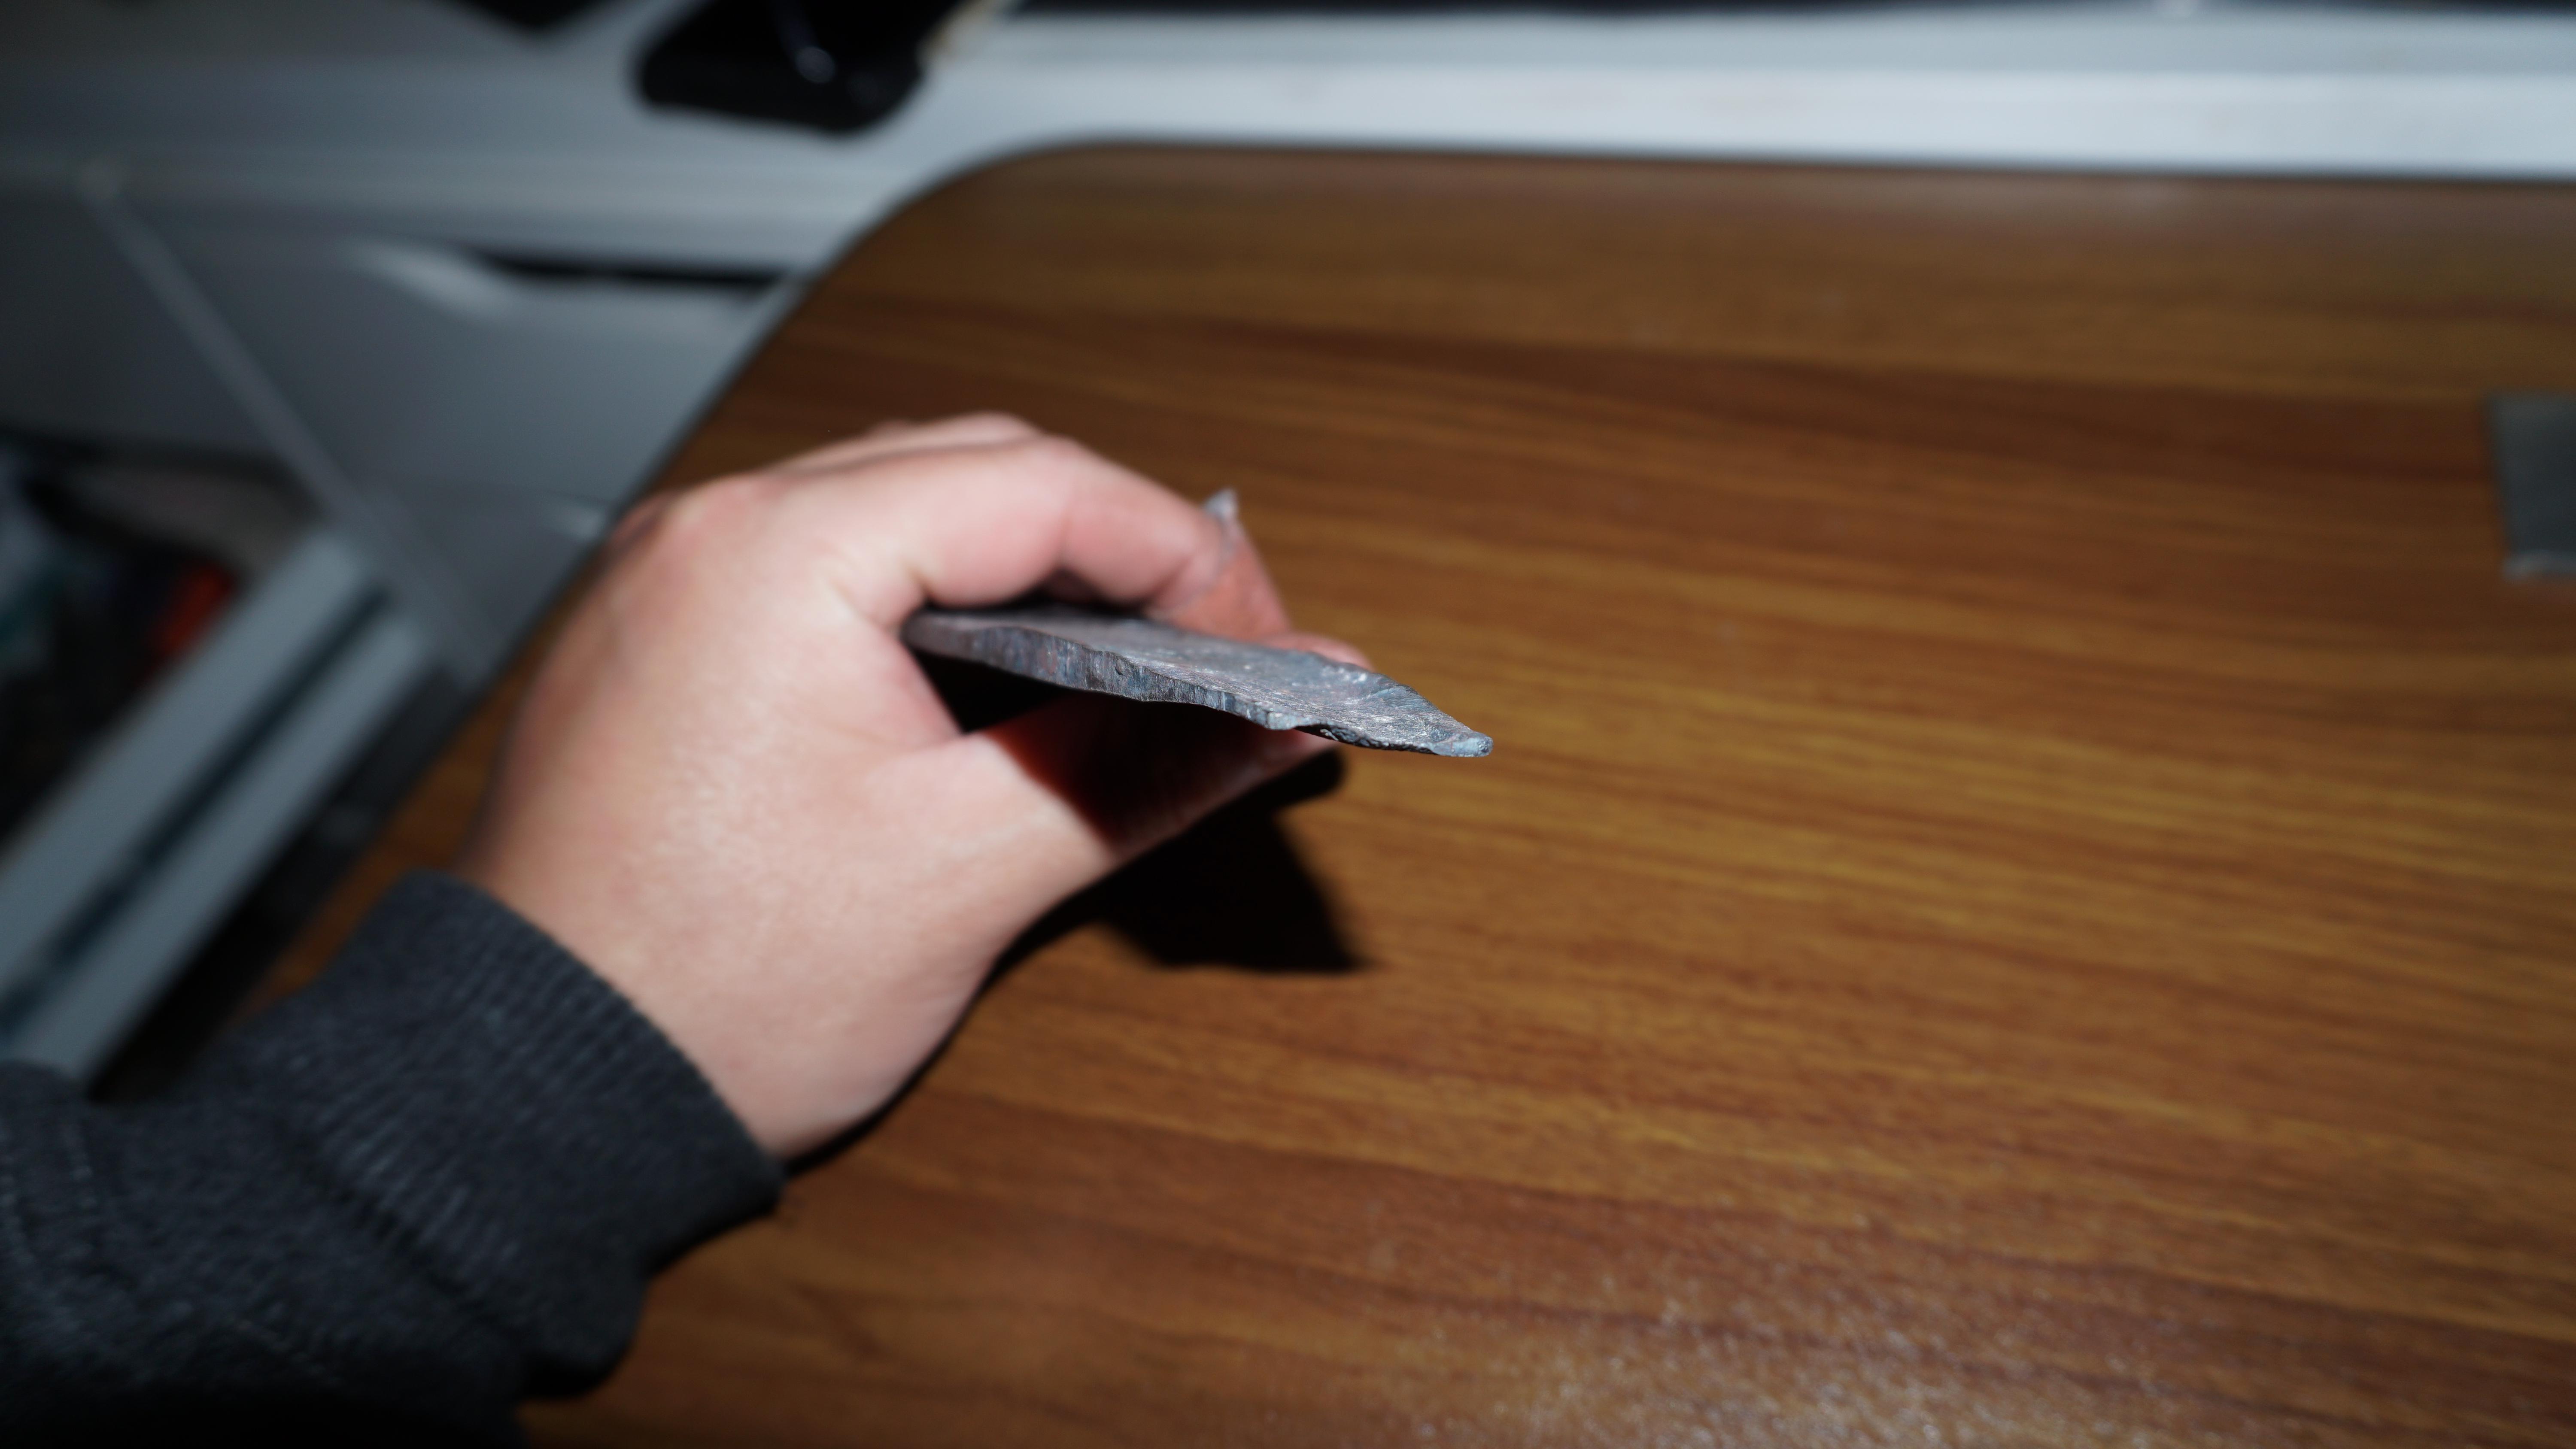
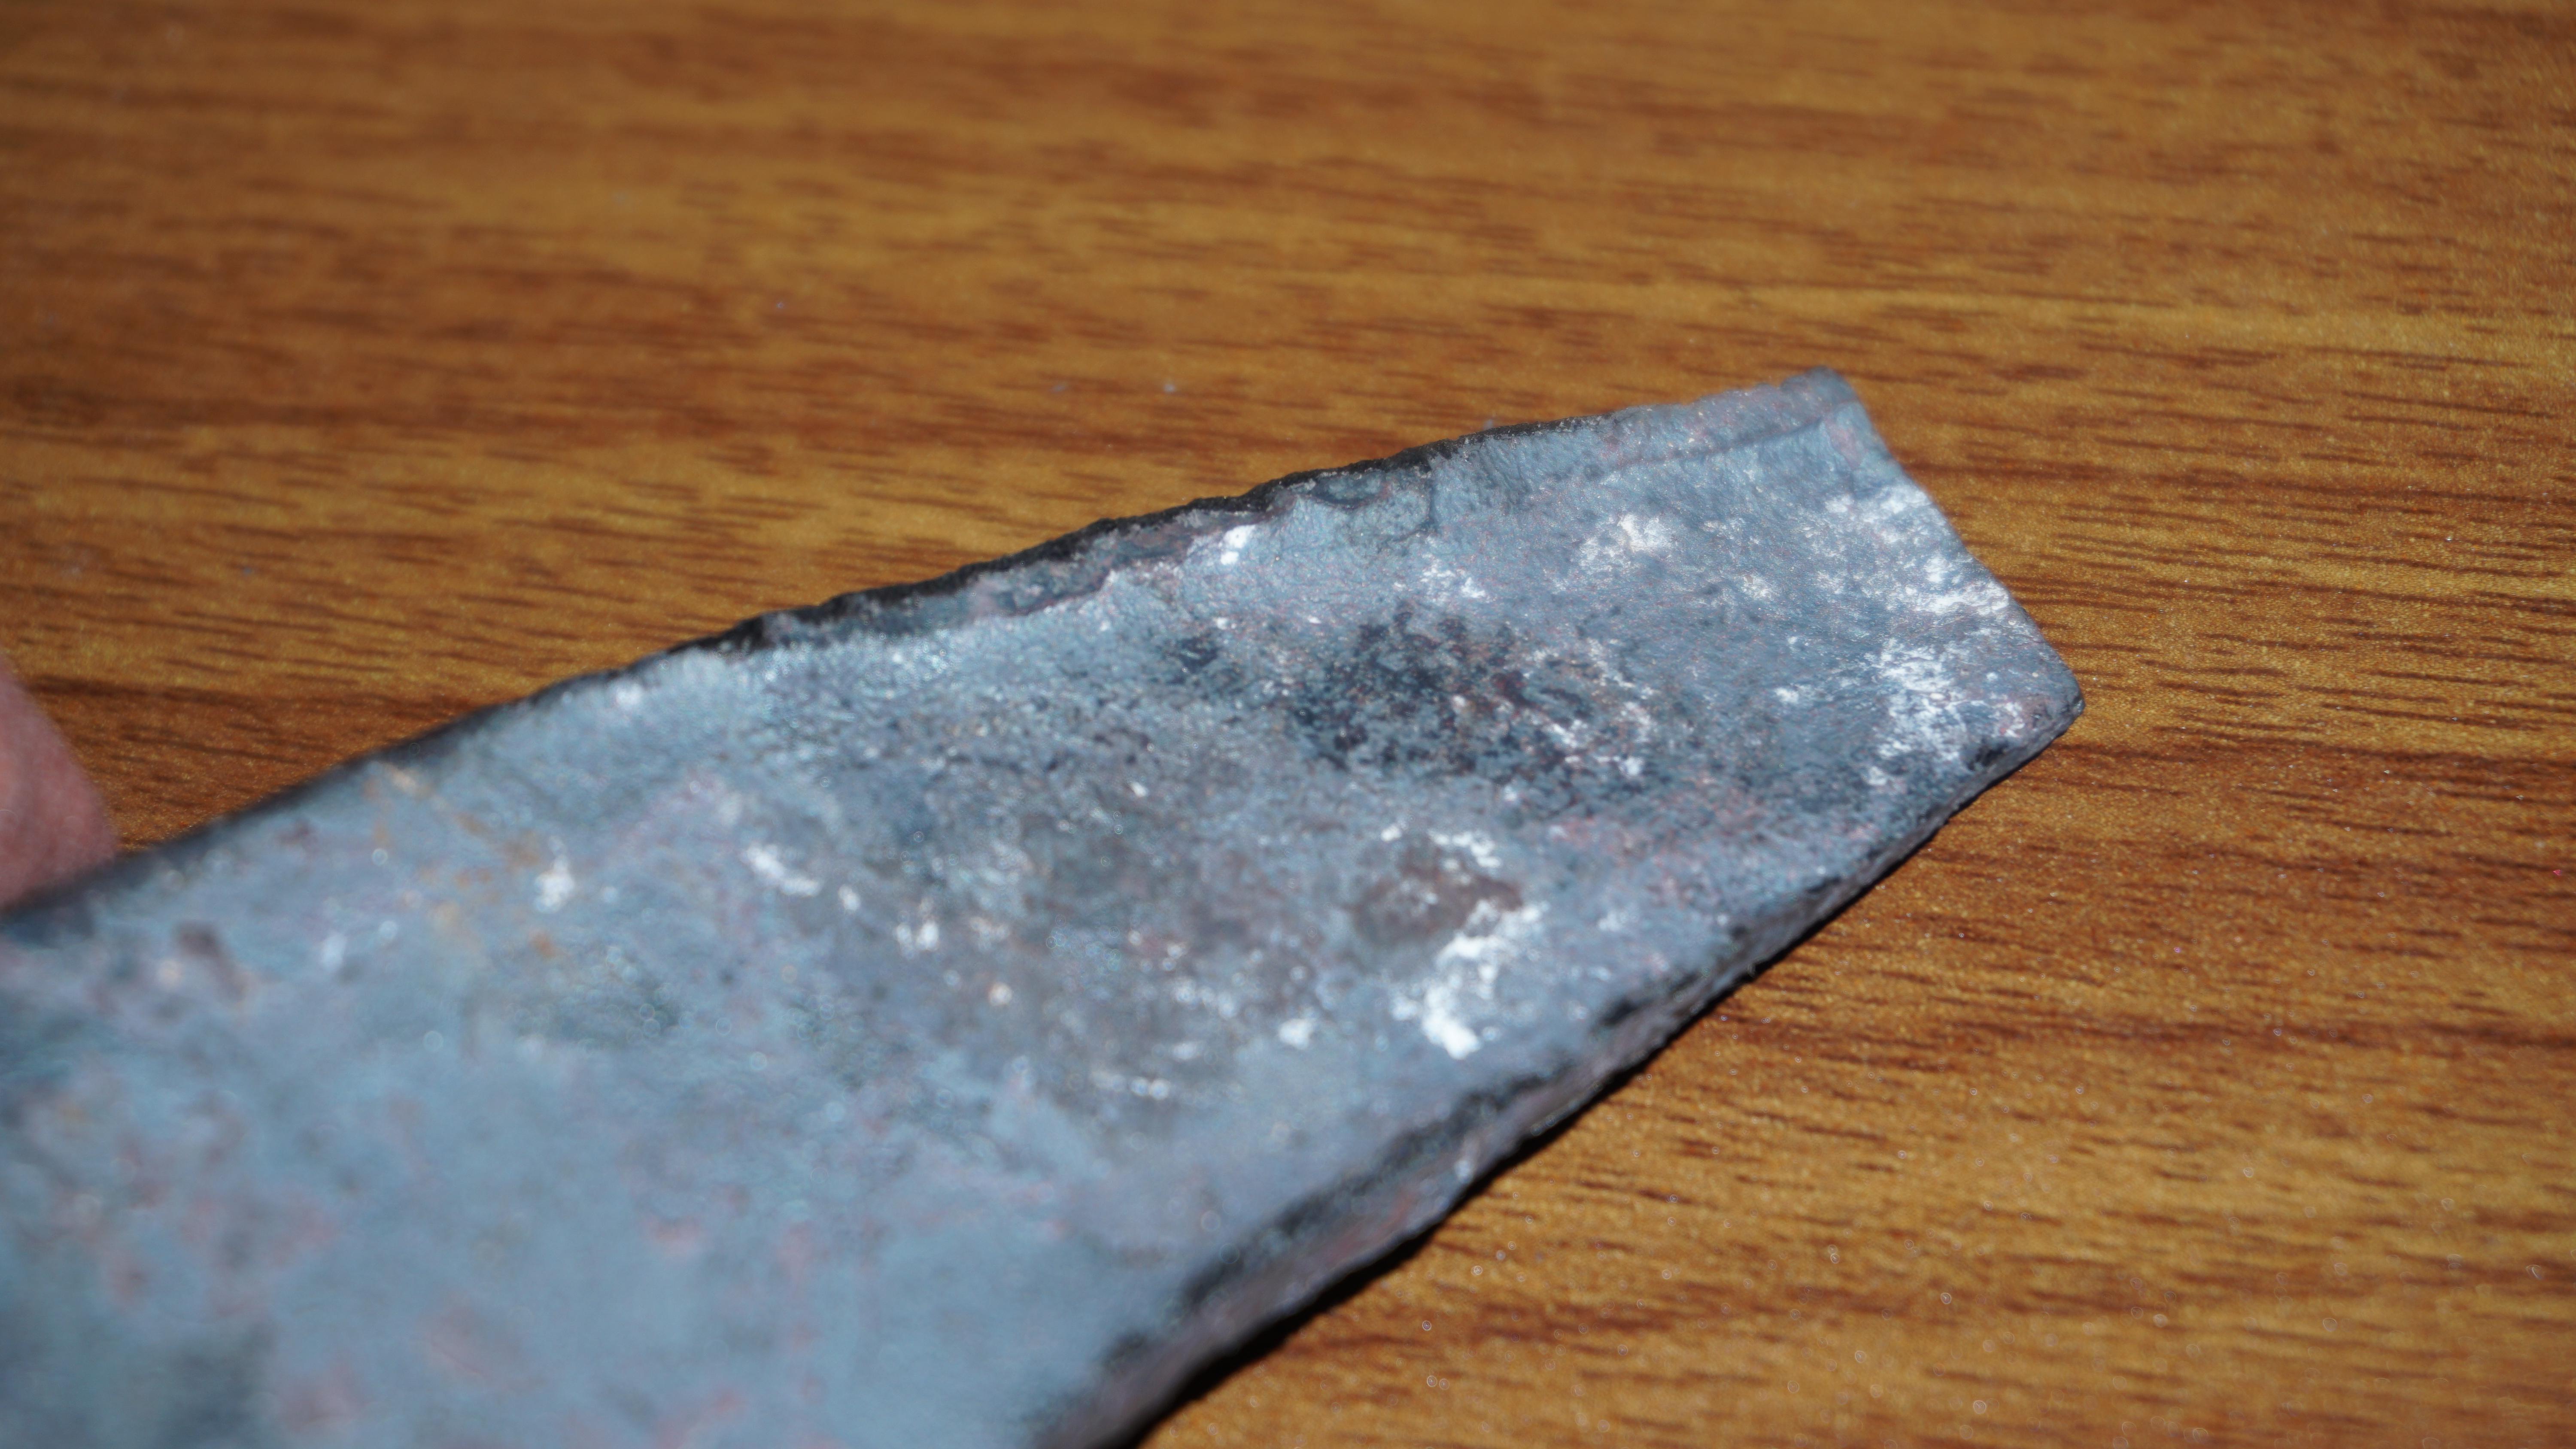
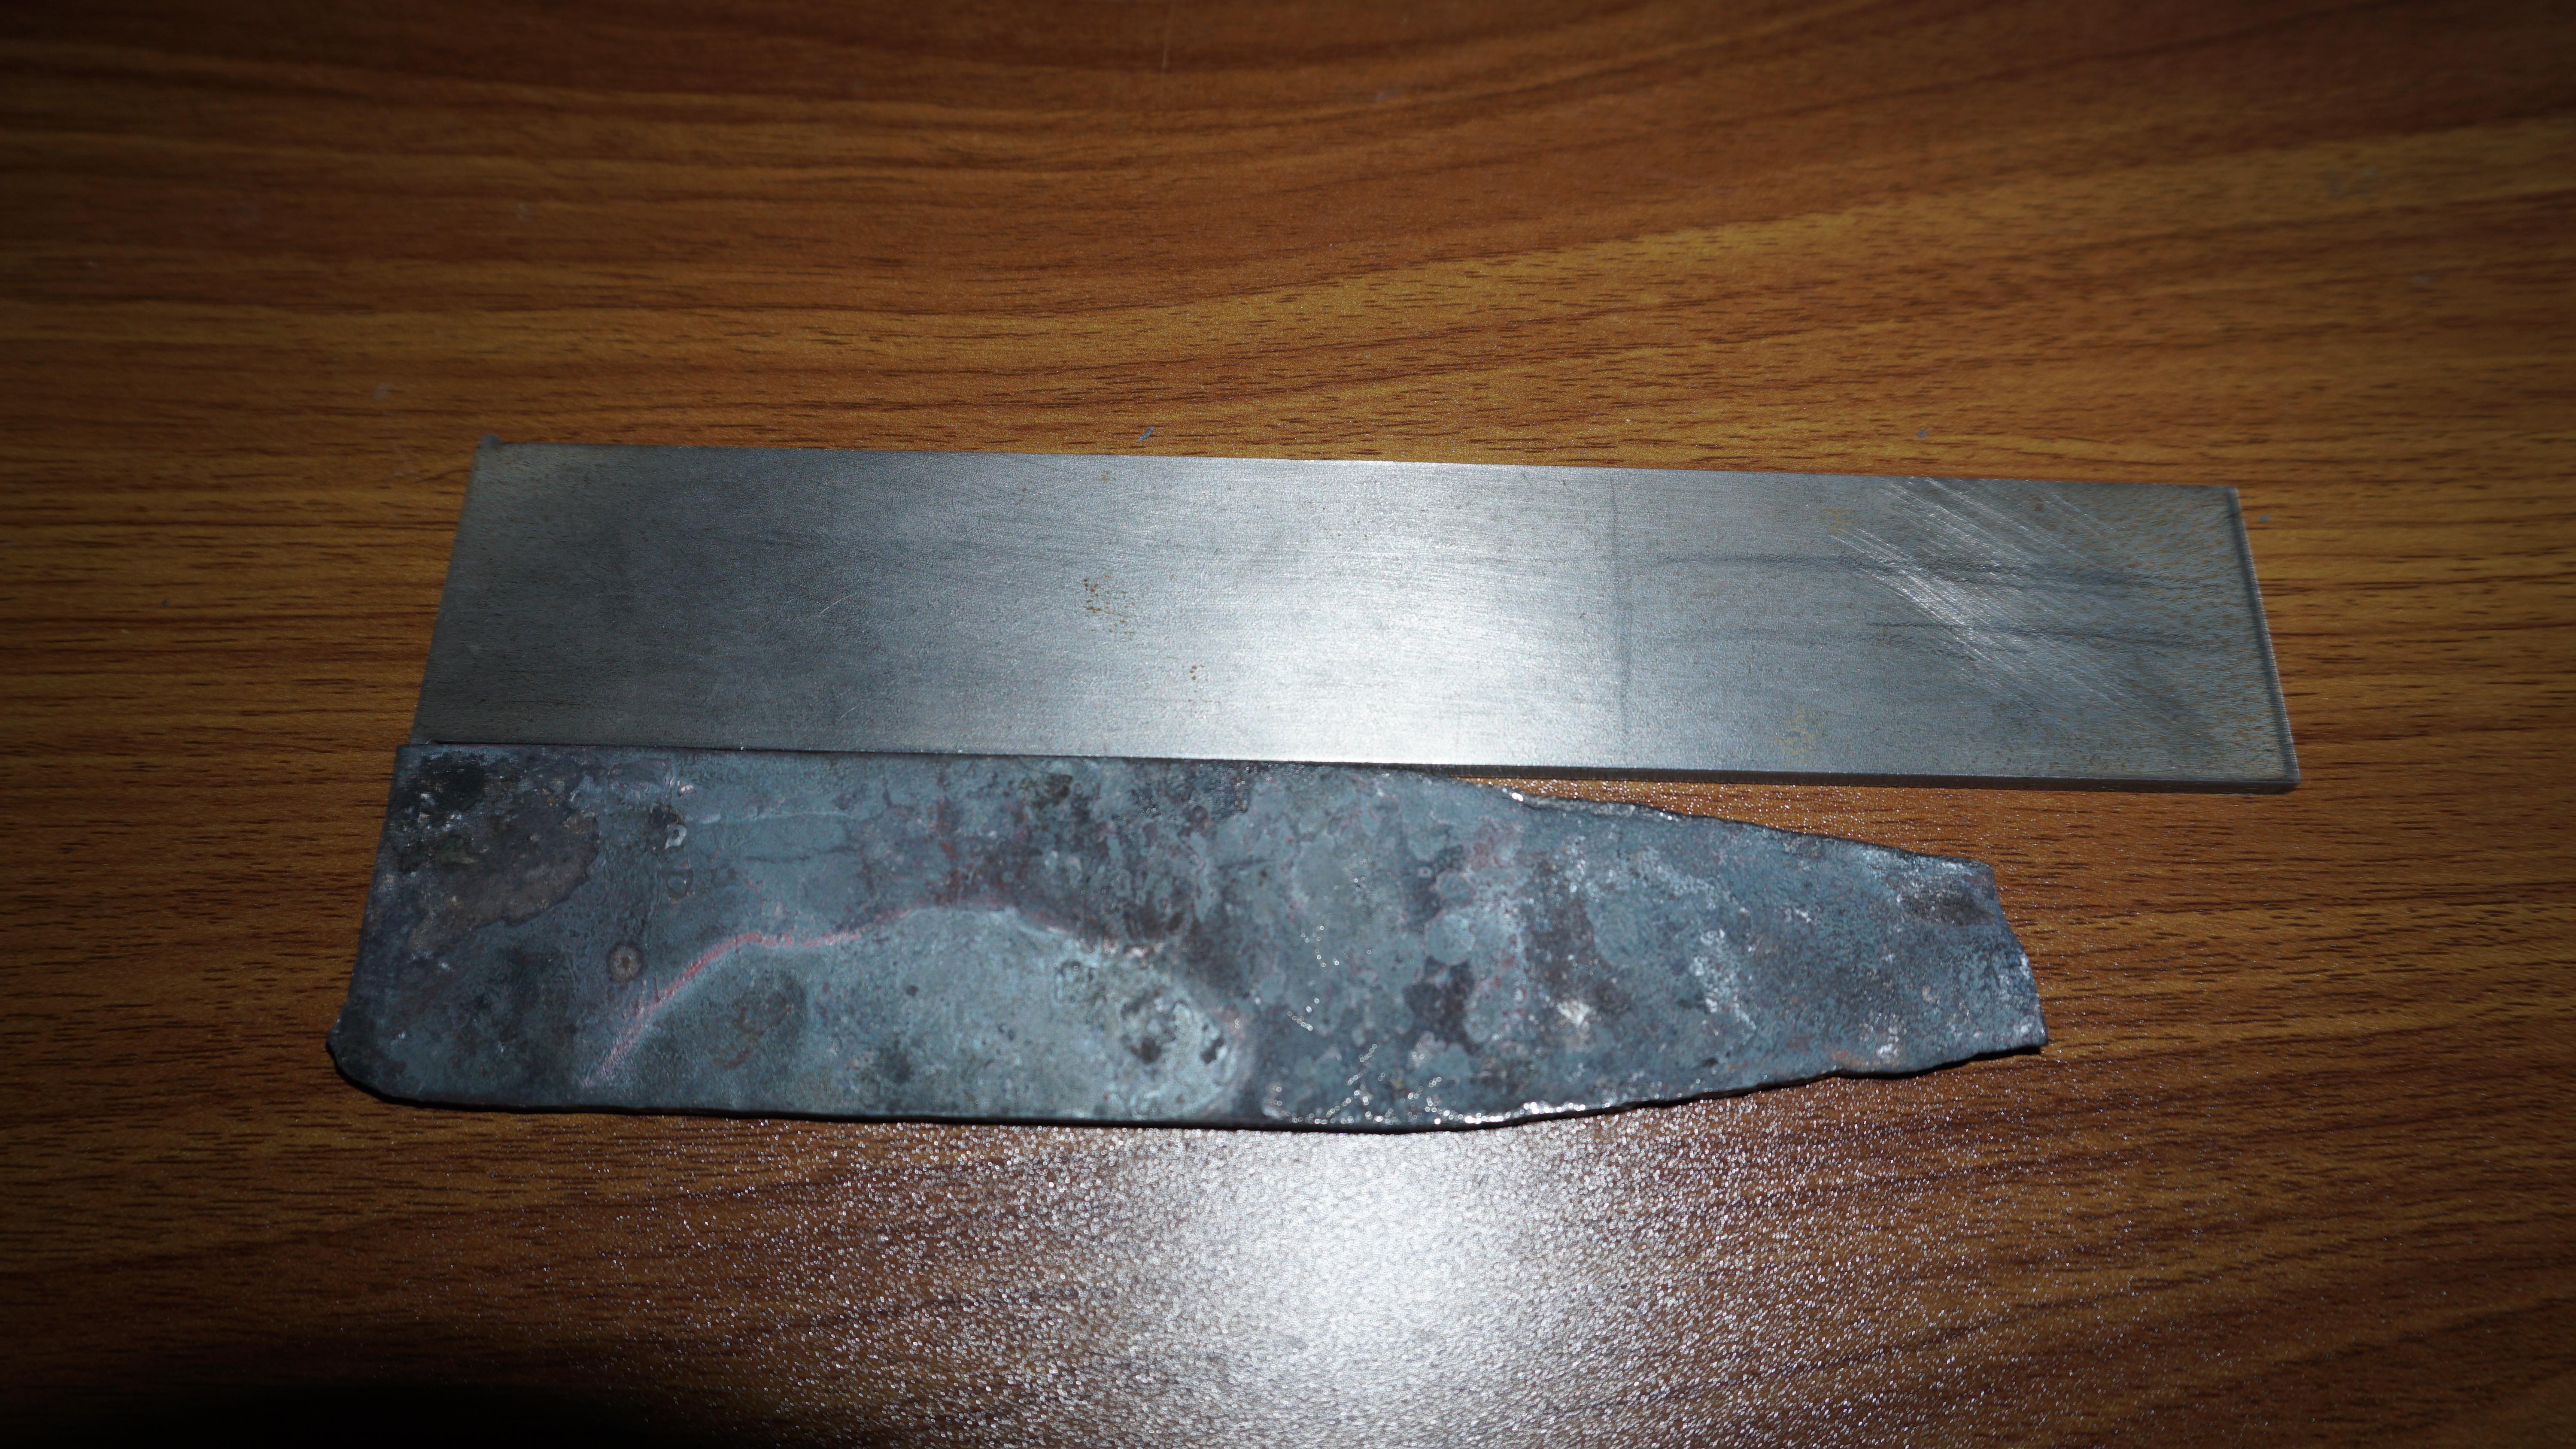
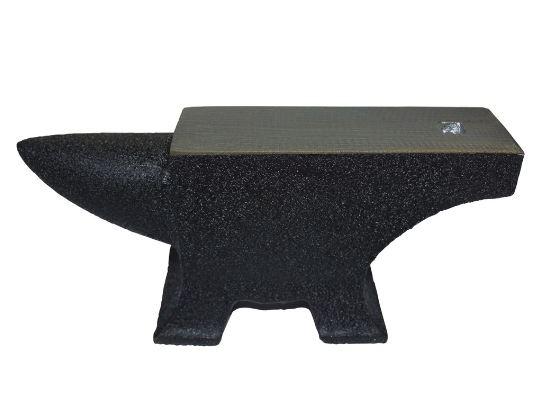
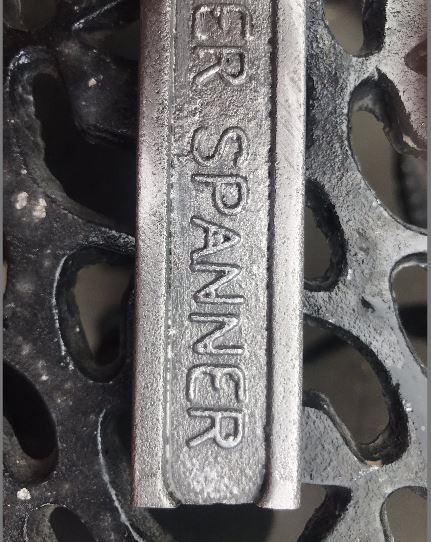
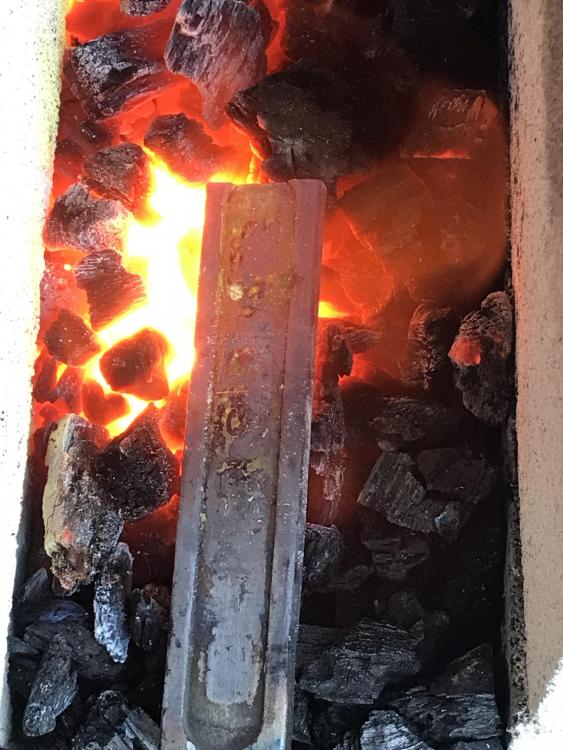
Apologies for the super late reply Thomas, I made another thread and completely forgot about this one. I definitely will work with some mild steel before attempting to work with the more expensive knife steels. Before I put the piece away, I did try alternating between the edge and the flat of the steel, so hit the edge once, flip and hit the flat, repeat until I needed to reheat. It definitely helped prevent the edge folding like it did when I first did it but the middle of the bar was so thin it just kept warping. I had to google what hammer and anvil dressing were haha. My anvil when I made this post was a very large, flat gate hinge screwed to a log, I now have a small 10kg (22lb) anvil that does have some somewhat sharp edges (it also has no way of securing it to a sturdy surface so that's a problem). The hammer (3lb) doesn't seem to have any sharp edges as far as I can tell. Both the anvil and hammer I have are in the two photos below Unfortunately I'm in month 2 of a 3 month lockdown so going out and finding metal to work with is tricky. I basically flipped our shed inside out finding any steel that could be worked, soaking it in vinegar and grinding it off to be safe. I did come across a piece of metal I was actually going to ask on the forums about. It was an old spanner, no rust at all despite sitting in the shed for probably a decade and was dark grey in colour or at least coated in something grey. I soaked it in vinegar, sandpapered it, then soaked it again and then decided to just use an angle grinder to grind everything back. It was magnetic and had a decent amount of sparks when I grinded it, I just thought it was cast iron or something and it was a nice thick piece that looked good to practice on. Upon putting it in the forge today, it took a very long time just to get to a dull red and a green crust formed over the metal (I had a respirator on and was in a open area just in case). This green crust ended up spreading to the charcoal somehow and I had bits of green charcoal in the forge. When the metal cooled, it was black and the crust looked like fried egg stuck to a pan (no joke! I'll put the photos underneath this). (After the two vinegar soaks and sandpaper but before the grinding, It had what looked to be air bubbles or something all over it so I thought it was just cast iron). I'd love if anyone could figure out what this metal could be! I checked the website (EziPier) but they had no information on what the spanner was made of


-
Need some tips and tricks on building a charcoal forge.
NguyenHoang replied to NguyenHoang's topic in Solid Fuel Forges
I may of got too excited and done a silly, I stuck the four bottom pieces of brick together with mortar (probably reversible right?). I'll see if I can get the tuyere higher or at least coming in at a downward angle, if not, I'll just have to fire it up an see how it goes. In hindsight I am starting to see how the box design might be a bit inconvenient with charcoal. When I wake up tomorrow I might have to do some redesigning -
Need some tips and tricks on building a charcoal forge.
NguyenHoang replied to NguyenHoang's topic in Solid Fuel Forges
Hey everyone, I decided to go with the side blast as it seemed much easier than the bottom blast. Is how I have it positioned in the photos okay or should it sit flush with the base or is the height it’s at now okay?

-
Need some tips and tricks on building a charcoal forge.
NguyenHoang replied to NguyenHoang's topic in Solid Fuel Forges
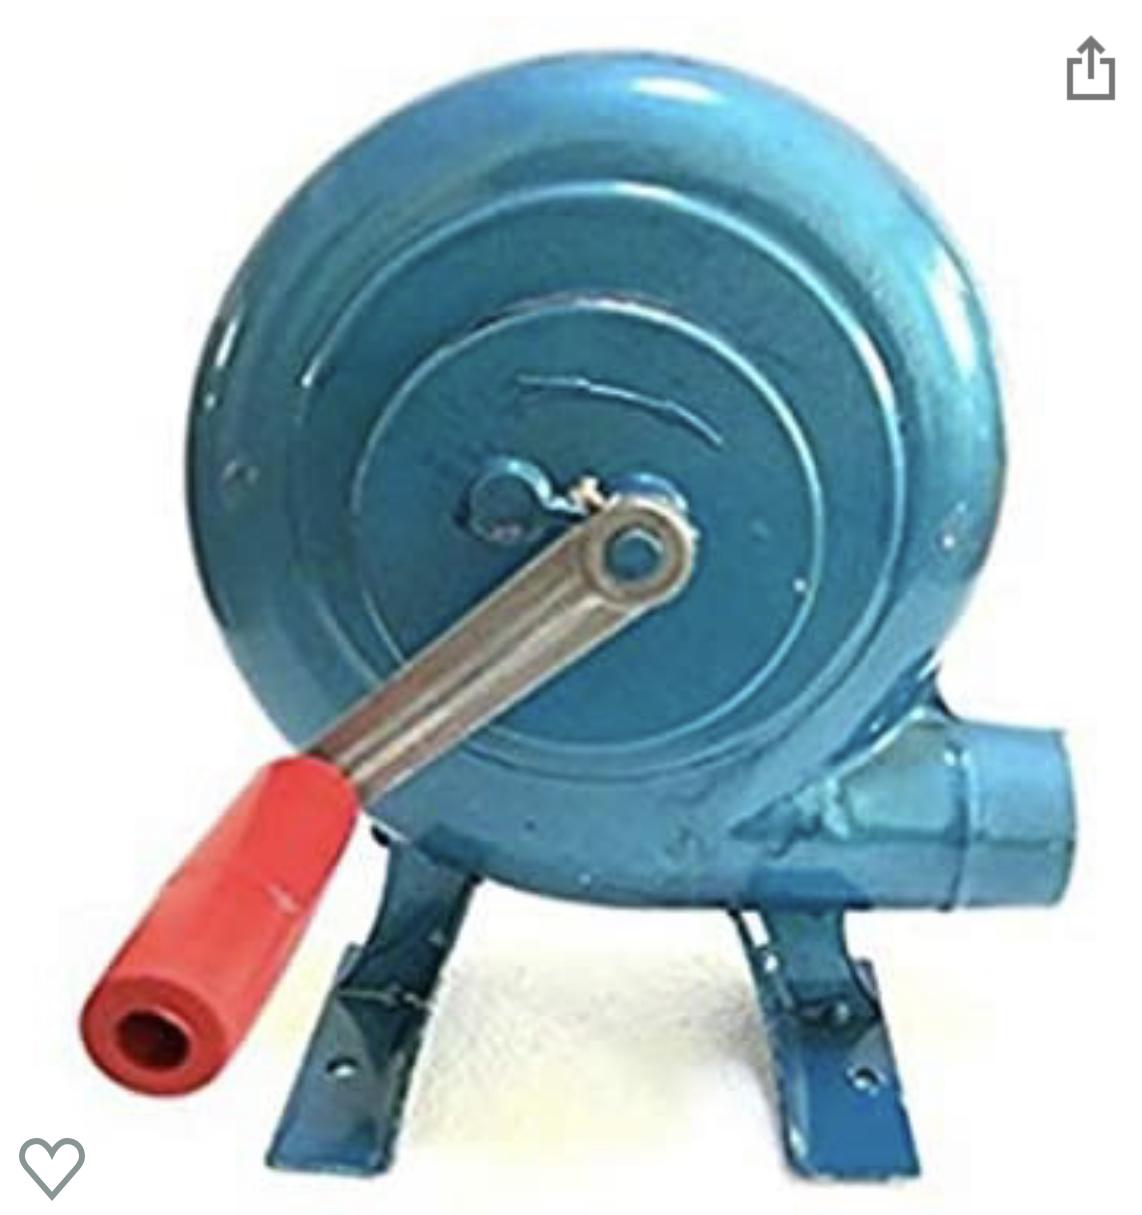
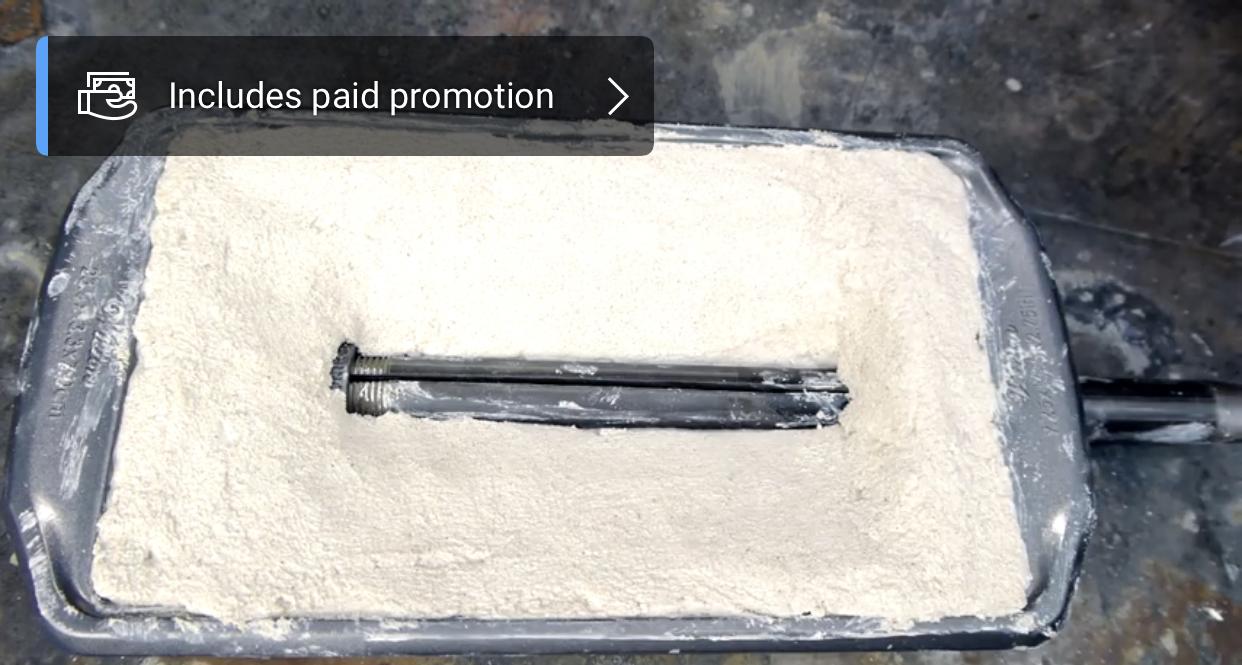
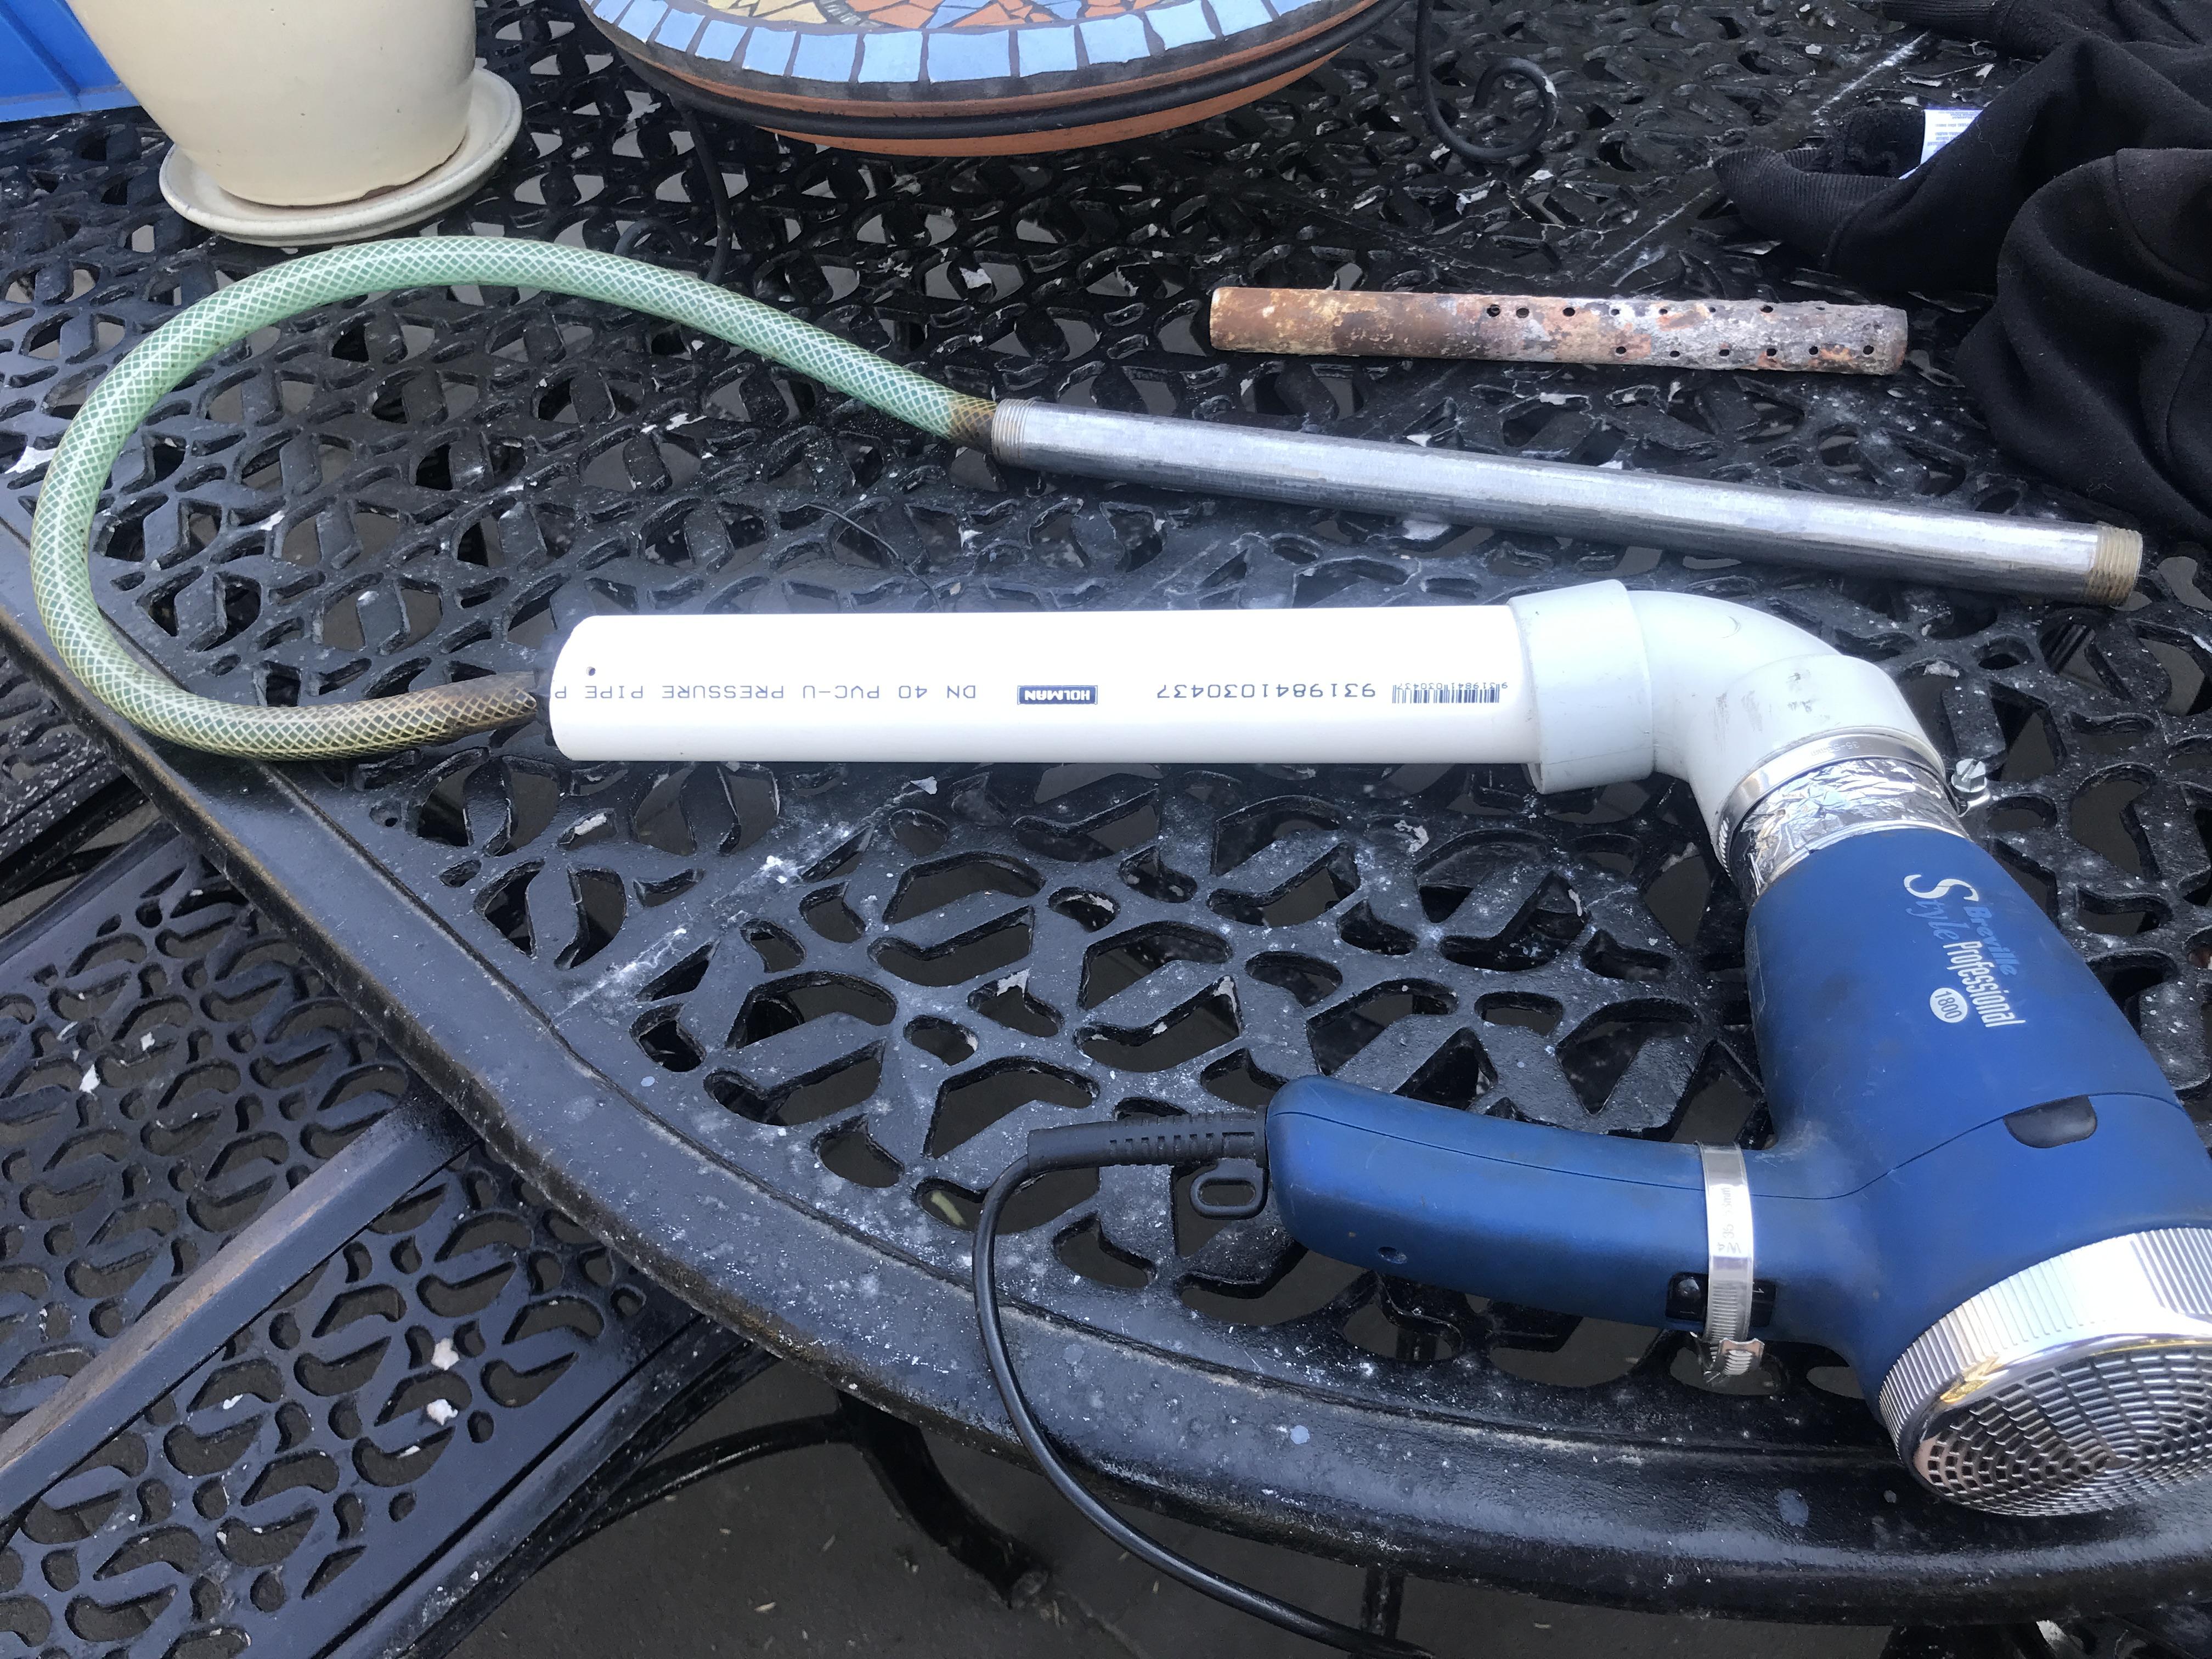
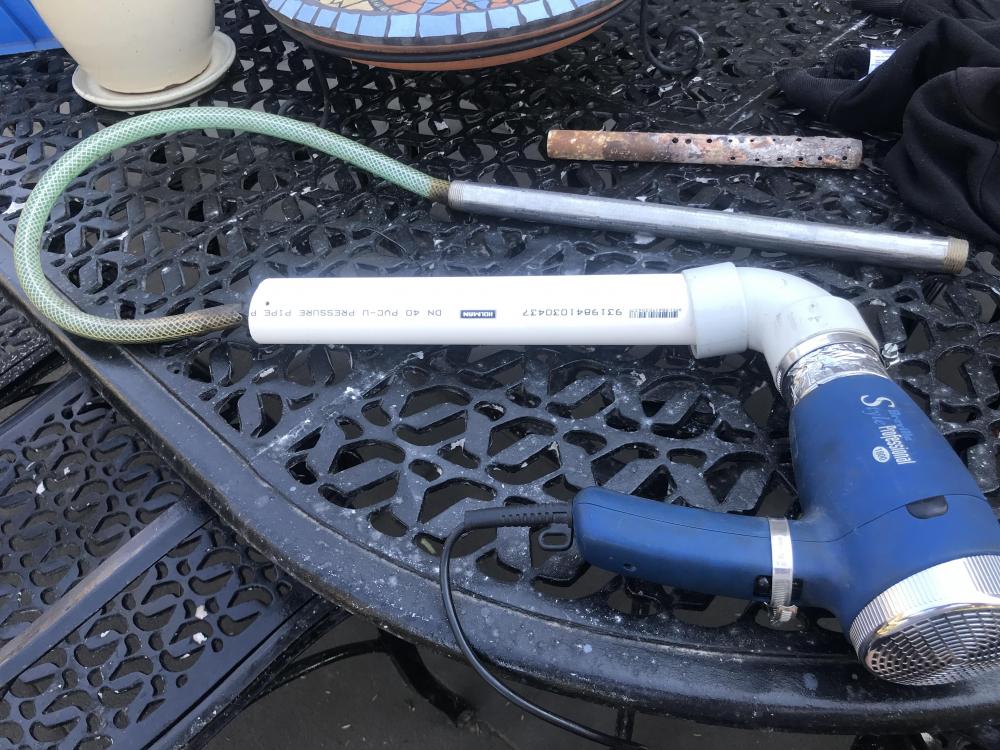
Ah I see, I decided to take the easy route and purchased a hand cranked forge blower instead. Hopefully that’ll be more efficient and quieter than the hair dryer and less physically intensive than a hand pump. I am still torn on the tuyere design, the idea was bottom blast using a pipe with a long gap running through the middle ( like in the photo below). Charles however mentioned a side blast and that seems so much easier than having to carve out the firebrick and cutting a line down the pipe. Would it work something like how I have it configured in the photo below? ( the pipe will sit much lower, just using regular brick to test it )
-
Need some tips and tricks on building a charcoal forge.
NguyenHoang replied to NguyenHoang's topic in Solid Fuel Forges
XXXX, that double bellows looks a bit too complicated for me haha. That manual air pump ( or even a bike pump) might actually be a good fit for my forge! -
Need some tips and tricks on building a charcoal forge.
NguyenHoang replied to NguyenHoang's topic in Solid Fuel Forges
Yeah the plaster of Paris didn’t hold up but it was just a temporary solution as I was just too excited to get started. Some of the forges in JABOD look really good and easy to make. A lot seem to be quite big which might make it difficult as I have set up shop in our shed ( great ventilation but very little space). I might see if I can make a JABOD forge but in a smaller form factor. Is the box usually filled with dirt or sand? In terms of air supply, would a little hand cranked fireplace blower or bellows like the ones in the photo work?

-
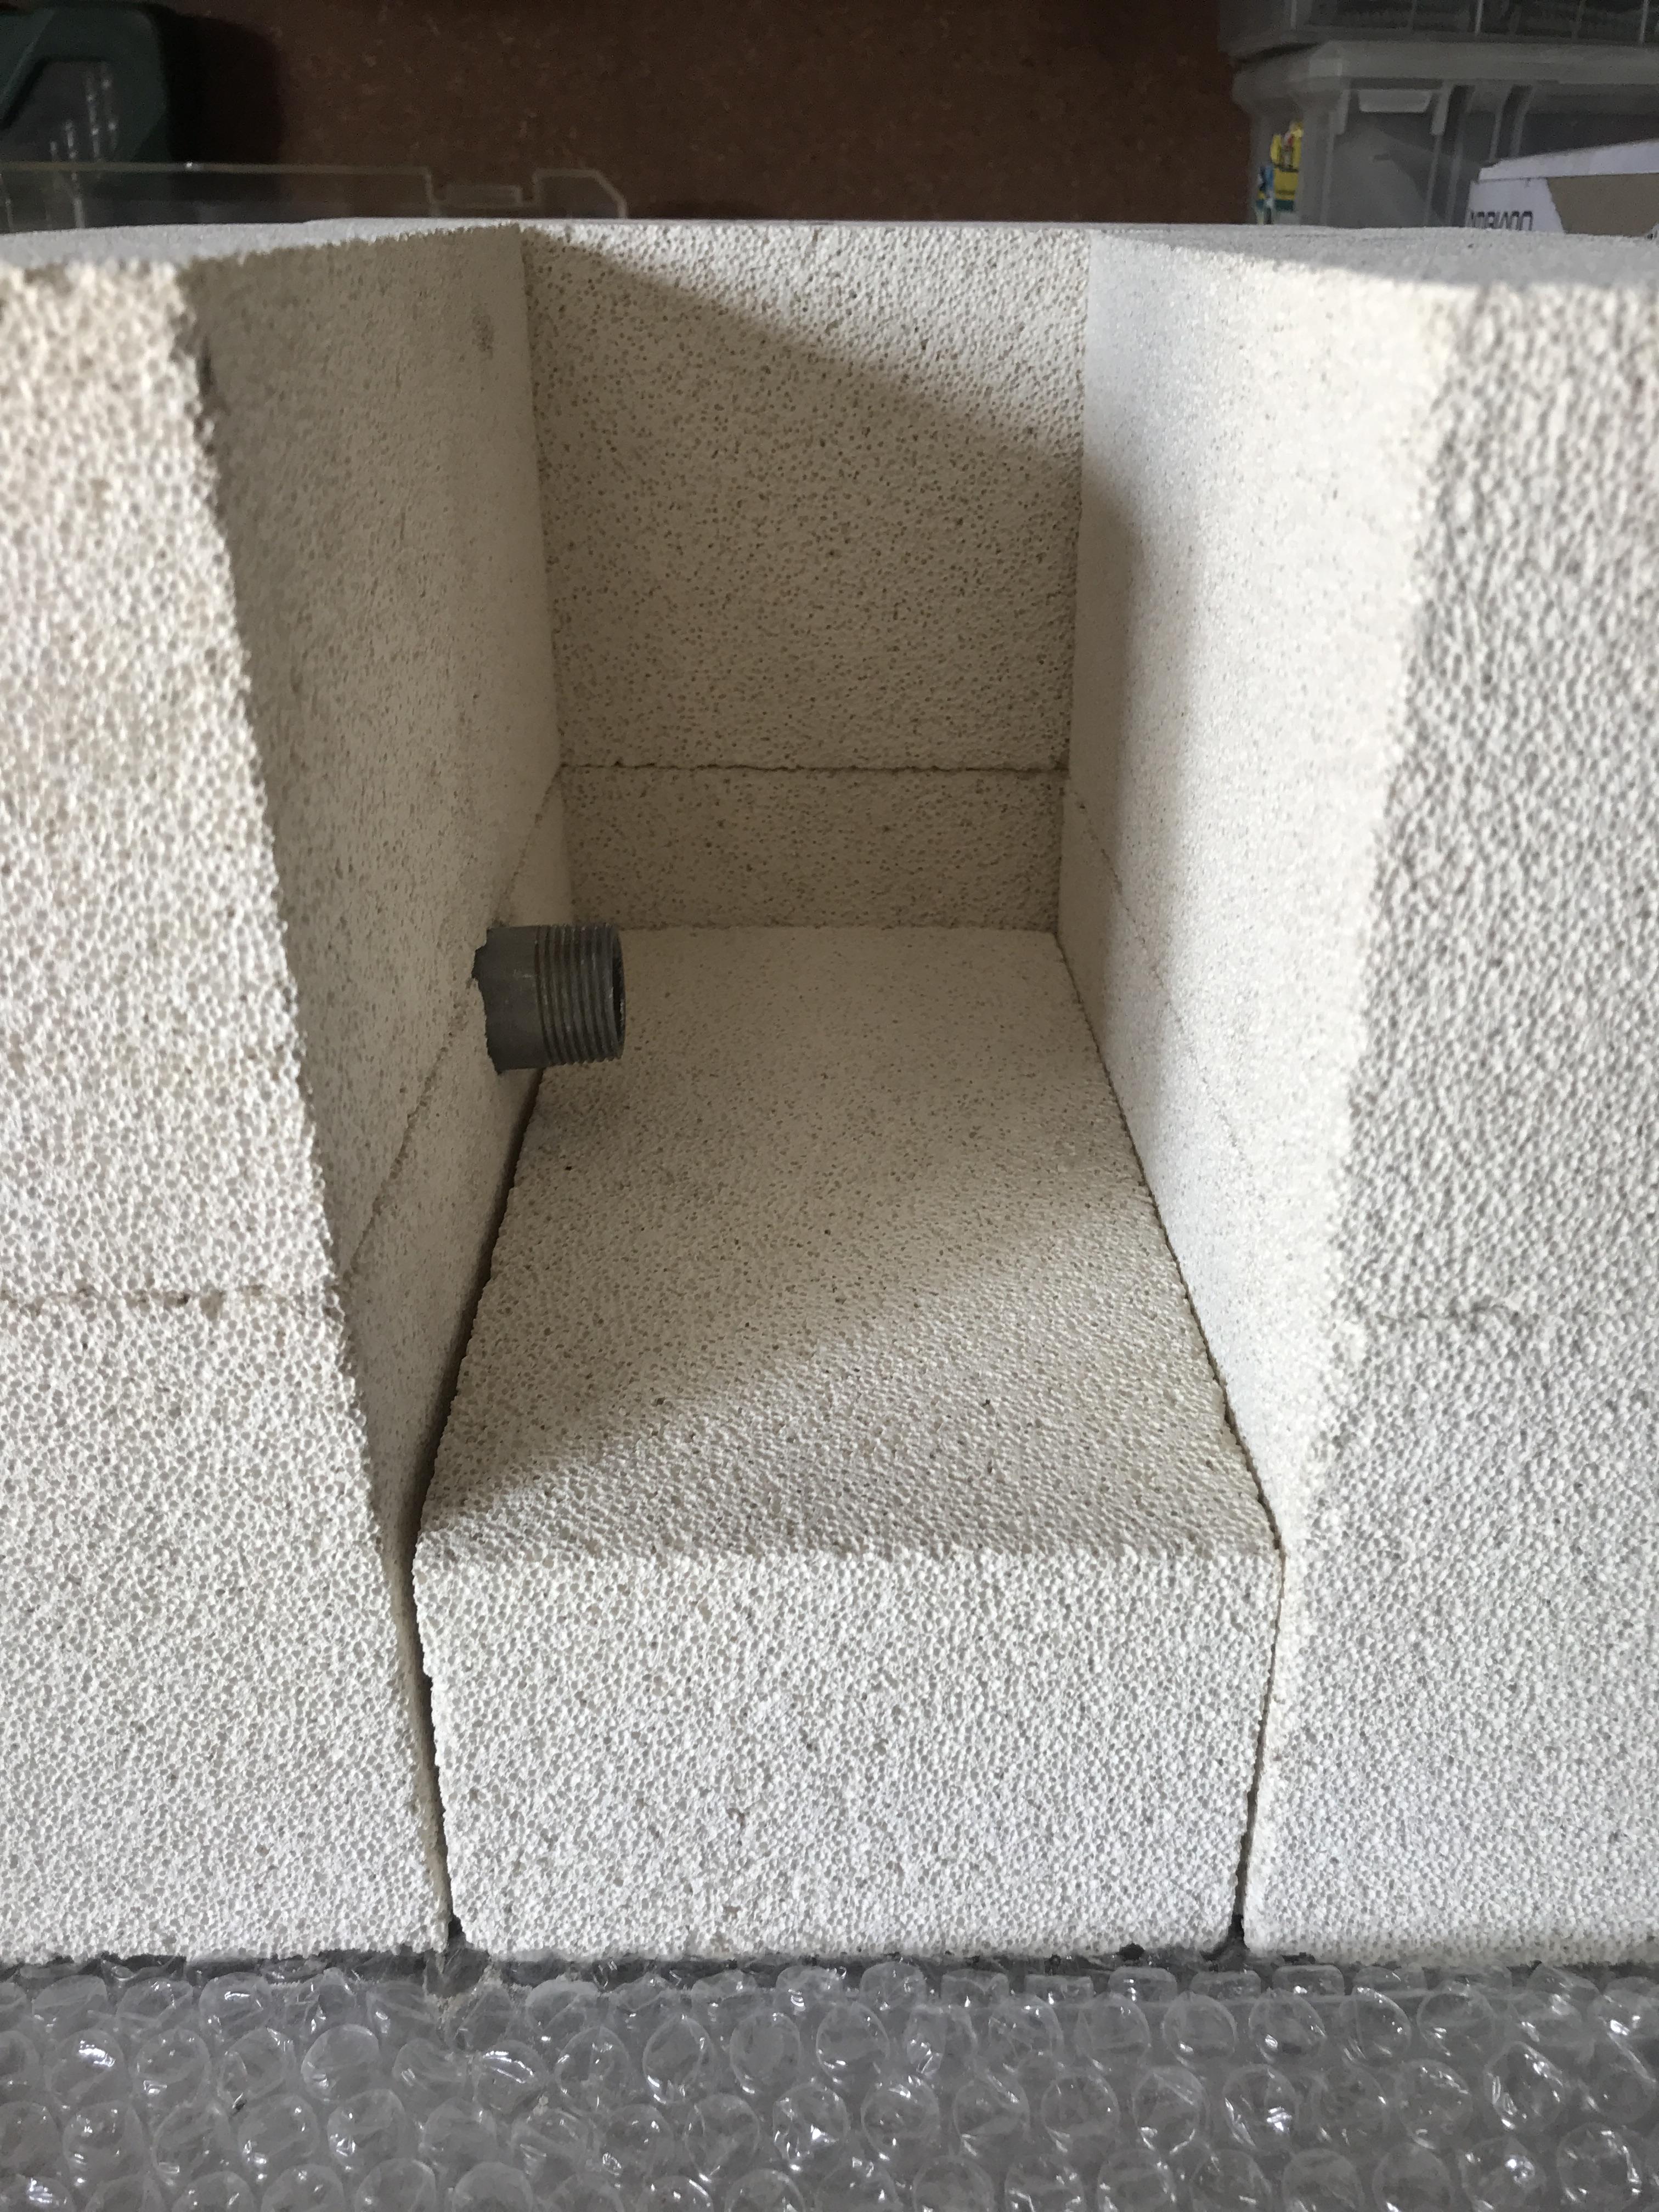
Hey everyone I'm just recently started my adventure into blacksmithing and am looking to upgrade my "old" forge (about 2 weeks old). The old forge was plaster of paris/sand molded around a steel pipe with holes drilled in it and surrounded by bricks. A hairdryer and hose was connected to the pipe for airflow. It was a great little forge for my first experiments into blacksmithing but I was looking to make something a little more portable and longer lasting as the plaster has started to crack. (old forge) My idea is to follow the same general shape of the old one but I am using firebrick instead. I was thinking of carving out the base of the firebrick so that the airflow pipe (tuyere?) sits recessed into the base (and also to carve a hole at the back of the forge for the pipe to stick out). I also have some high temperature refractory mortar (up to 1600c or 2912f), can I use this to line the entire inside of the forge (including the base around the pipe) so that it will last longer? I imagine placing metal and charcoal into the forge on just the firebrick alone will erode it quite quickly as they are very fragile. The entrance of the forge will likely be covered by another fire brick / regular brick on its side so that it creates a lip / barrier so charcoal doesn't fall out. In terms of airflow I am using the same hairdryer. Previously the hairdryer would sit loosely inside a funnel with a hose taped to the smaller opening, the hose is then attached to a very thin aluminium pipe which then went inside the steel pipe in the forge. The reason I did all this was due to the hose originally melting on the forge side and the hairdryer becoming so hot it melted the hose on the other side too. For what ever reason, having it sit loosely in the funnel and adding the aluminium pipe on the other end prevented it from overheating / melting. The new design is a little cleaner, with the hair dryer sitting inside a PVC 90degree bend connected to a PVC pipe. the hose is now sitting in a brass hose fitting that has electrical tape around it so it fits snugly in the PVC pipe. on forge end, I now have a bigger steel pipe (I removed zinc plating from both pipes) and the hose just sits directly in it. I am hoping the the longer pipe, which will extend further out the back of the forge than the old one (shown in photo above the new pipe), will not get hot enough to melt the hose. However the hairdryer now gets extremely hot, even on it's cold setting. I don't want to go back to using the funnel as a lot of air escaped but it might have to do for now. The old pipe just had holes drilled in random areas along and around the pipe (although only half the pipe was above the plaster of paris). Instead of drilling holes all over the pipe, my plan is to use an angle grinder to cut a straight line down the middle of the pipe so the airflow is more consistent along the pipe. Apologies for such a big post, I didn't think I had this much to ask! But I would love any constructive criticism or even advice on what I could do better, what I am over complicating and any better design for my forge. I'm building it in a small form factor just so I can move it around more easily and as I don't have a lot of space in the area where I use it. I would also love any recommendations for a good / cheap option for my airflow! Thanks in advance

-
They aren’t pretty but they work! I’ve put some 3 in 1 oil on it, wrapped it in paper and stored it away for a more experienced me in the future. I appreciate the help Frosty, I think I will tinker around with some wall hooks/ S hooks to practice my hammer skills a bit
-
Thanks for the reply guys I’ll make sure I add my location from now on! I definitely got too excited after watching some videos and thought “hey making a knife looks easy” ( boy I was wrong). I made one pair of tongs and immediately thought a knife was the next step. a stock removal knife is definitely what I will do with the other billet. I will however wait until I feel a bit more comfortable with blacksmithing overall. With the destroyed piece, would it be possible/recommended to try fold it and forge weld it into a thicker billet and restart from there?
-
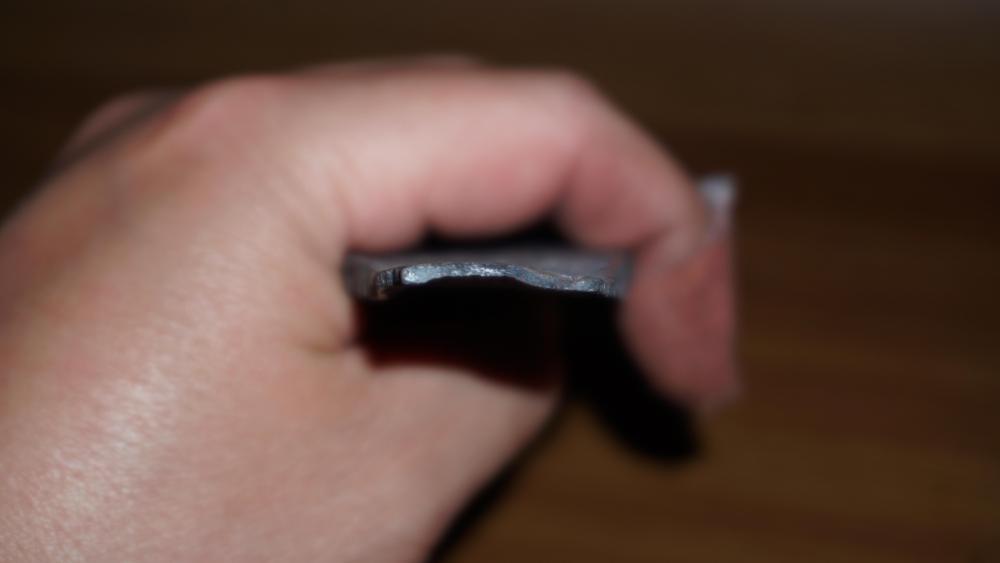
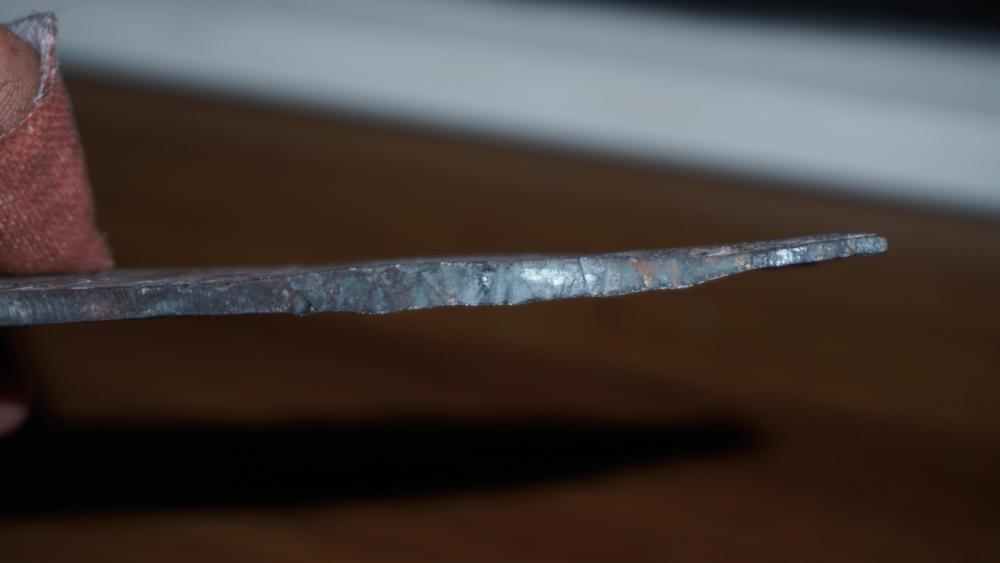
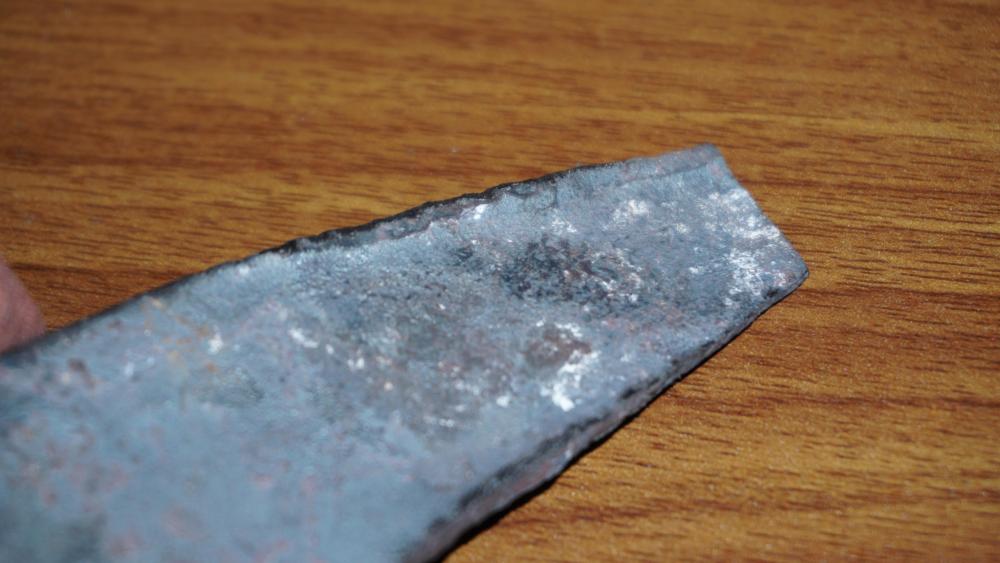
Hey everyone, As I'm in lockdown here down under for another month I recently decided to give blacksmithing a crack! Something I've always wanted to do but never had the time to. I've run into a lot of setbacks in my first 2 weeks or so and was hoping to get some advice on what I could do better / how to do things. I tried forging a knife from a billet of 1075 steel I purchased (dimensions 3.2 x 38 x 200mm (0.125 x 1.5 x 8″)). It is quite a thin piece and the idea was that I try draw out a tang and then go on to shape the rest of the blade (was aiming for a Tanto style blade). I'll provide pictures of what it ended up like but I initially began by just hitting a hammer directly downwards onto the metal and I believe that I created 'cold shuts' as the sides folded onto itself. I removed as much as I could with a file and read that to draw out metal, the hammer should hit the metal at an angle, so I started doing that (hitting the edge and then switching to the flat of the metal to prevent cold shuts). While I managed to draw the blade out a bit for the tang, the end is now completely destroyed. The edge of the bar where I worked it is quite thick but tapers to an extremely thin edge and an even thinner mid section (about 0.5mm /0.019685 inches or less). It was so thin I actually lost about 3cm of the bar as it was so thin I just snapped it off as it kept warping and folding whenever I struck the bar. I heated the bar up until orange however it would become a dull red in about 3-4 hits and I would have to put it back in the forge. Is the bar too thin to work with at 3.2mm or 0.125 inches? I currently am using a 3lbs machinist hammer / cross-peen hammer and my anvil is currently a flat mild steel bar attached securely to a roughly 20-25 kilo (44-55lbs) tree stump (proper anvil coming soon). I tried using both the flat face of the hammer and the cross-peen but it felt quite awkward to use the cross-peen, probably due to me doing it wrong. I'm guessing this bar is now a right off and I've got one more bar left and don't even want to touch it without having a bit more knowledge and practice. I would love any tips, advice or even how ya'll would work with the bar. Thanks in advance!