Steamcheng
-
Posts
19 -
Joined
-
Last visited
Content Type
Profiles
Forums
Articles
Gallery
Downloads
Events
Everything posted by Steamcheng
-
What did you do in the shop today?
Steamcheng replied to Mark Ling's topic in Blacksmithing, General Discussion
When I run my hit and miss engines in the summer, I mix in a little citronella lamp oil in the fuel (I run them on generic Coleman fuel/white gas) and that helps keep the little buggars at bay! I thought about trying it in the 50:1 mix in my trimmer, but figure it isn't really made for lubrication and will destroy it. But hit and miss engines will burn it just fine. -
What did you do in the shop today?
Steamcheng replied to Mark Ling's topic in Blacksmithing, General Discussion
Most definitely! I had it bead blasted before I took delivery of it. I'll also do a few hard burnouts before trying anything edible in it. My neighbor made one from the same kind of drum (from Sportsman's Warehouse) a few years ago and it works superbly. My old smoker is about to fall apart from years of use, so this project is being driven by that to a certain extent. -
What did you do in the shop today?
Steamcheng replied to Mark Ling's topic in Blacksmithing, General Discussion
Started work on my drum smoker today. Nothing really accomplished other than getting a few measurements and sketching out some parts to work on (hinge, handles, charcoal basket, etc). The drum is bigger than a 55gal drum - it's about 25" diameter. Was some kind of military aircraft engine container originally. Then I took the crude hooks I bodged out yesterday in a class and experimented with surface finishes. I used a mixture of beeswax, BLO and turpentine and got a nice black finish from treatment of black-hot metal after cleaning them up good on the wire wheel..jpg.84275ccf12a0c75674a8100c947ddc95.jpg)
.jpg.a3b32edffb68c777be9d3ddfdc1cef8c.jpg)
-
What did you do in the shop today?
Steamcheng replied to Mark Ling's topic in Blacksmithing, General Discussion
Not in *my* shop, but took a class today and made some hooks. Helpful to have an experienced smith looking over the shoulder and giving tips. Again, highlights how much I have to learn and practice, but I'm enjoying it immensely. I'll practice plenty more on my own. My wife already likes these amateur hooks, so I know I'll have at least one customer..jpg.aceb44872d4ecf23708b547b395ffdc8.jpg)
-
What did you do in the shop today?
Steamcheng replied to Mark Ling's topic in Blacksmithing, General Discussion
Alexandr, that's a sweet looking countertop! Well done! -
What did you do in the shop today?
Steamcheng replied to Mark Ling's topic in Blacksmithing, General Discussion
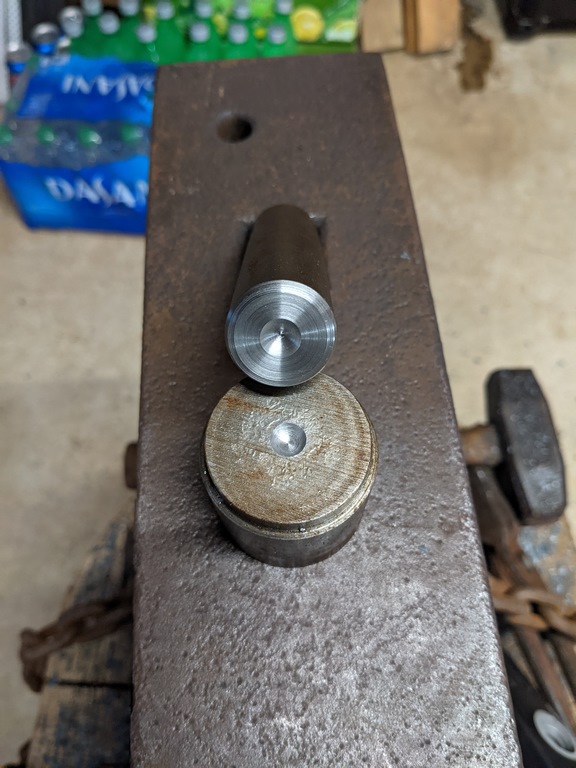
Frosty - thanks for the thumb rule. The rivets that came with the tong set are 1/4" with a 13/32" head on the prefinished side. Since I was finishing them flat on the anvil while peining the unfinished side, (while being very careful to keep both tong halves flat together) I can see where both sides are more like 7/16" now. I'll pay more attention on the next set I put together. Dragon, that's a nice batch of setters! I had in mind to make some of different sizes as I go along. I saw how much things like this sell for and I can't imagine paying that for things I can make so easily (one way or another). Thanks to all for the tips and help! -
What did you do in the shop today?
Steamcheng replied to Mark Ling's topic in Blacksmithing, General Discussion
Thanks Thomas. I buy used cold chisels (among other things) at yard sales and swaps, so have a decent place to start on a round end punch like that. I can't for the life of me find a large enough bearing ball in my shop right now! Need to "go to the source" and pick up some scraps. Originally, I settled for the 3/8 ball mill, since the rivets that came with the tong blanks are only .406 which is only about 1/32 bigger than 3/8. Since now I'm learning a new hobby, perhaps I should think more about how I'd do things in the forge than on the lathe or mill. Of course I could use a rounded profile tool bit on my lathe and make larger domed dies for setting rivets, but I ought to be thinking about creating them with a hammer. -
What did you do in the shop today?
Steamcheng replied to Mark Ling's topic in Blacksmithing, General Discussion
Man, I love those hooks and swivels! Great stuff! After making some tongs yesterday, I fiddled around in my shop and made a rivet setter to use on the next set. It is nothing fancy. I just used a ball endmill to make both parts out of a couple of pieces of steel. The largest ball endmill I had was 3/8" so it isn't very big, but should do for the next few sets of tongs I make.
-
What did you do in the shop today?
Steamcheng replied to Mark Ling's topic in Blacksmithing, General Discussion
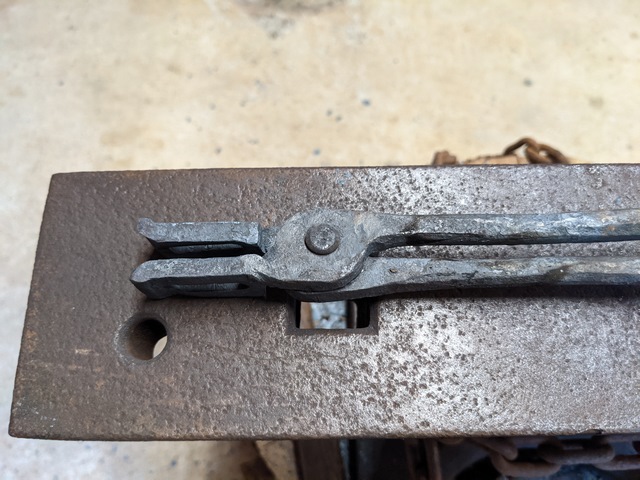
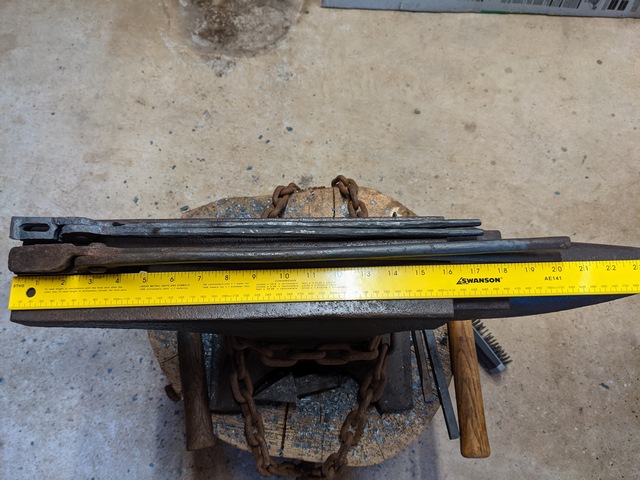
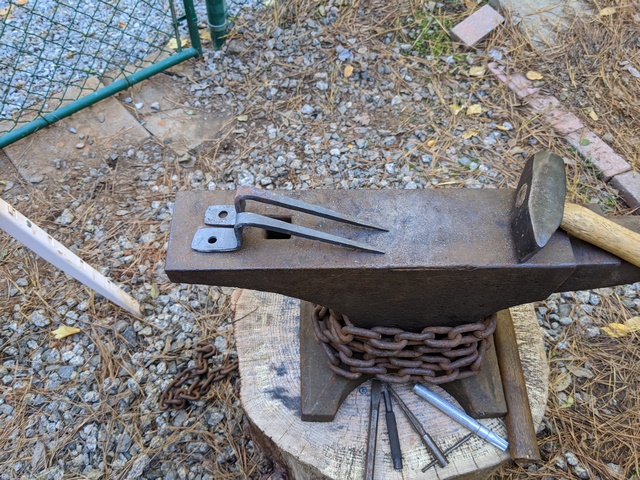
Hammered out my first set of tongs, courtesy of Ken's Custom Iron. I have a lot to learn and need a lot of practice, but these will get me started. I sized the jaws to let me hold the 5/16 blanks to make the rest of the tongs in the set. Then I'll resize/shape as needed. For comparison, here is a photo showing the gorilla tongs I had (was in an auction lot I won some time back). They're awful heavy for anything I'll be doing for a while. The ends of the reins are about 1/2" round - these things are heavy. Glad to put them down now!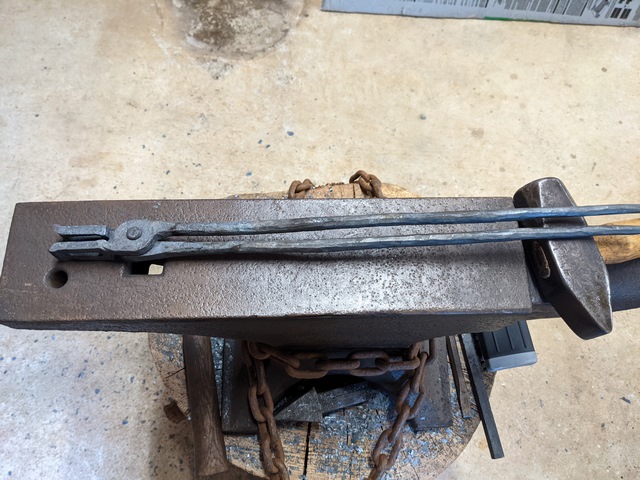
-
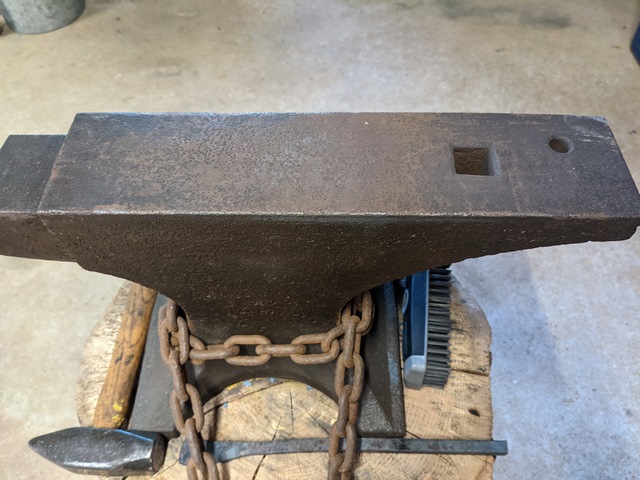
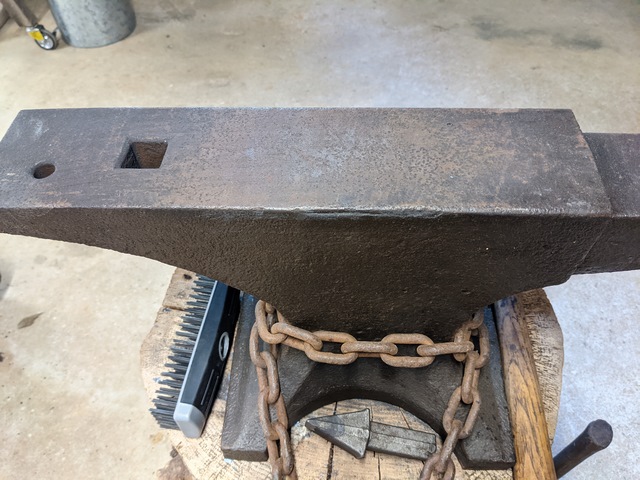
The edges do have a small radius and are not particularly sharp. The area near the chipping is a little bigger radius. I don't think the edges are too square and sharp as they are.
-
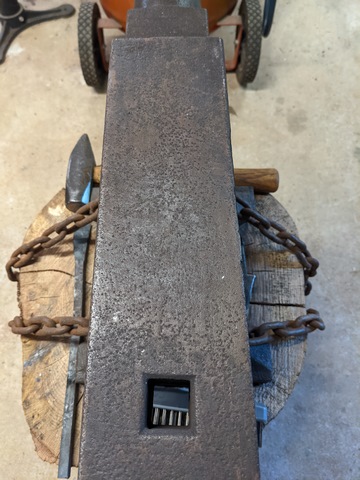
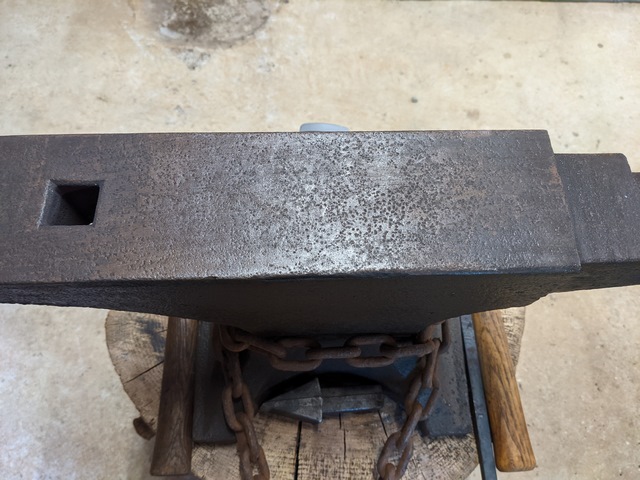
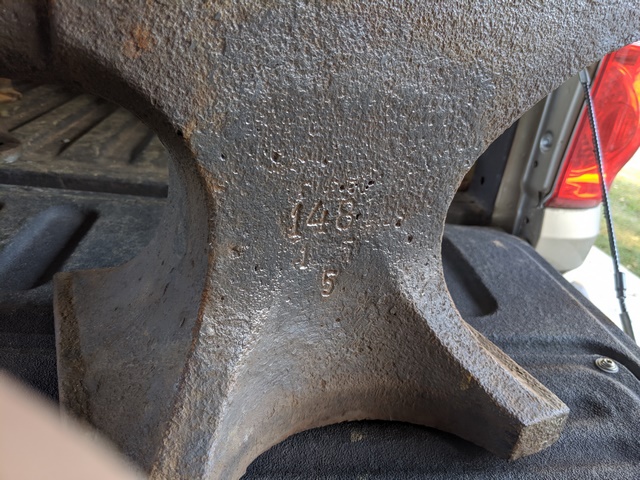
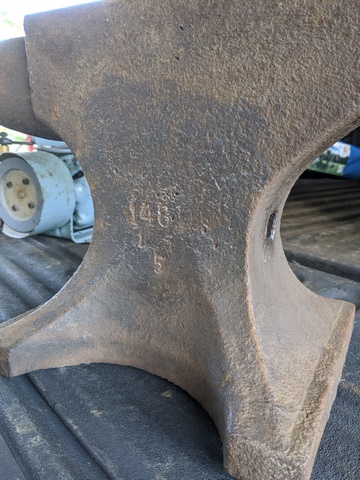
Thanks, Frosty. Good stuff! I have been reading all the posts on Soderfors anvils here and count myself lucky to have a great one. The face has some pitting and one edge has a little bit of chipping, but otherwise it is in excellent condition and just needs to be used. Now that I have time and a good space, I plan on remedying that! I'm a former career Navy steam engineer, so I come equipped with eye and hearing protection wherever I go. I only have two of each of those sensors, and plan to keep using them the rest of my life, so if using this anvil means wearing hearing protection it isn't anything unusual or discouraging for me. Anyway, with the chain hold-down I rigged it isn't that loud now unless working on the heel or horn. I'll put some silicone caulk underneath and add that magnet. I have some sheet lead and for a moment thought about putting a layer of that underneath, but I like the caulk idea a lot better. Less hazardous too! The anvil has no marks cast proud. Everything appears stamped. In addition to the marks identified in my previous post, I found this one on the foot under the heel - says 8921 or maybe 8927. Possibly a serial number? Here are a couple shots of the face: And finally, here are some photos of the edges. I think they are in fantastic condition, despite the little bit of chipping! This one down below is the one that shows the little bit of chipping. I can't really see that getting in the way of anything I'll be doing. Thanks again for all the great info on this site! My hat is off to you ladies and gentlemen who share your knowledge to keep the craft alive and well! Steamcheng

-
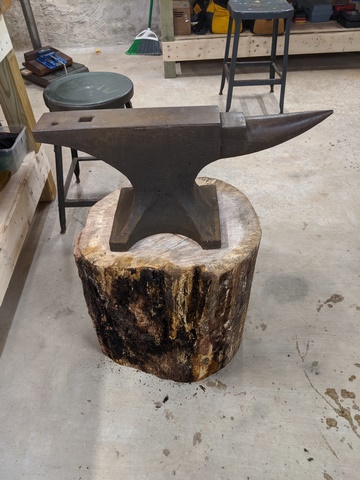
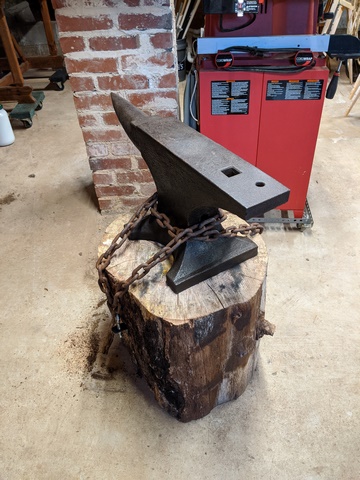
Here's my anvil - 148# Soderfors. I love this anvil! I found it at an old iron (hit-n-miss engine) swap meet a couple of years ago and paid right at $4/lb for it. I think I got a great deal. She looks to be in excellent shape, with some pitting overall, but edges look clean and only minor chipping there. Great rebound and rings like crazy! Anybody know what the "155" below the weight means? I made some spikes to chain mount it to a stump, hoping the chain would help quiet her down some, and indeed it does. Work on the face is within the bearable audible range, but getting close to the heel you risk permanent hearing loss! Too bad my neighbor works nights. I cleaned her up with a wire wheel and didn't find any other marks on her, but she was pretty rusty all over - probably spent some time outside since her last user. Once cleaned up, I treated her to a BLO rubdown and a nice inside location.
.jpg.2559e75c50fb5565cbc2651ca907a497.jpg)
-
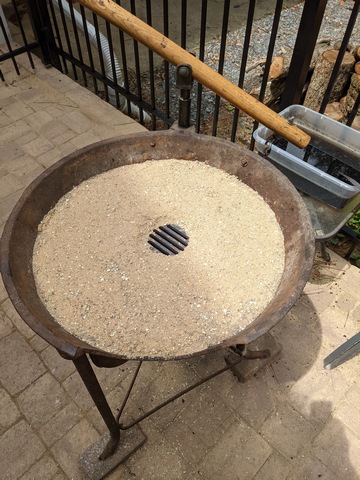
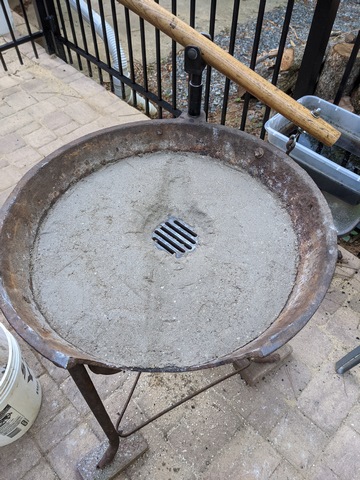
Thanks, Frosty! I will probably make the guard rail you and Dragon recommend. I've been reading a lot of your advice on the board too, including the "formula" for the clay lining. In the spirit of whatever's worth doing is worth doing again, I decided to prepare the recipe of 2 to 3 parts sand, 1 part kitty litter (hydrated) into a dryish mix. After slipping out under cover of darkness and swiping my neighbor's cat box off the screen porch and poaching a little sand from my other neighbor's swimming pool filter, I set out to mix things up. After picking out as much cat debris as I could, I got the kitty litter measured out and more or less rehydrated. I was afraid to get too wet, as I didn't want things to get muddy and crack later. I stirred in the sand and mixed everything up. The mixture just stayed clumped in my hand when squeezed. I pounded it into the pan as carefully as I could. It seemed to go well, but also seemed to be too dry. After a while in the sun it started to look more like a beach with a cat litter box spilled on it. I must have kept things too dry and not mixed well enough. The surface was loose and the rest obviously would crumble and easily scrape away in use. I was also afraid the neighbor's cat might come over for revenge. So, later on, I tried another batch. I ground some of the kitty litter down into more of a powder so I could judge the moisture a little better and added some sifted wood ash and mixed in water very carefully. I got things to a consistency similar to a very dry version of tile underlayment mix. It clumped when squeezed but didn't leave the hand stained (much). It pounded into the pan solidly, stuck together better but wasn't sticky and overall gave me a much better look than my first attempt. I think this will do. I suppose the proverbial proof is in the pudding. We'll see if it cracks. Thanks all for the great site with so much information! Cheers, Steamcheng
-
Thomas - Thanks. I already have plans in mind for a larger, rectangular steel forge with a bigger table and deeper firepot for the future. I figure this one will be a great place to learn, even if limited to smaller work. I'm not one of those guys who saw Forged in Fire and wants to make blades. I like making tools and other useful things, and would one day like to become skilled enough to produce some more artful things that non-blacksmiths might think are pretty. I've been reading the Controlled Hand Forging coursework on the ABANA site and will start with those exercises to build skill, along with a few personal projects to put them into practice. It reminds me of the MASH episode when the wood carver handed a 2x4 to one of the guys, who said "looks like a 2x4" and the craftsman said, "Thanks - was round." Maybe one day I'll be able to turn roundstock into square without hammer marks. Dragon - I actually considered what I was going to do about that missing chunk. I don't want to drill any new holes in this forge, so your idea may be the way I ultimately go, but right now I'm more inclined not to do anything about it. It doesn't seem like it will be a big problem, and as you suggest, also offers a way to put longer stock into the fire. I wasn't planning on having the filler material all that deep - maybe a couple of inches - and this gap isn't deep enough down the side to affect that. It might let some green coal dribble out though, so that may end up causing me to fix it as you suggest.
-
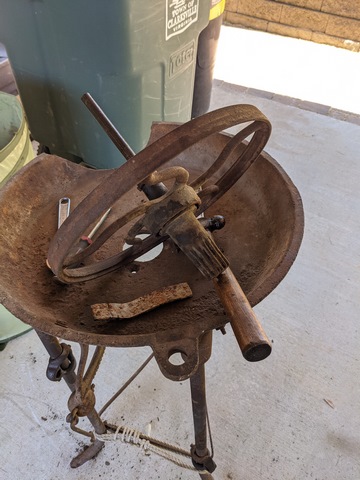
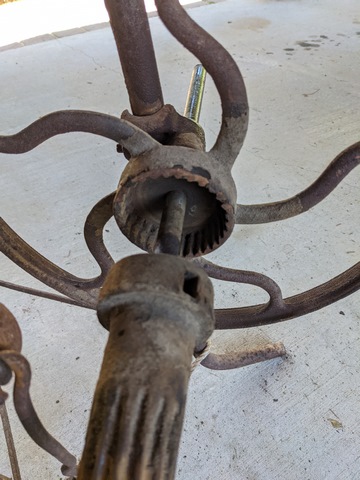
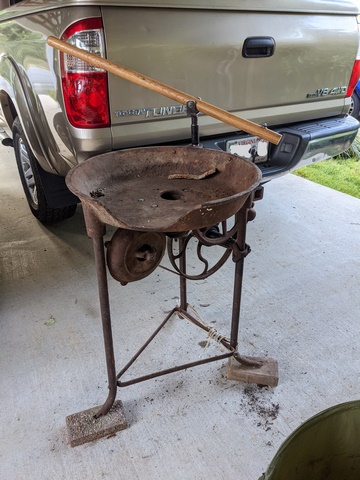
Thanks for the tip on quoting. I read the READ THIS FIRST (first, of course!) and misunderstood Bonus tip #1, as I trimmed what I was quoting without realizing it was frowned upon unless the previous post was particularly long. I'm a member of several sites like this and each is slightly different on this. I offer my sincere apologies to the mod who had to go edit each of those posts above! As for the forge, she was a bit long in the tooth and has a few missing teeth and some nicks in her ears, but I think lots of life left. I had a similar forge that was rusted down to a pretty thin pan with a lot of perforations in it, for which I received $100 at a recent swap meet. I picked this one up at the same swap meet for $60. There is a chunk busted out of one side, the blower wasn't attached or hooked up, and the ratchet on the drive assembly was stuck - all easy fixes for me. Here she is, after I took the drive wheel and ratchet off. I don't have a photo before I started work. Thought I did, but Here's the ratchet after I got it apart. Needed some cleaning, greasing and general TLC, but still good. I will probably have to make new teeth at some point, as these were worn and shimmed in. I used some small coil springs I had, but I think this probably had bits of clockspring originally. Anybody know? I had to make a new pintle for the lever, and then used the handle from a busted shovel for the lever. I used a couple of pieces of pipe and turned one down to fit the mounting hole on the pan, and another to fit inside that for easy swiveling. I welded a fork to the top piece of pipe, so the whole thing kind of works like an oarlock. I bought a new piece of leather belt and used the belt lacer I had previously rebuilt to stitch it together, and got the blower hooked up. Works great, after some lube! The only thing left to fix was the fire grate, which was missing. I have seen these with a "shower drain" sort of grate, but I decided to make a slotted grate I could easily clear with a poker, since this forge doesn't have a clinker breaker in the tuyere. I had a piece of 1/4 plate that I butchered a chunk out of with and angle grinder and milled the slots for the grate into it. Here's what I ended up with. As for the first fire and proper refractory, no. I didn't have enough material yet to do the whole pan, so I used some kitty litter and sand and covered the area around the fire grate and used some fire brick I had to hem the fire in so I didn't have it all over the place. I only fired it like that once, since that temporary "fix" was just that - temporary to allow me to test things and conquer my desire to try it out. Yesterday I got the rest of the stuff I needed (I had to go to a couple of places to find non-scented kitty litter!) and will be lining the pan completely today - photos to come in the Solid Fuel Forges topic area. I've made sure to resize my photos for efficiency - these are no more that 100kb, most in the 60 to 70 range. I hope that's good for the board! Cheers! Steamcheng

-
I certainly understand that. I have had much the same experience with machining over the years. It represents one of my "happy places" and offers me challenges, successes and failures, but always a place to learn, think and unwind. I know already that blacksmithing will offer the same opportunities for catharsis, and I look forward to each session.
-
Thanks! I like that idea. It certainly would have more visual appeal that way. I have to make some more pokers (for my woodstove and for my neighbor's) and I'll definitely keep that in mind for that project. I think my neighbor is going to help, and possibly be a partner in crime, as he pumped the blower on my forge while I made this and got quite interested. Steamcheng
-
Thanks, Pnut! I have a very good friend who made me a great deal on a post vise. He has plenty, so he loaned me one for life. Pretty funny, but it didn't cost me anything. If I find one I like better, it goes back to him. It is a lot of fun, for sure. I'm considering a little 10 x 10 smithy behind my garage if it becomes a habit (and I am pretty sure it will).
-
Greetings all. I am a new member here and new to the hobby. It is something I have always wanted to do, but a career in the navy (and another after) didn't allow me the time to engage. Now I'm retired and live in a place with enough room for me to enjoy a few hobbies. I figured one way to introduce myself here was to post something I made, so here goes. I've been an amateur machinist for close to 20 years now, and frequent auctions where I can find tools. I also collect and work on hit and miss engines, and go to some big shows and swap meets. These venues have afforded me the opportunity to kit myself out with some basic blacksmith tools. I'll make the rest. I got a nice, clean 148# Soderfors anvil a couple of years ago, and I recently picked up a nice little rivet forge similar to a Champion, but with the ratchet driven blower underneath. It needed a fire grate over the tuyere, and I machined one out of 1/4 plate. It also needed the lever and pintle, which I made, and a leather belt. So today I decided to get a fire lit and play around a little. I had previously made a little gas forge to fiddle with, but all I made with it are the hooks I hammered into my stump to chain my anvil down to. I like the traditional flavor of the coal forge better. So...one thing I don't have, and need, is a fire rake/poker for the forge. So that's where I started. I took a 9" piece of 1/2" round stock and drew it out to about 21 inches, then made a flat for the rake and bent it 90 degrees. Then I made an eye in the handle end, and realized I was a little off and wasn't it lined up with the rake, so decided to put a full twist in the middle as part of the fix. Since it wasn't planned that way (didn't think of it, duh!) it isn't as nice looking as it would have been if I had left the middle squared for the twist, but overall I'm not too bent about it. So here it is. My first effort from my new coal forge. I'm pretty happy with it, and enjoy being covered in soot and coal dust and ash. Be gentle. Cheers! Steamcheng
.jpg.dc6452f57b794a04814b3b5543170d55.jpg)