Seffers93
-
Posts
27 -
Joined
-
Last visited
Content Type
Profiles
Forums
Articles
Gallery
Downloads
Events
Everything posted by Seffers93
-
Thanks for the input Mikey. Definitely going to get it drilled out and shaped before firing. Lesson learned!
-
Thanks for the info, Frosty! I hadn’t read about drilling weep holes. I’ll do that before I fire it to be safe. Trapping steam like that doesn’t sound like fun at all!
-
Might be a dumb question, but would it be considered fully cured after firing? Or would it be considered fully cured just after sitting in a trash bag with a wet towel for 24 hours? I feel like I’ve crammed so much reading I’m missing the little details like this.
-
Good to know, JHCC. Thanks! Sounds like I’ll do my best to just drill through the refractory and maybe use a rasp from there if needed.
-
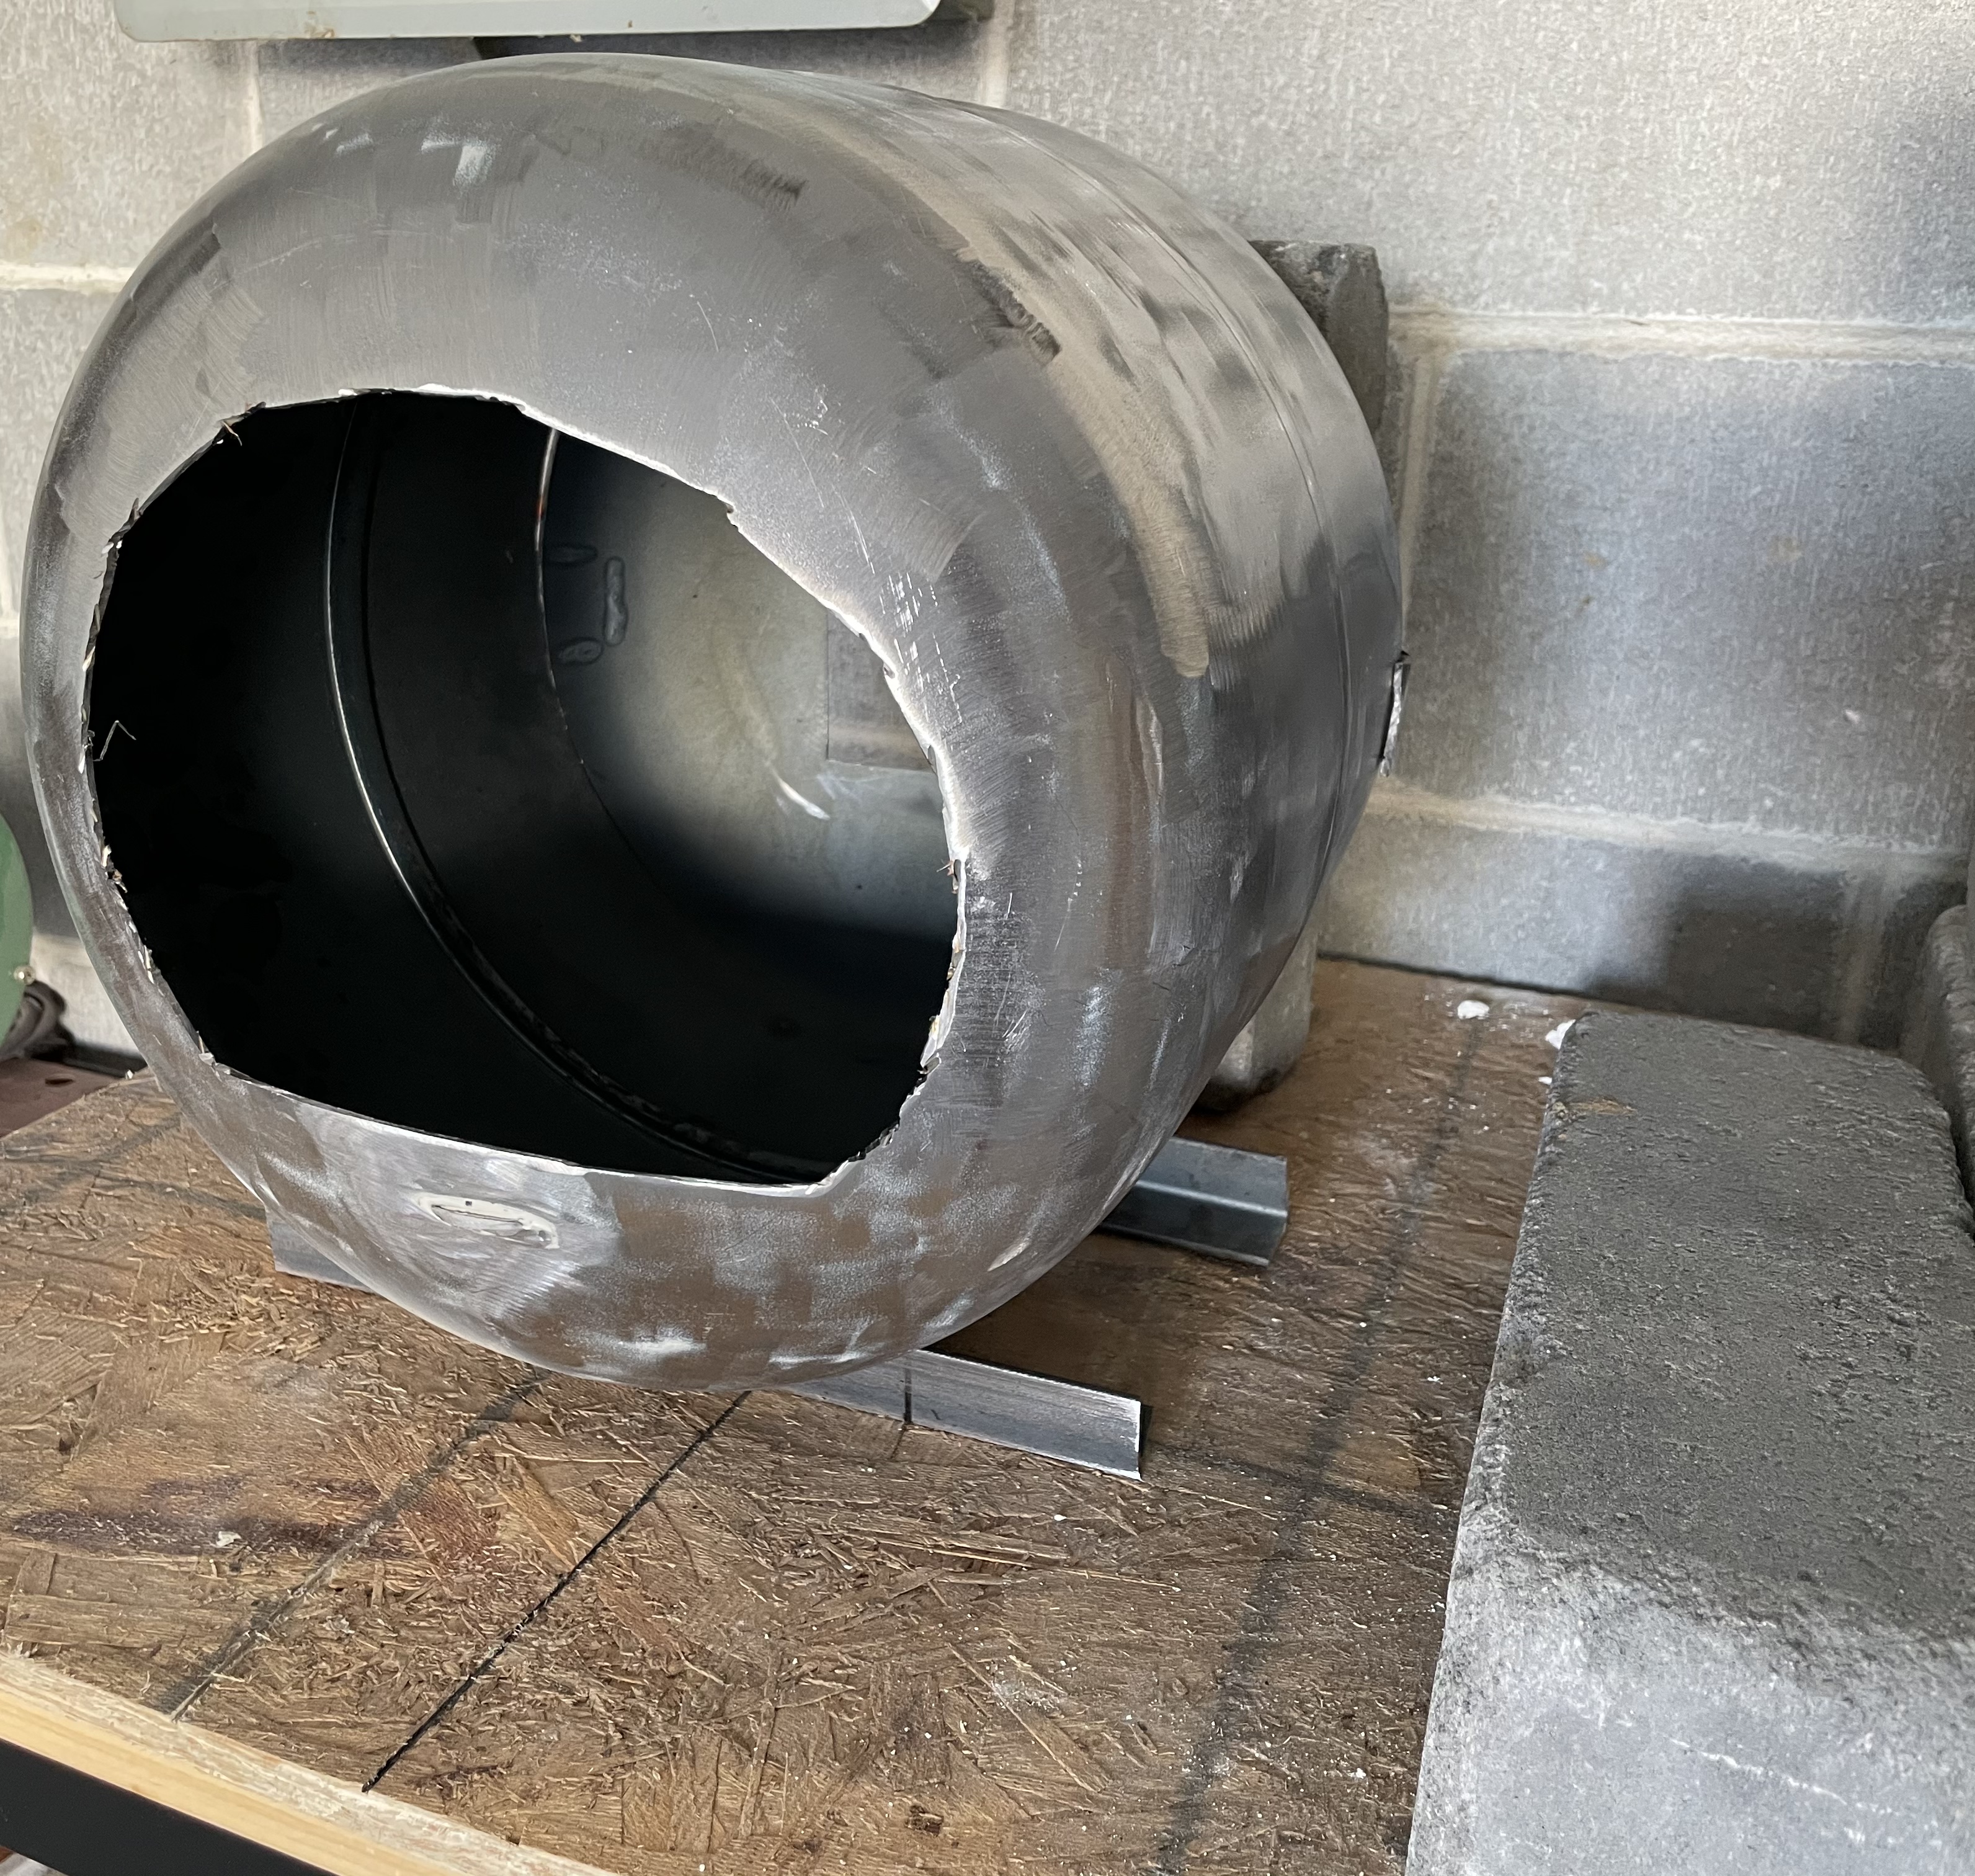
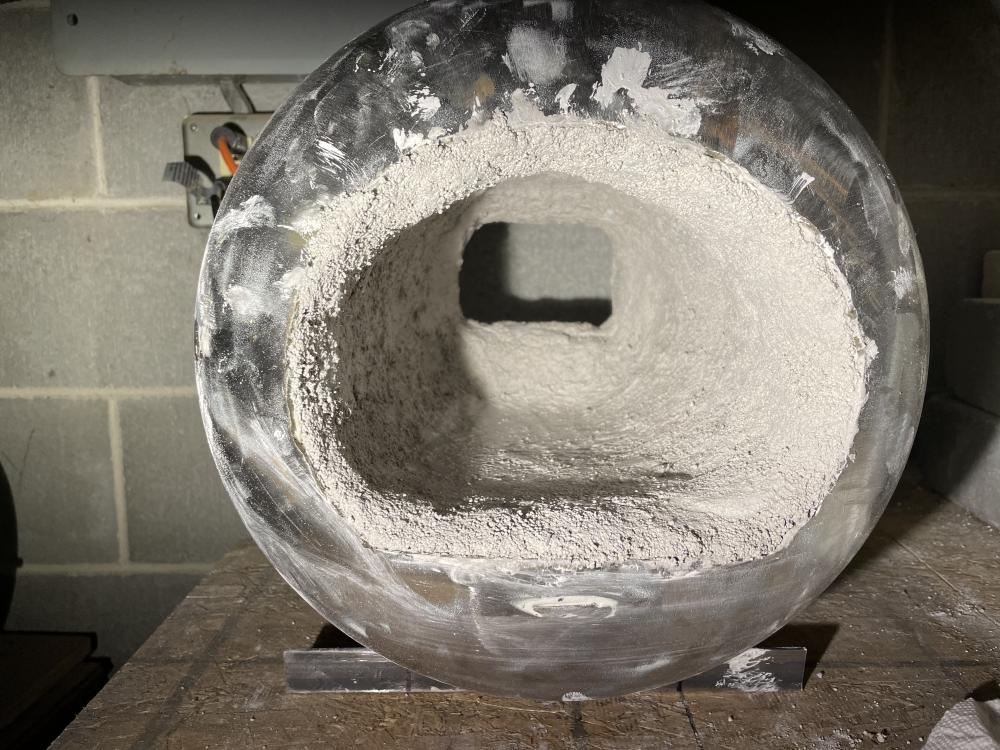
The forge body is just a 20lb propane tank. I used Kast-O-Lite 30 for the refractory, about 1/2” thick everywhere except the very bottom. These are the only pictures I have so far. I can take more tomorrow. Seeing that you’ve drilled Kast-O-Lite makes me feel a lot better! I’m assuming I’ll need to be very careful and take it slow?

-
I’m building my new forge. Everything is going wonderfully. I’m getting so excited to get this thing done and bang some hot steel on my recently-acquired anvil. I put down two layers of 1” 8# ceramic fiber blanket, got it all sorts of rigid, started applying the refractory, got it all finished and wrapped up with a wet towel in a garbage bag and BOOM… it hit me. I forgot to drill my burner hole. Is this a major setback or will I be able to just drill right through it? And right after I just ruined what was going to be an awesome handle for a Gyuto I’m working on. Face palm!
-
Thanks Frosty! I’m really thankful that I was able to get it. Looks like it’s losing the chain when I go back out! I wrapped it to hopefully make it quieter, but if it doesn’t ring even without the chain then I’ll get rid of it.
-
I just finished layering and rigidizing the ceramic fiber for my new forge. Can’t wait to hammer on this thing. I couldn’t flatten/shorten the stump I found. It was eating up the chainsaw blade I was borrowing so I decided to glue and bolt a bunch of 2x10s together, sanded down the top and set the anvil down with a layer of caulk. This thing is quiet!!
-
Awesome! Thanks for the info!
-
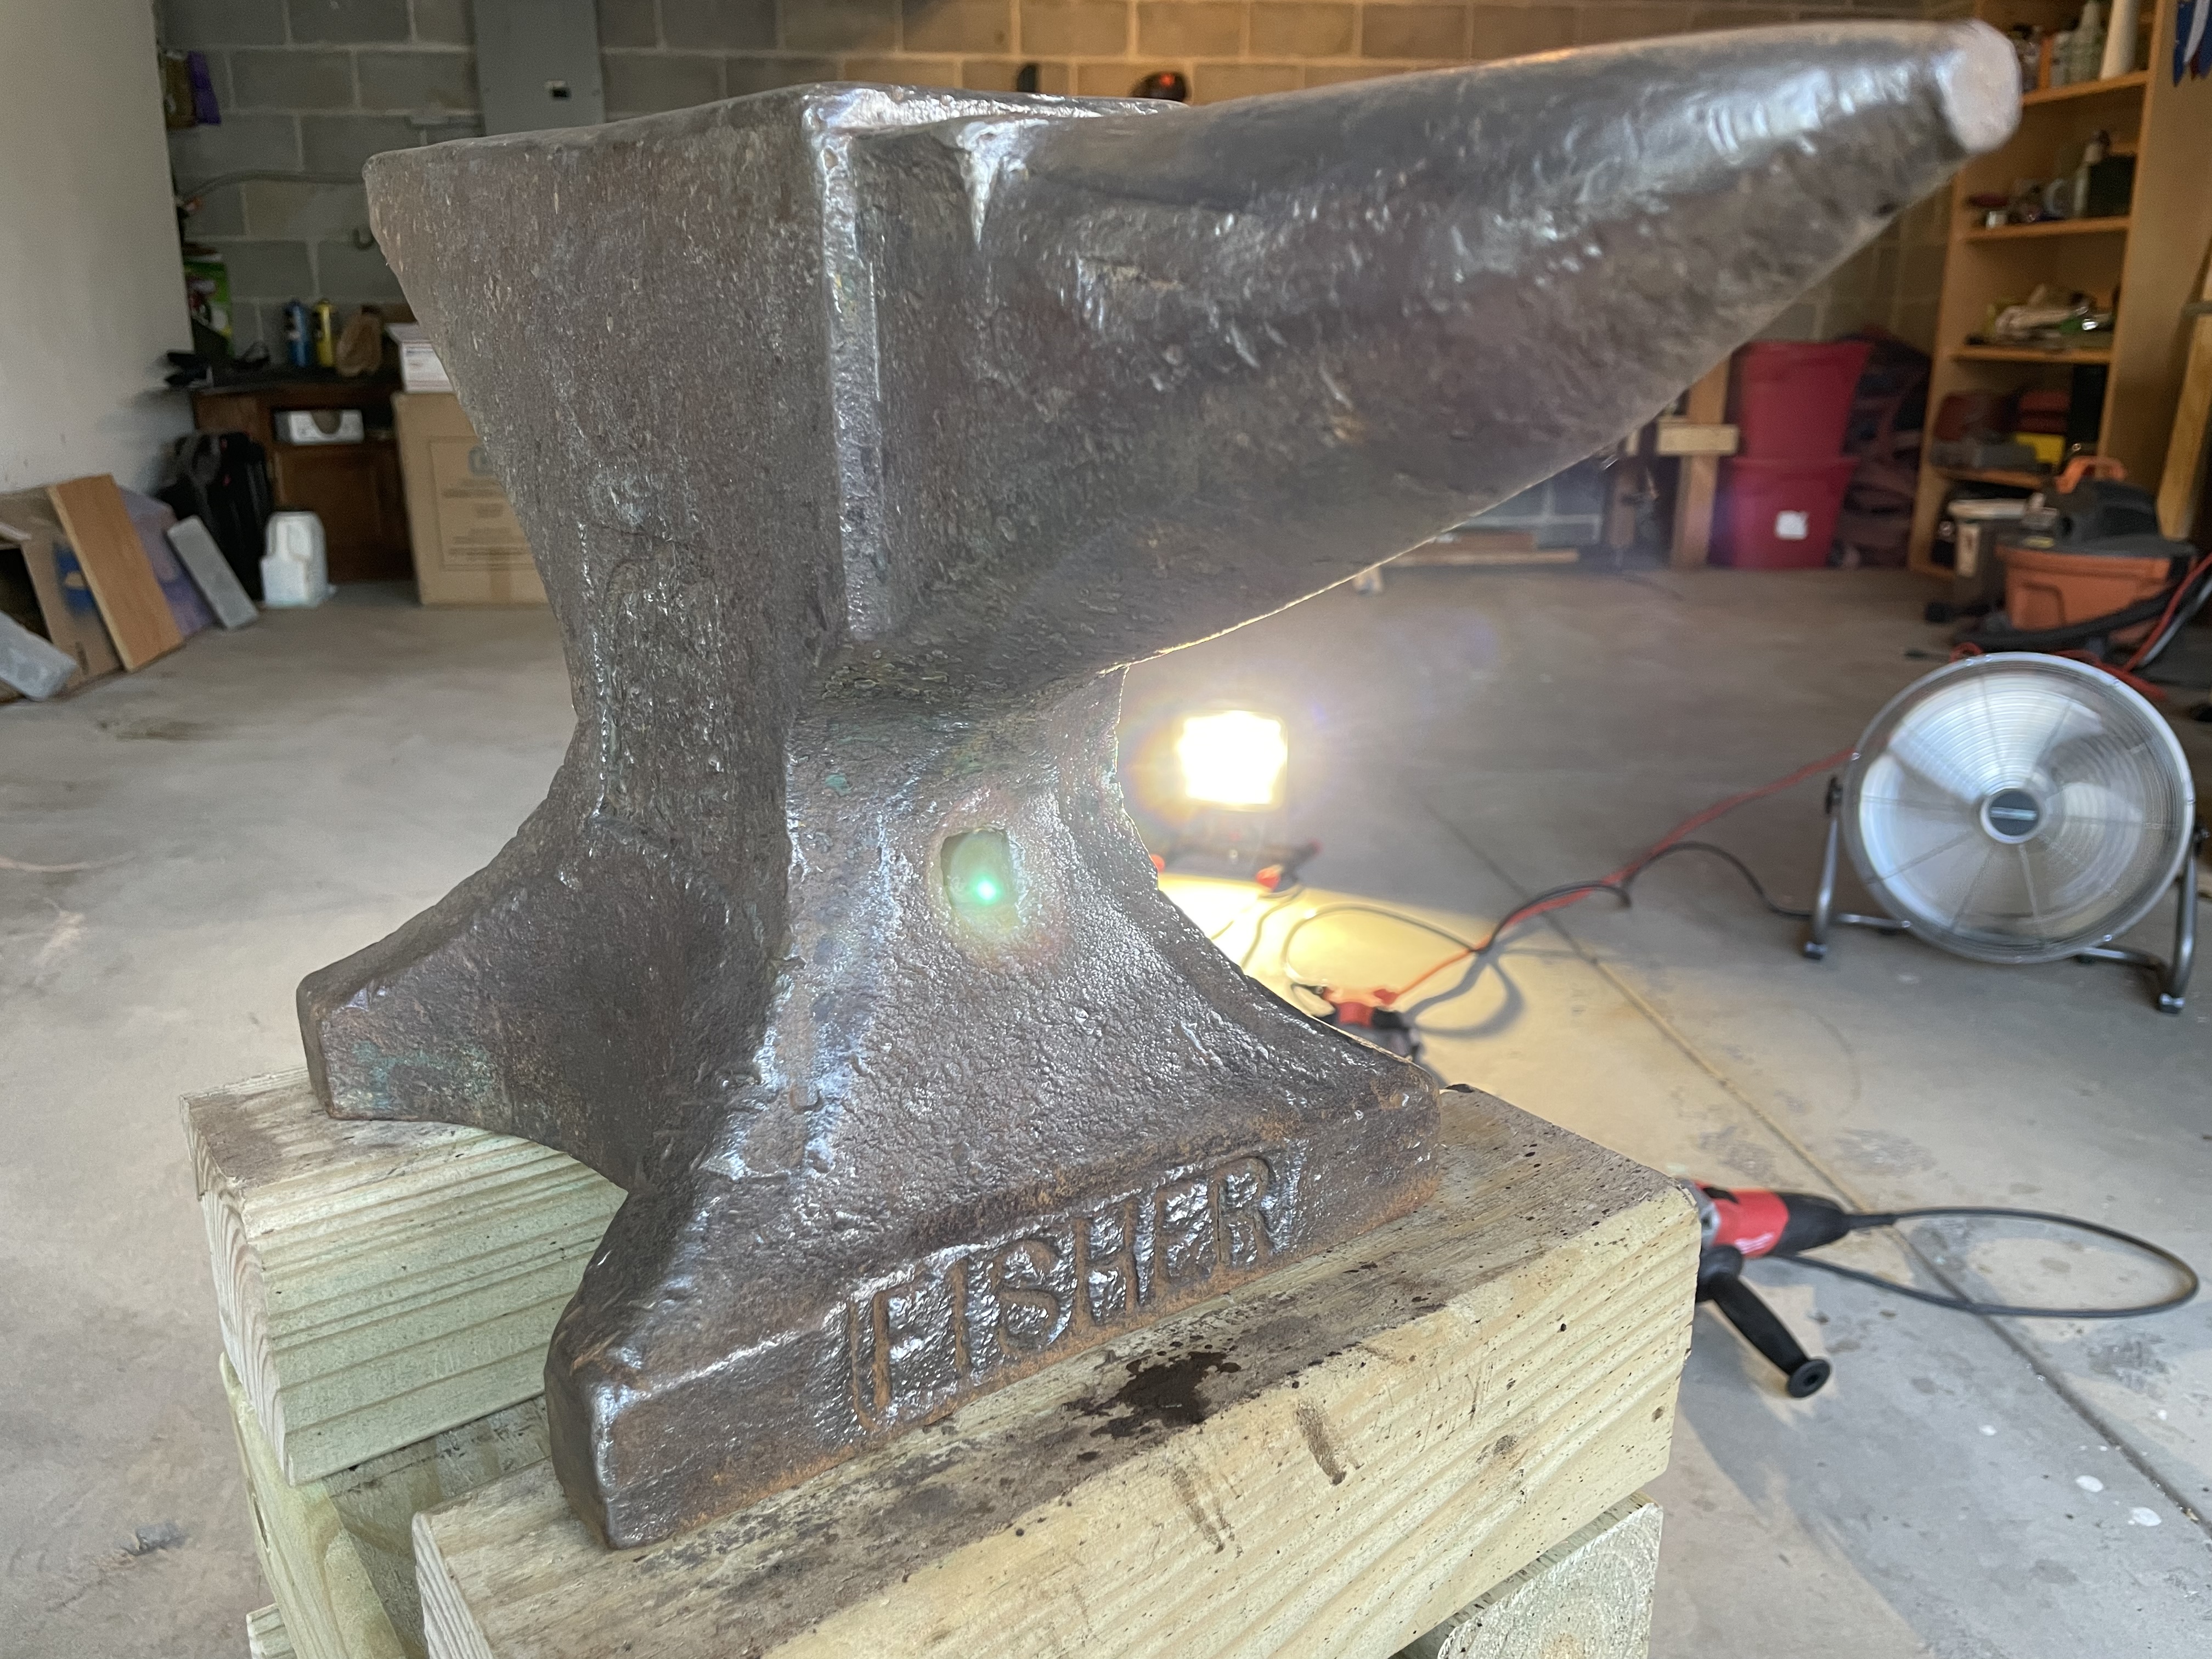
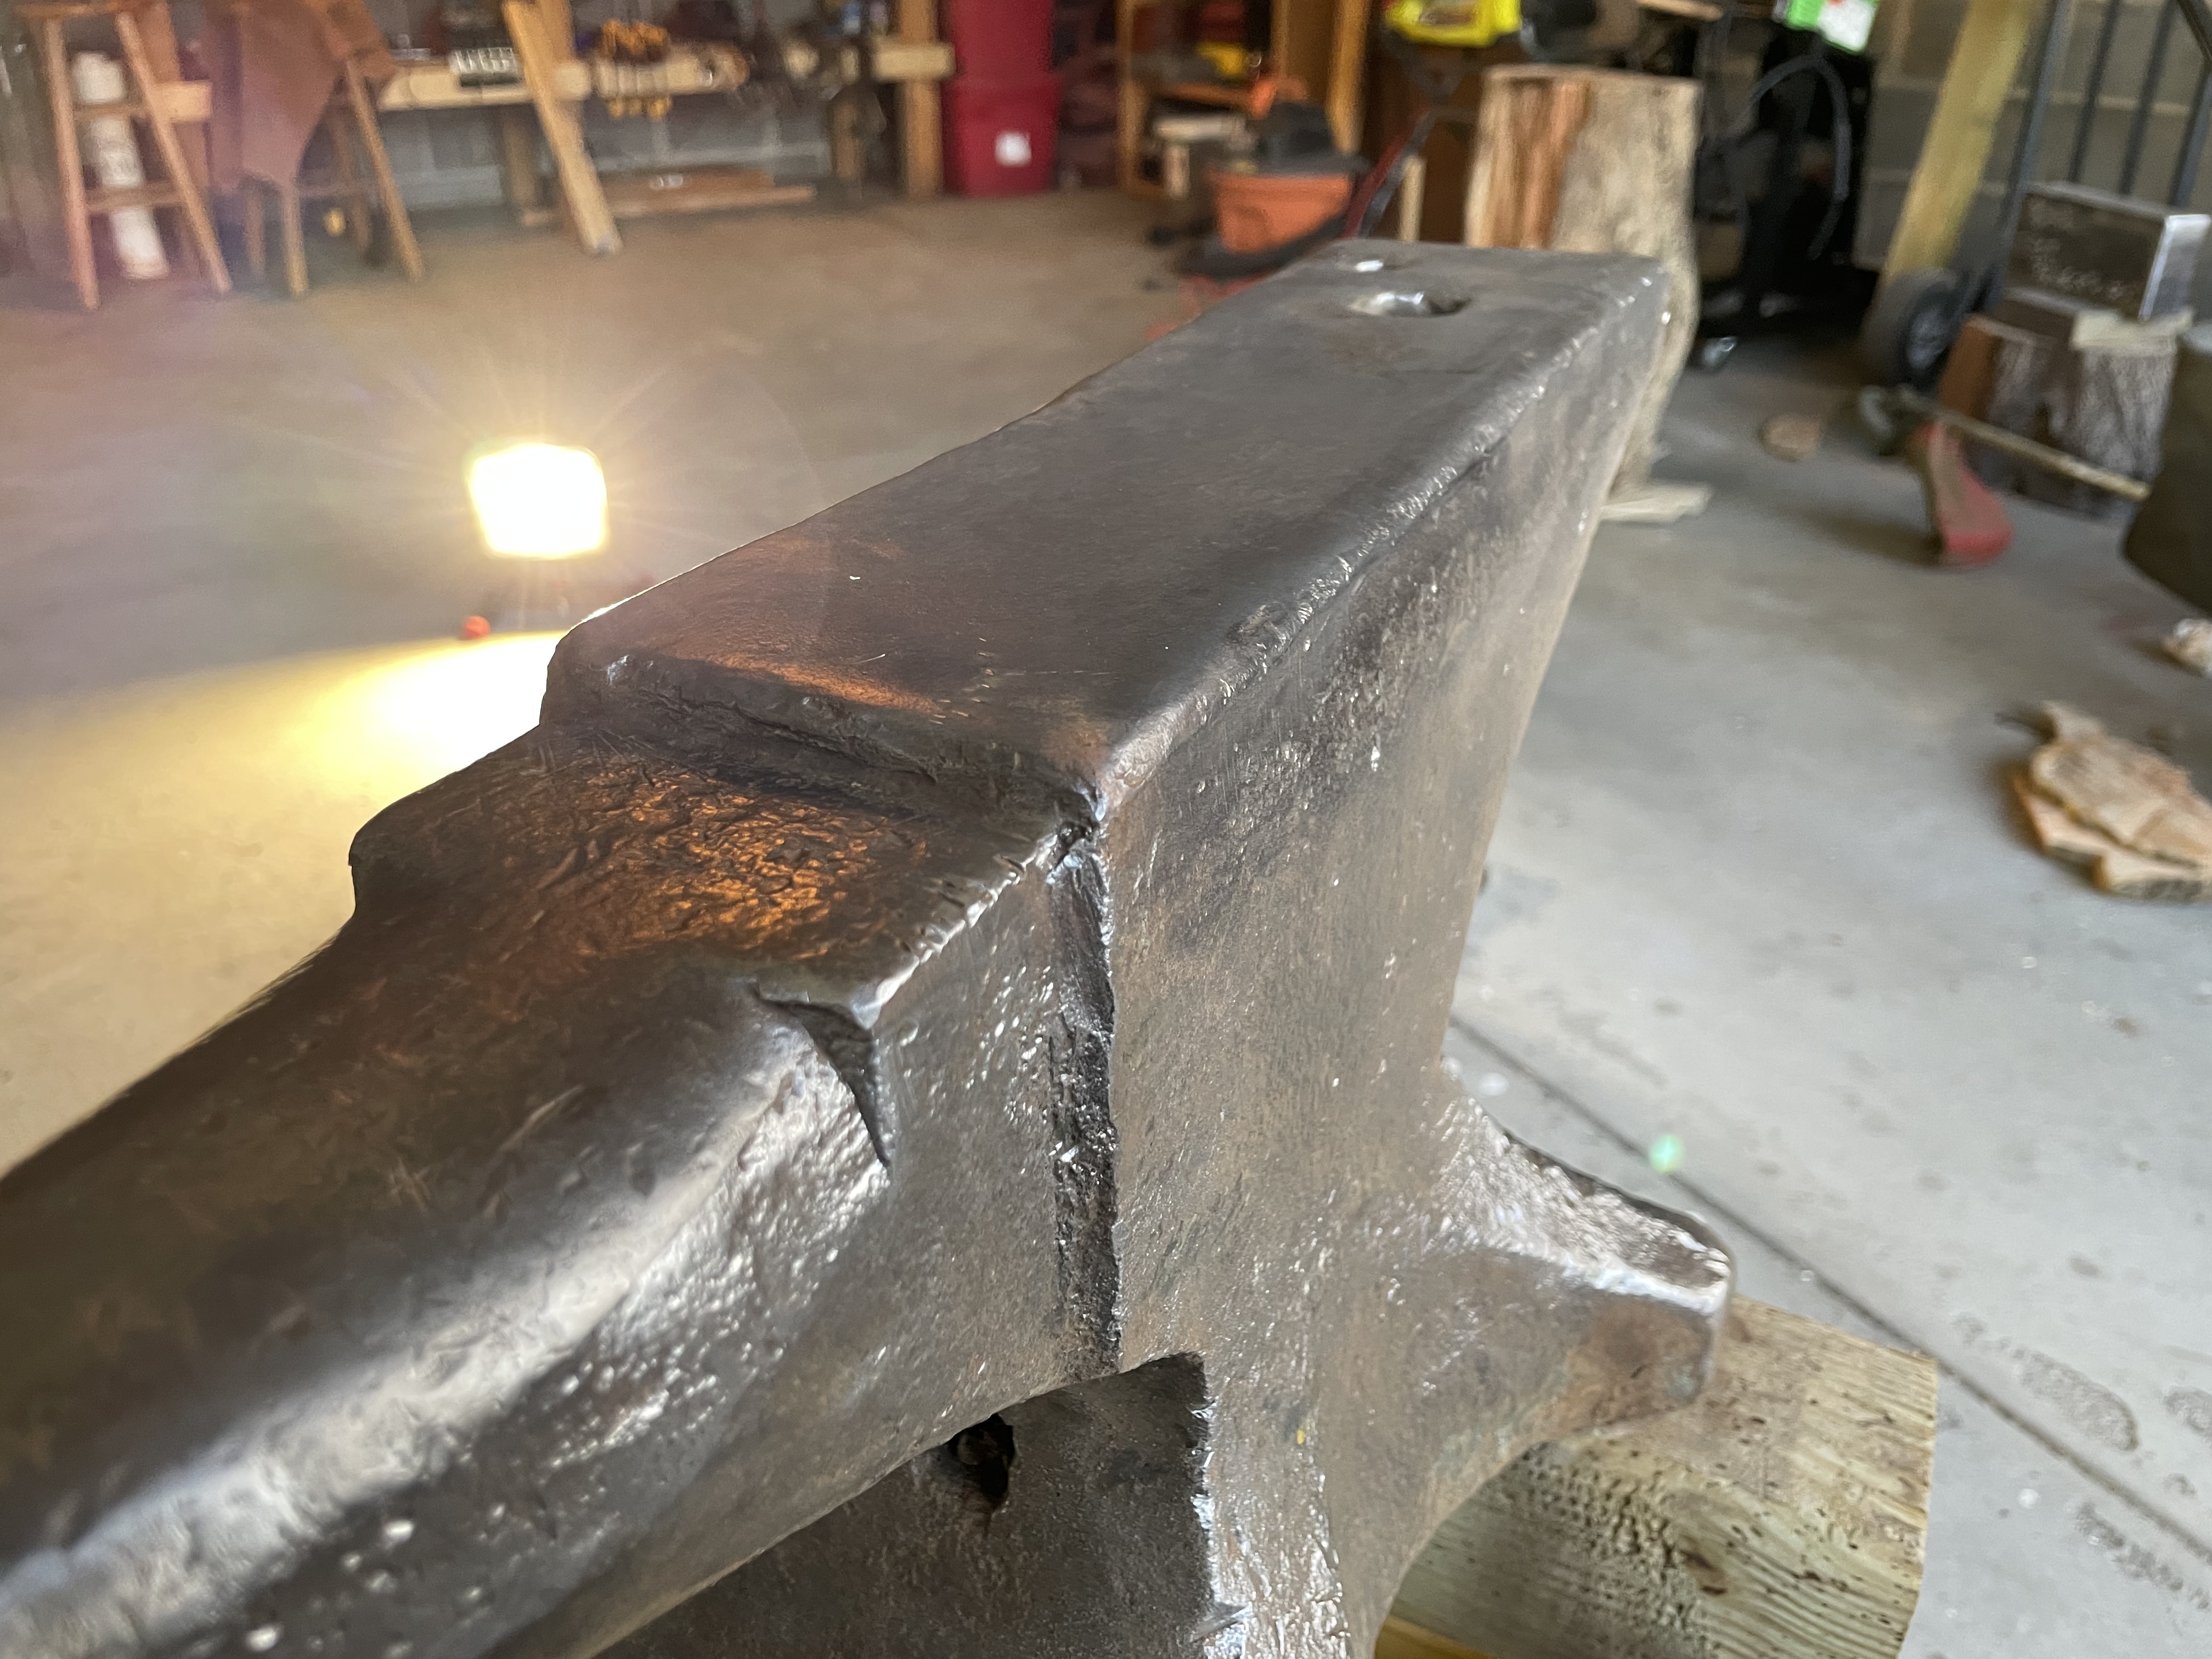
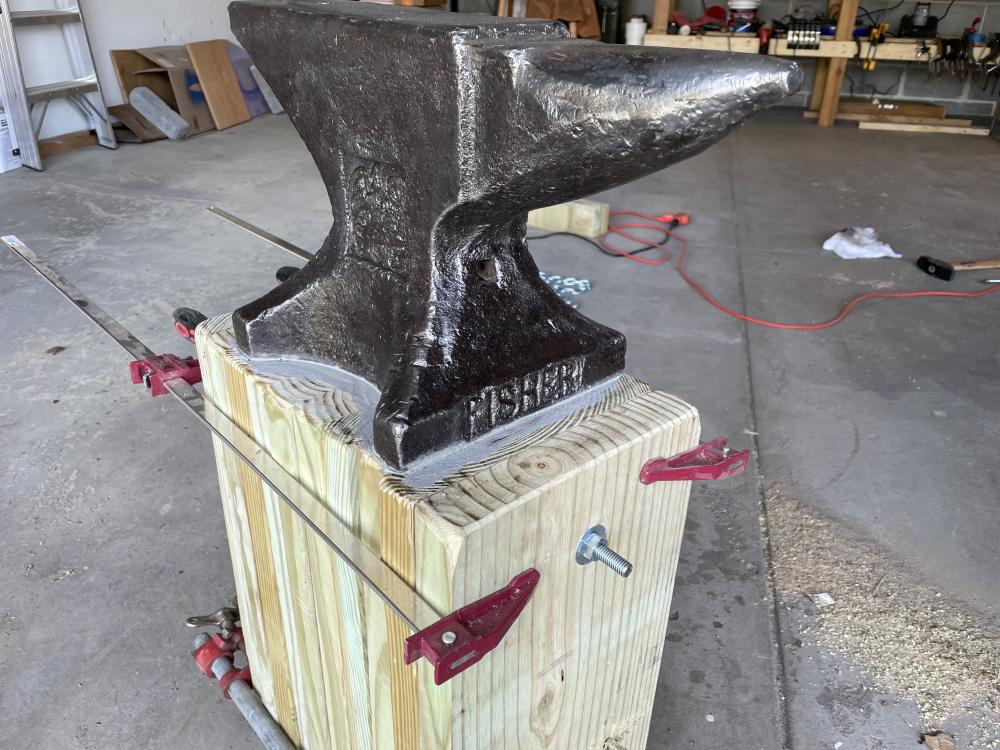
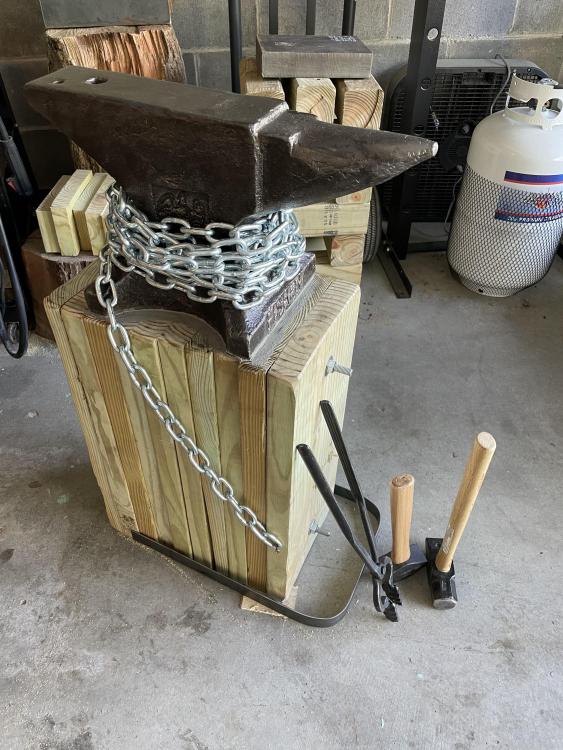
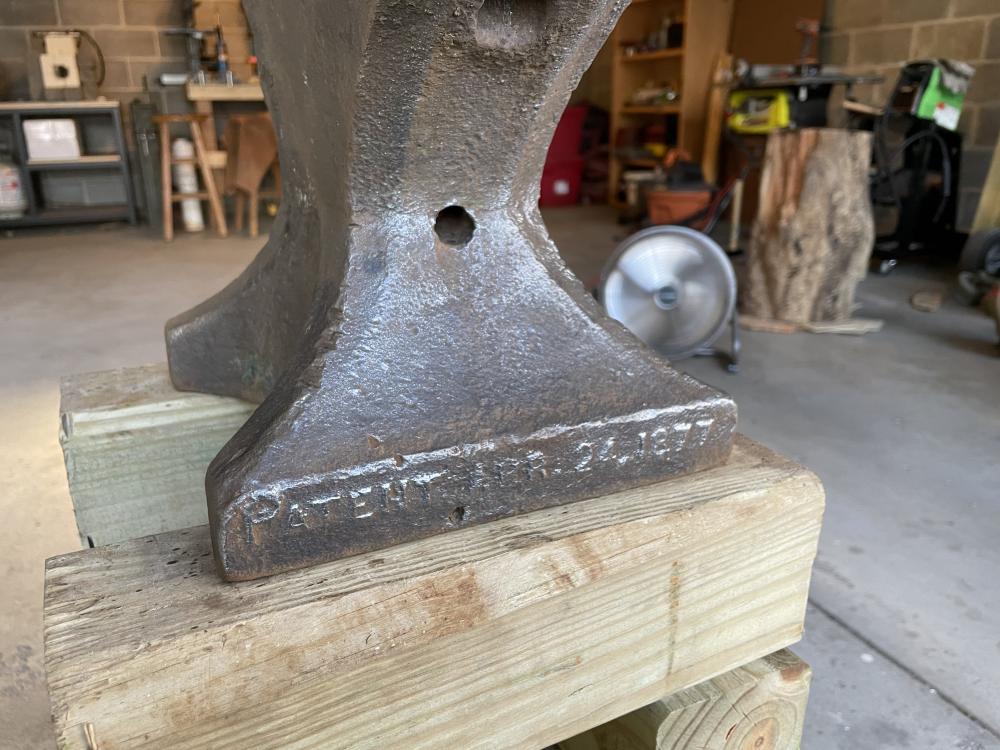
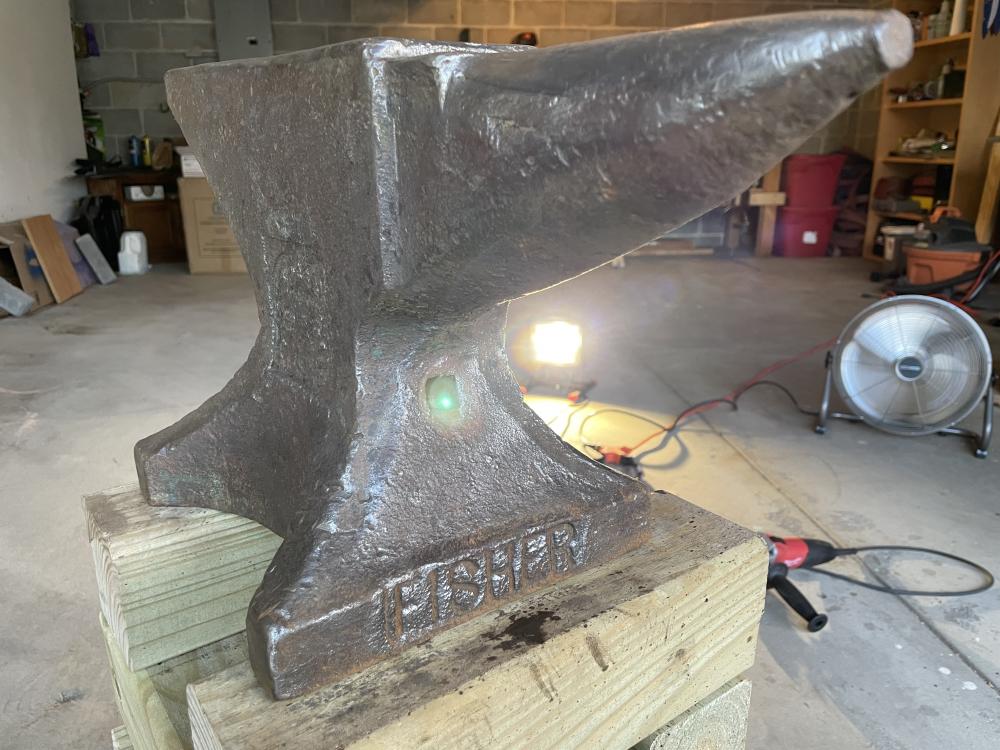
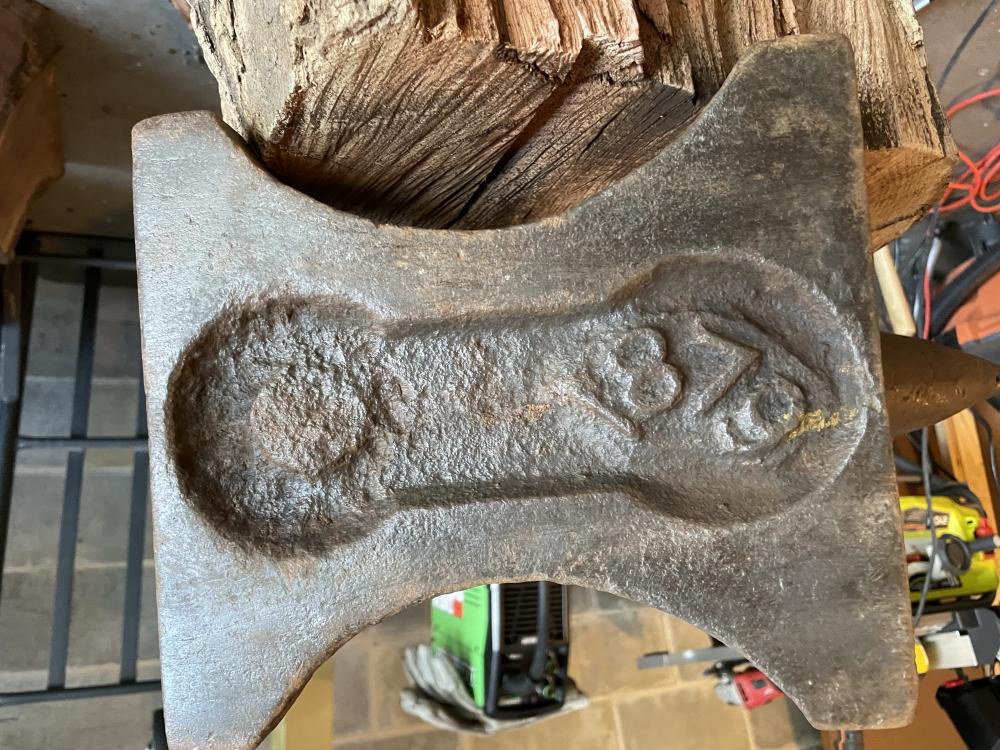
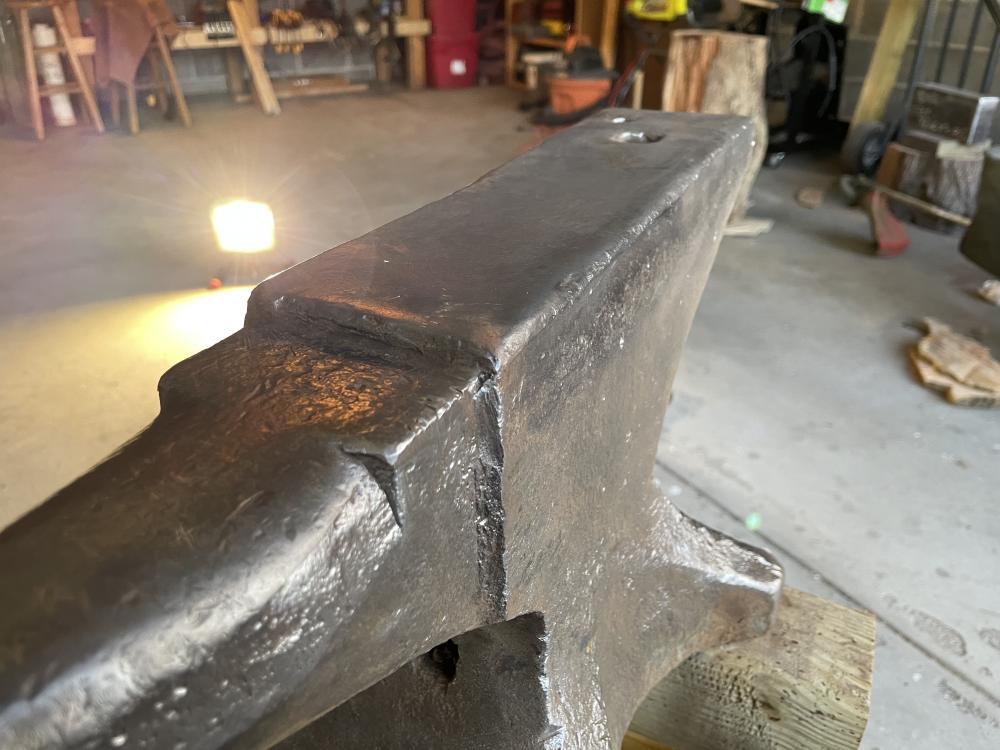
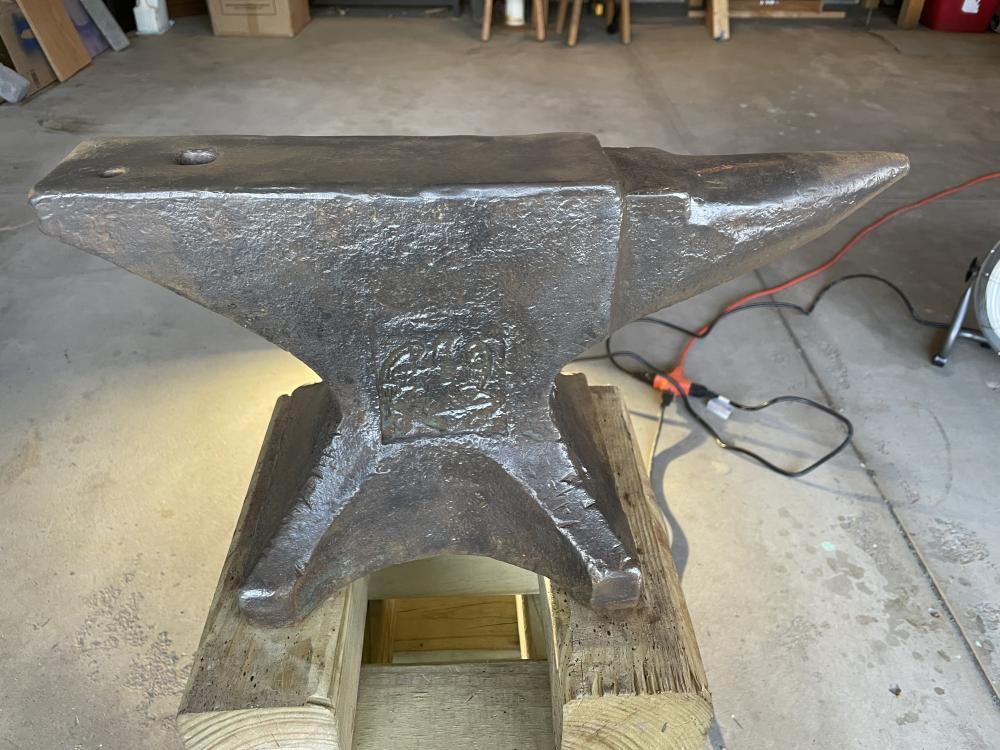
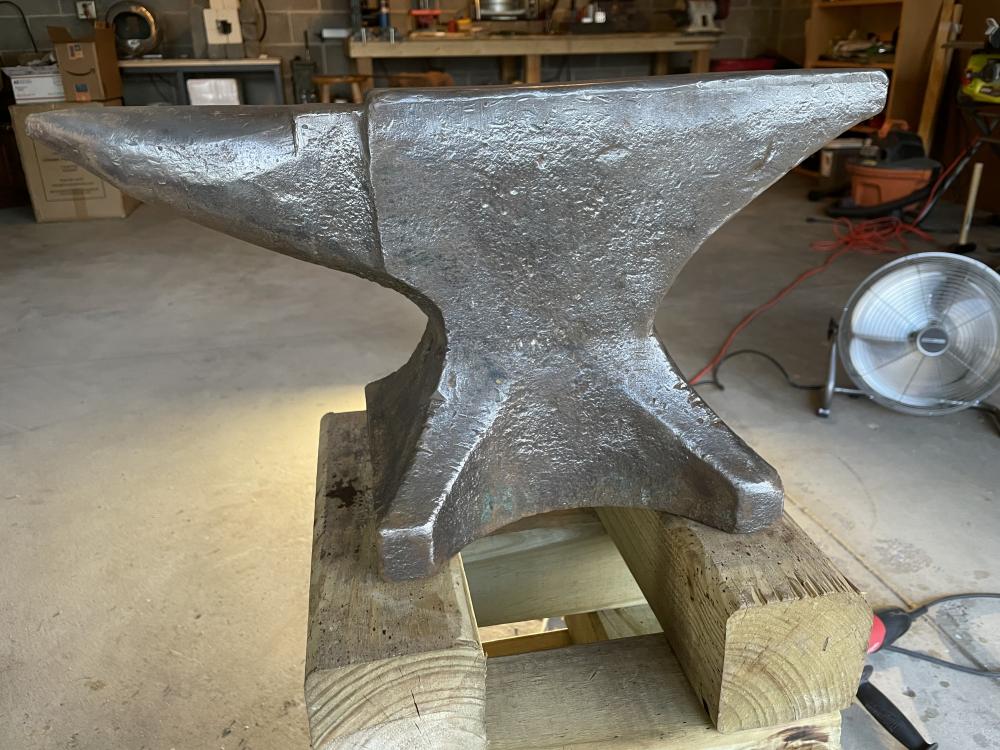
My father in law just brought it over earlier tonight! Man am I excited! I started taking a wire wheel to it but started losing sunlight. I figured I’d go ahead and post what progress I’ve made and what markings I’ve found. I still can’t make out any numbers on the feet that tell me how much it weighs. I have my wife’s scale charging right now so I’m going to weigh it shortly. Steel ball bearing bounces very nicely. It’s verryy close to bouncing all the way back to my hand! The face seems to be in really good shape from what I can tell. This is the only anvil I’ve ever seen in person though. I plan on taking the wire wheel to it again tomorrow and then rubbing it down with some boiled linseed oil as recommended. I appreciate the tips from everyone! Side note, don’t worry! I won’t be using it on that 4x4 stand. Update: Weighs 100lbs
-
Good to know. Thanks Slag!
-
Thanks for all of the info guys! Seriously much appreciated. I’ll do some reading on the site about Fisher anvils. I’ll also go pick up a wire wheel on Sunday and get some pictures uploaded when I’m finished. Can’t beat any hot steel on it for a bit. In the process of making a new forge. Waiting on some materials to come in. Can’t wait to start hammering on it! I’m so glad this was gifted through the family. It really makes it that much better and makes me feel good knowing I can hand it down to my kids and grandkids. So cool!!
-
Thanks Dan! I’ll do that!
-
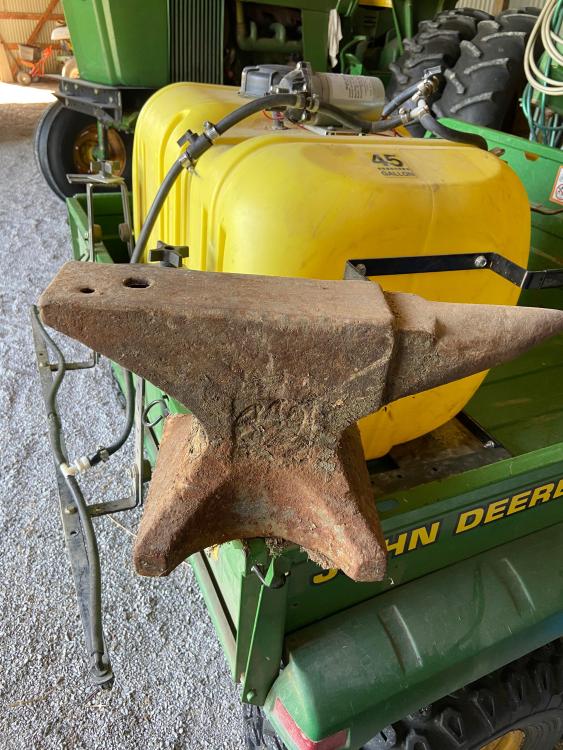
Just got a text from my wife saying her dad found her grandpas old anvil stored away and he had asked if I wanted it. Her grandpa just passed a couple years ago and I think it would be awesome to keep using his anvil. Looks pretty worn or maybe it’s just the rust. Hopefully I can sand it all down and get it looking good again. I don’t know much about anvils so I can’t tell anything about it from the picture. I’ll upload some when I get it Sunday. Looks like I might have some anvil restoration reading in my near future.
-
First time hammering anything
Seffers93 replied to Seffers93's topic in Blacksmithing, General Discussion
Sounds good to me! Thanks! -
First time hammering anything
Seffers93 replied to Seffers93's topic in Blacksmithing, General Discussion
DHarris & Thomas, yes, I welded around all four edges as I’ve heard from a couple people that this helps to keep oxygen out when you don’t have flux on hand. The three pieces were also pretty flush so I’m sure that helps a lot too. Should I be doing something different? -
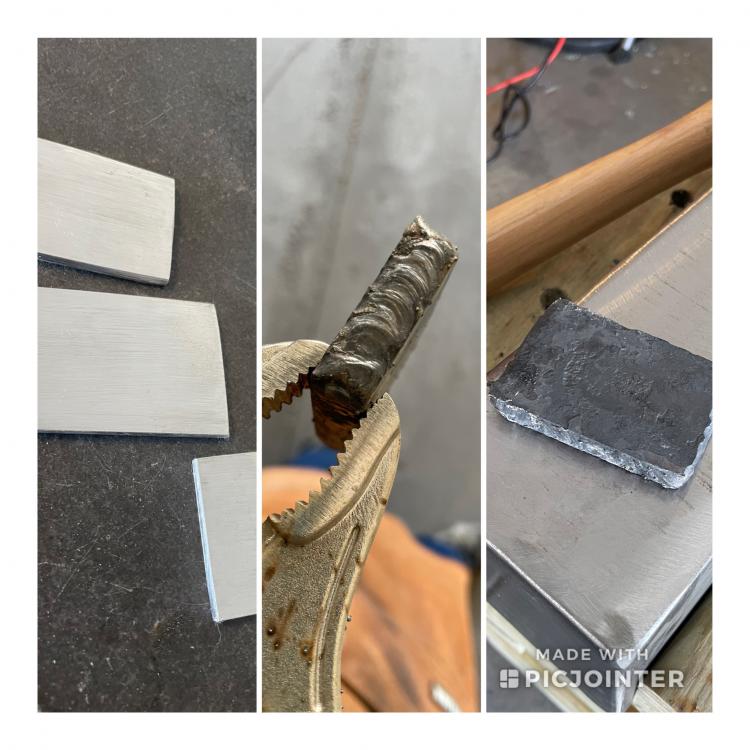
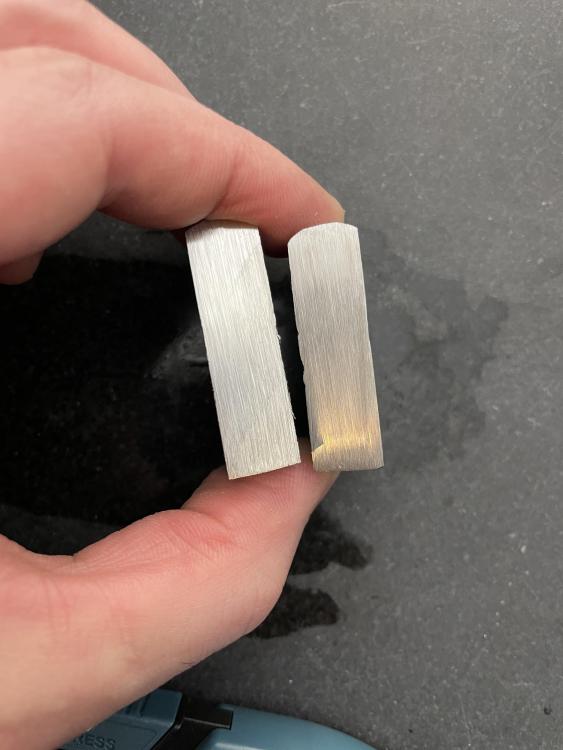
Well, I managed to get a stump for my makeshift anvil but I have to borrow a chainsaw to get it flattened out. Today was my only day off this week so I used the crappy anvil stand I put together and tried forge welding three pieces of 1084. I really want to get into San Mai so I figured just getting three pieces of steel to weld would be a good start. I cut three small pieces, cleaned them up, used a super cheap flux core welder to weld around the edges, threw it in the forge and started hammering (not very hard, just enough to hopefully set the weld) After, I cut the piece in half and I think it looks pretty good. Although I wouldn’t be able to tell if the center piece stayed center, so I’m going to try some 15N20 and 1084 soon and drop it in ferric to see. Then the torch on my forge started sputtering really bad (I’ve noticed it does this after being on for maybe 20 minutes) so I shut it down and decided I should do some research on that before firing it up again. Had a blast trying this for the first time though.
-
New here. US Navy, AT (aviation electronics tech), 2013 to 2017 active duty. Almost went back in last month because I hate my job lol.
-
A collection of improvised anvils
Seffers93 replied to Charles R. Stevens's topic in Anvils, Swage Blocks, and Mandrels
I was able to snag a larger chunk of steel today. Figured if I turn it on it’s side it would give me a larger surface to work on and more mass underneath. Why not! Going to go grab a couple stumps Sunday.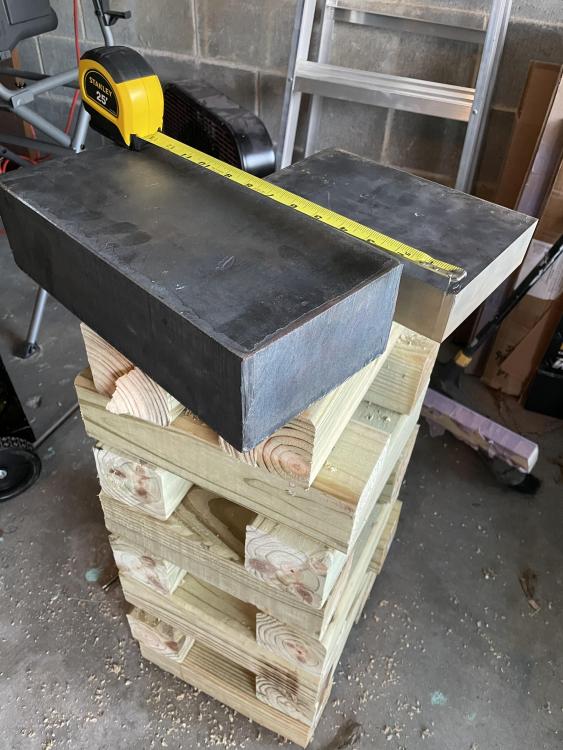
-
What's your latest blade look like? Post em and let us see.
Seffers93 replied to HondoWalker's topic in Knife Making
Thank you, JHCC! Much appreciated! -
A collection of improvised anvils
Seffers93 replied to Charles R. Stevens's topic in Anvils, Swage Blocks, and Mandrels
Thanks for the tips! Glenn, good call on cold shuts. I wouldn’t really know what to look for. I’ll try to make some so I know what they look like in person. -
What's your latest blade look like? Post em and let us see.
Seffers93 replied to HondoWalker's topic in Knife Making
Thank you! I think it would be good for me to play around with some scrap steel just to see how it moves under the hammer. I seem to always just “go for it” with pretty much everything, but I feel like this is something where I should start small and experiment. This forum has already been a huge help. Still lots of reading to do! Hoping to start hammering away this weekend. -
What's your latest blade look like? Post em and let us see.
Seffers93 replied to HondoWalker's topic in Knife Making
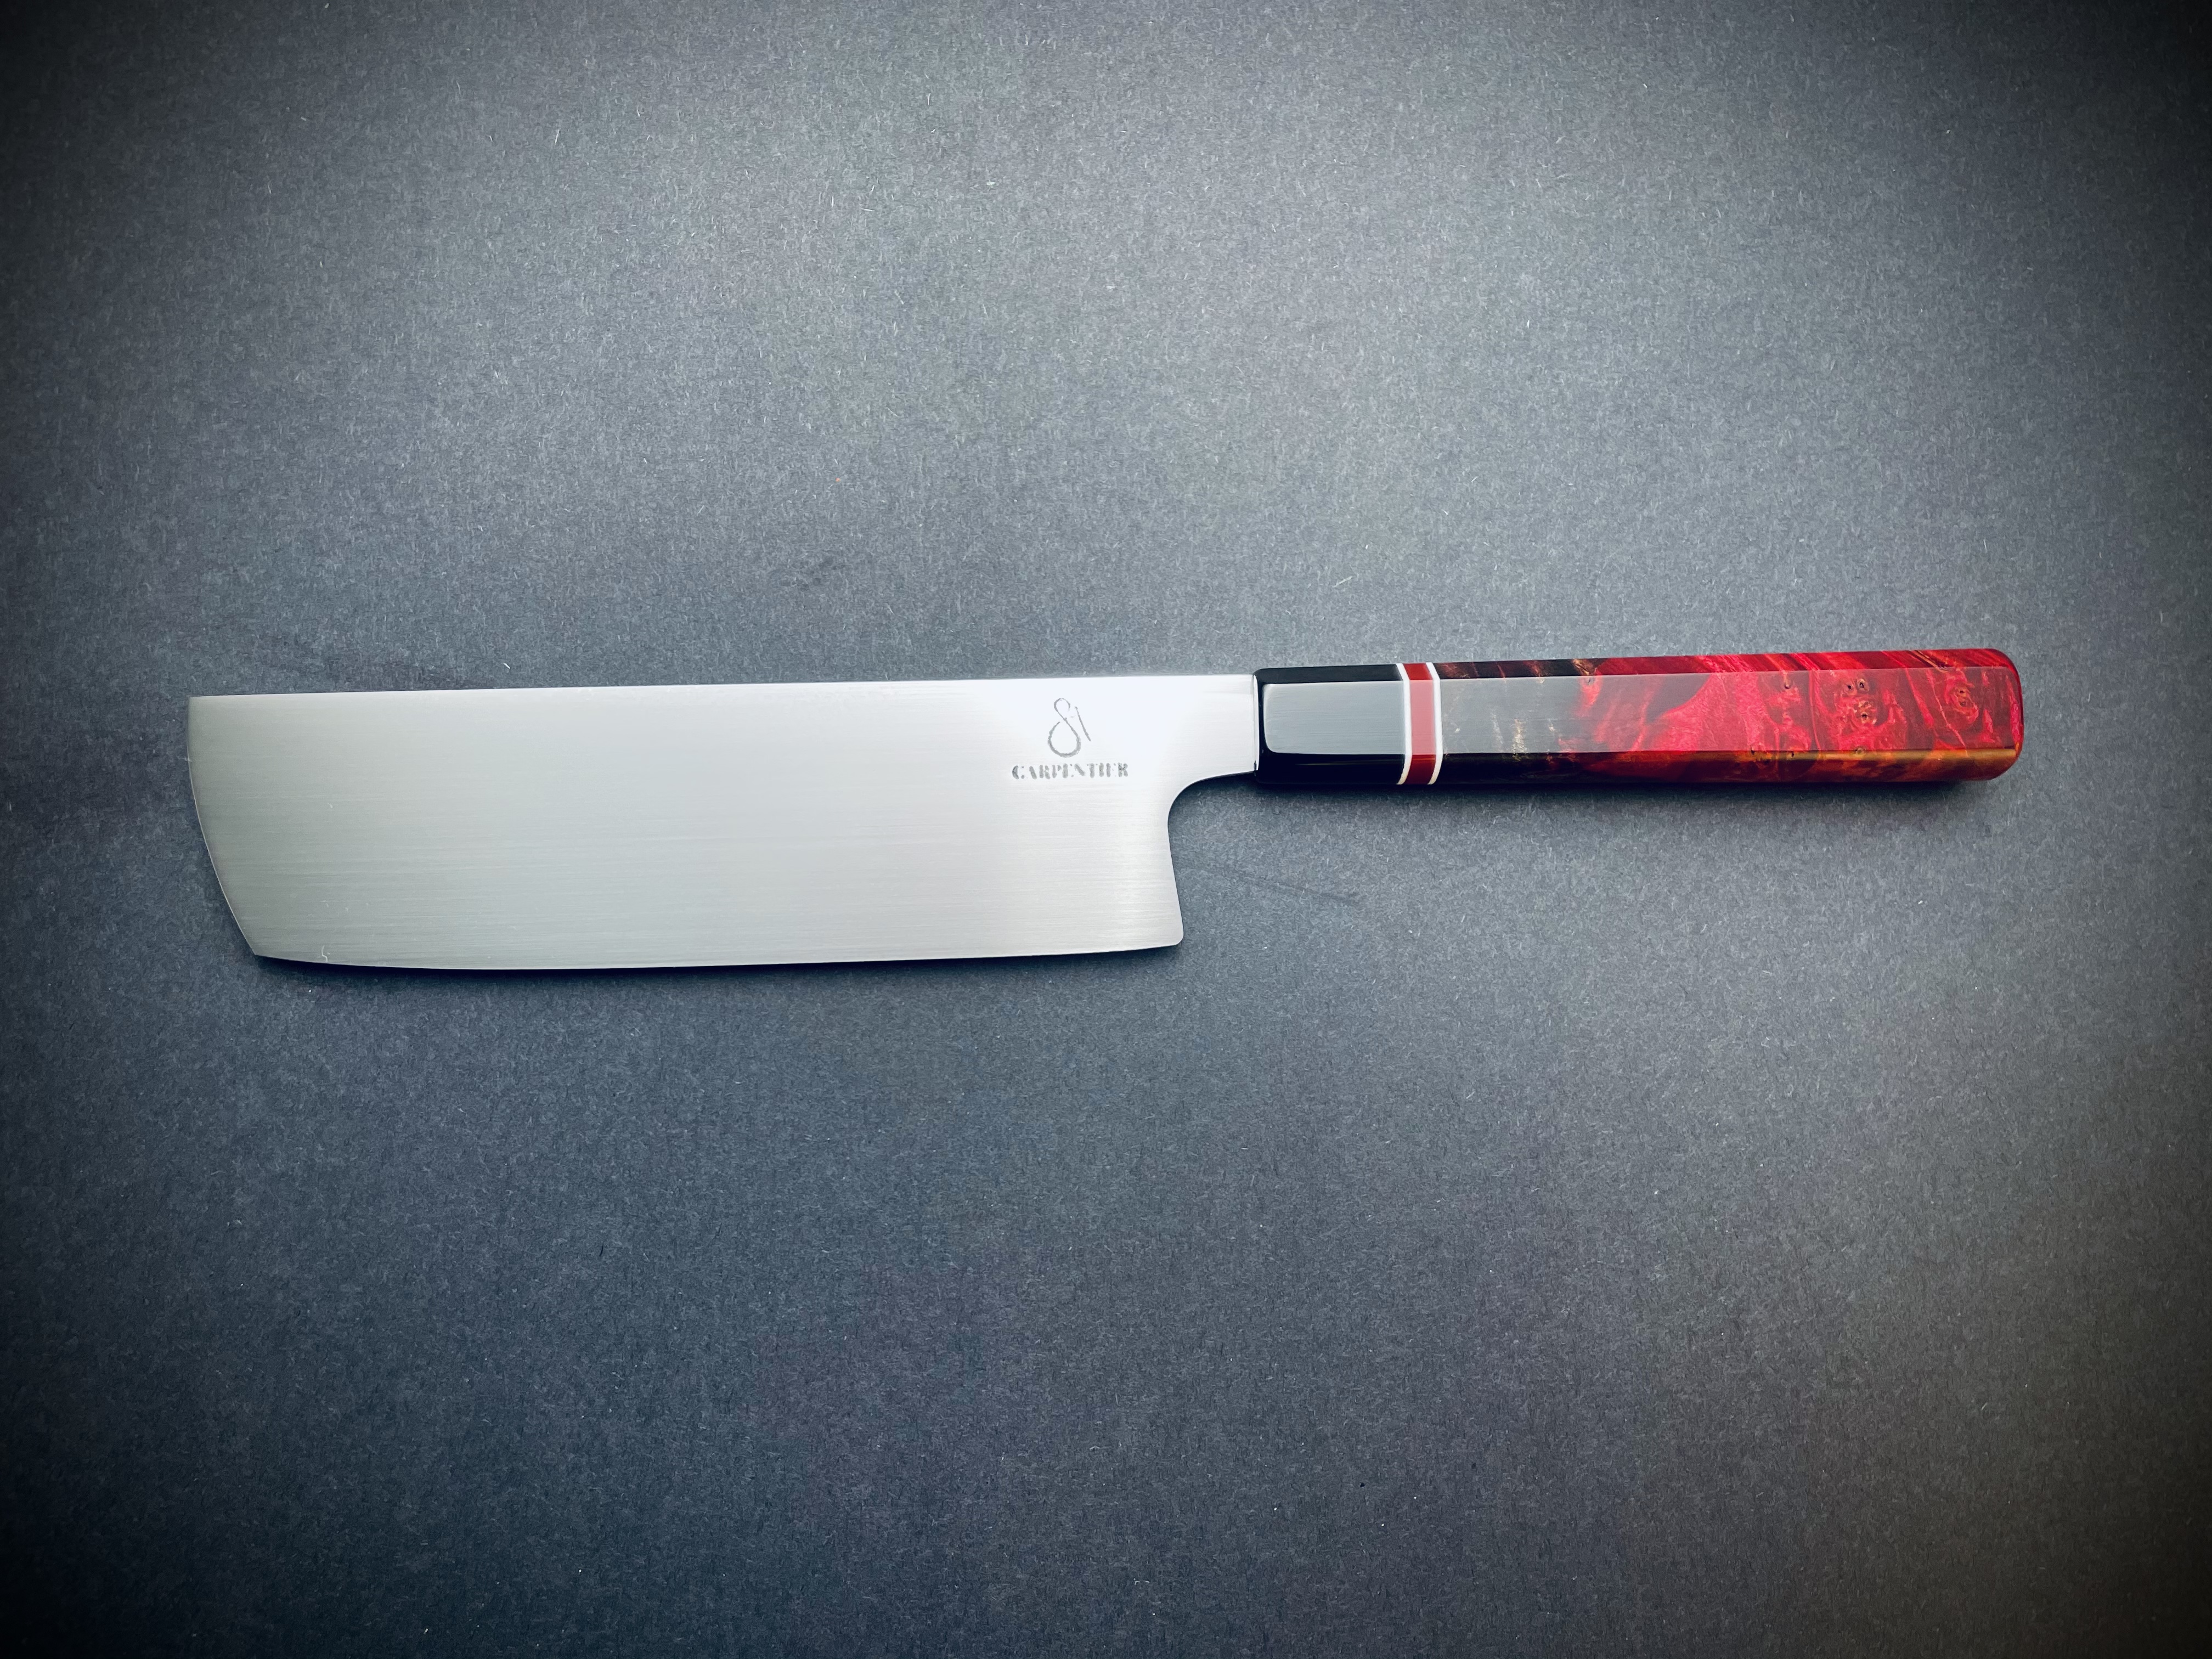
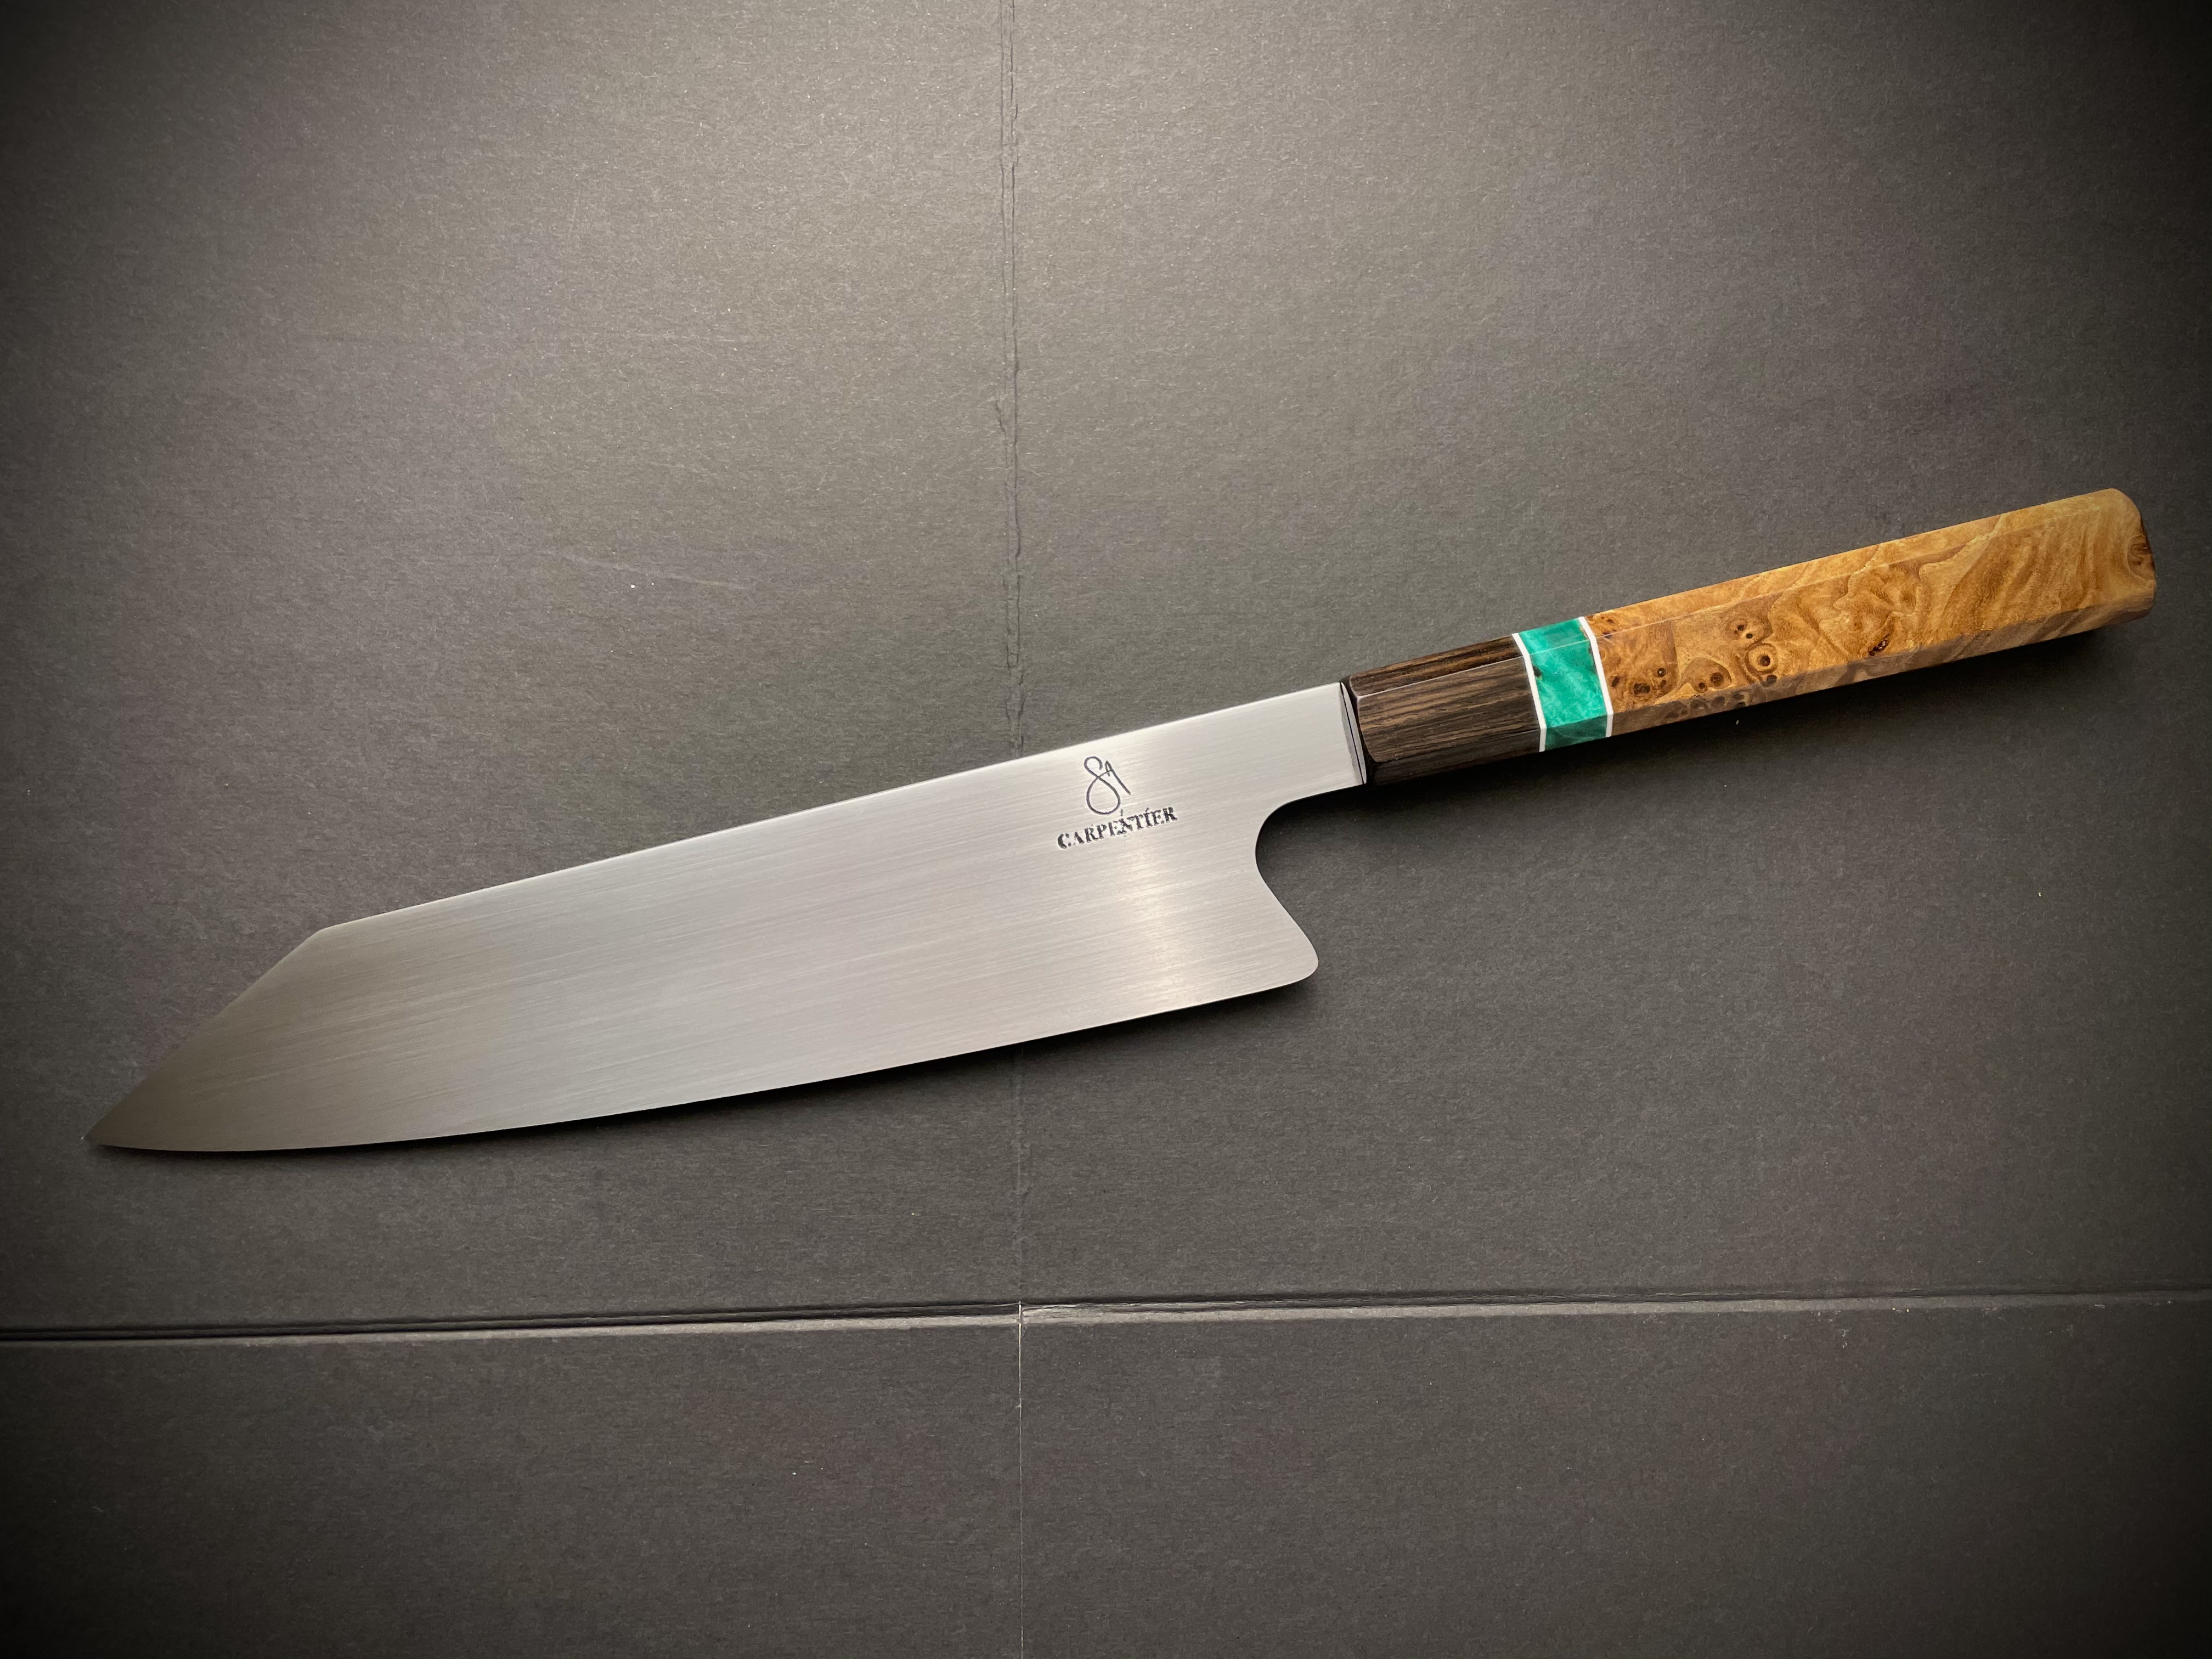
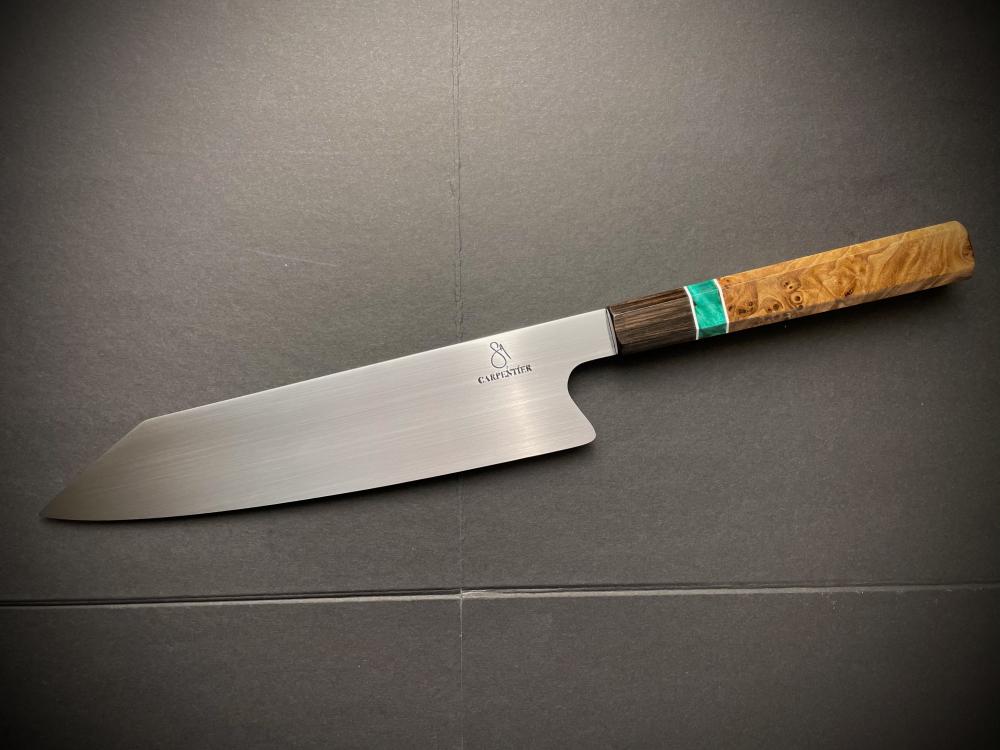
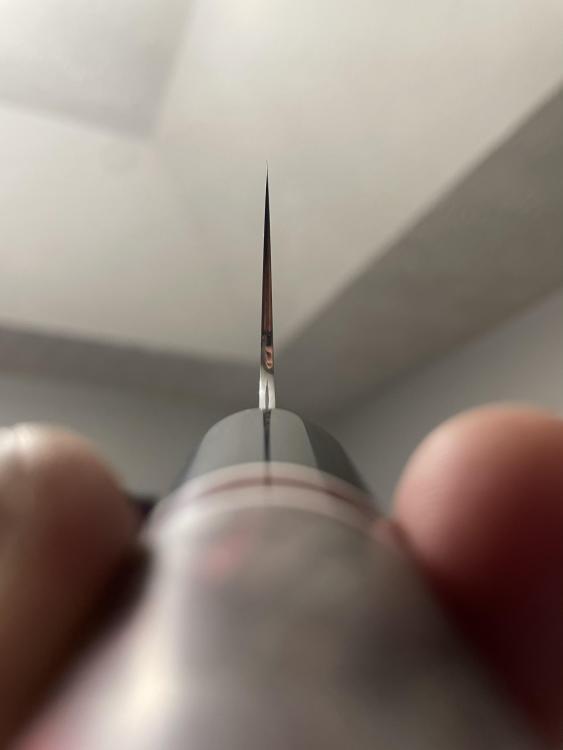
First day on the forum. These are my two latest blades. I just started knife making using stock removal in September. I’ve been dying to get into forging and try out some San Mai and other fun stuff. Figured I’d post these as my last two stock removal blades (hopefully), as I just got a makeshift anvil. Can’t wait to start hammering!
-
A collection of improvised anvils
Seffers93 replied to Charles R. Stevens's topic in Anvils, Swage Blocks, and Mandrels
Sorry about using the quote feature. I just read the Read This First sent by a Mod. I should’ve read that first lol. Thanks for the tip about rounding the edges. I’ll bust out the angle grinder and take care of that tonight. I wish work wasn’t a thing so I could go stump hunting tomorrow. I also have to figure out how to get them from the trail back to my car (it’s a long trail). Will post updates -
A collection of improvised anvils
Seffers93 replied to Charles R. Stevens's topic in Anvils, Swage Blocks, and Mandrels
I was wondering how I might go about that. This is exactly what I needed to see. Thank you