Schmidlapper
-
Posts
10 -
Joined
-
Last visited
Content Type
Profiles
Forums
Articles
Gallery
Downloads
Events
Everything posted by Schmidlapper
-
Welcome from me as well. The forum is certainly a treasure trove of valuable information on the subject, especially for us just starting out.
-

Hopefully never too late to the party, or fate stepped in.
Schmidlapper replied to Schmidlapper's topic in Introduce Yourself
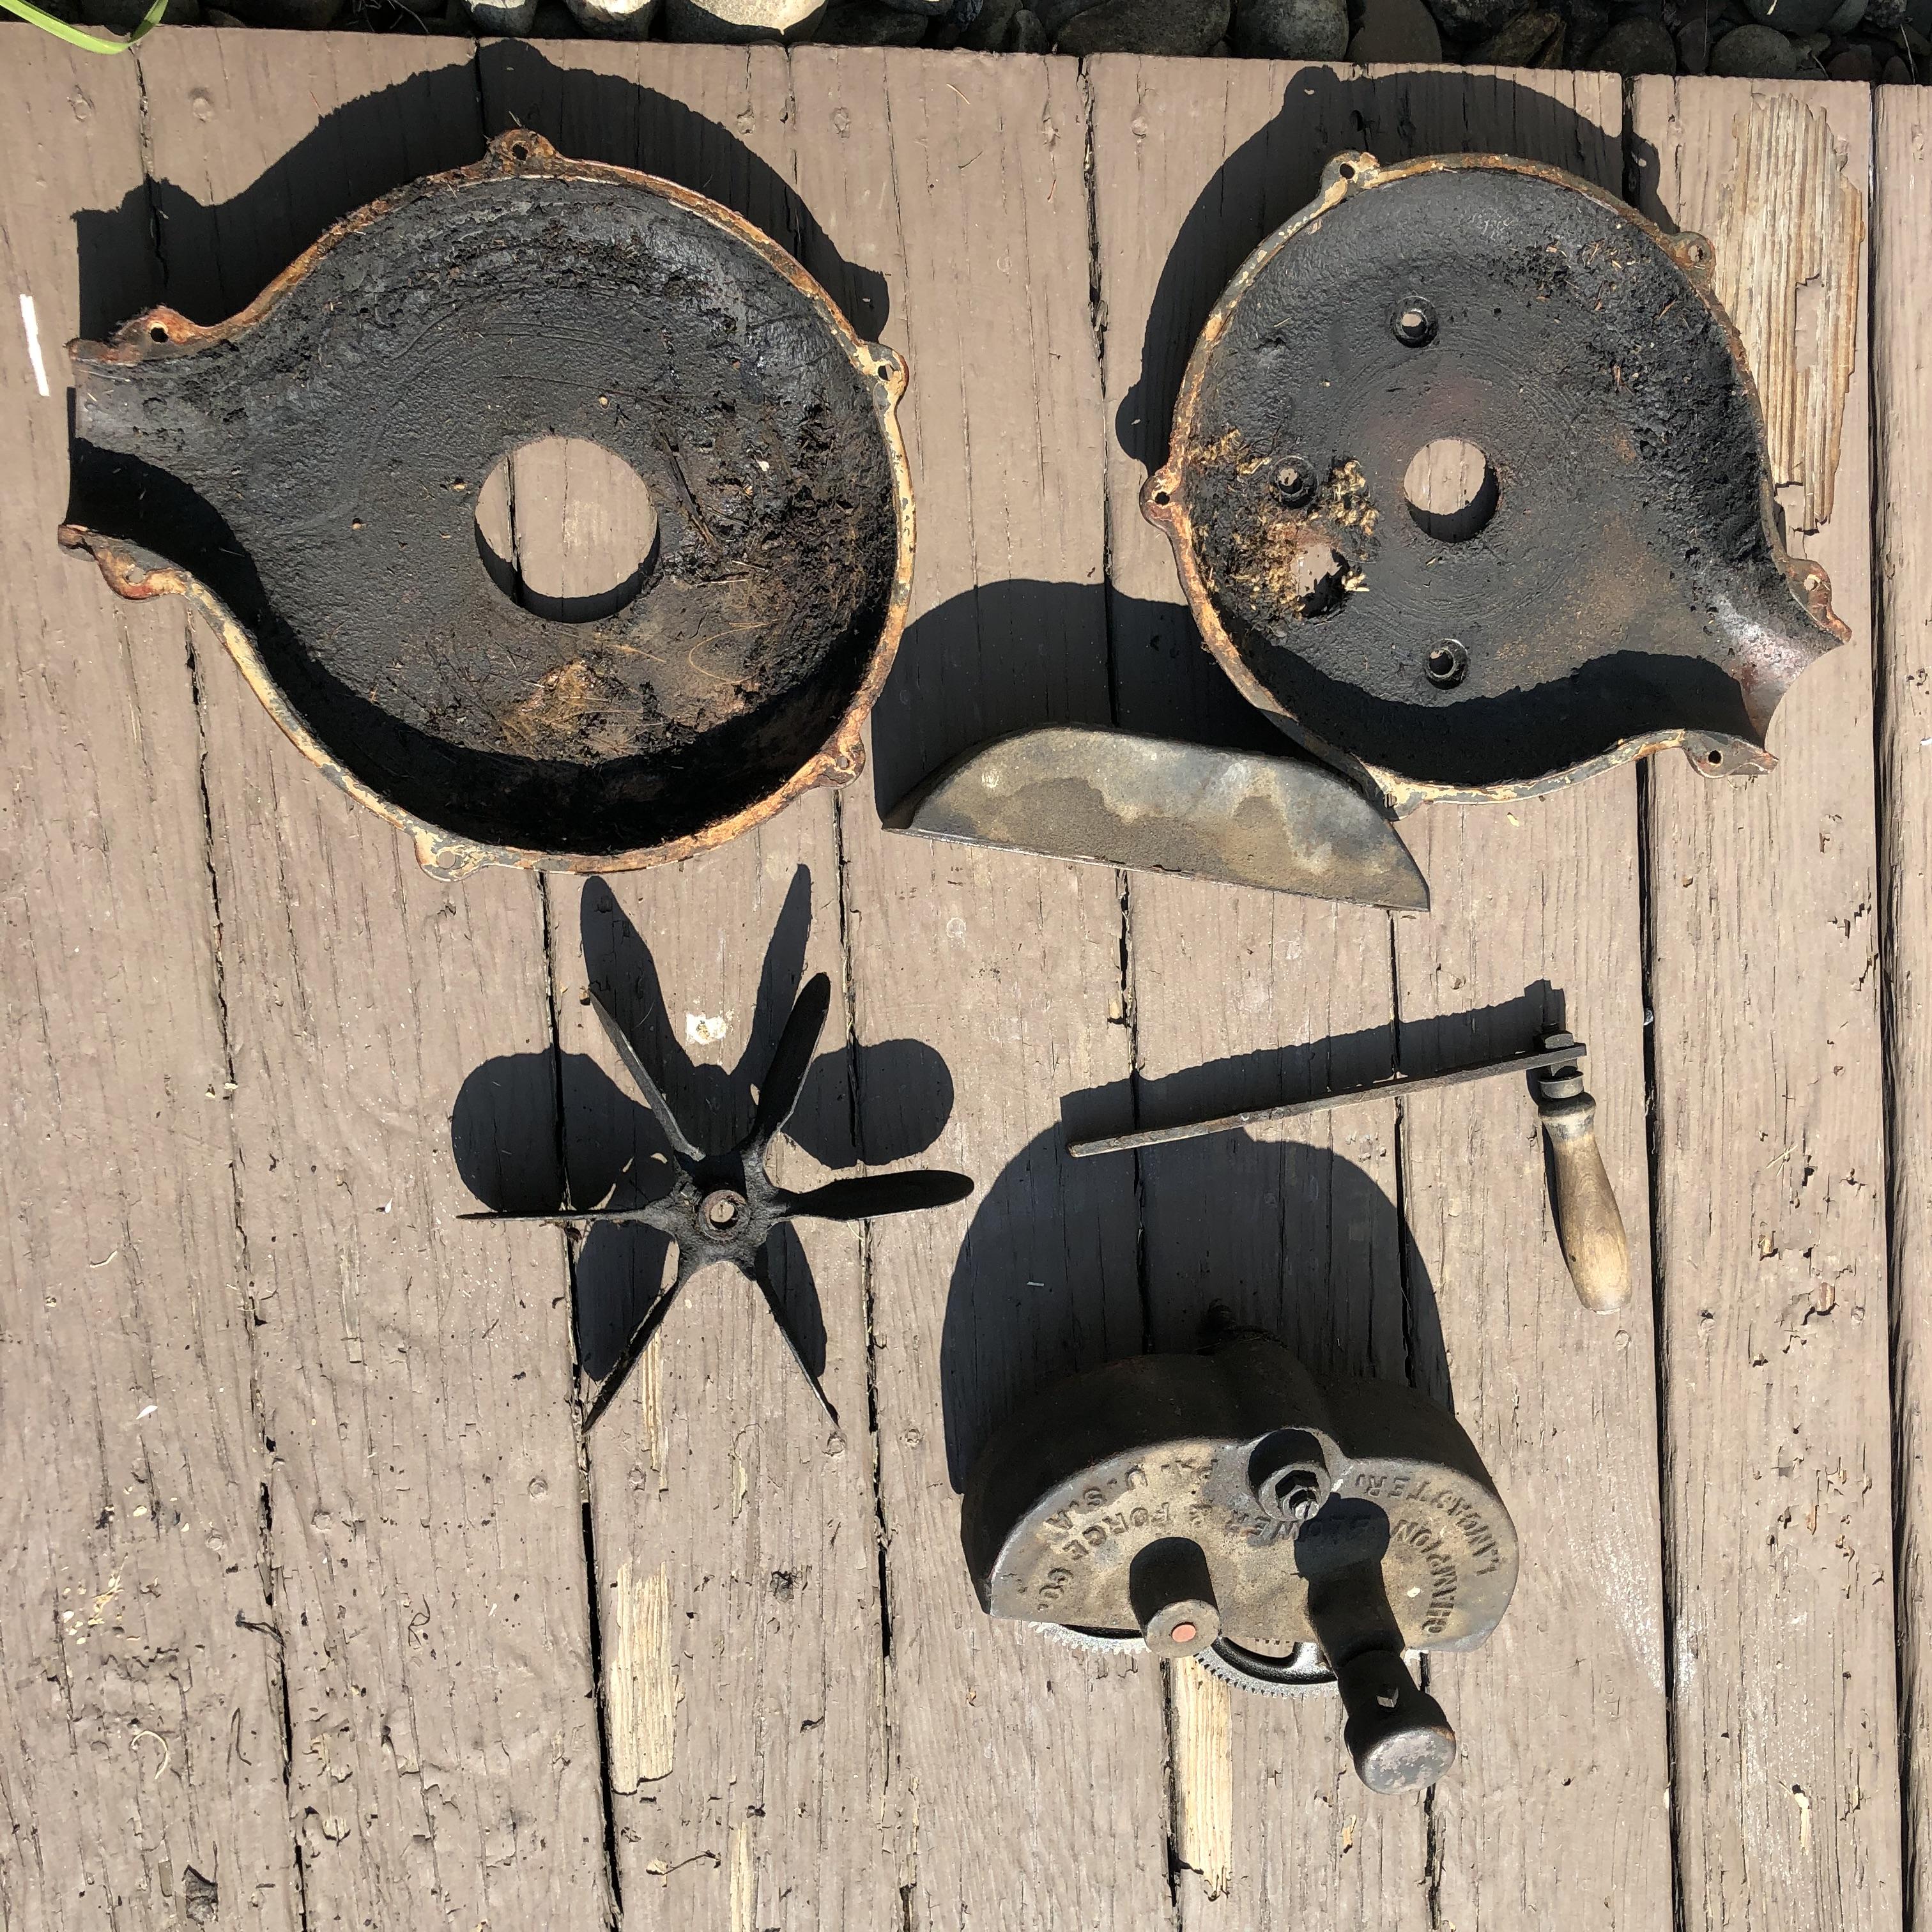
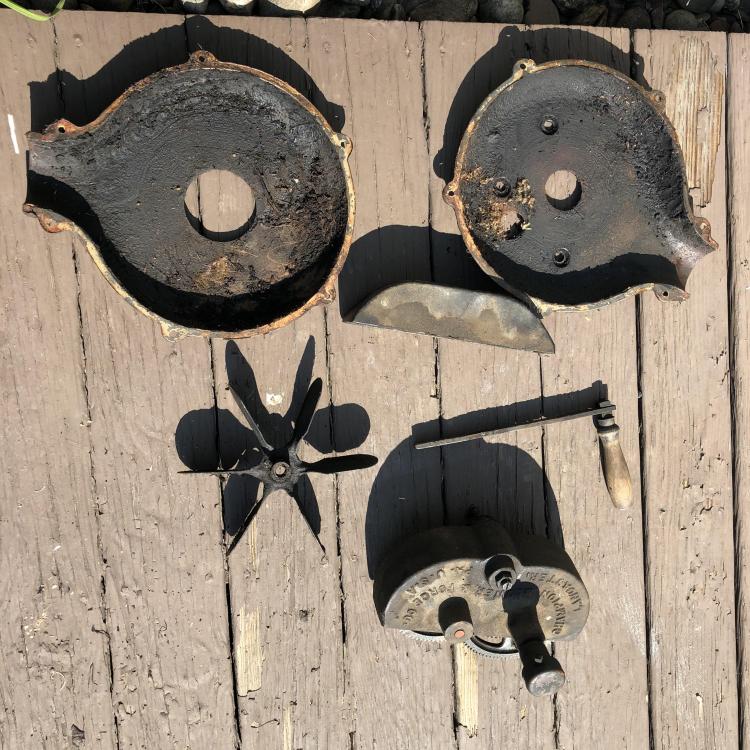
It had putty in there already when I tore it down, and it was suggested by others who have rebuilt them. I don't really know how important it is or isn't to have it. I know it cost about 10 cents in materials, was easy to re apply and it doesn't have any air leaks from around the blower housing. -
Hopefully never too late to the party, or fate stepped in.
Schmidlapper replied to Schmidlapper's topic in Introduce Yourself
Plumbers putty is just that a putty that can be easily formed, it doesn't harden for a very long time and is meant in this application only to prevent air from escaping through the air plenum seam. There are no actual gaskets used in these old Champions. -
Hopefully never too late to the party, or fate stepped in.
Schmidlapper replied to Schmidlapper's topic in Introduce Yourself
Don't know what was in there originally, there definitely was something sealing the halves. I did put a small seam of plumbers putty around the edge when I rebuilt it, as recommended by some. It looks very similar to what was in it before actually. -
Hopefully never too late to the party, or fate stepped in.
Schmidlapper replied to Schmidlapper's topic in Introduce Yourself
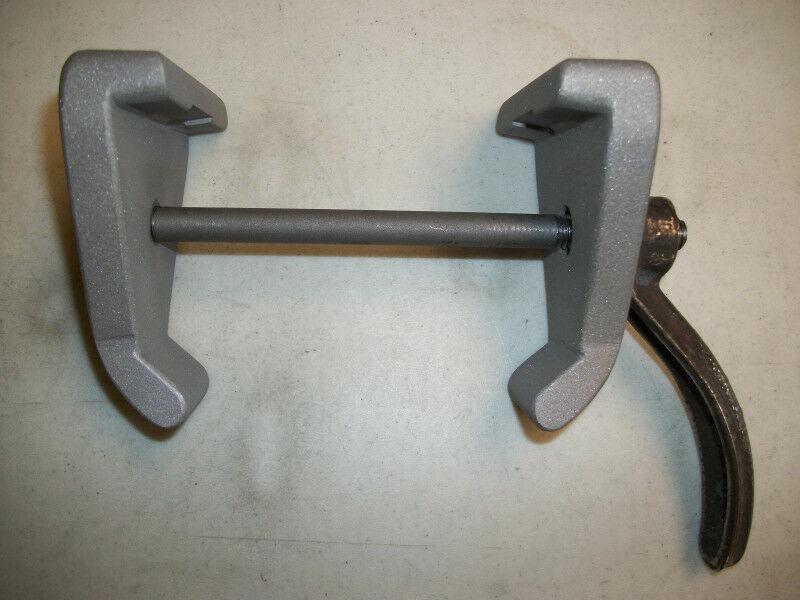
Yes mine also passes the bolt through holes in the air inlet and remains on the forge. There are two ears on the tuyere inlet pipe for the narrow clamp jaws as well. Which is Buffalo, blower or forge? -
Hopefully never too late to the party, or fate stepped in.
Schmidlapper replied to Schmidlapper's topic in Introduce Yourself
It sure is the same. That forge must have at a minimum used a Champion tuyere and blower, possibly the whole shebang was supplied by Champion. -
Hopefully never too late to the party, or fate stepped in.
Schmidlapper replied to Schmidlapper's topic in Introduce Yourself
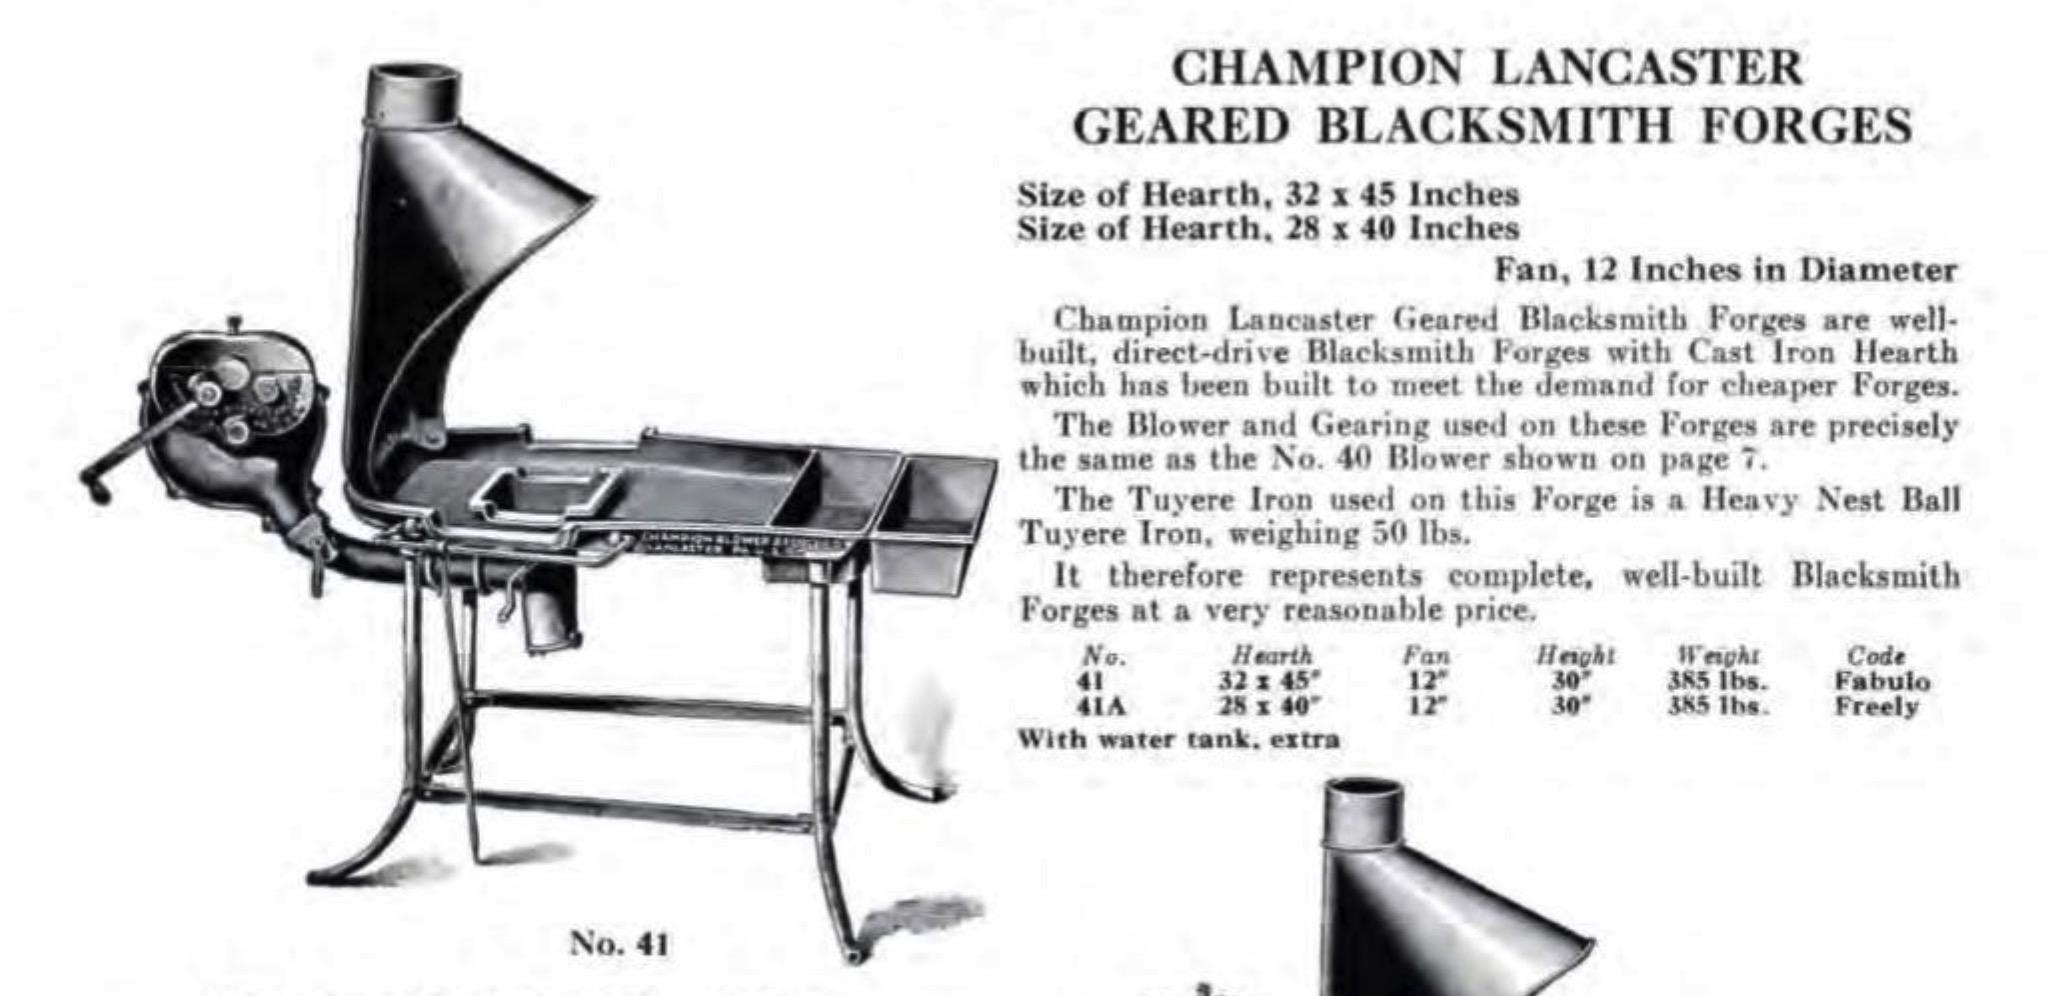
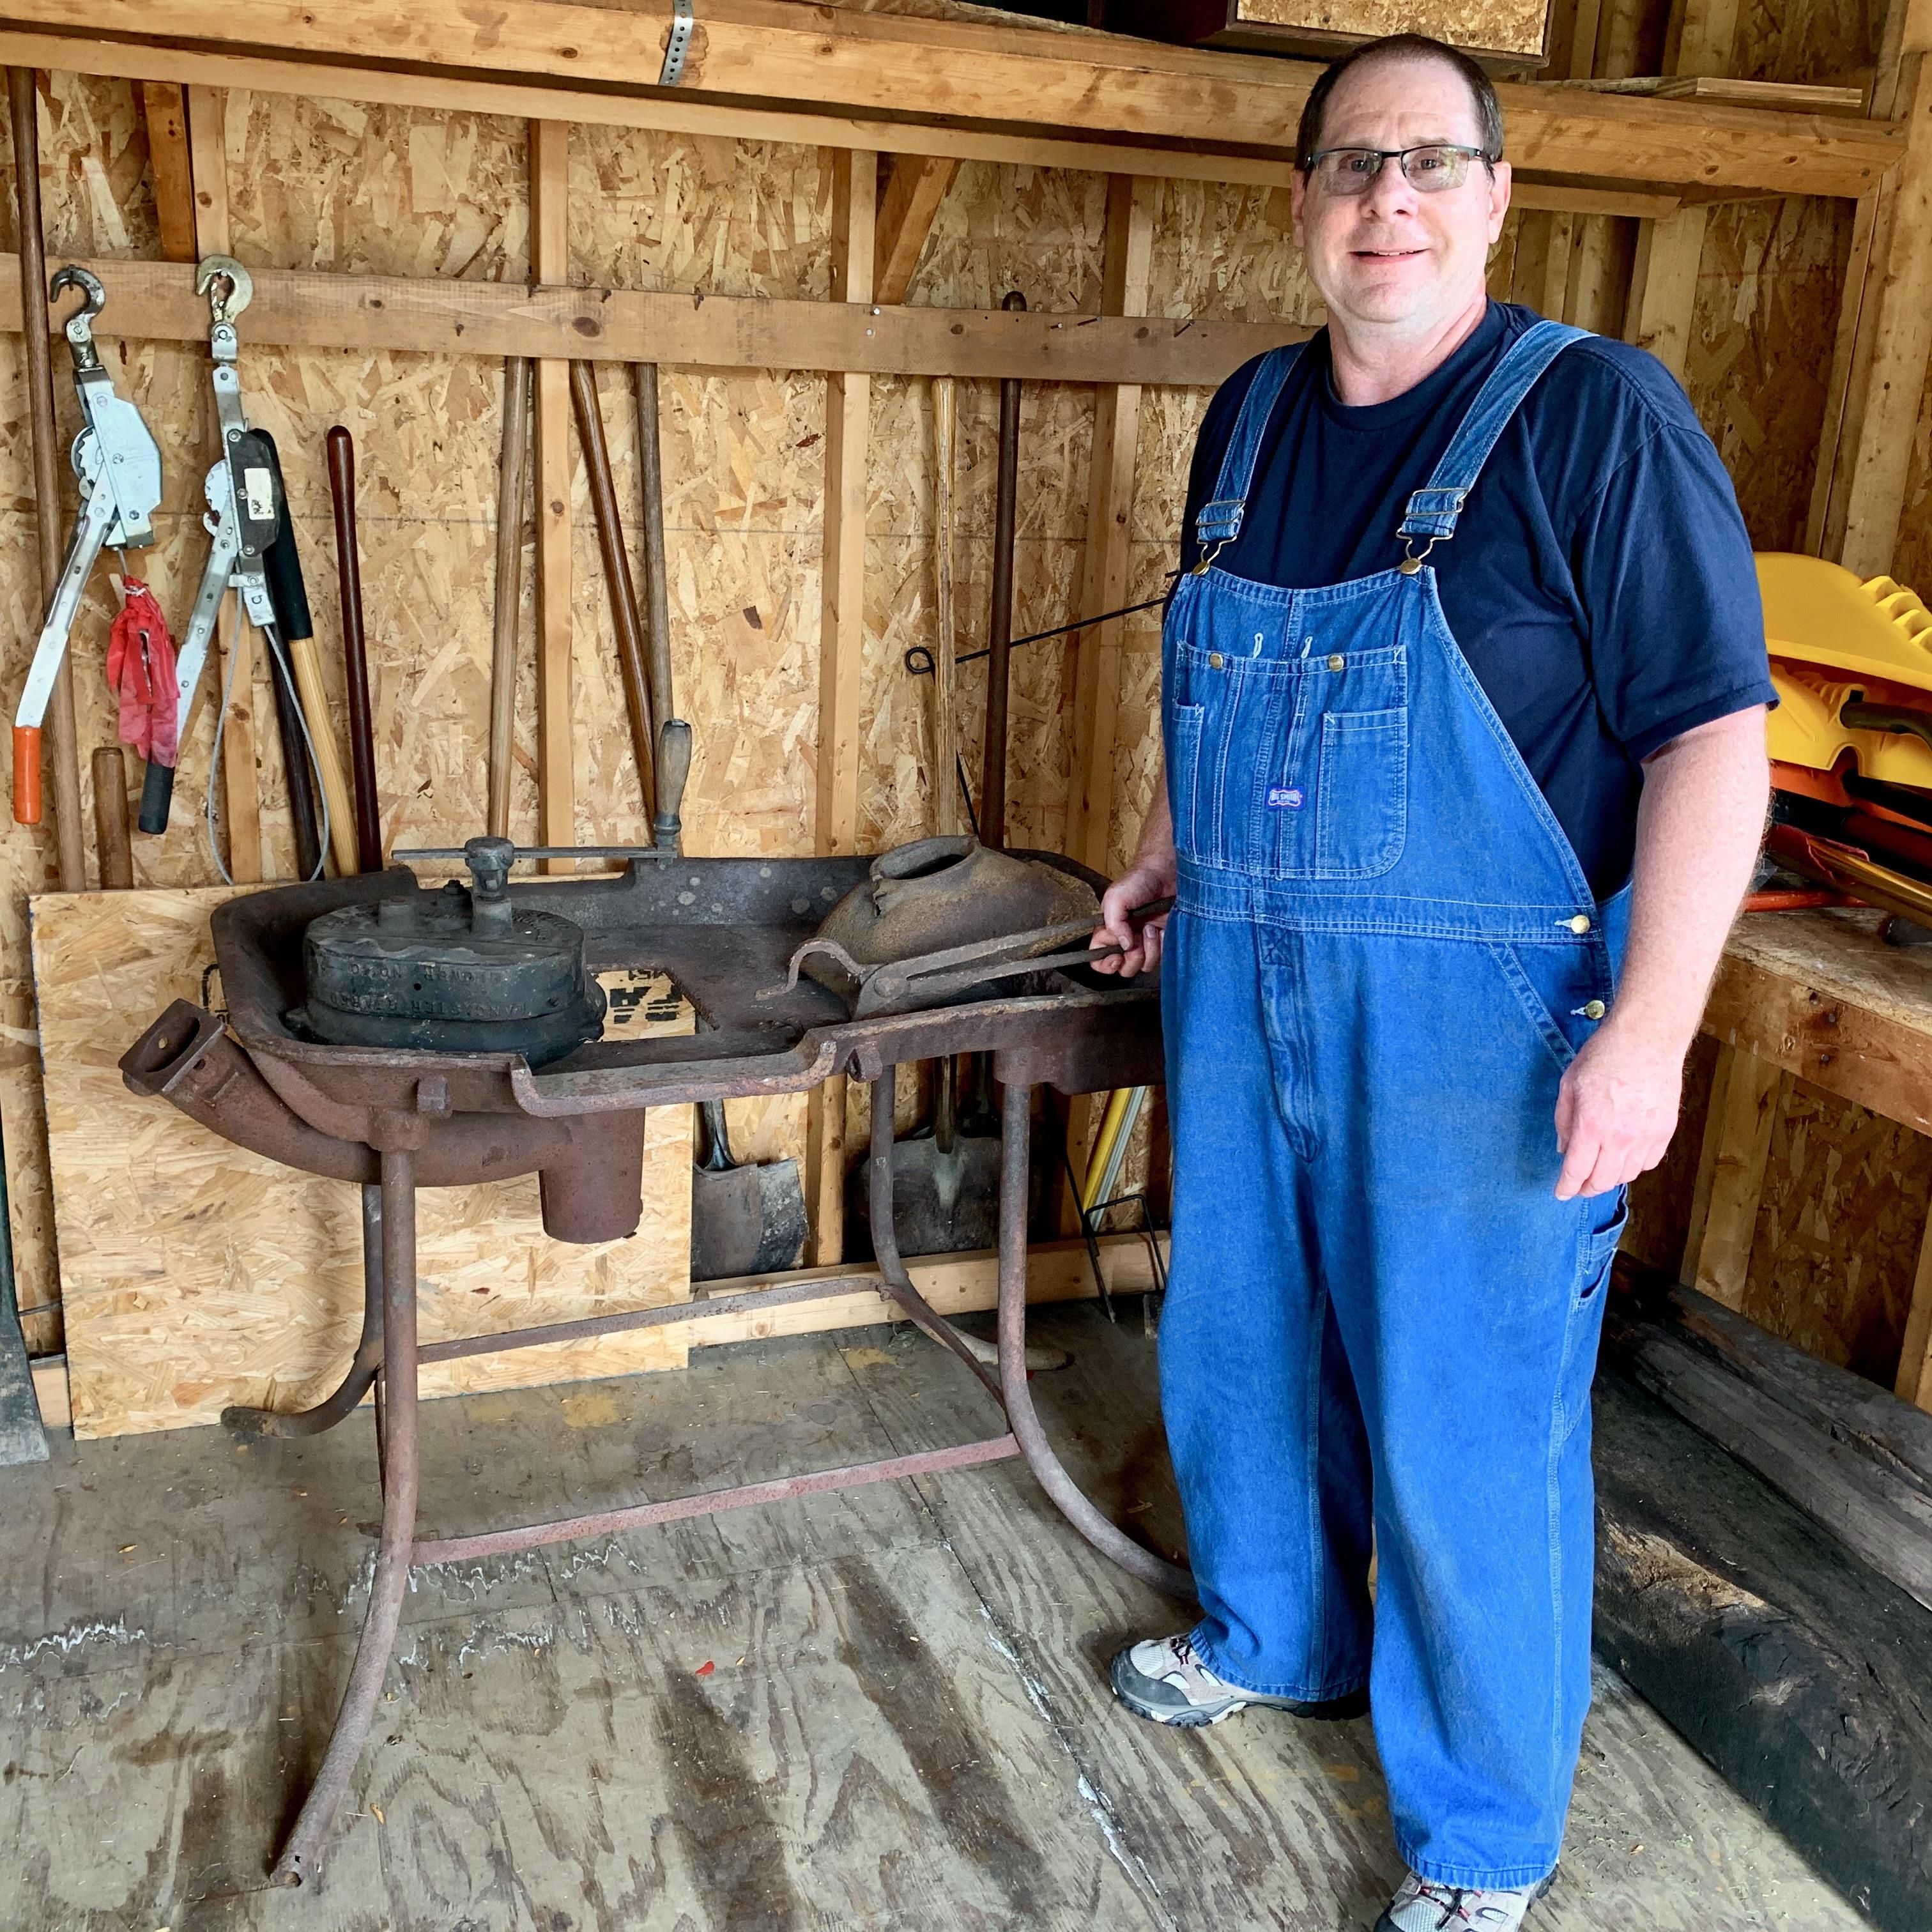
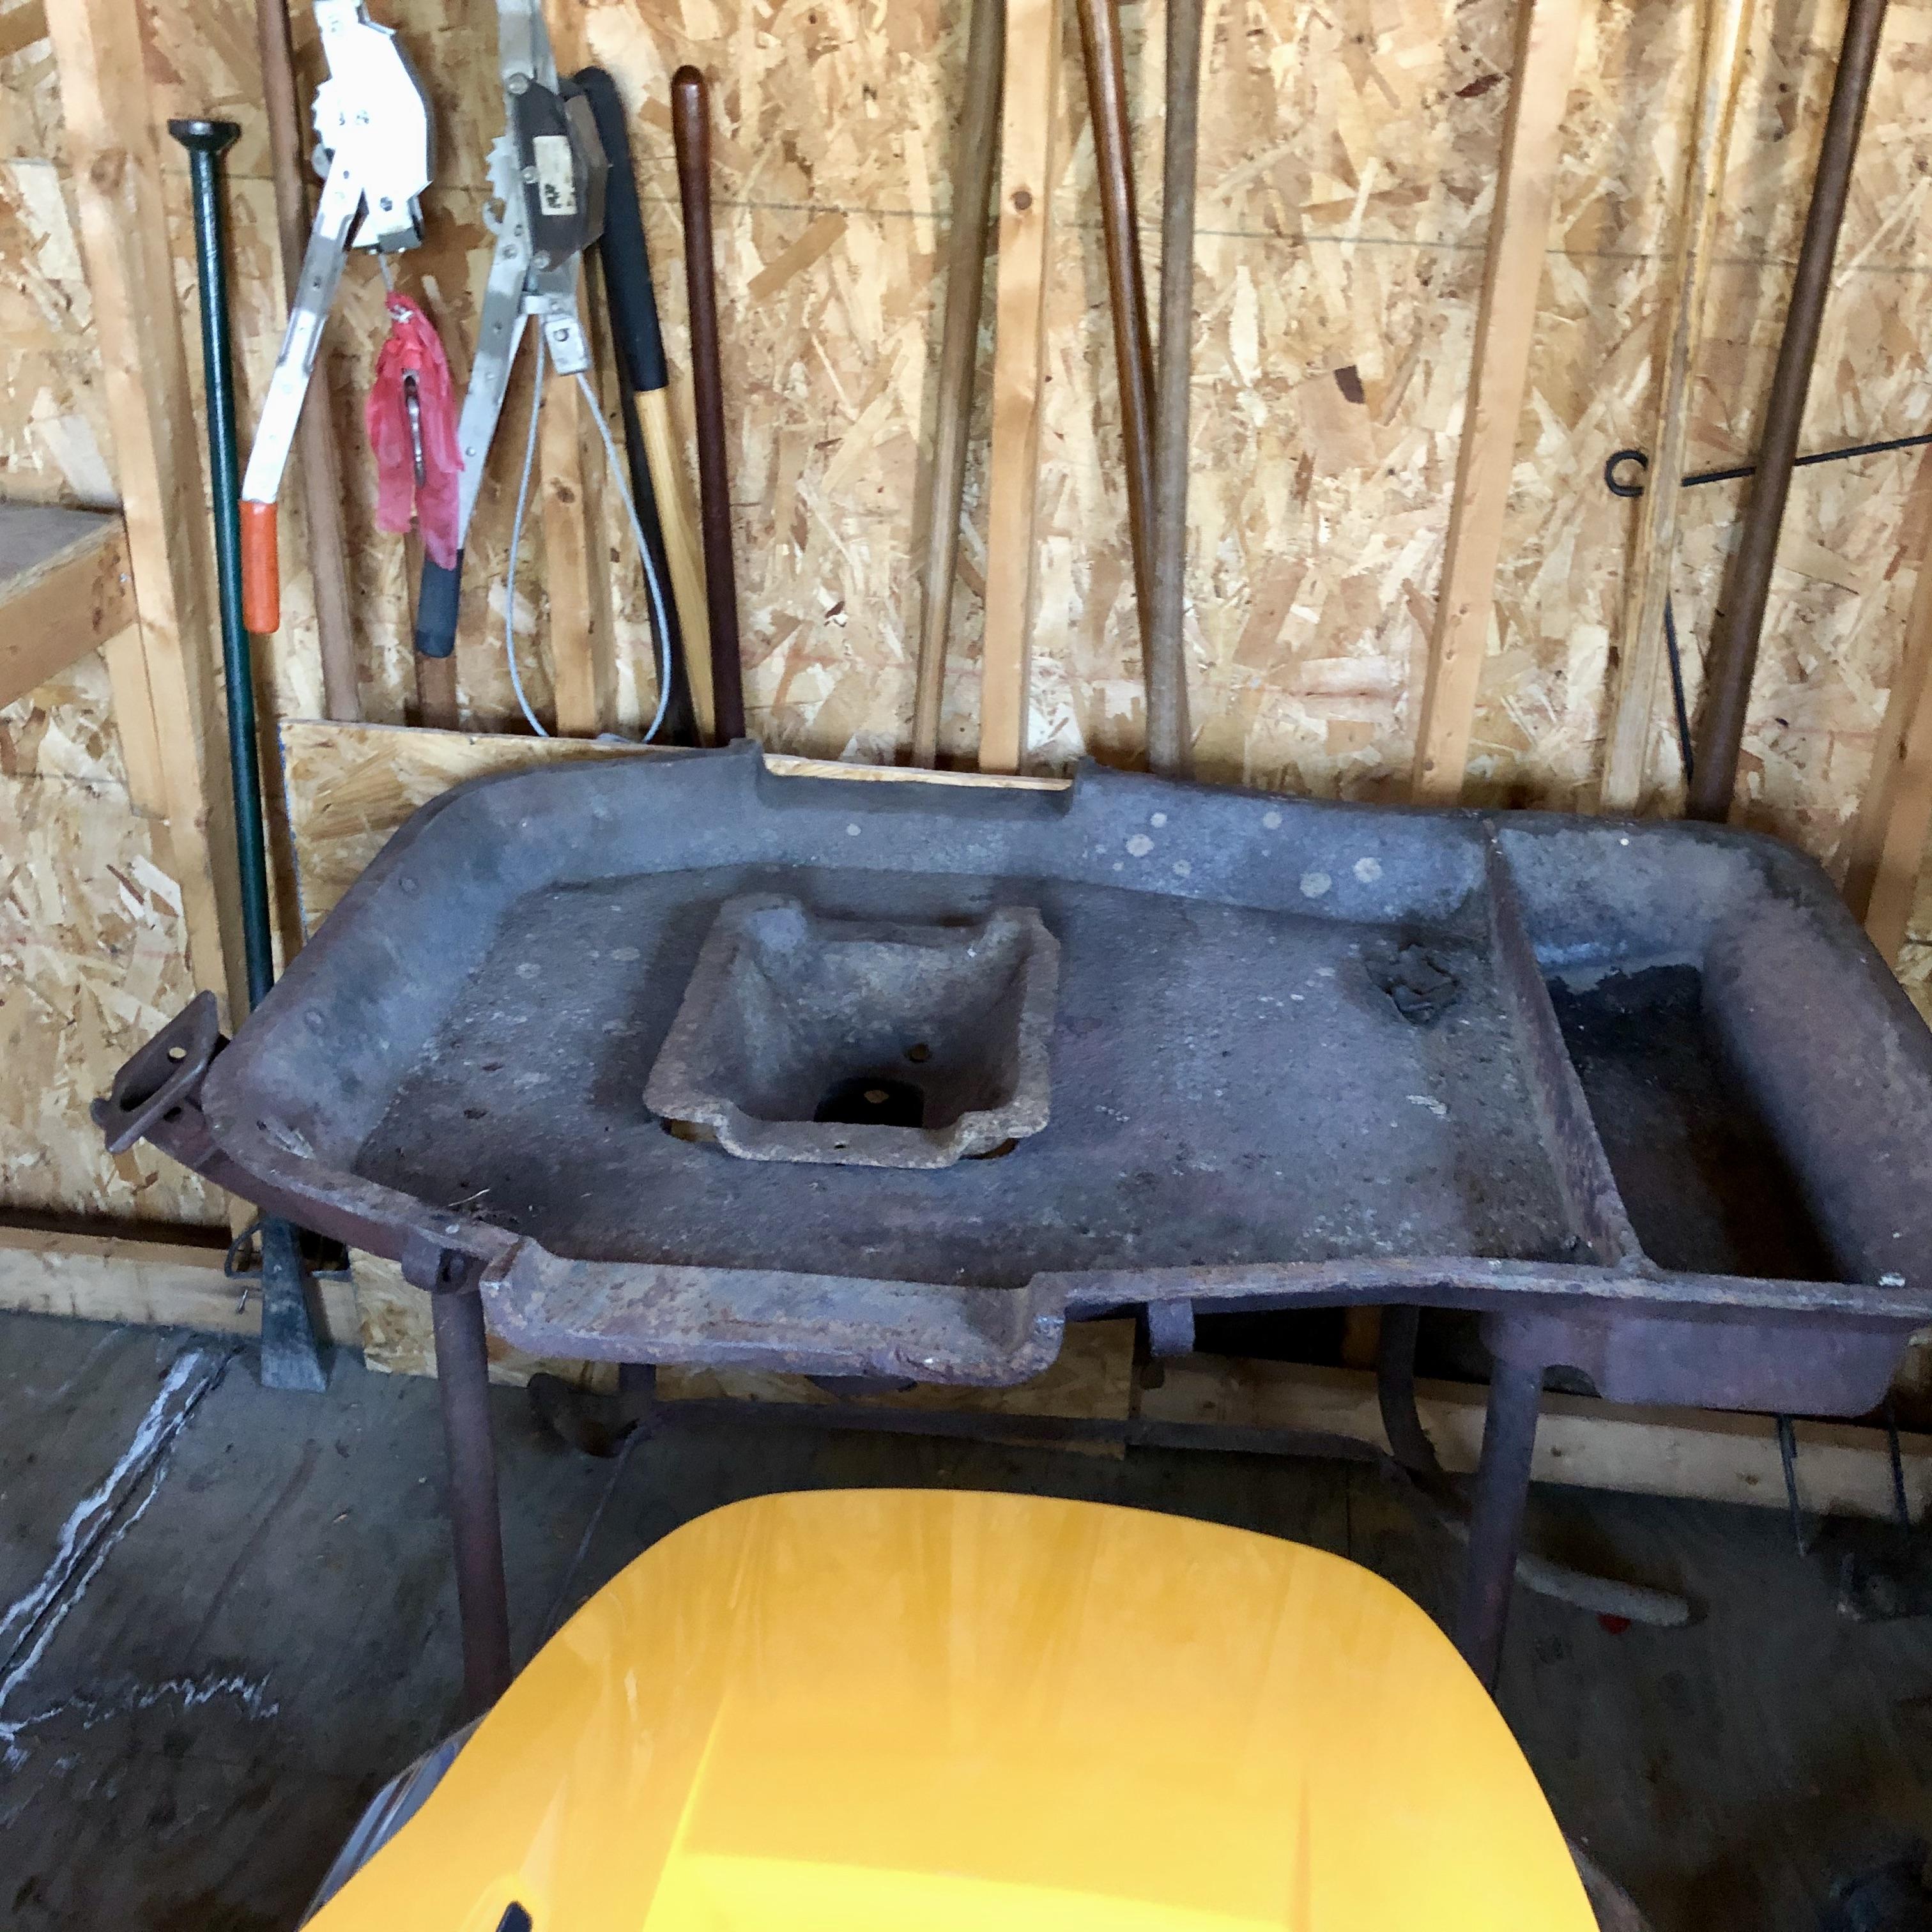
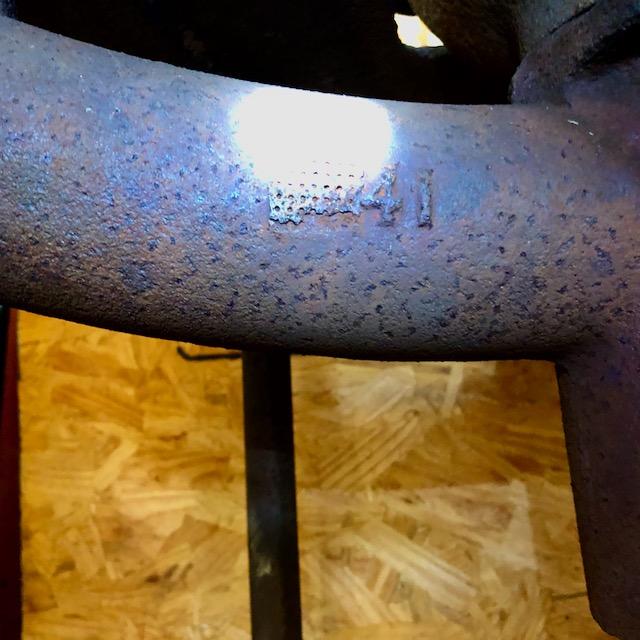
The forge is marked only with a 41, and because how the blower interface to the forge was so purposefully designed, I suspected the forge was a Champion also. With those two clues I finally found this catalogue description. With this information I could then verify that the clamp I had found to buy was the correct one needed to attach the blower. I remember it having the clamp when I was young, but it had become separated and lost in the 45 years since. Believe it or not, the first search I made for clamp, Champion, forge, blower, #40, interface led me to the clamp I eventually bought. The fellow had made one for a friend and then two extras, which he had put up for sale on the bay. After our discussions and some photos we concluded it was the correct clamp I needed, and it works perfectly. I couldn't have been more fortunate in getting this special purpose clamp. Maybe they are just common, I don't really know. Thanks IronDragon, I recently linseed oiled the anvil and stump so it looks pretty. the anvil when I was little actually sat outside for years, so did the forge. It is a testament to the endurance of cast iron irrespective of good care. My father eventually built a workshop and moved the anvil inside, the forge stayed out. He mounted the anvil to this walnut stump in the 80s and I recently added the bands to limit some cracking.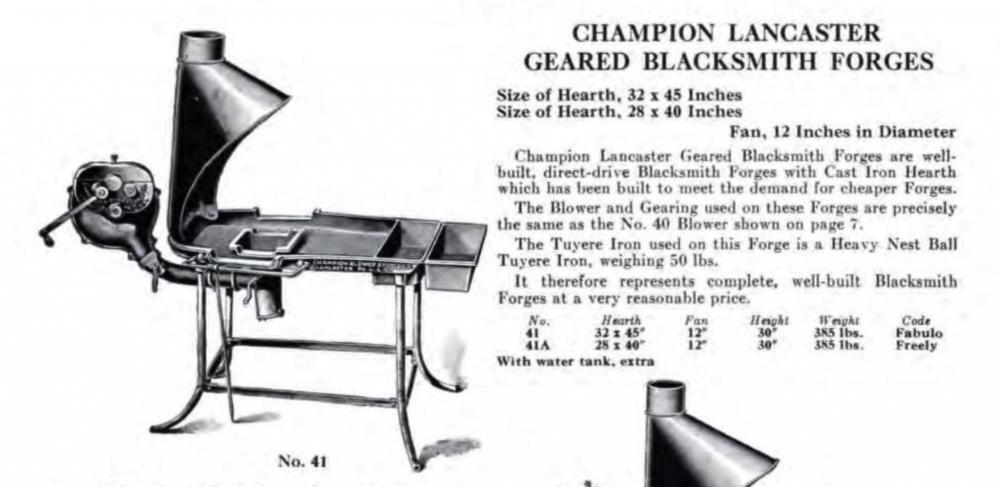
-
Hopefully never too late to the party, or fate stepped in.
Schmidlapper replied to Schmidlapper's topic in Introduce Yourself
Thanks a bunch guys. JHCC, I have been researching good info from the forum already, I rarely ask questions. JME1149, I am attaching a photo of my anvil. Frosty, the manner the blower attaches to the forge would preclude me from standing on the other side and cranking the blower even if I flipped it over. The inlet pipe is not centered, but comes up nearer the one corner.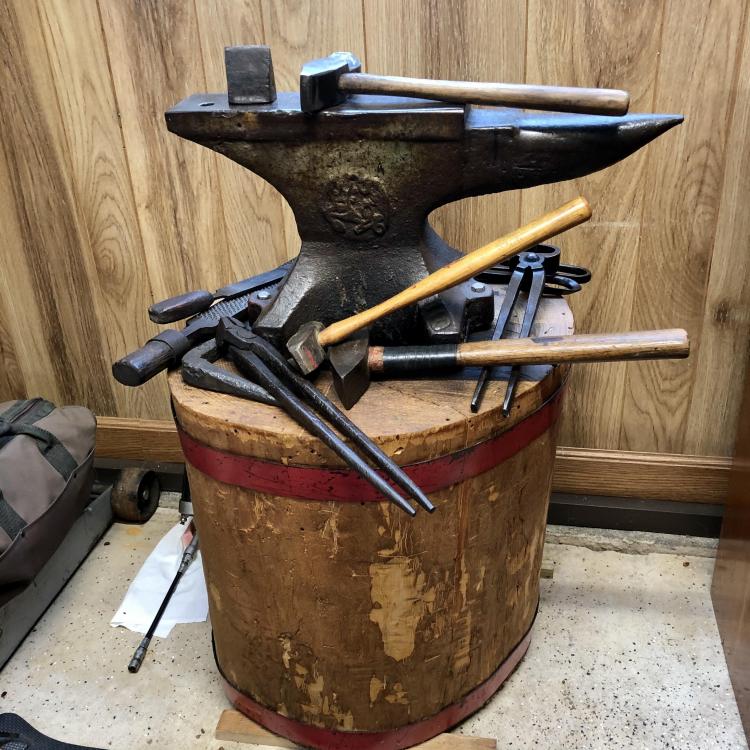
-
Born in 1869, in central Pennsylvania, my grandfather would become a farmer and ferrier. My father born in 1917, was the youngest child of a second marriage and he learned blacksmithing then from his father. Born in 1961, also from a second marriage, growing up I was always a generation out of step with the rest of my relatives. My father had obtained a lot of his father's blacksmithing tools over the years, which mostly sat around our house while I was growing up. I never showed any desire to learn blacksmithing and my father was usually too busy working to show me. When he died at the age of 93, it was I who settled his estate for my mother. In the process, I became overwhelmed and left a lot of items go that in hind sight I maybe shouldn't have. At that time, I sold the property to my cousin who now owned the adjacent farm it had come off of. At that time, I offered to give her what would be her great grandfather's forge, additionally I sent to auction, two leg vises and a post drill. I kept the 1906 Fisher 110lb anvil, swage block, hardy blocks, hammers and tongs as they were more easily stored. This was all in 2010. Recently, my cousin contacted me and wanted to know if I wanted the forge back, and I said I did. It is now in my shed and in the process of being overhauled for use. It is a Champion #41 agricultural forge which came with a #40 blower. I have already rebuilt the blower, and replaced the missing clamping bracket meant to hold the blower to the forge. It still needs an ash gate and clinker breaker to be functional. Once complete, it is my goal to begin learning the art of blacksmithing in my recent retirement. So I guess being a long time computer nerd, I naturally wound up here searching for some knowledge. So I guess I should say, Hi everyone. Bill Smith


-
The set screw is all that holds the pressed steel fan onto the shaft. It should be able to be pulled off at that point if the shaft is not peened at the end. The adjustment mentioned above adjusts the bearing cups in and out and a balance between end play and bearing tightness is needed, too tight and the bearings become clamped, too loose and the shaft moves around more. Adjusting the blades while on the shaft is necessary, use measurements from back of casing to blades and blade to blade to get close to even. As stated above the direction of turn will push blades in or out, check in both directions for rub. Re-tightening the set screw on the shaft can put a small amount of tilt to the fan, so watch out for that when adjusting. The outer housing can rub also and should be test fitted when adjusting. The reason to remove the fan is to inspect for small cracks in the blades. Over the approximate century these have been in use they can develop small cracks on both sides. Good luck.