

Red Shed Forge
-
Posts
226 -
Joined
-
Last visited
Content Type
Profiles
Forums
Articles
Gallery
Downloads
Events
Everything posted by Red Shed Forge
-
 David, Good call. We will definitely take a close look at it; despite it being free, I would hate to put a bunch of time a money into something that could take forever to get sold. I probably wont be able to start looking at it for a while, but if this post is still around after I do, I will give an update.
 -
Haha, yes it seems Thomas has the quick draw around these parts. And this is not the first time he has made me research something! Thomas, I have yet to master the TPAAAT Technique... as I am just learning of it haha. But yes, selling if fixed is also an option. The one in the fist picture apparently sold for $1,300. We will see!
-
Good point, weight will surely be a factor. But yeah... didn't think of a treadle hammer. I need to get back to Kentucky to take a look inside for myself!
-
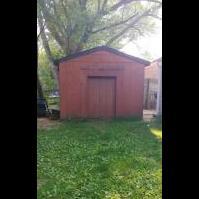
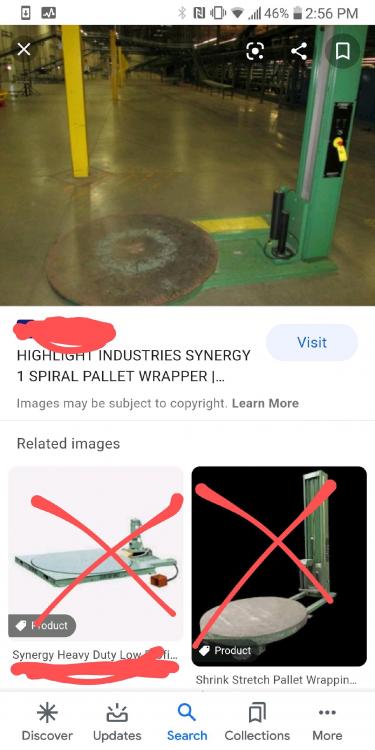
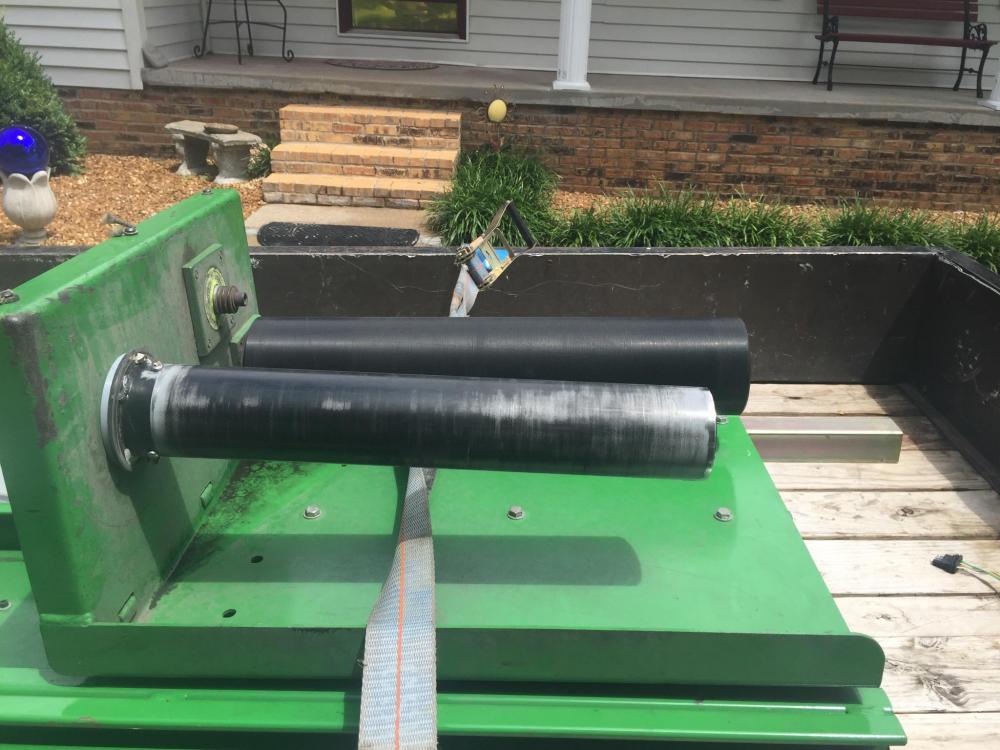
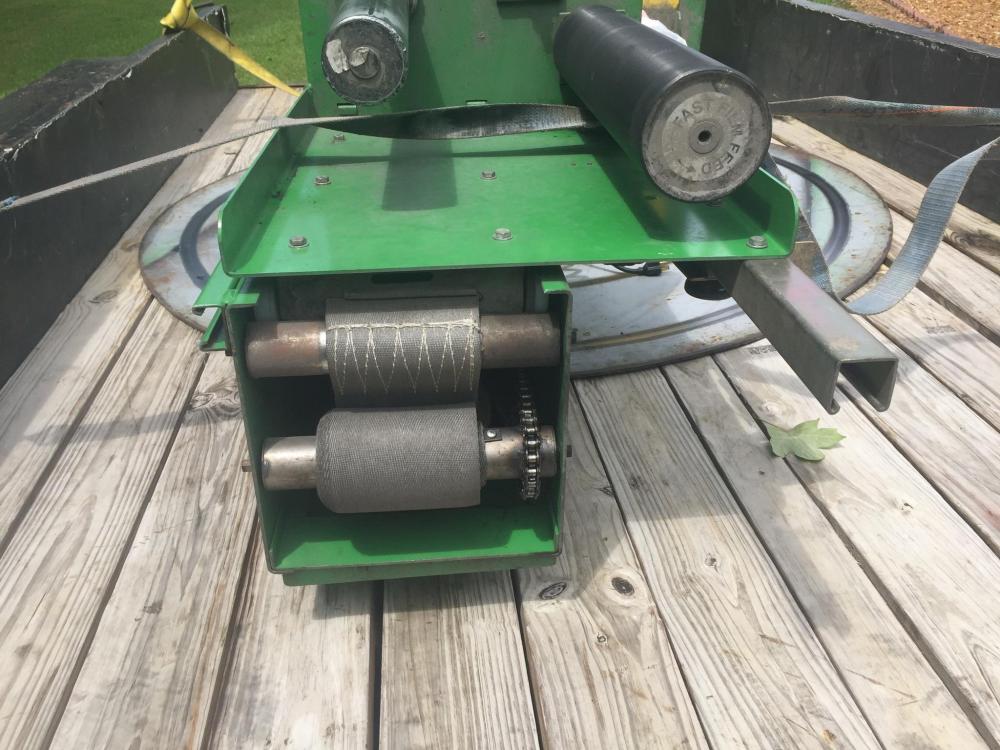
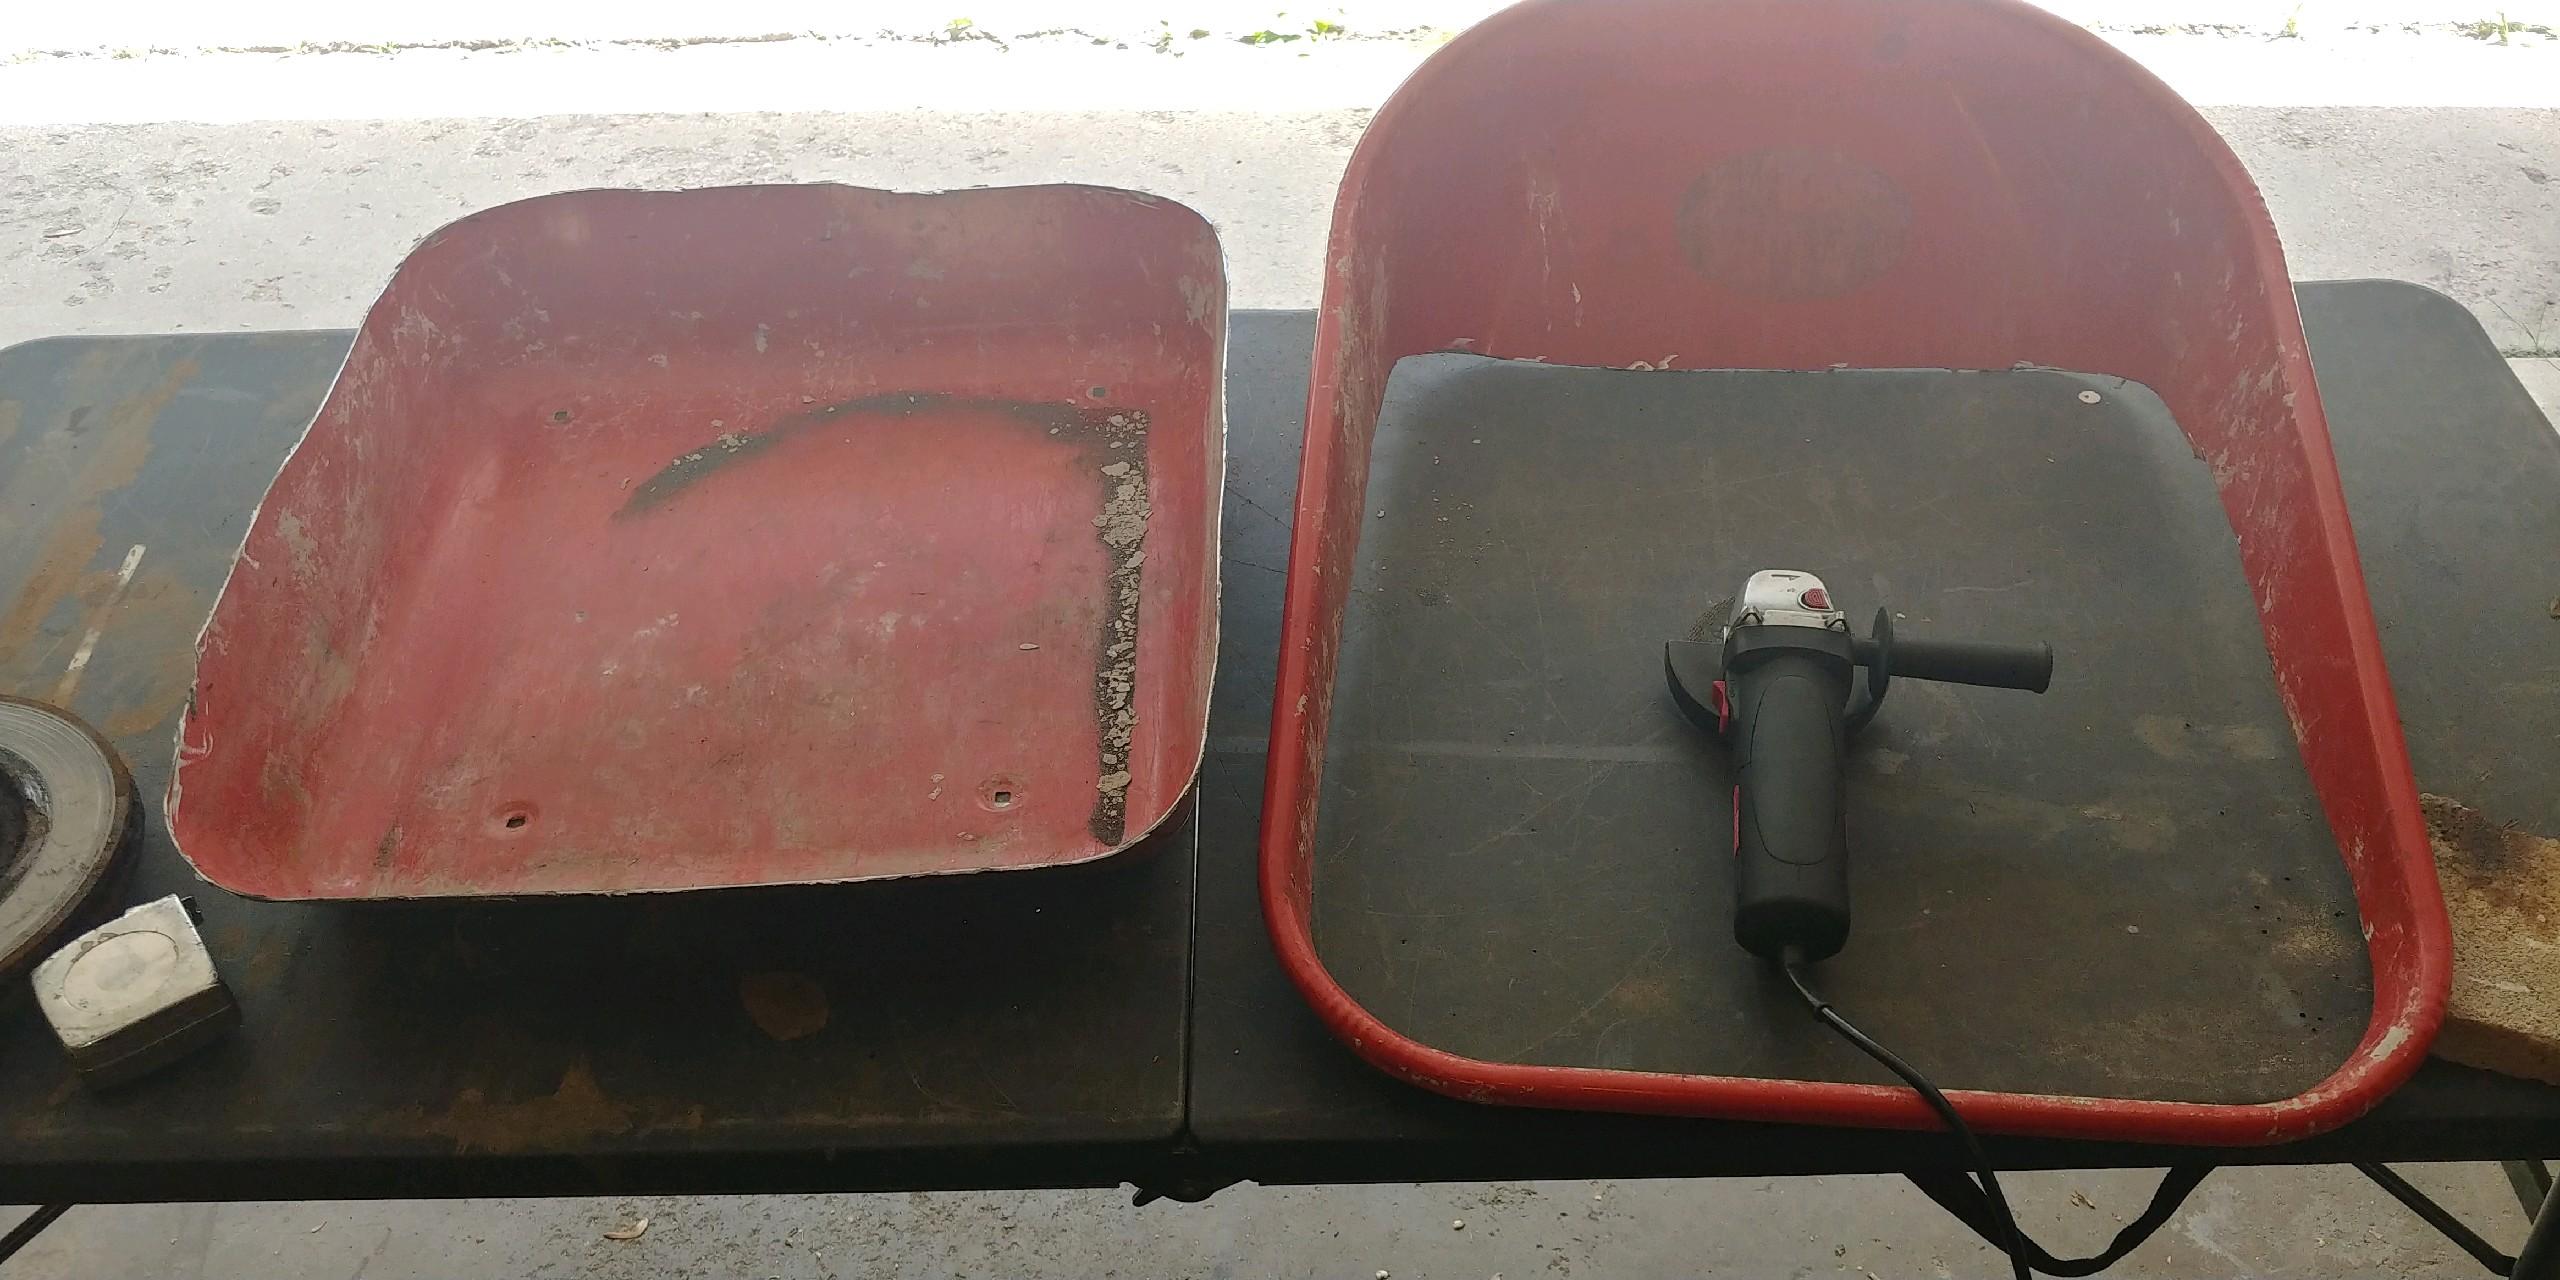
Hey Guys, My father-in-law was recently offered a FREE, broken industrial pallet wrapper. He has yet to properly tinker with it, but he believes the only thing at is broken is the motor which operates the spinning steel disc on the base. He has offered it to me, either in pieces or as is. Now, neither he or I know much about electric motors, pallet wrappers, or the mechanics therein. It clearly has plenty of steel that could be repurposed, especially that spinning plate. But I am wondering, does this thing have any potential of being converted into a power hammer or press? My FIL did not provide a good standing picture of it, so I have provided an internet picture of the same one, along with pictures he was able to provide. It is a "Synergy 1" by Highlight Industries, Inc. Please advise, Red.
-
I just picked up a few of these as well. Only one of them has a hole that runs the whole distance, I believe. I am happy to hear that they make good hardy tools as that is the reason I picked them up. Thomas, I would really like to see how that tomahawk turned out, if you happen to have a picture. I would imagine it is intended for smoking/decorative purposes only as I assume it is pretty heavy.... unless I am picturing it incorrectly? Red I should say, I am picturing the rod being used as the handle.
-
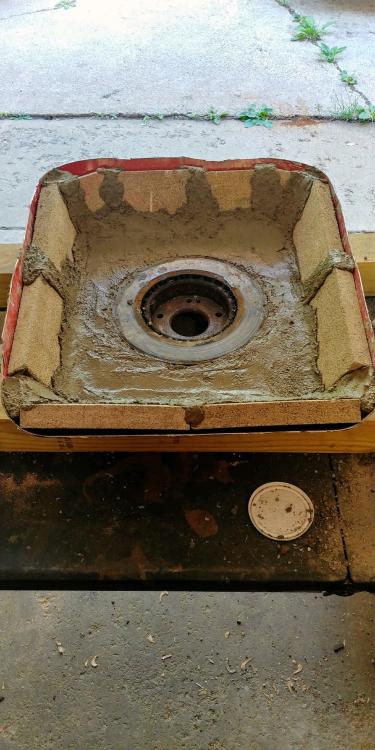
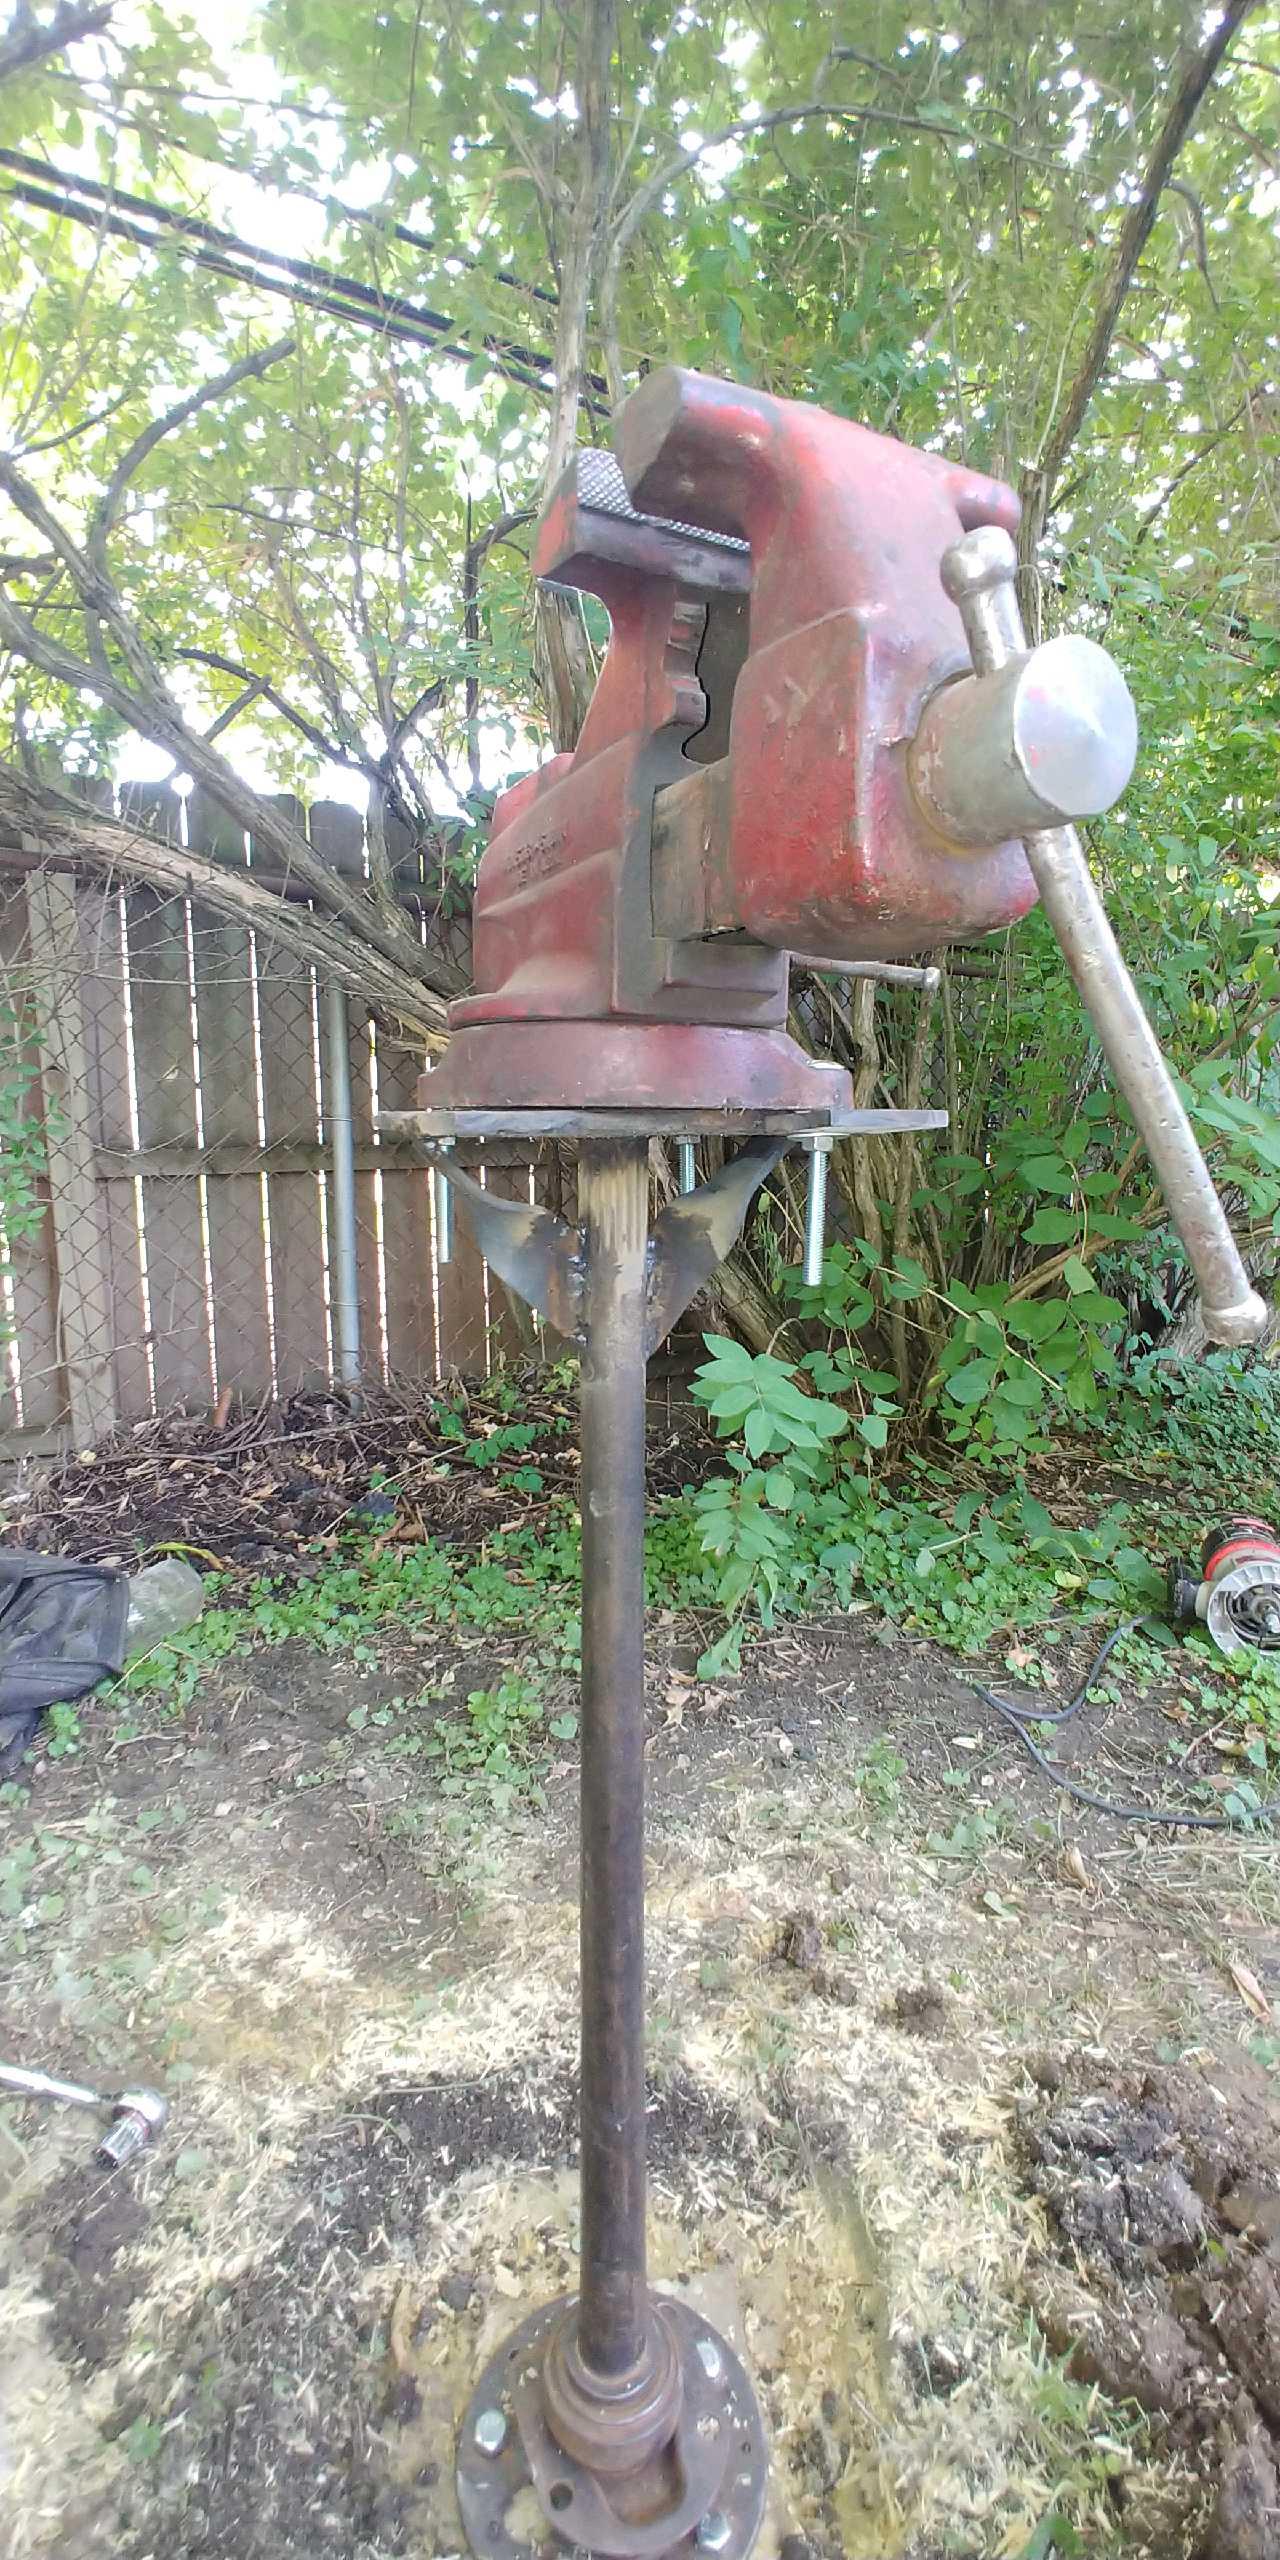
Over the 4th of July weekend, my wife and I visited her side of the family in Western Kentucky ("where paradise lay"). I was given the very gracious opportunity to raid her late granddaddy's storage sheds/barns to find any scrap steel that could be useful to me. He was a car guy; built several hot rods and restored a few antiques in his day. I knew there would be some thick rust on anything I found... but it was sure to be heavy! The first thing I have put to use from my haul is an old axle shaft and hub. All solid steel. I do not have exact dimensions, but I remember the hub is around 6" in diameter and the shaft came to about 36." I brushed off all the rust, hammered the bolts out of the hub and fabricated and installed a plate for the vise to sit on. I did not have a steel plate to just cut to size, so I used a heavy chunk of C-Channel which I also nabbed on my visit. That was a fun day at the anvil with the 'ol 8lb to get it nice and flat. It did already have holes in it for me to use in mounting the vise, so that saved me on having to drift them. I then welded it to the end of the axle, along with 2 support pieces which I forged to fit and welded on as well. The vise is a 35lbs Craftsman. 5" jaws and 15" from front to back when fully closed. It belonged to my father-in-law for many decades. It was attached to the bumper of his work truck in the 80's, but said it had to be there for years before he started using it. I still need to do more research on it, but it was made in the US, not Japan, so that might help in dating it. To secure the stand, I dug a 3' deep hole (frost line up here), placed 4 chunks of 4x4 of the same length blocked together in the center of the hole and surrounded it in cement. I then used 3/4"x 3" lags to secure the axle hub to the 4x4s. No weeble, nor wobble. This guy is sturdy. I am very pleased with the results and am finally going to put it to use today. Hope you guys like it!
.thumb.jpg.6a88810cd83f757fcd34f2658ecae915.jpg)

-
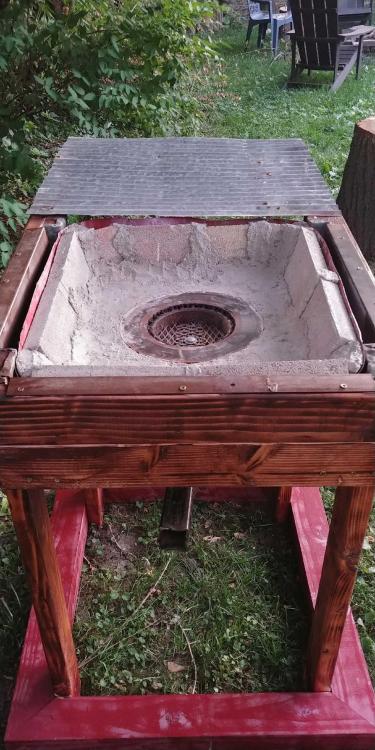
Update: I cut the sides down a bit recently to allow me to fit longer stock in the fire pot. I was unable to make it perfectly level with the fire pot without compromising the structural integrity, but it has been much nicer to work with both ends open. I also have the temporary hair dryer attached and have played around with it for a couple hours. It works just fine, but I still intend to attach a crank blower or who knows... maybe build a bellows. I am going to be attempting my first forge weld soon, as my current project is a (somewhat) ornate hose rack. Ground-staked, not hung. I want it to be all one piece and to incorporate a basket twist. Should be nice and challenging.
-
Understood!
-
Oops! My apologies ThomasPowers. My dad's name is Thomas and goes by Tom, so I made the assumption.
-
Tom, I agree, I am concerned about that too. I guess I have been telling myself that I wont encounter that issue too often due to the depth of the fire pot. If it does become an issue, I will flip the angle iron I have installed to make a raised perimeter. Then cut a dip on one side to keep my steel level with the pile.
-
Wow, very important information in that whole post. Thank you for linking that, I will be sure to make the counter weight handled flap... maybe even with something that will hold it open if I need to walk away from it.
-
That looks really nice. I will do that for sure, but I'm sorry, how exactly does it stay closed?
-
JHCC, Ok, good to know. I will look into changing it to a hinged one.
-
Thanks Frosty, Yes, I am slightly apprehensive about the lumber too. But I am hoping the protection I gave it will suffice. I will post an update on how it performs once I get the blower attached. The clay bed is a bit thicker than an inch.
-
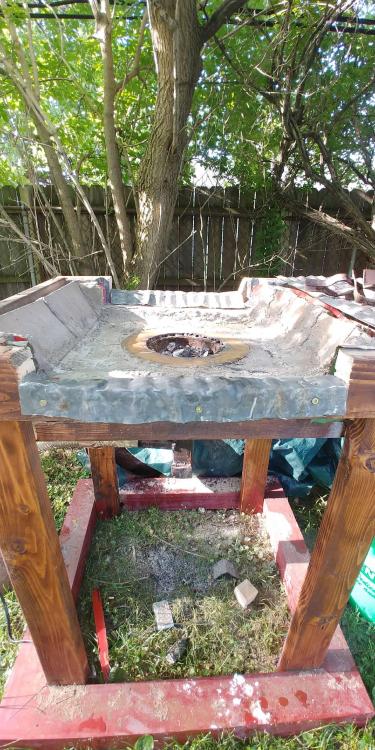
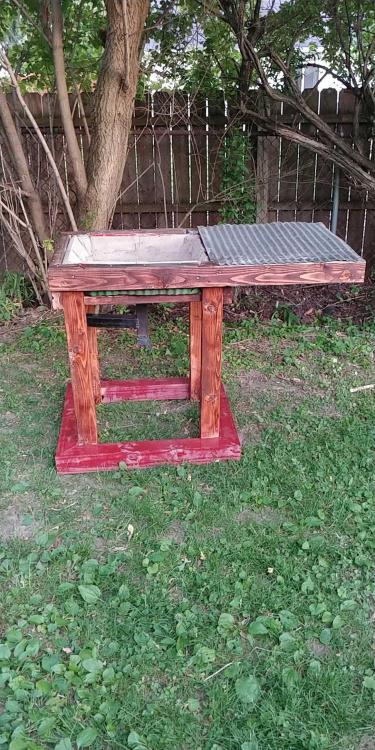
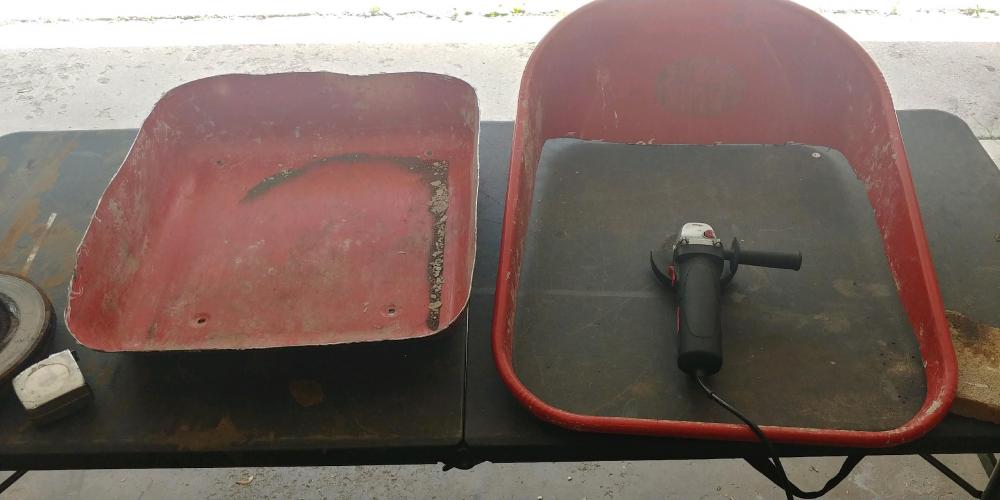
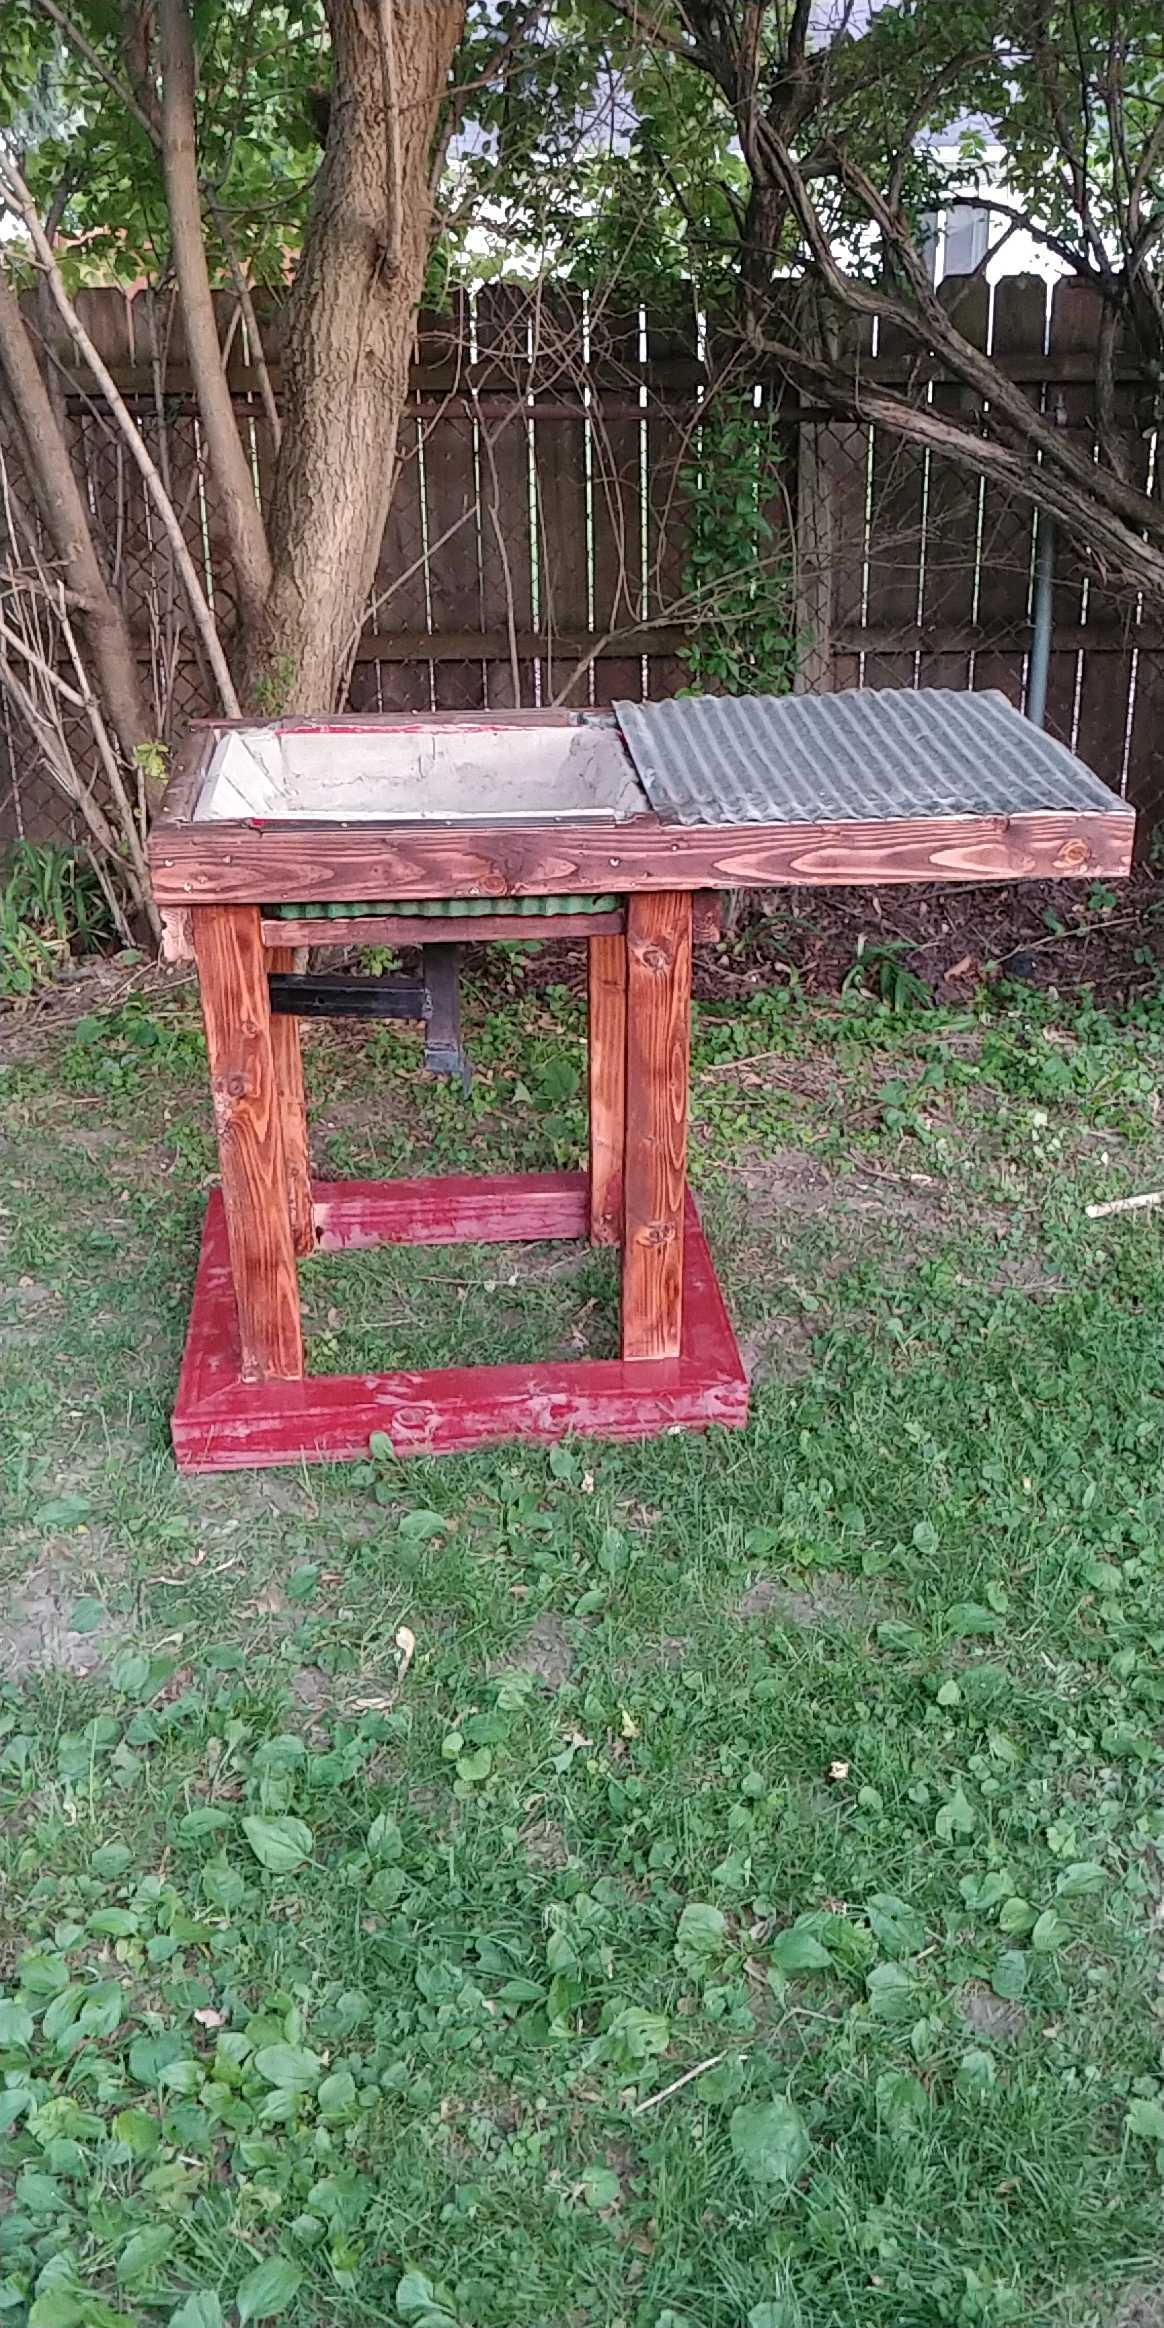
For about a year I have been working in my garage with a propane forge I built. It has been perfect for small projects and beginner forging, but I have been wanting to branch out to larger, more ornate projects like gates, barred windows and the like. Of course for this I need more forge space and the ability to spot heat and forge weld. So, I built a coal forge. And because I am not made of money, I did it without breaking the bank. I will provide the pictures and their descriptions in a series of comments so this post is more legible. I do not have the dimensions on hand, but if anyone is interested, I can provide them. Materials: about 5, 2"x4"x8' treated studs. 2, treated 4"x4"x6's. Scrap corrugated steel sheets. Scrap brake rotor. Garbage-picked wheel barrow. Furnace refractory, fire bricks. Angle iron from scrap bed frame. Steel square tube (not sure of proper name). Miscellaneous hardware. I still need a blower. I am going to start with a cheap blow dryer and save up for a hand crank blower so don't have to run electrical out to it all the time. Some of you may be apprehensive about the lumber... but I am confident it will be fine! Fingers crossed, just need that blower to find out. I cut the bowl of the forge from a wheel barrow someone was throwing away and filled it with the refractory, fire bricks and brake rotor. Before setting it in the standing frame, I lined the inside walls and base with the same corrugated steel seen above, sorry I do not have a picture of that. Angle iron was used to protect the top lumber from heat. I forged the air intake manifold into a cone shape from a square steel tube and welded it to the base of the brake rotor. I also fabricated a slide cover (?) don't know proper name) at the base to allow me to release coal ash build up.
.thumb.jpg.5e40b16db6c943caf2e19b55132c3c35.jpg)

.thumb.jpg.05740d957329a85fd5d3b60dcecc3771.jpg)
-
Ok great. Thanks for the help, guys.
-
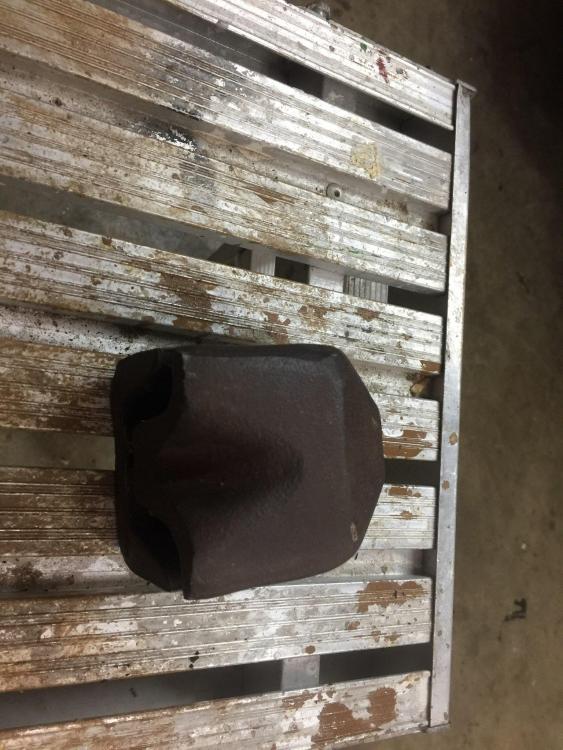
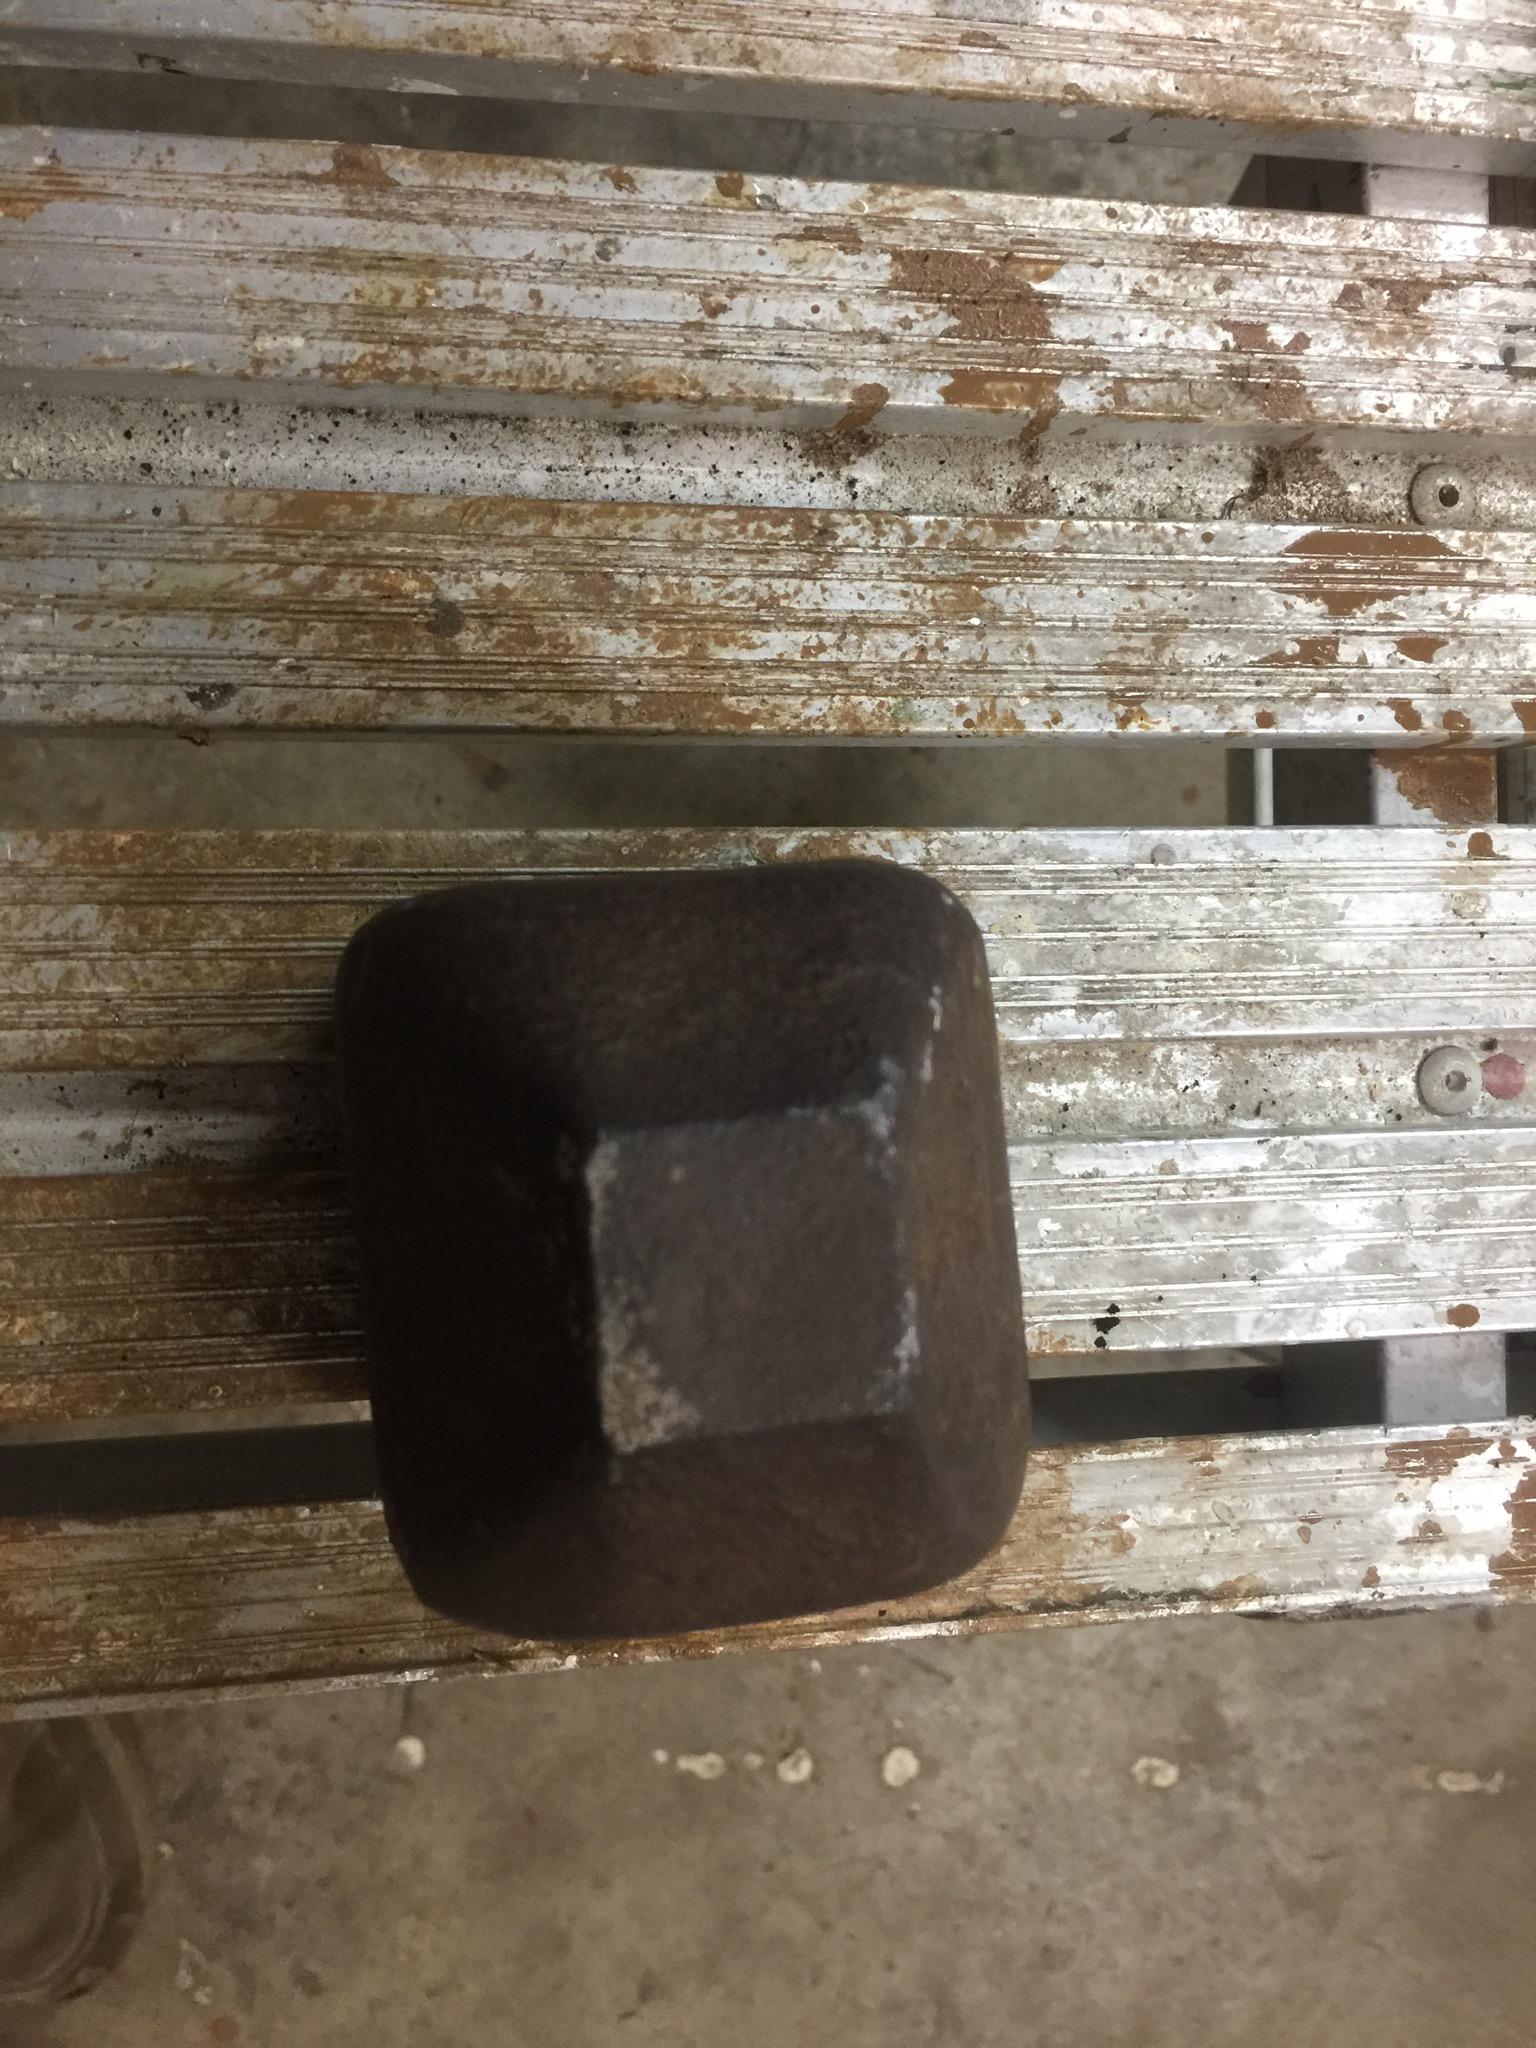
Good point about extraction. Yeah, I could see using it as a swage too. It almost looks like it could have been an end cap for something at one point... hmm.
-
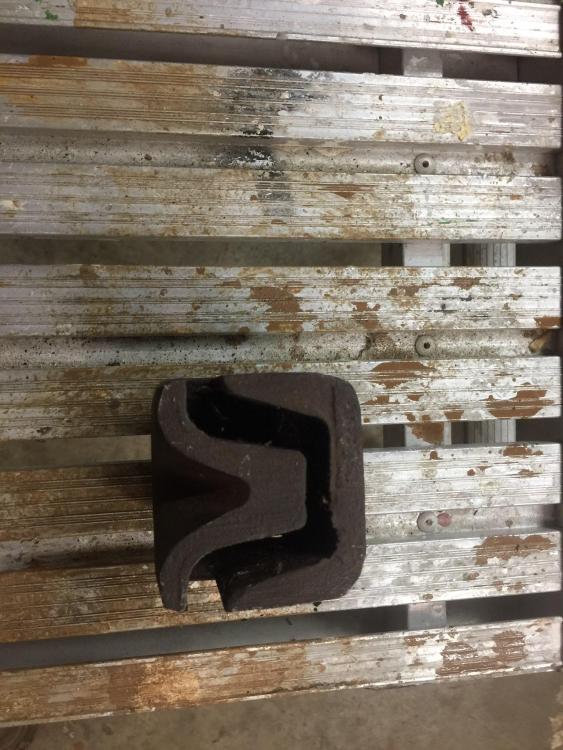
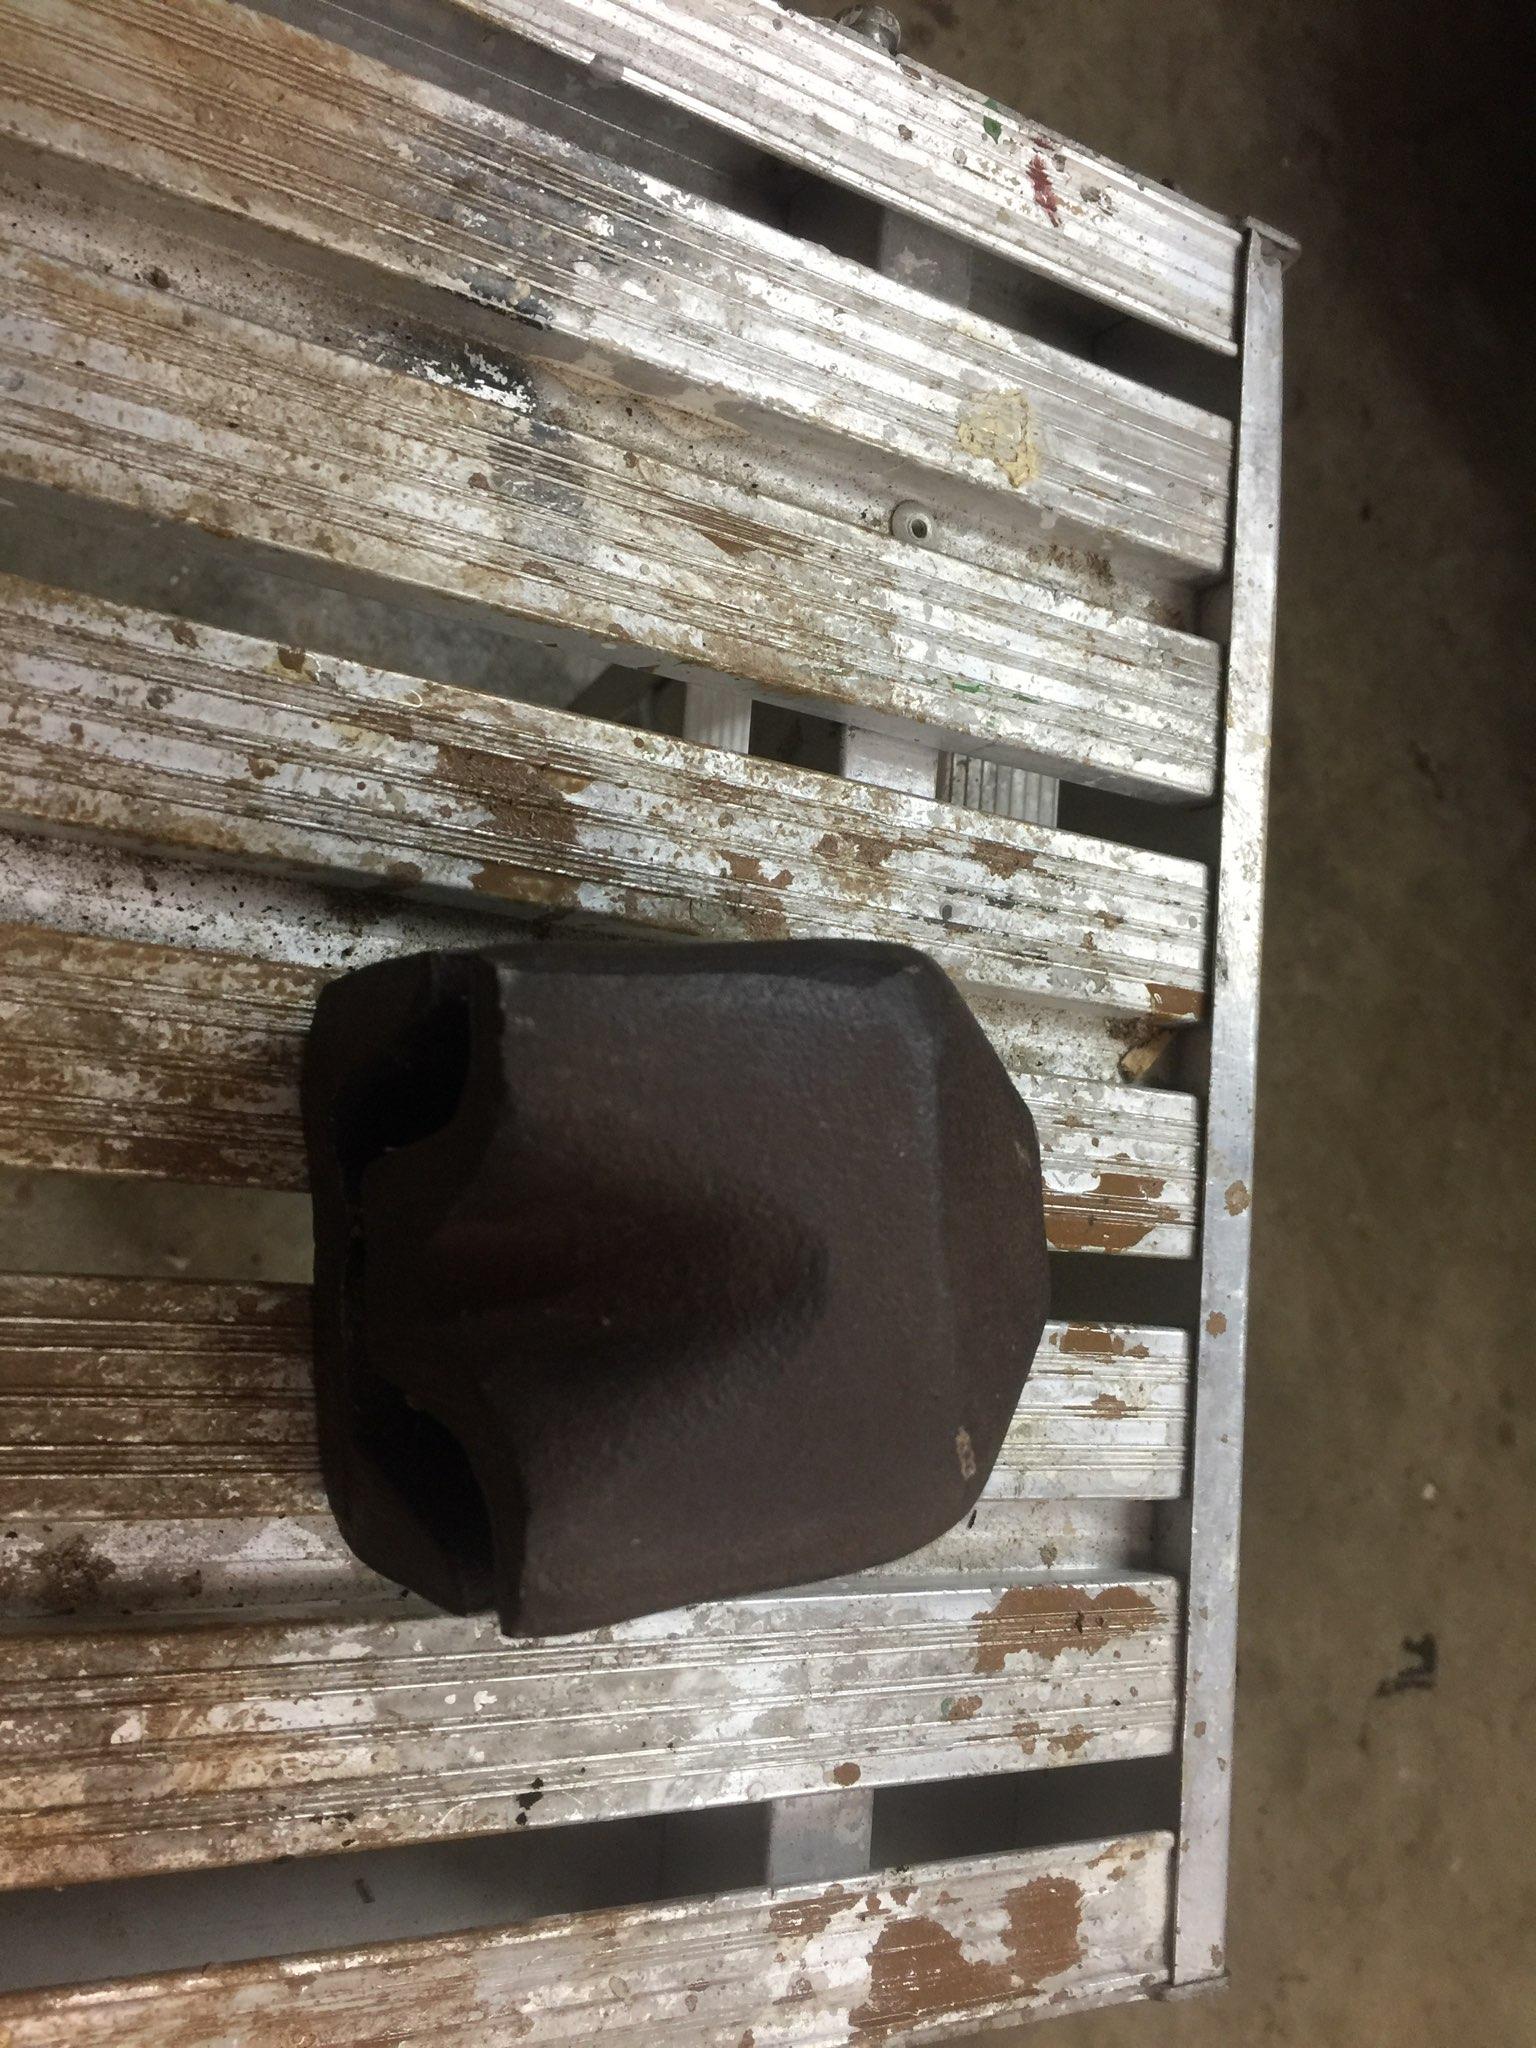
This piece was found in a neighbor's shop among 2 anvils and other smithing tools after he passed. I do not know exactly what it is, but my best guess is that it's a casting die of some sort. Any thoughts/discussion is helpful, thanks! -Red

-
Help Finding Names of Anvils
Red Shed Forge replied to Red Shed Forge's topic in Anvil Reviews by brand
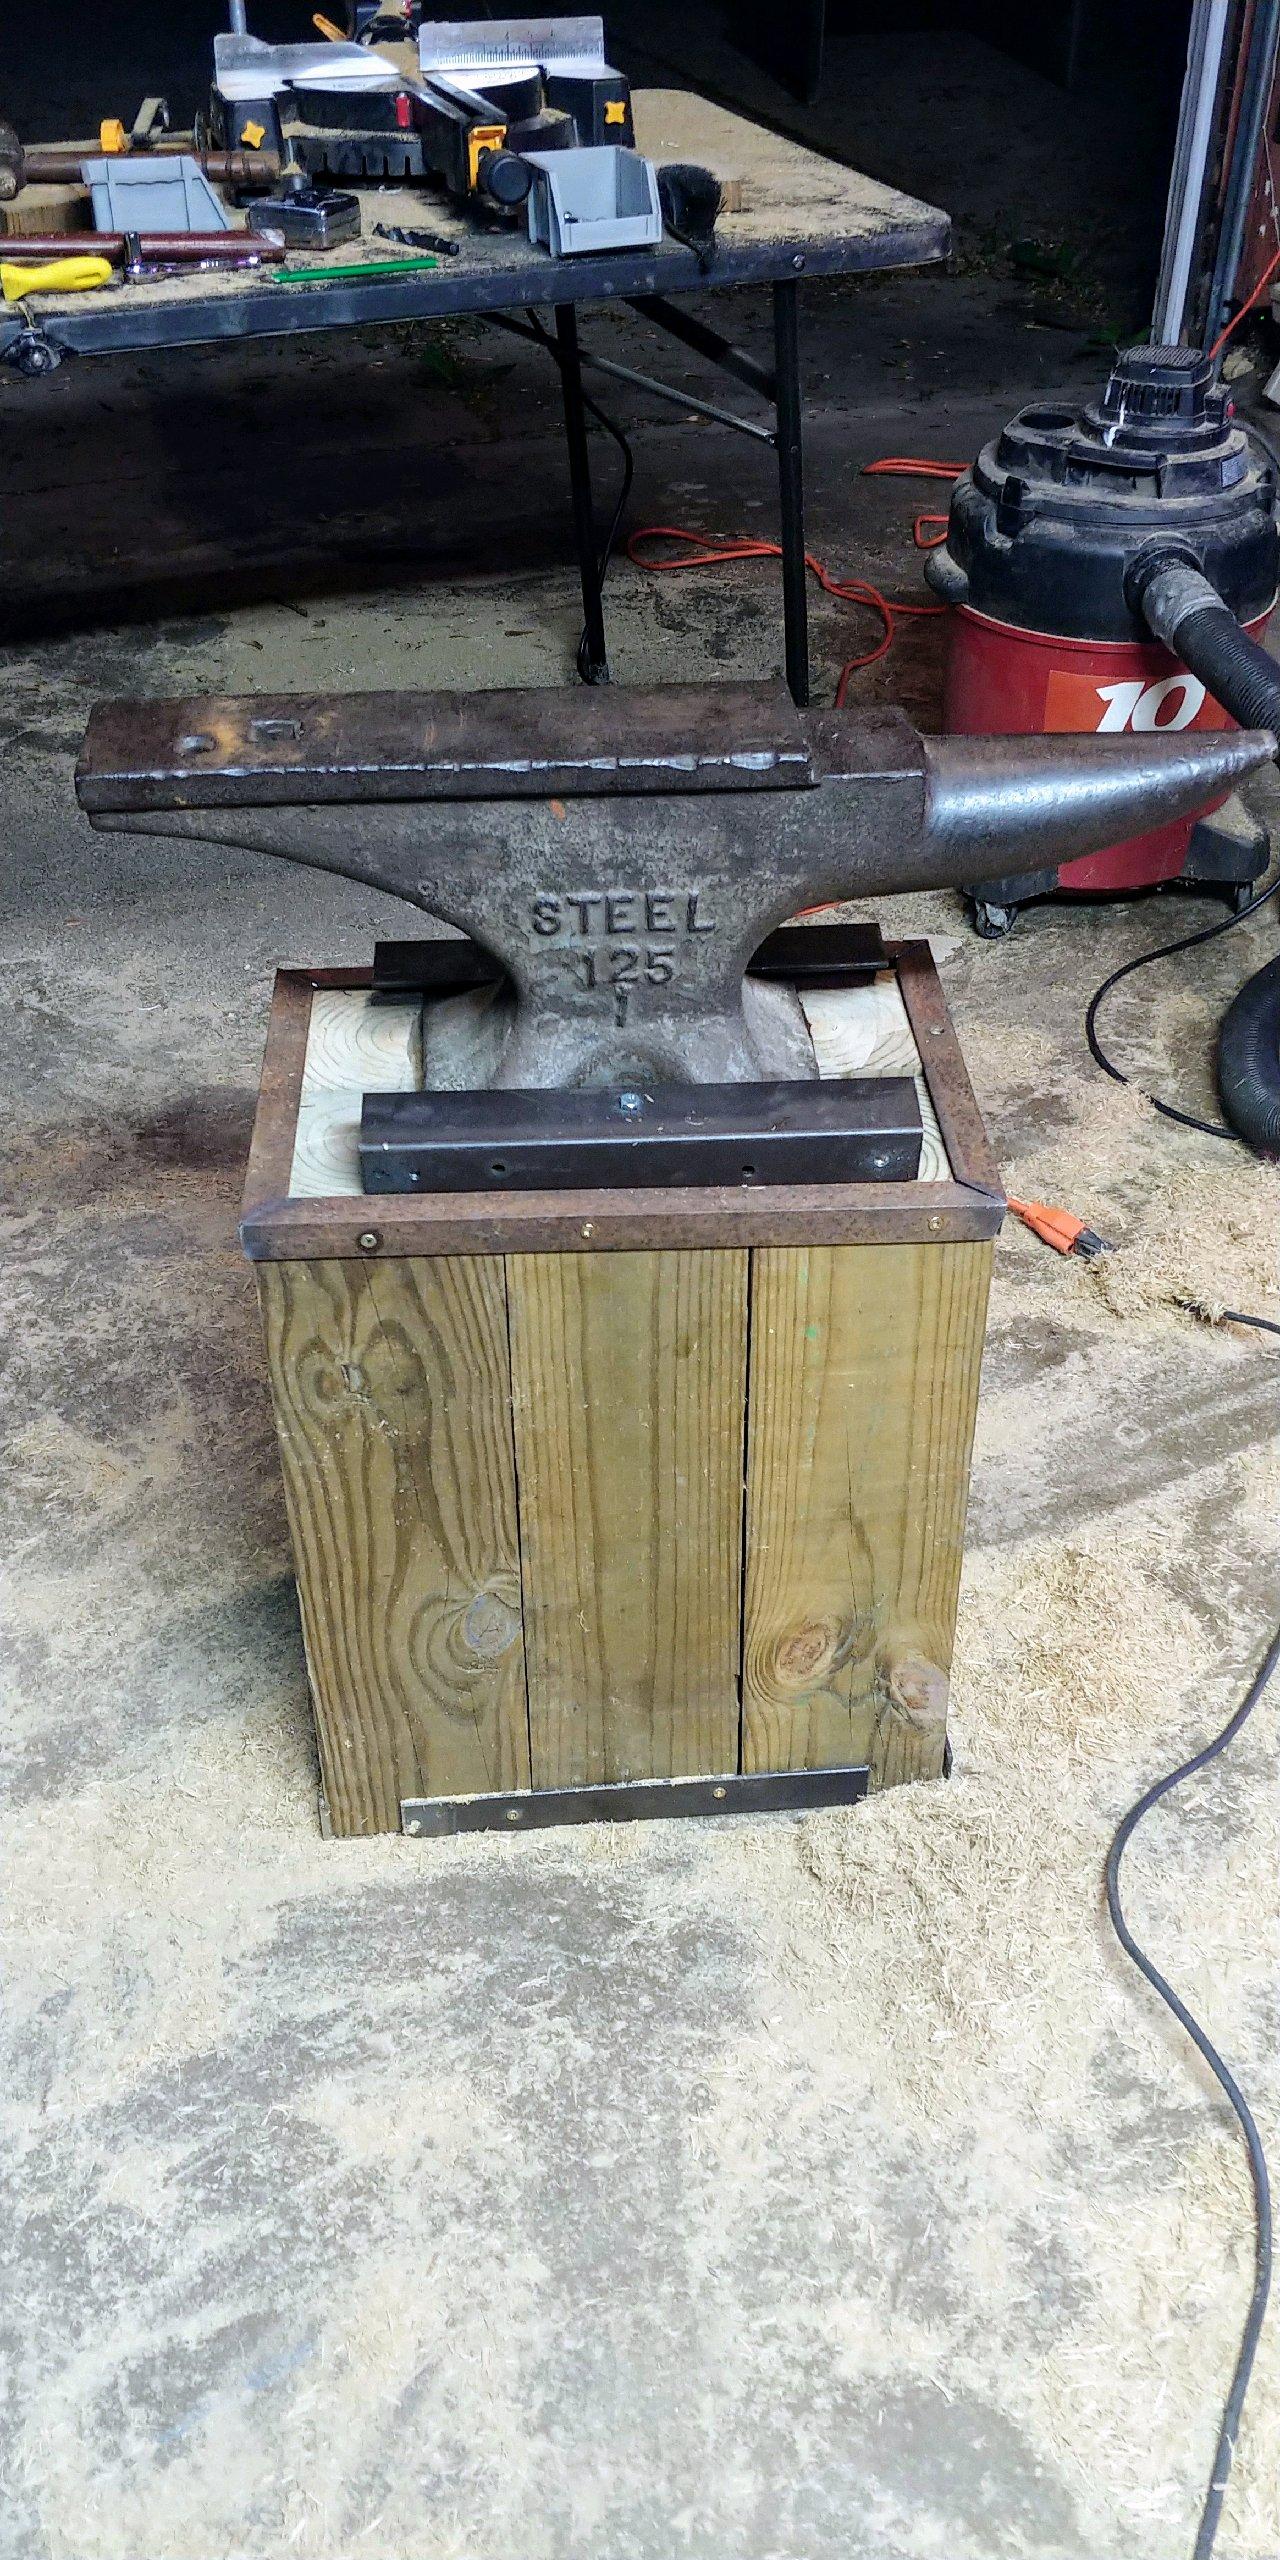
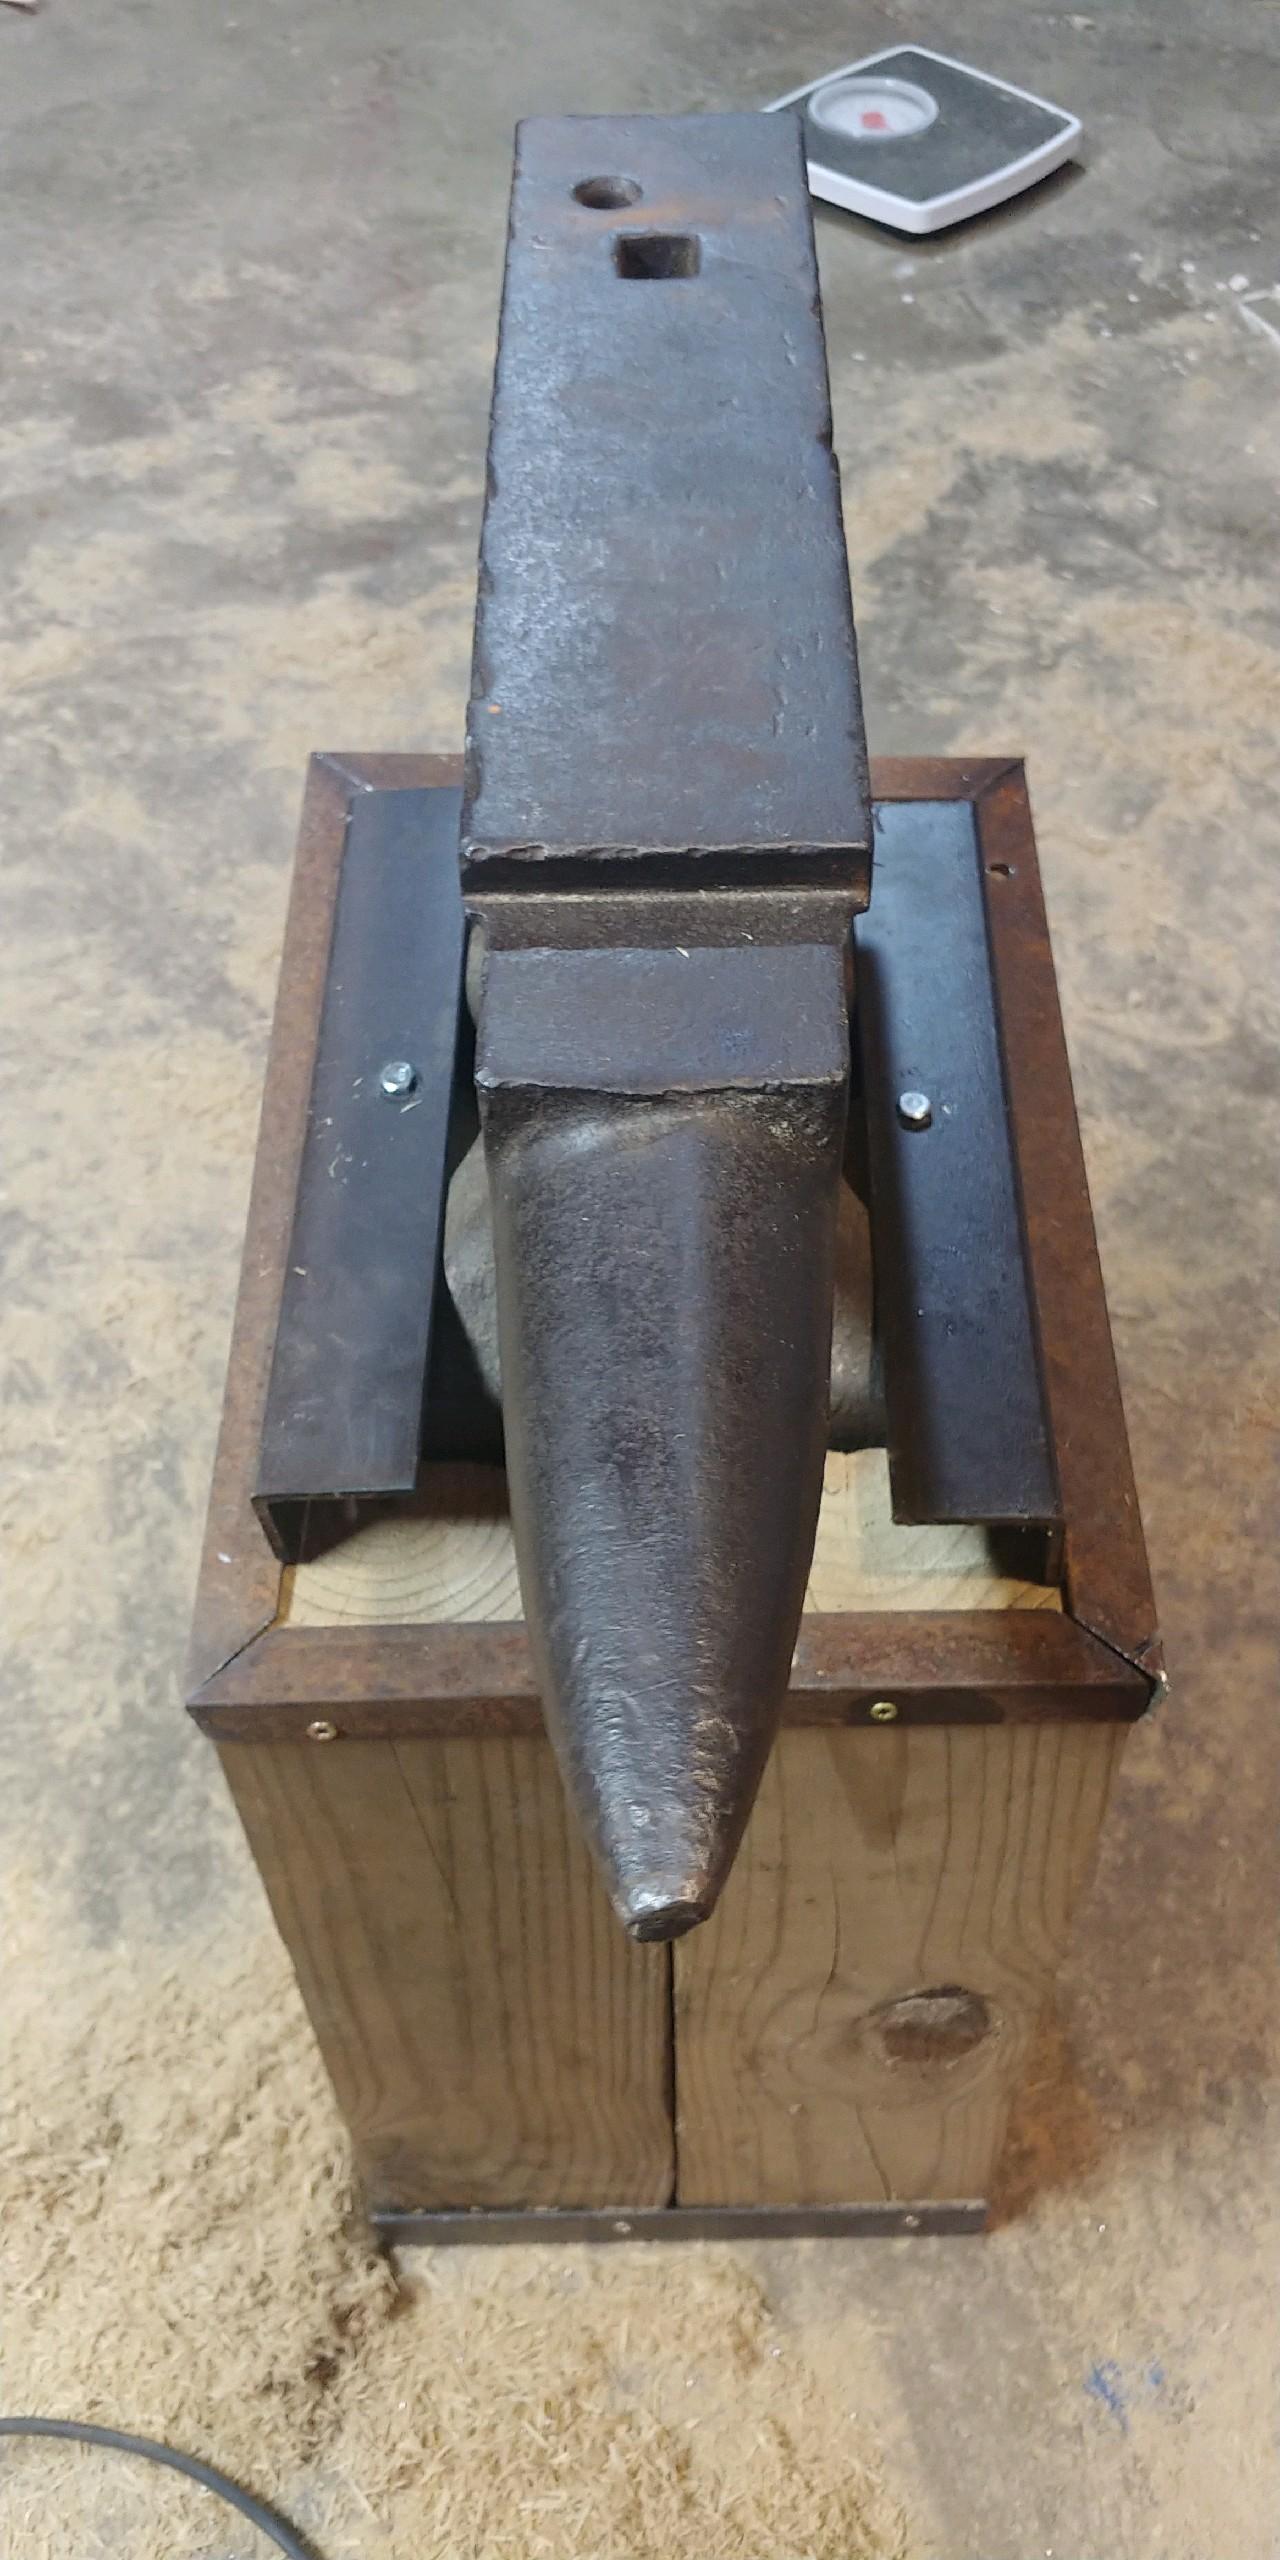
I finally have the 125lb anvil here. Attached a couple new pictures because I want to show off the stand I built last night too haha. I need to run to the store today to get some longer bolts for the horizontal ties on the securing angle iron, but otherwise it's pretty sturdy! I counter set it about 3/4" in the top as well. Still see no trademarks or brand names anywhere. It is clearly cast because on the underside I can see and feel the cast line. The rebound and ring seem really good to me, but my only comparison is to my other anvil. Any advice on repairing the divots on the top edges? I am curious about another aspect: It is hard to tell from pictures, but the horn is a bit lopsided... that is, it is not perfectly round. It kind of dips a bit from right to left. Maybe just poor casting? Last fun fact: When my father-in-law acquired this one, it came with another miniature anvil that looks exactly the same but with no raised letters or numbers. Can't be more than 20lbs he says. I do not have it or pictures, but it makes us wonder, do you think this could have been a salesman's model? -Red

-
Help Finding Names of Anvils
Red Shed Forge replied to Red Shed Forge's topic in Anvil Reviews by brand
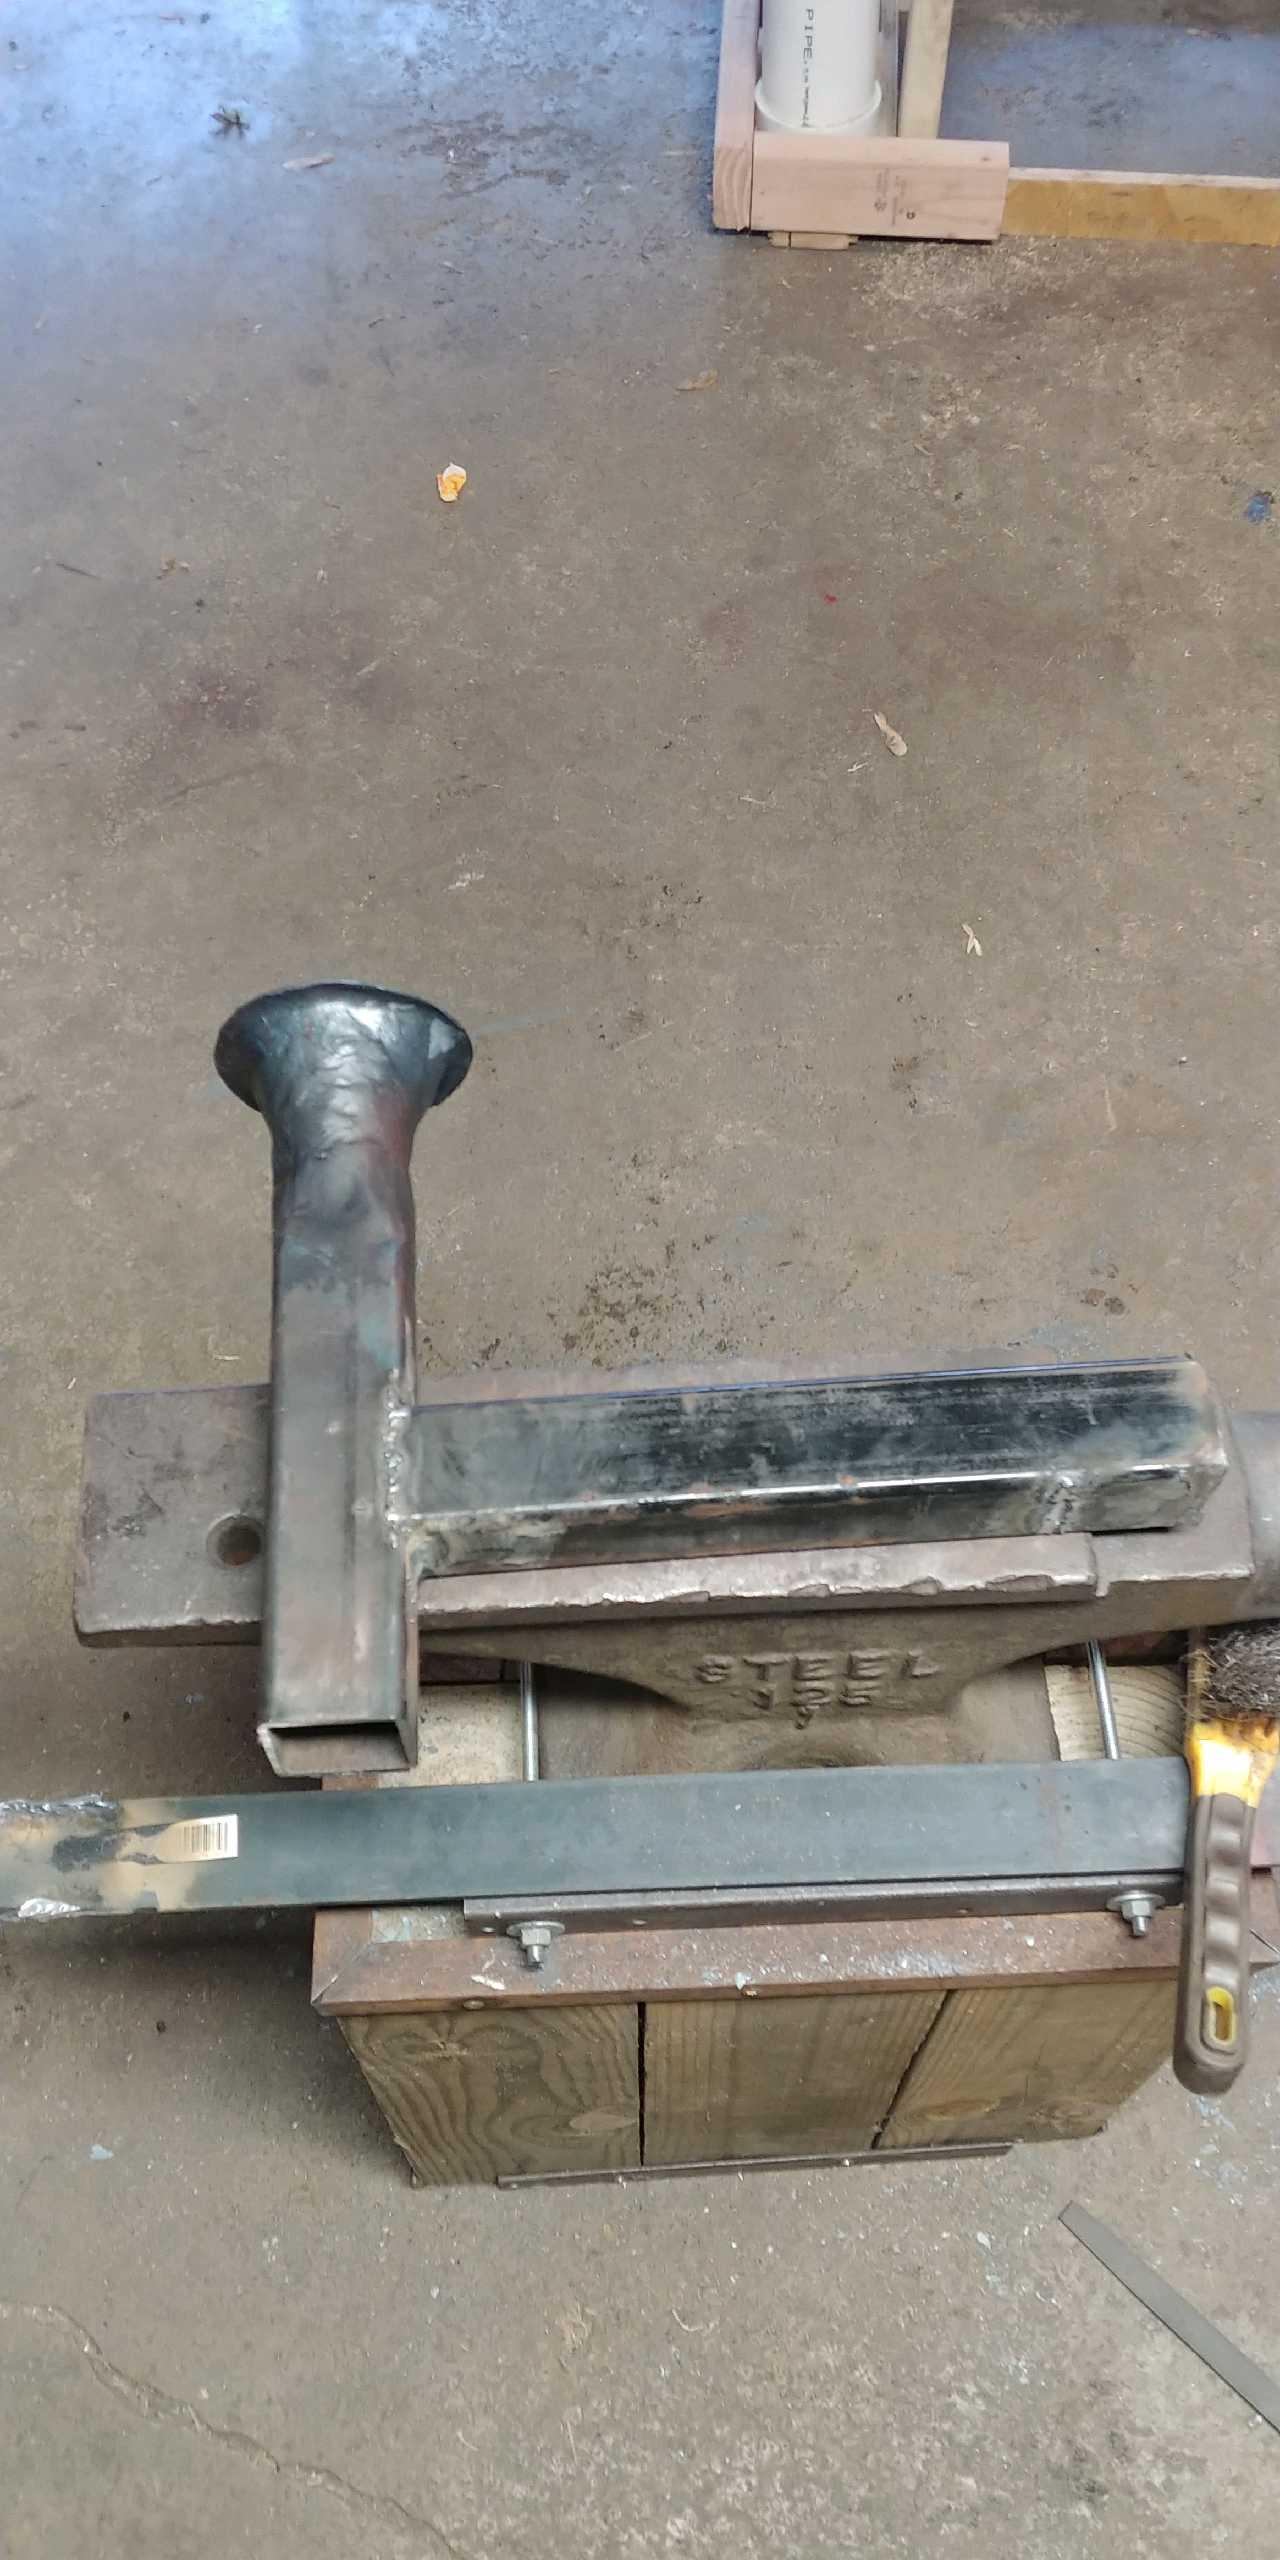
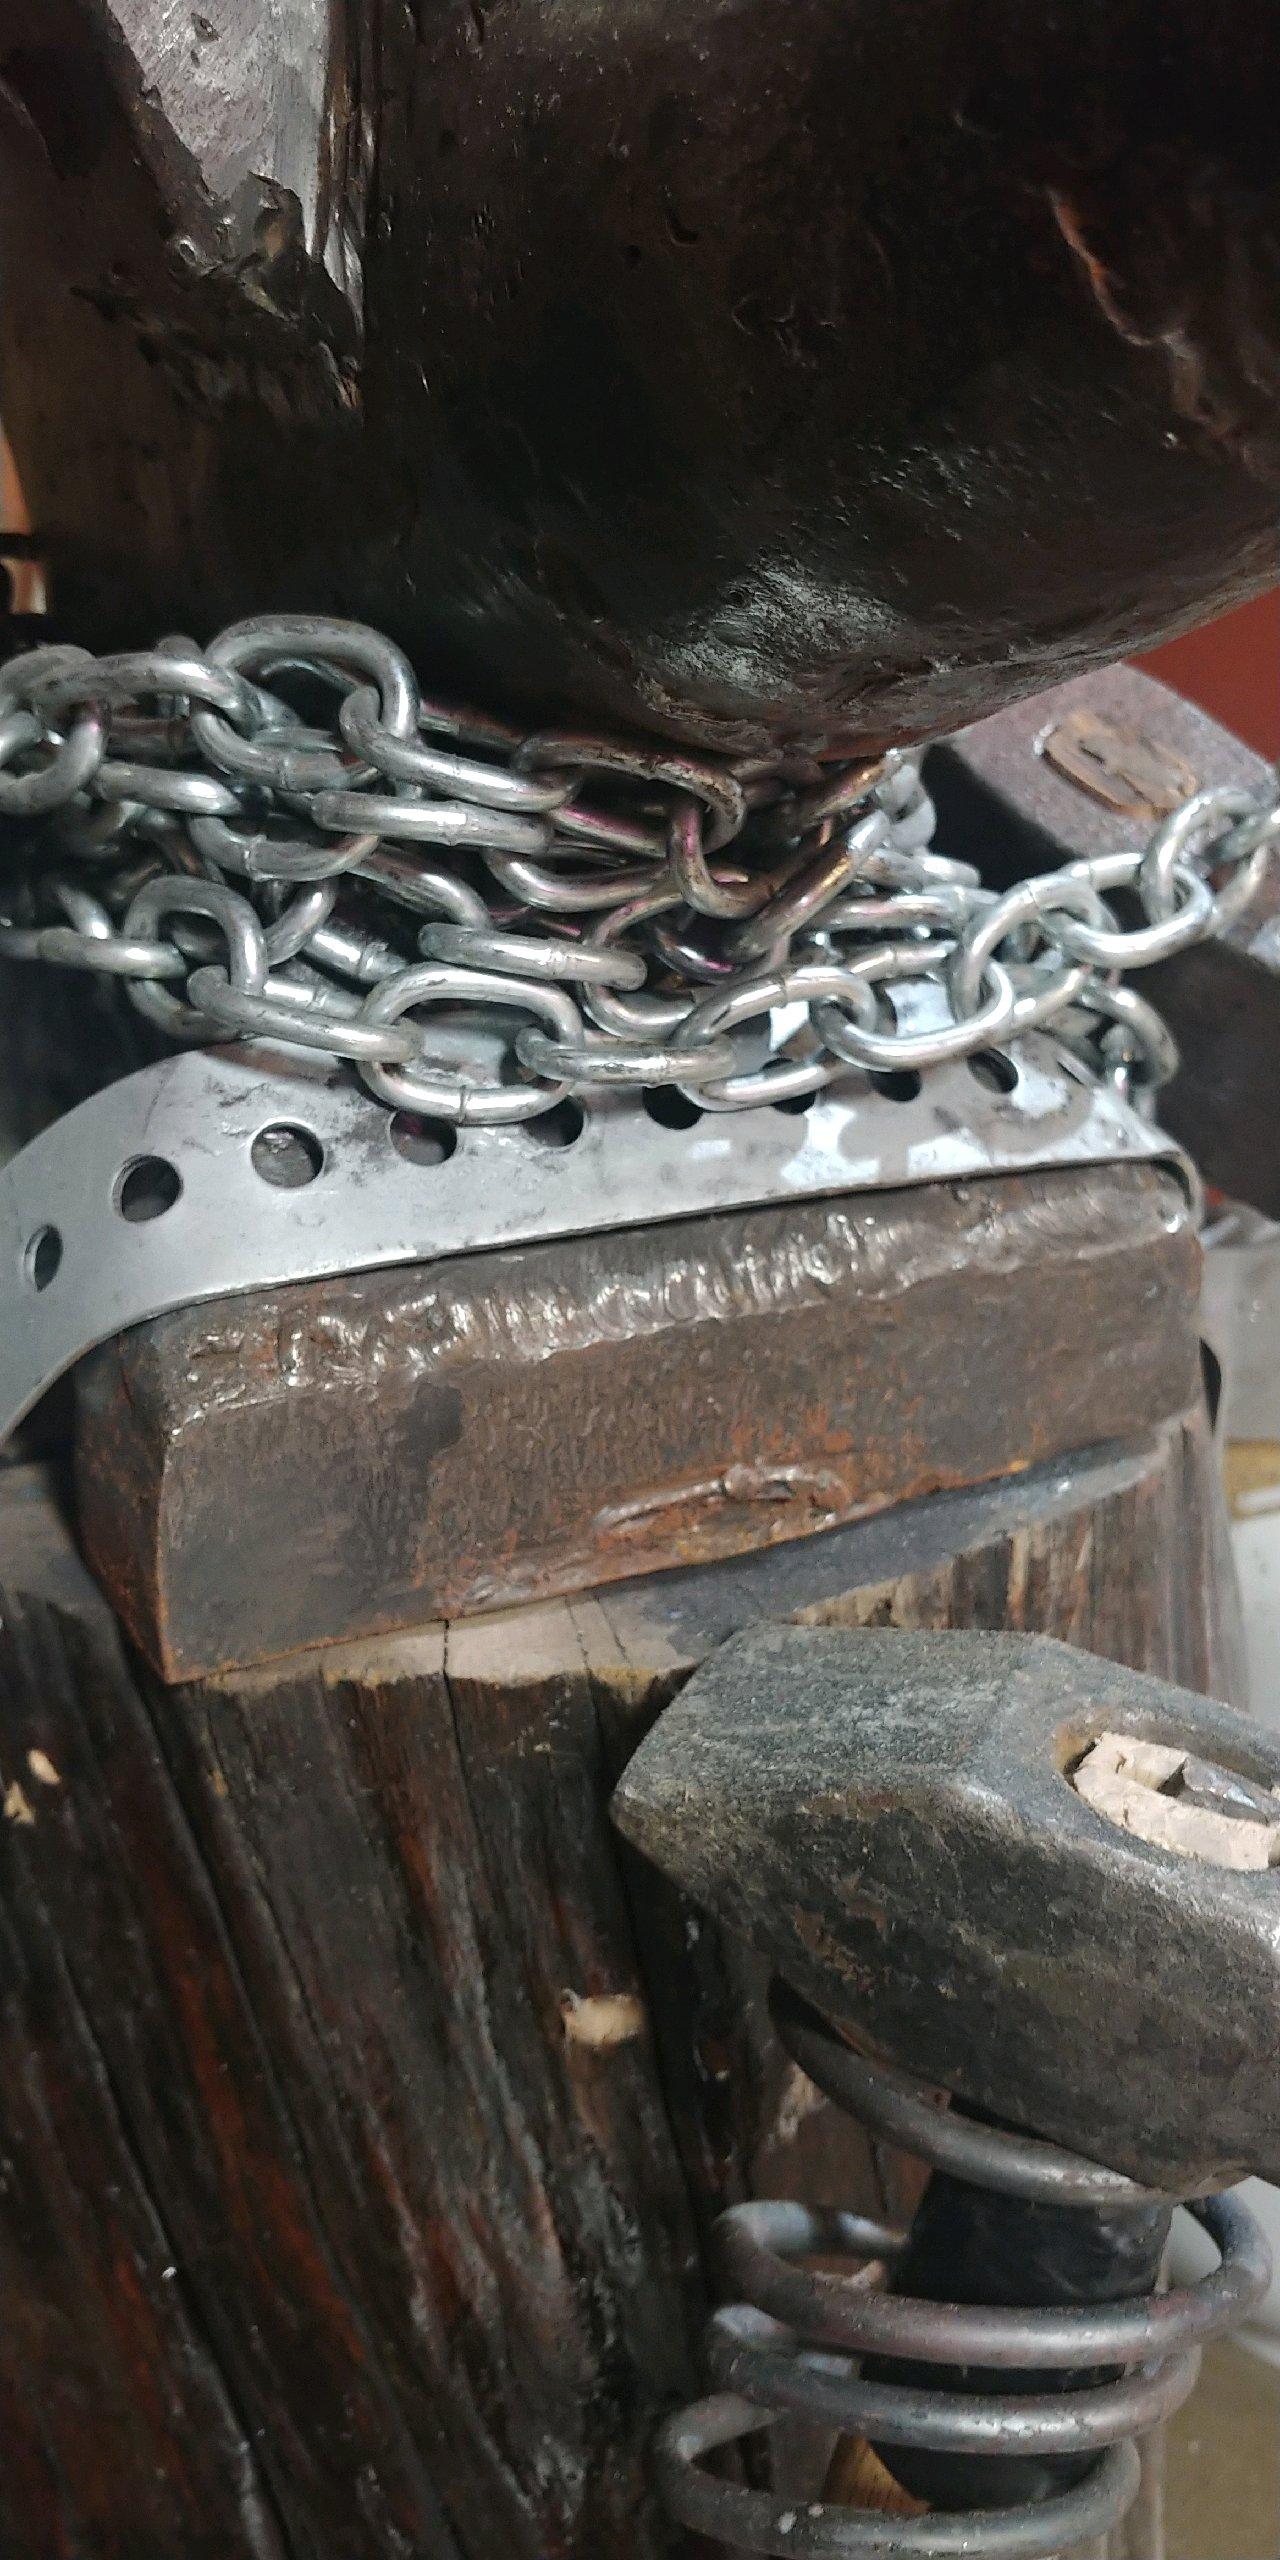
The main reason I thought it could be farrier's is because of how broad the horn is. But you're right, the clip leads me to believe that it was made for a blacksmith(?). But yes, the clip does kind of look like an add on, especially when considering the bolt protruding from it (I attached a better picture). By the way, any idea what that groove on the top could have been intended for? I did not cut it myself. As for the underside... might sound lazy but I really do not want to dismount it from the stump right now, but I do remember looking at it when I first got it and there are no markings at all. However, as you can see from my 2nd pic on this comment, the base was clearly welded on. So, underneath, from the weld down is all hollow... about an inch and a half. Nothing under the tail either. -Red
-
Help Finding Names of Anvils
Red Shed Forge replied to Red Shed Forge's topic in Anvil Reviews by brand
Frosty, Thanks for the reply. Yes, as I mentioned, I had trouble getting them to post appropriately. When I uploaded the pics and tested them to see if they opened correctly, they ended up all jumbled. Not sure why. Good idea to comment with the other pics, though. I will do that if I have trouble next time. I use the farrier's anvil regularly, it is quite solid. I am looking into mending the holes in the horn soon. The rebound test is nice but it can be a bit loud with heavy hits (working on mounting better). I'm just wondering why it is not labeled in any way.. leads me to believe it was either ground off or the whole thing was forged by the previous owner and not of any brand. If the cast anvil IS a Vanadium, then I believe it is cast steel with a machined plate ledge. I base my assumption off what this website says I will have this anvil at my forge in 3 days, if I find any indicators I will post an update. Remove link as per TOS. Thanks for the input. -
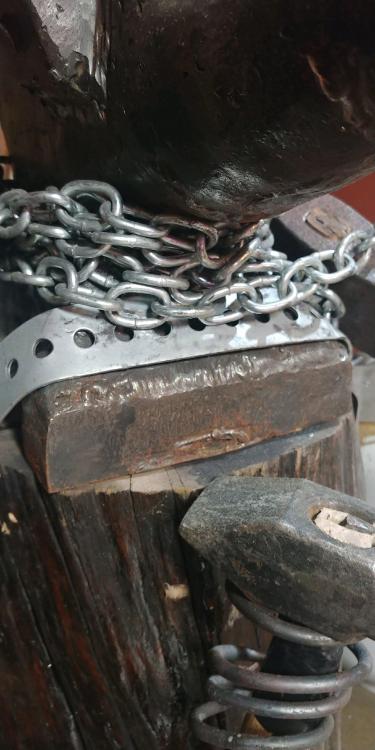
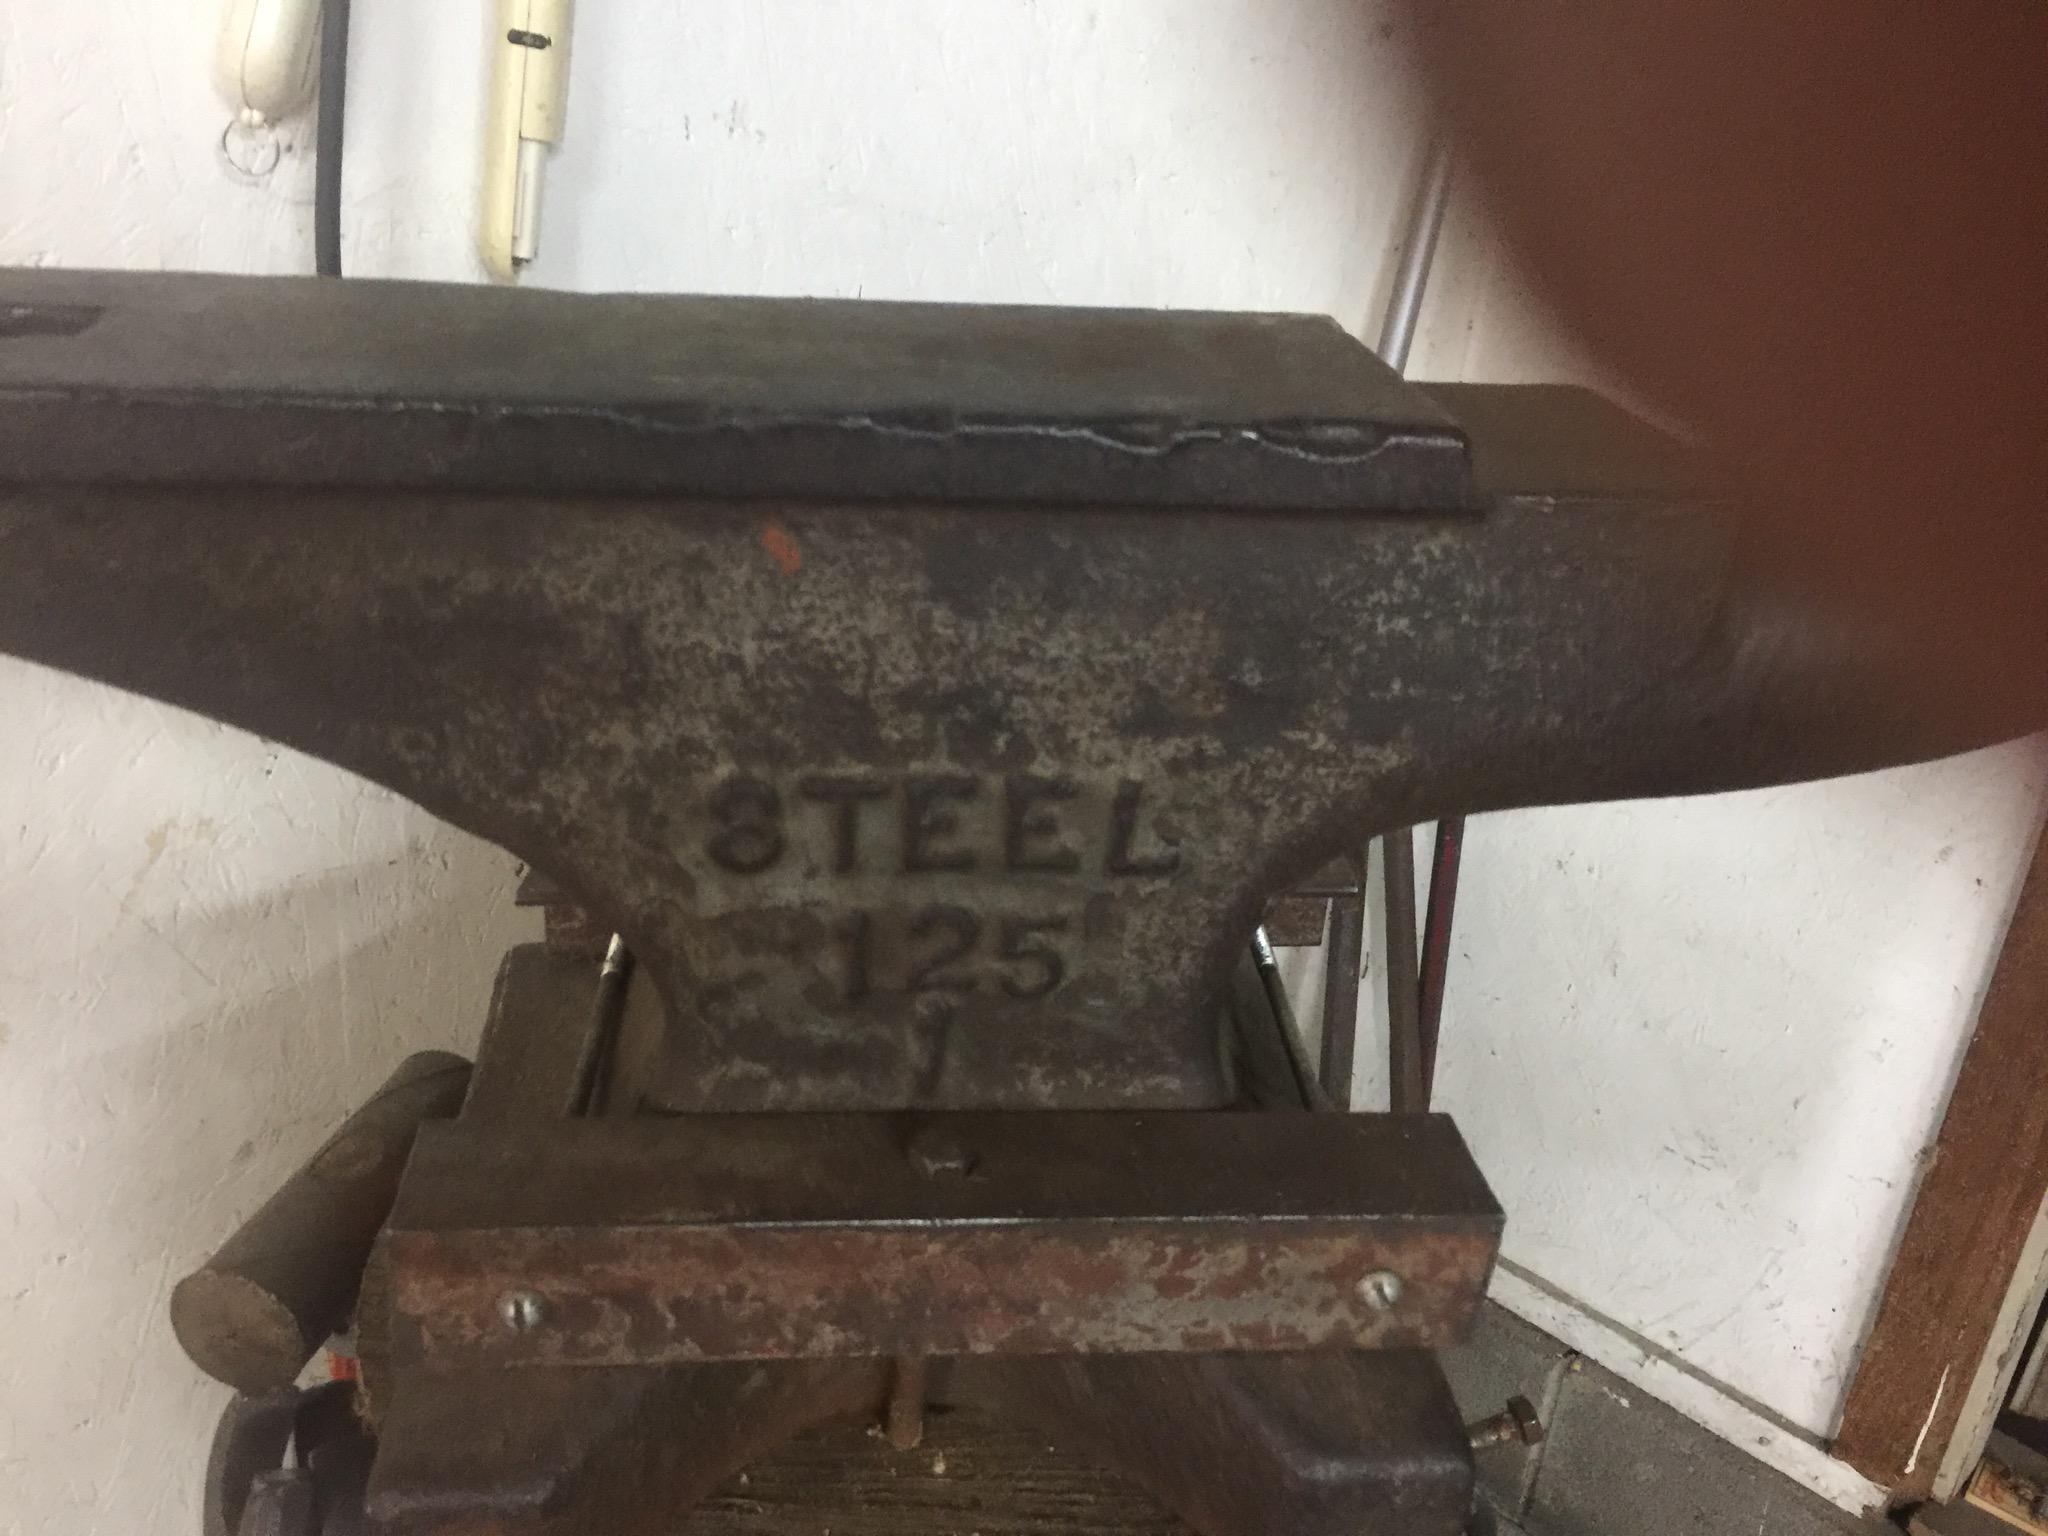
Hello, I am looking for some thoughts on what brand these anvils could be. I do not have this one yet, but it will be in my possession by the end of the week. It is a gift from my father-in-law (not the best pictures, sorry). My best guess on the first one is a 125lb Vanadium cast steel. I am assuming this only based on the little information I have found on anvils that resemble it online. It has a faux, machined plate ledge and has raised letters and numbers reading "STEEL 125 1" in descending order on the front of it. I assume this means it is cast steel at 125lbs... does the 1 mean it's 1st generation? Anyway, the only thing contrary to my assumption of its brand is that unlike actual Vanadium anvils, this one does not say "Vanadium" above the word "Steel." Could it be an early version? The second anvil shown is 100lbs, welded bottom, looks to be forged/welded together with steel rods as there is a hole in the horn and I can see the rods on the inside. Otherwise, I see no markings whatsoever. The pictures may not post in the right order, I am having some trouble with that. Thank you for your thoughts!
.thumb.jpg.eb2541fce9c8a22d4327b19d048d976d.jpg)
.thumb.jpg.291040a168b2d493f87f1f6559e282d7.jpg)

.thumb.jpg.b4fb3119bec041d57216316cffbbdbf5.jpg)
.thumb.jpg.801a86134b261f1bad21479fc1d65d62.jpg)


.jpg.2aaf1d62c22fcdd44157116eab31ce39.jpg)


.jpg.fe4d455b7a86ed0025fbef690cadfb31.jpg)
.jpg.d53a0b69cb4722951d2ca22941310d6e.jpg)


.jpg.9bda269b356c1ed12067623c8791e8b7.jpg)
.jpg.e6effc02ae80a44510d75cb4127ec339.jpg)
.jpg.618180aad584034e5ba52aeb80e7ec16.jpg)
.jpg.66409183f648d8925b0f10e61c162a77.jpg)