Red Shed Forge
-
Posts
226 -
Joined
-
Last visited
Content Type
Profiles
Forums
Articles
Gallery
Downloads
Events
Everything posted by Red Shed Forge
-
What did you do in the shop today?
Red Shed Forge replied to Mark Ling's topic in Blacksmithing, General Discussion
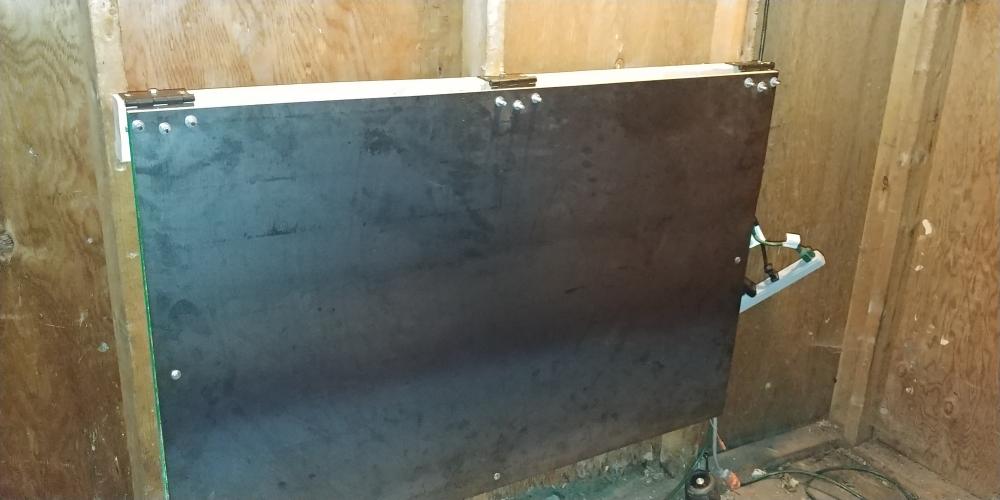
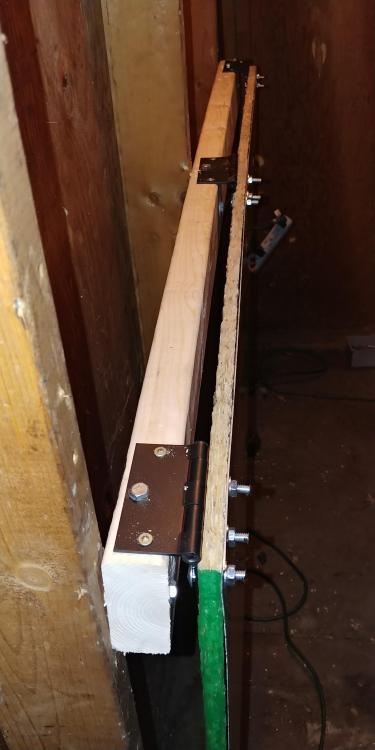
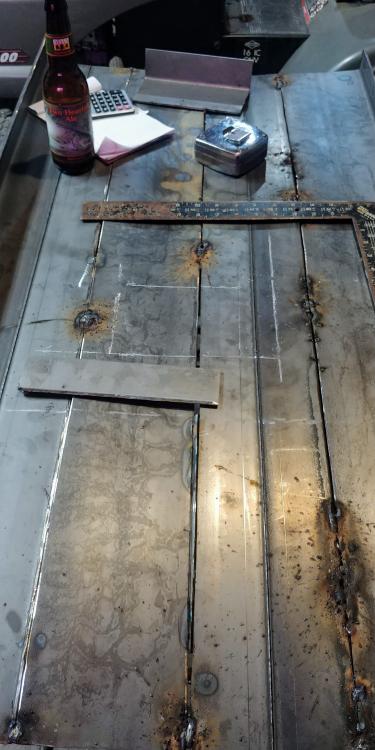
I am currently in the process of re-organizing/updating my smithy and this is one of my latest additions: a drafting table. I have a couple large projects in the works that will require me to have a sketch near by, so this was the first of the tools I will need to make for them. Before he passed, my grandfather gave me an old architect's drafting table when I was a teenager when I showed interest in the study. Wish I had kept it, but here is my homage! It is collapsible to make space in the 9'x'12 smithy. It is a piece of 31"x48" plywood that a local business was throwing out, with a 1/16" sheet steel attached to the top with carriage bolts. It is mounted to the studs with a 2"x4", lag bolts, screws and some hinges I had on hand. The stand in the picture is temporary; I will make one soon that is attached and collapsible as well. I will probably blunt those corners too, I wouldn't want to get jabbed in the ribs while moving quickly from forge to anvil!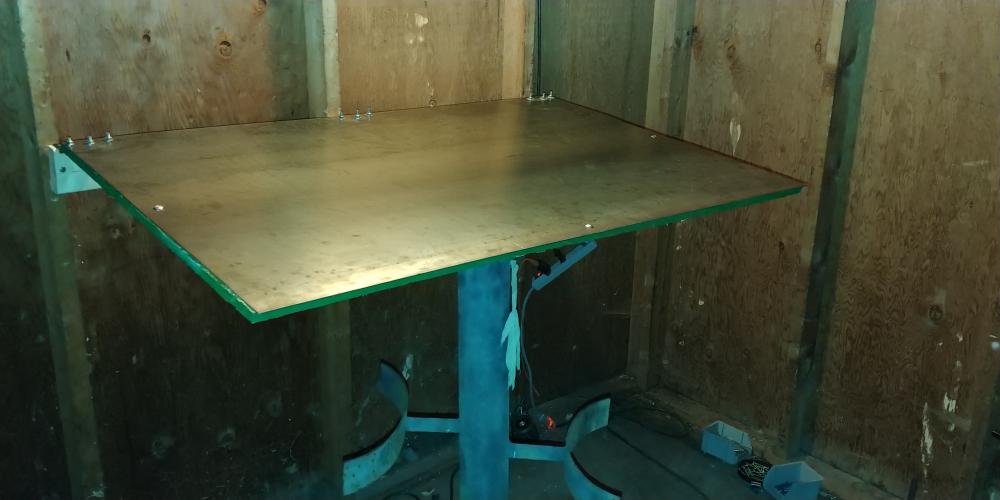
-
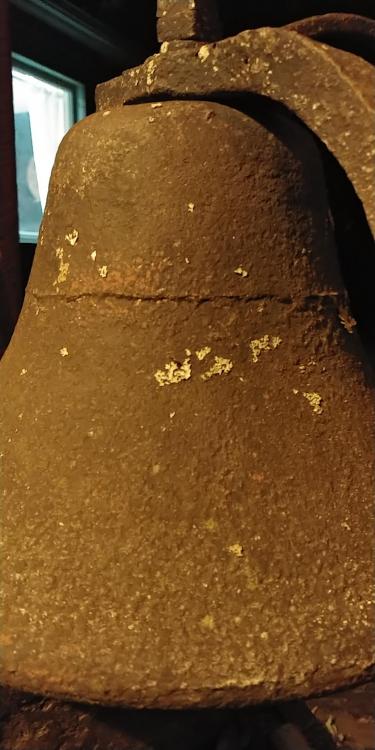
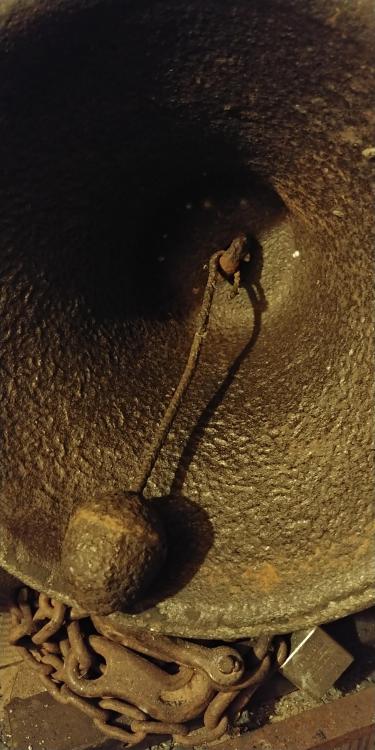
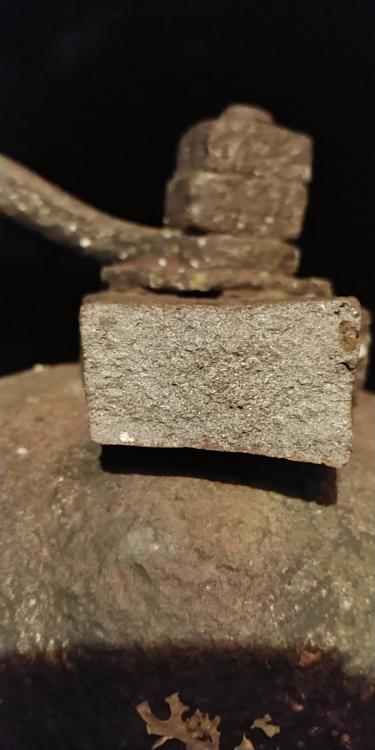
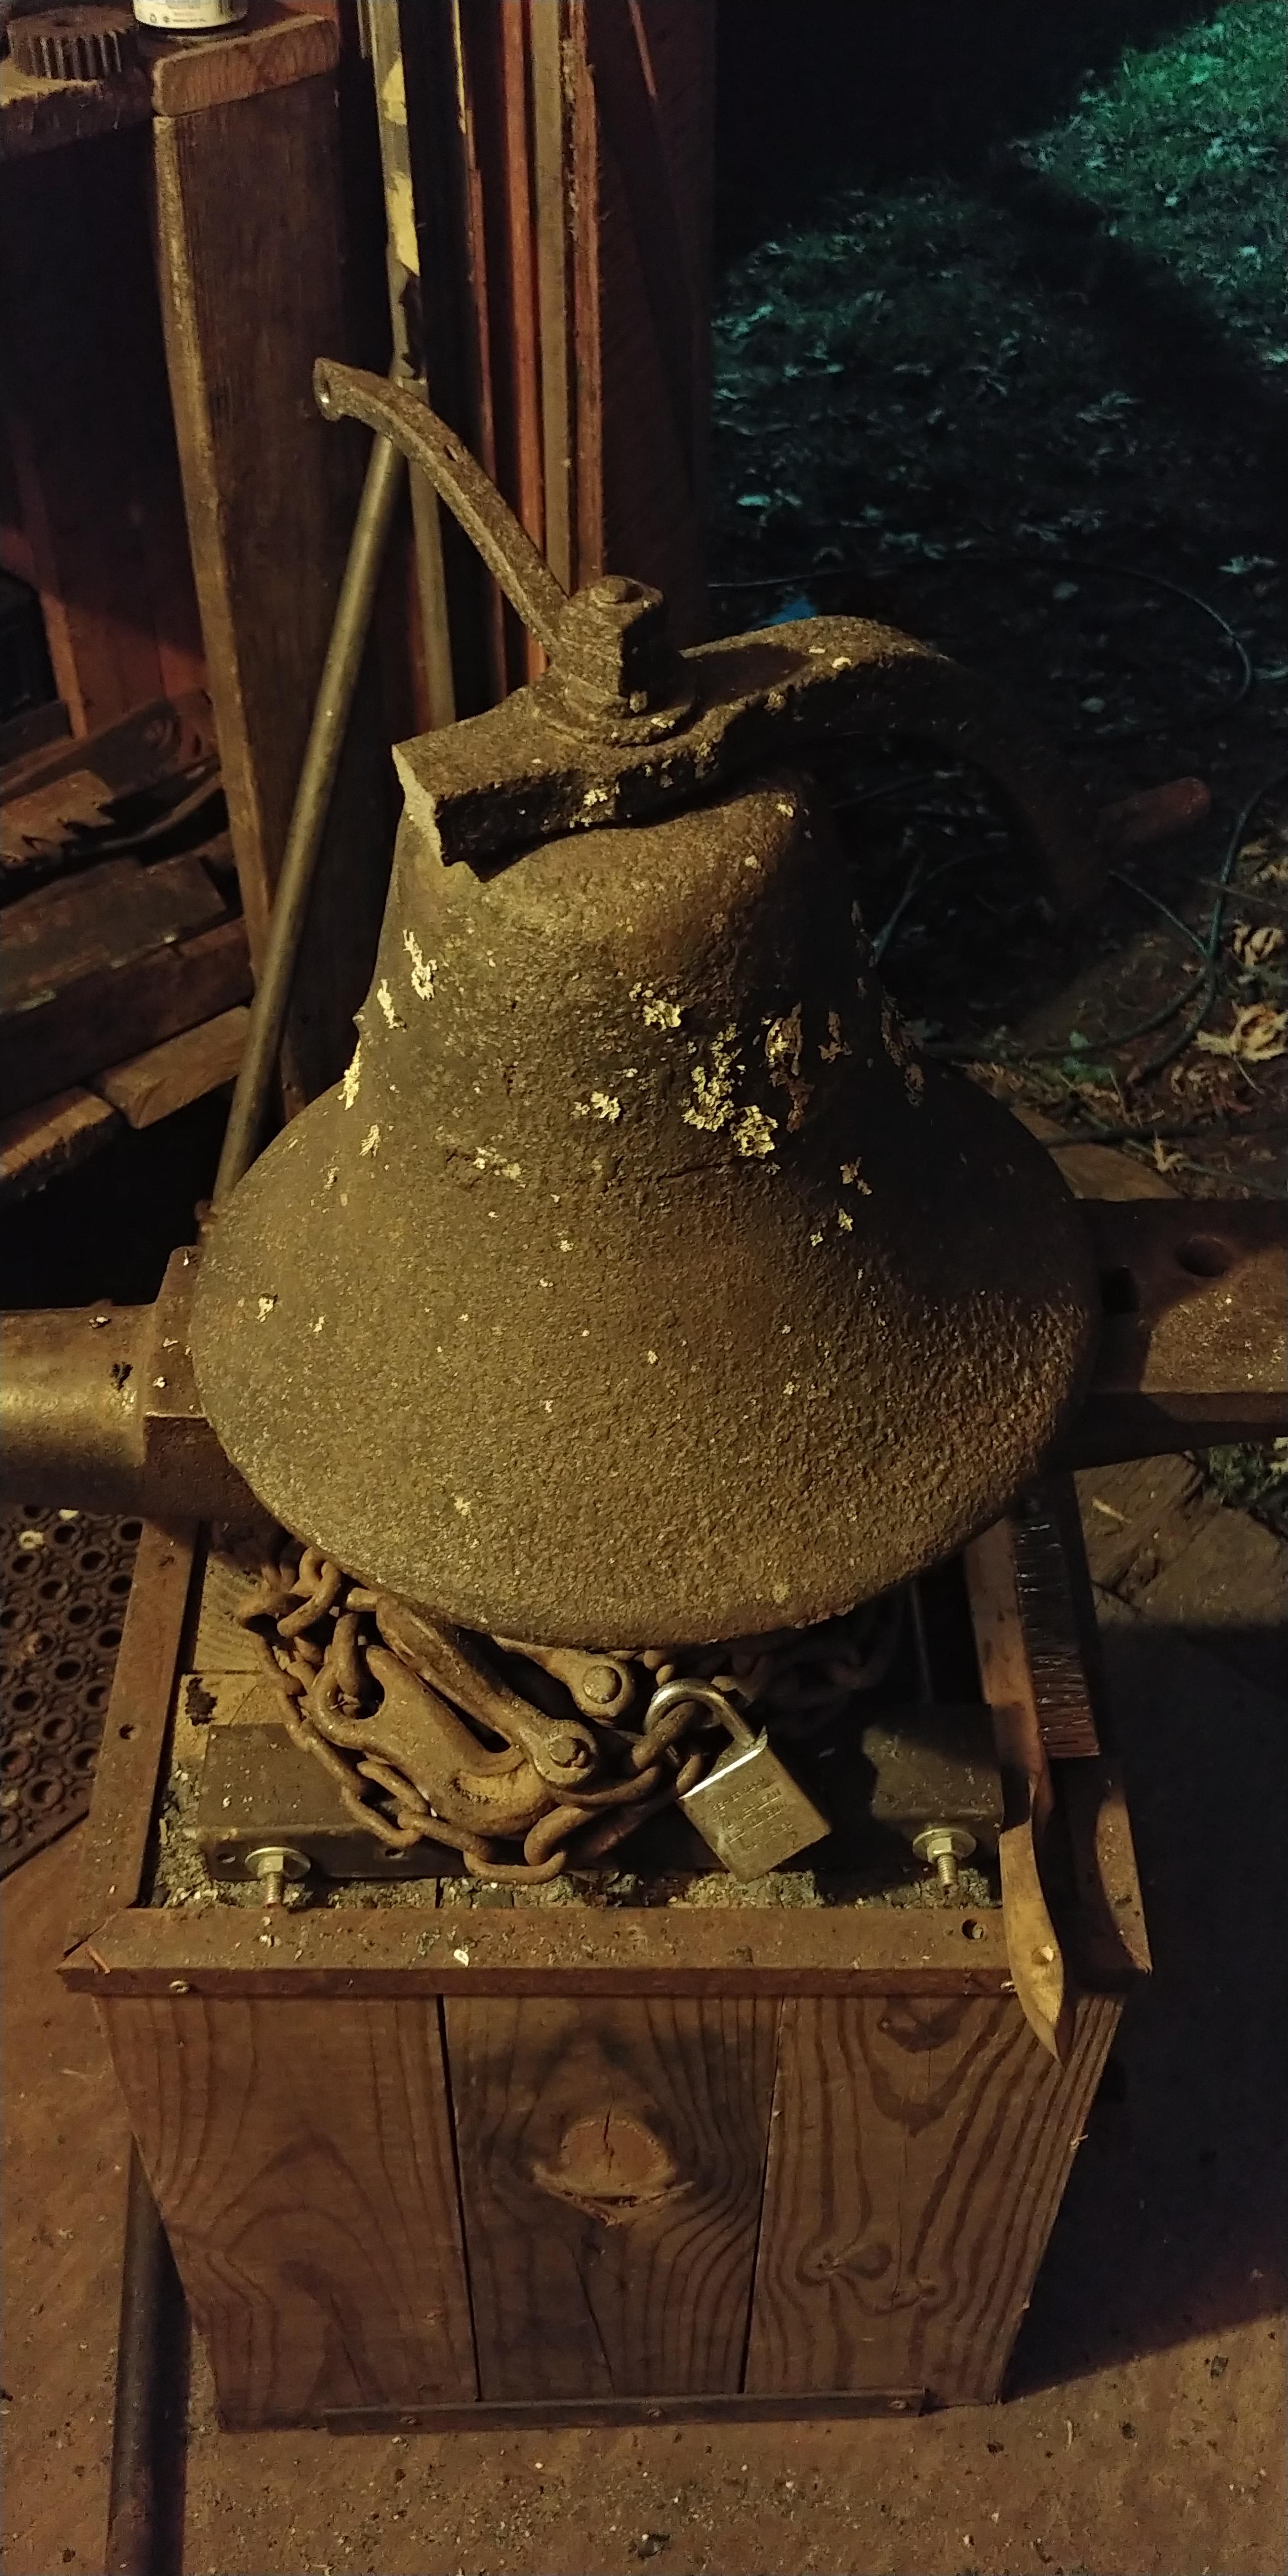
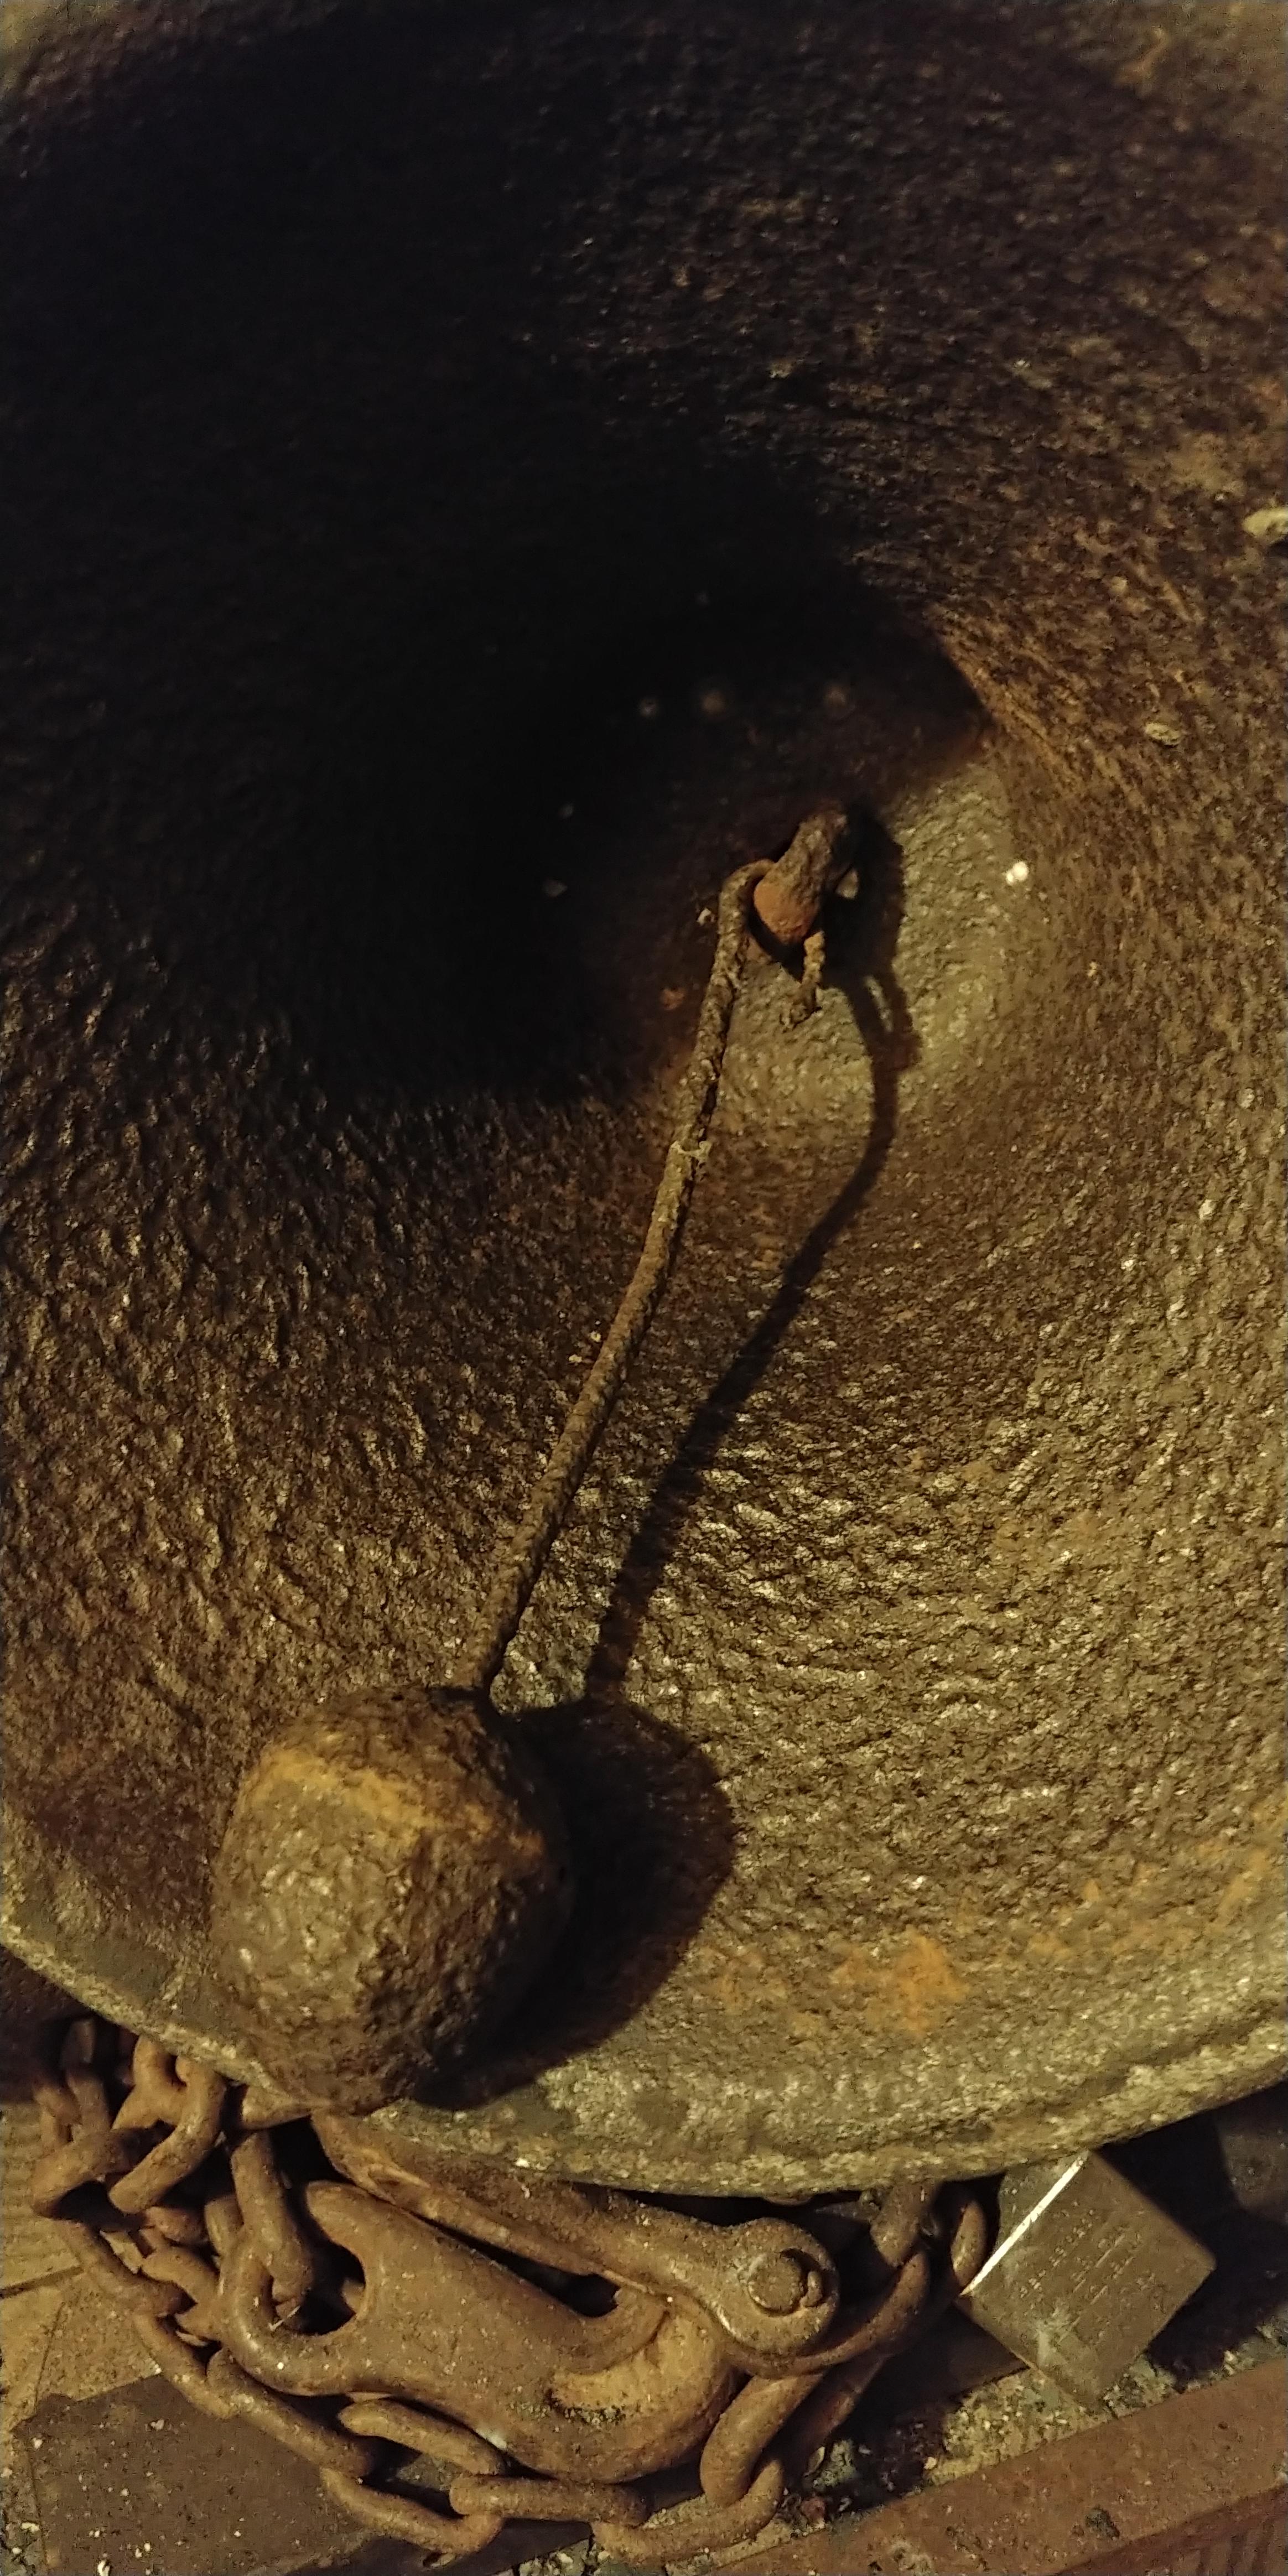
Over the weekend I was able to meet up with the owner of the farm bell and the weekend before that I received the oxy/acy tanks. On the tanks I found no dents or corrosion, cleaned up the outlets and used soap and water to pin-point the initial leaks in the regulators. I am still learning about using them, but I did receive instruction and practice on the basics from my FIL when he was in town. I will be meeting with a good friend who works with them daily for further instruction, soon. I also plan to do extensive research and practice on brazing as that is the plan for the broken yoke. So far, I know that it is important to heat the area around and directly where it will be brazed beforehand. I will also chamfer each piece, on top and on bottom, to create a U-shaped valley which will be filled during the braze. Thought I should also provide some pictures of the bell and the break. Notice what looks like a seem running around the top portion of the bell. I wonder if that is normal to bell castings. The tether of the clapper looks like it could use some work too.

-
Thank you all for the guidance along the way!
-
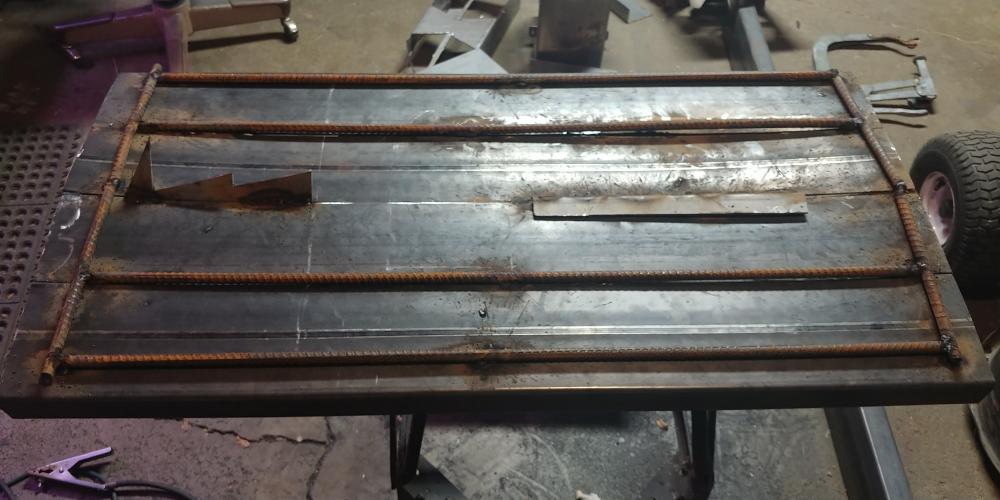
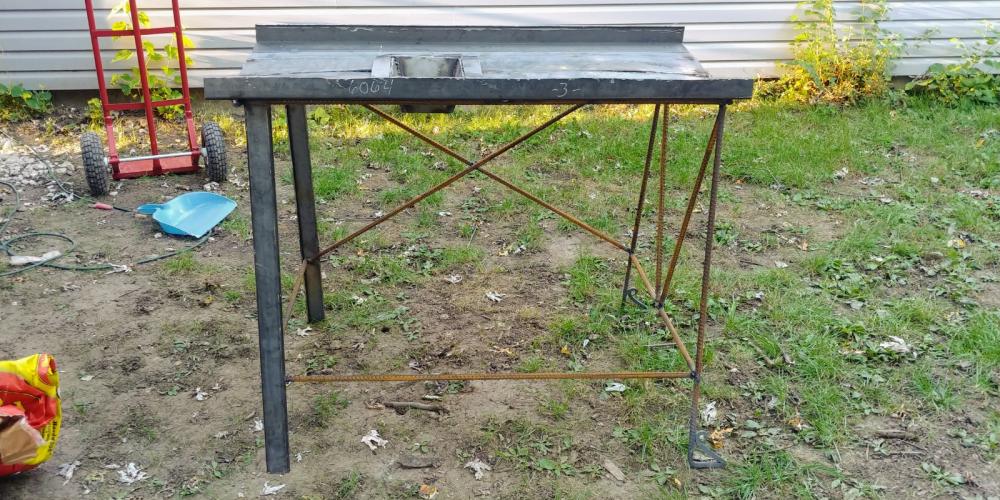
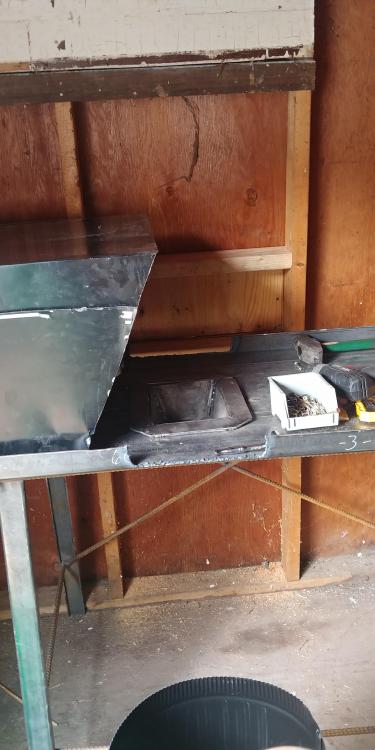
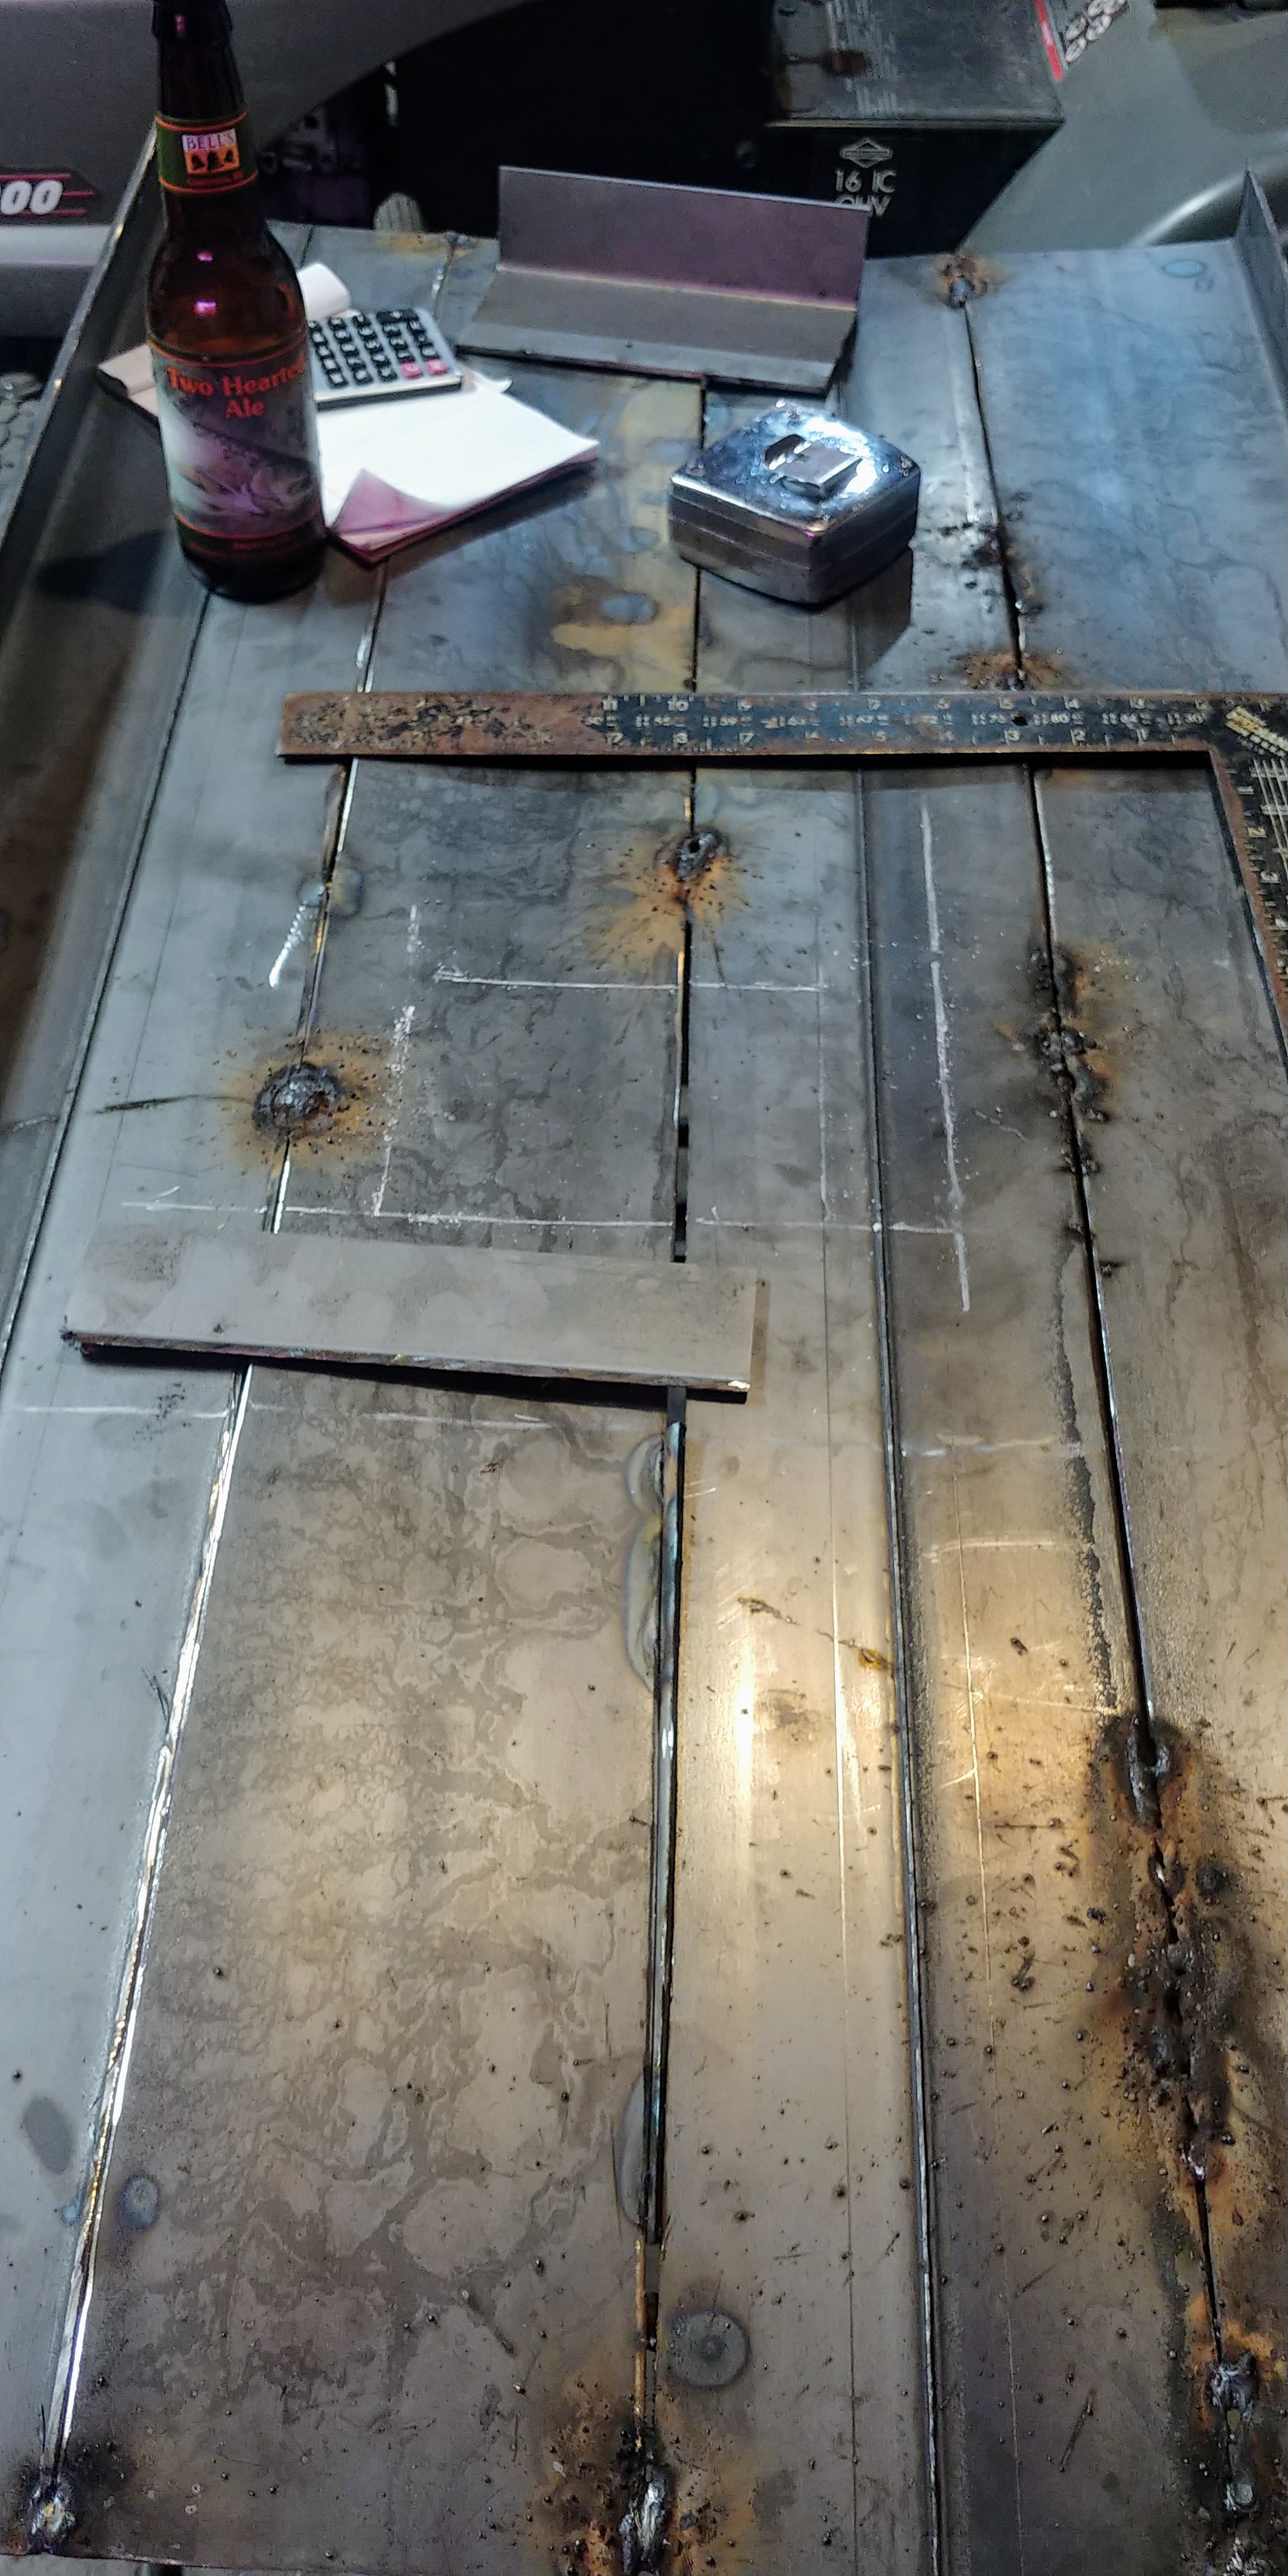
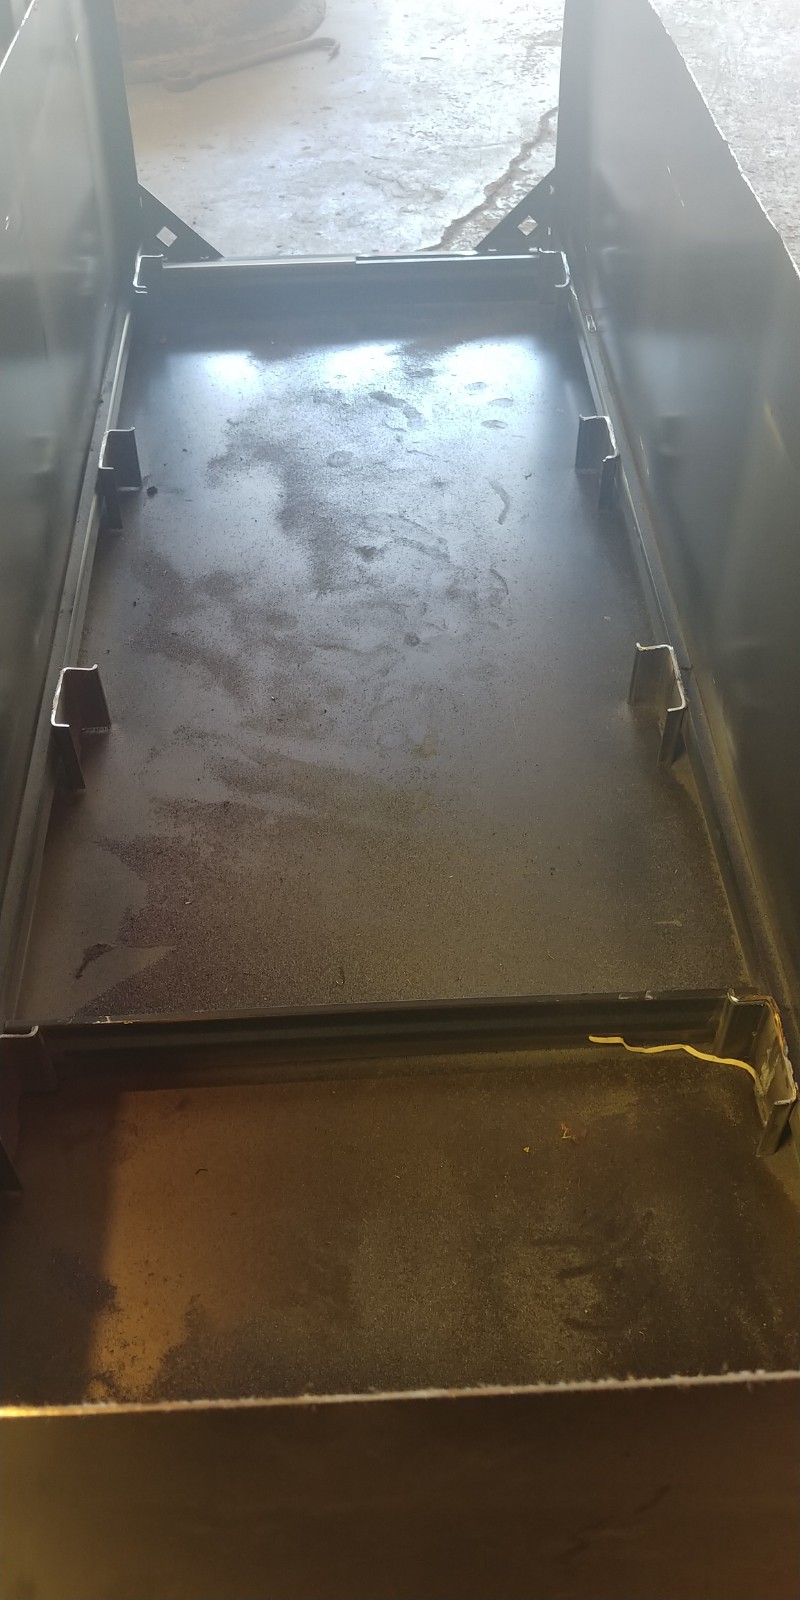
Some more pictures of the process. The steel tubing I split to create the table/hearth, joined together with the rebar underneath. Ugly welds and bad cuts, but I did go through and fill the gaps. You might notice that the table bows downward on each end, that happened as a result of the center sections of the tubing being cut out: it just naturally bent. I will eventually close off the right side of the hearth to block and charcoal from spilling off. And this is how I gutted the file cabinet to then put back together as my horizontal side draft.


-
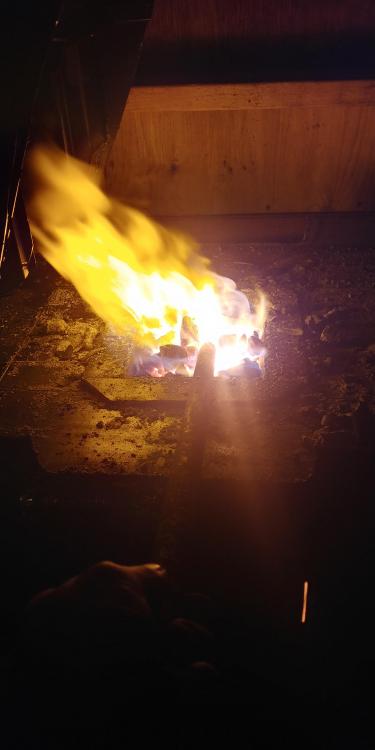
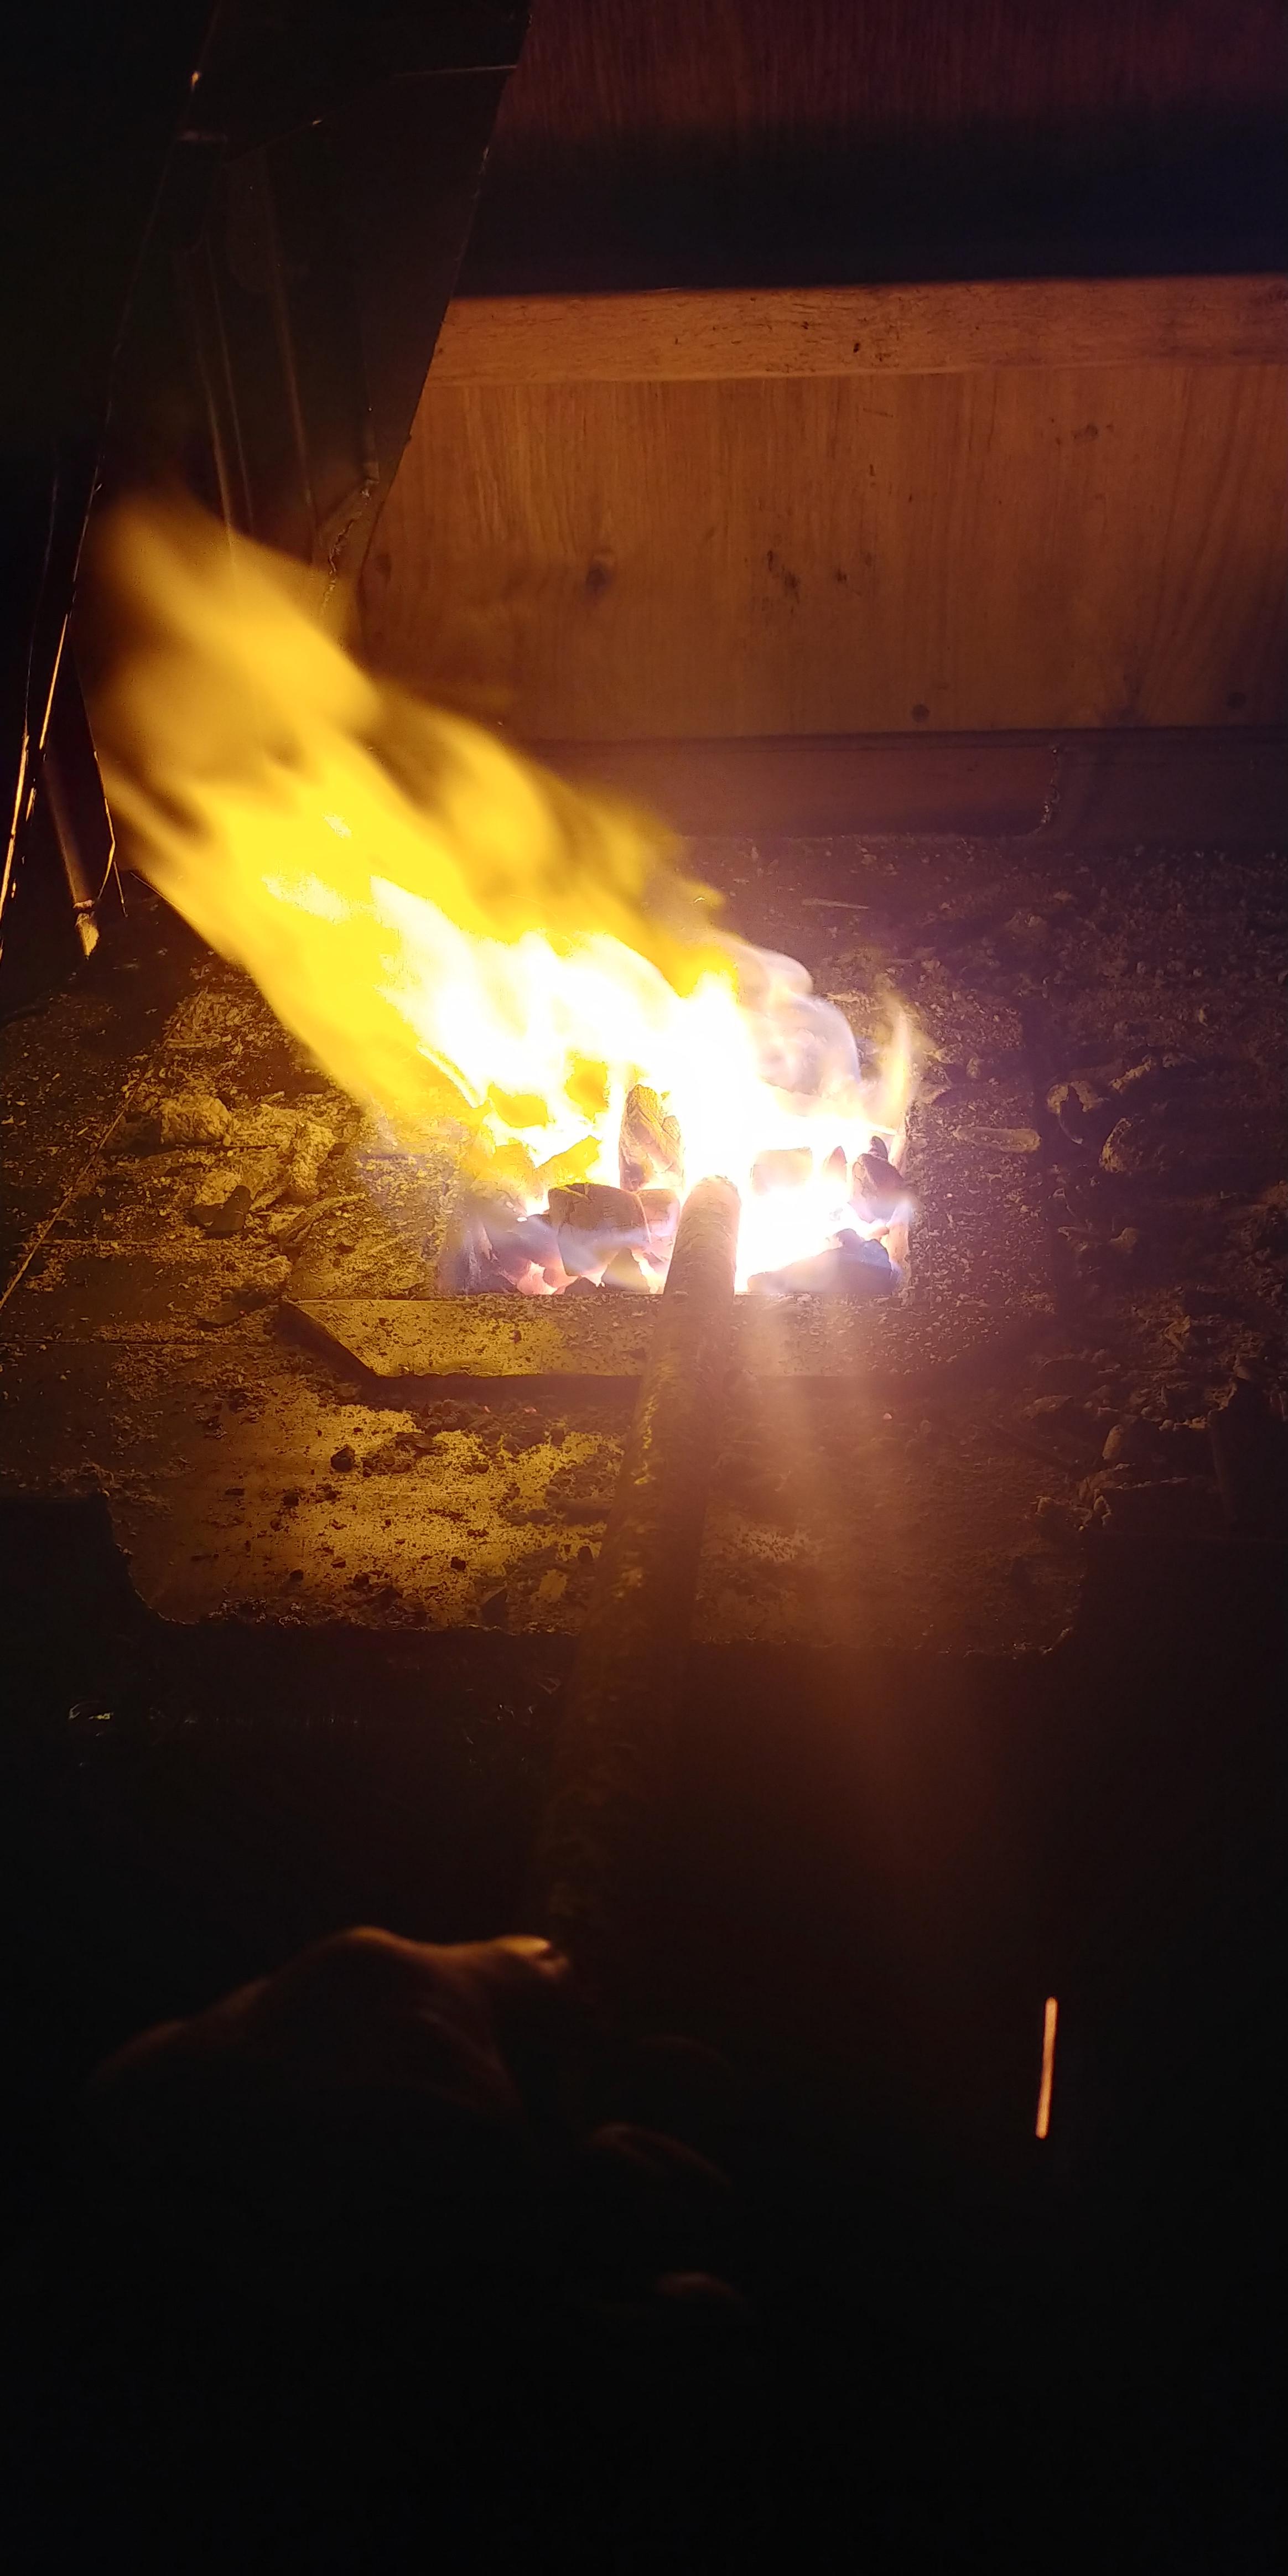
Last night I did a quick rig-up of the tuyere from the black pipe mentioned earlier in the thread, but it still needs refining. It is deadlocked from rust as it has been sitting outside affixed atop another project for about a year and after wrestling with it for an hour, I decided to spare myself any more frustration and just went ahead attached it to the fire pot as is so I can test the draft and chimney. And... I am very pleased with the outcome! I have not yet made the horizontal opening any smaller, but I did extend the chimney to reach over the peak of the smithy. No smoke or fire fleas inside the smithy, it all got pulled right out! I'm also psyched about the heat I was able to achieve! That is a 5/8" round tent stake that I had smashed a bit after the previous heat.

-
Frosty & BsnNFrnt, Thanks, guys! I appreciate the tips. If I have any more questions, BsnNFrnt, I will be sure to reach out!
-
He got them from a neighbor who's husband recently passed. He brought stuff home all the time, so she does not know exactly where anything came from. He worked for the electric company in town.
-
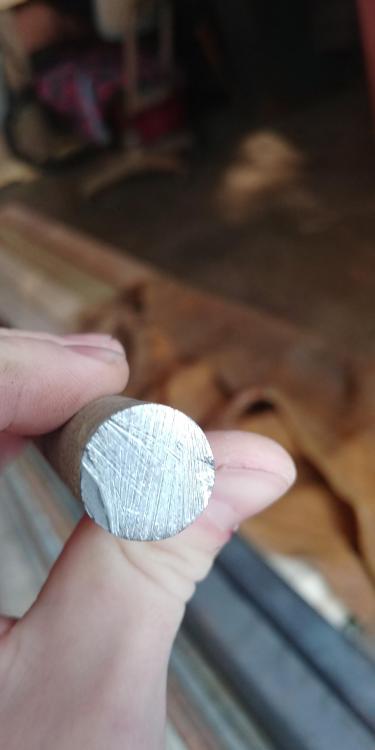
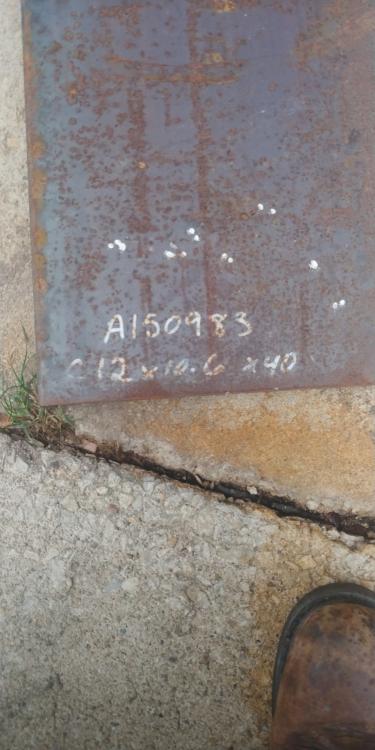
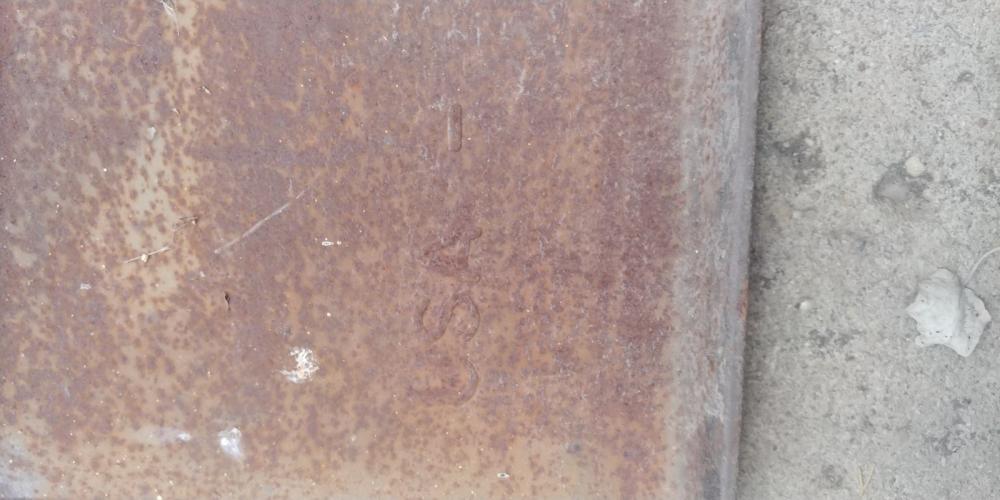
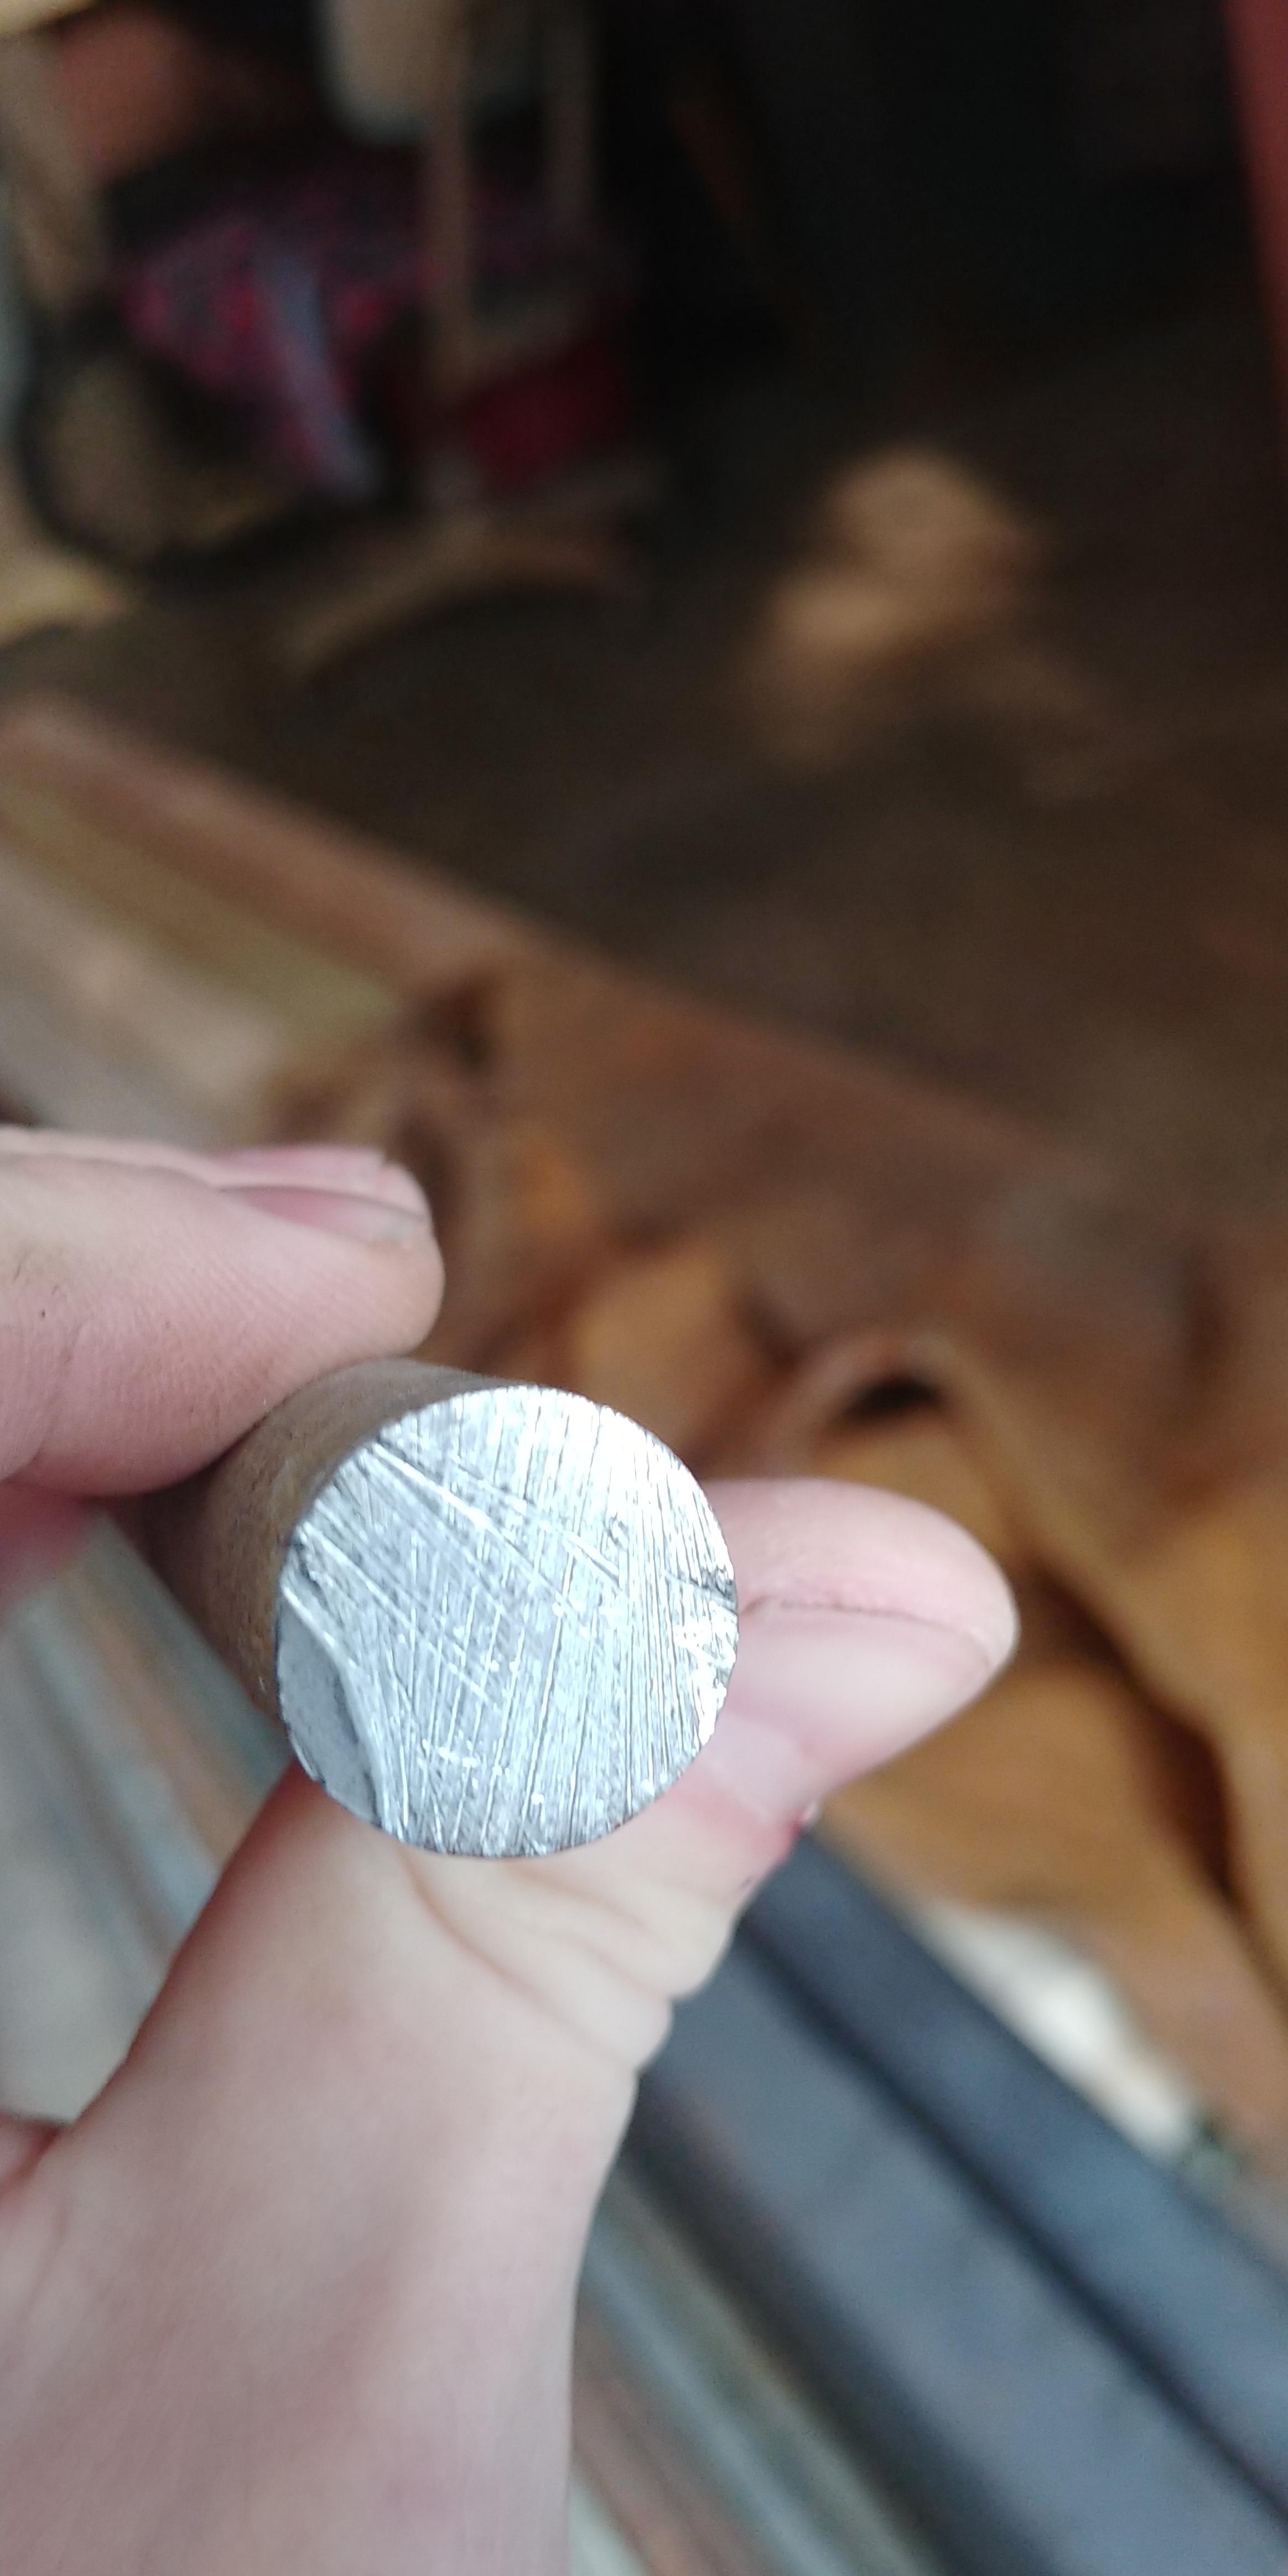
Over the weekend my In-Laws visited and had many steel gifts for me when they arrived. I have never seen it before the other day, but I believe based on what I have read here that this is sucker rod. None of the rods my FIL gave me have the joints attached, so that's the only reason I hope to confirm it as sucker rod. They traveled up here from South-Western KY. I do not know of any oil fields there, but my FIL used to work for the natural gas company in town. Anyway, he had to cut them down to fit in the truck bed but they look as if they would have been the standard 25'. They are 5/8" in diameter. Think it is sucker rod? Also, are there any precautions I can take to avoid the H2S I have seen discussed? Sounds pretty scary. Thanks, Red.
-
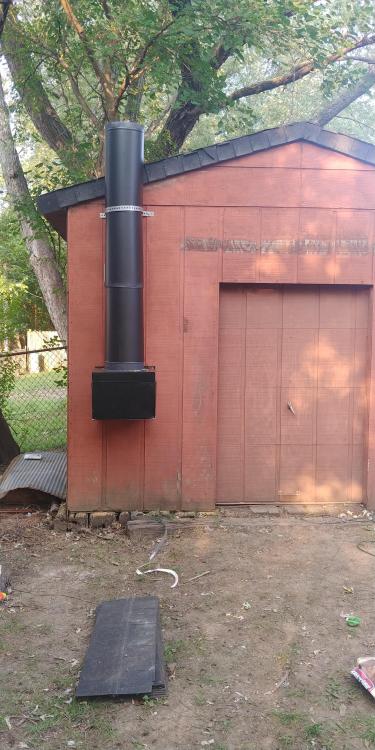
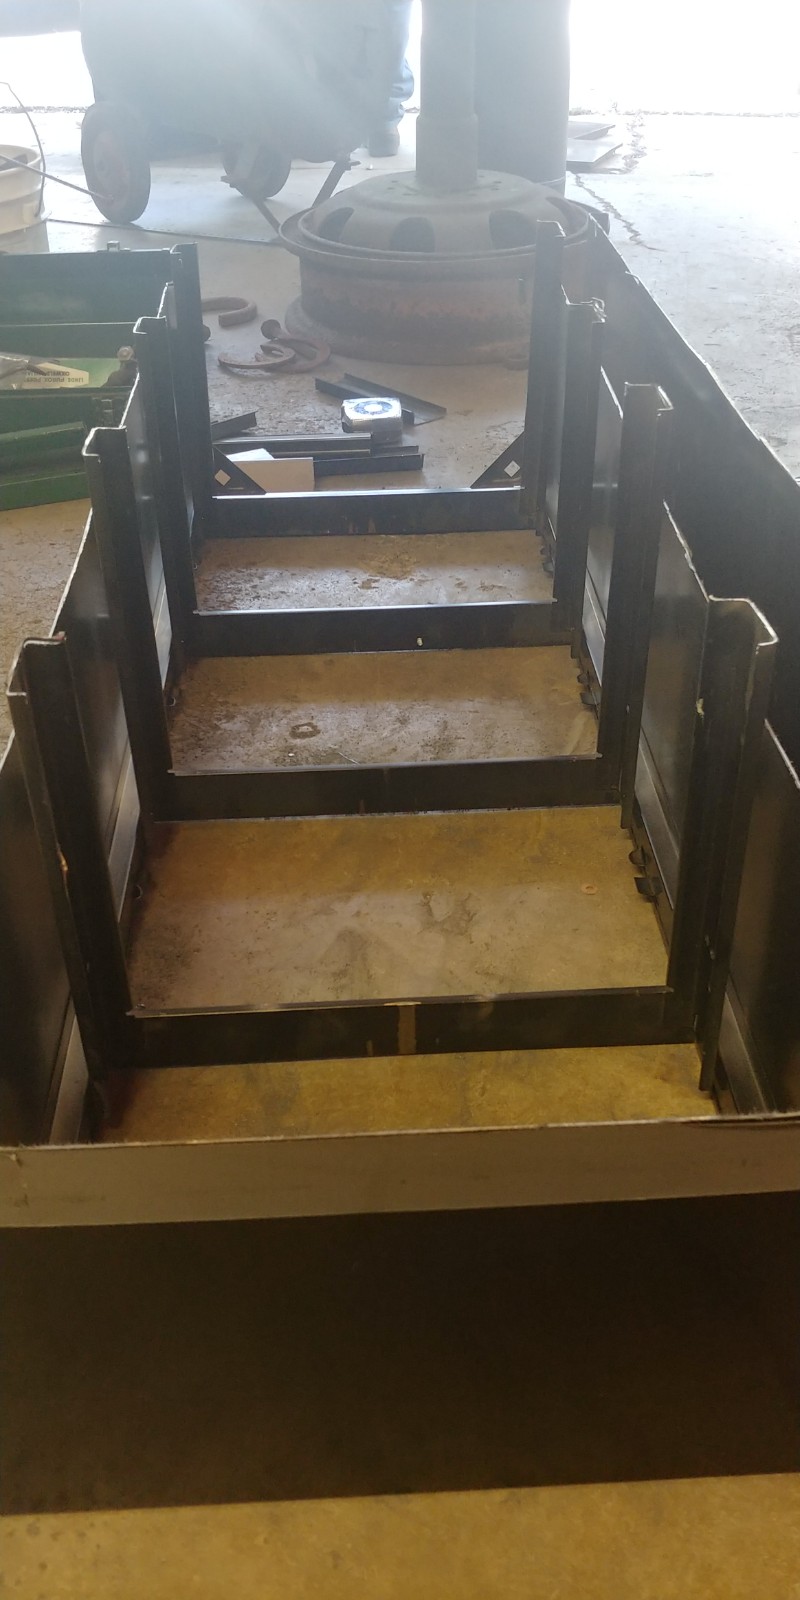
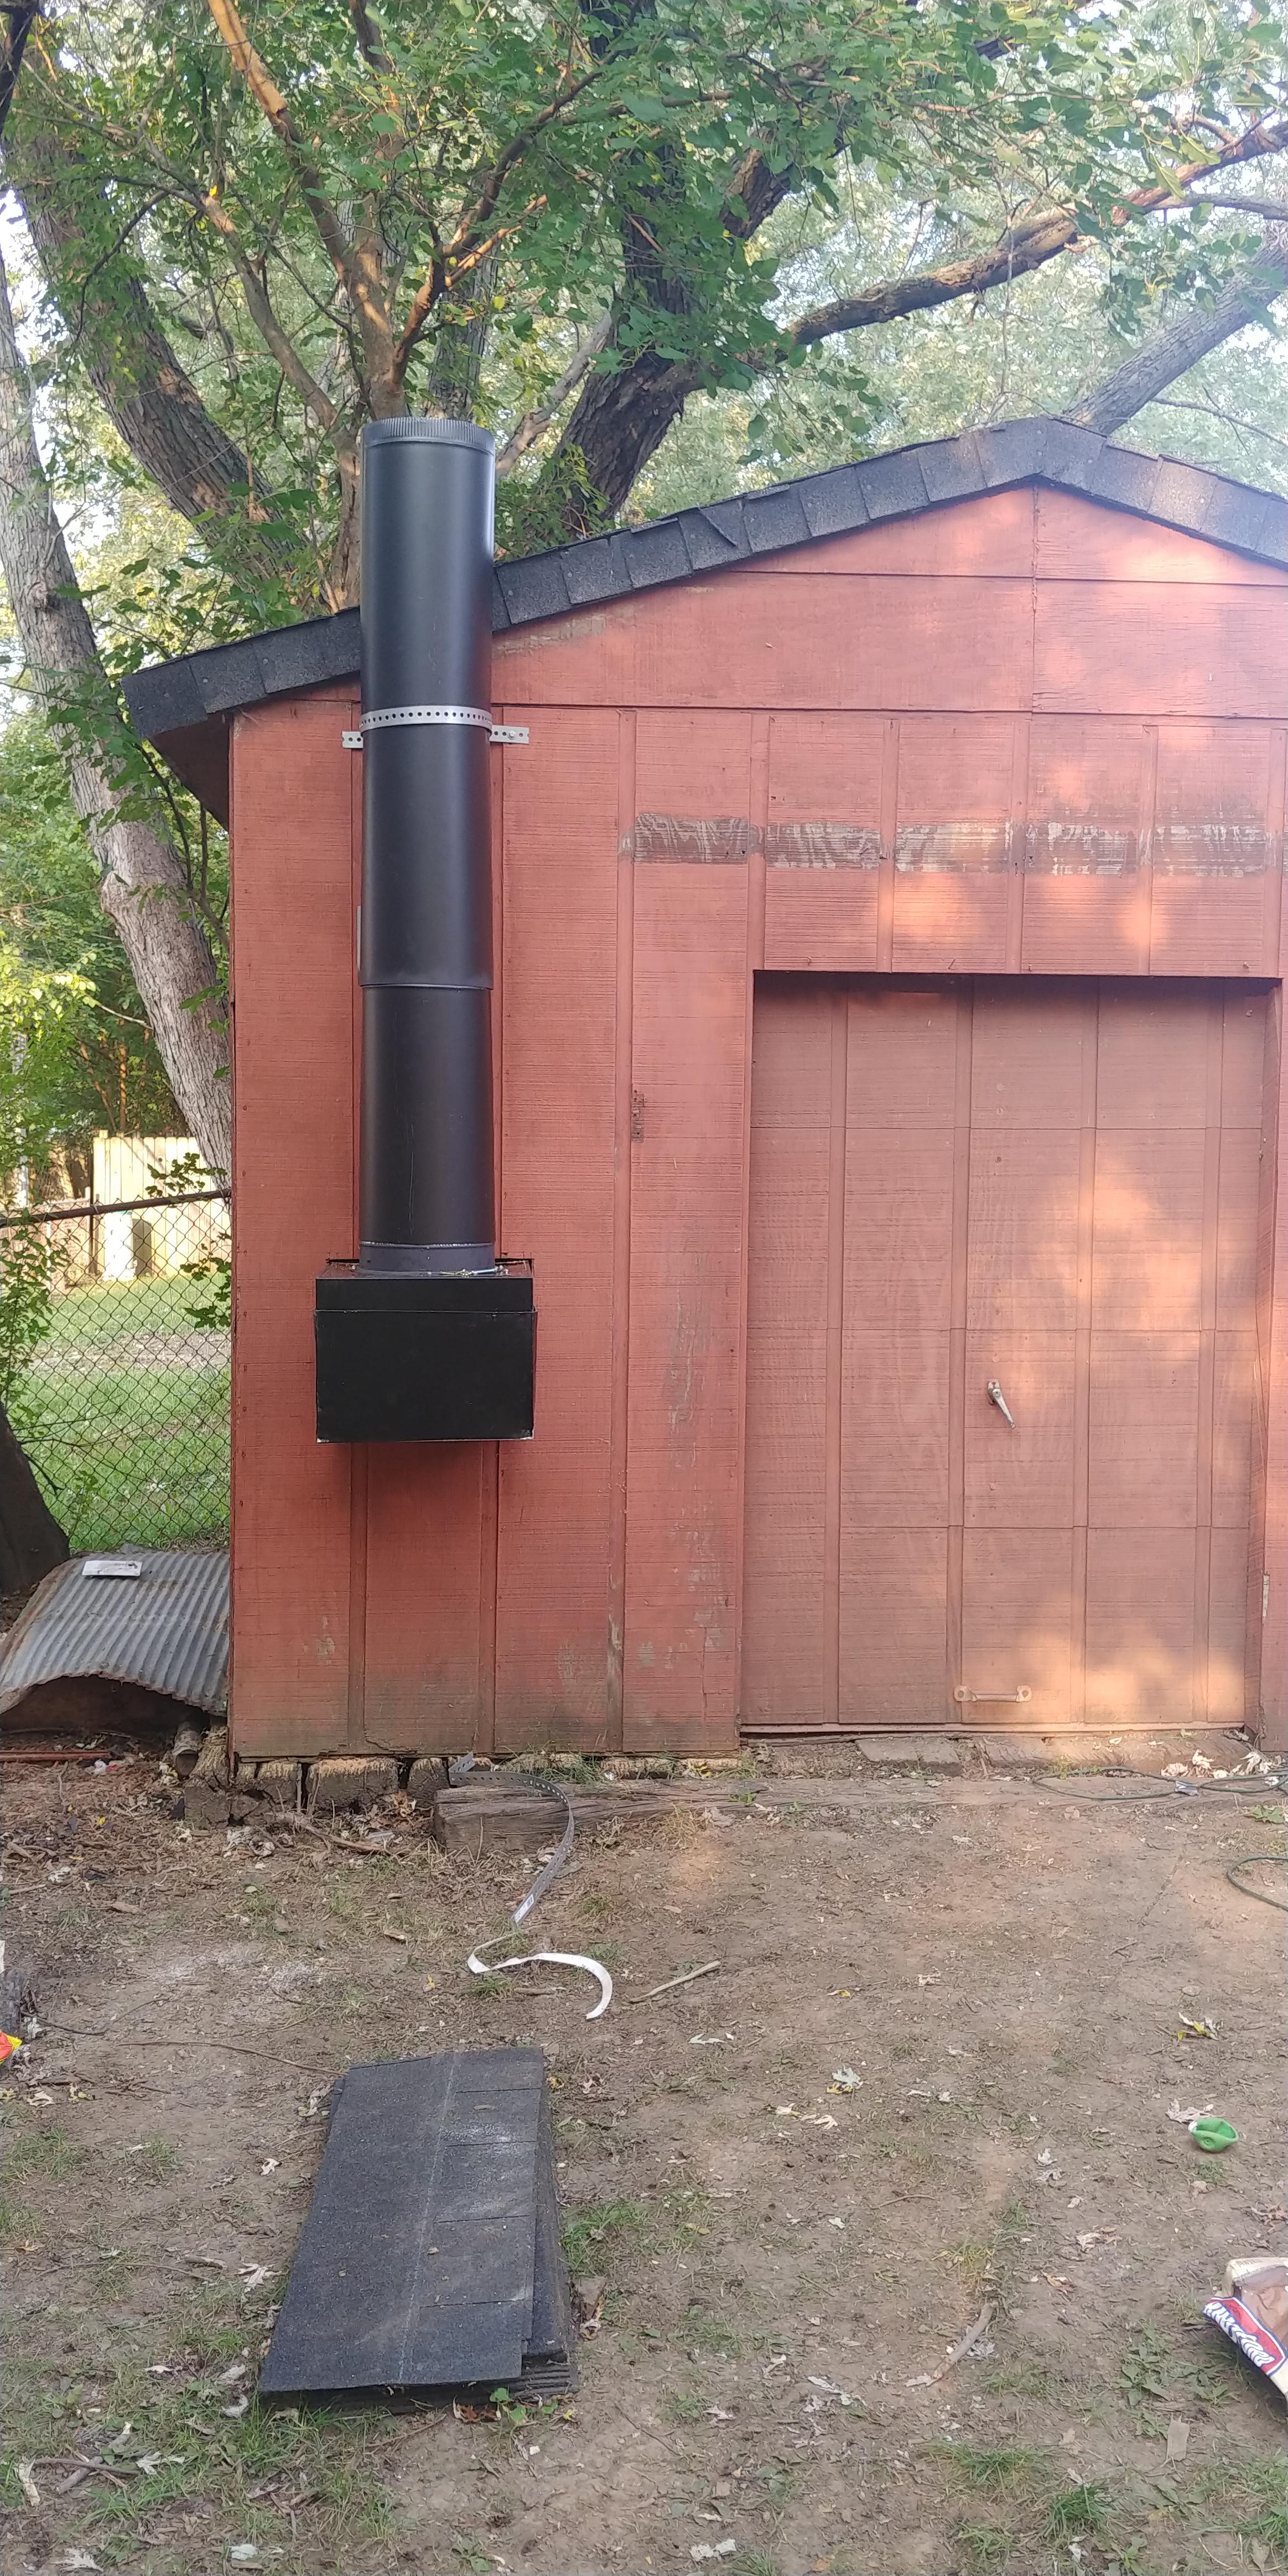
So, no blower or tuyere installation yet, but nearly everything else! took some quick pictures this morning before I left for work, more to come when it's finished. The chimney is not permanently installed yet... I am thinking it needs to be farther from the wall with a better bracket. Just what I had on hand and wanted to see how it all looked. 12" diameter chimney built from 6" pieces of black steel duct, snapped together. I have one more section that I believe I will need to install to make it reach higher above the 10' peak. It barely passes it now. The horizontal box is an old file cabinet made of sheet steel; gutted, cut and welded back together to sized. The old drawer faces are on the underside, welded back on. Unfortunately, it is 18" wide. I know 14" tall has been reported to work well, but I am worried about it being too wide. Any thoughts? The opening by the fire pot is also still 18". I think I will make a smaller mouse hole out of thicker steel..? Also, cut a hole in the wall beyond the forge to allow for long stock. It is just closed in the picture.
-
My 2 cents on making charcoal here in the 'burbs of Chicago: It is similar to what Frosty suggested. I bought a used and cleaned 55 gallon drum for 20 bucks through one of those local marketplace apps. I punched holes all around the bottom sides of the drum to let air in. I then fill a small (30gal?) metal galvanized trash can with the wood I want to become my forge charcoal. Laying both on their side, I slide the galvy can into the 55 drum with the top facing the bottom of the 55 drum (upside down when both standing upright). Center the can and surround it with scrap wood, light it and let it burn for about 2 to 3 hours, adding more scrap here and there. Too much smoke means it's not being very efficient; you want to see flames surrounding it. After that I take the remaining charcoal out and scatter it on either concrete or dirt and mist it with a garden hose til it cools to the touch. I get my scrap wood from local businesses that throw away their wood pallets. I have heard pallets can make decent charcoal too, but I have yet to try it. For bigger batches at one time, just fill the 55 drum with the wood you want as charcoal, seal it closed and install a small chimney or punch holes at one end and lay the drum horizontally over a raised fire pit for a few hours. Tend the fire in the pit. Red
-
Indeed! It gets hot in there when using the gas forge!
-
Check it off the list! Haha
-
Oh gotcha. Understood. Yeah, it cracked around the time I was only able to achieve a dull red heat. Should have quit sooner.
-
I did not quench. I felt a little guilty for using good tool steel for that project, but I didn't have a big enough piece of mild steel for it. Is it a bad idea to use it simply because its composition can serve a better purpose?
-
My wife told me that my In-laws will be visiting us this weekend with many gifts in-tow. The most exciting gift being the oxy/acy tanks and torches! Since I will have them much sooner than I thought, I am putting off building the hood and chimney until this weekend so it will all be much easier to cut and assemble with the tanks. So, this weekend I forged an ash dump instead. I really just wanted to try my hand at a decorative ball-end for the handle -- it did not go as planned. I was unable to make it round before my propane ran out (I was near the last of it when I began) and it developed a pretty big crack so I just did a rough squaring and left it as is. The twist also got away from me; I should have just twisted half the bar, not all of it. Not a proud moment, but it will work once I get the hinge fabricated and attached. I forged it from a pry bar I got cheap at a flea market a while back.
.thumb.jpg.5532a936f35949fe7e3d963679e8312b.jpg)
.thumb.jpg.432c1a9ee2025d33e3ac0a1b9fdec20b.jpg)
.thumb.jpg.3834c9f6068337e9bdf2c6ebe45646c2.jpg)
-
That combined with my angle iron anchors and a couple chains worked perfectly! From loud ring to damp "thwap." Thanks!
-
Seconded! haha Nah, but I am very fortunate to live in an eclectic, blue collar subdivision with great neighbors. My smithy is near the corner of where all 4 of our backyards meet and I am almost completely covered by a border of trees and fence. My closest neighbor, whom I share a larger portion of fence with, is very supportive of me and even hired me to restore an axe for him. Never had a complaint or concerned looks from the others. I also live on a busy thoroughfare, so the frequent trucks and cars deter from my noise. Nevertheless, I am grabbing some latex caulking on the way home today. However, when I first started outside my apartment complex a few years ago... I did get shut down the first day I used bituminous coal! Even if the smell of a construction zone is common around here, people still don't like it! haha. I have only used coal a few times where I am now, but no complaints so far. I hope I don't eventually get a similar reprimand, Thomas, but until then... I wait to ask for forgiveness, not permission!
-
Yeah, for the sake of my ears and consideration to the neighbors, I think it's passed time to do just that. Lol! I just imagine myself swinging a hammer underwater... could be a good muscle exercise!
-
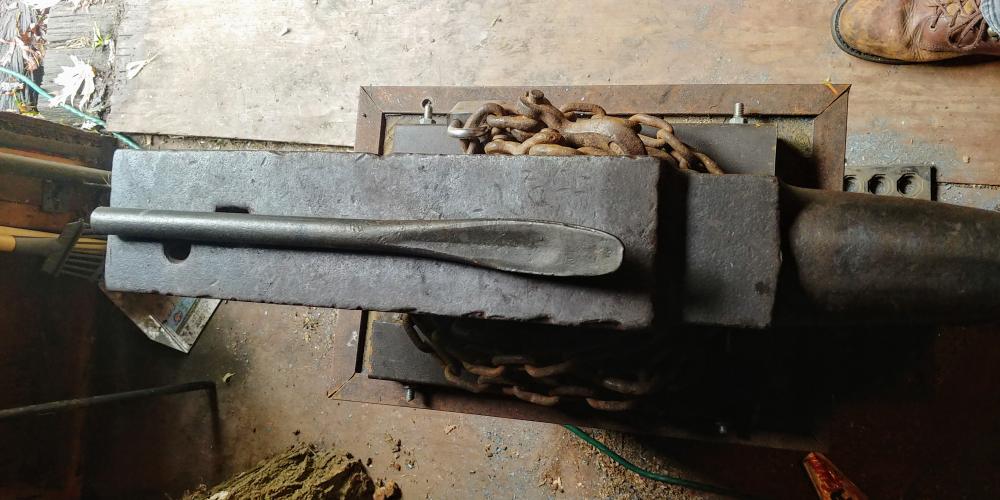
JHCC, Yes, I have seen this before and thought about using your design (IV) as the base of a potential portable hole. I am dreaming of stand-builds in general, I guess. My 125lb cast steel anvil currently sits on 6"x6"'s in a 1" deep offset with angle iron anchors. I like it because it was a project I did with my FIL and it's at the perfect height for me... it does ring quite a bit tho. My 100lbs forged steel anvil sits strapped atop a large stump I acquired after the village removed some trees that were leaning and shedding large branches into the street. I don't use that anvil much but I really like the stump haha. I believe the stump and a large chain really dampened the ring on that one.
-
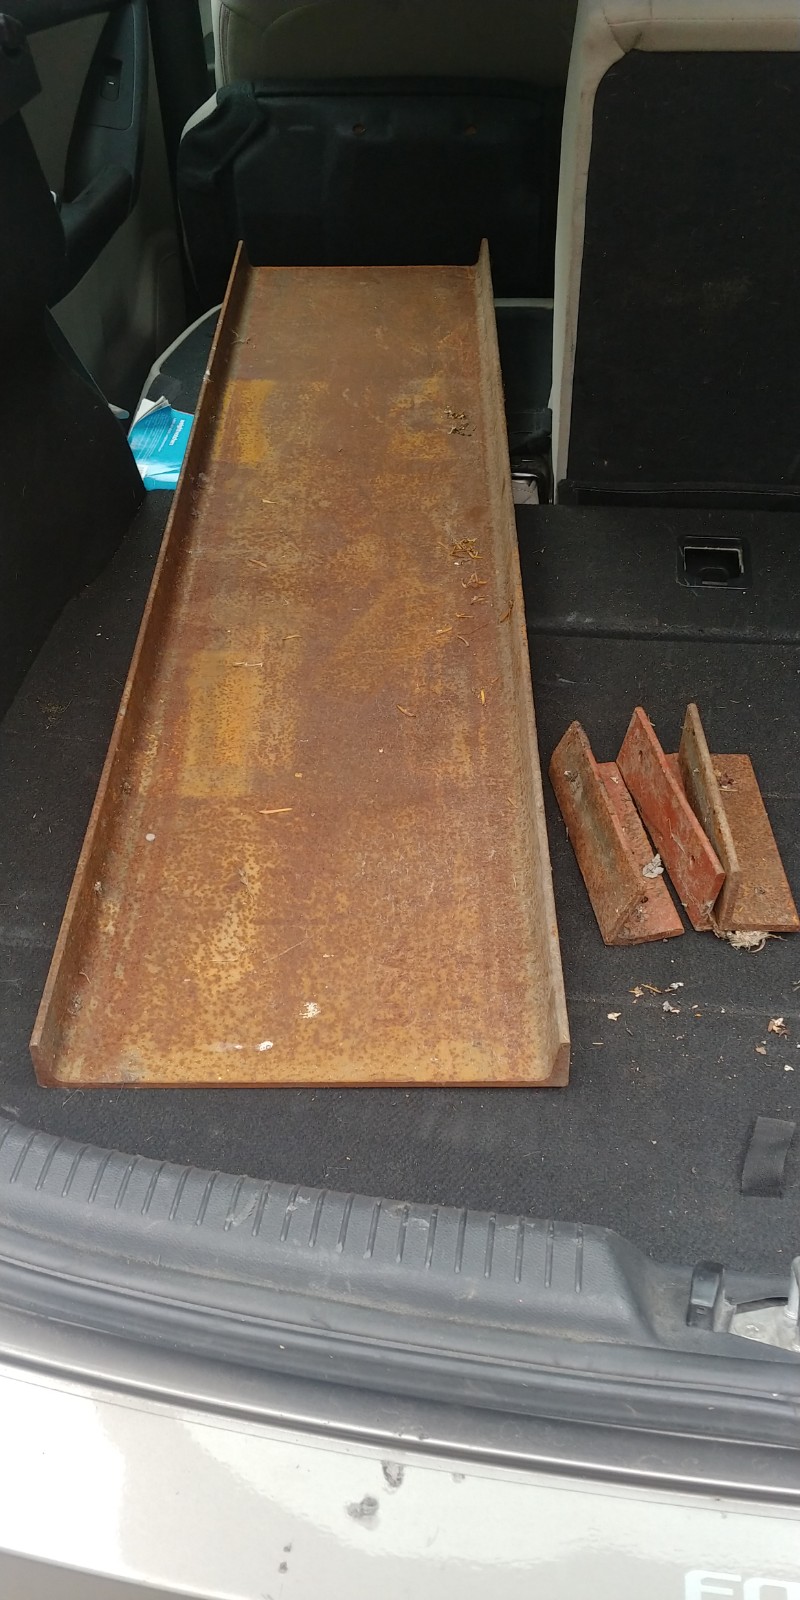
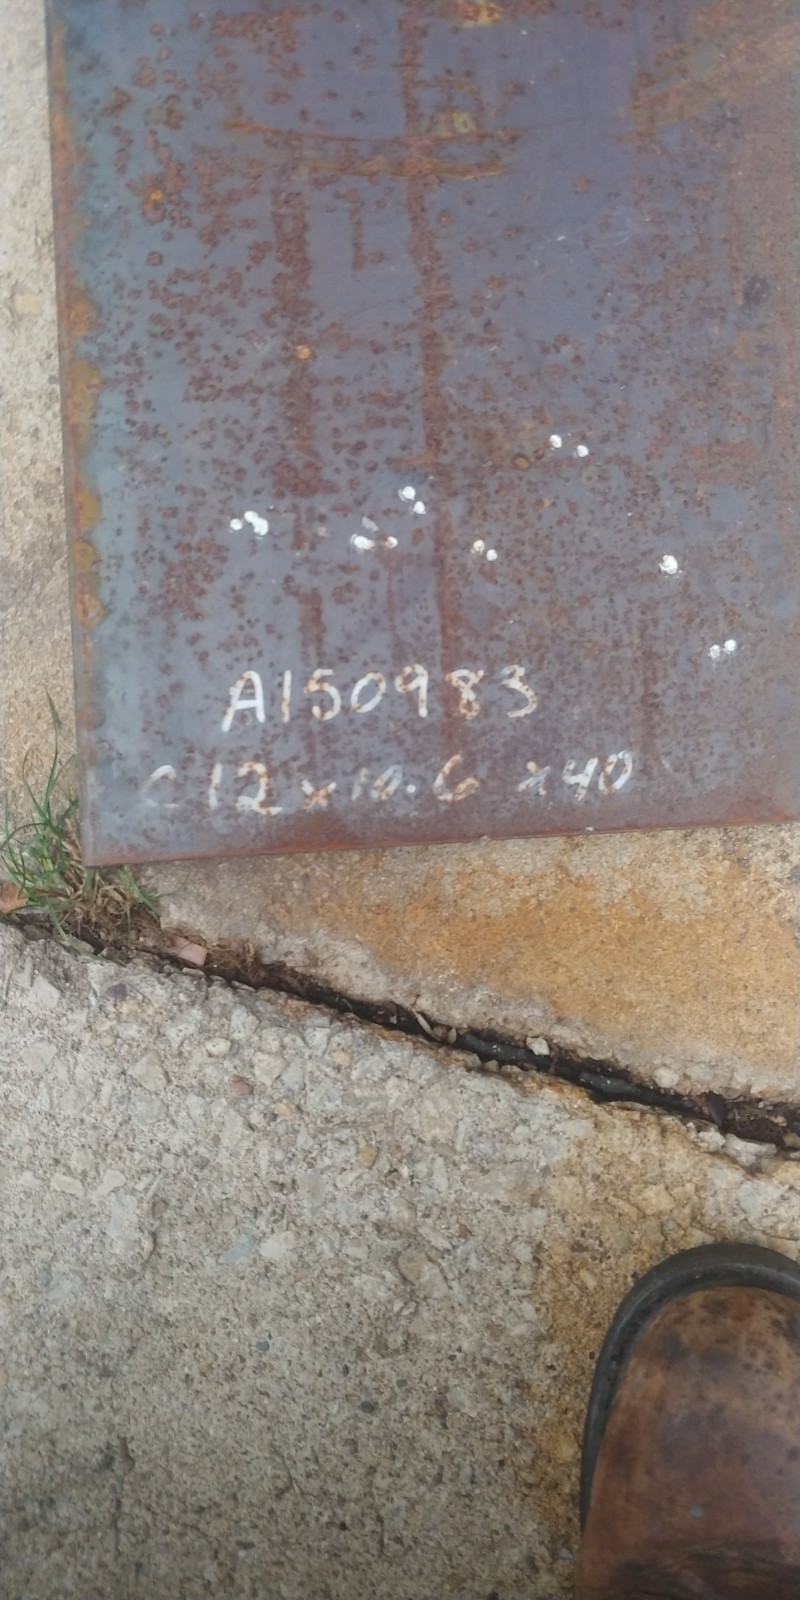
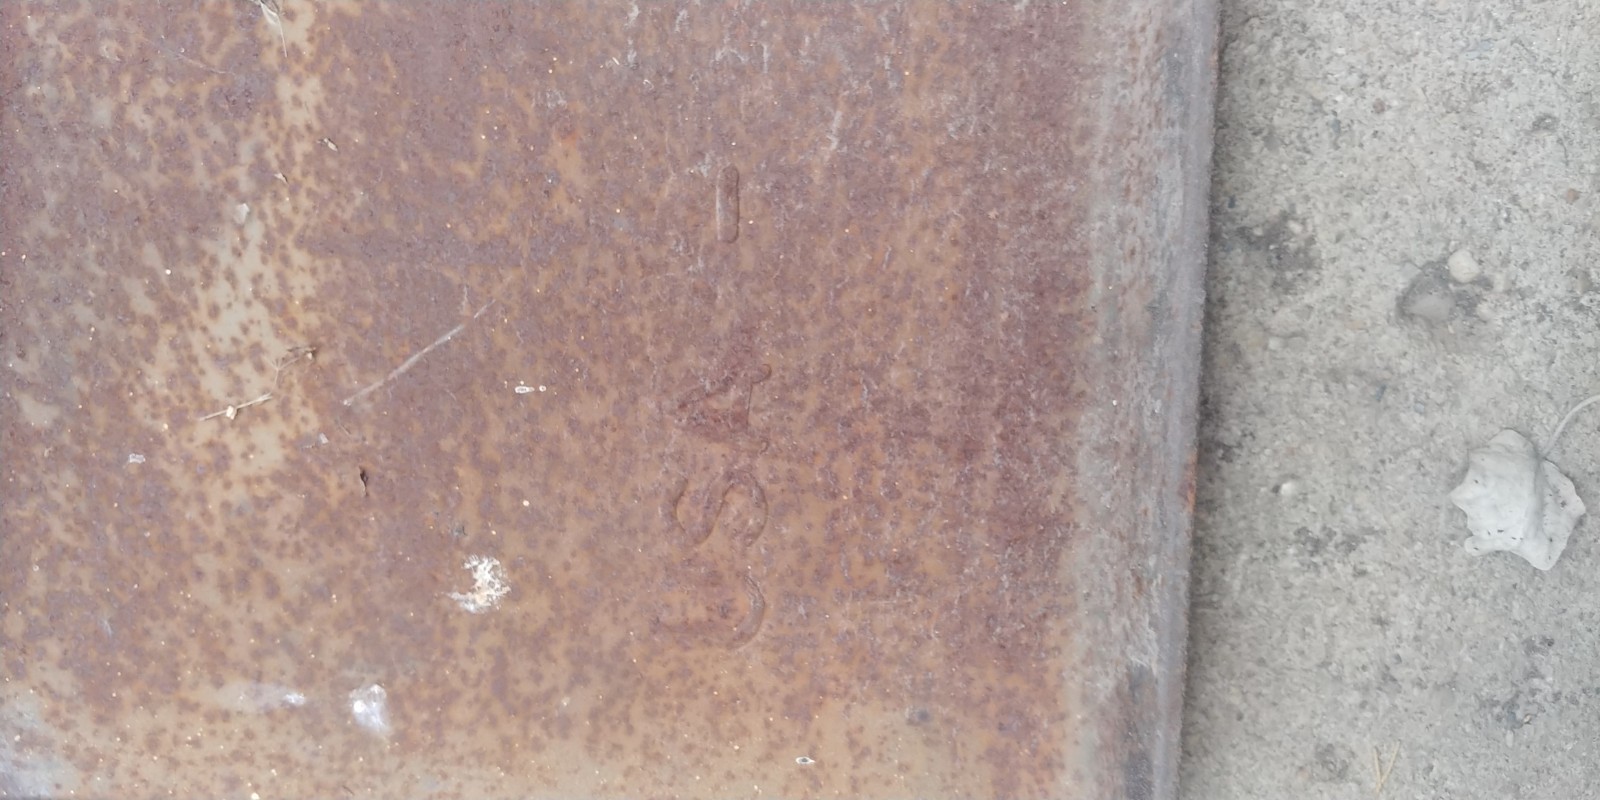
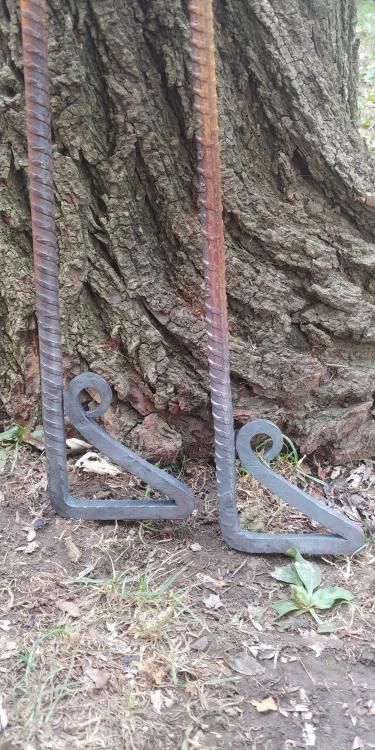
Found this chunk of beam and 3 chunks of angle iron curbside on the way home from work yesterday. Always feels good to beat the scrap metal collectors to the punch around here! Trash pick-up day was thrown off by Labor Day so I think everyone, including the scrappers, are still confused about when they are picking up. It's usually just the day after when there is a holiday during the week, but 2 days later and we all still have the trash at the curb! But I'm not complaining, worked out in my favor! Would have been perfect for the coal forge I am currently building, but I'm already too far along. I might incorporate a chunk of it somehow... or maybe use it to make one of those "portable holes" I have seen on here. 1/4"x12"x50"

-
I am late to the editing time, sorry admins. I think I found my answer: It should be fine with no chimney or a short stack chimney should be fine while outside, as long as it is a minimum of 10" in diameter. Sometimes I need to keep my endless concerns to myself lol
-
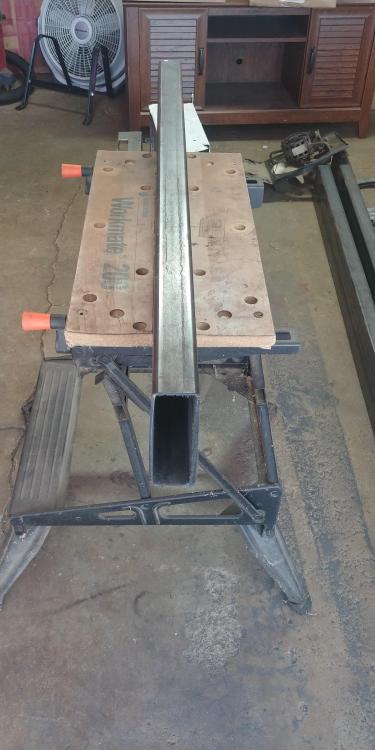
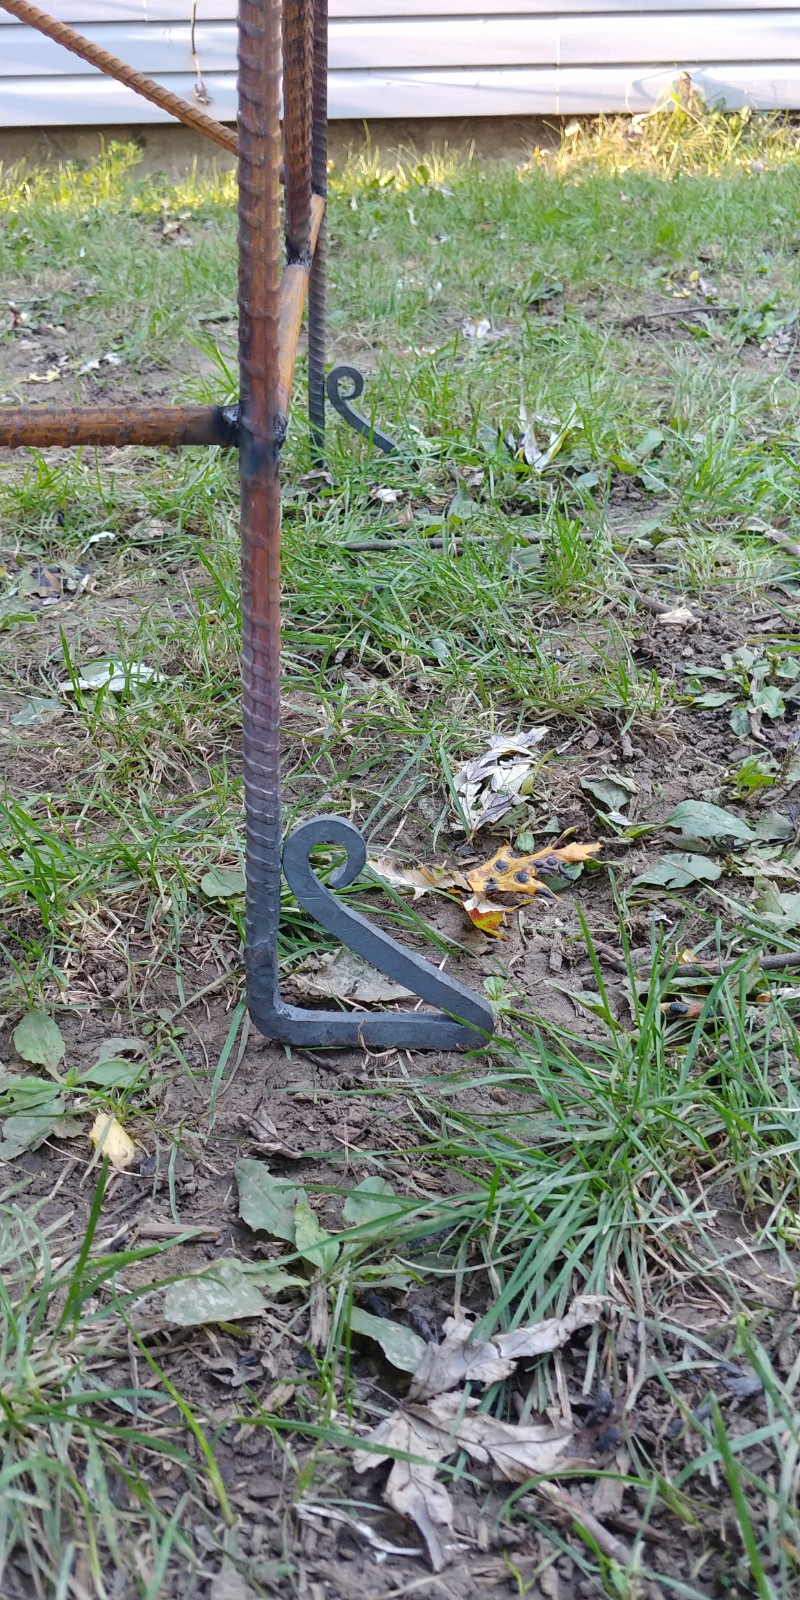
Still on a budget. This weekend I finally got the body of the forge cut up and welded together. No pictures yet as it still still needs touching up. I also forged some feet for the front 2 legs; the back 2 I am thinking will be wheels. Like these legs, the frame will be built from rebar... 30' for less than 12 bucks. I have enough of the structural tubing to cut out pieces for a frame, but cutting free-hand with an angle grinder for hours on end has proven to not only be tiresome, but sloppy. A new concern I have: Before I have the ability to get the forge installed in the smithy with a nice side draft and chimney system, how should I have it built to operate outside? It will be a 3.5' (left to right) x 2' (front to back) steel table with 2" high border. I will primarily be using my homemade charcoal as fuel. So I wonder: when outside of the smithy, should I still have a hood and short chimney installed? Or does said chimney still need to be 10'+ high in order to be effective? In which case I might as well just bite the bullet and install it in the smithy.
-
Chimney Plan - Looking for Feedback
Red Shed Forge replied to tjdaggett's topic in Chimneys, Hoods, and Stacks
Glenn & jlp, Thank you for sharing these; super helpful. Now I have a tough decision to make! -
What did you do in the shop today?
Red Shed Forge replied to Mark Ling's topic in Blacksmithing, General Discussion
For sure... Big dips! -
Chimney Plan - Looking for Feedback
Red Shed Forge replied to tjdaggett's topic in Chimneys, Hoods, and Stacks
The Modern Blacksmith, that's it! Thanks, Thomas. tjdagget, perfect, glad we confirmed it. I guess I was just thinking out loud, hope that doesn't read as a snide remark.


.jpg.0281f19e7439b32ded5b13402b306bd5.jpg)
.jpg.72a04de4bba0db83eae421adcc6e6005.jpg)
.jpg.7c9ce3a033a8ab2b9ea9d90eb2c015a5.jpg)