Red Shed Forge
-
Posts
226 -
Joined
-
Last visited
Content Type
Profiles
Forums
Articles
Gallery
Downloads
Events
Everything posted by Red Shed Forge
-
show us your letter openers
Red Shed Forge replied to ausfire's topic in Blacksmithing, General Discussion
HA! Oh no, you're right, I'll send out a memo right away! -
show us your letter openers
Red Shed Forge replied to ausfire's topic in Blacksmithing, General Discussion
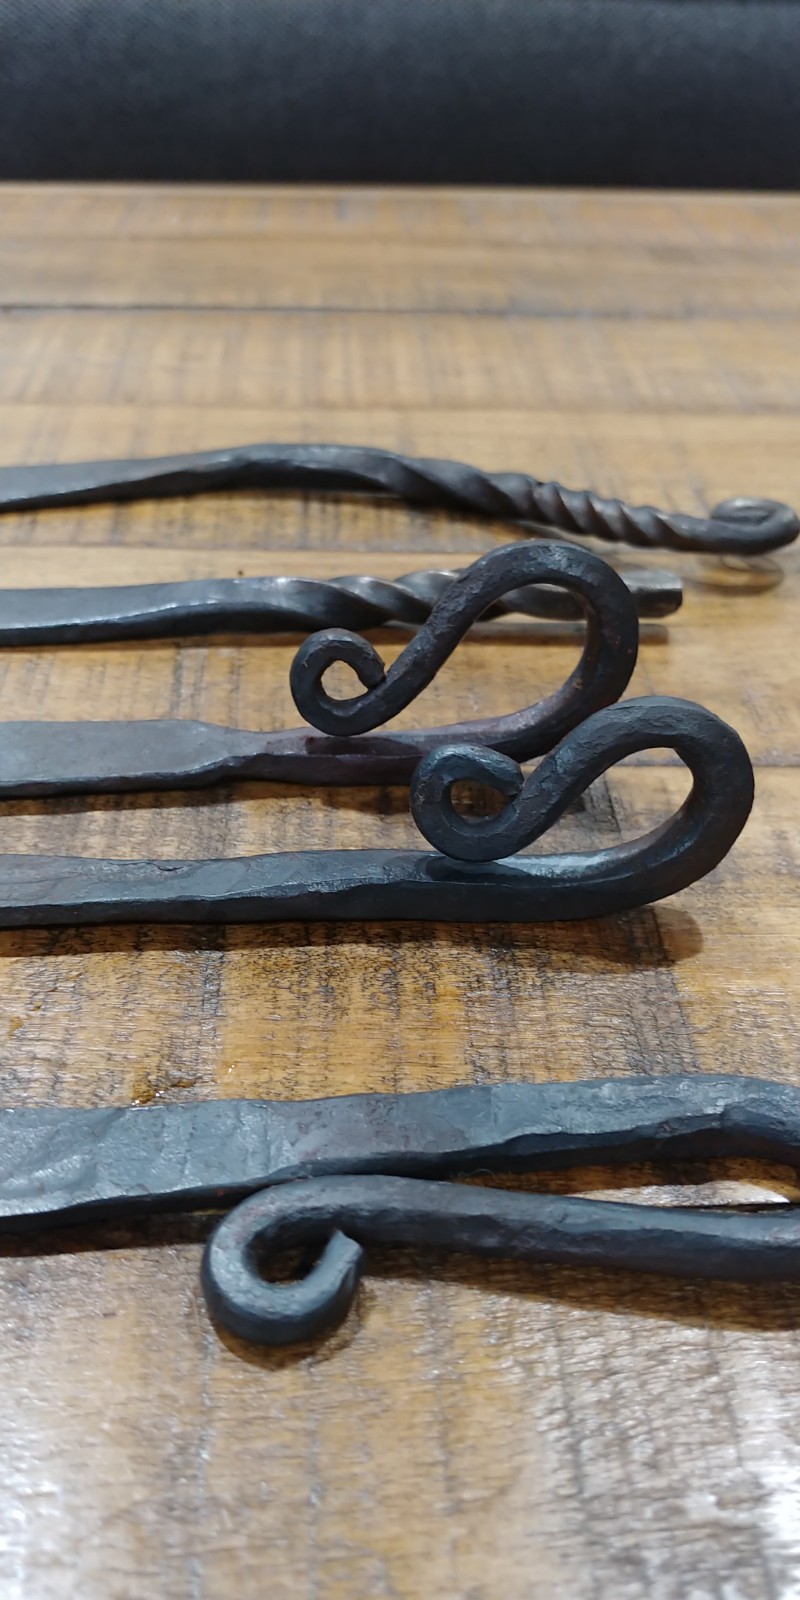
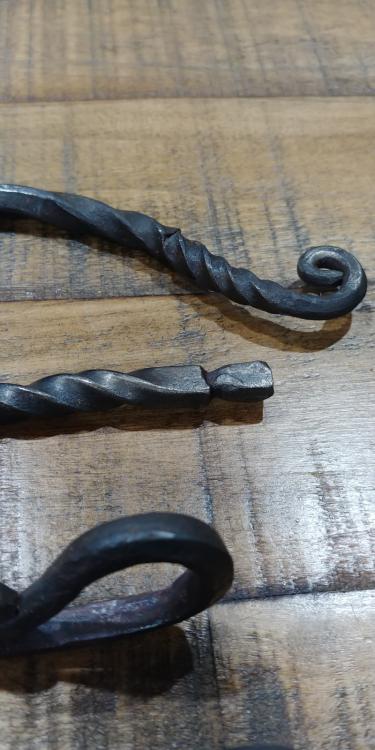
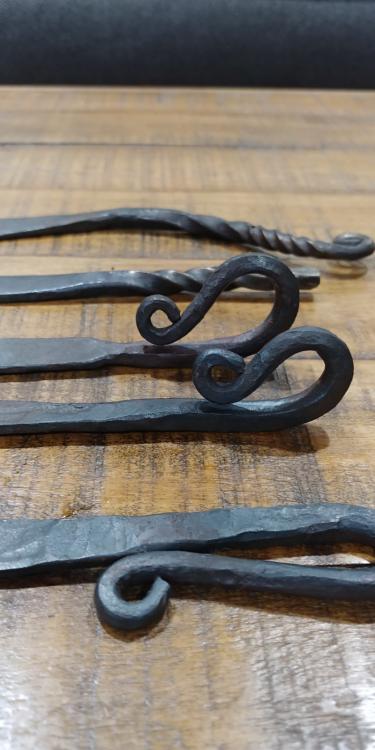
Well, I got them finished; delivered this morning. I was unable to meet face-to-face with the Event Coordinator -- for each other's safety, of course -- so I'm not sure how they feel about them. I hope they like them. They work just fine... I just know I could have done better, aesthetically. I went with the style seen in the picture below for the remaining 10. They are made from 3/8" coil spring, at varying lengths. After showing the first 15 to my boss, he asked that the rest be made shorter, so they range from 8" - 3.5". I used a flap disk and wire brush attachment on the angle grinder for clean-up and to lightly shape and round the edges, and finished them with Trewax. Immediate Takeaways: Time to update my dern gas forge, it's just not achieving the heat I need long-term, especially for higher carbon steel. I'm sure it's my homemade Venturi burner and insufficient regulator, but that's another project for another day. It would have been tough to keep up with the coal forge, as I make my charcoal as I go. Don't take (create) the job if I won't have enough time to meet my standard of work. Obtain/forge a flatter. Keep working on the taper (and range) of my scrolls.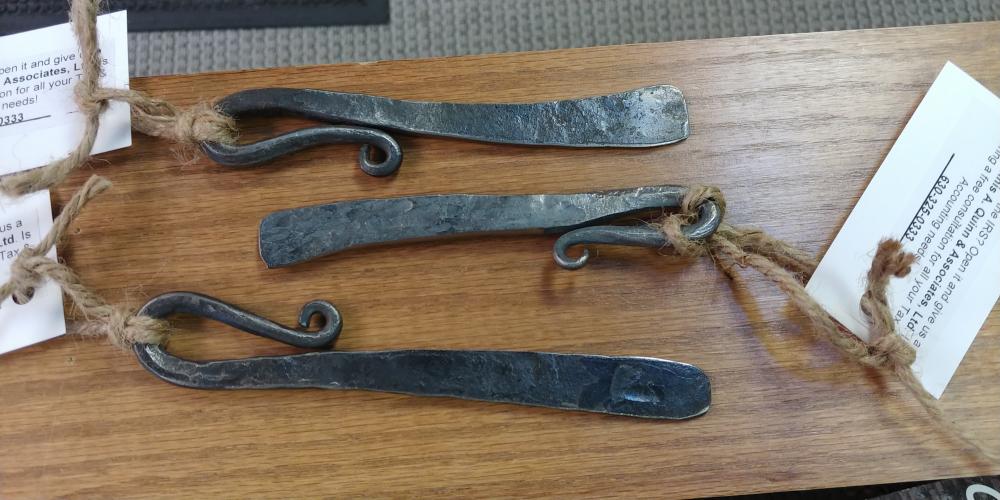
-
What did you do in the shop today?
Red Shed Forge replied to Mark Ling's topic in Blacksmithing, General Discussion
Ha! Very true! -
What did you do in the shop today?
Red Shed Forge replied to Mark Ling's topic in Blacksmithing, General Discussion
When I originally went to tackle it the day before, a friend came over with a different, weaker winch and a heavy duty ladder that works short and can extend taller. We straddled the hole with the ladder, hooked the winch to the top ladder rung and tried to crank it out vertically. His winch broke and shortly after it started raining and wouldn't let up lol. Thomas, ya know it might have one in the front, good point. We dont have the 4x4 version though, I wonder if front wheel would have mucked up the front yard. Either way, I was probably just taken away by my hype of getting to use the anvil for an unconventional purpose lol. -
What did you do in the shop today?
Red Shed Forge replied to Mark Ling's topic in Blacksmithing, General Discussion
I don't have a truck, or vehicle with a hitch to attach to unfortunately. We have a Jeep Patriot, but when looking under the backside, I could not find any safe place to hook a rope or chain... the frame is not visible and I didn't want to hook it to the wrong spot and cause a bigger problem. The original plan actually was to use my 55 barrel and the Jeep, but I talked myself out of it for that reason. Would have lagged to the actual post too, but it was all rotted and falling apart. -
show us your letter openers
Red Shed Forge replied to ausfire's topic in Blacksmithing, General Discussion
Thanks, guys. Frazer, you are absolutely right. I did over-promise for the time frame. I actually had to prioritize a fence repair in my backyard; not only was weather demanding I fix it very soon, but other factors like my 2 dogs escaping and privacy in general influenced the decision. I have 15 done so far, but I spoke with the marketing company and they had no problem giving me til Wednesday this week to finish them up. I did continue to make a few in different style, but you're right, sticking with one style will help with speed. And yes, I did test them on junk mail and have not seen any issues. Although, I'm sure they would open more smoothly with a better bevel and dull edge. John B, I had not thought of the 90* handles being an issue, but I can see what you mean. And yes, I need to add a flatter to my artillery soon. I also agree with your opinion on my scrolls... Not the first time I have received that critique, either. This is a great opportunity to hone that skill and I need to take better advantage of it. IDFCW, penny scroll would look nice, for sure. Another style to practice. -
What did you do in the shop today?
Red Shed Forge replied to Mark Ling's topic in Blacksmithing, General Discussion
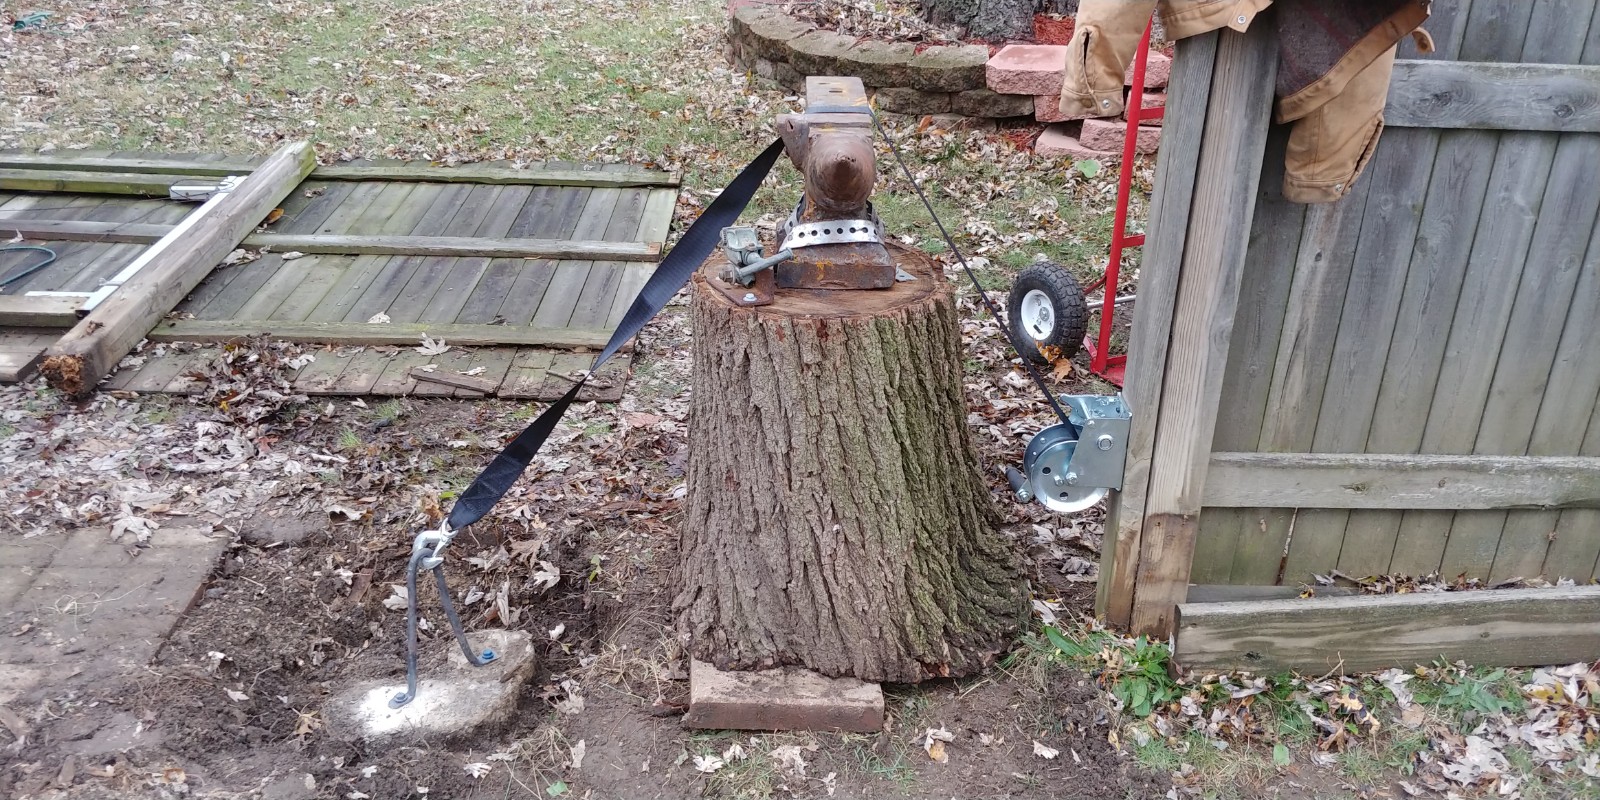
Last week high winds knocked over the gate to my backyard. With the weather getting colder and raining more often, I thought it was time to dig out the old post and replace it before the ground freezes. It's no fun digging a large chunk of cement out of the ground, so I got a little creative. I whipped up a bracket(?) from 1/4" round mild steel at the forge and anchored it to the top of the cement using cement lags. It was hard to find 2 strong spots as the majority of the block was in pieces and crumbling. From there I tipped my 100lbs anvil and attached stump onto a dolly and lugged it over to the hole and placed it between the hole and another fence post. At the base of the fence post I mounted a hand-crank winch and slung its strap and hook over the face of the anvil to hook to the bracket. After a couple minor adjustments and a few rotations on the crank, the first big chunk came right out. Had to do it all again for the next small chunk, but there after was all digging. I hate digging holes. Problem solved, anyway.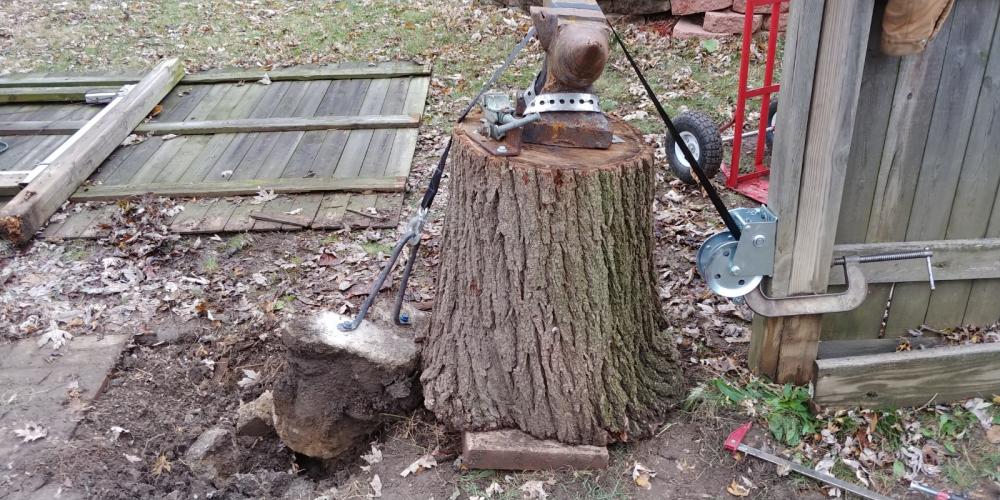

-
show us your letter openers
Red Shed Forge replied to ausfire's topic in Blacksmithing, General Discussion
I hired myself for a letter opener job. Well our family accounting firm did, anyway. I met with our local village magazine publisher last week because it was time to renew our ad and, of course, her opportunity to pitch us on an upgrade. A few times a year the publishing company sends out gift baskets to new residents of the community; in the baskets are little gifts from local businesses advertising their services or products. She says, "We have clients who order little things like cork screws and key chains, but for you guys I was thinking we could order some letter openers!" The fire sparks in my eye and, without hesitation, I agree that it's a "wonderful idea and to do it one better... I'll even make the letter openers!" Anyway, that's how I remember it. To the point: Our firm hired our marketing firm to hire me to provide our welcome gifts. I forged 2 tonight, 3 yesterday, hopefully done with ALL 25 BY MONDAY .... it will be fine. Here's what I got so far. I will keep mixing it up; it has been great hammer control practice and allows me to explore different styles. Need to focus on refining and speed most of all. Too many many hammer marks. They are finished with Trewax, but I think I put it on at too high a temp for a couple of them.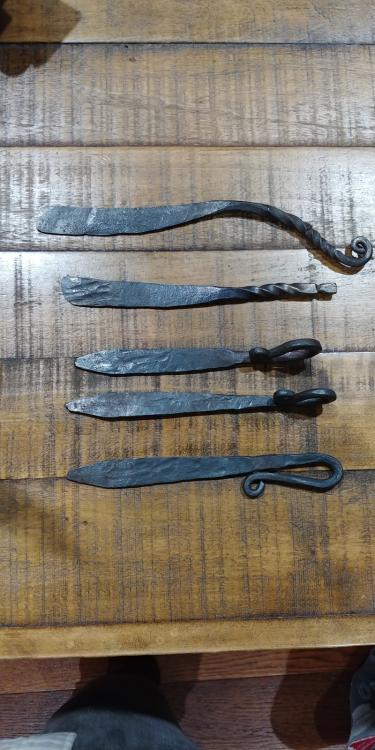
-
JLP Blacksmith Teaching Center.
Red Shed Forge replied to jlpservicesinc's topic in Building, Designing a Shop
Thomas, great point. Tax depreciation is an enabler, for sure. But, that does not mean the new machine that is replacing the now fully depreciated former machine has to be factory new. For example, a blacksmith could purchase a power hammer that is generations older than themselves, but because it is new to the business, the business can start depreciating it. A small win-win I suppose: continue the longevity of a great machine that was built to last and still reap the tax benefits (however shorter they may be). -
JLP Blacksmith Teaching Center.
Red Shed Forge replied to jlpservicesinc's topic in Building, Designing a Shop
Intentional obsolescence! You see it everywhere: toys, tools, electronics i.e. cell phones, cars etc. Just the other day at the office we had a repair guy come out for our large photocopier. Was just a routine cleaning and checkup in preparation for tax season, but this time he suggested that we start shopping for a new one soon as "this one is getting old." "What? it's only 5 years old." "Yeah but they upgraded and don't make this one anymore, so parts will be harder to find an more expensive. You can sign a new maintenance contract on it, but it will be more expensive to fix if it needs to be. The new one has all these bells and whistles you don't need, but you should buy this instead." I wish I had started tinkering and fixing earlier in life because I agree with the manifesto as well.... just not very mechanically skilled (yet)! -
What did you do in the shop today?
Red Shed Forge replied to Mark Ling's topic in Blacksmithing, General Discussion
I woke up to find the gate to my backyard was knocked over by the 65mph winds we had here last night. Broke right at the base of a post. The good news: the chimney to my forge didn't even budge. -
Show me your blacksmith pets
Red Shed Forge replied to Glenn's topic in Blacksmithing, General Discussion
These two good boys kept me company this weekend as I was prepping for a project. Cosmo (facing) & Charlie!
-
Thank you, Thomas. I believe I have some scrap WI from the first pair of tongs that came with my first anvil. I broke them in use a couple years ago, forgot about them and then came across them the other day. I will use the pieces as practice before I tackle these brackets.
-
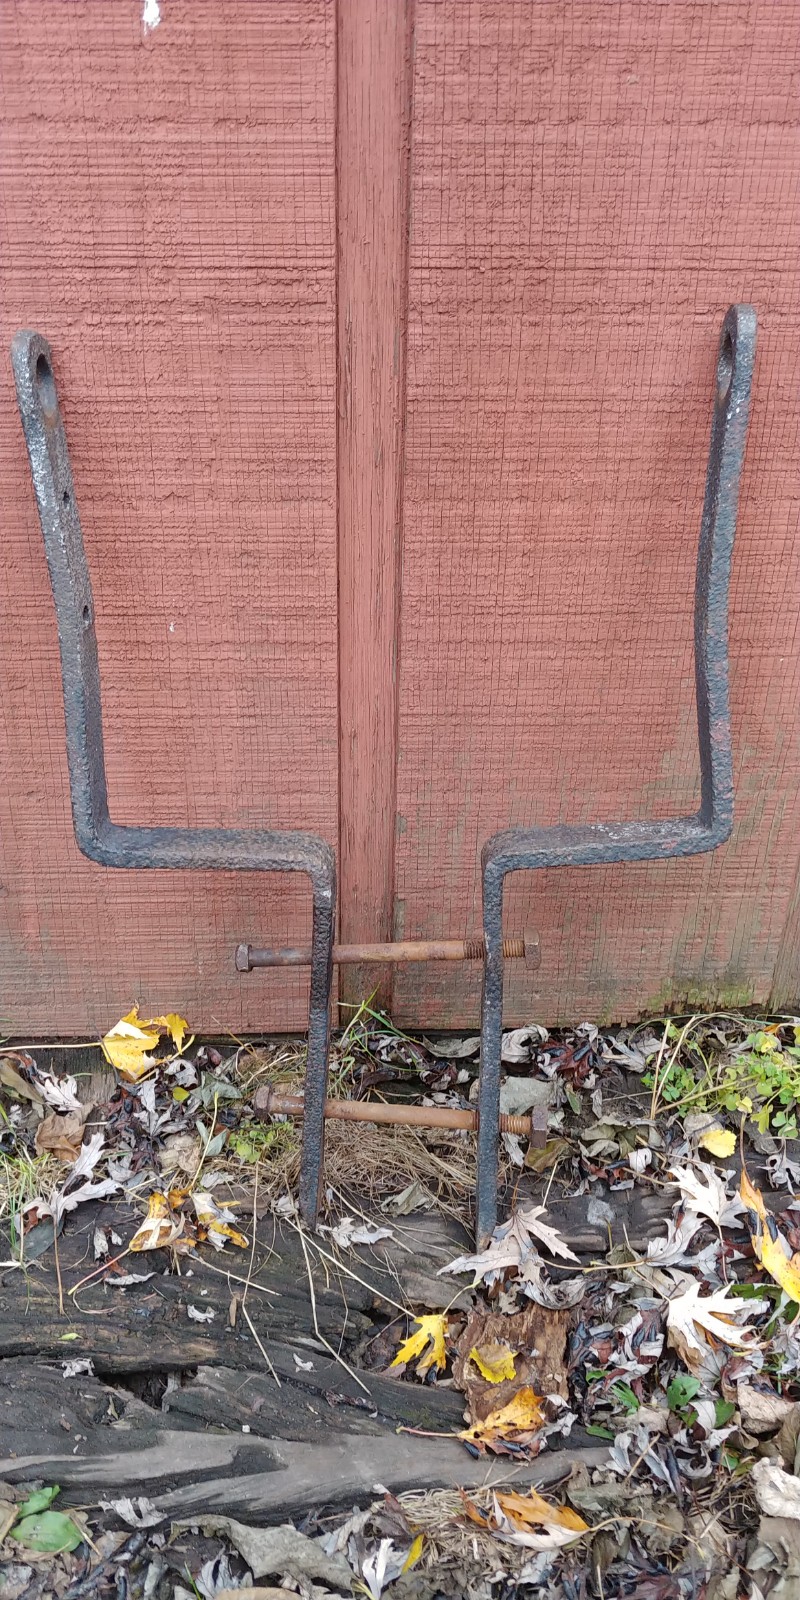
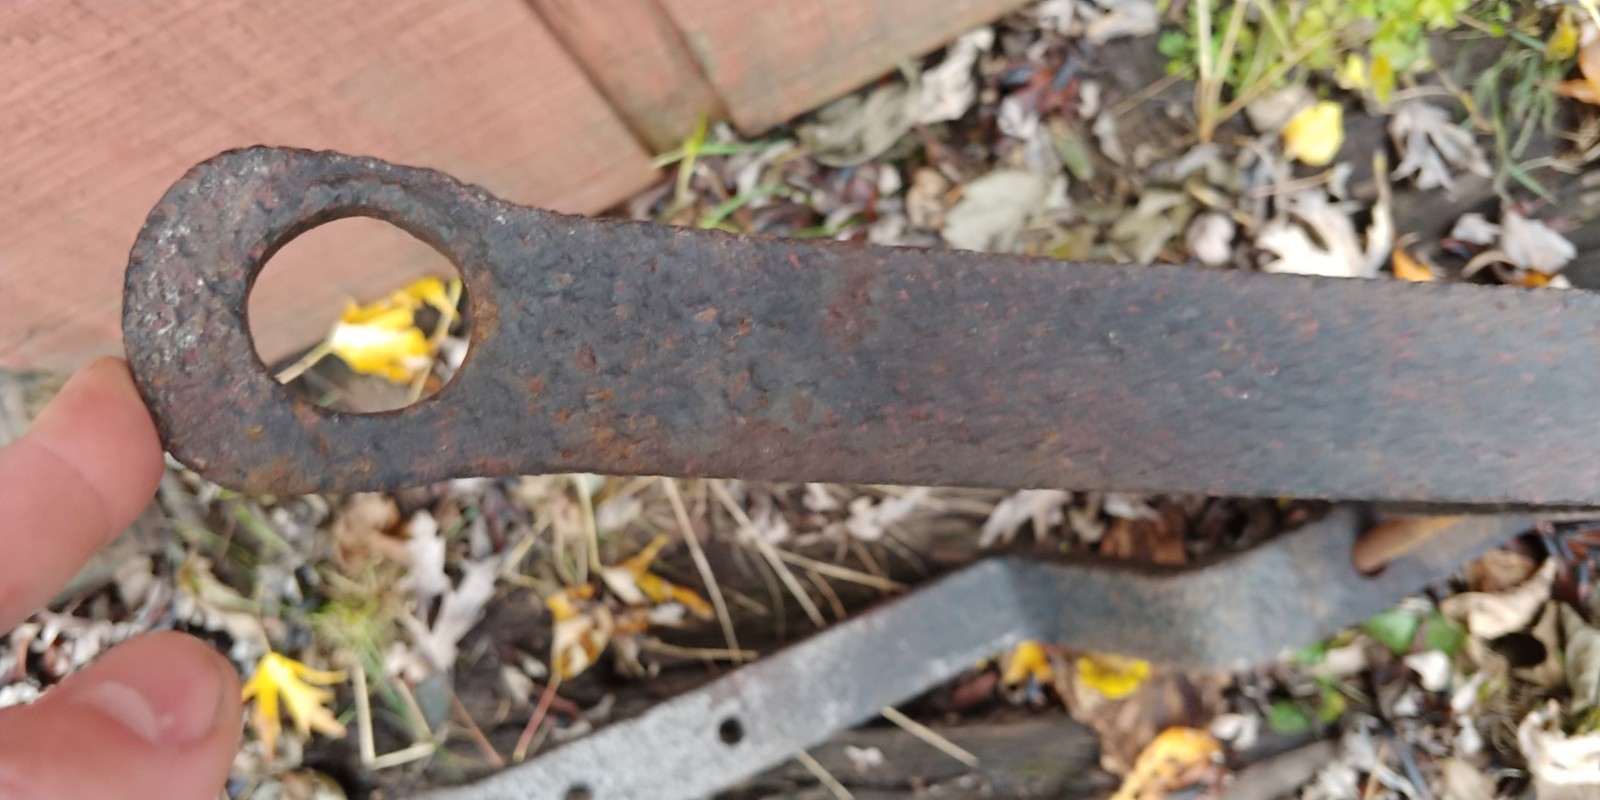
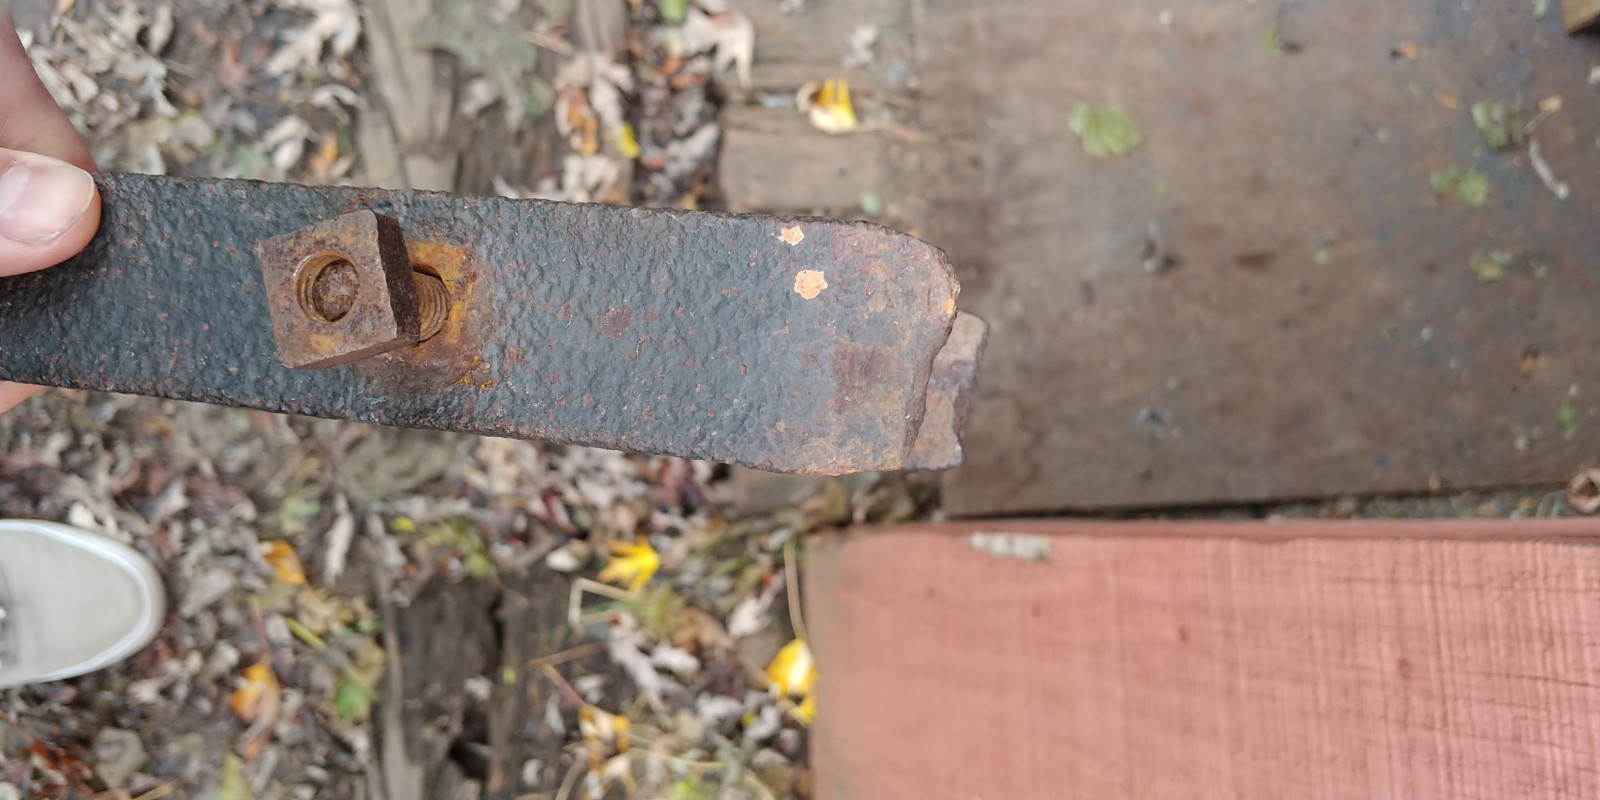
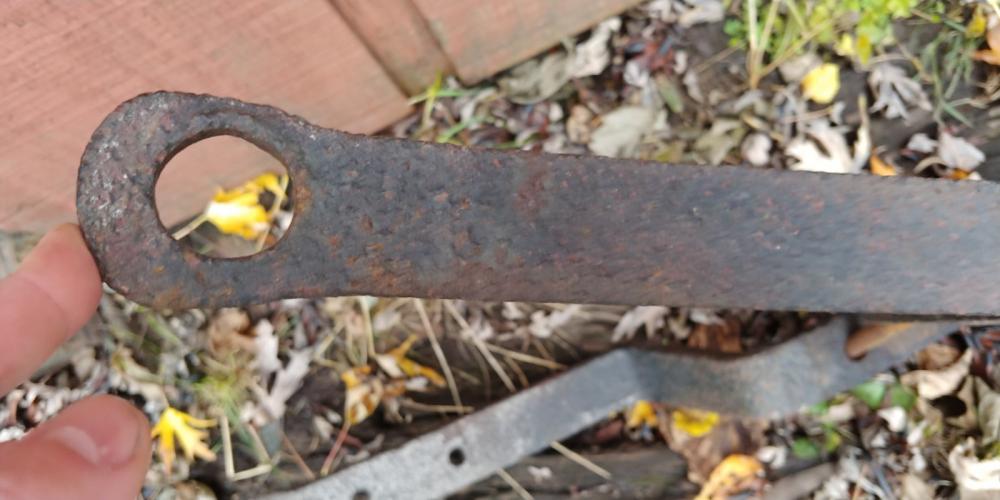
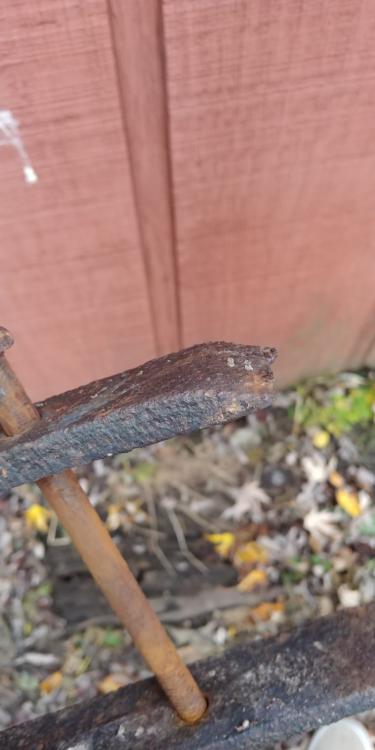
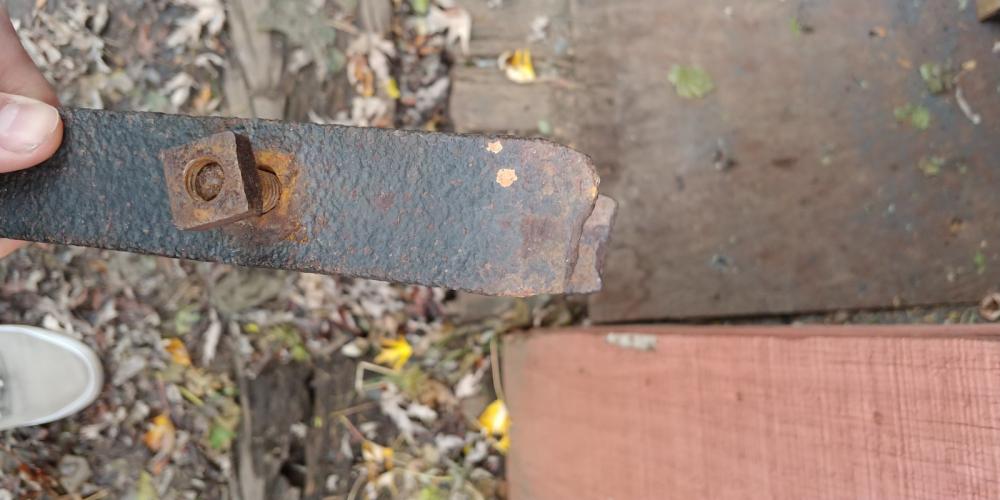
So yesterday the original brackets were delivered from Wisconsin. I think they are wrought iron. I did a spark test and the sparks were a very dull orange, did not travel far and did not flare out at the end. It also kind of looks like the larger holes were drifted based on how the material looks to be pushed to the sides of the holes. The ends opposite the large holes also look to be beveled by hand. Since it shows signs of forging, I assume it is either WI or mild steel, not cast. I also think they are not original to the bell as one of the longer vertical arms has 2 smaller holes below the large hole, where the other does not. Thoughts? The owner wants me to use them on the hangers. At first I was thinking of using them as the 90* frame bordering the scrolls, but they only measure 22 1/4" long each. Thinking as I type, I should have measured the diameter of the bottom of the bell to see if 11" will be far enough from a wall to allow the bell to swing properly. Hmm. I will measure later today when I get home. If not, I will find another way to incorporate them.

-
I agree with anvil. I recently built a Uri Hofi-style coal forge for the inside of my shed. For the horizontal piece, I used a steel filing cabinet that I found through an online marketplace for 20 bucks. For the 12' of vertical chimney I bought 8 pieces of 6" x 36" black steel piping from Menards, connected them to form 12" diameter pipes and then stacked them. Total cost for all that was maybe 80 bucks, IIRC. Before I ventured to build it, I considered building an outside forge too, but the memory of harsh winters here ultimately deterred me. I am glad I went with this style. Although it took all day for 2 of us to gut the cabinet, put it back together, cut a hole in the side of the shed and make sure it is still structurally sound, connect the piping and stack and secure it, it was totally worth it. The cabinet was a bit wider than I would have preferred at 18", but it starts sucking with just one lit section of Farmer's Weekly Review. I use charcoal and I love how it performs.
-
What did you do in the shop today?
Red Shed Forge replied to Mark Ling's topic in Blacksmithing, General Discussion
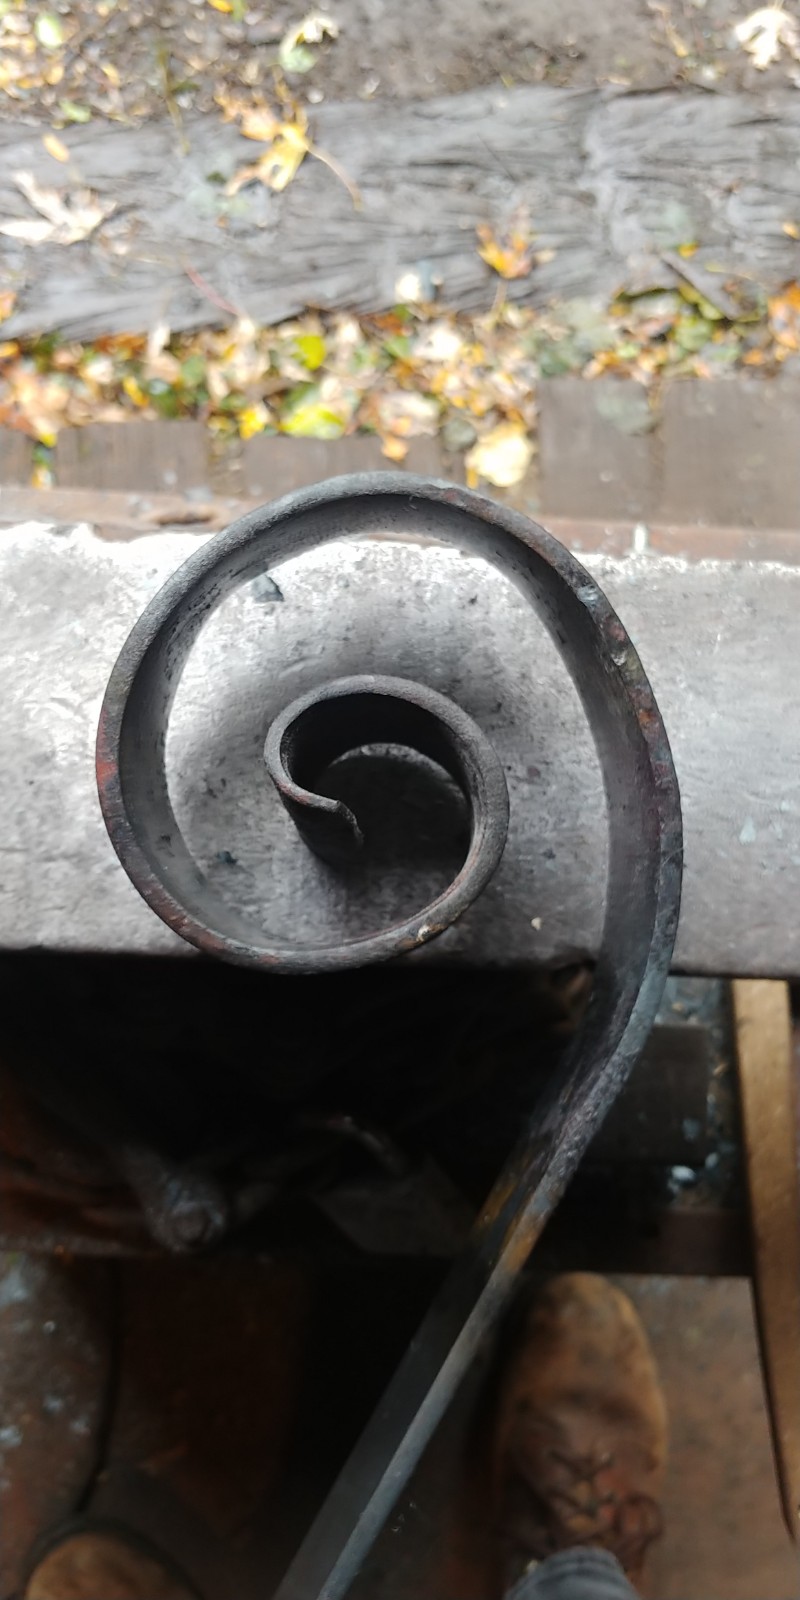
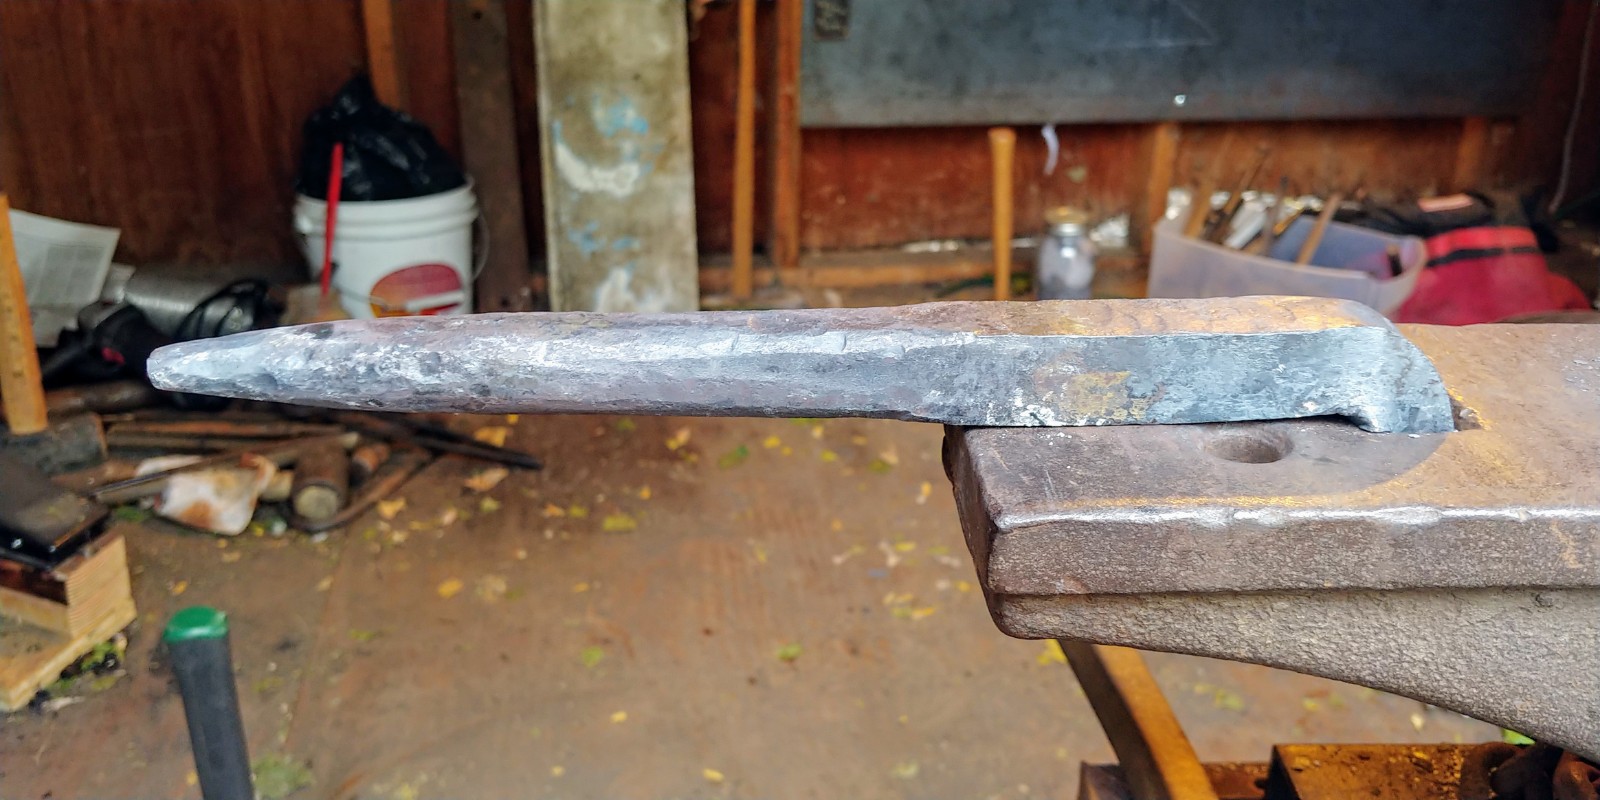
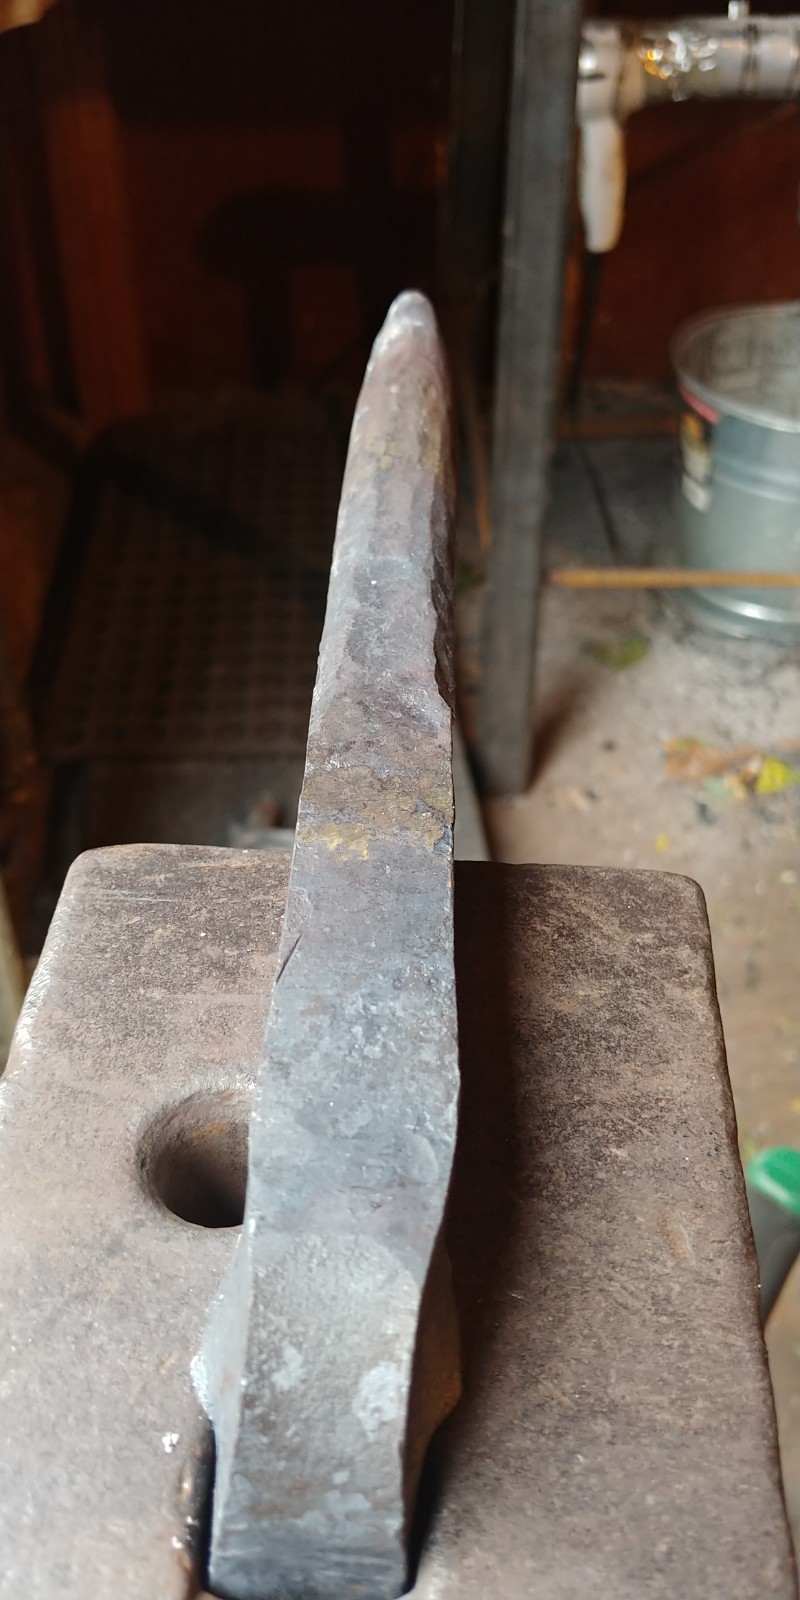
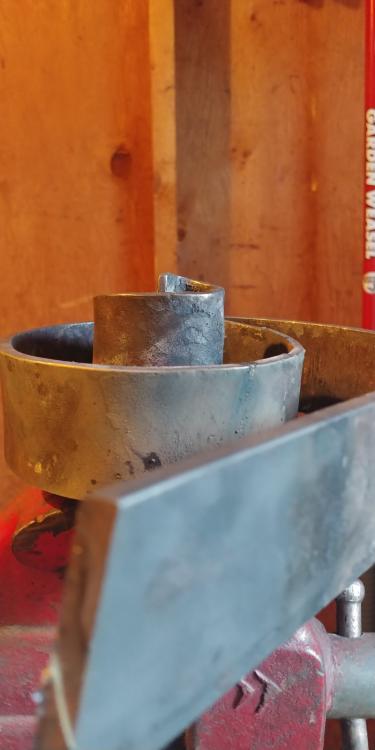
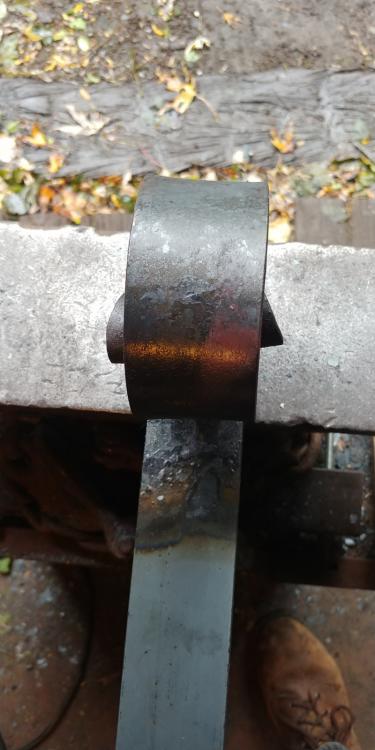
Lots of great work here recently! alexandr, JHCC: all very impressive. Yesterday and today have been about preparation for two big projects I have in the works. In order of appearance: A scrolling jig, an example of what it can produce, and a hardy bick from high-carbon 1" bar. None are perfect, but will be indispensable for the WIP. I probably should have forged the bick before I finished and tested the jig because the jig could clearly use some fine-tuning. But, I am happy with them as first-attempt tools. I have also been practicing fishtail scrolls because that is the style my customer would like. You can see from the second picture of the test scroll that it is crooked as a result of lack of adjustment during scrolling... and probably because the stock is the same width as the jig stock. I think some scrolling tongs will be in the works soon!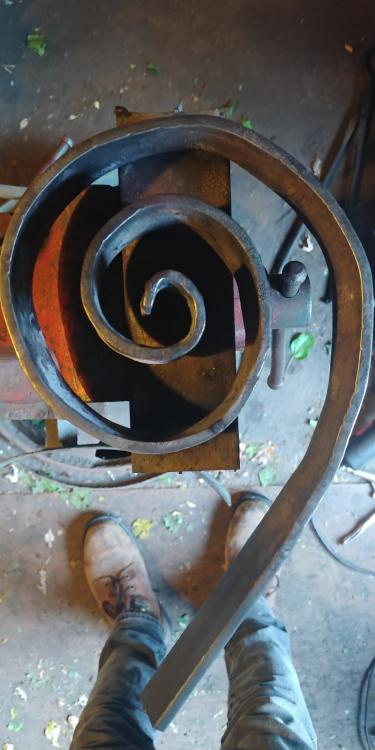


-
Gotcha. Ok, that makes sense as to why to grind so much. Oh yes, I expect a lengthy process. I did go to 2 shops. At the first one, the entire staff working that day seemed completely baffled and didn't really want to give me a confident answer, even when referring me to the chart. Helpful and concerned, but not completely sure. The 2nd just pointed me right to E99. If you are up for it, there is a guy on YouTube who has a really good series of videos on welding CI. He tries different rods, processes and strength tests and does a good job explaining himself. So far, based on what he has shown, I am most convinced that, if done correctly, I will achieve the strongest and best-looking weld with the Muggy Weld CI repair process. Google, "Stick Welding Cast Iron Repair With Muggy Weld - YouTube." It shows up on my page as the 2nd one on the list. He does not pre-heat, but in another video's comments he recommends pre-heating much thicker stock, as this project is. Although the finish is a different color, after grinding it looks like it never even happened. Plus, after annealing I should be able to blacken it, right?
-
Thank you again for this detailed explanation. After asking 2 different welding stores, friends and family who weld and braze, and a guy I found online who sells welding rods, I have decided that the best rout to go here is to weld the yoke, not braze it. The only examples and relayed experience I could find for brazing show/say it should be done with either brass or bronze rods. With it being a load-bearing project, I am skeptical of the strength of those two. The most confident advice I received was from a GM of a Praxair store who recommended (without me mentioning that I was already considering it) using E99 Nickel rods for the weld. So... that brings me back to the way you would tackle the project. But first, those rods that you cannot remember, does the brand Muggy Weld ring a bell? I only ask because they are expensive like you mentioned and seem to be able to do what I would need. As for the quote I have: do you mean that I should grind all the way from the back side to the weld I just put down on the opposite side? It just seems like I would be grinding pretty deep as it is a half inch thick, I believe.
-
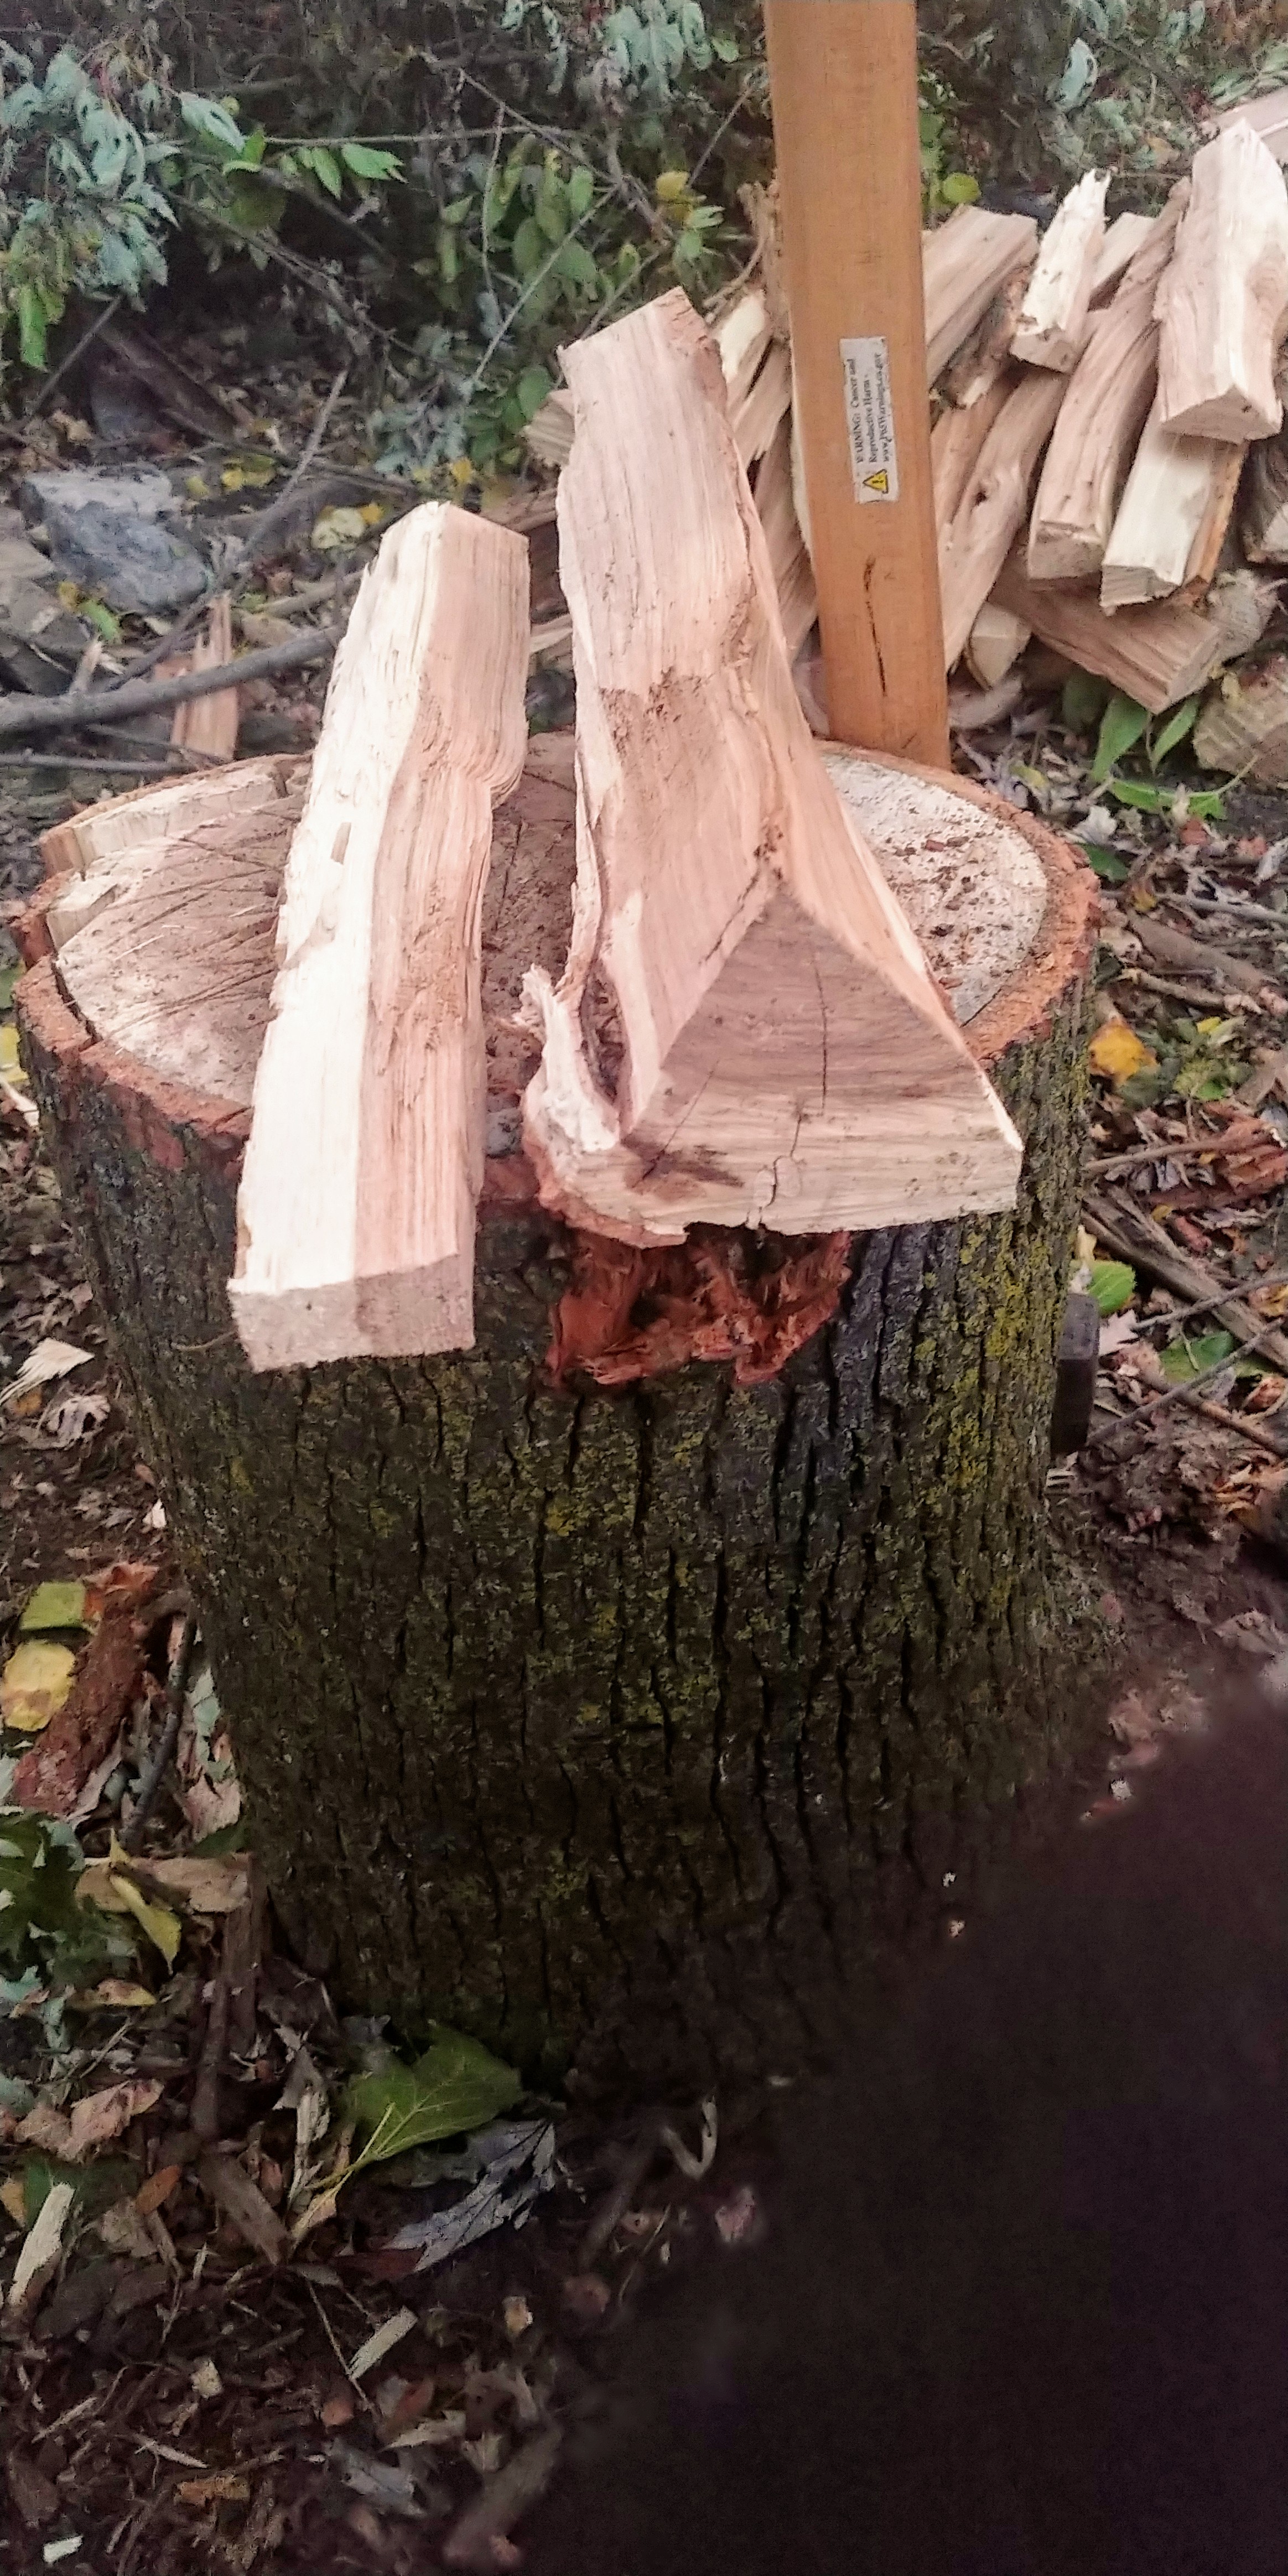
All very helpful info guys, thanks. Of course, books! How strangely unsettling it is that it didn't even cross my mind to reference books. The advent of the vast internet can sometimes be quite limiting with its immediacy of information, it seems. That's my excuse, anyway haha. I hewed some of the maple tonight with plans to make the charcoal tomorrow. I have made about 10 batches since I started a few months ago and that experience has led me to find that, with the can-in-barrel technique, there is an ideal size log that I should try to achieve. In the attached picture, the chunk on the left is about 1/2" thick by 2" wide and the one on the right is near triple that. Not only will it be easier to break up and thus provide more manageable bits in the forge, but the smaller chunk will also burn (bake?) in the can faster and with less tinder. Here's hoping that the same is true with a harder wood like maple.

-
SLAG, That does help, thank you. Great idea to make my own key with pictures of leaves with the log, I will do that going forward. I did look for a comprehensive key online, but all I ever found were keys that showed what the wood looked like in finished or floor-sample form; one that shows it in logs would be ideal. I will do a better search here soon.
-
That was my thinking on the Maple too, didn't seem dark enough. Nice, I'm cool with that. He did not mention having an apple tree, but I will take a closer look at the bark when I get home and see what I can conclude. Thanks!
-
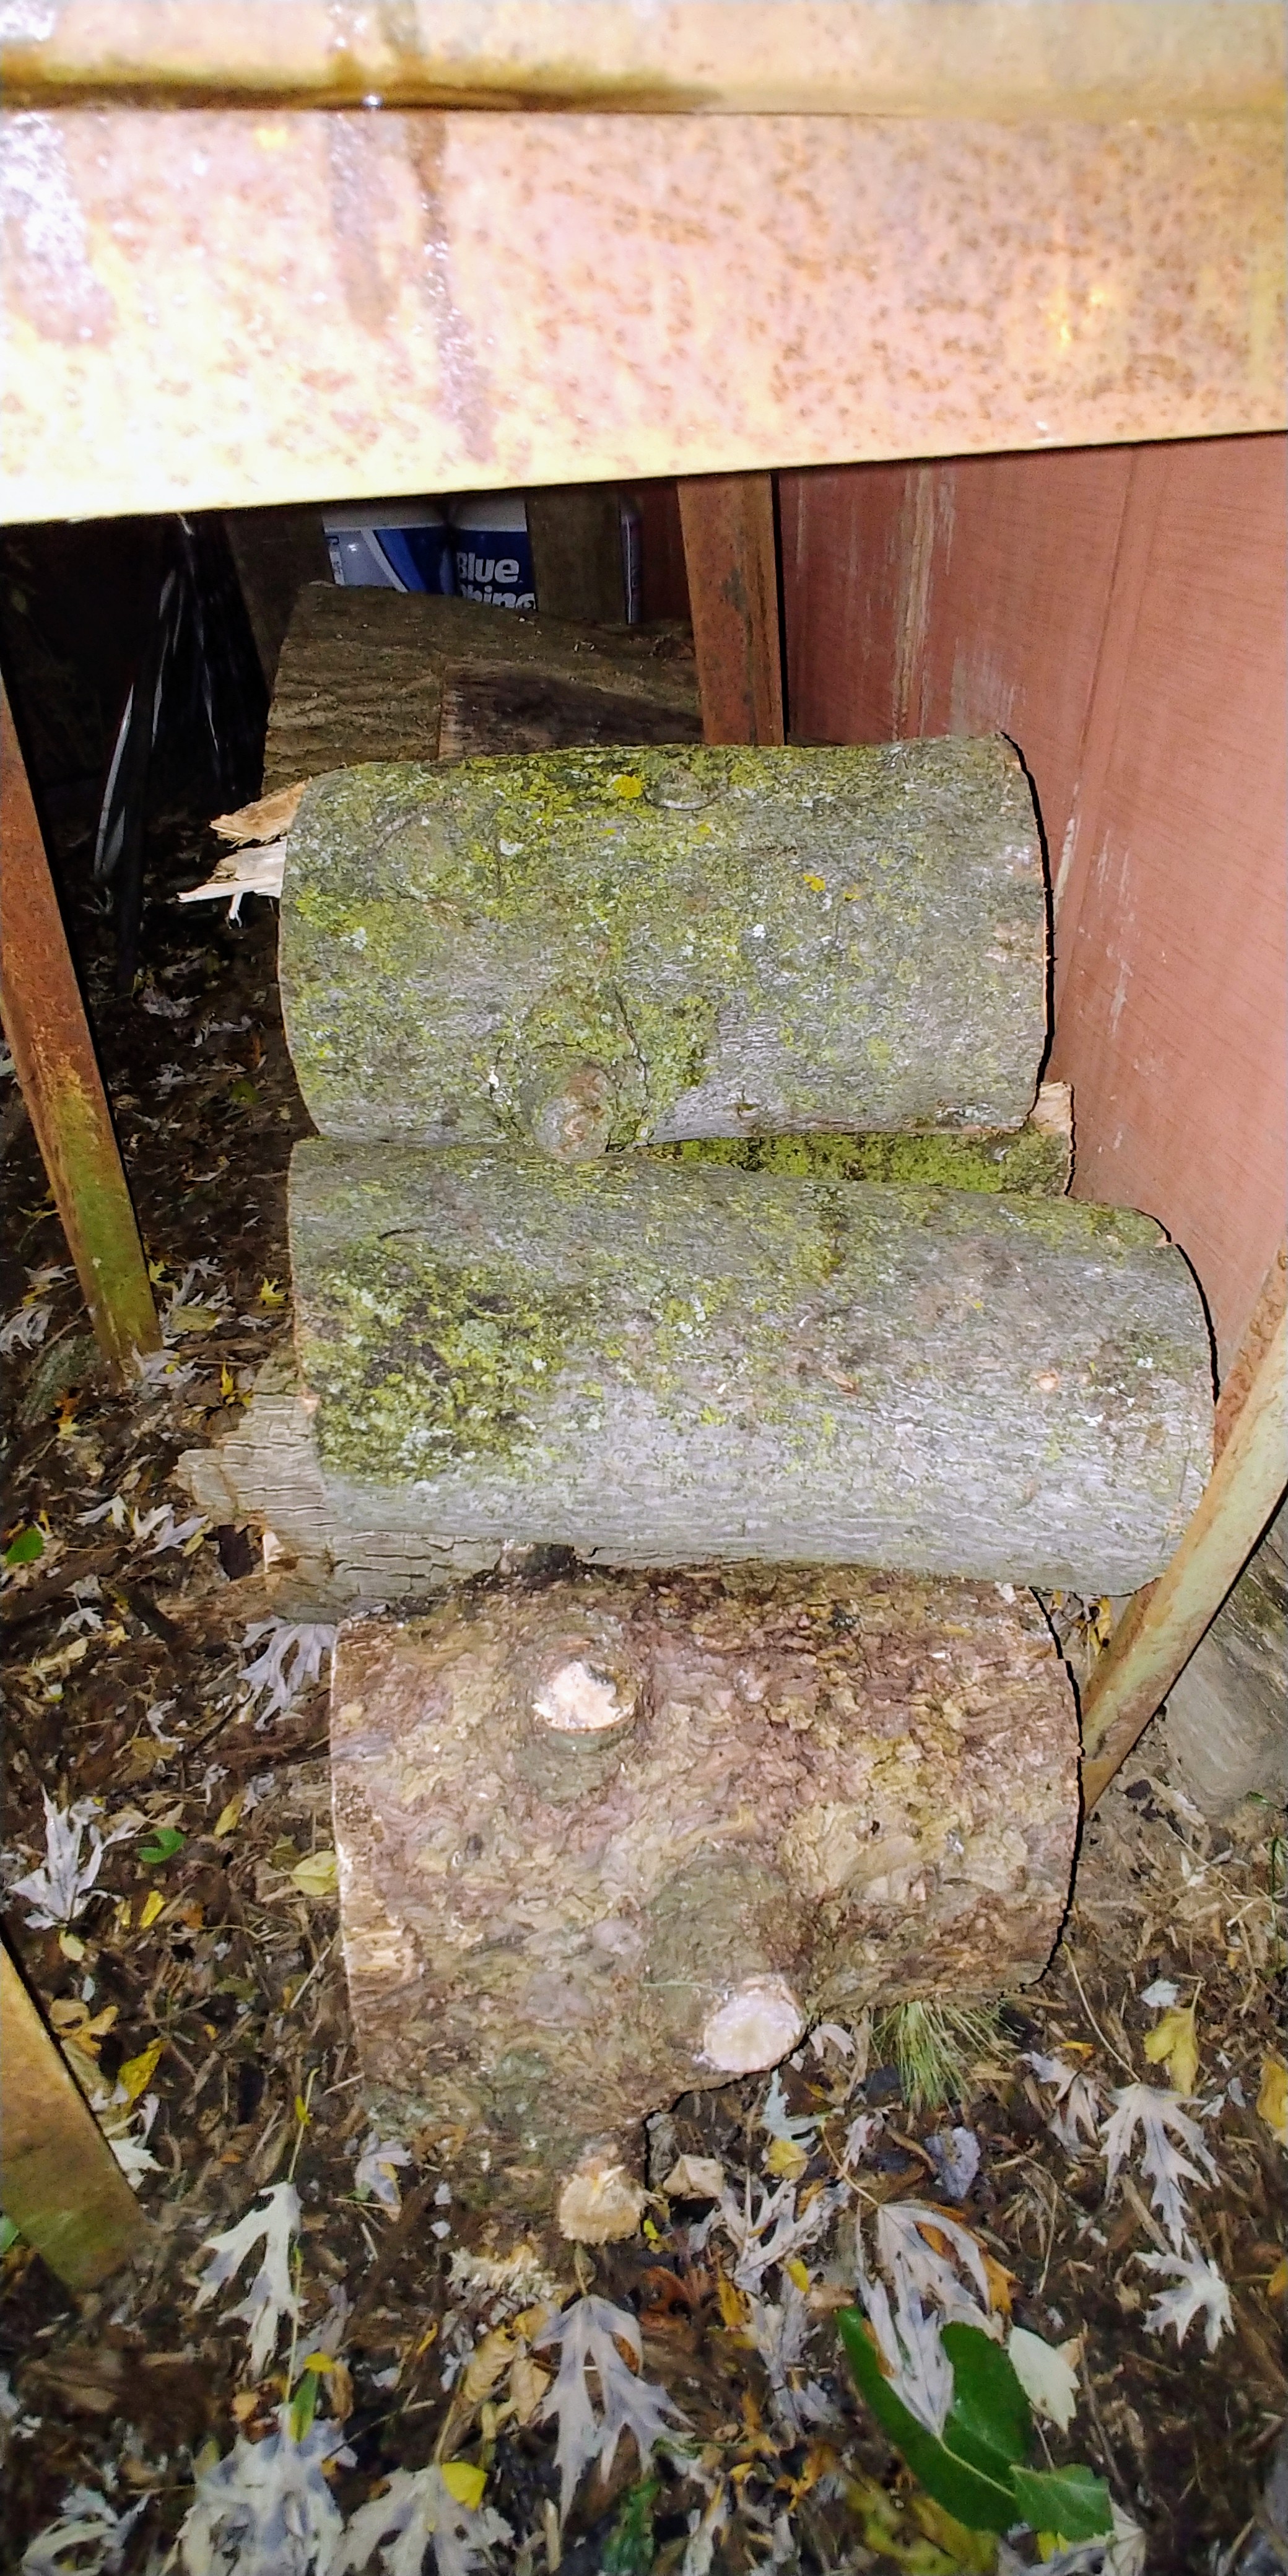
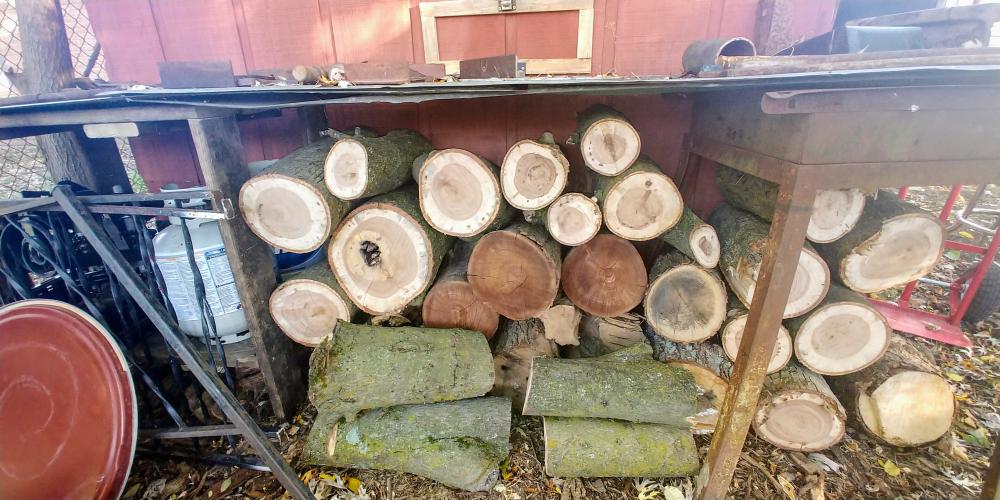
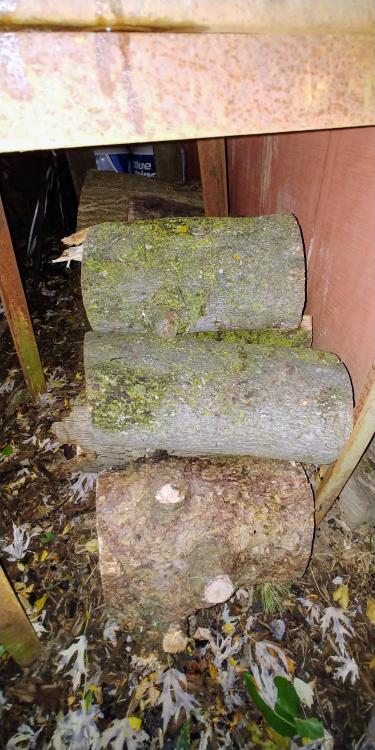
Last night after work I made a trip about 40 minutes west to Elburn, IL where an old friend had just cut down 7 trees on his property. I told him that I would like to use it to make charcoal for my forge and he said I could come by and grab as many logs as I could haul, no charge. What a great guy. The best part about it is that the majority of the haul is hardwood! He believes it is English Walnut, his neighbor thinks it is Black Walnut and I, after some research, think it looks very similar to hard Maple based on its bark. Although we are no experts, I know the logs are hard and heavy when compared to the pine that I also grabbed. He also had a few logs of another species that had been sitting on a pile for some time that he told me to take; we do not have a good guess of its species. The picture shows the Walnut/Maple on the top of the pile, with the unidentified reddish heartwood on the bottom. If anyone has a guess as to its species, let me know! The pine is out of the picture in a separate pile. The second picture is of the bark of the possible Walnut/Maple. I am excited to see how it all acts as charcoal! Thought of using the heartwood for scales/handles as well.
-
What did you do in the shop today?
Red Shed Forge replied to Mark Ling's topic in Blacksmithing, General Discussion
Yeah, one of those would be perfect. Will have to pen a grid on it, for sure. Paint pens, my mom would call them when prepping for her flea market in the morning. Little spooky faces painted on 4x4's, this time of year! Thanks for the memory. I picked up some craft and speaker magnets today and started work on a recently commissioned machete. Working on that and a stand for the drafting table has really gotten me acquainted with my new coal forge. As a result, I think I will be practicing forge welding soon because my uncle would like a tomahawk. I want to wrap it and weld it to a mild steel edge. I am also learning to balance and manage gift projects with personal-need projects with commissioned projects! Of course, I couldn't ask for more. -
What did you do in the shop today?
Red Shed Forge replied to Mark Ling's topic in Blacksmithing, General Discussion
Goods, I actually plan to write with soap stone or chalk on the steel-face and chalkboard sides. The magnets would be to hold miscellaneous small tools, paper sketches, yes, but I thought I might also use them to prop-up the hot steel I am working with if I need to compare its size and shape to that which I drafted; the drafting table will be at an angle and some pieces will require some momentary support. -
What did you do in the shop today?
Red Shed Forge replied to Mark Ling's topic in Blacksmithing, General Discussion
JHCC, See... that's why I post here. Great idea! Just need to get a latch for the top and some paint. Might even forge a latch! Thanks. Thomas & Glenn, I thought about magnets, for sure. Did not know they were called speaker magnets though, that helps with finding the right ones. Definitely going with the bag in a bag idea too, thanks! I learned the other day that some people who practice and collect Hoodoo are often looking for anvil dust for their "Goofer Dust" and other concoctions. What an interesting biproduct to monetize!