frozen_coyote
-
Posts
15 -
Joined
-
Last visited
-
I finally got the forge back together. I had it going for about 5 minutes when I took this video. It looks like it's burning oxygen rich but I'm pretty happy with it. I'm not sure how hot this will get. I'll have time this weekend to get some steel in it and really test it out. IMG_2027_HEVC.MOV
-
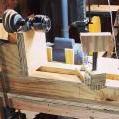
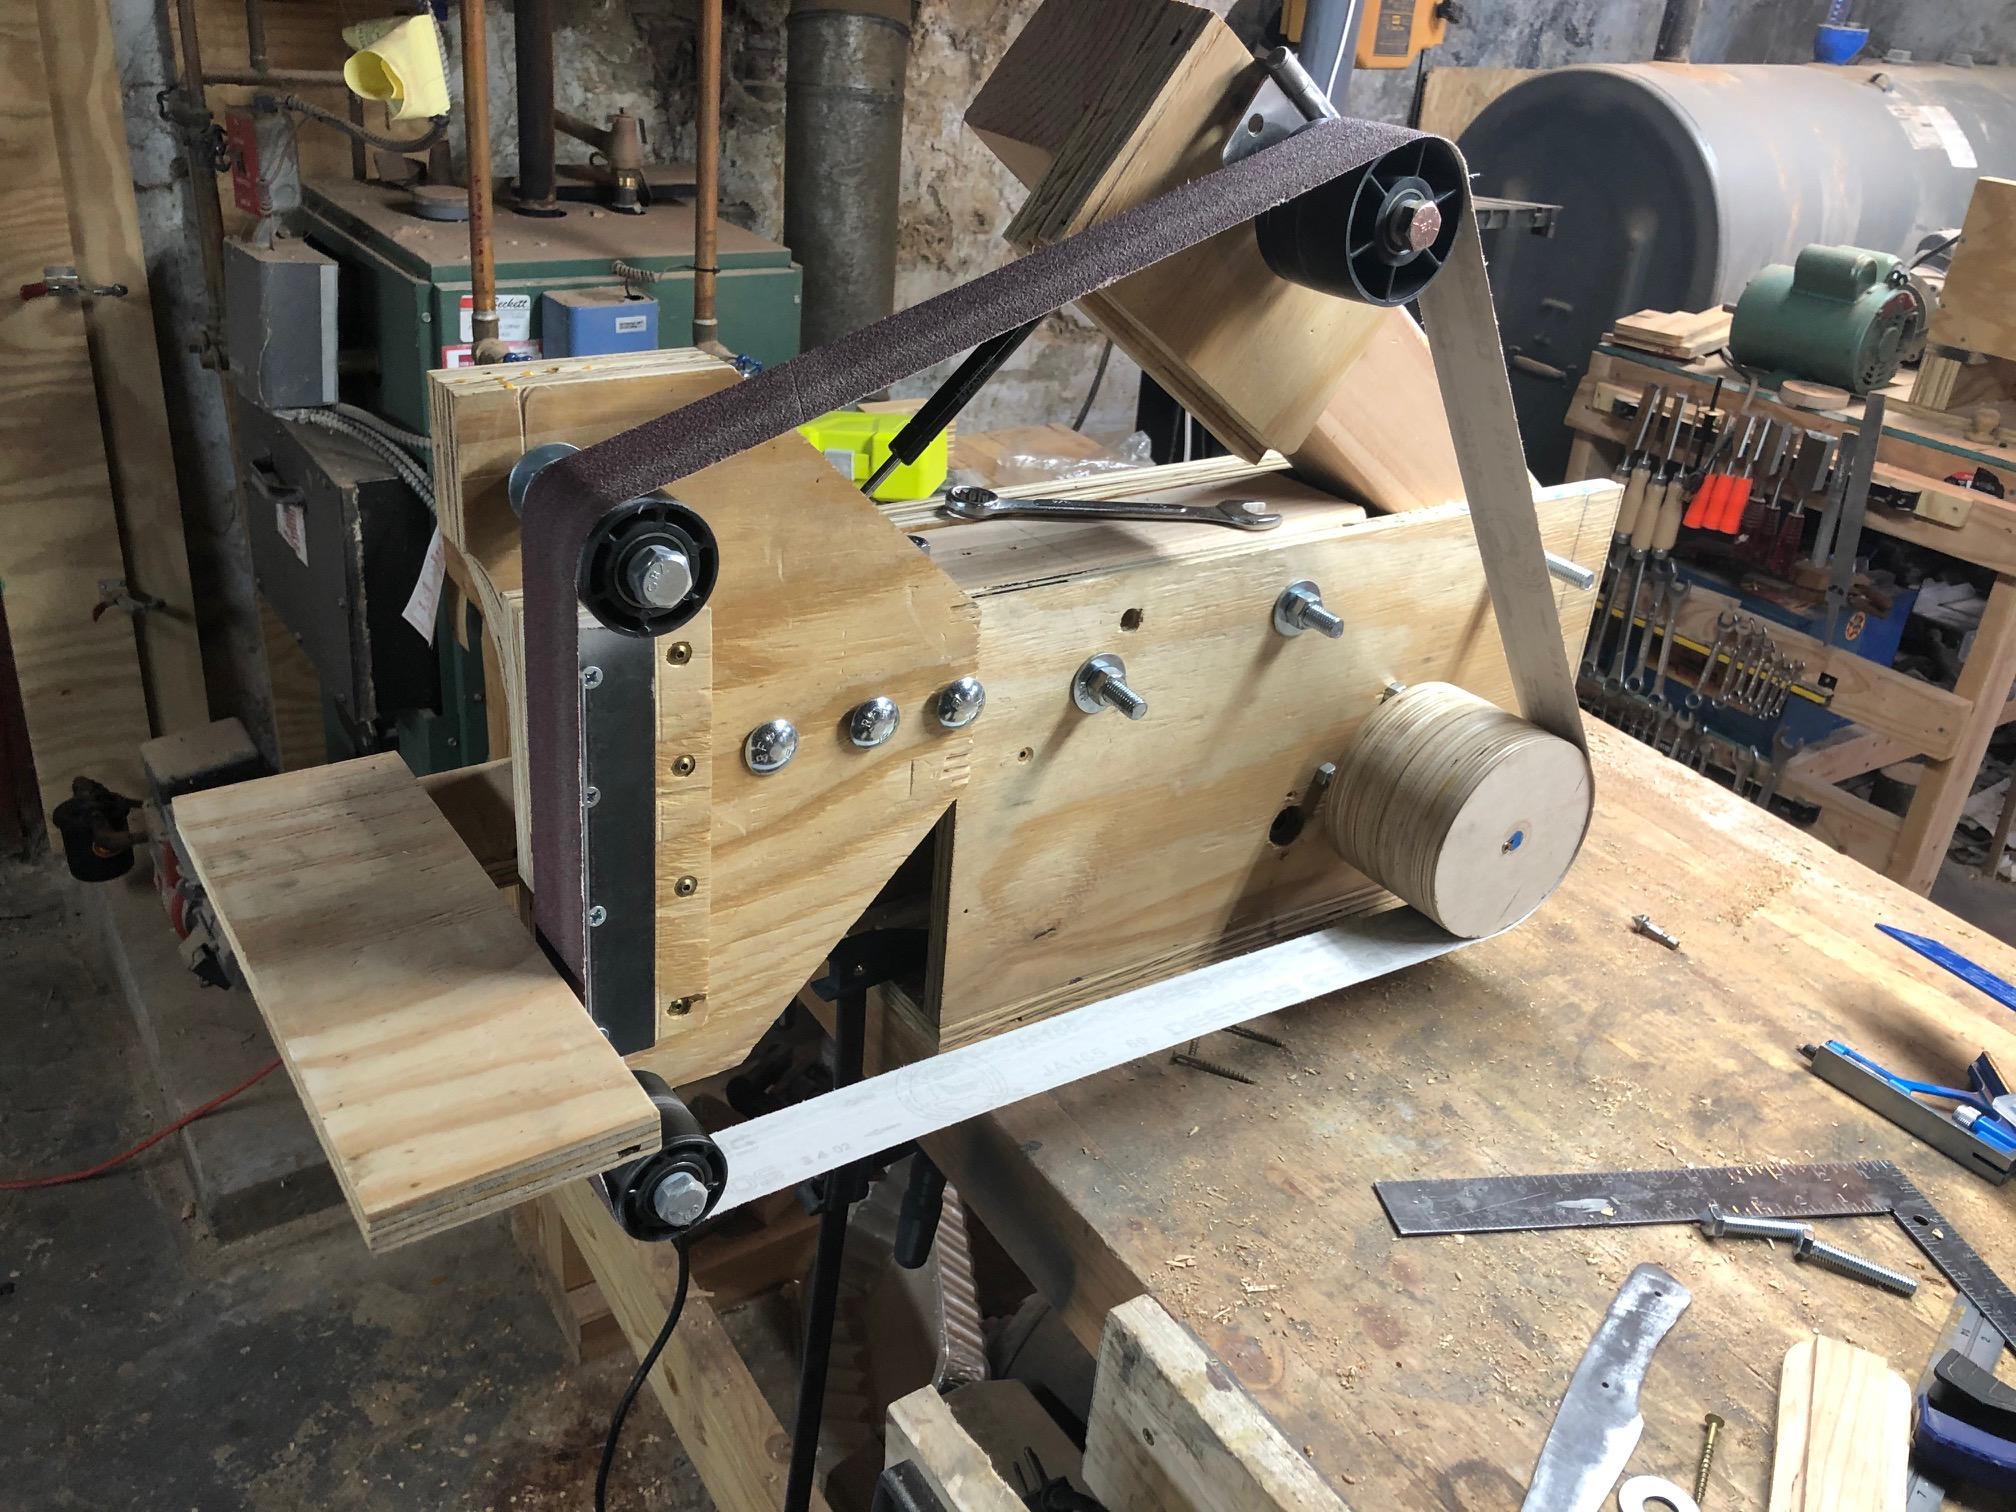
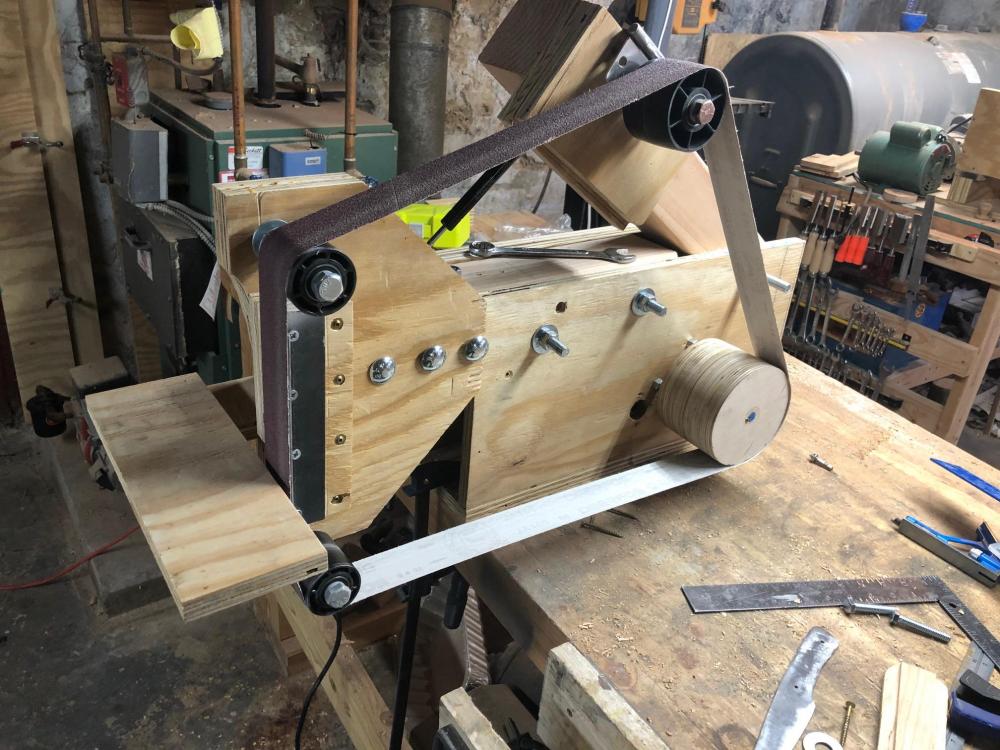
I fell off this build for the past few weeks. I had the forge assembled and was ready for testing but the weather had other plans. The forge took a hit during a storm and I walked away for awhile. Finally got the parts back in for my new manifold and I'm putting everything back together. These few weeks were fruitful though because I decided to build a 2x72 grinder. I imagine it will not be taken well because I built it out of a sheet of plywood and an untreated 4x4. I'll put a picture below but it tracks well and now I'm back to building this forge.
-
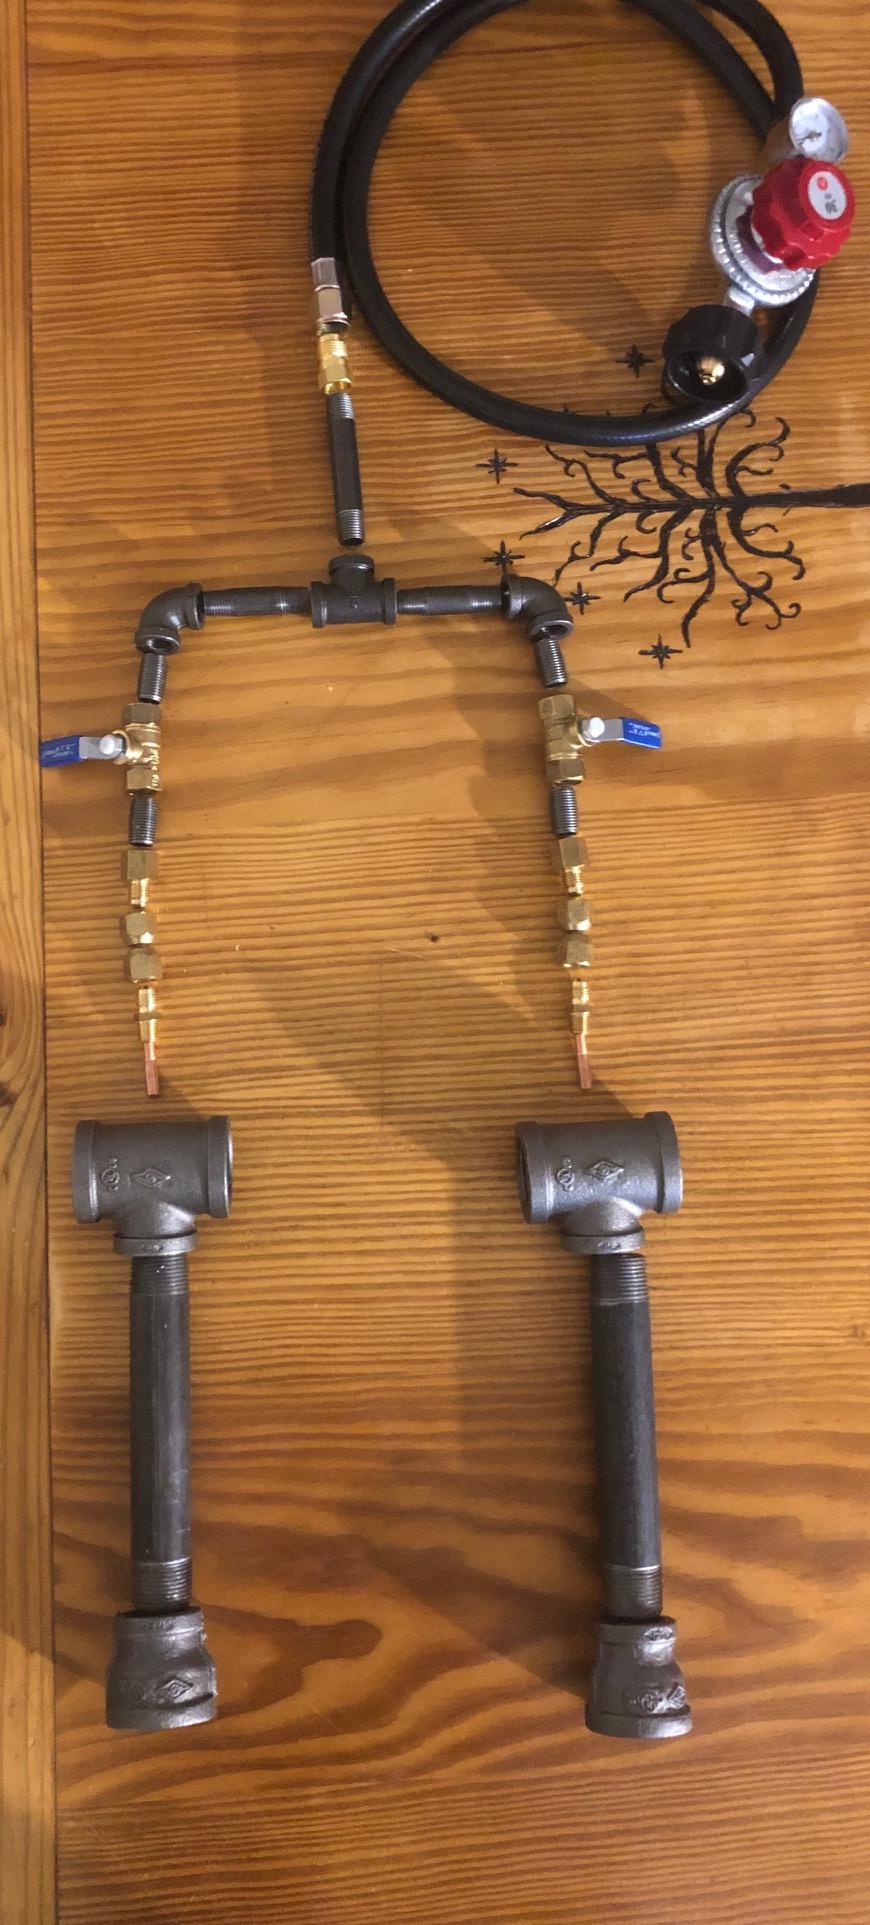
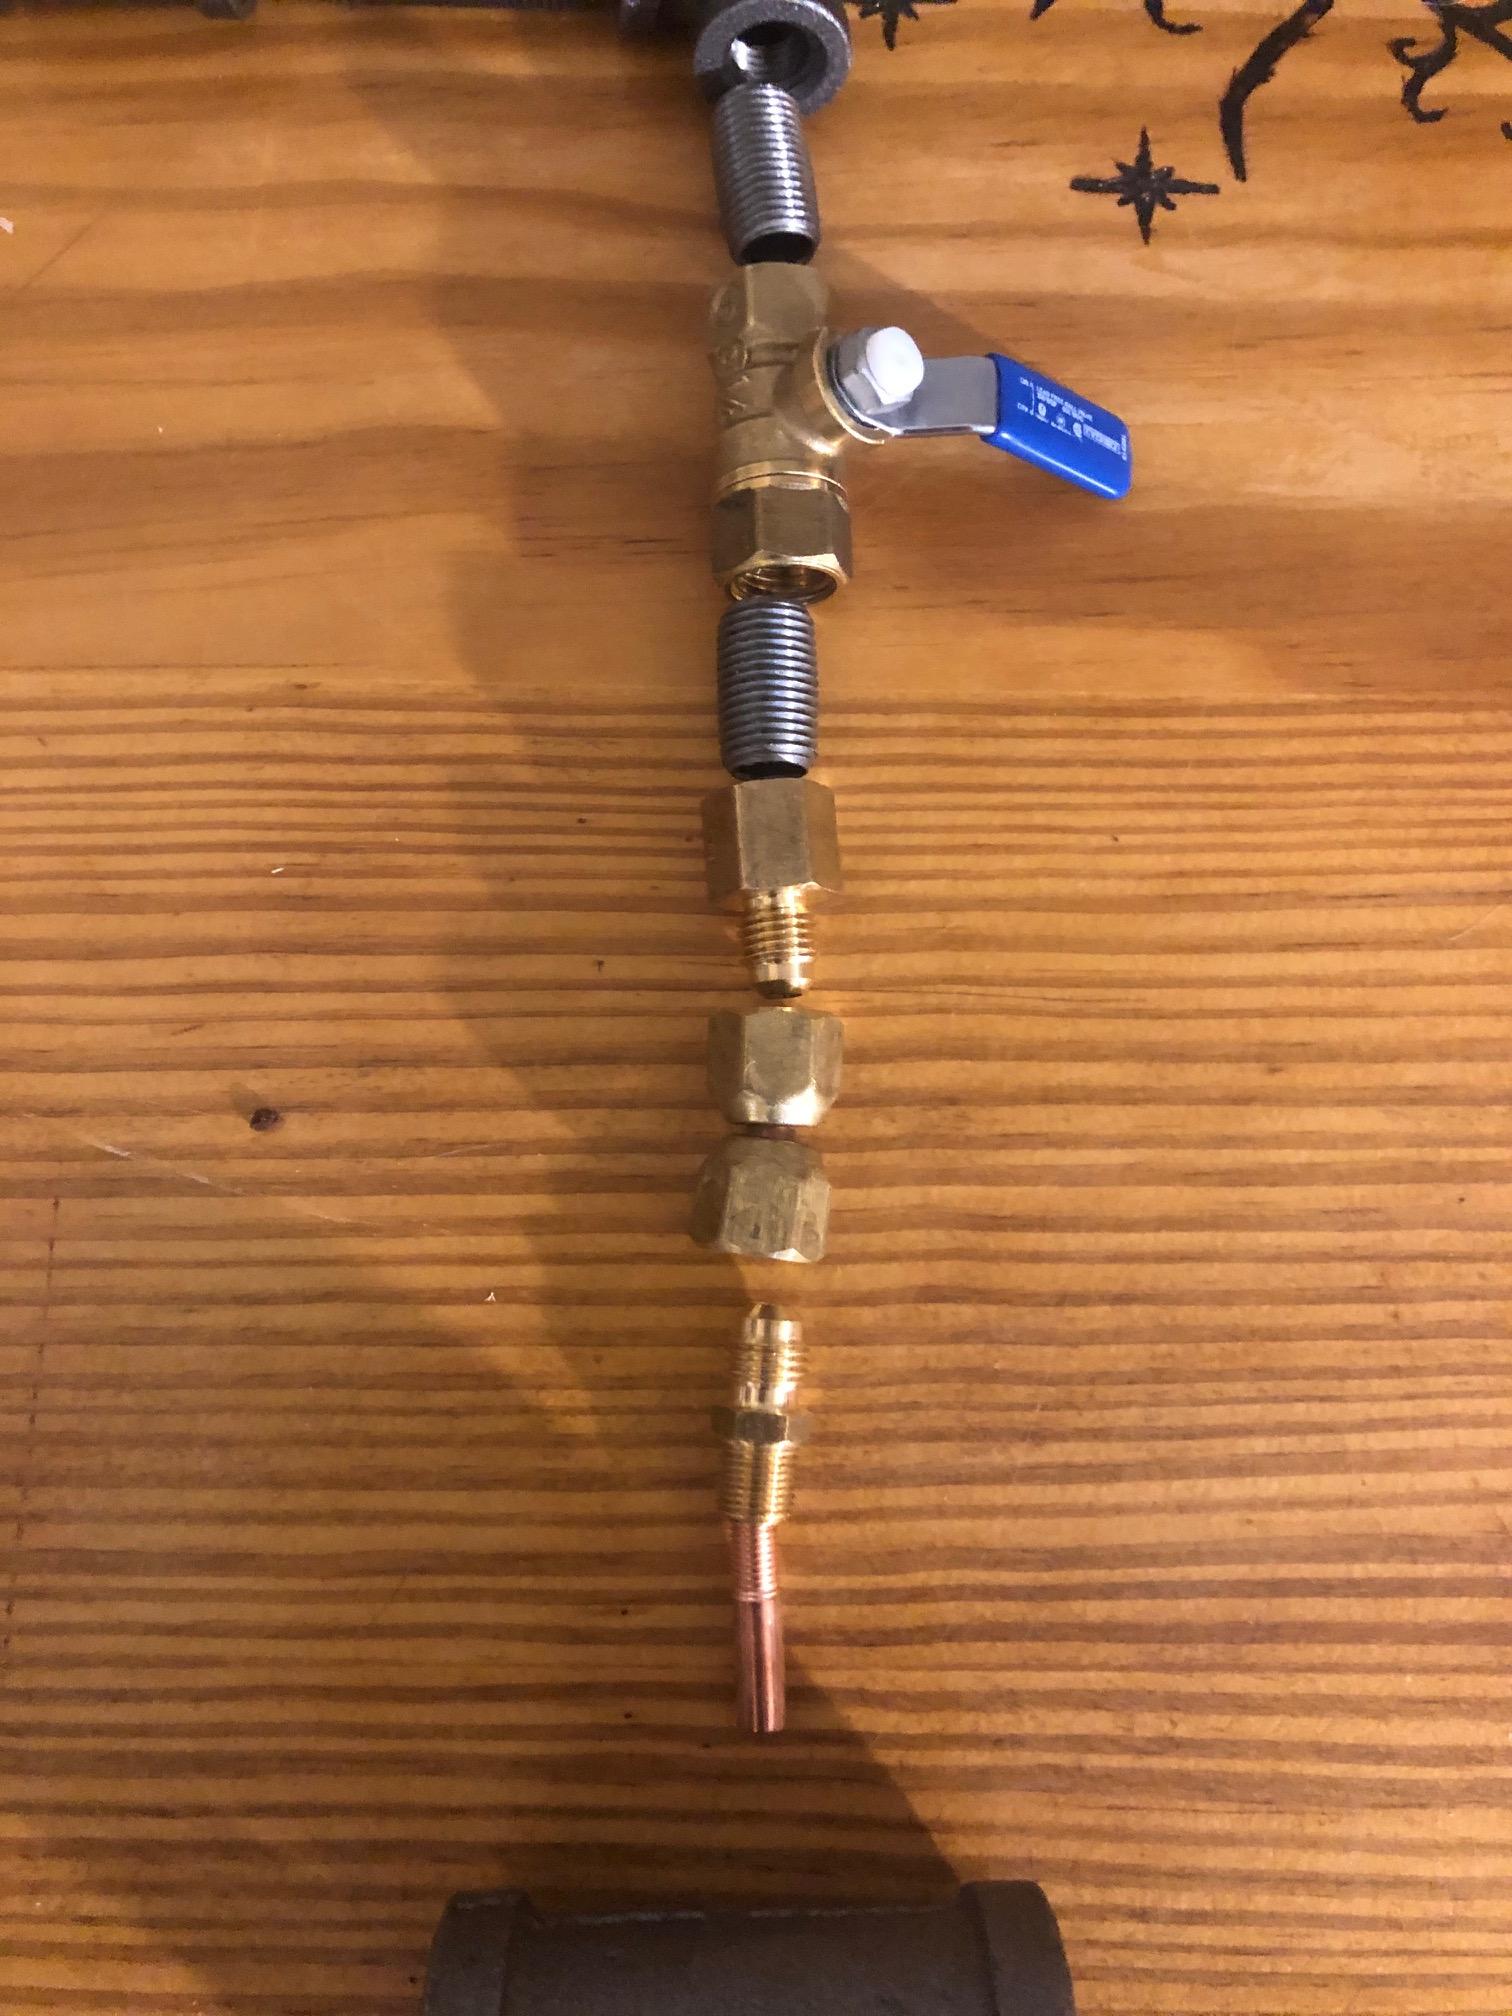
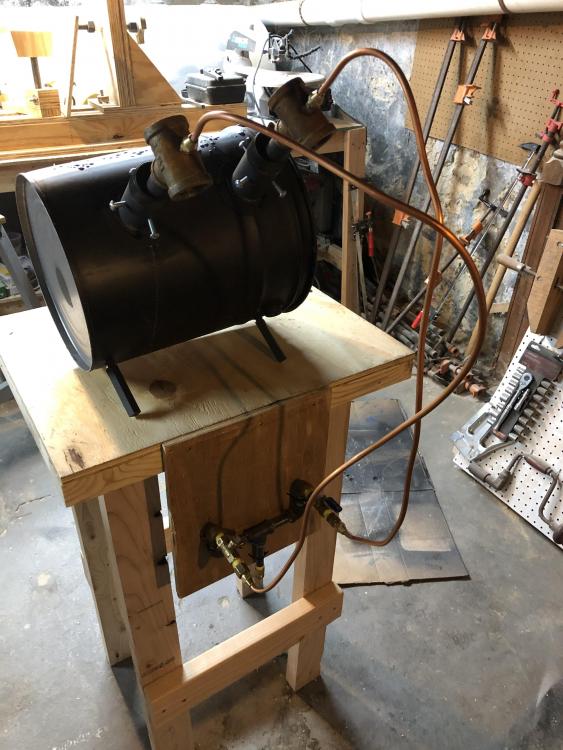
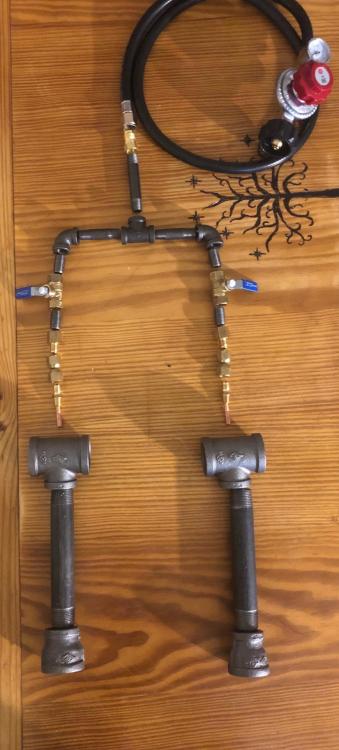
Had a chance to build the stand and mount the manifold away from the burners with copper tubing. Flaring tubing and connecting everything was a lot simpler than I thought it was going to be. Tested every connection under pressure with soapy water and 0 leaks so far. I'll have a chance to fire this up tomorrow (weather permitting) and start tuning the burners. I did grind back the mig tips about 1/8" while I was reconnecting everything. Cleaned them out with a torch tip cleaner. The stand is just 2x4s and ply. I'll keep an eye out for any burning going on and mitigate it as needed.
-
It hasn't. I picked up a flaring tool and 10' of 1/4 copper coil. Before I think of testing it again, I'm going to make a stand and mount the manifold away from the burners. I'll flare the copper and use the tubing to give it space. I'm suspect of any results I've shown thus far. Knowing I had leaks on both lines is a good wake up to getting this all put together before continuing. Once it's all mounted then I'll get back to the quality of the burners.
-
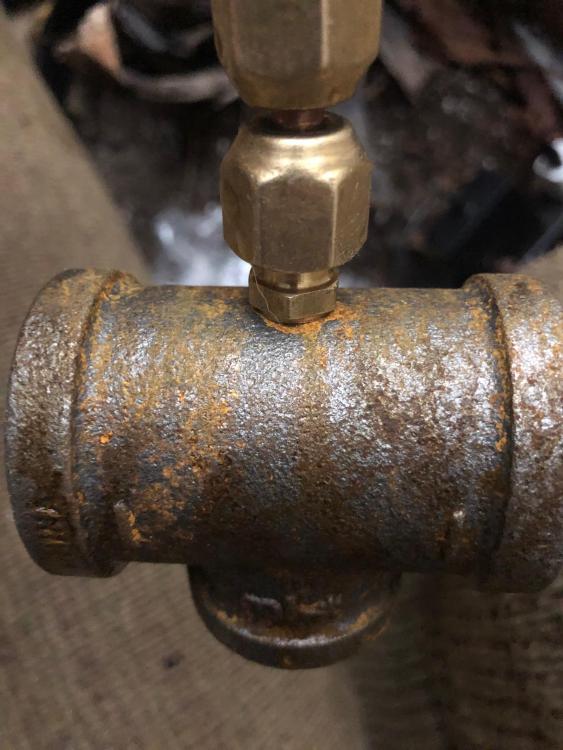
I figured out a big source of the problems I've been having. Both of the female 1/4" x 1/4" flare swivel nuts I'm using are leaking. It's happening on both burners. How did I miss this before? Short answer: because I'm an idiot. Longer answer: I wasn't testing the swivel nuts when I submerged the manifold. I had 1/4" endcaps that I put on the 1/4" flare connection before the swivel nut. I really don't have a good reason as to why I wasn't testing the swivels. Anyway, I'm new to brass fittings so I'm wondering if I'm doing something wrong with these fittings. I'm not using tape or dope as I saw that that's not needed on flare fittings. I'm also avoiding over-tightening as I've read that can cause leaks. To problem solve today I tried tightening to loose, snug, and tight and still leaks. Then I tried every combination I could between the burners to see if I could isolate some part but both swivels would just keep leaking. It's not isolated to one part of the fitting either. It leaks on both sides and in the center. I feel like I must be doing something wrong. Again, thanks for all the help and input. I would've probably blown myself up without your guidance. And Frosty, once I get the leaks resolved I'm going to trim back the mig tips and recenter the one that's off.
-
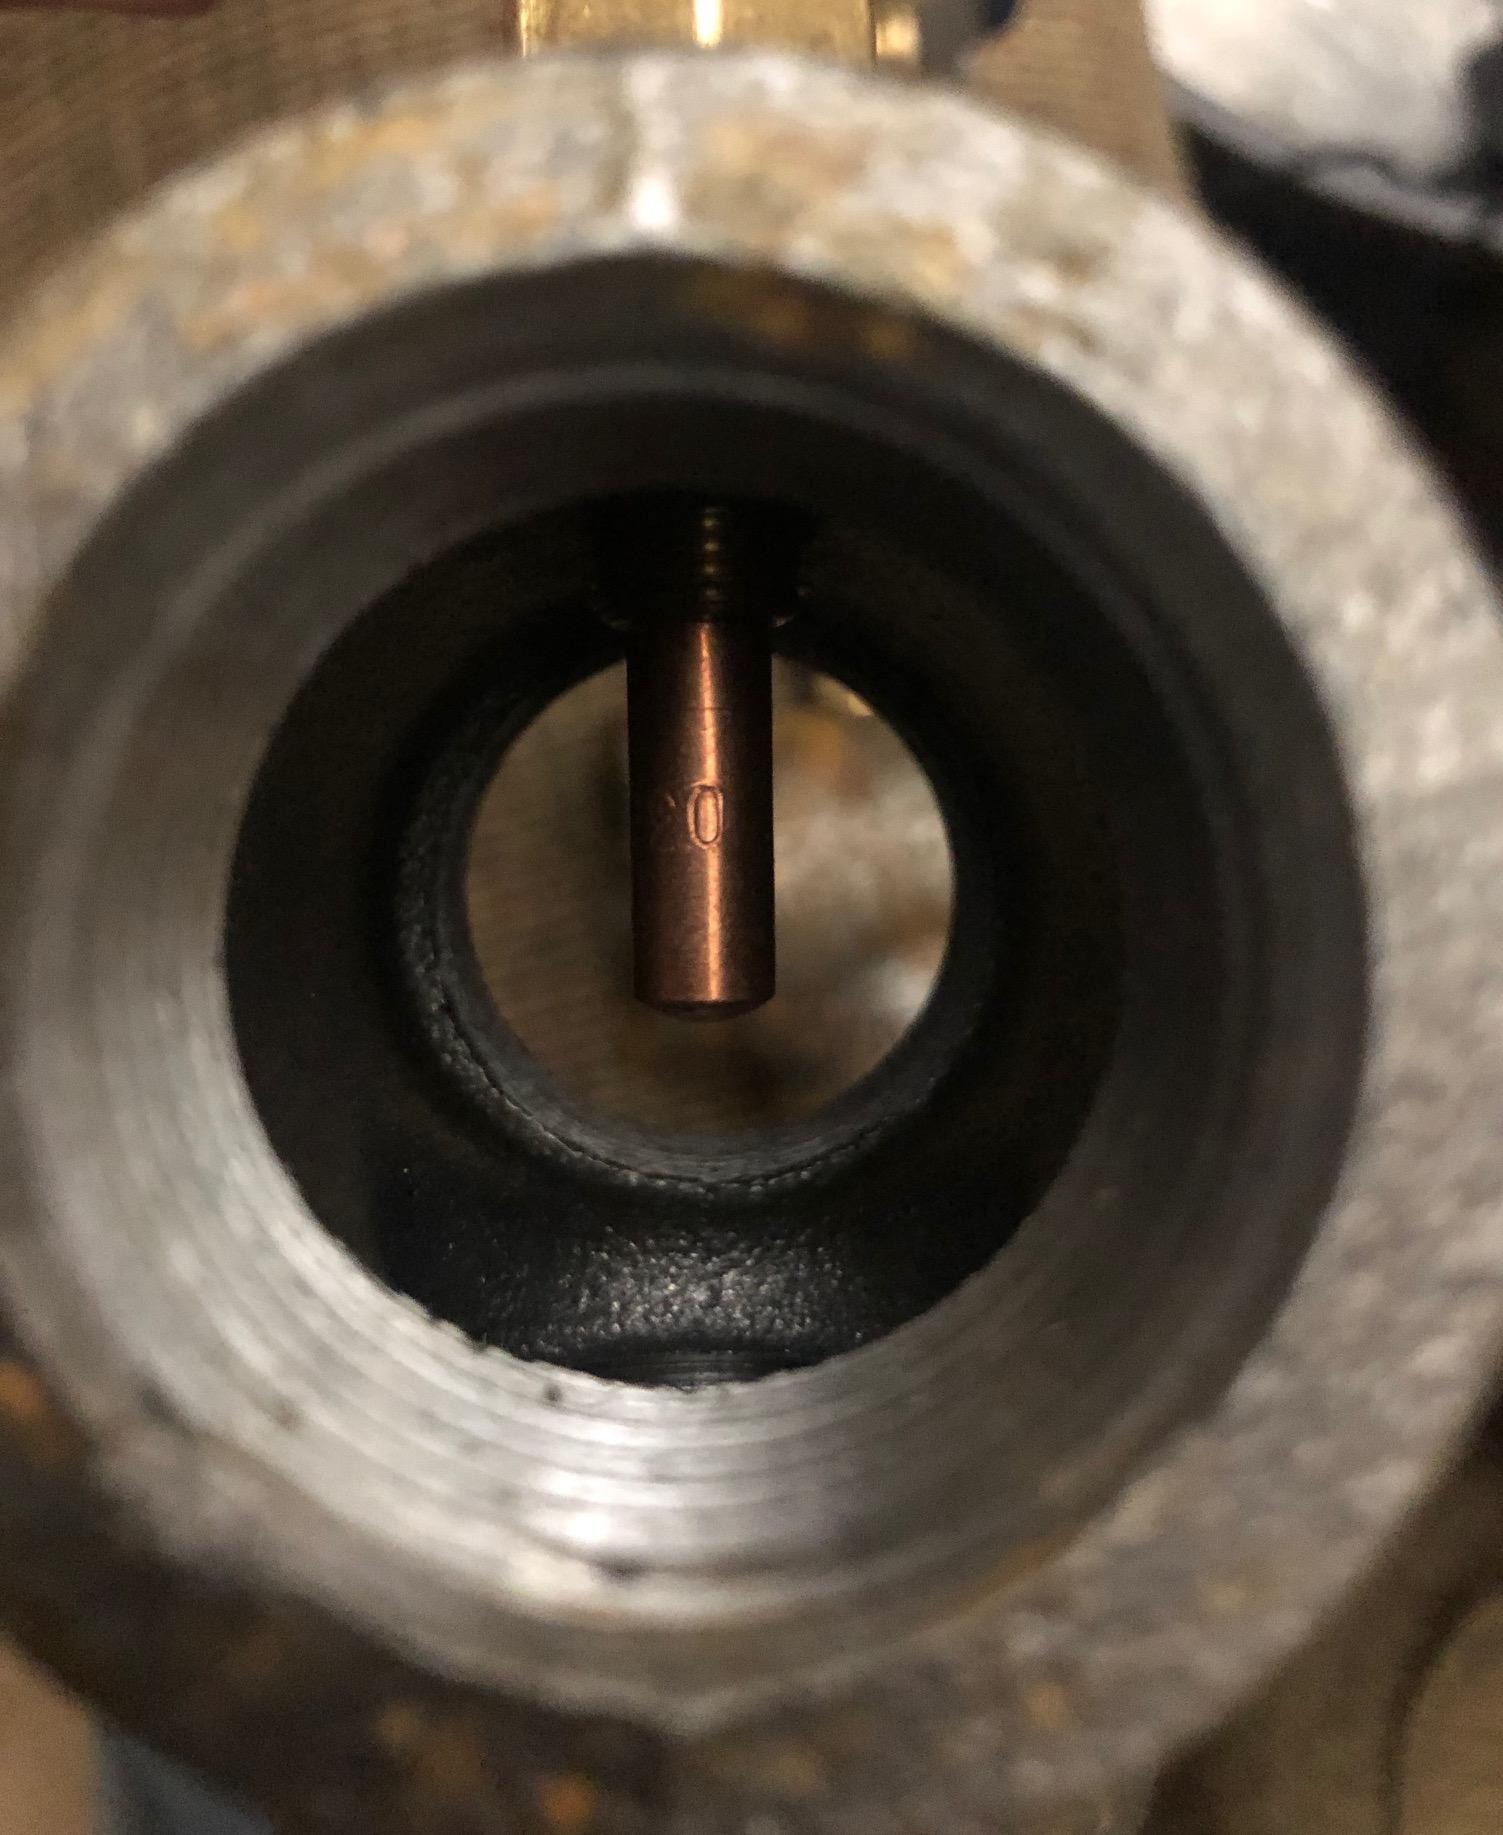
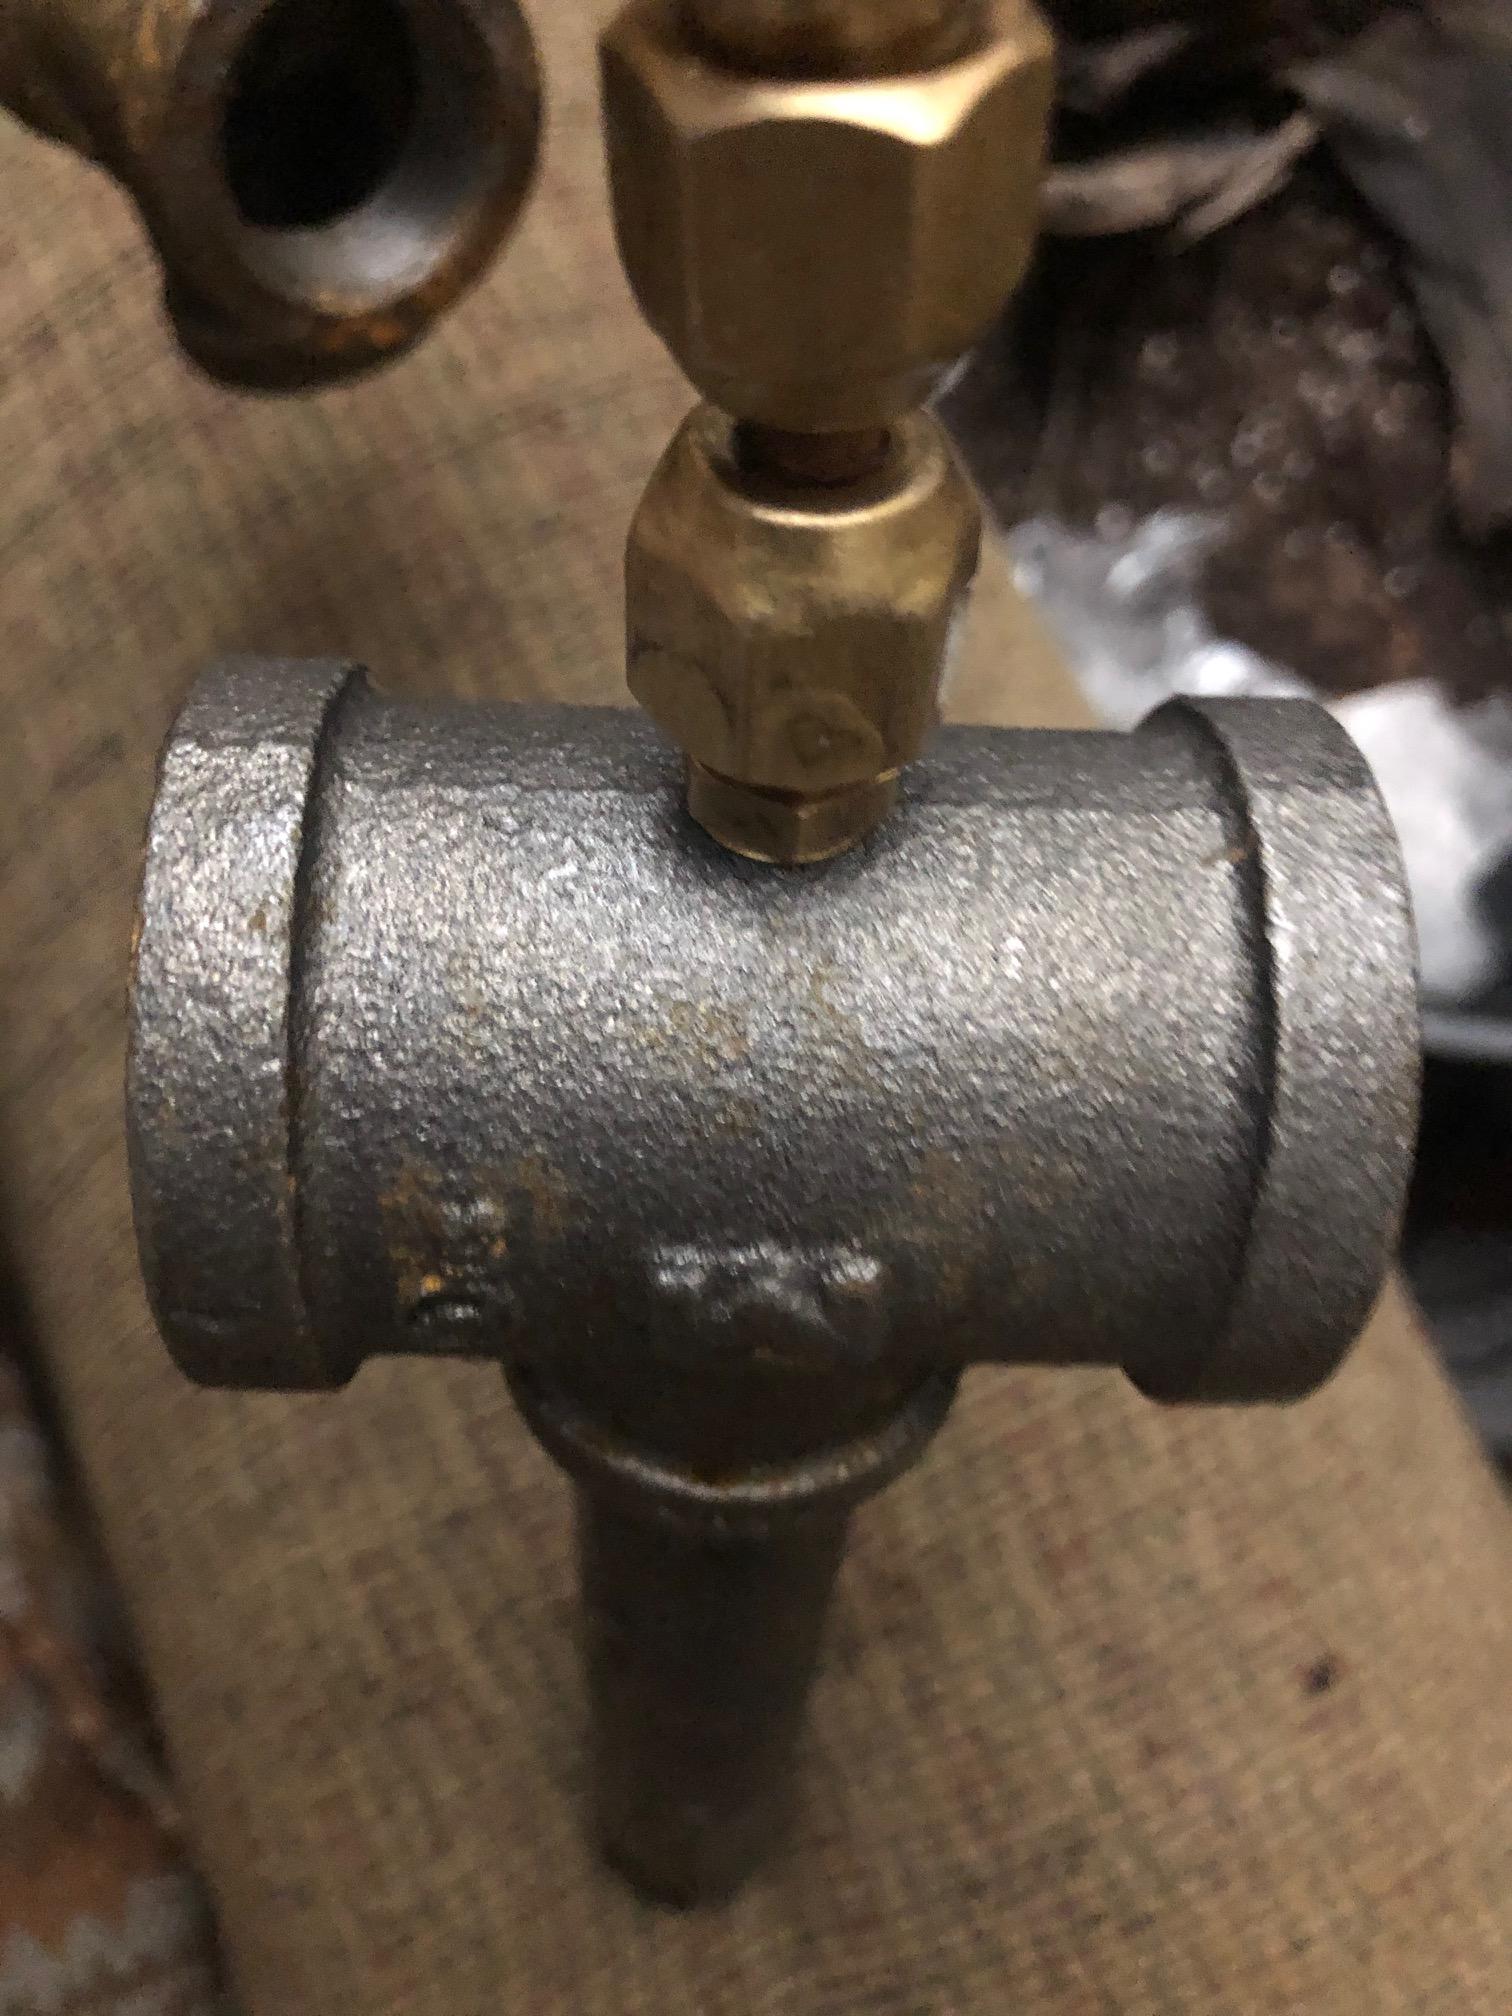
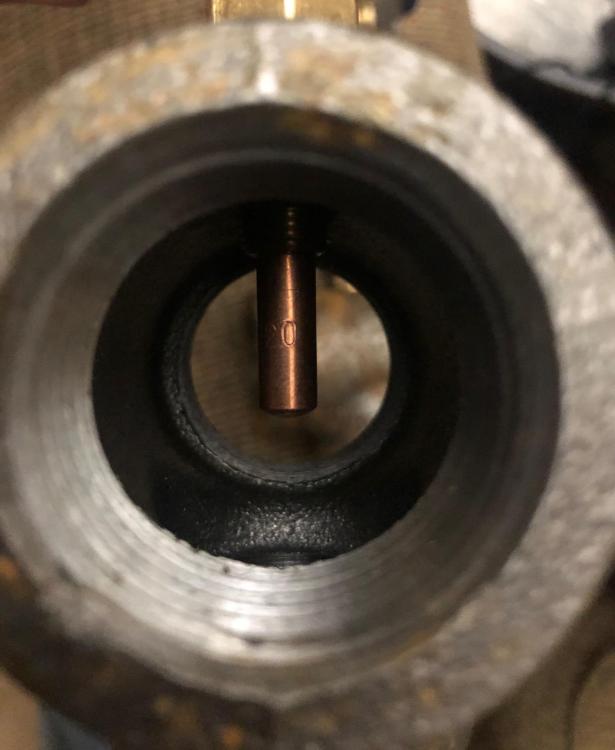
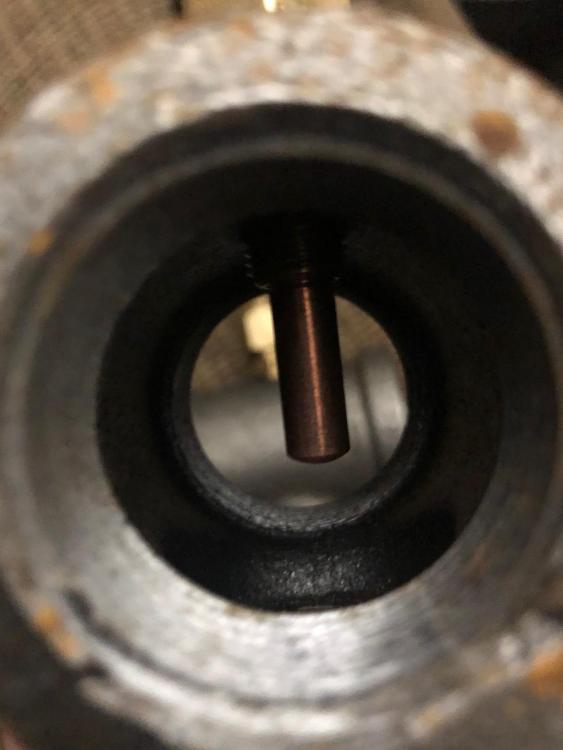
I didn't see/hear any sputtering in the back burner but the front one going out for a second there seemed to be the sputtering again. I feel like the air/wind could have been doing that? I think that might have been the reason for the front burner having that difficulty in the video. I do have the reducers on the pipe in the forge. They're in the blanket about an inch and a half. They don't actually fit in the burner ports so I have to screw them on from the inside. The only part in the forge is the reducer itself which is about an inch and a half in length. I drilled out the the holes with a hole saw. When I got through the thin metal bucket I took the 2 inch hole saw bit and just cut into the blanket with the bit by hand. The burners are both 3/4" (the inside area of the forge is around 650 cubic inches so following the 350 cubic inches per burner led me to making 2). That makes a lot of sense to turn the burners 90 degrees. I attached pictures below of the t fitting and how the mig tip sits in it (one t got minor surface rust from being outside today). I have not ground these mig tips back at all. I did have two that I cut short but I held off on using them because I didn't like the way the cut turned out (used an angle grinder and it made for sloppy cuts. I'll just grind them down on my disc sander if I need to again and clean them out with the torch tip cleaners I picked up).

-
I should probably add after looking at this. The flames color seems to indicate that it's very fuel rich so I'm going to have to tune the burner some more and trim more off the mig tips.
-
Just to be safe, I took everything apart and then re-wrapped it making sure everything was done correctly. Tested for leaks and didn't find any. I'm using a .035 mig tip and I picked up some torch tip cleaners and made sure the tips were clear of any obstruction. I put everything back together and let the forge run for a few minutes. The video below is about a minute after I turned on the gas. This isn't a permanent location (being near the bilco doors would not be a great idea) just where I was testing. You can see at the end of the video that the burner closest to the front opening is going out for a brief second or two. What could cause that? I'm also going to add a firebrick door to the front. Thanks for the continued advice as I muddle my way through this. forge running.mp4
-
Thanks for the tuning advice. I cut back the tip and my flame changed pretty significantly, but I ran into a pretty big issue. I got the burners going and finished the forge. Put everything together and did a test run. When I lit the burners they had a sort of sputtering sound. You can hear it in the above video and the one I'm posting here. After about 30 seconds, my manifold burst into flames. I was at the tank so I shut it off immediately and the flames died down. Very close to needing a new pair of pants. I thought I could smell a bit of propane in the air so I figured one of my connections was leaking. Took it inside and completely submerged it underwater and then turned the pressure on and no leaks. I'm not sure what happened. The video below was at around 5 psi. Let me know if there's any info I might be leaving out that you'd need to know, and thanks for the help. IMG_1881.MOV
-
I’m testing each burner individually before putting the whole thing together and checking for leaks with soapy water. Here’s the first burner running at around 5-7 psi IMG_1868.MP4
-
While I'm waiting for the kaowool to get here, I got the fittings to make the burners. Here's two pictures of everything laid out. One thing not shown is that I'm adding another elbow with a closed nipple to the elbow in the picture to give it a 90 degree bend down from that point to the forge. I'm hoping to reduce the strain on the burner ports by doing that. If you see any issues let me know before I blow myself up. I have propane rated teflon tape (the thicker yellow stuff) to seal it. Debated going with some sort of adhesive but given that I'll have to fiddle around with the fittings I'd rather not make a permanent mistake.

-
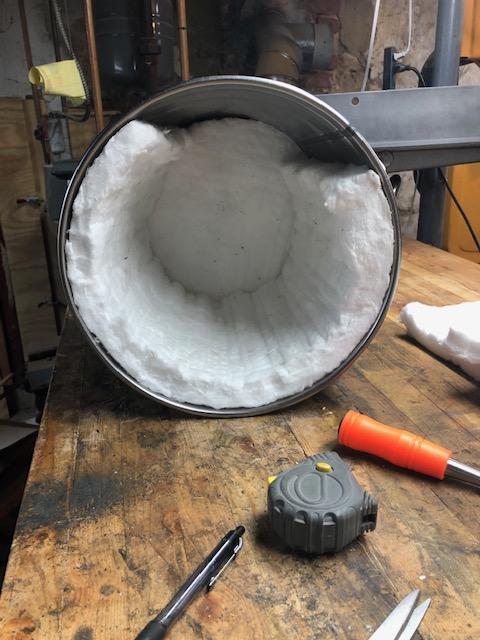
I got the new forge shell in and have started building. This picture was me realizing that I need another running foot of kaowool. Delayed until it arrives. I'll have time to construct the burners in the meantime.
-
The idea of building a forge came about because I wanted to make a stock removal knife but didn't have a way to heat treat it. There's simpler ways to heat treat a knife, but I like going down these rabbit holes and building things. I came across a piece of railroad track so now I have a makeshift anvil. I already have a decent woodworking/restoration shop set up so I'm hoping to make my own handles and hinges for the cabinets and things I make out of wood.
-
This is why I knew it would be a good idea to ask before starting the build. That was a huge oversight on my part. My brain just thought, "8 inch stove pipe minus 2 inches for the kaowool so the diameter is 6 inches making the radius 3." That would have been a really stupid mistake to make. Thank you for pointing that out. My original plan was to use an old propane tank but after doing a bunch of research I got scared off the idea. Basically everything boiled down to: take off the valve, fill it with soapy water (or nitrogen or car exhaust fumes (!?)), let it sit for some amount of time, then cut into it and you'll probably be okay. Inevitably in these discussions 2 or 3 comments would pop up saying something like, "My cousin Steve used to cut open propane tanks all the time with that soapy water method. Then one day the tank exploded anyway and that was the end of Steve." All this to say, I'll have to recalculate but I'll most likely opt for a steel (non-galvanized) 5 gallon bucket. Thanks again for pointing out that mistake and saving me a good amount of time/resources.
-
I’ve been reading everything I can in preparation of making a small gas forge. This is completely a hobby thing so this is a bit of an experiment. I wanted to lay out what I’m planning to do and see if anyone has thoughts on what I should change if anything. The plan is to use an 8-inch diameter piece of stove pipe that is going to be 10 or 12 inches in length. 10 inches puts me at 282 cu/in or 339 cu/in at 12. I’m going to be making a ¾” Frosty T burner. I’ve read that 1 properly tuned T Burner is sufficient for sizes of 350 cu/in and below. Will the 12 inch length pose a difficult setup for one burner or is that a fine size? The build is going to be two 1-inch layers of kaowool. Put the first inch in, wet it with a spray bottle then use rigidizer. Then wrap the 2nd inch and do the same. I’m going to then put a ¼” to ½” layer of kast-o-lite in the forge (just the bottom or all the way around?). Then it’s a layer of plistix and it’s built. How does that sound? Hoping to catch any mistakes before making them. Thanks