D Ravizza
-
Posts
70 -
Joined
-
Last visited
Content Type
Profiles
Forums
Articles
Gallery
Downloads
Events
Everything posted by D Ravizza
-
Njanvilman, Thanks for the info! Best, Dan
-
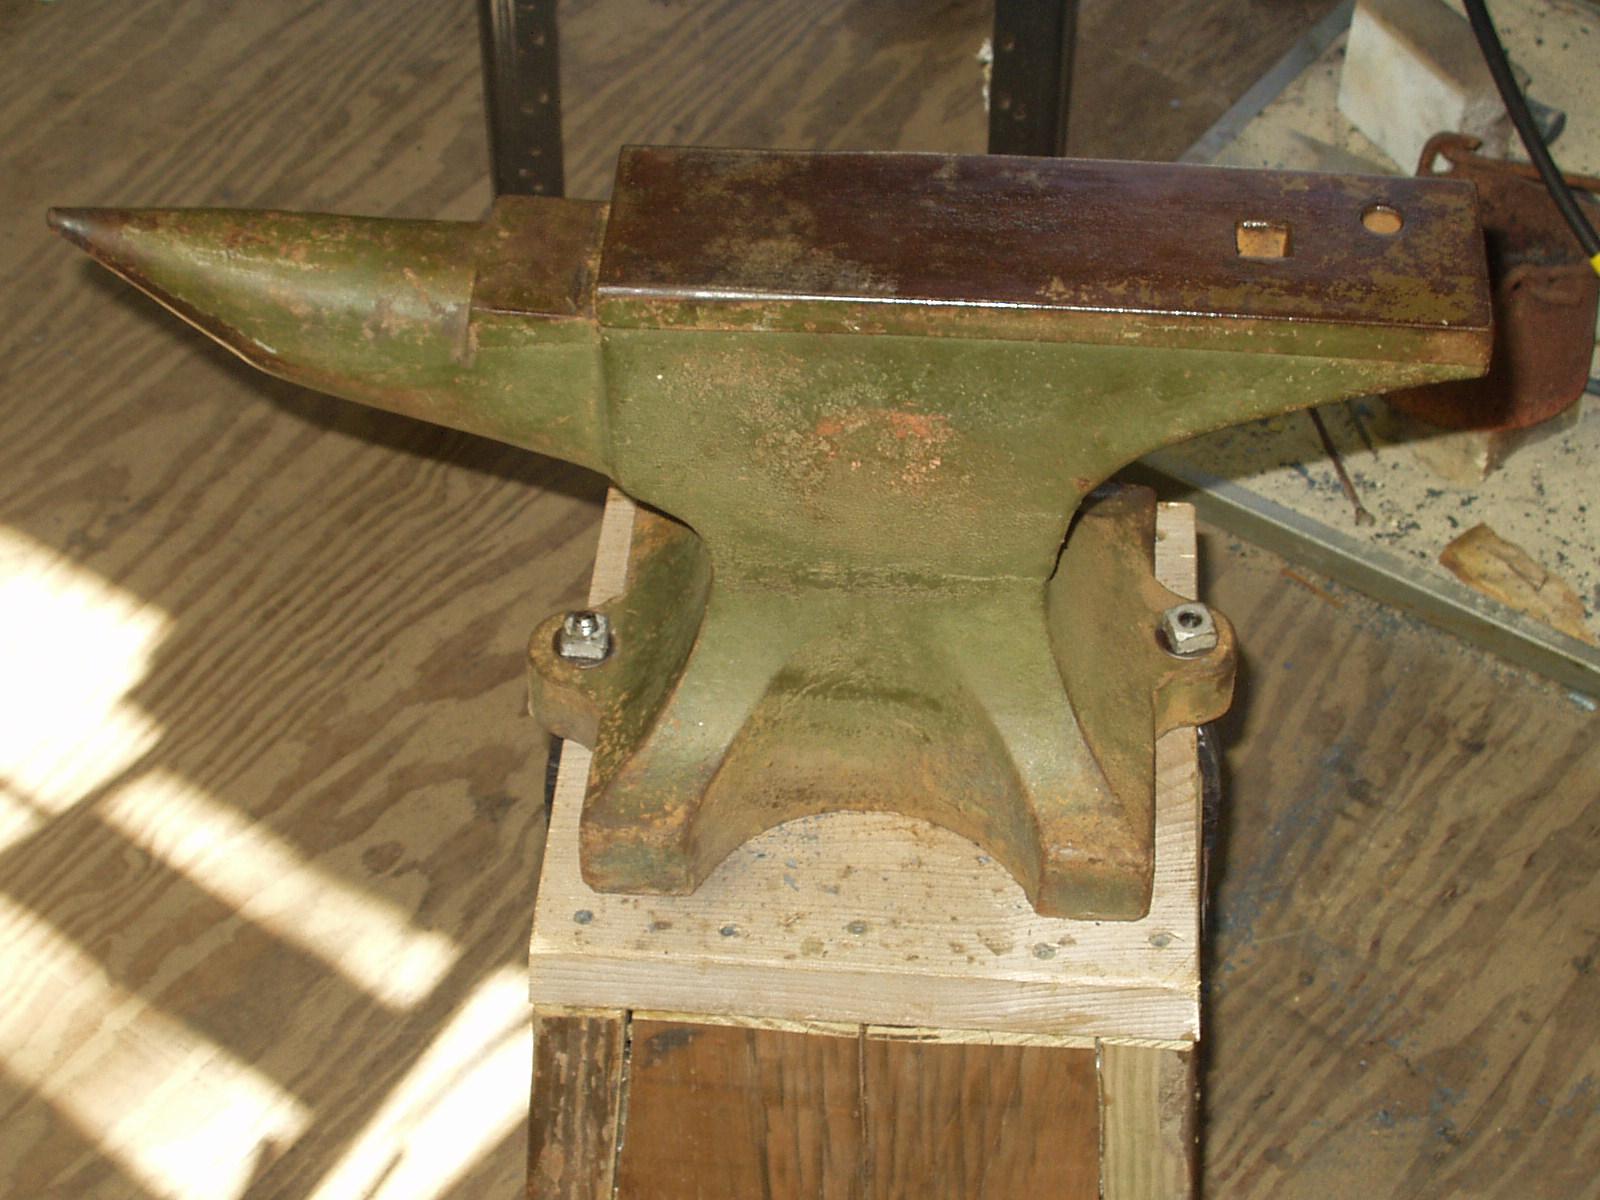
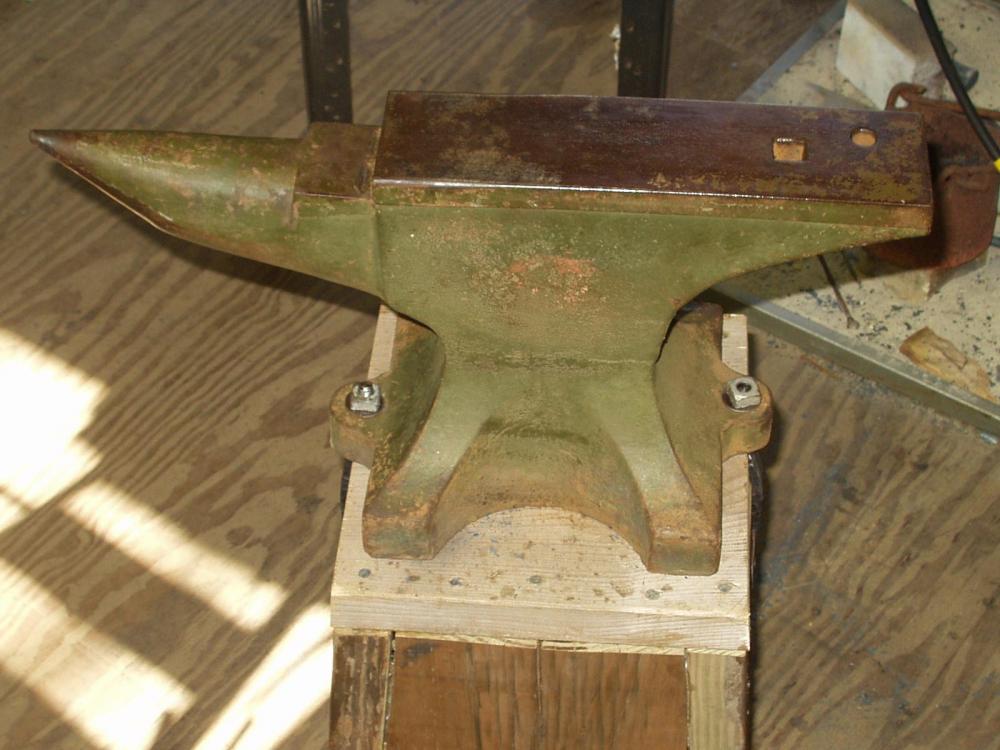
njanvilman, I enjoyed your post regarding Fisher anvil that was made for the military. I believe I have an almost identical one. It also has olive drab paint, I have often wondered if it was for the military. Other than the 10 on the foot mine has no other markings than P D F W stamped into the side (no idea what it means). Do you think this anvil was made for the military too? Thanks, Dan

-
Very nice anvil! Brooks anvils are very high quality and yours is in great condition. I suspect that both spots of damage you see are caused by a cutting torch. I hate to see this happen to nice anvils. Anvil are not cutting tables! My Brooks anvil has about a 1 inch long torch cut in the heel end. It does not really affect its use but sure looks bad. Enjoy that anvil! Dan
-
Anvil identification. USA IAF
D Ravizza replied to Halphwit's topic in Anvils, Swage Blocks, and Mandrels
Halphwit, Nice anvil there! I saw one similar to it years ago. I was told they were made for the military. As I recall, the one I saw was painted olive drab and was completely unused. Any evidence of paint color on yours? If the anvil rings and rebounds well, what more can you ask for? Enjoy! Dan -
Refacing a Anvil with Leaf Spring
D Ravizza replied to PaulKrzysz's topic in Anvils, Swage Blocks, and Mandrels
The anvil looks great! Nice work! -
Thanks for the kind words everyone. Alan, The drive from the swing arms to the main screw is a tapered hexagon. It is nicely machined. You can remove the nut with the large wrench pictured then move the arms to a more convenient position. No sign that anything was forged on this machine. Good question about how the vertical arm is attached. I got curious and went out and loosened it. You can see how it’s constructed in the photo. There is a pin in the face of the shoulder that corresponds to a hole in the horizontal arm. There is only one hole, so only one position for the handle. The stop nut is basically two pieces. The inner part is threaded with a male buttress thread. You can wind it up and down to set the stop position of the press. The holes are to insert a bar to ease in turning it. You can lock and unlock the nut by loosening the lever on the side of it. The flange on top of the main screw bottoms out on this stop nut. The nut is not threaded onto the main screw of the press as I have seen on others. I hope the explanation along with the photo helps explain things. I suspect the machine was built in the 1950's or early 1960's. I really don't know. The neat thing is I do know a good bit about its history. I purchased it from the estate of a watchmaker/horologist from Connecticut. Sometime in the late 1970's early 1980's he purchased this machine as well as a huge amount of other tools and machines from various Bulova watch factories around the country. I was told that this particular press came from Bulova’s Woodside, NY plant in Queens, NY. I am sure Bulova purchased it new straight from Switzerland. I suspect the press was in a toolroom or model shop environment, I don't think it was used for high production. That makes sense that my machine is likely a number six as your number eight press takes 1.5” tooling. Mine takes 1 3/8” tooling. I would love to see some tooling you use on your machine. I have not done much forging with it yet. It is handy for doing chasing on flat work. The chasing tool is pressed cleanly into the work. No bouncing at all like doing it on an anvil. With the stop set, no worries about squishing my hand. Thanks Dan
-
Thomas, There are four leads.
-
Hi, I wanted to share a few photos of the fly press that followed me home in the early summer. Not a machine I have often seen in my travels. I have wanted one for a while as they seem most convenient for certain forging operations. I also wanted a solid press that I could do simple punching/blanking operations in. I have a few ideas for dies I would like to build. With all due respect to power hammers, I like the idea of a quiet, hand controlled machine. Plus the garage floor won’t withstand a power hammer. I have seen some neat work smiths have done with fly presses and I hope to learn to do the same. I would love to see ideas about tooling people have made for their presses, as well as what they are capable of. This press, in my opinion is rather nice. It’s in almost immaculate condition. Only the paint needs to be touched up where it chipped when I moved the machine. I had to separate the press from its base. It’s made in Switzerland and it shows as the machine work is exquisite and many surfaces are actually hand scraped! The hold-down clamps are also a convenient feature. The press even came with a wrench to remove the cross bar and as well as the spanner nuts holding on the weights. The size of the machine seems to equate to roughly a number 6 press. I measured the screw diameter and over all dimensions and compared it to data on the new Indian fly presses. I am curious what size presses other smiths are using. Since this machine is an H frame, I have been wondering if other smiths find the C frame machines more convenient. For what I intend to do I think I prefer the rigidity of the H frame. Due to the shape and color of the counterweights this press was known as the “M & M machine” by its former owners. I think it’s a very fitting name! Thanks Dan
-
I think the fascination with sharp edges on anvils partly stems from the collector mentality. Many of us enjoy both forging as well as collecting old tools. A collector will pay more for an anvil in mint condition with clean edges. Old anvils are rare in this condition as they were used/abused and dressed as needed. That may influence what beginners and even more experienced smiths think. There is a greater perceived value in something that looks clean and new. I wholeheartedly agree that an anvil with a variety of radii is much more useful. I have a clean Fisher anvil that I seldom use as its face is dead flat and edges sharp. It does come in handy once in awhile. Mostly, I use a larger Peter Wright with crowned face and varying radii. There is something more comfortable about an anvil with softer edges. Dan
-
Nice work!
-
Iron cross stamps on a PW.
D Ravizza replied to Black Frog's topic in Anvils, Swage Blocks, and Mandrels
There is an anchor stamp on the left foot of my Peter Wright too. Probably marked for the same unknown reason as all the other ones. Although, my anvil did at one time belong to Anchor Glass in Elmira NY. The anvil is also marked "Made in England". Its stamped well below the trademark, sideways between the two front feet. I have often wondered about these mysterious symbols found on anvils. Hopefully someone can identify their purpose. Dan -
Disappointing that your vise is cracked. It looks like a real beauty otherwise. The vise is likely wrought iron. If so, here are a few of my thoughts on arc welding wrought. I am not a pro welder but have had some experience welding wrought iron. Based on reading some older welding books the best thing to do is avoid a deep penetrating weld. What happens with a deep penetrating rod is the iron silicate slag is released into the weld zone. At this point the slag it is no longer in grain form but can develop porosity in the weld. I would avoid welding with a deep penetrating rod such as 6010/6011. 7018 should work just fine. Also a good preheat may help burn out some of the grease and will aid in welding. Good luck Dan
-
Fisher 1200# anvil !?
D Ravizza replied to Topsoilking's topic in Anvils, Swage Blocks, and Mandrels
Thomas, Very good question, I suspect not. I bet a bear would make a good striker though. Plenty of strength and power. Probably not accurate though. Dan -
Fisher 1200# anvil !?
D Ravizza replied to Topsoilking's topic in Anvils, Swage Blocks, and Mandrels
I stopped by to preview this auction today. Its only about 3 miles from me. I have heard of this guy for years and finally got to meet him. Very interesting fellow. Amazing collection of steam engines and other equipment. This guy was a master rigger who specialized in moving heavy equipment as well as buildings. Early in his career he was a diver and did underwater oxyfuel cutting in the NYC area. As far as I can tell the large anvil weighs 500 lbs. Its clearly marked 50 on the foot. I will say that it appeared in just about pristine condition. The other anvil listed is a Trenton probably about 200-250 lbs. He has a number of trained bears for sale too if anyone is in the market. Not sure I can make it to the auction. I am sure any of you guys who attend will have a blast. Dan -
Great project! The coils look really good. Its nice to see somone take on the challenge of building a complete vise screw and box from scratch! It should work fine. I forge brazed a male thread once and it worked out just fine. This was to replace a missing male screw. I had the existing female box with thread. You should have no trouble brazing the male. One suggestion that may help is to be sure that there is some space between each of the coils. So, if you used 3/16 key stock. Stretch the coil slightly so the gap between each coil is greater than 3/16. This will help leave some room for any irregularities once both are brazed in place. Really looking forward to seeing your progress! Best of luck! Dan
-
Blacksmith in the news
D Ravizza replied to BIGGUNDOCTOR's topic in Blacksmithing, General Discussion
Neat story. Thanks for sharing. -
Wayne, The triangular lock has two L shaped bolts and a spring for each. When the key turns it just pushes back the bolts against the spring force. A really simple mechanism. I would love to see some photos of your locks. Thanks Dan
-
Good topic. Traditional locks and locksmithing are subjects near and dear to my heart. I am afraid good sources of information are a little hard to find. The very best book I have seen on the subject comes from the Hanns Schell Museum in Austria. Someday I hope to vist the museum. http://www.schell-collection.com/index.php?id=3&L=1&tx_ttproducts_pi1[backPID]=3&tx_ttproducts_pi1[product]=6&cHash=6a07002aee The book is facinating as it covers padlocks from Roman times up to the 20th century. The book also discusses the trade of the locksmith. Many smiths were specilists making only one kind of lock or key. If it would help, I can quote the sections relating to the locksmiths trade. This website has a lot of good information about the trade as well as locks in general. http://www.historicallocks.com/en/site/hl/Locks-and-technology/The-locksmiths-workshop/The-locksmith/ The Spruce Forge Manual of Locksmithing is decent. A good starter for a blacksmith who wants to make locks. Not a lot of historical information though. As others have mentioned, locks from the middle ages through the renaissance were simple warded locks. Many locks from this period have very intricate and beautiful wards but they still are mechanically simple. It was not until the late 18th century that the lever lock was invented which used mechanical means to increase security. Attached is a photo of an orignal 16th-17th century padlock from Europe along with my attempt at one. I hope the information helps. Dan
-
Tim, Very nice work.Thats an impressive bit of forge welding. I am glad you are bringing that vise back to life! The ball looks great. Are you using wrought iron or steel for the repairs? I am looking forward to seeing the final result. I have a feeling it will be almost indistiguishable from a real Peter Wright. The dovetail braze repair should work well. This was a recomended repair to fix stems of keys that had broken apart. It was good seeing you at Ashokan. Dan
-
Northeast Blacksmiths Spring Meet May 3-4-5
D Ravizza replied to Frank Turley's topic in Events, Hammer ins, Where to meet
I will be there. Really looking forward to it! Dan -
That's really cool! Nice idea. Dan
-
Any idea what this Fisher was for?
D Ravizza replied to VaughnT's topic in Anvils, Swage Blocks, and Mandrels
I have been watching this auction and almost put a bid in. Wilkes-Barre is not far from where I live. But, njanvilman, I am glad you got this anvil. Its going to the best possible home. I am also curious about what the vise parts are like. Is this the first anvil like this one you have found? Thanks Dan -
Its definitely a Hollands vise. Here is an add from 1902 Nice vise! How wide are the jaws? Dan
-
Double arch anvil AKA Hornless anvil
D Ravizza replied to Timothy Miller's topic in Anvils, Swage Blocks, and Mandrels
Nice find Tim! That's cool that it is such an early Mousehole. Do you think you will repair it? Dan