DanJohnson
-
Posts
16 -
Joined
-
Last visited
-
First fire in new forge!
DanJohnson replied to Elemental Metal Creations's topic in Solid Fuel Forges
What does your hood look like outside? Looks to be working really well. Dan -
That is an exceptionally nice vise. Wow. Outstanding find and respectful restoration. That's a vise that would never leave my shop once it had entered. Dan
-
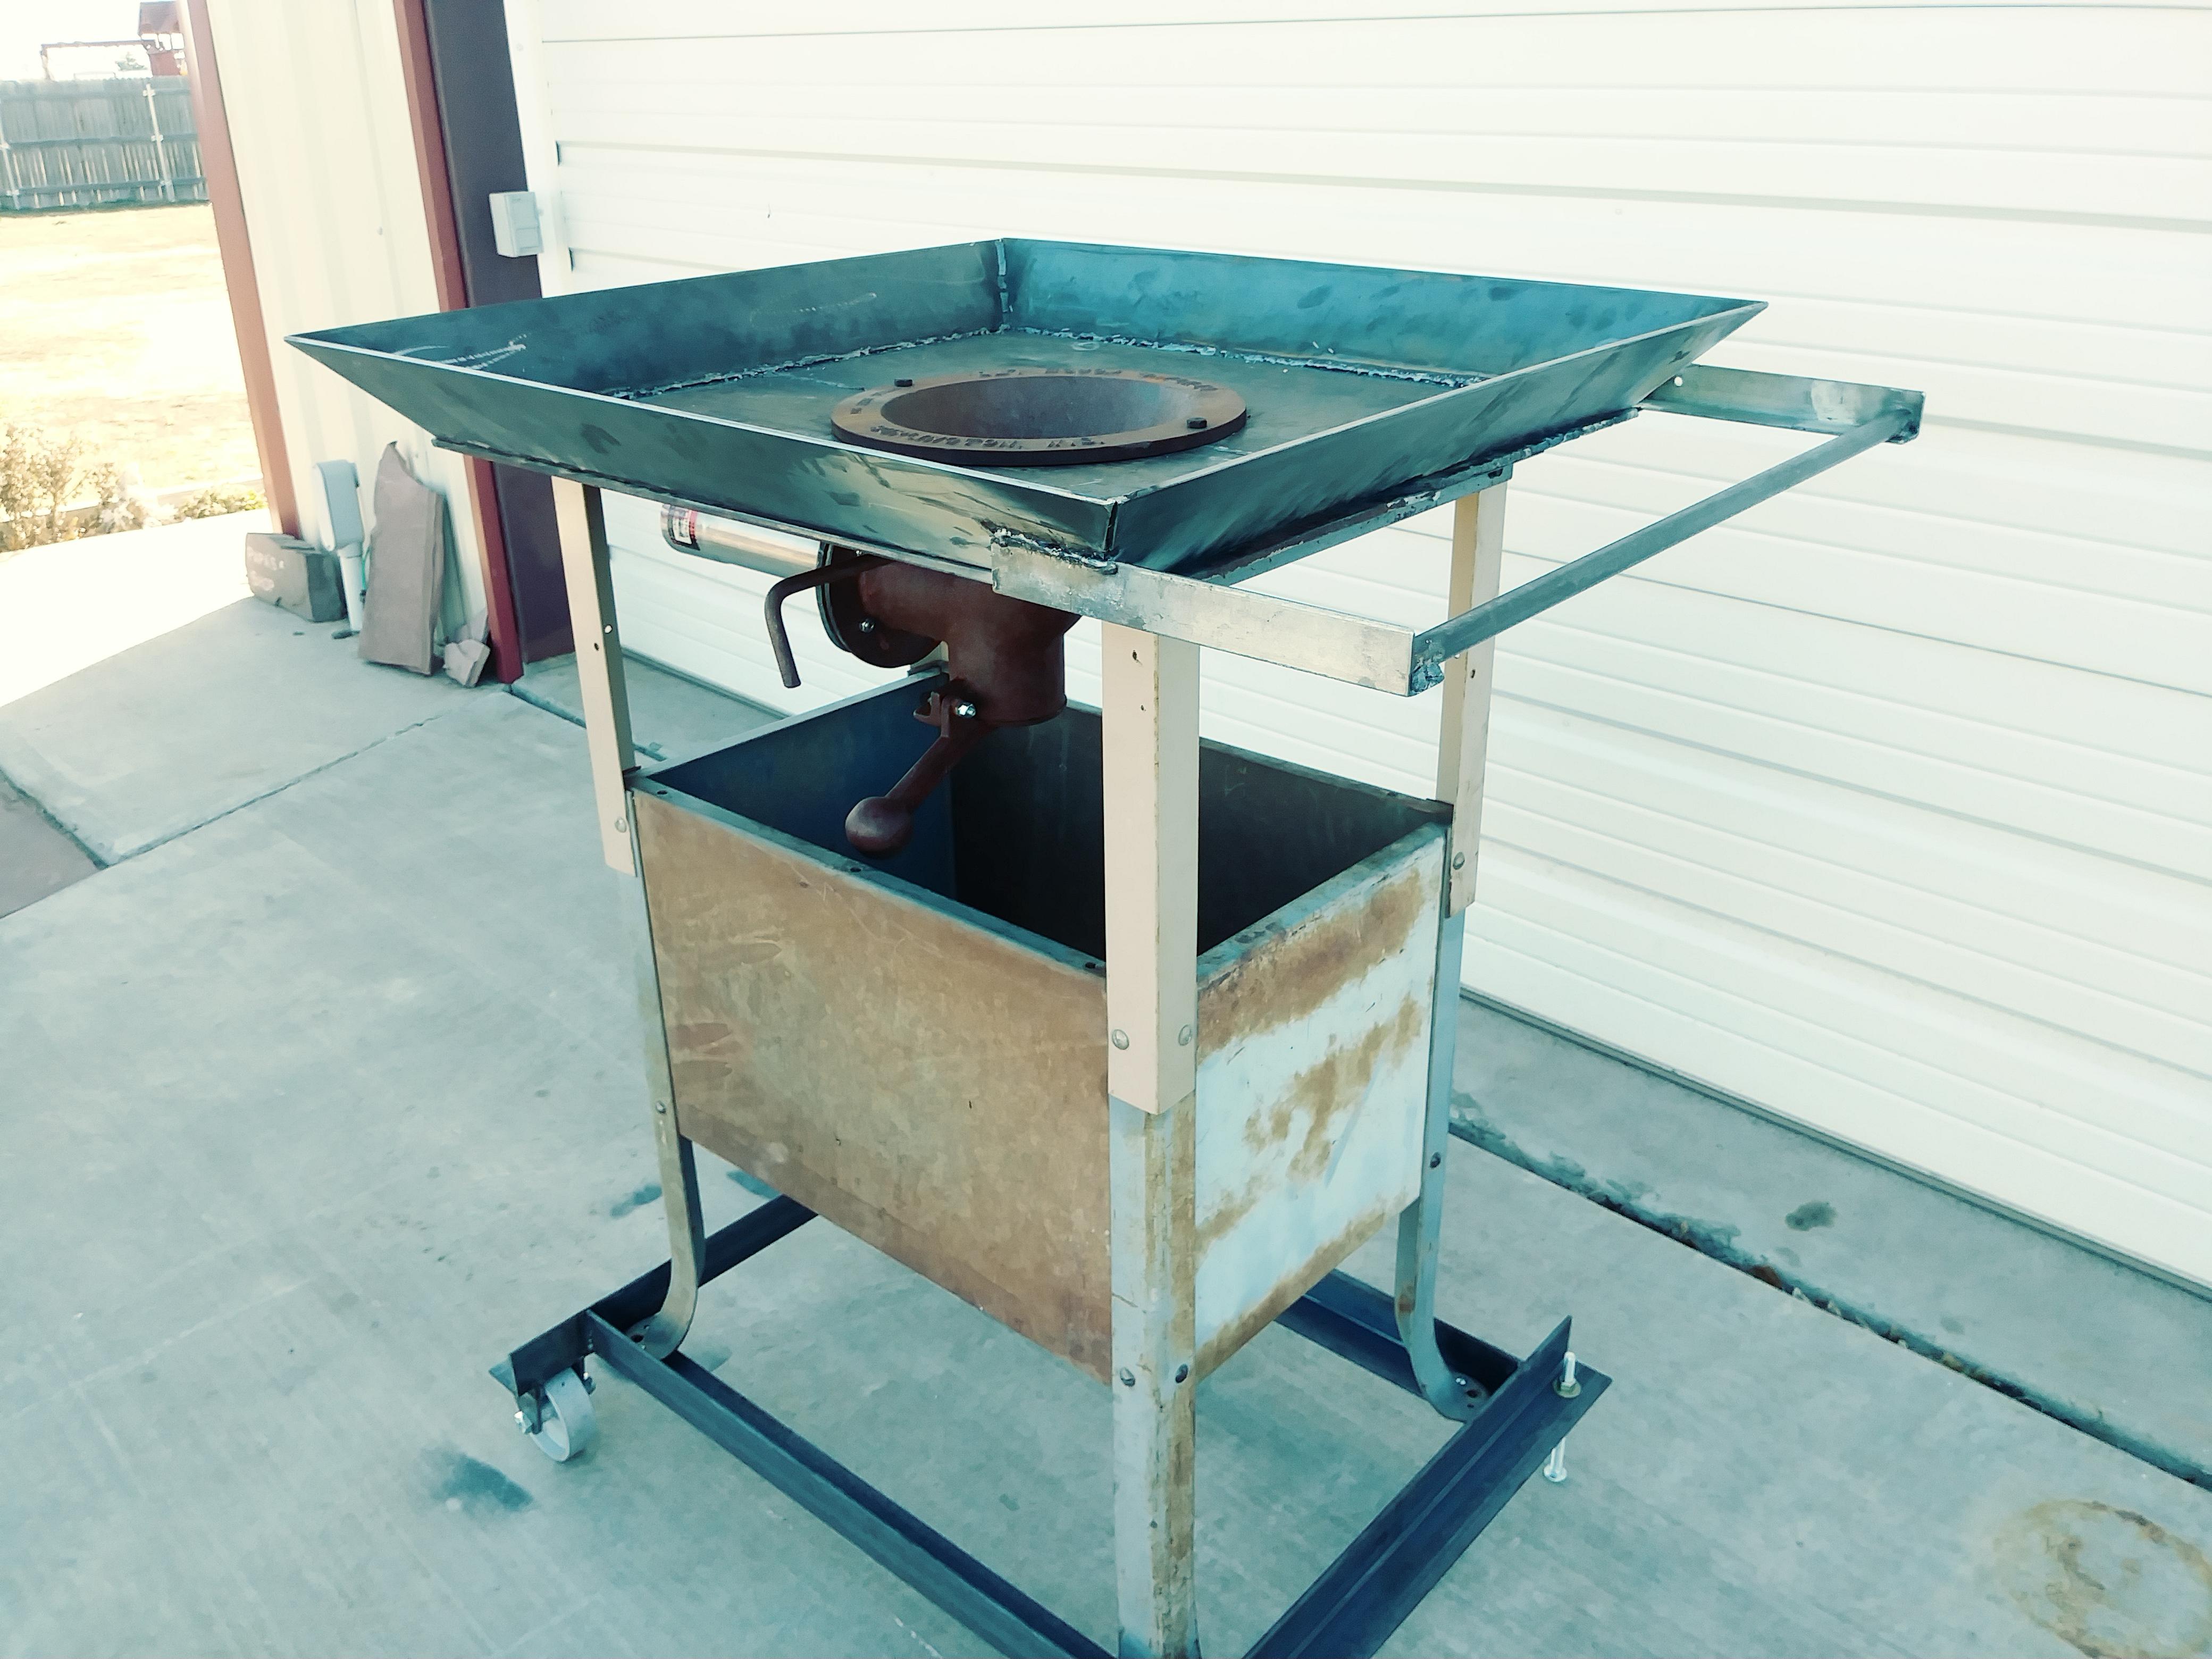
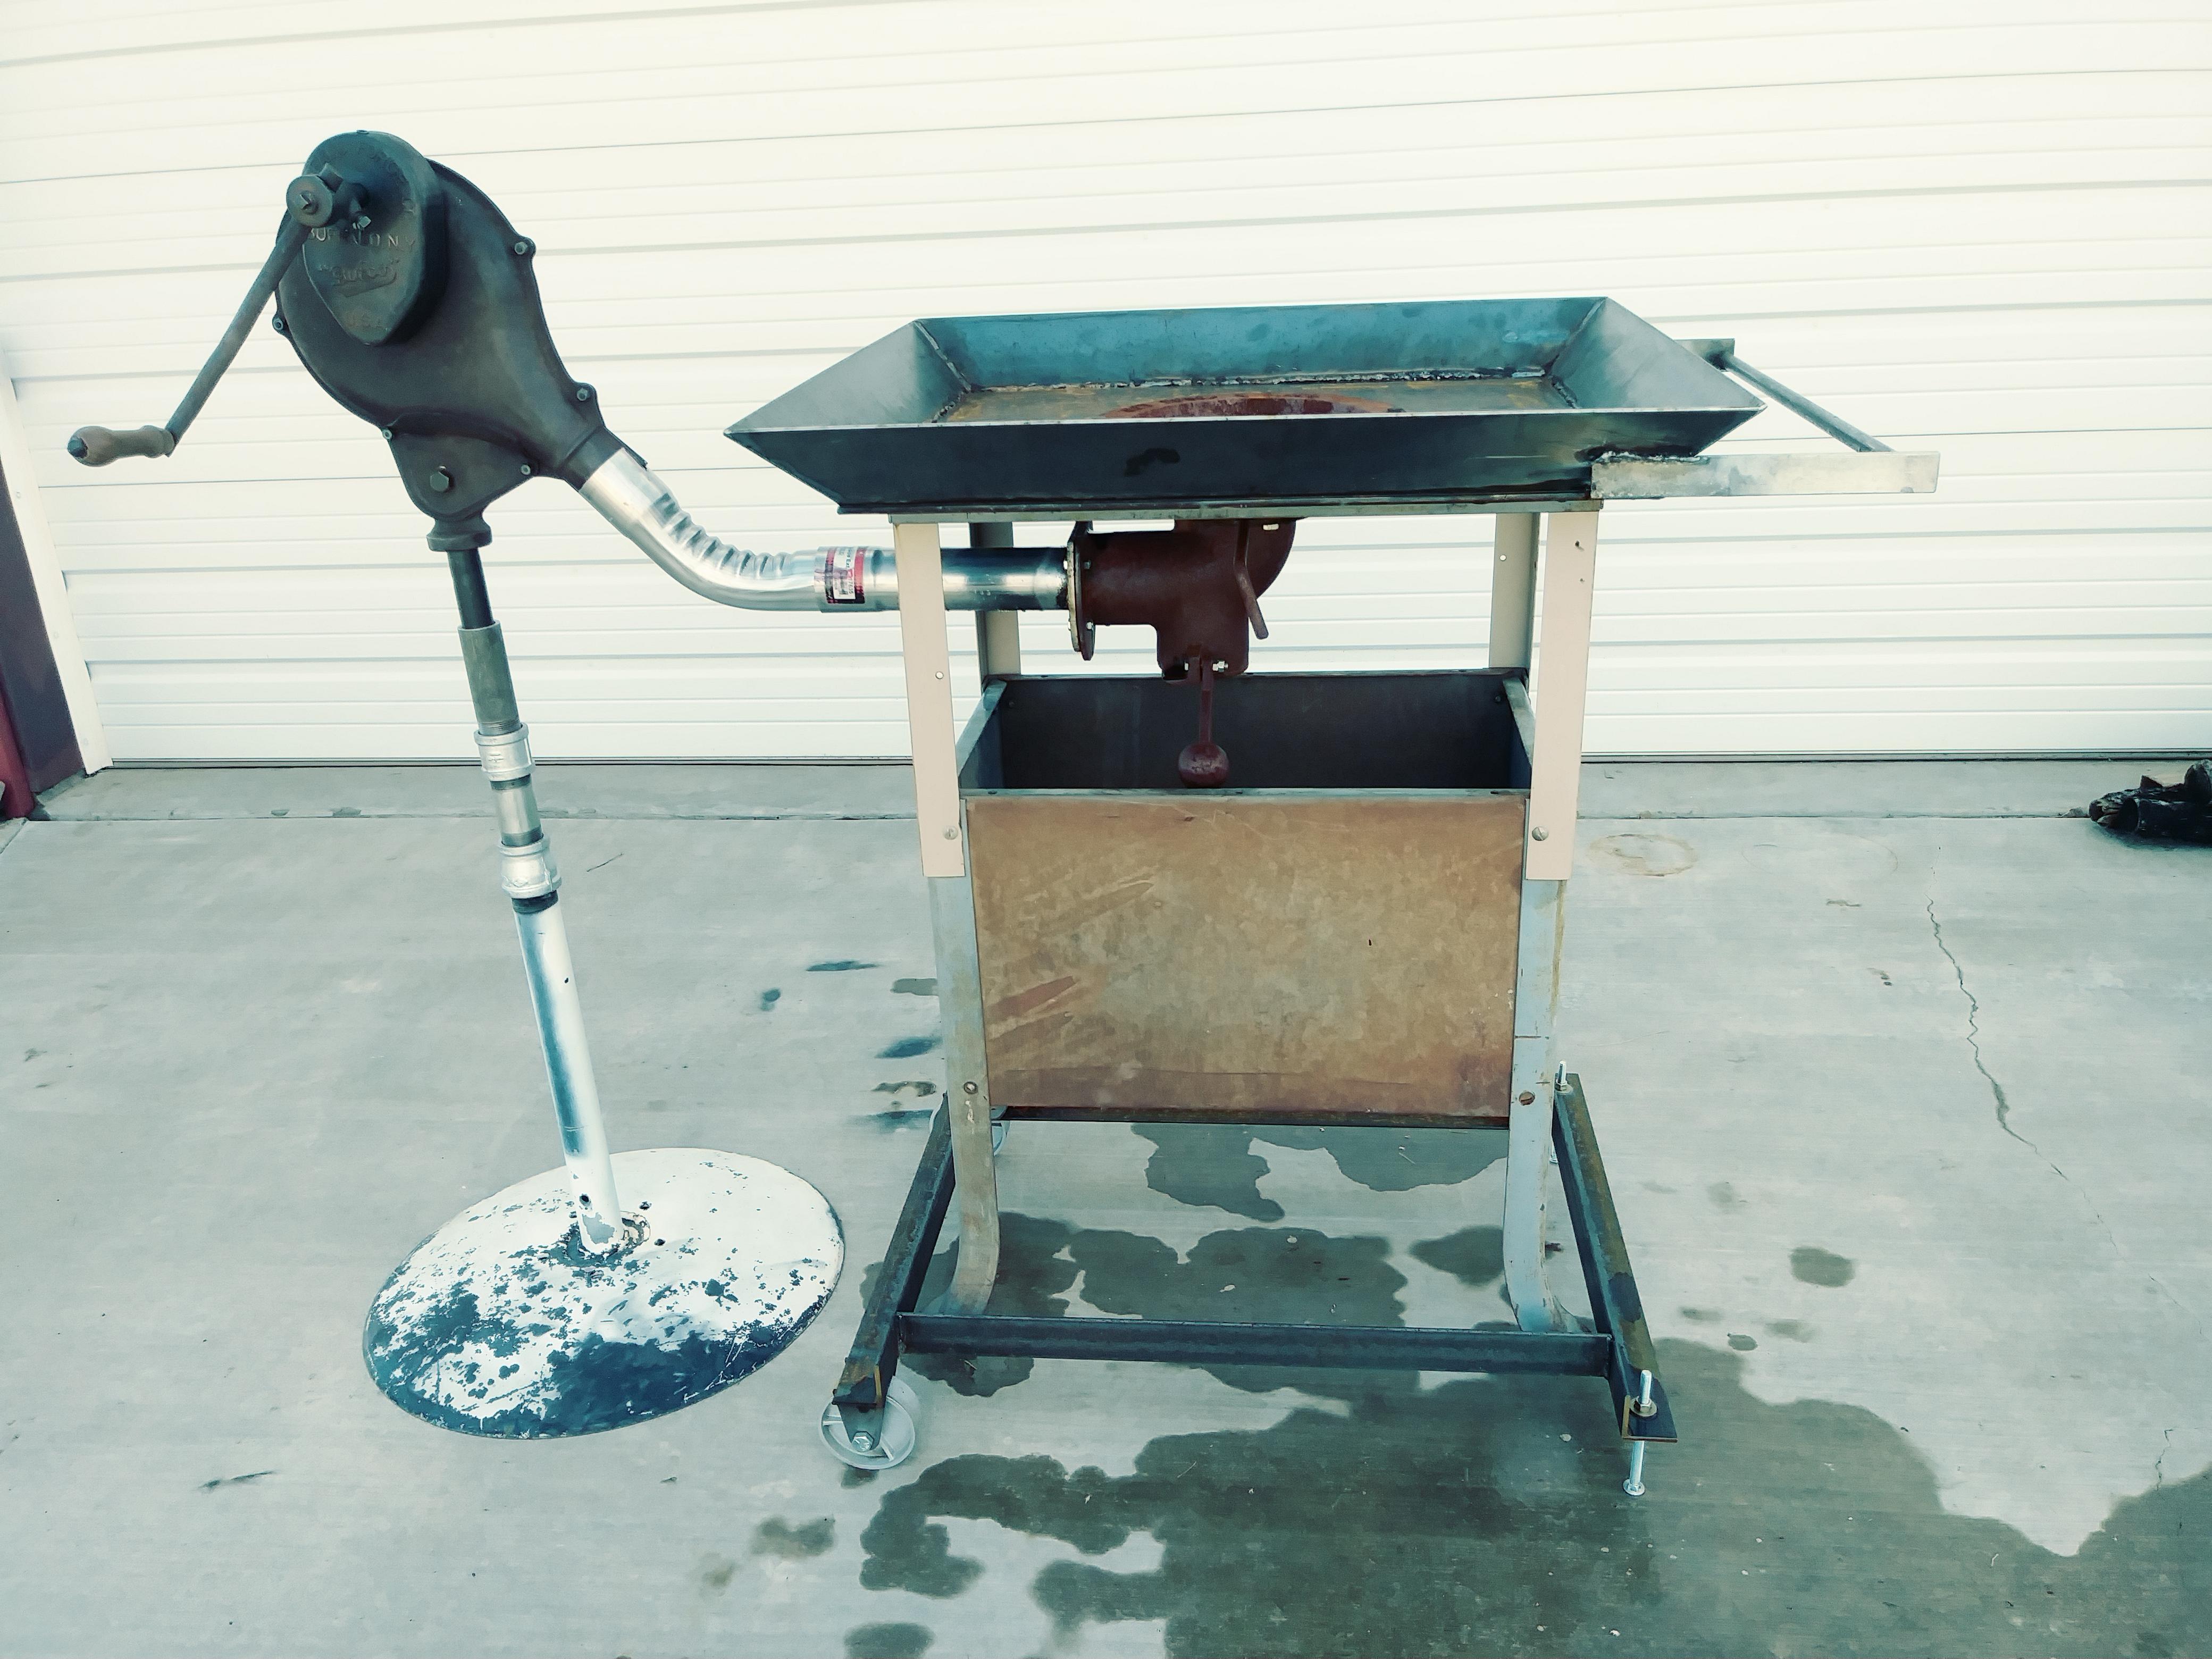
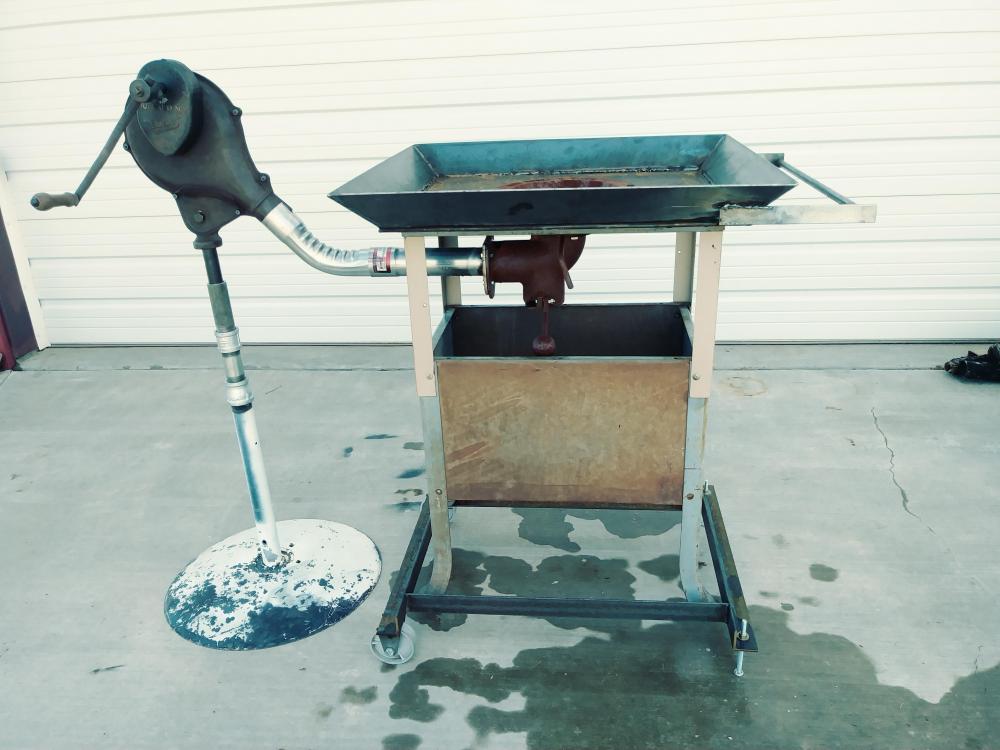
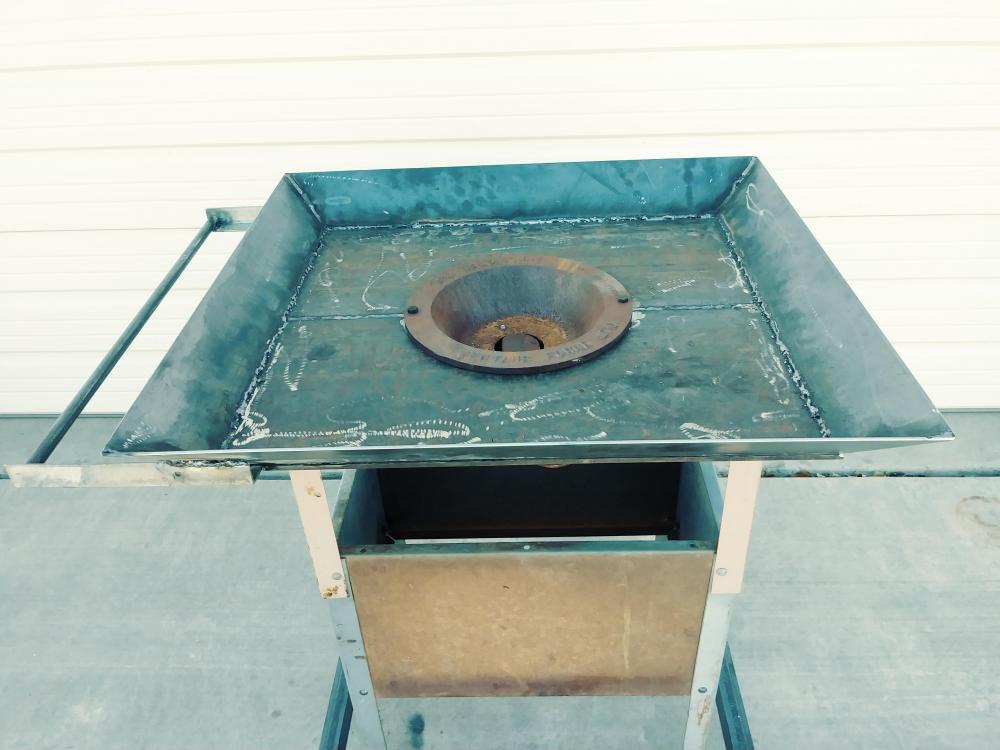
My current air piping is a prototype setup. When I firm it up, I'll put a tee in so I can have a secondary air supply from a "constant" source. That way, I can use either. I'd prefer using a hand crank and will source future coal accordingly. Can bituminous coal be broken up in your hands easily? Mine seems to hard fur that. Maybe I'm not 100% sure about it being anthracite. I assumed so... FYI, the "box" below the clean out tee is open bottomed. I'll have more to report when I actually burn coal in it.
-
Anthracite.
-
I had already planned to add notches but decided to wait until my personal preference (after use) of front-to-back or side-to-side lay-out is decided. I picked up a deal on close to 400 lb of coal I'm itching to get into. Dan
-
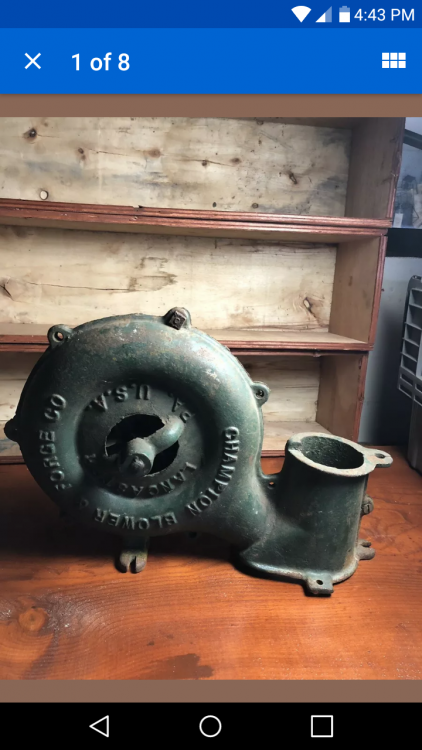
I just finished restoring a Bufco blower and fabricating a bottom blast coal forge. I intended to "first fire" it yesterday but the wind kicked up and I thought better of it. I purposely used as much on-hand materials and components as I could to keep the cost down and thin the "clutter". I found a local guy selling an unused Centaur fire pot assembly (for a fraction of the cost) after changing his mind about his forge plans. Photos:

-
I just finished restoring a Buffalo Forge blower. Mine was a little simpler but the same in principle. I doubt there's anything drastically wrong with your unit. To accommodate reasonable manufacturing tolerances, they used shims to position the gears on the shafts and align the meshing teeth. Find some thin quasi- precision washer/ shims (mine are brass) and start playing with it. Due to the high speed increase, it takes a lot of torque to turn these. A bind anywhere in the gear train is hard to overcome. Obviously, getting the gears in the right places matter. Hopefully you took pictures you can look at. Good luck. Dan
-
Any idea of the approximate speed the blower below was meant to run at? It has a belt/pulley and it isn't clear to me if it was meant to run off a motor or hand crank system. Thanks in advance. Dan
-
New with a Kohlswa Anvil (I think)
DanJohnson replied to DanJohnson's topic in Anvils, Swage Blocks, and Mandrels
I finally got my anvil mounted. When I got it it came on a very crude stand assembly but some of the components had promise. The base section is a VERY heavy cast iron/steel turbine pump section with an approximate weight of north of 300#. The middle portion was a section of thick wall steel pipe which bolted to the cast base with studs welded to the pipe. I cut away a very crude mounting arrangement on top of the pipe section and shortened the pipe to the anvil working height I was shooting for. I then welded a round 3/4" steel plate to the thick wall pipe. The crescent-shaped locators were salvaged from the original crude arrangement. My welding is still a bit crude but I'm making progress... To dampen out the ringing, I put 3/16 EPDM rubber between : 1. The pipe section and casting, 2. The anvil and the 3/4" plate, and 3. A boss on the casting which reaches up under the 3/4" plate (not visible in the photo). I finalized the mounting by clamping the anvil to the 3/4" plate with toe-clamps. The mounting is rock solid and the rubber interfaces dampen the ringing nicely. I'd estimate 500 lbs (+) total but its fairly easy to move by rolling on the edge of the base. I finished up by carefully radiusing the edges of the anvil face to get rid of the sharp corners. I'm very pleased with how it turned out. I've been rounding up some very nice hammers and am about ready to start. I've found a propane forge I can borrow until I make a decision between coal and propane. I'm about to go get some sucker rod and begin making tongs and a few hardies. Enough words... Enjoy the eye candy. Dan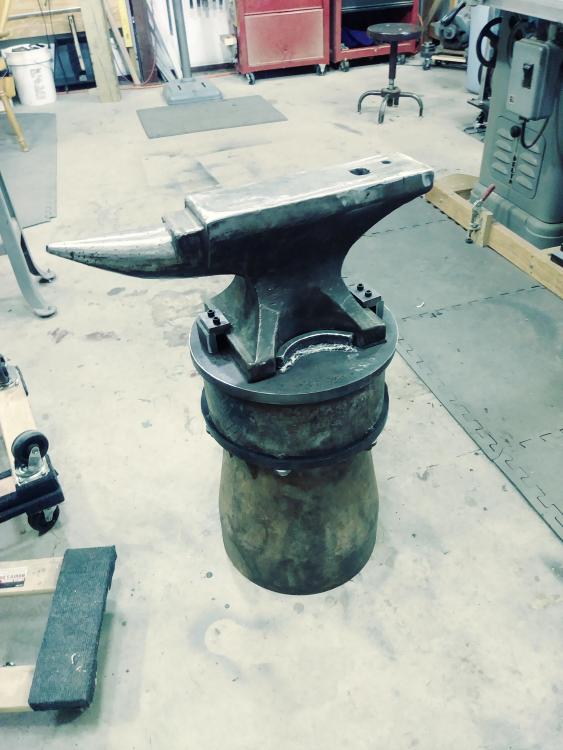
-
New with a Kohlswa Anvil (I think)
DanJohnson replied to DanJohnson's topic in Anvils, Swage Blocks, and Mandrels
You know your anvil better than anyone but I'd be surprised if it has a hardened face. Didn't think the Swedes ever did that. I think charcoal steel relates to the process of the iron making. In most modern iron making, coal is used. In some processes, charcoal was used. Apparently, it helps create a tough and durable iron. -
New with a Kohlswa Anvil (I think)
DanJohnson replied to DanJohnson's topic in Anvils, Swage Blocks, and Mandrels
BTW, the clip above is from the Janney, Semple, Hill & Co. Catalog from 1934. They were a big supplier of hardware, dry goods, etc. (along the lines of the old Sears & Roebuck) located in Minneapolis. So.....that's where I'm going to date mine until told otherwise. I feel pretty certain mine is a North Star (aka Kohlswa). Again, open to changing my opinion on that when shown better data than I've come up with. -
New with a Kohlswa Anvil (I think)
DanJohnson replied to DanJohnson's topic in Anvils, Swage Blocks, and Mandrels
I did find this the other day. Apparently, North Star imported Kohlswa anvils. My 125# Kohlswa conforms fairly well to the dimensions in the table. Dan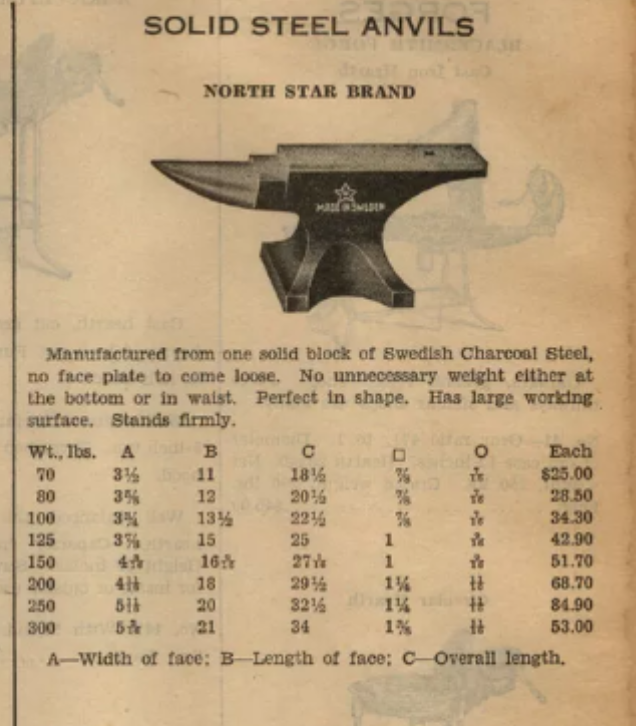
-
New with a Kohlswa Anvil (I think)
DanJohnson replied to DanJohnson's topic in Anvils, Swage Blocks, and Mandrels
Ausfire, Nice Kohlswa anvil in it's natural habitat. I've not seen anything helpful relative to coming up with a vintage on these anvils. It'll turn up at some point. Dan -
New with a Kohlswa Anvil (I think)
DanJohnson replied to DanJohnson's topic in Anvils, Swage Blocks, and Mandrels
IF&C, Yep, I saw and read that post. It was informative. I'll be pounding on the anvil soon. Trying to decide on a forge...coal or propane. I'd still like to understand it better. That kind of stuff really interests me. I doubt I need to explain that to any of you. Dan -
New with a Kohlswa Anvil (I think)
DanJohnson replied to DanJohnson's topic in Anvils, Swage Blocks, and Mandrels
Urge to resurface completely managed... Also, profile updated.