Cedar Crest Forge
-
Posts
114 -
Joined
-
Last visited
Content Type
Profiles
Forums
Articles
Gallery
Downloads
Events
Everything posted by Cedar Crest Forge
-
571 pound new to me anvil
Cedar Crest Forge replied to SilentForge's topic in Anvils, Swage Blocks, and Mandrels
Nice anvil! If you notice it walking, try 4 nails, one on the inside of each foot. That is what I use anyway, for my temporary setups. -
571 pound new to me anvil
Cedar Crest Forge replied to SilentForge's topic in Anvils, Swage Blocks, and Mandrels
Wow, what a wonderful deal for a German style anvil. Keep the good karma going by forging something wonderful on it ! -
Anvil $ per pound in my area
Cedar Crest Forge replied to Chris C's topic in Anvils, Swage Blocks, and Mandrels
Oklahoma is usually a good place to find anvils, due to the number of old farms and ranches. If you can avoid the big auction houses and city antique stores, you should do fine. 2 to 3$ a pound I am guessing. Ask around...network your way to an old farmer. And don't forget to bring a ball bearing. If you run out of luck, expand your search to nearby states, like Kansas. But avoid New Mexico...prices are much higher in the southwest , compared to the mid west. -
Looks like a fun project. If you can afford it, I also encourage you to look into 2 x 72 grinders. There is a lot more available in 2 x 72 : Plans, Parts, accessories, training videos, belts, etc will be easier to find. As an aside, I still have my 4 x 36. Sometimes I just don't need to fire up a 2 hp 2 x 72 grinder. You can also get surface conditioning belts for the 4 x 36.
-
Hauling a hammer a LONG way
Cedar Crest Forge replied to RKM556's topic in Power Hammers, Treadle Hammers, Olivers
Will you be traveling from Atlanta to Washington with an empty load? You may want to consider picking up a load to help offset the gas costs. I would mention where to look for loads, but my post would probably be deleted and I would be issued another 2 warnings for advertising and swearing. Apparently, an advertisement is like swearing on this site, lol. -
Sure, that may work. Or any metal cart may be a good start. Side notes: There are many other ways to attach metal, besides welding. In most cities, recycled metal is cheap, no need to buy new. Those pictures are humorous to me. A carpenters mind at work. I wonder if the plywood floor comes as a bonus gift with the second blacksmith forge. What they should have done instead is just made simple metal legs, like a rivet forge.
-
Not sure if you are joking. The table has other uses for the shop. Replace 3 top boards and it is back to a normal table. I am simply suggesting to make the forge all metal (well, non-combustible. It could be brick, stone...) , for fire safety reasons. If you go online, you will not find any modern propane or coal forge that is constructed with wood.
-
The tuyere is 22$. T pipe suggestion is a good idea then , as 400$ is a lot! . p.s. If you put a hot piece of metal on sheet steel, it may still burn any wood supports underneath it. Heat transfer. Same physics apply to your pipe. As it is, the hot coal will slide down the pipe, catch the wood support on fire, and then travel up to the rest of it, all while you are in the front yard, distracted. (Murphy's Law)
-
Nice forge start. Wood though? Is there a thrifty store near you where you could buy an old metal desk , or maybe a metal retail display with a shelf, cut a hole in the center, and use that instead of the wood? It looks like a fire waiting to happen. Plus, you could then put your hot items down safely. Actually, your entire area looks unsafe to forge in. Smiths occasionally drop hot steel, and if it fell under that shed, it would make quite a mess. p.s. You can buy the bottom part of the forge, tuyere etc, in solid cast iron and well within your budget.
-
DIY surface grinder....Links?..
Cedar Crest Forge replied to Peppie's topic in Grinders, Sanders, etc
So you are looking for an x y z table mounted sideways to your grinder, correct? By the time you are done, you will basically have what ThomasPowers mentioned, except sideways. -
Great knives, looks like they were fun to make! And Frosty is helping, so you are good there as well. As for breaking bits, did you want additional advice? If so, how exactly are they breaking? What is your process, and what step in the process are breaking them? I am sure we can help refine your technique so you do not break as many. I can only guess at possible problem areas: Are you using a drill press, and if so, is the handle moving around as you drill? Are you using the drill bit , or the foredom, to start the hole? What speed are you drilling the bone at? High or low? Drill bit brand?
-
Yeah, thats what I meant. The standard area. Thanks for clarifying.
-
Interesting anvil. For weight, look for the english weight marks on the end of the feet. I am guessing about 300 lbs. Looks like the thinner tool steel plate was welded on over the original plate, probably at the factory. Should be fine as long as you use the other side, and don't miss with a sledgehammer too often. Suggestion is to make a striking anvil instead, if you plan on having a striker. Your anvil looks like a better deal than what I am seeing out here in the southwest usa. If you clean it, and want to keep the original patina for historical or antique purposes, than use a wire wheel , rather than a flap wheel or grinder. Then BLO.
-
Little Giant has been selling dies with this design, as the "two piece interchangeable system". How well it holds up under stress, I don't know, but they have been selling them since 2002.
-
found a leg vice online for 50 bucks. help me ID it?
Cedar Crest Forge replied to CheechWizard's topic in Vises
Nice vise, but that doesn't look like a blacksmithing vise. Actually, those sanders don't look like they were designed for a blacksmith shop either. What exactly is your goal? In an ideal setting, you would have a mentor guiding your projects, and the tools you buy would directly support those projects. It looks like you are randomly buying tools. Those tools will then decide what projects you will be able to make. This is the opposite of where you want to be. -
A few questions about blacksmithing
Cedar Crest Forge replied to Astargath's topic in Blacksmithing, General Discussion
If you are serious about your game, start with research. Buy a few books and dig in. Attend some meetings. Then ask questions to fill in the gaps. -
found a leg vice online for 50 bucks. help me ID it?
Cedar Crest Forge replied to CheechWizard's topic in Vises
Looks like a neat old tool. Made of sheet metal though, so it may rattle around a bit if you are grinding metal with it. No rubber contact wheel..so looks like it was designed for flat grinds. Motor may be just for wood..check it it is open face or TEFC. That lower smaller wheel could probably be repositioned towards the back instead..giving you any size belt you wanted. -
found a leg vice online for 50 bucks. help me ID it?
Cedar Crest Forge replied to CheechWizard's topic in Vises
That certainly changes things. 8 hours, 65mph? ~500 miles? In a truck that is ~100$ in gas, plus motel costs, dinner costs... plus speeding ticket costs for going 75mph to try to beat that "other guy" who is getting off work in 3 hours. -
New with a Kohlswa Anvil (I think)
Cedar Crest Forge replied to DanJohnson's topic in Anvils, Swage Blocks, and Mandrels
Chances are it is cast steel, which means the hardness most likely goes deeper than the normal welded tool steel plate anvils. Have you tried flipping it on its side and doing a few rebound tests? (maybe with a board or two underneath to keep it level). Is it still 90% an inch or two down from the top? -
Thanks everyone! I will pass on this one.
-
Thanks for your thoughts. I have usable anvils now, I was just looking at it as a challenge, to bring it back to life. If it is going to cost a lot in time and materials to repair, from a master blacksmith like Robb Gunter , then I will pass on it.
-
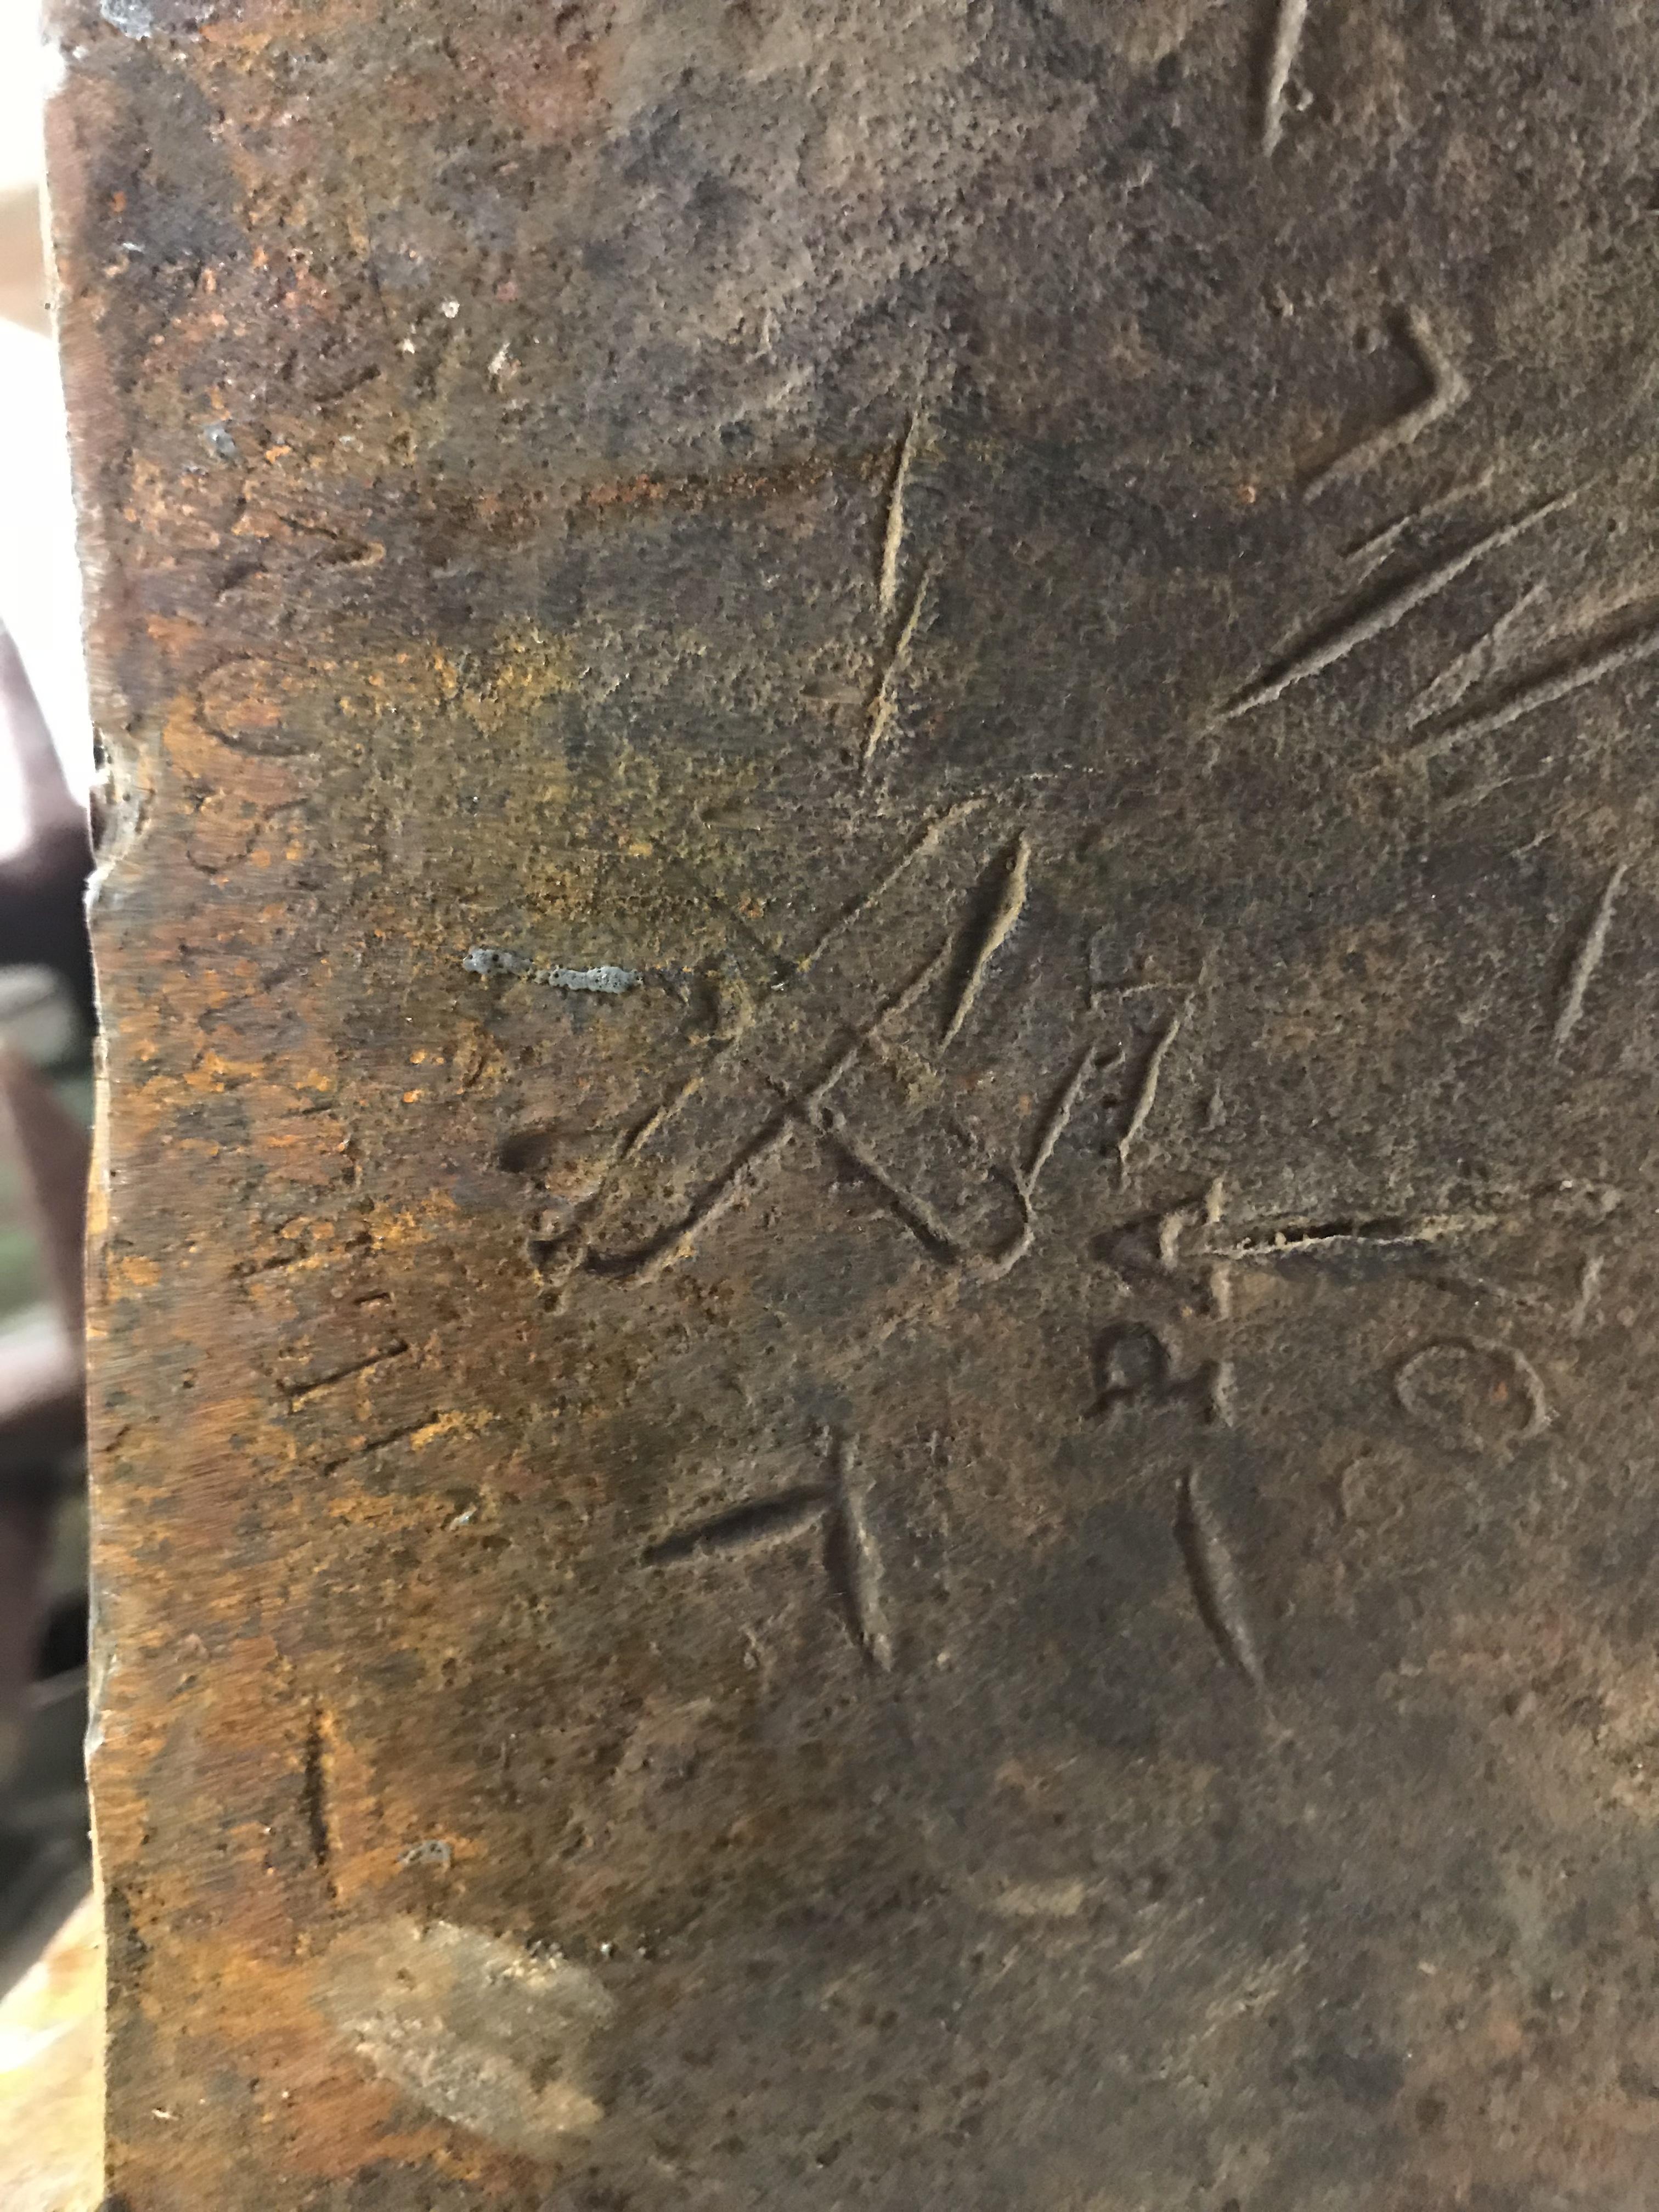
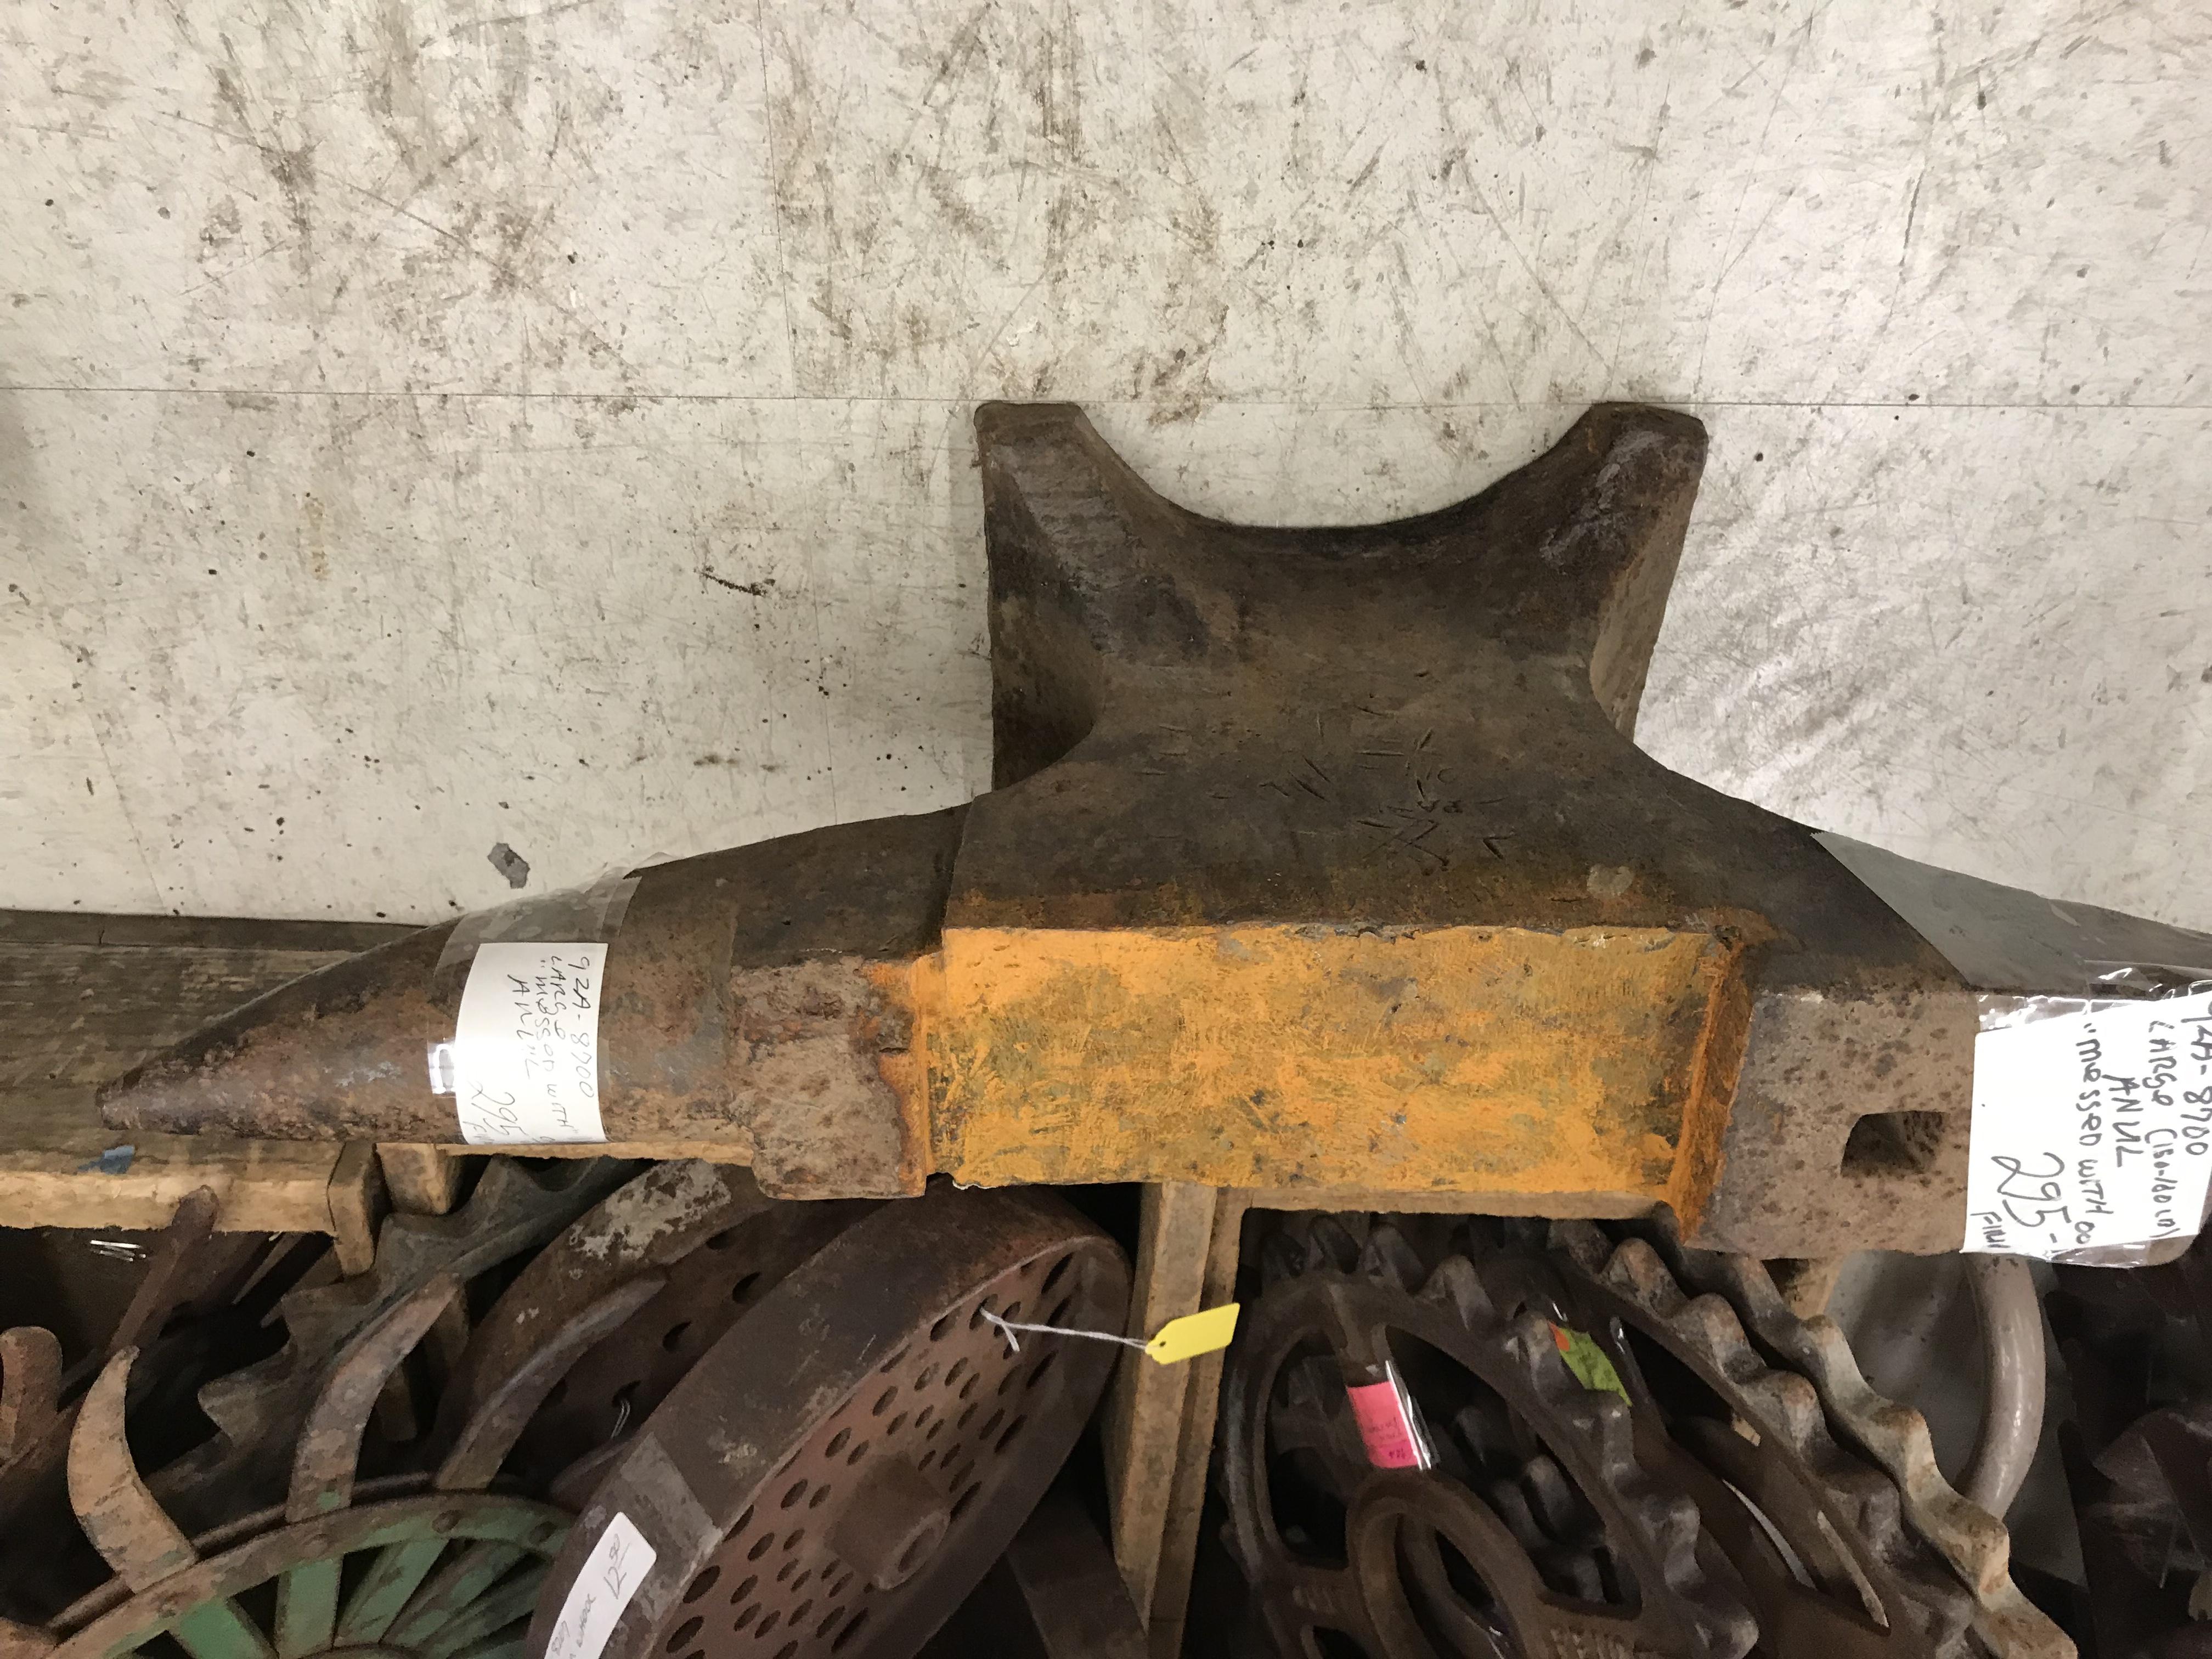
I noticed this anvil at a local second hand store today. Any idea of the maker? the logo at least is clear. I am not sure if this one could be restored. Perhaps it can be turned into a cutlers anvil by welding on some one inch plate sections, I don't know. Is it worth bothering with?


-
If he wants a hammer from Kens shop, then sure, let him buy one. Their quick tongs are great, and the items are American made. Comments look positive as well: "Very good our students love them" Checking the site, Looks like the 2lbs are in stock, and its all 15% off this weekend! I wonder if that includes their new power hammers. I have been a customer of Kens shop, and the tongs have been great. I think we should support each others products as blacksmiths, where we can.
-
Rust removal from very old butchering knives
Cedar Crest Forge replied to SoCal Dave's topic in Finish and Polish for Knives
"Maybe a new round of epoxy, on any gaps..." -
Rust removal from very old butchering knives
Cedar Crest Forge replied to SoCal Dave's topic in Finish and Polish for Knives
Old wooden handles, neglected on a rusty knife, would most likely have cracks, and gaps between the wood and steel. Gaps that can contaminate the meat. Maybe a new round of epoxy, followed up by sanding, would seal in and keep out contamination, as a final step in the restoration process.