MCalvert
-
Posts
75 -
Joined
-
Last visited
Content Type
Profiles
Forums
Articles
Gallery
Downloads
Events
Everything posted by MCalvert
-
Backfiring elimination (maybe/hopefully) via velocity increase
-
I would recommend reading the consolidated notes (Lou's sticky) and Burners 101 so that when you make a 300-400ci forge to use the other 99.9% of the time you forge, it will be a well-built and useful tool. I hope your behemoth turns out great, and please post all the trial and error so that we can learn from your testing the limits of normally-sized burners in such a whopper. Good luck to ya!
-
I am currently doing this, and I am hopeful it will improve low pressure performance.
-
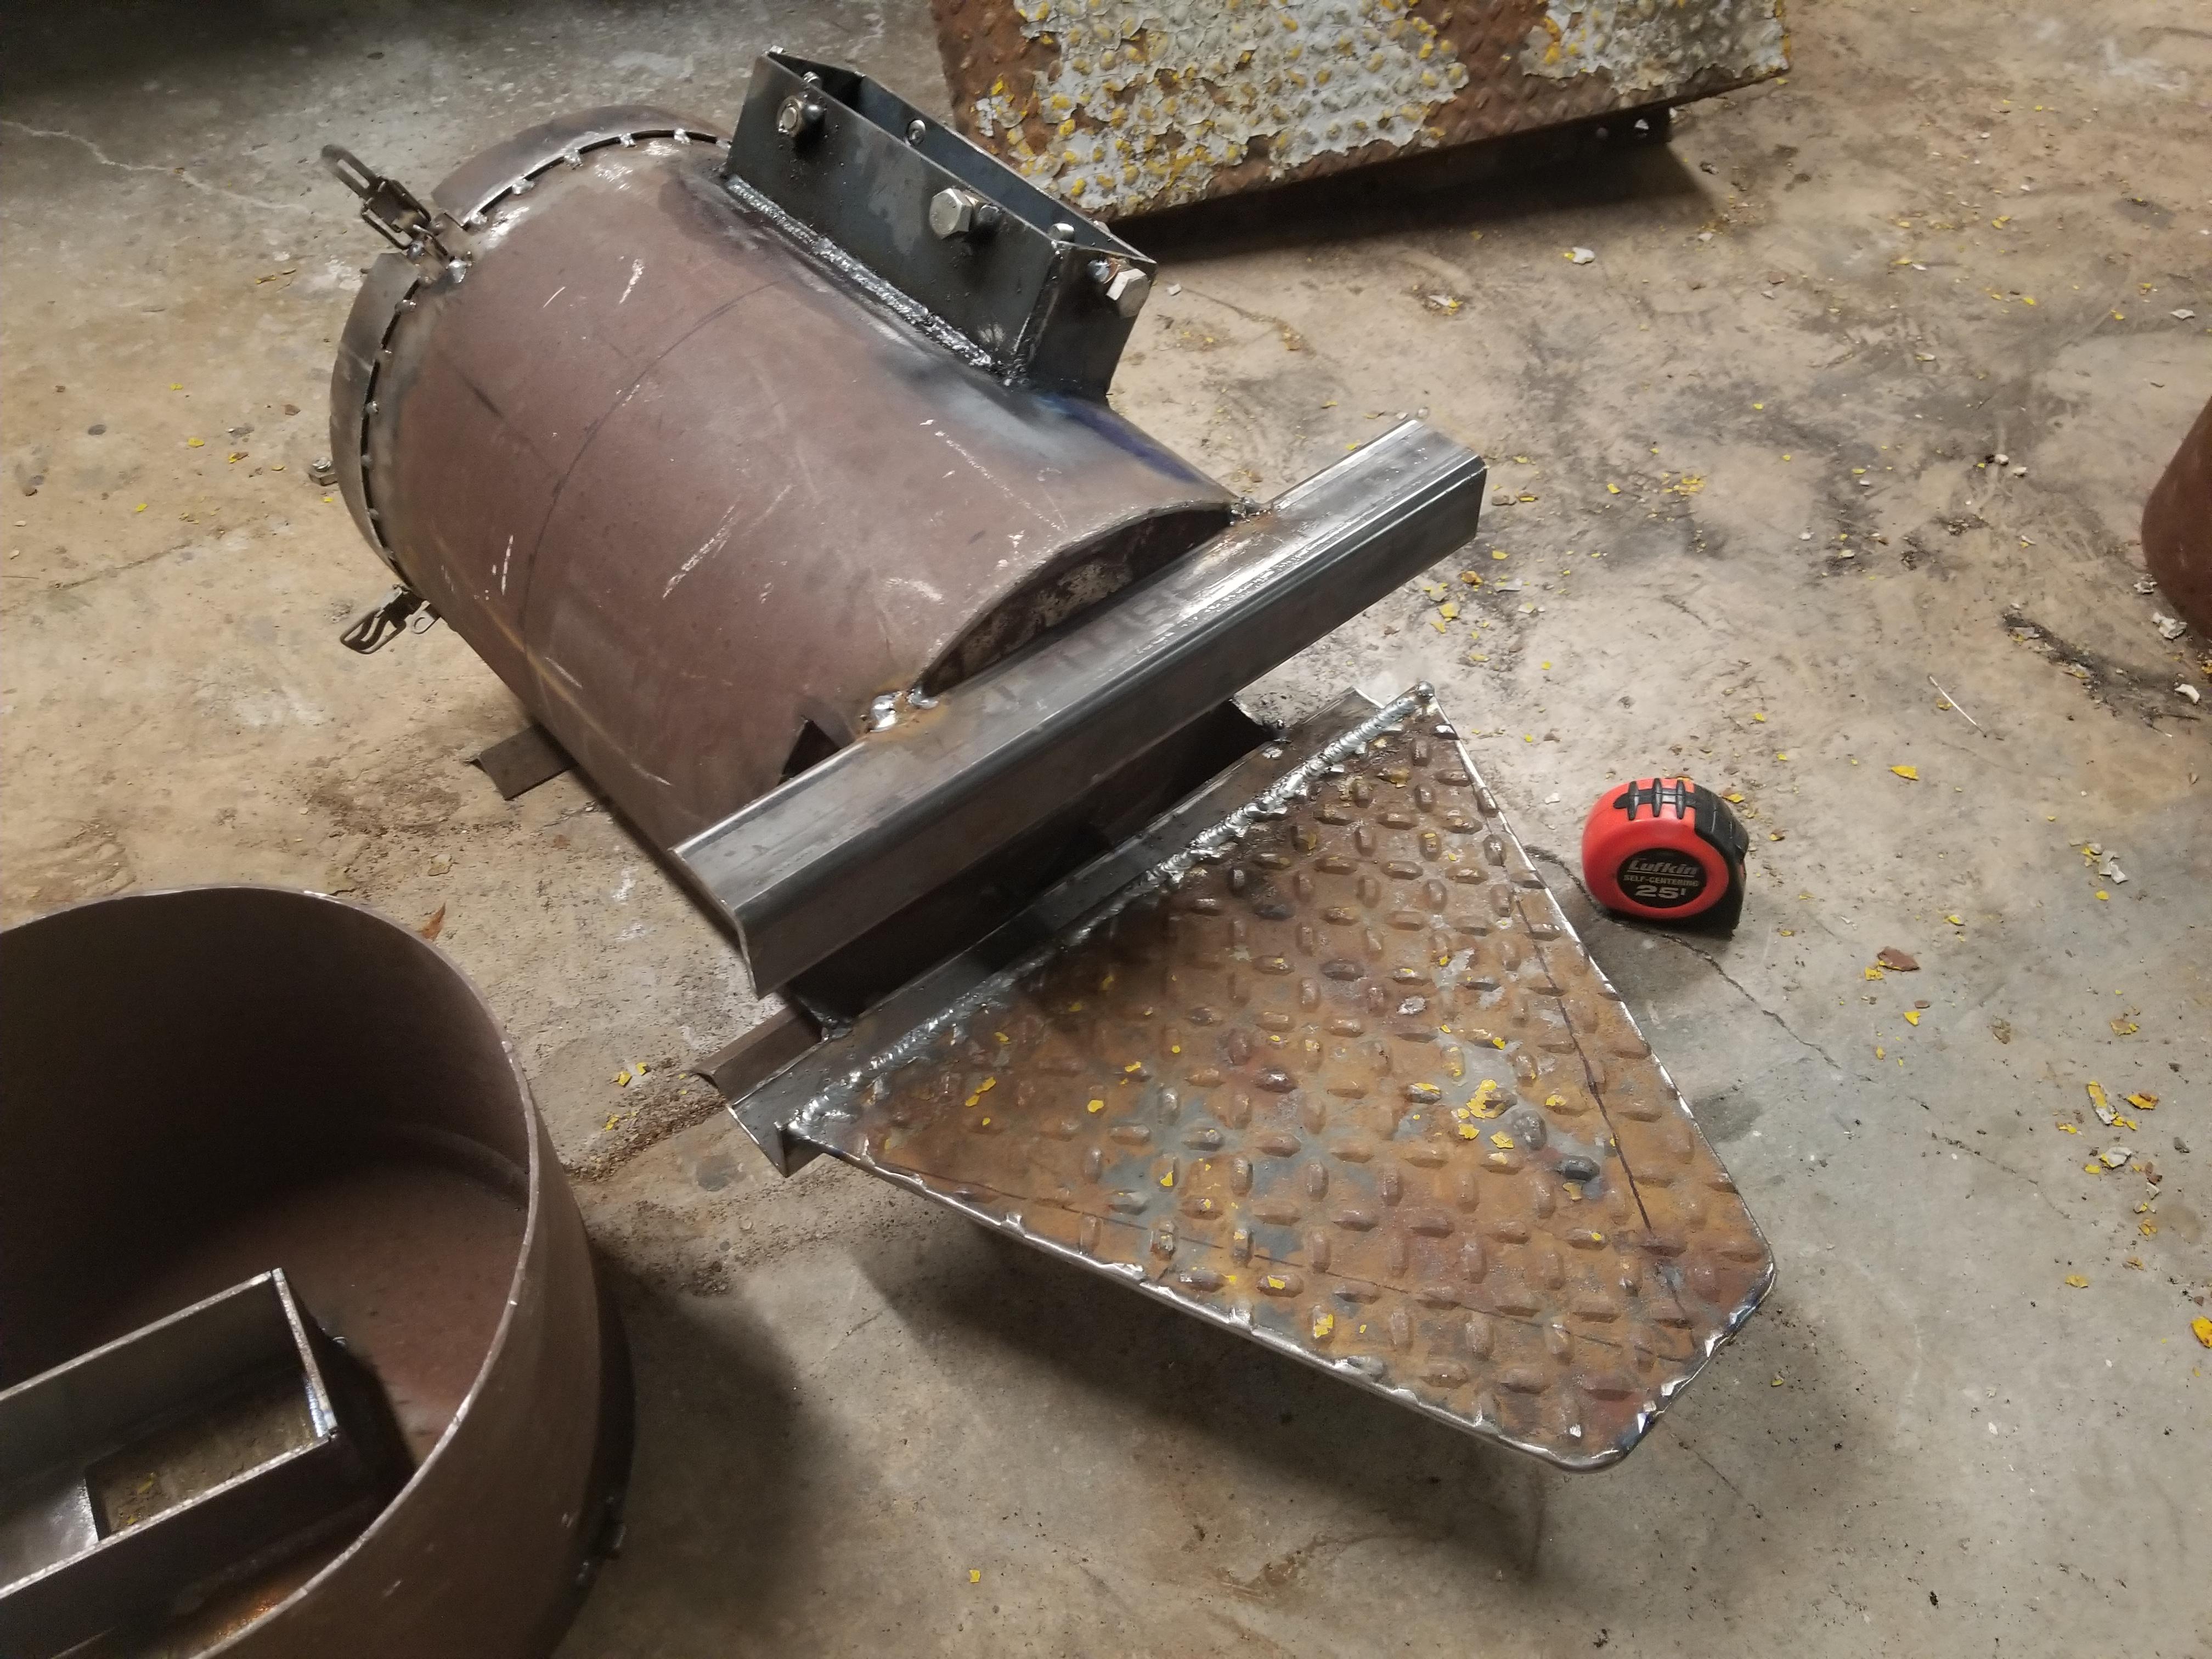
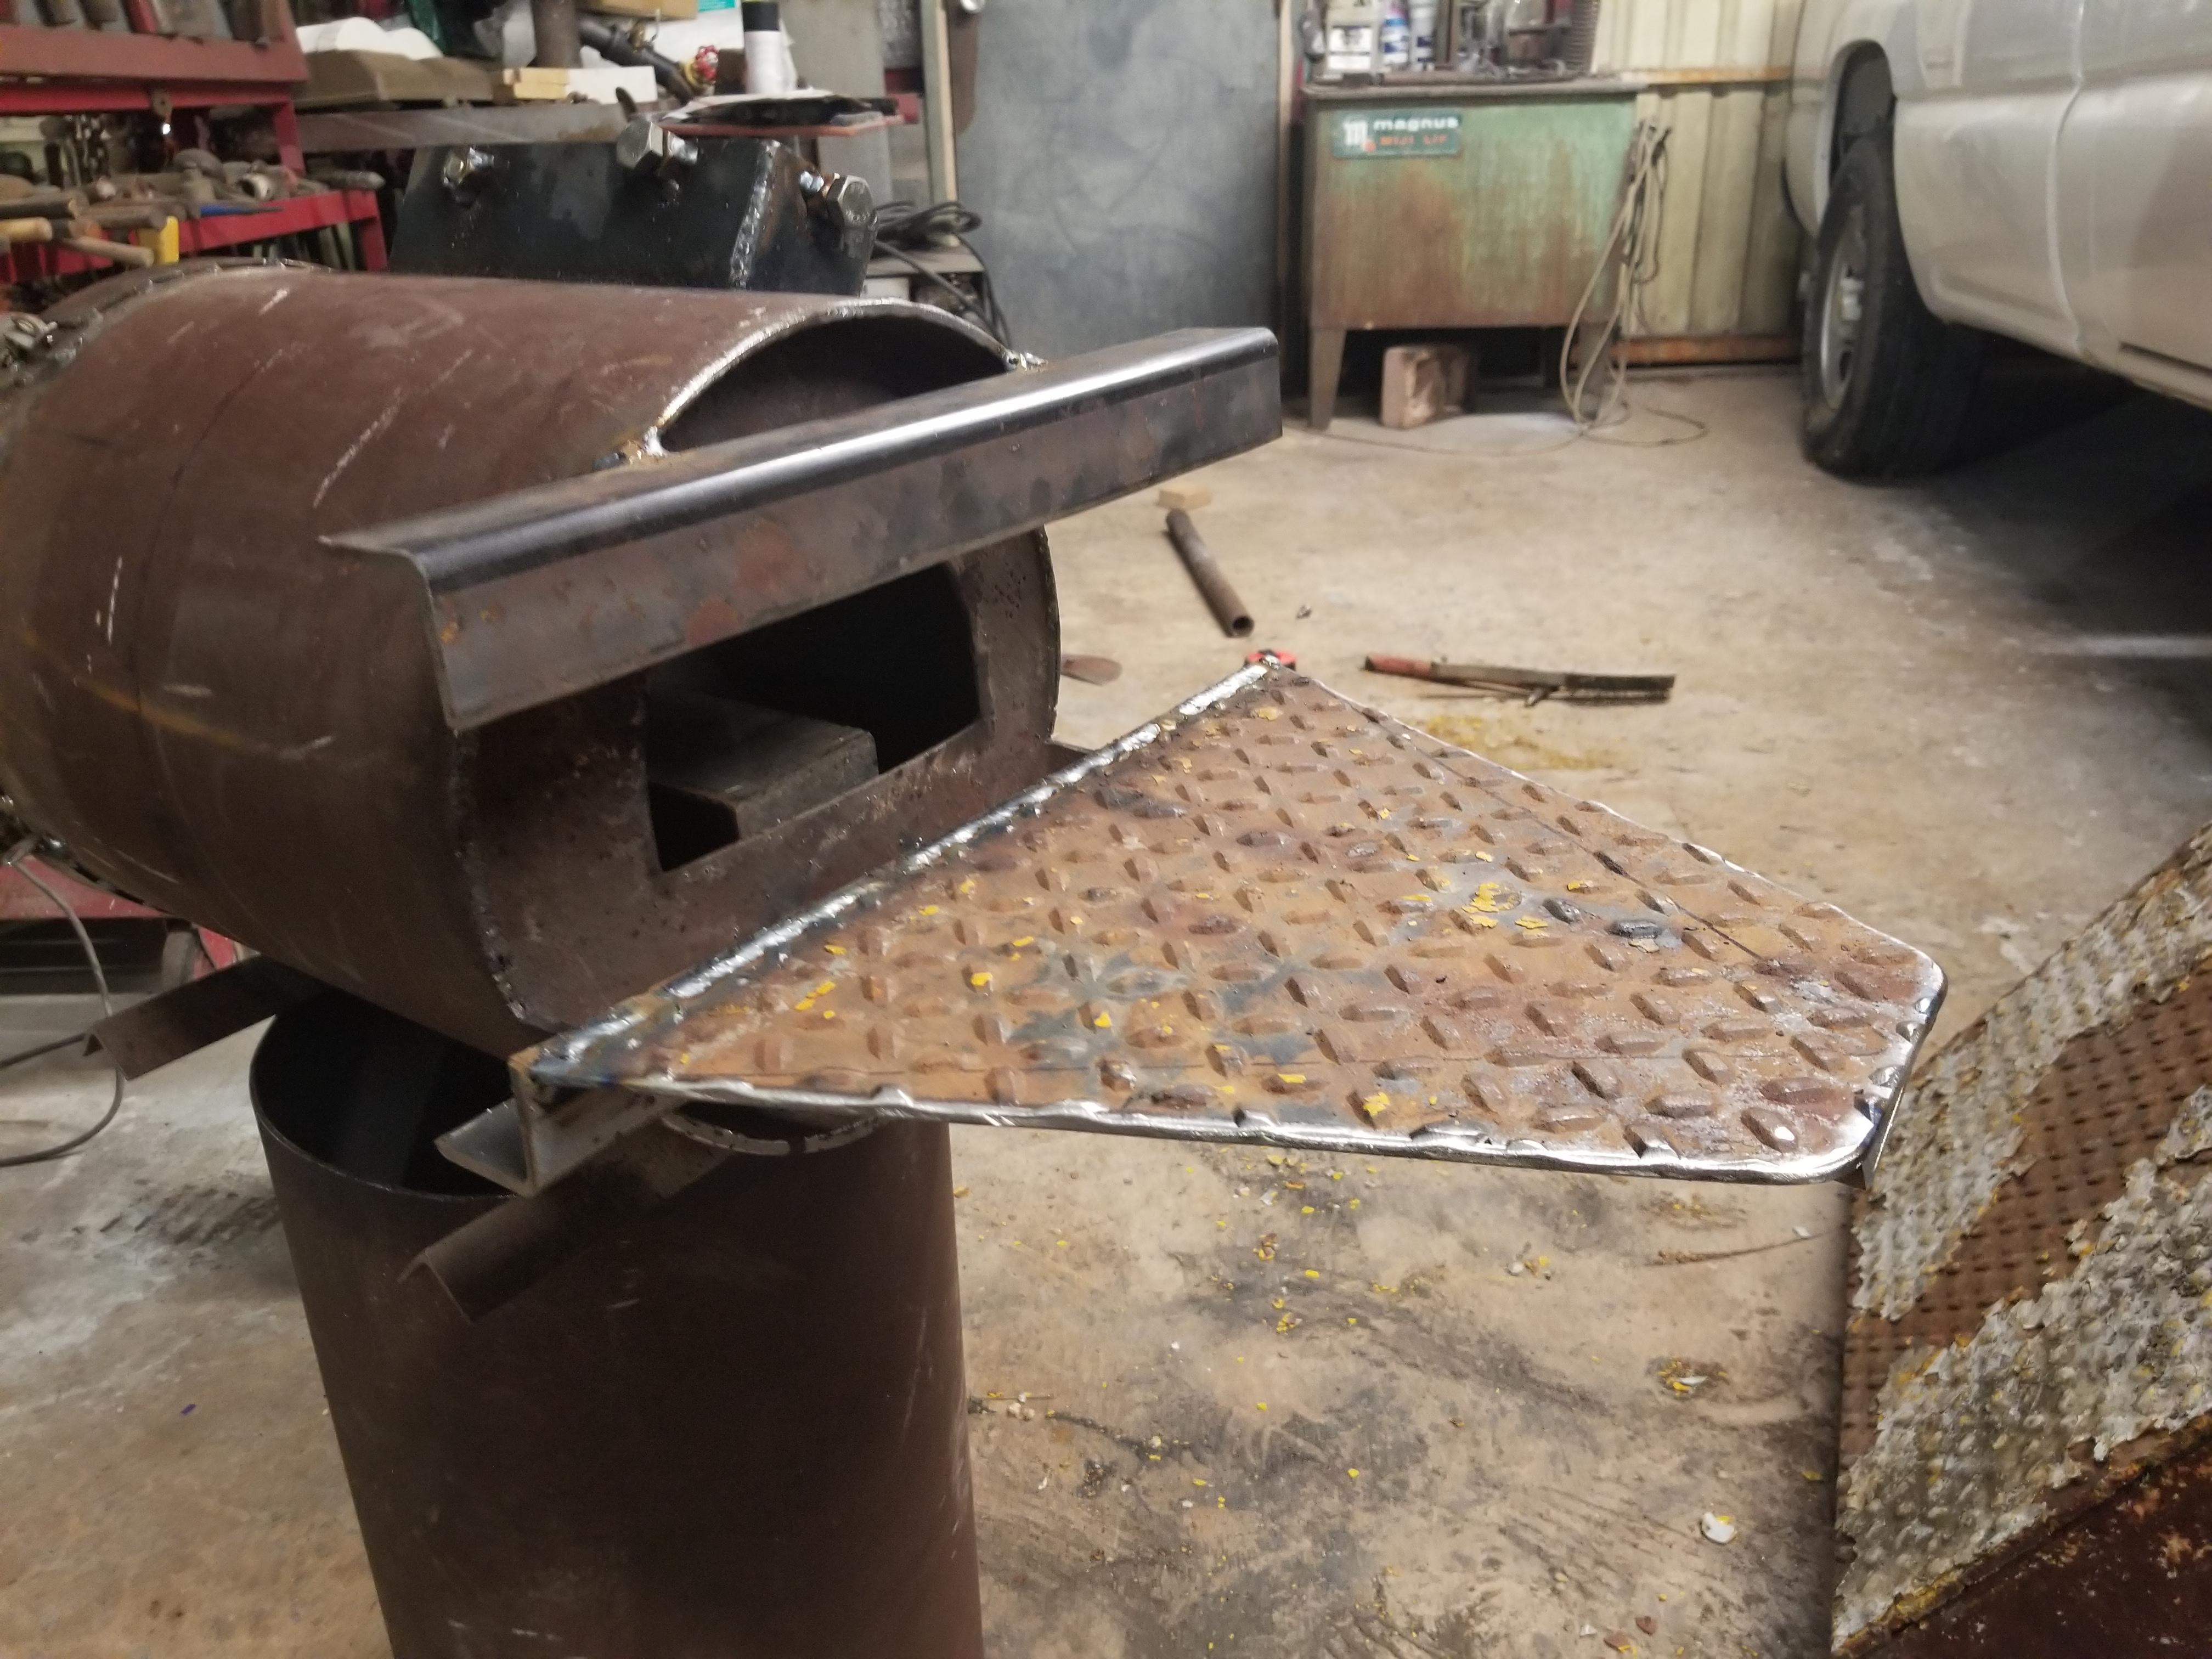
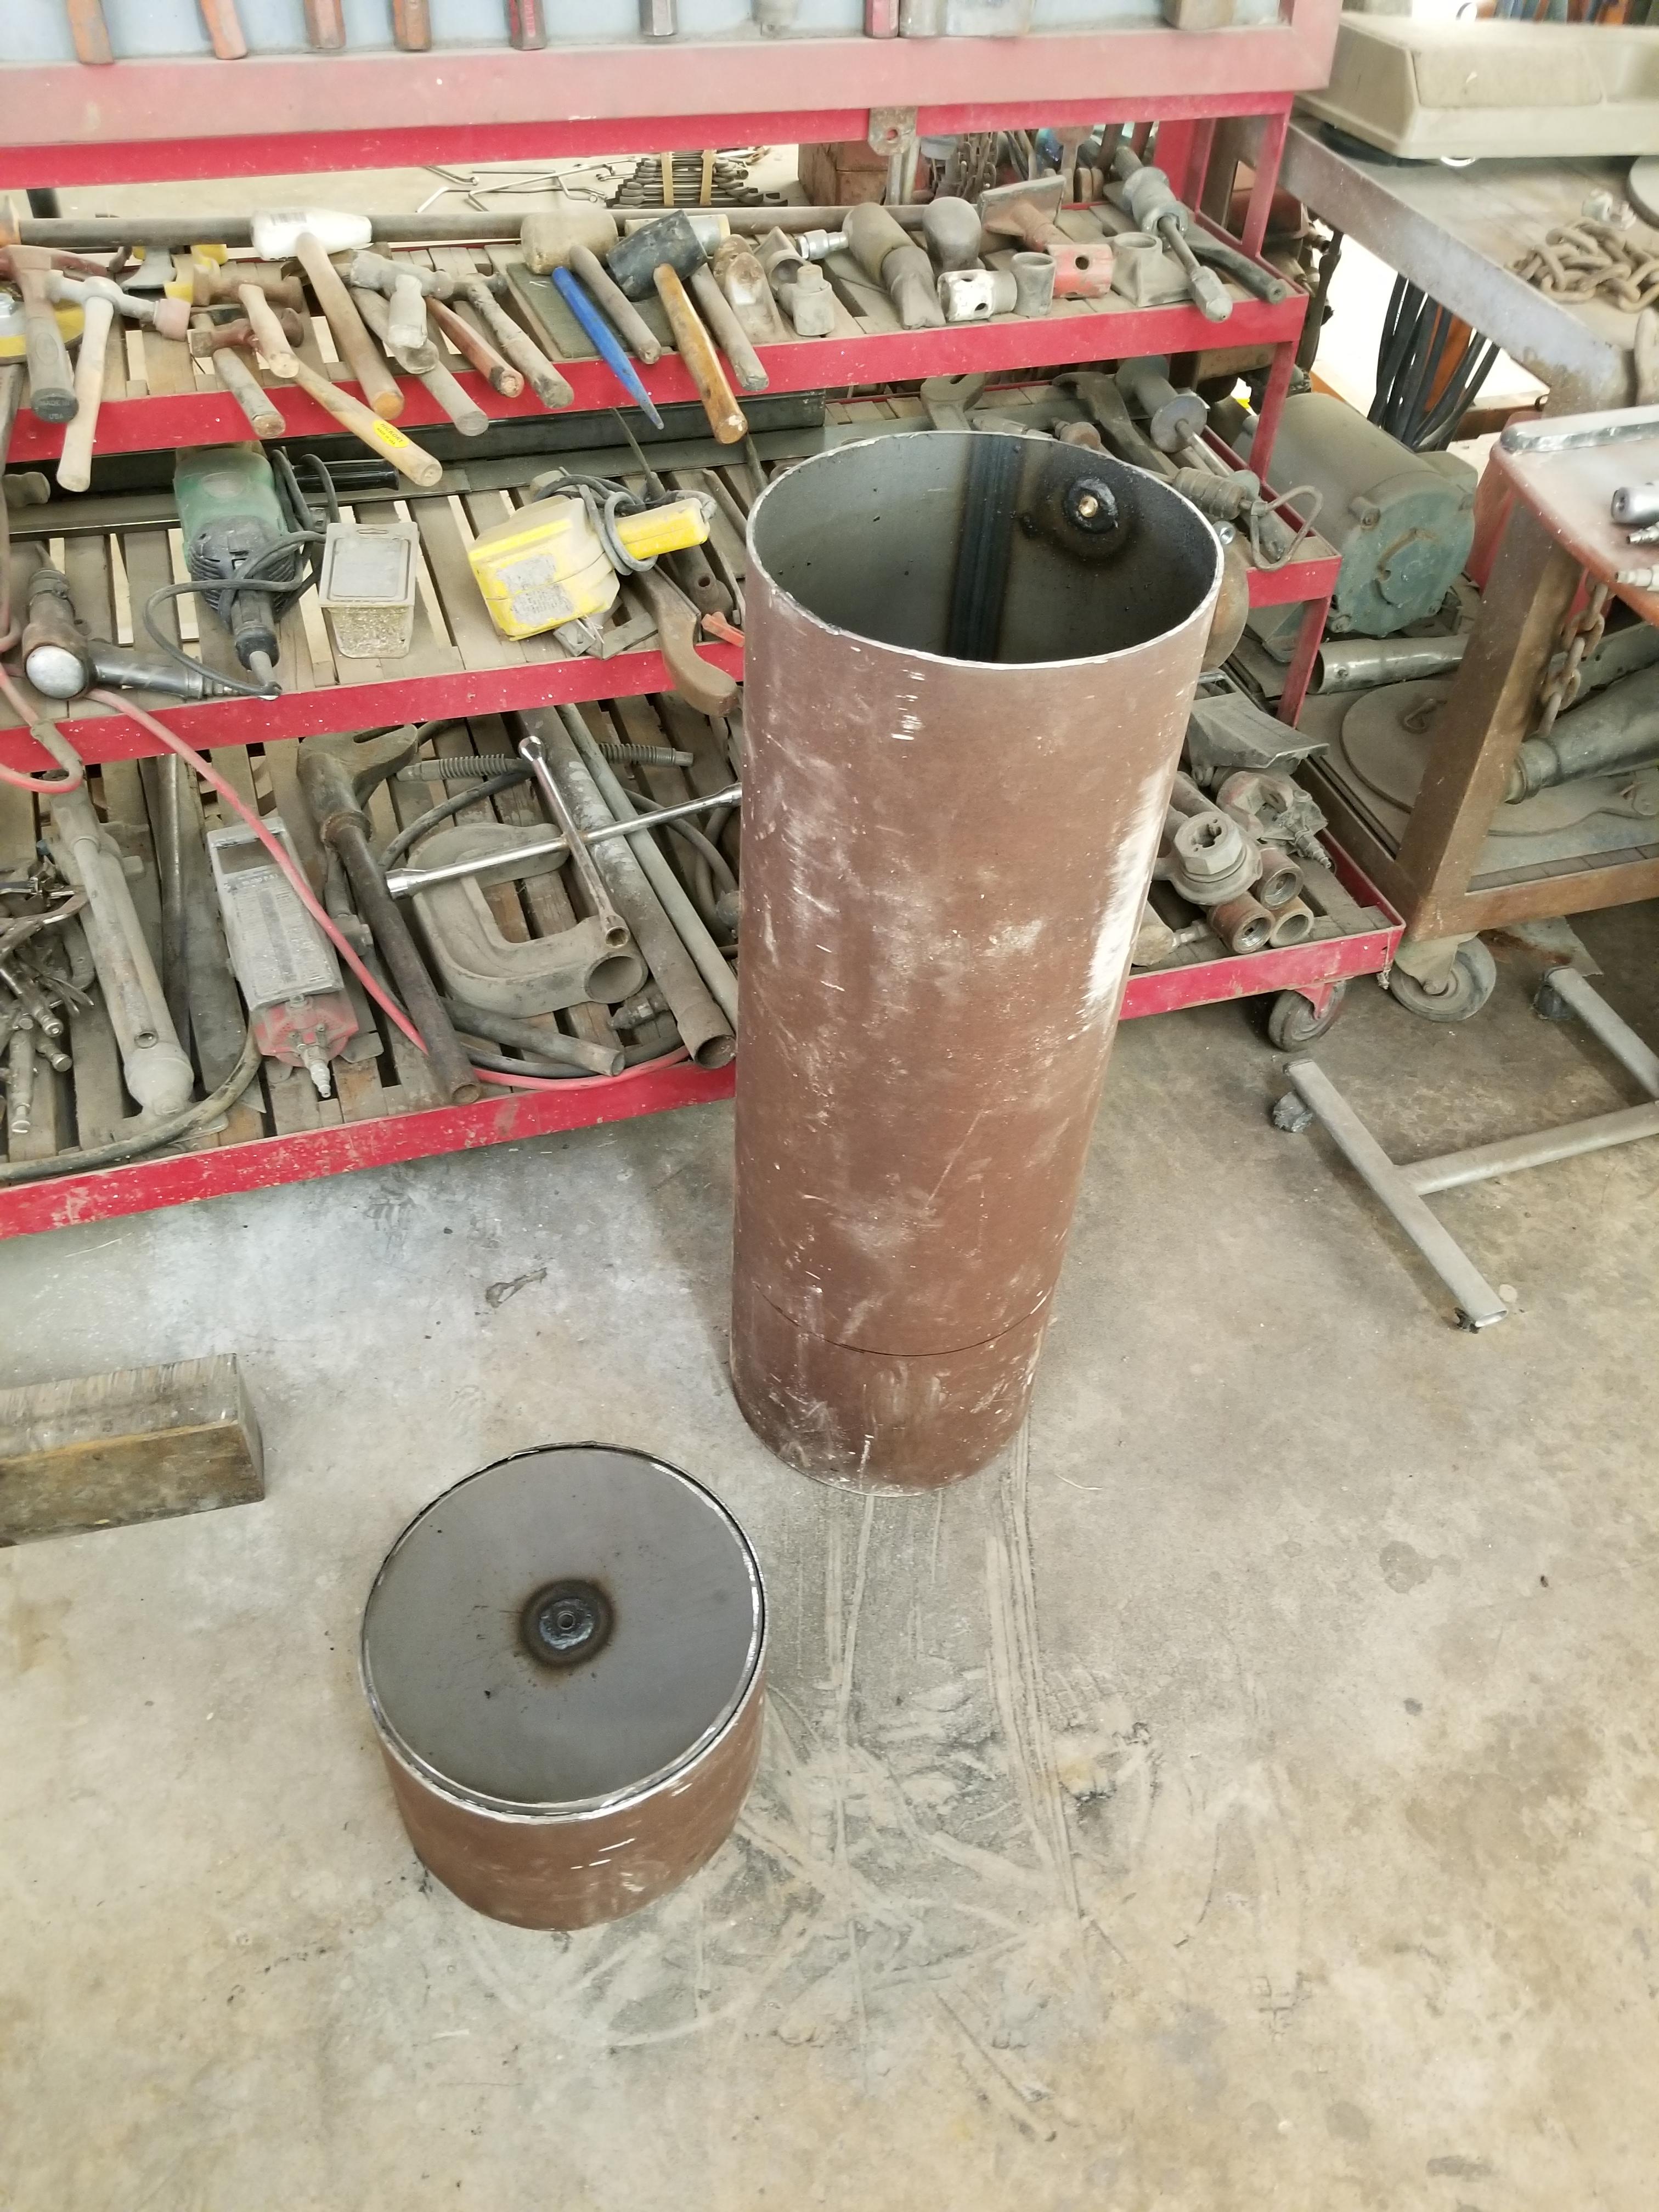
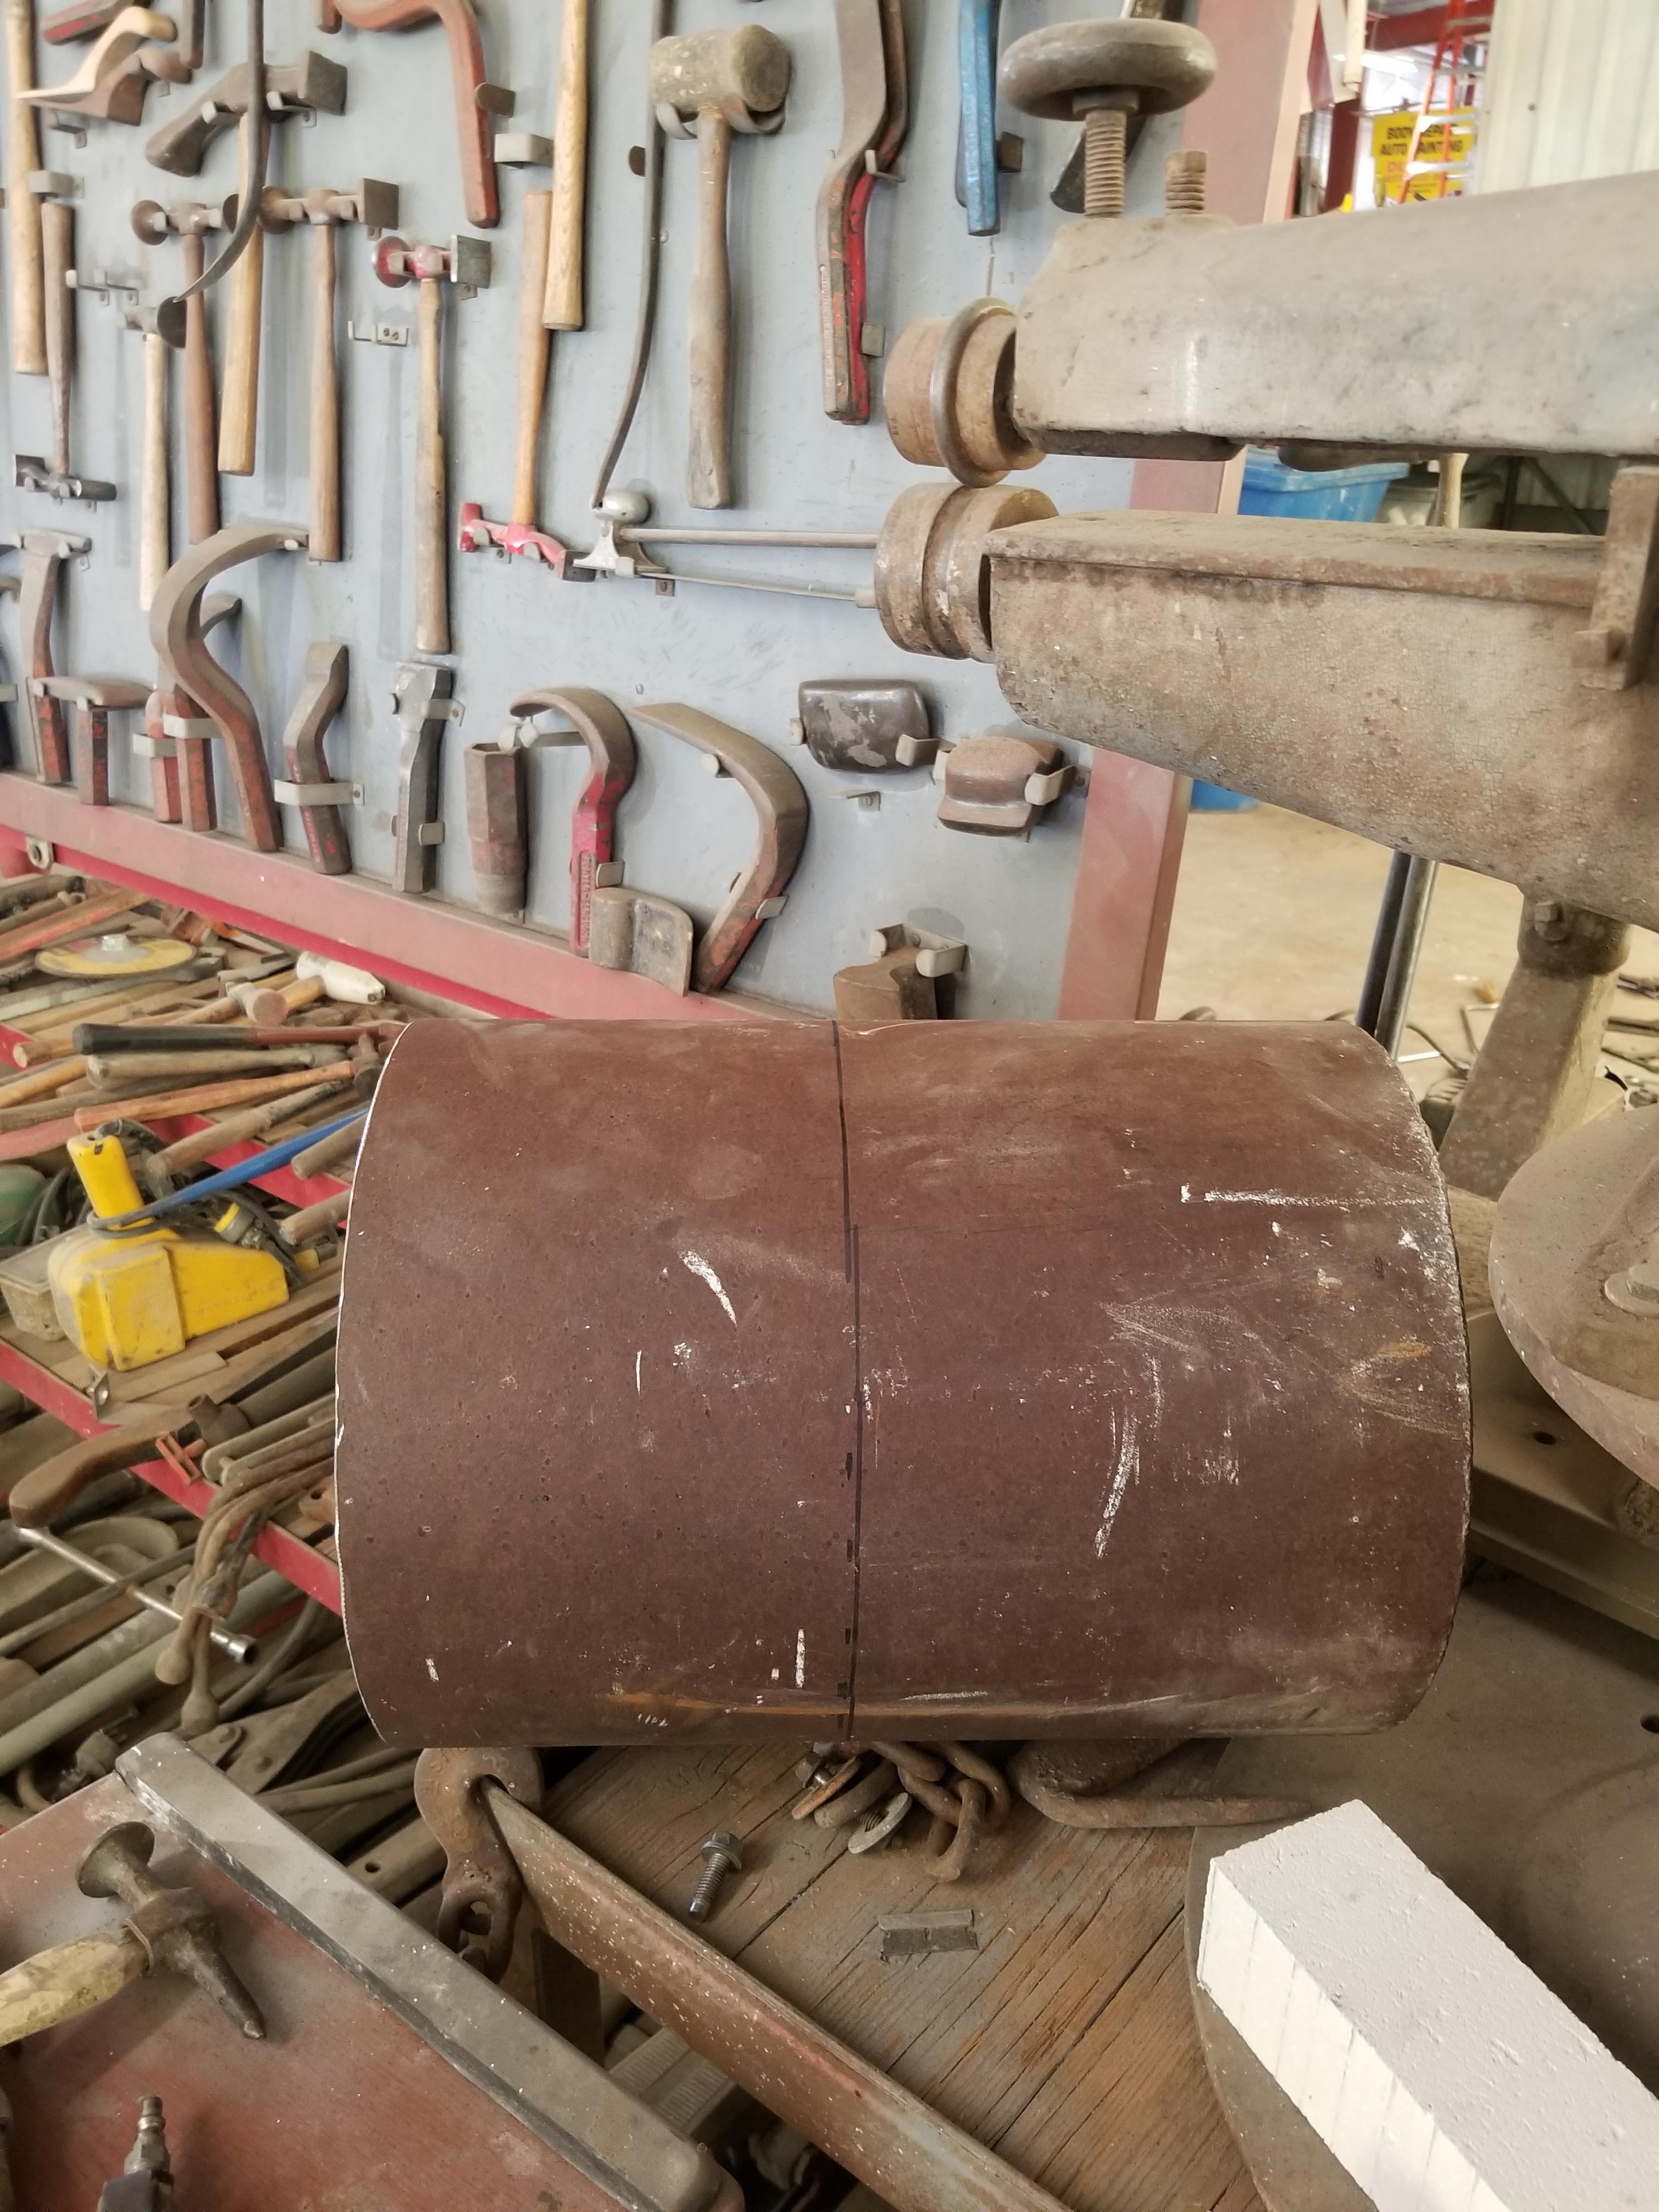
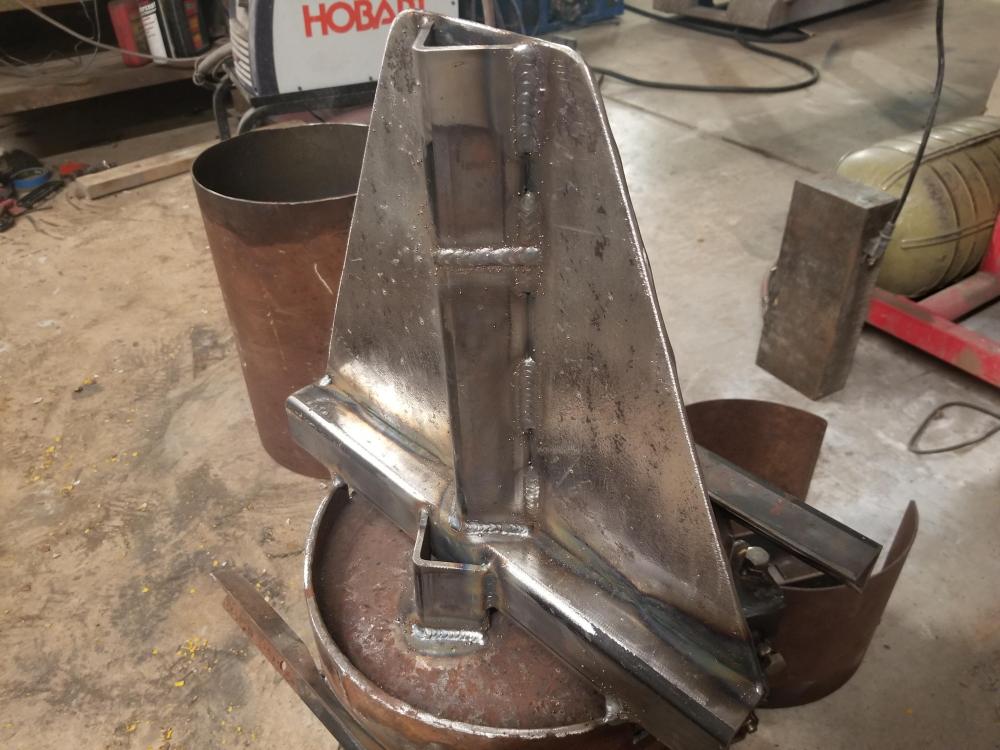
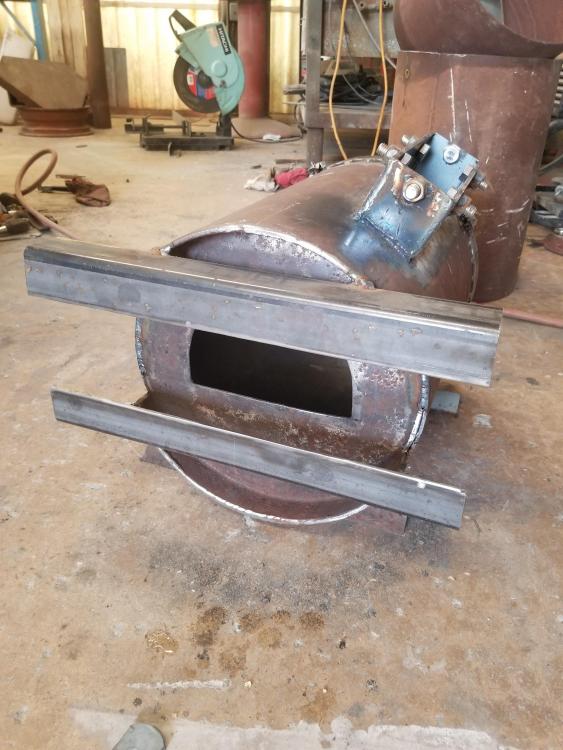
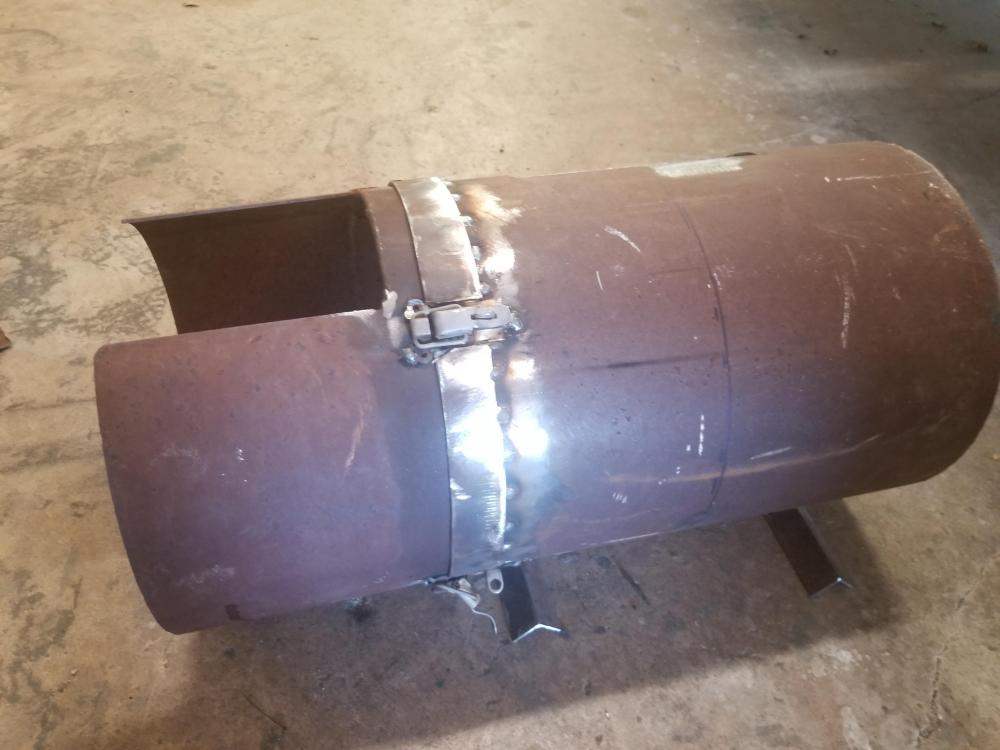
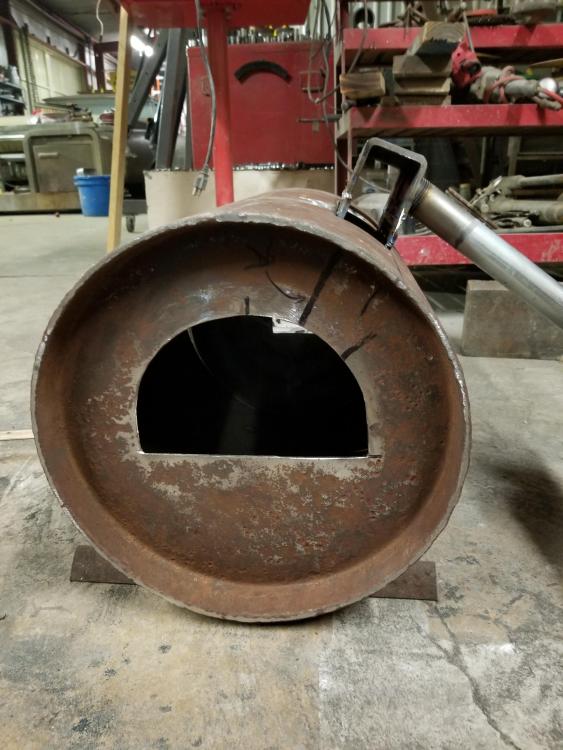
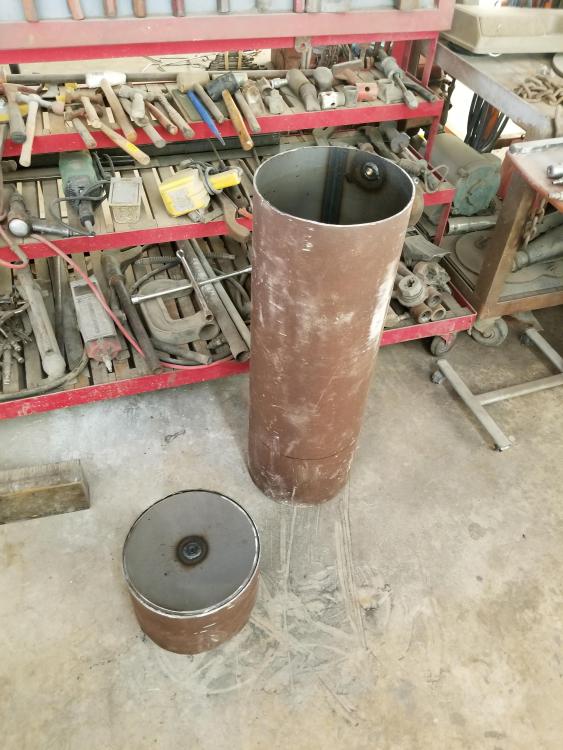
Progress has been slow till tonight. I got my shell finished (I think). I did run into some trouble though.. Two of the bolts warped in their nuts while welding. I have had good success with the method to hold the nuts while welding, but in the past I had used a TIG. I think the MIG had way too much heat transfer. I should have switched but didn't think about it at the time. Everything turned out ok though. I'm pretty happy with the shell, and if the next four days go well at work, I will be cutting and rigidizing refractory blanket. If the setting of the guts goes as planned, the forge volume will be somewhere between 302 and 318 cubic inches. As a side note, you may see these pictures and observe popping/high wire speed on the shell's welds/beads. This was due to an issue with the spool, and I had to turn her speed up to make it work.
-
Thank you! I was probably looking at the same Ebay listing that you used. The price really isn't horrible from comparisons on Amazon/interwebs.
-
Jwmelvin, Did you get one of the Ebay thermocouples? What are your thoughts on where to purchase having done so recently?
-
So I'm both on the right track and in good company!
-
I couldn't agree more, though I sometimes wonder about civilization. The patrol life is honestly a good one, but you NEED a support structure and avenue to decompress! In my case a wife/kiddos and lots of metal. (This comment intended for anyone by chance considering law enforcement as a career.)
-
Frosty I'm having a blast. I traded my hot rod gig in a few years ago for a police job, so this is my regular mental health recharge. Everybody needs an outlet.
-
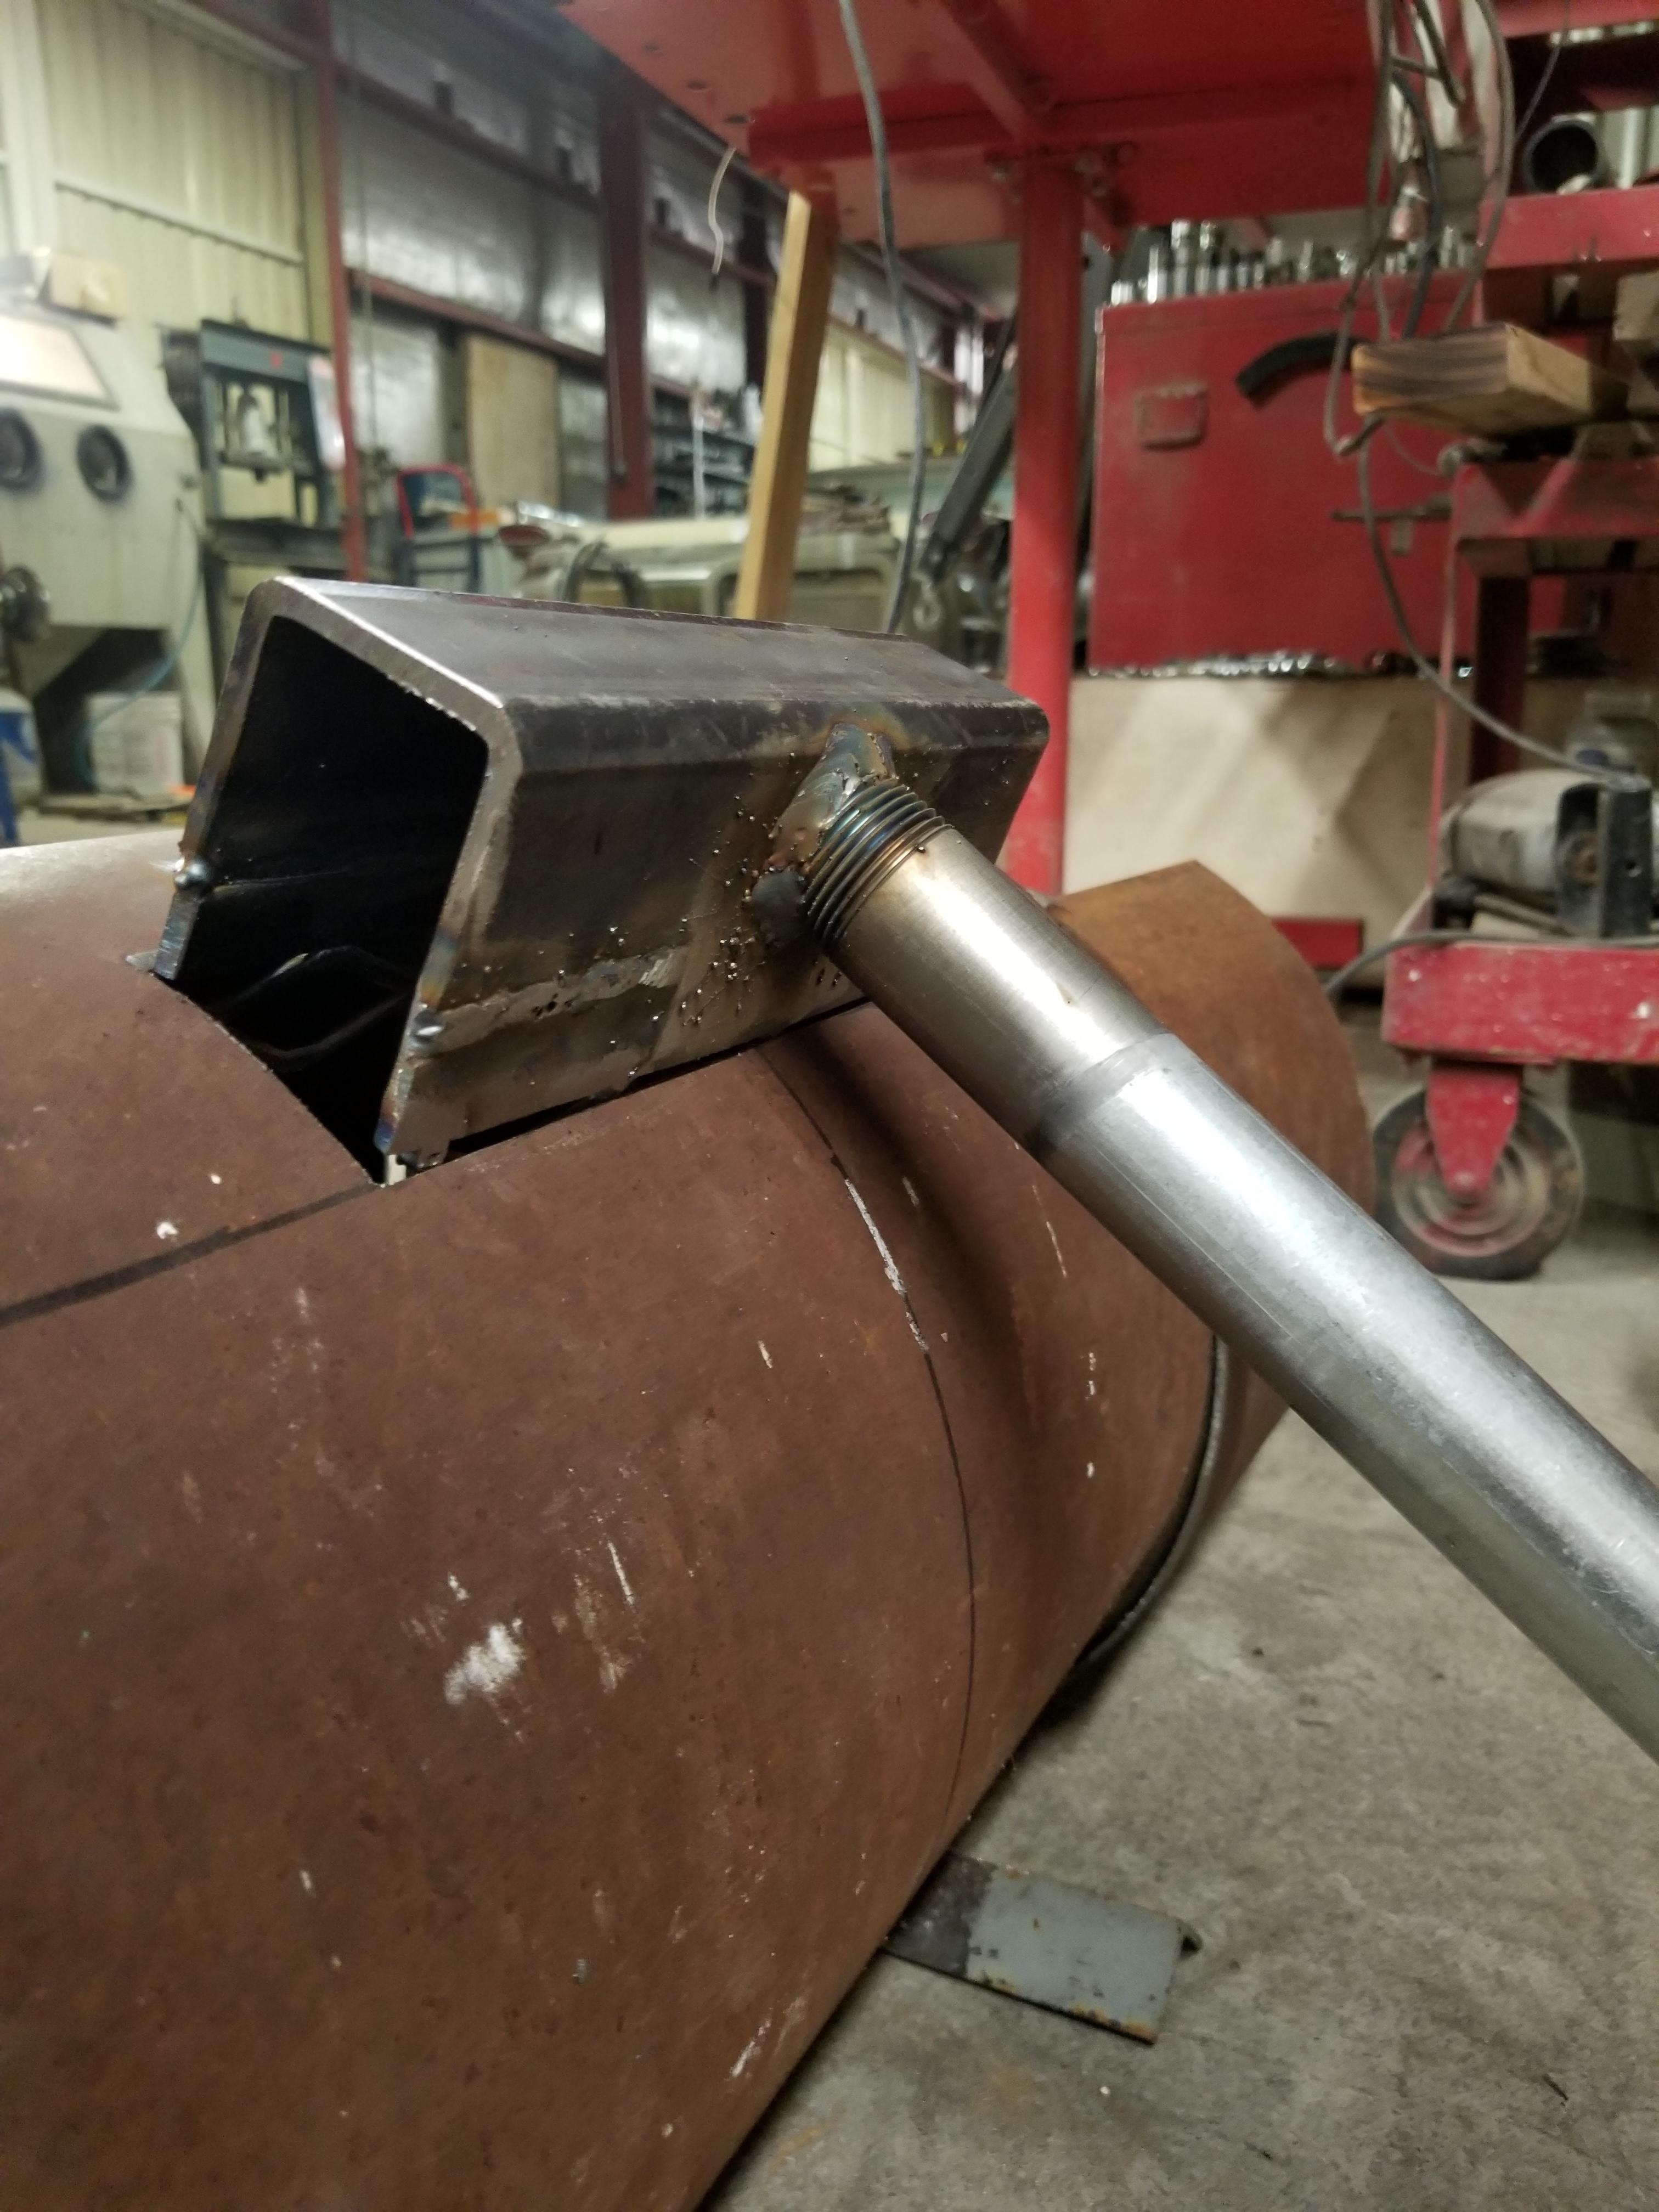
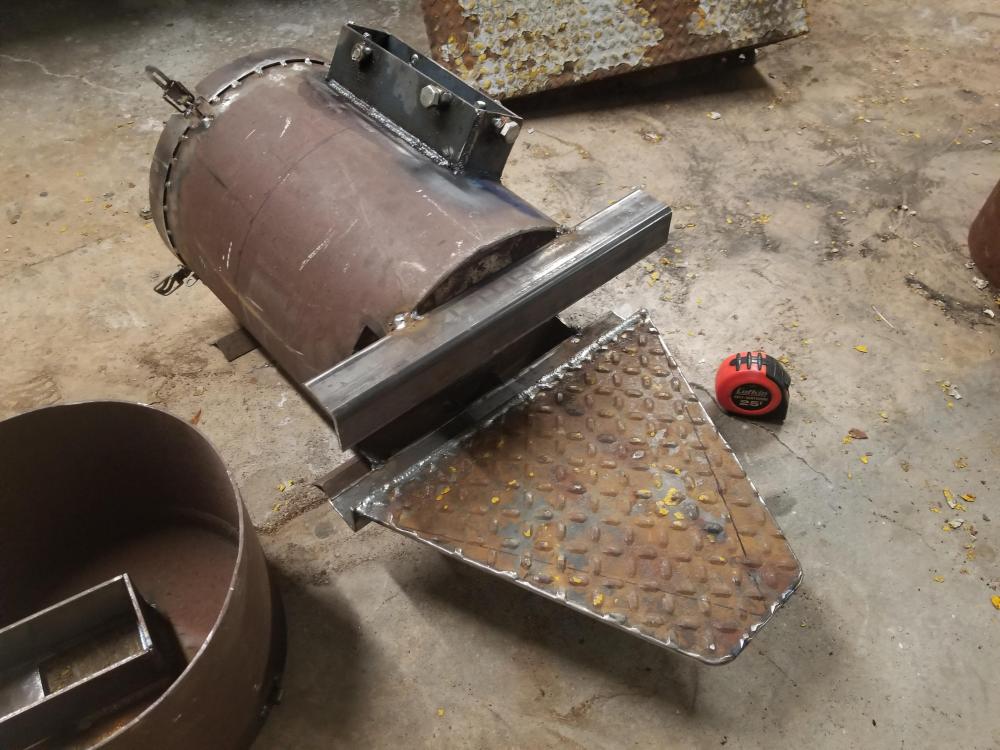
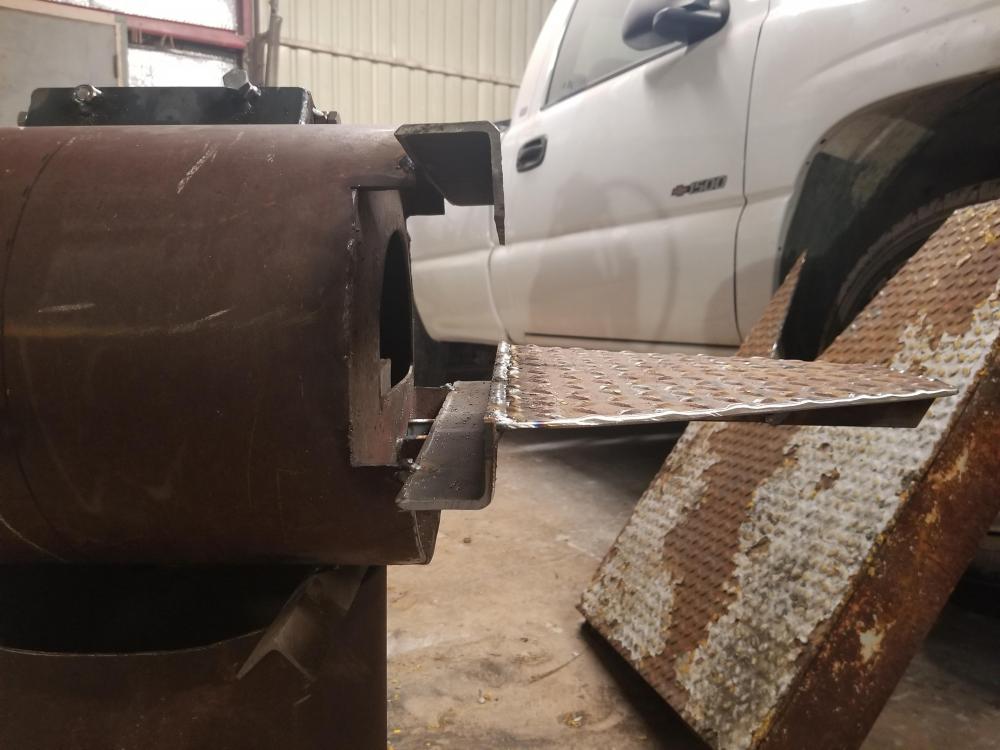
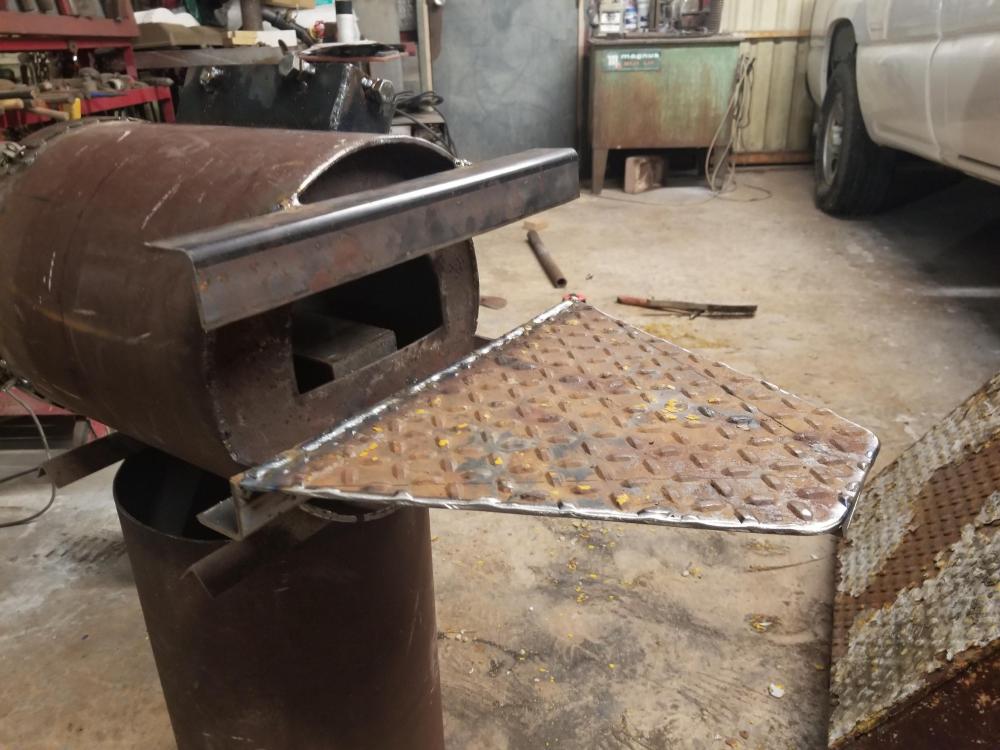
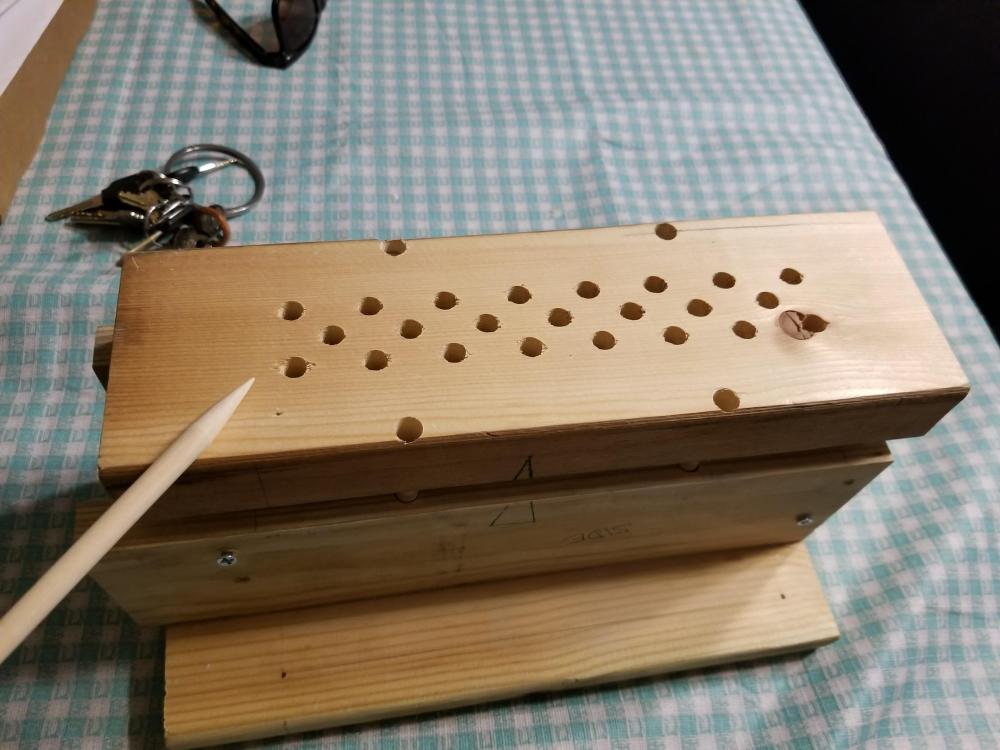
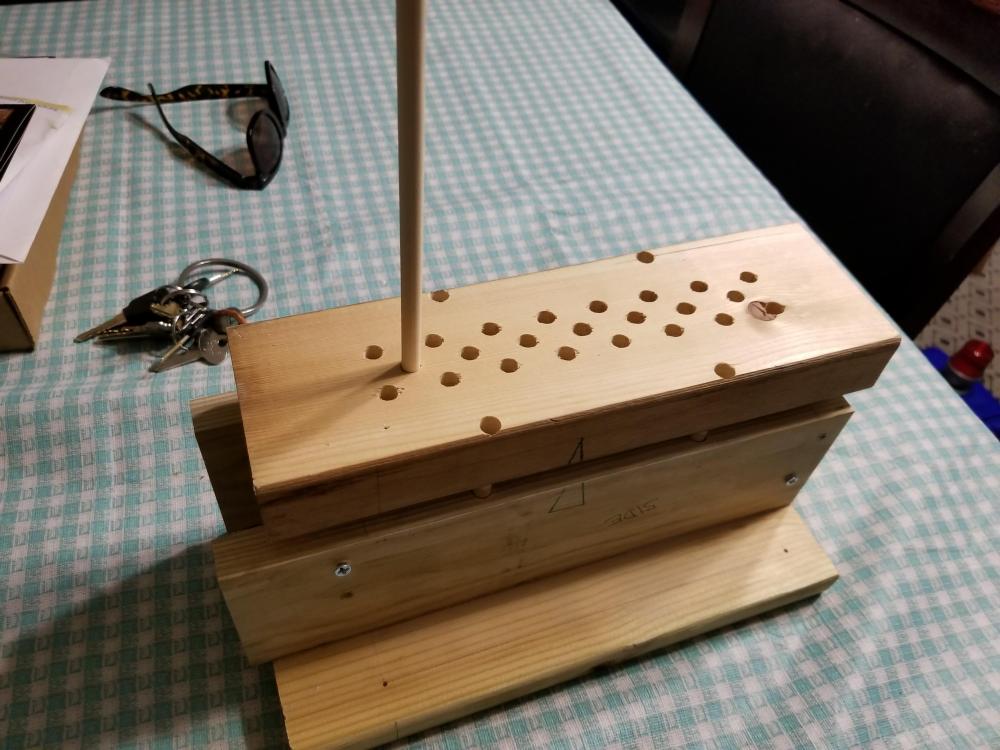
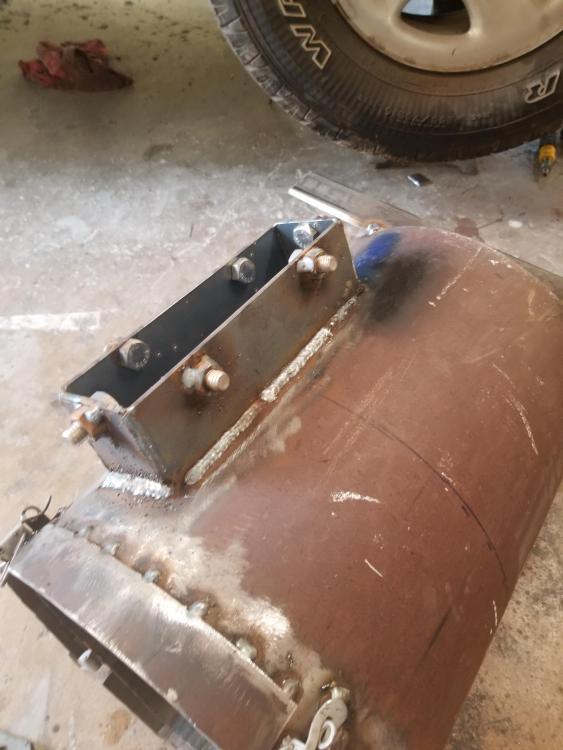
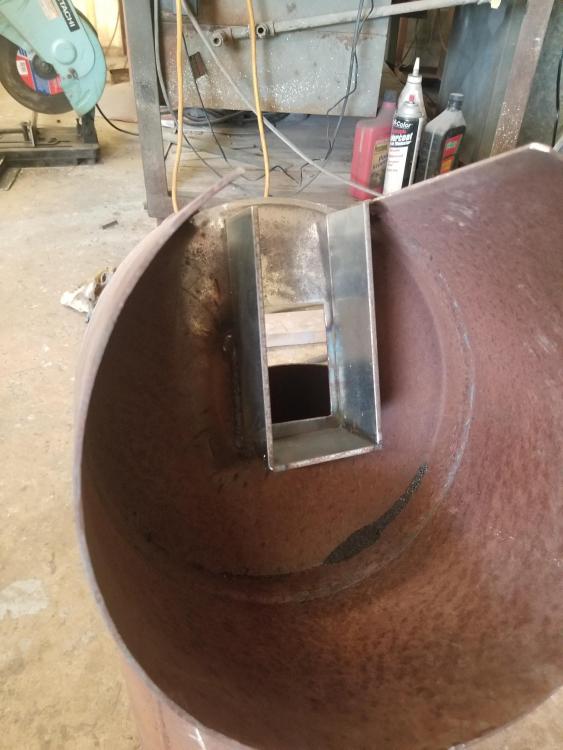
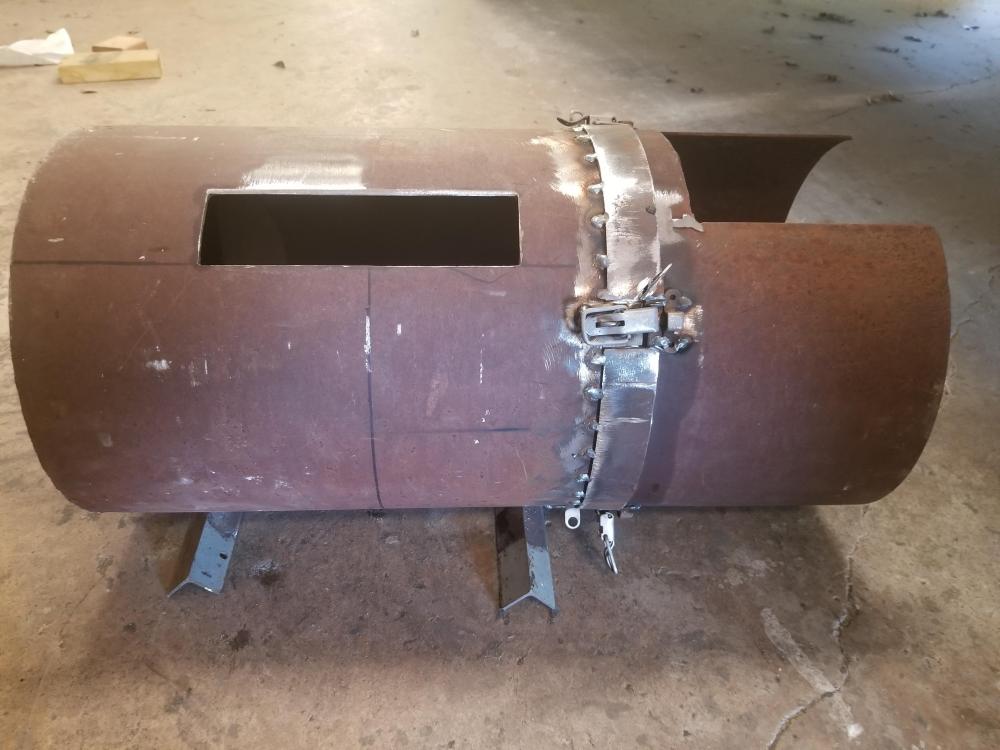
Another progress update - The door and exhaust guides are on, nuts to hold the ribbon burner are on, and the ribbon burner is cast. I let the burner sit in a bag for 24 hours, then in open atmosphere for five days. I cast it a little different. I cast the refractory a little long, made a guide setup on some dowels, preset the voids for the crayons with a tapered rod of less angle than the crayons, then set the crayons tapered end down. This worked fairly well, but when setting the burner plenum in, a couple of crayons settled a little lower than the rest. The crayons were tapered, and when the bottom 3/4 of an inch was cut off, the smaller holes were exposed. The crayons were then melted out. I am hoping to slightly increase the air fuel mix velocity exiting the outlets. If it works, I came up with a precise way to do it next time so that the outlets will be very uniform.


-
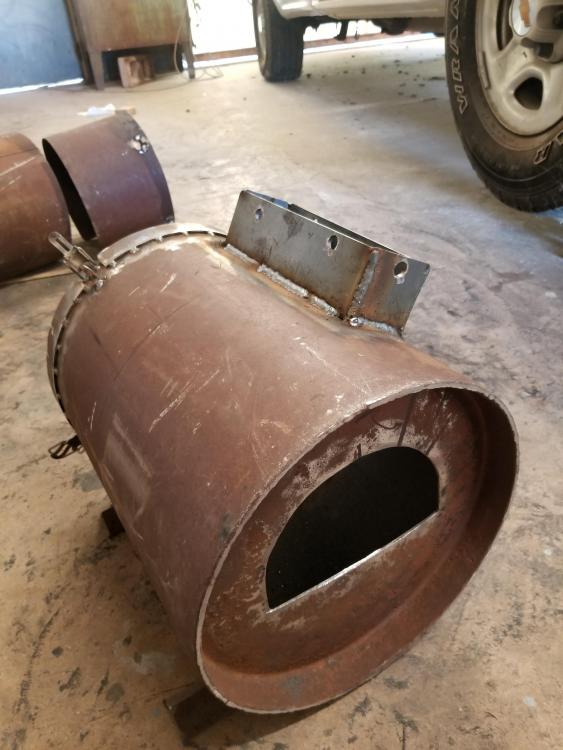
Progress update. Casting the burner this weekend!
-
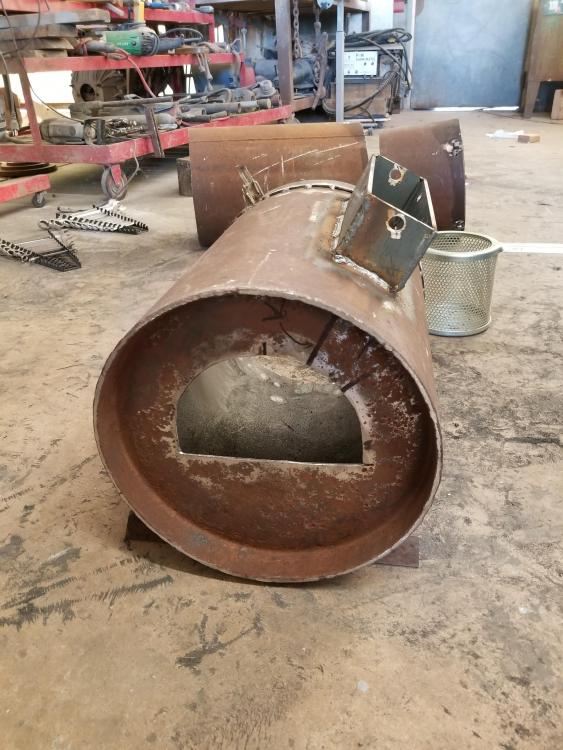
Progress. next will be casting and testing the burner.

-

Calculating number of holes for ribbon burner???
MCalvert replied to Peppie's topic in Ribbon Burners
It would be much easier to have independent air/fuel adjustment (for each blower). To be able to tune for both ribbon burners simultaneously could be achieved with a plenum, but testing designs to achieve this without having back pressure issues would take multiple iterations. Not only that, but experience with plenum design and sheet metal. I'm getting excited just thinking about it. I am building a multi-port type forced induction forge for working everything from small knives to larger choppers and the occasional dagger. The pattern-welded billets for these will easily fit in my chamber, and it's only 5in tall, 6in wide, and 9-10in deep with a vault cross-section. If I ever make a long dagger or short sword, I have a passthrough. Just something to think about. -
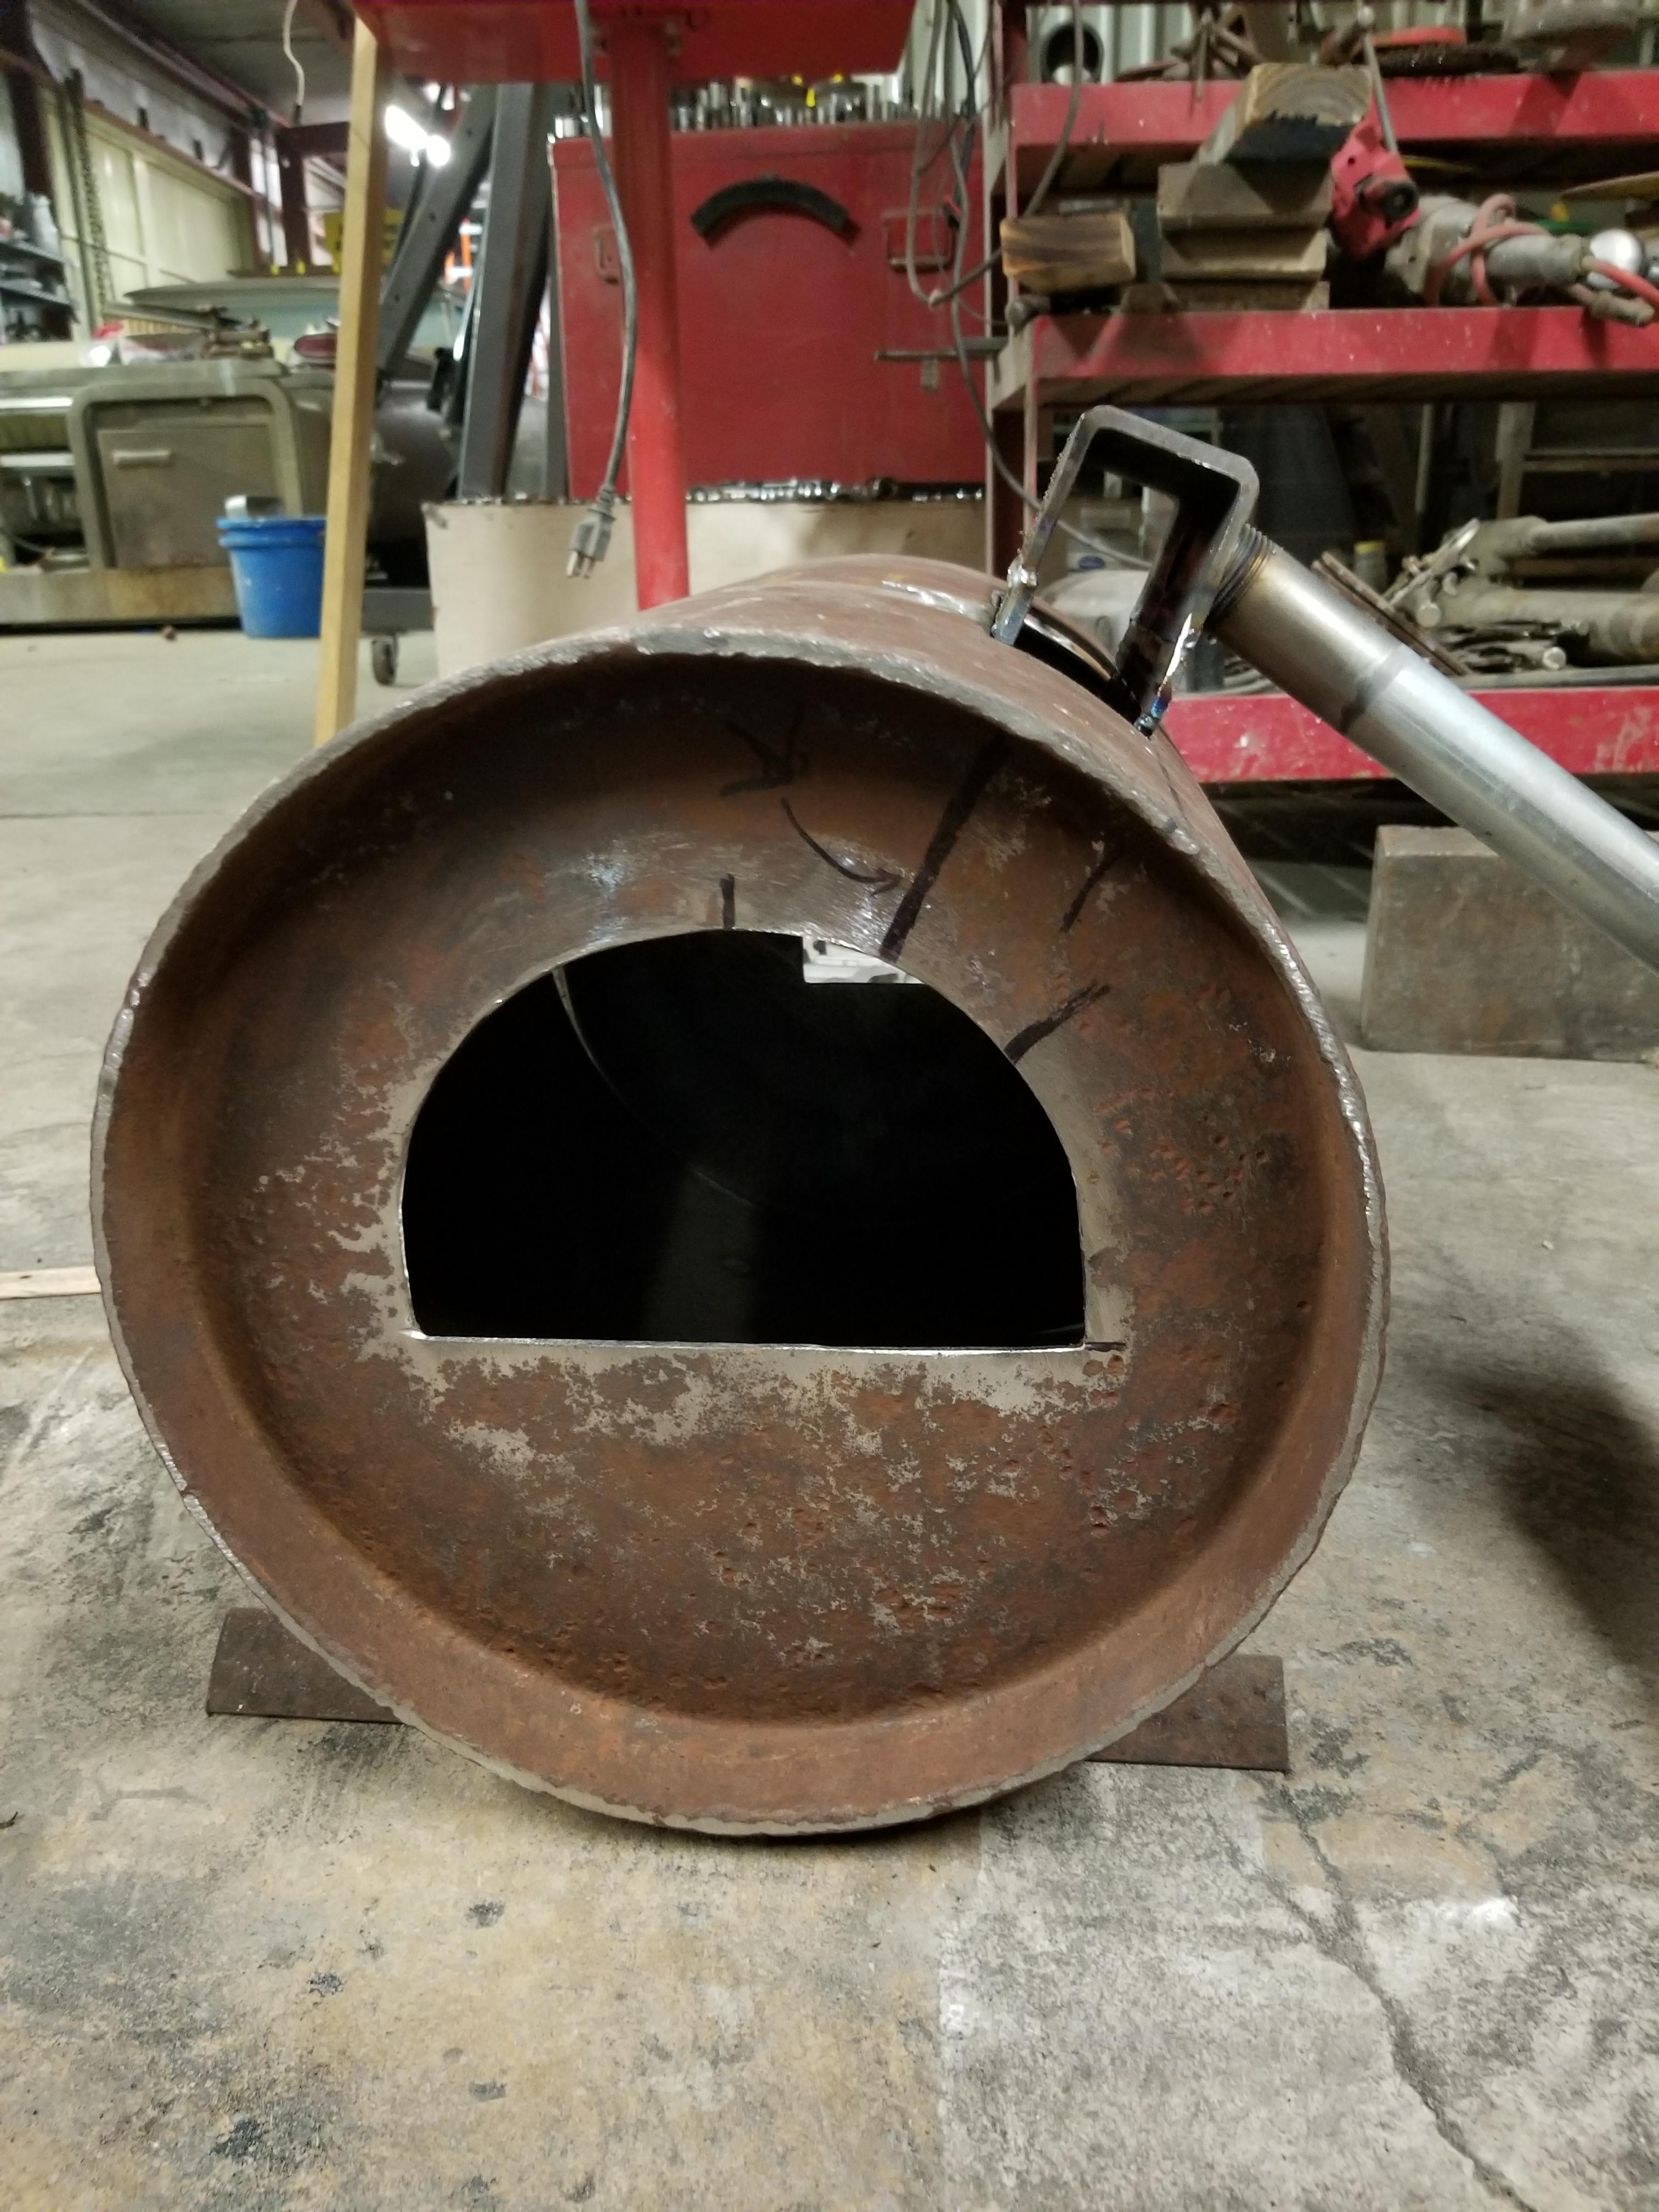
I found a tank that I was happy with. I am getting it sectioned currently. Progress is a bit slow right now as I have many irons in the fire, but it's progress none the less.


-
Has anyone sent an Elmax blank out for heat treat? Where did you send it? I contacted my go-to company for my 440c blanks, and the only premium steels they will do are s90v and s35vn.. Another company quoted me an astronomical price (hundreds..). I'm just looking for suggestions, and any experience shared is greatly appreciated.
-
If you are planning to pattern-weld for smaller projects (like blades), I would take 4 inches off the bottom side of the tank and weld a flat piece there. Then you would have a nice flat surface to facilitate a floor without using fire bricks, and you would decrease the internal volume. This may prove more efficient during heating. You could use the extra blanket to decrease the width of the internal volume too. A 16 inch diameter tank is pretty big, but then I do bladed things, so you may need bigger. Also, read the consolidated notes for beginner forge builders (sticky). In my opinion, that's a really great place to wet your feet.
-
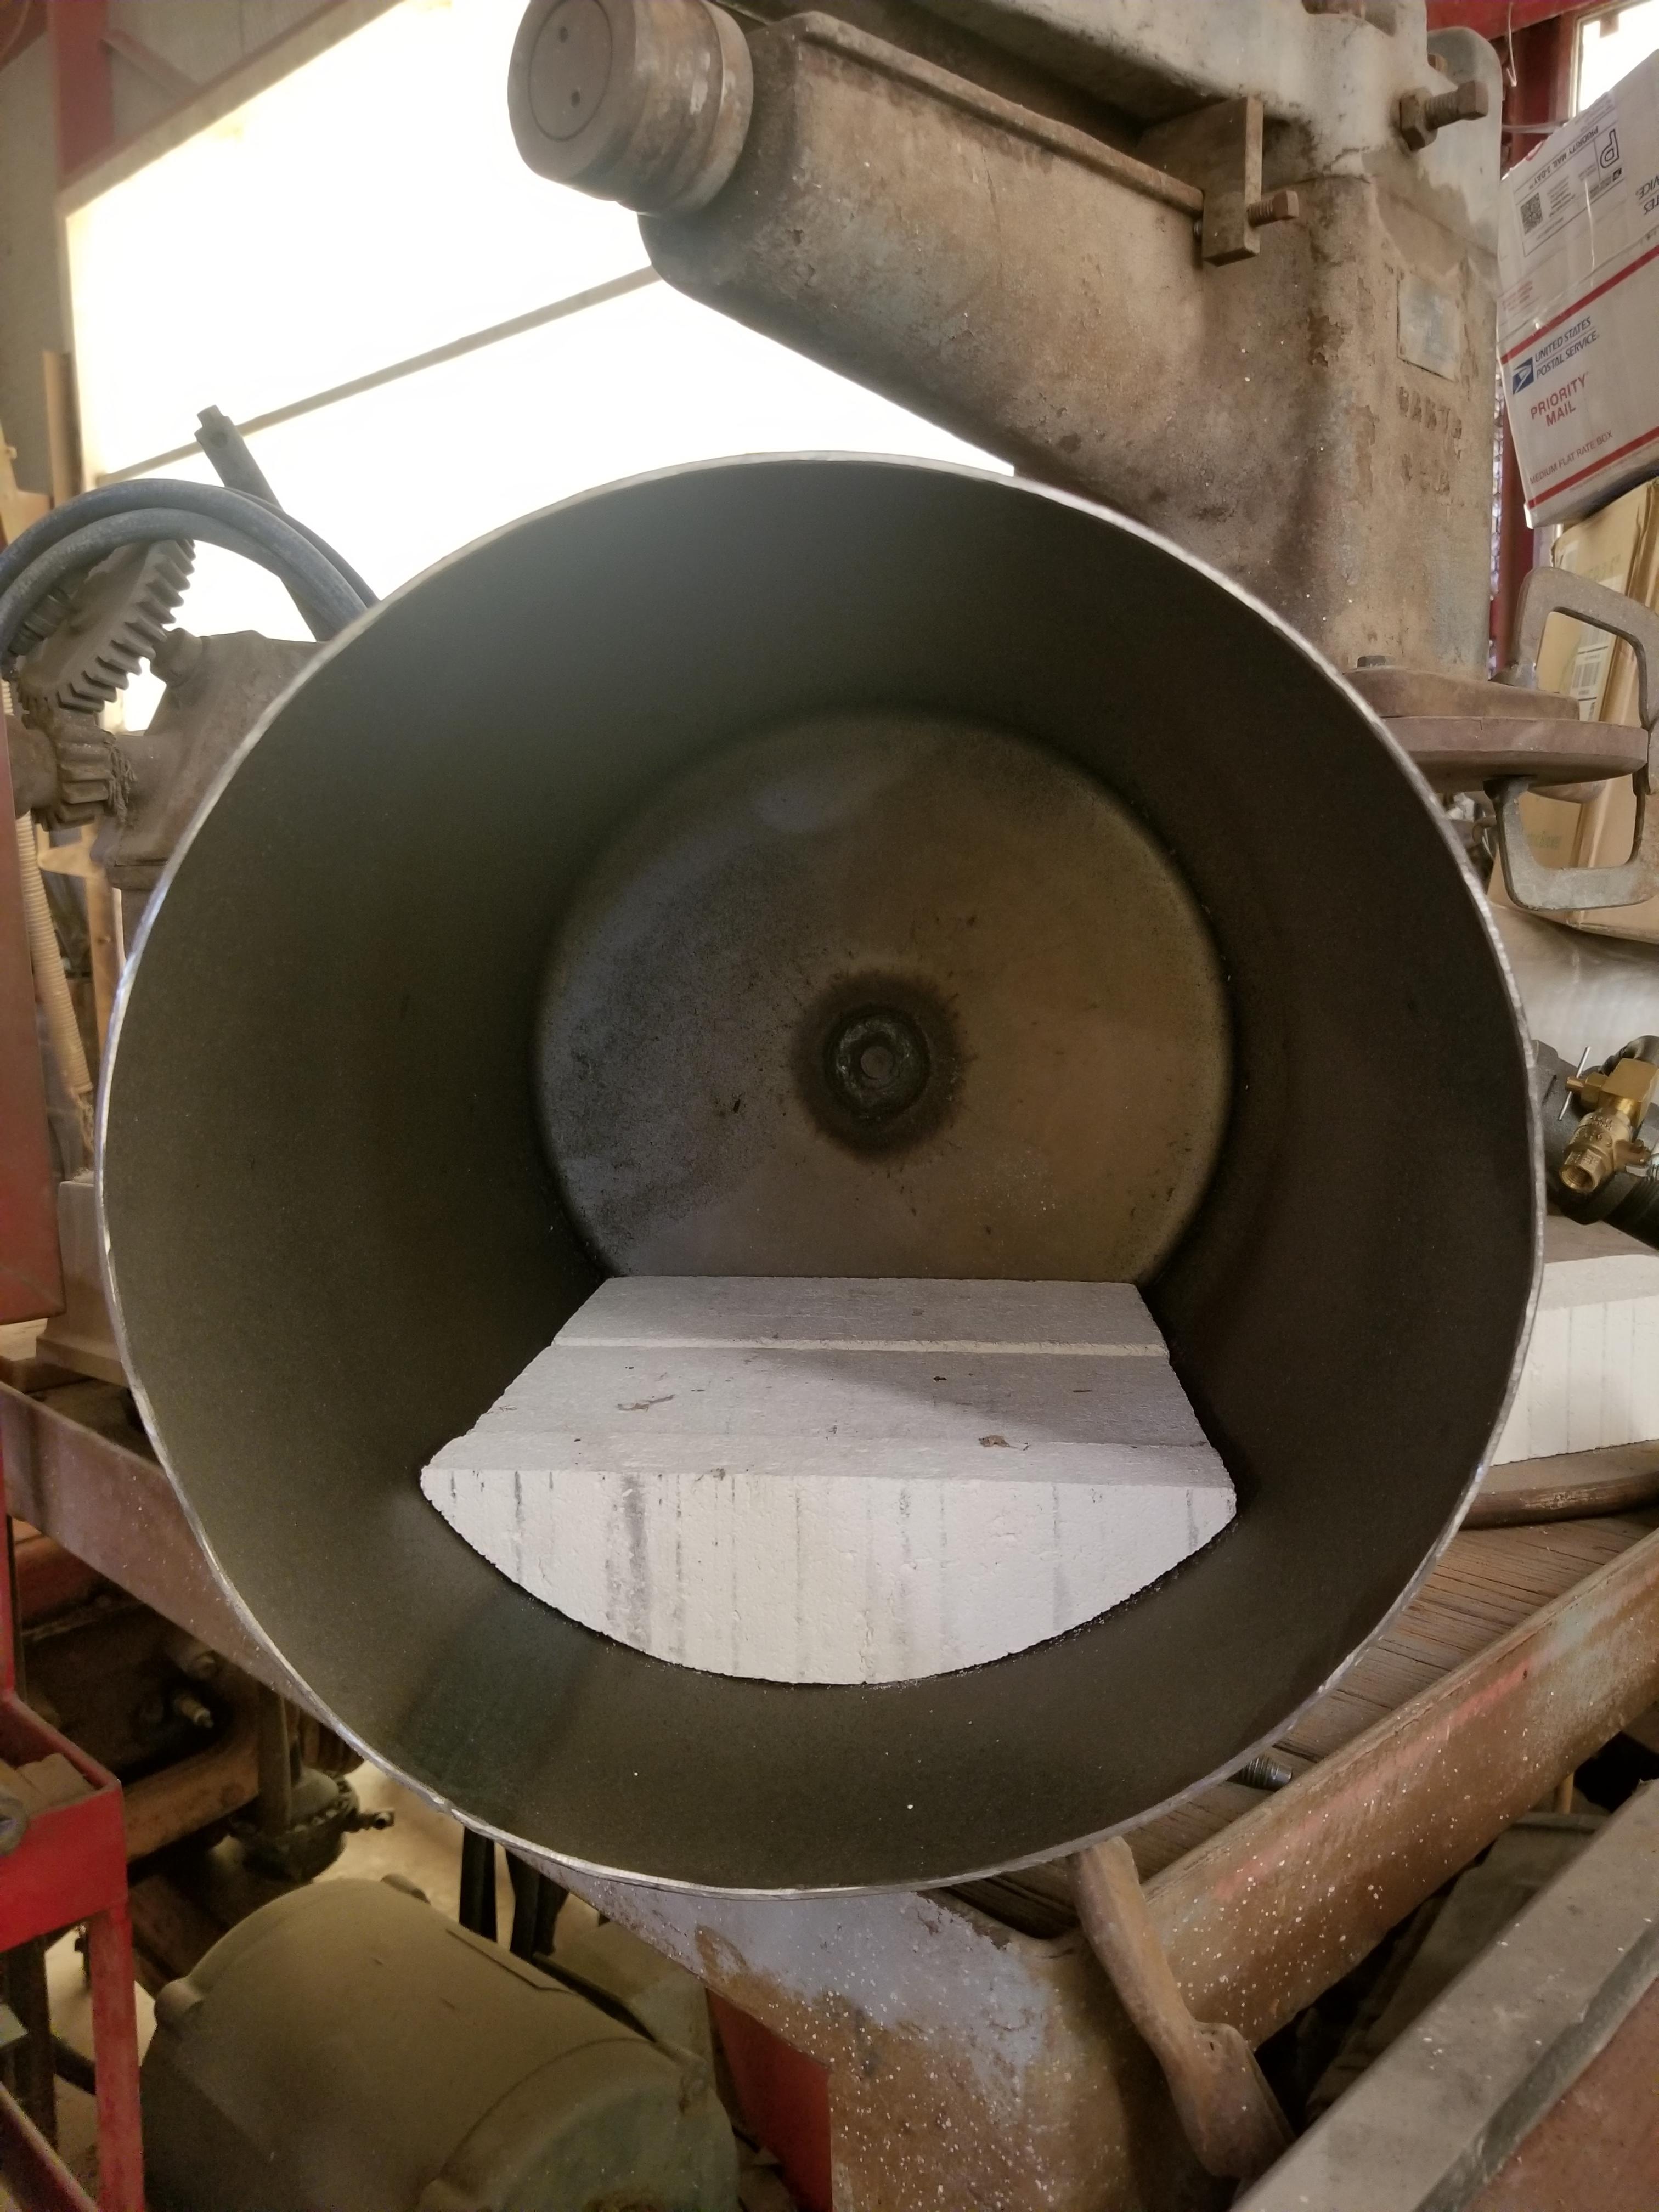
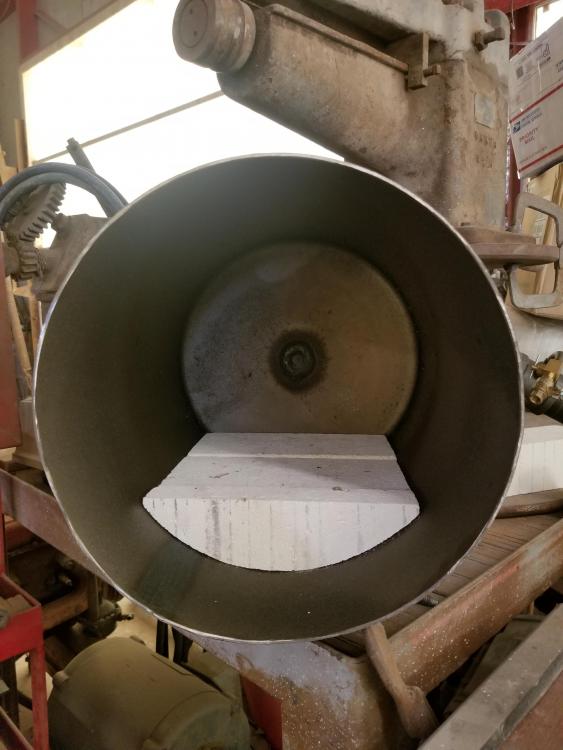
I love FIF for bringing so much interest into bladesmithing! I think it's really good for the knife community overall. To the OP, I have fire bricks (soft) inside my forge taking up the bottom two inches. They are on the outside of the insulation, and are only there to decrease the volume of the chamber and make a small flat area so that the cross section is not circular but vaulted (thanks frosty).
-
A collection of improvised anvils
MCalvert replied to Charles R. Stevens's topic in Anvils, Swage Blocks, and Mandrels
As a short safety note, dont accidentally hit an unknown metal too hard with your ballpeen hammer while looking for hardened surfaces. I had a corner of the hammer shoot off while trying my luck on a large gear, and it is now somewhere beside my bellybutton down in my fat. I am now iron man. -
You really need to read the consolidated forge building notes. It is a sticky thread. Then, read the forge 101 sticky (or the important parts anyway). These contain the information that you need, and you will be very happy that you did the reading (and will come out WAY ahead for it).
-
Do you think the clay will be rigid enough to suspend the refractory while it sets up? If not, you may want to get some West 406 and spray the other side with it (suspended in water with food coloring). It will be a cheap fix I think.
-
A LOT better! Those welds will last the life of the forge! A few more projects and you will be laying some pretty beads down. If you need to weld anything else, weld dot com has some quality, easy to understand tutorials that will help a lot. It's a good resource with some great teachers. Glad your forge is nearing completion!
-
Using a mig, I would suggest turning your heat setting up to 2 (looks like you're set at 1). If you don't feel comfortable turning the heat setting up, turn your wire speed down to 30ish. You also may not have a good ground. I think running at 2 with a wire speed of 35ish will yield the best results as long as you don't dilly dally (or you will have blow outs!). Or you can just do you, I'm just a dude on the internet! Having just typed that, my suggestions are from experience with Miller products. I don't think it should matter too much, but the wire speed may be a touch different. It wouldn't hurt to get a couple of scrap pieces from your door cutout to practice on till you get the bead to run.
-
Thank you for the replies. I will use a vault design with an 8in burner. I would like to copy your NARB design regarding the plenum's fuel/air inlet orientating from the side. If I need to include a baffle, it stands to reason that it could be much smaller using the NARB design. My thoughts are a 2in by 2in by 8in plenum with a 2in thick refractory section protruding 1in out of the assembly. This would make the metal section 2in by 3in by 8in. I will probably keep the same location and angle as previously proposed because it sounds more fun to build than a 90° angle. Does this sound workable?
-
Frosty, you are correct. I apologize for my terminology. I come from an automotive fabrication background, so my word association is not very good. By runner I meant the individual passageways inside the molded refractory part of the burner. This is really irrelevant though, because I reread the thread where you were teaching someone about edy currents and I grossly misunderstood what was being taught. After going over it again I understand better, and realize that it does not apply to what I thought it did. My ideal of the internal volume of the forge coming out to 10in L by 6in W by 5in tall sounds like it will be workable after reading your reply. By 'D' I was meaning the shape of a ladybug, but with rounded corners. So maybe saying an oval with a flat bottom side (floor) makes more sense? Apologies if I am still butchering it. I believe my mistake with my plenum idea was in thinking that if a strong enough vortex could be achieved inside the "ladybug," that the rotation would keep more combustion inside due to being caught in the swirl. I realize the flaw in my thinking, so thank you for that. It makes a lot more sense that the more heat that ends up outside the work area, the more wasted energy. I will follow the plans linked on Wayne Coe's website exactly then. Also, it sounds like a 6in burner paired with an 8in long internal volume would be a better idea? Thank you for the information. Oh and burner angle/orientation stays the same? Thank you.
-
I am new to the forum, and I am thankful that my Google searches led me here as I have learned much in a few short hours of reading (including TOS and read this first, thank you). The expert knowledge is appreciated. I am planning to build a multi-port gun burner. I have flipflopped between a couple different chamber ideas, and I am starting to settle on a 'D' (flat face down) with relaxed 90s at floor corners. D's seem like they are common, and from other threads, ovals direct the flame path well. This is why I am thinking about making a relaxed oval with a flat floor. I have access to a large amount of scrap metal, including sandblasting tanks and 20lb propane tanks. I was wanting to use a sandblasting tank sectioned down to 12 inches (not including domes), but with a diameter of 13 inches I feel like the volume may be too large (possibly 8 inches wide). Ideally I would like the chamber to be 6 inches wide, and 10-12 inches long. I will have to keep looking through our metal to see if I can find something closer to my end goal for the size. For the design of the forge, I'm not designing squat. I'm just following the recommendations here. 1 inch 2700 degree blanket soaked in water/colloidal silica (two layers), heat cycle, bubble alumina refractory, matrikote, heat cycle. I plan to orientate the burner in the same manner one would with a Frosty T burner, 2 inches off center with a tangent 25ish degree angle. The part I am not as settled with is the runners in the burner's refractory. I had an idea that I thought might be fun to try. I wondered if putting a slight curve in the runners (but not to parallel, still striking the floor) would increase the speed of the flame travel across the floor, which may strengthen the swirl of the flame. Sure, this is min-maxing, but it's fun. For a 10 inch long chamber I would aim for a 6 inch long burner. I read how many ports would be appropriate but I have forgotten, so I will have to find it again. I even considered making the runners square as apposed to circular after reading a comment from Frosty that this can mitigate a specific type of turbulence (edy current). The bottle to burner will be standard regarding the various valves in the plumbing. I am going to fabricate the burner's plenum differently, which really only amounts to giving the airflow a smooth transition from pipe to plenum. I want to do this to reduce the mass of turbulence from the air going from a round pipe/orifice to a block. On the other hand, the turbulence may be the primary AF mixing element? Anyway, I don't feel that this forge will be any different than the other forges that follow the recommended design/parameters. I'm sure it will forge weld ok, provided I don't muk anything up (it happens). The only elements I lack are the right size steel tube, matrikote, and colloidal silica. Feel free to suggest/correct.