LeMarechal
-
Posts
81 -
Joined
-
Last visited
Content Type
Profiles
Forums
Articles
Gallery
Downloads
Events
Everything posted by LeMarechal
-

A work from Alfred Habermann - How does it hold together
LeMarechal replied to LeMarechal's topic in Historical Ironwork
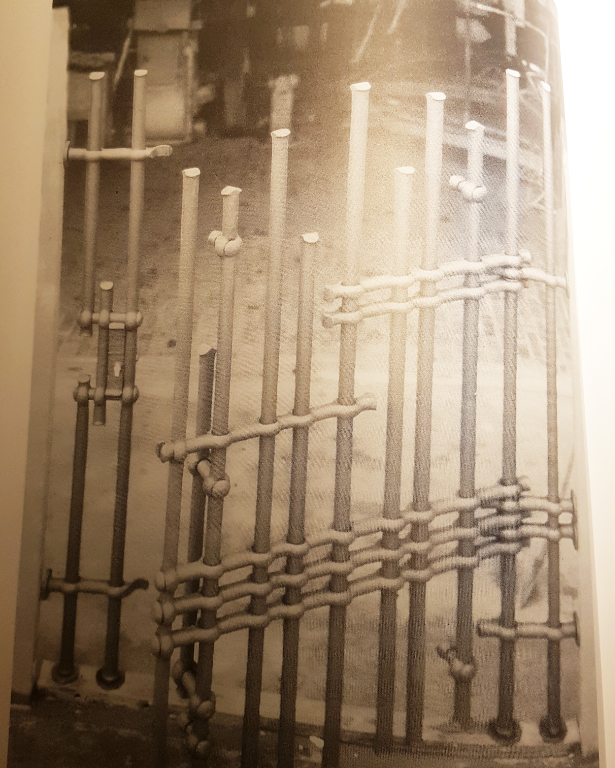
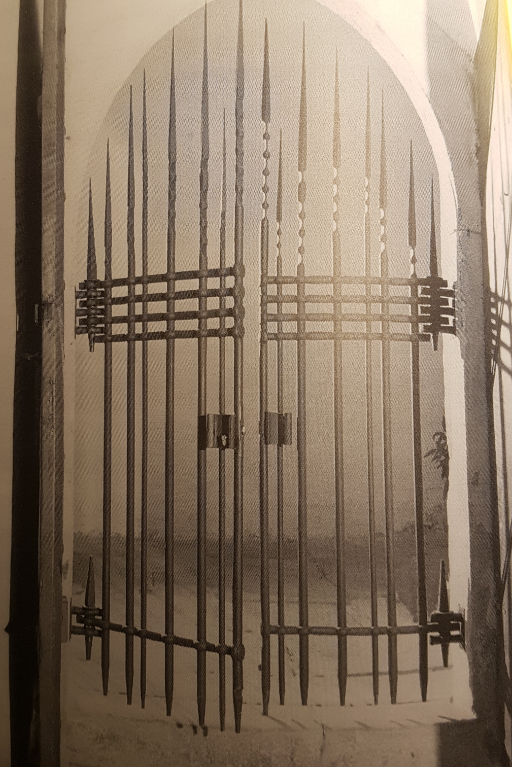
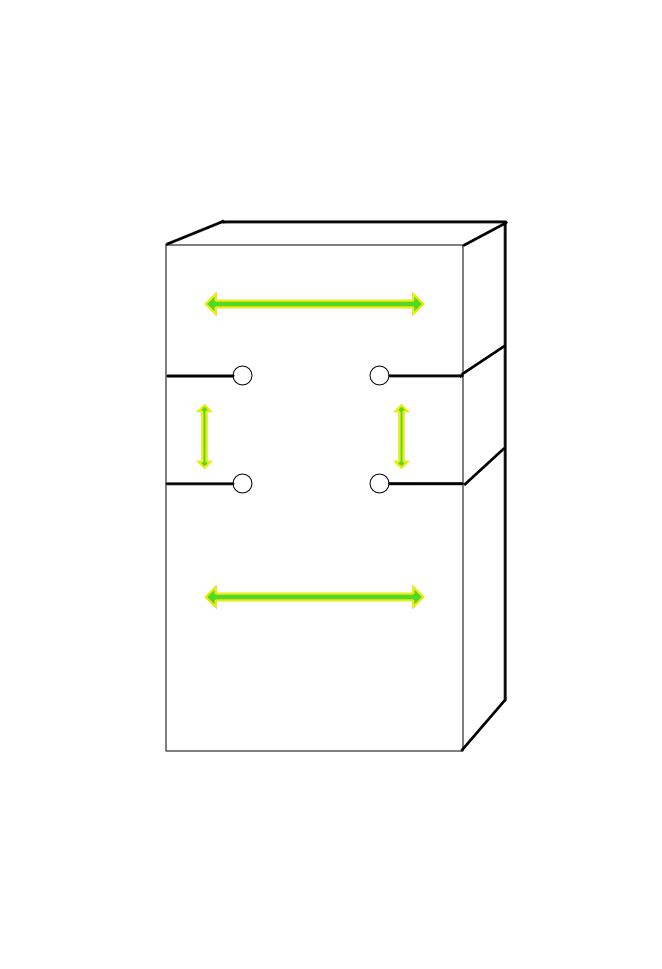
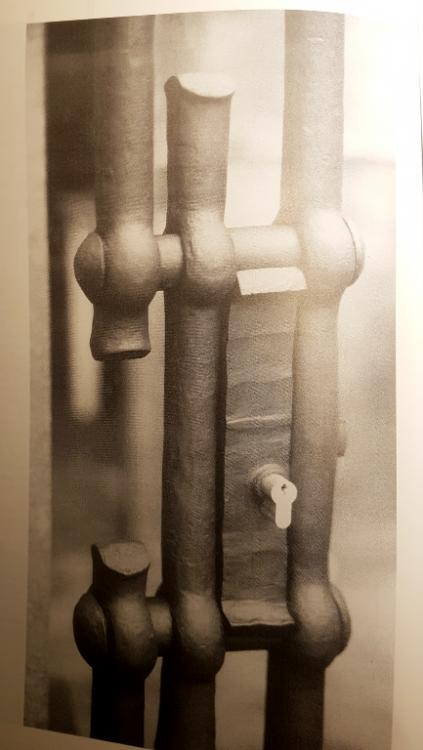
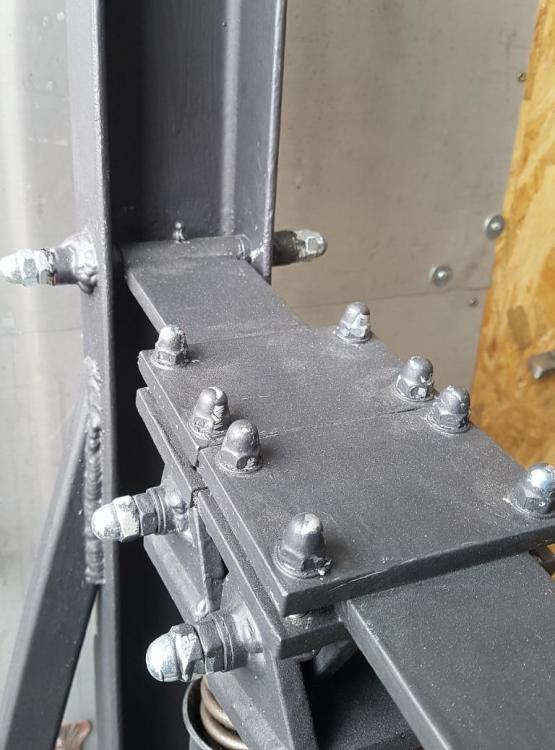
Hi Thomas, I'm totally with you. It must be something like riveting or some welding points. Shrinking is in theory possible but I can't imagine that it will work here. I made a little bit of math about changing in length by heating up a bar with a 25mm hole in it.(see the photo) If I'm not too wrong with that calculation, you can see that the diameter will only grow about less than 1/64"... This kind of measurements is a very unusually one in blacksmithing Ok let's say if your drift is well dimensionsed and you drift at the right temperature each time, each hole...the next challenge would be, the distance between the holes must be exact 0,0000mm the same! Ok let's imagine that someone can do this... now it comes the moment to assemble all parts together. You have now to bring up all 5 joints/holes to nearly orange-heat and slip one upright bar after an other thru all 5 holes into the right position .... and all the clearance you have about the 5 holes is that fraction of a millimetre . Ok, what I heard about Alfred Habermann was that he was an amazingly good blacksmith, who knew all techniques and I won't say anything against that. But I think everyone can see what I'm meaning (Hope my english makes sense)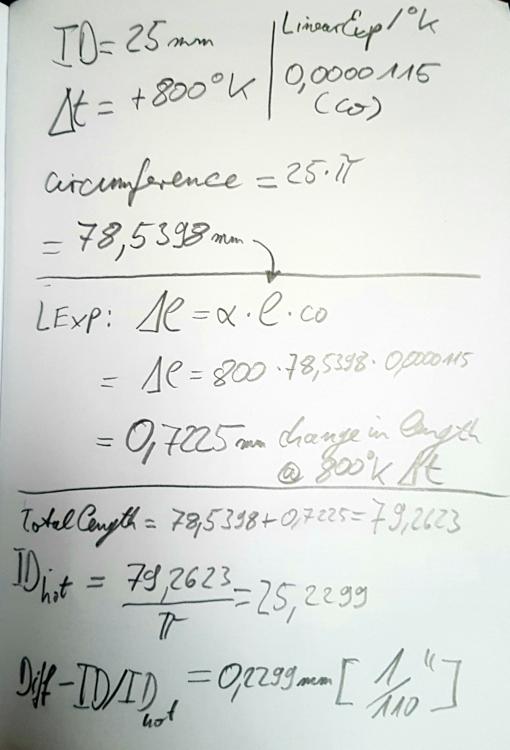
-
A work from Alfred Habermann - How does it hold together
LeMarechal replied to LeMarechal's topic in Historical Ironwork
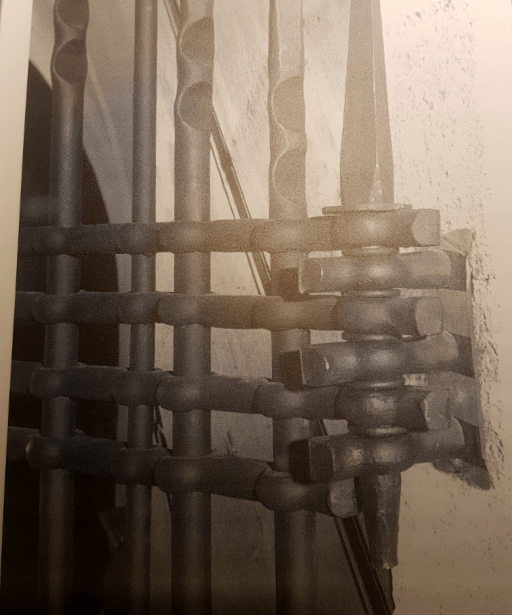
I thought too, that it must be this shrinking thing. But the upright bars have to cross the horizontal bars 5 times. Must be a very fiddly job, not? -
What did you do in the shop today?
LeMarechal replied to Mark Ling's topic in Blacksmithing, General Discussion
Yes, that was the idea -
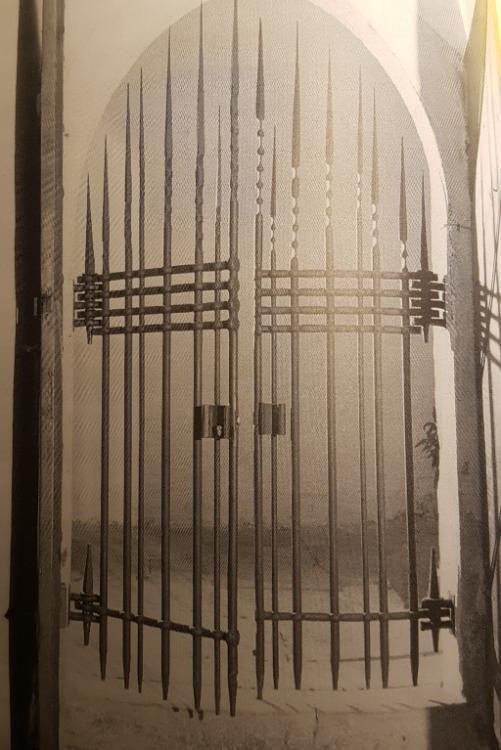
Hi to all out there, There is a book named - Alfred Habermann - Blacksmith and Designer. It is a kind of an portrait and I think a friend of him wrote this book. There is almost no information about the techniks he used for the pieces shown in this book. And there is one thing Habermann made I evertime wonder how this all helds togehter: Does anyone know this gate? Or had it seen in nature? How does Mr. Habermann prevent the parts from slipping apart? As you can see on the photos, you can´t see anything there. They are not detailed enough. What do you think? Did he weld it at a few points from below, where it is not visible? Did he rivet the crosspoints and ground the rivets leveld with the edge of the holes? Grettings Sascha

-
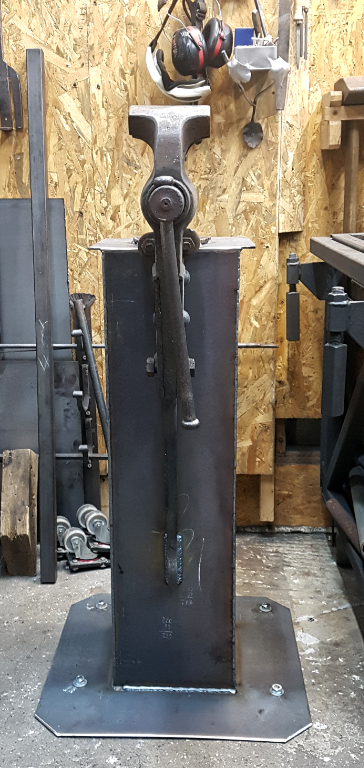
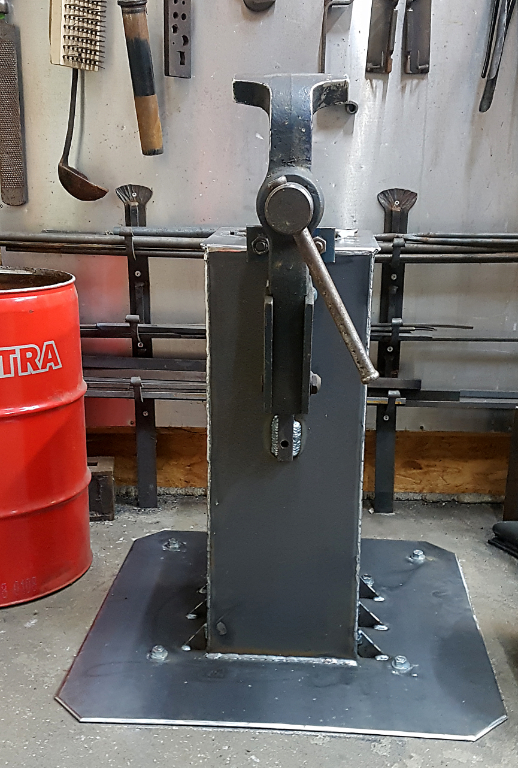
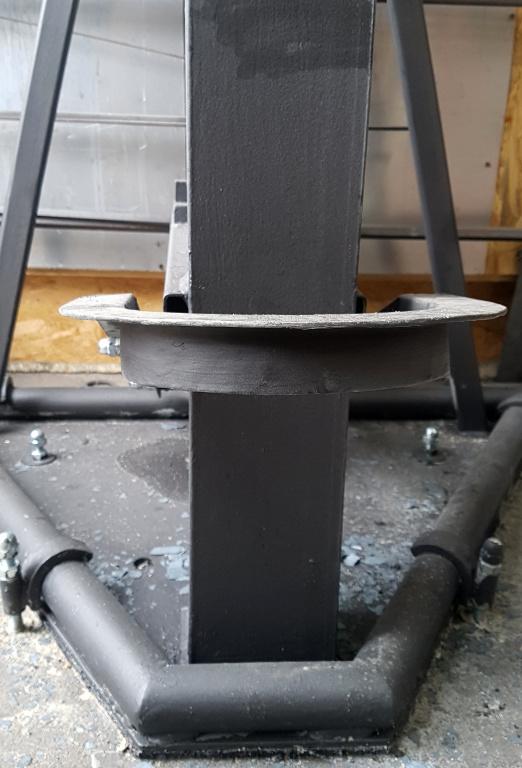
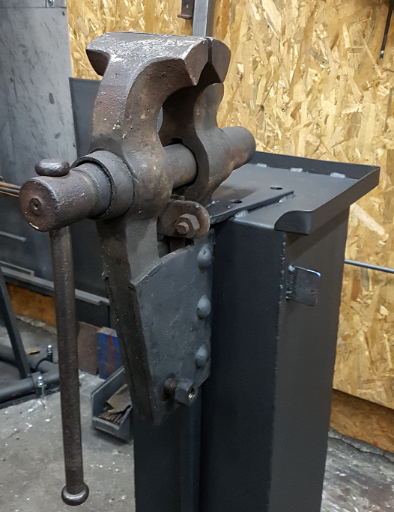
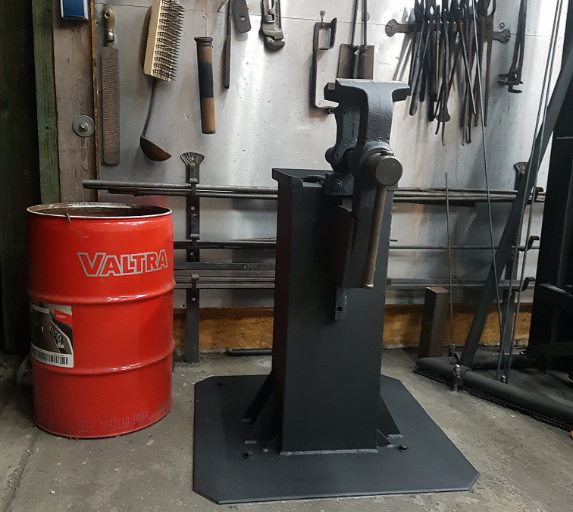
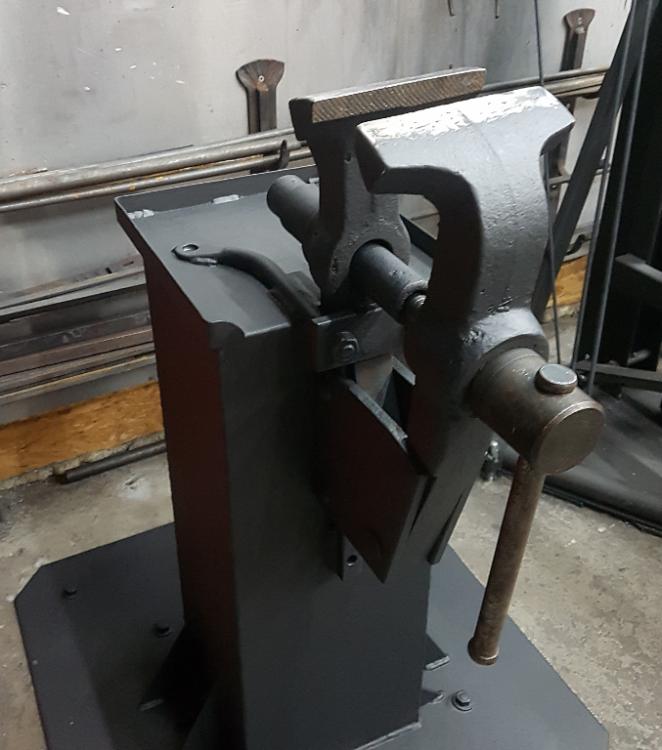
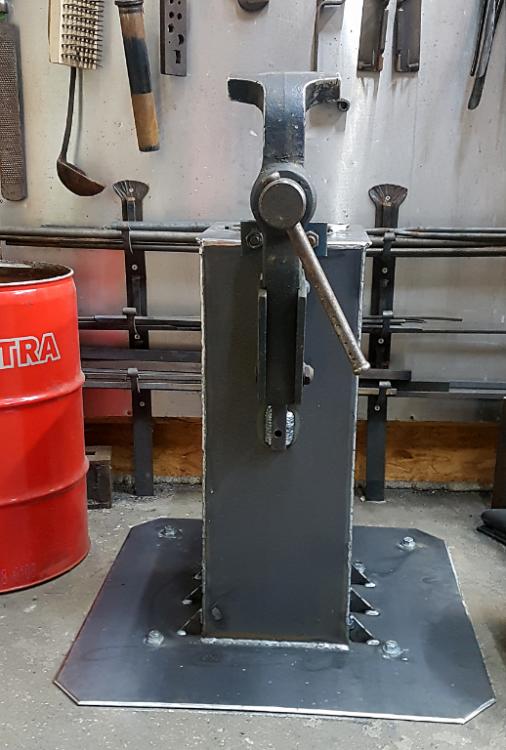
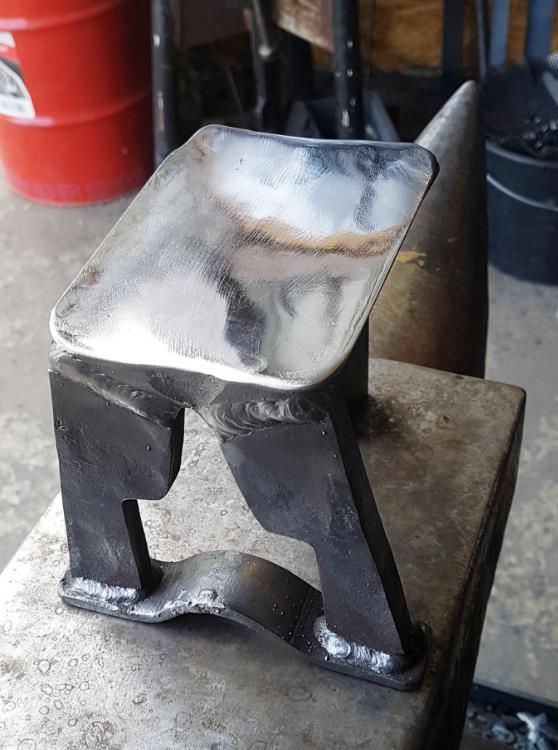
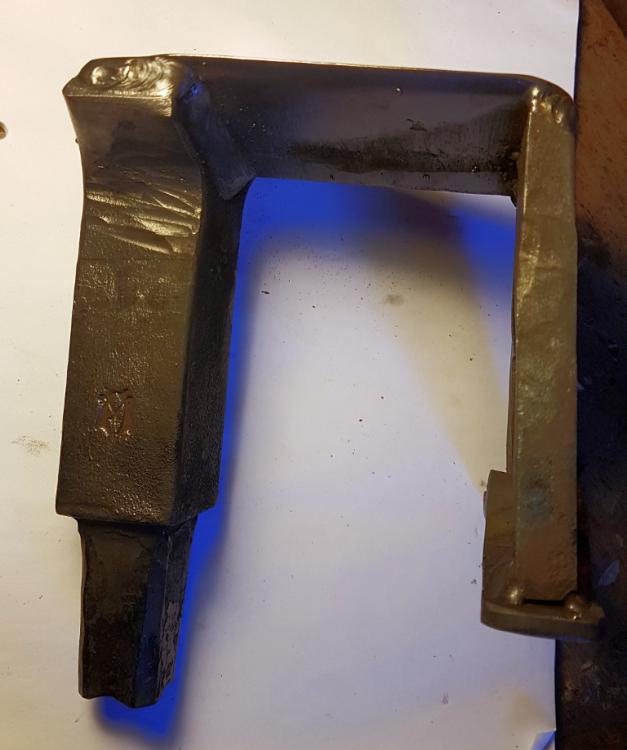
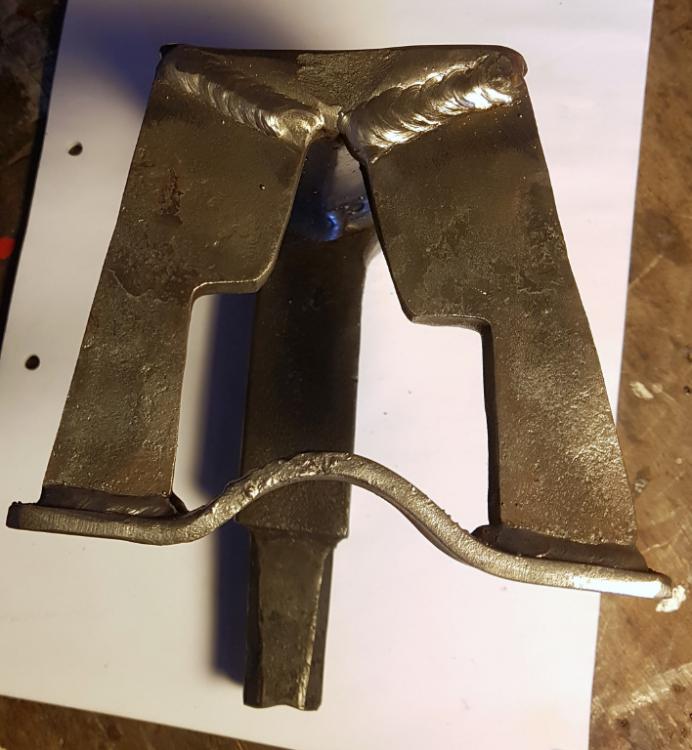
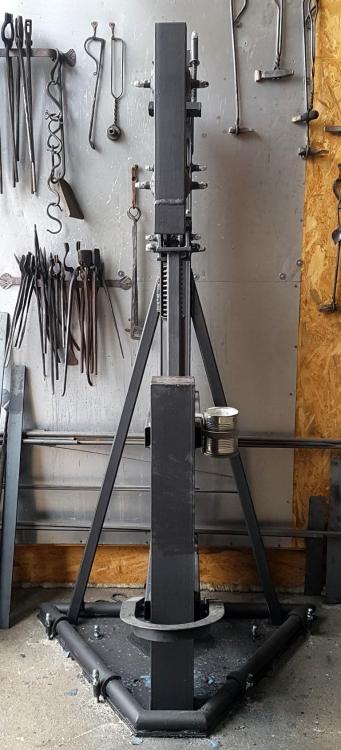
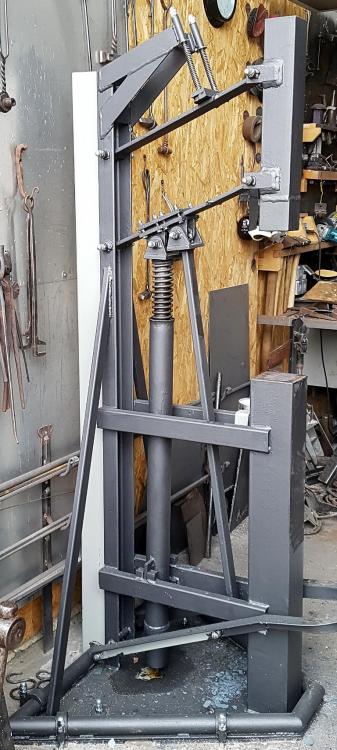
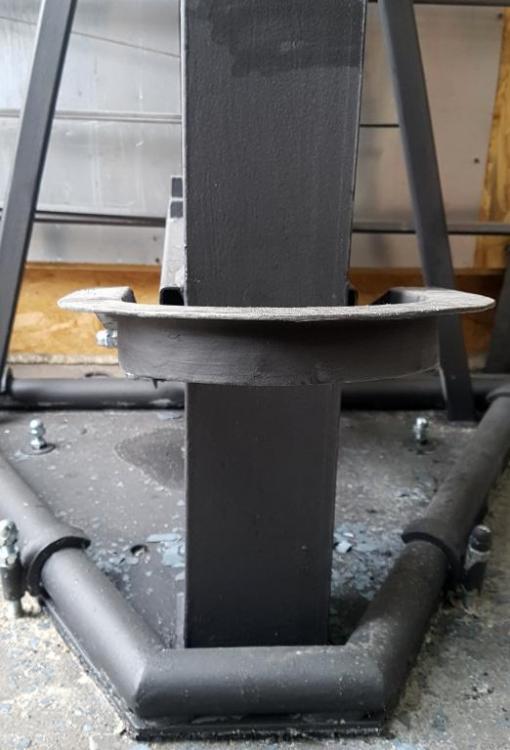
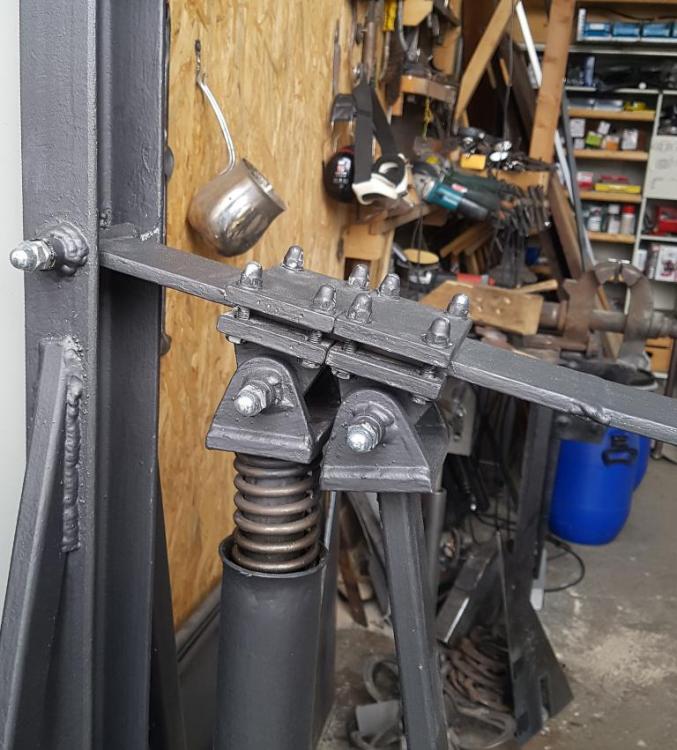
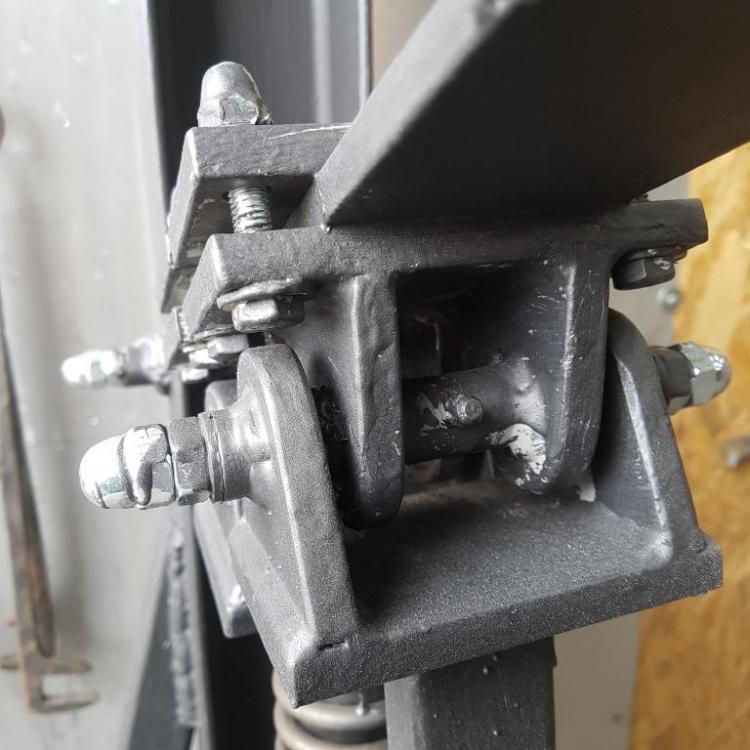
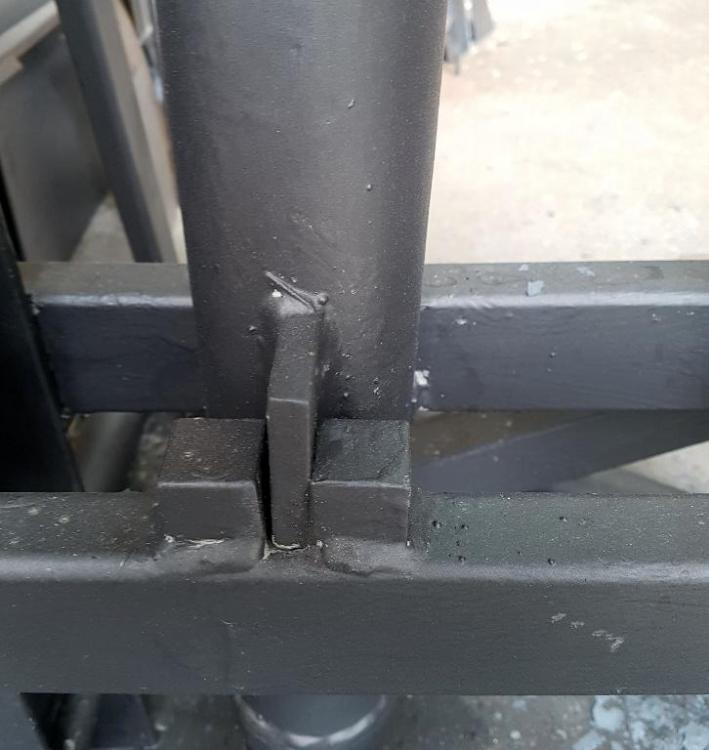
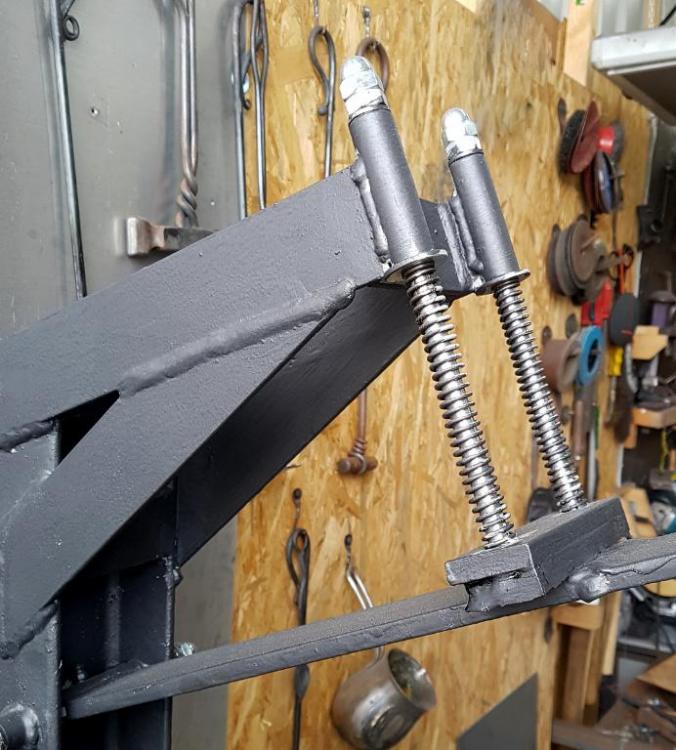
Inspired of the "Steven NY"-version I built two new stands for my vises. The smaler one is for rough forging working. So it got a wider bottomplate as the higher one that is more for benchwork, filing, bending and so. The main dimensions: small one - hight without the vise 690mm - squar pillar 200/200mm - Base 700/700mm high one - hight without the vise 960 - squar pillar 200/200 - Base 500/500mm As the higher one is not only higher but has also a smaler base it tends to swing/vibrate a little bit, so I added some bracings (red circle on the photo). Even though they are not soooo big, they make the whole ensamble much more stable than I thought. So I put some too to the smaler one for my own good feeling Greetings Sascha Above the small one


-
What did you do in the shop today?
LeMarechal replied to Mark Ling's topic in Blacksmithing, General Discussion
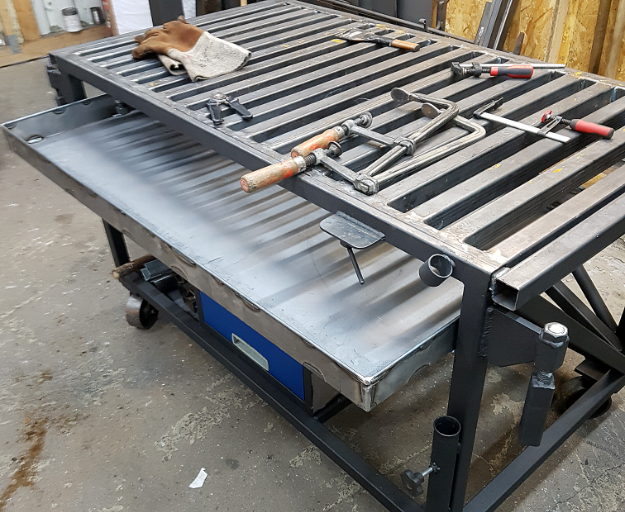
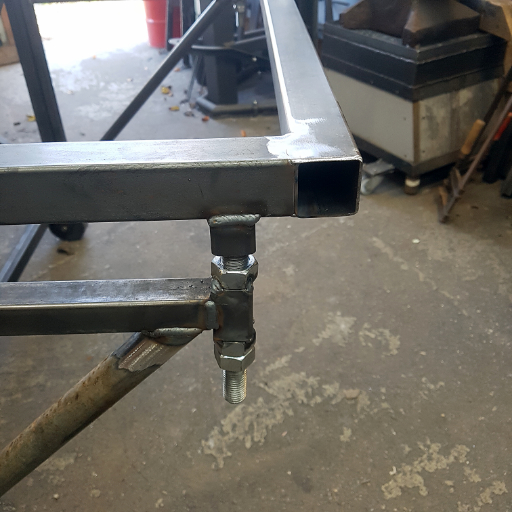
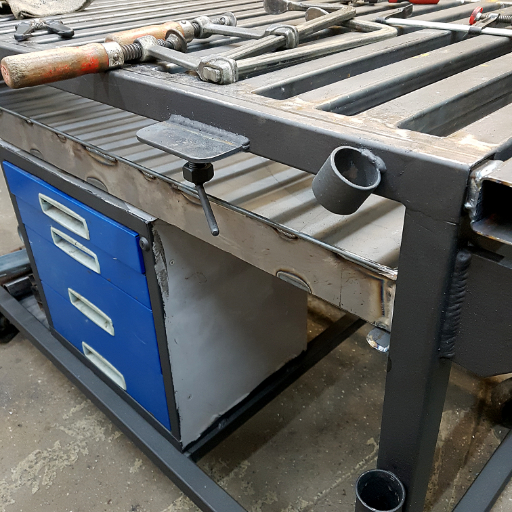
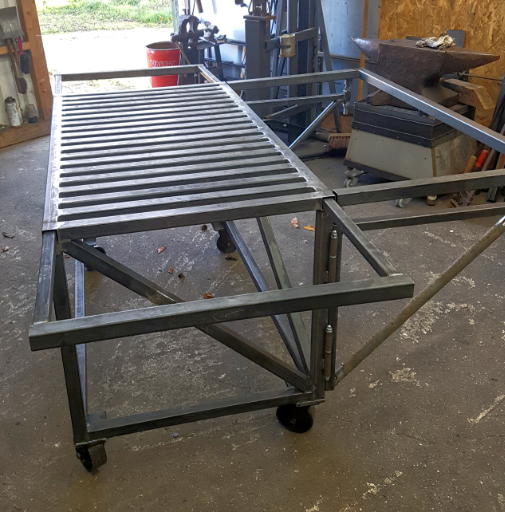
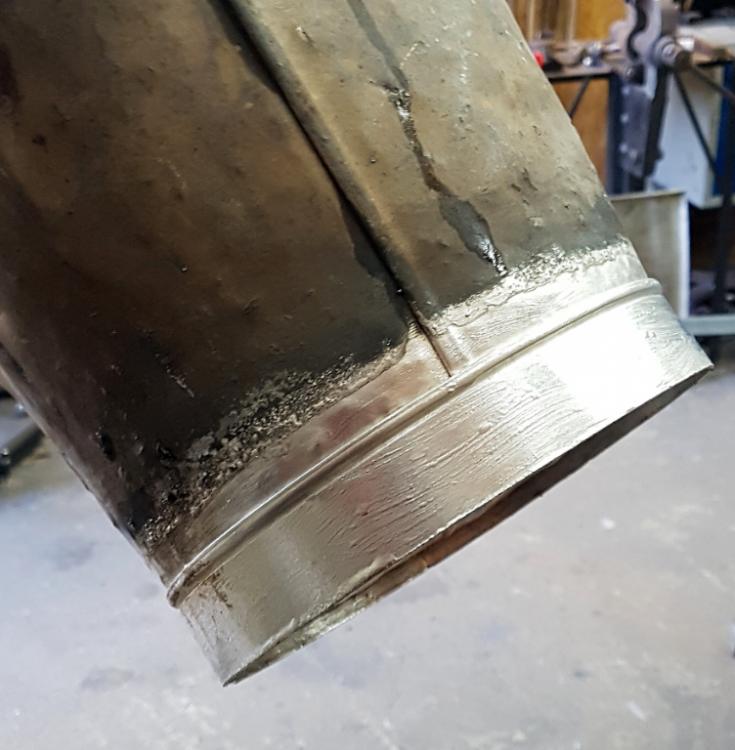
No forging last time but constructing a new weldingtable. A few impressions: The surface choose steel wheels if all extensions are pulled out to their max. it ist about 2,5m to 1,4m (98,5" to 55") Supportarm adjustable in high holder for the mig welding gun and the dust drawer Dust drawer Greetings Sascha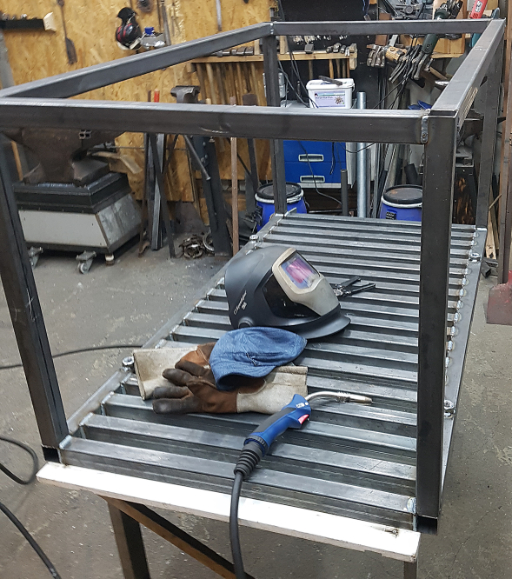


-
Hi to all out there, few days ago I tried to make a basket twist, the traditional way. Meaning, that I split squar bar from all 4 sides and then go to twist it. Using my sharp hotcut chisle... However, if you punch holes in a bar using a flat surfaced slotpunch, you will shear off the rag/slug as the final step. But using a slitting chisle, hotcut ect. meaning something that has a sharp working end, a fairly big rag will develop if you slit from the opposite side. I found it a little bit hard to deal with this rag after splitting was complete, and try to file it away. But does anyone knows an easier way to get splitting without or with a minimum of rag? Greetings Sascha
-
What did you do in the shop today?
LeMarechal replied to Mark Ling's topic in Blacksmithing, General Discussion
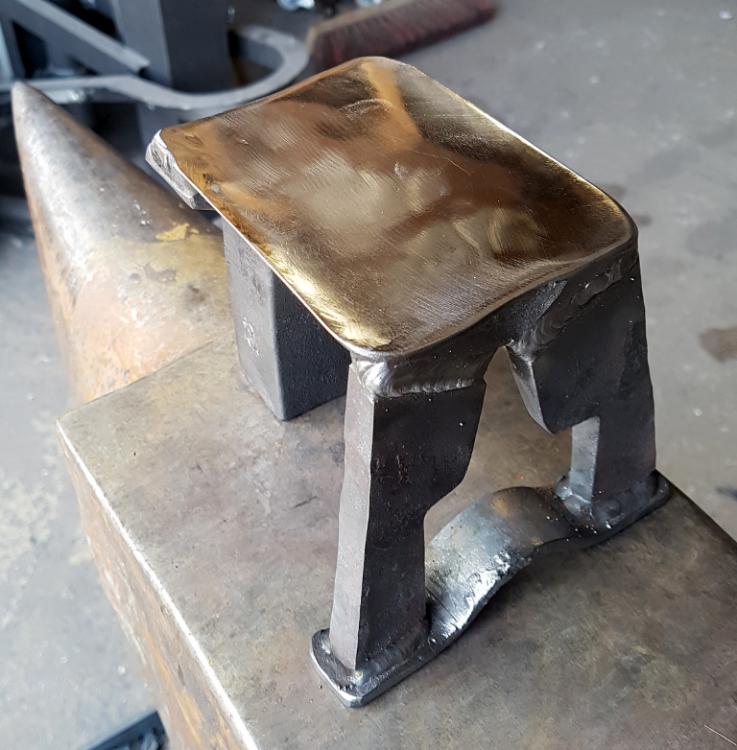
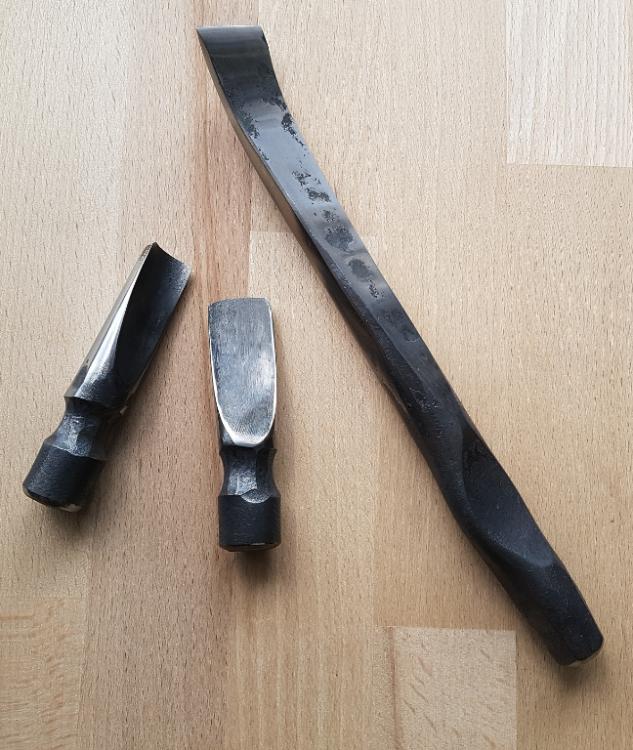
Got some toolings ready (over the last few days) An Anvil saddle, will be used for splitwork This piece was inspired by something I found in Otto Schmirlers book: My interpretation : The plate is made from C45 (similar to 4130 if I´m right). A usefull projekt with some heavy-forgings, heavy weldings, heavy heattreatment and not at least: heavy desperation This was a realy heavy day Also made some chisles and tools for my treadlehammer: And at the end of the session also did an often postponed repair of my old farrier waterbucket. When I started my career as farrier 20 years ago, this was a gift from one of my first clients. And as I´m a little superstitious I feel better repairing this old guy than buying a new one. Mig-welded and tinned should rest for the next 20 years Greetings Sascha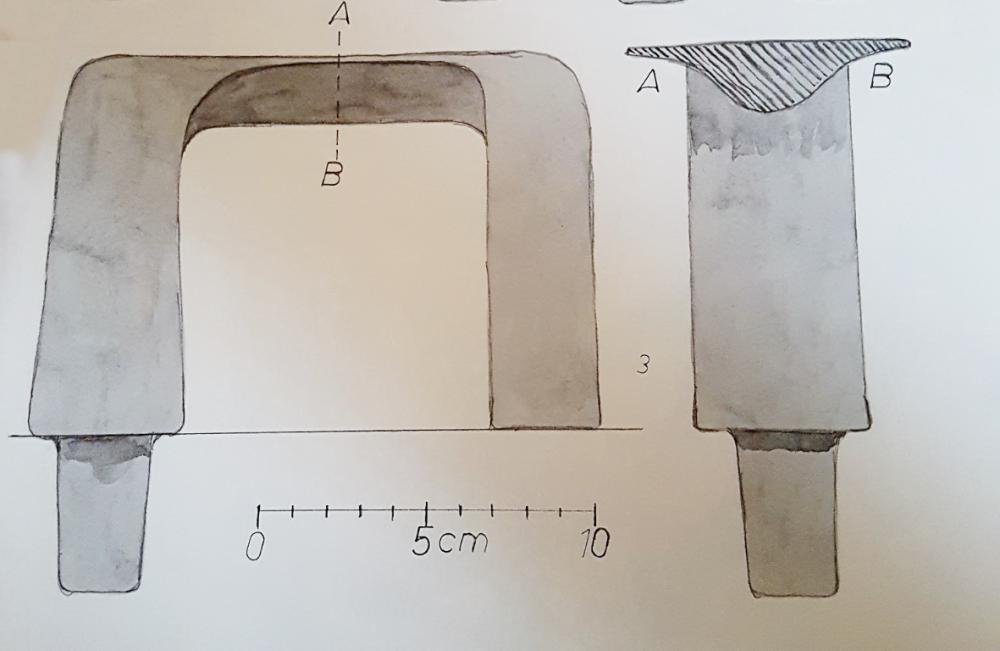


-
how to forge a normal cross
LeMarechal replied to LeMarechal's topic in Blacksmithing, General Discussion
Dear George, I´m absolutely with you. The point of success or failure is to devide out the mass of the upper sections equally. My drawing should only be understood as a general idea... Next week I will have some time to make some experiments about this. I will show the results.... -
how to forge a normal cross
LeMarechal replied to LeMarechal's topic in Blacksmithing, General Discussion
Thank you all for all the ideas. One method occurs to me today: Splitting and forging out like in the sketch below Drilling or punching the holes, then splitting along the lines and changing dimensions in the direction of the arrows... First the upper and lower part of the cross to get the mass out of the way to be able to reach the crossing middle... Must be good calculated as JHCC wrote :)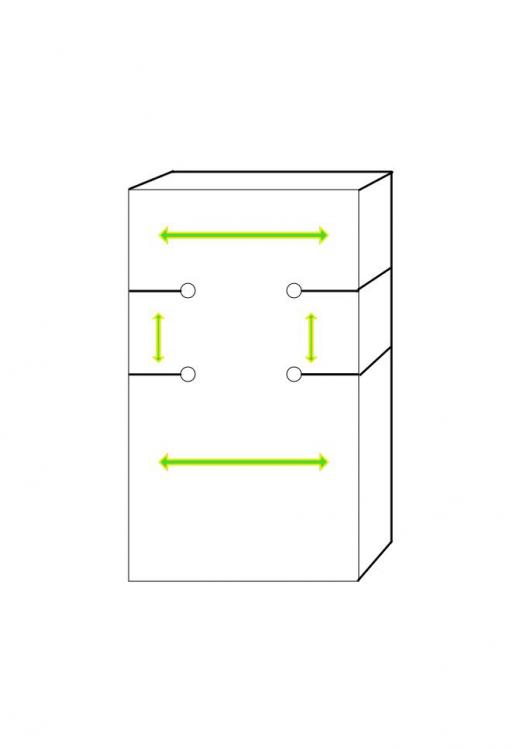
-
Hi to all out there, as it is realy easy to find tons of videos on youtube about making a split cross, I wonder how to make a normal straight cross. The easy way would be, to weld (stick or Mig) the crossing parts together but what I´m searching for is how the old blacksmiths had done a simple cross? Did they split a large rectangular piece of metal from both ends up to where the crossing point will be, and then bend an draw down the splitted legs? Forgewelding??? Greetings Sascha
-
What did you do in the shop today?
LeMarechal replied to Mark Ling's topic in Blacksmithing, General Discussion
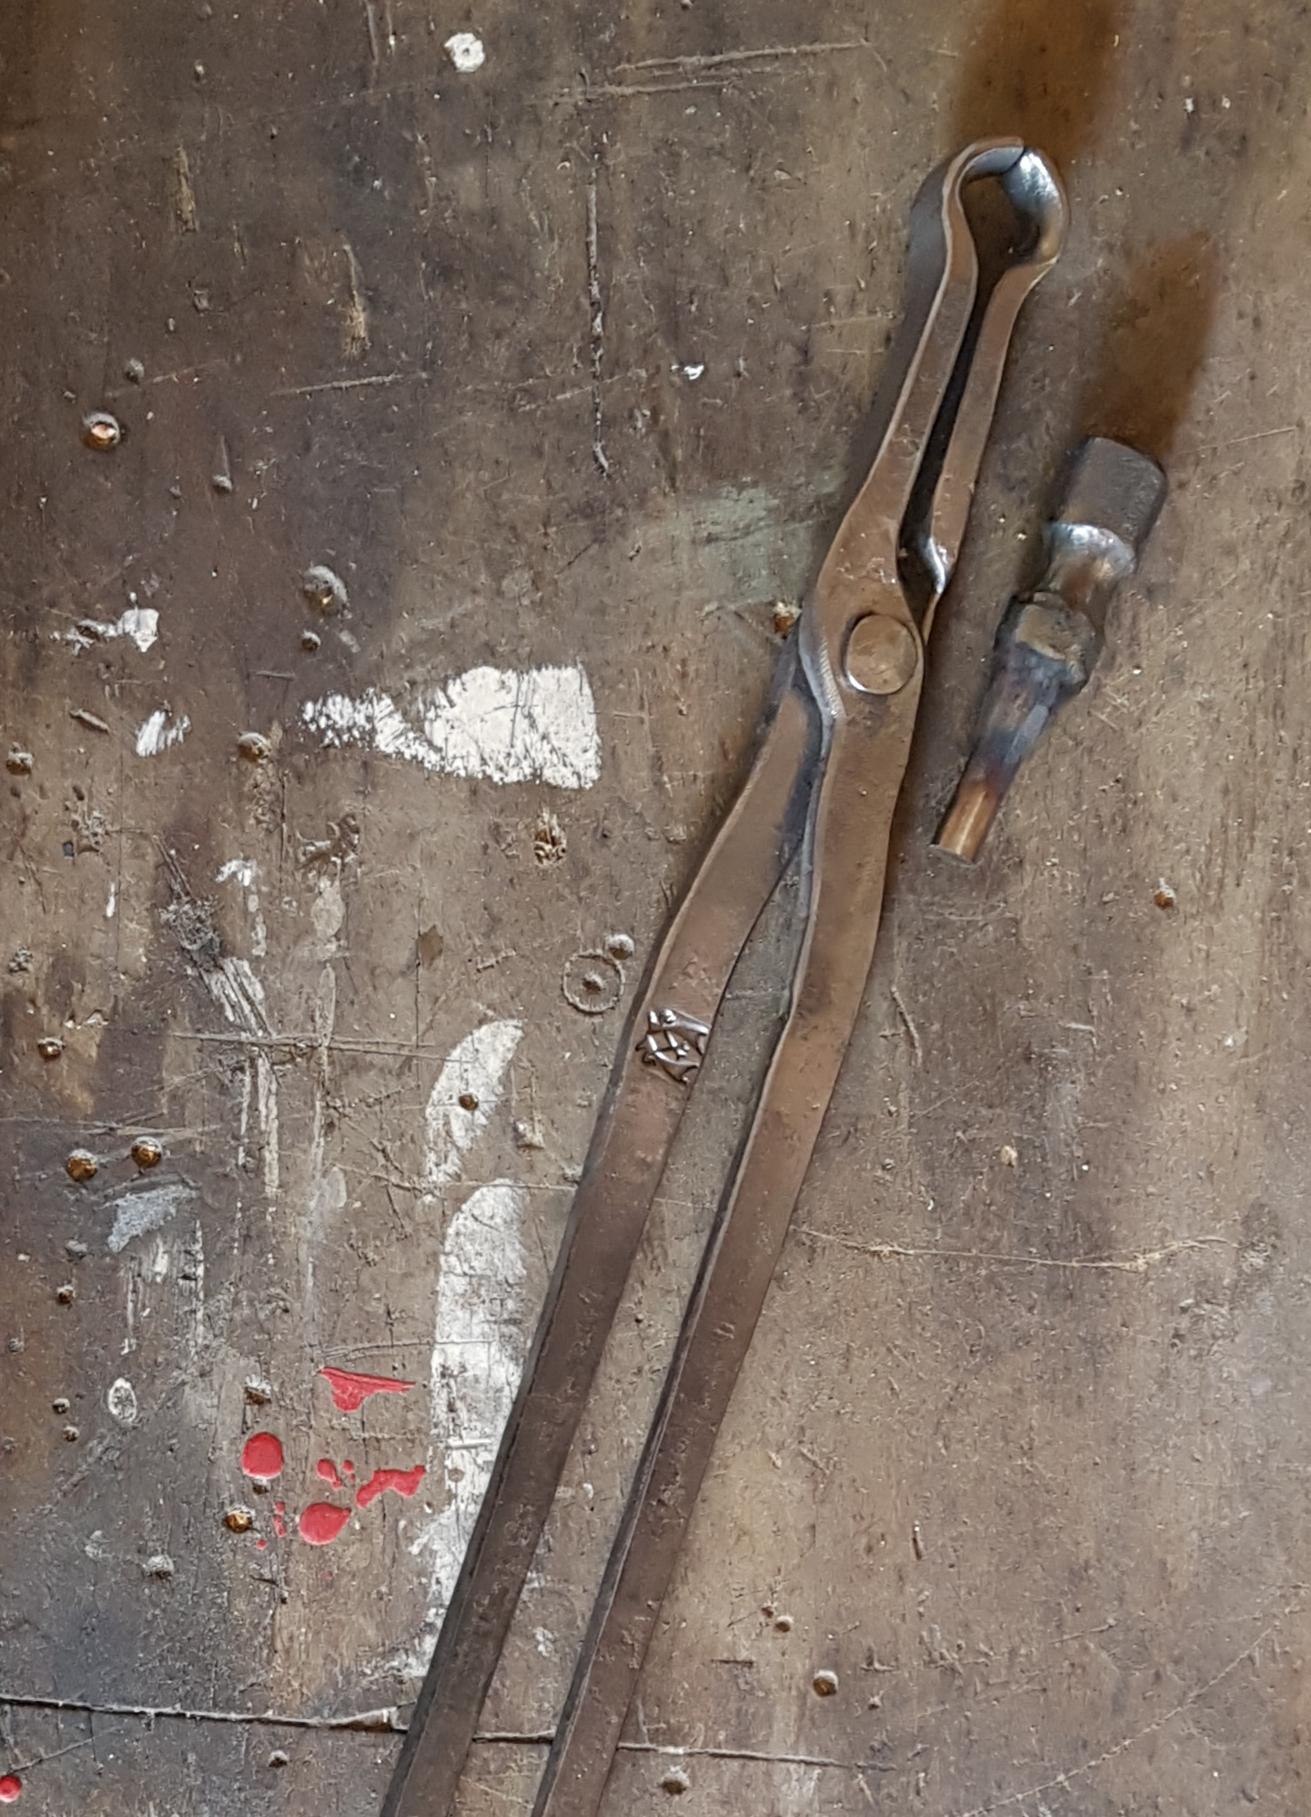
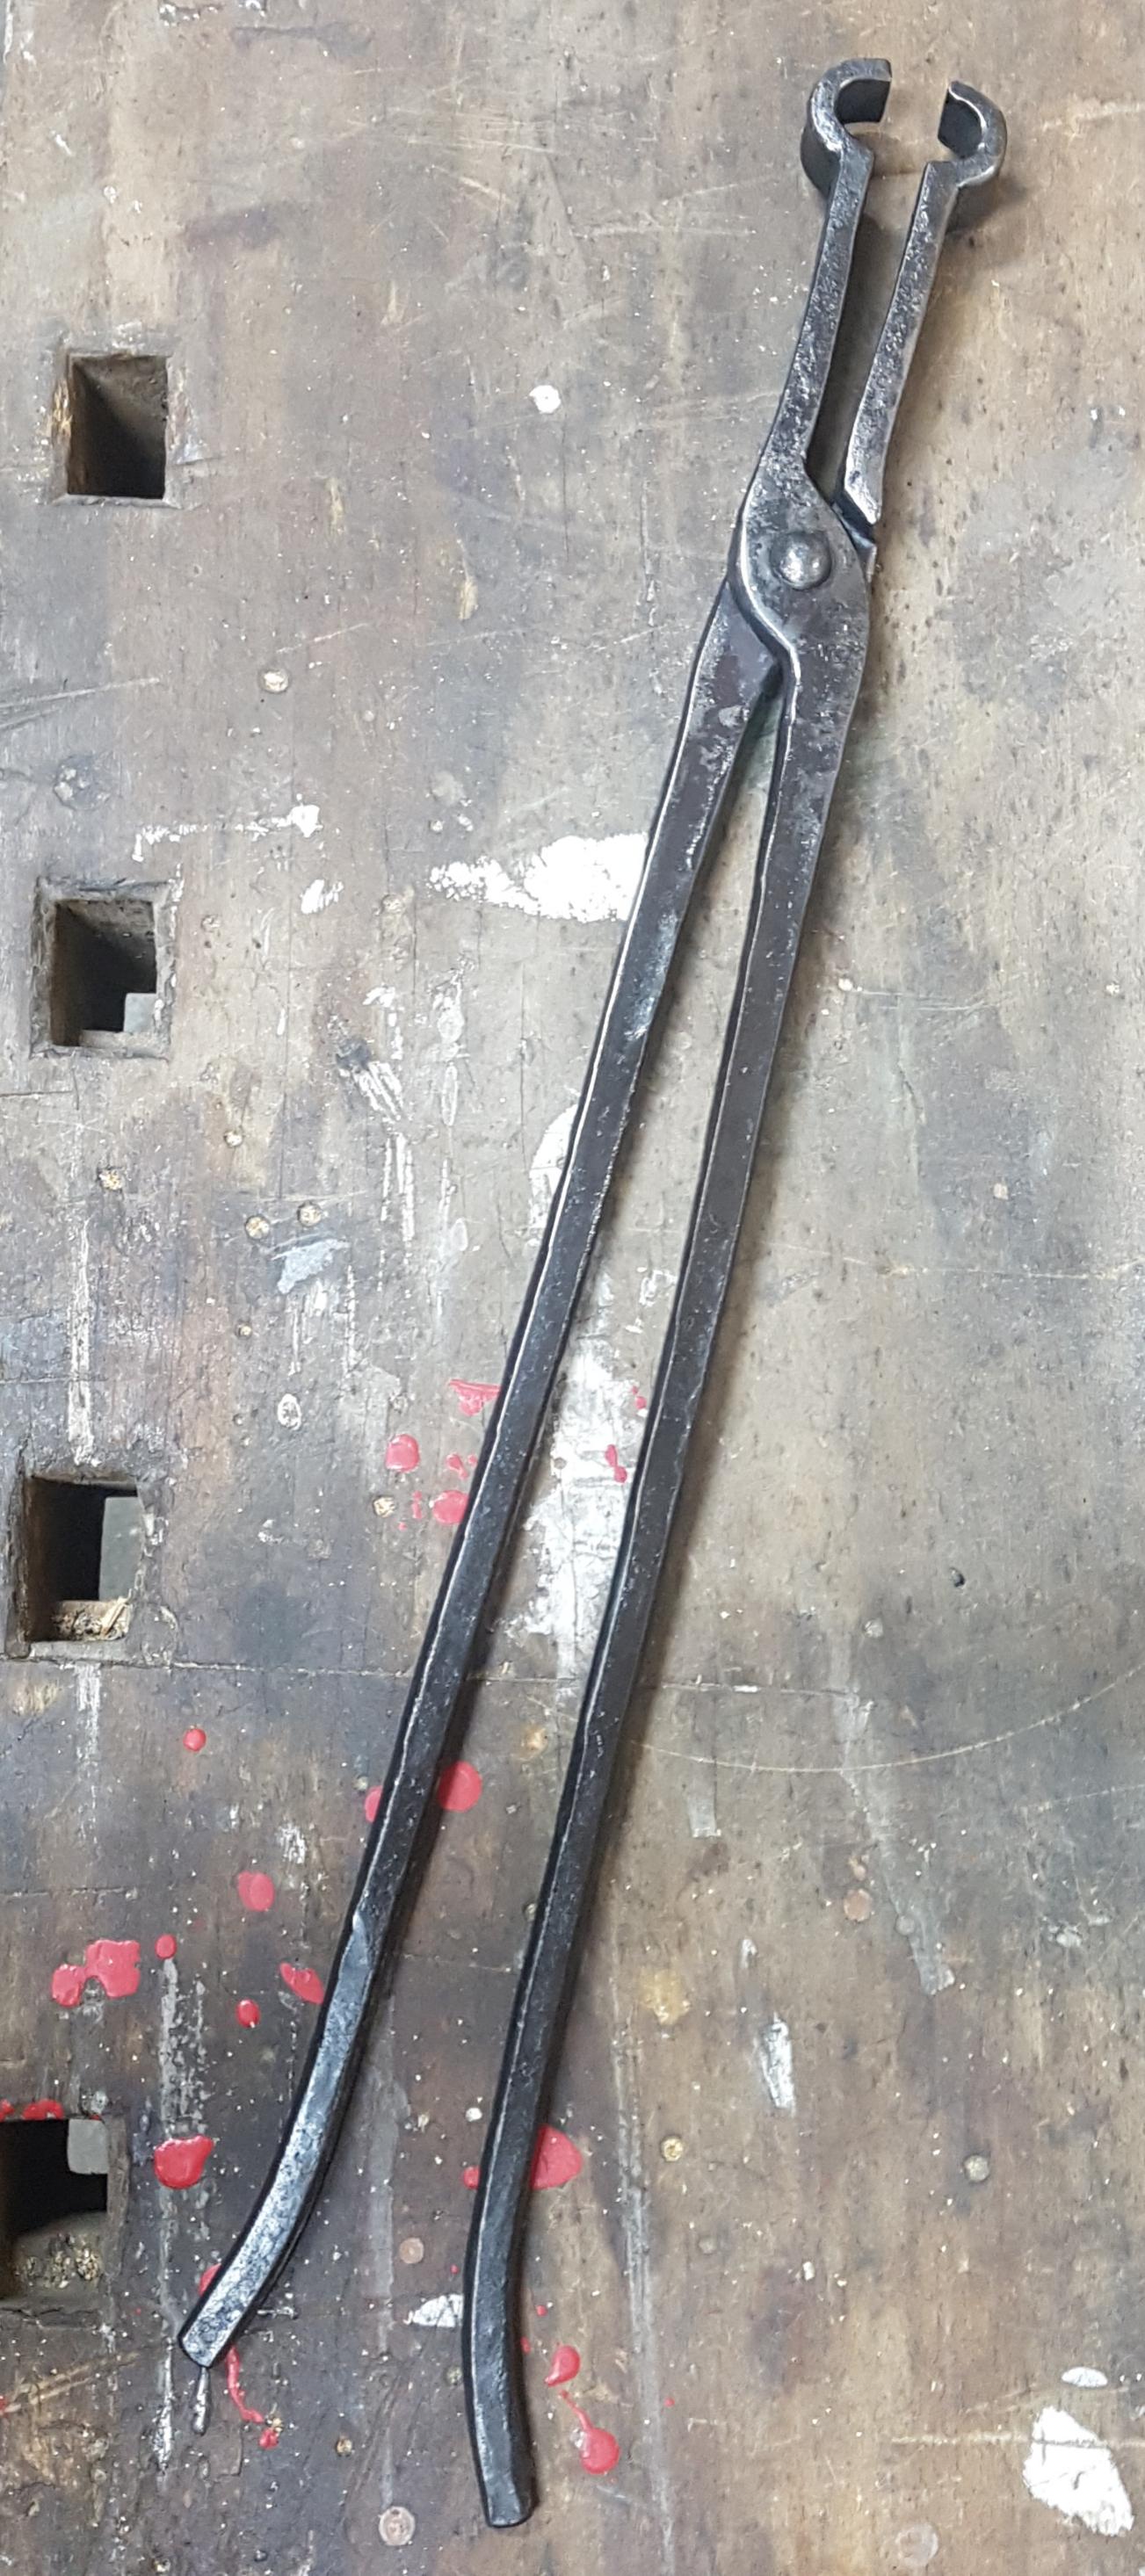
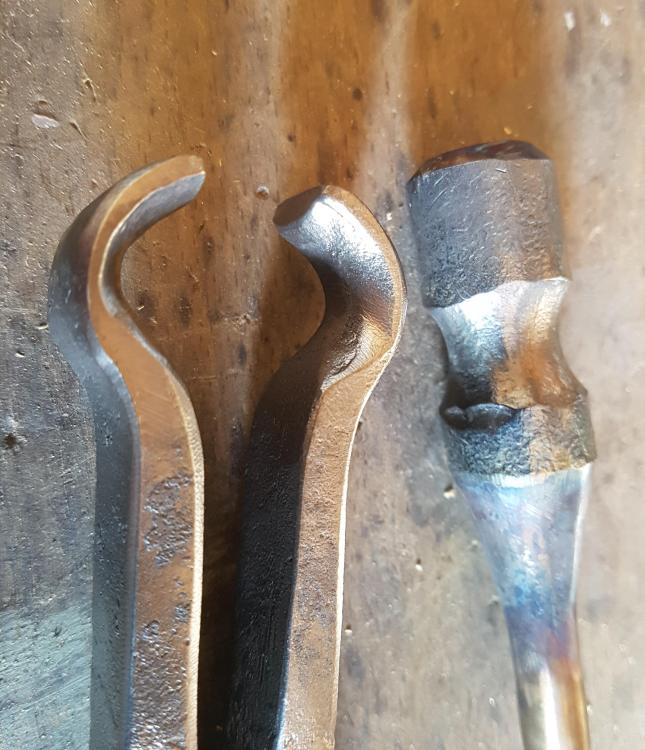
Made another tooling for the treadlehammer. A pair of special toolholding tongs. Here a roundpunch hold by this tongs. Made that roundpunch too today. So you still can see the colours from the heatreatment ...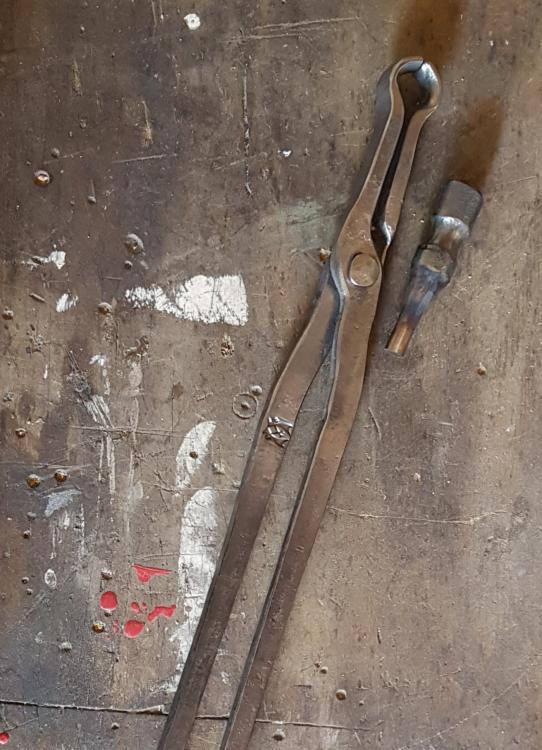
-
What did you do in the shop today?
LeMarechal replied to Mark Ling's topic in Blacksmithing, General Discussion
Made a pair of pickuptongs for powerhammer-work.
-
Self made Treadle-hammer
LeMarechal replied to LeMarechal's topic in Power Hammers, Treadle Hammers, Olivers
Hi, Ok I'll post a video soon -
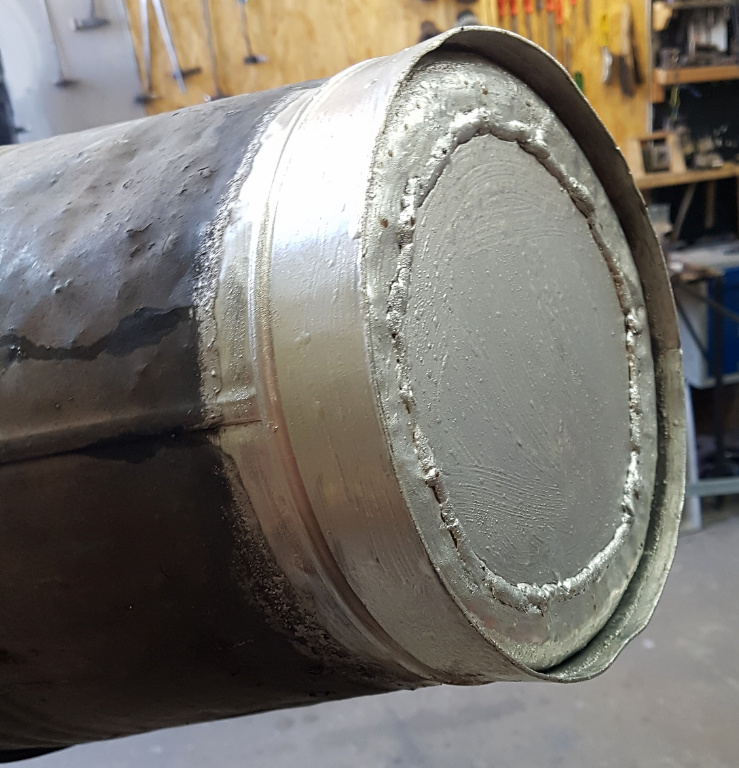
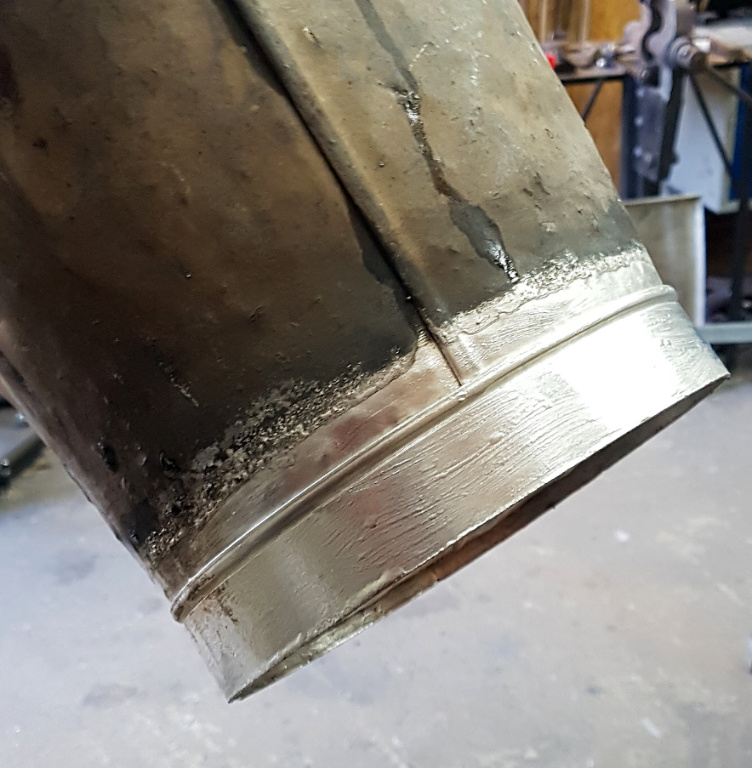
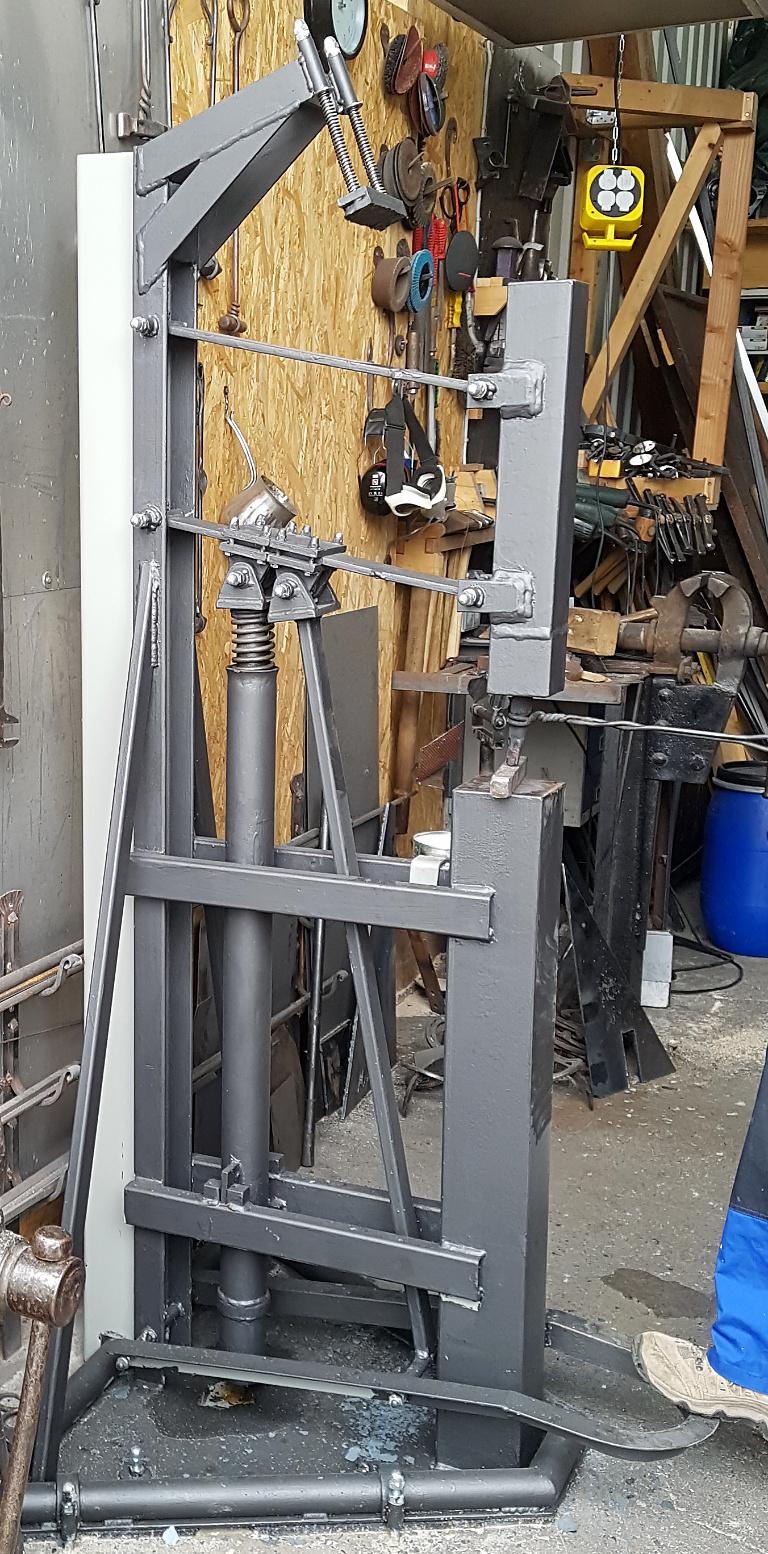
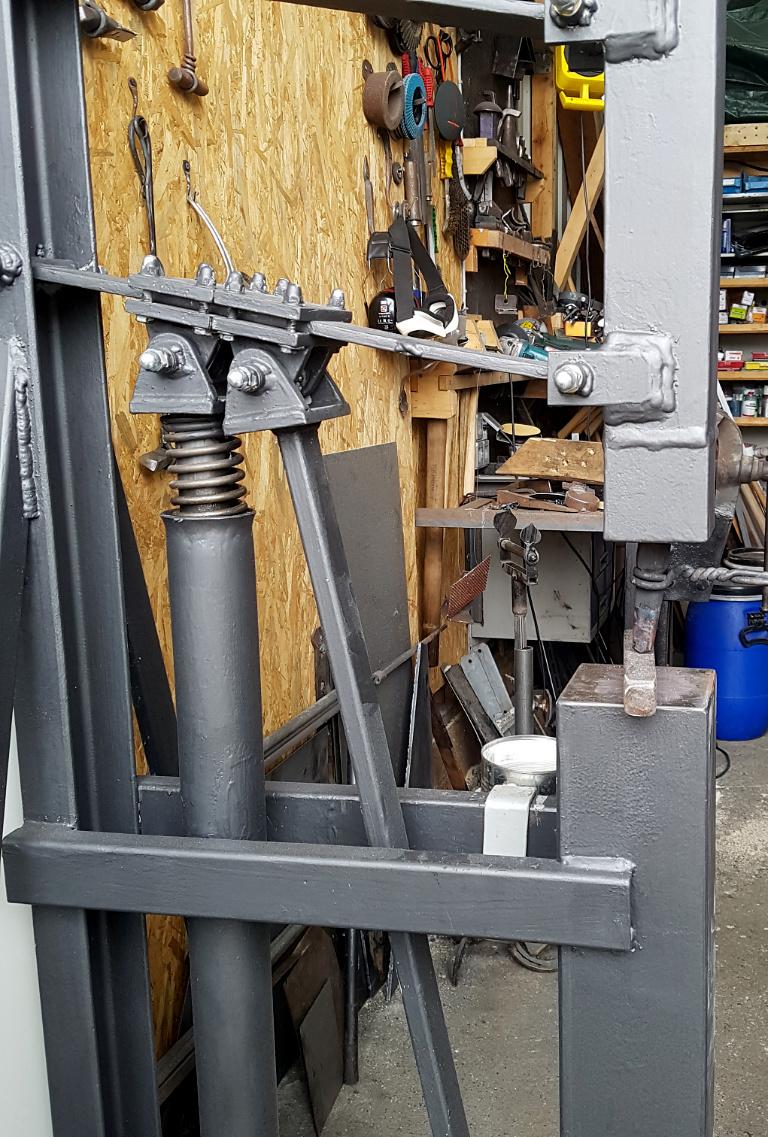
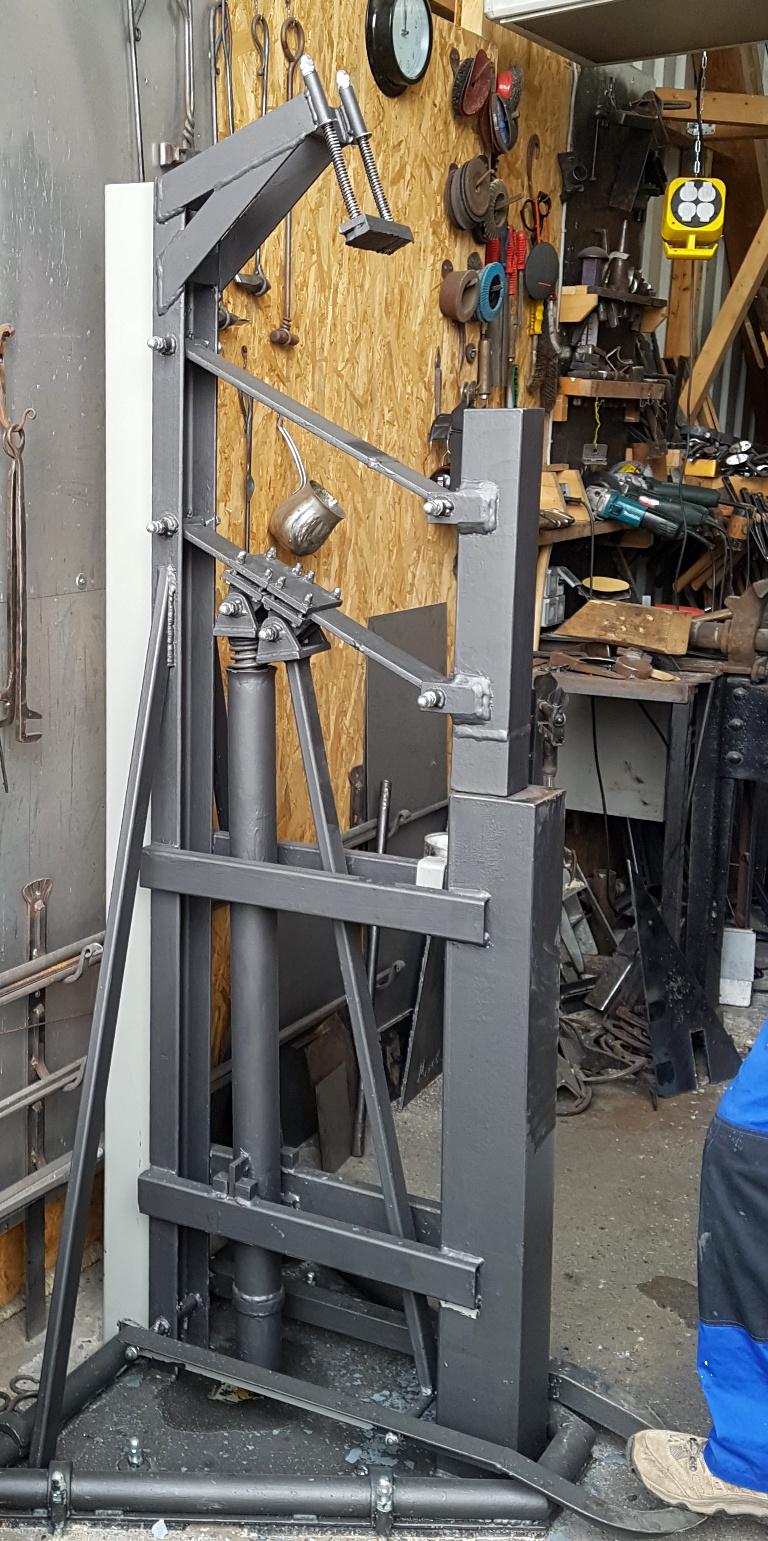
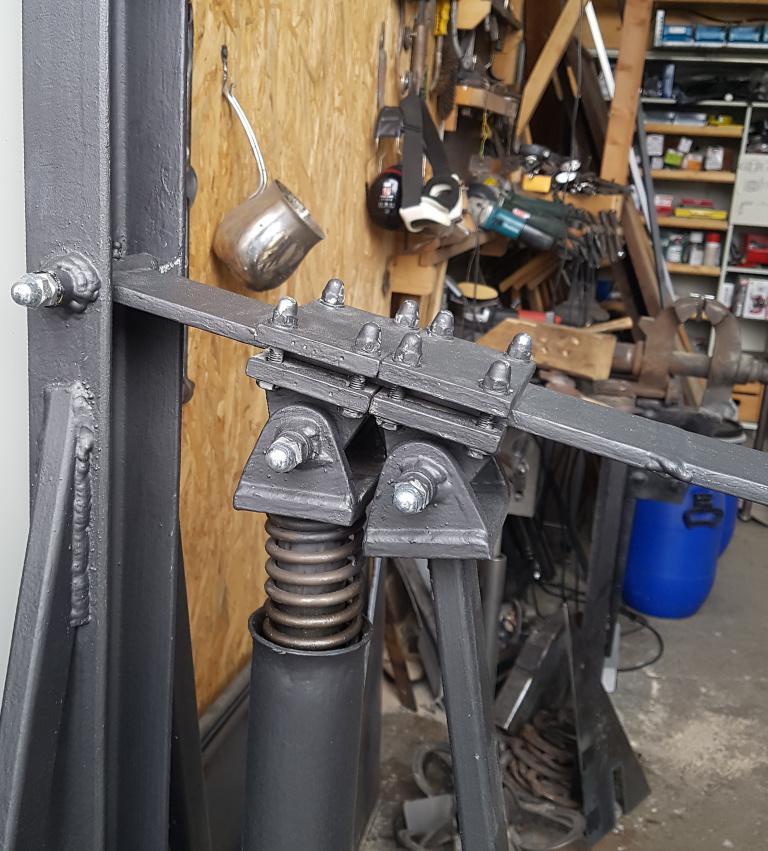
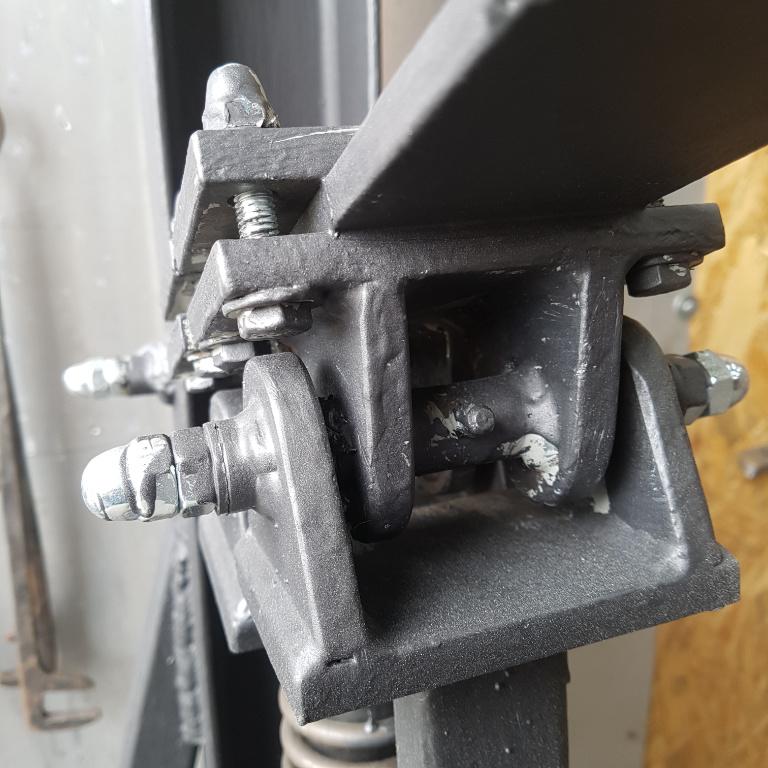
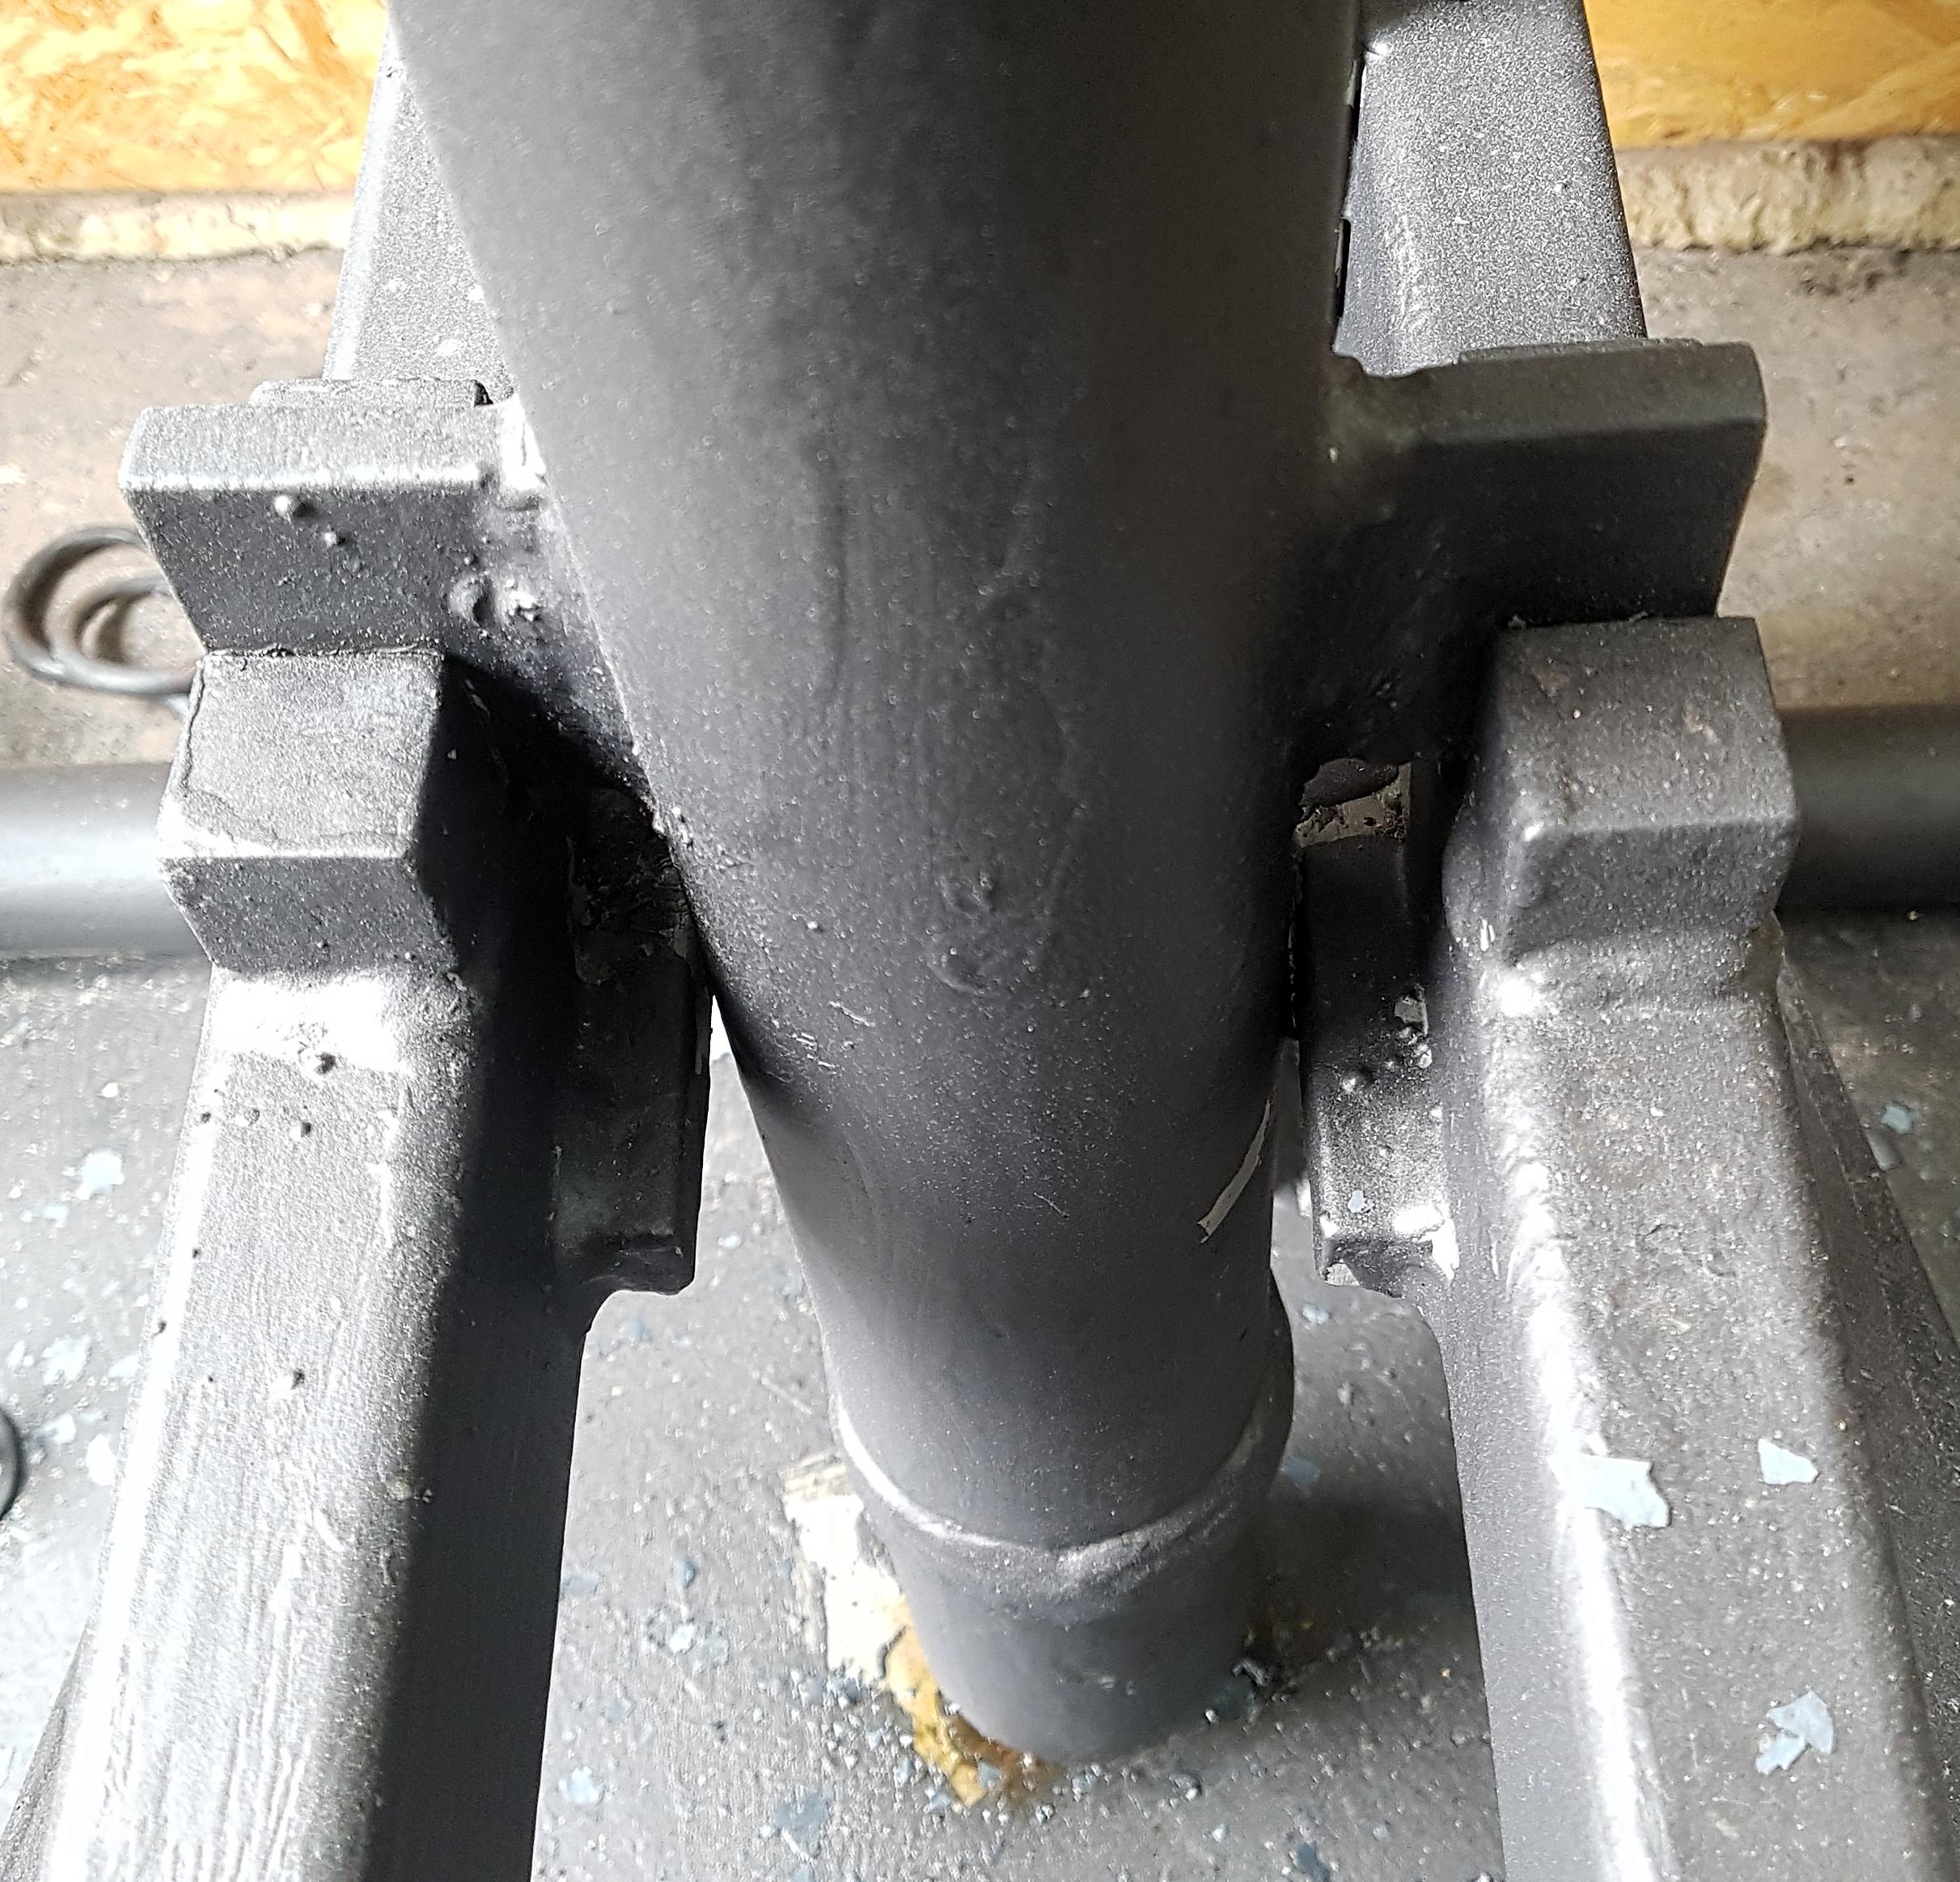
Hi to all out there, I like to show you my new toy. It is a treadle hammer inspired by an photograph out of the book: The Smithy´s craft and tools by Otto Schmirler.He worked as artisan blacksmith in Vienna during the earlier middle of the last century. In his book he gave an immense overview over tooling and the works done with these tools. A little section is included where he showed his design of a treadlehammer, with some measurments. I spent a lot of time drawing the construction via CAD and recently I found the time to built it. Now it is ready, and here are some pictures. It works very fine, the fact that the hammerhead itself describes a circular path is only a little drawback. Frontview Sideview The first additional tool - the watercan The treadle made out of angleiron In use A little closer look Hammerhead complete way down Joints detail, all joints all over the construction got grease nipples A look on the seat (bearing) of the springtube Once more the tubeseat on the inner side you can see two pieces of 12mm square acting as guide to keep the springtube fairly centered. The damper Hope you enjoy Greetings Sascha


-
Hi Thomas, hoping you survived this dentist thing...! Thank you for the tip with the armor. That may be a good scene to look around for further informations. Greetings Sascha
-
Hi to all out there, it seems that repoussé often means : working with nonferous metals. But in earlier day´s there was much repoussé-work on iron. Take a look at all these leafwork at older buildings etc. and you know what I mean However, I can´t find books about chasing, repoussé etc with iron? Does anyone know such a book explicit for ironworks, respectively for blacksmiths? greetings Sascha
-
What did you do in the shop today?
LeMarechal replied to Mark Ling's topic in Blacksmithing, General Discussion
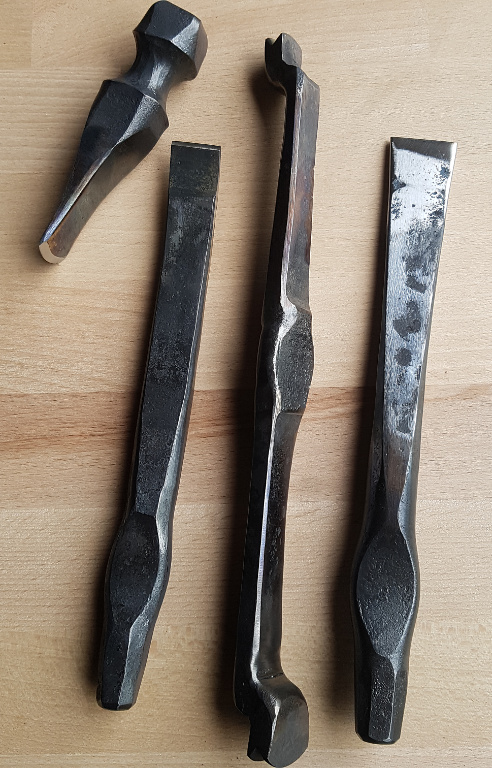
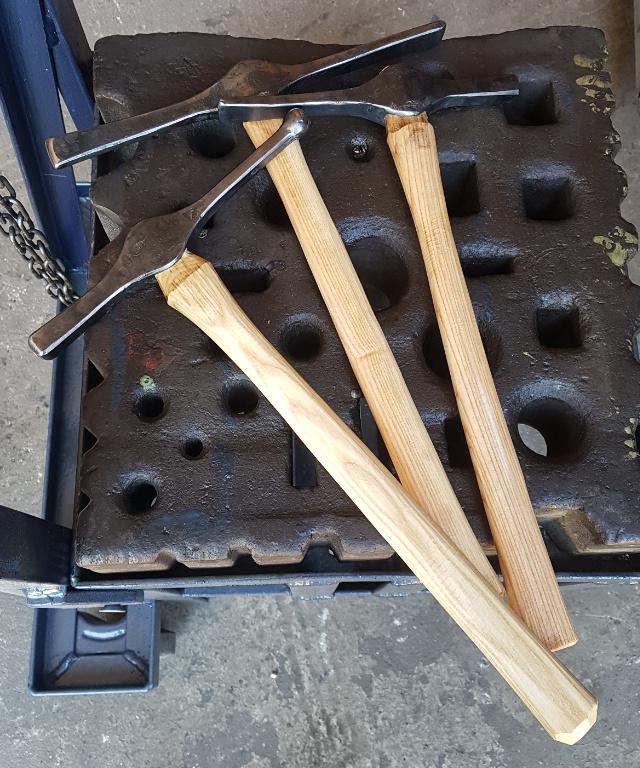
Get ready one "big" project. My Treadle-hammer. By drawing and constructing this one I was inspired by some photographs in the book :" The Smithy´s Craft and Tools" - Otto Schmirler. He gave some photographs and a watercolour drawing with some basic dimensions. It took me one year (not fulltime ) of brainwork and AutoCad drawing. Now it´s ready and just works fine. sorry for the bad photo. Will take some more... Some first workpieces using the new toy: some repousséhammers (punched the hole) Making two handhammers based on the Bailey Crosspeen design( Brent gave a tutorial in "Hammers Blow" from Summer 2007; Vol.15;#3 ): Now it´s time to make tools vor the treadlehammer. Hotcut-chisle and some fullers and the punch for the small hammers Greetings Sascha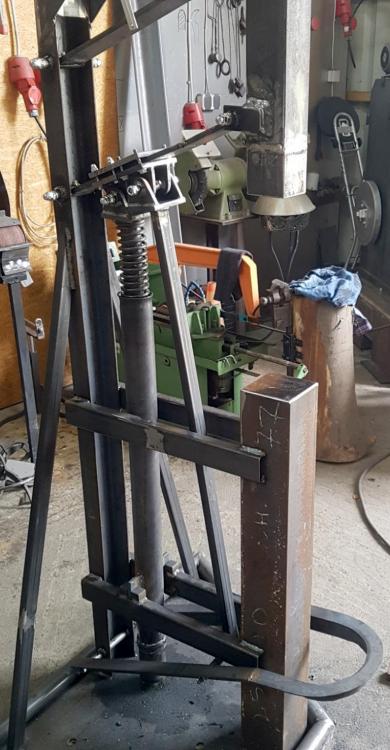


-
I'm using vinigar of 10%. Stored in a tub of plastic. Works fine over night. Maybe that the salt in your mixture does eliminate some of the power of the vinegar? But I'm not a chemistry, so that must not be true...
-
Hi John, Thank you very much for the description! Will try it out next time and show the results! Greetings Sascha
-
Could anyone give a little instruction how to make these kind of twists? Thank you very much Greetings Sascha
-
Much, much thanks to all for all the ideas... I will play a little bit with the length of the arm and its "springiness" .... if I got a moment or so. If I got further findings... I´ll be back here, with photos :)
-
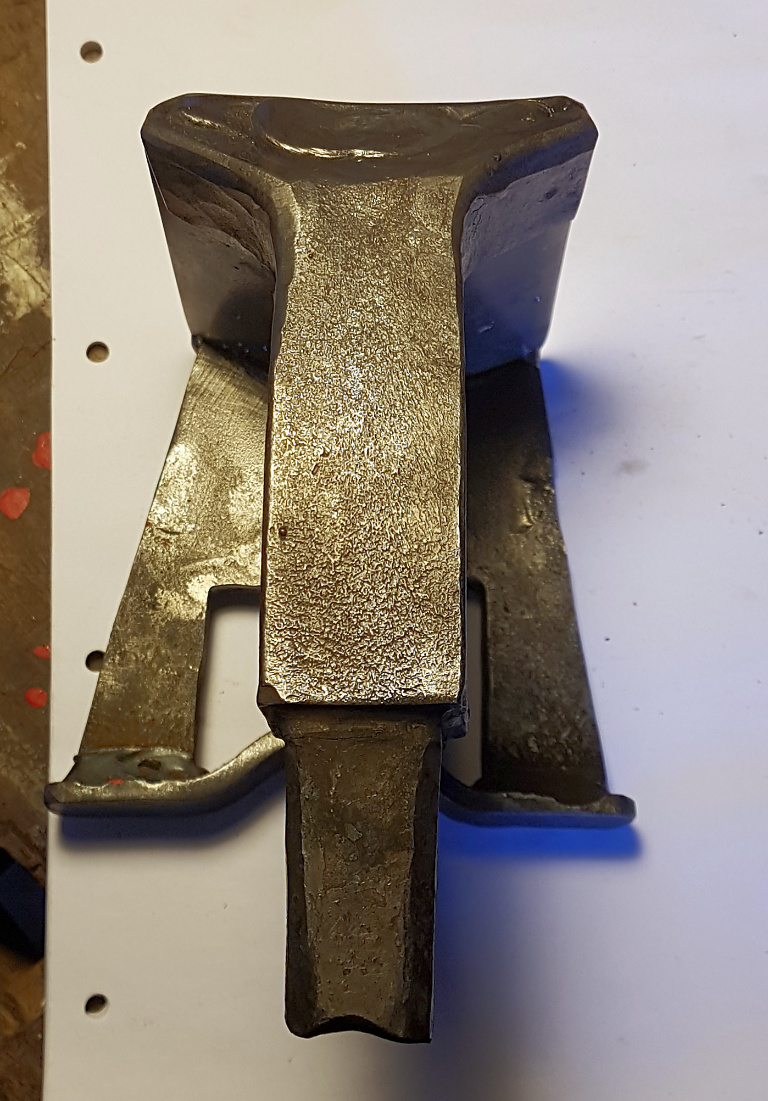
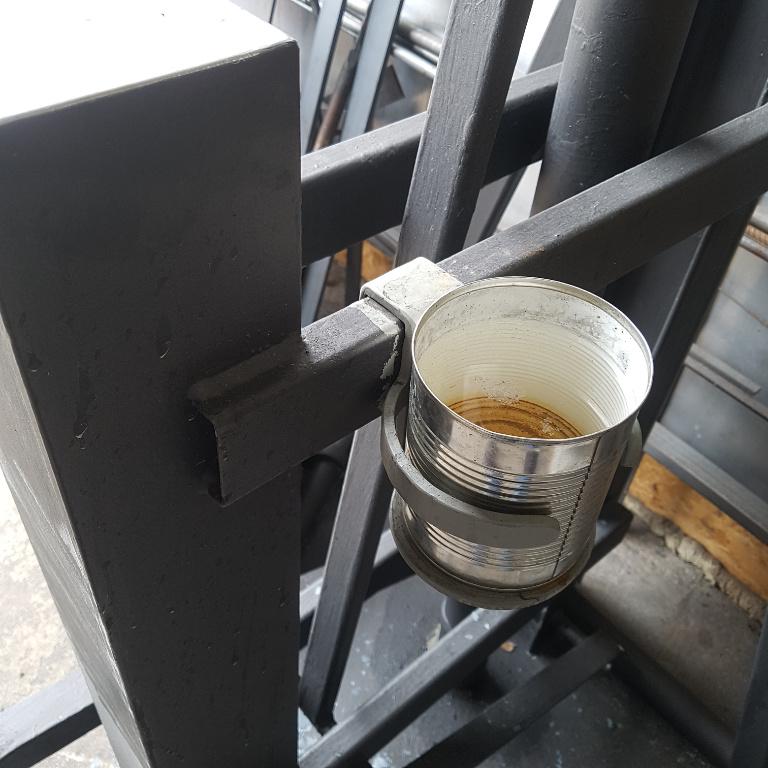
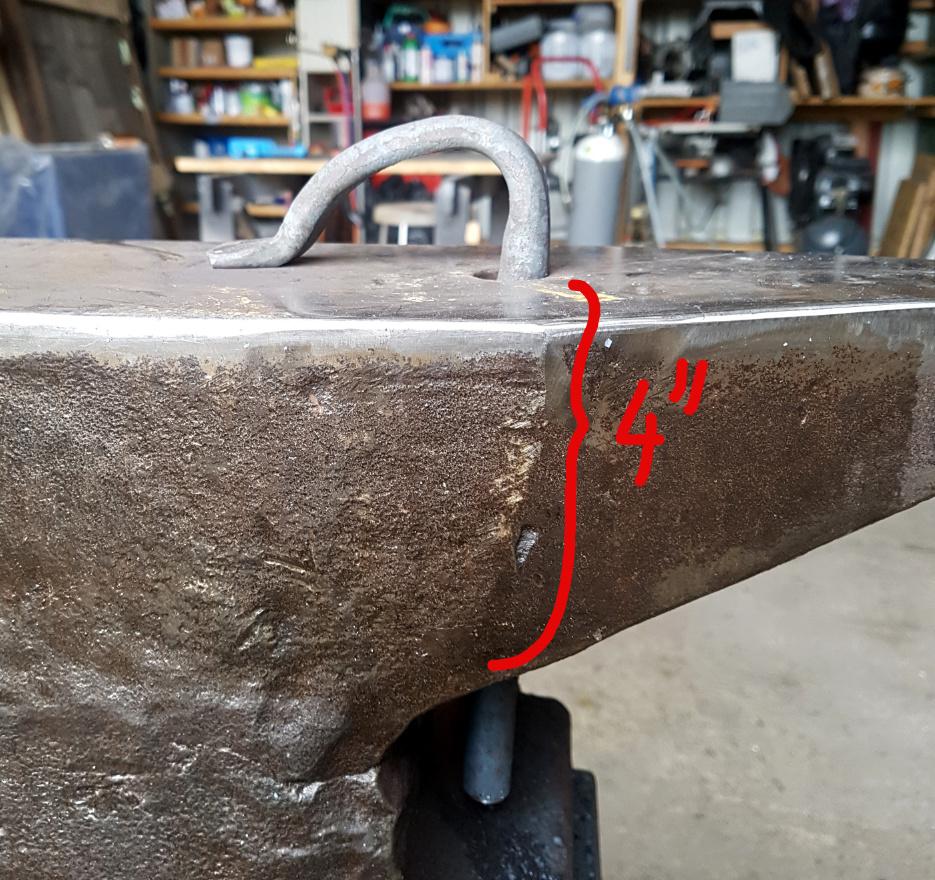
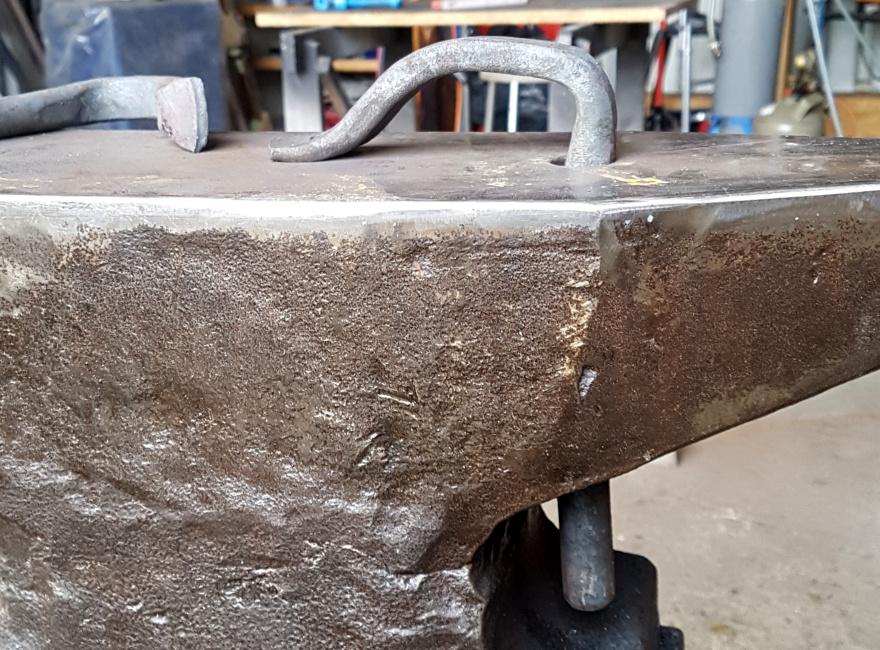
Thank you all for your responses. Like I wrote in my topic description above, this was not my first try. As you wrote I believe too, that the lenght of the clamping arm must be longer for a better function. But then it's to long for my anvil. For a better understanding here a photograph of my little anvil. It's an 160lbs anvil of what we here in germany are calling a northern germany style. You can imagine that a longer holdfast may be a little bit impractical So it may be that I have to choose an other way. Something like Thomas suggested seems to be one option to try out. Do you have any pictures of that?
-
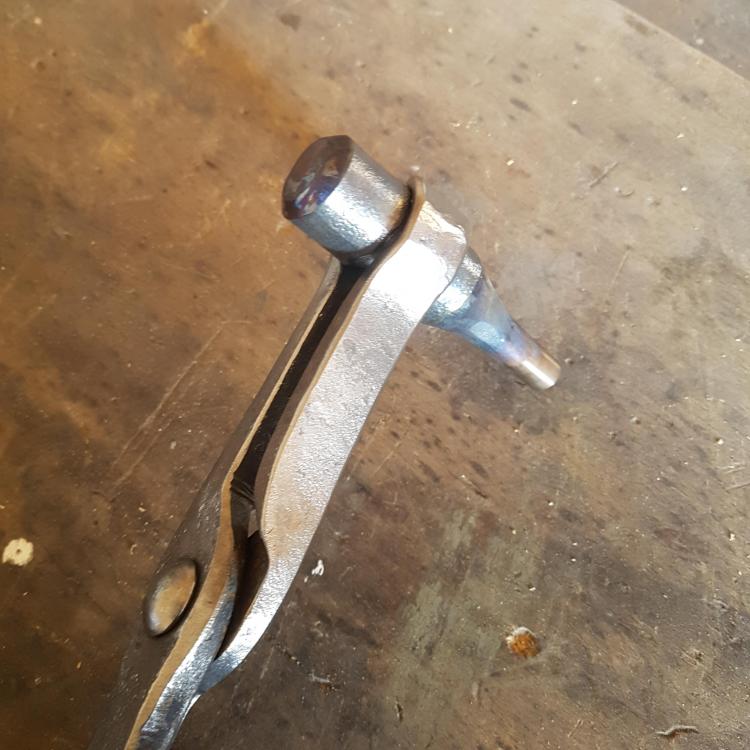
Hey there, this was not the first time I tried to built one of these easy holdfasts. But I wasn´t successfull. It doesn´t matter if I tried out mildstell or some toolsteel with or without heattreatment. There must be one big mistake that I´m always overlooking. Or the principle of this kind of holdfast doesn´t work with my anvil, because the two holes (pritchel/hardy) are to long because they are crossing the anvil to near at the body, if that make sense...? Here two pictures of the last two styles: I would be very pleased if anyone could enlighten me Greetings Sascha

-
Hi Chris, do you have some example pics of items wich are leaving black marks? I would be interested in how these surfaces/coatings are looking. Greetings Sascha