billp
-
Posts
313 -
Joined
-
Last visited
-
ok thinks we have a HD not to far from where I live I'll chck them out
-
I would us the clips but I did not build the original frame and fear it would take away from the picture or be distracting. All I was asked to do is add the two back straps that stop the piece from falling through the back side, clean, paint and mount the picture. In another word finish the job someone else started. Sorry about not having a picture but it's kind of an oval shape with scrolls at the top and bottom. The picture is just the couples names and wedding date pinted on it with a flower type border. Which is why I did not want to use the clips.
-
Thinks folk for all the advice I appreciate it Iron Wolf is PL the brand name or an abbreviation of a type of glue I havee not heard of PL before.
-
What type of glue works well when attaching a cramic picture to steel straps? I have a friend who bought a cramic picture framed with a steel frame. There are two straps that I have to weld to the back to hold the picture in place. I can't drill as it would distroy the picture so my only thought is to glue it with an epoxy glue unless there is something better to use. If you have any diffrent ideas or suggestions please let me know. billp
-
Thinks I will billp
-
Thanks guys No, I worked without a clinker breaker before in my home forge till I replaced that fire pot. So working without one again is no big deal. I took the grate off the table I had to buy to replace one that was missing when I bought it. I modified it to fit in the bottom of this pot so that should work for now. Besides I will only be using this for demos and things like that. I have one next weekend at a friends farm where there will be, we hope, over 500 Boy and Girl Scouts. We will be showing how things were done way back in the day. I'll be making a fire pit set up for my friend so he can hang a pot or two over the fire when he has get to gathers. I don't think I'll ever try a hood on my forge but I do like yours Ten Hammers and yes it does look a little like yours. Oh and Mark I like the <>< beside your name I'm with you on that. billp
-
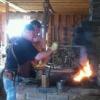
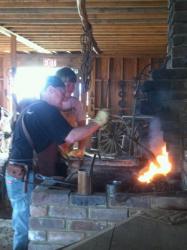
Will after long time of thought and debate I finly did it and put a fire pot in my rivet table forge. Now it may not be a pretty as several I have seen on here but I do think it will do the trick. I want get my supply of coal in till sometime next week so will have to wait till then to see just how well it does work. But I made a pot just about like it I put in my big forge a few weeks ago and it works really great. The only difference is this one is a bit smaller and it does not have a clinker breaker. I just did not have enough room, but if it looks like I will realy need one I'll go back and redo it. Take a look and see what you think. billp
-
Thanks Stormcrow I have been given the same instructions from a post I did about using 7 1/2" up to 12" saw blades. So I for sure will test all my metal that I use. Just thought someone else may have used the old plow points before and may have some advice on them. As I had another grandfather who had a set up he used just to sharpen his plow points. The shame is I was to young back in the day to lay clame to any of this equipment and now it is all gone to heaven knows where. Thomas I think it is a matter of preference as I like a point on mine, it seems to come in handy in a very tight place. But I do find I have to be careful not to go through the skin if I want to save the hide. My problem is in making them I seem to have trouble putting a point I like on a blade so I'm working on solving that now. Which is also the reason I don't use really good metal as I'm still working on my skills for the good stuff. billp
-
I like it I started making a skinning knife too, but in some ways like yours a touch better. I for sure like the cord warped handle so I might steel that part from you. I'll also start looking for plow disk too just wounder if an old plow point would work as well. I have several that were used by my grandfather who plowed with a mule. Really good job on the knife. billp
-
Here in West Tenn. we call that an attack of CRS Here ar a few pictures
-
I have used both and ya'll are right it takes a lot of blades and discs how ever I favor the discs over the sawall but not appose to try it. Just having more trouble thinking about cutting up something that old to change it's orgional look and use. This comes from someone who has a deep respect for antiques as I feel I become one myself. Mark I'll try and get pictures but after I have had several fires in it they want be pretty but will do my best. Sorry I did not think of it as I was building it but your not the only one losing things as we get older billp
-
After using my new fire pot for a little over a week now I'll have to say WOW!!! Really wish I had done it a long time ago, I get and keep a good working fire and get a lot more milage out of my coal that I did before. Even added a clunker breaker which I did not have before and even that added a big plus to the whole thing. It's really not any special build, 9" square at the top and about 5 1/2 " at the bottom. I went from 2" deep to about 41/2 " deep and that is the difference that has made the great change. The first was made from 1/4" diamond platet the new from a 1/4 " from a 6" x 6" x 1/4" angle iron. The old one was two years old and had held up well to the heat and looked to have a number of years still left i it, so I hope the new one will do just as well. But so far it is the best job I have done and I'm glad I did it. Now just wish the rivit forge I have was not so thick would love to cut it our and out a fire pot it to make it a better portable forge. but who know I may do it any way to spite the thick pan. billp
-
No I take no offence in any of the remarks but look at it a helpful advice. I'll defiantly try out your advice Brad thanks and to all who have responded. billp
-
I'll do that thanks Thomas billp
-
Thinks Rich that really helps a lot billp