.JPG.2f3624accaac3d3b9eda127ac2e5aecc.JPG)
Chelonian
-
Posts
406 -
Joined
-
Last visited
Content Type
Profiles
Forums
Articles
Gallery
Downloads
Events
Everything posted by Chelonian
-
.thumb.JPG.709dad07e8fea36ff1bade44acc98e95.JPG)
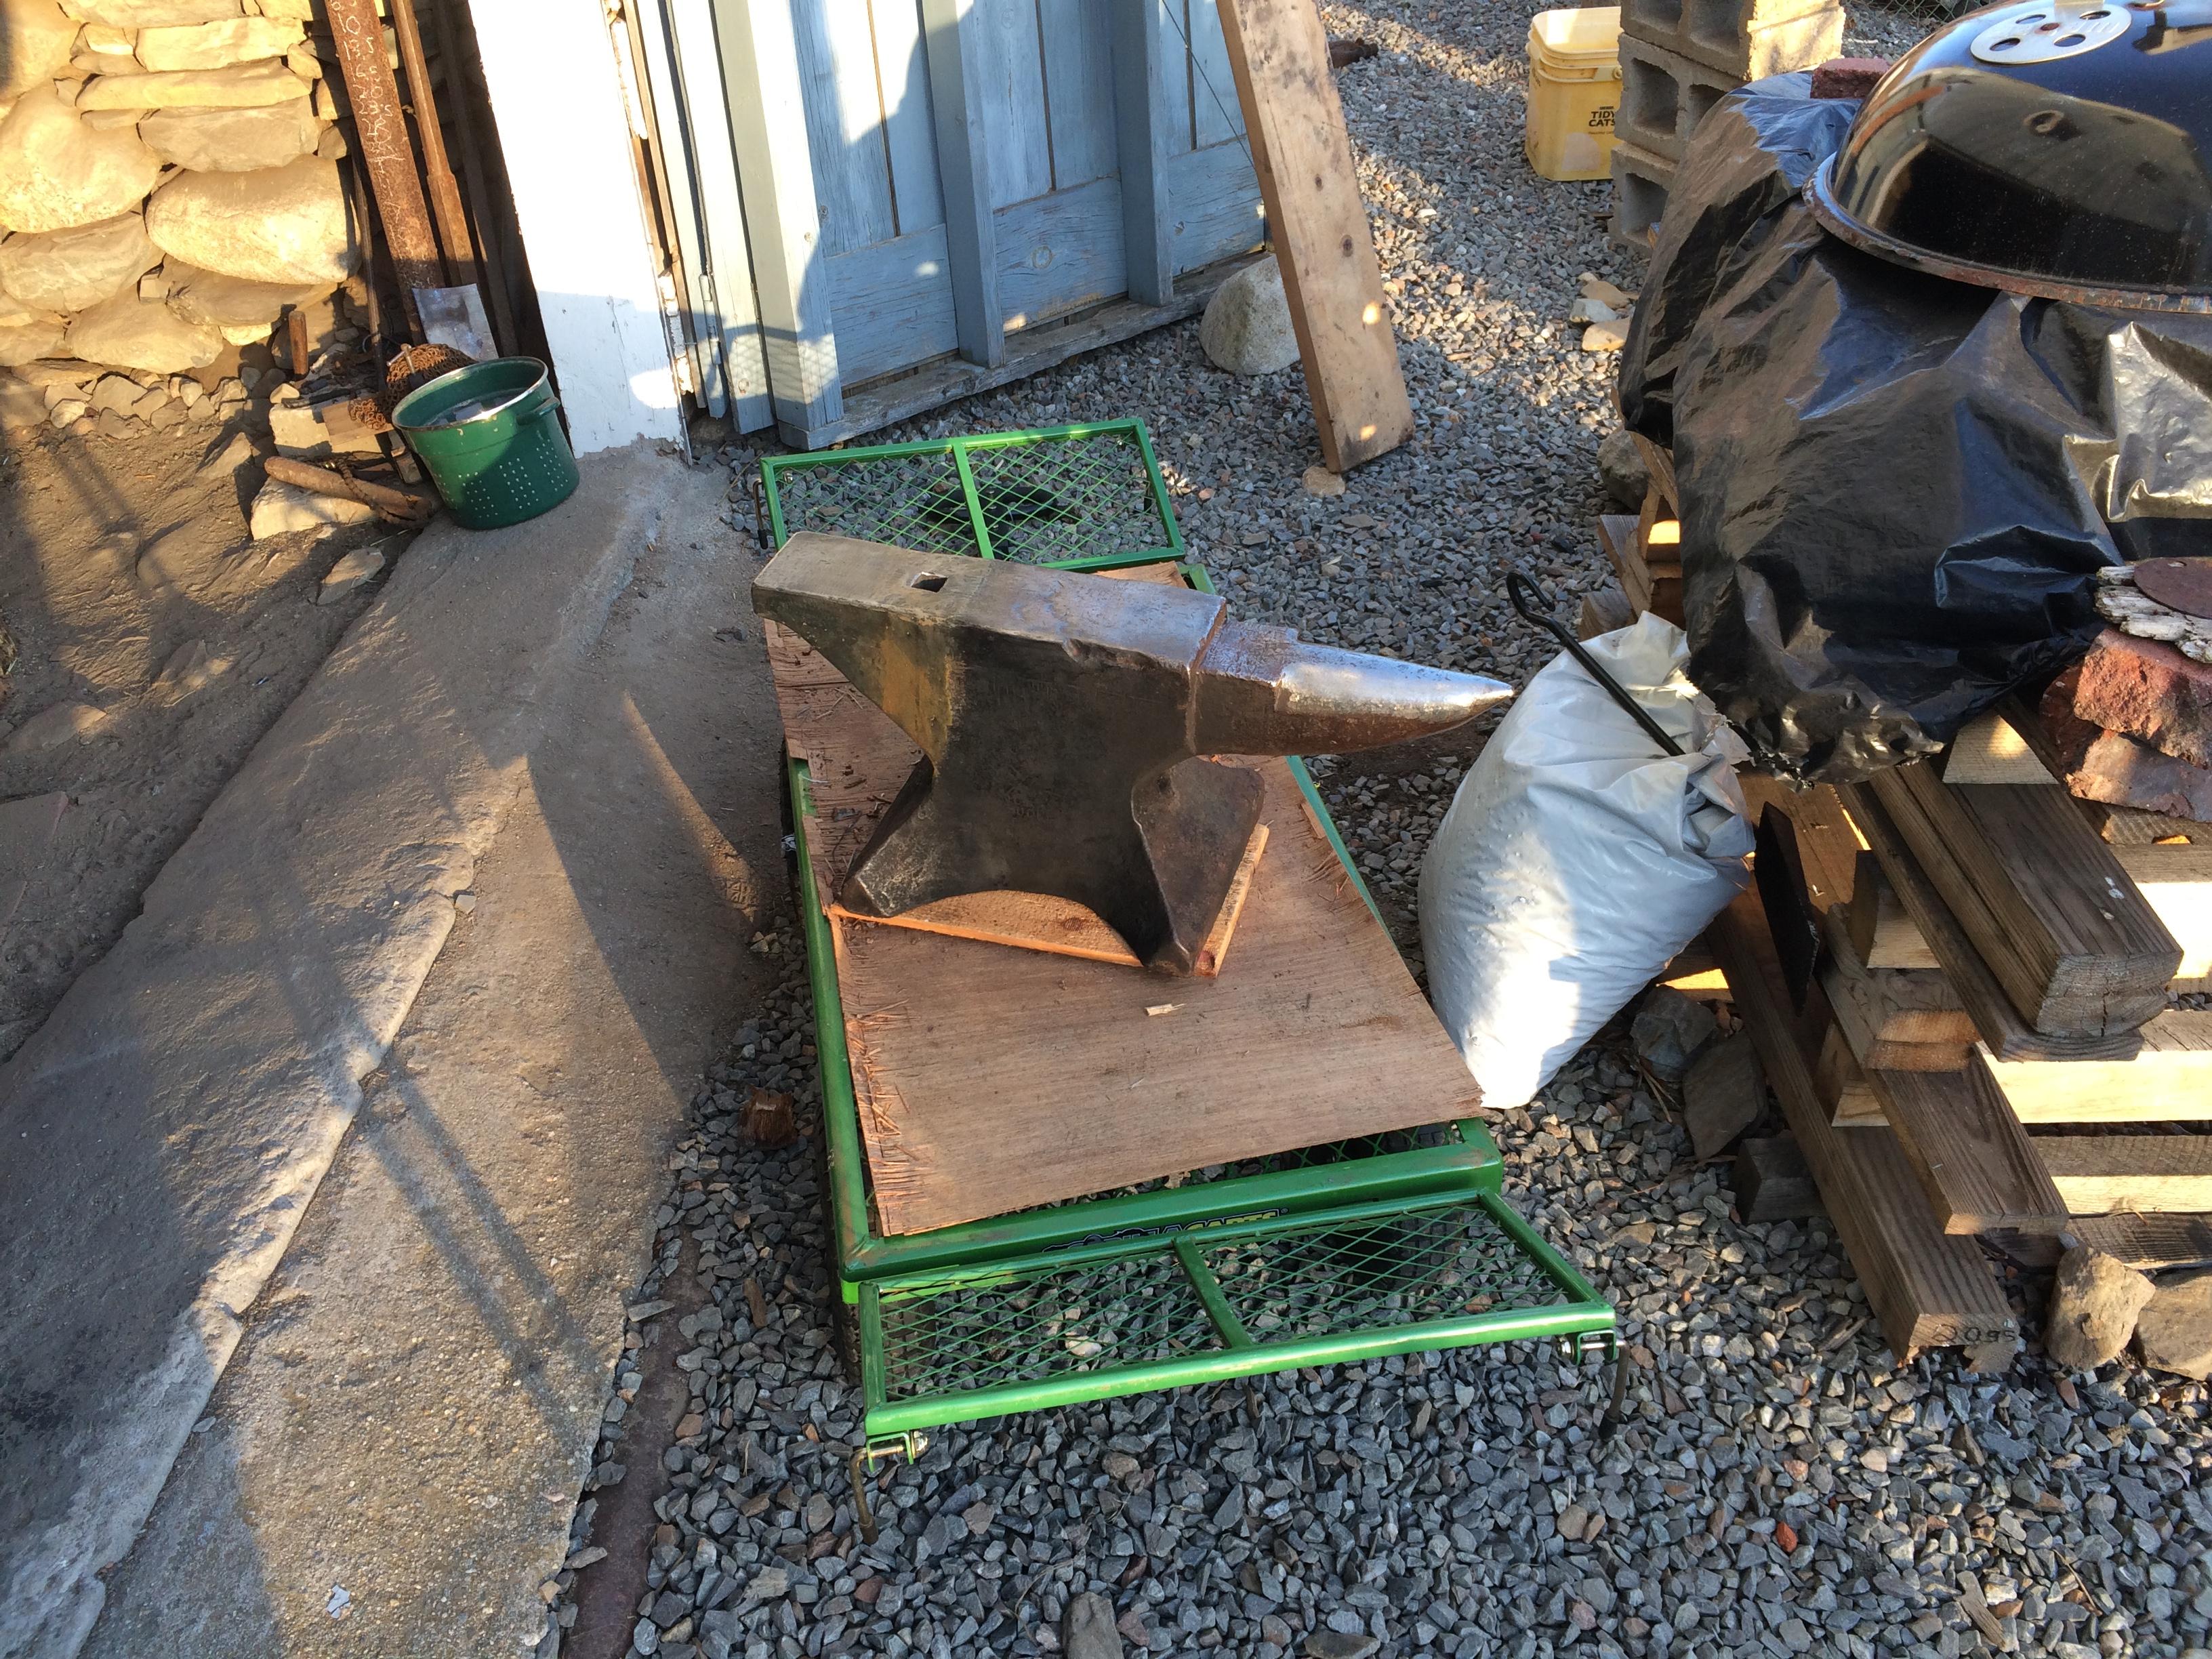
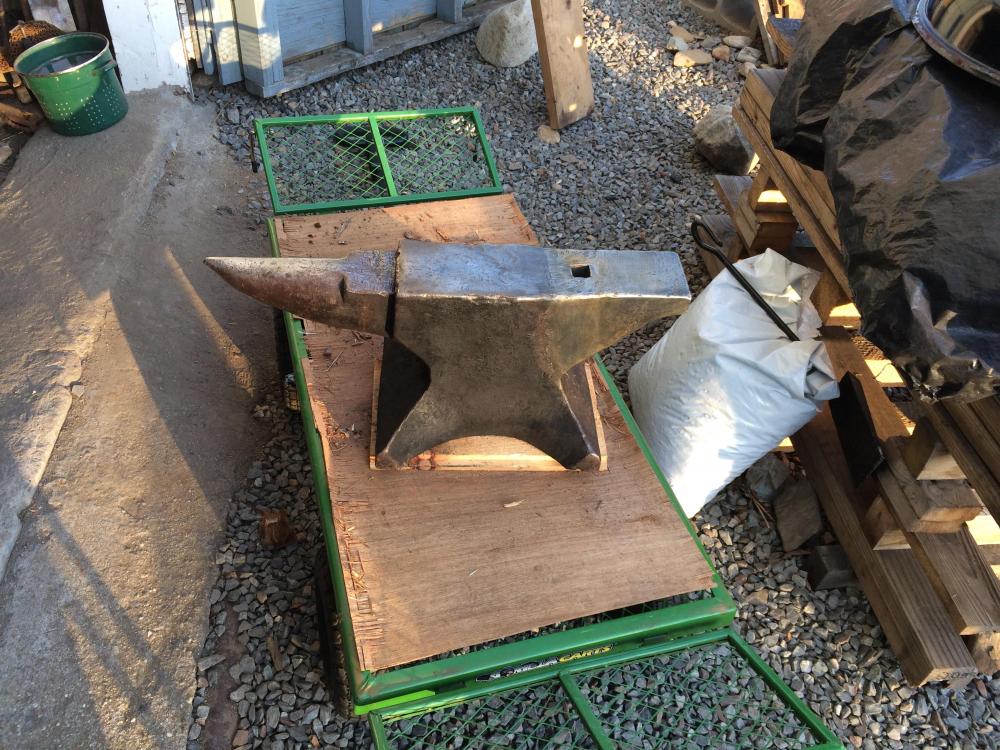
my first real anvil
Chelonian replied to Iron Kitten Forge's topic in Anvils, Swage Blocks, and Mandrels
Looks great! If you haven't already, be sure to dress/radius the edges of that HF hammer before using it to avoid putting marks in your work or your new anvil. -
It means to radius the edges of the hammer with a grinder to your preference. That looks like a brand new hammer, which typically come with a sharp chamfer. Those sharp edges of the chamfer dig into the work (or the anvil) so they are best removed.
-
Be sure to dress that hammer if you haven't already.
-
Just be sure when you clean it you do not use any thing more aggressive than a wire wheel (nothing abrasive). I know Irondragon mentioned this, but it's worth repeating. Congratulations on such a nice anvil.
-
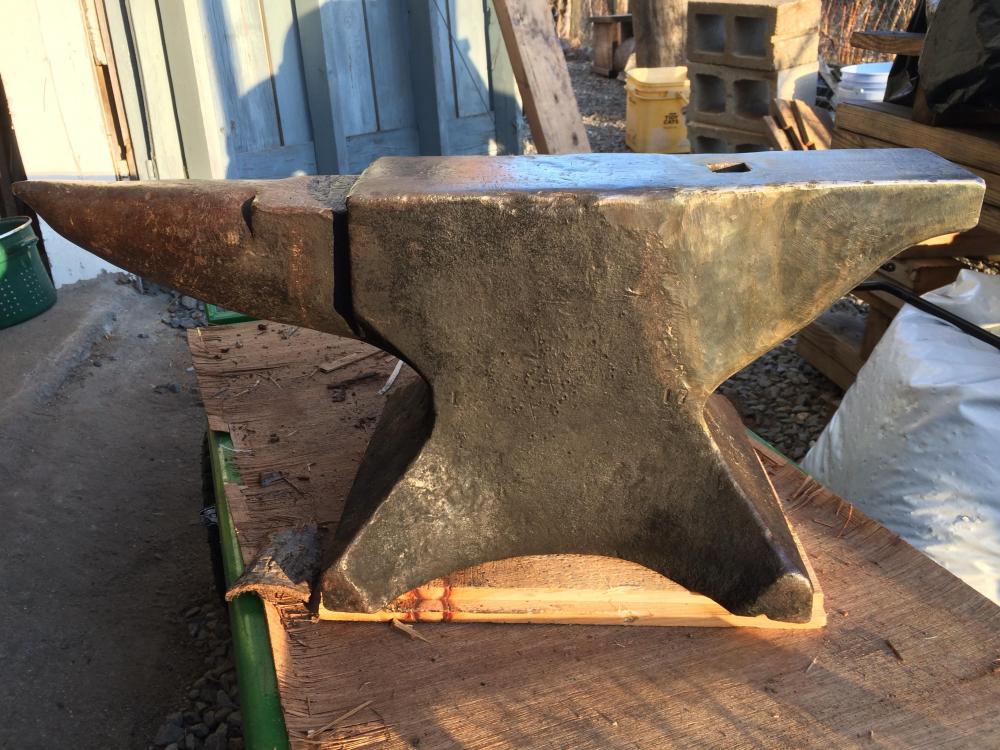
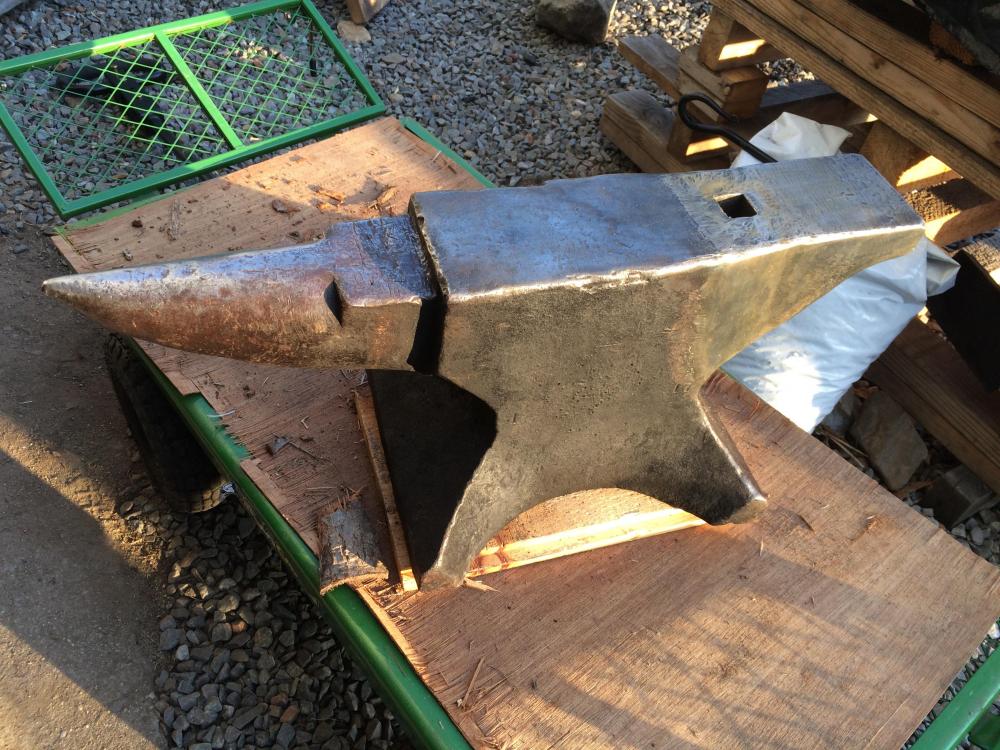
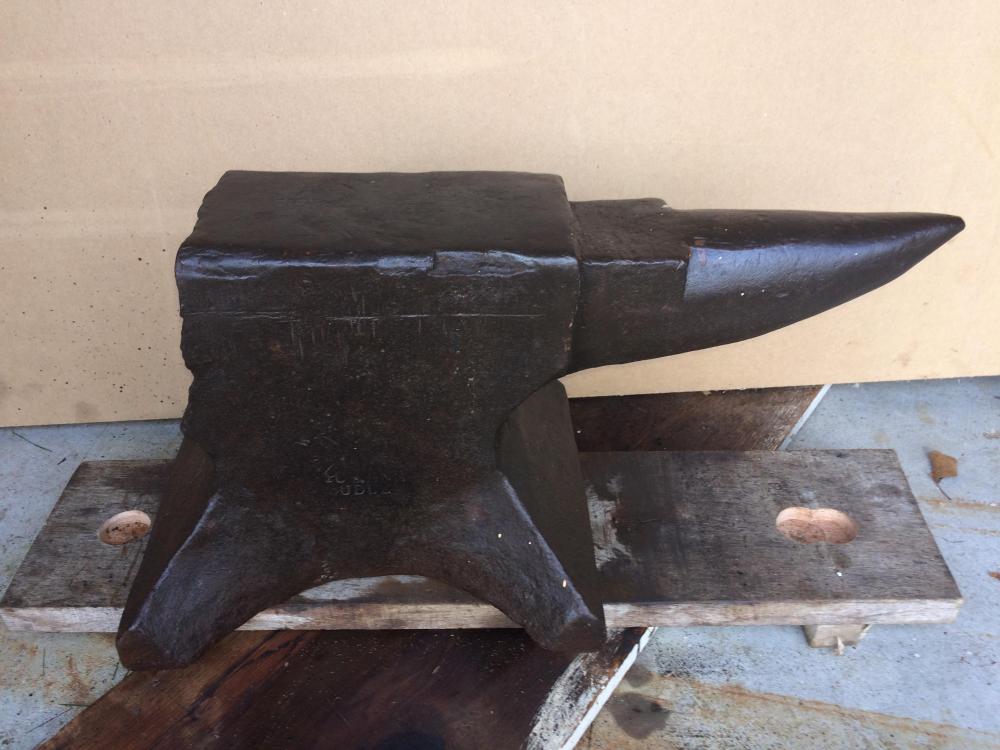
Looks like a Hay Budden (just from the shape) made in Brooklyn NY. It's a very large anvil from a highly regarded manufacturer and in excellent shape. It is likely worth quite a lot of money and would make a really incredible user anvil! What you have there is not very common. I don't see a face plate either so it is likely a solid steel upper-half Hay Budden, unless I'm just not seeing the face plate line. This is a relevant video that talks about Hay Budden anvils. From the dimensions you gave, your anvil is even larger than this one. Again that's quite an uncommon anvil, congratulations. Take good care of it and it should last a very, very long time.
-
Justin’s Smithing progression. [PIC heavy]
Chelonian replied to Justin Topp's topic in Member Projects
Looks really nice! I made one a while ago but it was not very nice. I need to make a better one at some point. -
Off topic but does the tuyere last fairly well in that forge? Is the end covered in clay or something? Also nice looking shop!
-
A collection of improvised anvils
Chelonian replied to Charles R. Stevens's topic in Anvils, Swage Blocks, and Mandrels
Here's an improvised anvil I made last year. It's a piece of 6" round stock, about 8" long and ~70lb. It's a really nice little portable anvil, and the "fine" horn and heel I added have proven very useful. They're kind of like a bridge tool and a bick, except they're really solid instead of bouncing around in a hardy hole.
-
A collection of improvised anvils
Chelonian replied to Charles R. Stevens's topic in Anvils, Swage Blocks, and Mandrels
Looks like a good chunk of steel, but it will work a lot better it you turn it on end so there is more mass directly under the hammer. -
To me the third photo looks like a very old repair. It looks like the original slit and drifted hole broke right at the top, and the jaw was fixed by forge welding two bars around the original jaw. You could straighten the bent jaw by forging it very hot (Probably forge welding temperature if there are delaminations), but depending on how large that vise is it might be difficult to heat it up (depending on the capacity of your forge).
-
Goods: Yes I certainly need to make some tooling for this anvil. The hardy hole on my other anvil is something like 15/16" and is not quite square, so all the hardy tools I've made for that anvil are loose in this one. Luckily 3/4" square tubing fits the 1" tubing (at least in the wall thickness I have) without too much modification so I can use that for making hardy stems. Thanks again!
-
Thank you Frazer and JBM! I got the anvil on a stump and used it for a while today. It took a little getting used the the fact that it now has a heel, since I'm so used to it not having one.
-
Thank you! I did brush some gun-blue on it so make it look slightly less shiny and out of place, but I think it will take a long time before it is not easily distinguishable from the rest.
-
I don't have any hardness files, but I was really careful about how hot I let it get during preheat and welding. The original main face never developed noticeable temper colors because I did not let it exceed 400F. I'm sure that there is unavoidably a thin HAZ on the face at the point where I had to weld to it, but I used back-stepping beads for this portion and let the heat soak in and distribute between passes. I don't know how high English anvils like this were tempered back to originally, but I would guess somewhere in the 500F range. Anyone know for sure? From the lack of temper colors I'm pretty confident the main face hardness was not affected, and it still rebounds well as a sanity check. Thanks!
-
Sounds like good advice to me, and thank you!
-
I used 6011 rods, but I think using 7018 would have been better for all the build up. A member here "blacksmith-450" who did a similar repair was kind enough to give me some pointers about the process he used which was very helpful. Part of me wants to make a hardy tool by upsetting it in the hardy hole just so I never have to worry about it breaking in my "normal" use, but the other part of me does not. Thanks, anvil!
-
About two and a half years ago I got a 213lb (as marked) Wilkinson anvil with a missing heel, using it as my main anvil for over two years until I found another anvil. I had been considering repairing it for a while but I wasn't sure it was worth it. Around a month ago I decided in favor of repairing it, and here it is finished: Here's an old photo of it back when I got it: The heel was built up from pieces of forklift tine, and I used a piece of 1" ID square tubing as the hardy hole. I preheated the anvil before welding with a wood fire. After capping the WI with weld, I used the square tubing to define the gap between the anvil and the heel so it's full penetration welded and filled in on both sides with weld (a lot of welding!). I then insulated the anvil after welding to cool as slowly as possible. I did not hardface the heel, but the 4140 is reasonably tough as-is, and I could always add it later if I really need to. I also did not attempt to repair the chips on the edges since I didn't want to push my luck, and after using this anvil for a long time they don't bug me much anyways. I intentionally placed the hardy hole very close the the body of the anvil so it is as well supported as possible, similar to many German anvils. The heel is almost 6" thick/tall where the hole is. I will probably drill a pritchel hole at some later point. I'll try to remember to post an update at some point after some use!

-
Looks like a really nice vise for heavy work! I have no clue on the maker. The part the handle goes through looks a lot like the top of a screw jack, so the screw/screwbox may be a replacement.
-
Bought a 205lb fisher need some info!
Chelonian replied to Cholder777's topic in Anvil Reviews by brand
I've seen quite a few "I Hill" anvils; they seem about as common here as many of the other similar English brands. So they aren't really a rarity around here. I paid $1.15/lb for a nice 175lb English anvil a couple months ago (although this was a good deal in this area). In terms of "rarity" this was a Royds Works anvil, which I don't think is even mentioned in Postman's book. I also have not seen another example of one (If anyone has one, I'd love to see a photo!). I suspect Royds Works just didn't make a whole lot of anvils. However, it works just the same as an anvil from any other more common maker. -
Bought a 205lb fisher need some info!
Chelonian replied to Cholder777's topic in Anvil Reviews by brand
Also, you don't really want a shiny mirror finish on the face of an anvil. It makes the workpiece feel annoyingly "slippery" under the hammer, at least in my opinion. That anvil is in great shape! -
Any market for old anvils and forge here?
Chelonian replied to Dan N's topic in Anvils, Swage Blocks, and Mandrels
The old anvil could be worth quite a bit, but there's not a lot to go on without photos of it. -
Personally I'm not a fan of the patterns that have an artificially wide face by having it flare out at the top like that. I prefer having a narrower working face to begin with, and I like having flat sides for some operations. I myself would go with the Holland, but I'm sure either anvil would work fine.
-
Value/Condition of 160# Trenton Anvil?
Chelonian replied to ToMang07's topic in Anvils, Swage Blocks, and Mandrels
Here's an 8" long piece of 6" round mild steel that's a great anvil (~70lbs). I welded on a small horn and heel, but if you're planning on making knives there's not much need for that. I've used it a for a while and despite being mild steel it holds up just fine. If this were my main anvil I would have made the heel and horn heavier duty, but I made this more to act as a nice solid bick and bridge tool. And if for no other reason, starting with a block-of-steel anvil will let you learn hammer control on a much less expensive anvil. While learning, if you put dents in a block of steel you can just grind them out, but if you put dents or chips in a nice old anvil with a steel face, you pretty much have to live with them for a very long time. I would really suggest you take the advise of the members above with years and years of experience who are trying to help you here.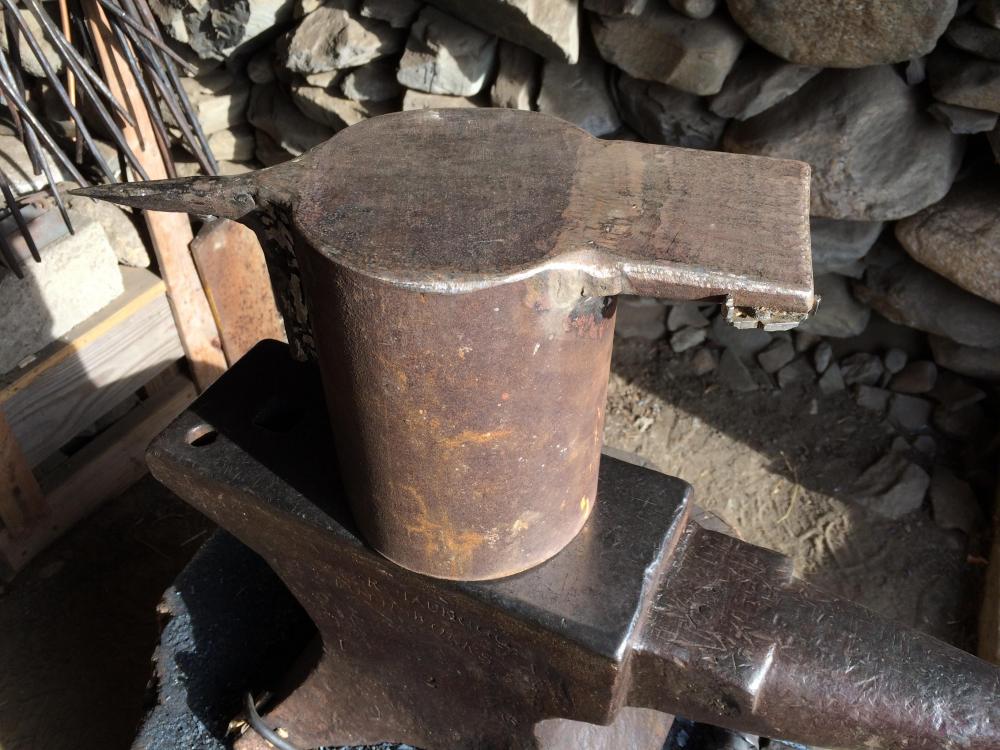
-
Poor rebound certainly could point towards a perimeter weld.
-
Really interesting! I've never seen someone do this before. For "A", I believe the face curves down because the downward hammering while welding the face on causes the face to mushroom out a little, and when they hit from the side to knock the edges back it pushes some of it down the sides of the anvil. This is why anvil faceplates always look thicker judging by the edges than they really are. The rest is pretty much a mystery to me as well. Hopefully others with more ideas will chime in. I really wonder if a slice from an anvil that did not break would show nearly as many inconsistencies as this one. Also, in terms of forged anvils, 1908 is fairly new. I wonder if as time went on it became harder and harder to avoid accidentally including some steel in the scrap as steel became more common.