Cannon Cocker
-
Posts
296 -
Joined
-
Last visited
Content Type
Profiles
Forums
Articles
Gallery
Downloads
Events
Everything posted by Cannon Cocker
-
Welcome aboard! I look forward to seeing your work (make sure to post pics). I really like the "critique my work" section because many of the seasoned eyes on this forum will help you refine your craft with friendly advice (and a little chiding!)
-
This is an awesome idea. I will be making one at work tomorrow for sure! It seems much more handy than shimming up stock because a guy wouldn't need to look for the right size shim every time. This tool will do the trick no matter what thickness material you are cutting. I agree with Buzzkill that a bearing race would work well. I feel like if you are really cranking down the vice mild steel from a chunk of pipe would spread out over time, where a race would last longer. a guy could also neural the ends if slipping was ever an issue. I like to paint things safety orange. Red seems to be a common color in manufacturing so red things often get thrown into the scrap bin at work.
-
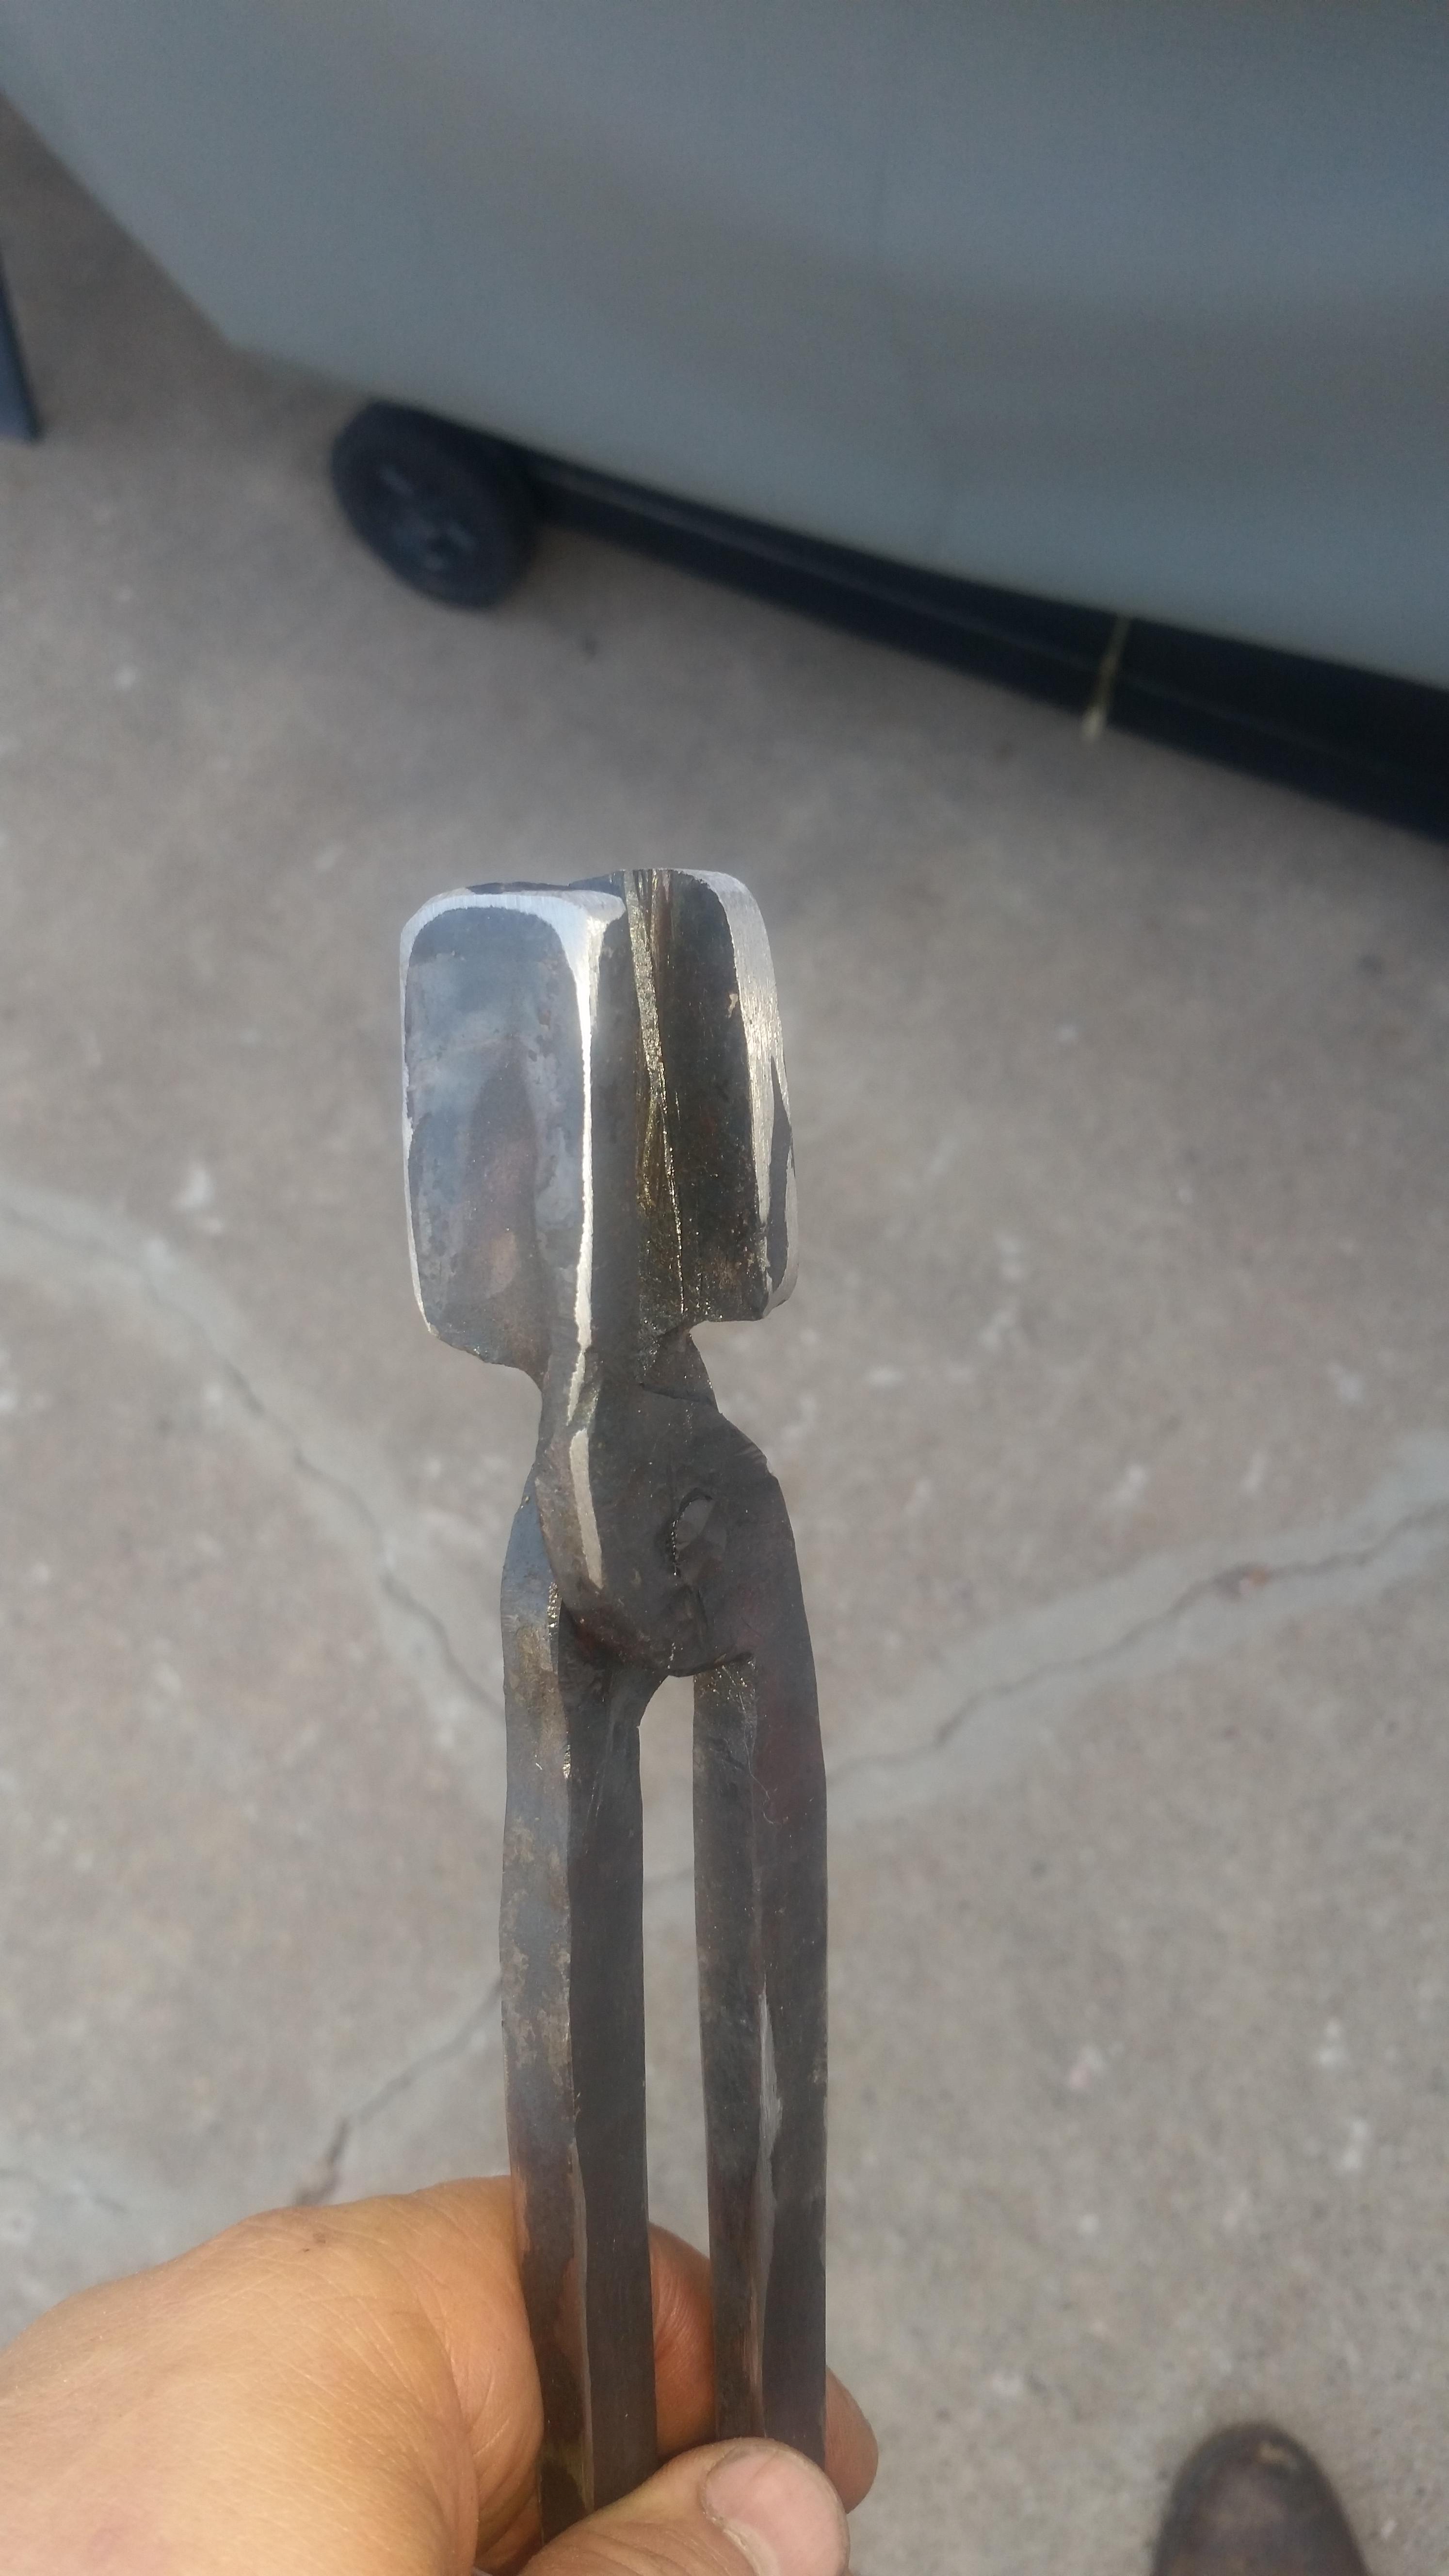
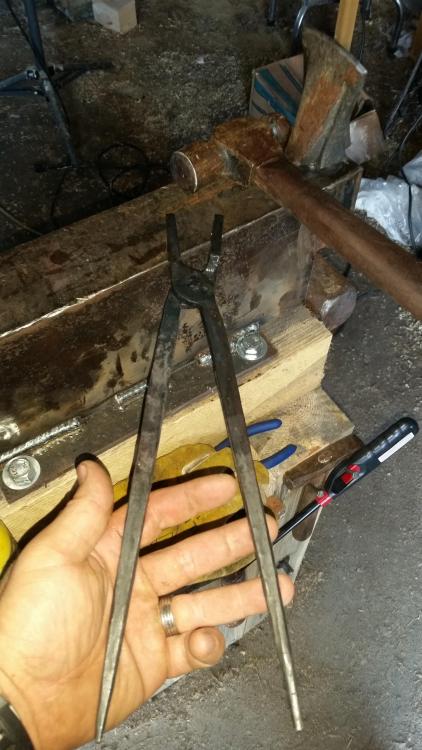
I set this pair for 1/2 inch as that is the most common size I have worked with so far. (as well as the most common size that gets thrown into the scrap bucket at work!) I want to make another set much like this set for 1/8th so that I can use them for making leaves and other small things. From there I'll just see what I come across and end up needing. As far as I can tell so far blacksmithing is a game of "decide what you want to make then make the tools so you can make it!" I also need a pair of knife tongs because that is what I really want to focus on making. I've forged a few already that have turned out pretty good (for a novice) and want to continue pursuing that path. Thanks again for the advice. You all will be hearing from me quite a bit as I tend to really get into my hobbies!
-
Thanks TC. I just finished them. The rivet isn't very good and I'm sure it'll fall out fairly soon. I did learn a few things such as how long the rivet needs to be for the material, that the head of the rivet needs to be better, and the rivet didn't need to be hot. These are all recommendations from TC, and after doing all of them wrong I see the value in his advice! I'm going to make a jig for a few different sizes so I can have them ready in the future. By the way, feel free to critique my work and give me some advice that I can use on my next tongs.

-
Thanks, I understand the different dimensions. I was curious about the material that I should use. I'll give it a shot drawing one out.
-
I am making my first pair of tongs and so far they are coming along very nicely. I am to the point of riveting them together. I attempted to use a 1/4" bolt as the rivet, but when I got it set together and started working the tongs open and closed the bolt sheared off right in the middle. I am guessing that the metal the bolt just became brittle from the heat. My question is this. Does regular mild steel work well for rivets? I chose not to use it because the smallest stuff I have on hand is 1/2" and I didn't want to take the time to draw it out, I know, I know Lazy right! Anyway, any advice you guys could give me would be great! (I'll post some pics of the tongs as soon as I get them done!)
-
Tonight I cut off 4" from one of my burner tubes to make it 6" long just to see how much that changed the way the burner acted. It went MUCH better! However because of the immense volume of my forge it was still taking a while to heat the steel. (1/4 X 1 1/4 flat stock). So I broke some chunks off of a cinder block I had laying around and put those on either side of my stock. After only a few minutes of warming up it became what I would call decently efficient. I was able to start drawing out my material (I'm making a pair of tongs) with each heat only taking a minute or two. So here's what I'm thinking. If I dome the walls and top of the forge using Kaowool and castable refractory bringing the width of my forge down to 6" inches and the height to an average of 7 that will give me aprox 336 cu/in per burner. Then my thought is in order to NOT have to run all three burners all the time I will make a "sliding wall" out of insulation materials that I can move down to give me access to my second burner or take out to use all three (probably only for heat treating operations). This plan makes sense to me but I want to hear some of your opinions about it as well.
-
I was an 0811 (Marine Corps Artillery) in my past life. Now I'm a pastor who works with combat veterans. Thank you for the Welcome TwistedCustoms!
-
This is what I love about this forum! I've only been on here a week and this fact has been proven to me time and time again!
-
Thank you for that but of knowledge Slag Thank you for that but of knowledge Slag Slag, I just searched that and it appears that the "Gandy dancer" is not actually the hammer, but the slang term for the men who laid track by hand.
-
Thomas, I saw that in the book "Fifty dollar knife shop" and thought about it. I'm not sure where one finds those hammers these days though. All the rail around me is laid by machine.
-
I really like the bottom gate. The combination of materials really "pops" beautifully!
-
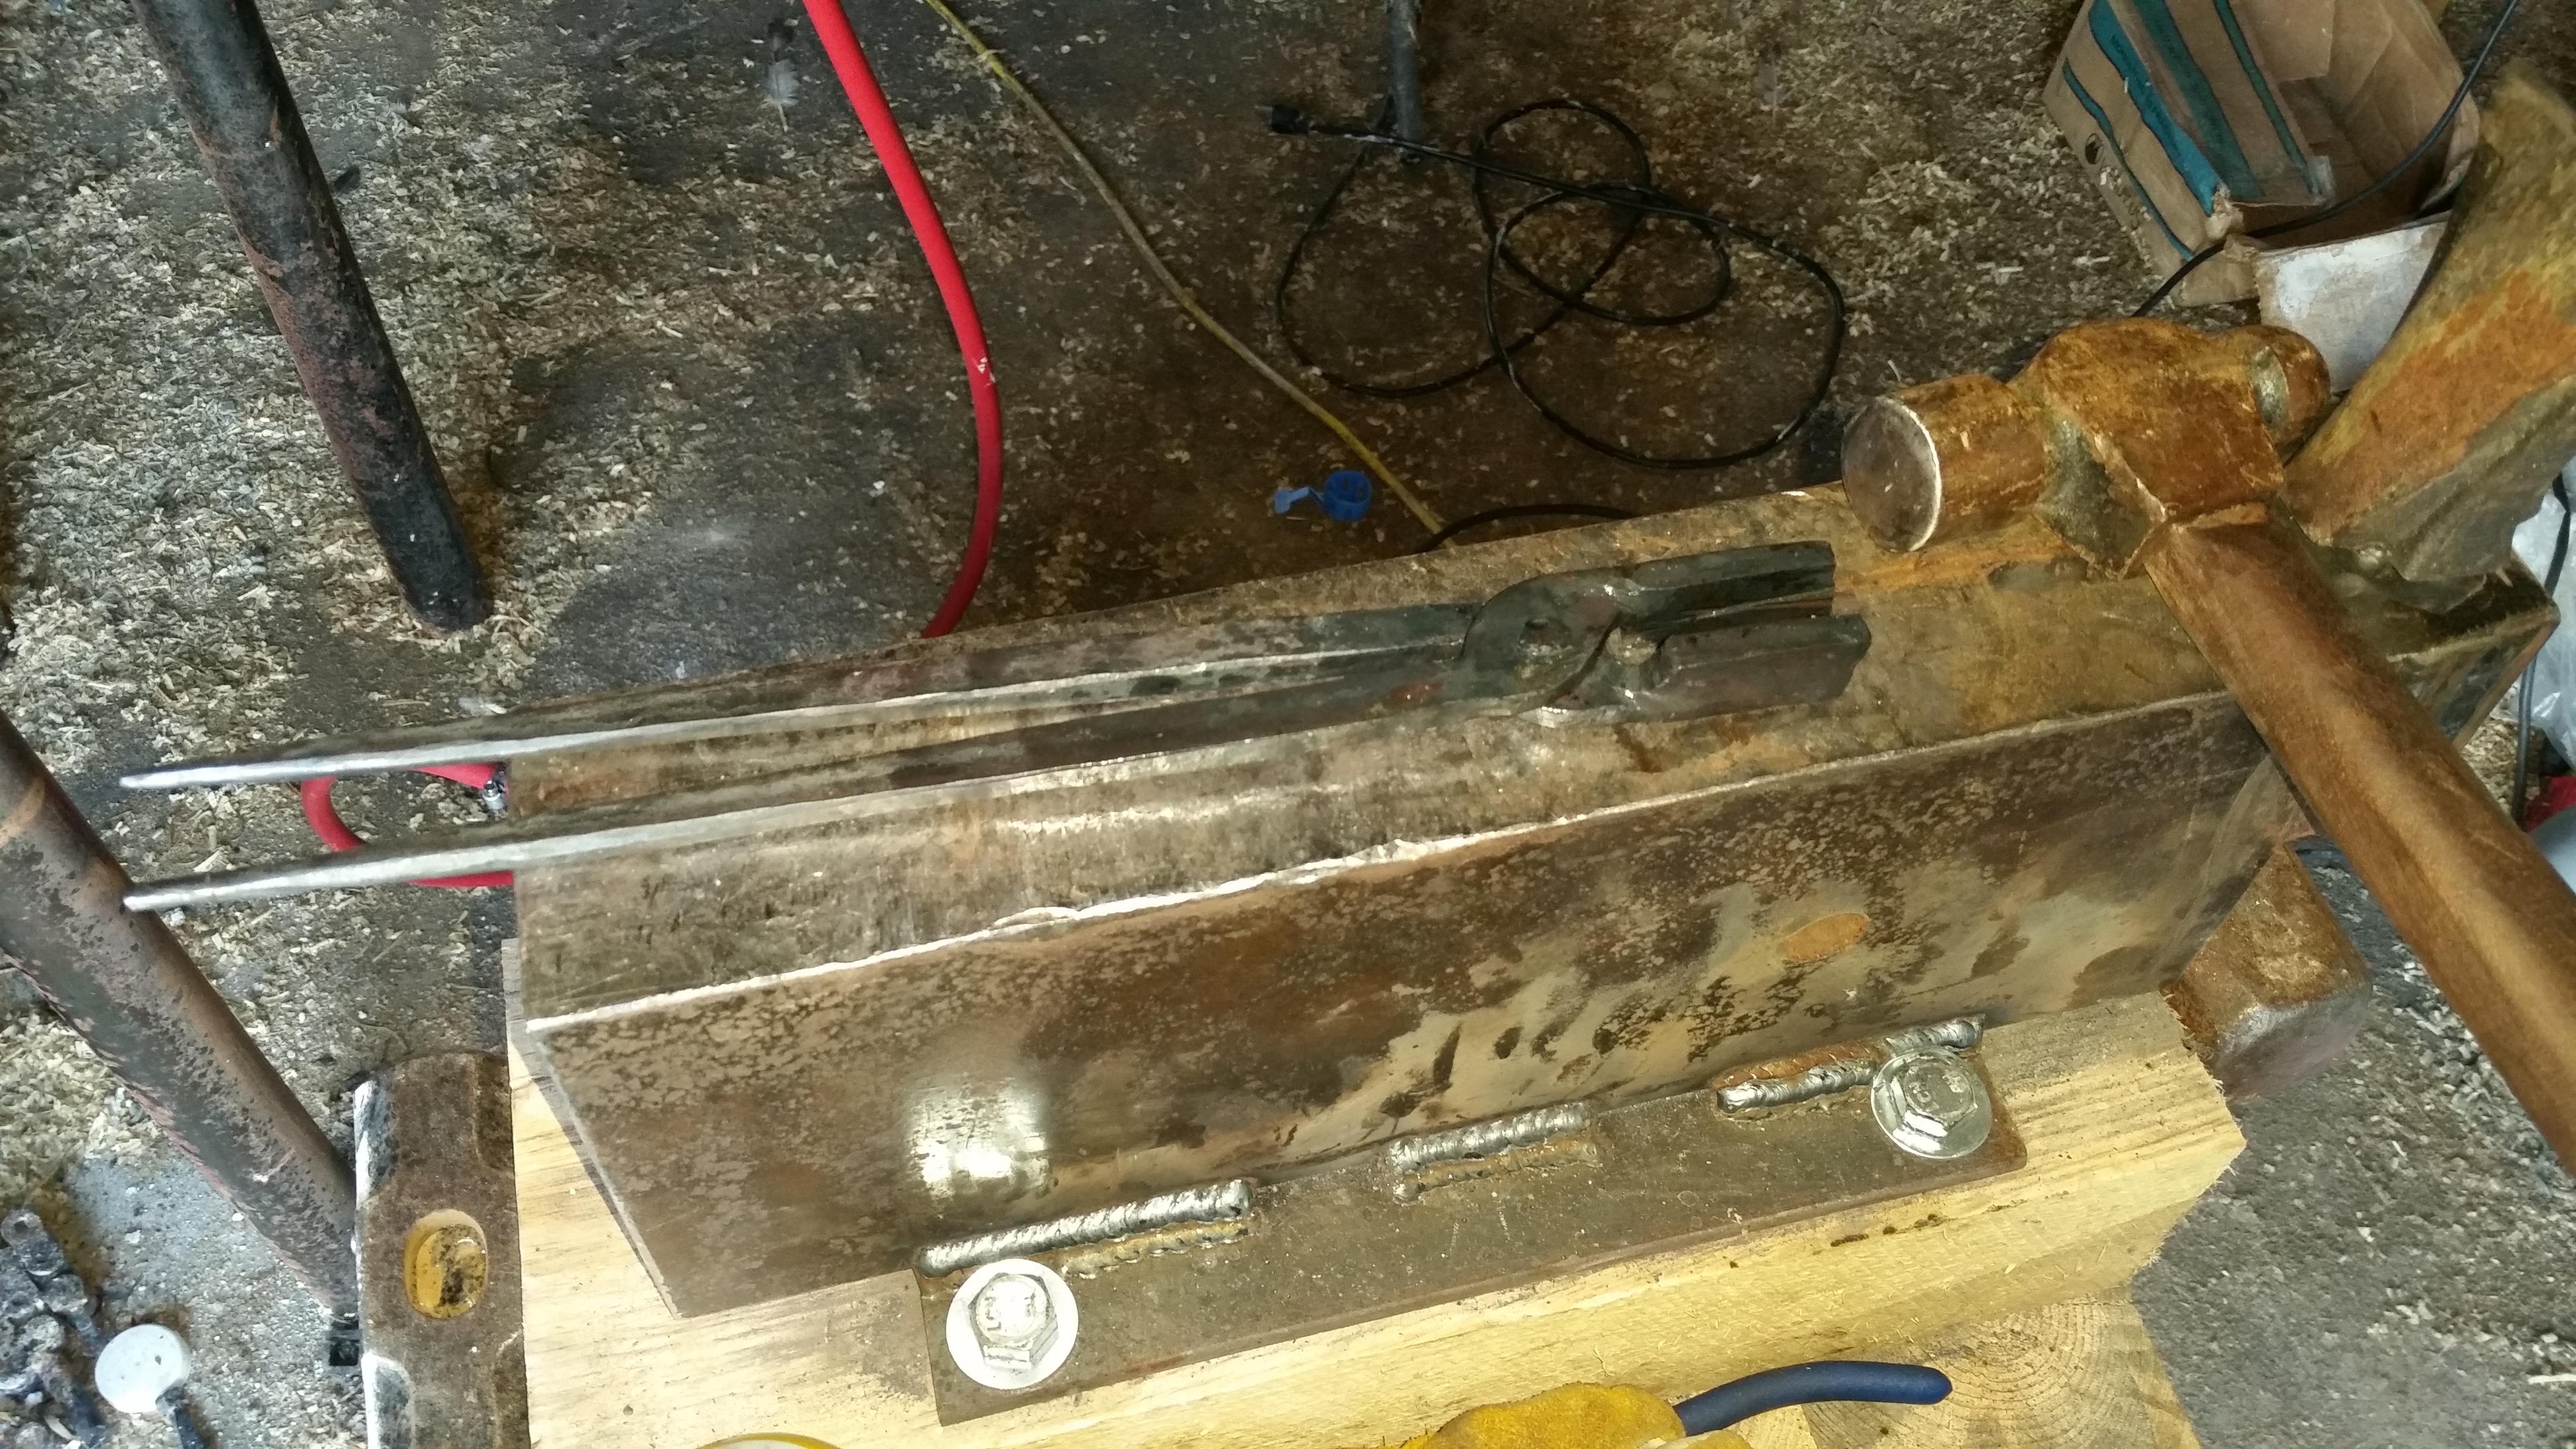
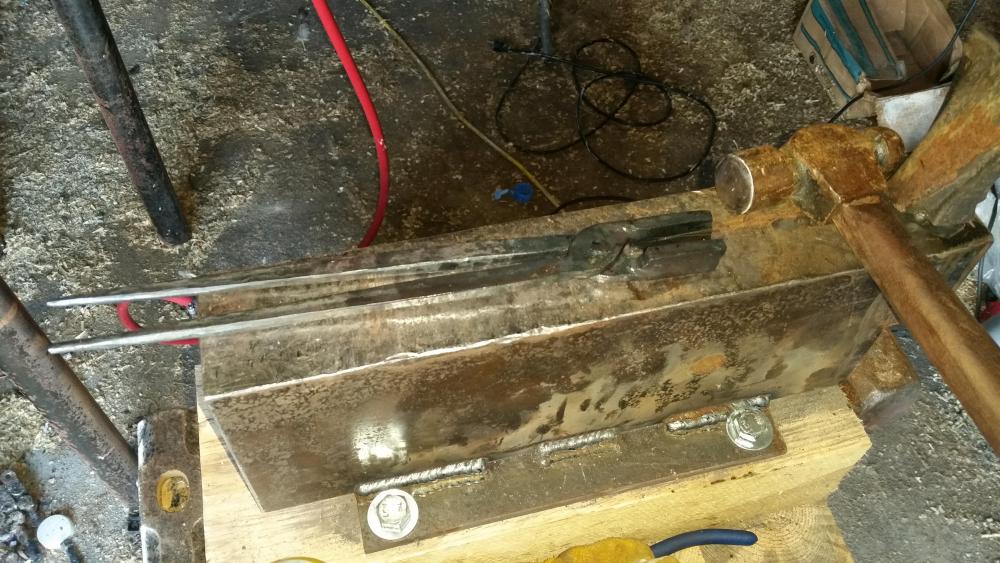
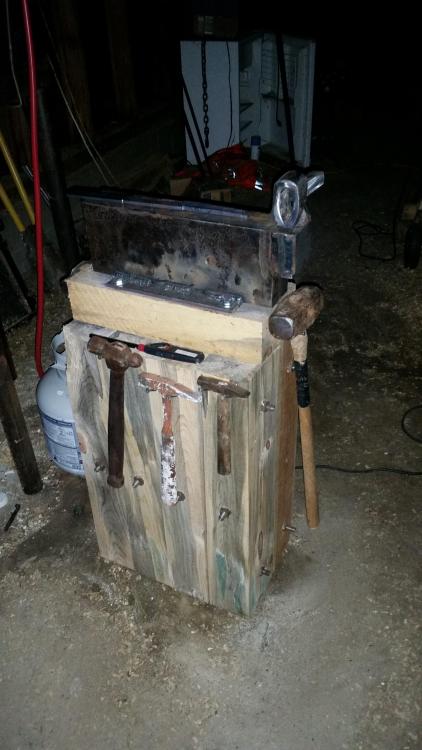
I cut this chunk of steel (16"L X 3"W X 6"H) off of a larger plate at work for the purpose of using is as an anvil. I then clamped it down in the mill and trued up the edges. I thought about turning a cone on the lathe and making a horn that would weld on higher than flush and then machining it down to level so that I would have a tapered transition. However I have not done that yet. My plan now is to make a horn that goes in the 1" square hardy hole that I welded on the end. Do any of you have any thoughts on that? Or other suggestions for additions/tools for the anvil? The Hardy tool that is installed in this picture is a splitting axe head that I cut in half. I originally wanted the blade off of it for a hot cutter, then I looked at the back half and thought it would be good for drawing out steel if it were rounded a bit and the handle hole could be dished out to use as a makeshift swage for leaves and the like. So I made it a two sided hardy tool. I'm just kind of playing around trying to figure out how to make the tools out of what I have available. Again any suggestions would be welcomed!
-
very cool. I would bet that this is something you could knock out quite a few of and turn a decent profit.
-
I like the idea of doing some of these for my own house. I'm glad that I came across this thread. I was thinking that it would look cool to do a decorative twist (not sure of the name so I'll describe it and maybe one of you can tell me what it is called!) where you start with square stock and use a fuller to concave the flat sides which draws out the corners so if you were to look at the bar from a cross section it would look kinda like a four pointed star. After that you twist to your heart's content you've got a cool decorative bar to bend into whatever you want. In this case one really cool looking set of curtain holdbacks! Yup, I'm gonna do it!
-
Would I be better off putting the larger bell reducers on or should I go ahead and buy T's to transform my burners into Frosty's design? Or are you suggesting the 3 X 3/4 reducers because of the large amount of volume in my forge? I had planned on cutting 4" off of my pipes and rethreading them to get down to the "rule of 8".
-
I was reading through the "burners 101" thread and saw that you were able to find an online copy of Mike's book to download. I was searching for it online and was unable to find it. Would you please share that link with me?
-
I'm not real sure about that either. However I do know that this type of refractory is what they use in the burning chambers of power plants. So I assumed it would hold in the heat well. But you know what they say about assumptions!
-
That is one thing that I'm proud of with this build. Total out of pocket is only about $50! Hopefully I can get that lucky again!
-
I was given a boatload of Vesuvius monolithic refractory from a friend that rebuilds power plants so that's what got put in it. The tank in using now is a BBQ tank, but I just acquired 2 100# tanks, just need to get them tested and filled. Frosty, I take it that you are suggesting building a new forge from scratch. In your opinion is there any way that I could save this forge? Such as restructuring the inside with the materials you listed to reduce volume, or do you think that would cost just about as much as building a new one or off a tank or something. (finances are awfully tight)
-
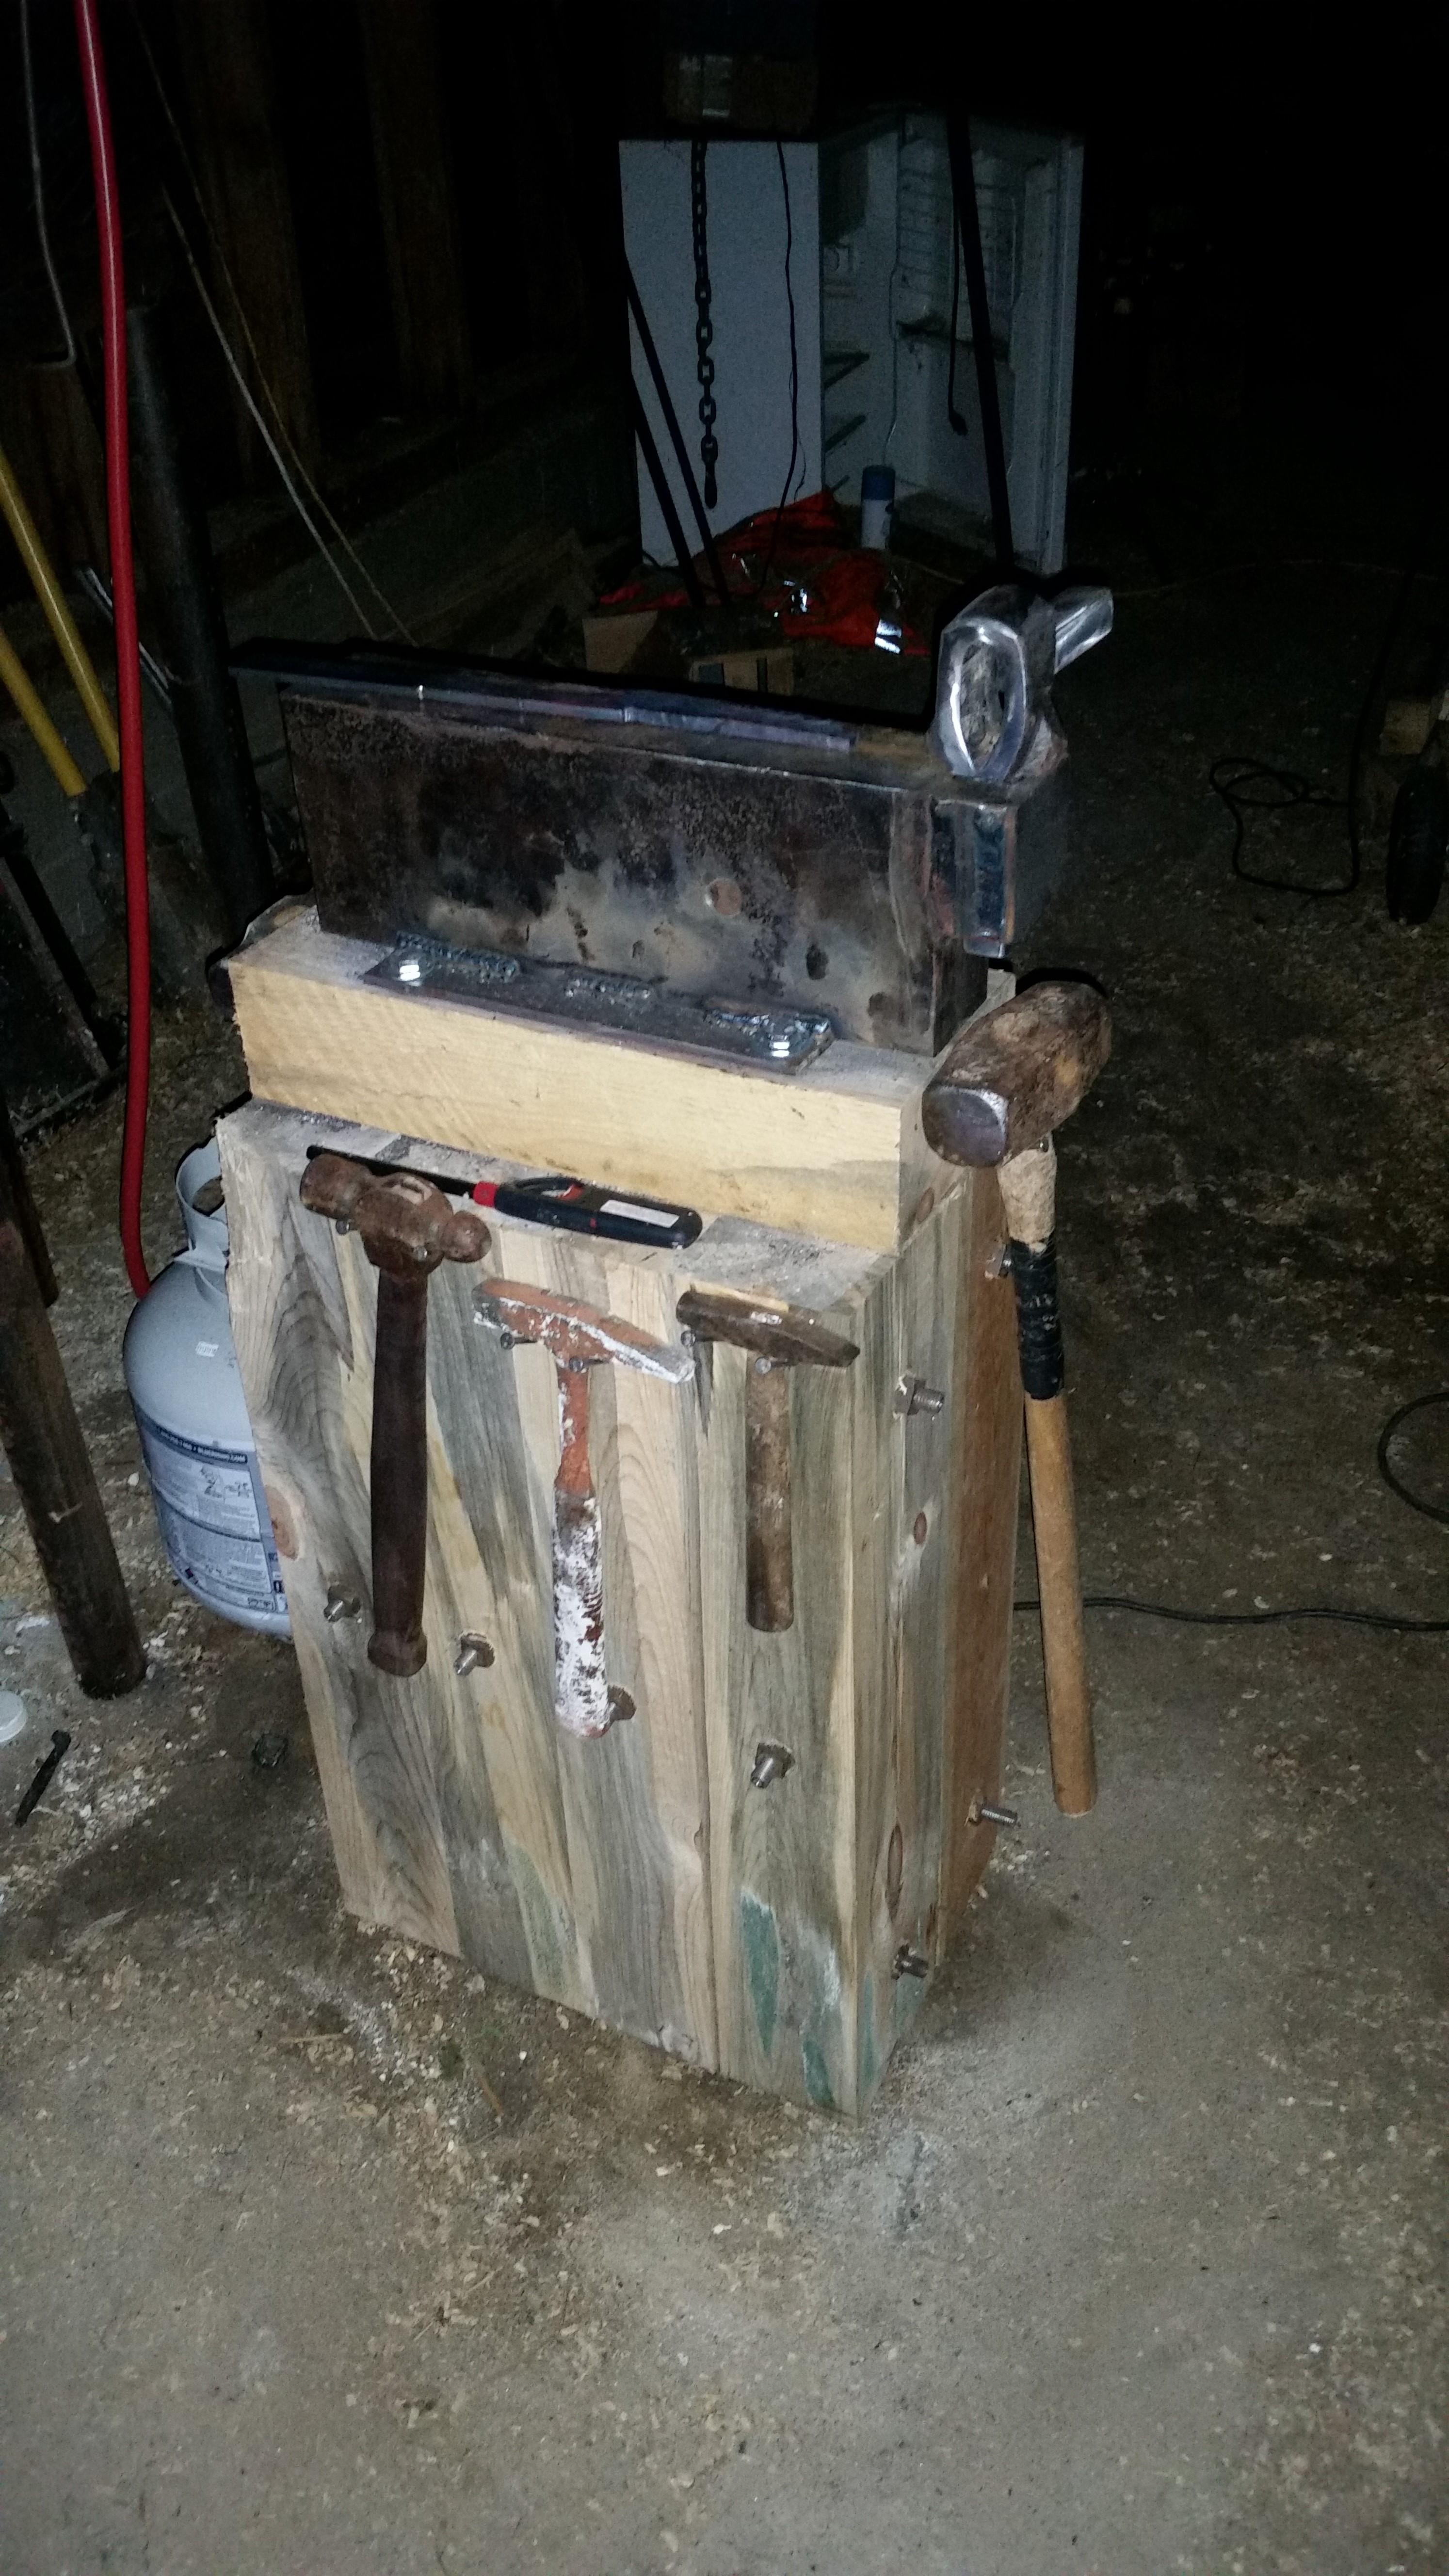
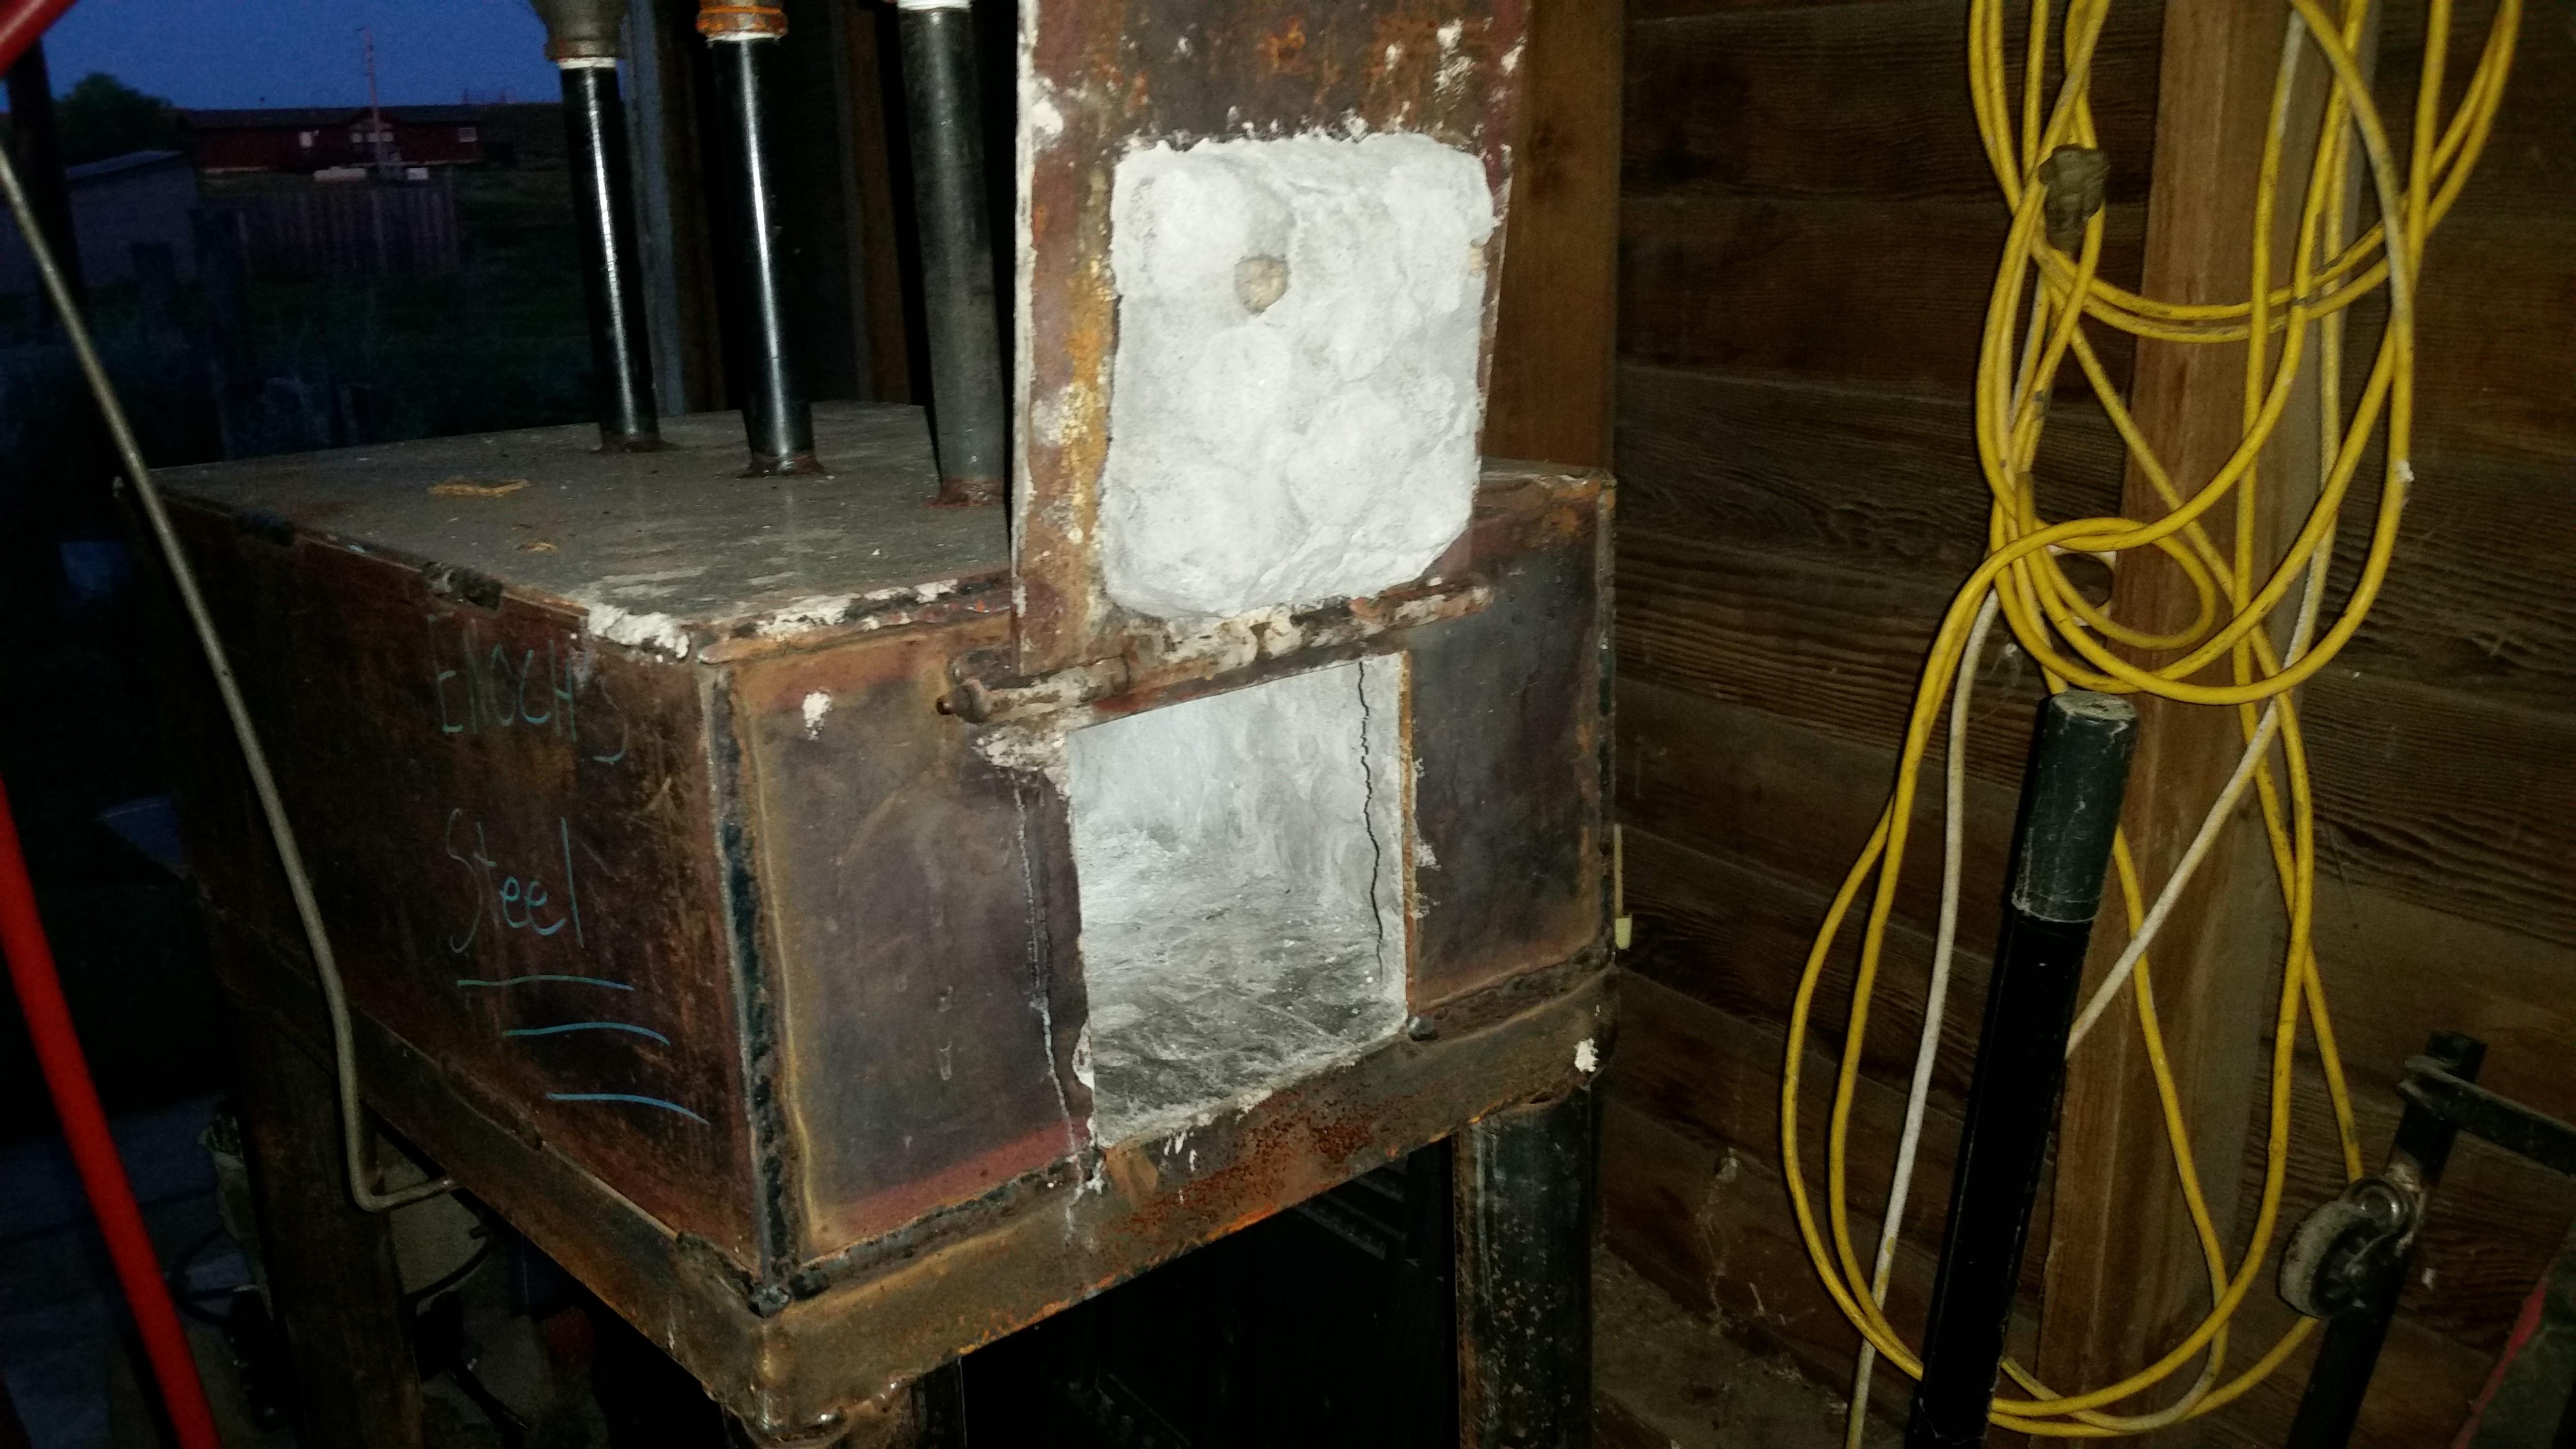
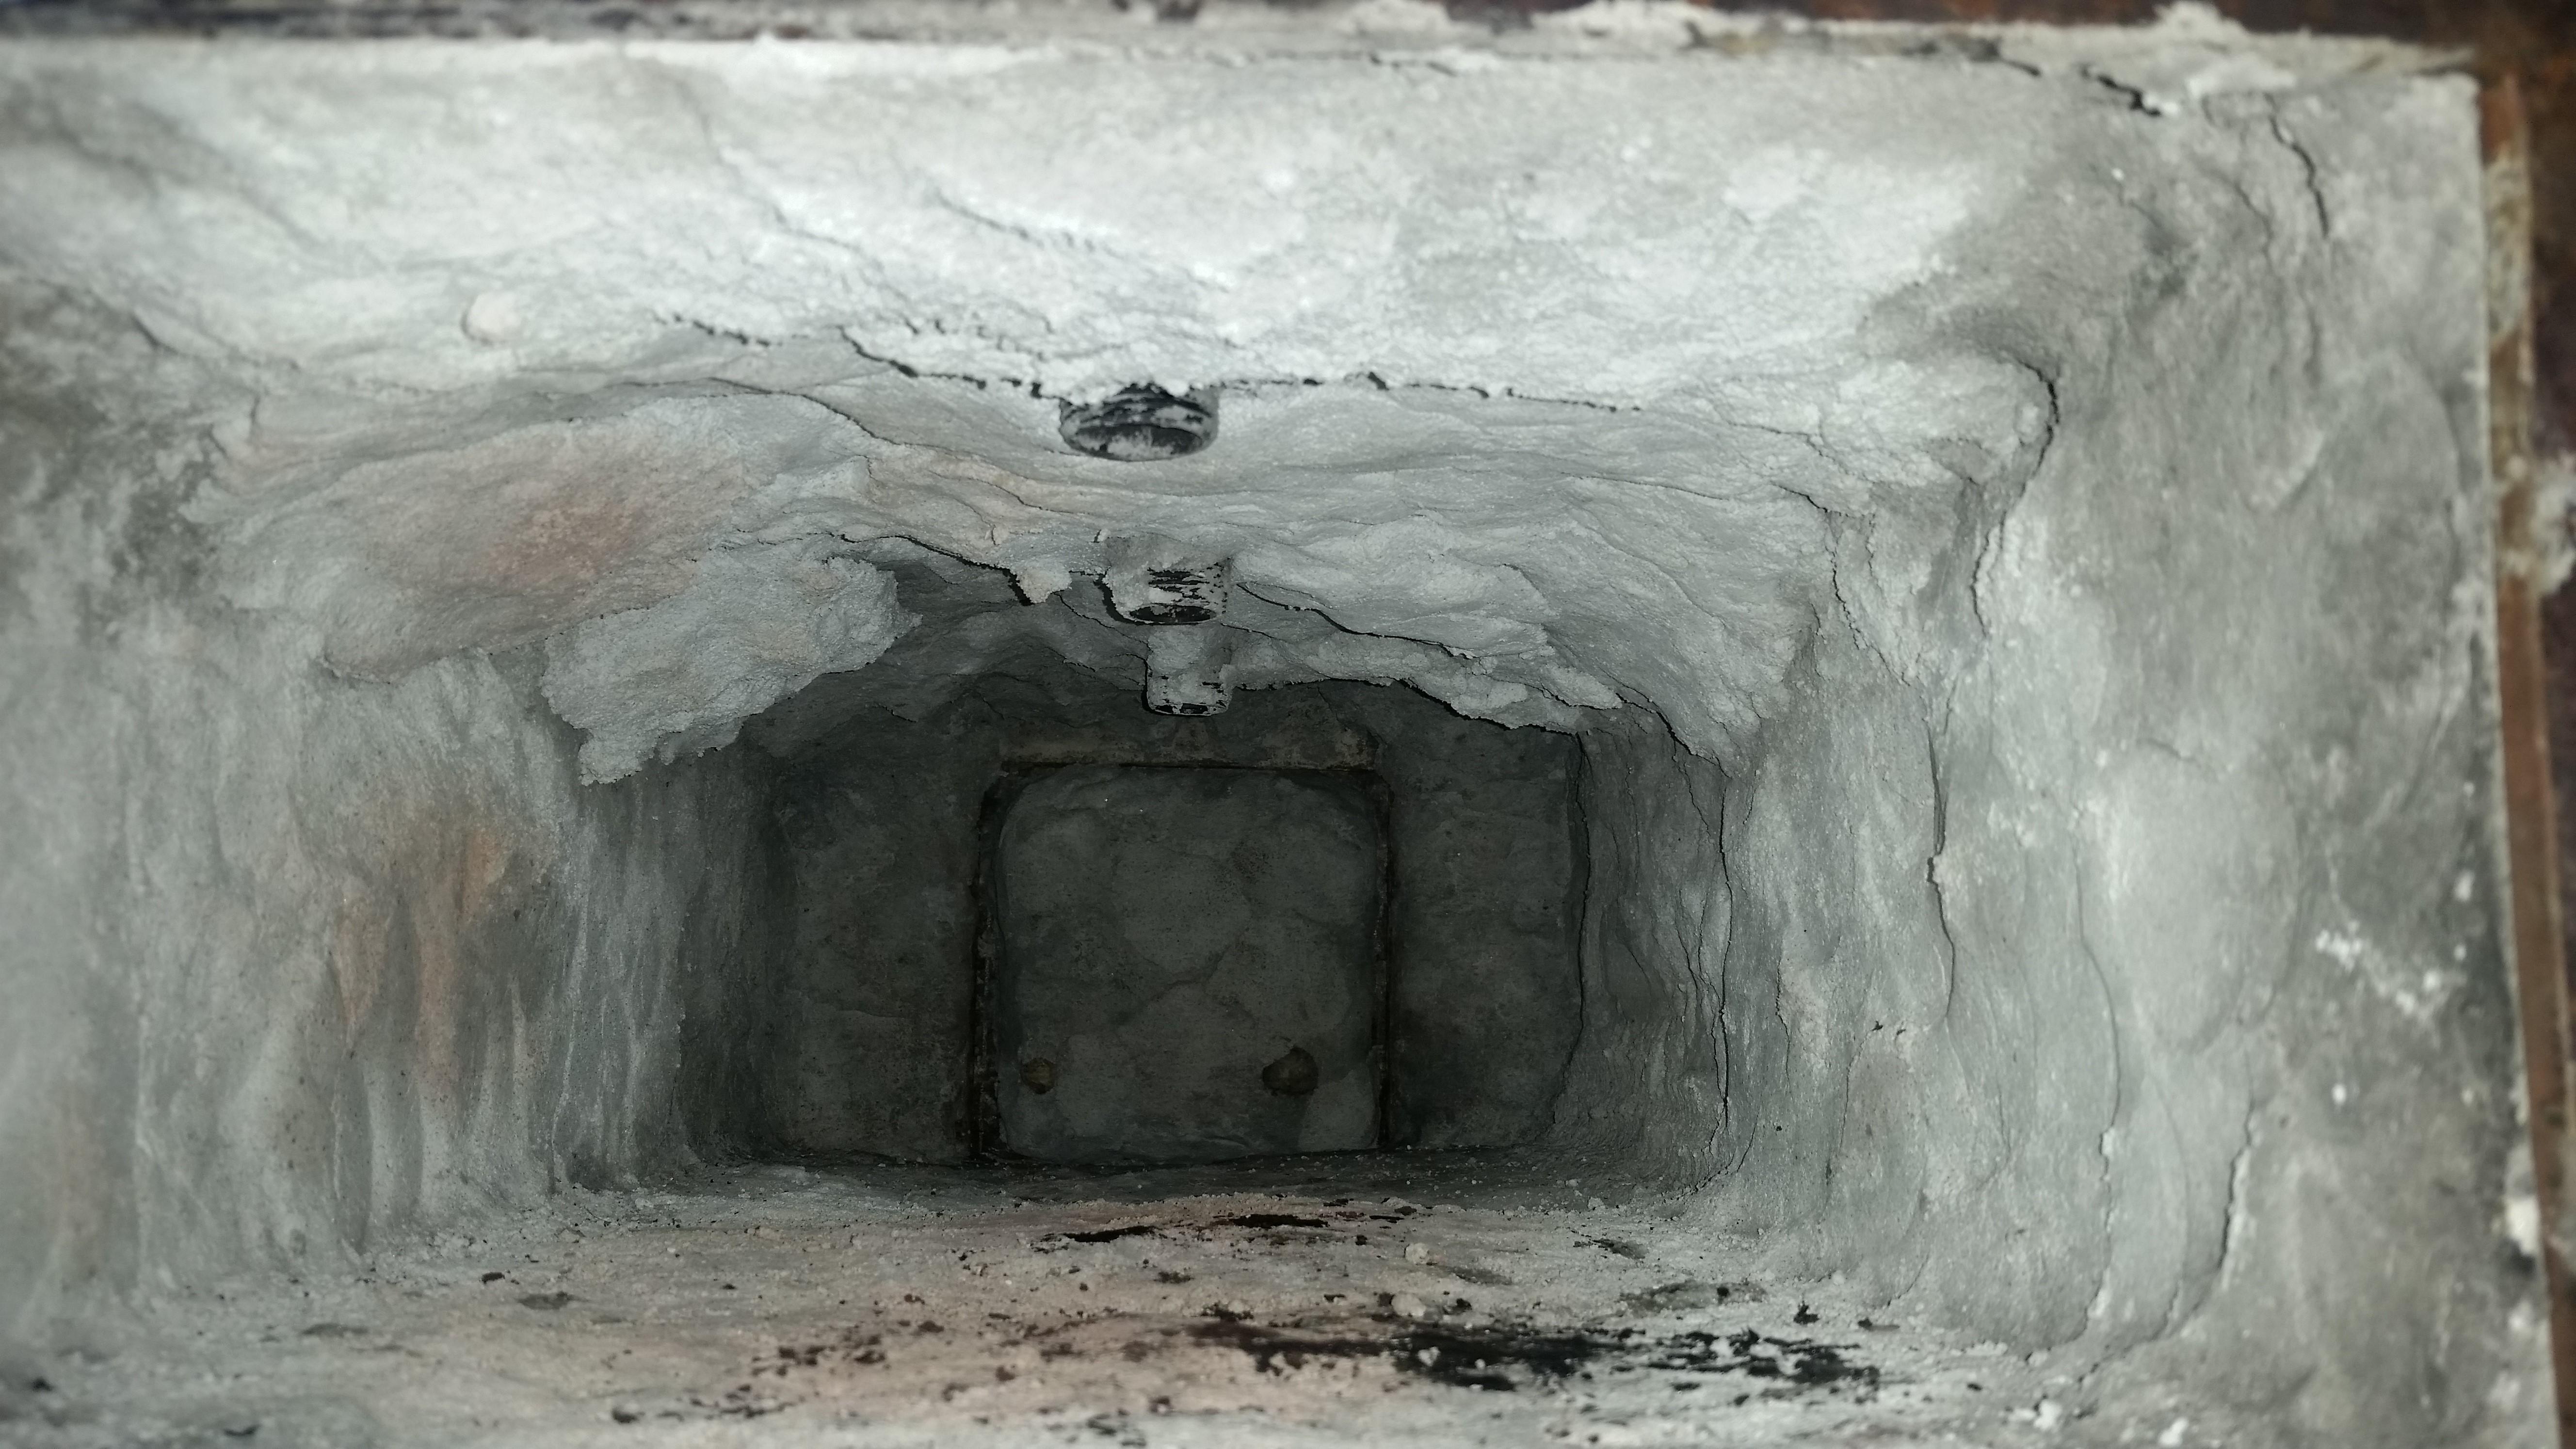
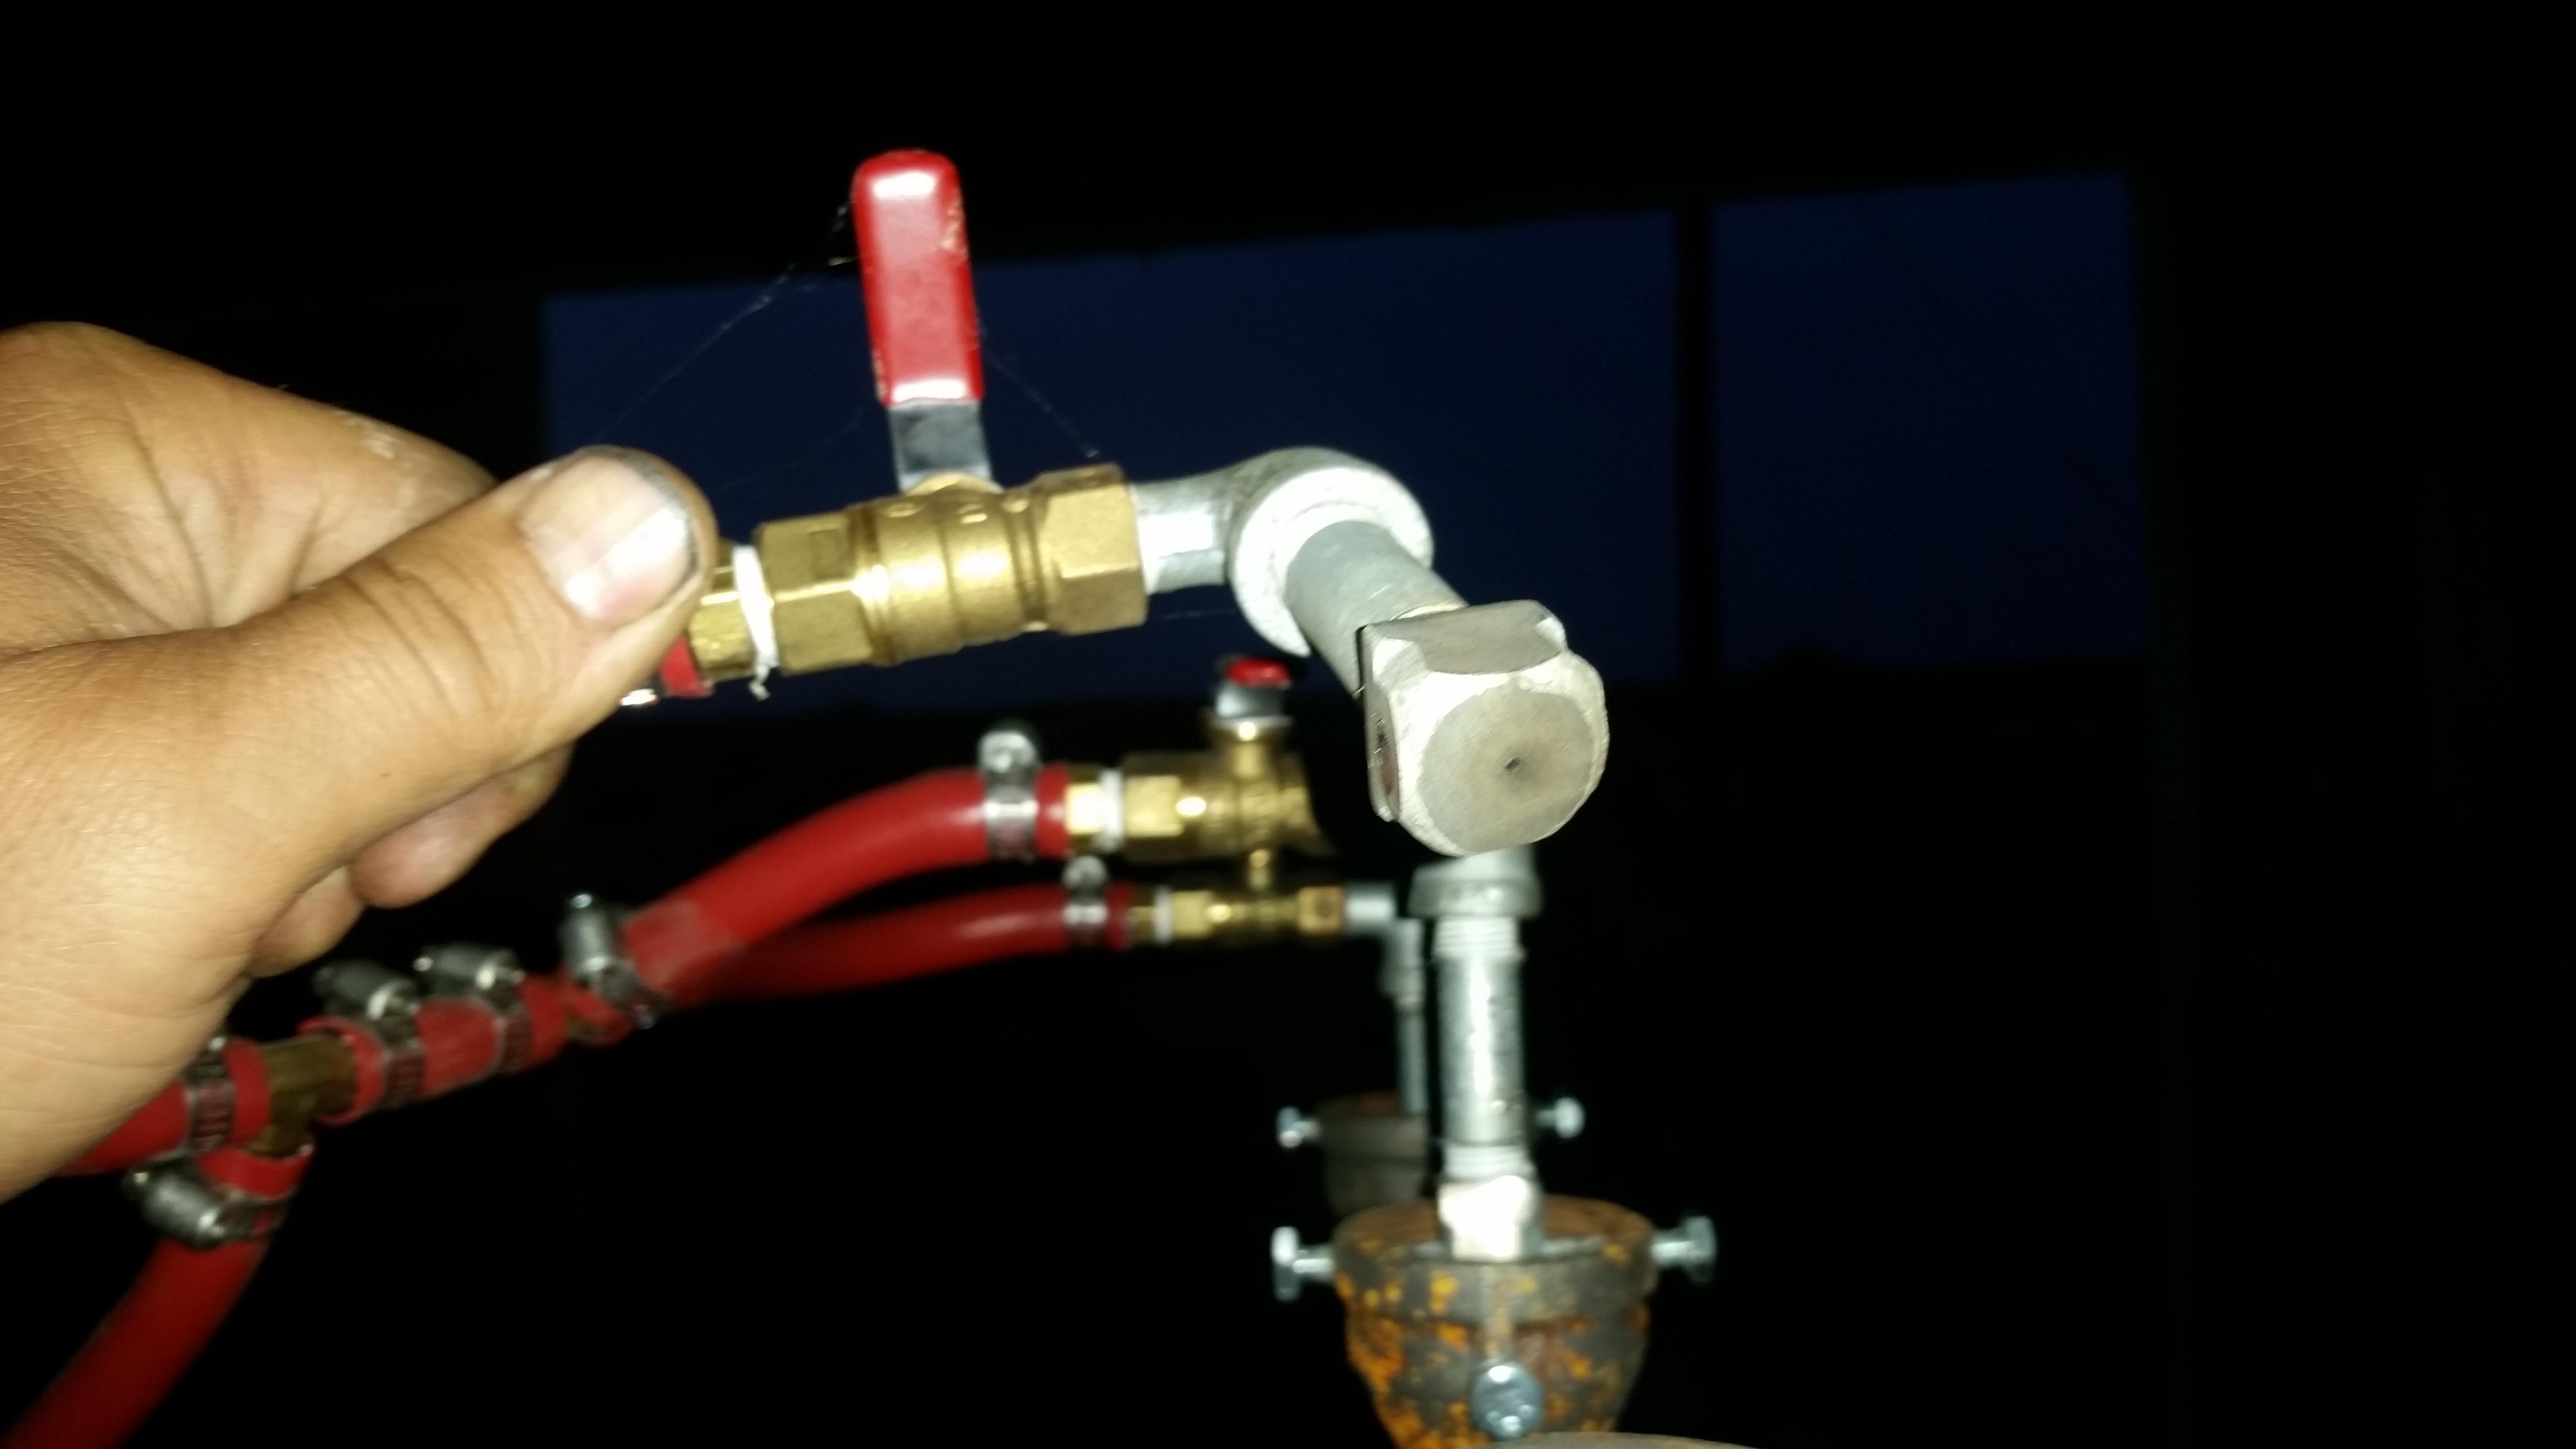
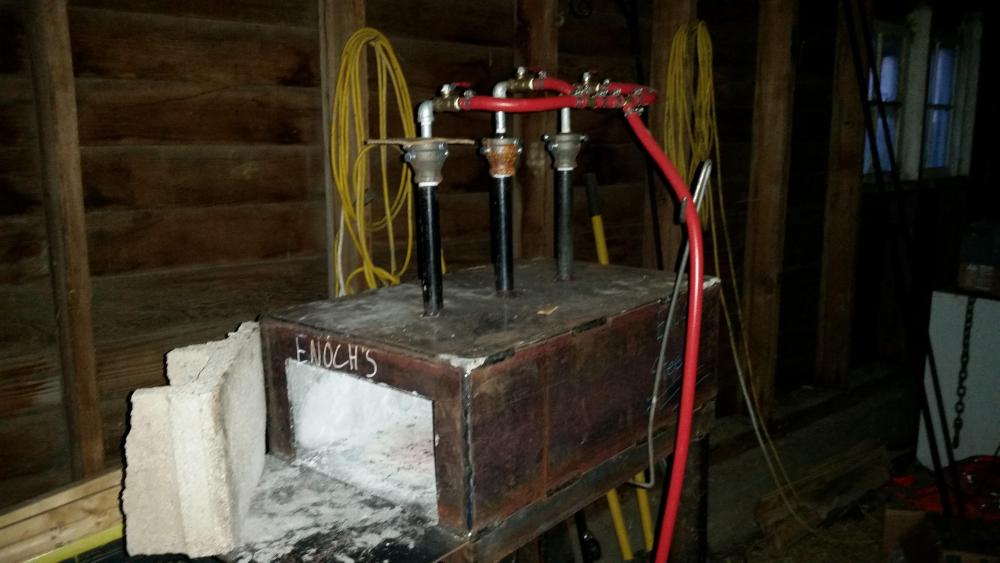
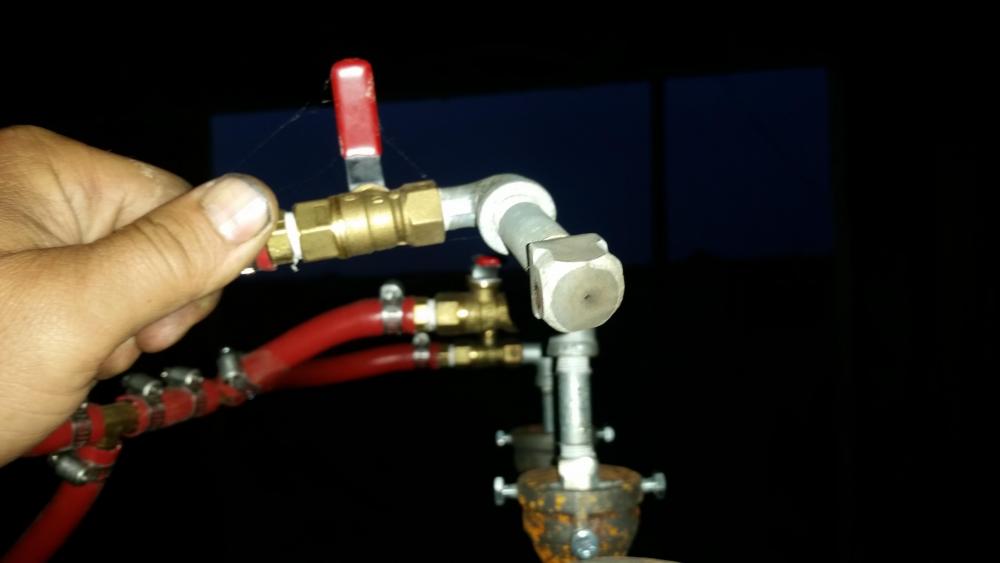
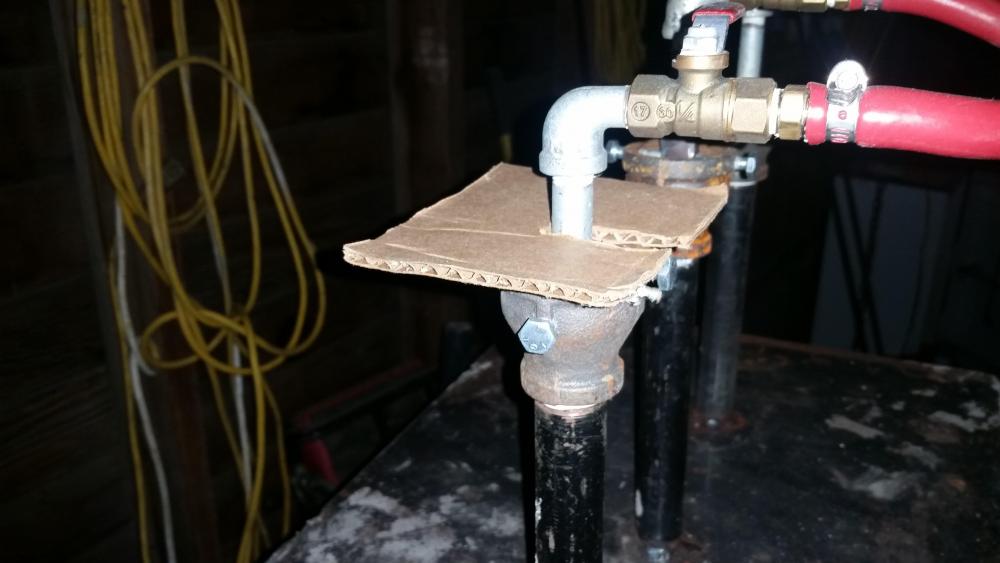
okay here are the pictures of my forge. The last one is a cardboard test piece I made out of desperation, surprisingly it did seem to help the situation a bit, but it's still a far cry from being a practical burner.


-
Close! I was an 0811 That's artillery in the Marine Corps. I'll go out and take a video and some pictures now. I'm sure that will give others a better idea of what I'm working with. Thanks!
-
Hello all. This is my first post. Let me say that I am very glad that I came across this post today. I recently built my own forge with ideas I got from watching videos on Youtube. The inside dimensions of my forge are 12" wide 8" tall and 24" long. I have a large door/opening on the front (12" X 8") that I block off with a brick and the back is 6" X 8" with a swinging door. All sides of the forge filled with 2" of refractory cement. I am confident that this forge will hold heat well. My problem is with the burners. I have 3 burners but am only able to run one at a time with limited success. If I try to run 2 I have to choke one WAY down to keep them from blowing themselves out, and even then they "chug" really bad. It takes about 15-20 minutes on my first heat to get any kind of color in 1/2" round in order to start forging. I started with a 1/16" orifice and switched to a much smaller one, about .035". I have also tried adjusting the height on my nozzles inside of the 3/4 X 1 1/4 bell reducer. The pipe on the burners are 3/4" nipples that are 10" long. They protrude about a half inch under the refractory straight down from the top. Does anyone have any ideas of how I could get them to heat better? I'll try to get some pictures posted on here.