

SoCal Dave
-
Posts
840 -
Joined
-
Last visited
Content Type
Profiles
Forums
Articles
Gallery
Downloads
Events
Posts posted by SoCal Dave
-
-
Thanks for the suggestions. A little info on my friends. They are 85 years old and have lived most of their lives on a cattle ranch. So, they use everything as long as possible and then longer. Using their very old knives is just in their blood. I haven't seen all the tools they are going to use but assume they all have wood handles. I will check out Evap-O-Rust.
-
An old friend has some very old hand made rusty knives for butchering a beef carcass. They also have a couple of cleavers, and a rusted saw. They asked me how to remove the rust so they can butcher a cow that has been cut up and has been hanging. They are concerned about contaminating the meet by using rusted knives. They thought vinegar could be used and then some steel wool.
I have not been involved in knife making at all and couldn't advise them. Any suggestion would be appreciated. They told me that the knifes and cleavers and saw have not been used for at least a couple of years and that is why they are rusted. The few knives they showed me appear to be a carbon steel, a low carbon steel and very thin.
-
I have an old work/welding table that is 3' X 5'. I haven't really cleaned it in 20 years. I would just grind or wire brush a small area to get a ground. I have used it for everything and as a result, it has 20 years of different colored paint. I'm going to clean the entire table now. I'm using an electric angle grinder with a twisted wire wheel and a grinder with a grinding disk that is most likely 36 grit. I was thinking that a solution of some sort may help the process? I was thinking of vinegar since it will help taking off rust. Any other ideas would be appreciated.
-
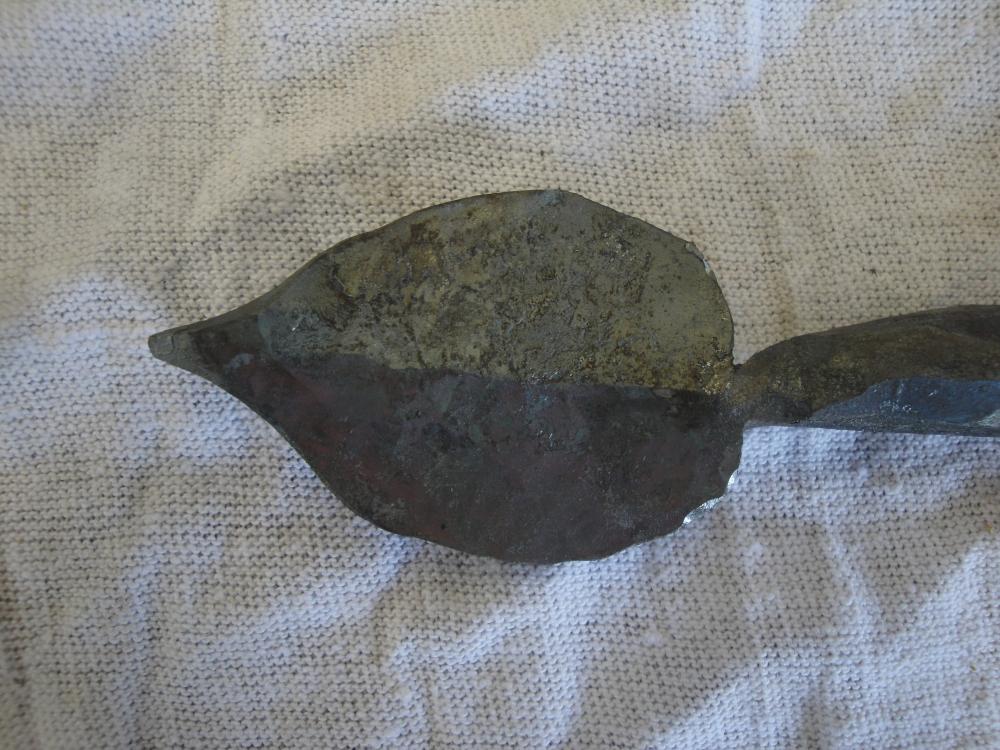
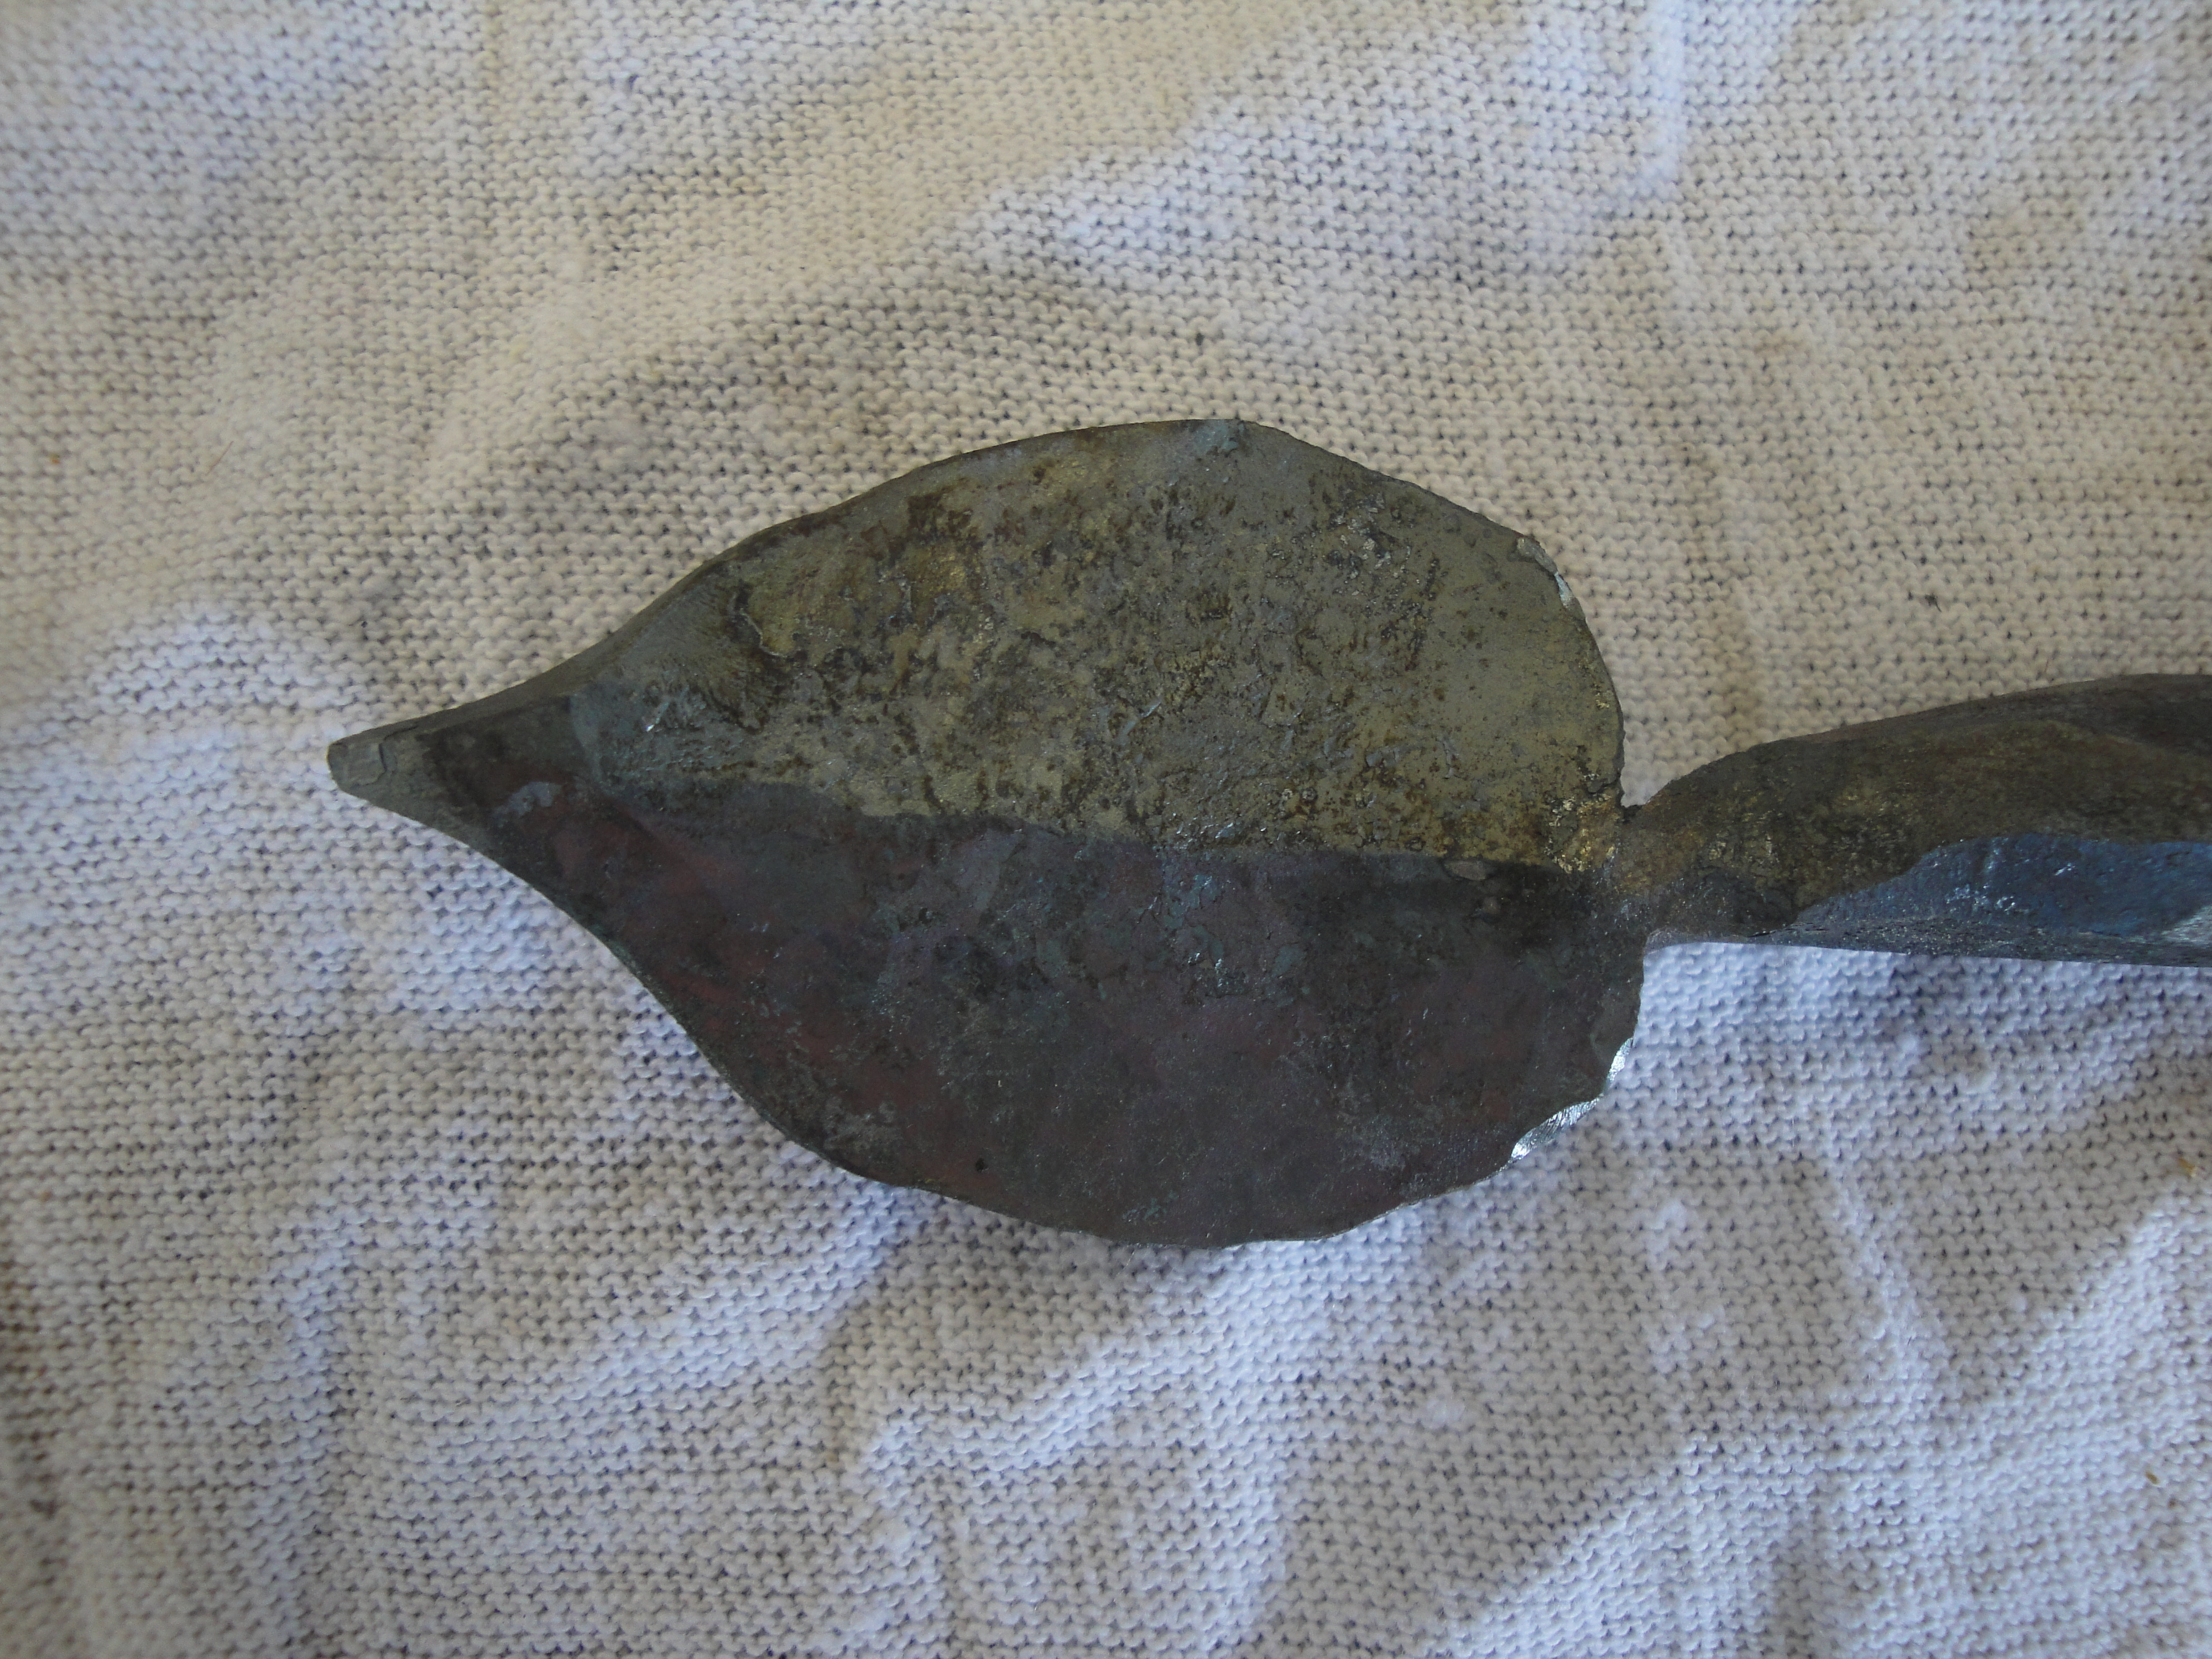
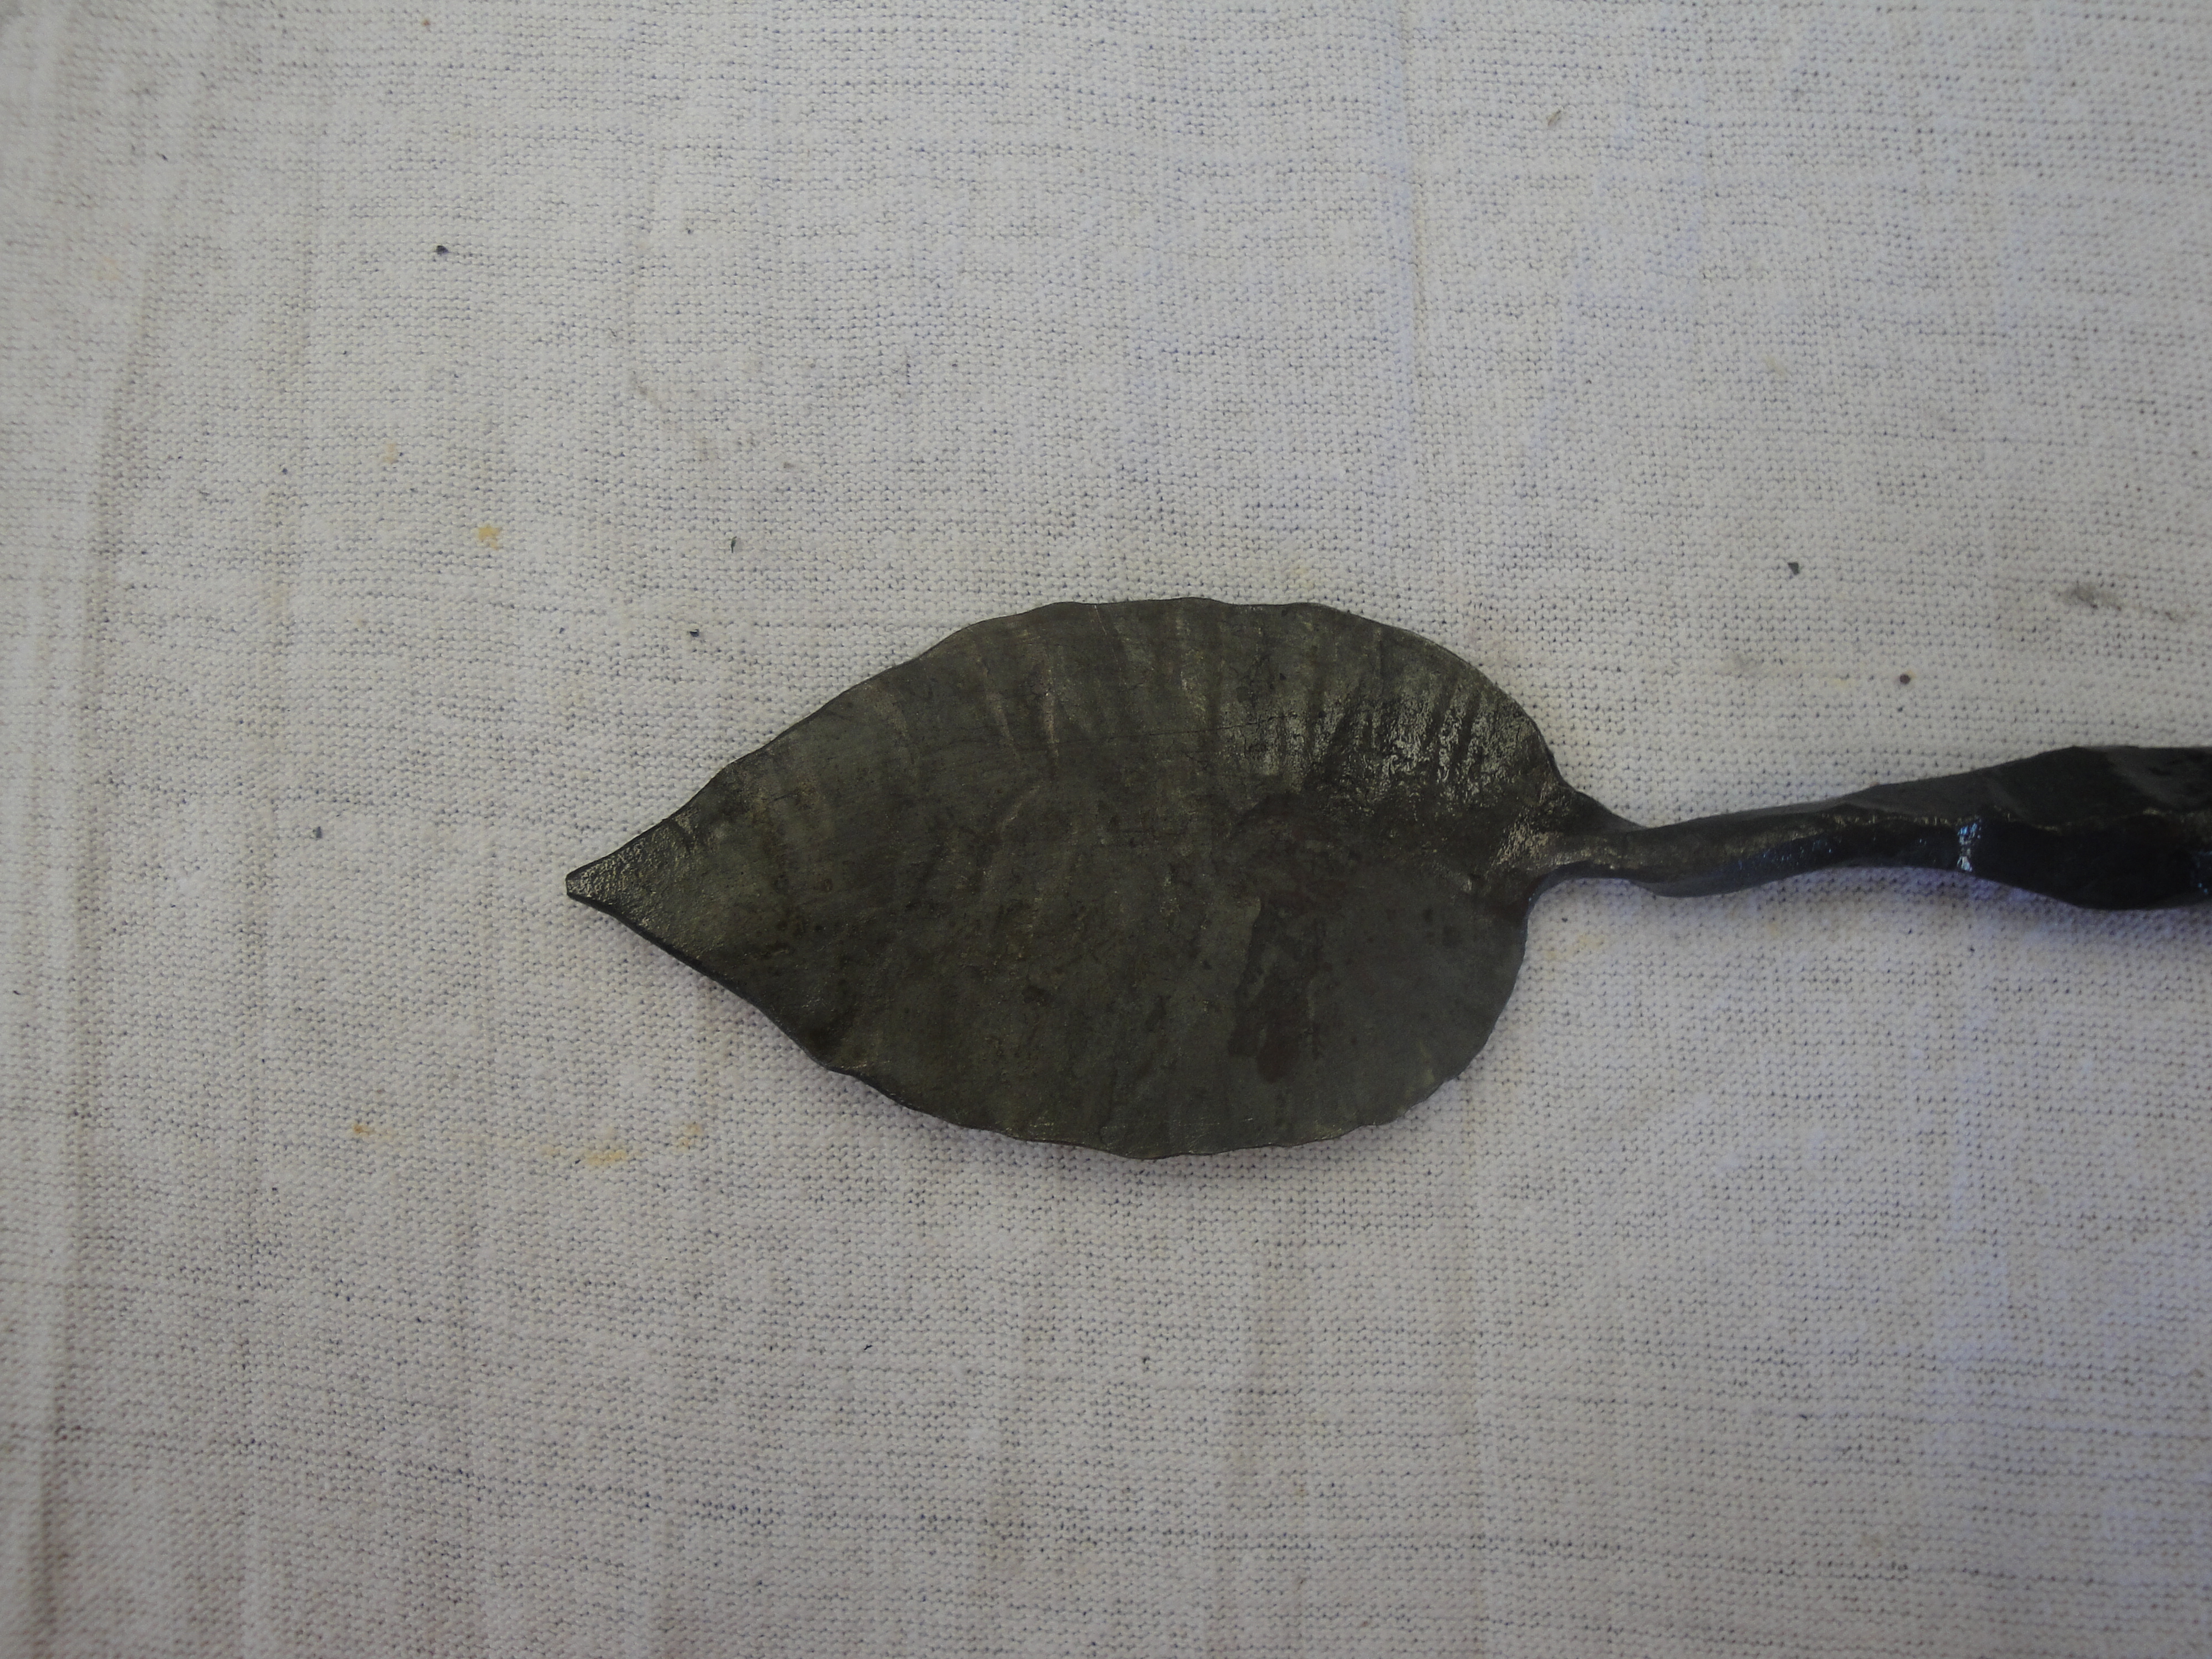
I made this leaf yesterday and used my rounding hammer only. I use the rounded or curved side of the hammer to spread the leaf sections. I'm learning to use all the aspects of or sides of a hammer. On to the Gingko leaf.
-
Off the subject a little but to welding in a gas forge. I've watched Craig Trnka, a top farrier, video and he has one with him welding some steel stock with out much trouble. He used Iron Mountain Flux and didn't smother it in flux. I notice he didn't use a heavy hammer either. Most likely a 2 lb er. He did scarf the two ends. Watching many of his video's he does a lot of horseshoe forge welding in a coal forge. I am not sure of the carbon content of horseshoes. Good luck
-
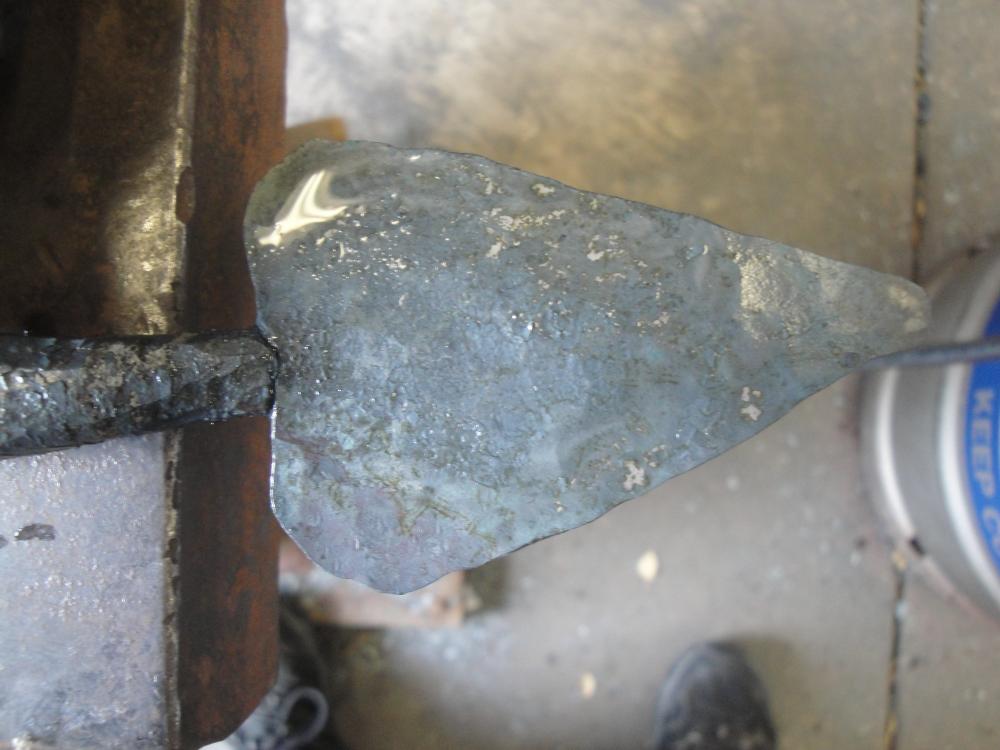
I will try to get a photo in the next few days as I ran out of propane yesterday. I agree that the shape is important and found that I was making the point to long. By doing that, I didn't have enough material left to move it around and spread out the leaf.
-
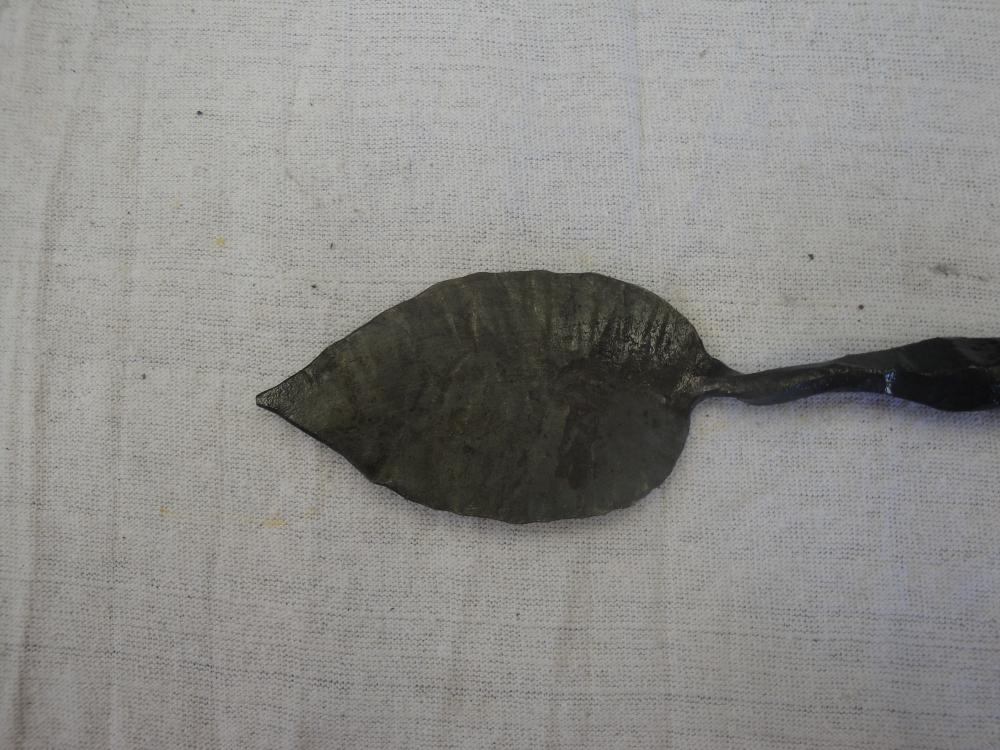
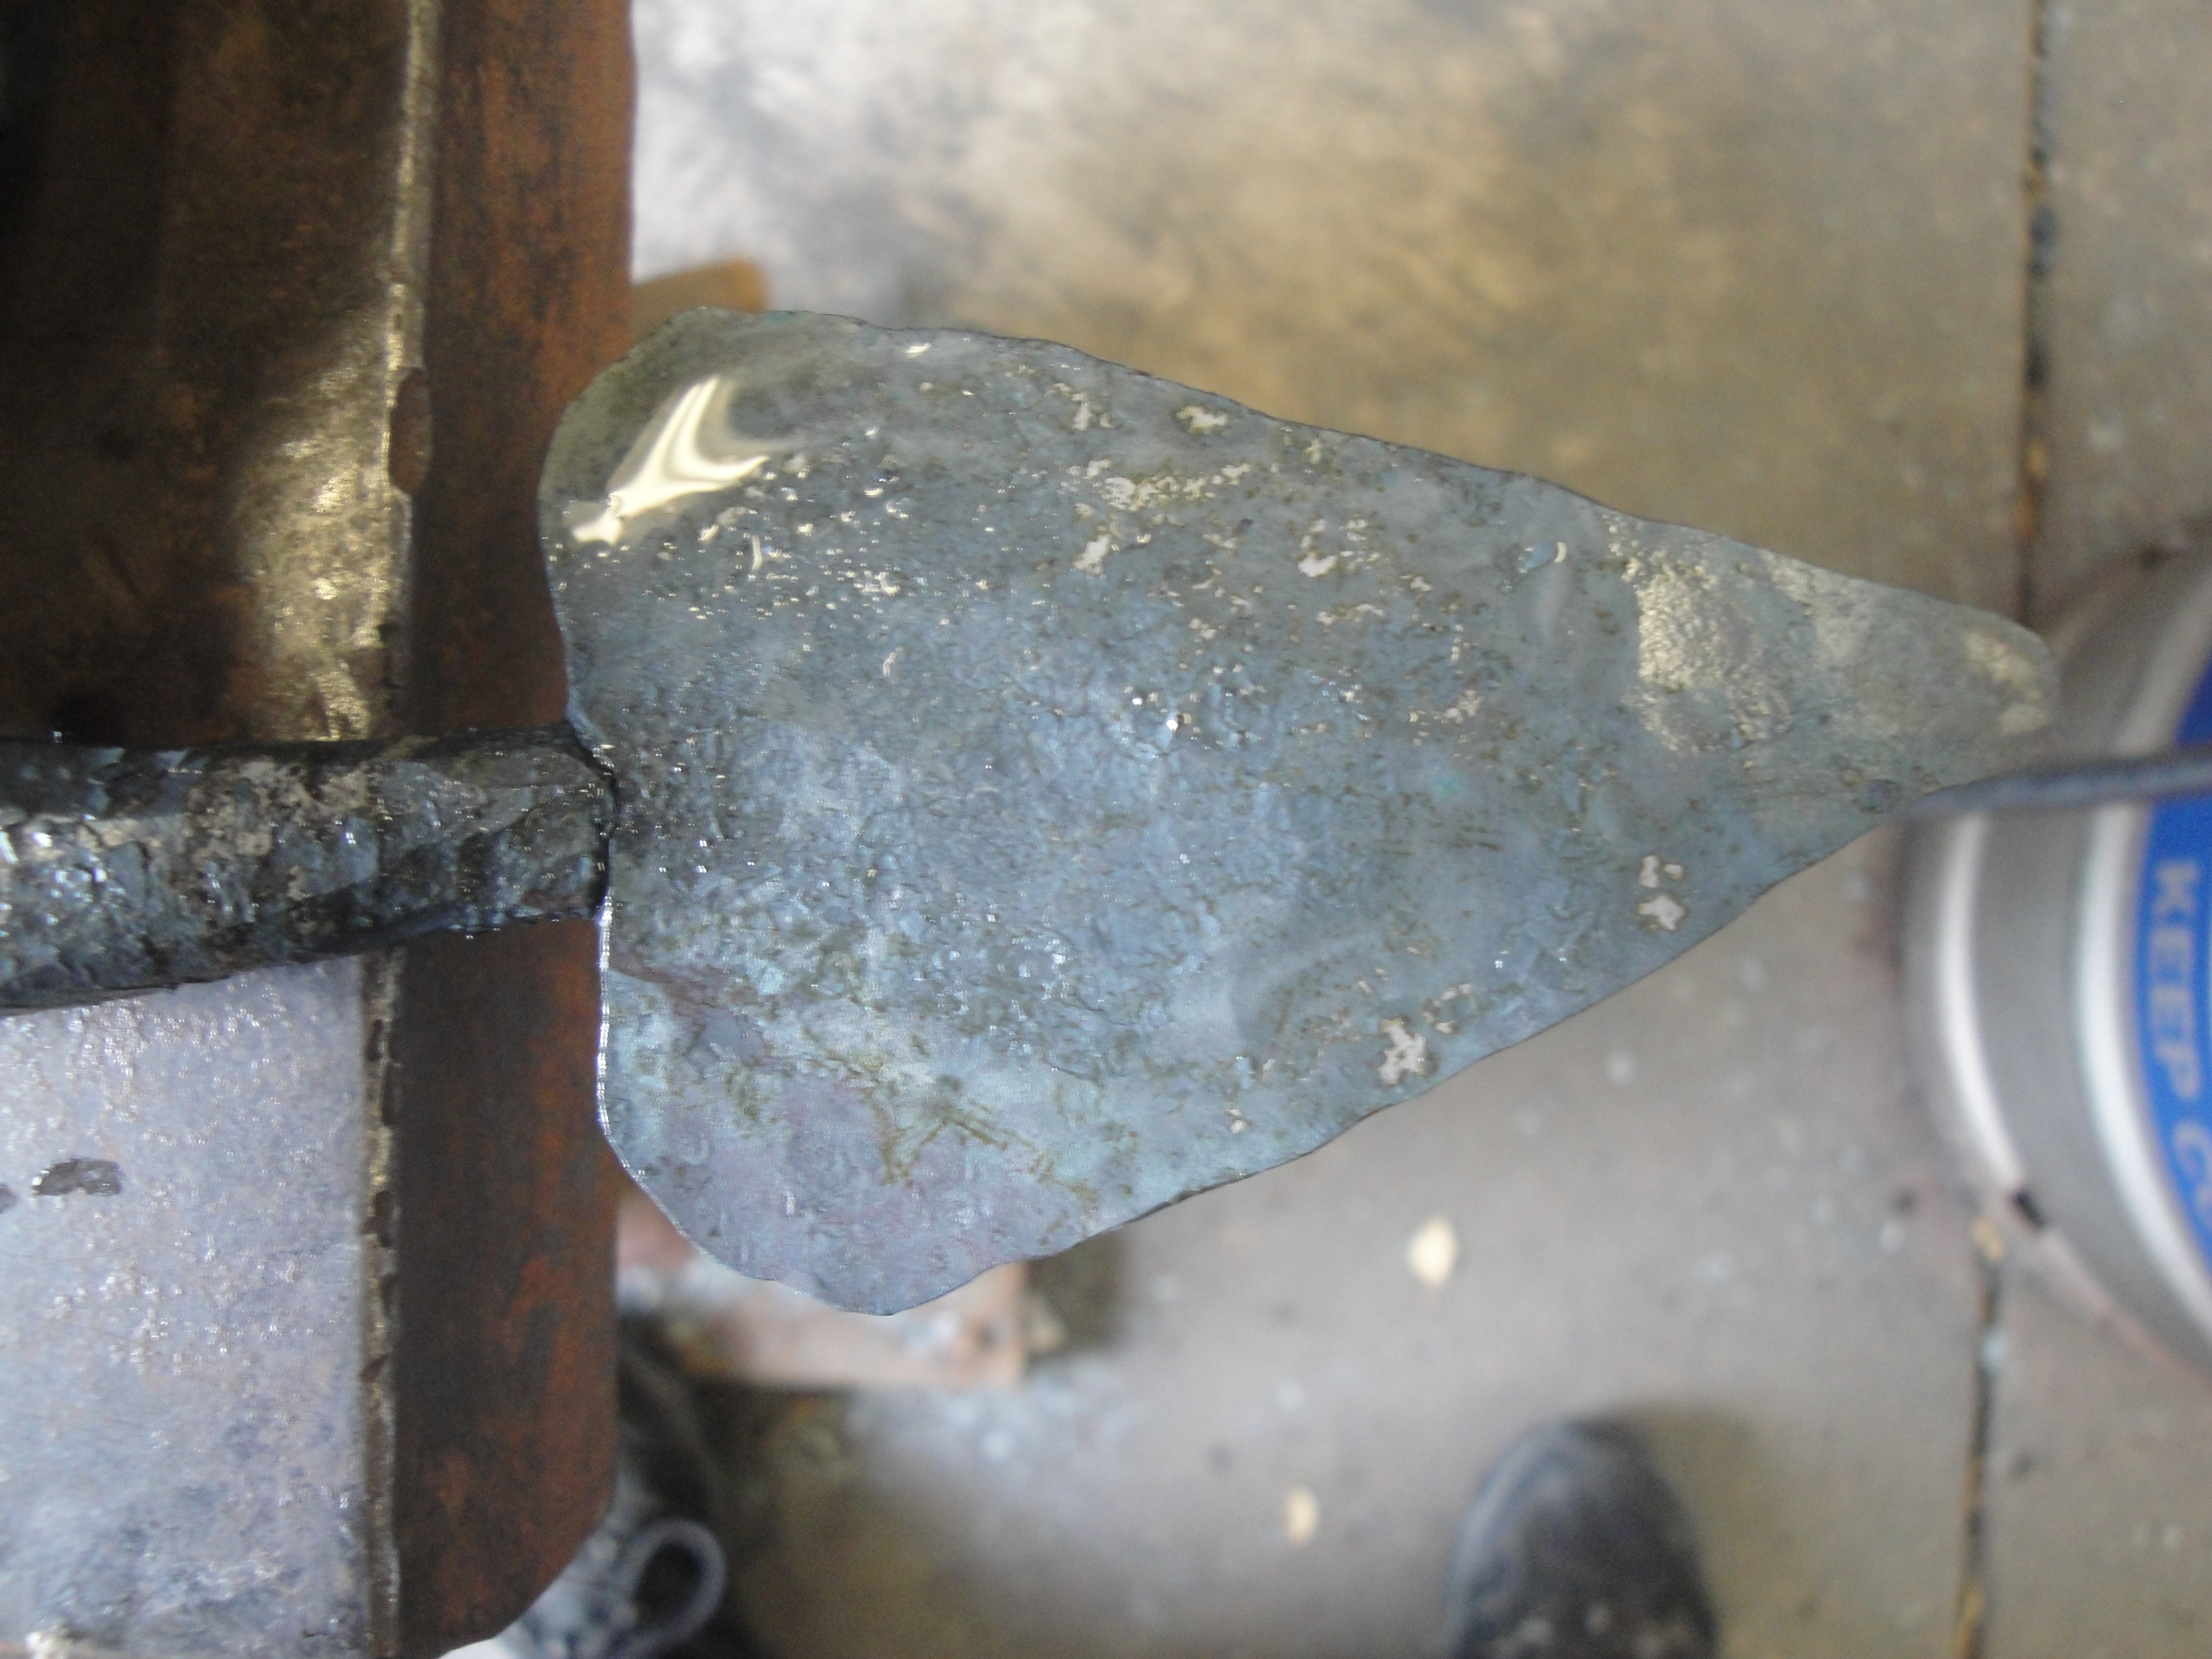
I stopped working on the cottonwood leaves for a little while. Sometimes it good to step away. I tried another one today with more success. I didn't finish the one below with veins and the entire shape of the leaf wasn't finished but I think I got the stem/leaf transition area near or below where the stem transitions to the leaf. The difference was that I use my rounding hammer and not the cross pein. I use my rounding hammer most of the time and feel more comfortable using it. Jeremy K suggested that idea and when I tried it, I found it worked better than the cross pein. The cross pein seemed like the practical, mechanical, way to go, but I never could get the metal to move the way I wanted. So, I tried the rounding hammer and success.
-
I don't mean to diverge a little but I've been watching Craig Trnka videos. A farrier with extra ordinary skills. I find it interesting in the hammers farriers use and blacksmiths use. It looks like Trnka uses a 2 lb rounding hammer most of the time and a thin long wood handles. He moves some big thick steel horseshoes with ease using very light hammer heads. But, he strikes the shoes at a much faster pace. Blacksmiths like 3lb hammers and bigger for the most part. I believe the thin handles are much easier to hold in comparison to a large handle Fiskars. Also, blacksmiths I've watched in person or on videos hold the hammers very close to the hammer head which is much different than the farriers. There must be lots of opinion on this subject.
-
How long were the two rings when they were straight? Did you straighten them by hand with a hammer or did you use a press of some kind? There doesn't appear to have many hammer marks on them.
-
I have a three burner Mankel forge with a blower. It uses a lot of fuel and I don't need all three burners all the time. If I want to use just two burners, which ones should I use and which one should I turn off? Is there a problem with the heat going up the turned off burner? I have the openings blocked off so the fire comes out of one end like a tube. Do I turn off the one burner nearest the opening or the one farthest back in the tube?
-
I've used coil springs a lot to make center punches. What comes to mind when I read your text above are these points. Quench in oil, not water. Don't drive the punch at all before quenching. Heat treat the material first, normalize it, then heat treat again to non-magnetic and quench it. Run the colors to a straw gold. But, you probably have tried this. So, Good luck and let us know what you find that solves the problem.
-
Thanks Jeremy, I will try that tomorrow.
-
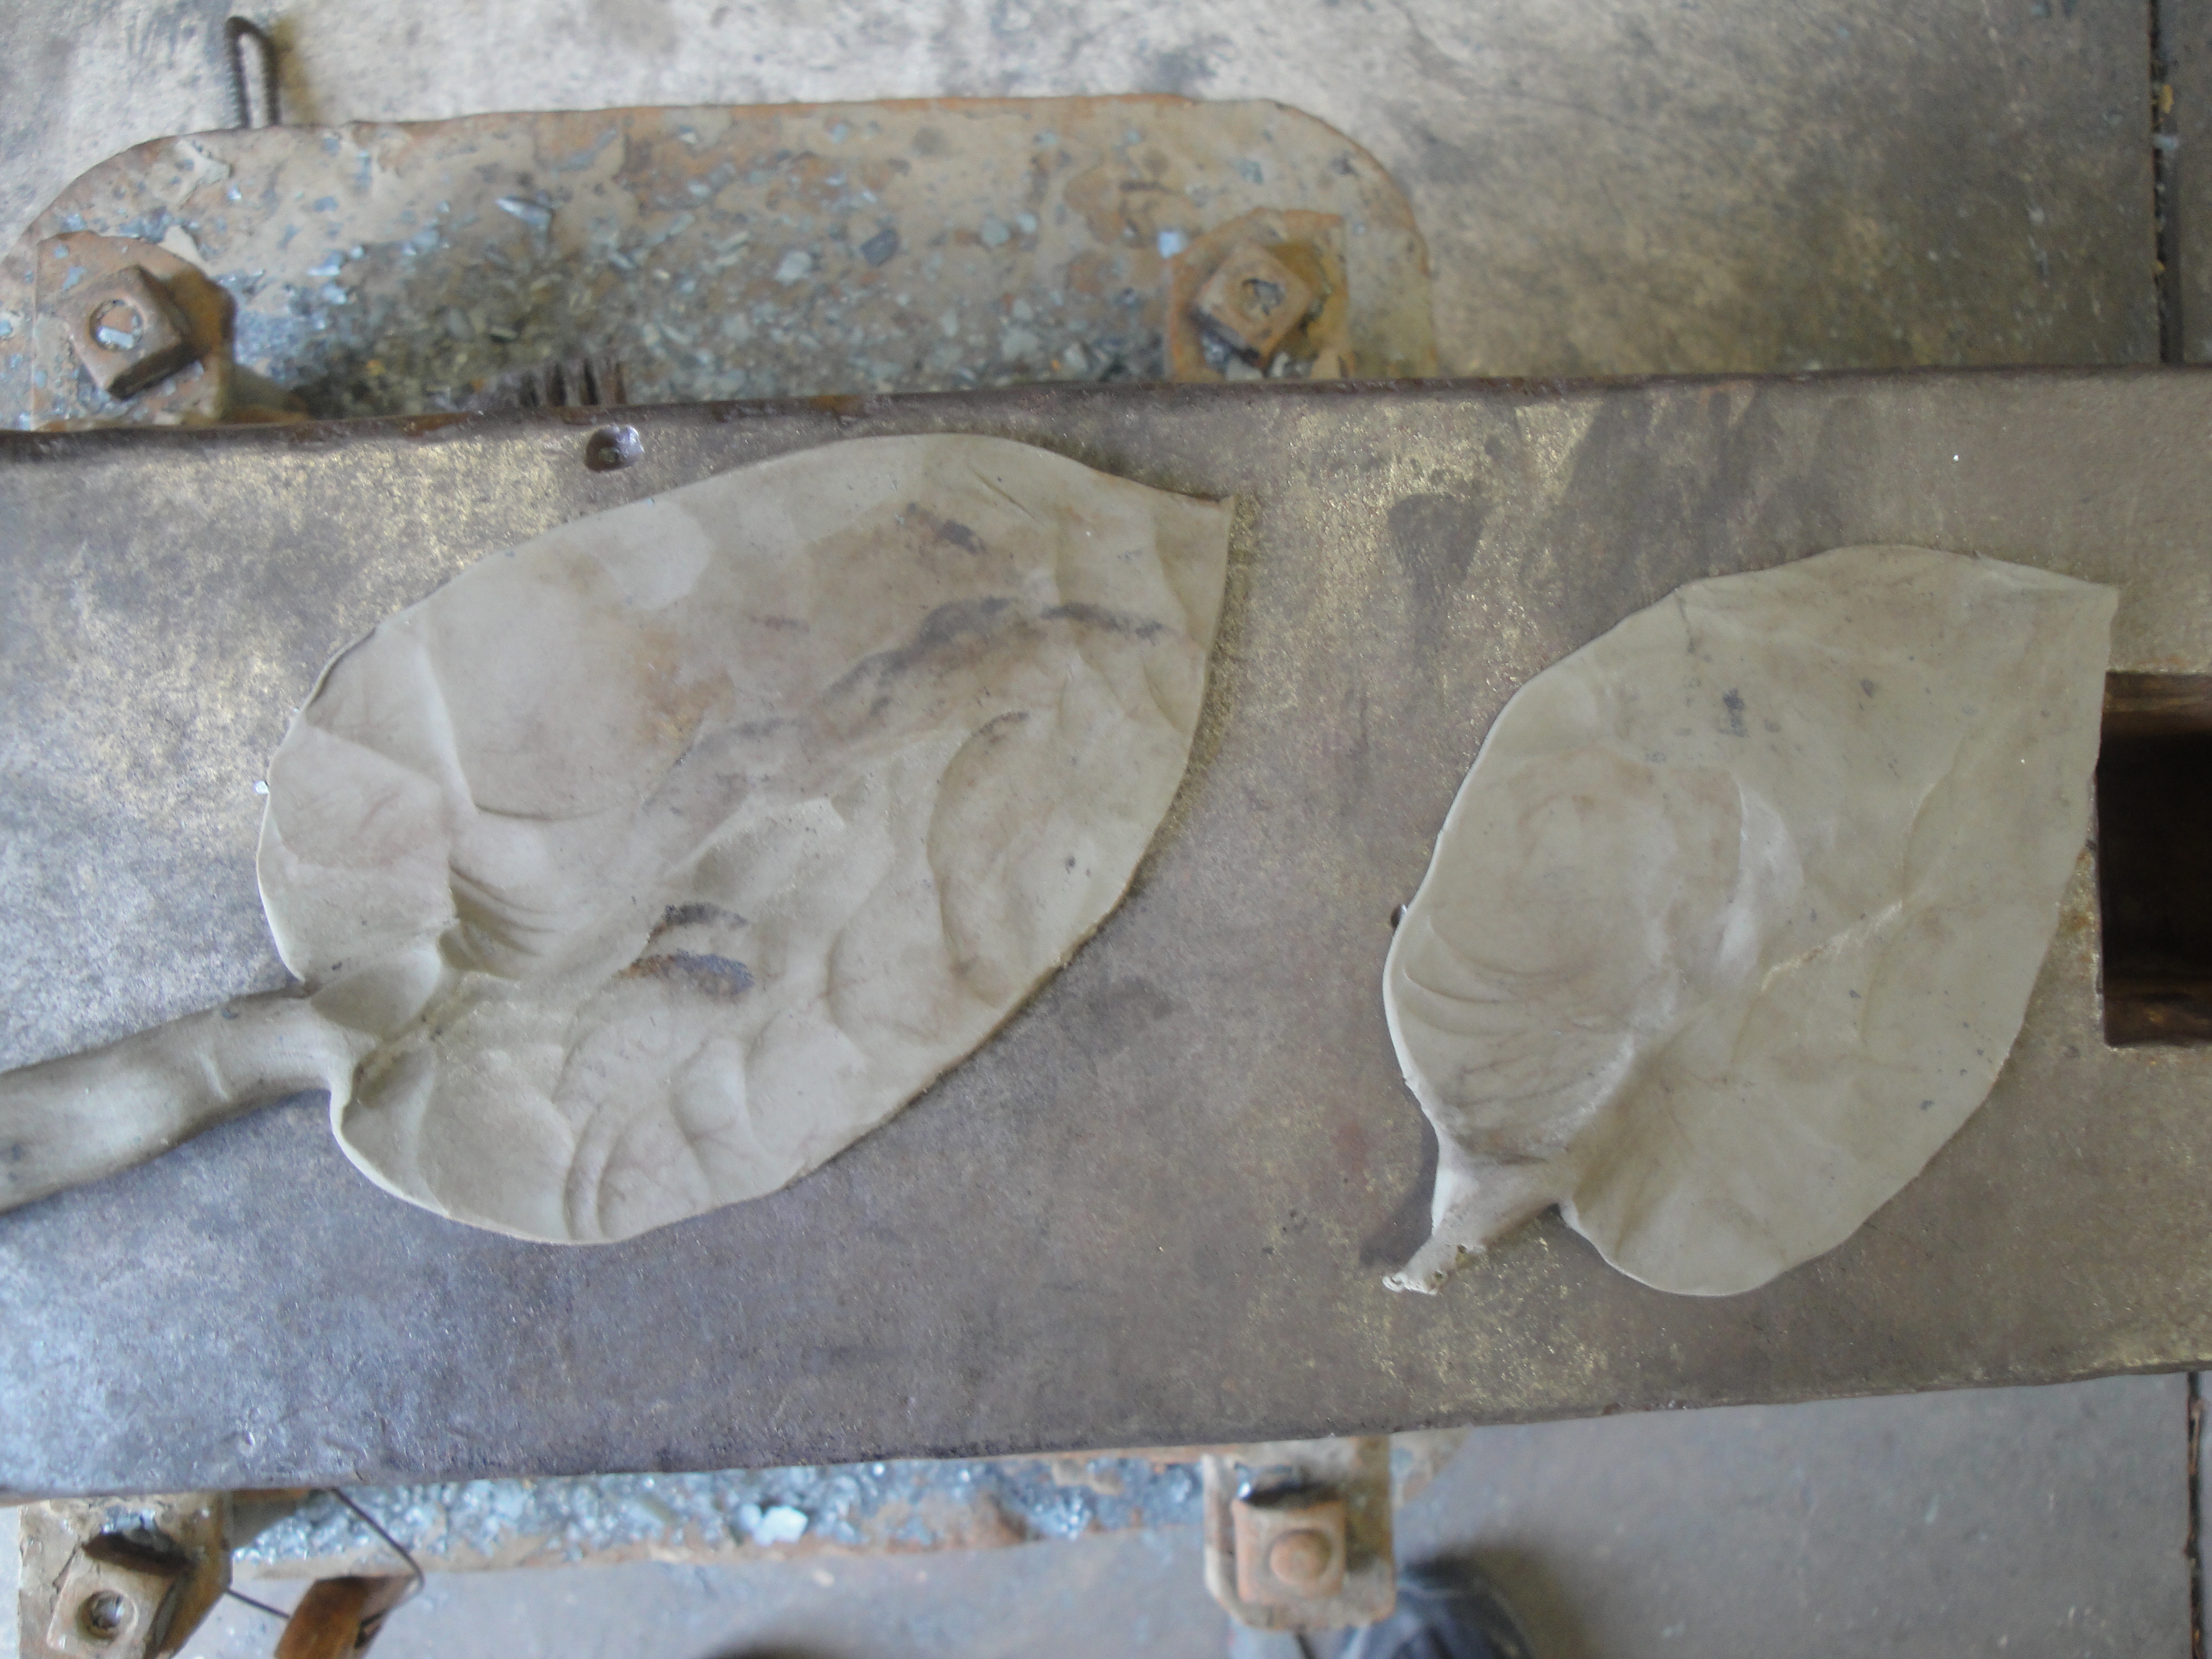
I did two things today. First, I worked in clay and could concentrate on my hammer blows. Second, I didn't flatten the stock as much as before and that did leave me more material to move around. Now, I haven't worked it with steel yet, and I plan on working with the clay a few more times. Photos of clay leaves.

-
Thanks Lou, I will give it a try.
-
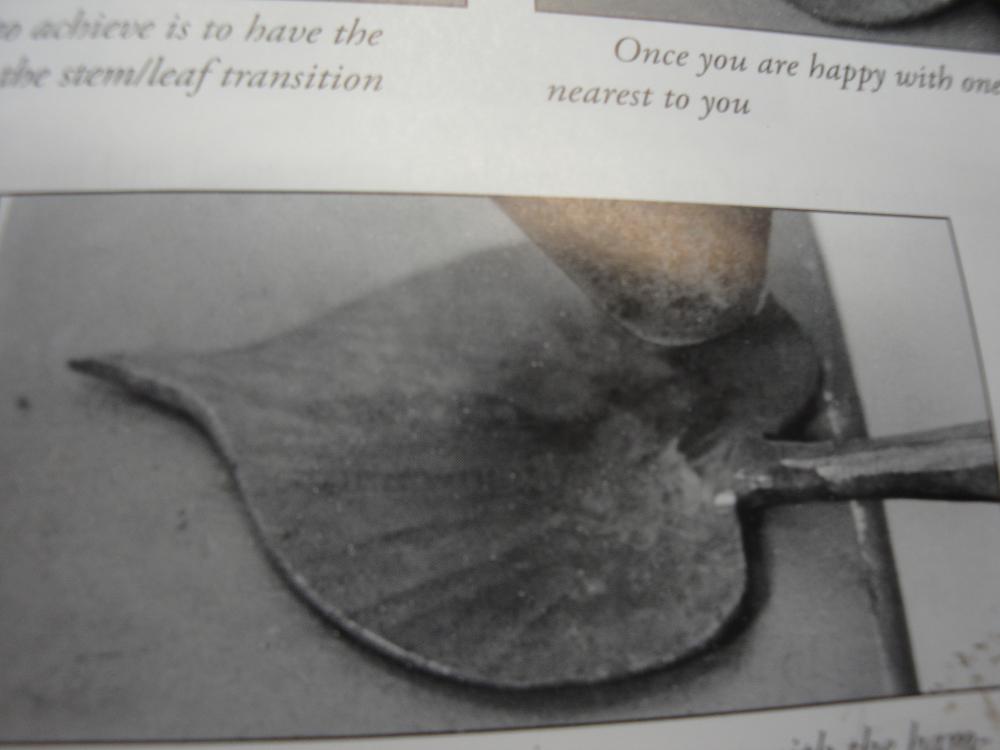
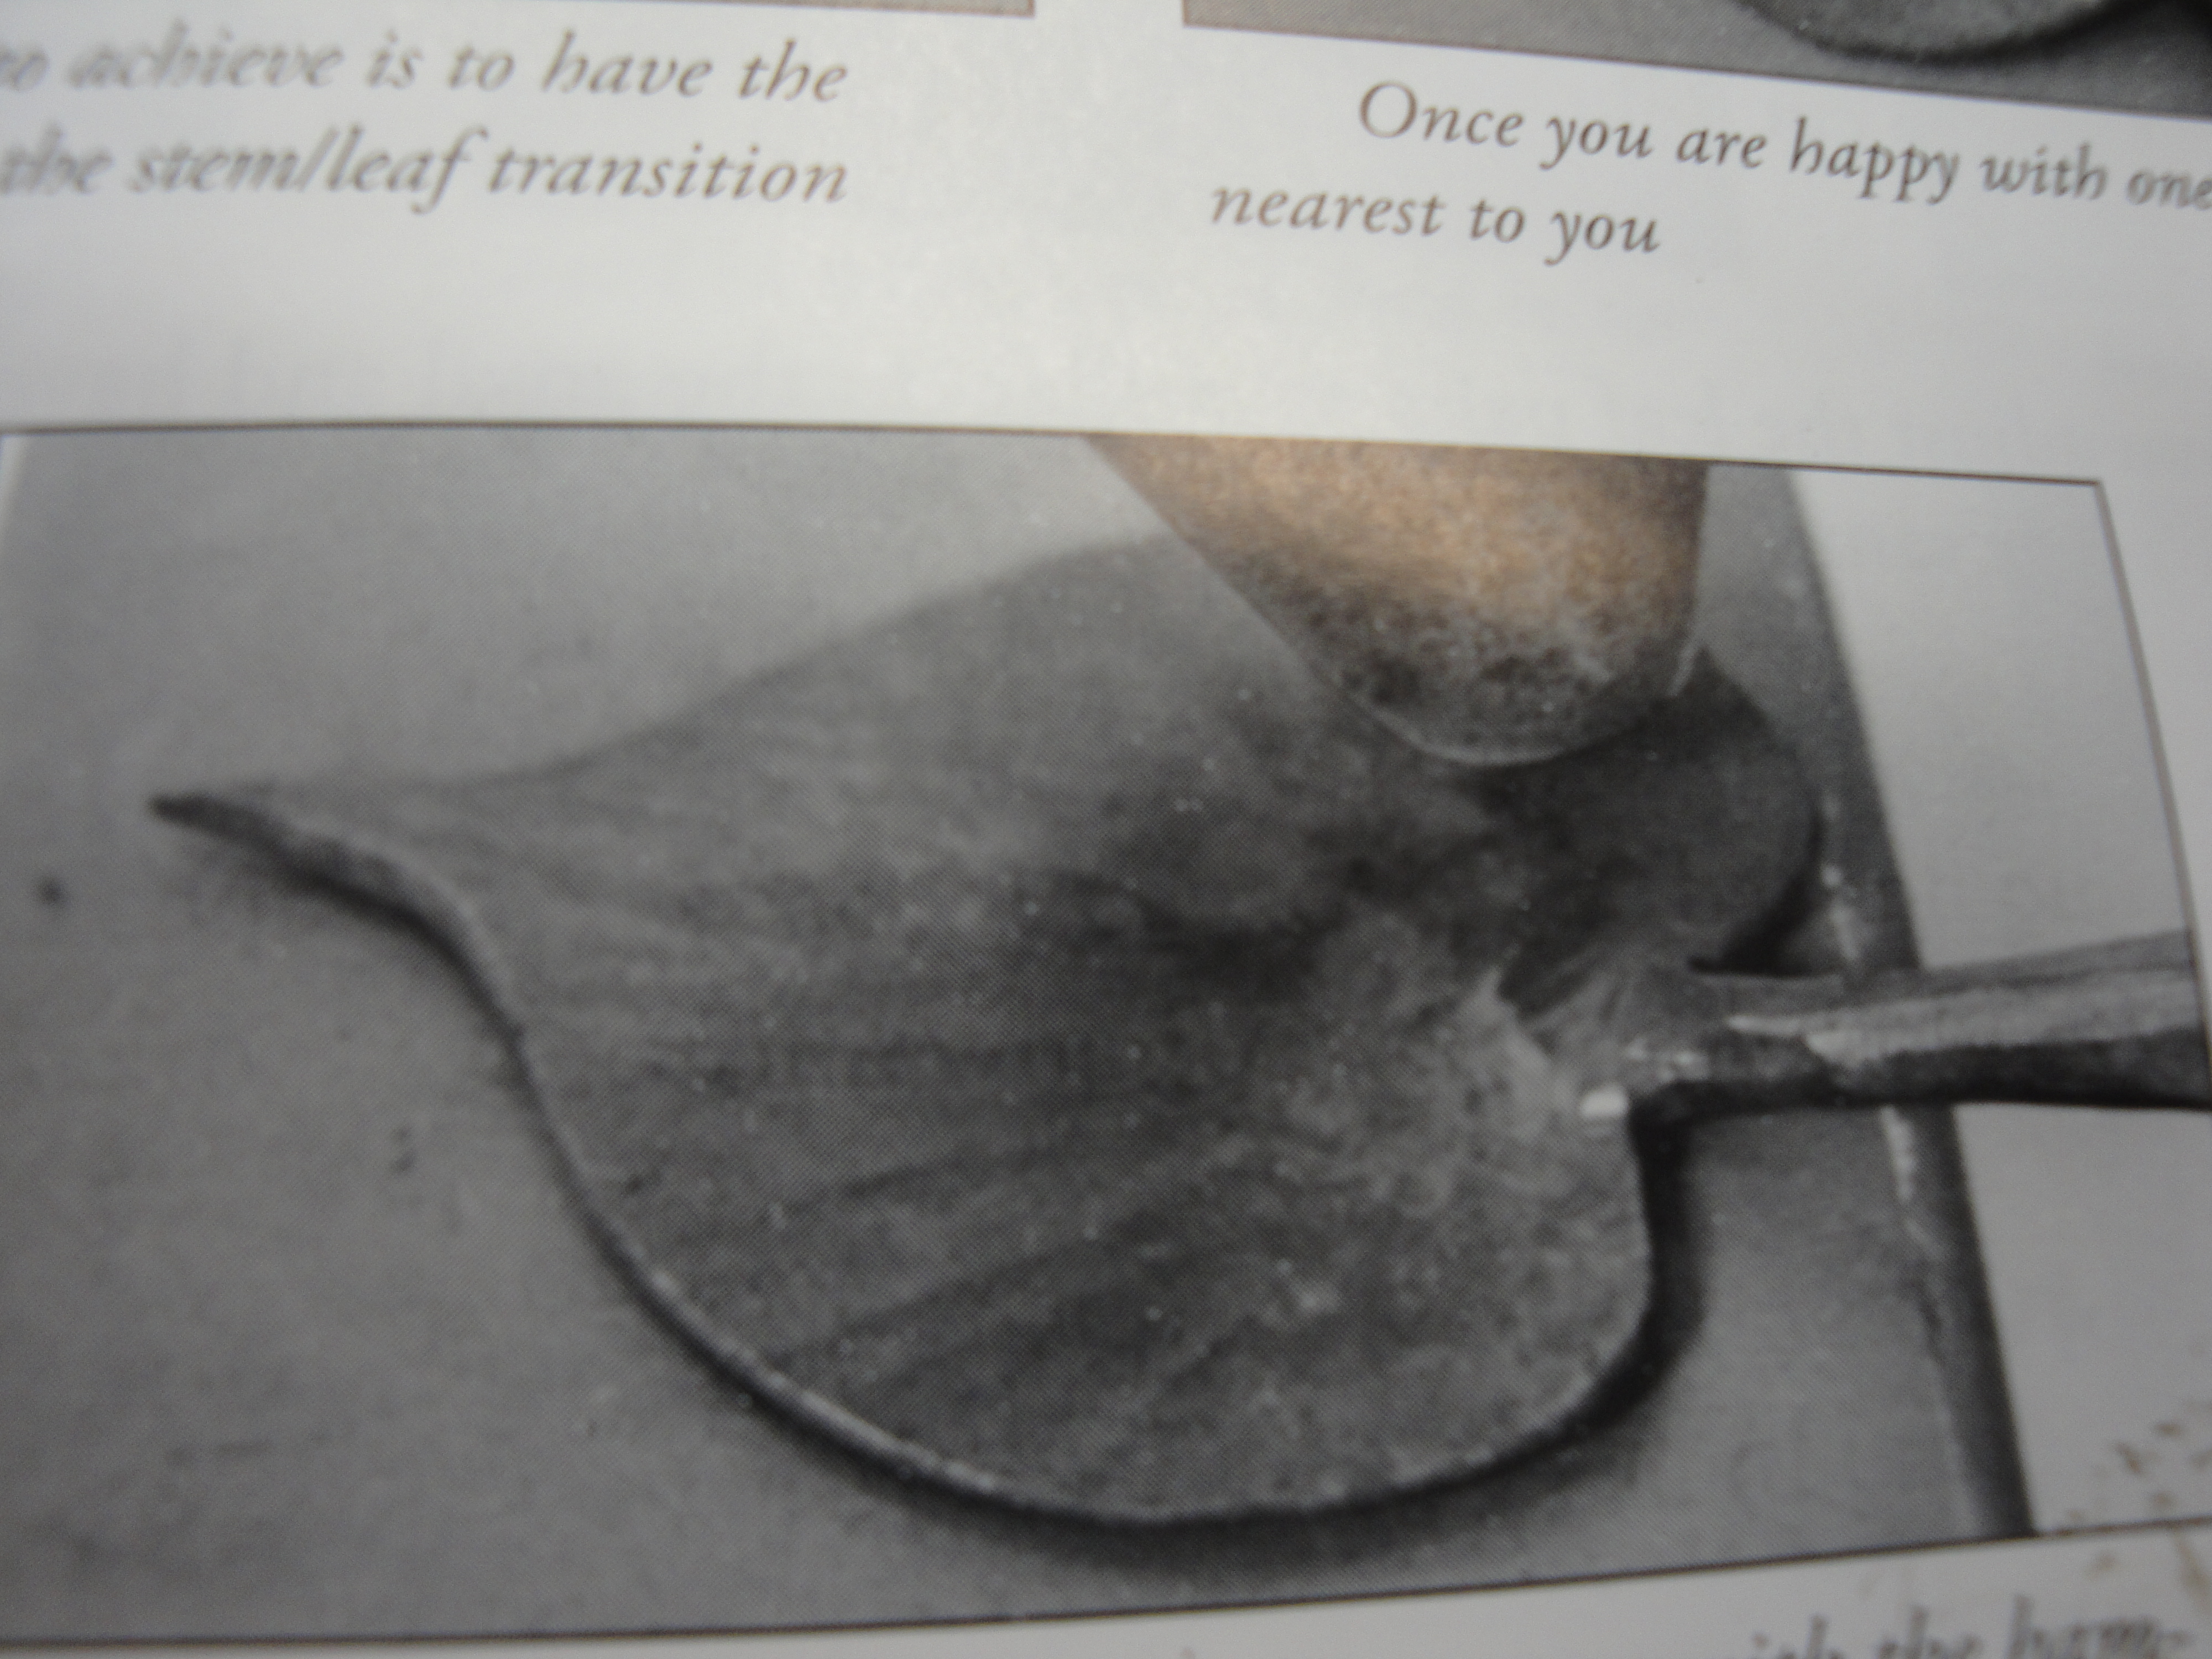
I am working on my blacksmithing leaf phase and ran into a problem with the cottonwood leaf. I've been following the Mark Aspery Vol 2 process of forging a cottonwood leaf. I have not been able to get enough material spread on either side of the stem and down towards the stem area. The leaf is actually supposed to spread out below the stem like the picture. I seem to run out of material to move down to the stem area. Picture the Aspery leaf and my leaf. Any suggestion on how to do this? Sorry about the picture size but I couldn't see how to make them smaller.
-
I've got a three burner Mankel forge w/blower. I was playing around with the air volume by opening and closing the cover plate at the air intake. I notice when It was at a mostly closed position the forge fire was swirling around the inside of the forge. I could see two eddies circling around. With the air intake at fully opened, the eddies disappeared. My question is "do the eddies help make it hotter" It was hard for me to really gauge the heat level as a three burner really put out the heat and I don't have a temp gauge. I'm assuming that with the air intake opened fully, the volume of air is increased greatly and heat should be increased.
-
What are the different steels that you use in place of coil springs? I do have access to sucker rod and the cost is easier on the wallet.
-
I used an old coil spring to make a cottonwood leaf. I made a point and back about an inch I made the stem. I rounded the stem and then went to flatten the leaf area. I used my 50 lb Little Giant to flatten the leaf and I could see a crack near the side of the flatten area about half way back. When I turned it over, I fond the crack traveled down towards the stem. I assume this was a flaw in the coil spring. It looked like a forge weld that didn't weld completely thru. I didn't forge weld it at any time. Any ideas as to why it would appear. Clearly it was a weak spot in the coil, but I thought it was a solid one piece of steel. I used my gas forge to heat it. I've used coil springs before and never ran into anything like this.
-
I went to my local auto paint dealer and they gave me a two solution process for preparing the metal. One was used to remove finger print oil and other oils. The solutions were mixed with water, and I had to dry them immediately after washing off the solutions. The times I did this I was lucky to have very low humidity. Even taking lots a care to scrub all the surfaces really well to remove all the oils and never touching the metal without gloves on, I still found little spots of rust that had grown when I just clear coated the bare metal. That was many years ago, and when I went to the auto paint dealer recently, they gave me one spray can to use. No washing or two solutions. Good luck.
-
A business name should tell people what you do. Like "I Forge Iron". It might have the word "blacksmith" in it for example. If I google the word metal, forge, or blacksmith, would it show up? Good luck.
-
What about epoxy or JB weld and then tig braze the back? I would only trust someone who really knows how to tig braze. Good luck.
-
The old power hammers usually start at about 25 lbs for the ram. I have a 50 lb Little Giant and I think that is minimum at times. You can always ease up on the power for lighter blows, but at a certain point, it won't hit any harder than the ram weight can produce. I like the 50 lb starting point. Good luck.
-
First, if it gets the job done, it's worth every penny. You can use it for spot welding things together. Run lots of practice strips to see how it works and how it penetrates. As a 110 machine it won't penetrate very deep, but it can be use for art or decorative work. You might find that you use it all the time. Good luck.
-
I am not familiar with the numbers for the spring steel you will get. Here in the U.S.A., Spring steel is use a lot for hand tool like punches or chisels. Some people normalize them and then heat treat them but others just shape them and use them. I usually get my spring steel from truck springs. Good luck.
Best Clear Coat for Complicated Sculptures?
in Finishes for Metal
Posted
I've used Automobile clear coat. It's designed to be out doors.