
Jon Kerr
-
Posts
293 -
Joined
-
Last visited
Content Type
Profiles
Forums
Articles
Gallery
Downloads
Events
Everything posted by Jon Kerr
-

Possibly Pine Anvil Stand
Jon Kerr replied to Drunken Dwarf's topic in Stands for Anvils, Swage Blocks, etc
Drunken Dwarf- here in the UK you can buy it easily on eBay. In fact, many sellers sell small quantities (100-200g per pack). 200g = £2.75. I bought one of these, keep it in an old tobacco tin, and its lasted ages. Next time I'll probably buy enough to fill a pour bottle Torbjorn Ahmen style. 1kg tub = £5.99. As for your Pine stand..... my stand is made from softwood sleepers, and edges at the top with pine 2x2" to form a kind of socket to sit my block anvil into. Occassionally I have dropped or placed hot metal on this rim. It flashes up with a little flame, chars a little, but not what I would describe as a fire hazard....... there are plenty of worse fire hazards around my shop, starting with the walls! Just be careful- keep track of hot metal, especially when chiseling off pieces or whatever, stay clean and tidy, and do a 5 minute sweep-up after forging while the fire goes fully out.
-
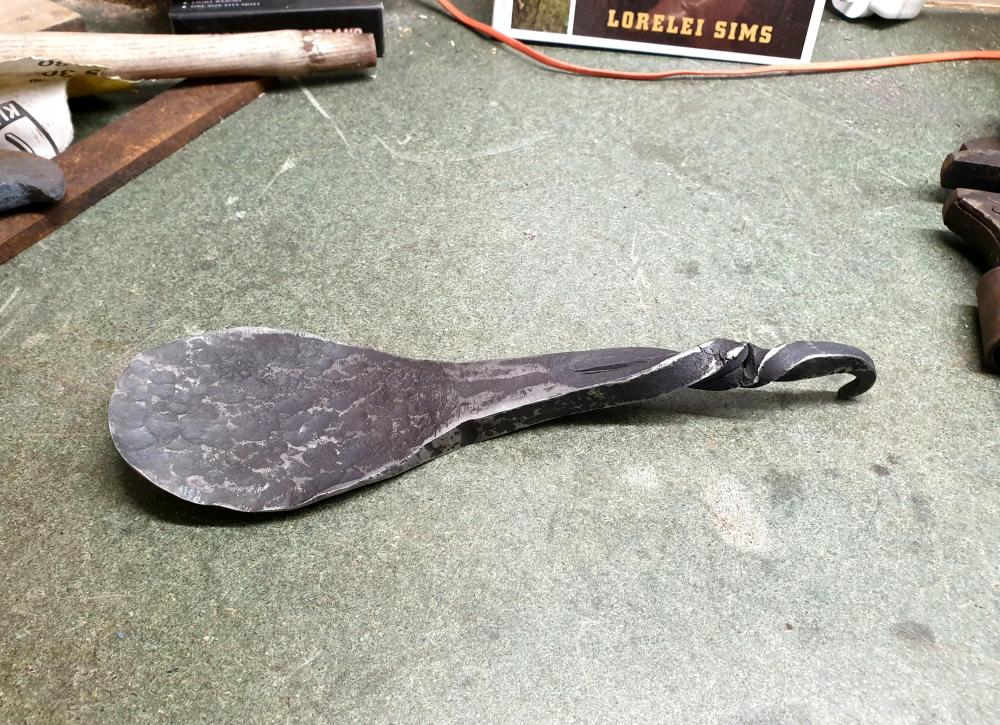
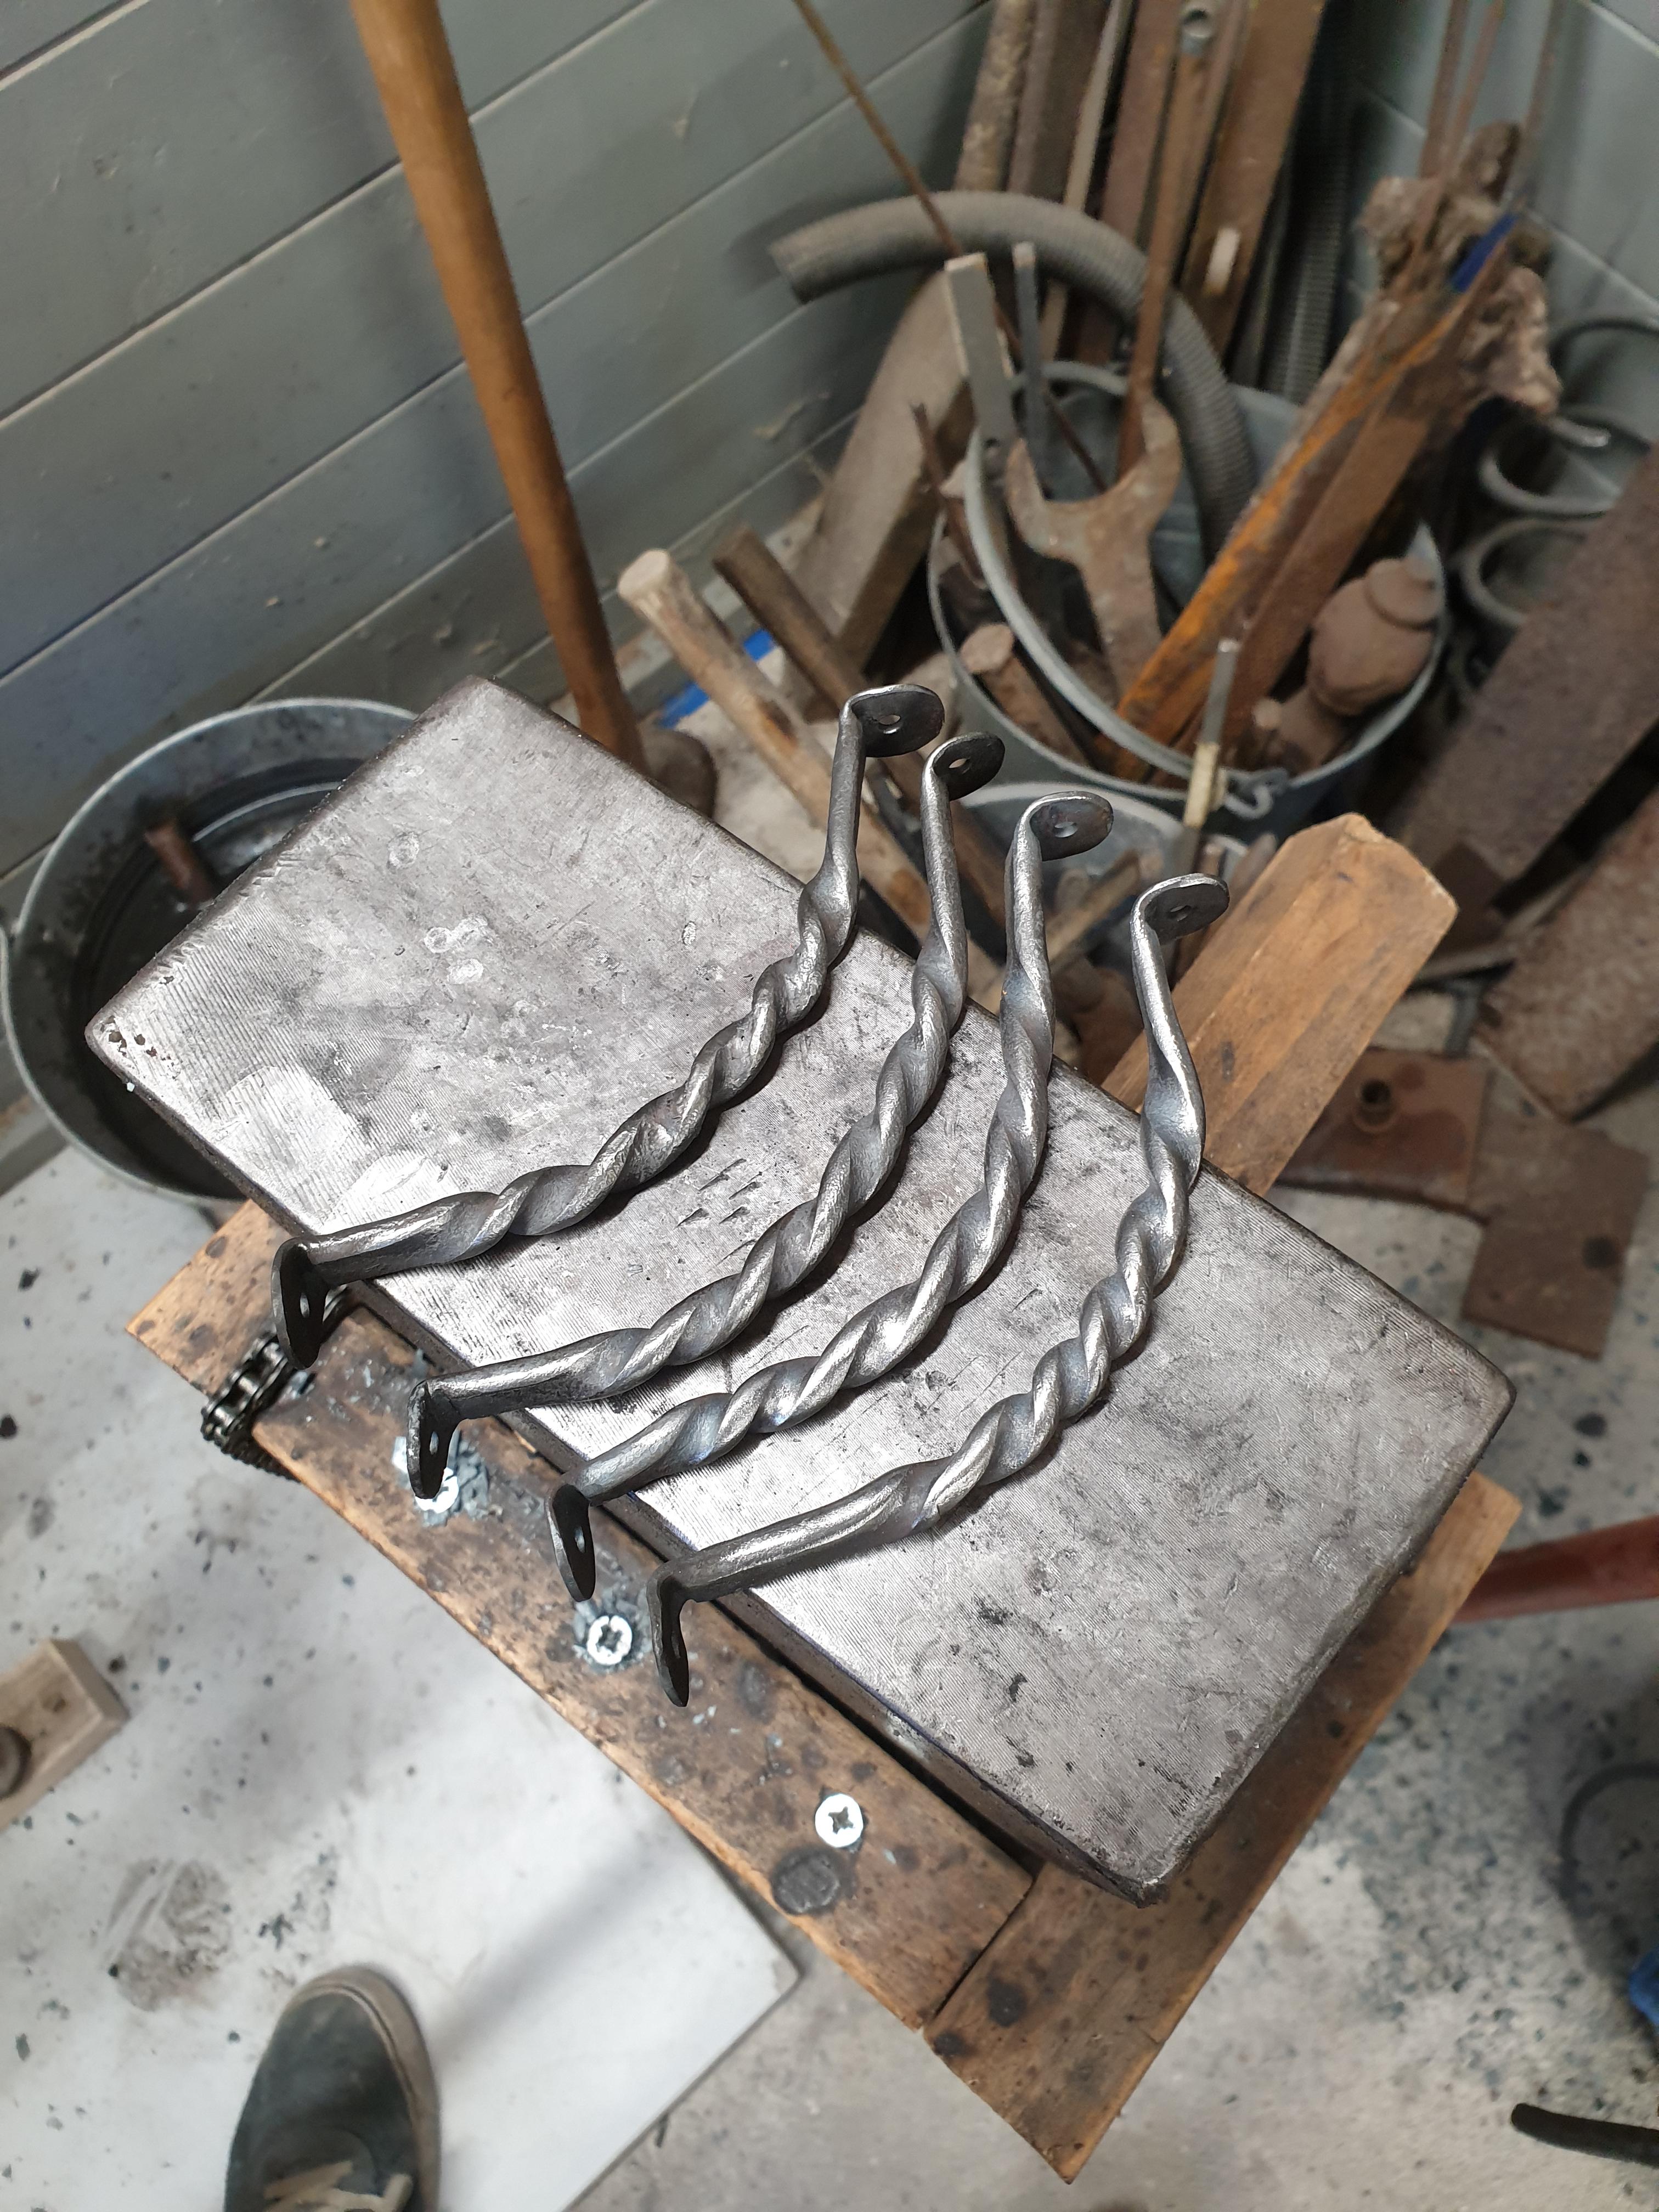
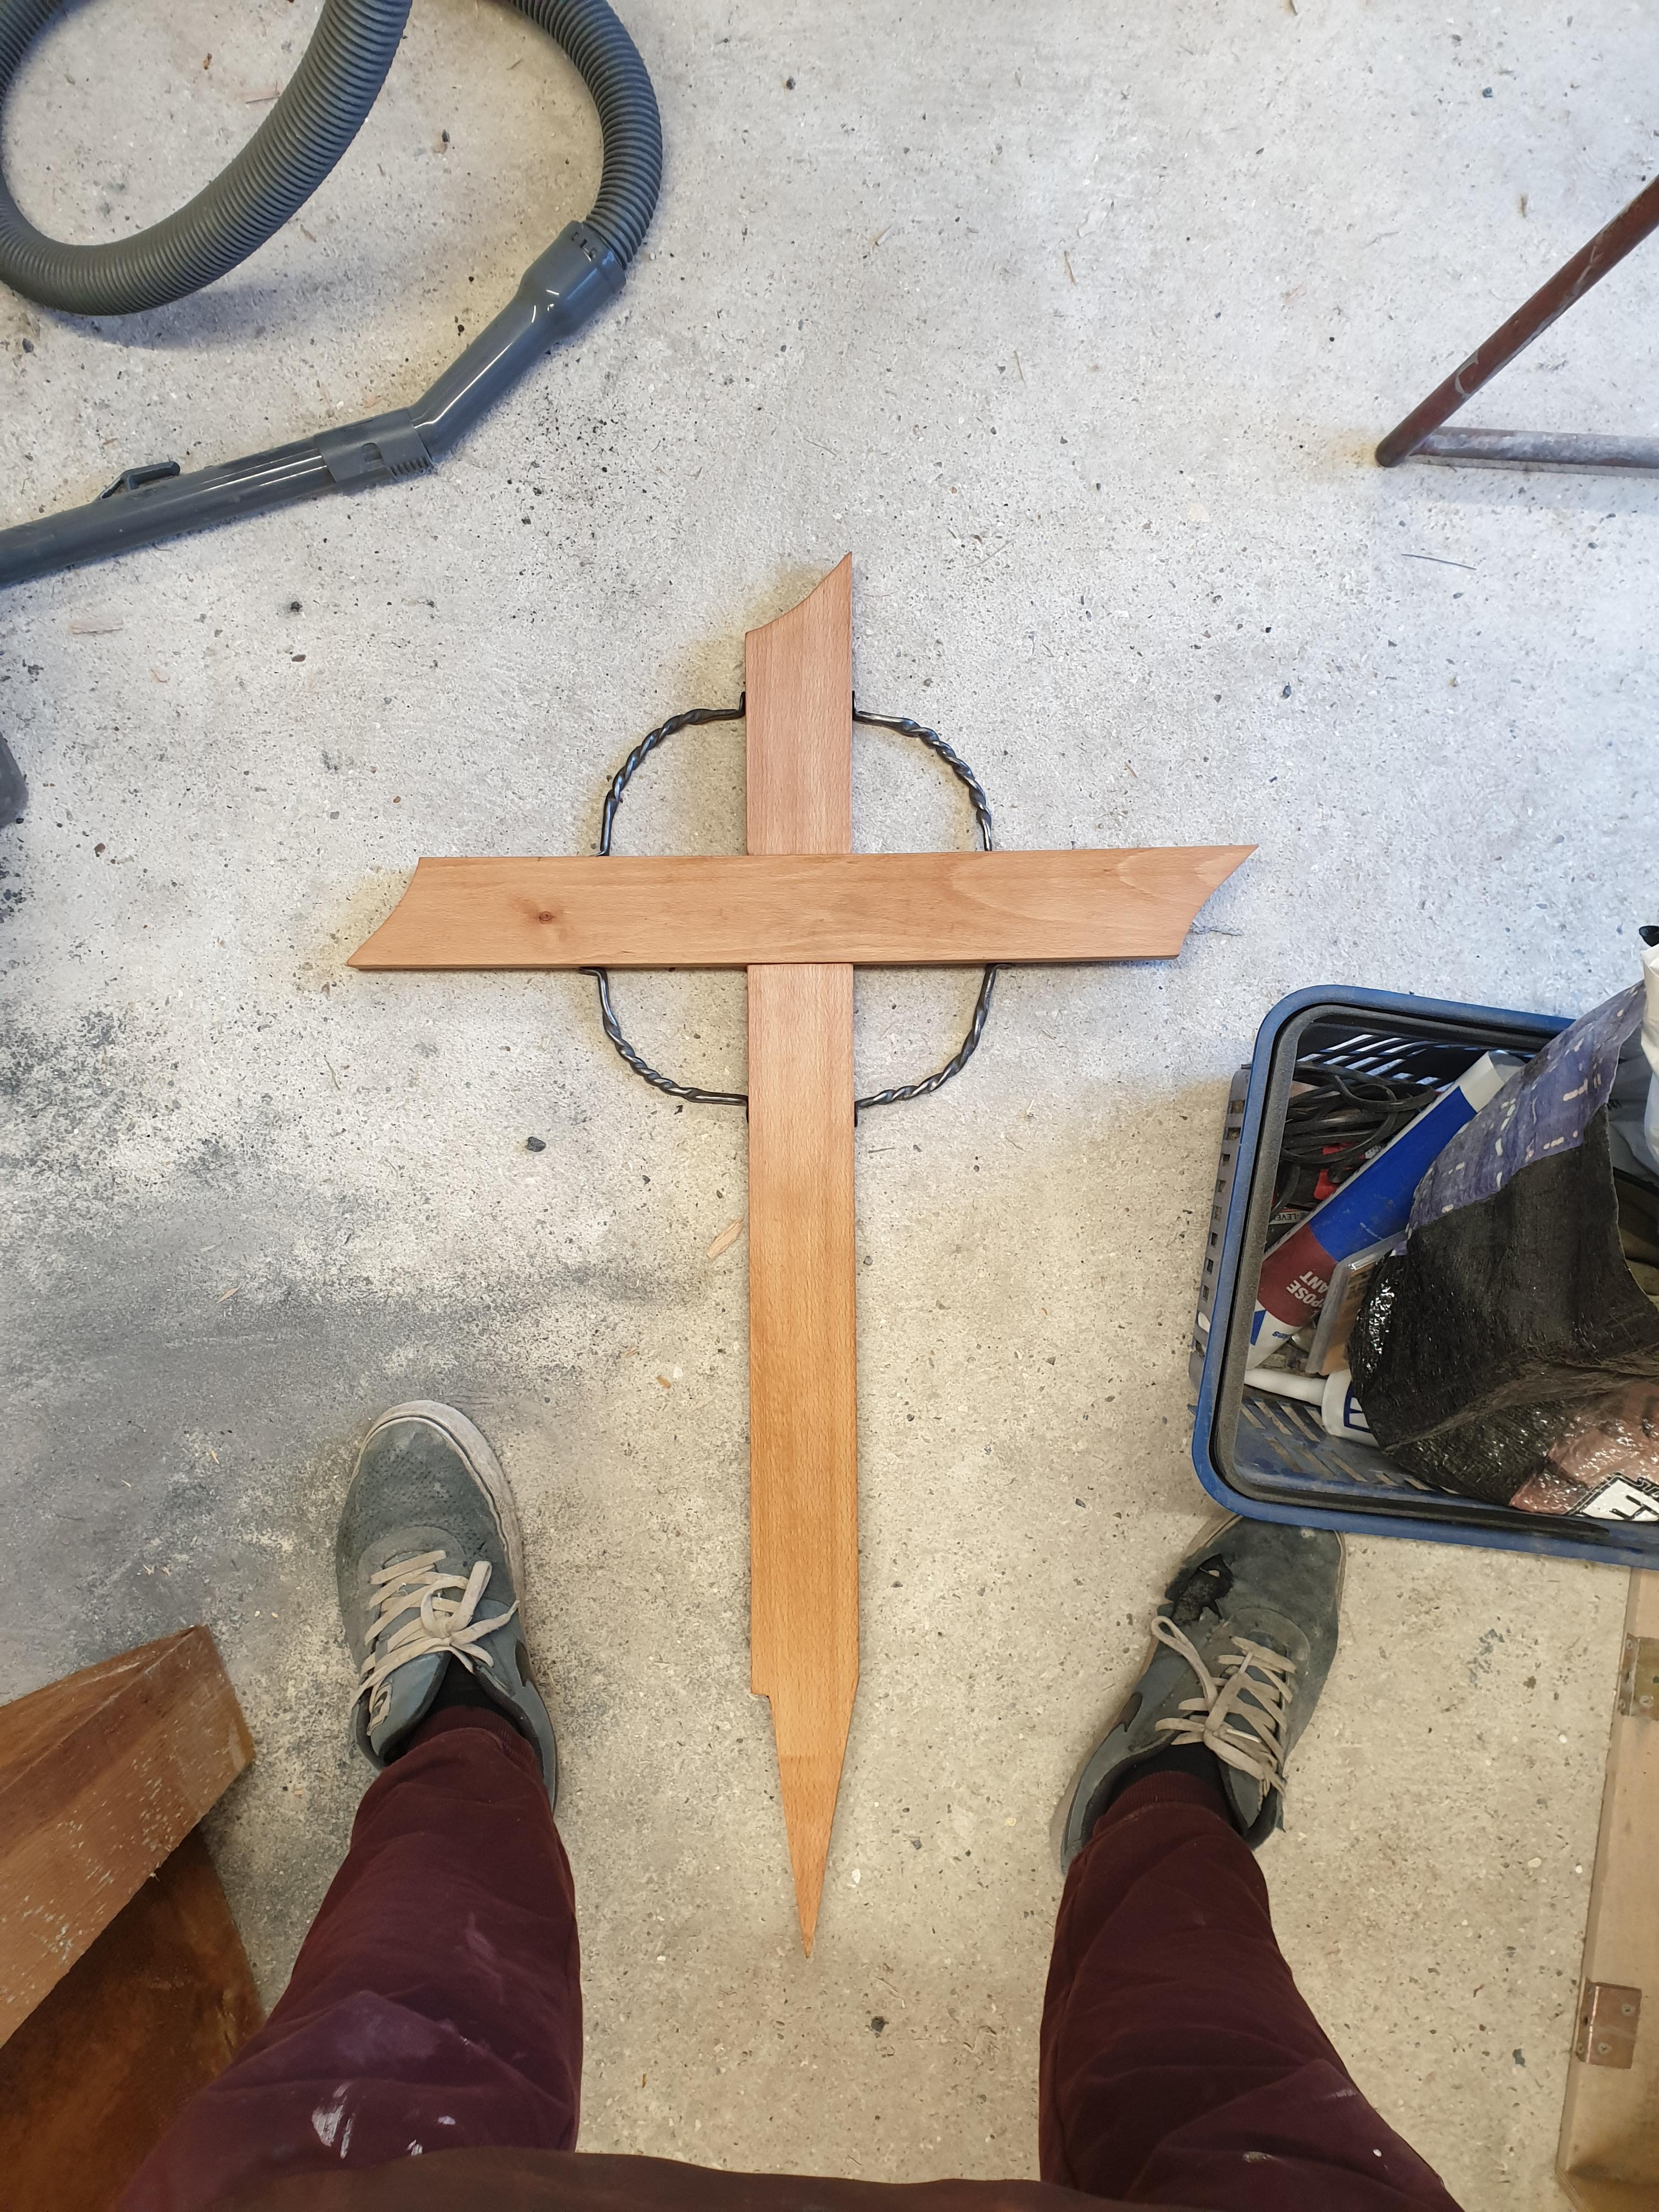
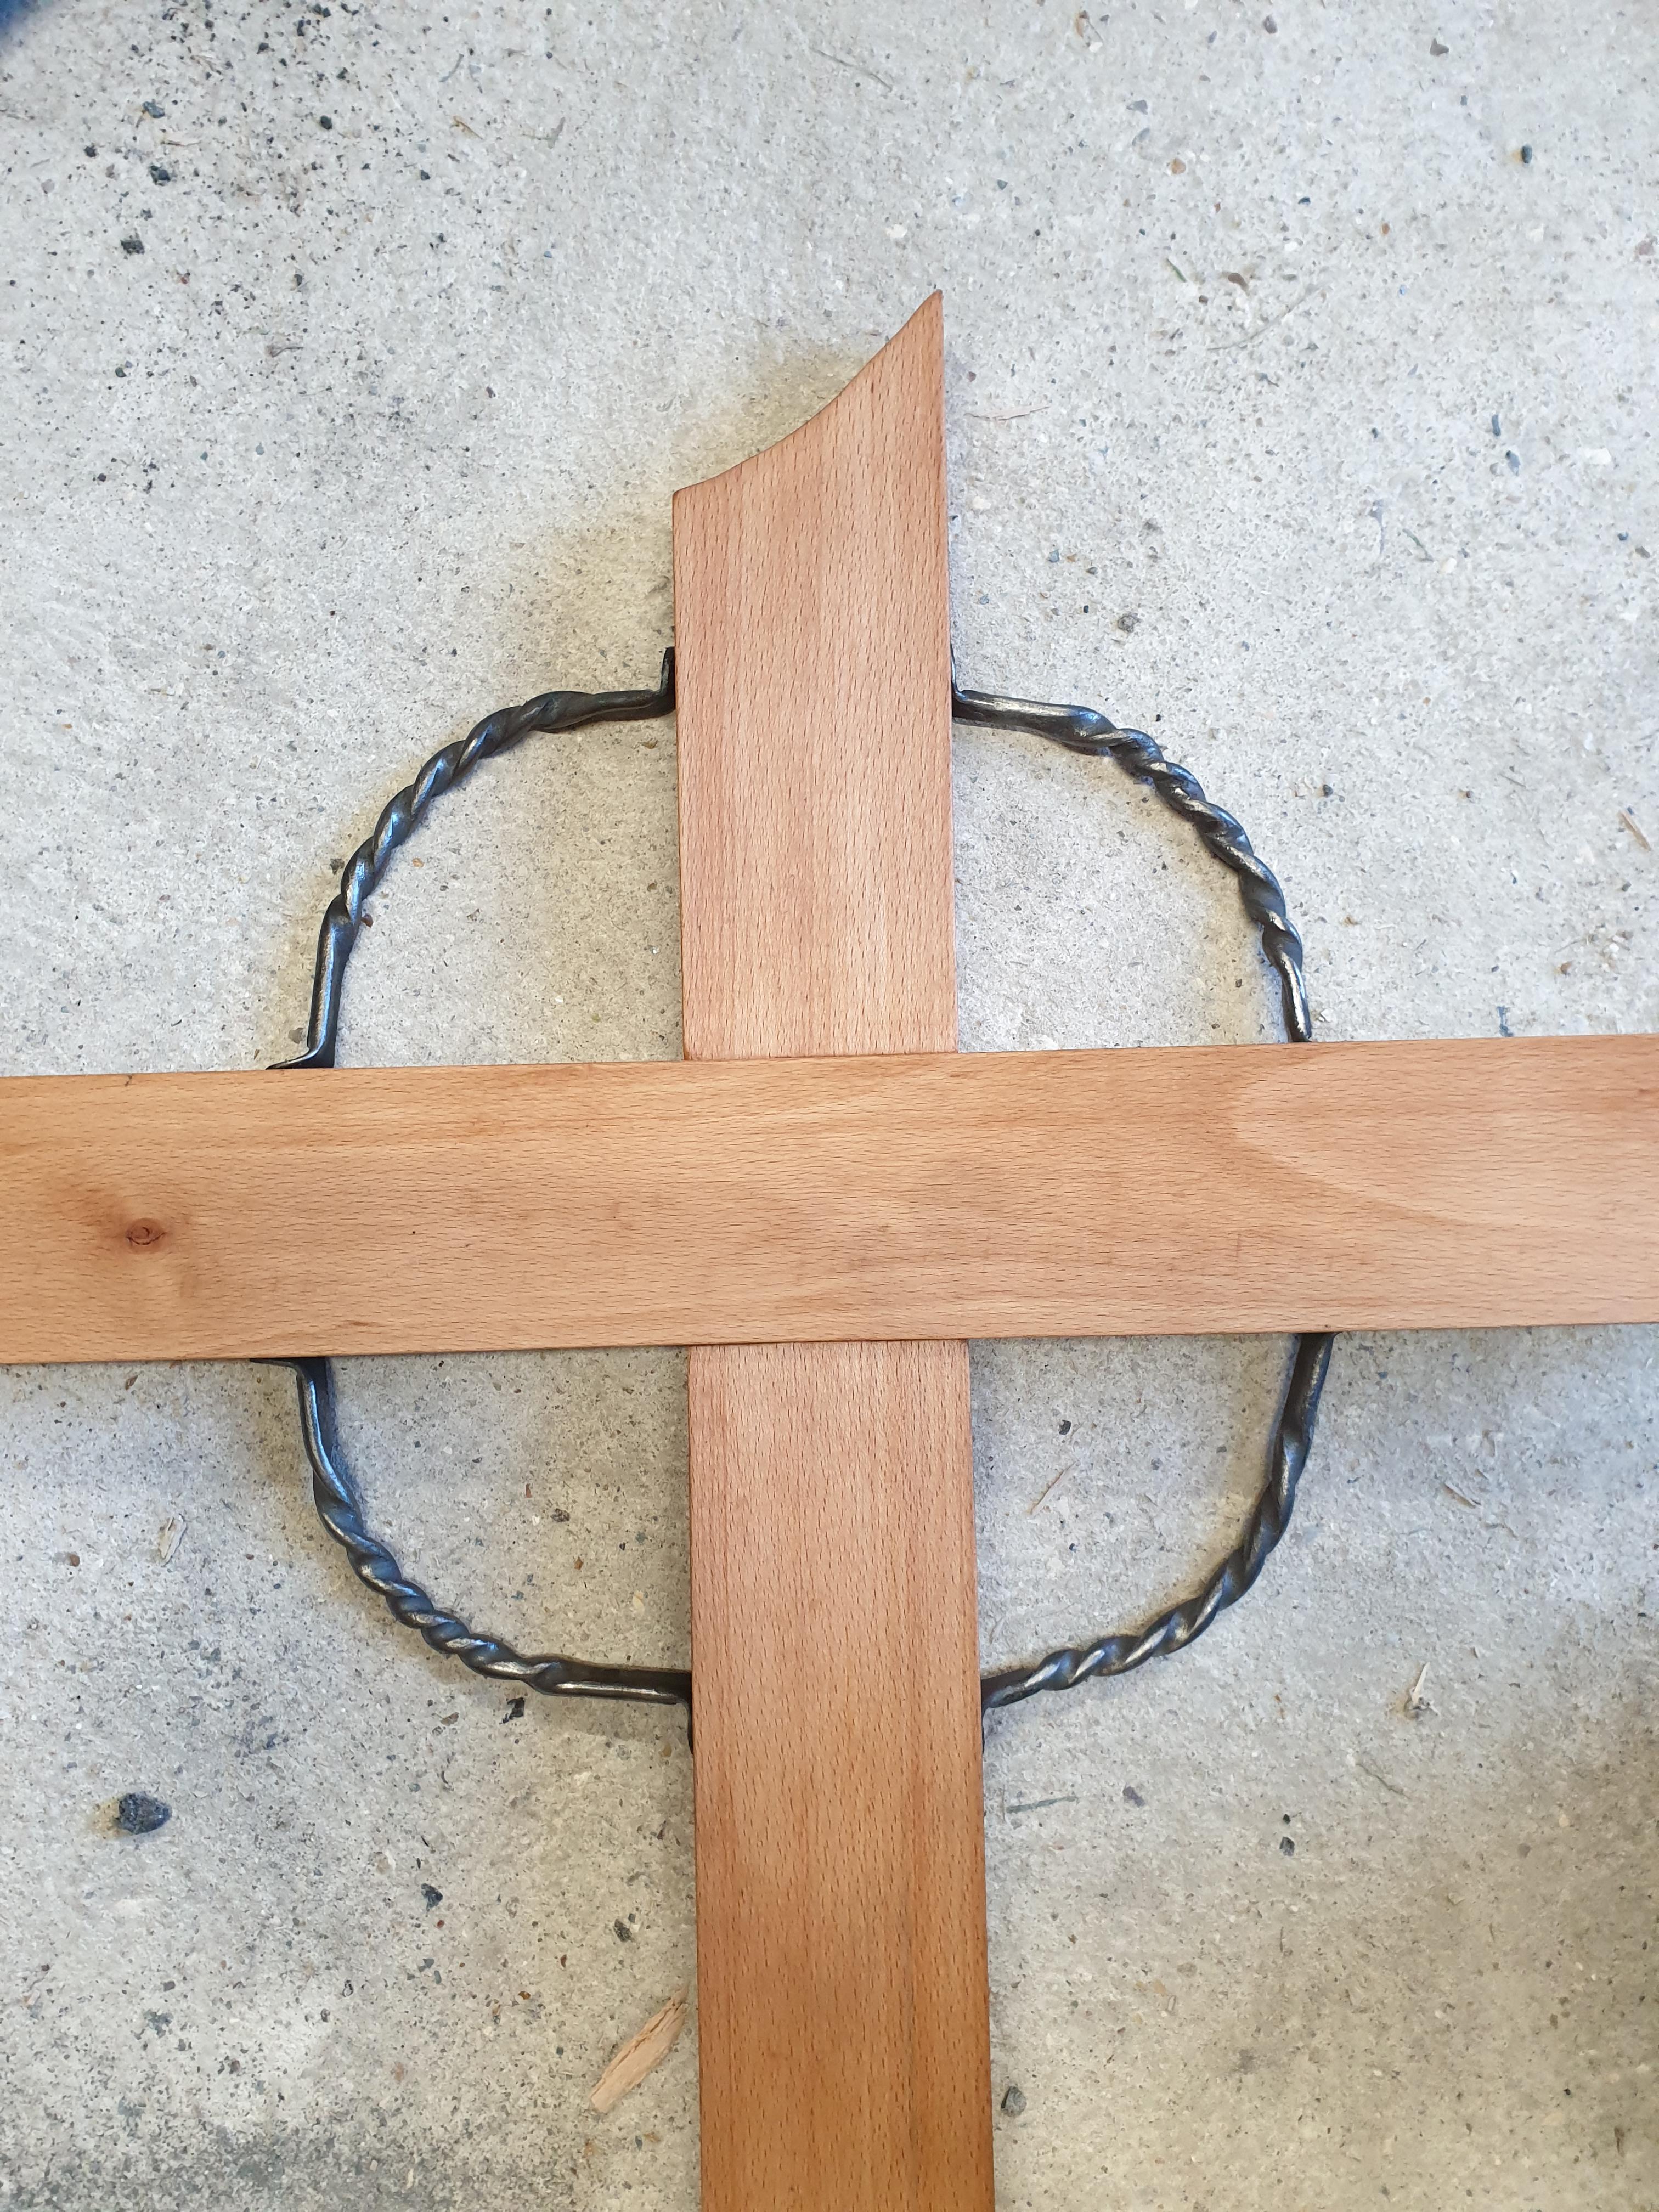
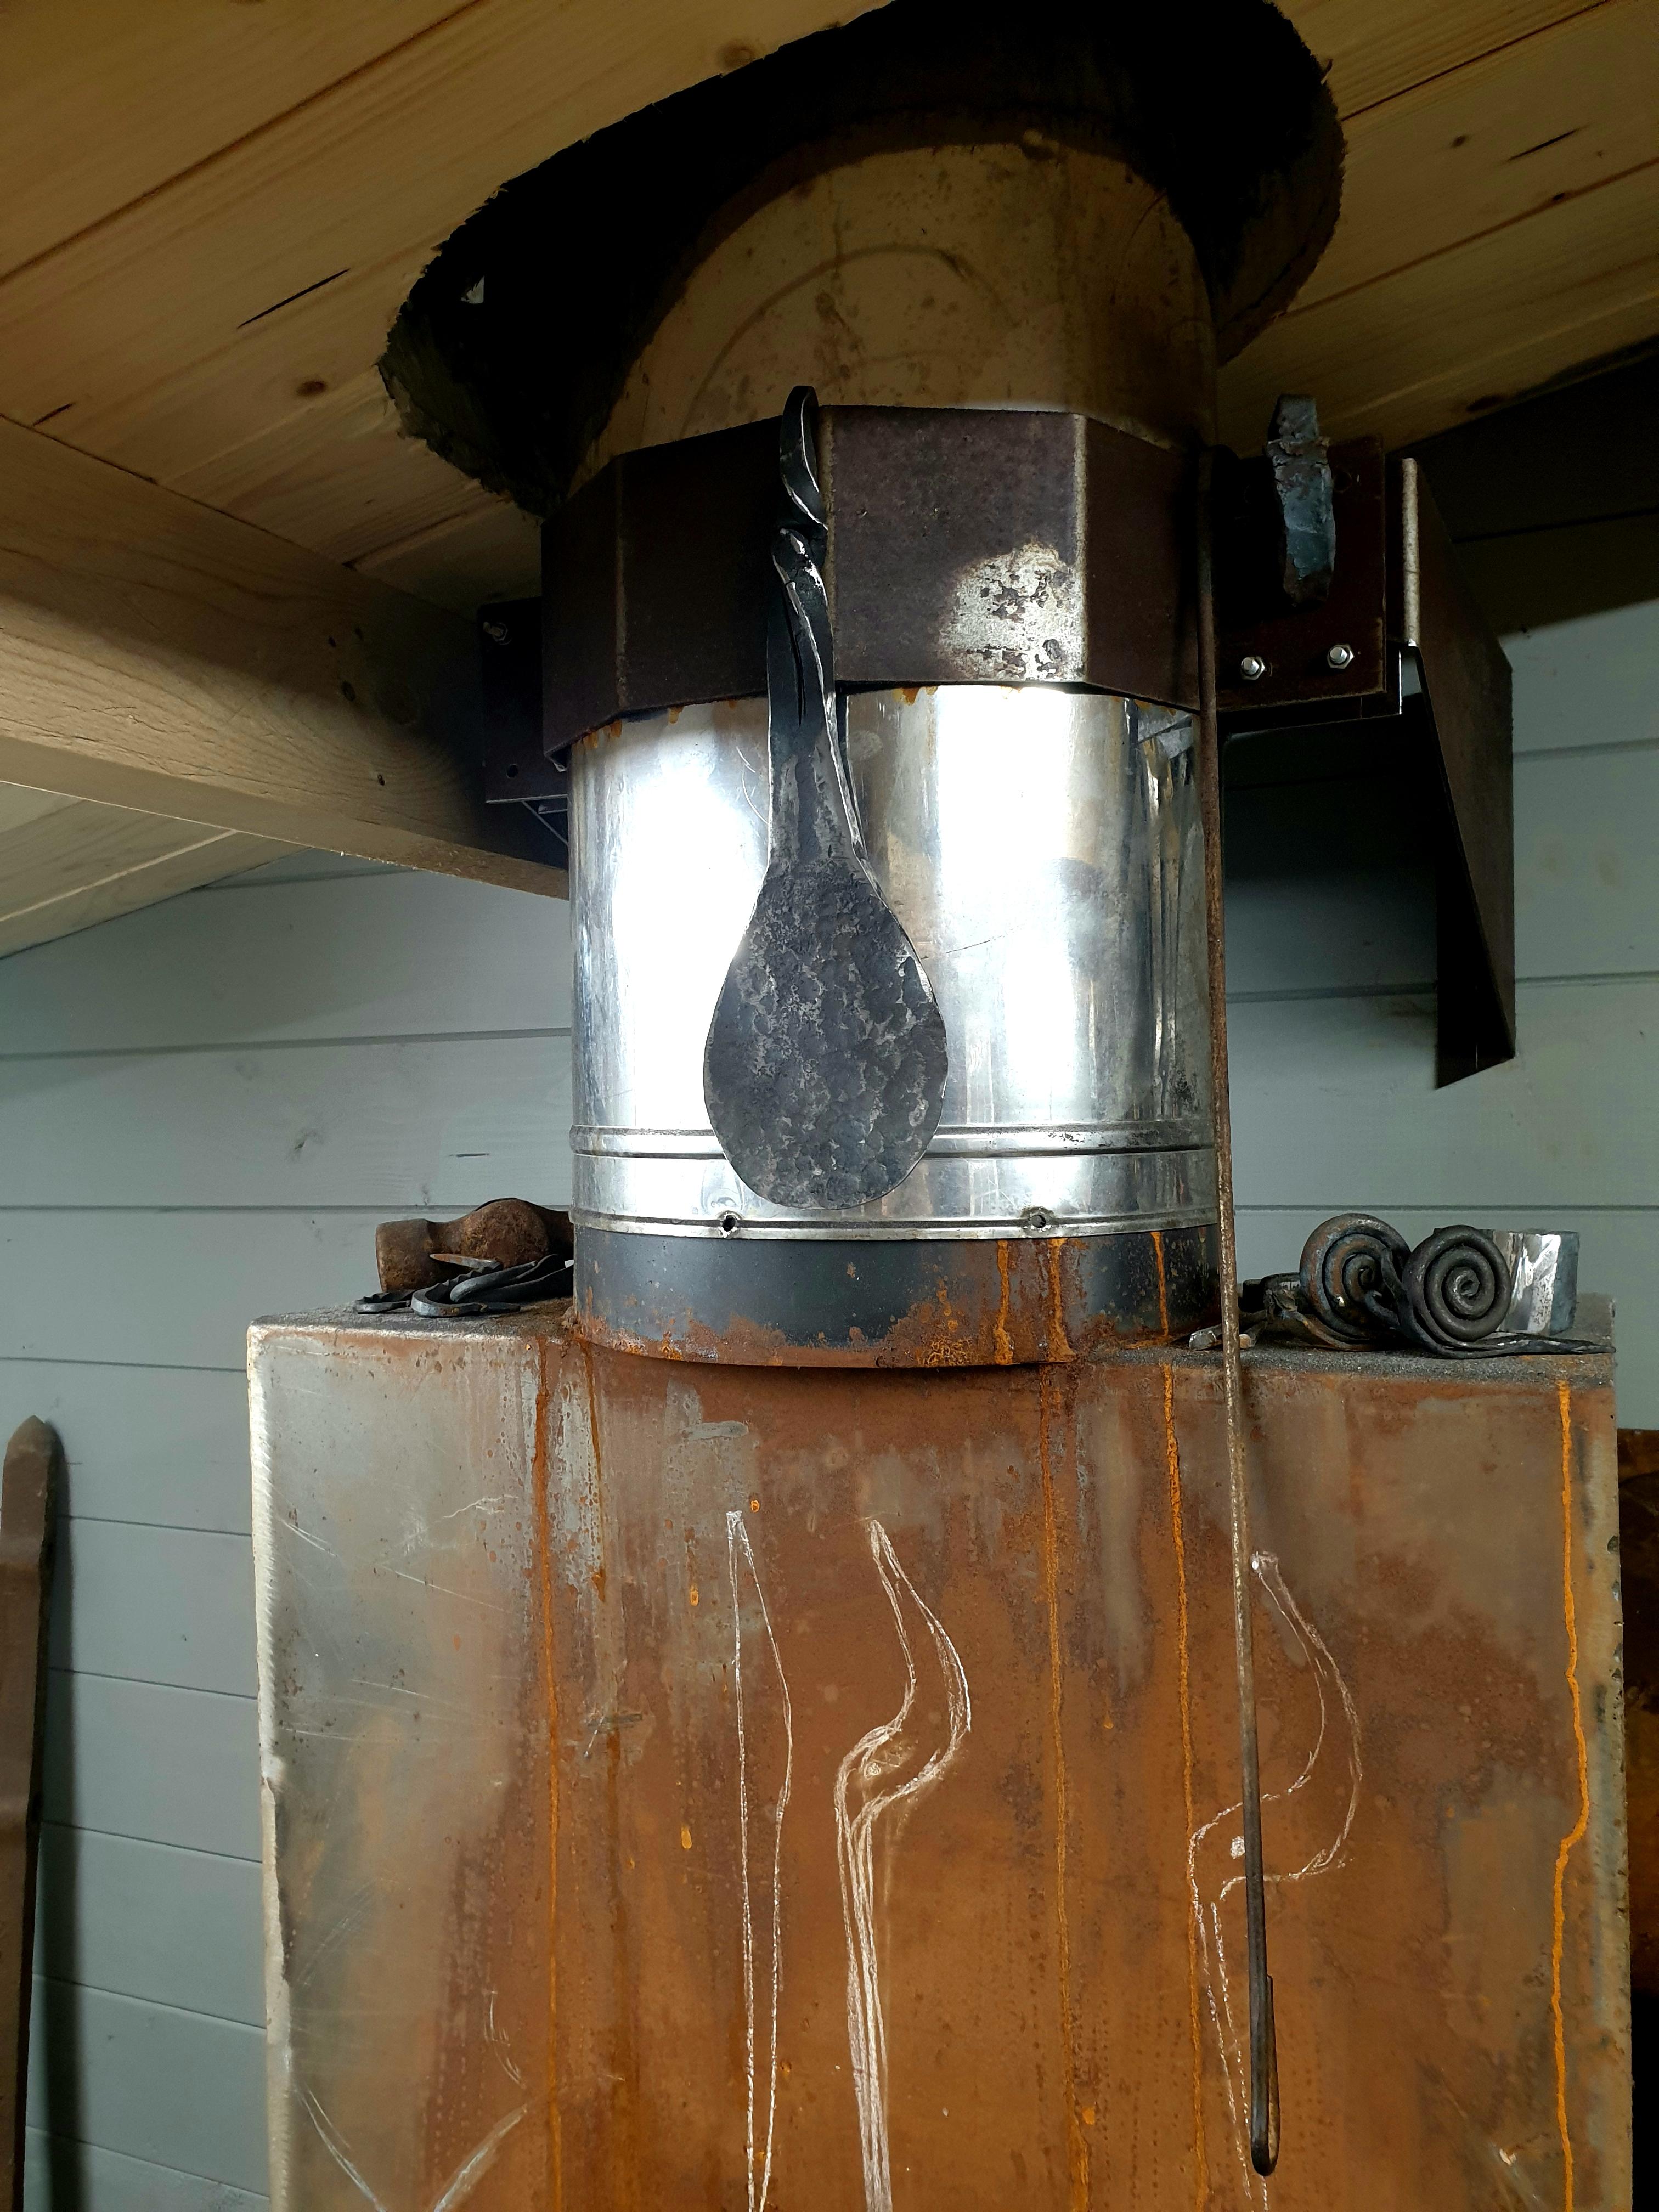
Spoon fixed. Confession: there are, or course, massive cold shuts running the entire length thanks to the chisel line from before..... but its hardly going to effect the functionality of a spoon handle. I need some help and advice on another project, please... I'm trying to make a cross for my wife's grandfather who recently passed away. Its a temporary grave marker for the 9 months till the ground settles and headstone can be placed. He was a carpenter, so I wanted to do a nice job, hopefully something he would not be ashamed to have on his grave. He was also a proud Irishman, so I figured a celtic cross with a ring would be nice, and I could forge the pieces of the ring. I'm happy with them so far, but I'm worried they do not form a perfect circle. While working I was matching them to a chalked line to try and get the correct curvature but they're not perfect. Any tips for getting the curves perfect? Or do you think they look good enough as is?


-
!!!!!!! It looks pretty good to me! I'd kill for a nice anvil like that. A few chips here and there but plenty of workable surface and plenty of intact lengths of edge for setting down etc. Have you forged much on this anvil yet Ted? I don't know what your experience level is so hard to say what you need from an anvil. Where is your desire to "repair" this Anvil coming from?: - "Tool Performance"? Looking at the pictures I'd be very surprised if that Anvil wont do anything that a beginner or intermediate blacksmith needed. If you were a full time professional blacksmith/bladesmith then maybe you'd want to upgrade.... but in that case just invest in a new or better condition anvil! - "Preserving Heritage" I understand the desire to want to preserve old tools and keep them in service for many years but.... in many ways you will actually ruin the heritage of this anvil by repairing it, especially if the repair goes wrong or has some undesireable side effects! -"Perfectionism" Do you just want to see a nice clean anvil with sharp edges, a mirrored face, no flaws?..... thats just not what most anvils look like and not necessarily what a blacksmith would even want. Often, the flaws can actually be used by an experience smith as tools. Sag in a small section of anvil can be used to flatten objects or fix bends. Chipped edges (tidied up to be safe) can provide a range of radiuses along the edge of an anvil. A rougher surface anvil is sometimes desireable (as with rougher hammers) as it stops the material skating around. The surface will polish up under hot metal anyway. I wouldnt touch that anvil with a welder or grinder and would happily get decades of forging out of it. I hope I'm lucky enough to be able to afford one similar at some point!
-
Really sorry to hear about your issues Pnut. Hope you manage to find a solution. I encountered a similar problem where I'd set up an outdoor weights gym in a secluded area near my work. Our (engineering) company owns a large site, most of which is abandoned, and much of which is large empty fields and greenery. My gym was in one of these abandoned zones in a small grassy area out of sight behind a building. I kept everything neat and tidy in as small an area as possible when out of use (probably a couple of metres square) against an old wall. Unfortunately, the gardener decided that, rather than leave this tiny area of grass un-mowed, he would destroy my equipment. Not just move it- destroy it, to the point at which it was past economic repair. He smashed the items and threw them into a nearby ditch. While I appreciate it was his job to mow the grass under the gear- nobody would have ever noticed, and a conversation following a notice on the noticeboard asking for the owner of the equipment would have been far more reasonable than destruction of property.... even if the property was in a public area. I'll never understand why someones first course of action would be to trash it. .. fortunately my colleagues calmed me down and convinced me not to insert the broken equipment into a bodily cavity which would have required removal by a team of medical specialists. Make sure you are calmer than I was when you speak to the pastor! Best of luck and hope you get resolved.
-
Hi Ted, welcome to the forum. If you havent yet, please check out the READ THIS FIRST! thread. Most importantly, add your location to your profile. This helps people provide advice tailored to your location, and you might even get lucky and find an expert close to where you live. As for your anvil...... I can almost guarantee you'll be advised not to attempt to "repair" it unless you have a lot of experience doing so, or can find someone who is an expert in anvil repair. Generally, attempting to repair the anvils results in more harm than good. Welding can damage the hardness of the original face, and grinding is guaranteed to reduce the life of the anvil as you are removing the hardened layer rapidly. More often than not, even a battered old anvil is perfectly useable as-is as for most forging you are only using a very small area at a time (the area underneath your hammer!). The advice is often to use the anvil in-earnest for at least a year before considering making any alterations (2000hrs of forging!). If you have some pictures, that will help others give more specific advice to your case. All I can say is.... don't do anything drastic and put the grinder down till you weighed up all the options!
-
Thoughts go out to anyone affected.
-
My blower has a foot pedal, but I'm finding with coke I need it on all the time so I've basically rested a hammer head on the pedal so it's always on. I control the air flow with the valve on the Iron Dwarf forge. (my blower is noisy as hell though unfortunately!) I'm learning about burning stuff the hard way. I was excited to have my friend in the shop, and I got caught out once we'd drawn the steel down to a smaller size and the heating times went down accordingly. The handle is too big anyway. For now, its structurally sound and I can use it as-is (its better than the rubber handled garden trowel that I was using before!). There's enough material to cut off at the burn and draw out much longer.
-
A collection of improvised anvils
Jon Kerr replied to Charles R. Stevens's topic in Anvils, Swage Blocks, and Mandrels
True and true! -
A collection of improvised anvils
Jon Kerr replied to Charles R. Stevens's topic in Anvils, Swage Blocks, and Mandrels
Looks awesome JHCC. The only thing I dont like is the fixed hot cut because I can imagine myself losing a finger. GREAT idea with the notches in the stand so it can be laid side-on. Have you considered drilling out a square (ish) hardy hole in the thin web in that orientation? That side on view gives me so many other ideas for tooling too. With access that way you could grind in bending forks and all sorts. I'd echo Pnut's comments- theyre very lucky to have you helping out! -
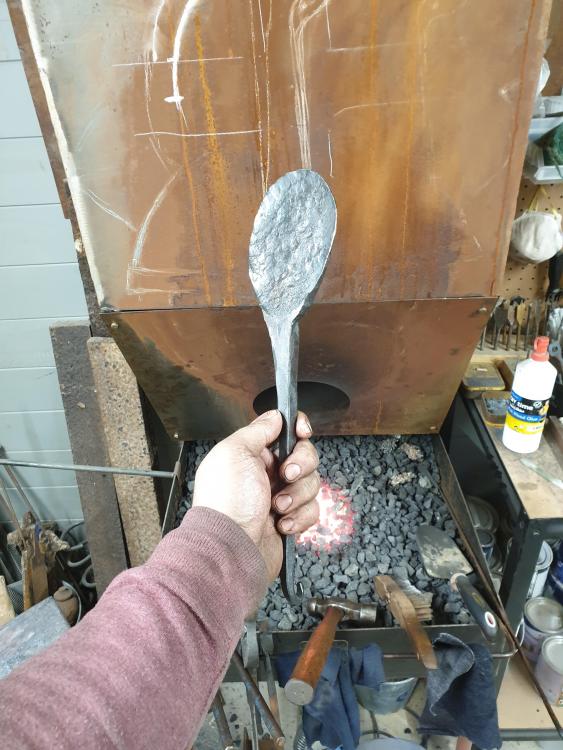
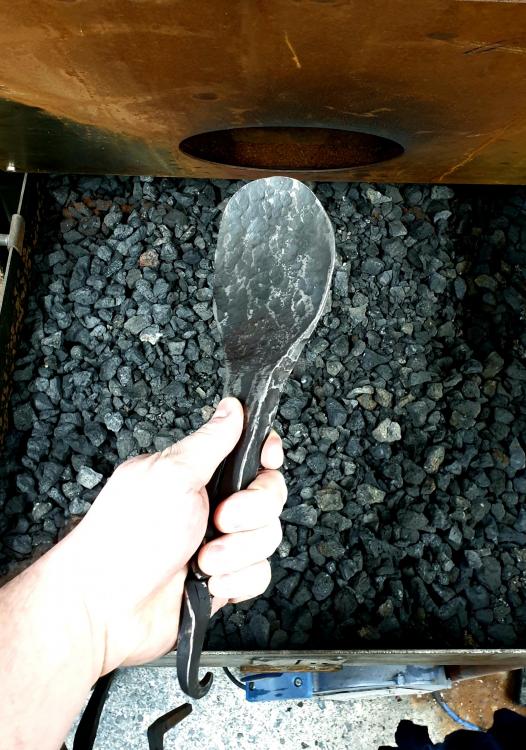
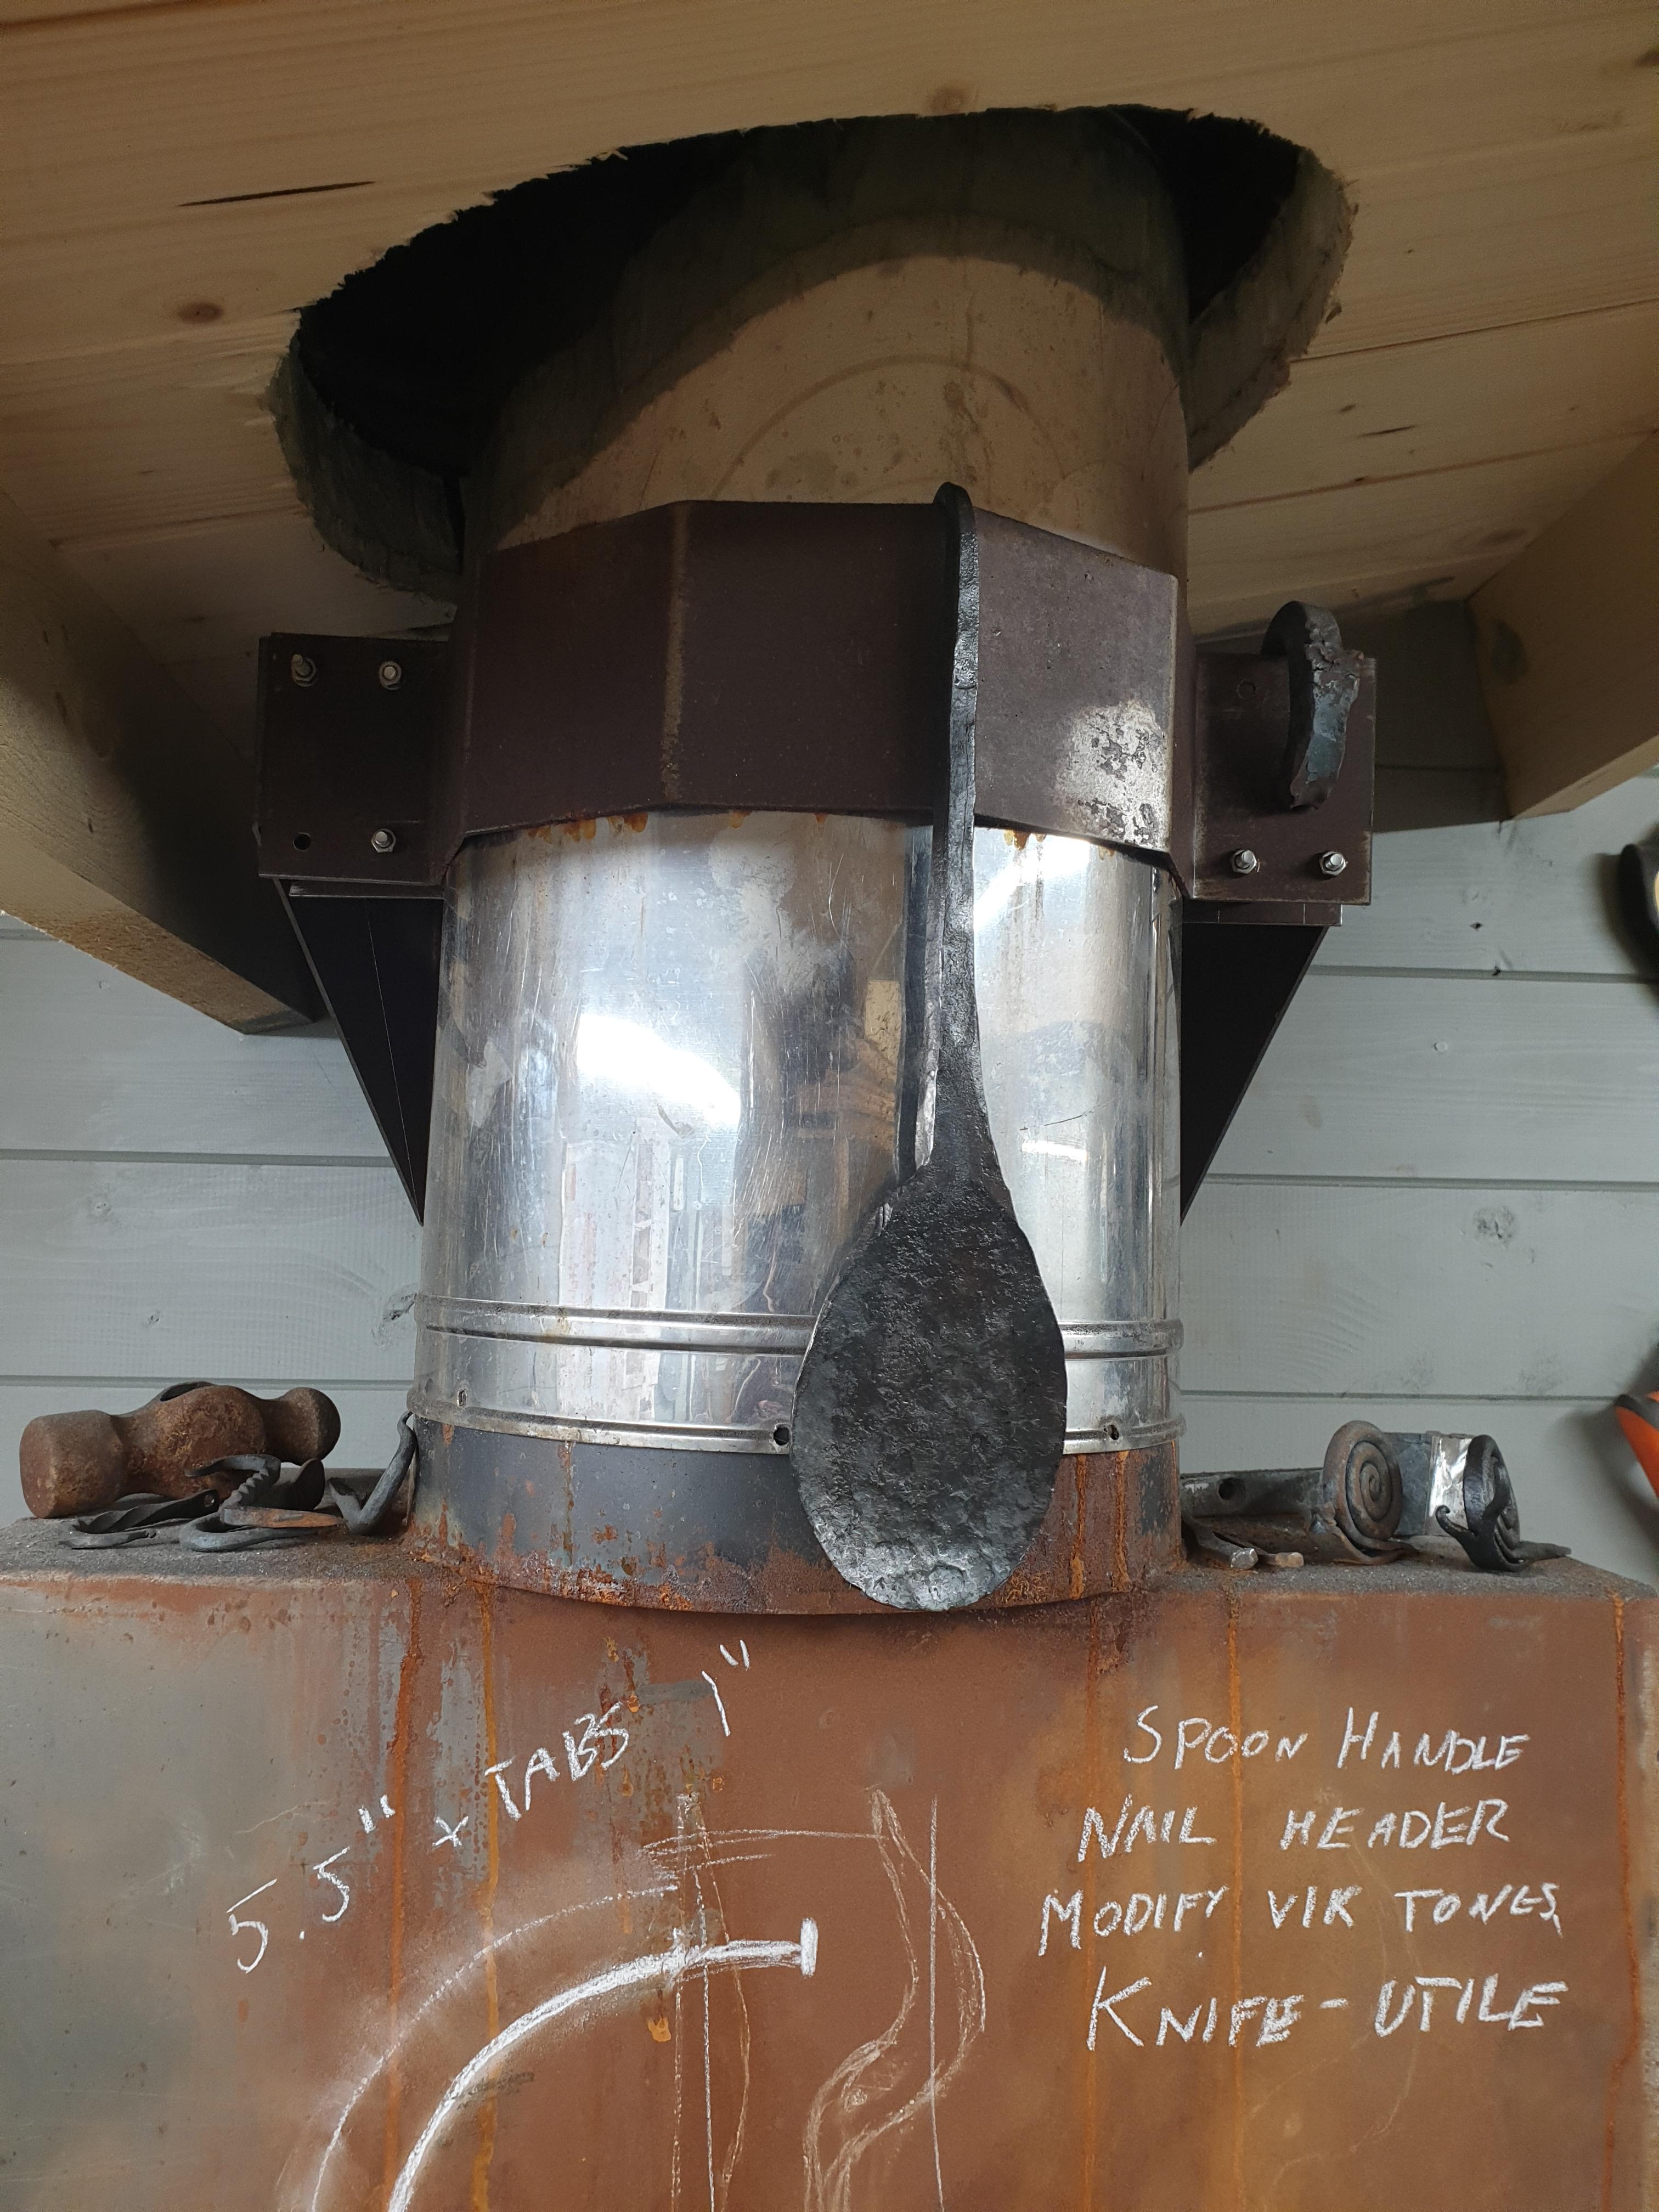
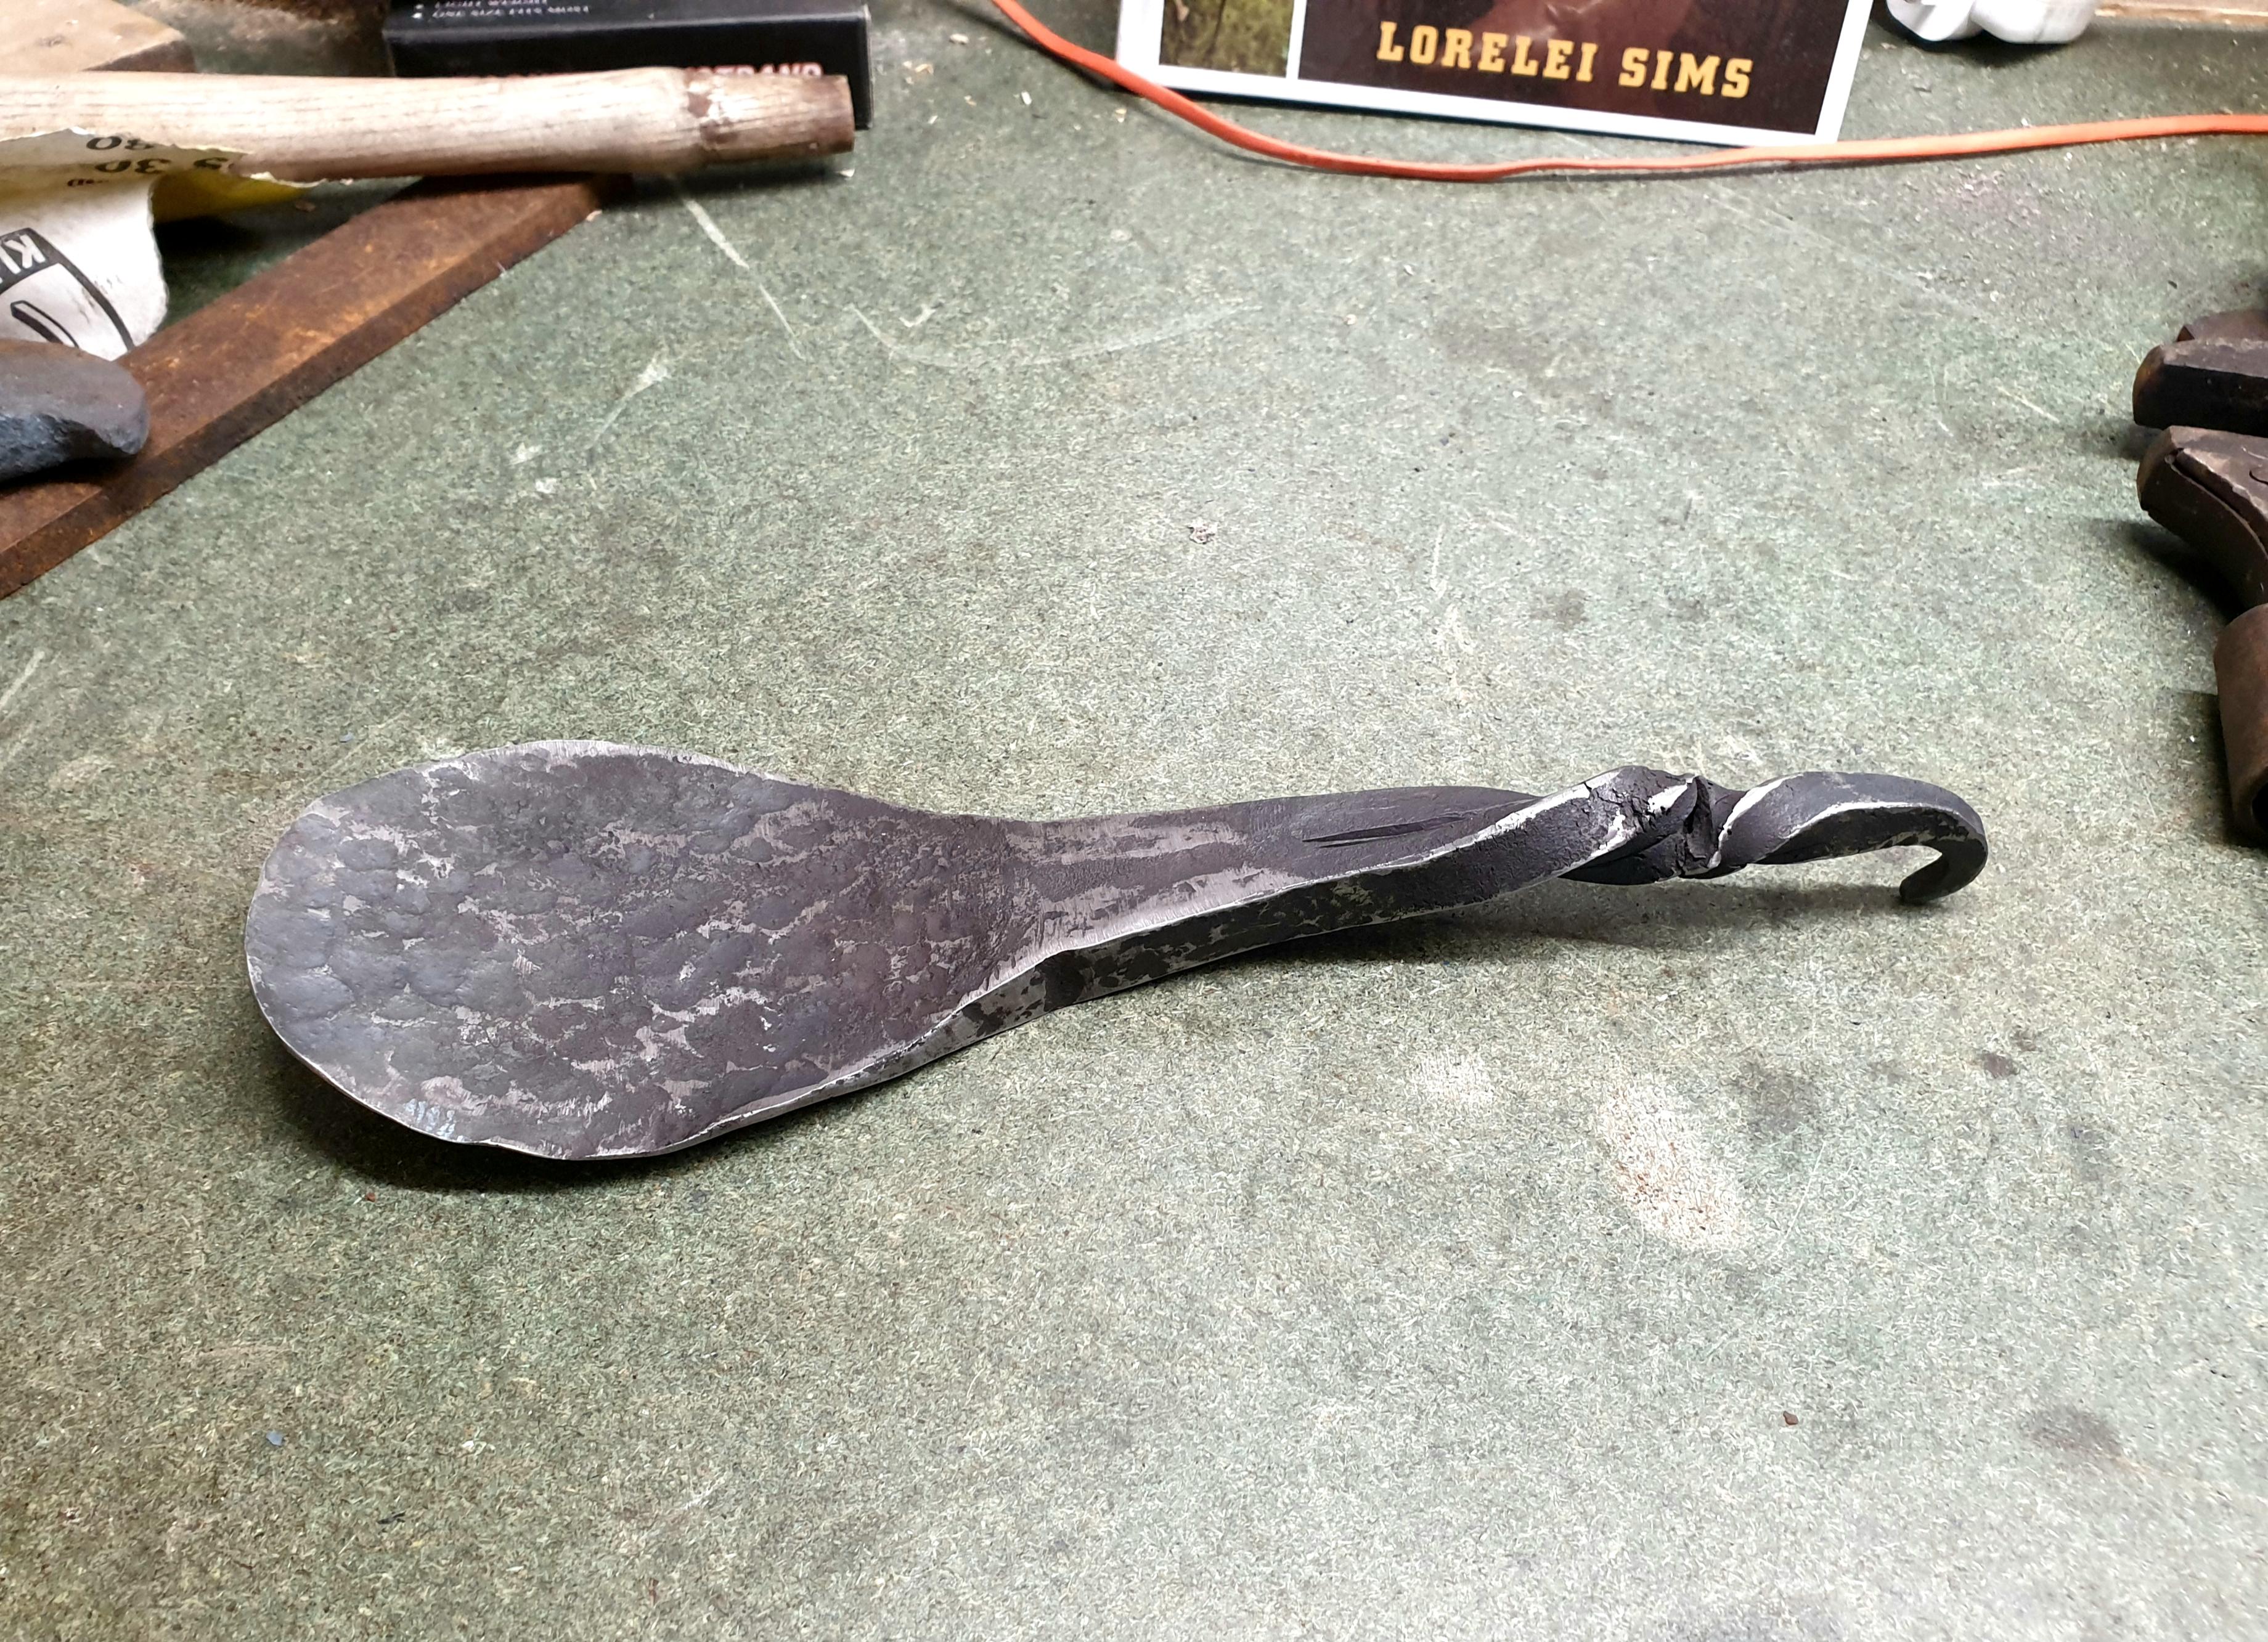
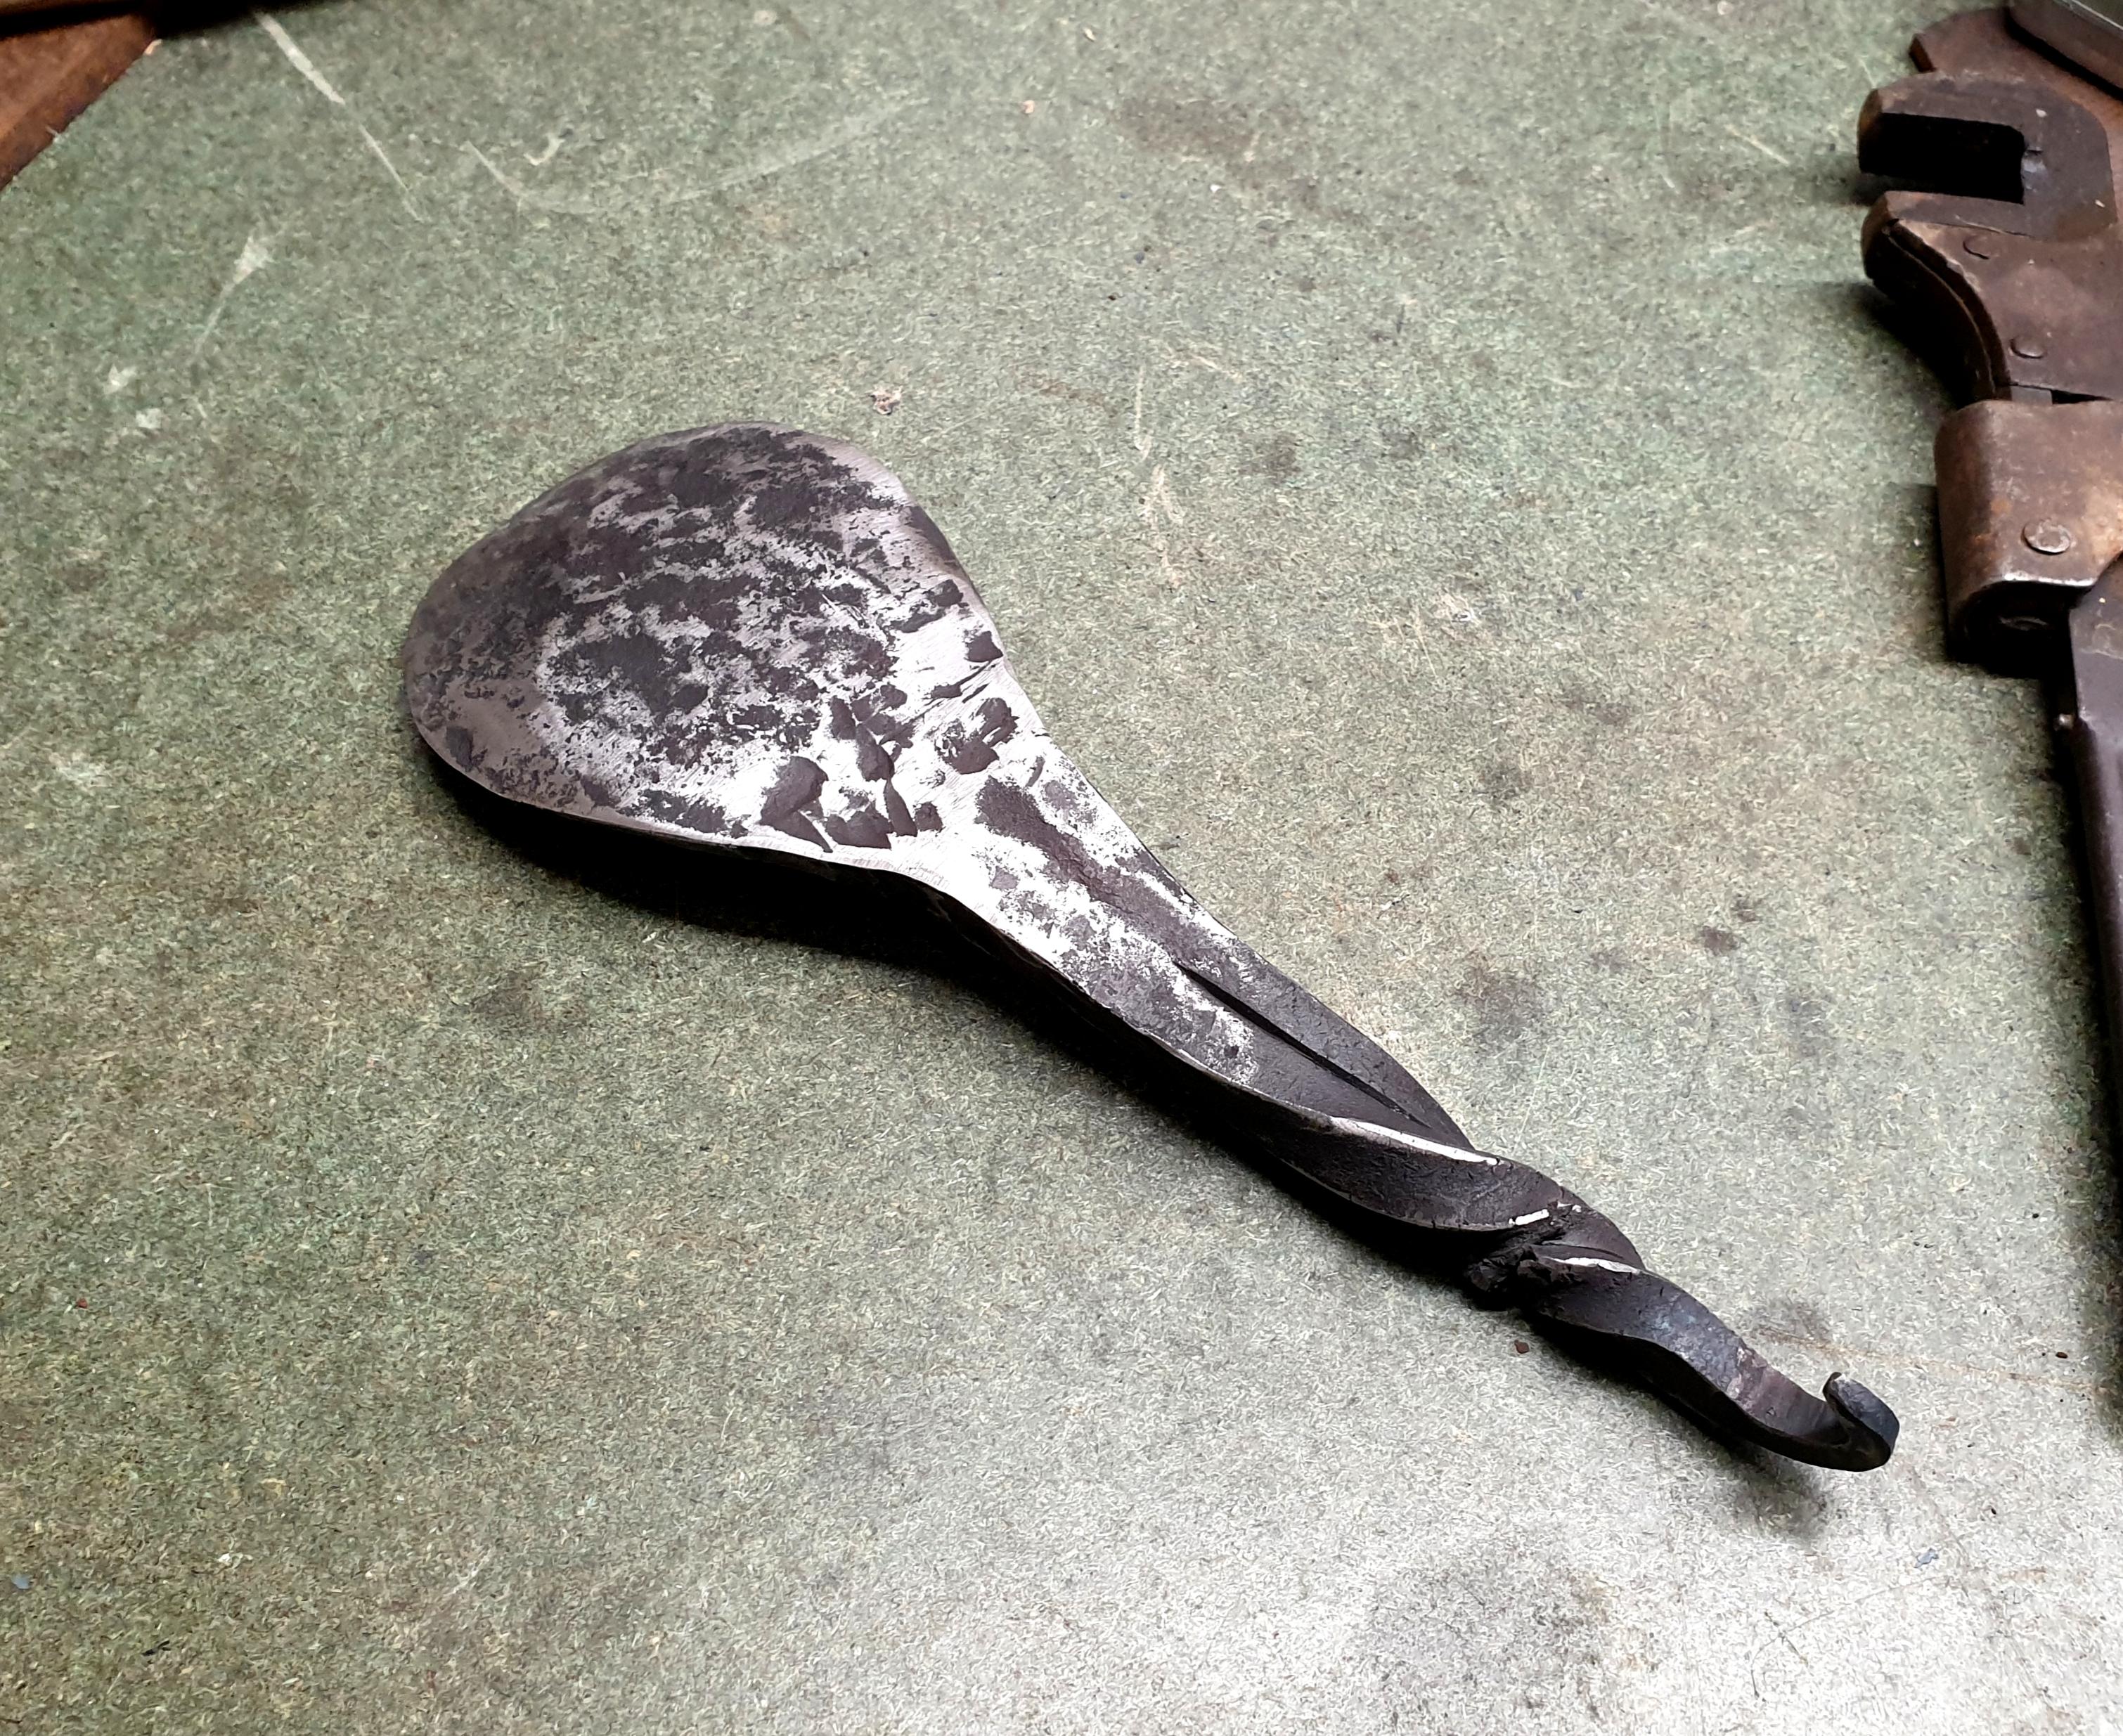
A friend of mine wanted to see my forge in action, as he hasnt visited since the forge was "a box of soil in the garden" (his words!). .... well I wasnt just going to let him watch so he got handed the sledgehammer. He did a fantastic, tireless job and we succeeded in making a new coke spoon for managing my fire. Unfortunately, I burned the steel on the handle while we were chatting, and then tried to twist it with a tapered handle. Both these errors resulted in a crack in the twist which ruined the handle. The handle is also shorter than I'd have liked, anyway. Im planning to cut it off at the damaged section, then do some more work to untwist, reforge square and draw out much long and thinner, then recreate the twist and hook.

-
Absolutely- thats what I was trying to say/clarify in my second post! .... its still a fair achievement in design and fire management (skill) in my opinion. So my congratulations to the original poster still stands.
-
I know that the Vikings+Franks pattern welded swords using charcoal so the issue was certainly with my design/set up rather than the fuel! Congrats on your design since its working so well.
-
This looks great Paul, and excellent for people who have a ready supply of scrap wood like yourself. I'm amazed you managed to make damascus in it- you must have your fire management down to a fine art! When I had a charcoal forge I struggled to heat large objects and certainly wouldnt have been able to reliably heat and pattern weld. Shame the pictures are sideways- its hard to see whats going on. Do you have any sketches of your final design? Might be handy for anyone trying to replicate in future. I assume its fed with blower air from underneath and the large pipe out the back and up is the flue? Many people have a ready supply of scrap like pallets etc. In a well ventilated place this would be great for forging with cheap (free!) fuel.
-
Thanks Neal! Neal and I had a good forging session on Sunday- he gave me some tips on forging leaves and hooks while having a go with the coke forge (Neal uses gas). Here he is modelling my new "bike-chain-foot-powered-hold-down", which he loved
HoldDownb.thumb.jpg.1fee1bb47b5987ae1c45f6dc8bfd2473.jpg)
-
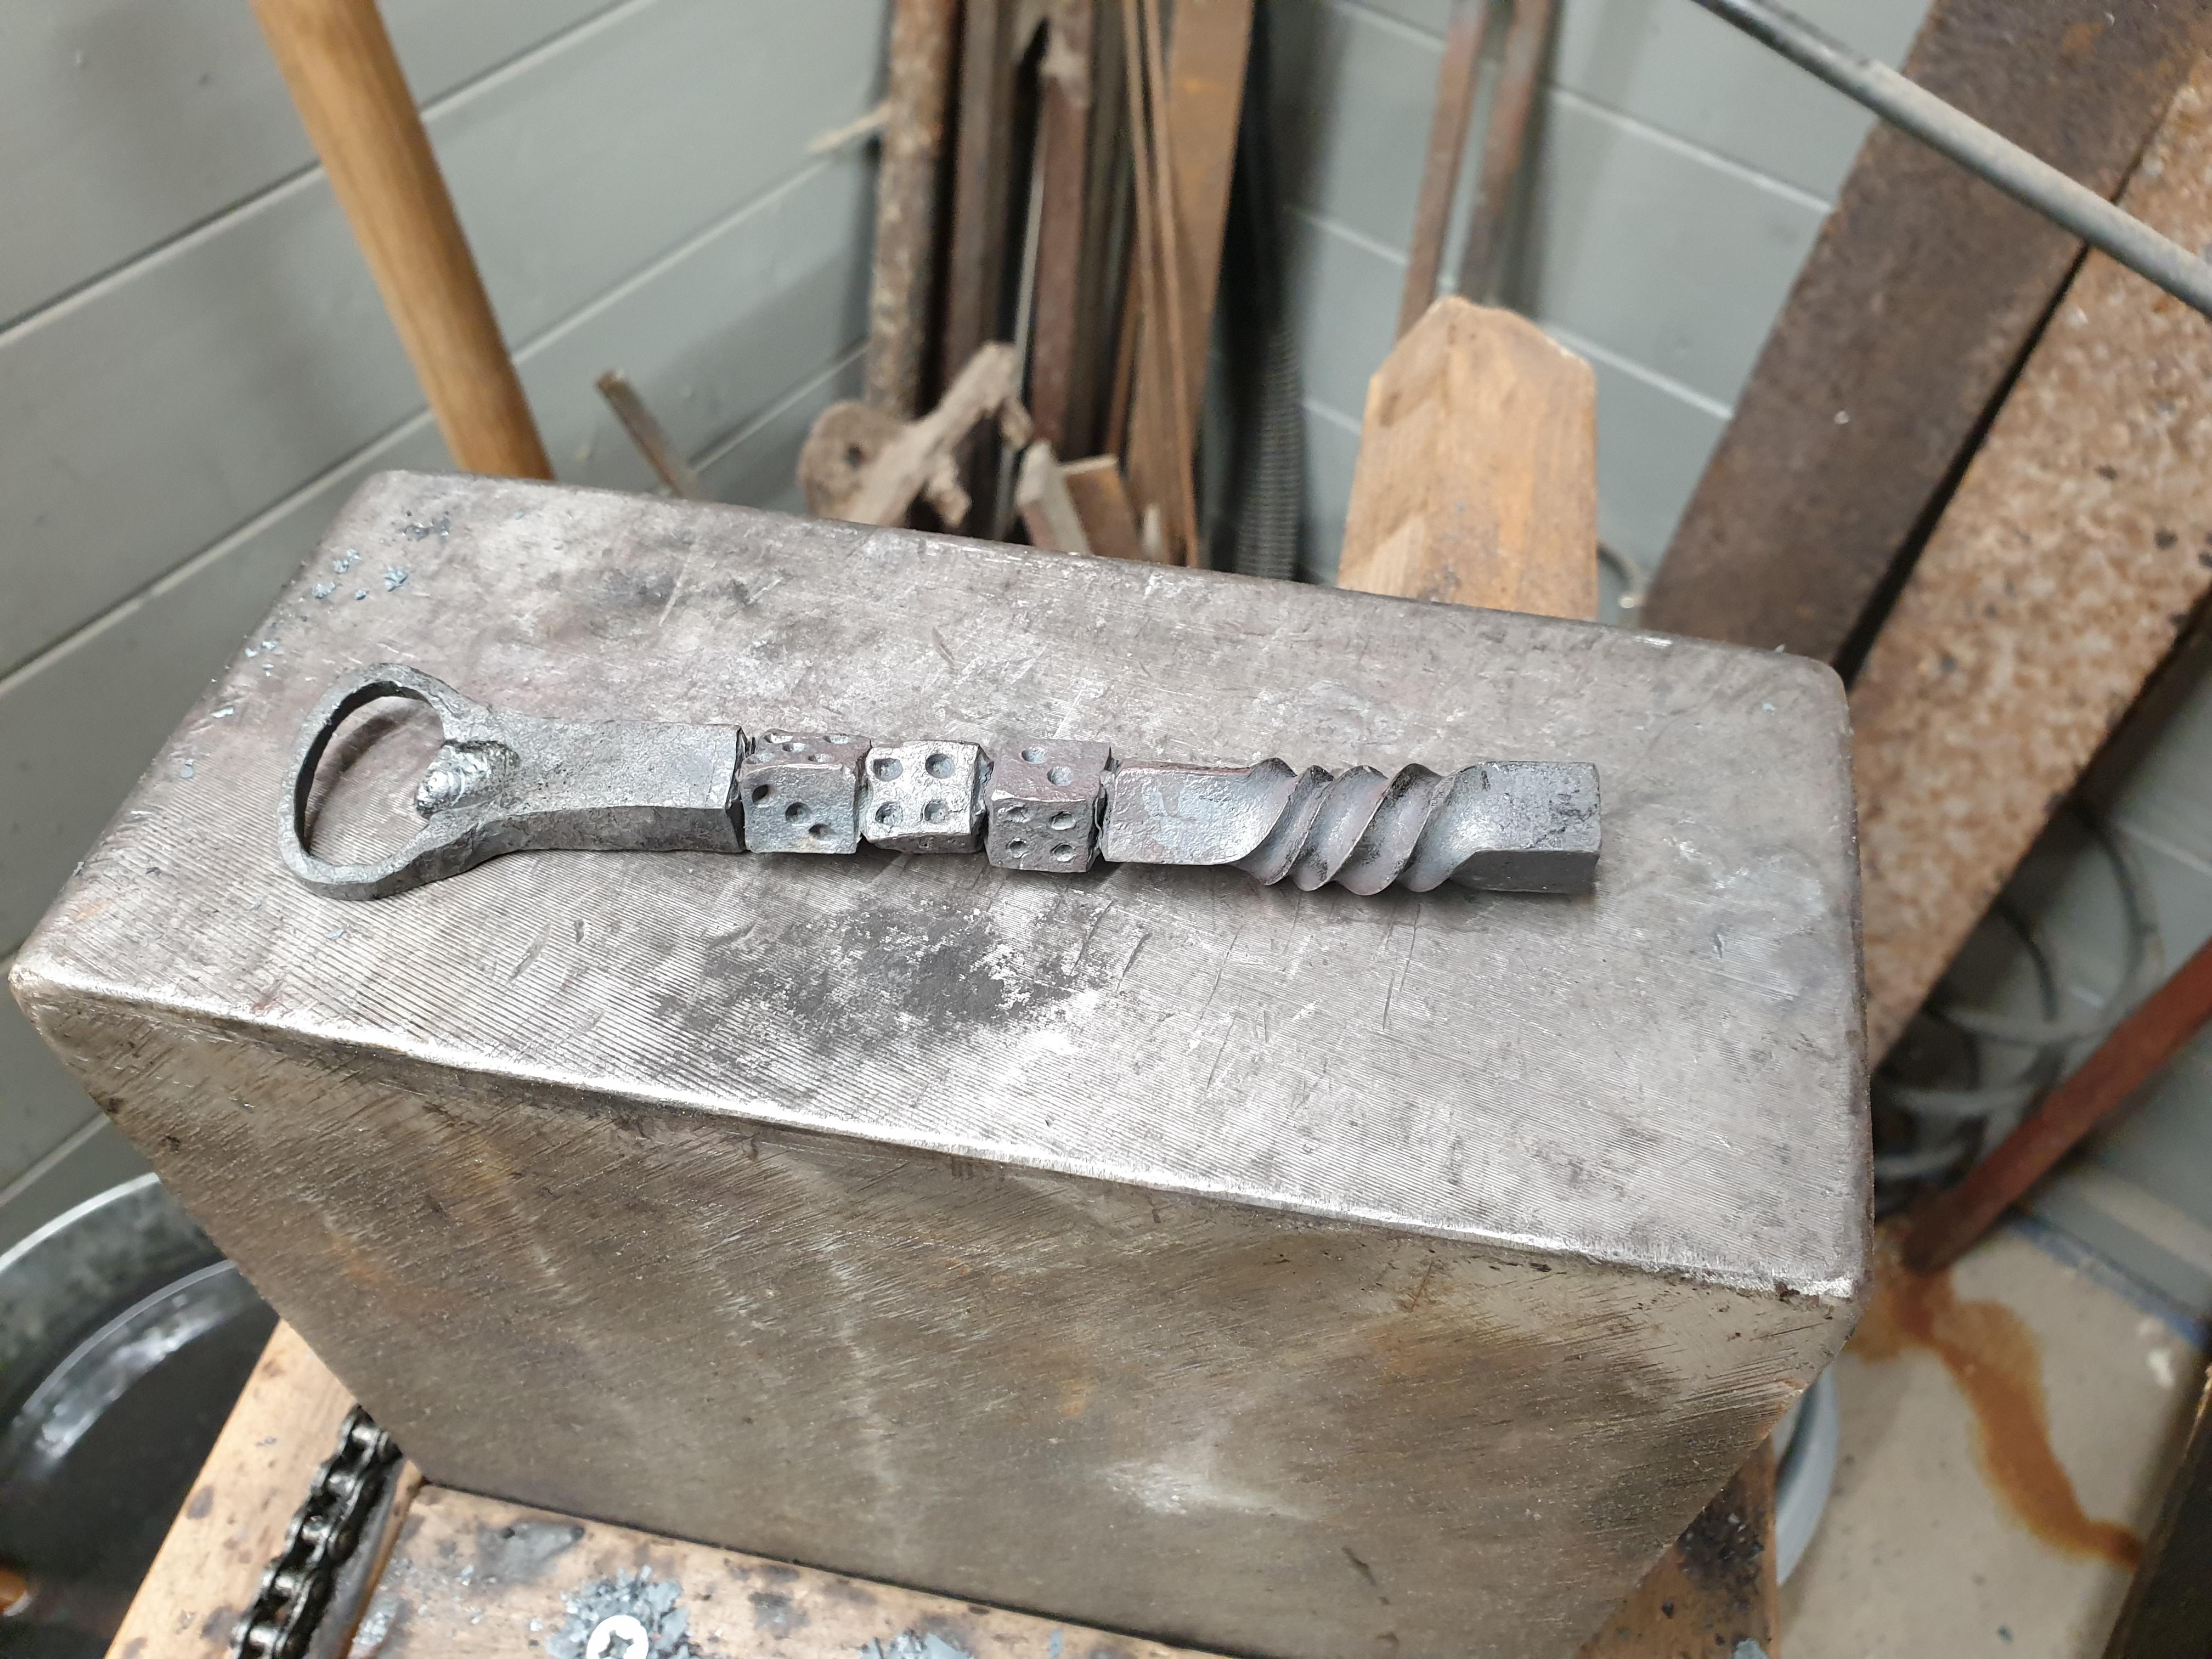
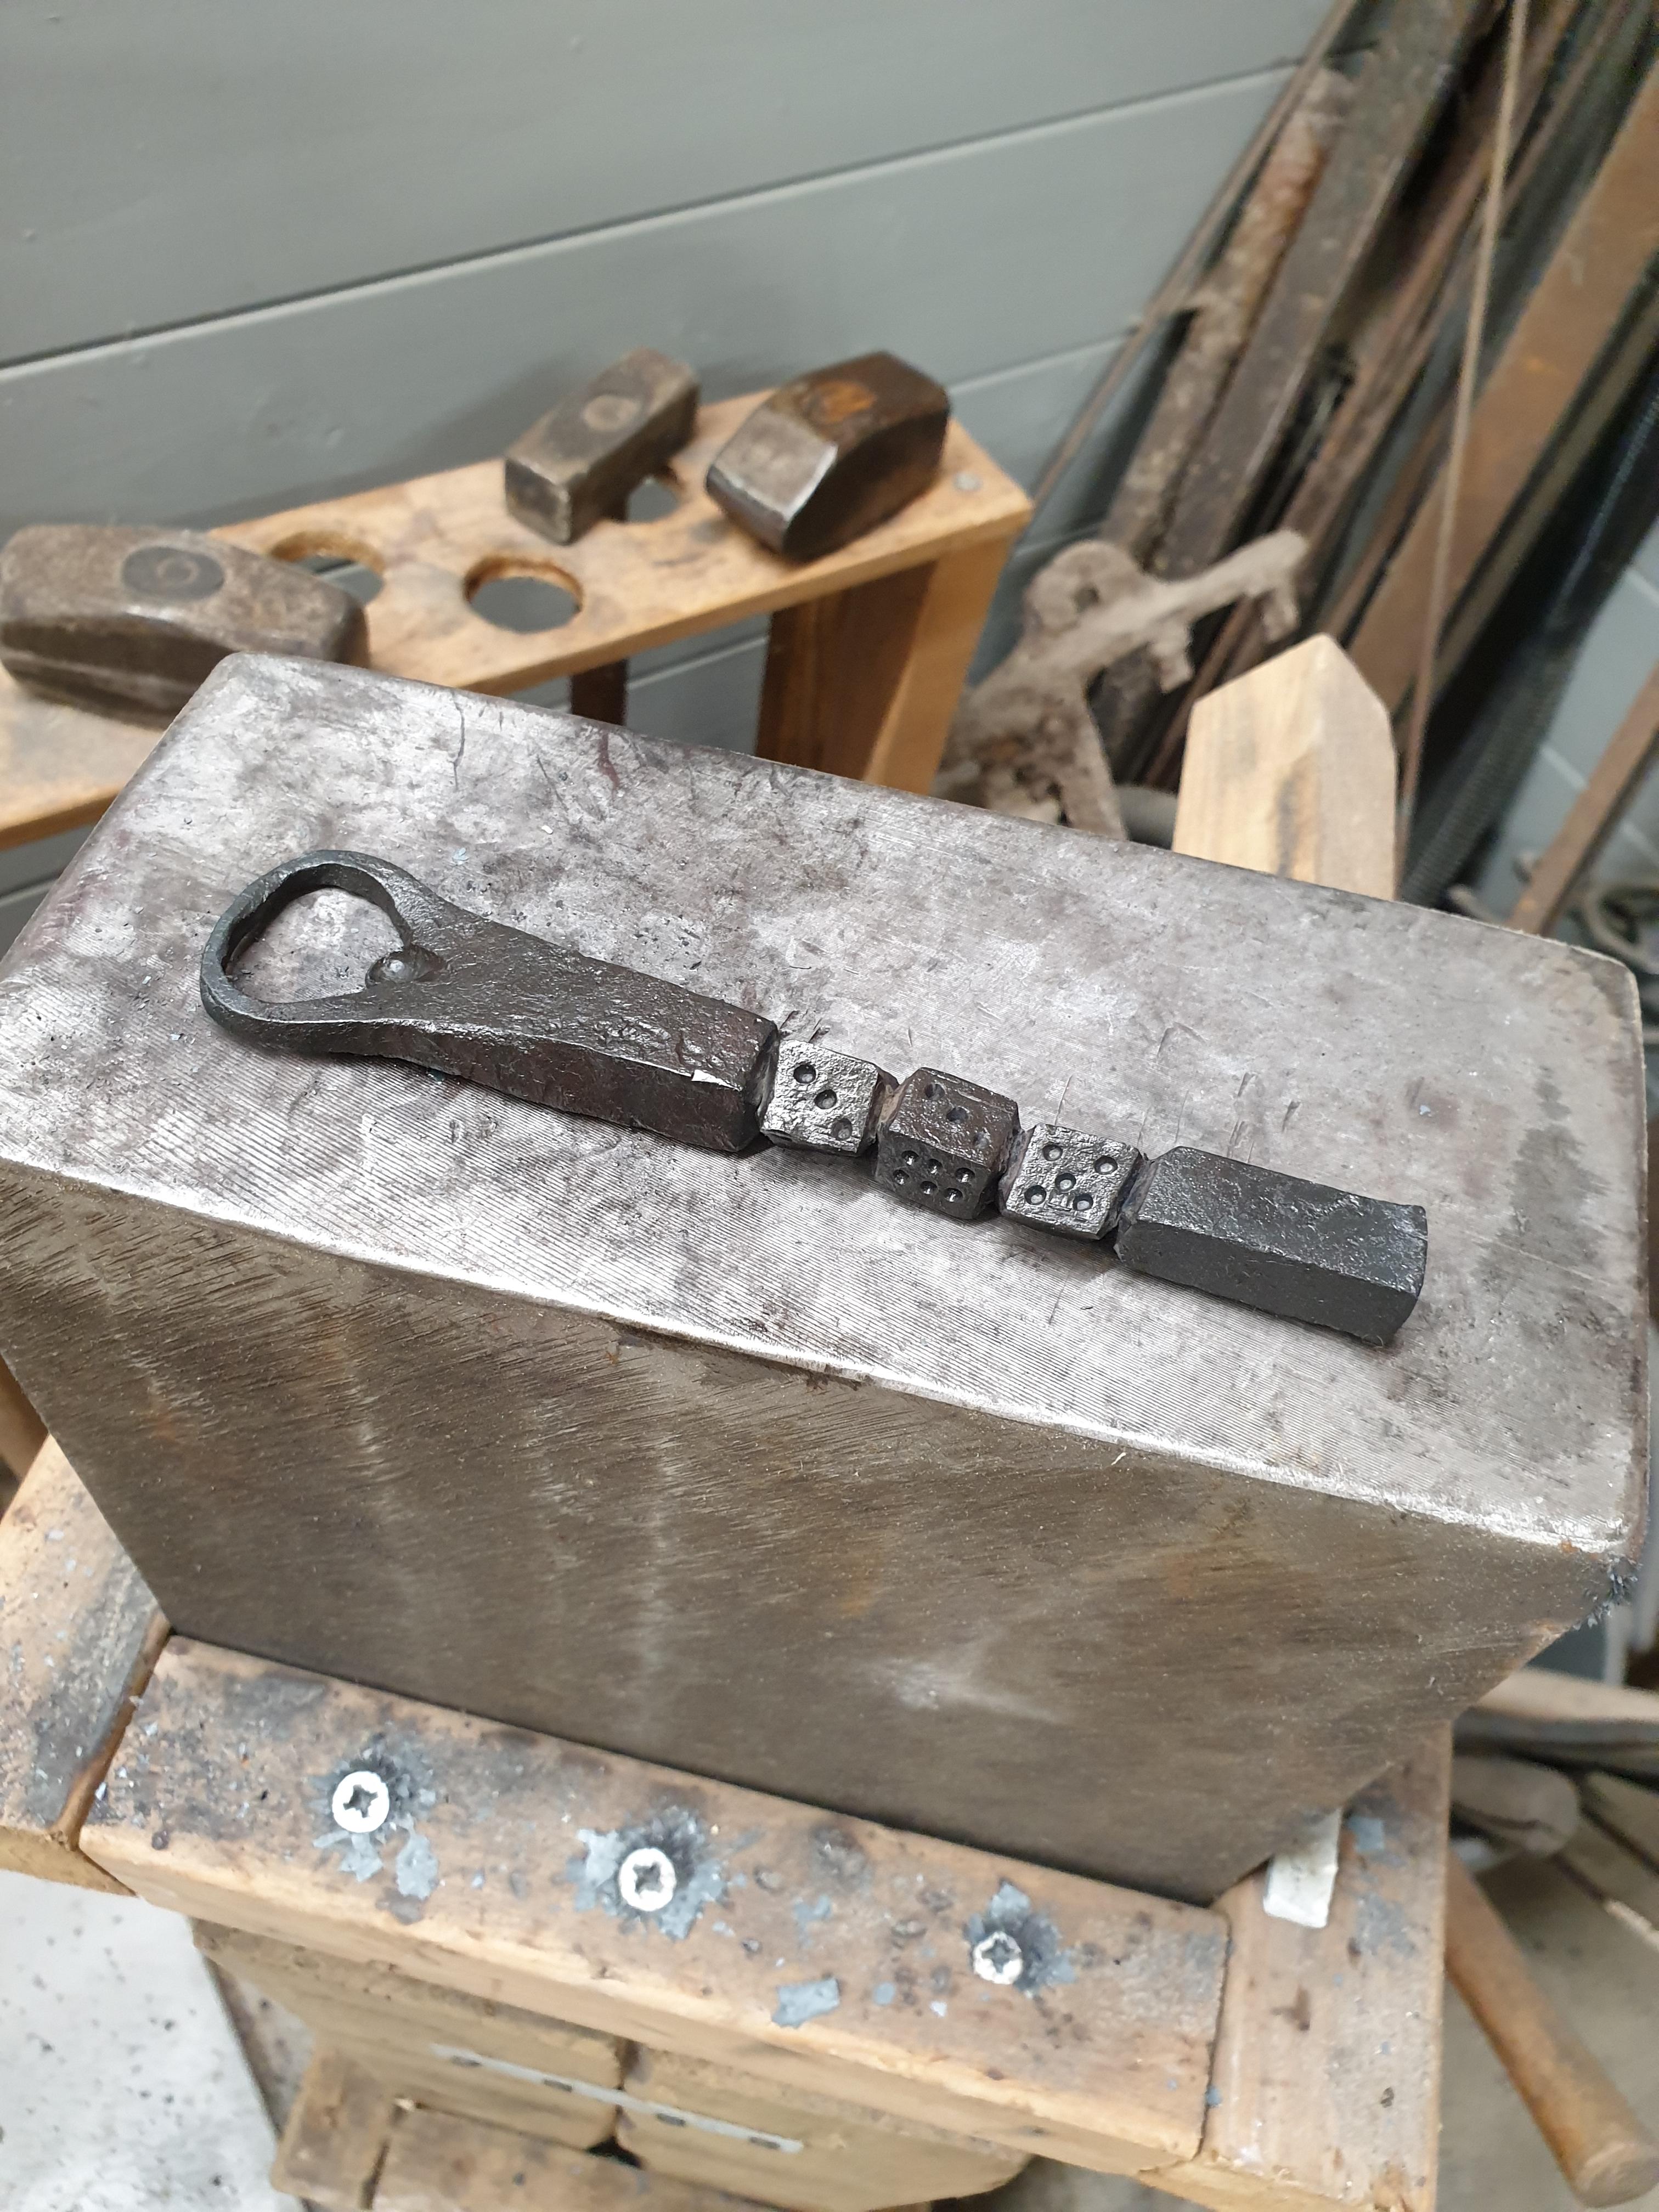
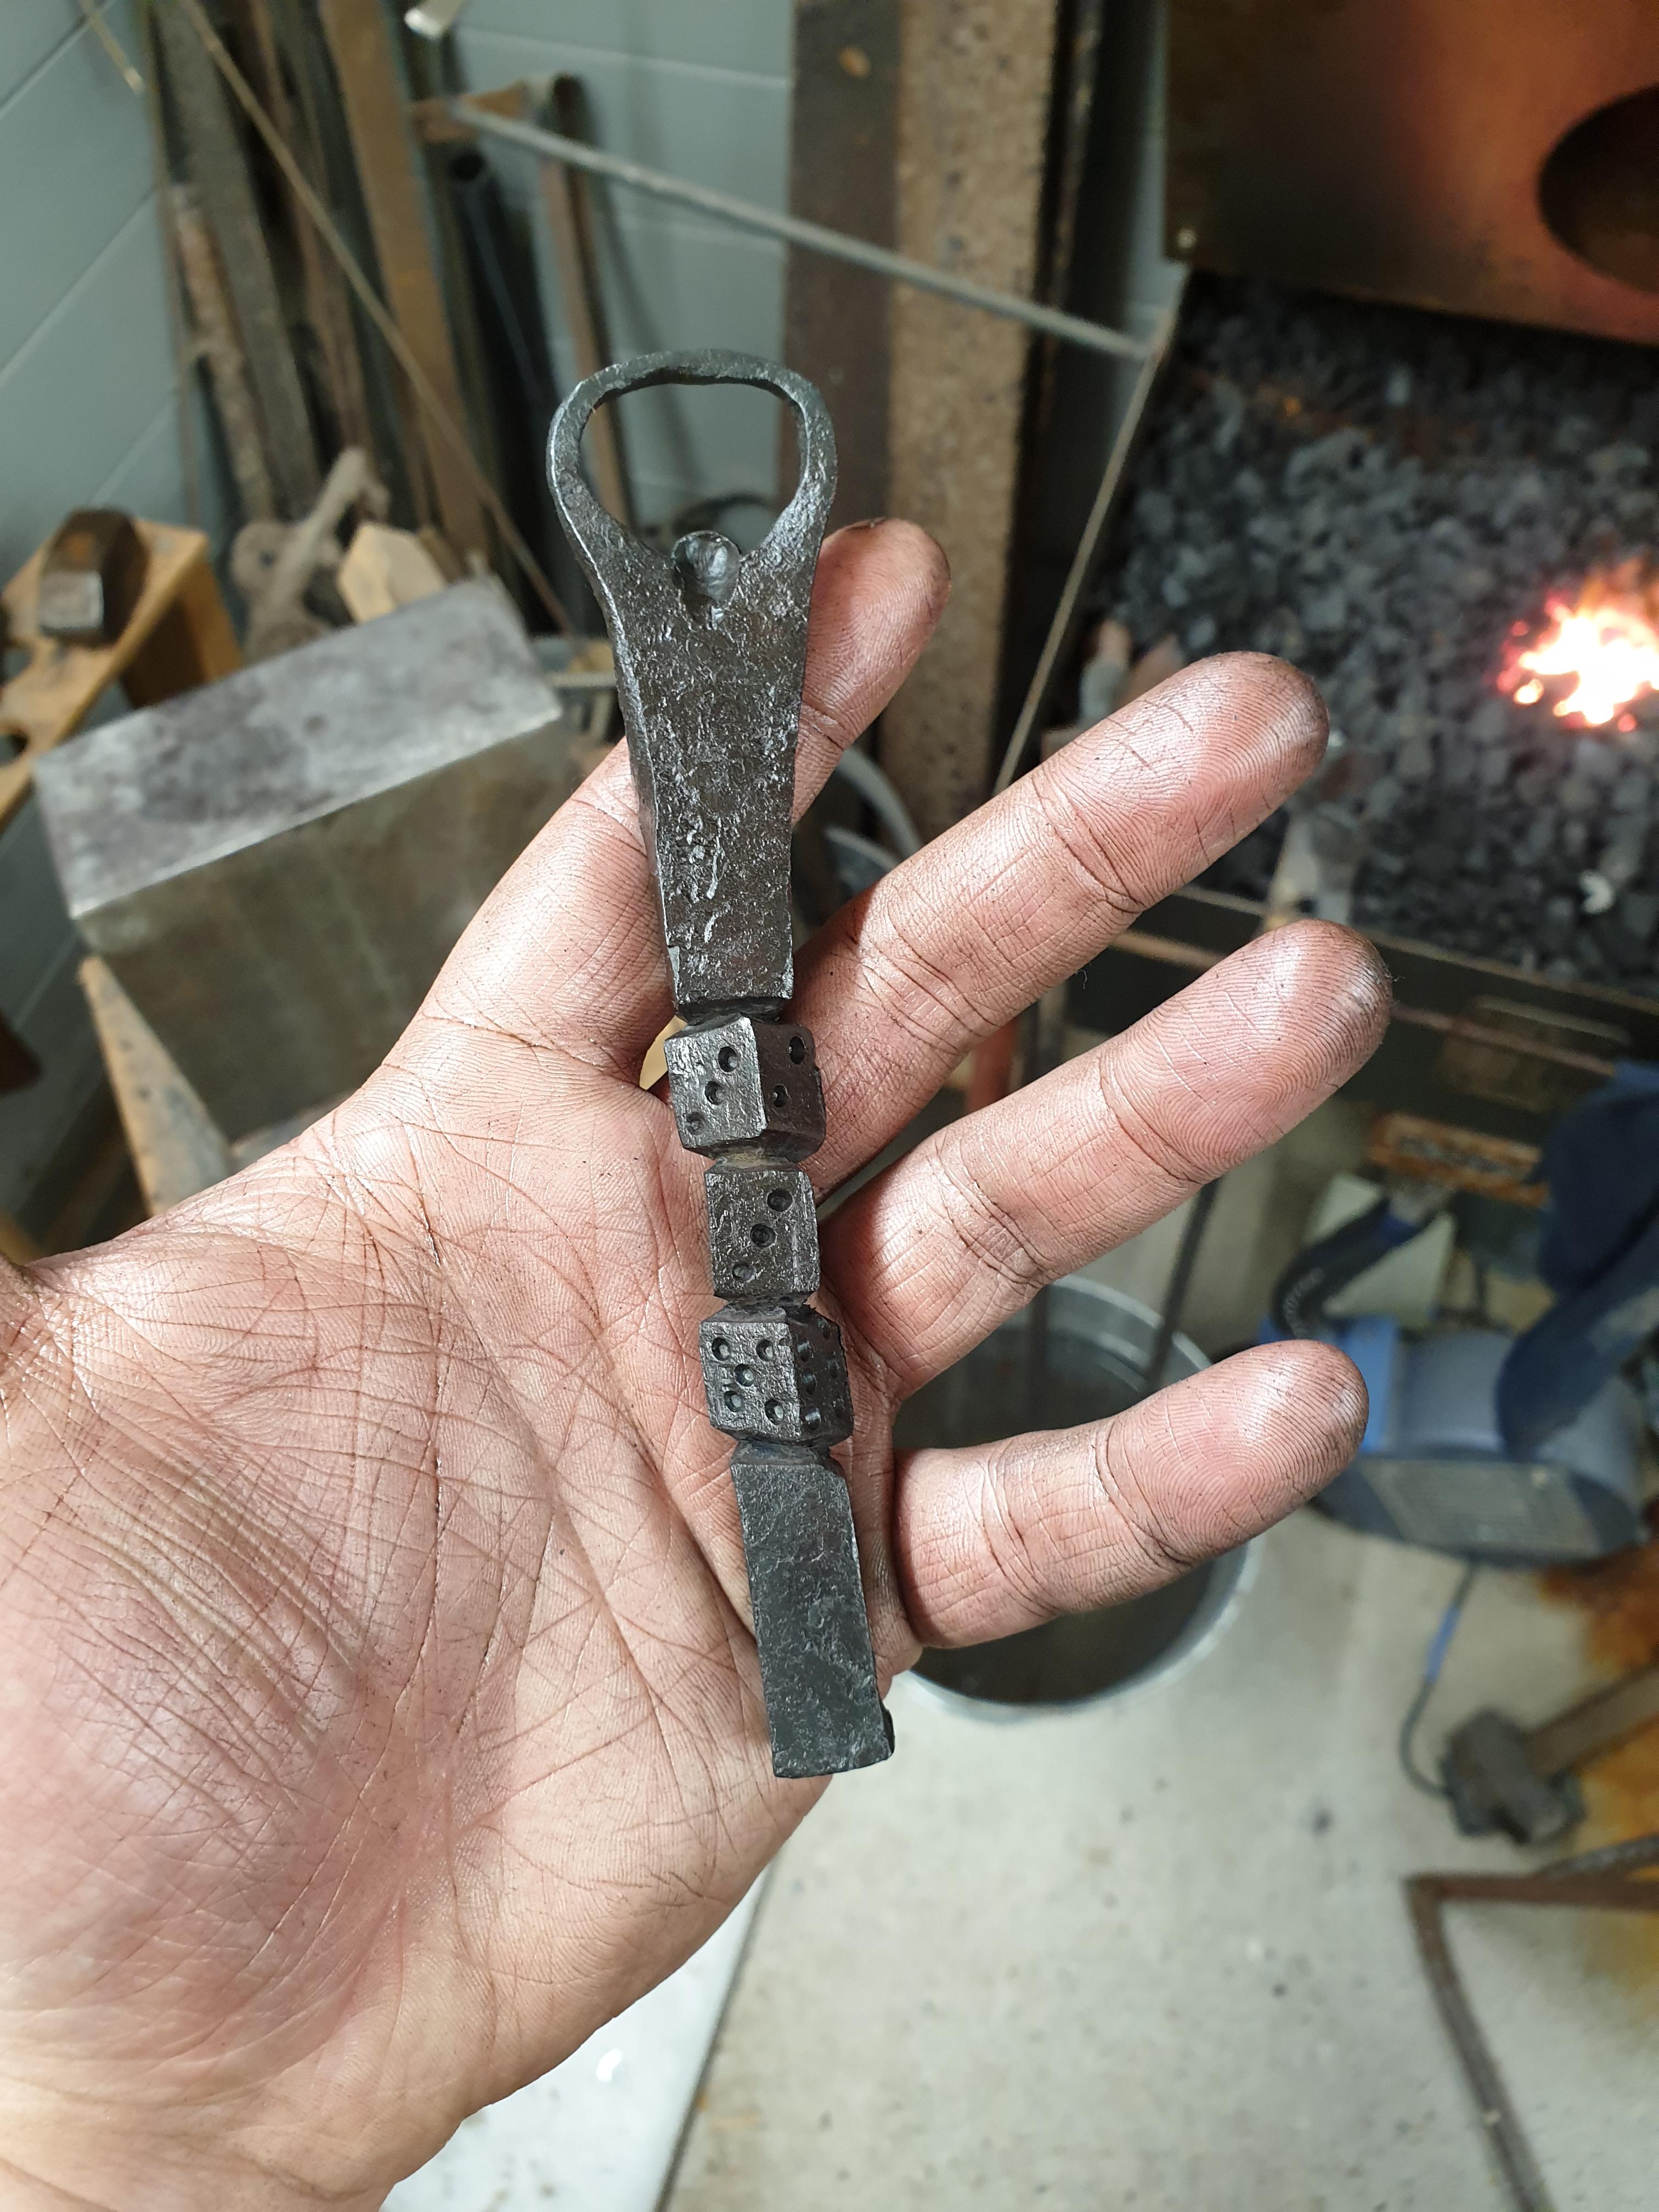
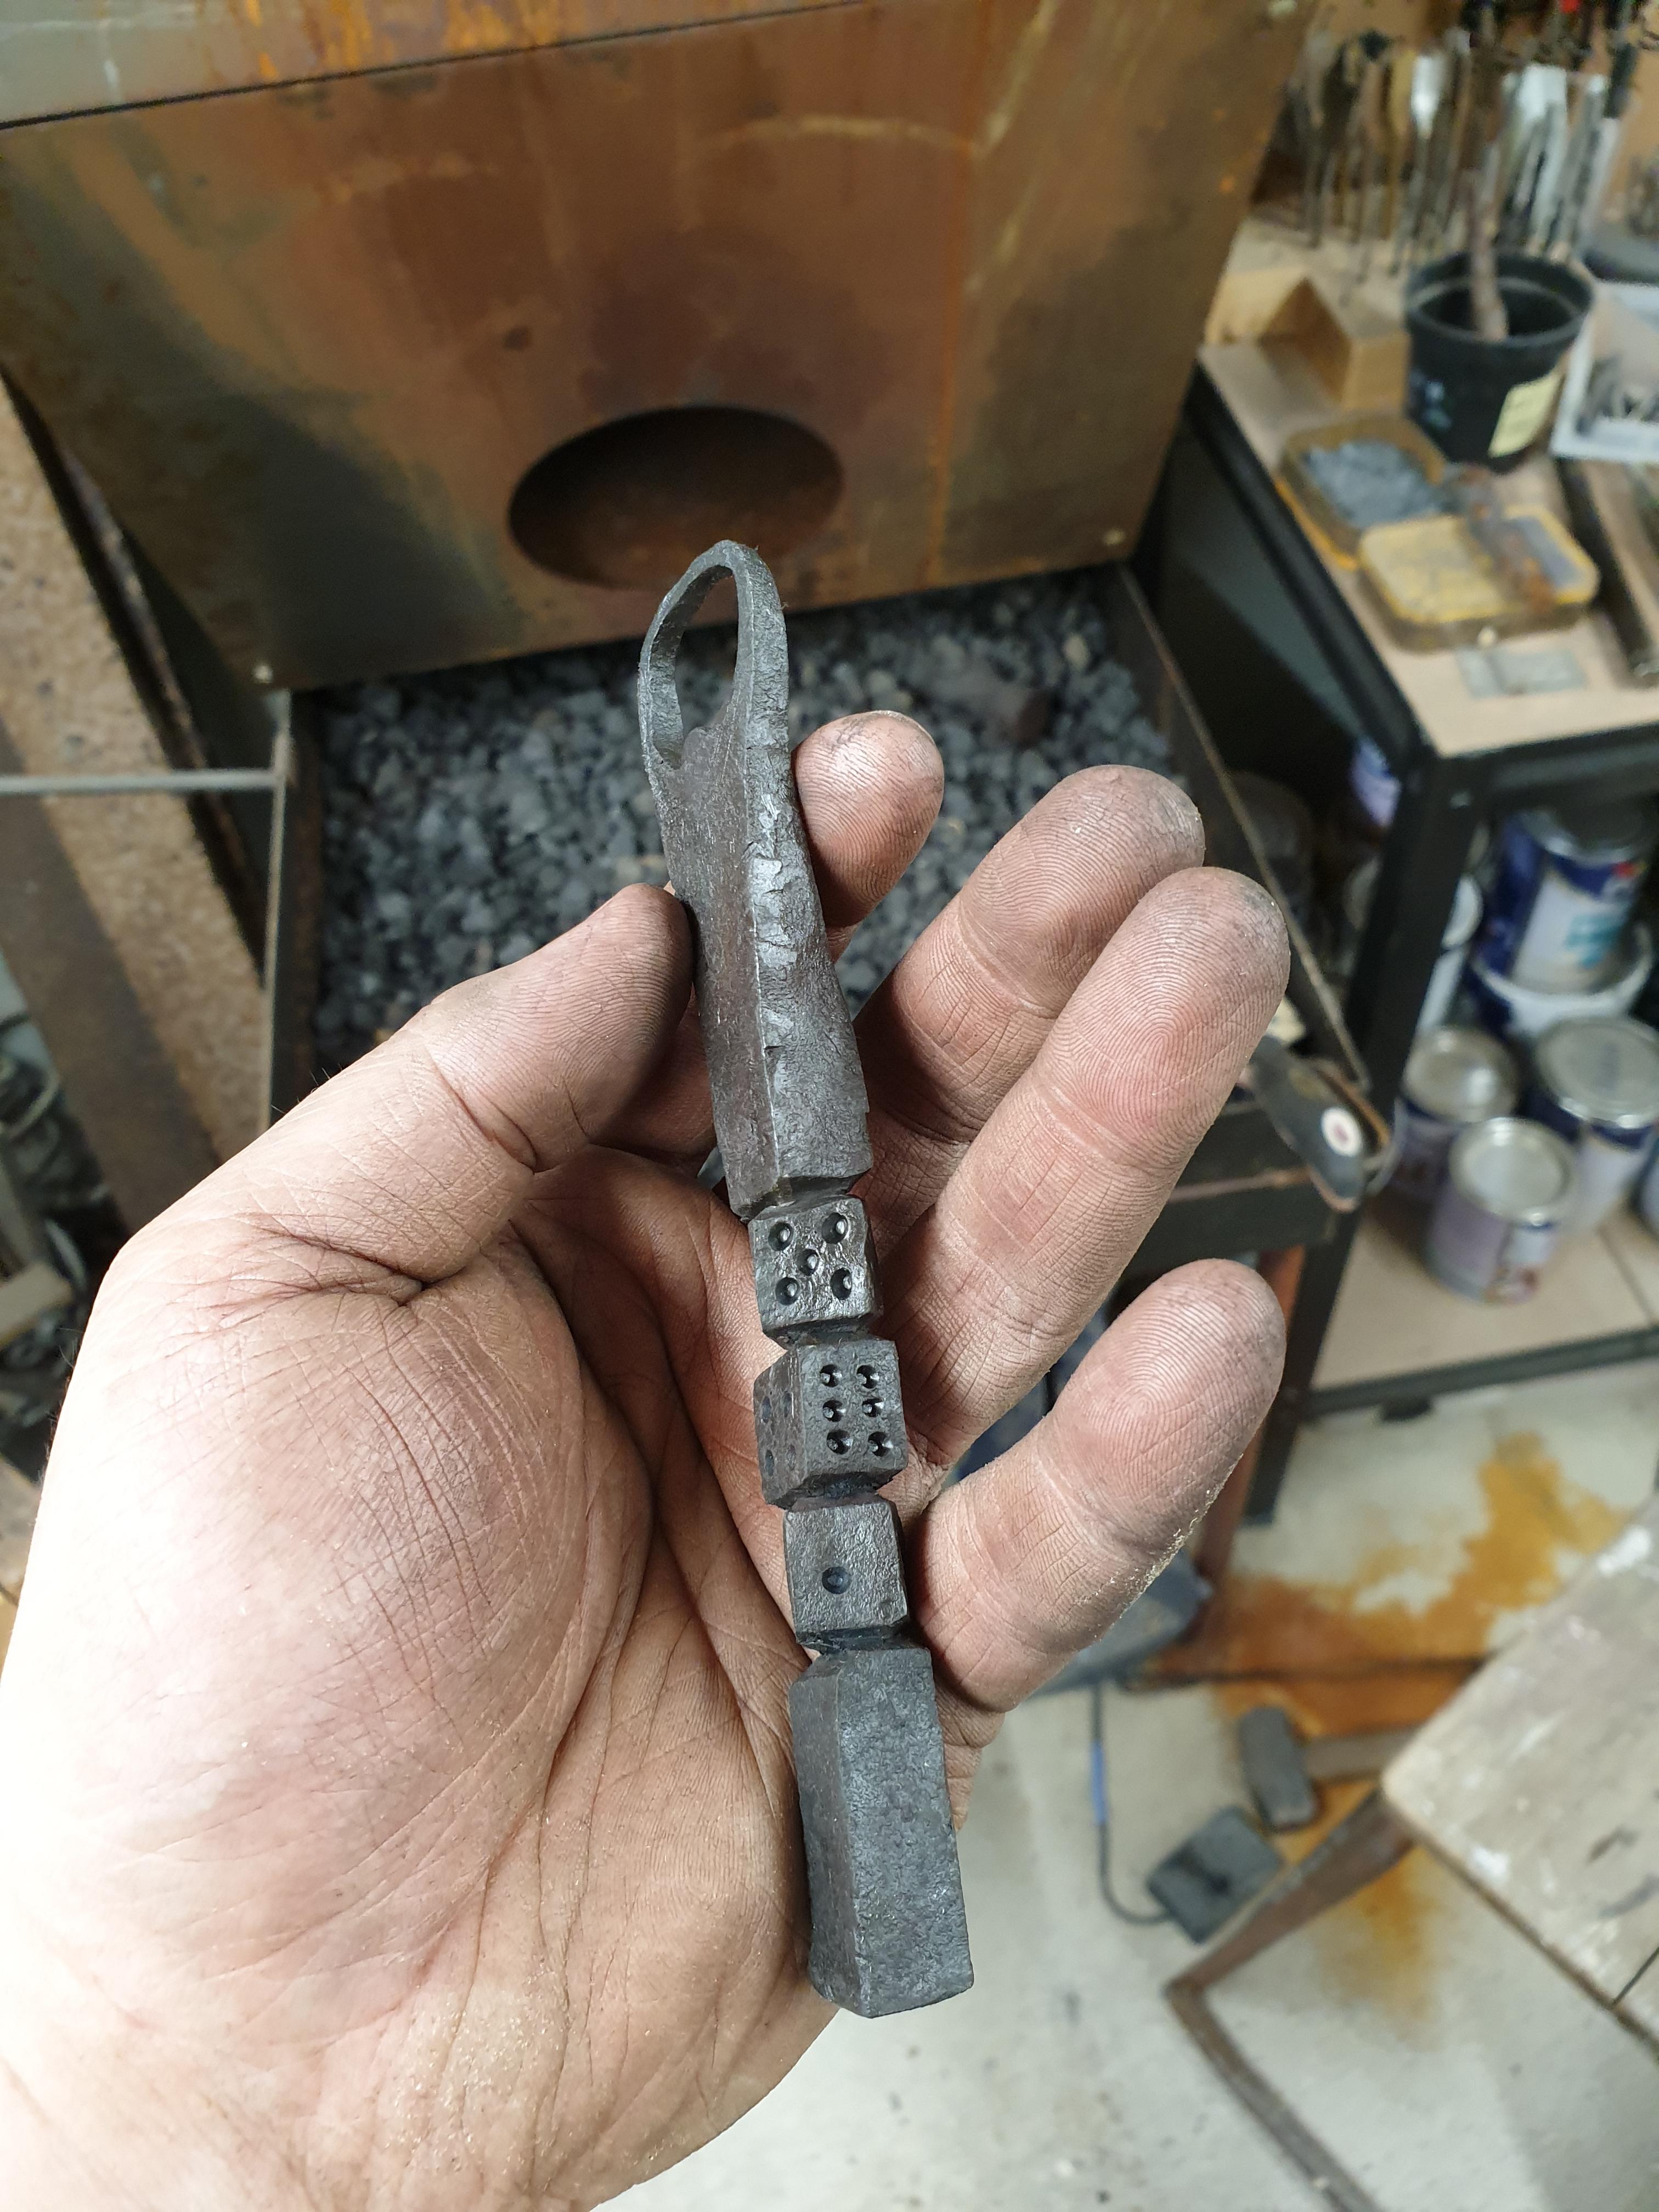
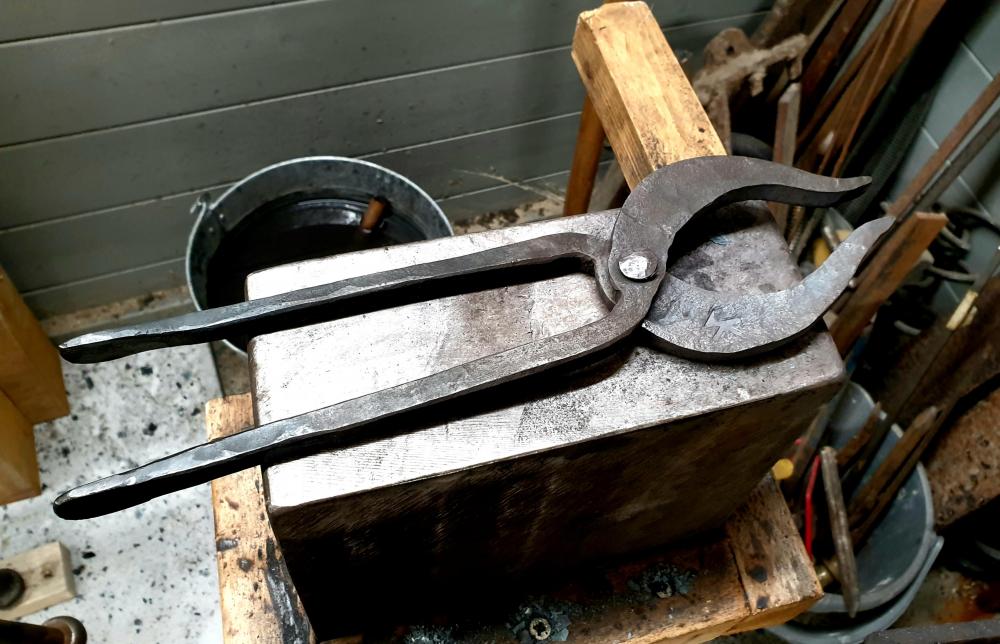
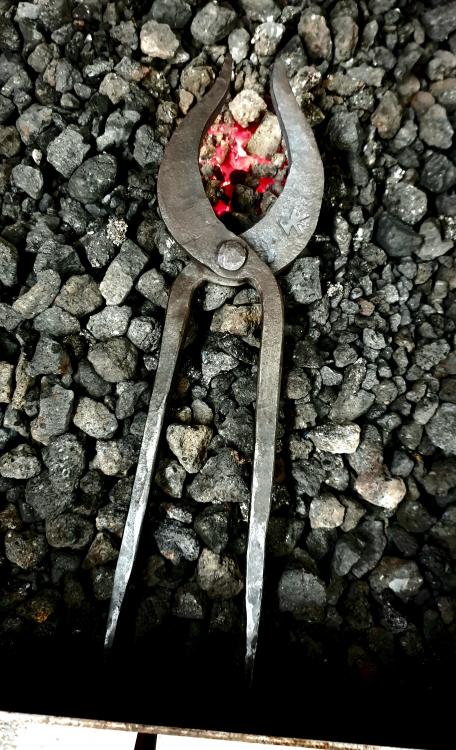
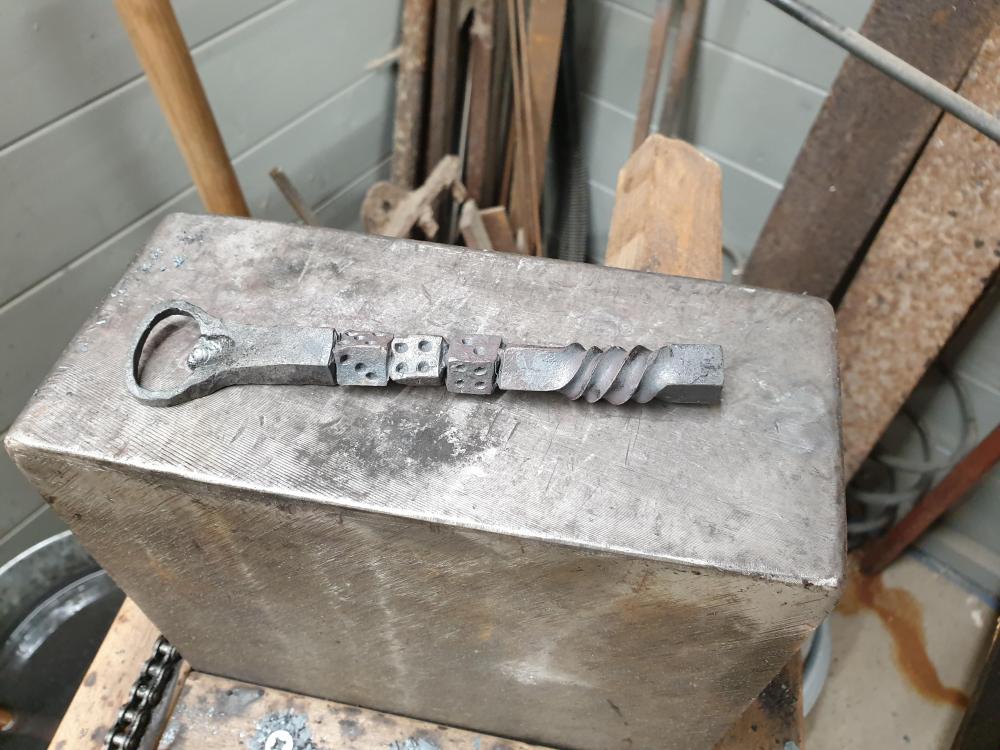
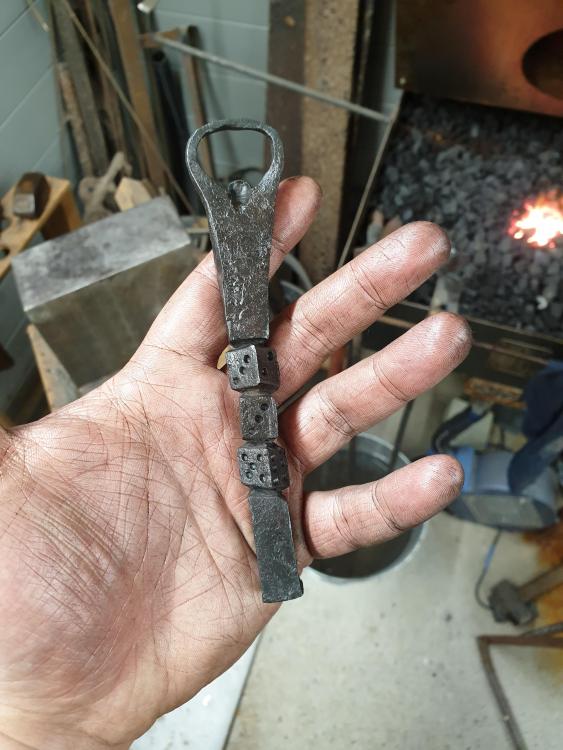
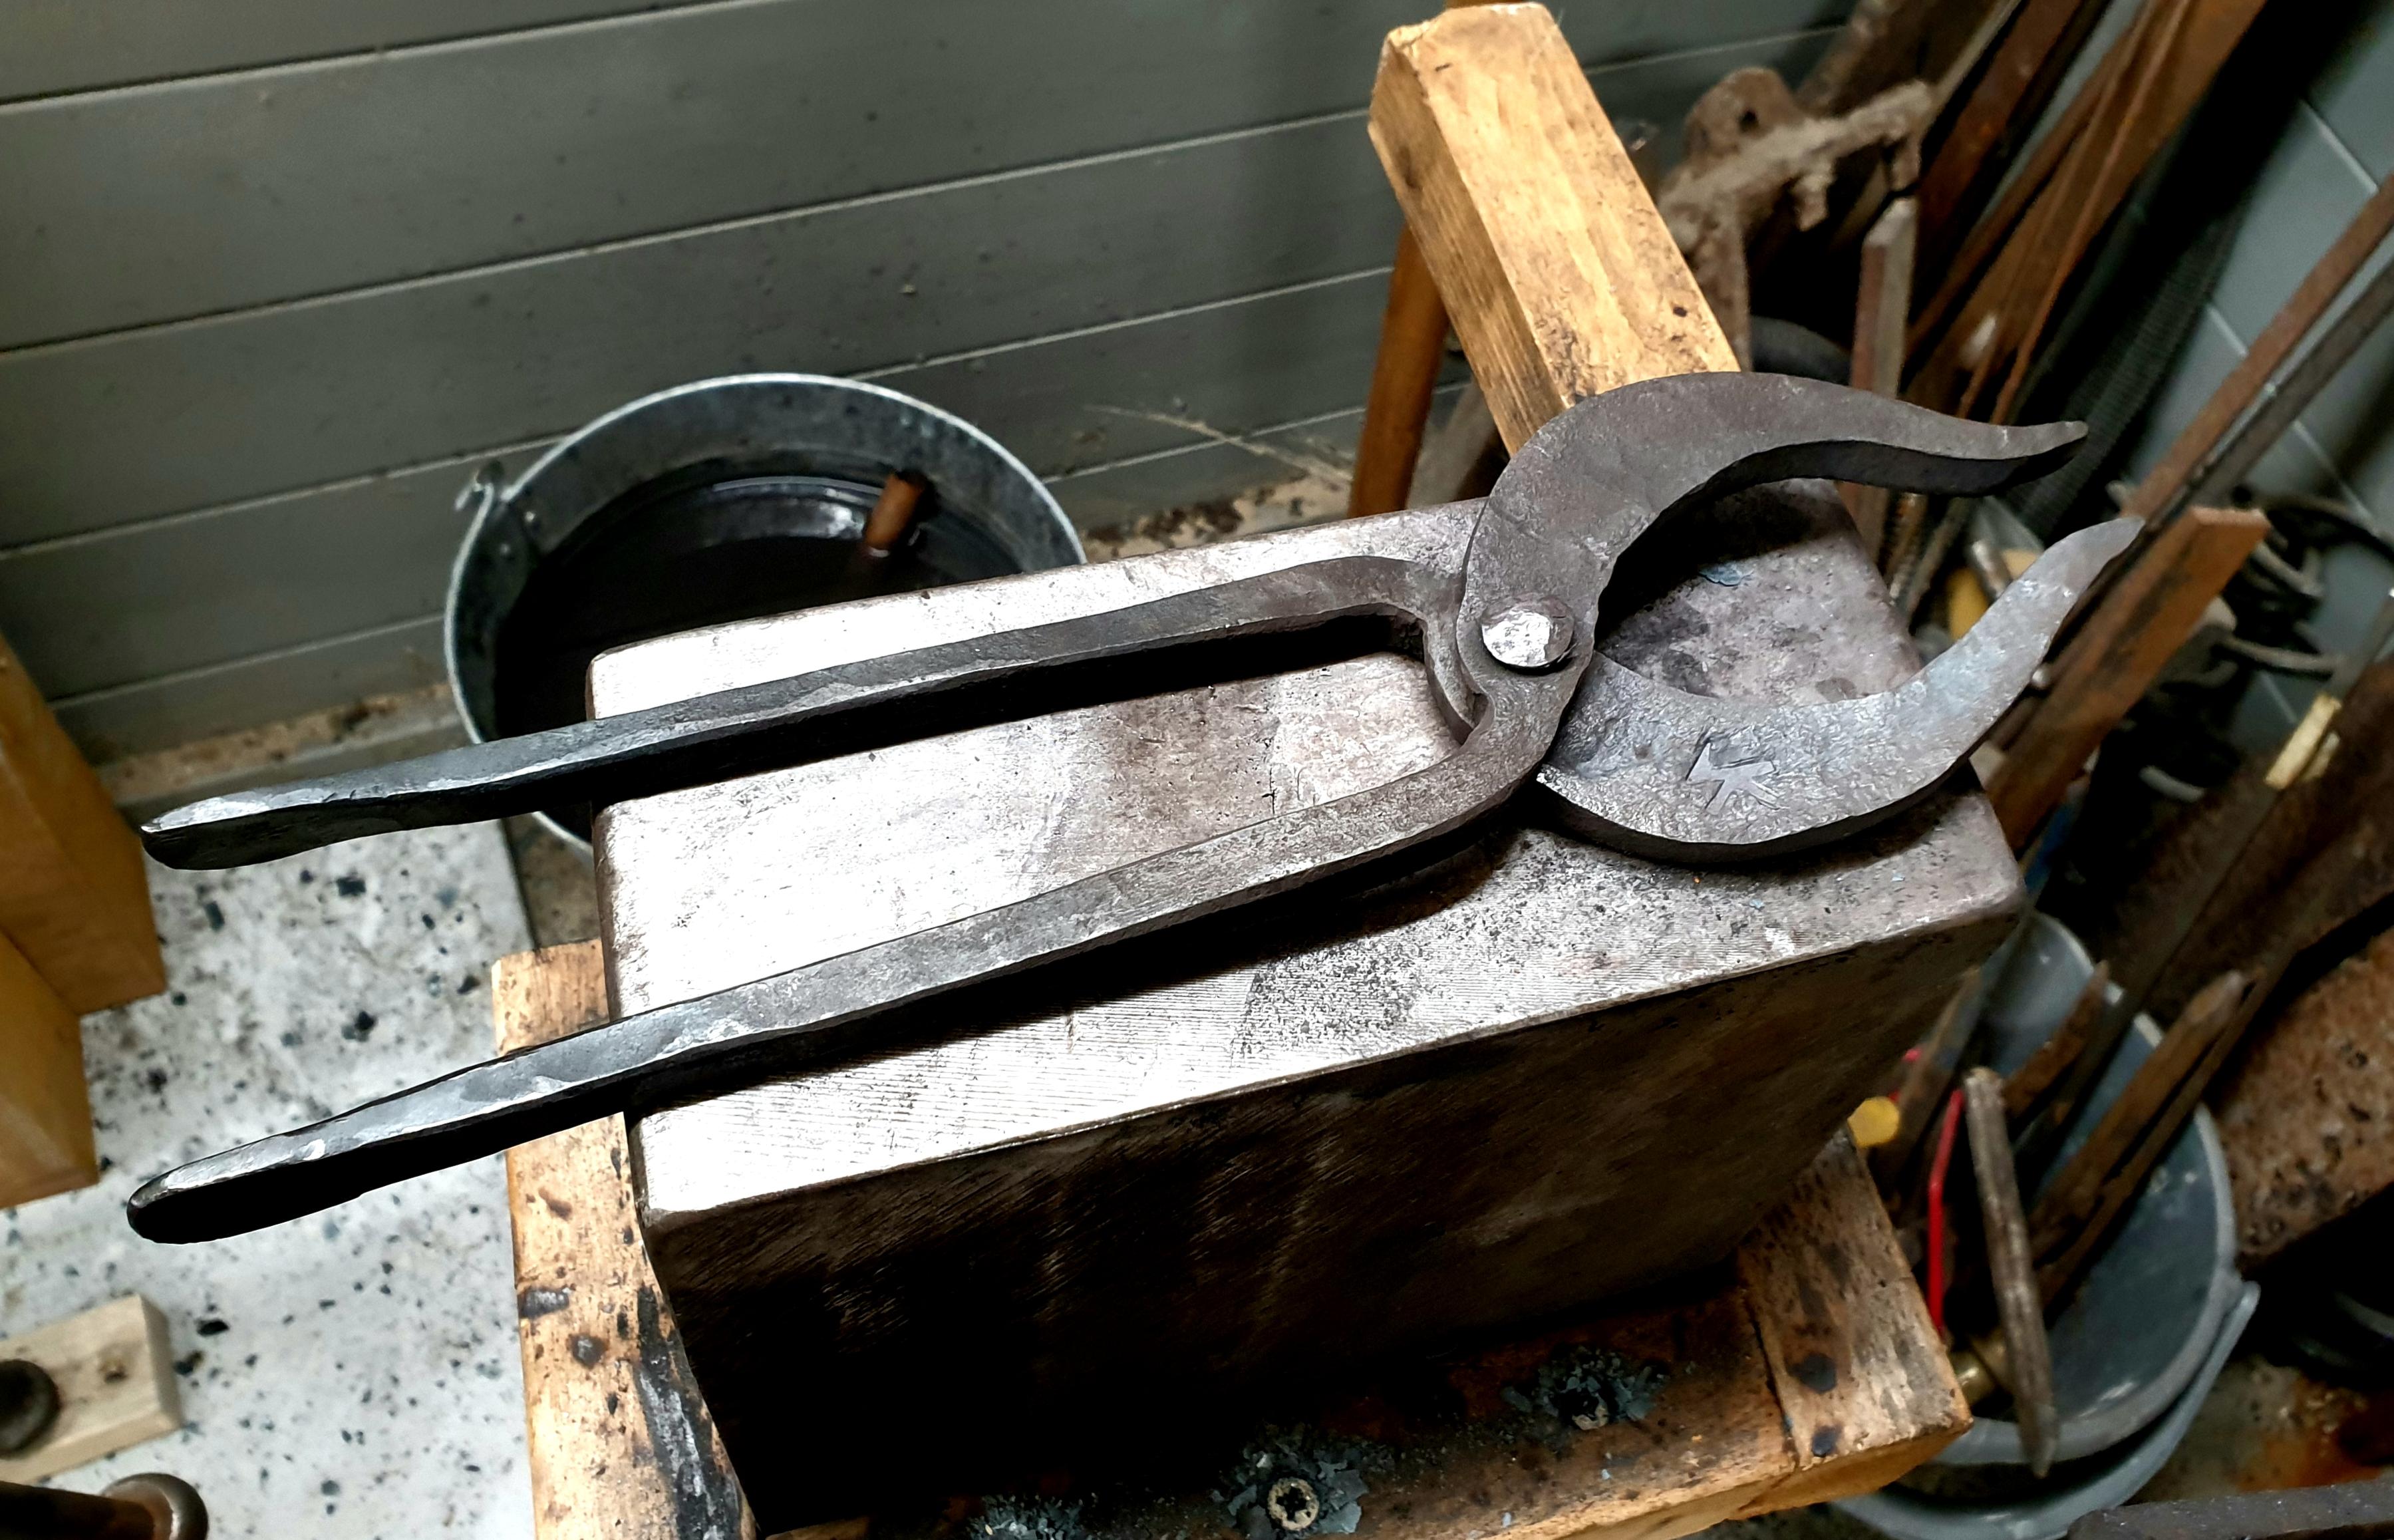
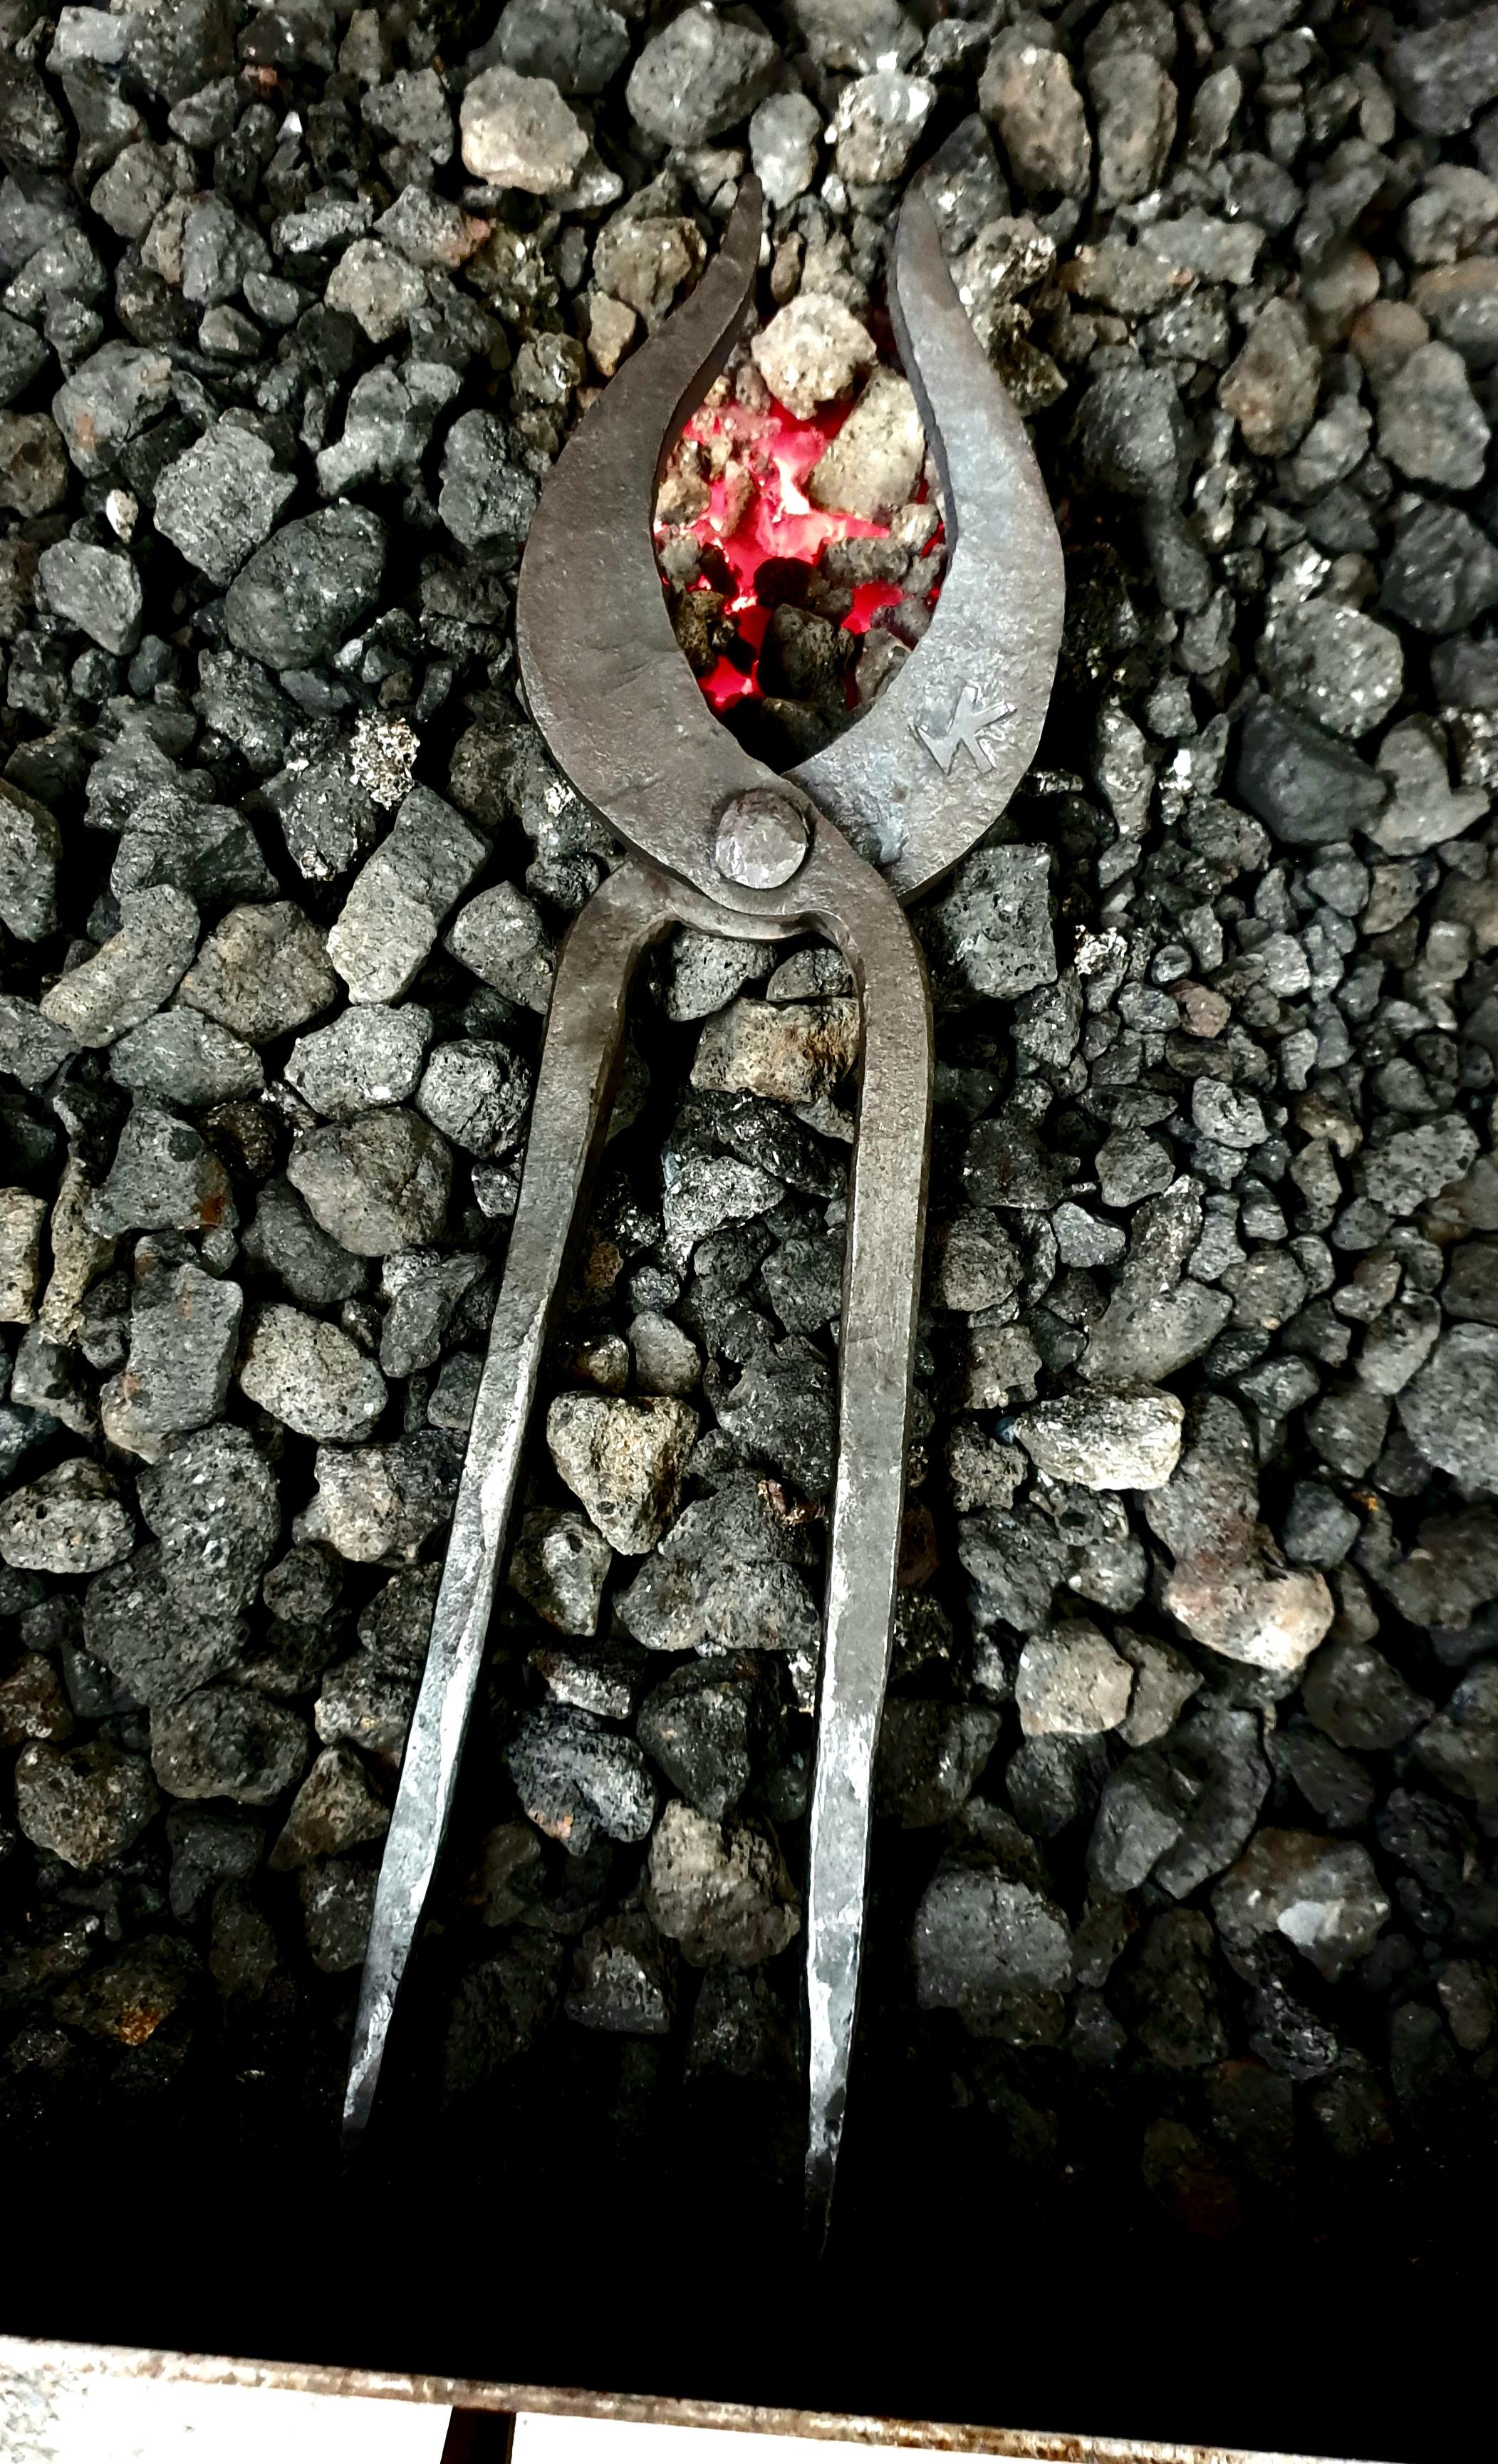
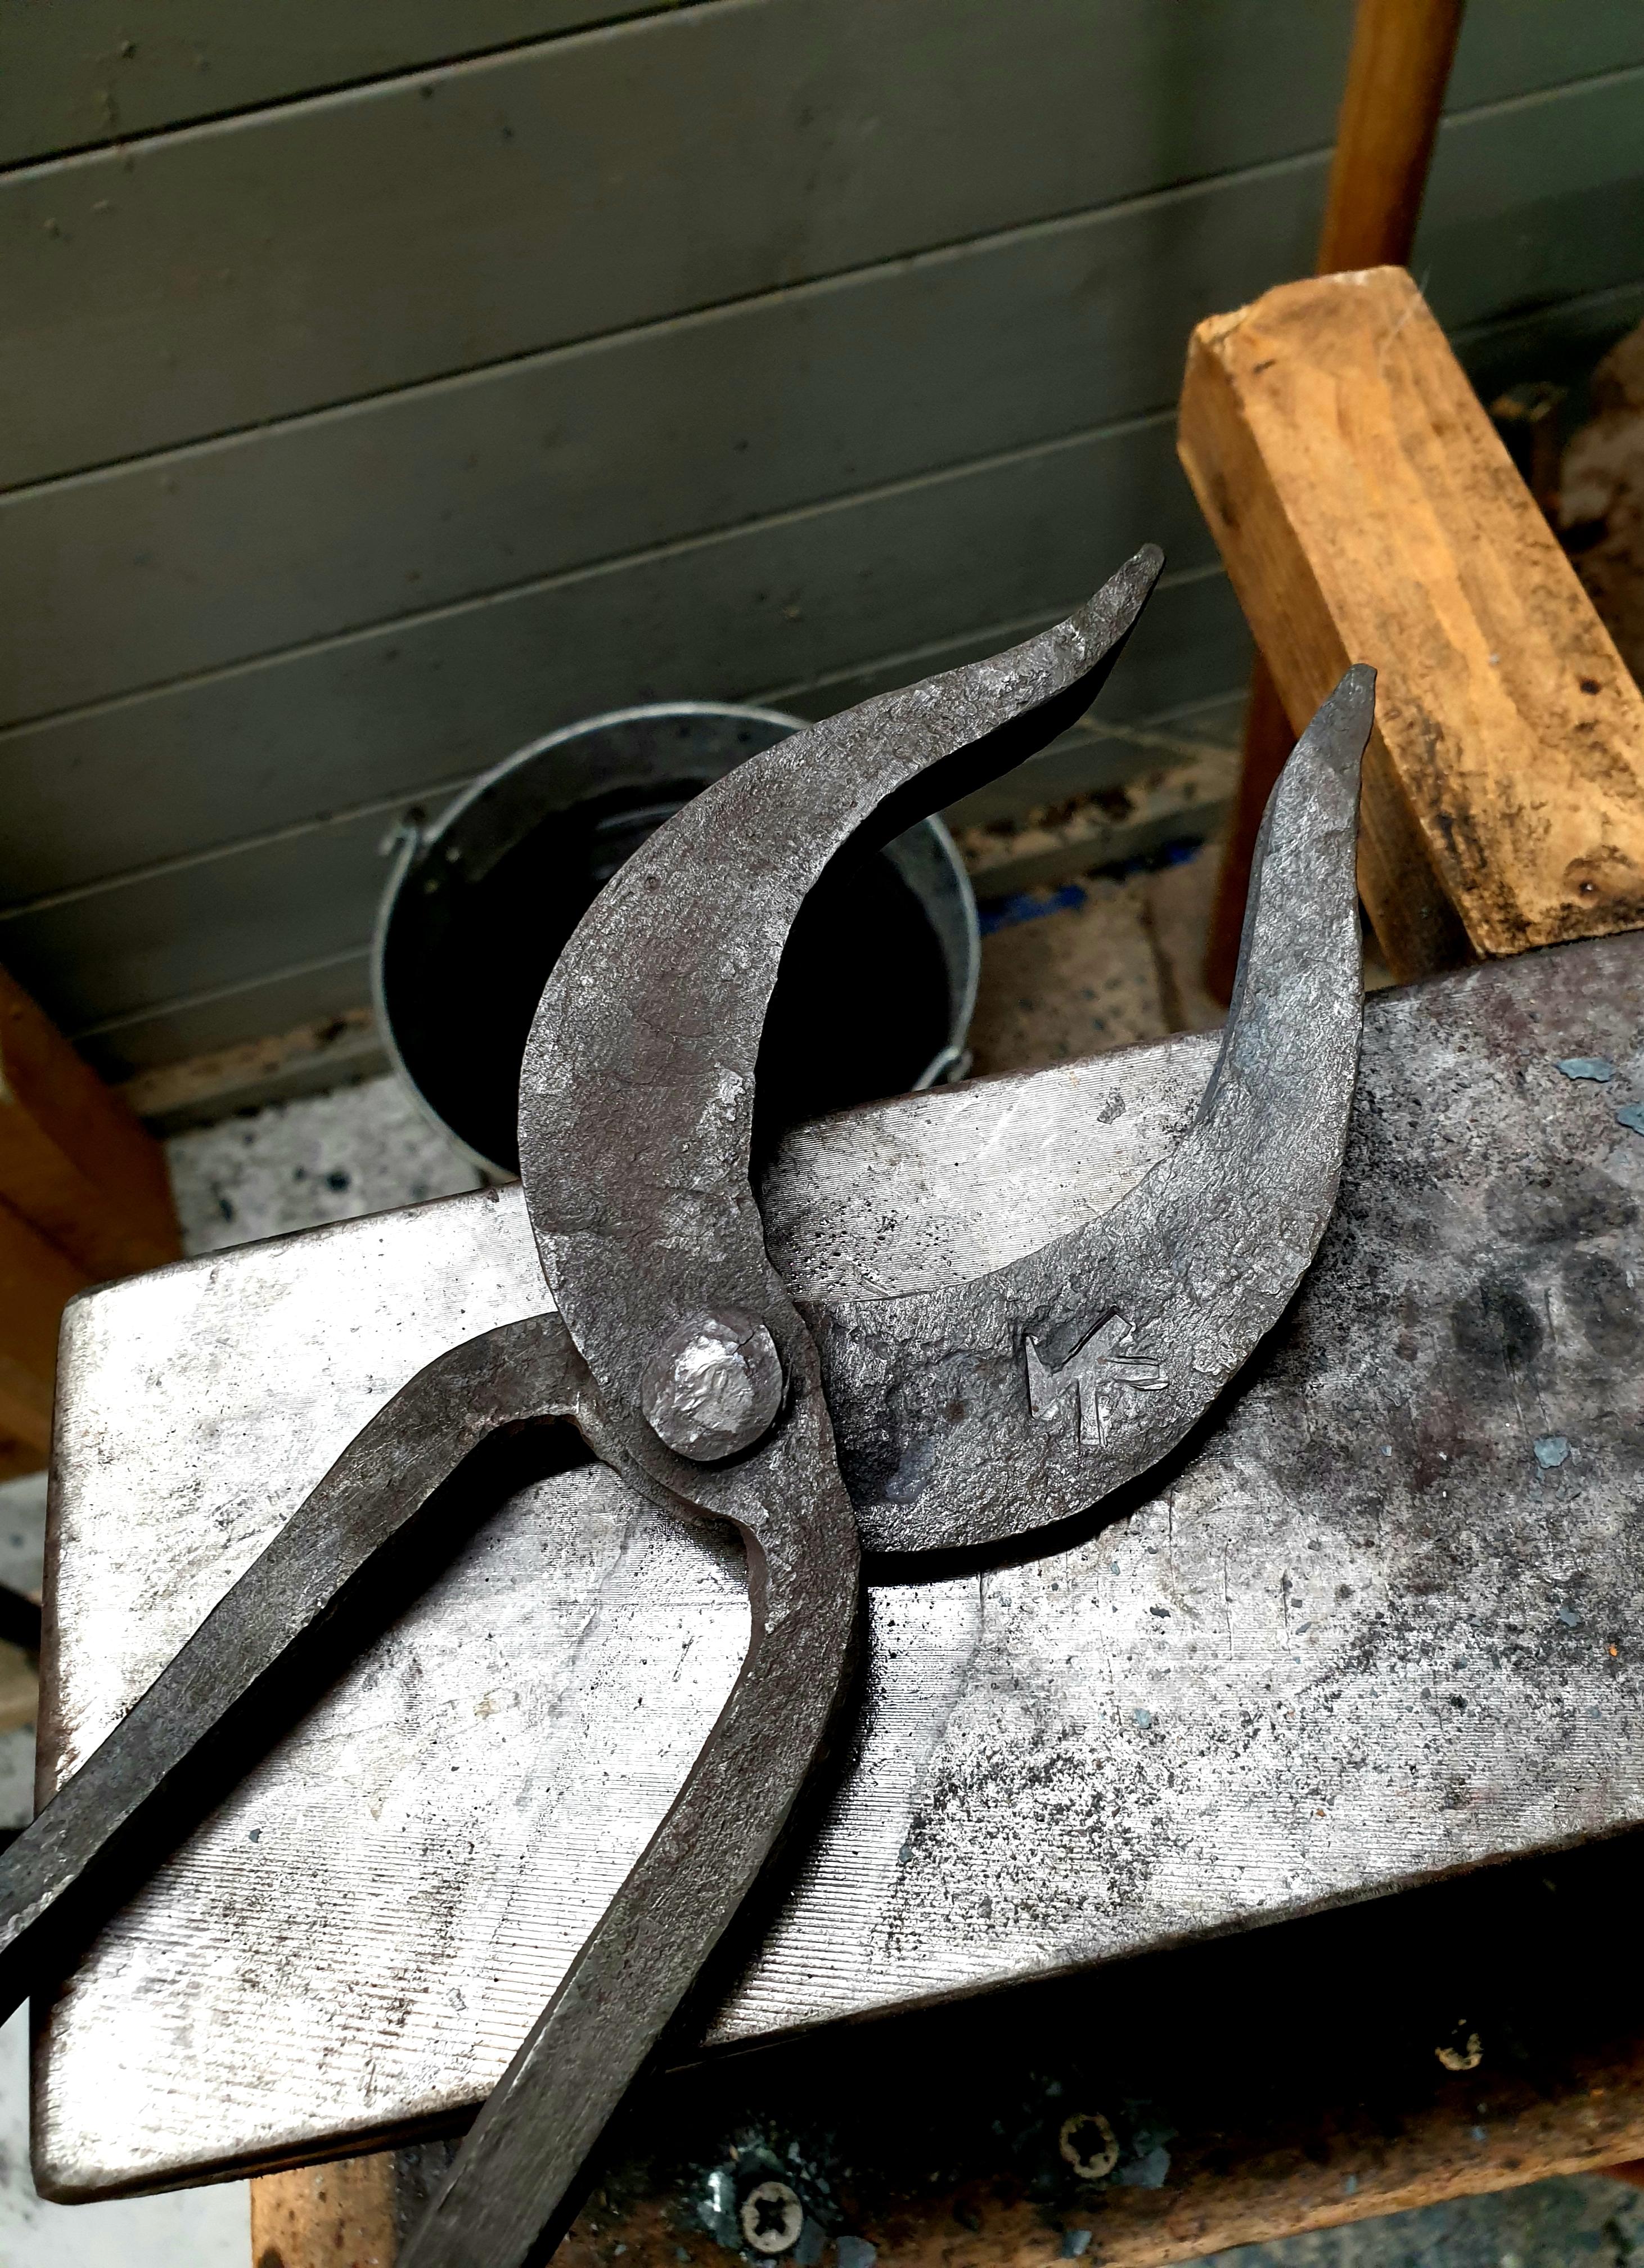
TP- im about to buy a welder so a tool holder like you described might be possible soon.... thanks. Also yes I was careful that the dice opposites added to 7. My gamer mates would never forgive me for a mistake like that.... id never hear the end of it. That said.... one of my gamer friends is very lucky, and the another very unlucky. I might make their bottle openers to be all 5s and 6s, or all 1s and 2s, for a bit of a joke. Today was a HUGE success. I wanted to have a go at a set of viking style tongs, similar to those found at Mastermyr. I also wanted to try shorter handles than my other tongs to see how that feels. Im incredibly happy with these. Easily the best thing Ive forged so far. Took me around 4hrs although that inluded making my first rivet and making a nail/rivet header. (Note- they look enourmous in the photo- they were still to hot to put in my hand for scale. They're not that big because the reins are fairly short, but theyre nice and chunky. Reins are approx 8-10mm square for scale).


-
Interesting! So whats the precaution against this? Thus far I've been turning off the blower to my (coke) forge, doing a quick tidy up while I make sure nothing is on fire, and then leaving the shop within a couple of minutes. Should I be doing something better to shut down the forge which is safer?
-
A collection of improvised anvils
Jon Kerr replied to Charles R. Stevens's topic in Anvils, Swage Blocks, and Mandrels
Wow Piteog! Thats a great looking anvil from a serious bit of rail! I'm actually very jealous. If I were you- I'd look at putting some radii on the edges, they look quite sharp. Theres lots of info regarding this on the forum but generally its nice to have a few different radii on the edges to give yourself forging options. Additionally- have you seen the "swiss army anvil" by Charles in this thread? I'd look to turn the web into a fuller, and one side of the rail base section into a mini horn. That would pretty much give you everything you need! (Note.. I personally DONT recommended carving a permanent hot cut into the rail as its too risky) Here's mine as an example of what I mean by the mini horn. (note this isnt my main anvil so ignore the grinding on the rest of it, its not finished and for a different purpose). Re/ ringing... I stopped my anvil ringing using a magnet, which I also use for checking for critical (non magnetic) temperature when quenching. The magnet is a (30mm diameter, 8mm thick) neodmium ring magnet which is designed to take a countersunk screw down the middle. It's screwed into a lump of wood as a handle. This relatively small magnet+handle stops all my ring dead. You can get them on eBay etc dirt cheap.RailAnvil.thumb.jpg.eaa2eed0cc20f1e0d312f3c77b9d2af1.jpg)
-
Out of interest, does coke have the same potential issue or is this a coal related problem?
-
Sorry gents wasnt meaning to complain! I was more concerned that I might be driving people nuts with updates that arent interesting. The tidy shop is your fault Frosty! I took your advice re/fire safety and am regularly brushing and keeping the area clutter free. Nice tip re/ tool holders in the anvil stand too. I might do just that for my "in use" tools as you say.
-
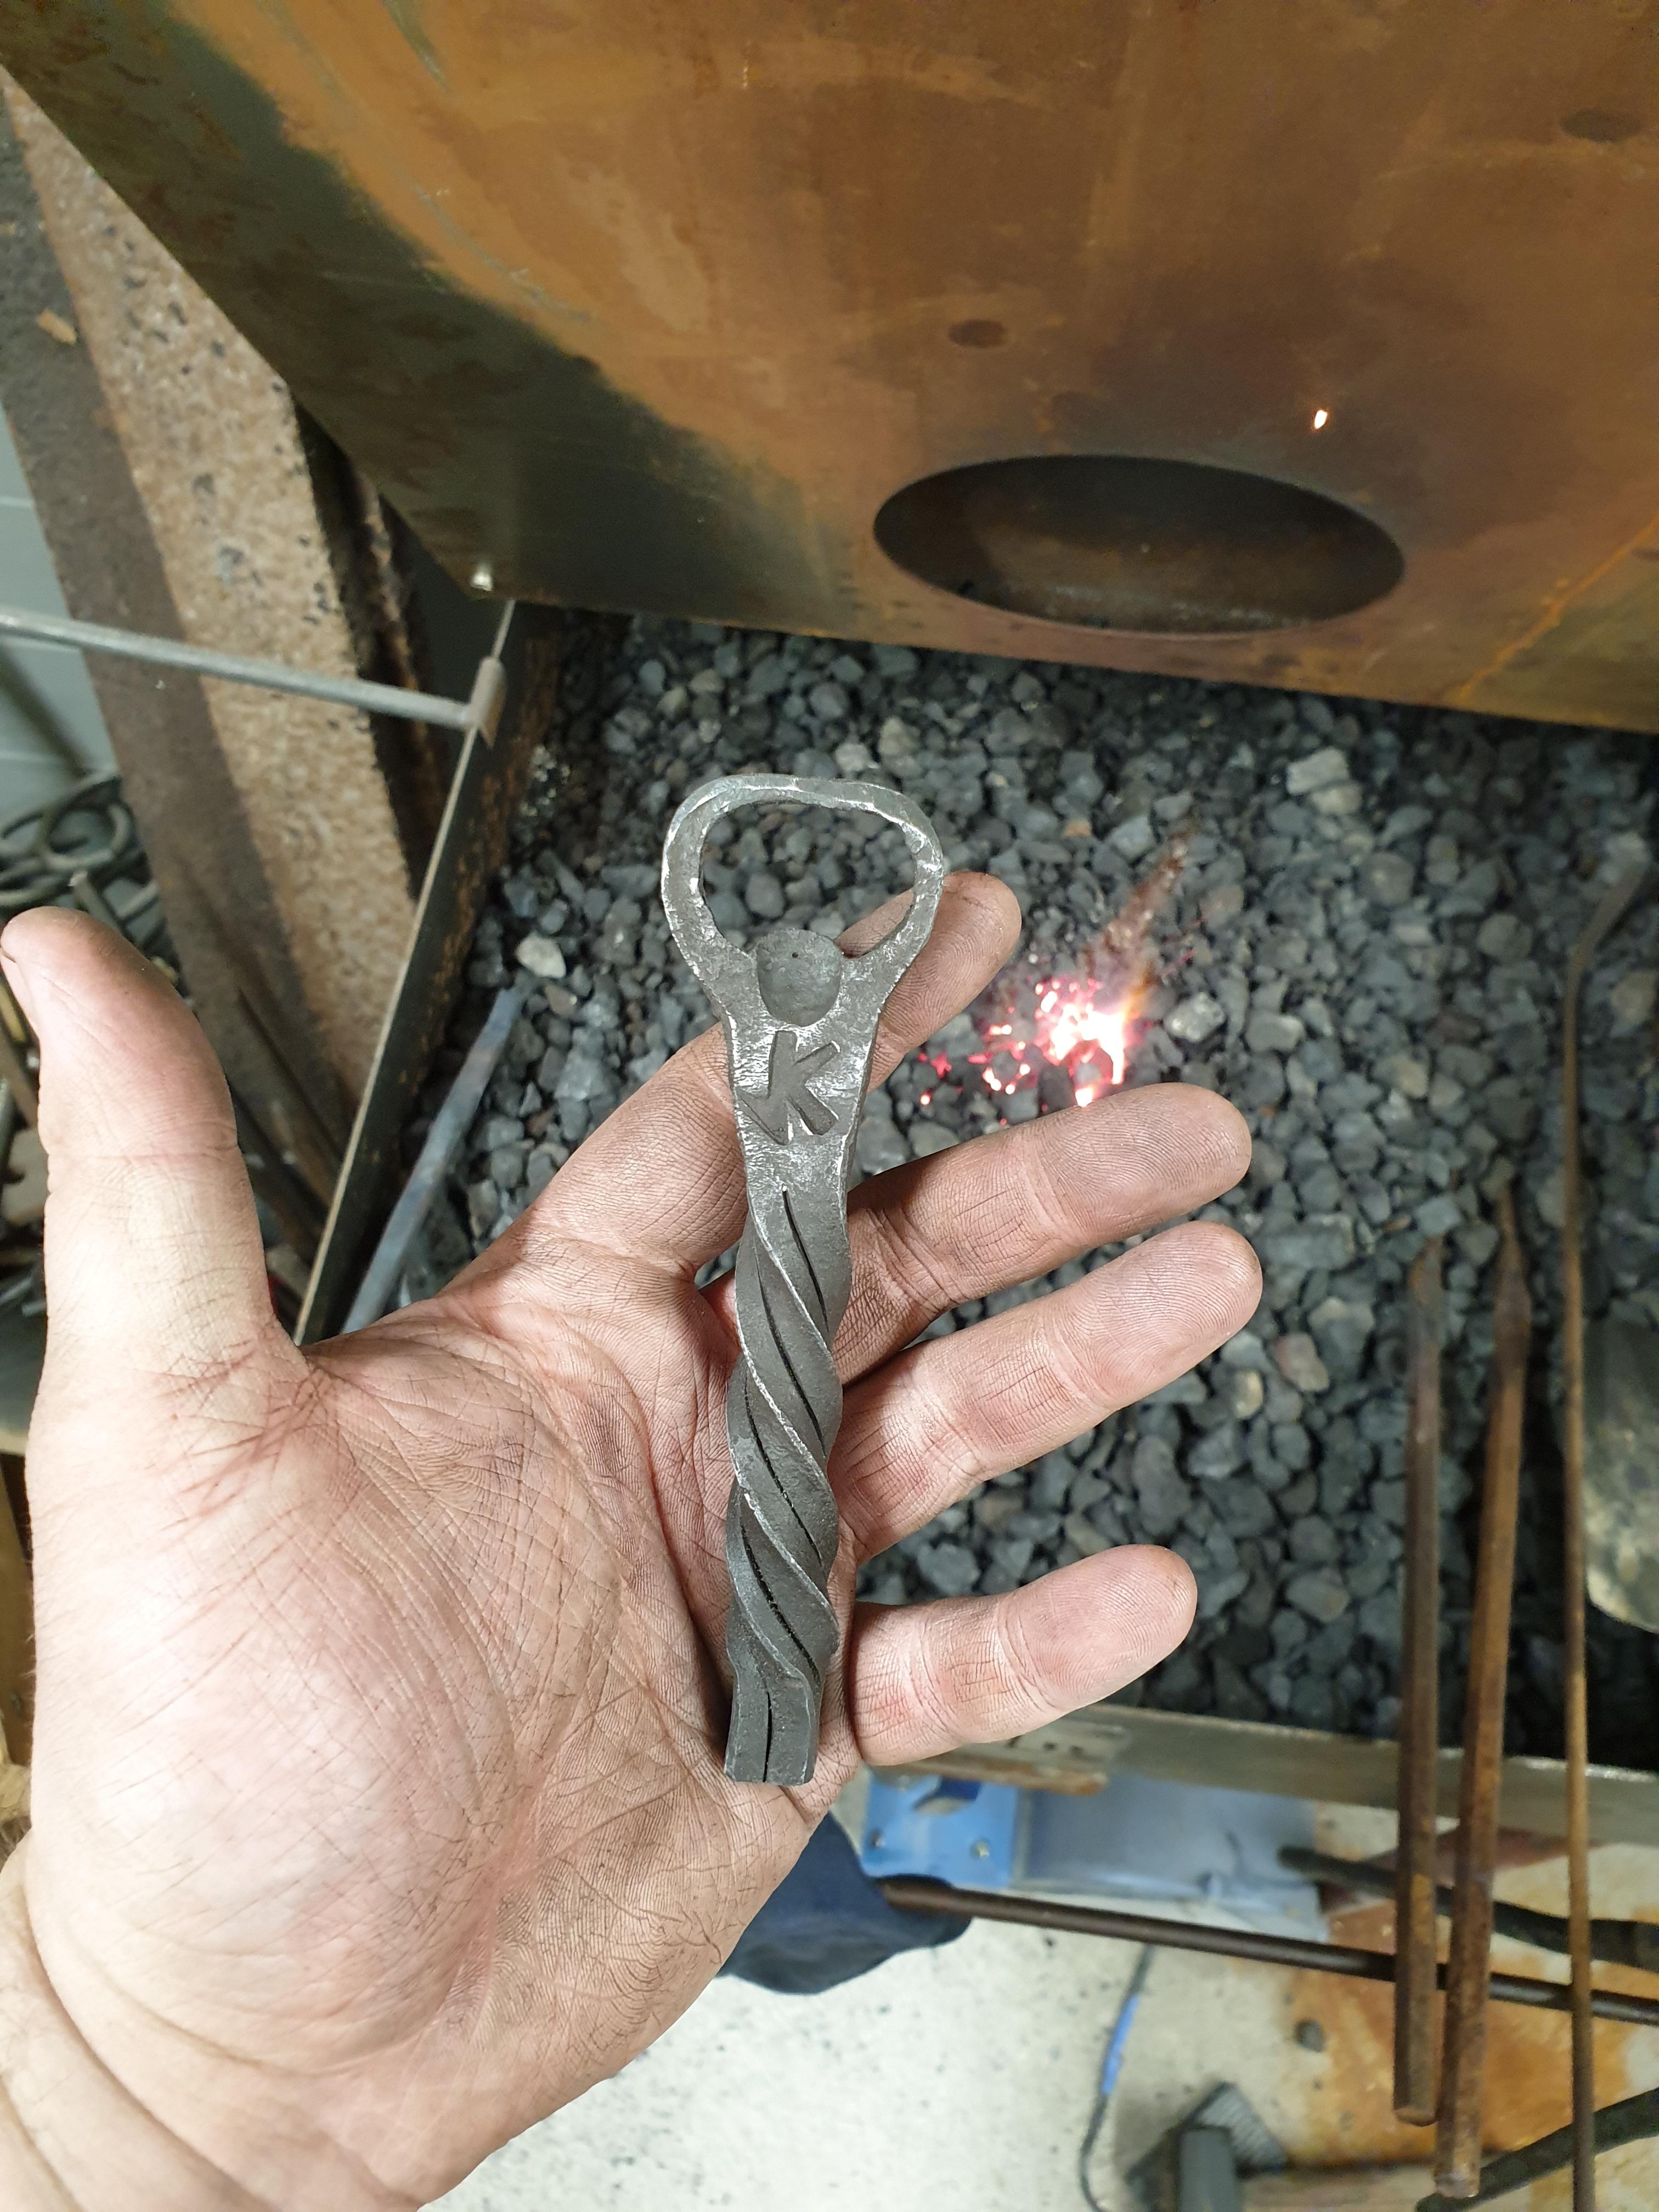
Not sure if anyone is reading these updates but I'll keep posting nonetheless as its nice to track my progress for my own sake... Today I made a bike-chain hold down with a foot stirrup, inspired by JHCC. Forgot to photograph it but it works wonderfully well. I also made two more bottle openers. Really really pleased with twisted one and used my touchmark in earnest for the first time which came out nice. I made a second dice twist opener which didnt turn out as good as the first.... but practice makes perfect.


-
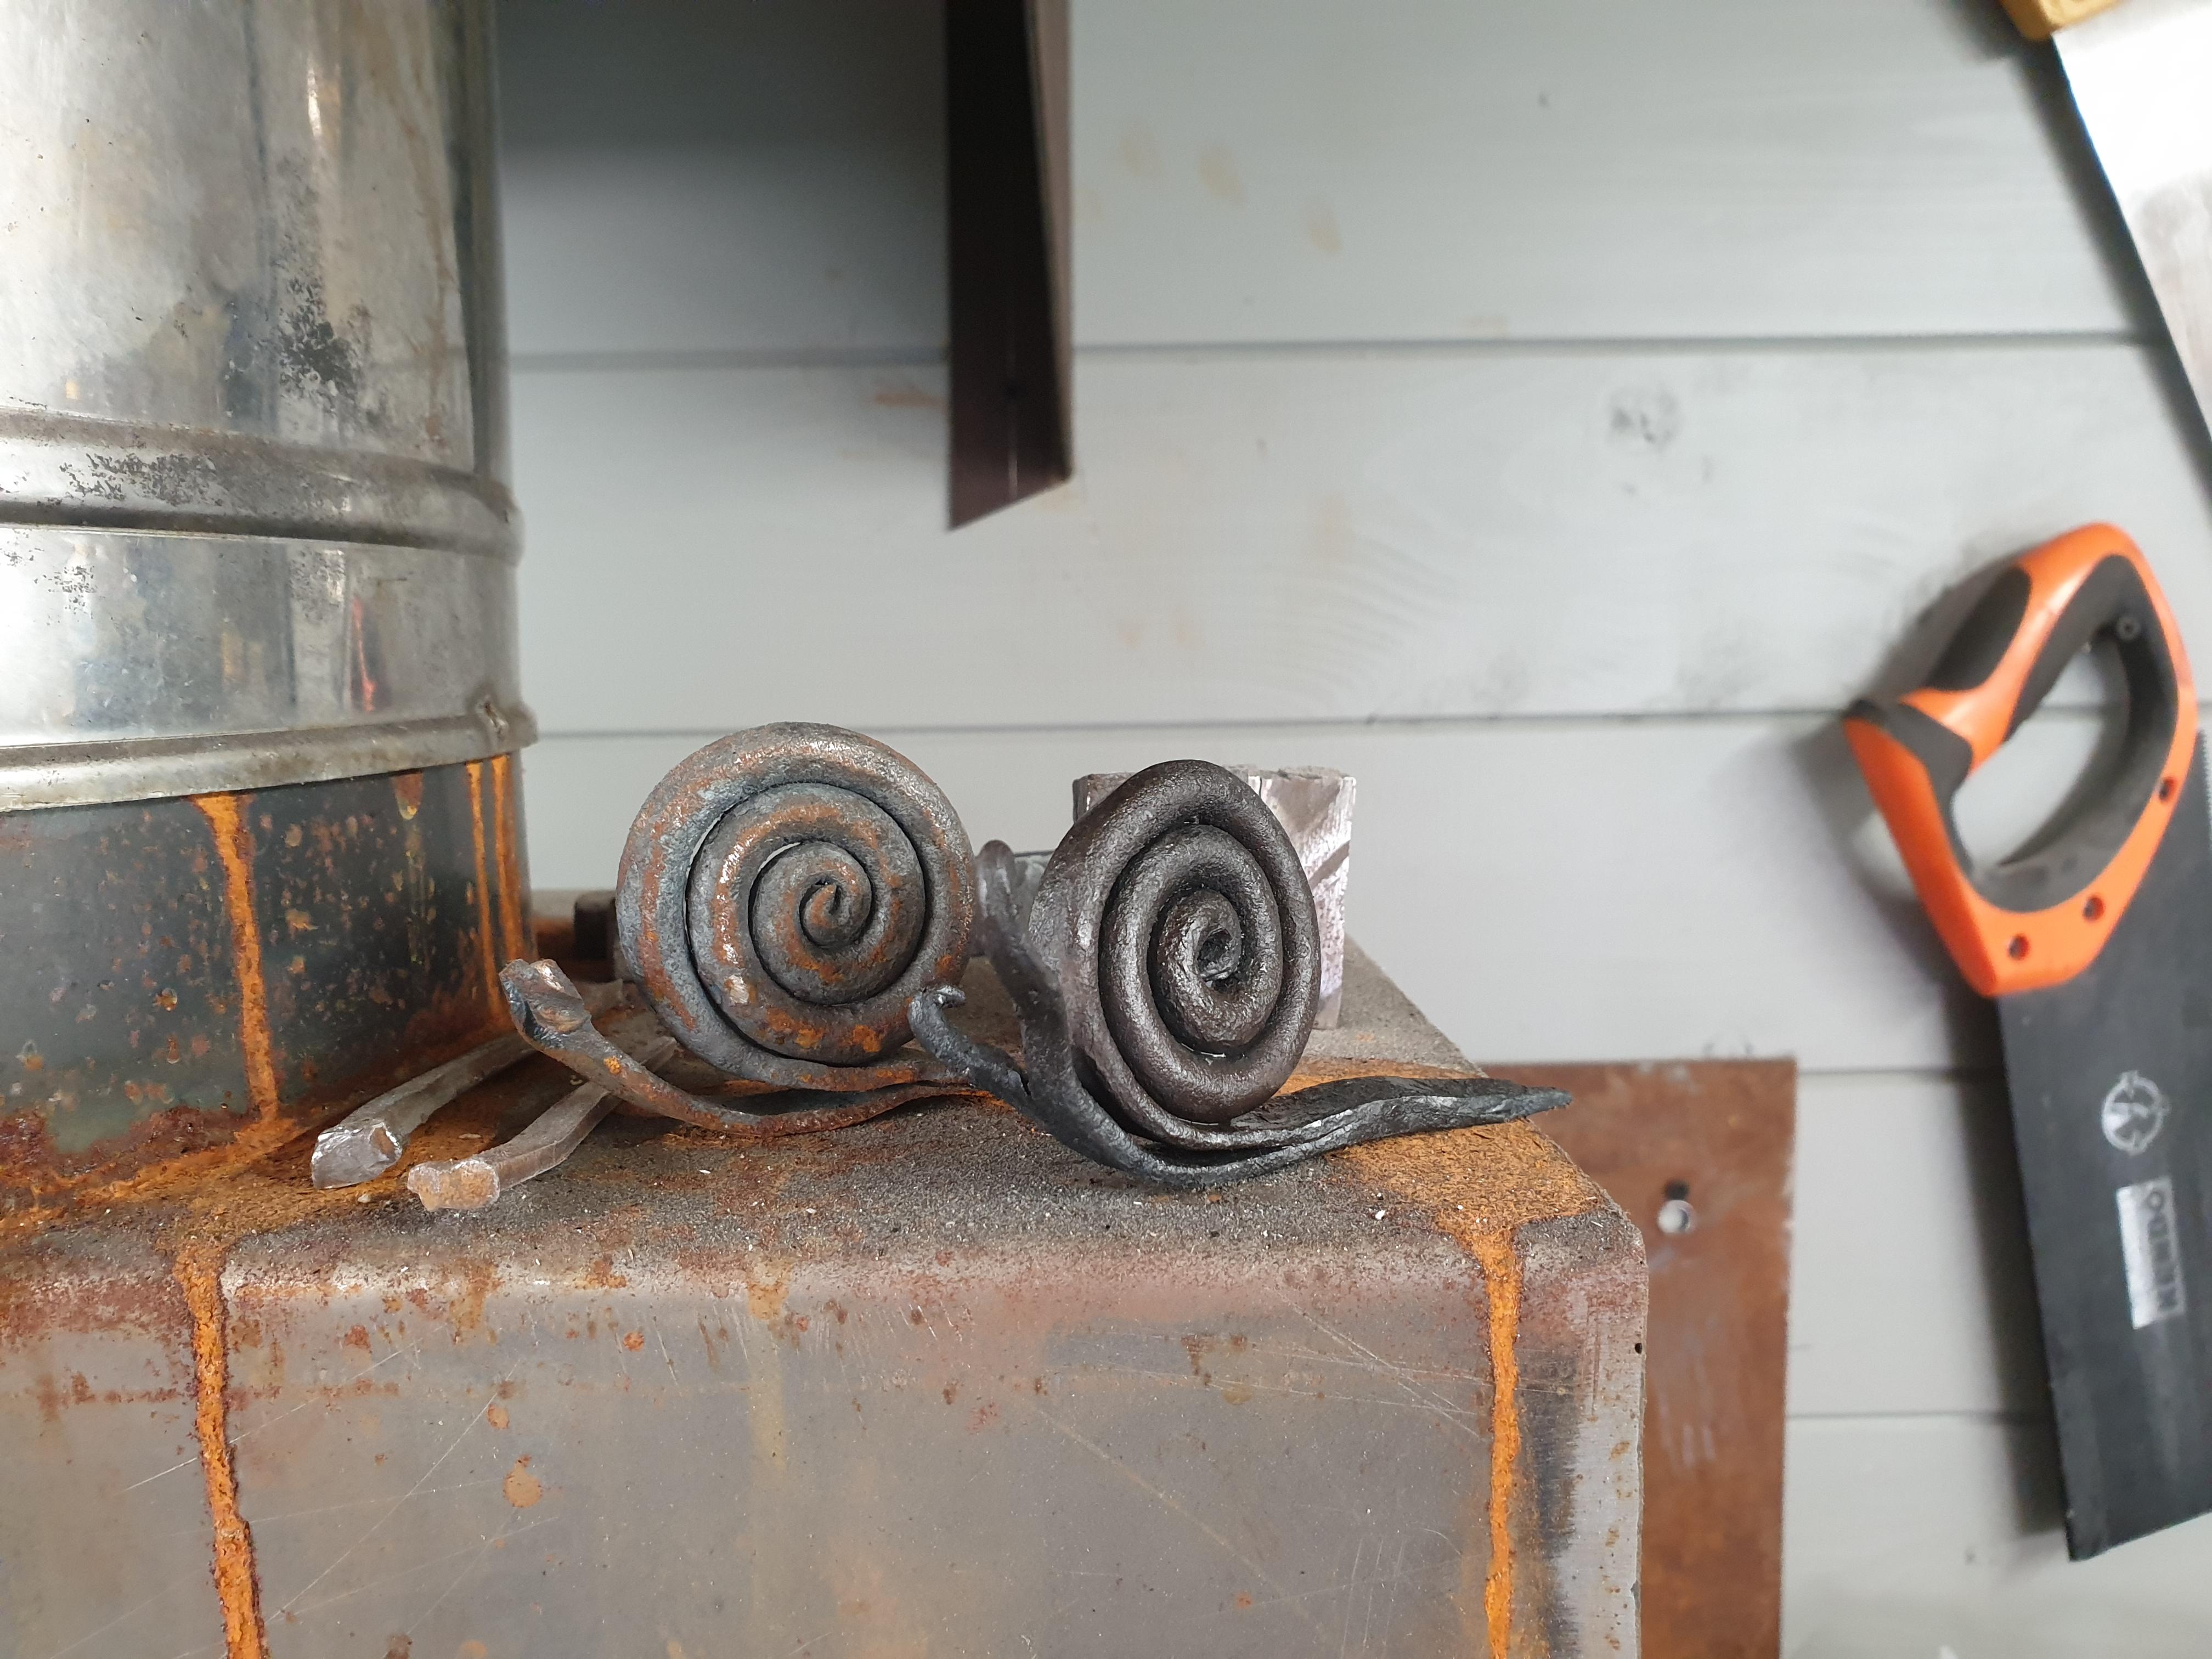
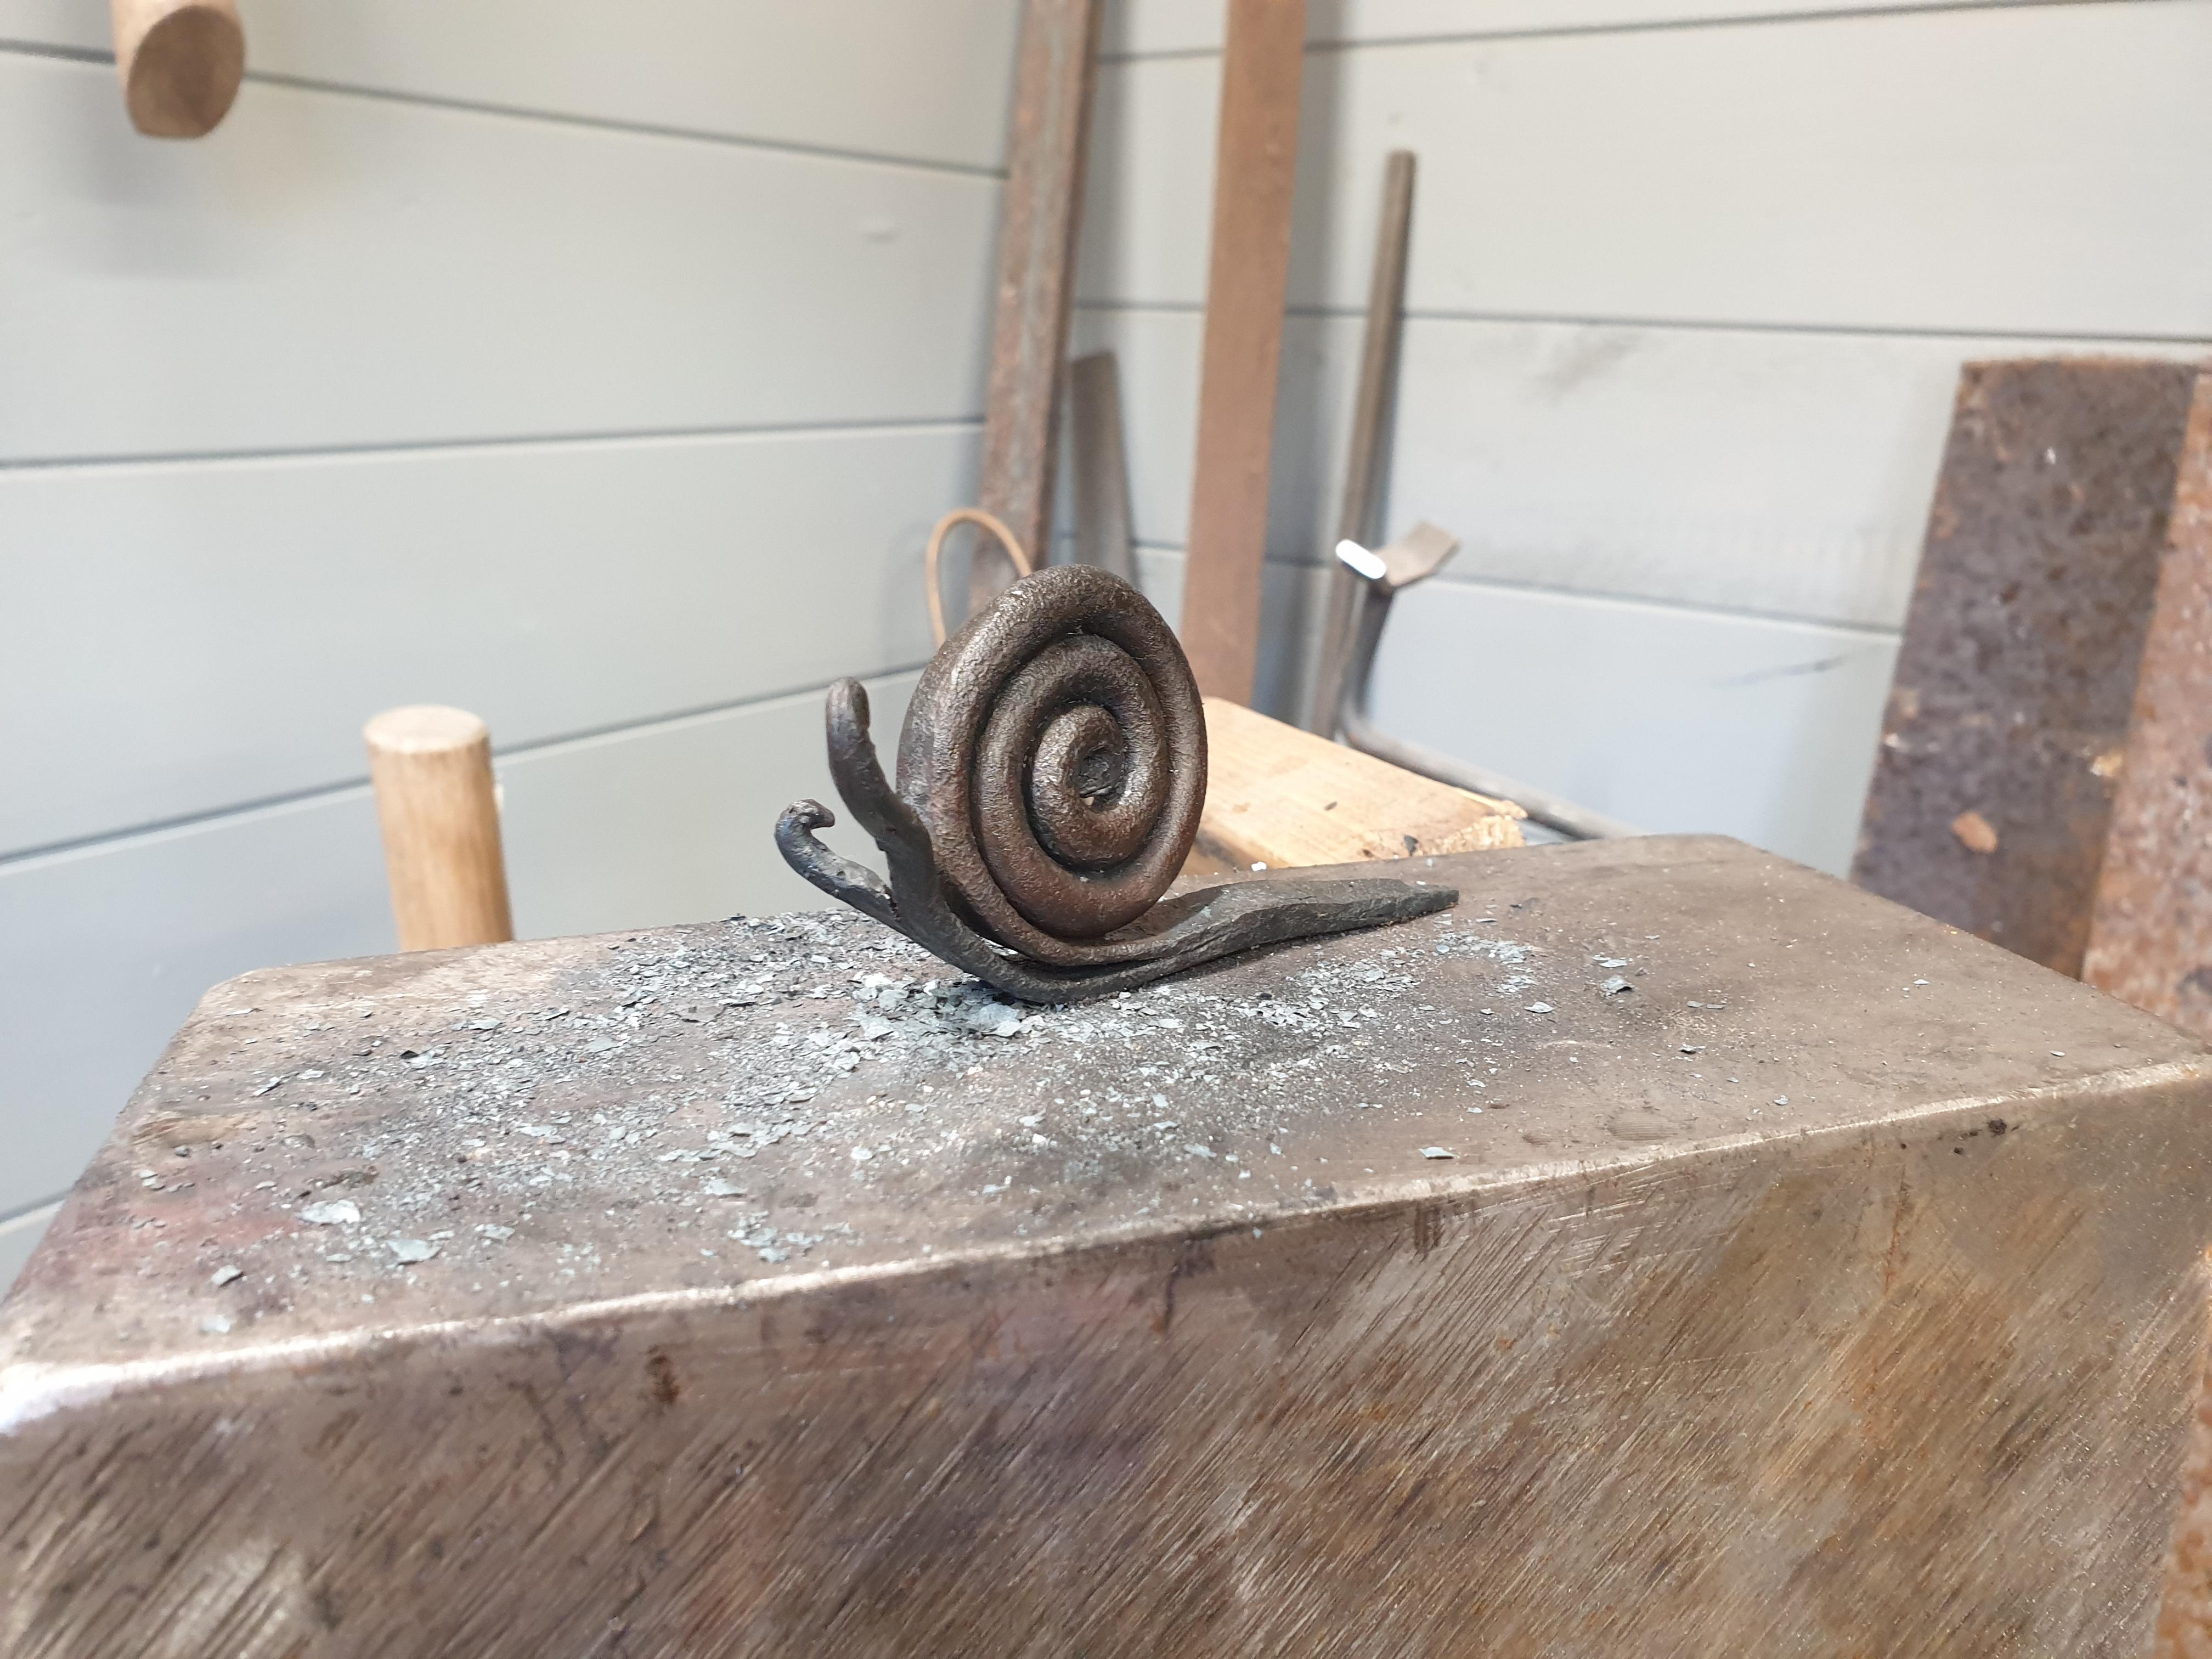
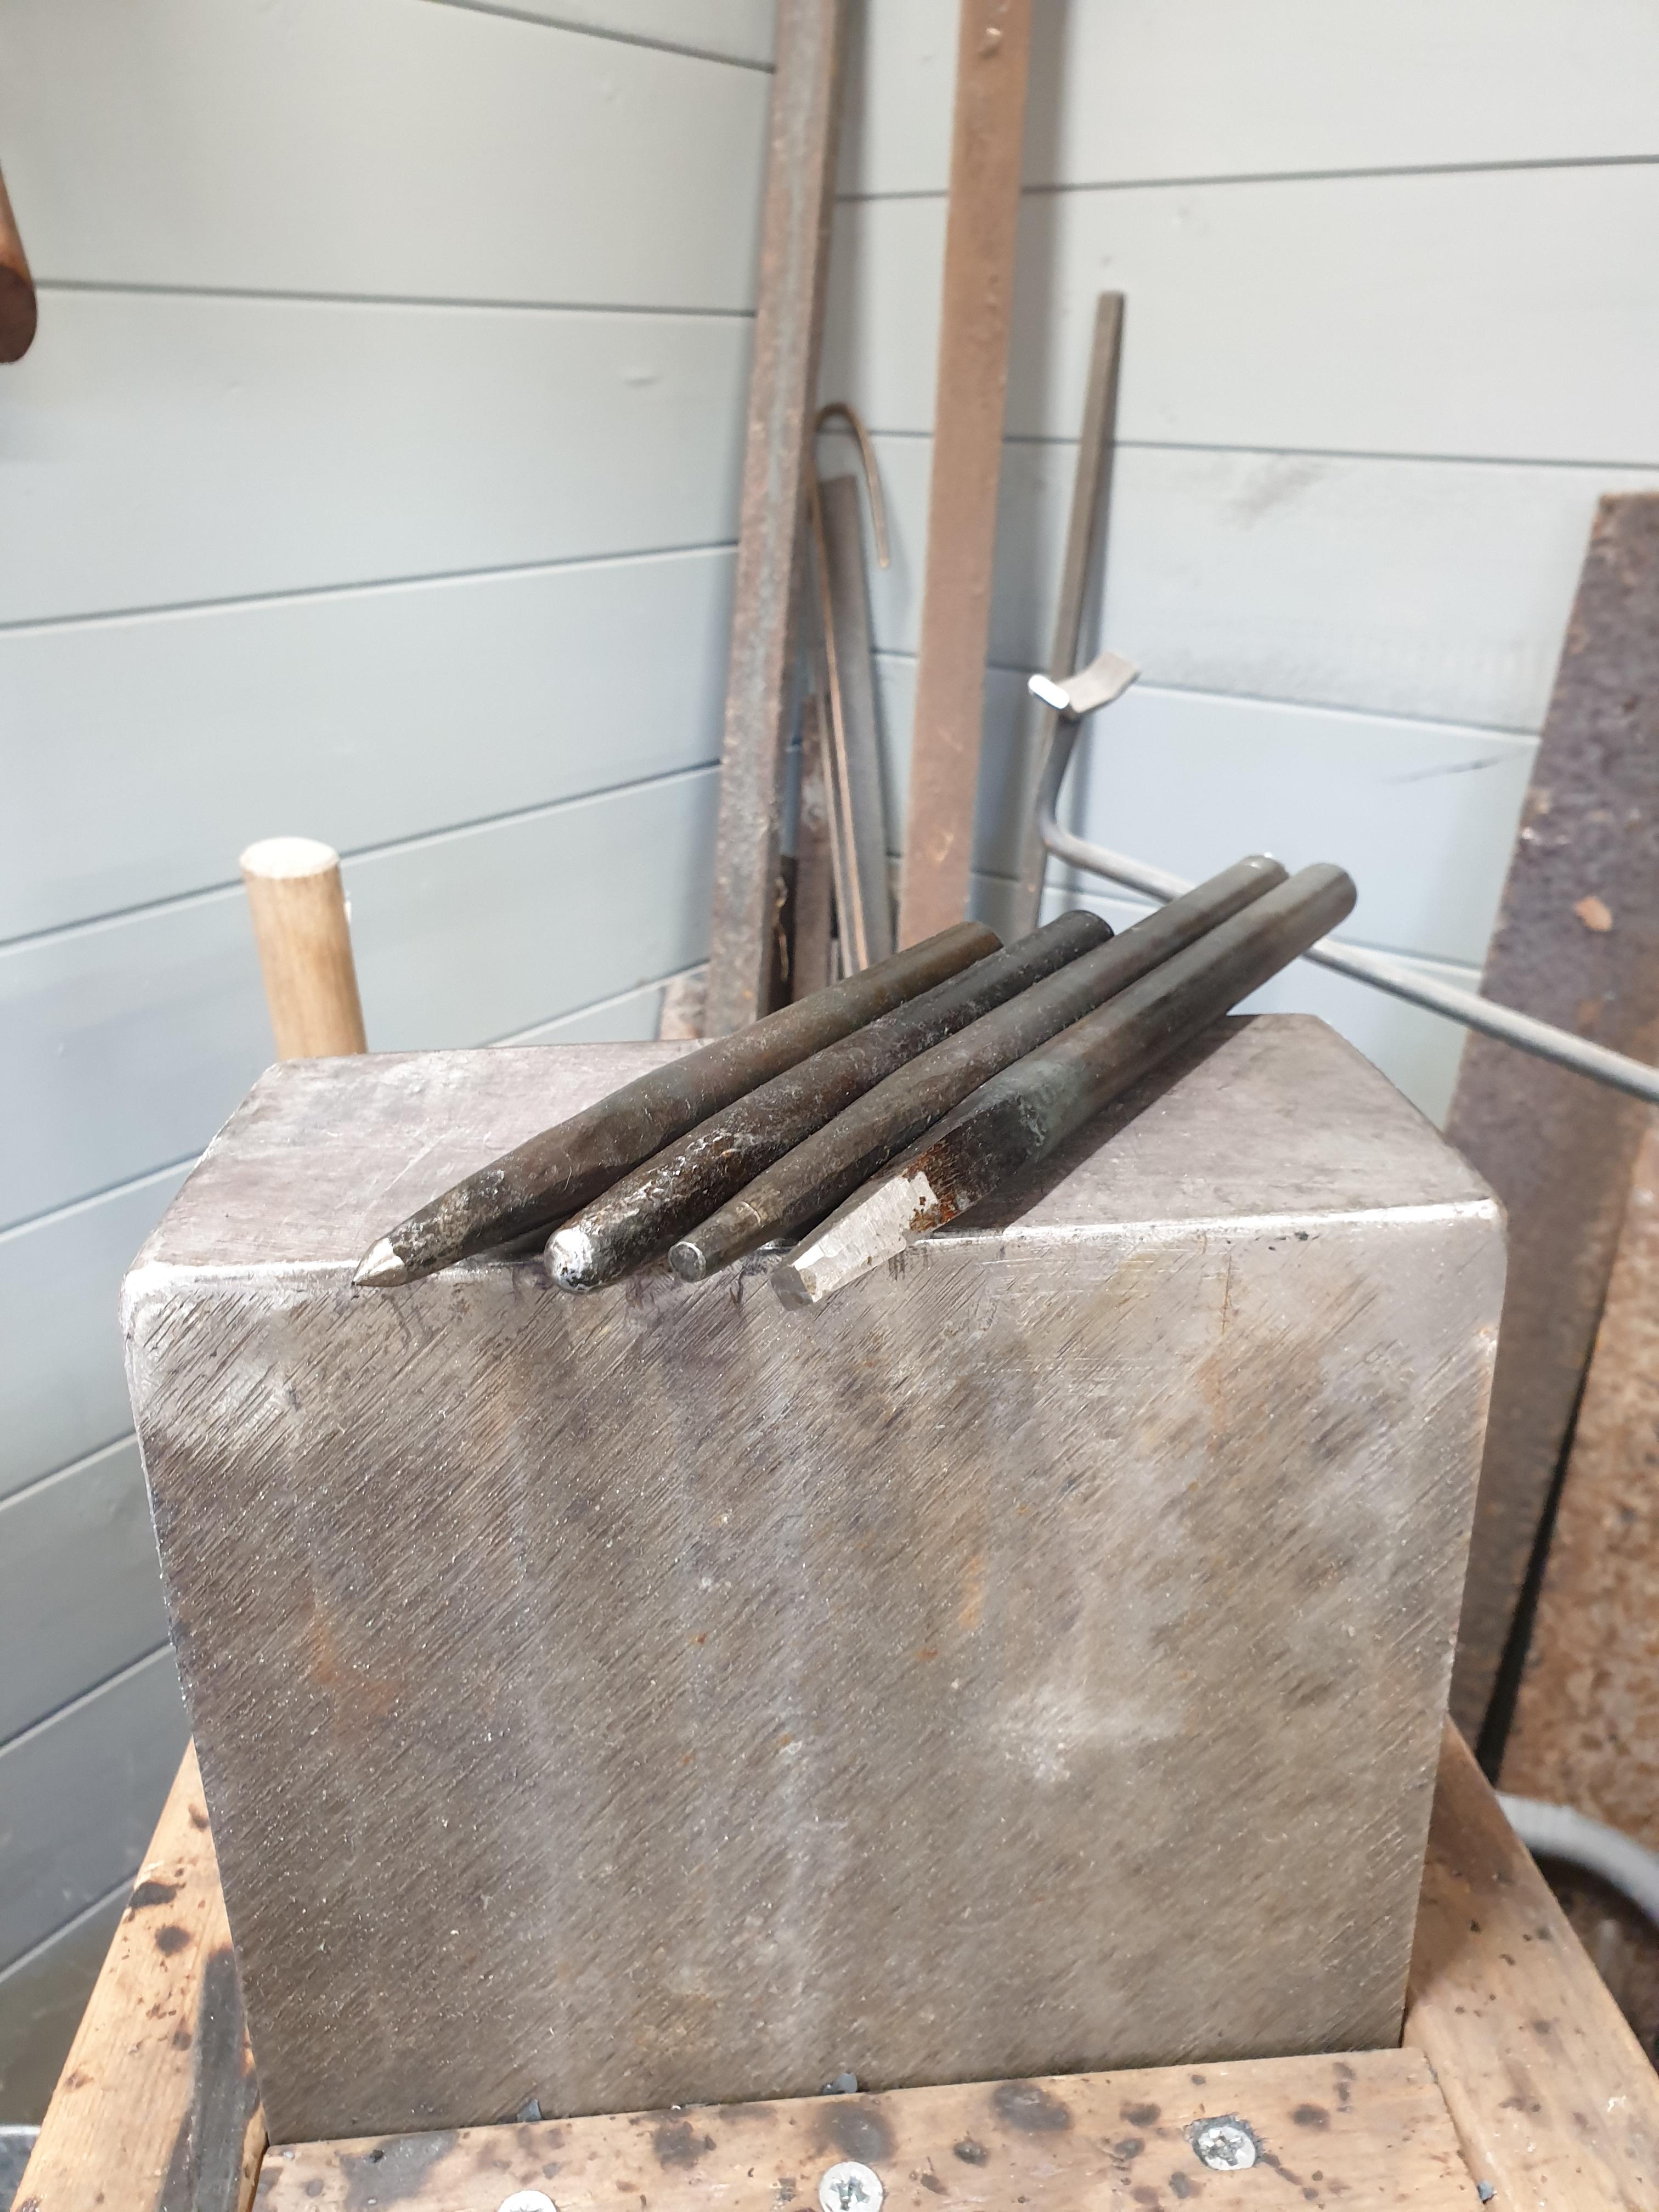
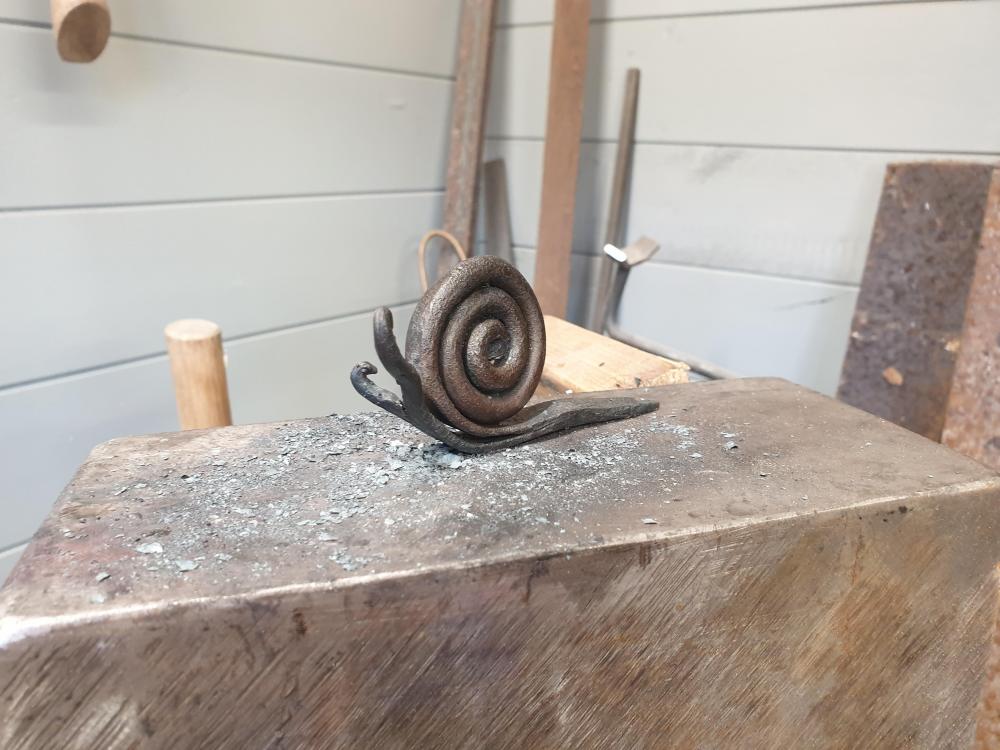
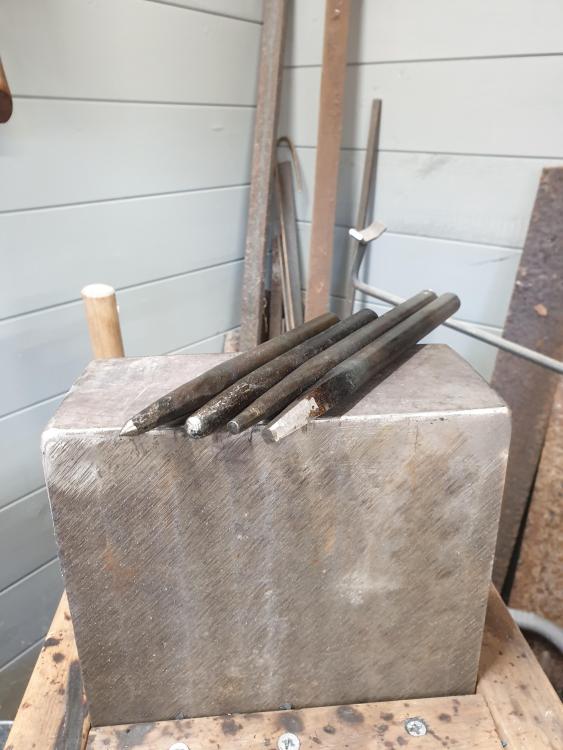
Today I managed my first solo forge weld!! A few weeks ago I met up the Neal the Smith from IFI and he gave me a forge welding intro which was awesome. Today was the first time I managed it in my own forge (coke, wheras Neals is gas). Super happy and I finished a snail (much better than the first, although I still burned an antennae off!!) I also forged and heat treated a better centrepunch and a rounded punch (last one was rebar)..... to make more dice twist bottle openers. Finally I made a simple punch holder from a tin can screwed into my hammer rack....


-
Get a CO detector with a digital readout. That way you can watch if the levels rise even if the alarm hasnt triggered yet.
-
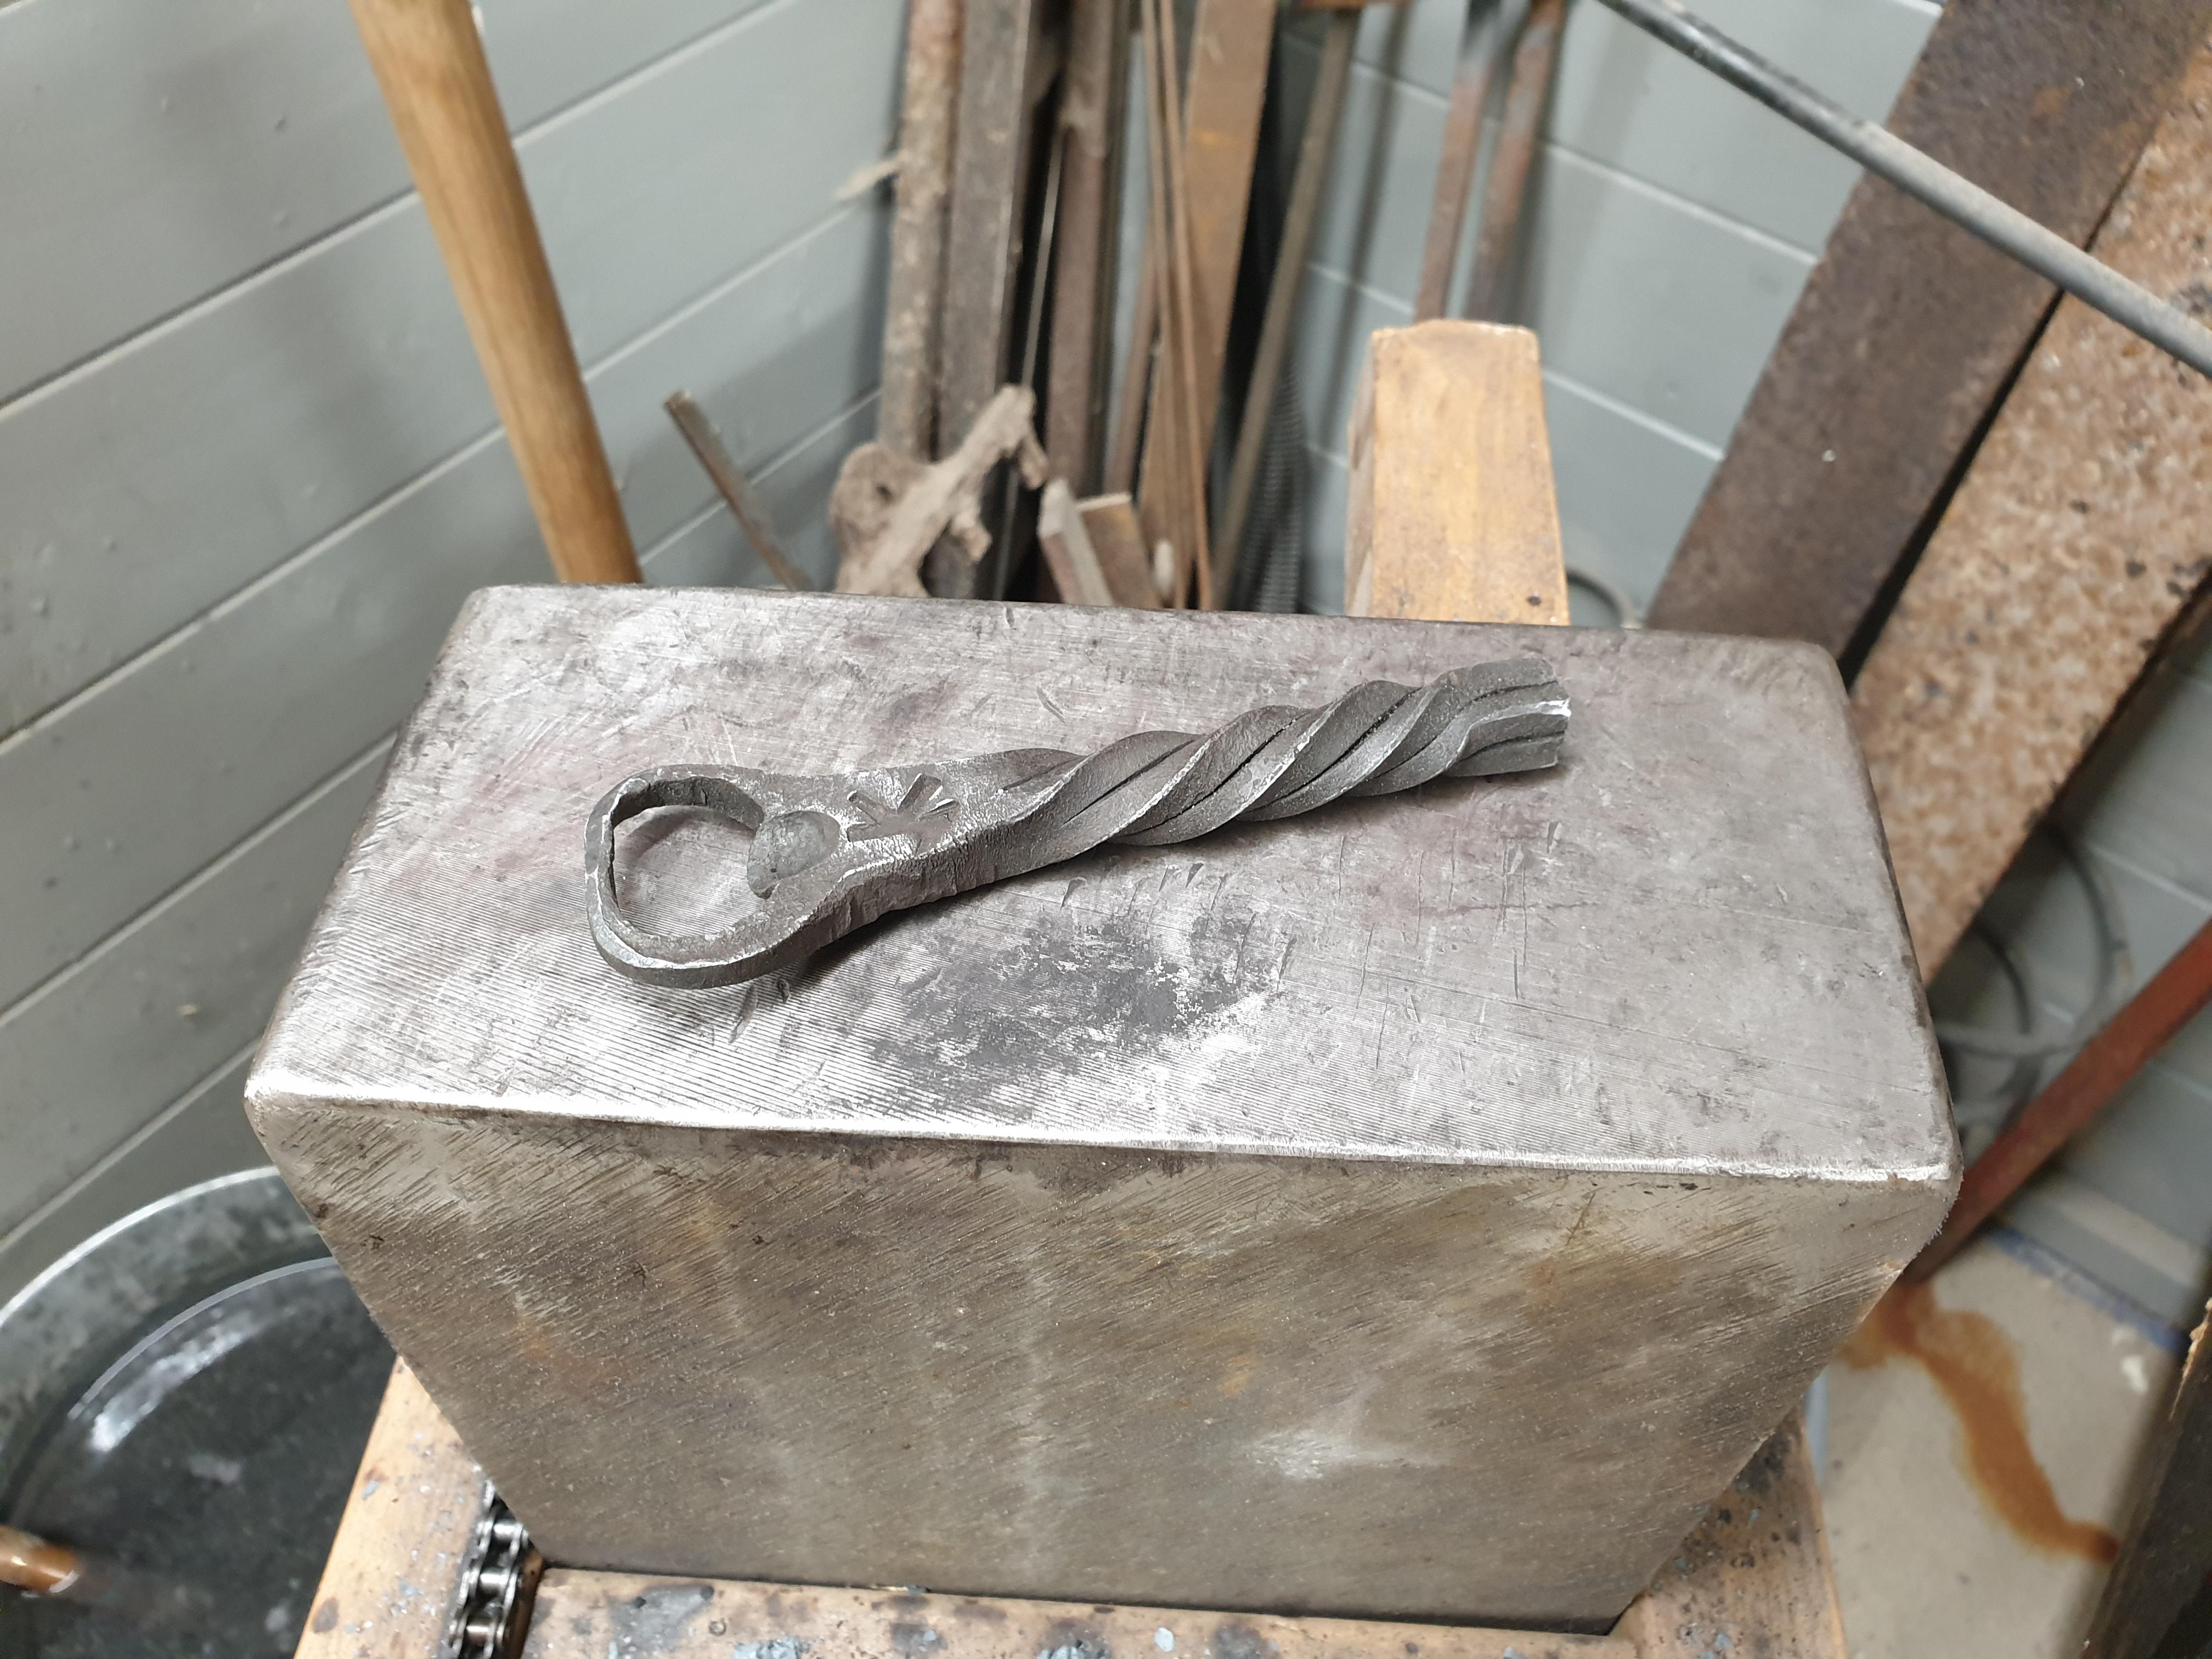
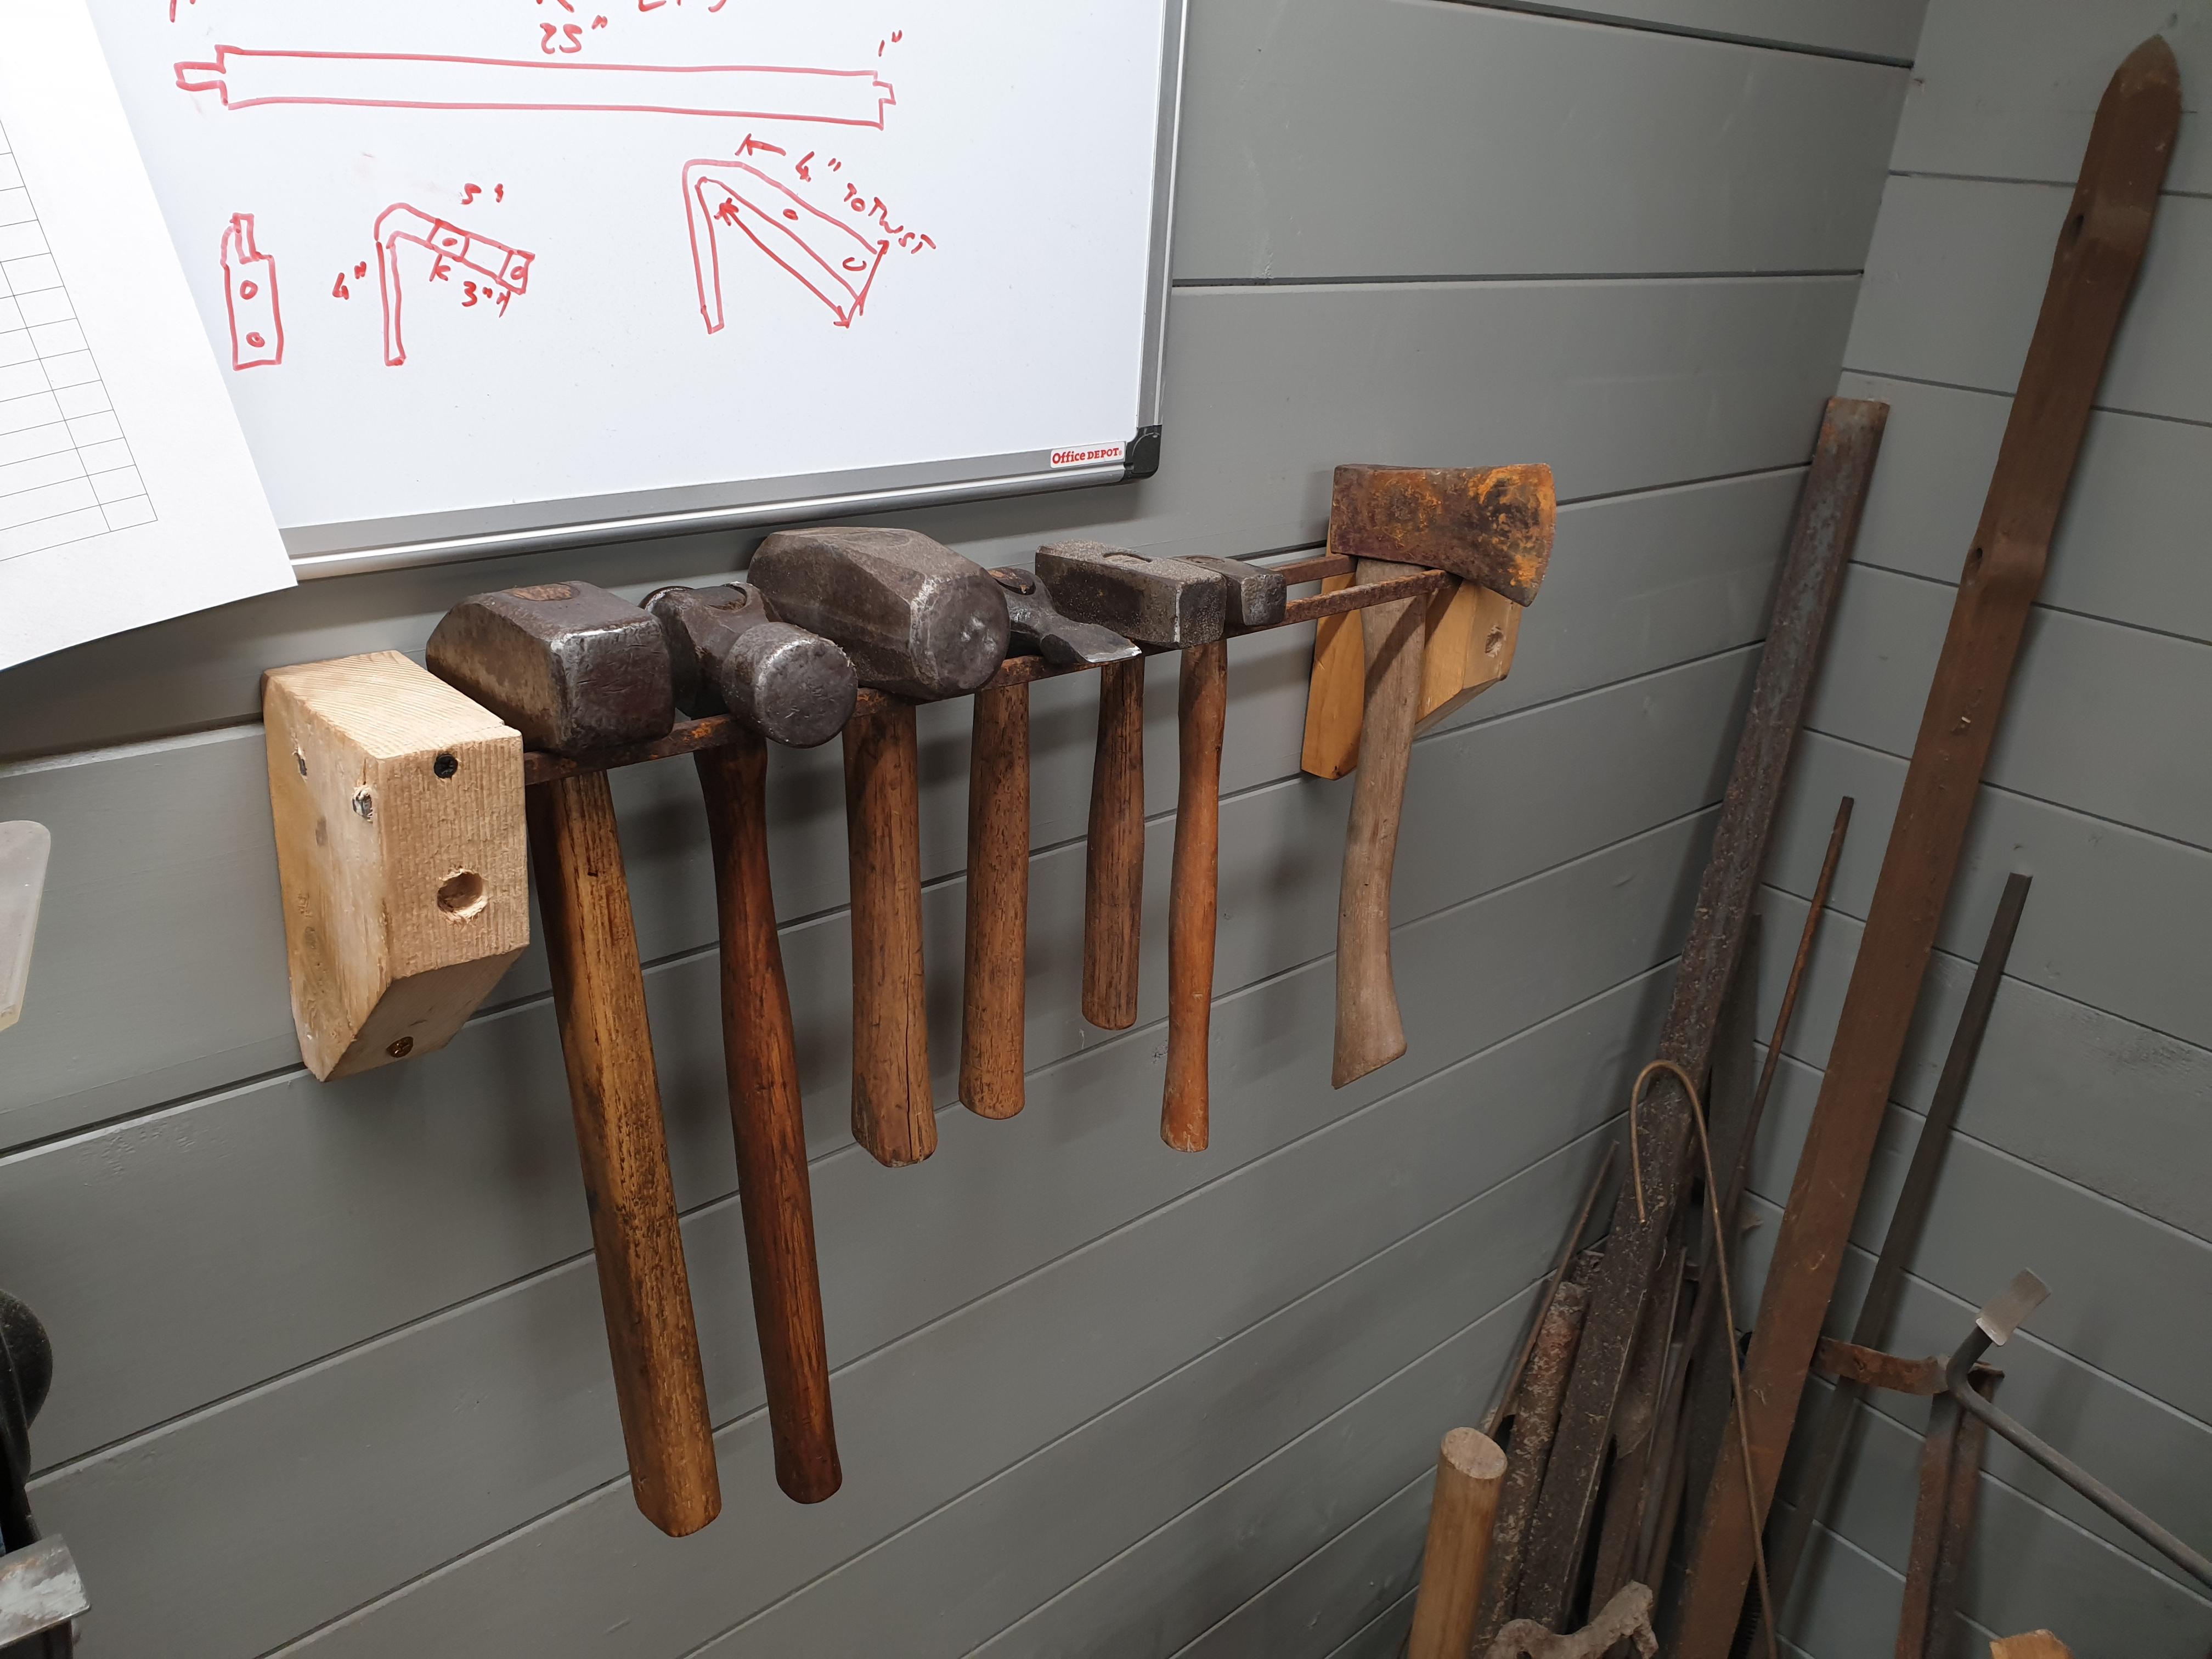
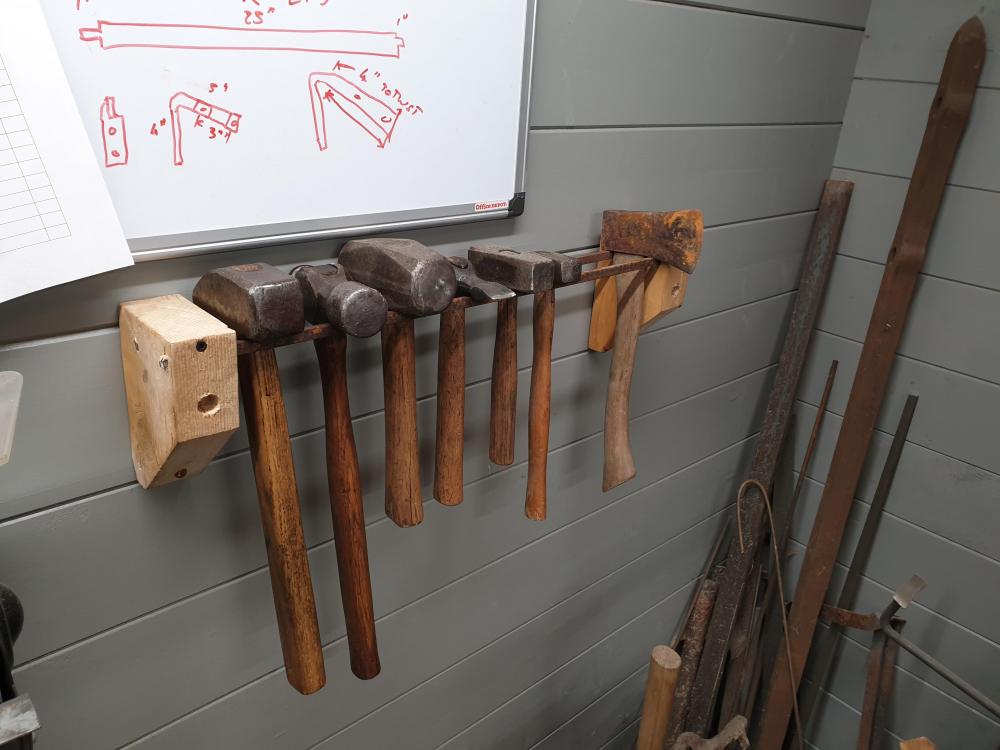
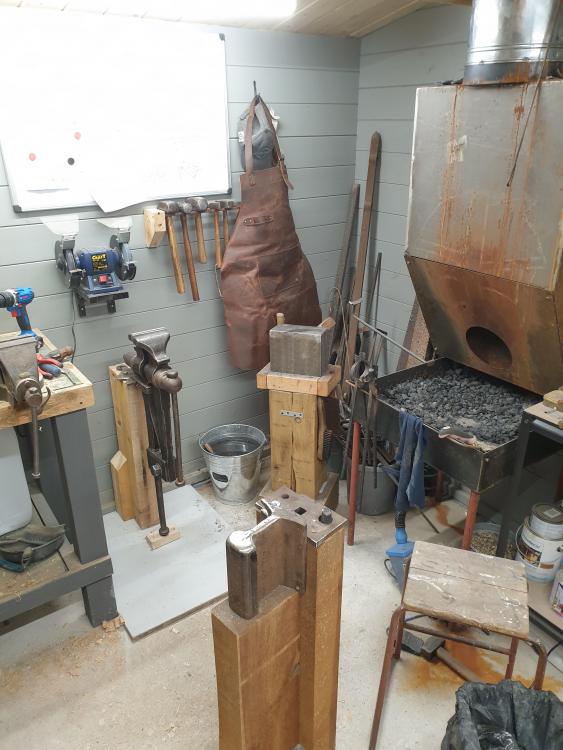
Hi all, quick update! Things are going great in my little forge- I'm really making progress. Thanks to the introduction of the mini-horn to my rail anvil, I had all the tools I needed to finish my first bottle opener with a dice twist!! Incredibly happy with this- especially sincs I've tried this a few times over the past year and this is the first time I succeeded. Really proud of it. Now I just need to make about 10 more for all my nerd friends. I also took Thomas' advice and made a handled chisel from an old small cross peen hammer. Havent used this yet. Heat treated the chisel end and annealed the striking end. The forge is evolving all the time! I made a quick hammer rack. My sister bought me a new apron for Christmas which is hanging on a hand made hook. And..... most excitingly of all...... my amazing wife bought me a 3 day Bladesmithing course with Owen Bush (Basher on IFI)! I cant wait. April cant come soon enough.


-
Do you have a Carbon Monoxide detector cloee to your forge? You really should. Cant help with the burner issues, sorry. Someone more experienced will be along shortly Im sure!
-
Thats very clever, I'd have never thought of that. Will do! ...... ... what I wouldnt give to be one of your "shop apes" for a few weeks Thomas! I'd learn more in a week than I will in a lifetime of hobby blacksmithing alone.


HoldDownb.jpg.d3bb3cabbd77d2891004e5b8cccdd9d5.jpg)
RailAnvil.jpg.48c3fba477f6f576c709902751c6286e.jpg)