BKToad
-
Posts
9 -
Joined
-
Last visited
-
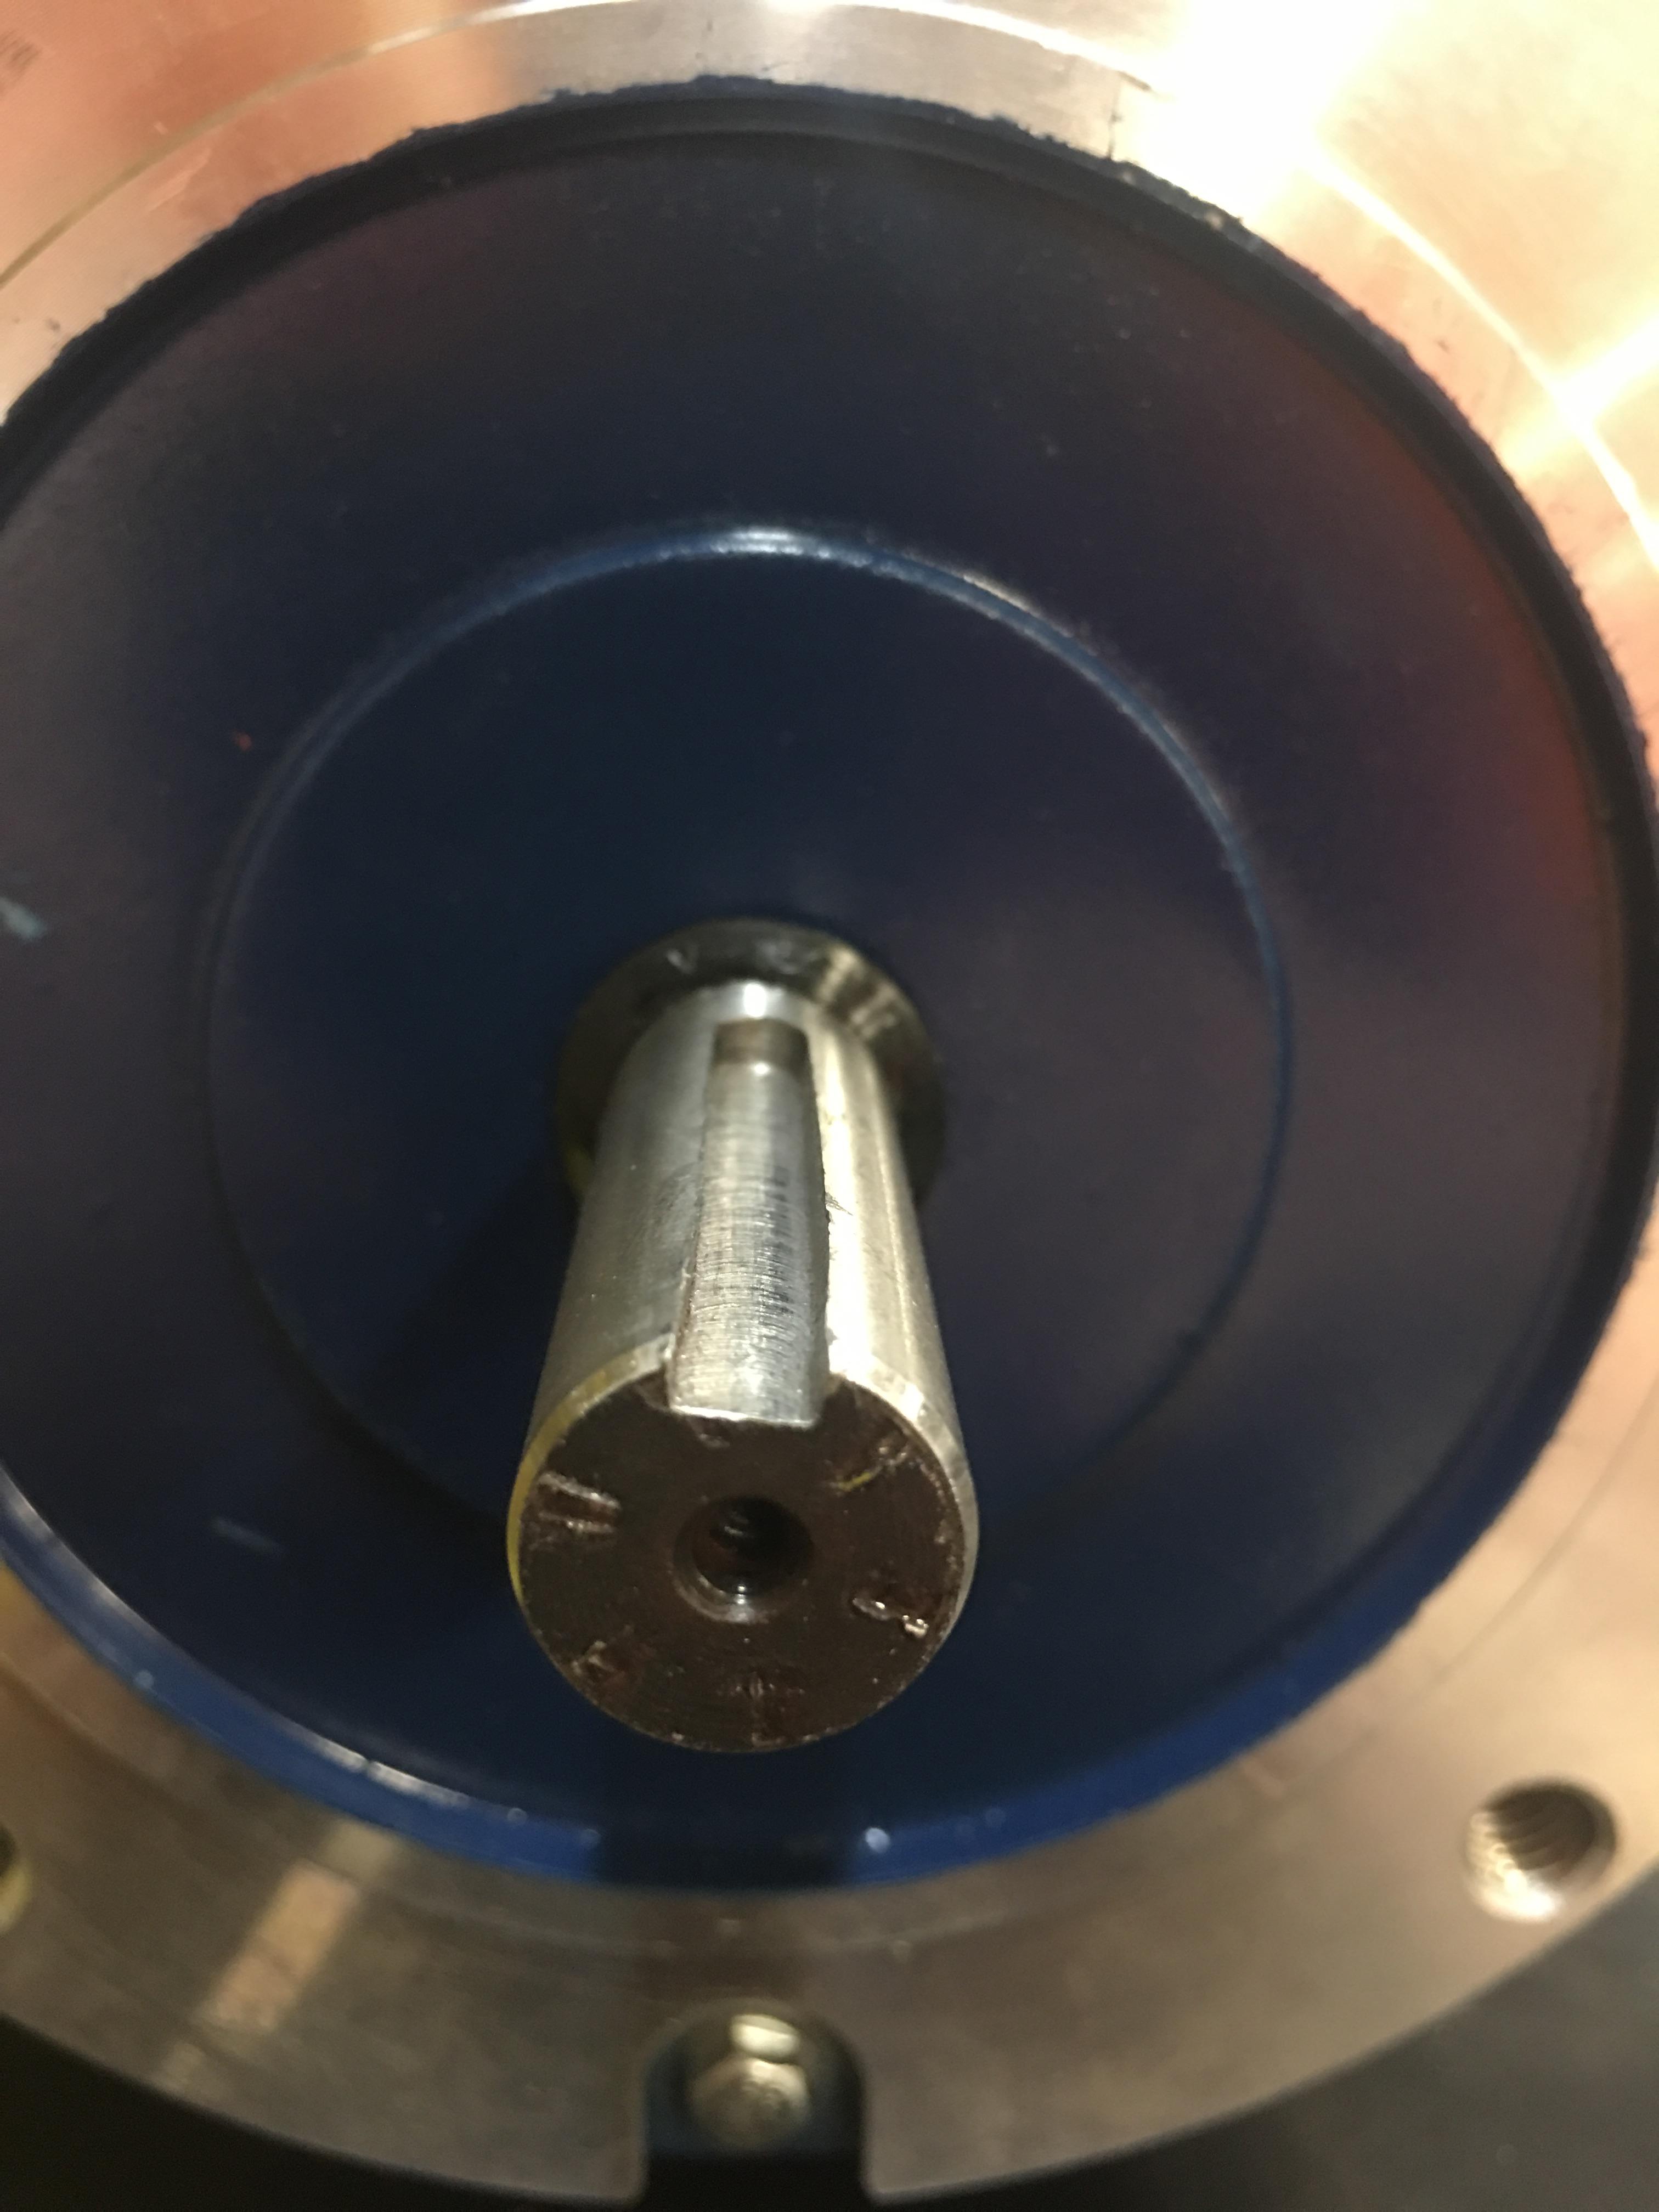
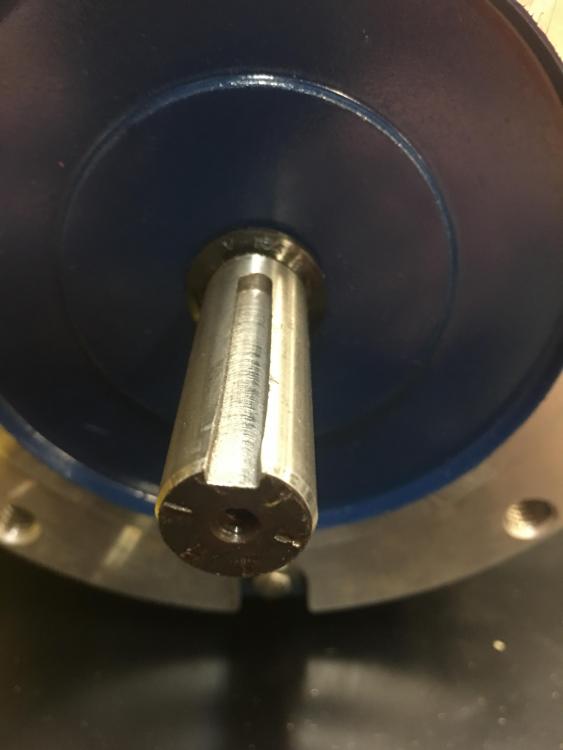
How much key is enough? The last 1/3 of the keyway is the “hinky bit”. The side farthest from the motor. Do you think that if I shortened up the key to 2/3 length and put it on the non-hinky bit it would suffice? Or should I just bide my time, send it back, twiddle my thumbs, and wait for a replacement? (That may or may not be as awesomely milled as this one)
-
A little askew I can deal with. I live my life a little askew. Inserting the key in the keyway puts a slight kink in the key. And the wheel will not go onto the shaft because of it. I thought about trying a shorter key that is the same length of the non-askew portion. Didn’t know if that would potentially lead to other problems or premature wear.
-
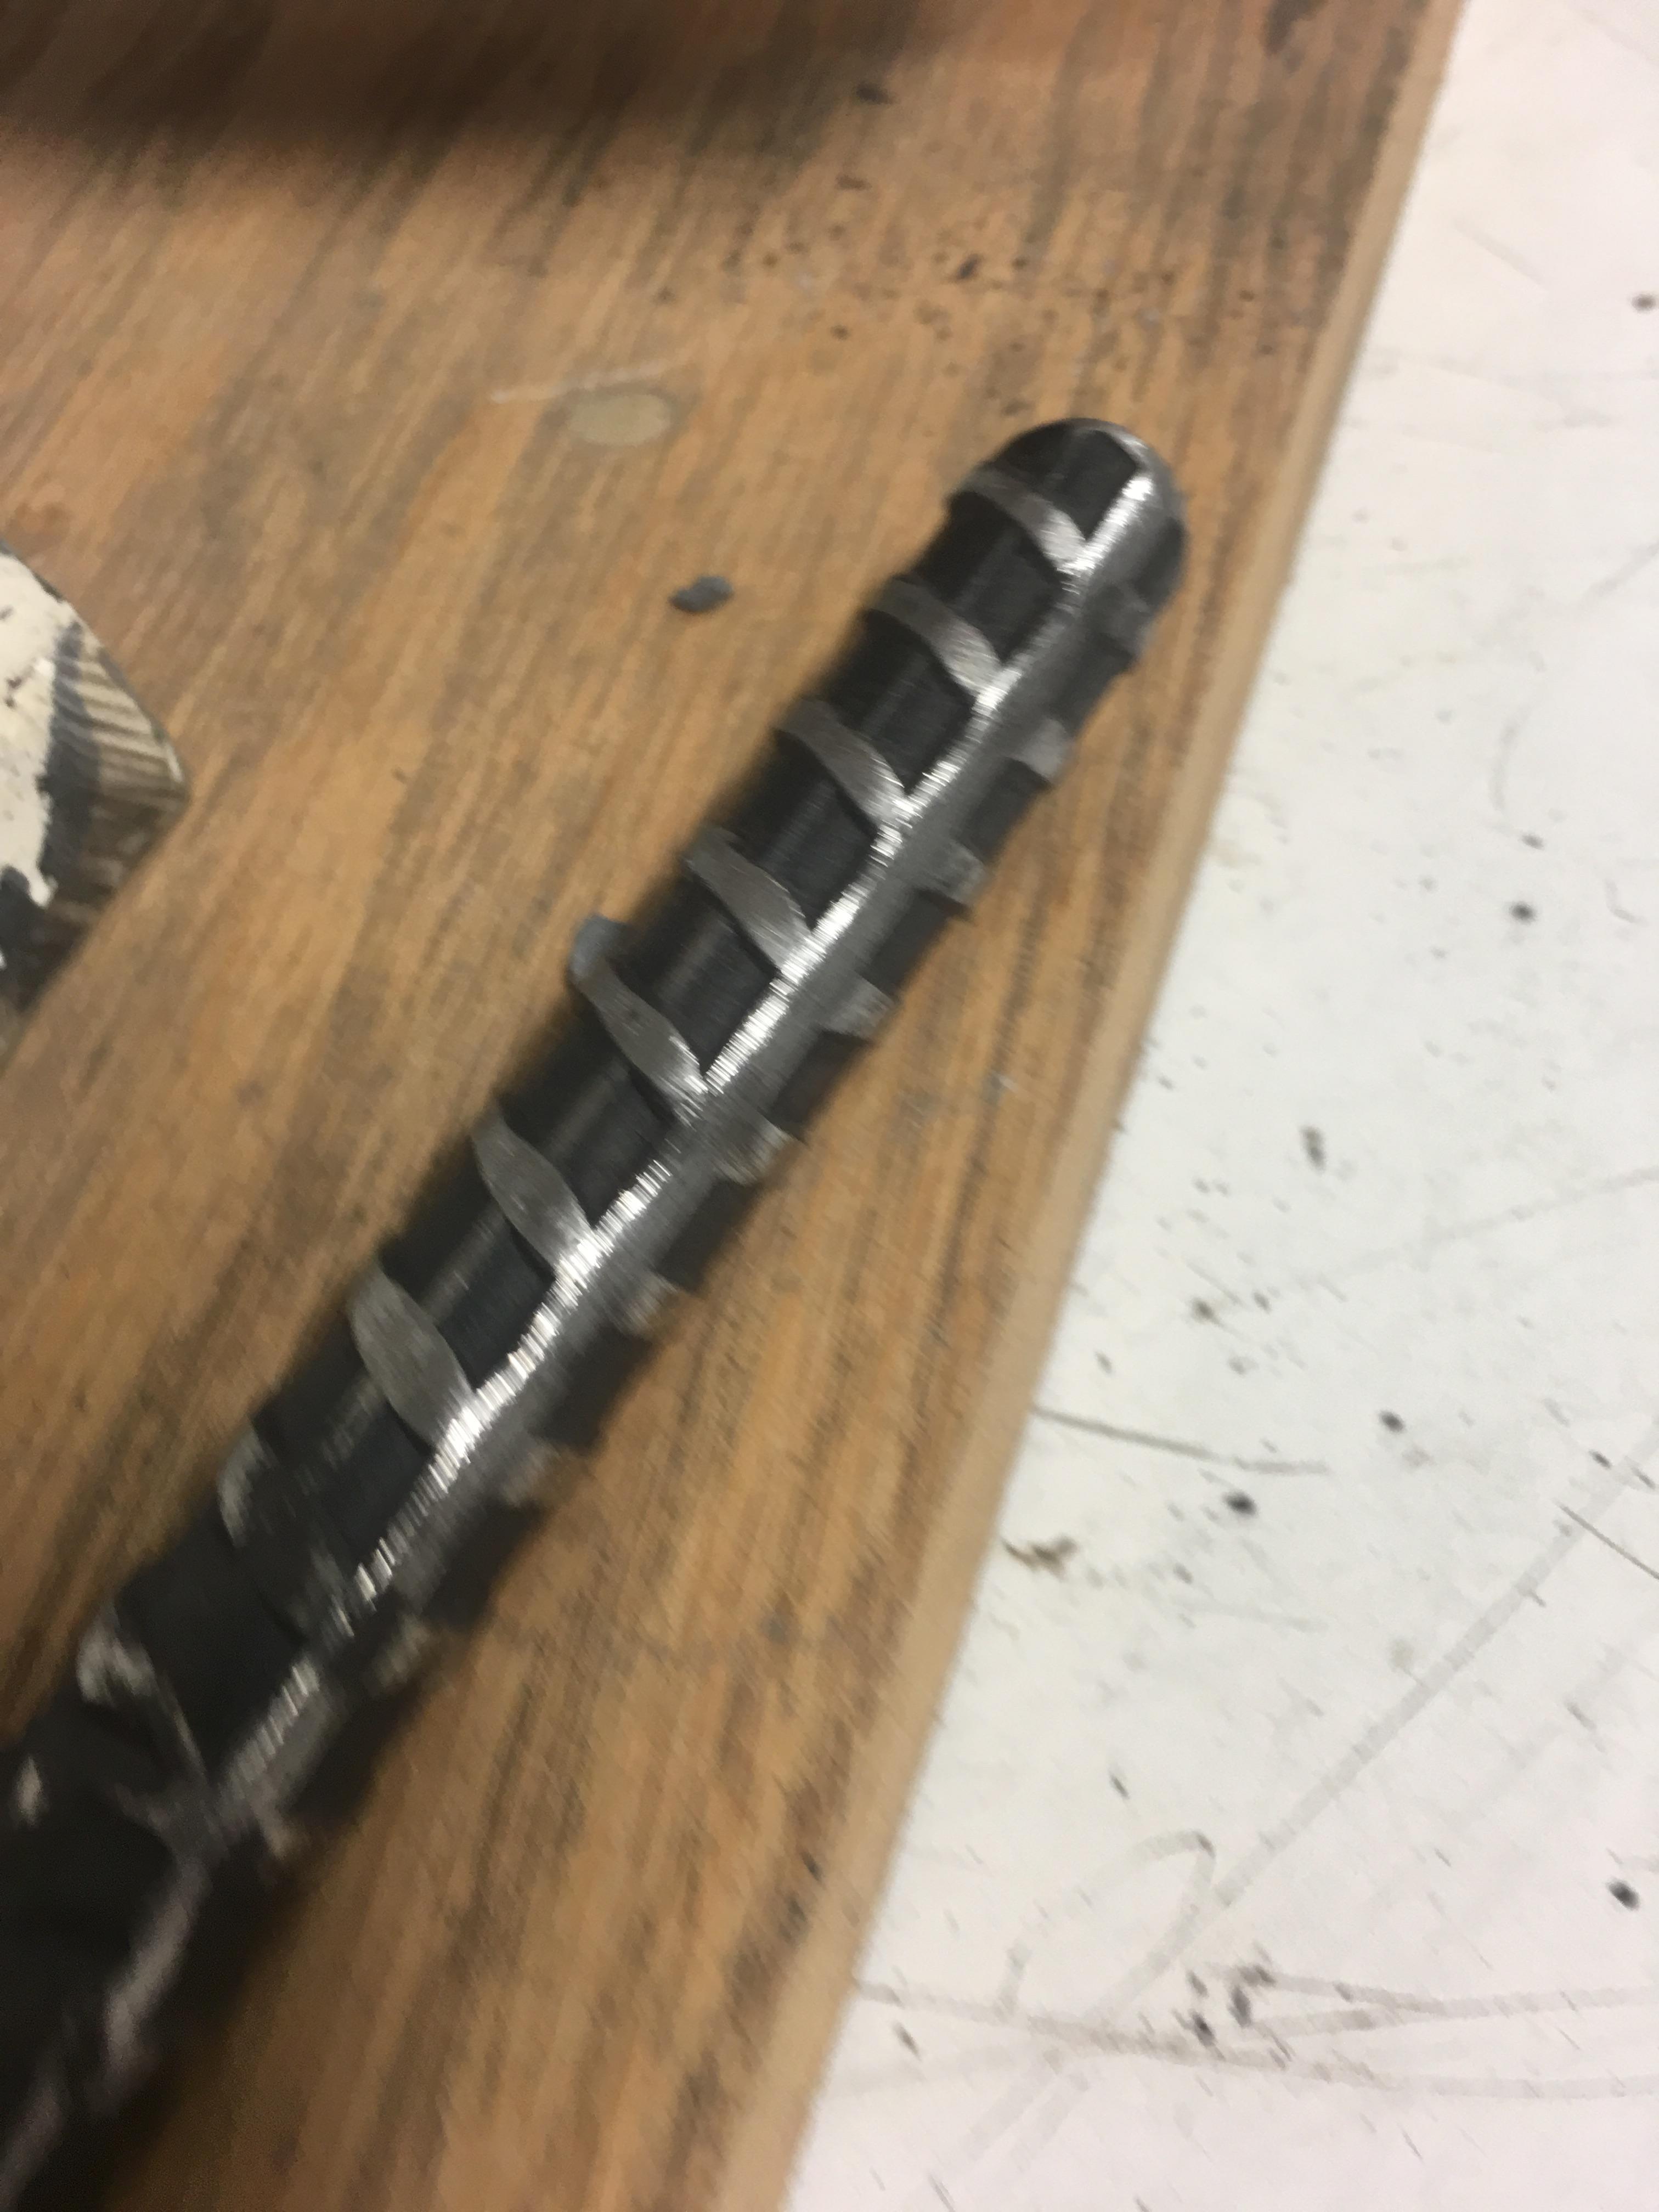
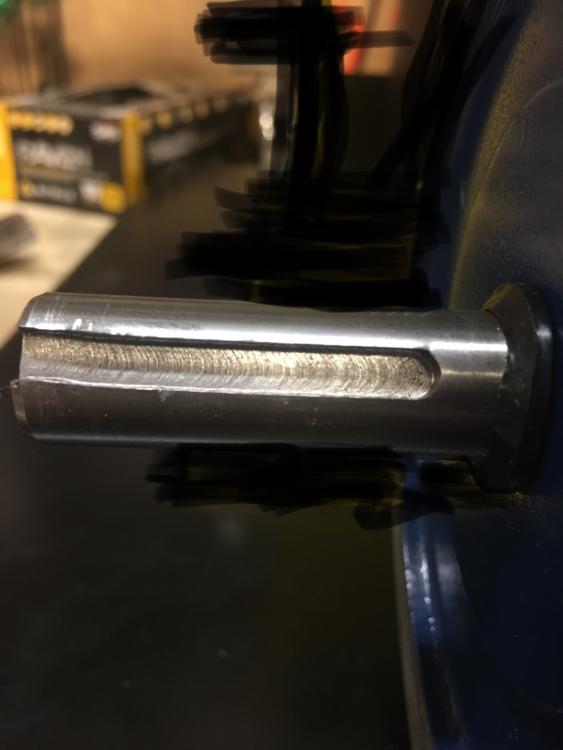
Brand is to remain nameless. Unless I get more flak during the return process. Maybe you guys could tell me if I am off-base here. Just came via fedex today. Getting it setup, went to put the drive wheel on the motor shaft. Will not budge. Notice the key looks a little screwy. Fiddle with the key a bit. No help. Remove the key and see this. Am I crazy or is this not a completely ruined and unusable keyway? Notice the bend/slant/crookedness near the end. My point of contact, who I assume is the owner of the company, has agreed to have it shipped back and ship out a replacement. Not really thrilled about waiting 2-3 more weeks to have an operational machine. Is what it is. what I don’t get is how this guy failed to see the severity of this flaw from these pictures. I would think anyone who does anything with machines would take one look and see the problem. I even offered to have a local machine shop fix it and have him foot the bill. Would have saved him a good bit on shipping costs. His reply? “I don’t want some local machinist to ruin or damage it.” How? How could a machinist make it any worse?

-
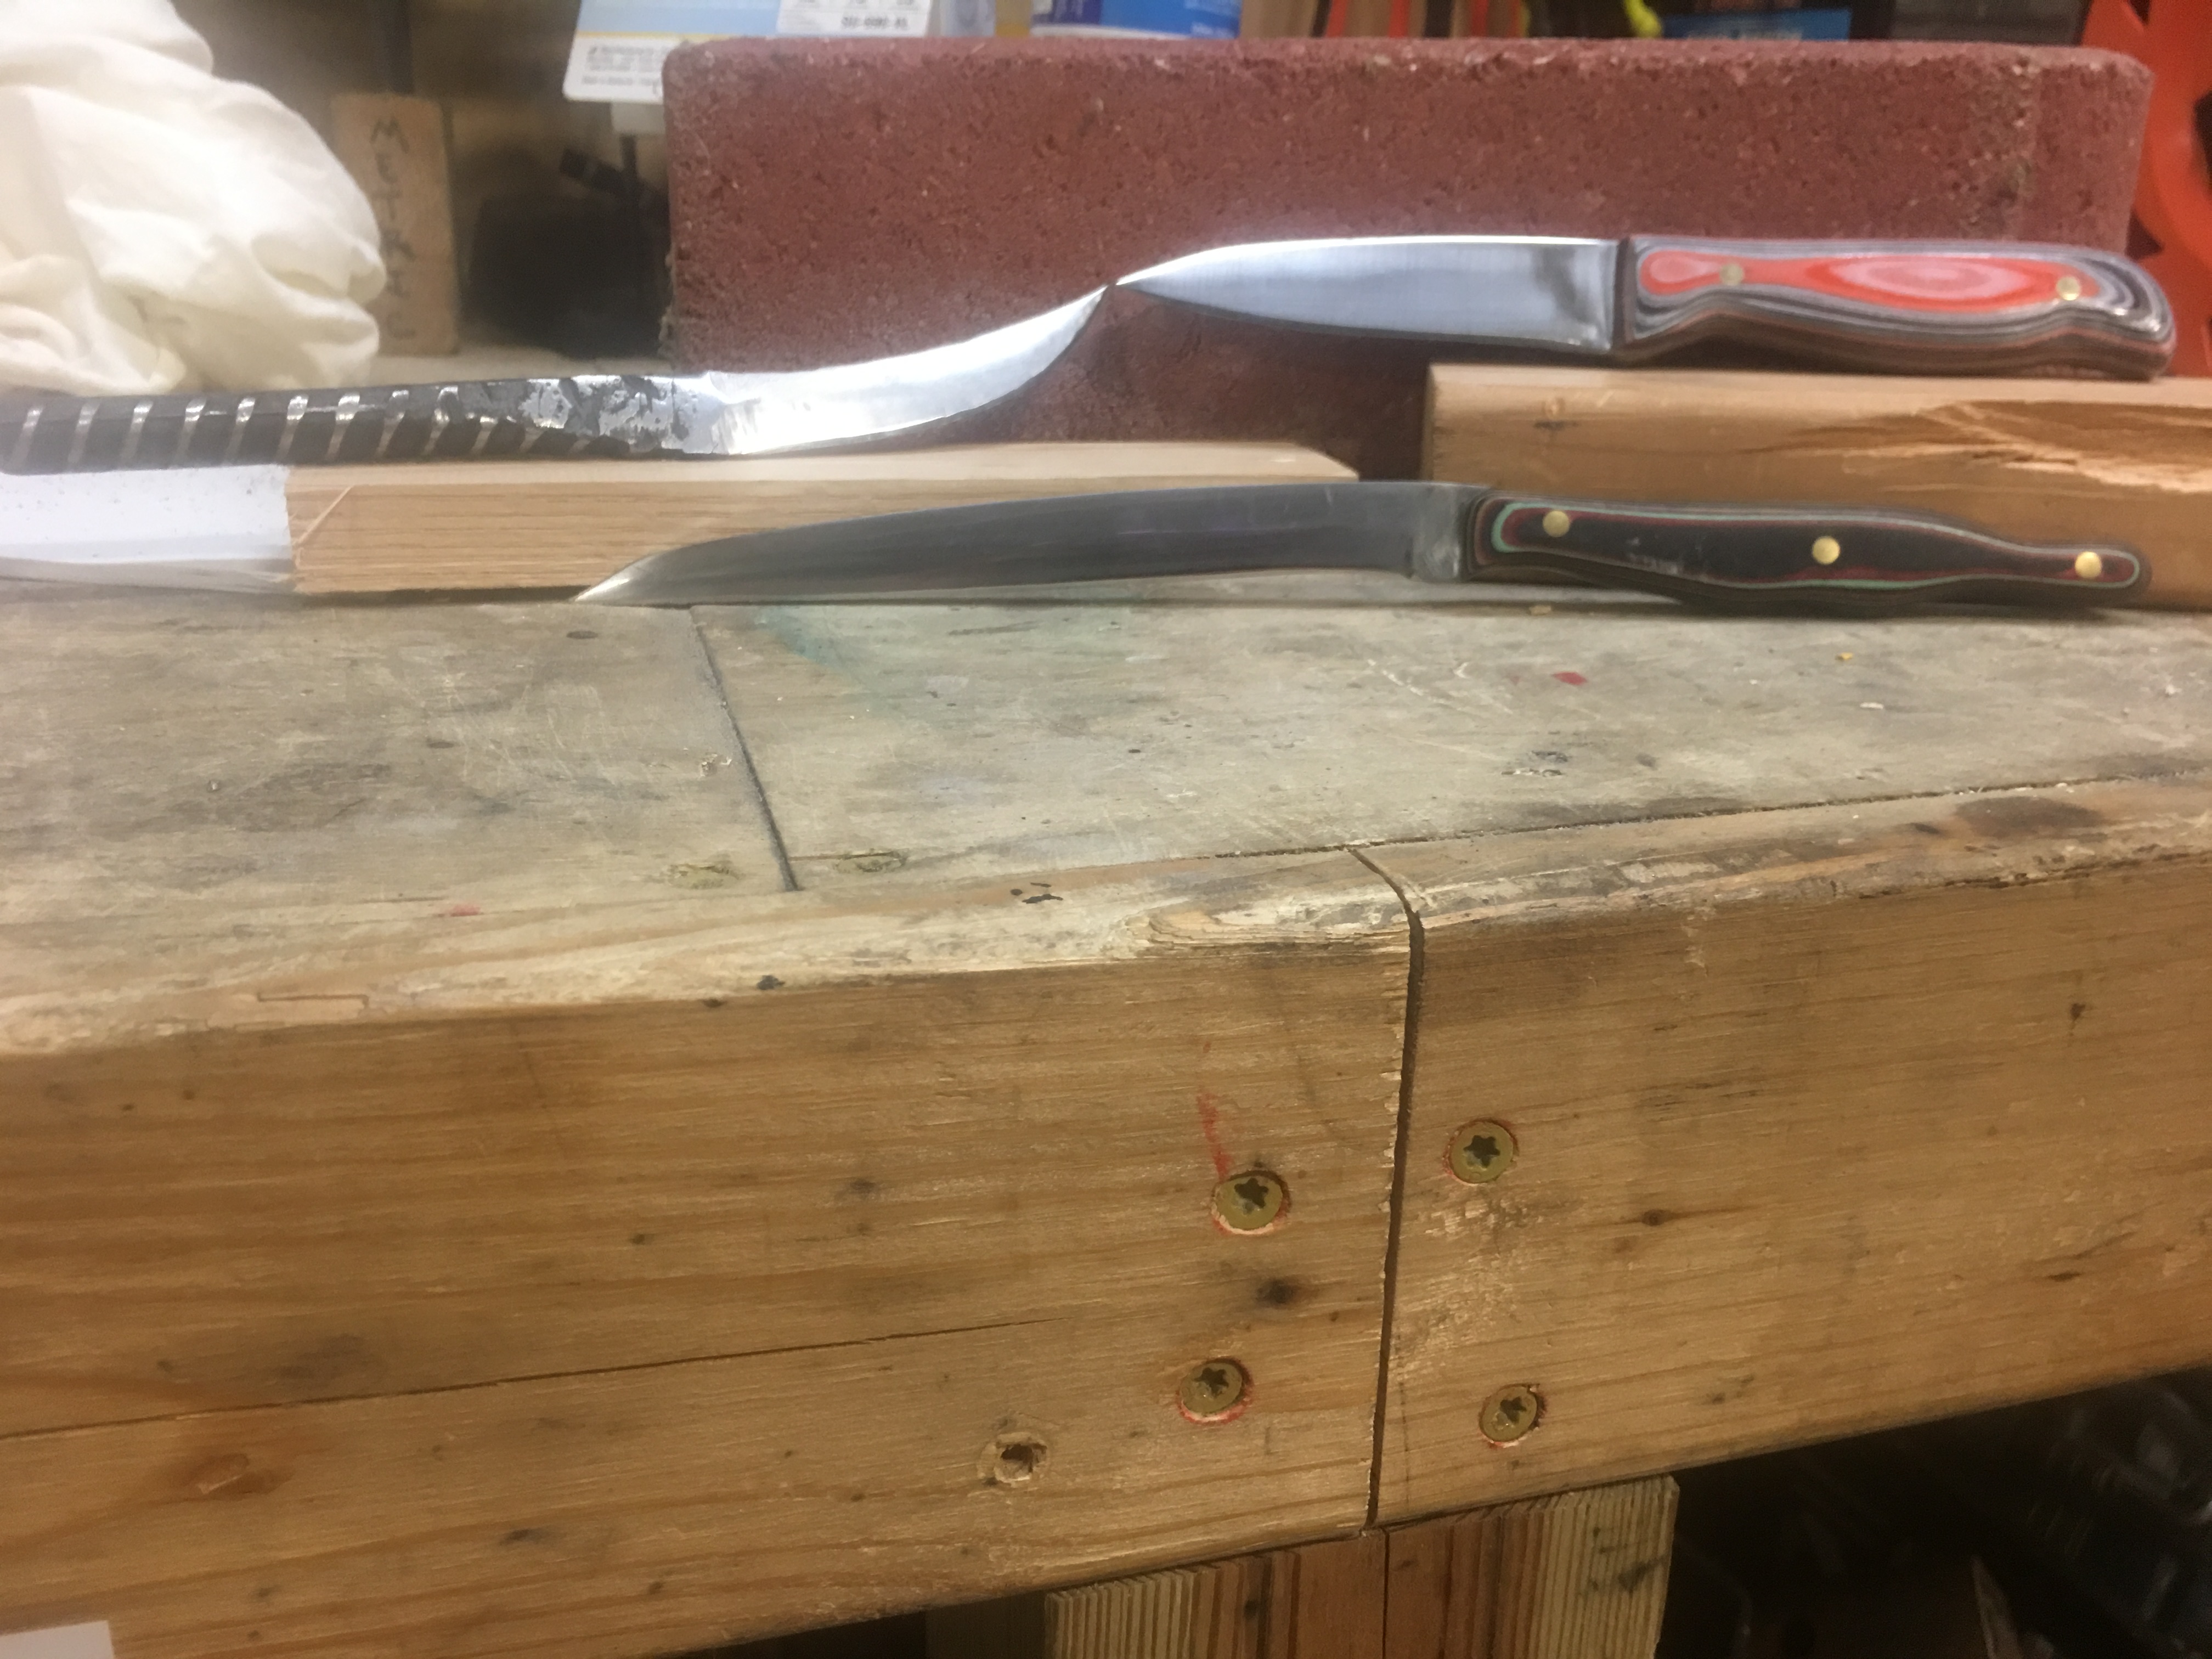
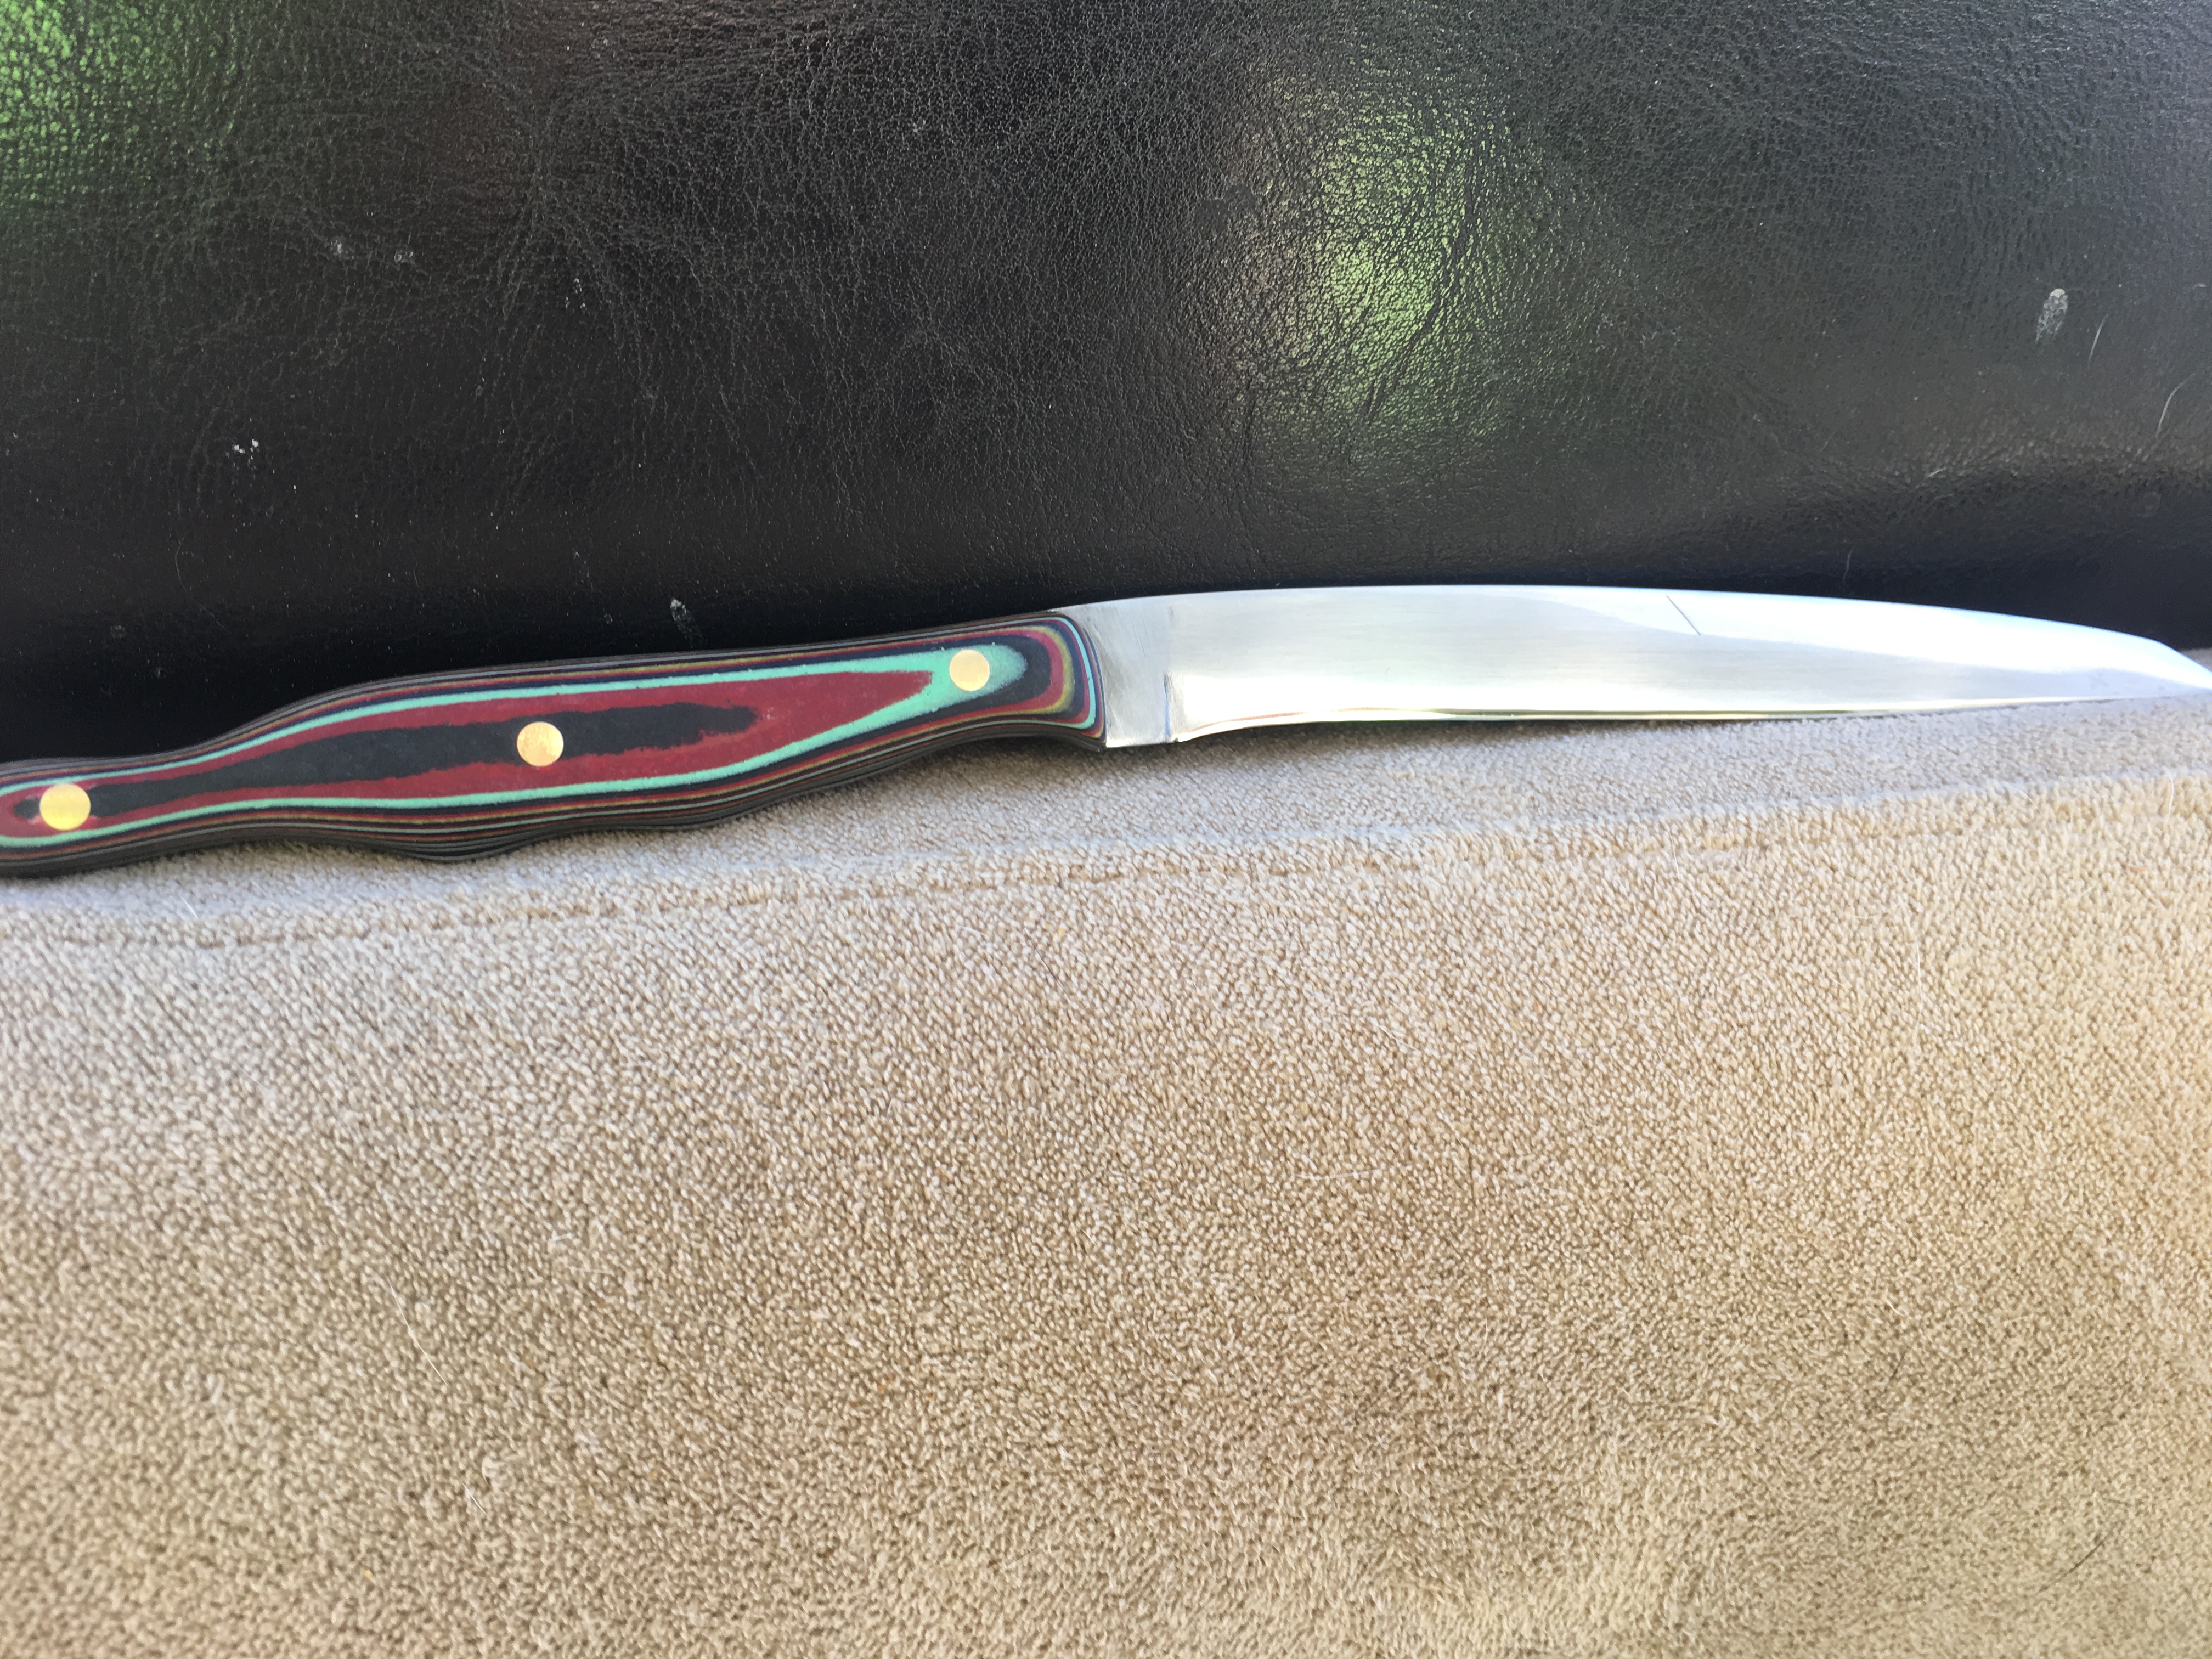
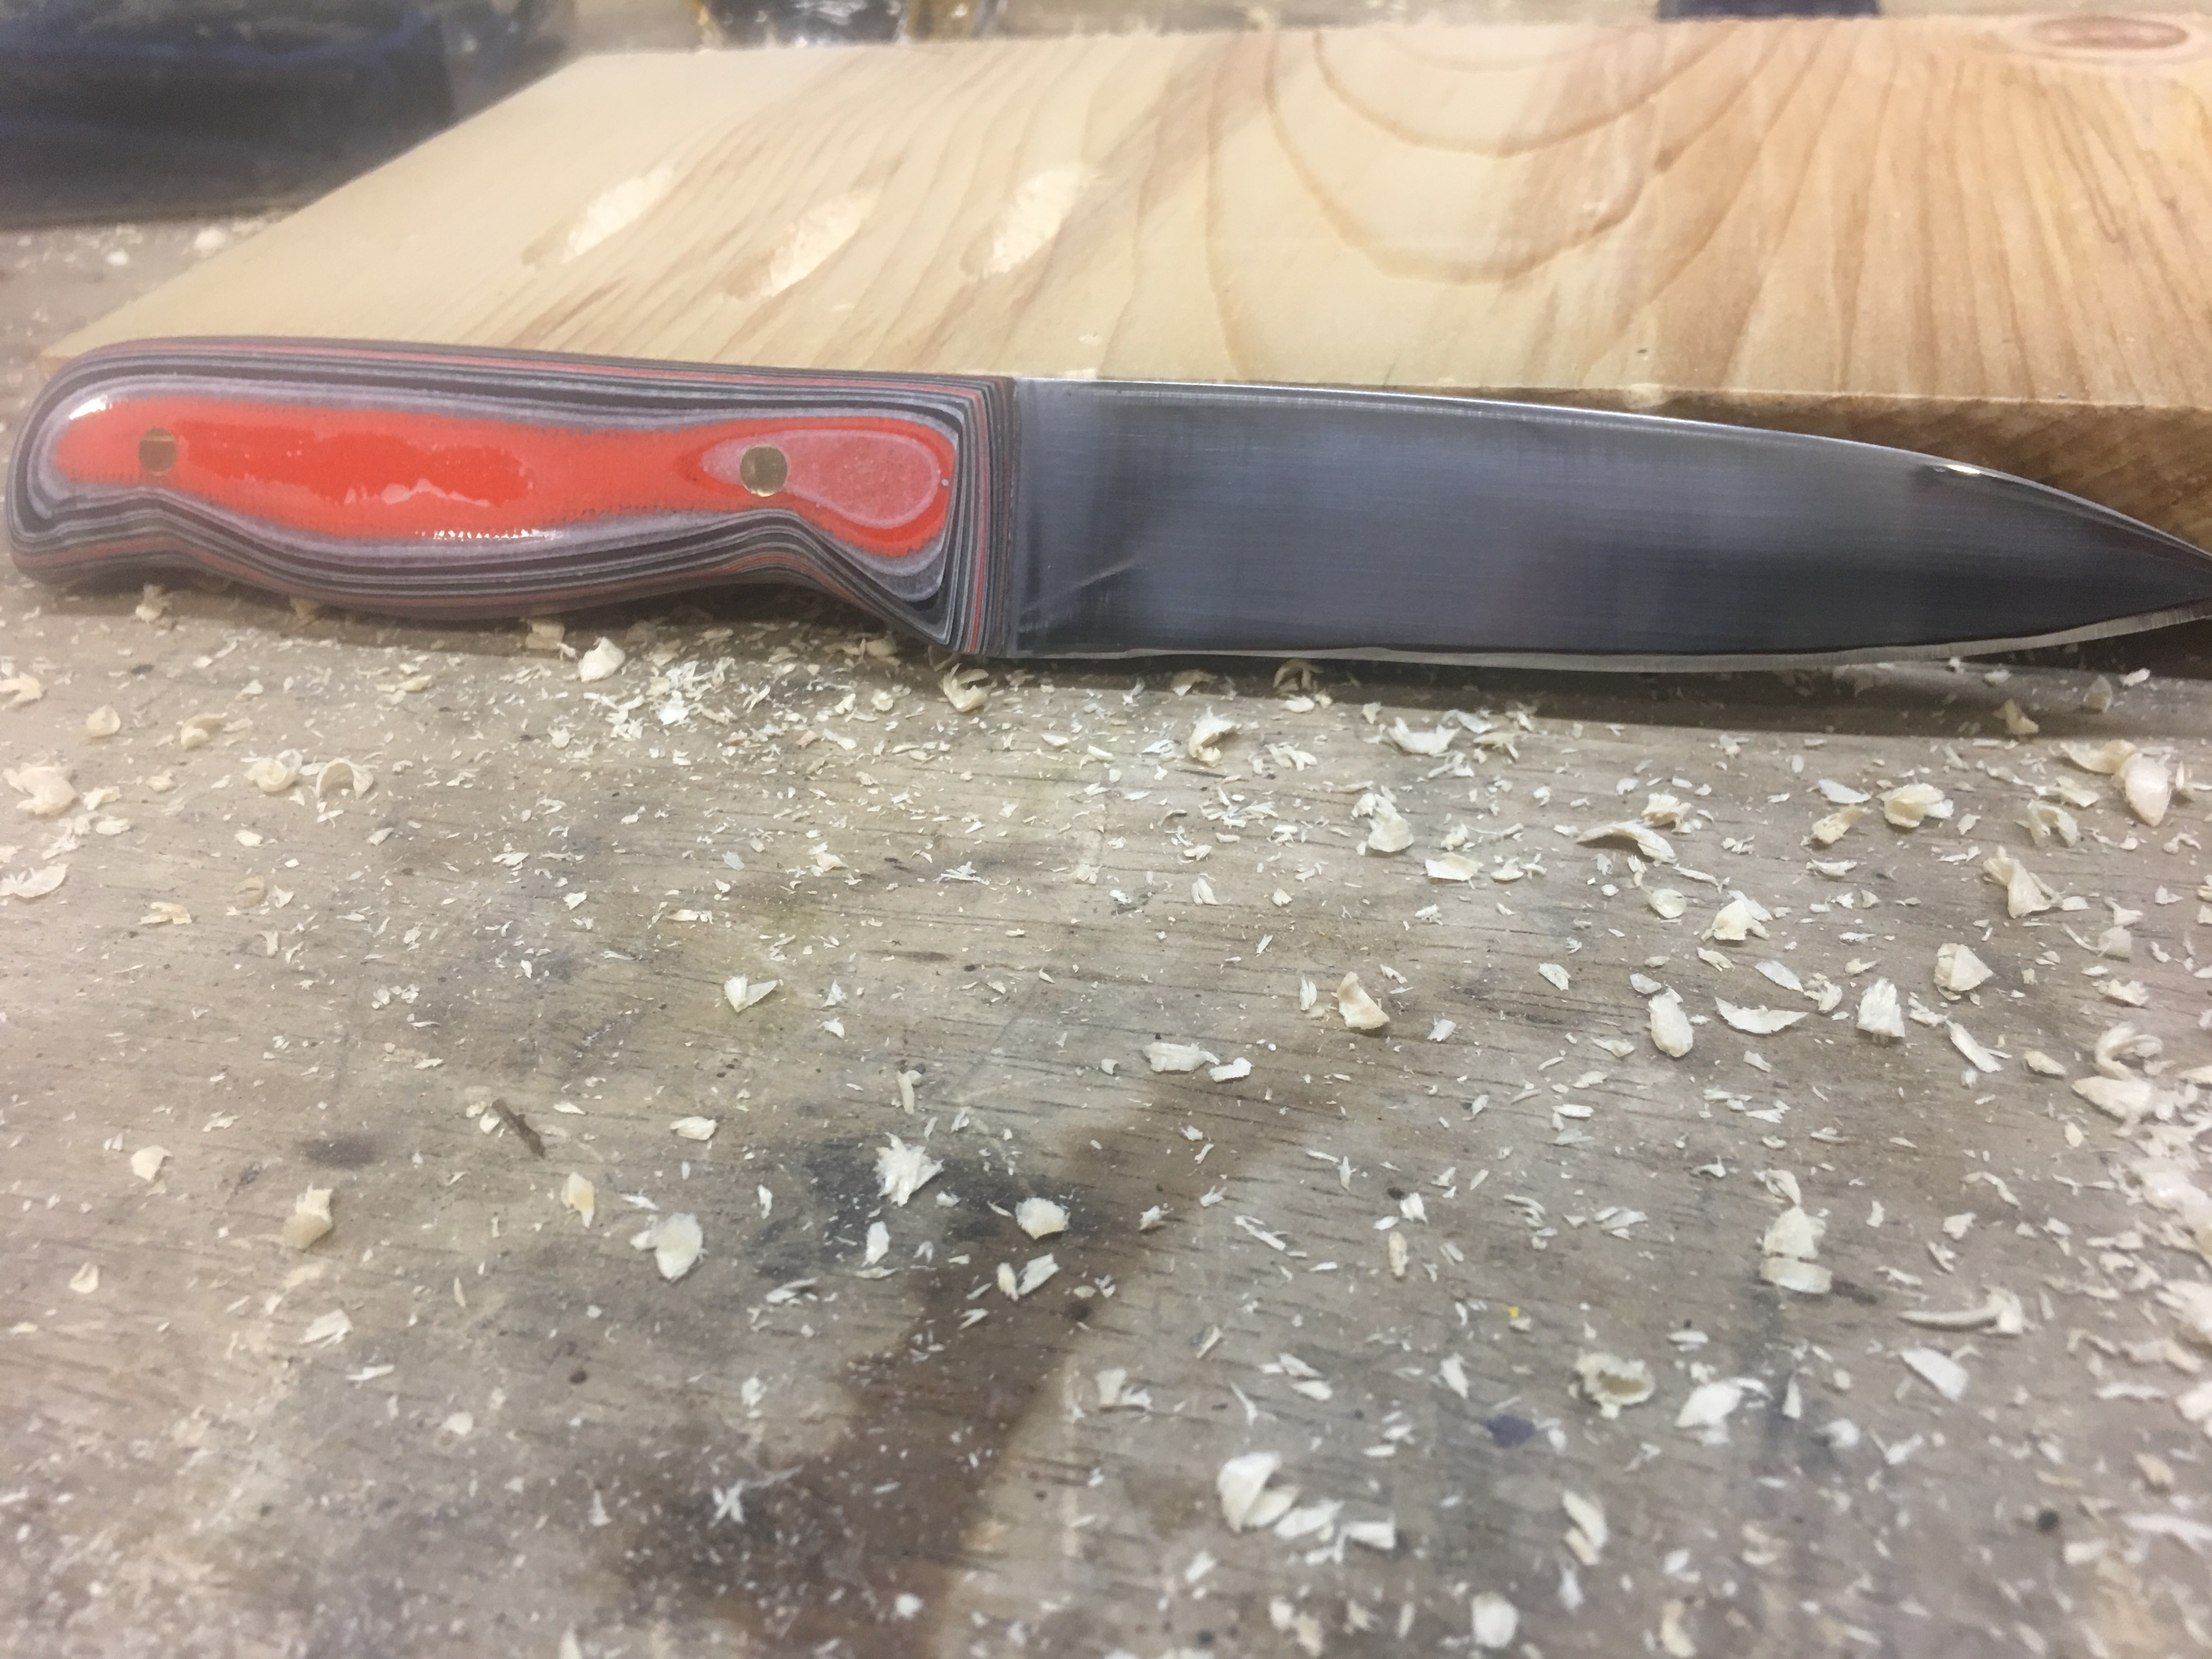
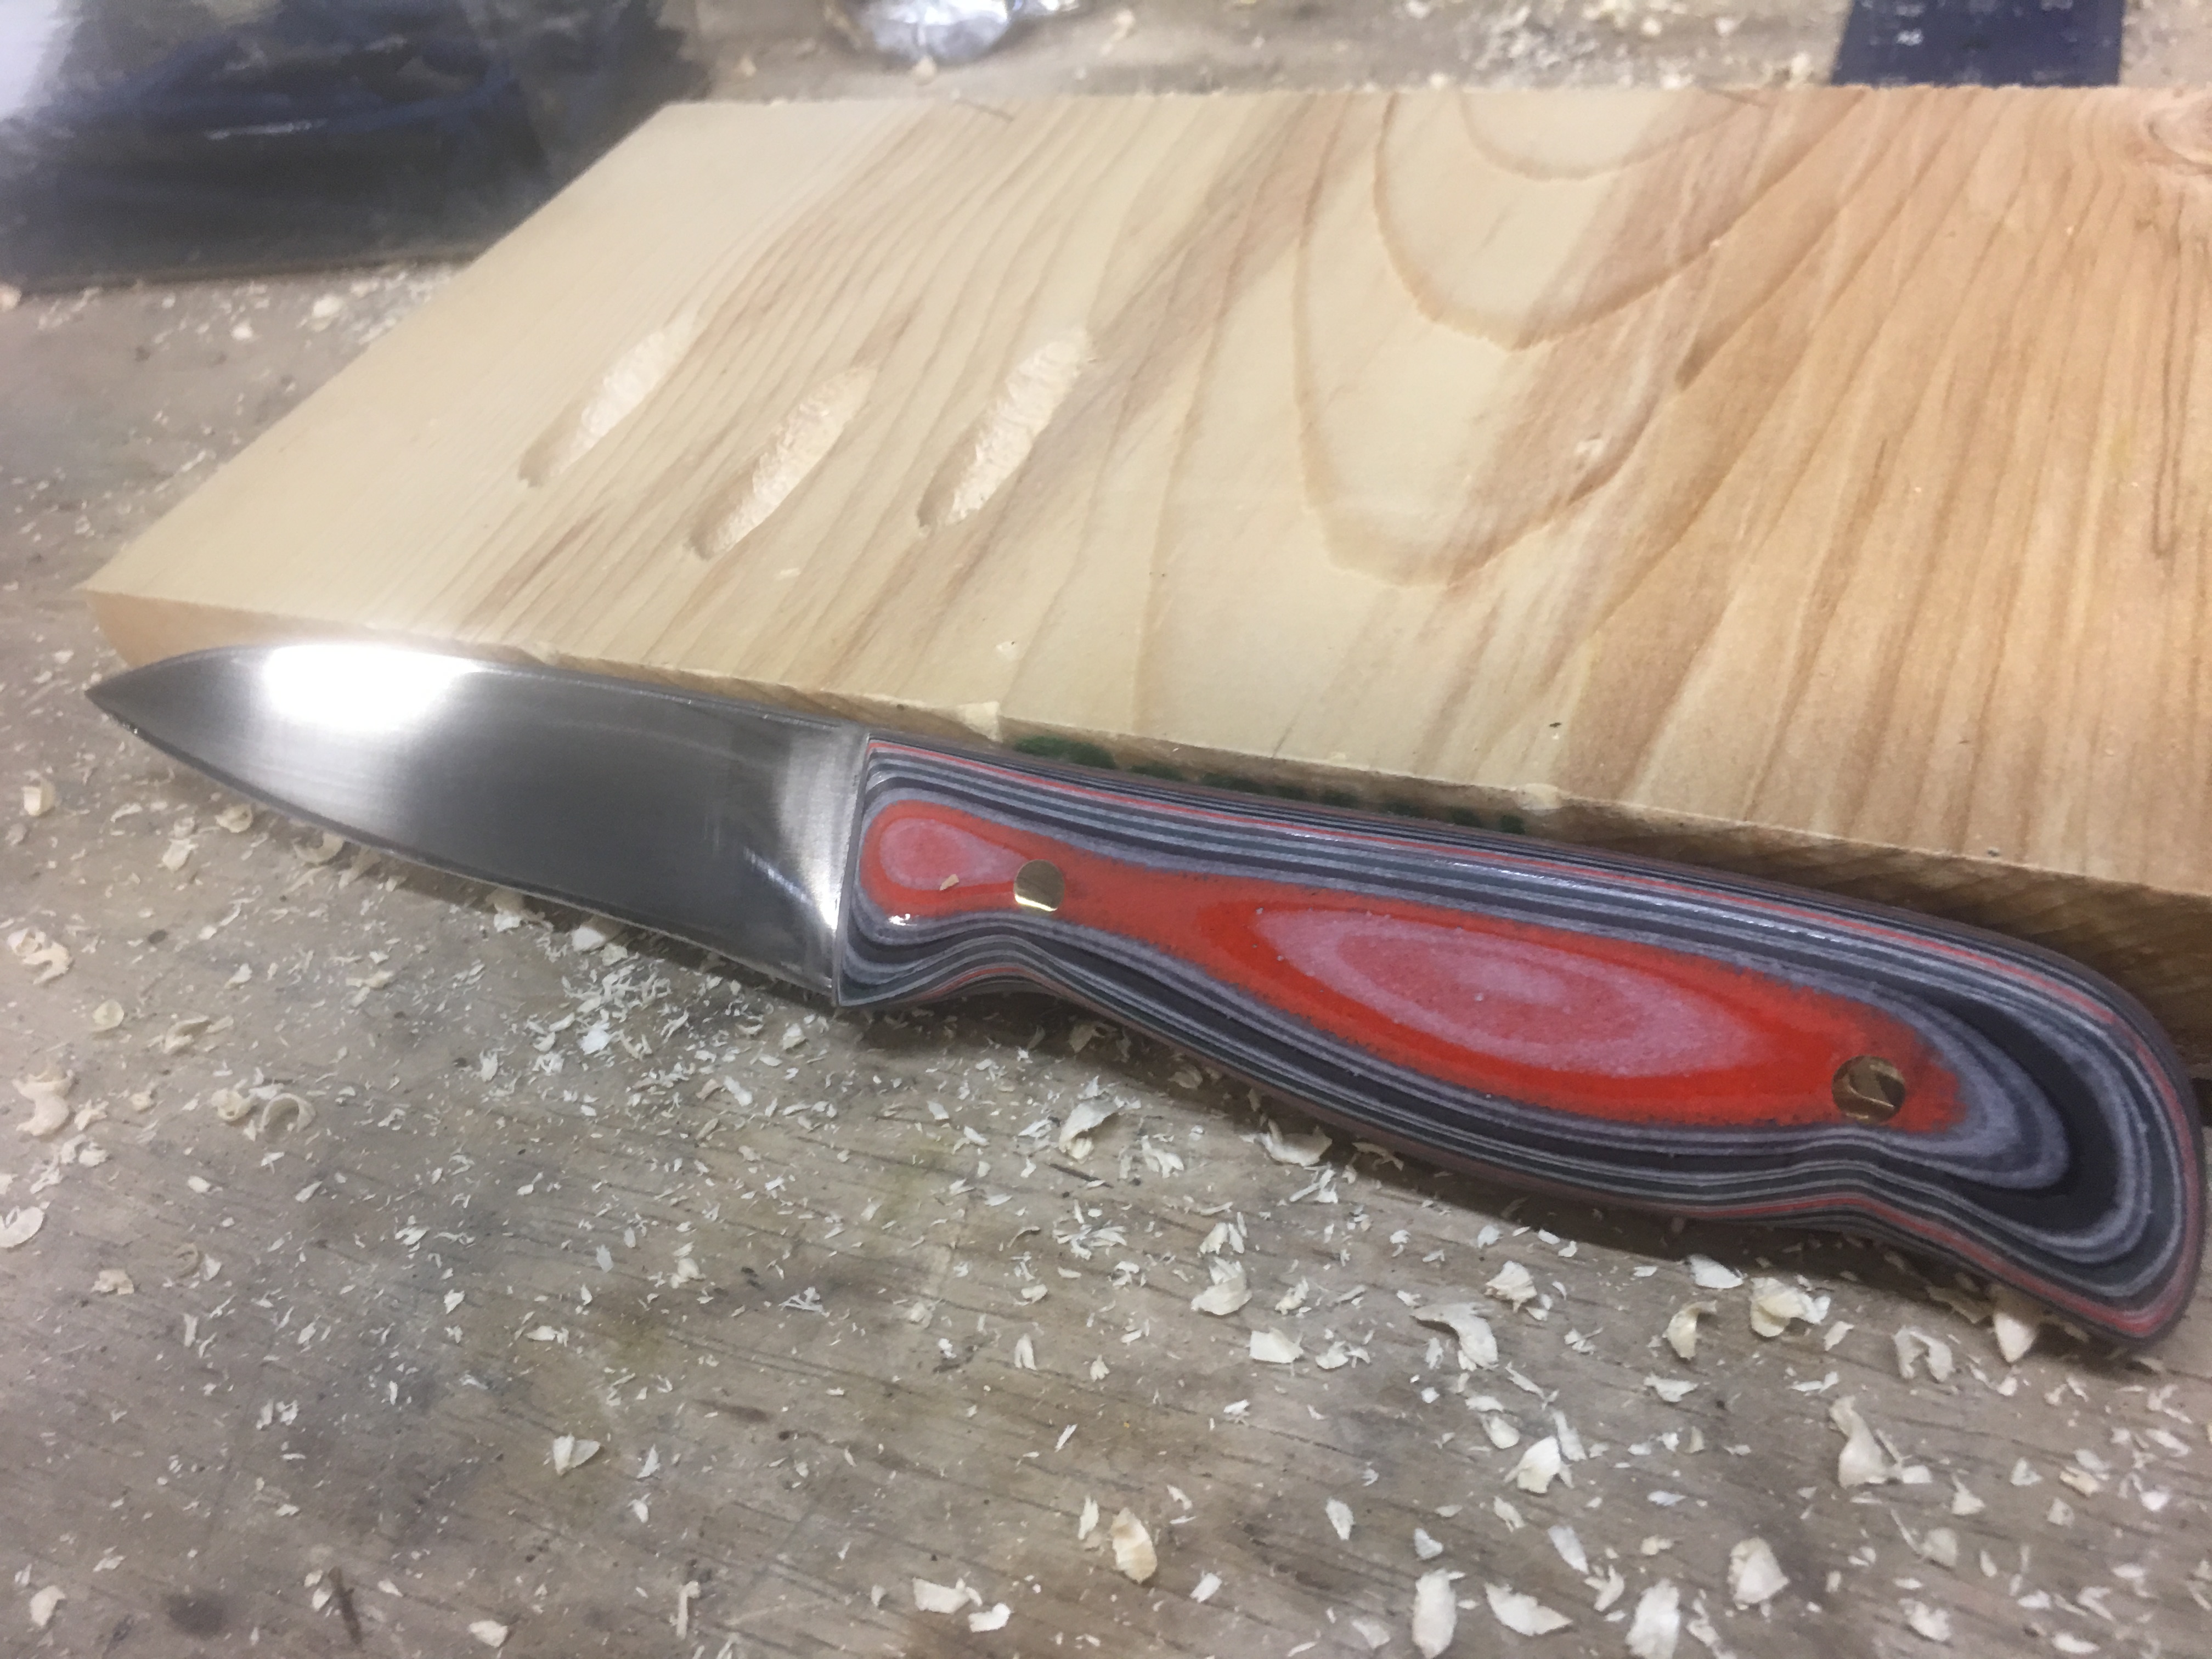
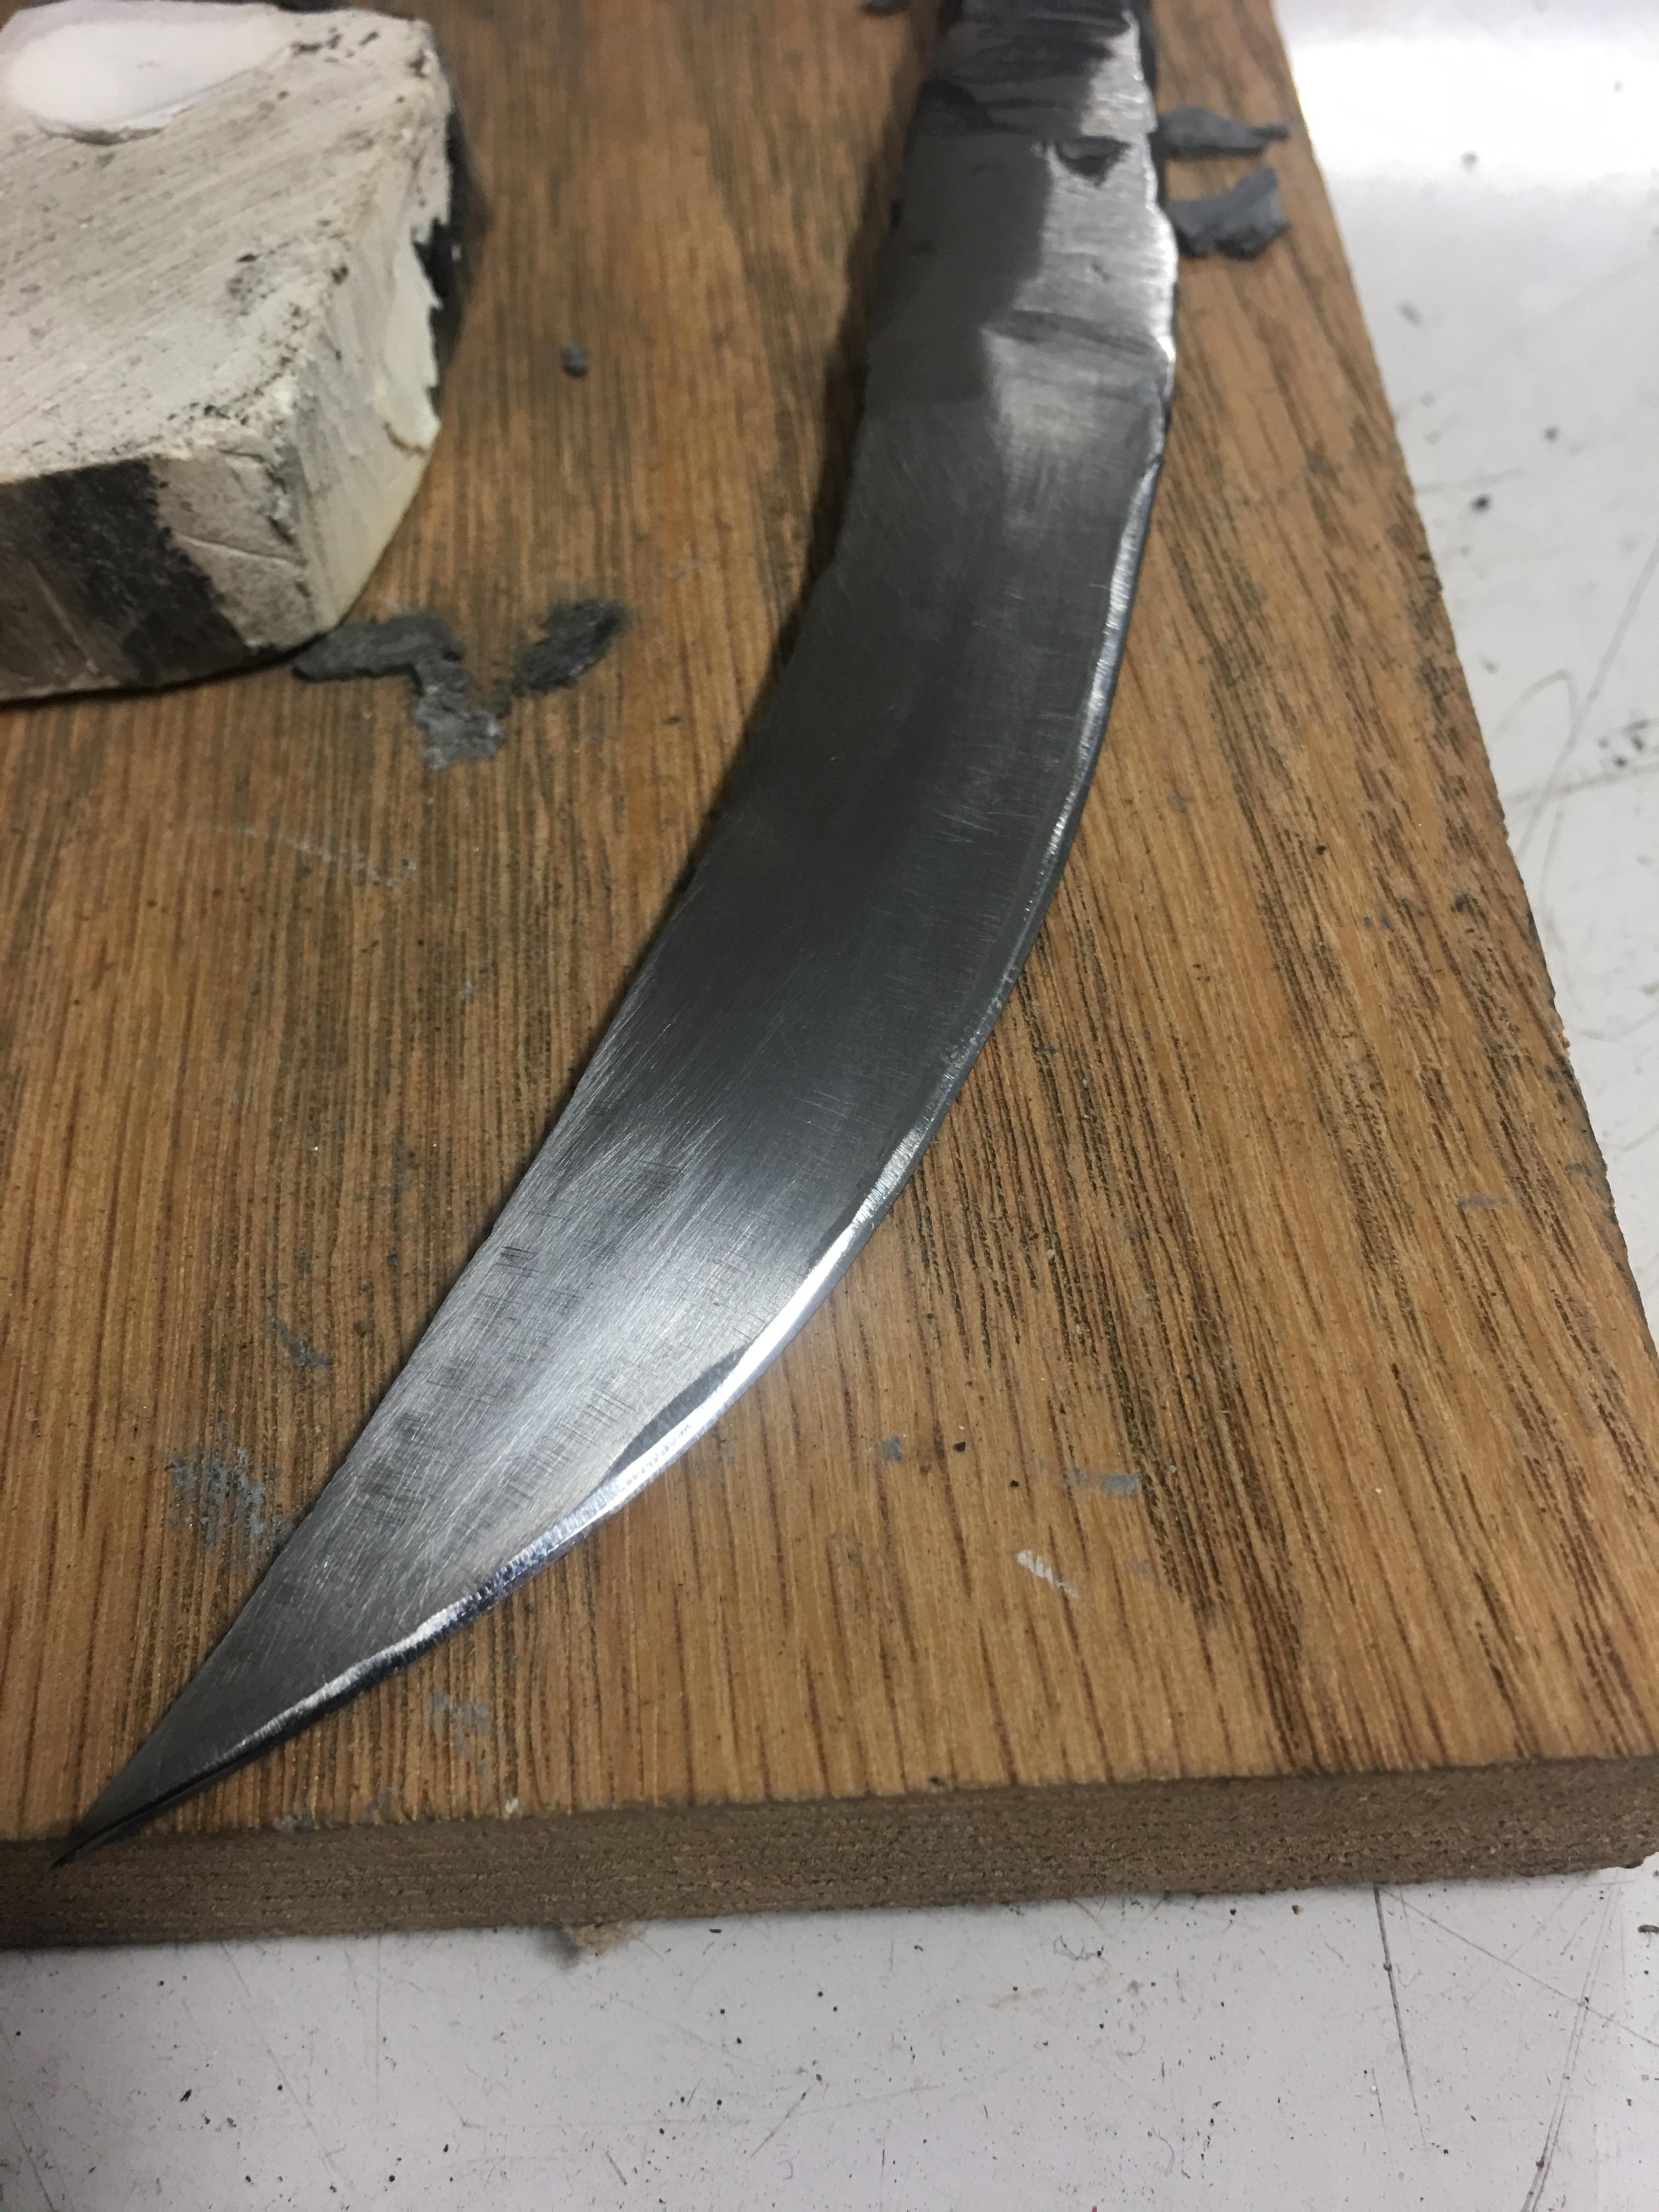
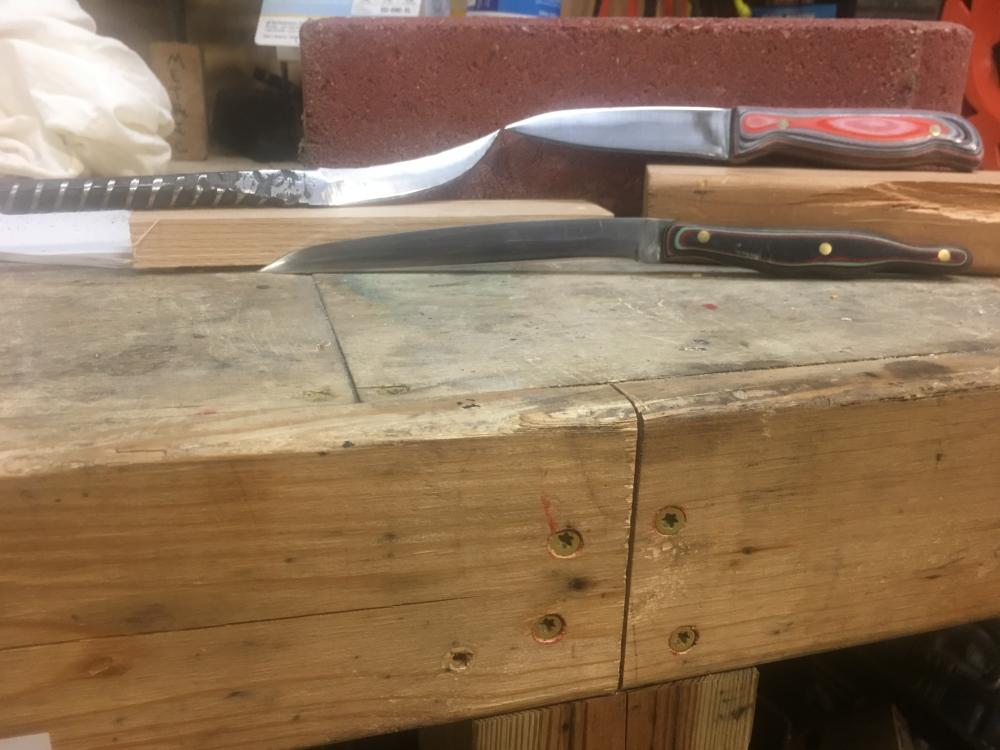
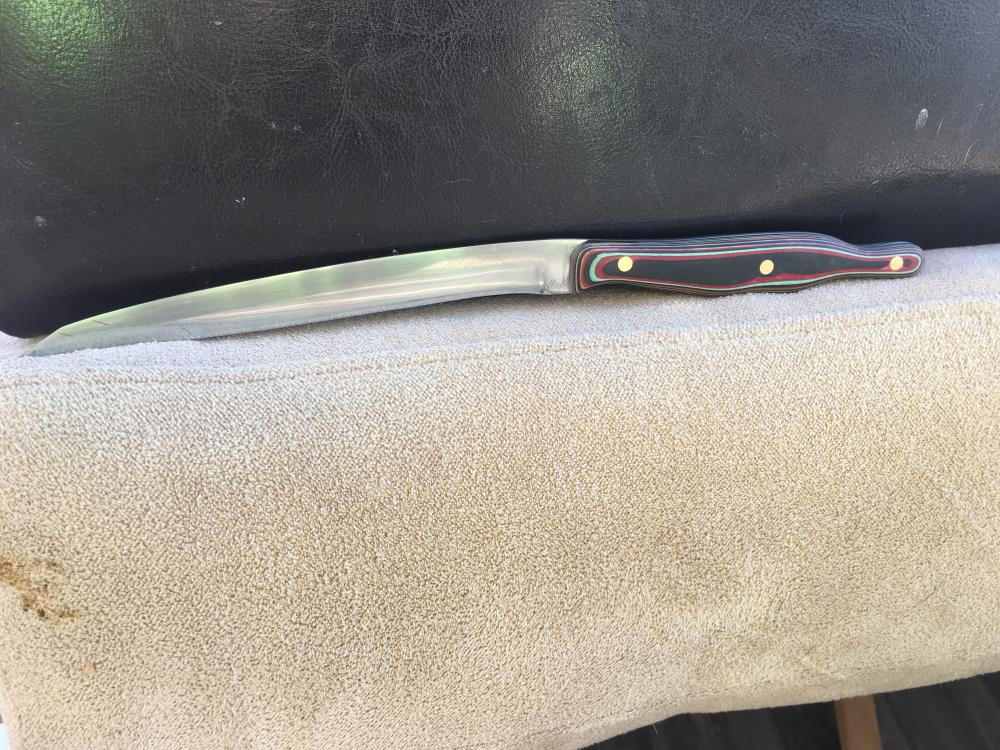
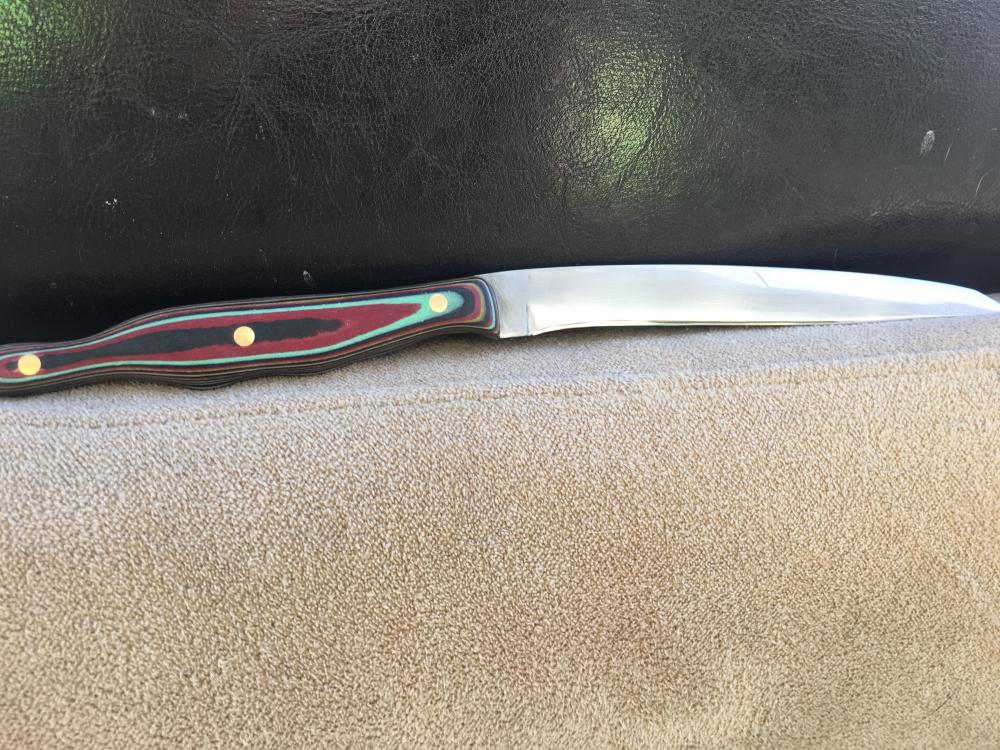
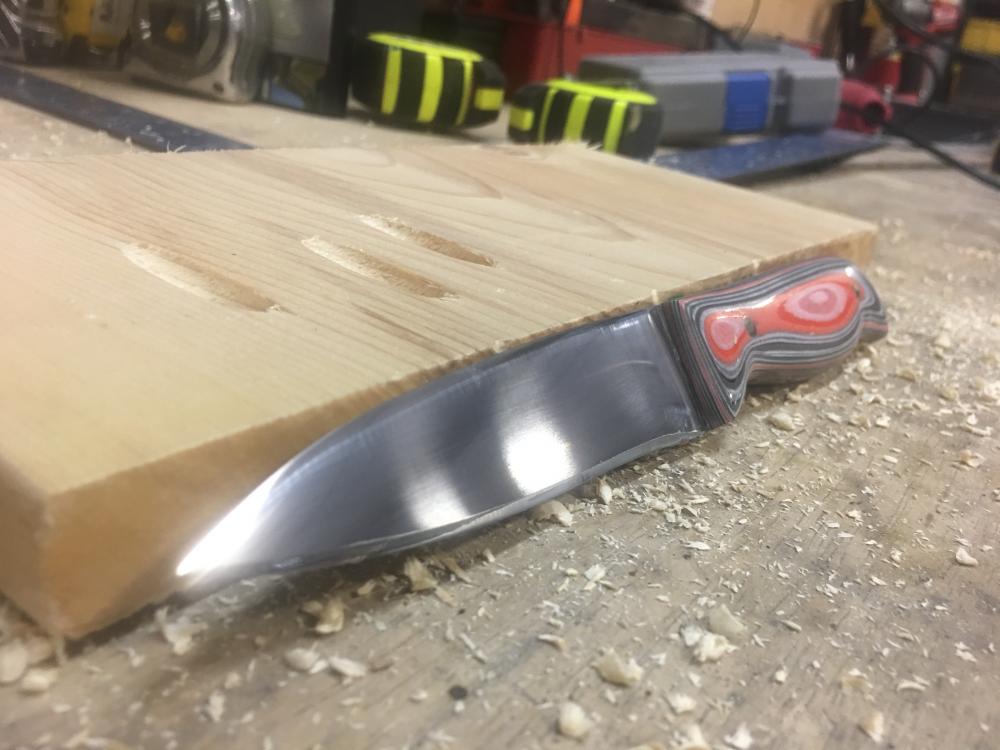
First, second, and third knives. All with their own lessons learned. first knife was the first “anything” I ever forged. Rebar blade and polished rebar handle. Could have spent more time making it look good on the grinder and giving it a handle but was smart enough to realize it would be wasted time on a low grade steel. Learned a bit about moving metal and grinding bevels. Quenching in water and oven tempering. Learned that grinding and sanding each knife would be very time consuming. And learned that it was somewhat easy (for me at least) to form a basic knife blade shape in forging. Easier than I thought it would be anyway. Second knife was a Nicholson file with a paper my-carta handle . I learned how to make the micarta, how to draw out better, how to put a handle on, how to be more meticulous with sandpaper before going up a grit, that I should have followed my drawing while forging because I ended up with a very thin handle and blade, how to harden with an oil quench, how to anneal and normalize, and learned first hand how much work goes into putting a finish on blade and handle. Learned that any curves, bends, anything other than a straight line sucks to polish inside the radius. All in all, I am happy with how it turned out, eventhough it has many design and execution flaws. I feel like I learned a lot of valuable lessons on this one. third knife is 1080 with a paper my-carta handle. Kind of a drop-point hunting knife. I feel like this knife ended up way way way better quality all around than the second, thanks to the lessons learned. Followed my drawing every step of the way and didn’t stop til it looked like the picture. Plus, kept the design simple. Flaws are there though. I ended up having to feather out the plunge lines due to one bad touch to the grinder (of course, after I had them looking pretty good). Slight shiny spot in my polish due to stupidity. Left it be so I didn’t end up botching it like the plunge lines trying to “fix” it. Learned that I will in the future use fewer colors in my handle scales. Learned that a sanding block makes a world of difference. Going to make my first leather sheath in a couple days, so soon-to-be-learned experiences. Learned not to have small/thin portions before heat treat. Got the very tip way to hot and had to grind away a tiny bit (less than 1/4”) because it was very brittle where it got too hot. Fun game. Cant wait for the next one to materialize.


-
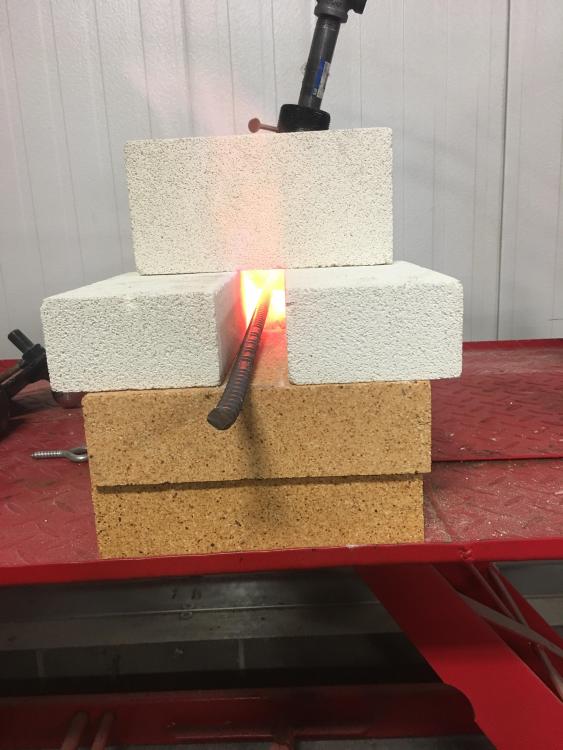
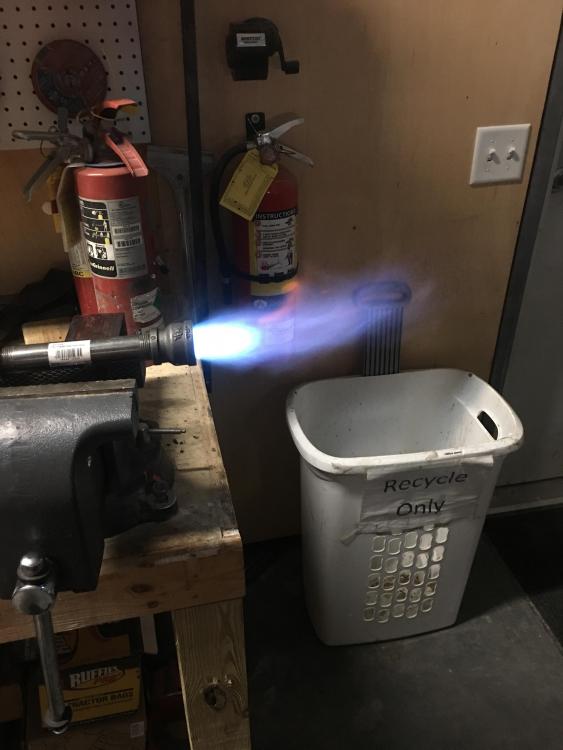
Finally got it all put together. 5 gallon air tank, 2 layers 1” kaowool, 1/2” kastolite3000, and 1/16” plistix. Sitting on a couple hard bricks, with a couple more hard bricks for a material rest, and a few soft bricks to close down the opening some. Putting it together was a learning experience, but I think it all worked out. I know the flame is hard to see in the forge pic, but please do let me know how my flame looks and if further tuning is necessary. Thanks for the input, guys. Fun times with fire.

-
I planned on simply putting a coating of plistix on the rigidized kaowool. Thanks for the suggestion, and I will absolutely Add a coating of kastolite or the like as you suggest.
-
Perfect thanks. Seemed rigidizer would be a necessity, but on the build in question I looked at it seemed the plistex was the rigidizer. I will coat with both rigidizer and plistex
-
Please correct me if I am wrong here. But I think you may have misunderstood (or I mis-explained) how I was applying the kaowool. The “bottom” of the paint can when standing upright would become the back wall of the forge when on its side. So I was going to line the back wall with kaowool, and the circumference of the paint can as well. All the way to the opening (“top” of the can when upright, forge opening on its side)
-
Hi everybody. First time poster. short time (but intense) lurker. Through research on here and other sites, I believe I am ready to pull the trigger on construction of my first forge. I would like to outline what I intend to do, and hope those who have the know-how will tell me whether my idea is genius, needs work, or is simply not gonna work. My intent with this forge is to be able to shape small tools and shapes of carbon steel as well as heat treating. Simply to get my feet wet, however not be underpowered or terribly inefficient fuel and time wise. I am going to make a 4" long 1/2" burner in the style of Frosty's "T" burner. I plan on having a flexible (rubber) hose from the 30# regulator to the burner. I will likely put a 90 degree fitting and a few inch nipple from the mig tip fitting on top of the t fitting just to keep the hose a little farther from the heat. What size mig tip would be a good starting point on this size of burner? And is a burner flare absolutely necessary for my forge and burner combination? The forge I plan on making is going to be a 1 gallon paint can, lined with 2 layers 1" kaowool on the sides and bottom. I will also have 3 soft firebricks to use to close off the open end of the forge when possible and necessary. figured it would be better than nothing. On some of the builds on Zoeller's page, it seems he used Plistix as the rigidizer. is this an ok practice, or did I misread something and should get colloidal silica? It is my understanding that the plistix also acts as to protect the kaowool. Is this correct? And then make a forge floor over the kaowool with a high temp cement. This would leave me with about 52 cubic inches (3.5" diameter and 5.5" deep). The burner is to be installed at 10-15 degrees from the top center and the nozzle just into the first layer of kaowool. Would the 1/2" burner be overkill for this small of a forge? I realize I could turn that burner down, but if it is not necessary to dive into getting all the plumbing and fittings right now, I would just as soon wait for my bigger forge build to do so. I already have a bernzomatic 8000 torch, and if it would be sufficient for this size of forge to do what I want it to do, I would just as well use that torch for this initial forge. And build a bigger one down the road after I get some experience under my belt.