

KENR2600
-
Posts
32 -
Joined
-
Last visited
Recent Profile Visitors
652 profile views


-
I hadn't cranked it up to it's max yet. As it got to temp to get my metal orange, I backed it down to 6-7 on the pressure. It runs good on both burners up to 20-23. On the primary alone 25+ …. I yet to know how hot this thing can get- especially if I choke down that hole....
-
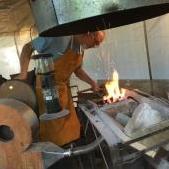
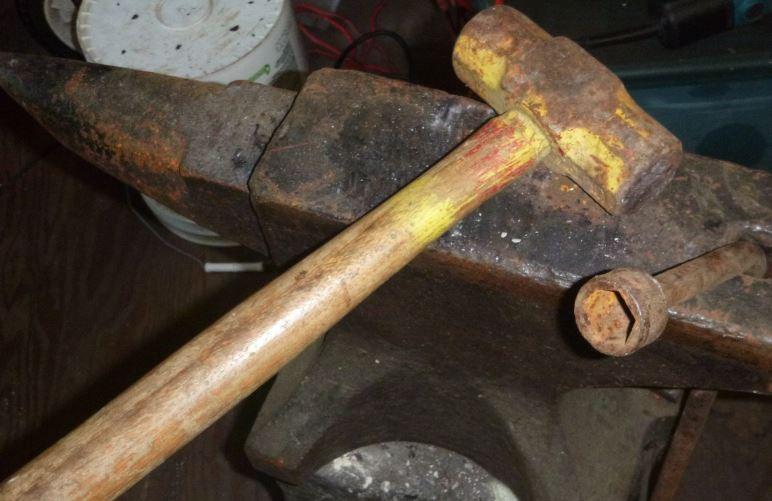
SO, I made some tongs.... things seem to be working fine. So, for lack of an actual job to do - and to learn my equipment and materials, I decided my big deal for the day will be to see how hot I get stuff, and straighten a piece of coil spring. From fire up to flame out, about 20 minutes. Everything seems to be up to snuff. I chucked the piece in, and lit it up. The last 3 photos - working temp at 20 minutes. Then, the afterglow after shutting it down and closing all the valves - and the no longer coiled spring. I think working out tooling, and just learning how the metal works and moves will be my initial "fun".


-
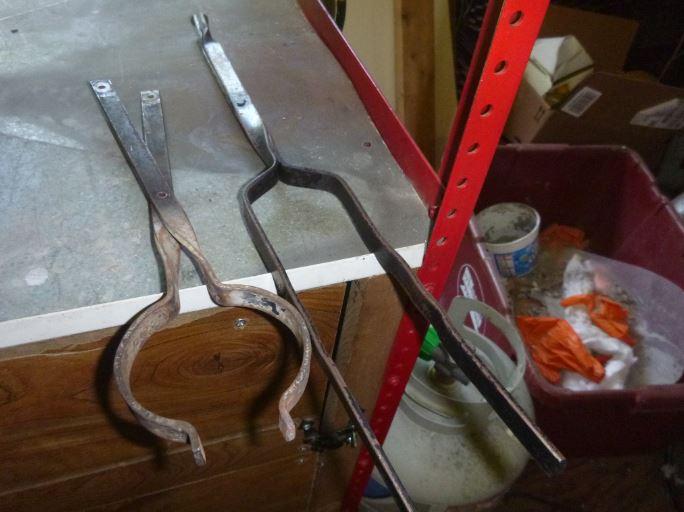
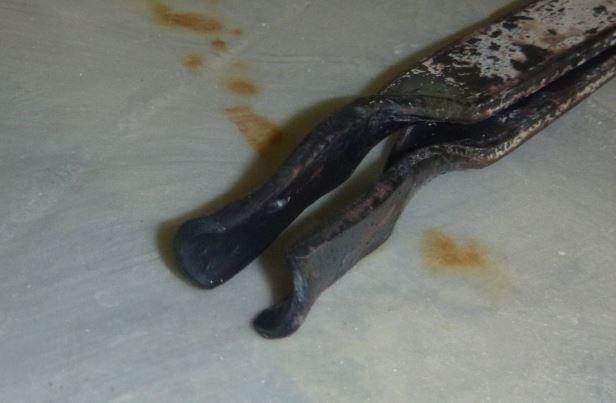
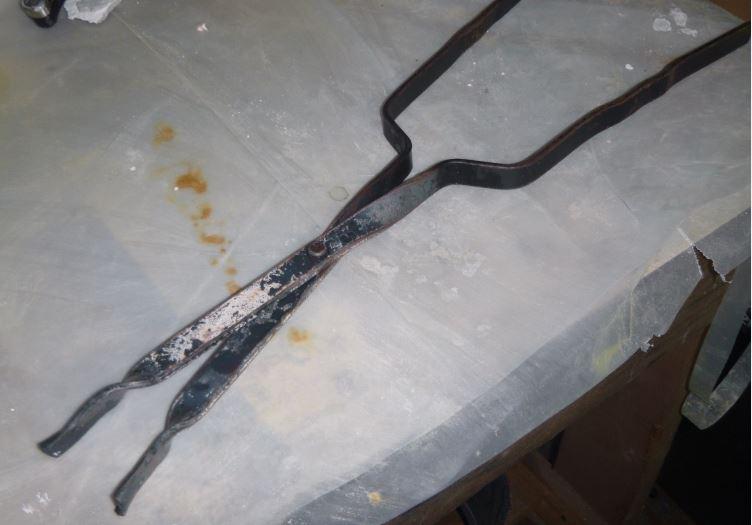
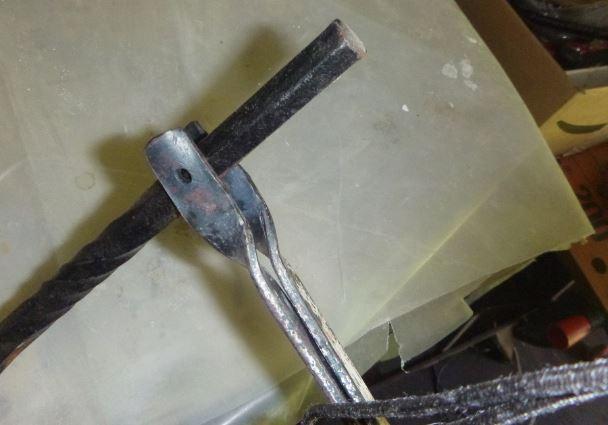
So, I made a forge. Finally fired for the first time today to full heat. SO, now what? I need tongs. I had a pair of old fireplace tongs - scissor style with bad rivets - pretty chintzy. So, I separated the parts, flattened the ends out a bit, and rolled the noses over to get a bit of grab and bite. Voila!! 15 minutes later, a pair of serviceable tongs with a springy grip handle to them. Nothing pretty, nothing fancy, but perfectly useful.... kinda like me....
-
I started tall. It seems more comfortable. But, I wasn't sure how I'd like it, so I went with tall. It'll be easier to shrink it, if desired, than to stretch it.
-
 KENR2600 changed their profile photo
 -
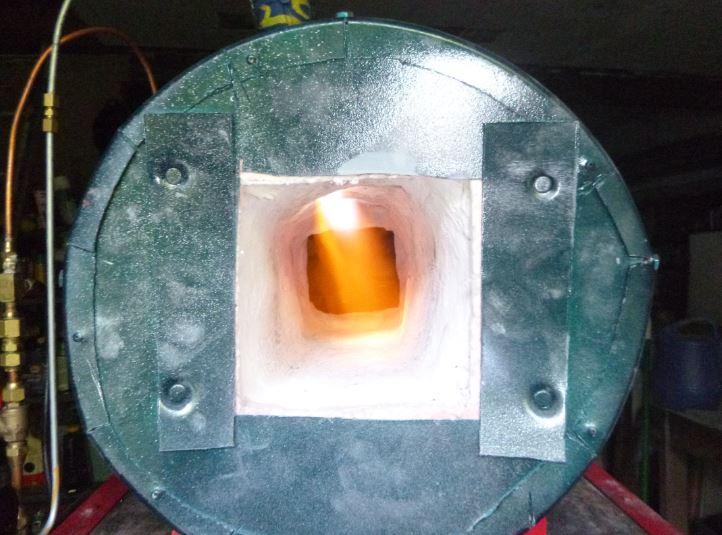
I'd rather the flames hit the wall up higher, but my "hard coat" got too close on the entry ports, and restricts my ability to turn them up further.... still. not bad for a first shot - in my "newbie" opinion....
-
… not sure what your coating is - looks to be a matrikote or some such painted right on a 2" blanket wrap. As it goes through heat cycles - it WILL shrink and expand a bit - a good chance through use- the blanket will stabilize, and successive recoats may hold without cracking out down the road. Be sure it is super dry - and then cure the finish coat at moderate heat for short bursts, and it may help. ANY moisture left in the coating or sucked into the insulation will make the problem worse... not that it appears actually problematic - yet... Everything needs time to settle itself into "normal" from cold to super hot cycles.
-
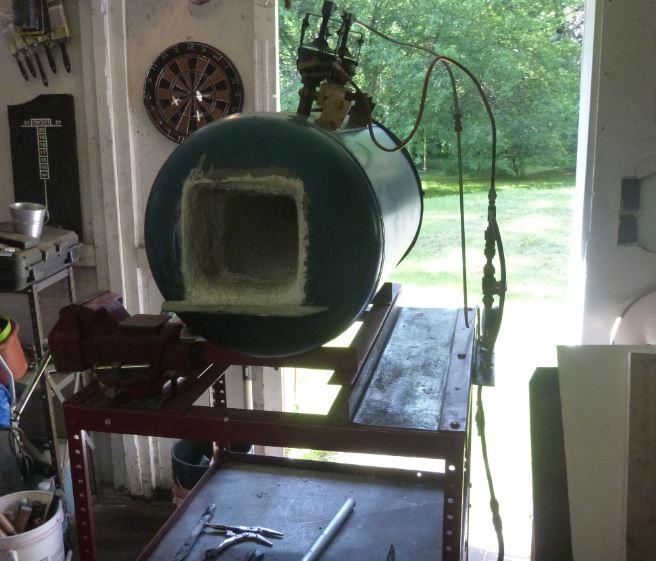
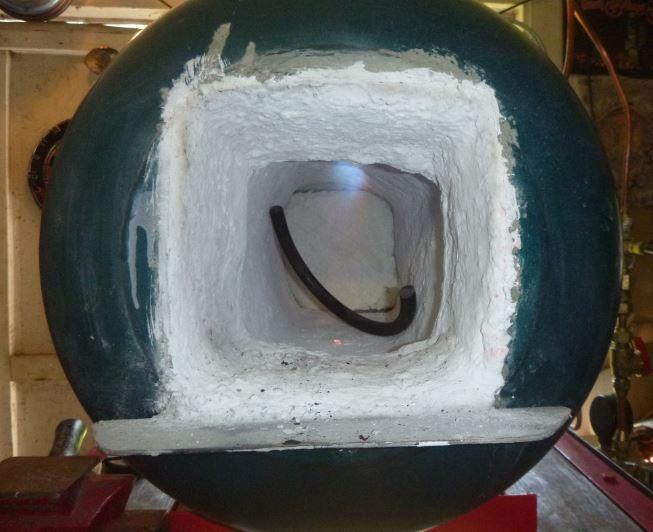
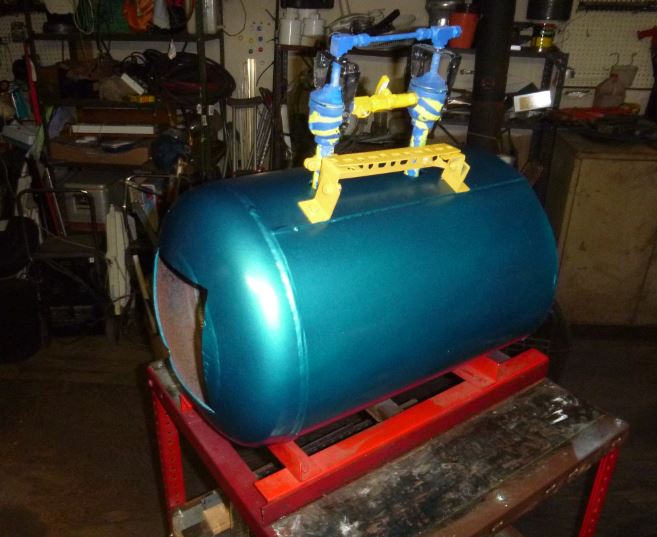
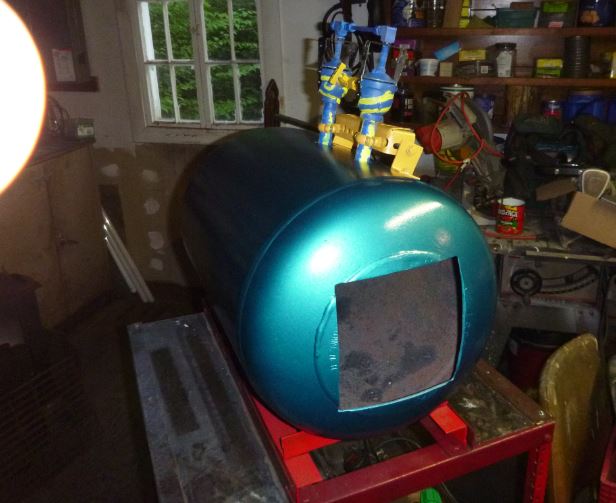
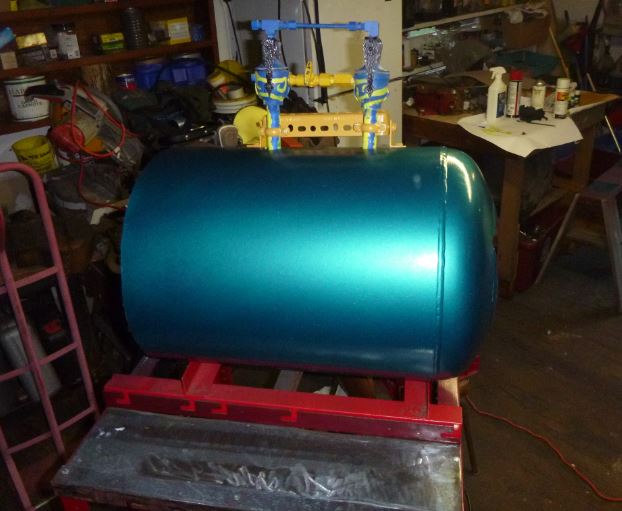
After just over a year's layover - from health, wealth, and time issues - I finally got my insulations, liners, and the like. Finally, the forge gets to spit some fire. A bit of trouble with the primary burner spitting at low pressure - idle basically. Once it turns up 4-5 psi, it seems fine. A whiff of a breeze over the intake cup solves it. Everything else looks nice. Can't help but wonder if I have a small leak at the junction of the mig nozzle.... The photos show 8-10 psi - the shorter video is my "dragon's breath" with the pressure maxed up at about 25 psi, and the back hole blocked completely. The unit had been running about 5 minutes on the front burner 2-3 on the back. The finished space is about 5-1/2" wide by 14" deep. P1030221.avi P1030225.avi

-
same as Mikey pointed out on your other set-up... the t should be a reducer type with larger intake ends than the output. From there, getting your jet size and distance will make the difference.
-
...having had a similar issue on a different design... I ground down the tops of my reducer intakes to an angle into the cup...instead of the flat tops. That alone , I went from barely enough air to more than I need, and need to choke it down. Having it draw air in from the very edge instead of across the flat surface and then down into the obstruction of your gas jets, it should greatly improve the draw past the jets. The smaller tip with a greater velocity of fuel should increase the suction and mix.....
-
It is going to get much smaller on the inside along the way. I expect when done, it will be whisper quiet, cool as a cucumber, practically feed itself infinitely on a whiff of fuel, and even start shaping metal before it even comes out.
-
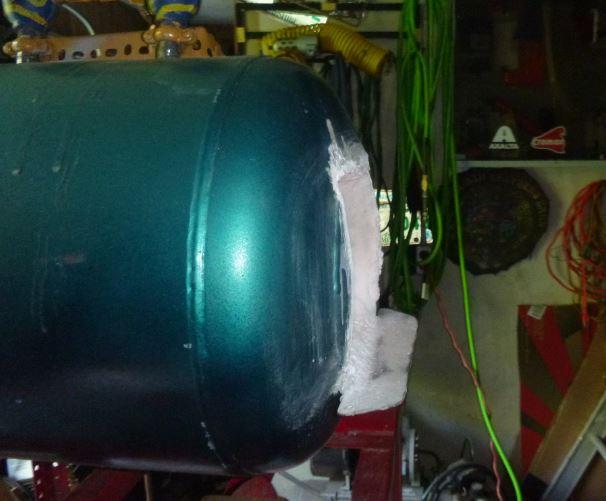
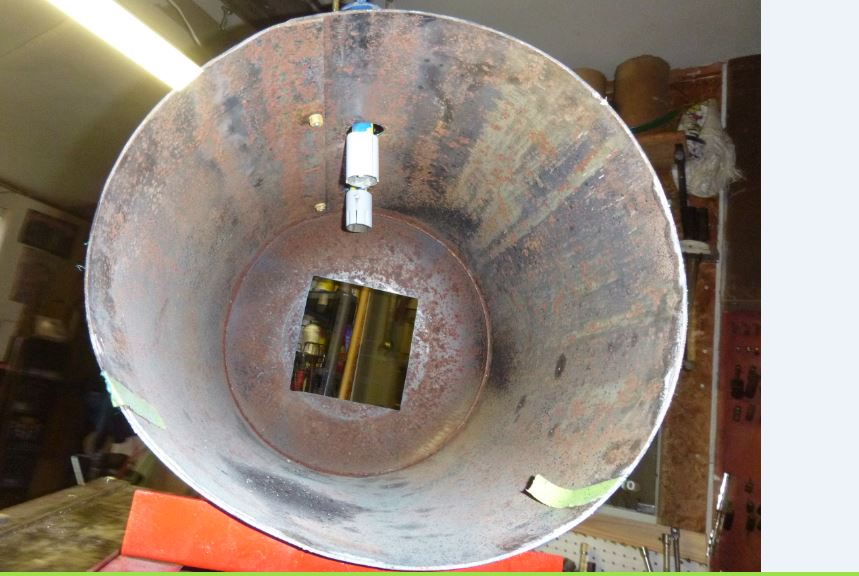
Well, I found an item for use as an end cap to this forge. What better use for an old dish? And I have 2 - so I will be able to cut out a slider type door in the one, with the proper concave and angles to match. It will take some more tinkering about, but - that's what I can do for now. I added the porch - and did some plumbing - all leak tested and tweaked up. Still no dough for refractories - so playing with the rest of the project - caps, doors, the cart - plenty to fidget with yet!


-
There are future plans for a real backer - with door, or cap dome, or some such. But in the meantime, I built space enough on the back of the cart to build the brick wall in a frame to serve the need... I'll keep it minimal at cost for now, while waiting to see what great ideas or adaptations I would like to add along the way... I even have a vague notion of using the other 1/2 of the tank this was made from, building another similar - and if needed for a long project - could potentially back to back them, making a nearly 4 foot forge...
-
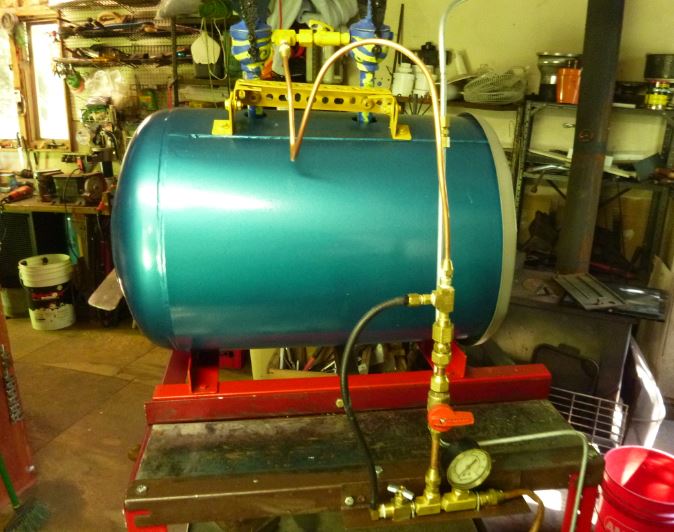
So, forgive the color schemes..as all the parts (except propane valves). none of it is planned, and all stuff on hand. In fact, the shell is Honda - Tahitian green, mixed in a color match from 2004, a few years on the shelf - but paints just fine. The burner bracket - Dodge "prowler yellow" - also an old mix. some craft paints while building the burners just for fun.... So far, it has been an interesting build, but put on hold. I haven't come across a dime to invest in insulating, and found no one around with freebies - or mostly no clue what I'm talking about.... Plenty of tinkering to do yet anyhow, so - we will be patient and see what the universe brings...


-
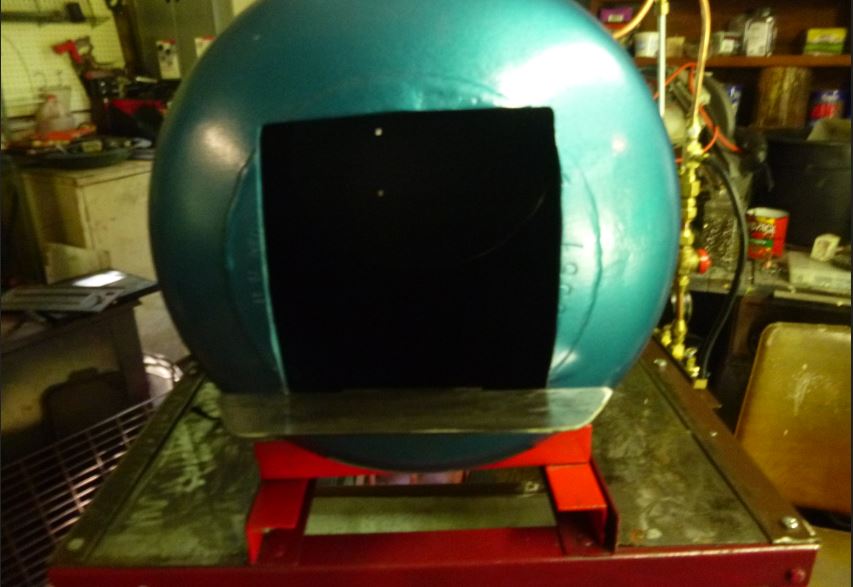
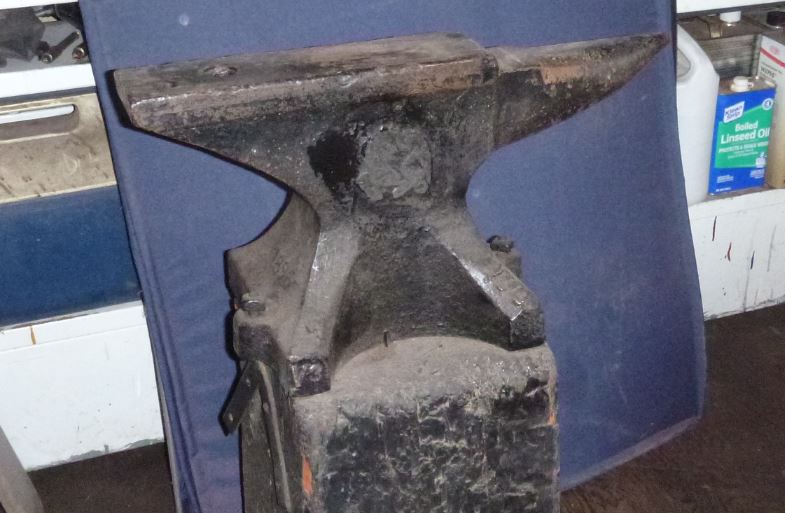
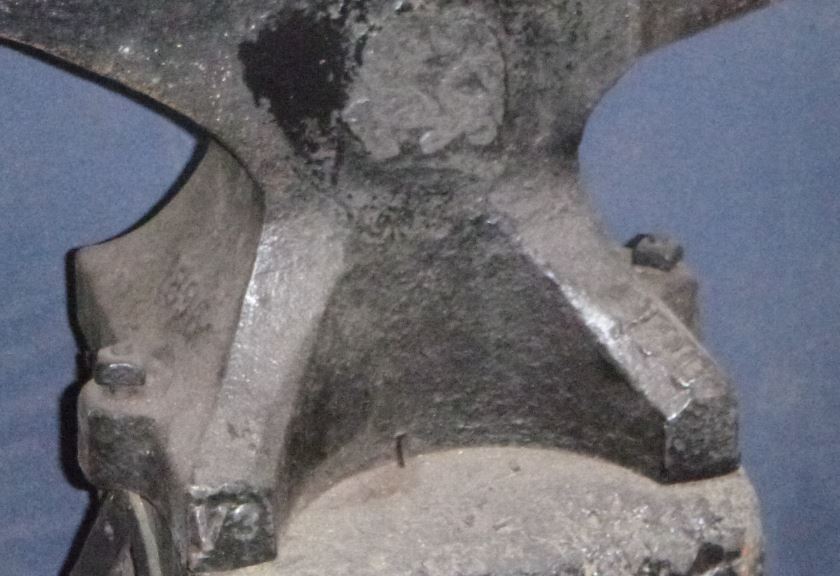
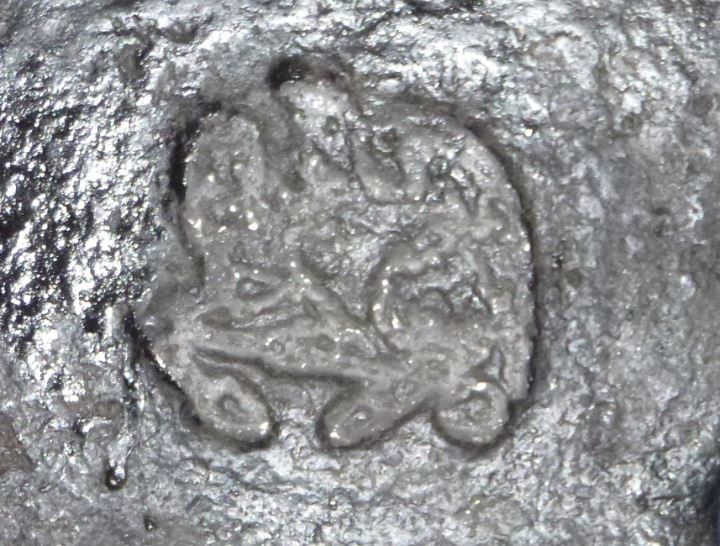
found this one at a last chance shop before scrap-it. I figuring 130# don't know what the v3 is for - and not sure what that side casting is supposed to be.... 50 bucks... I'll take it. Actually, I had to get the wife to go get it , since they were kind enough to load it for her...
-
I was thinking of a wide bowl type floor raised up. I wasn't sure the best way to support the floor. I figure to invest in a kiln shelf floor - and saw a recommendation to use some segments as wall sides out at an angle. Then using other material to make a curved floor up. The perlite lift, some rigidized blanket, and a shelf floor? Would shelf posts work under that to keep it lifted, while it sets on the blanket/perlite? Or will they not like the environment - or conduct heat through...??? I was thinking to bring the floor up to the bottom of the door area, about 3" up. I like the idea of a fairly wide floor for odd objects...or multiple pieces... or...... Plus, I thought a wide pan with rounded up sides would really help promote some good flame swirl in the forge and armor up the sides a bit too. I had considered just bracketing in a steel floor, and then just do the blanketing and such over that. But that will create an empty air space underneath. I don't know what that would do to the overall environment inside.