

Peppie
-
Posts
228 -
Joined
-
Last visited
Content Type
Profiles
Forums
Articles
Gallery
Downloads
Events
Posts posted by Peppie
-
-
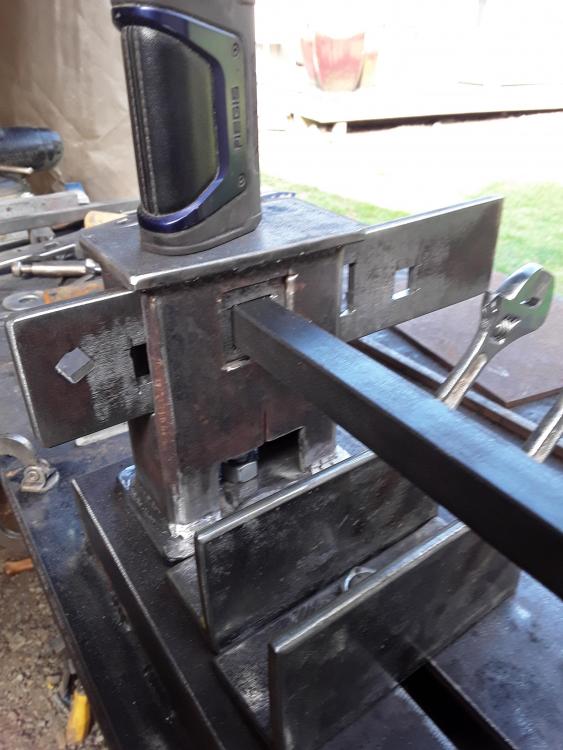
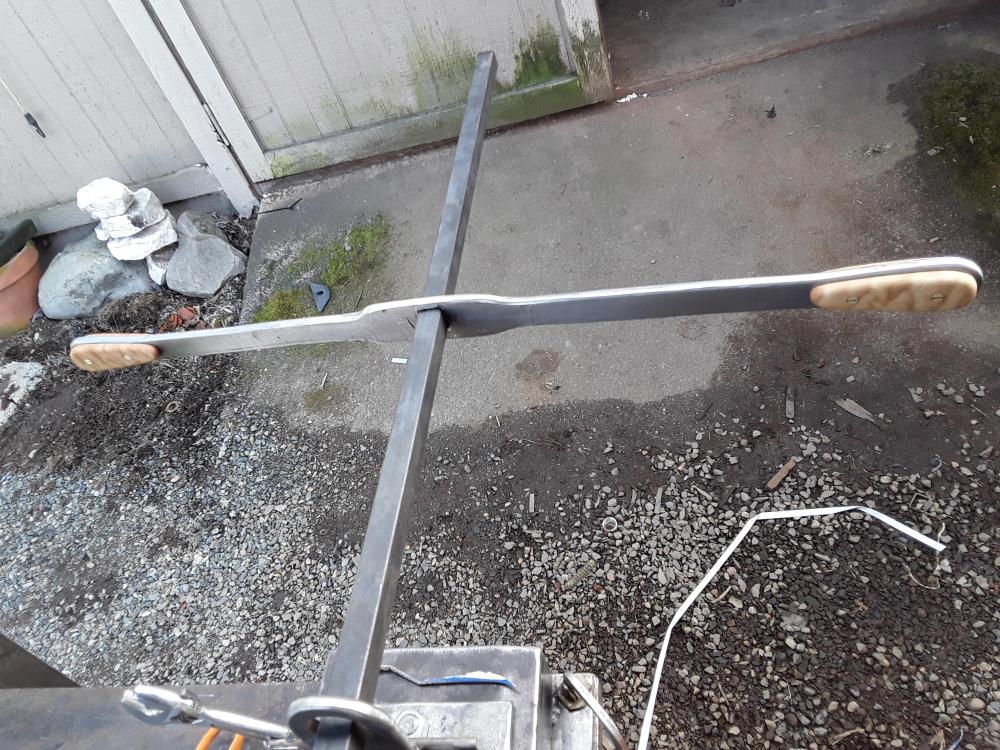
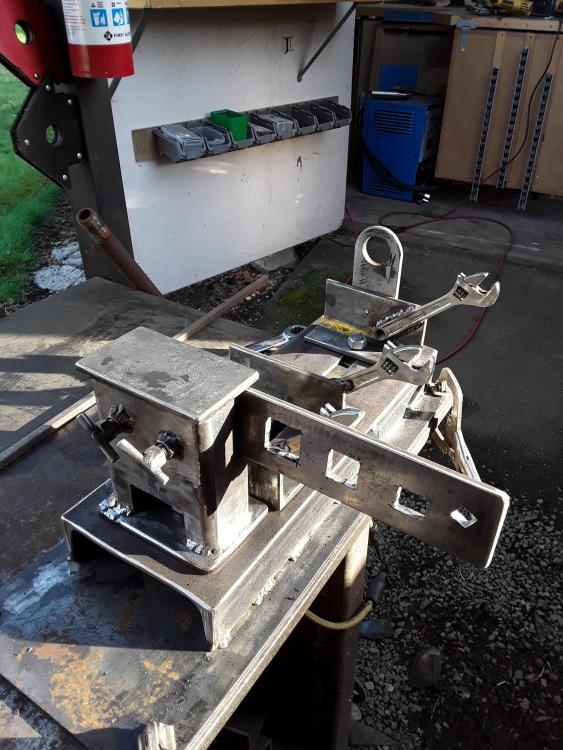
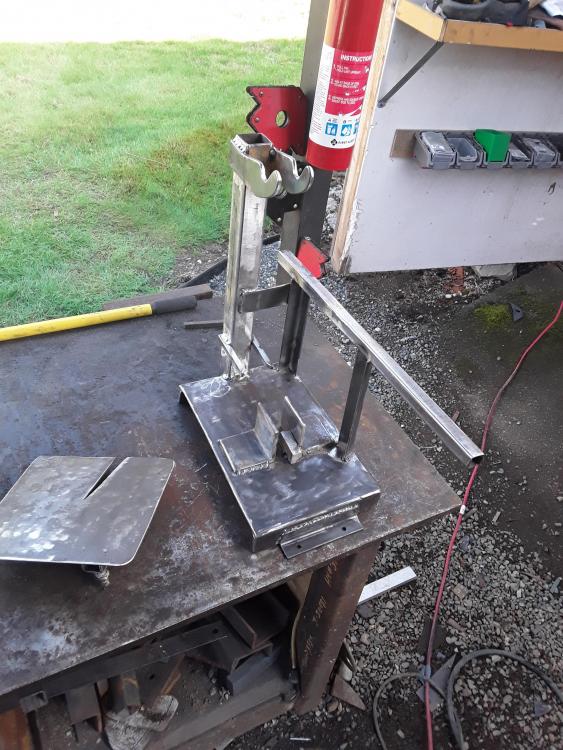
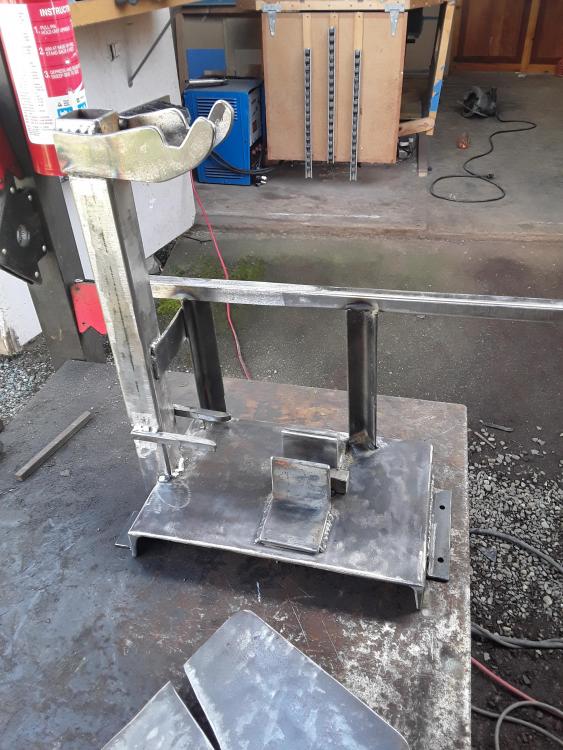
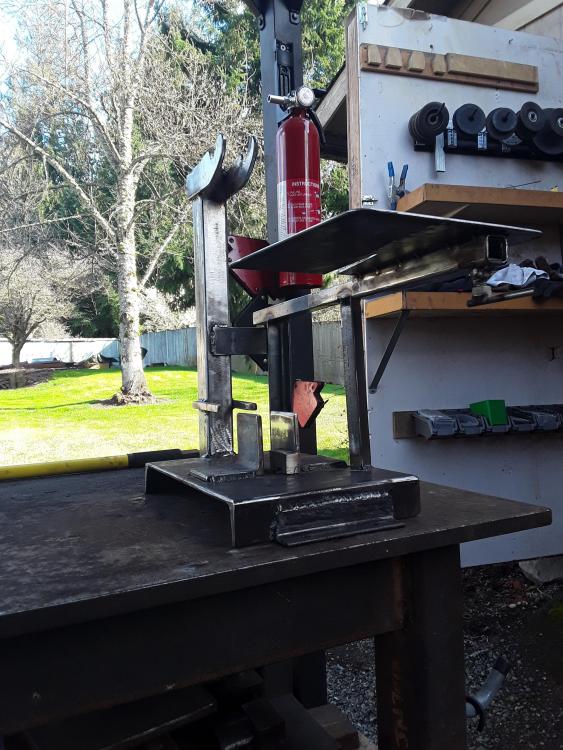
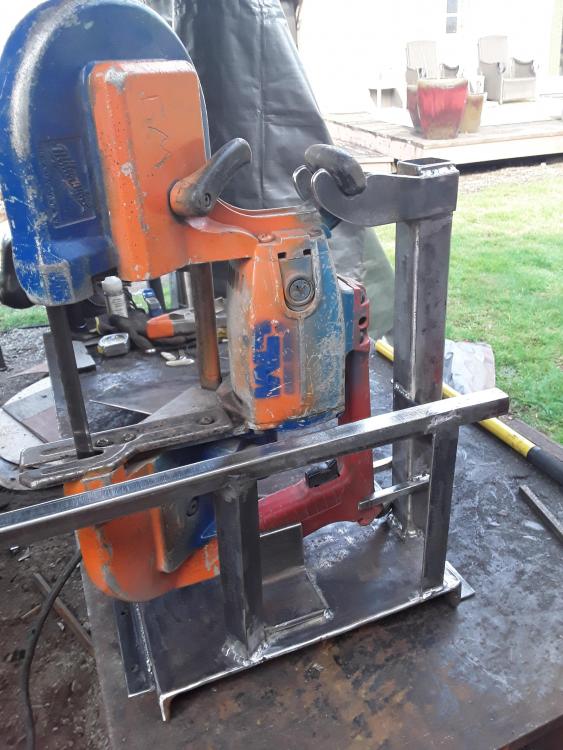
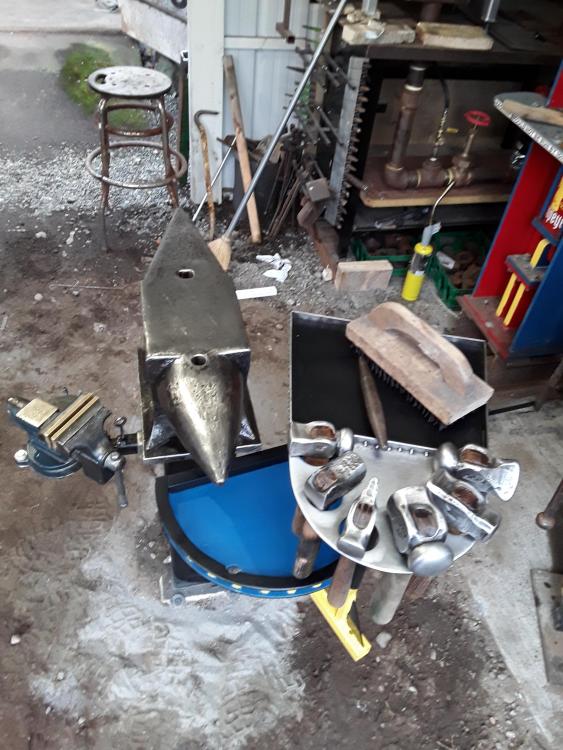
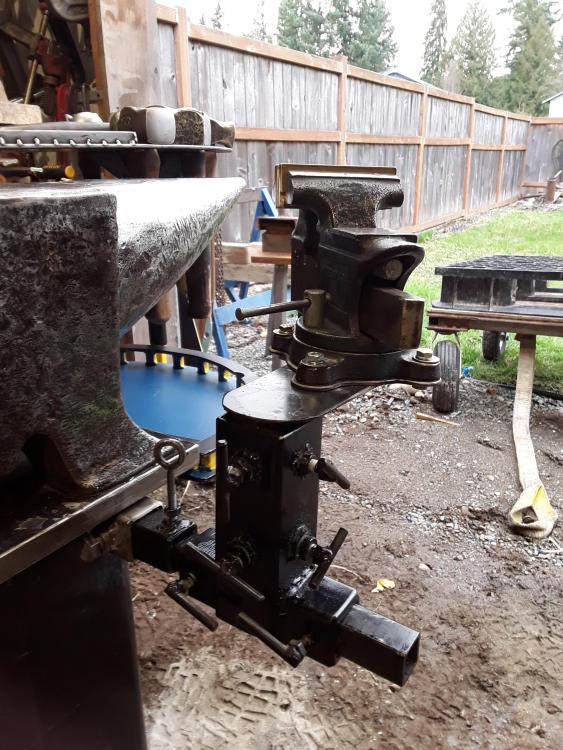
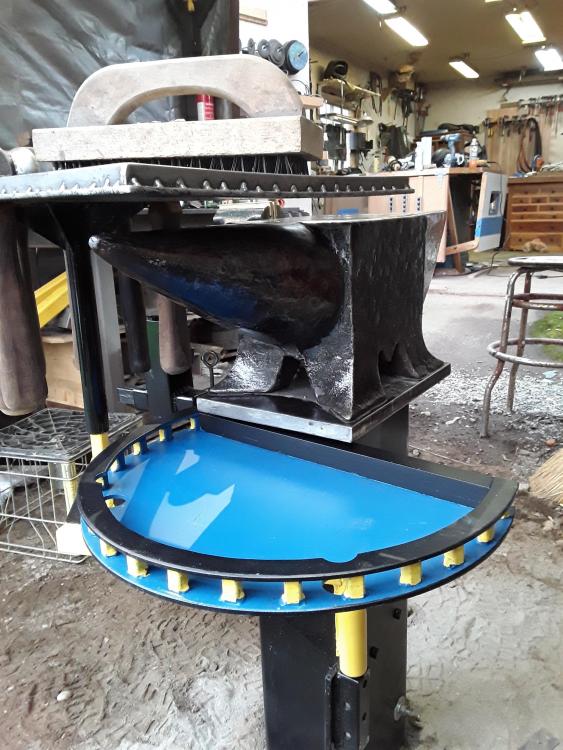
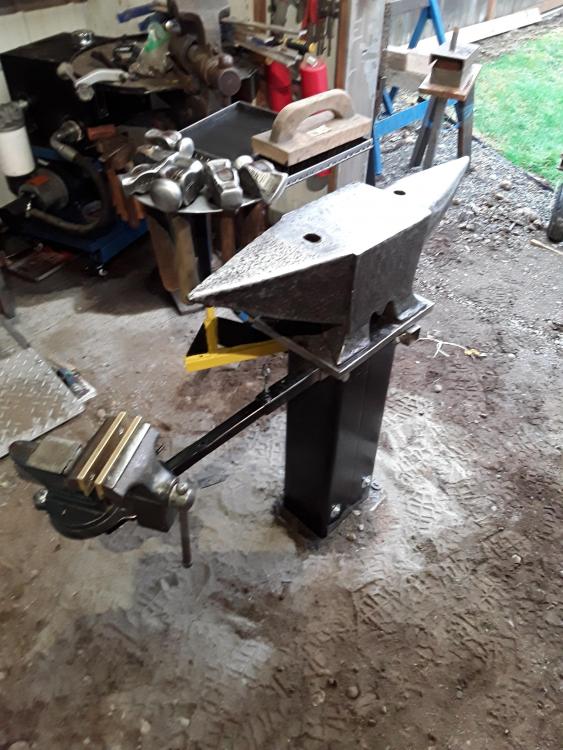
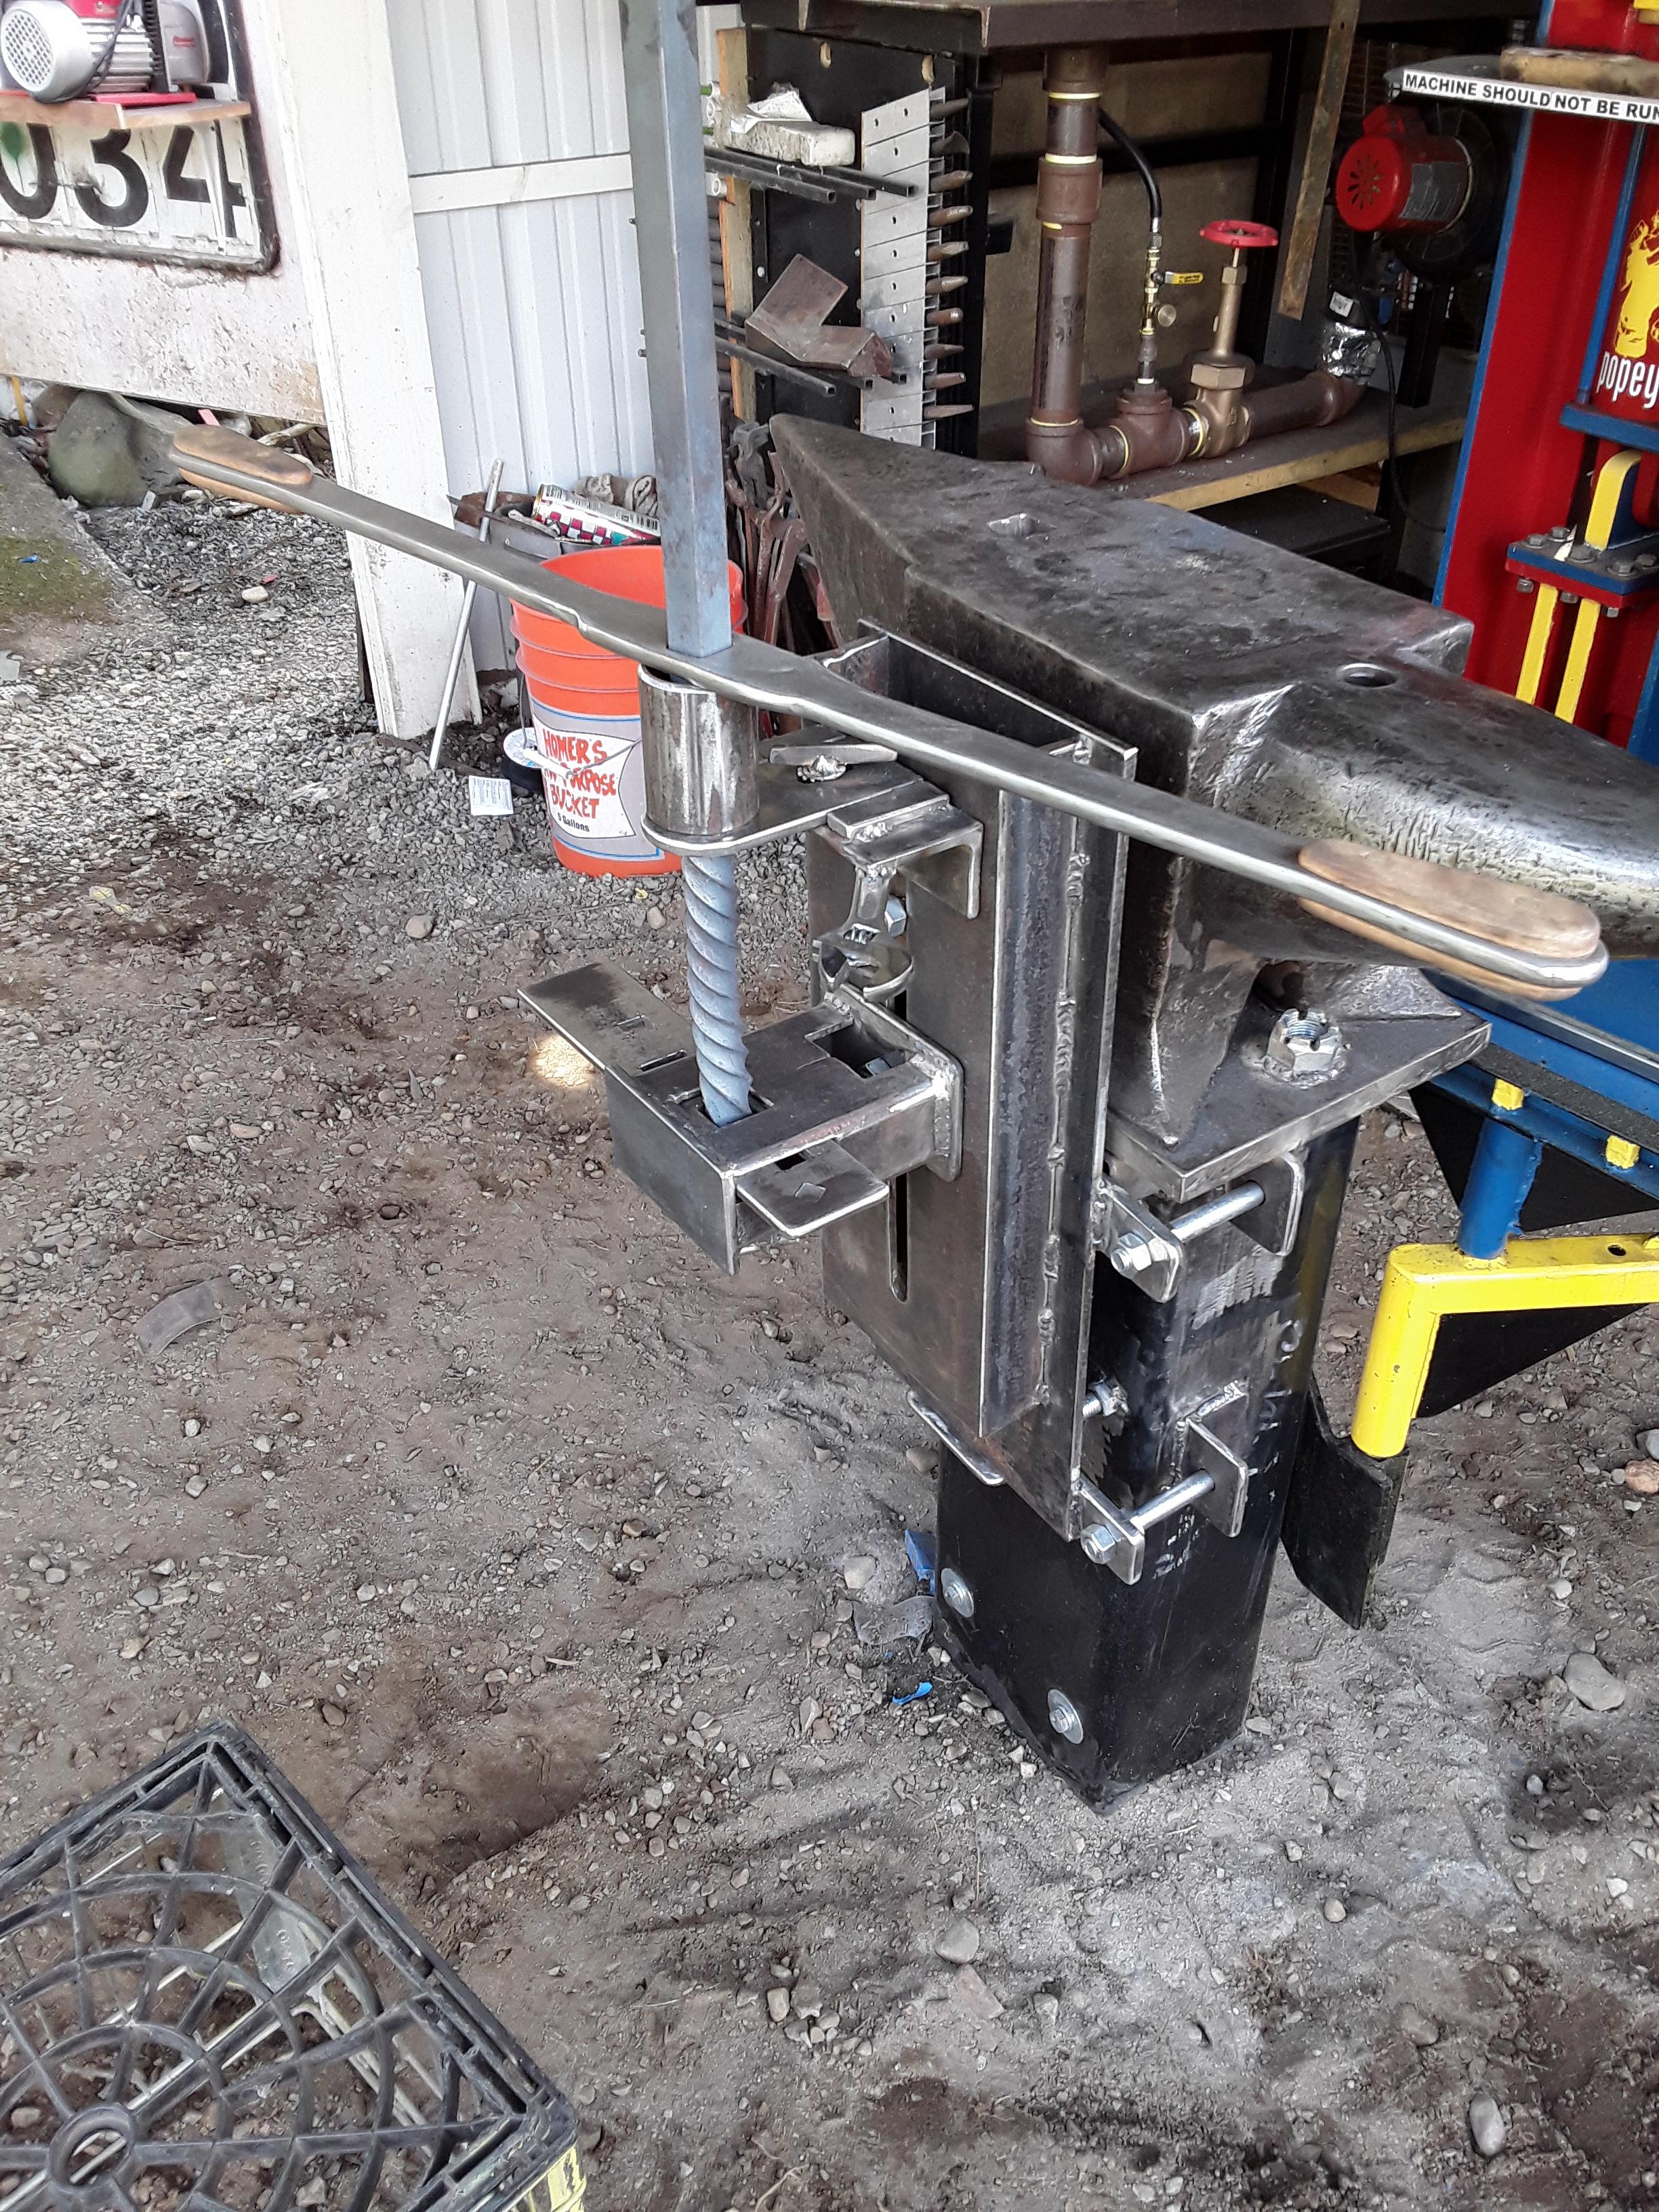
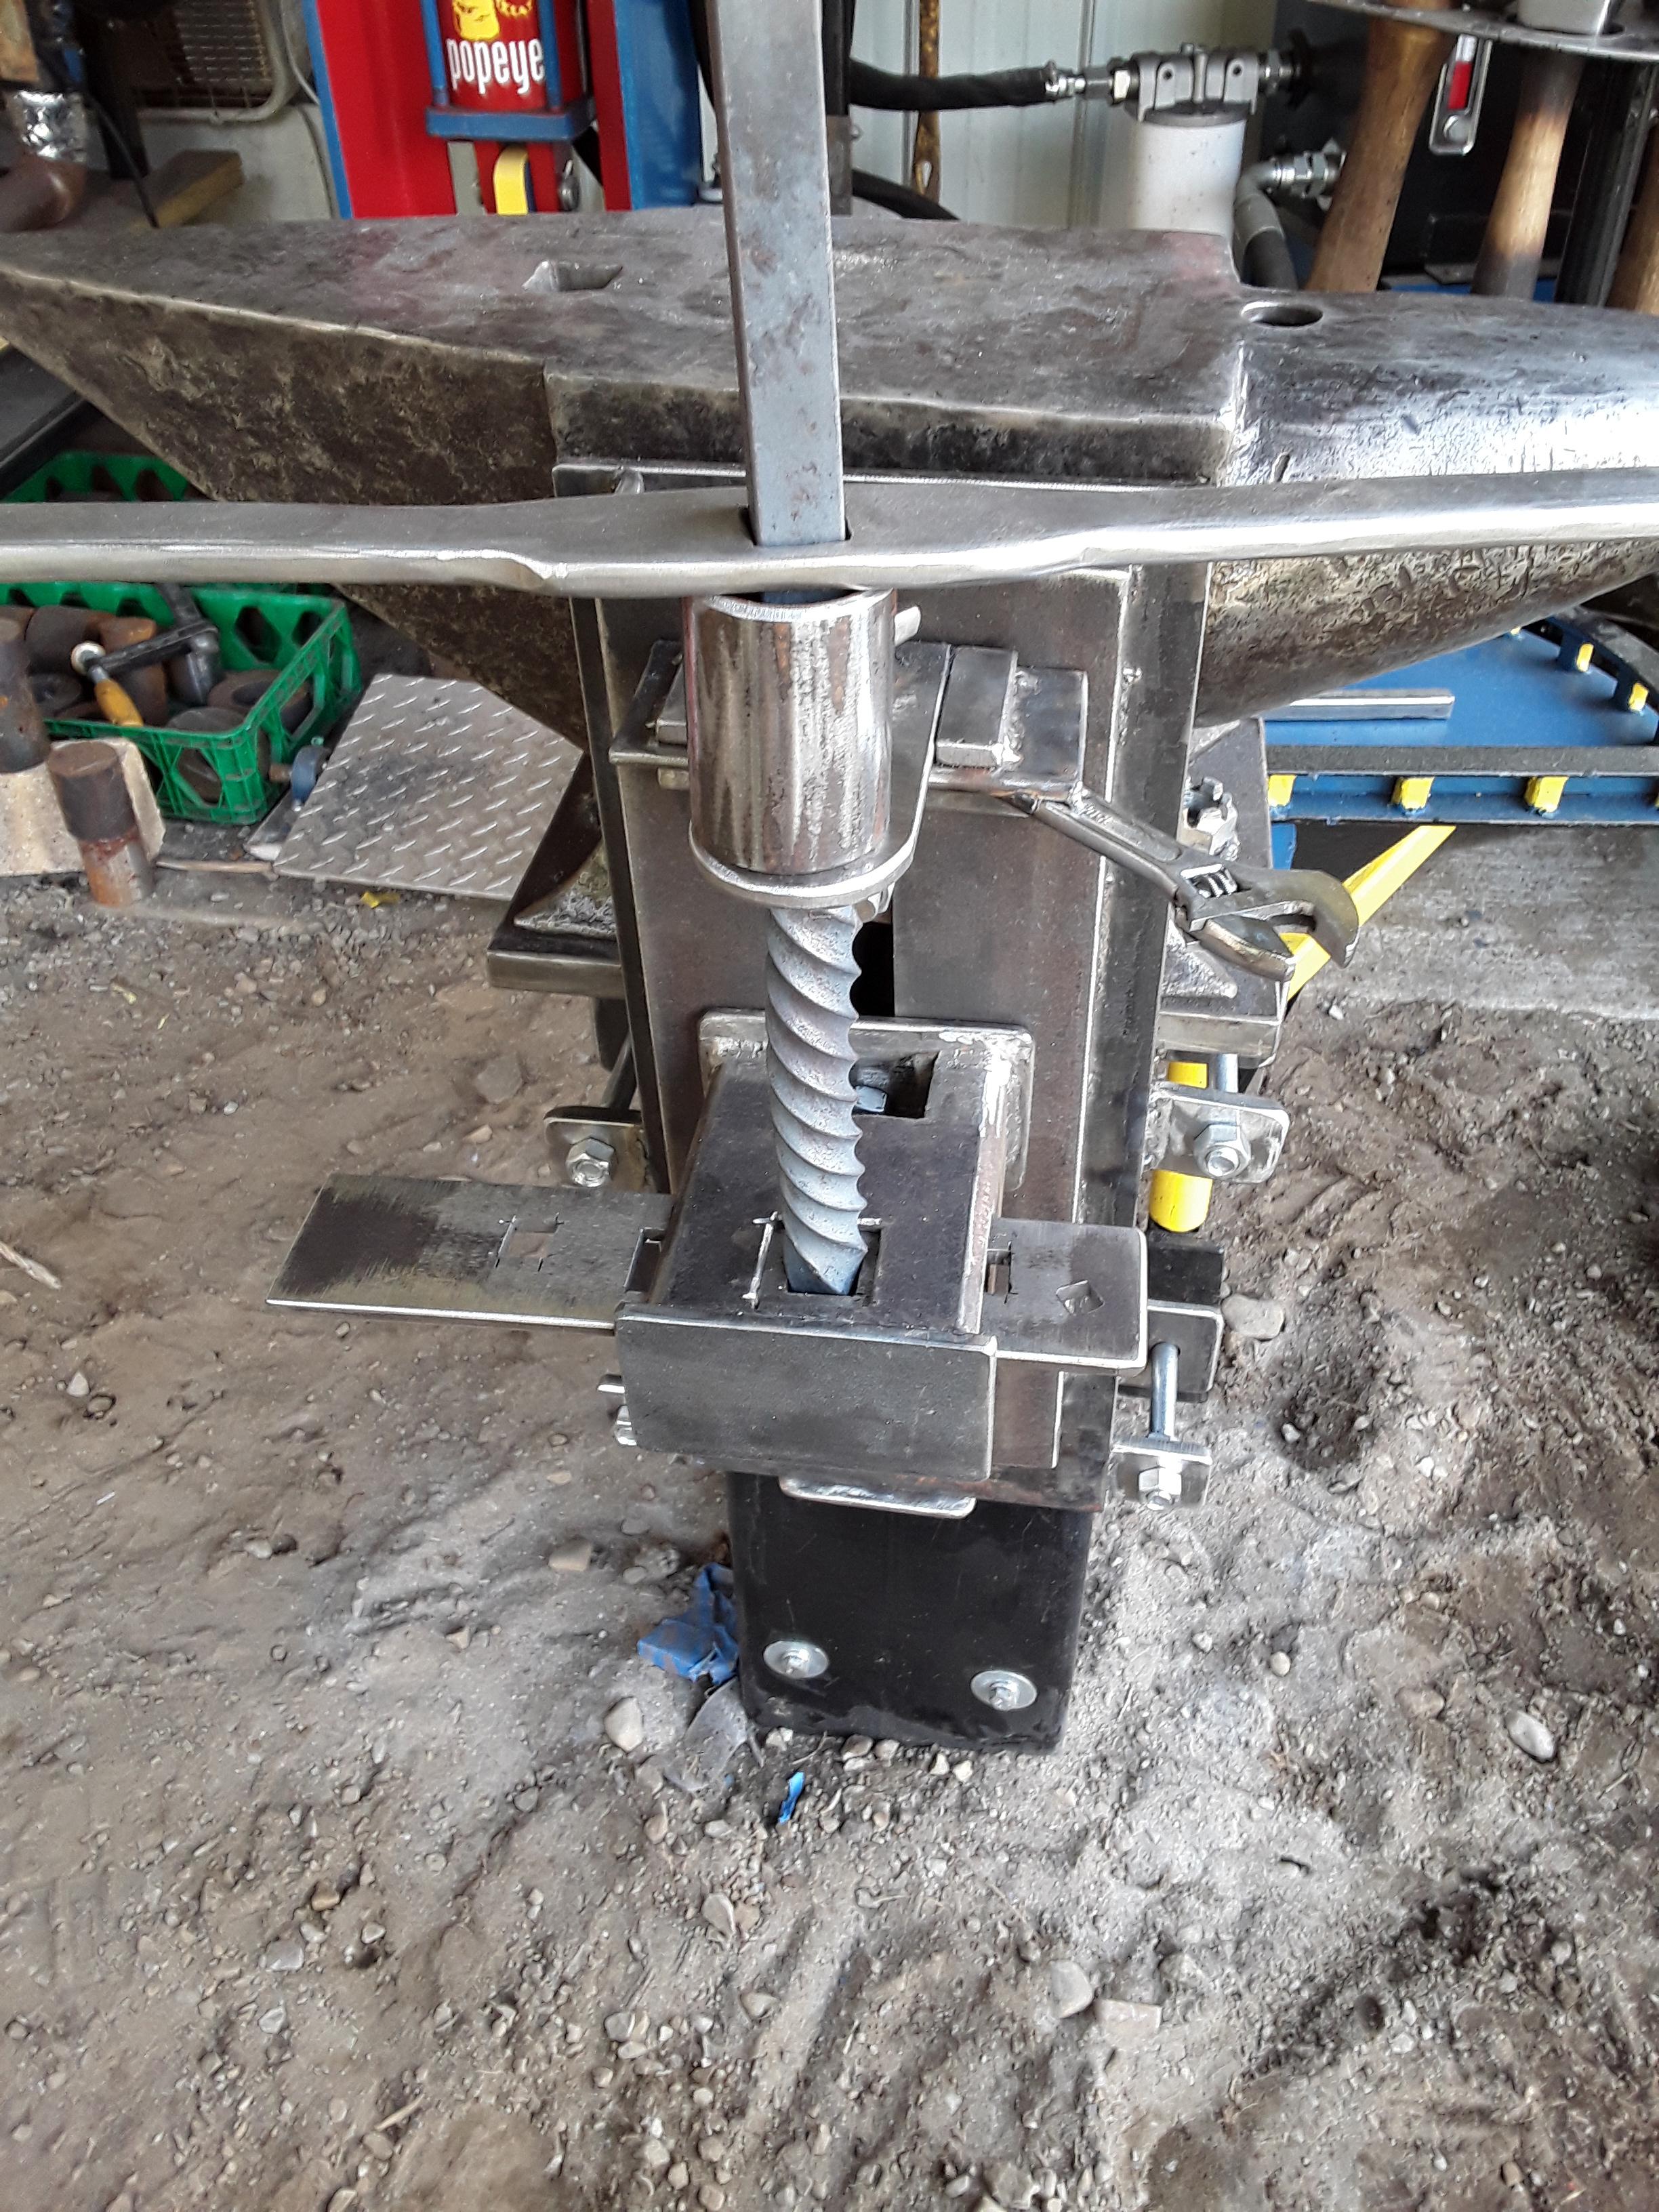
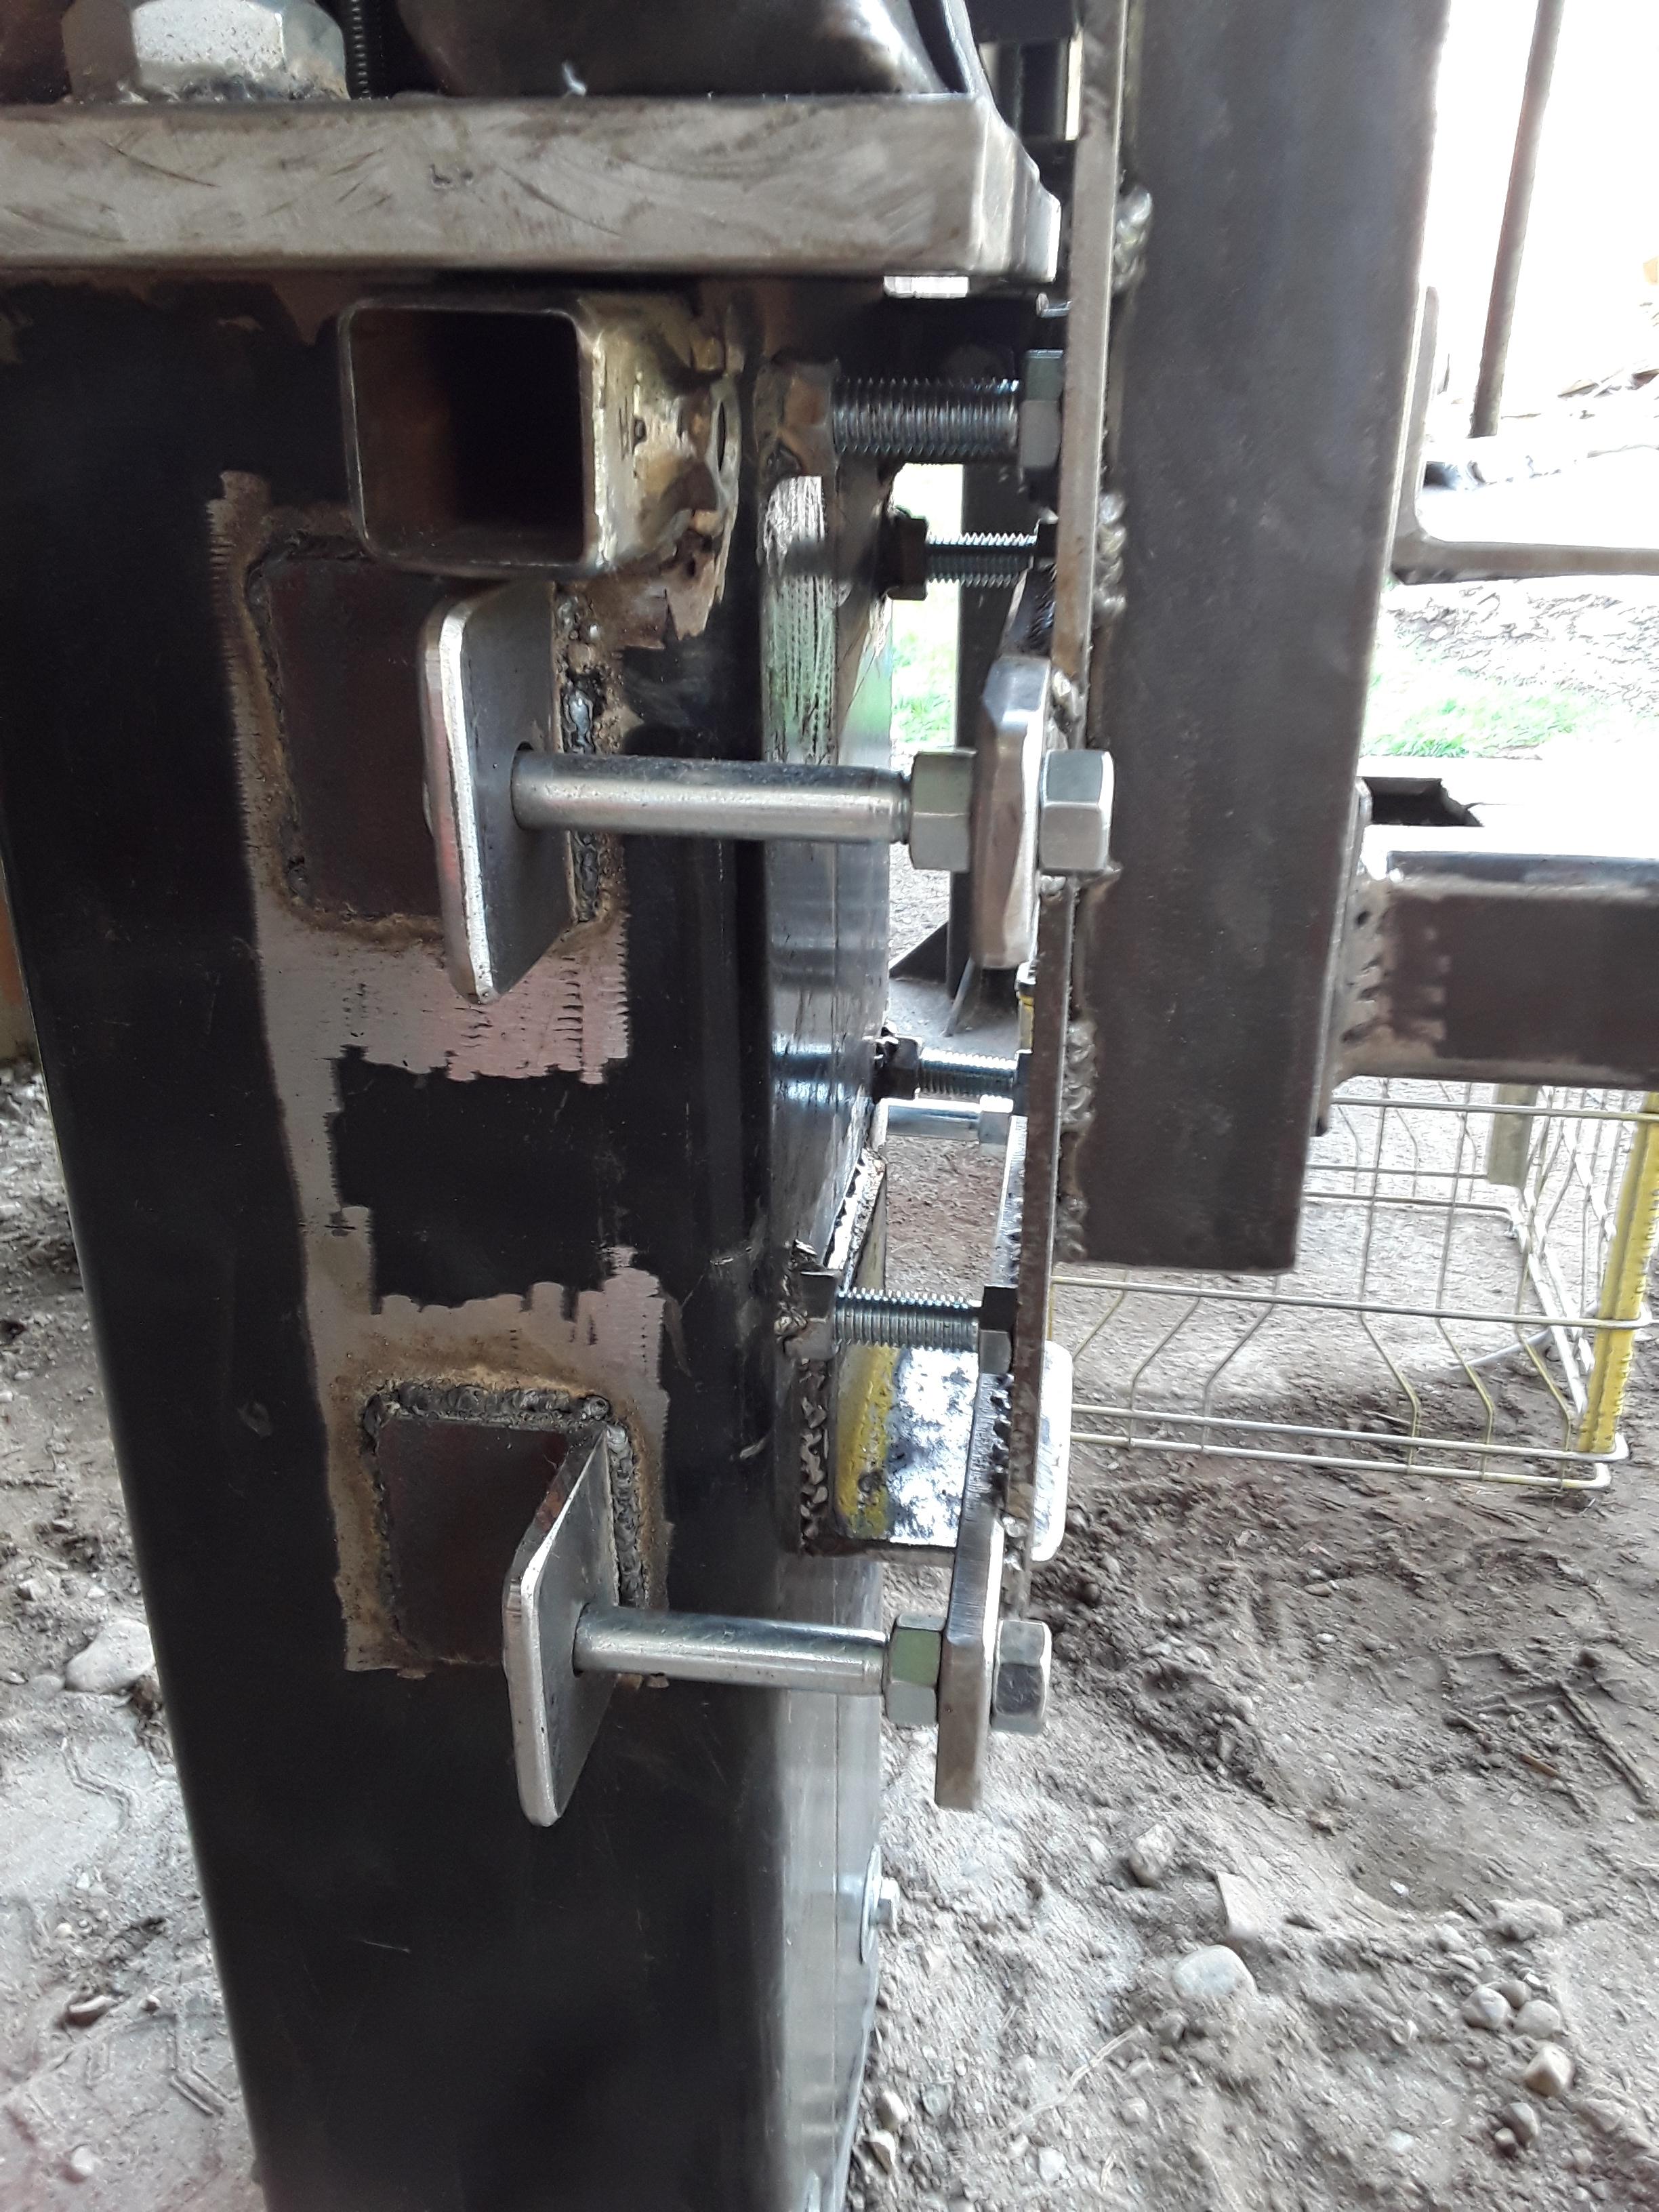
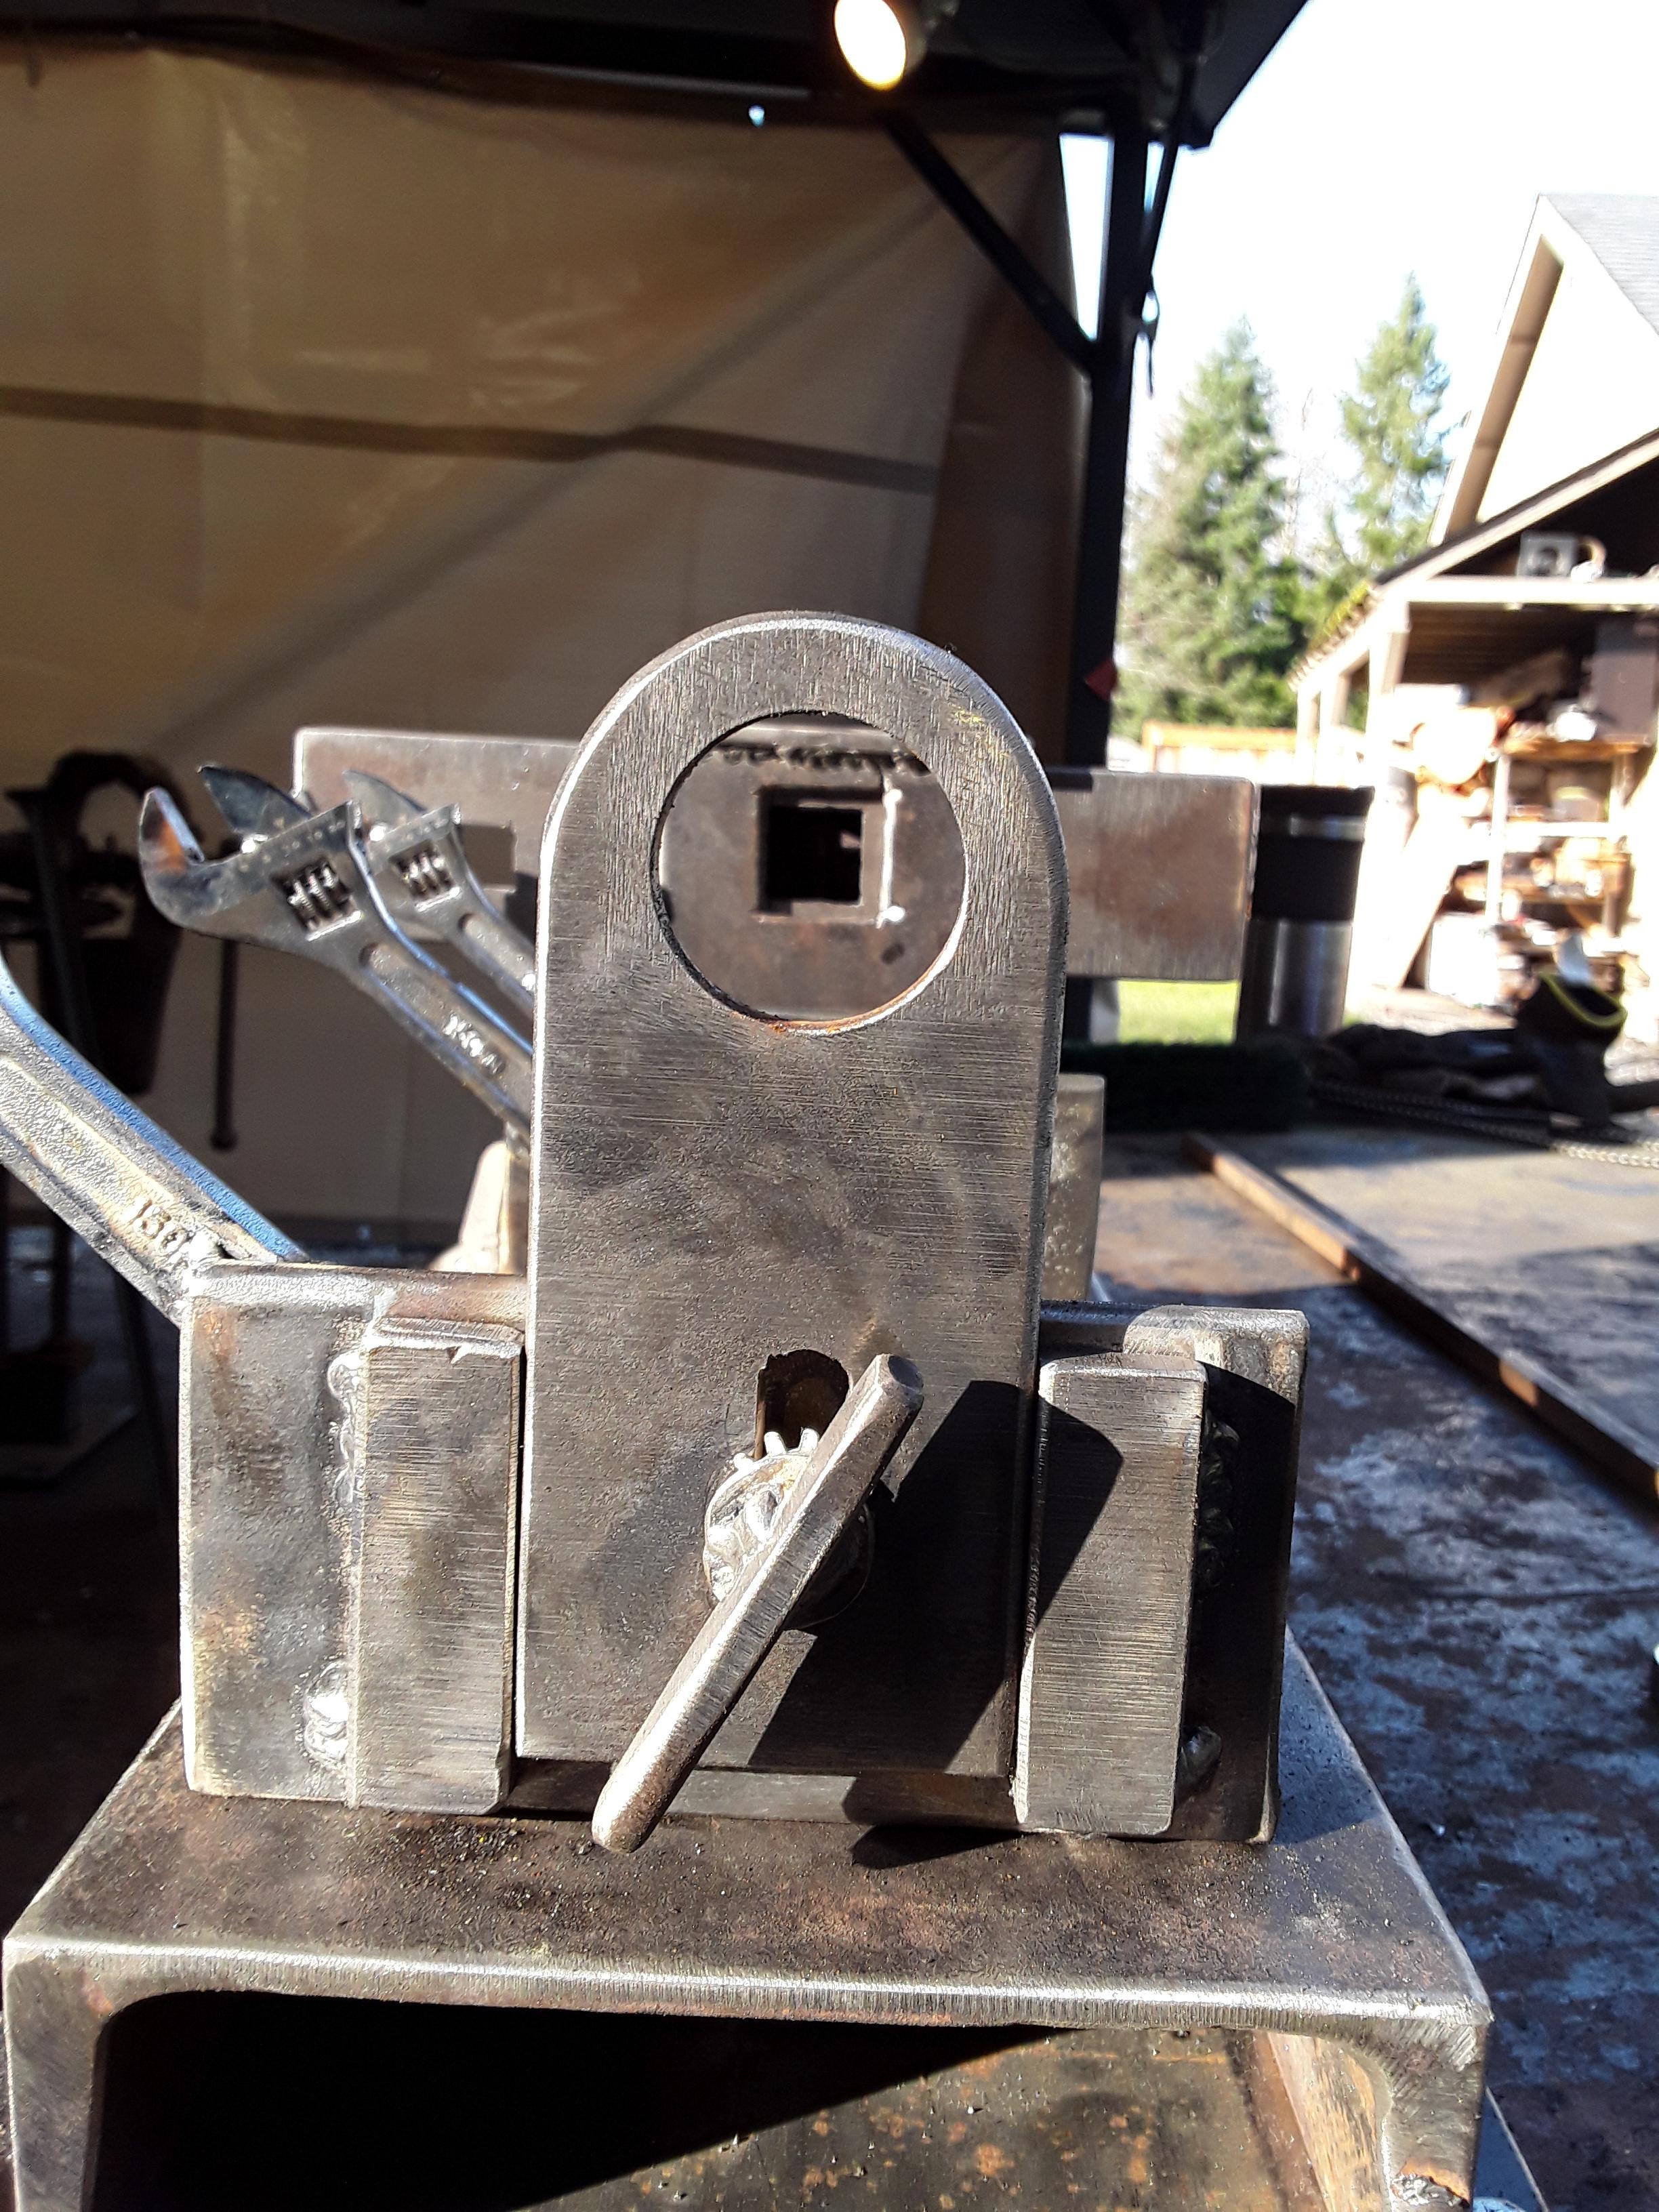
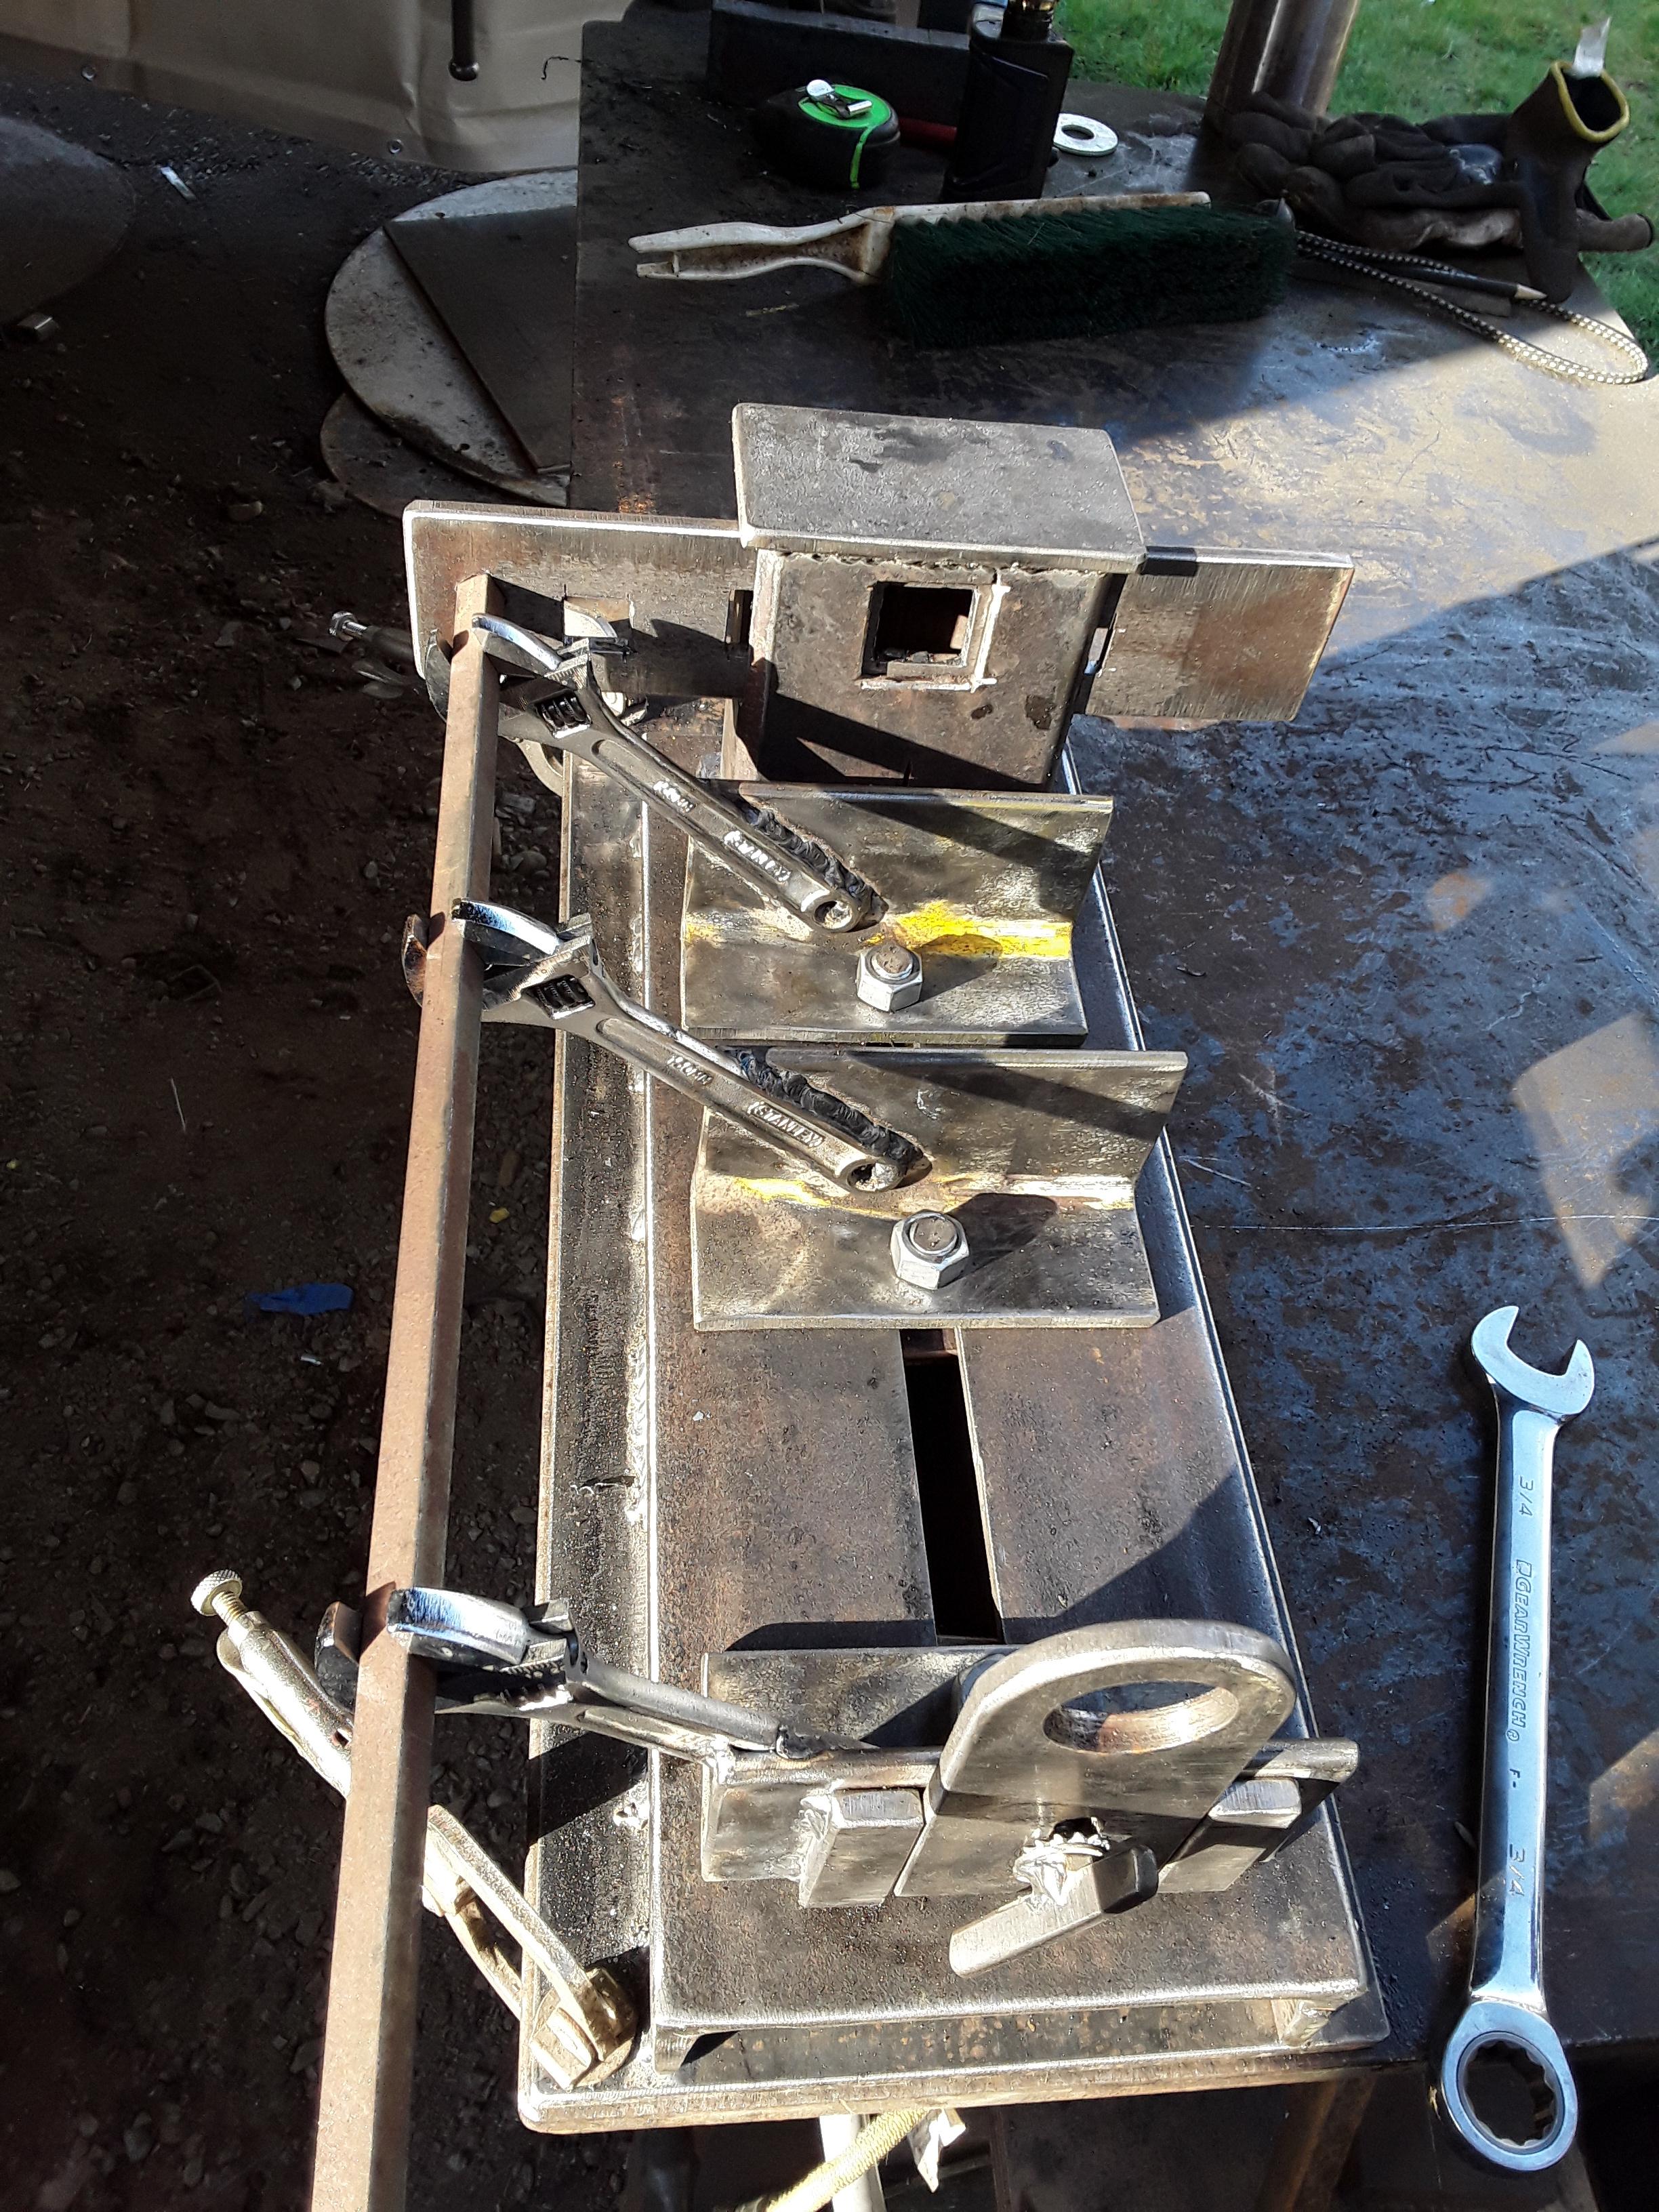
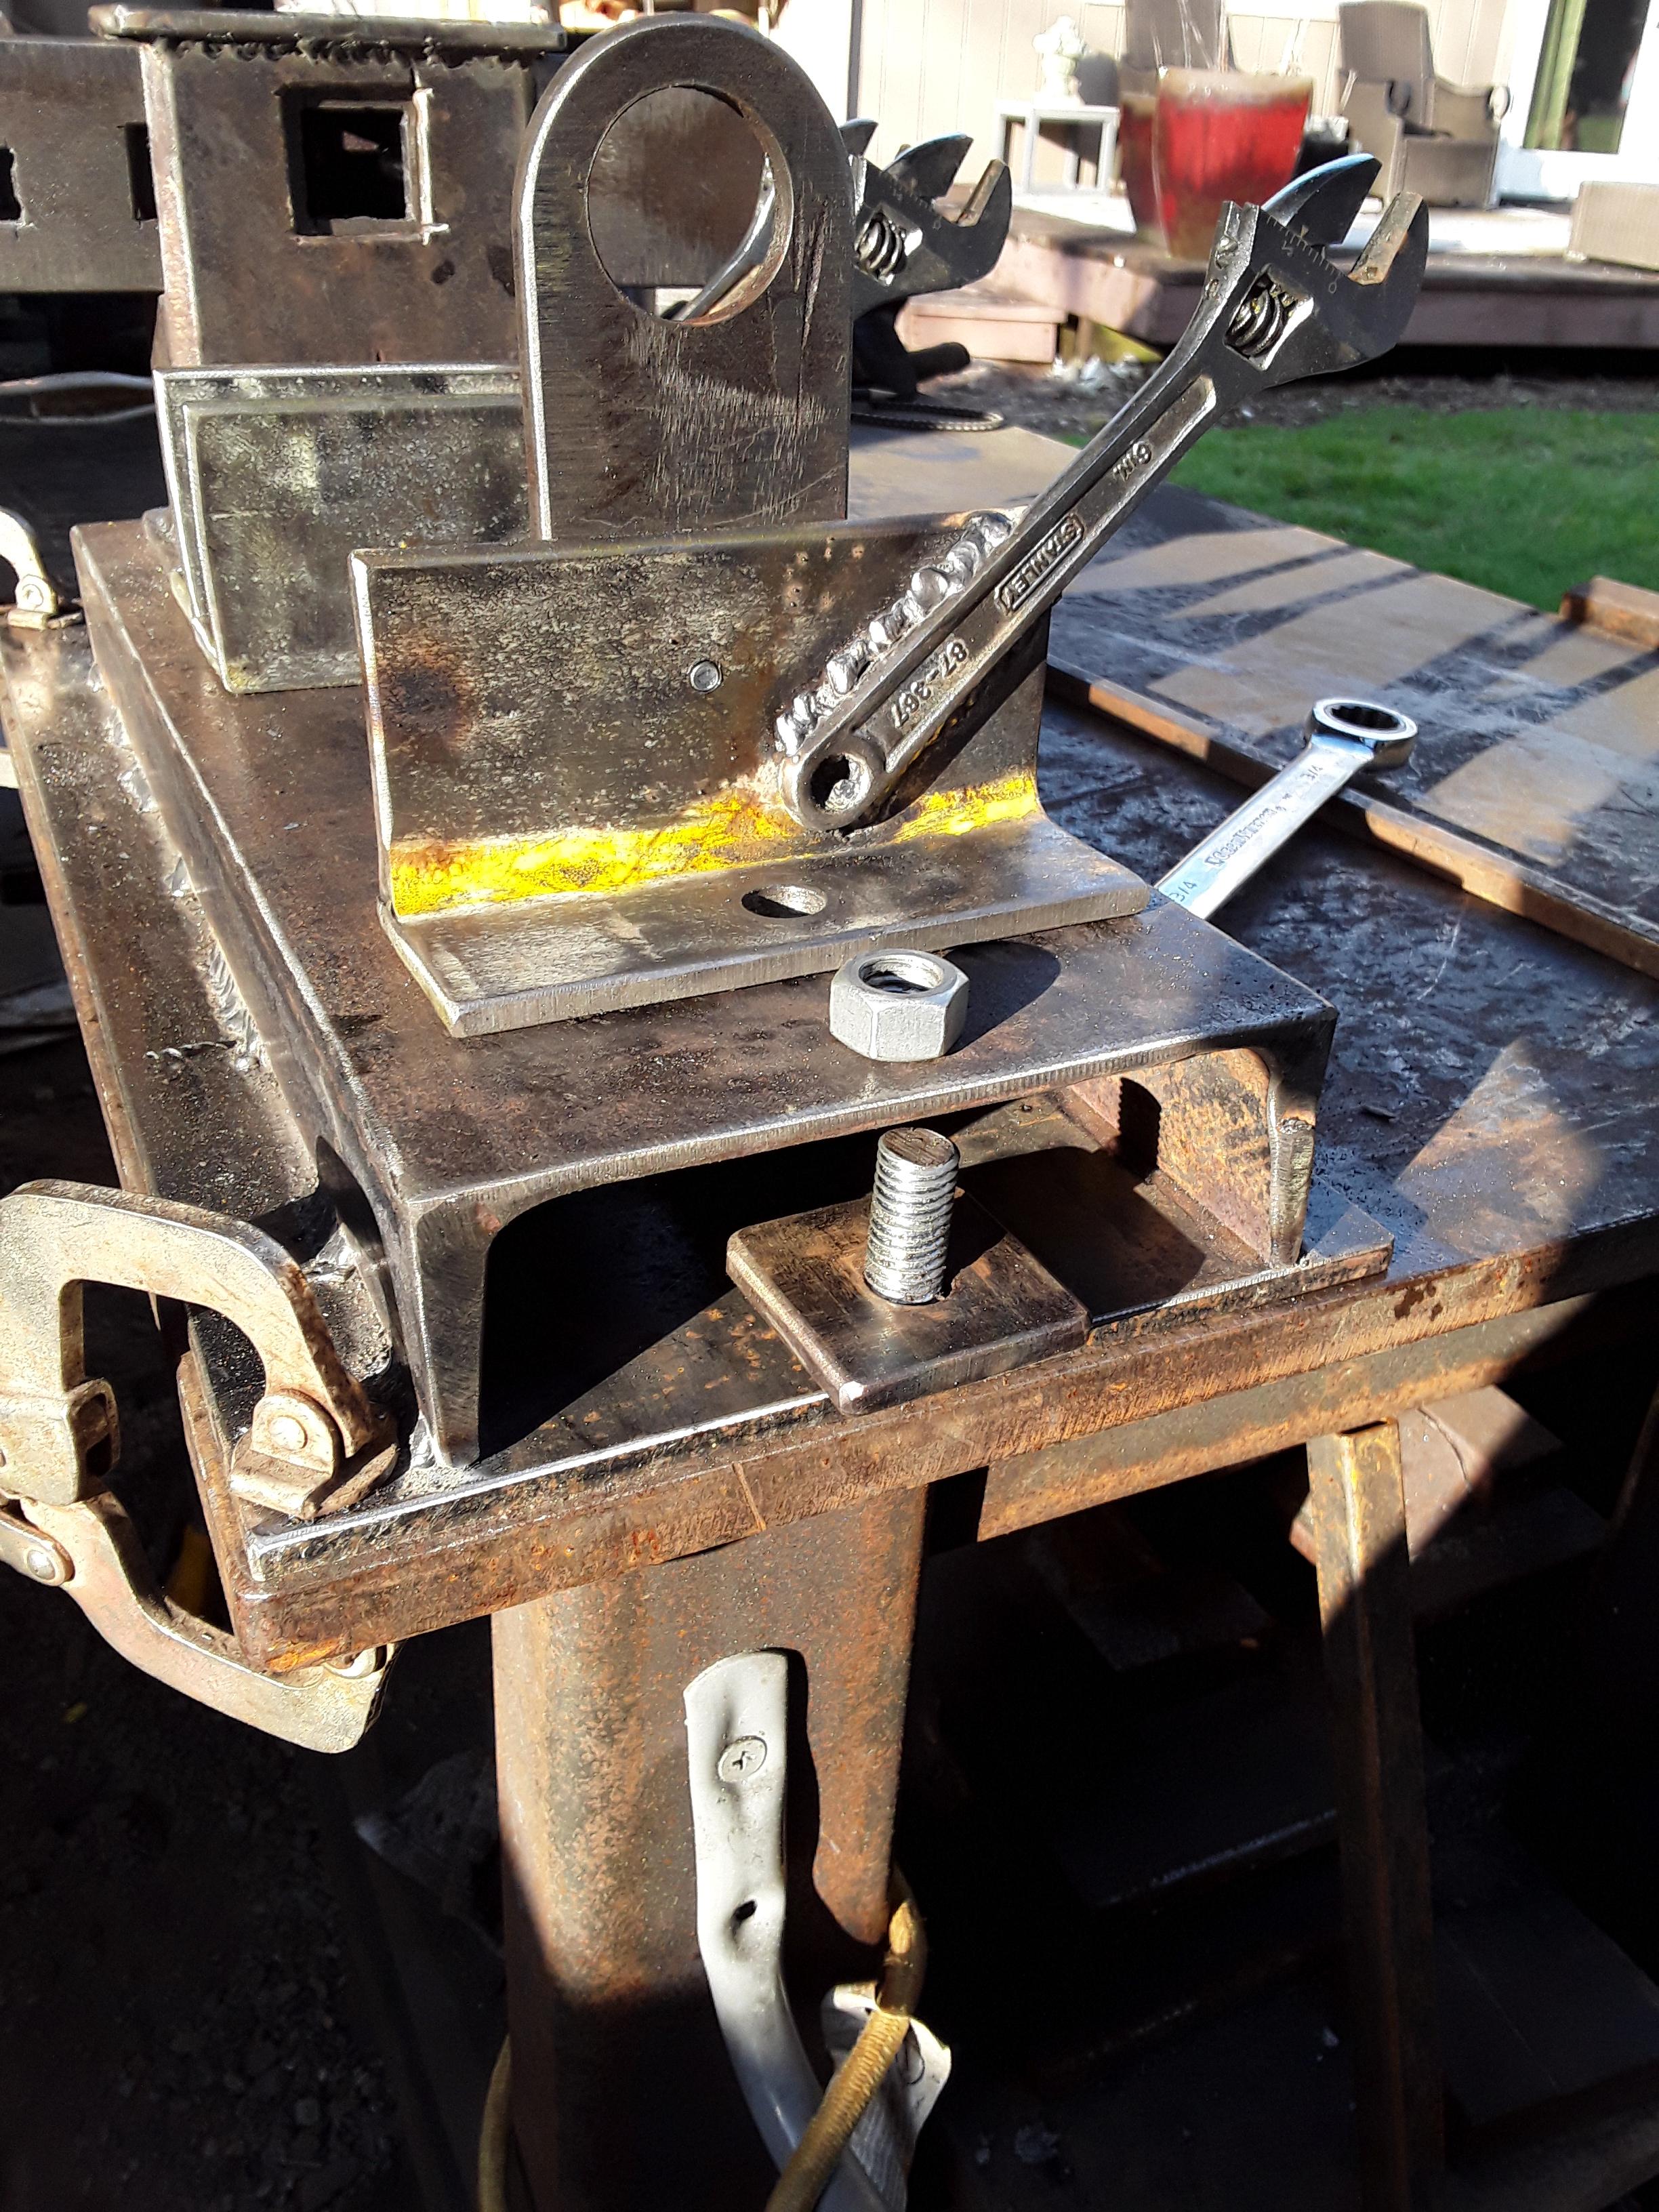
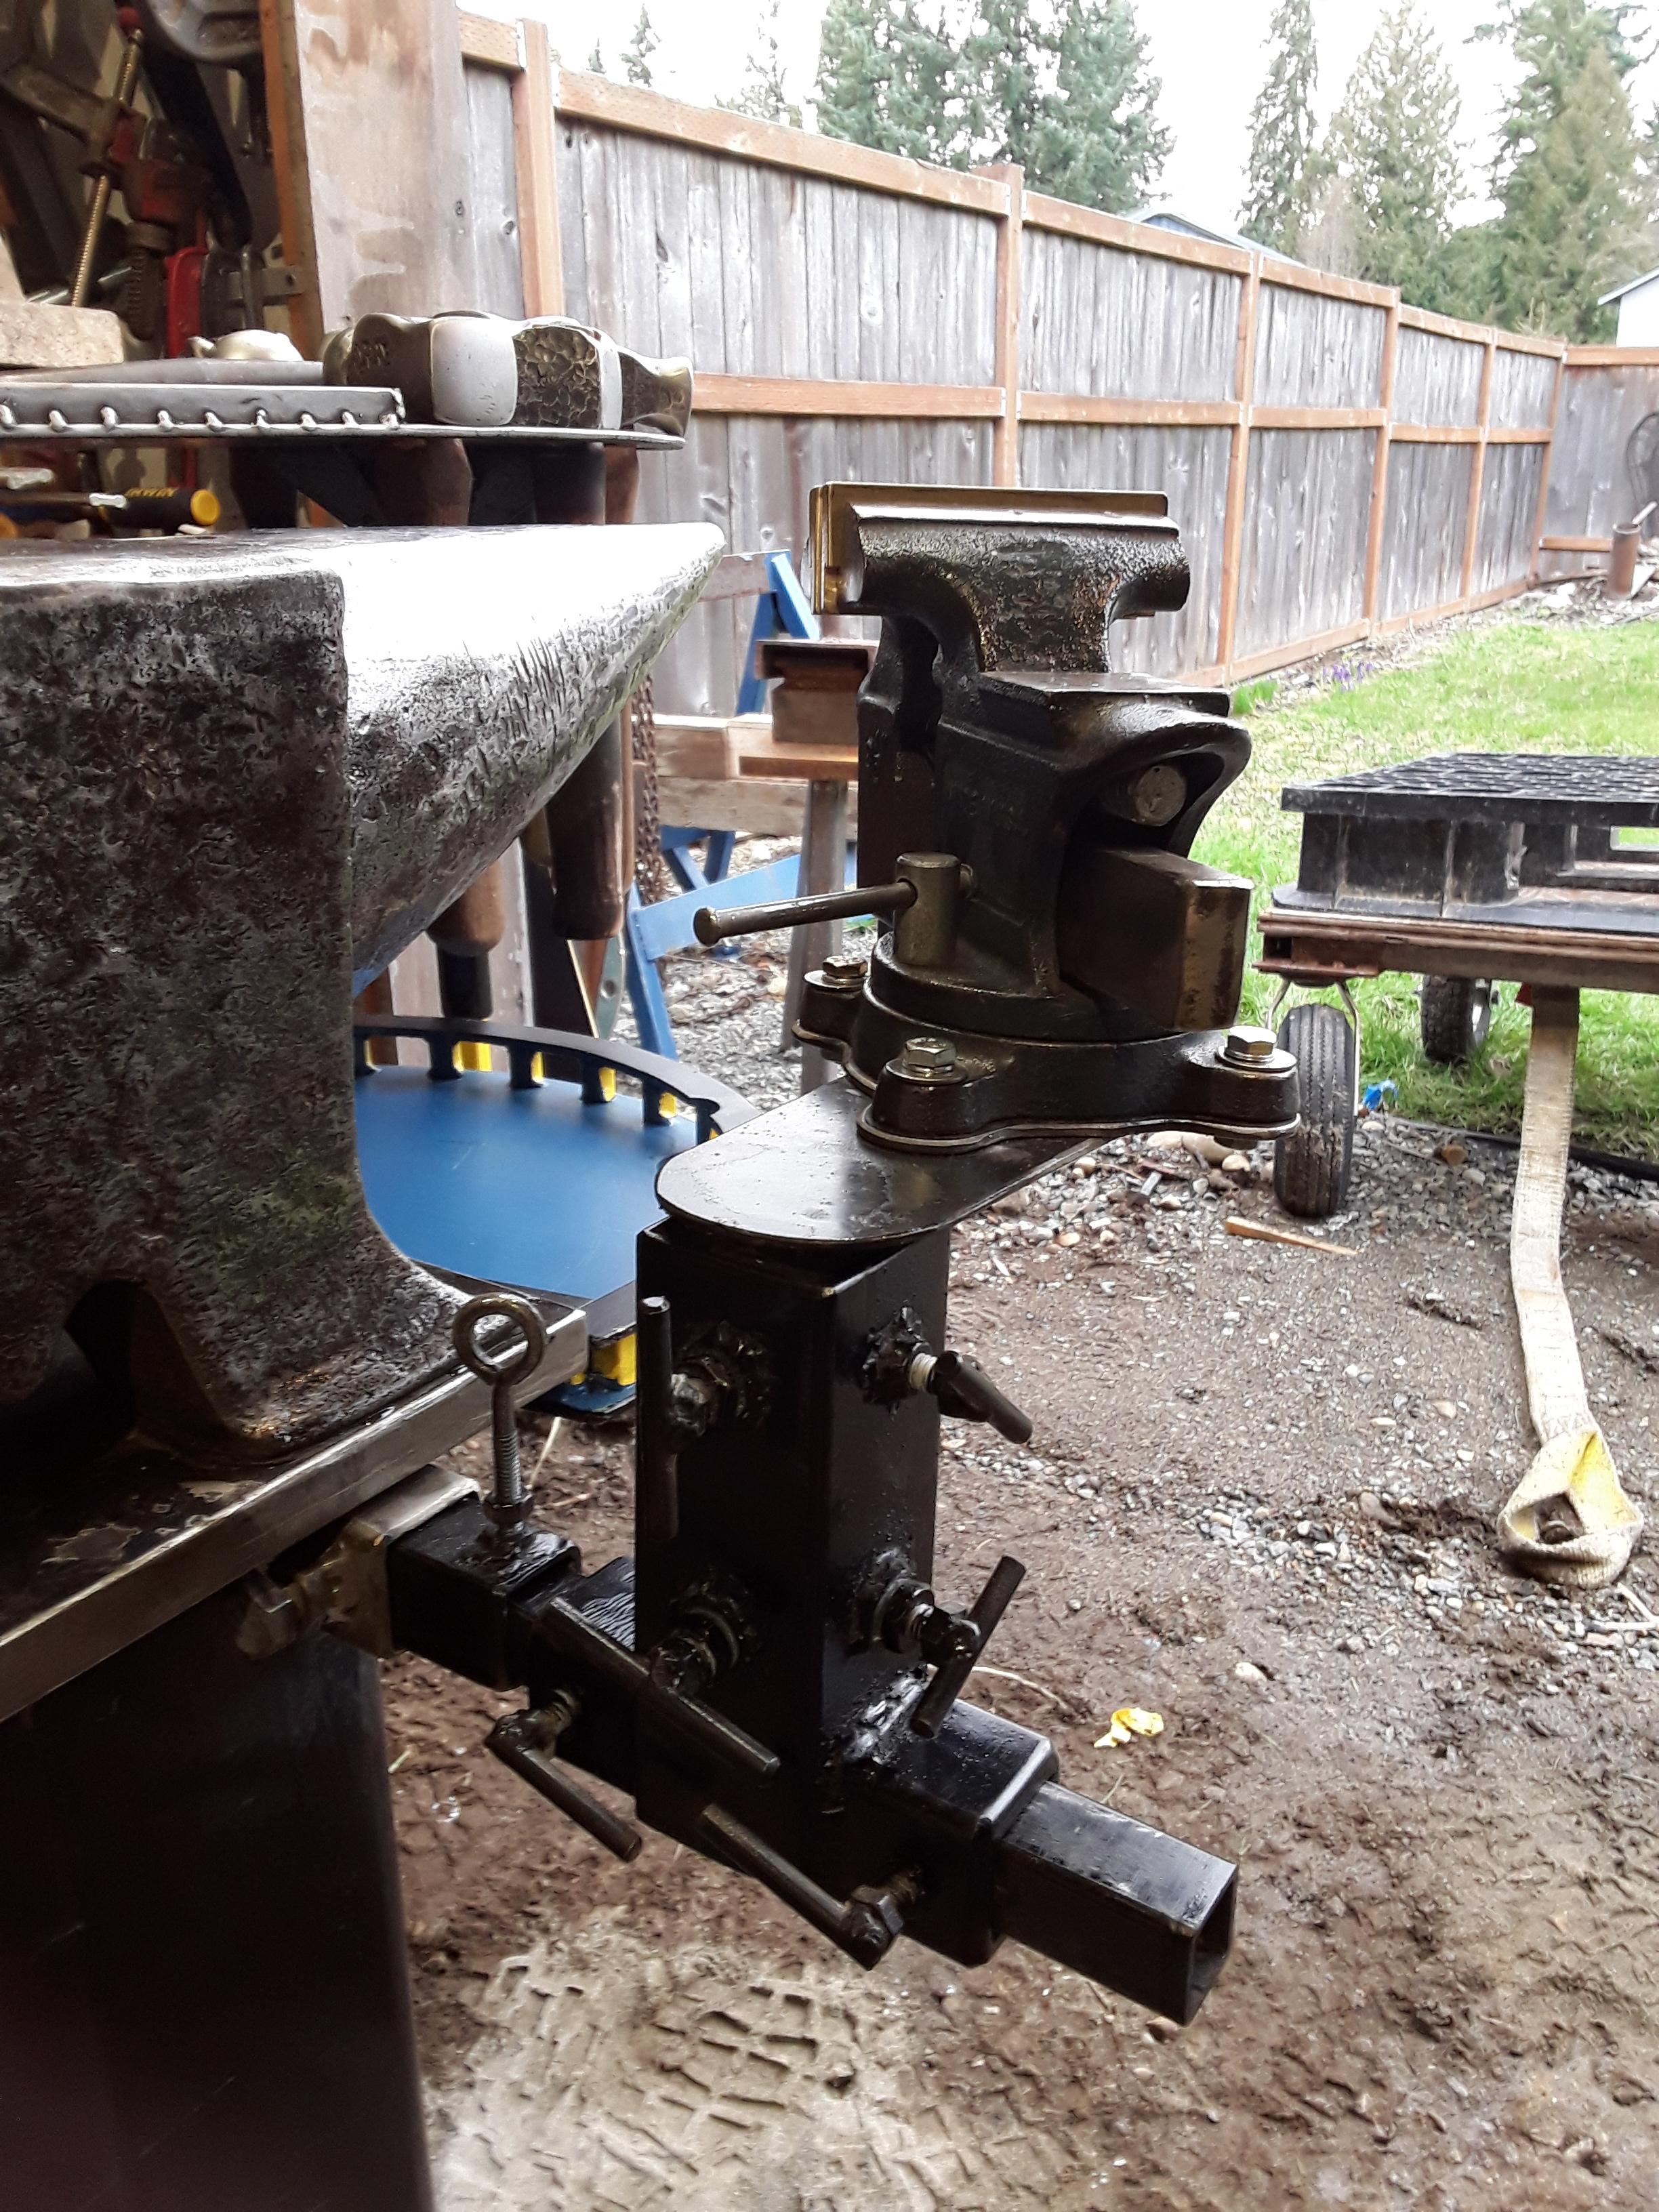
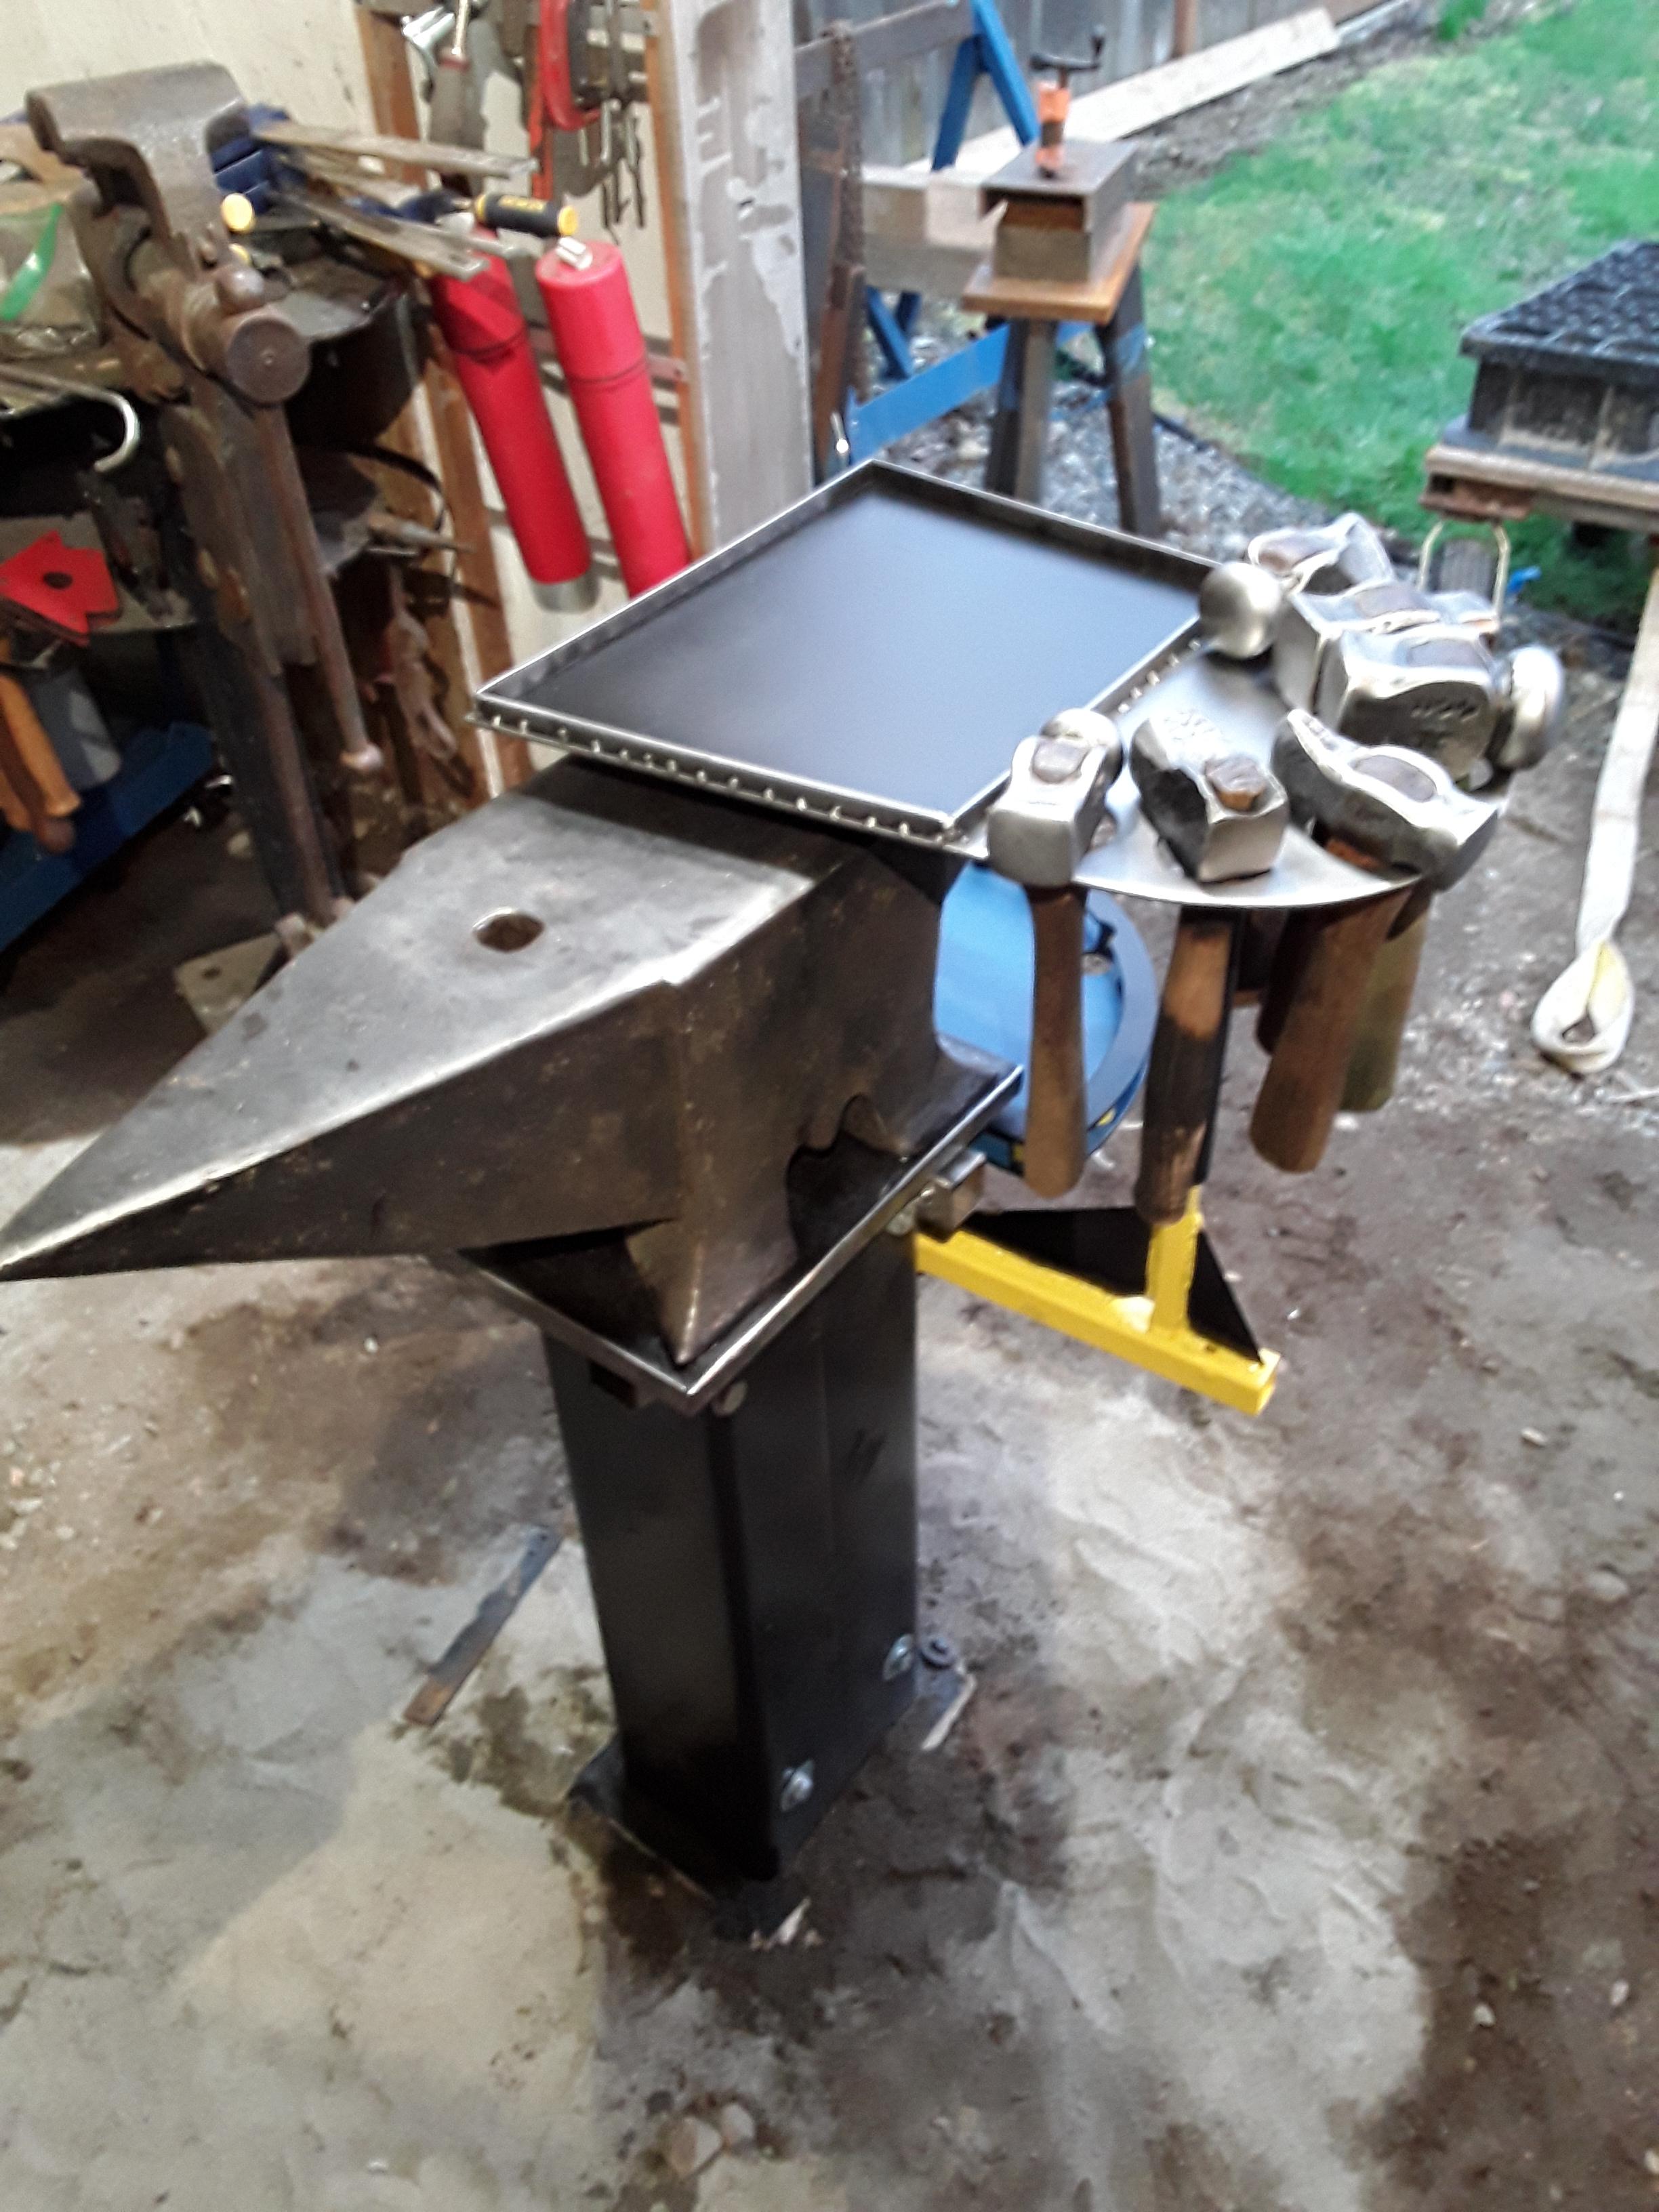
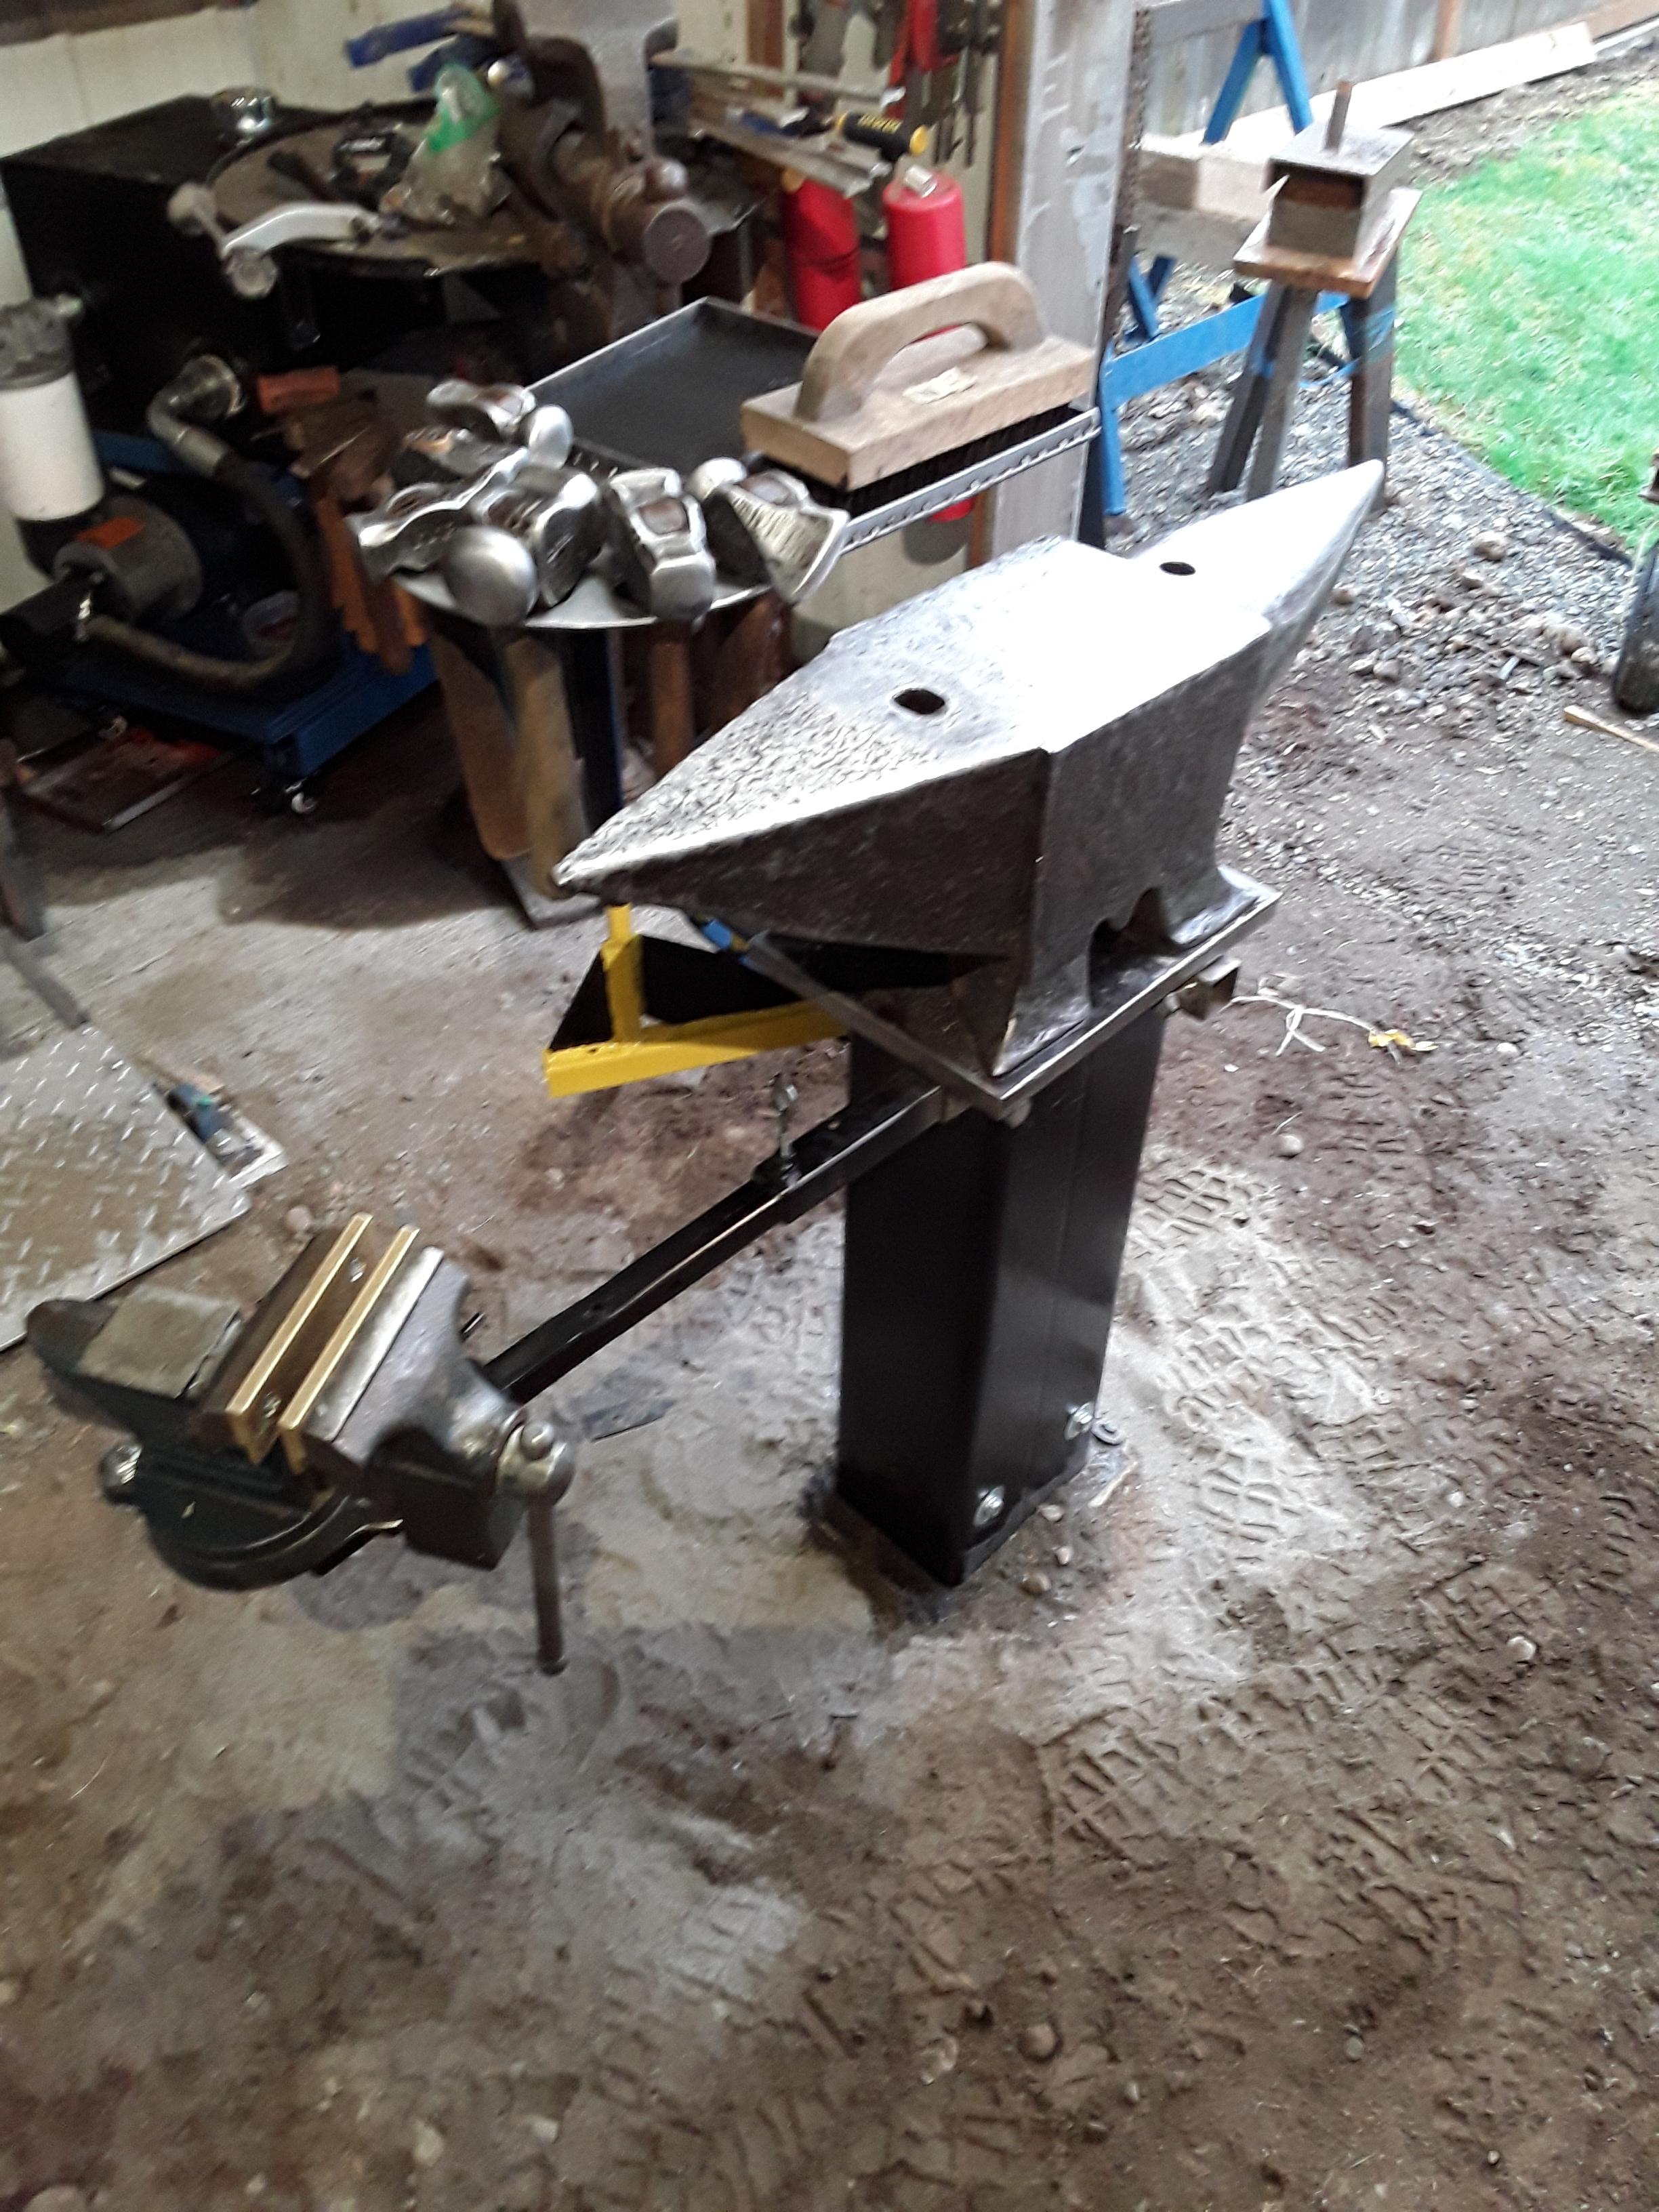
I just cant leave well enough alone! I know I will be twisting Damascus billets in the future. So I took the time and effort to build a jig, and a couple of twisting handle/wrenches. The jig is adjustable along the center. It is also easy to remove, and mount to the stand. I can also use it mounted to a bench. The bar in the jig is 3/4" square stock. It was a breeze to twist. The plate in the "tower " slides left to right to accommodate different sizes of square stock. 1/2",5/8",3/4" and 1".


-
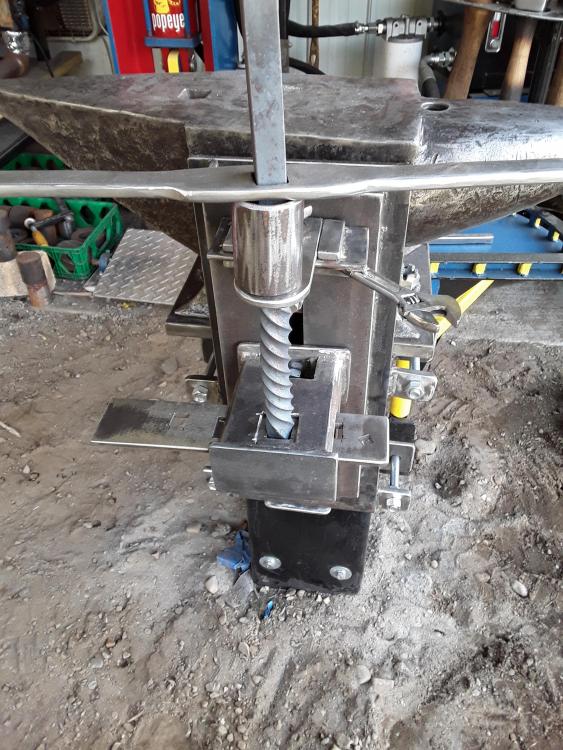
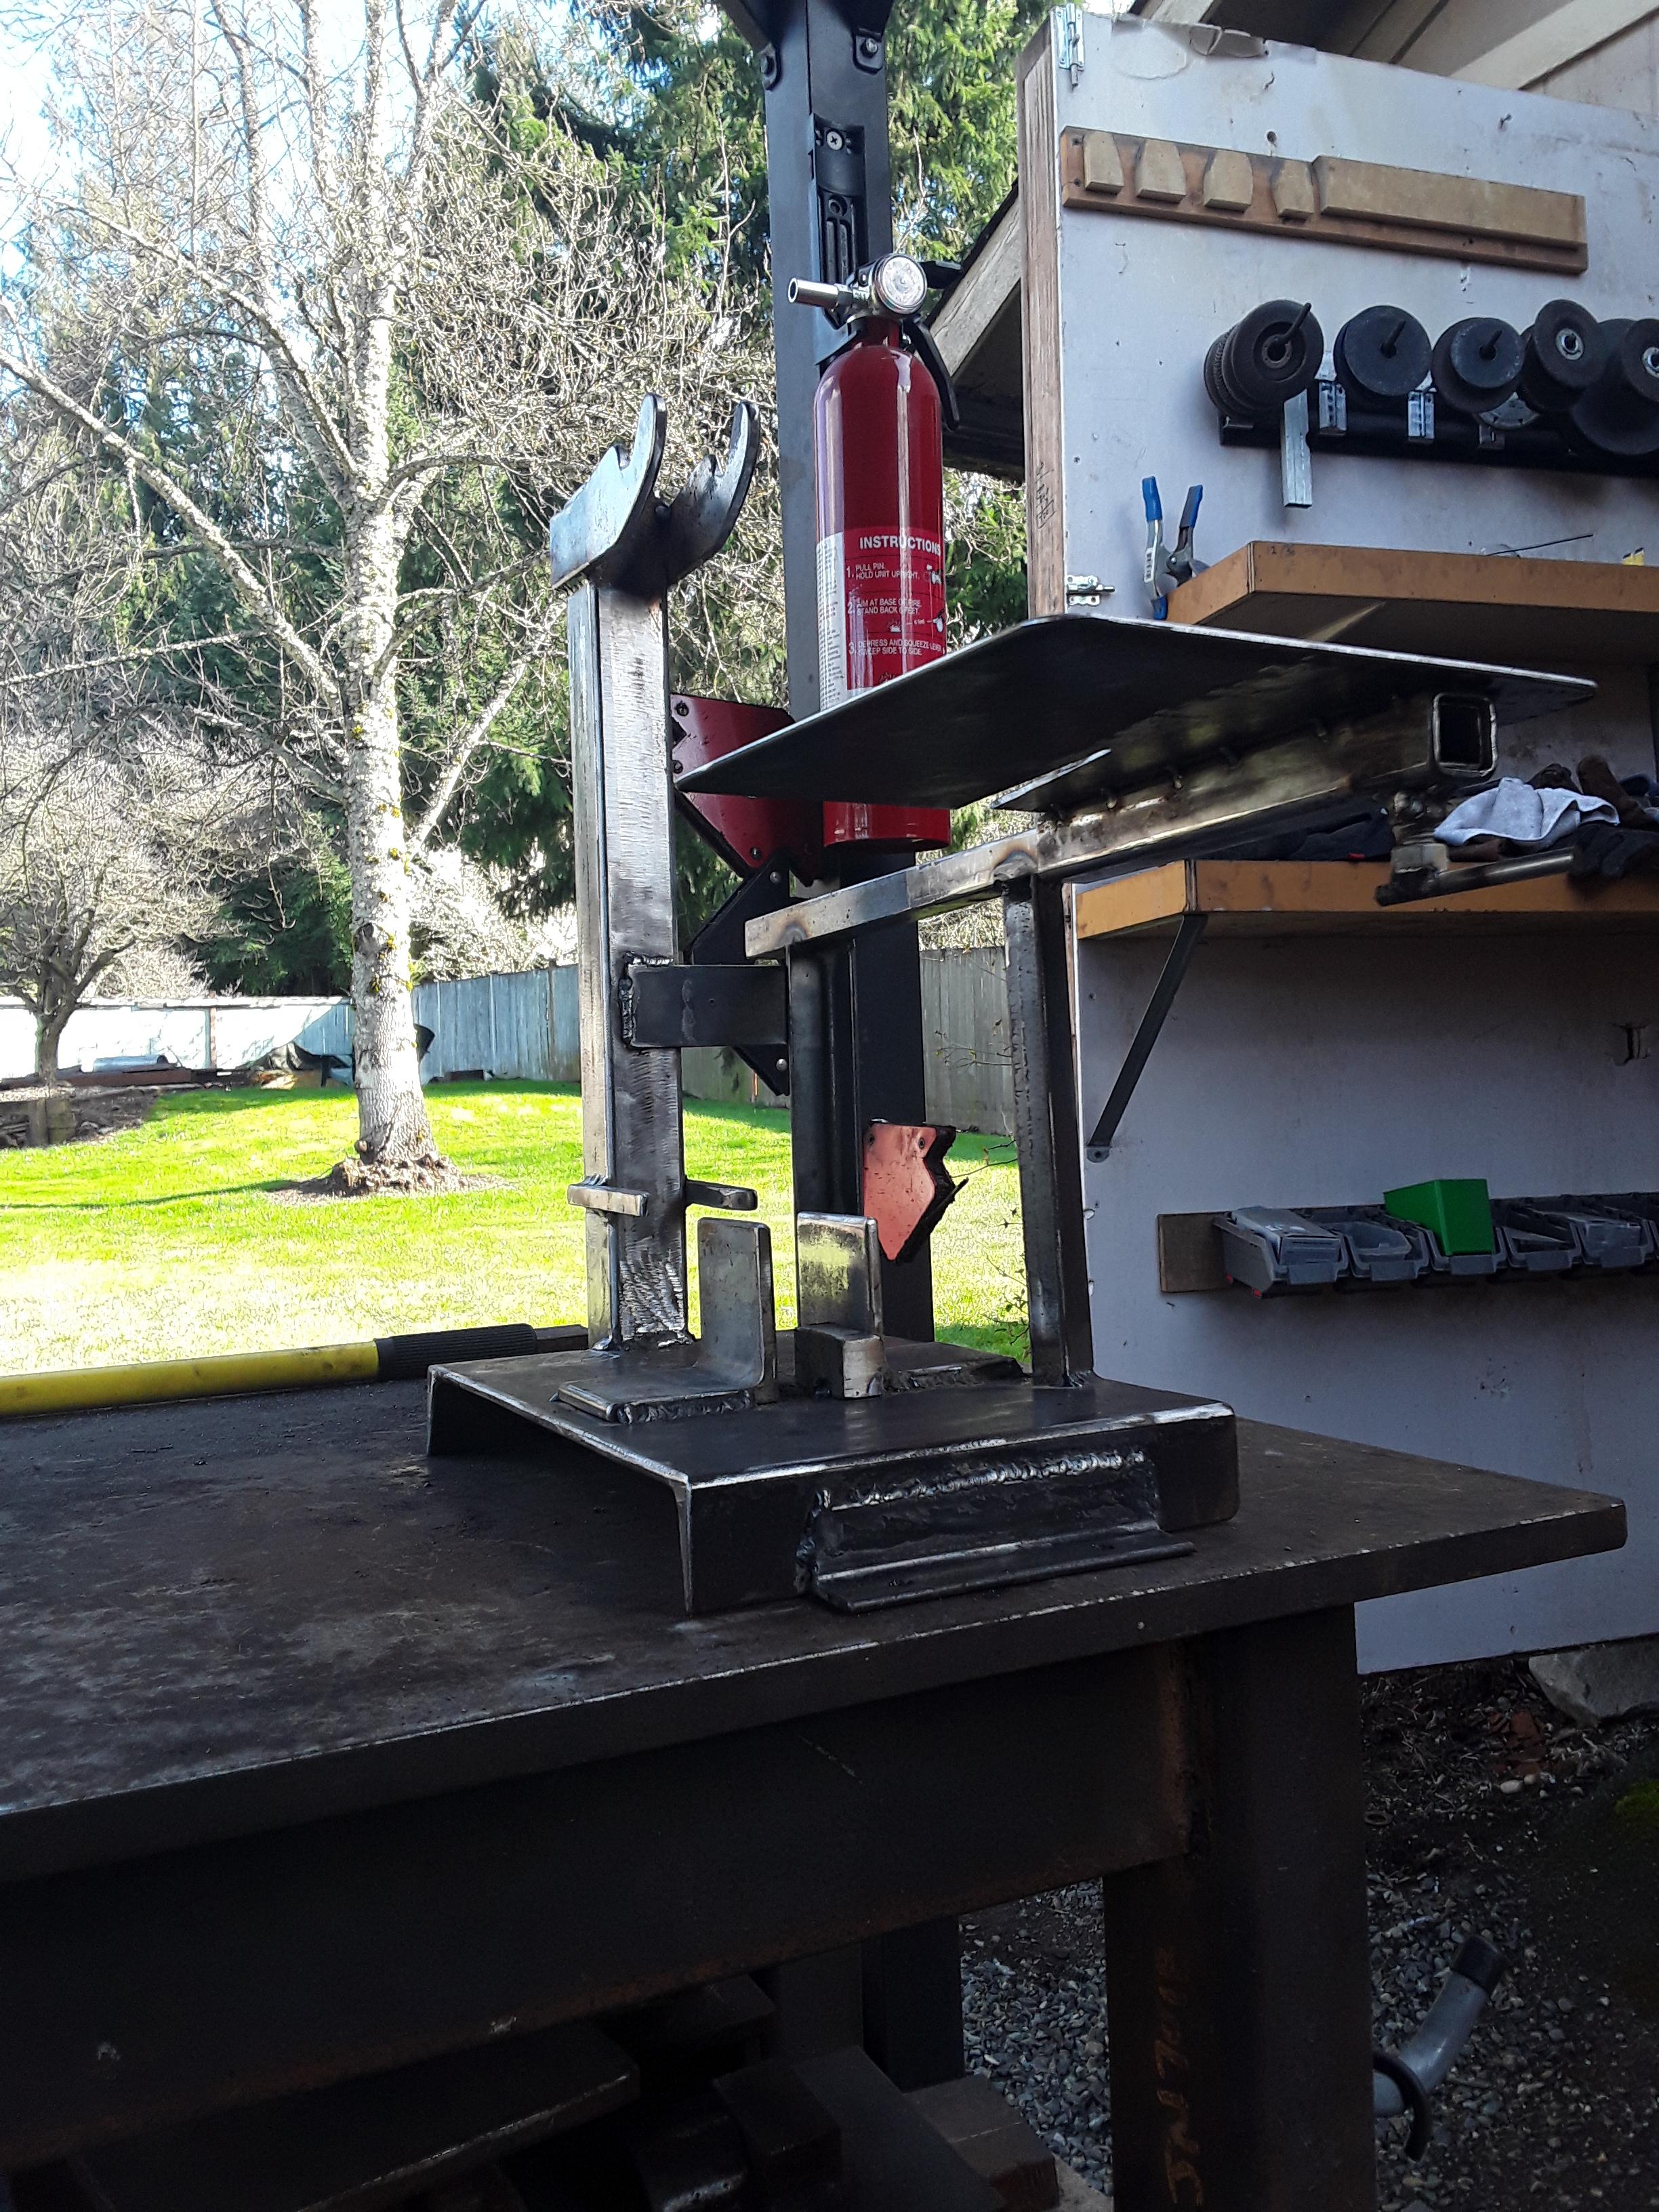
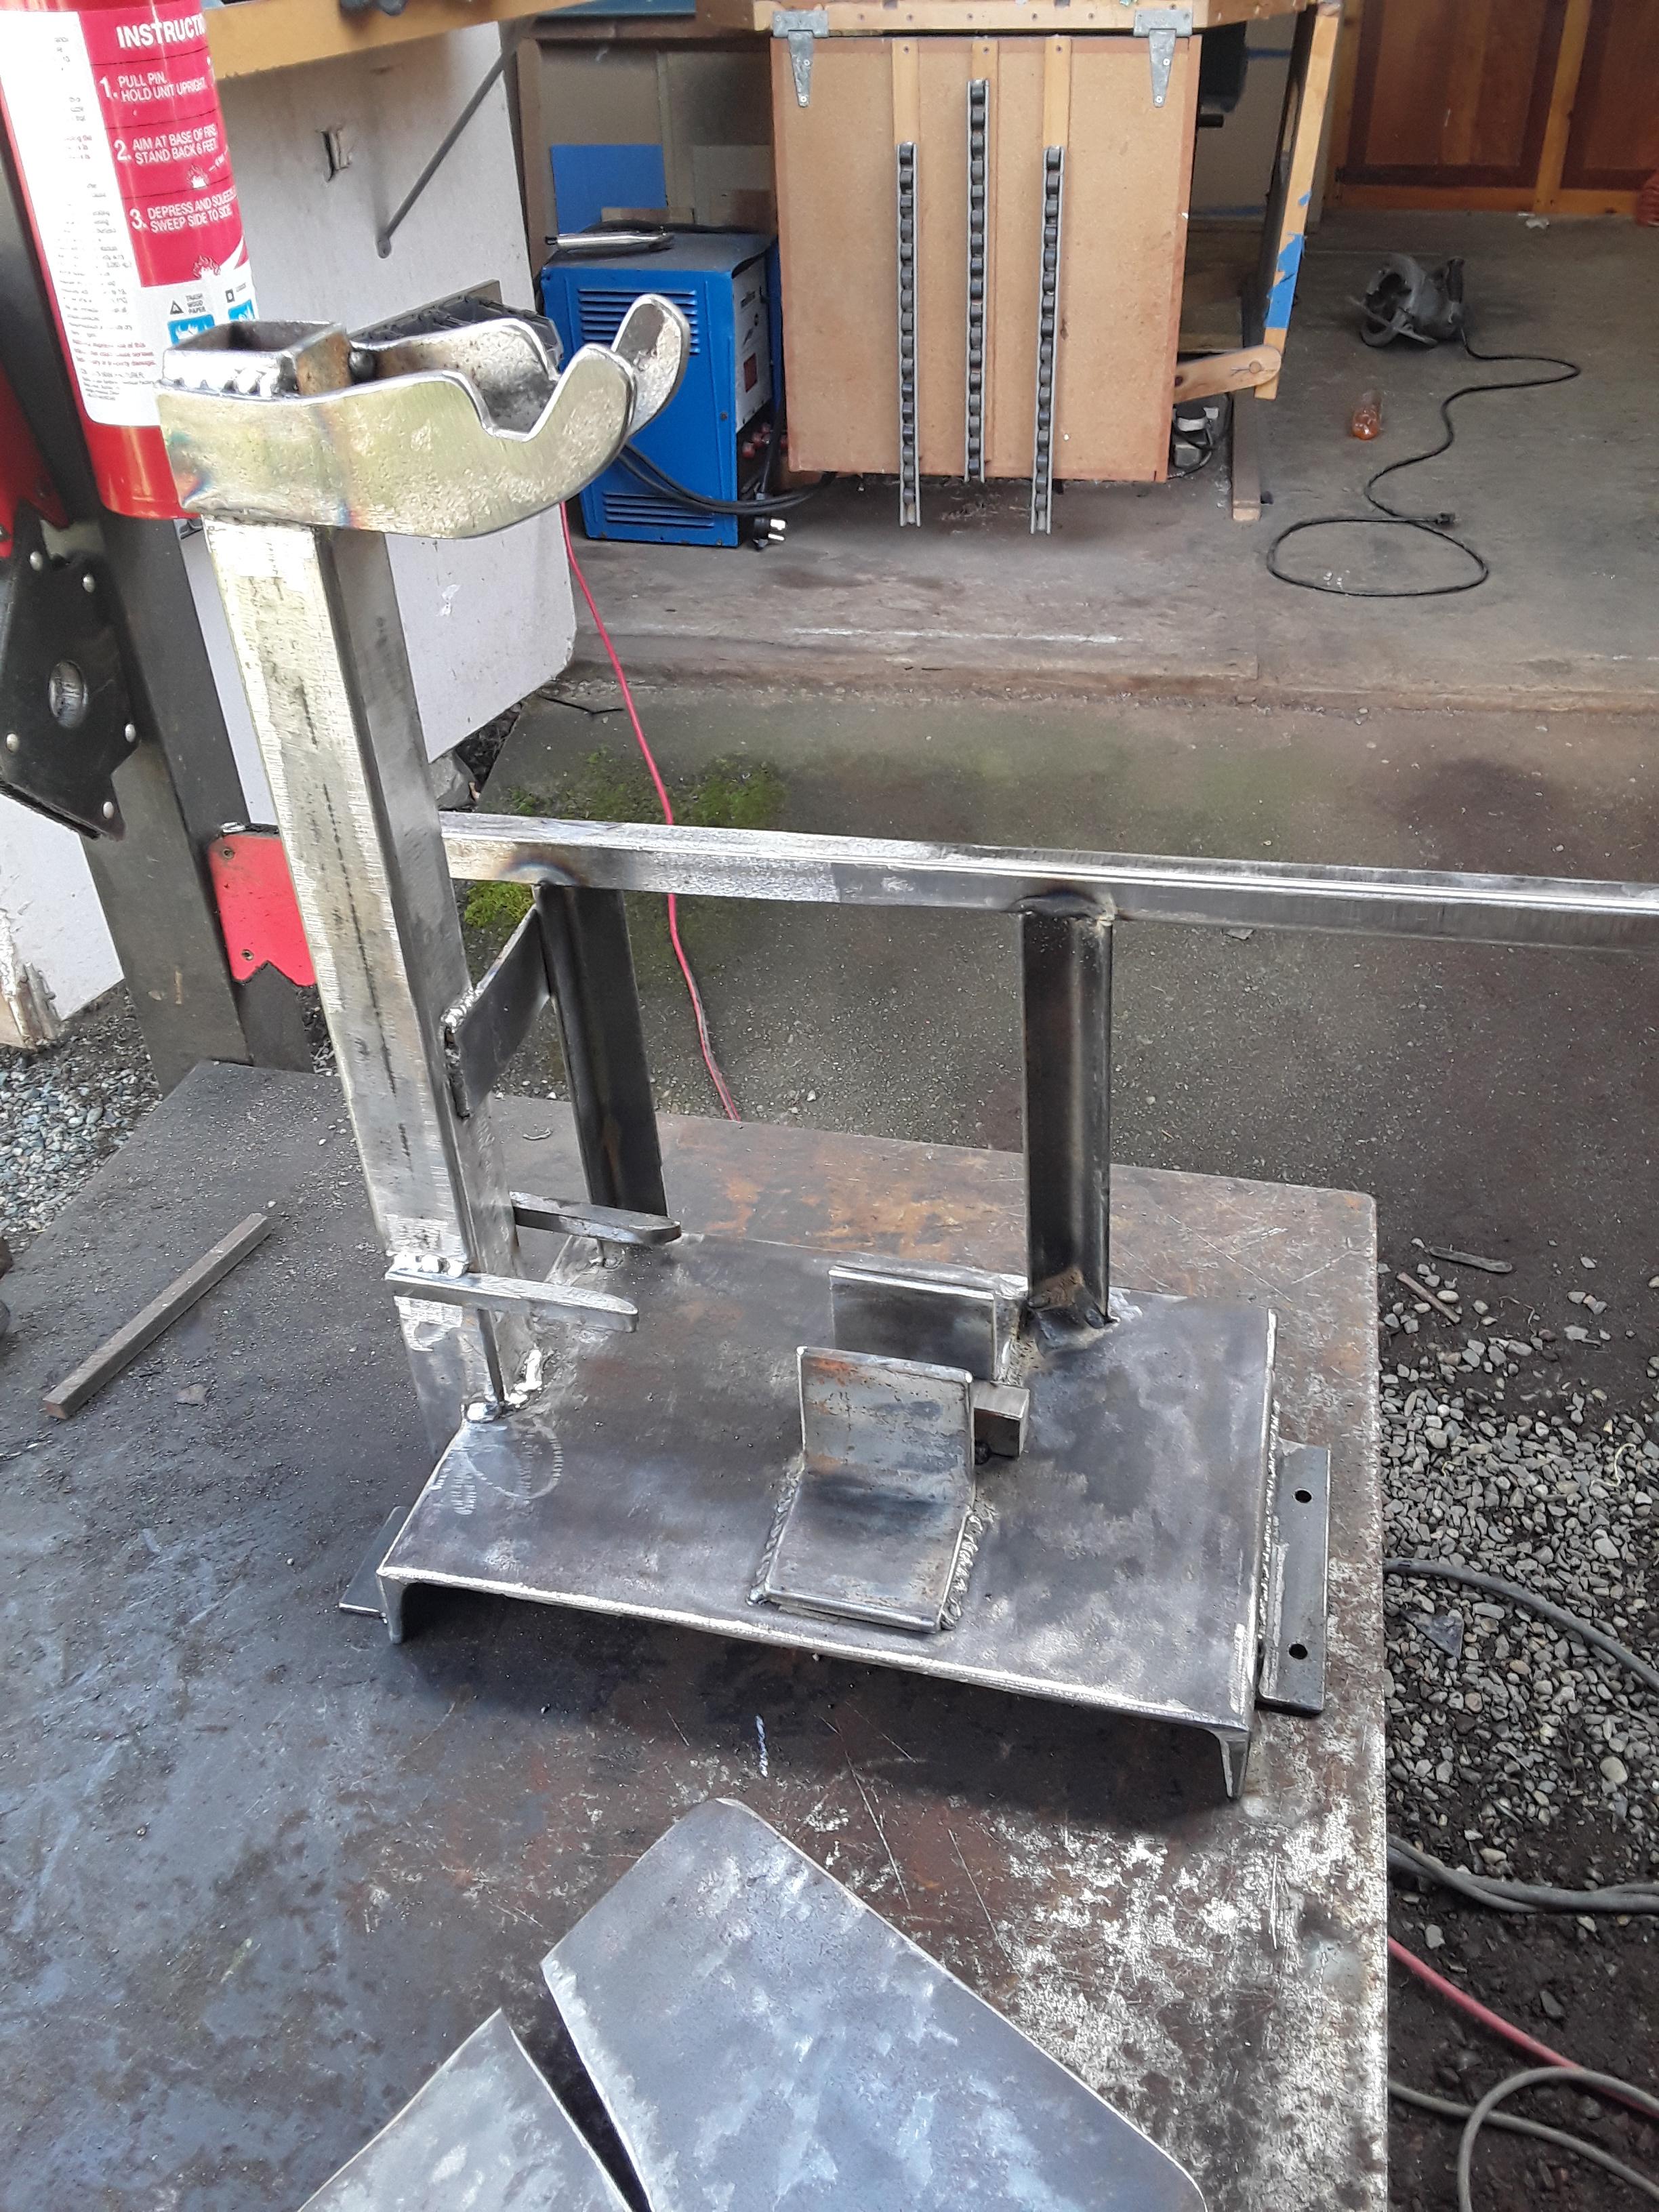
Finished up a twisting jig today. The twisted bar in the jig is 3/4". The jig was first mounted on a bench, but I found it awkward to twist large stock. So I thought I would jig up a mount for my anvil stand. It is easily removed, and can be mounted back on the bench to twist smaller stock in the wrenches.


-
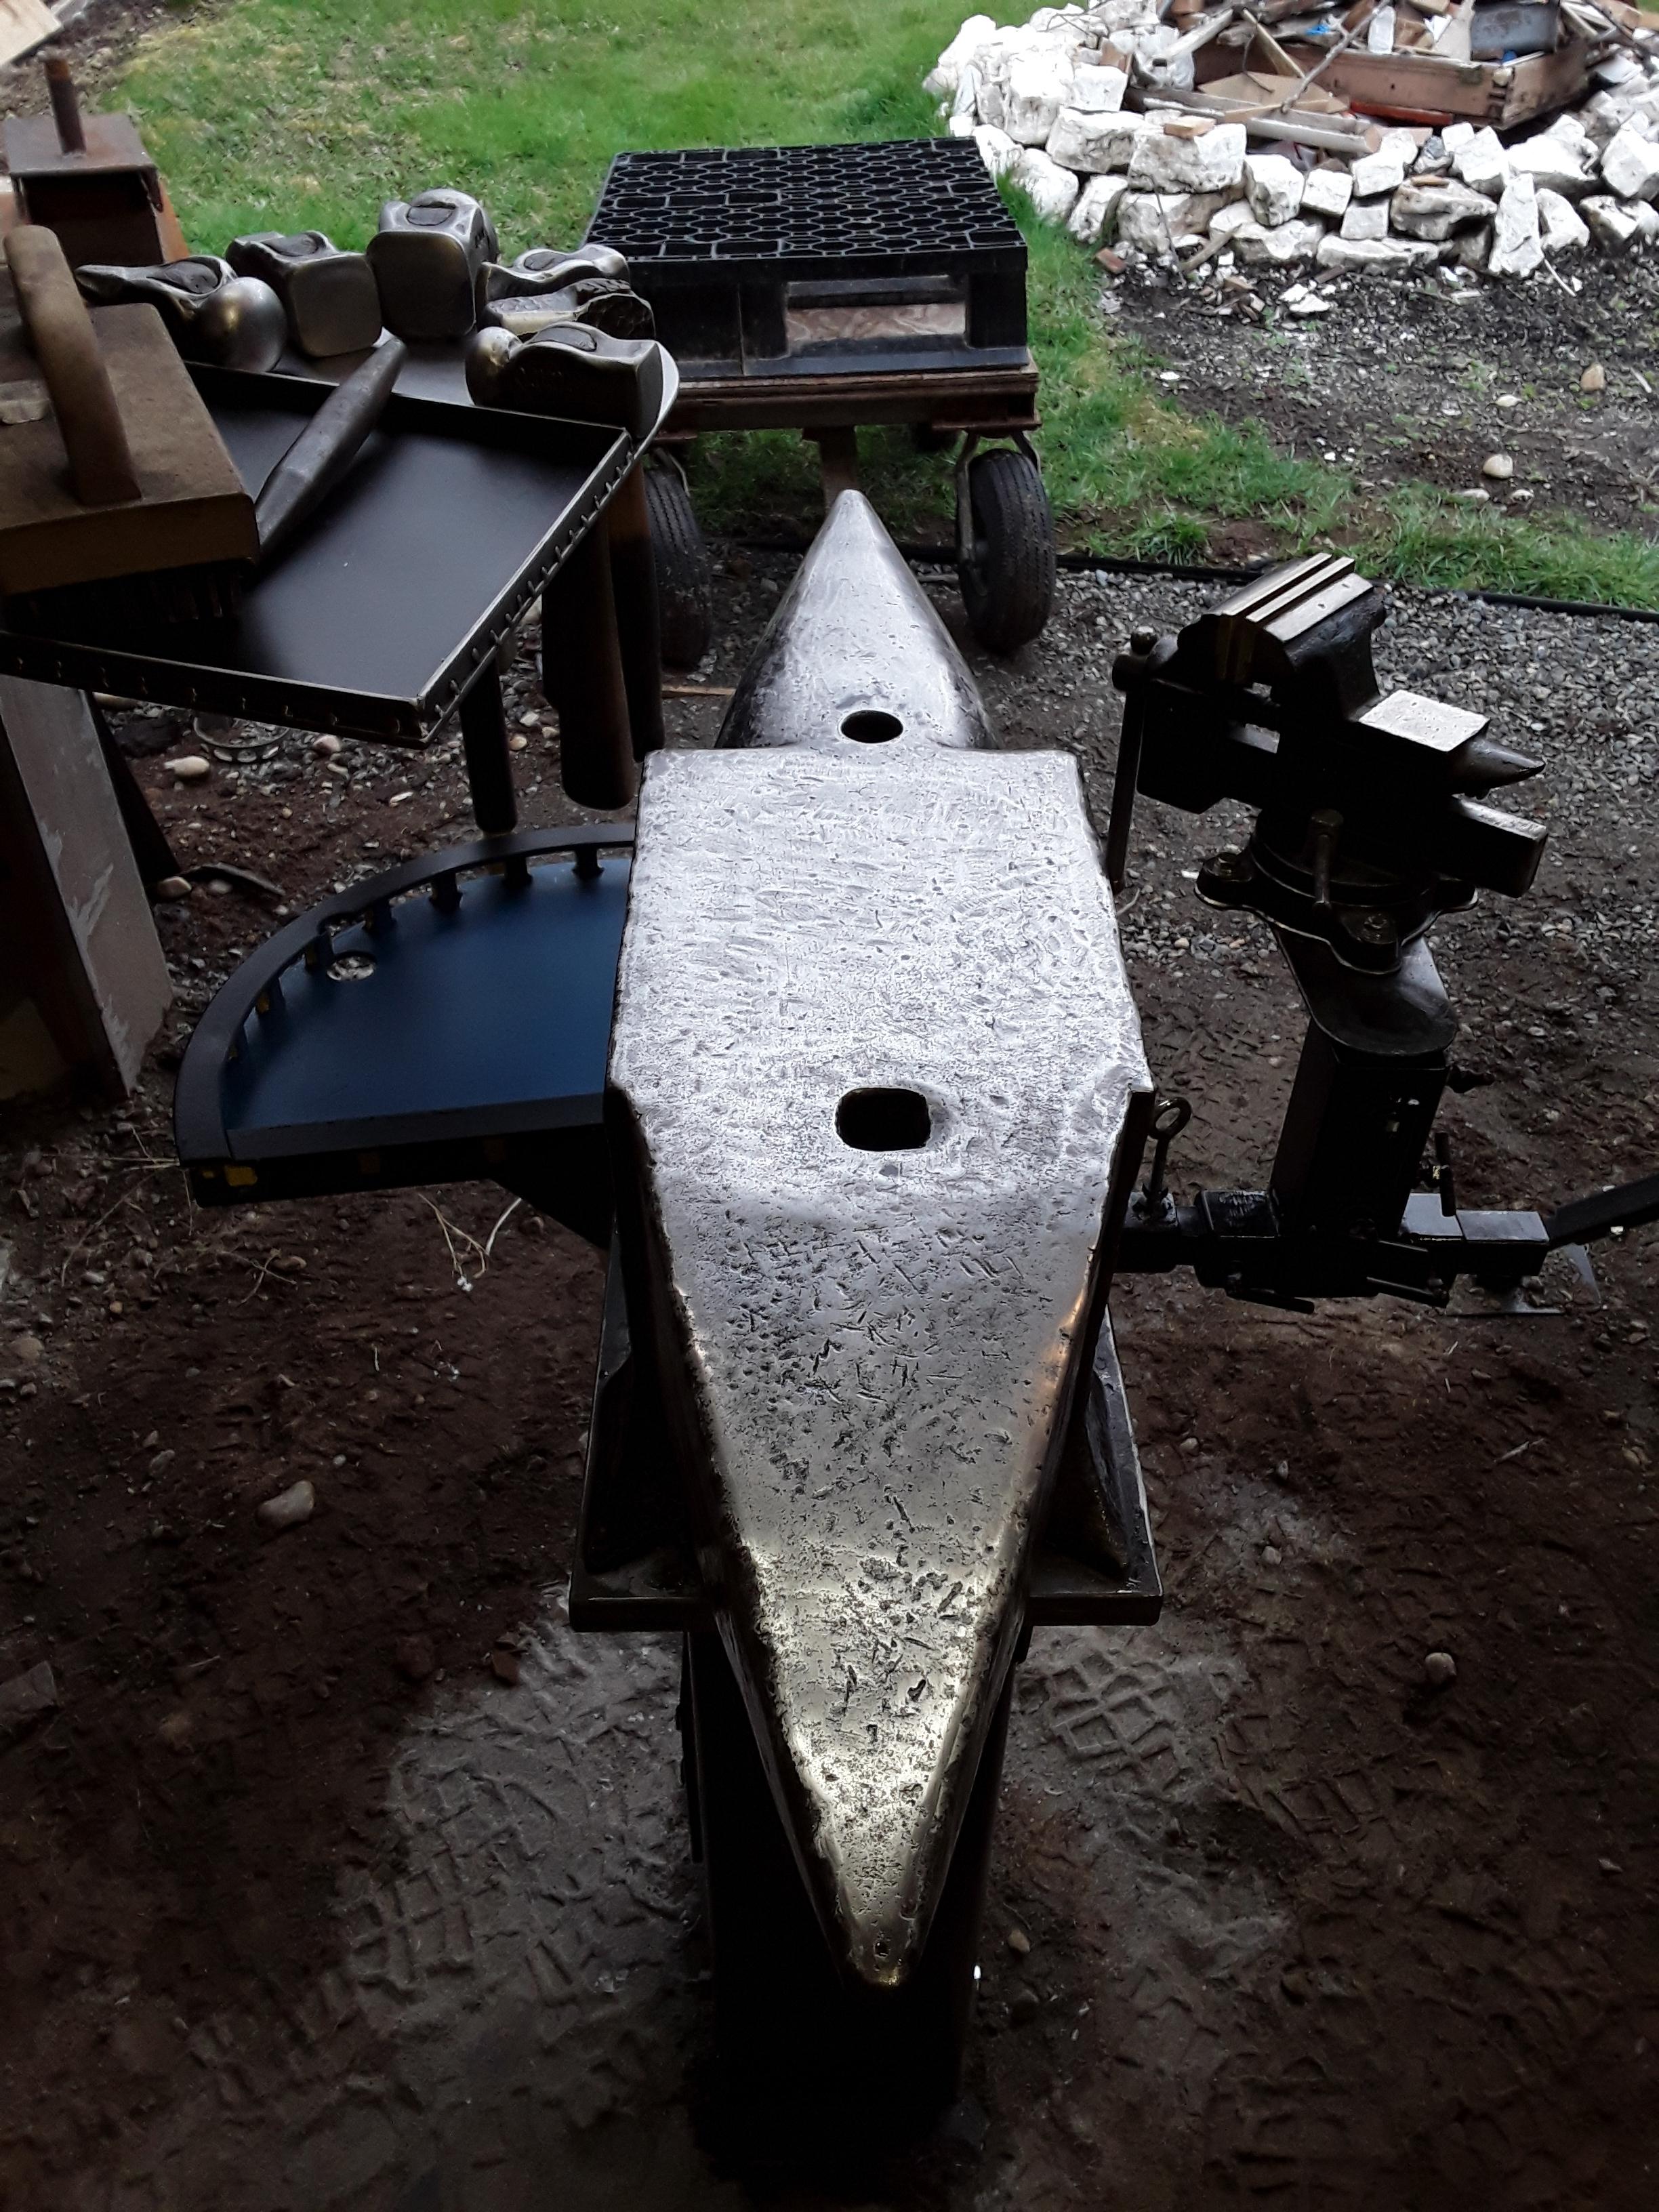
25". Ya think that is long enough to twist 1 1/4" octagonal Damascus billet?
-
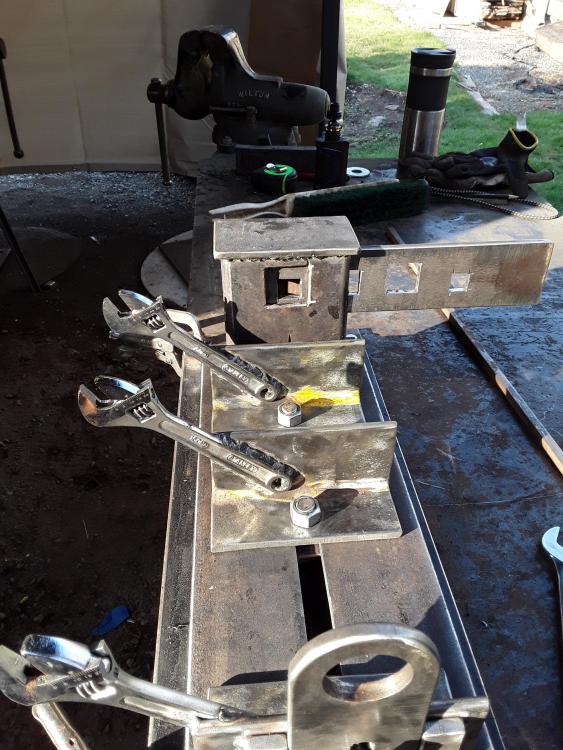
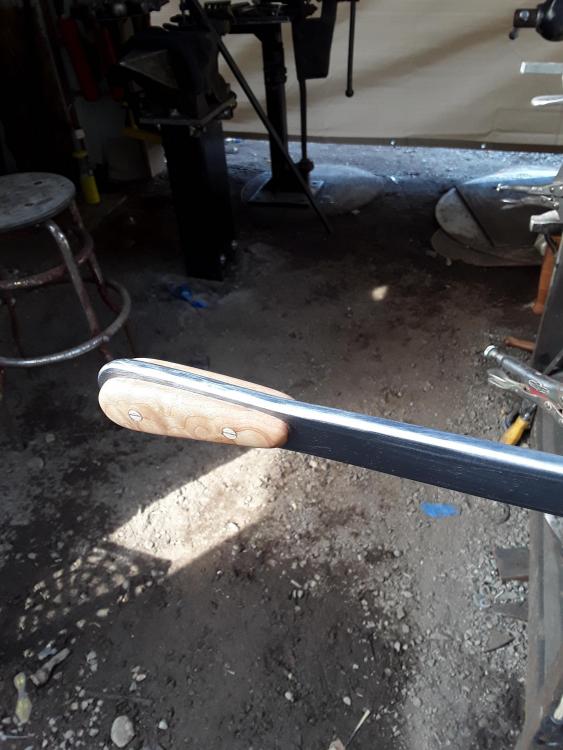
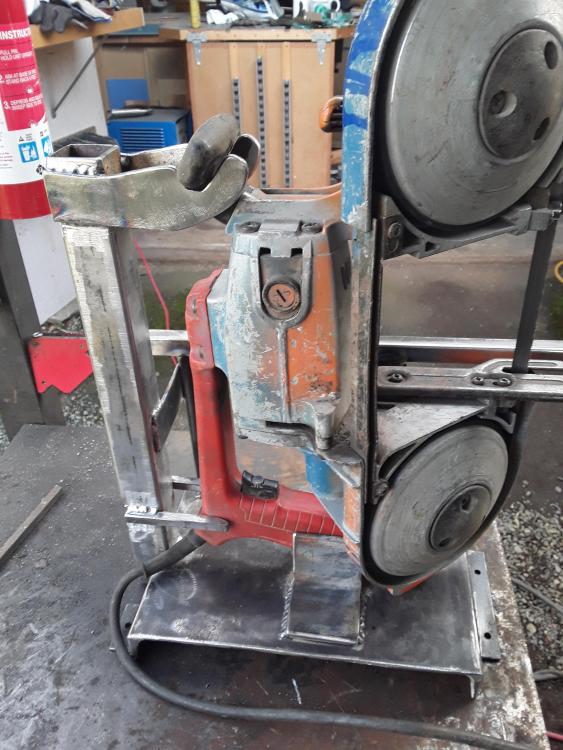
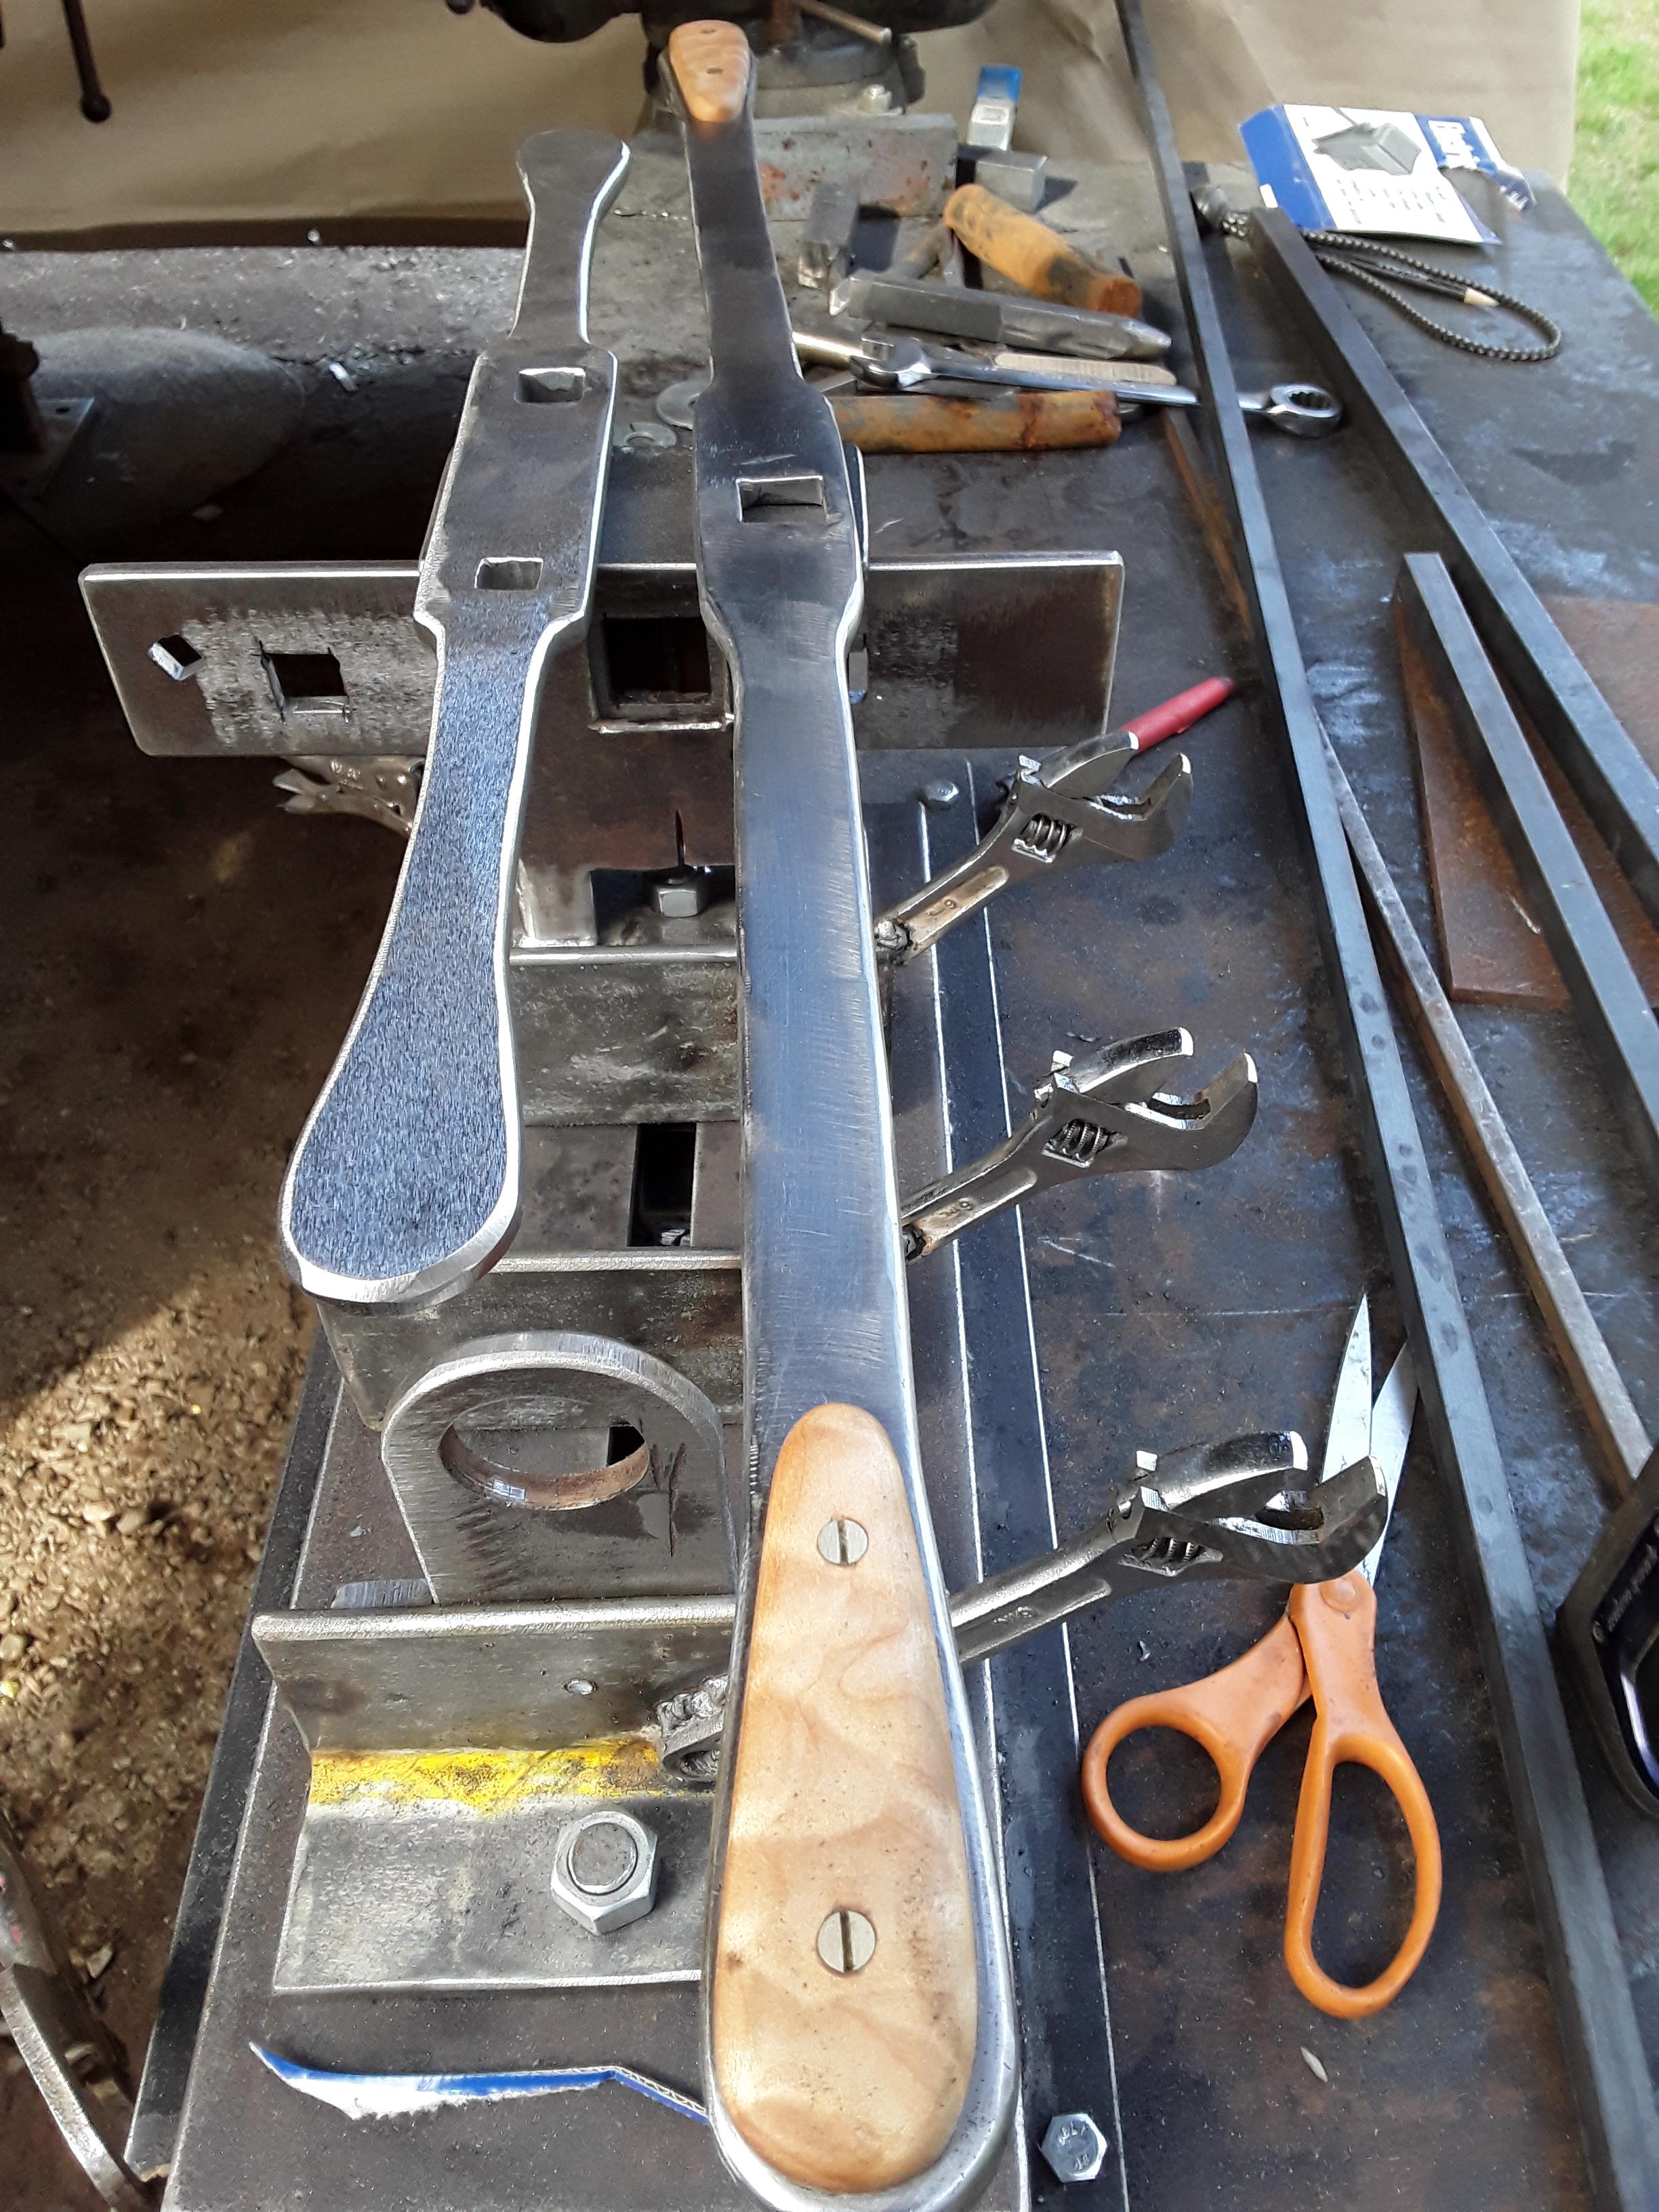
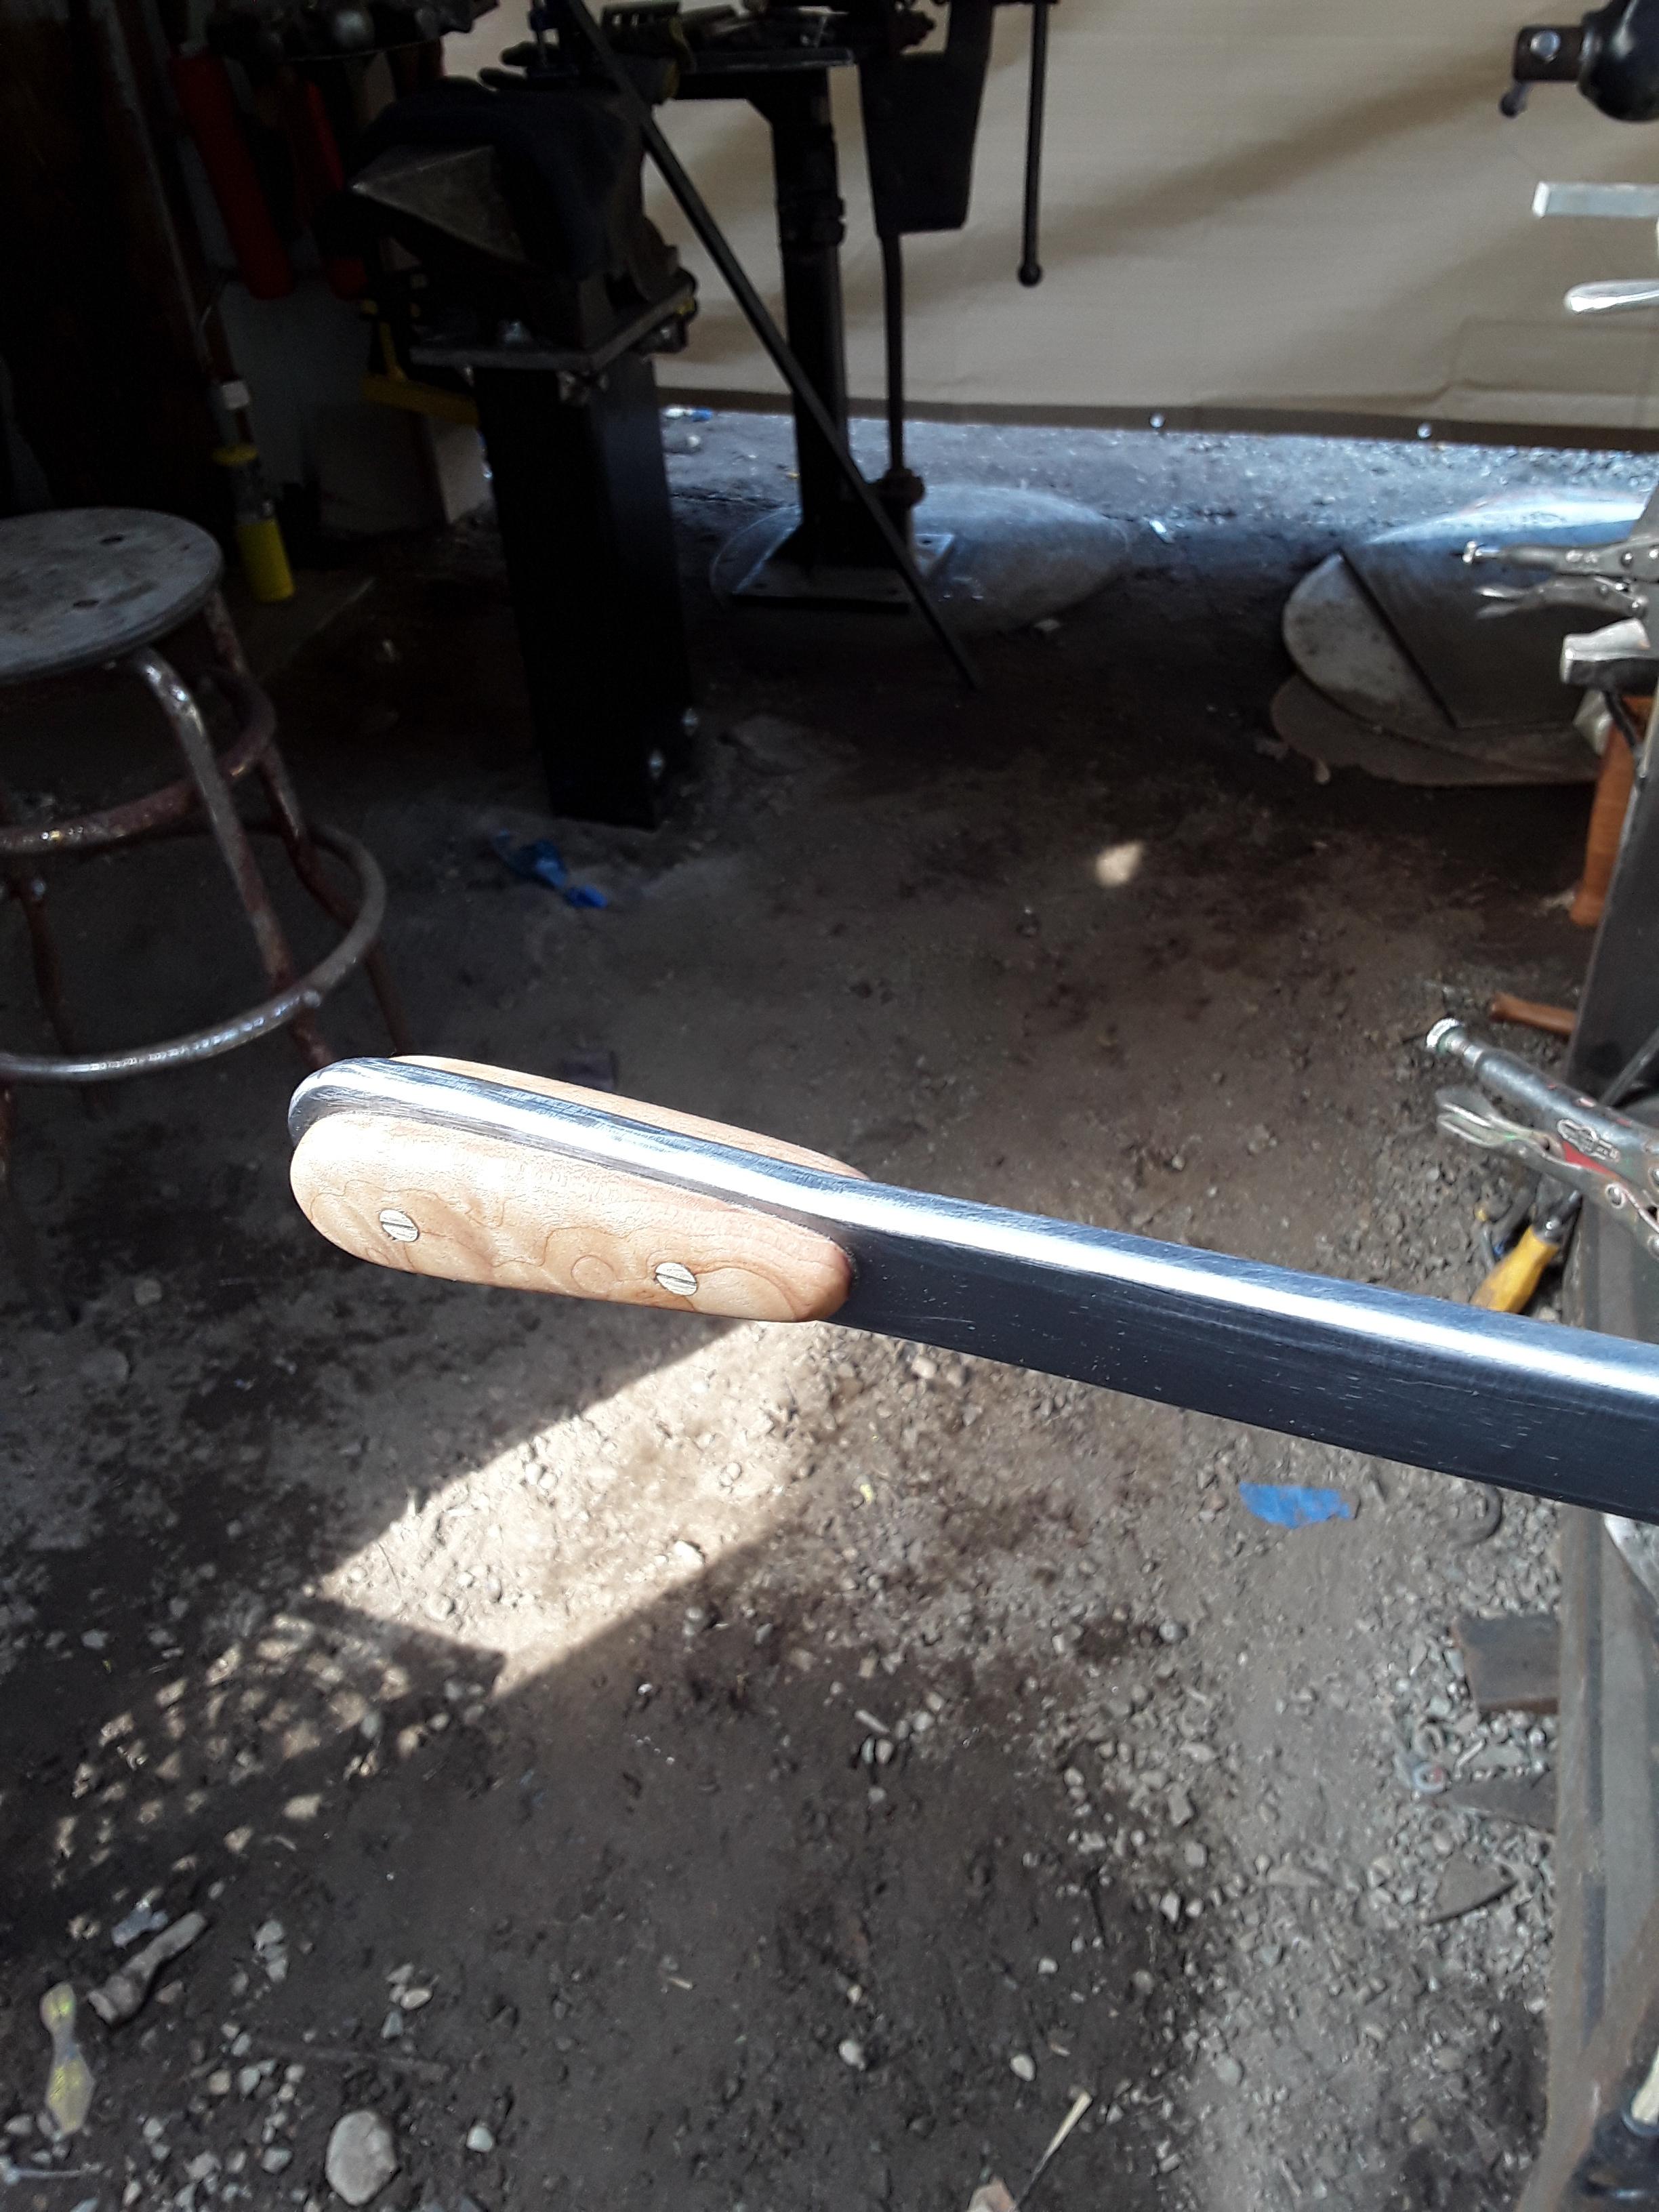
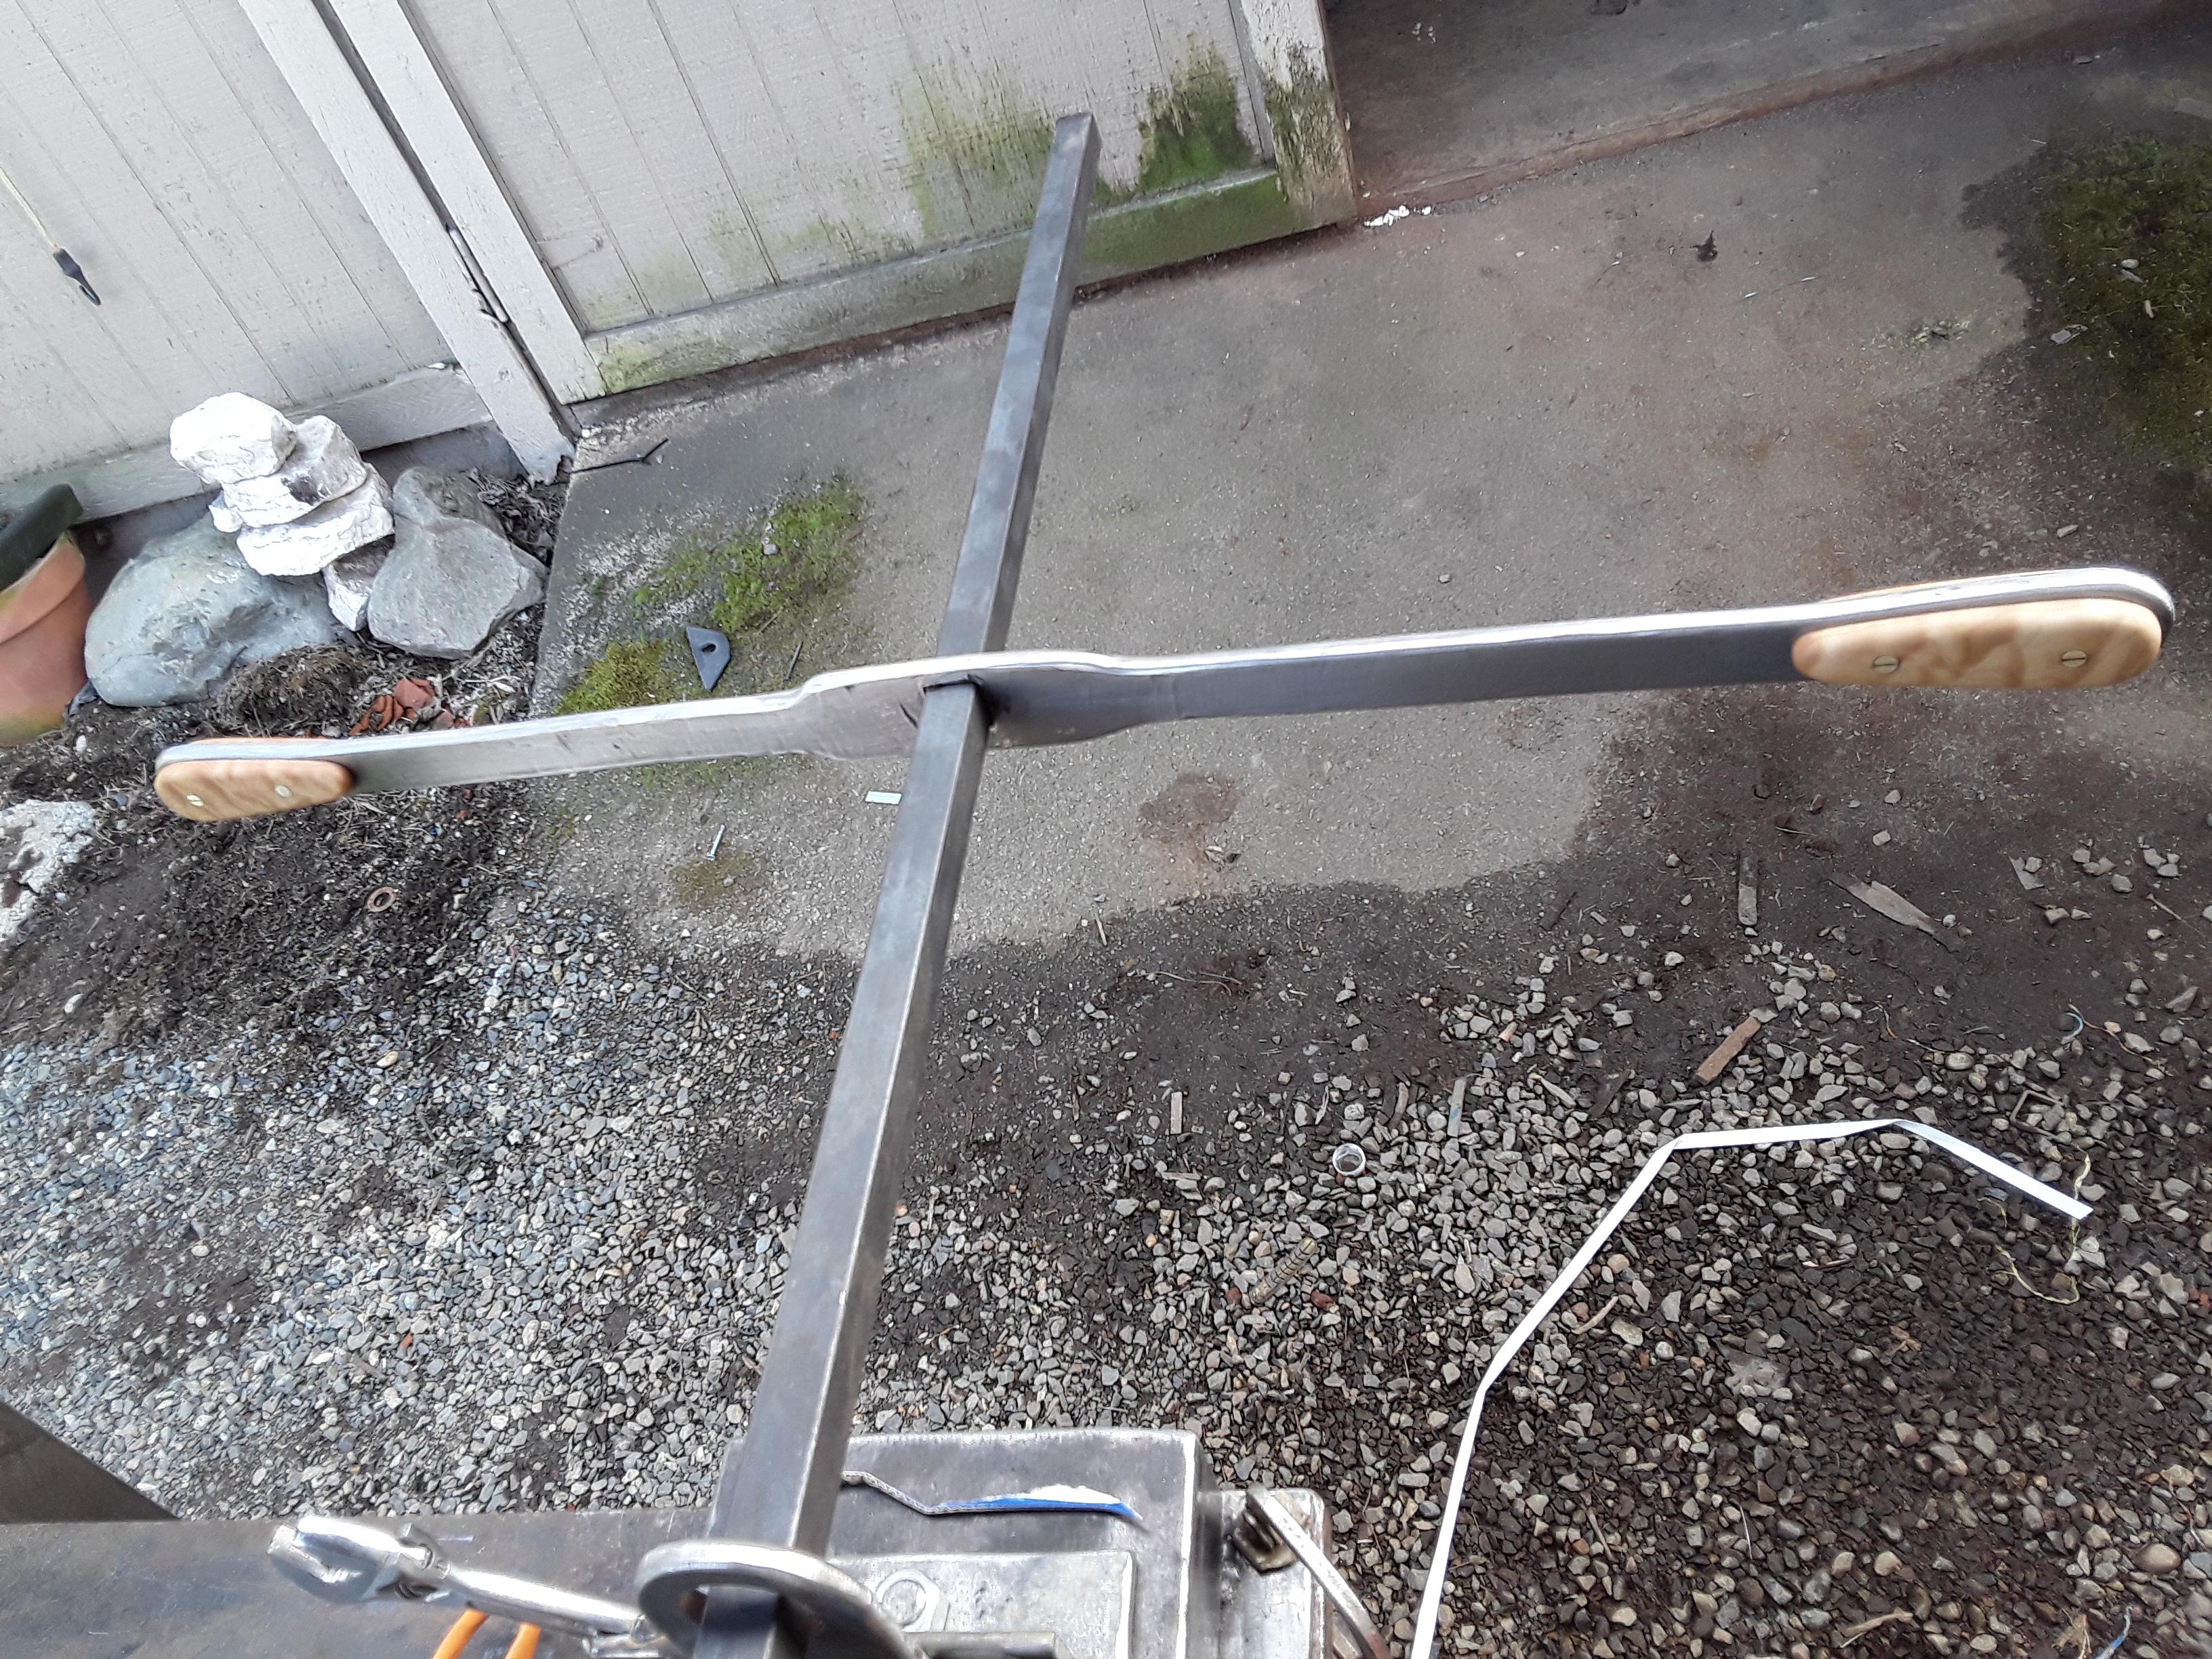
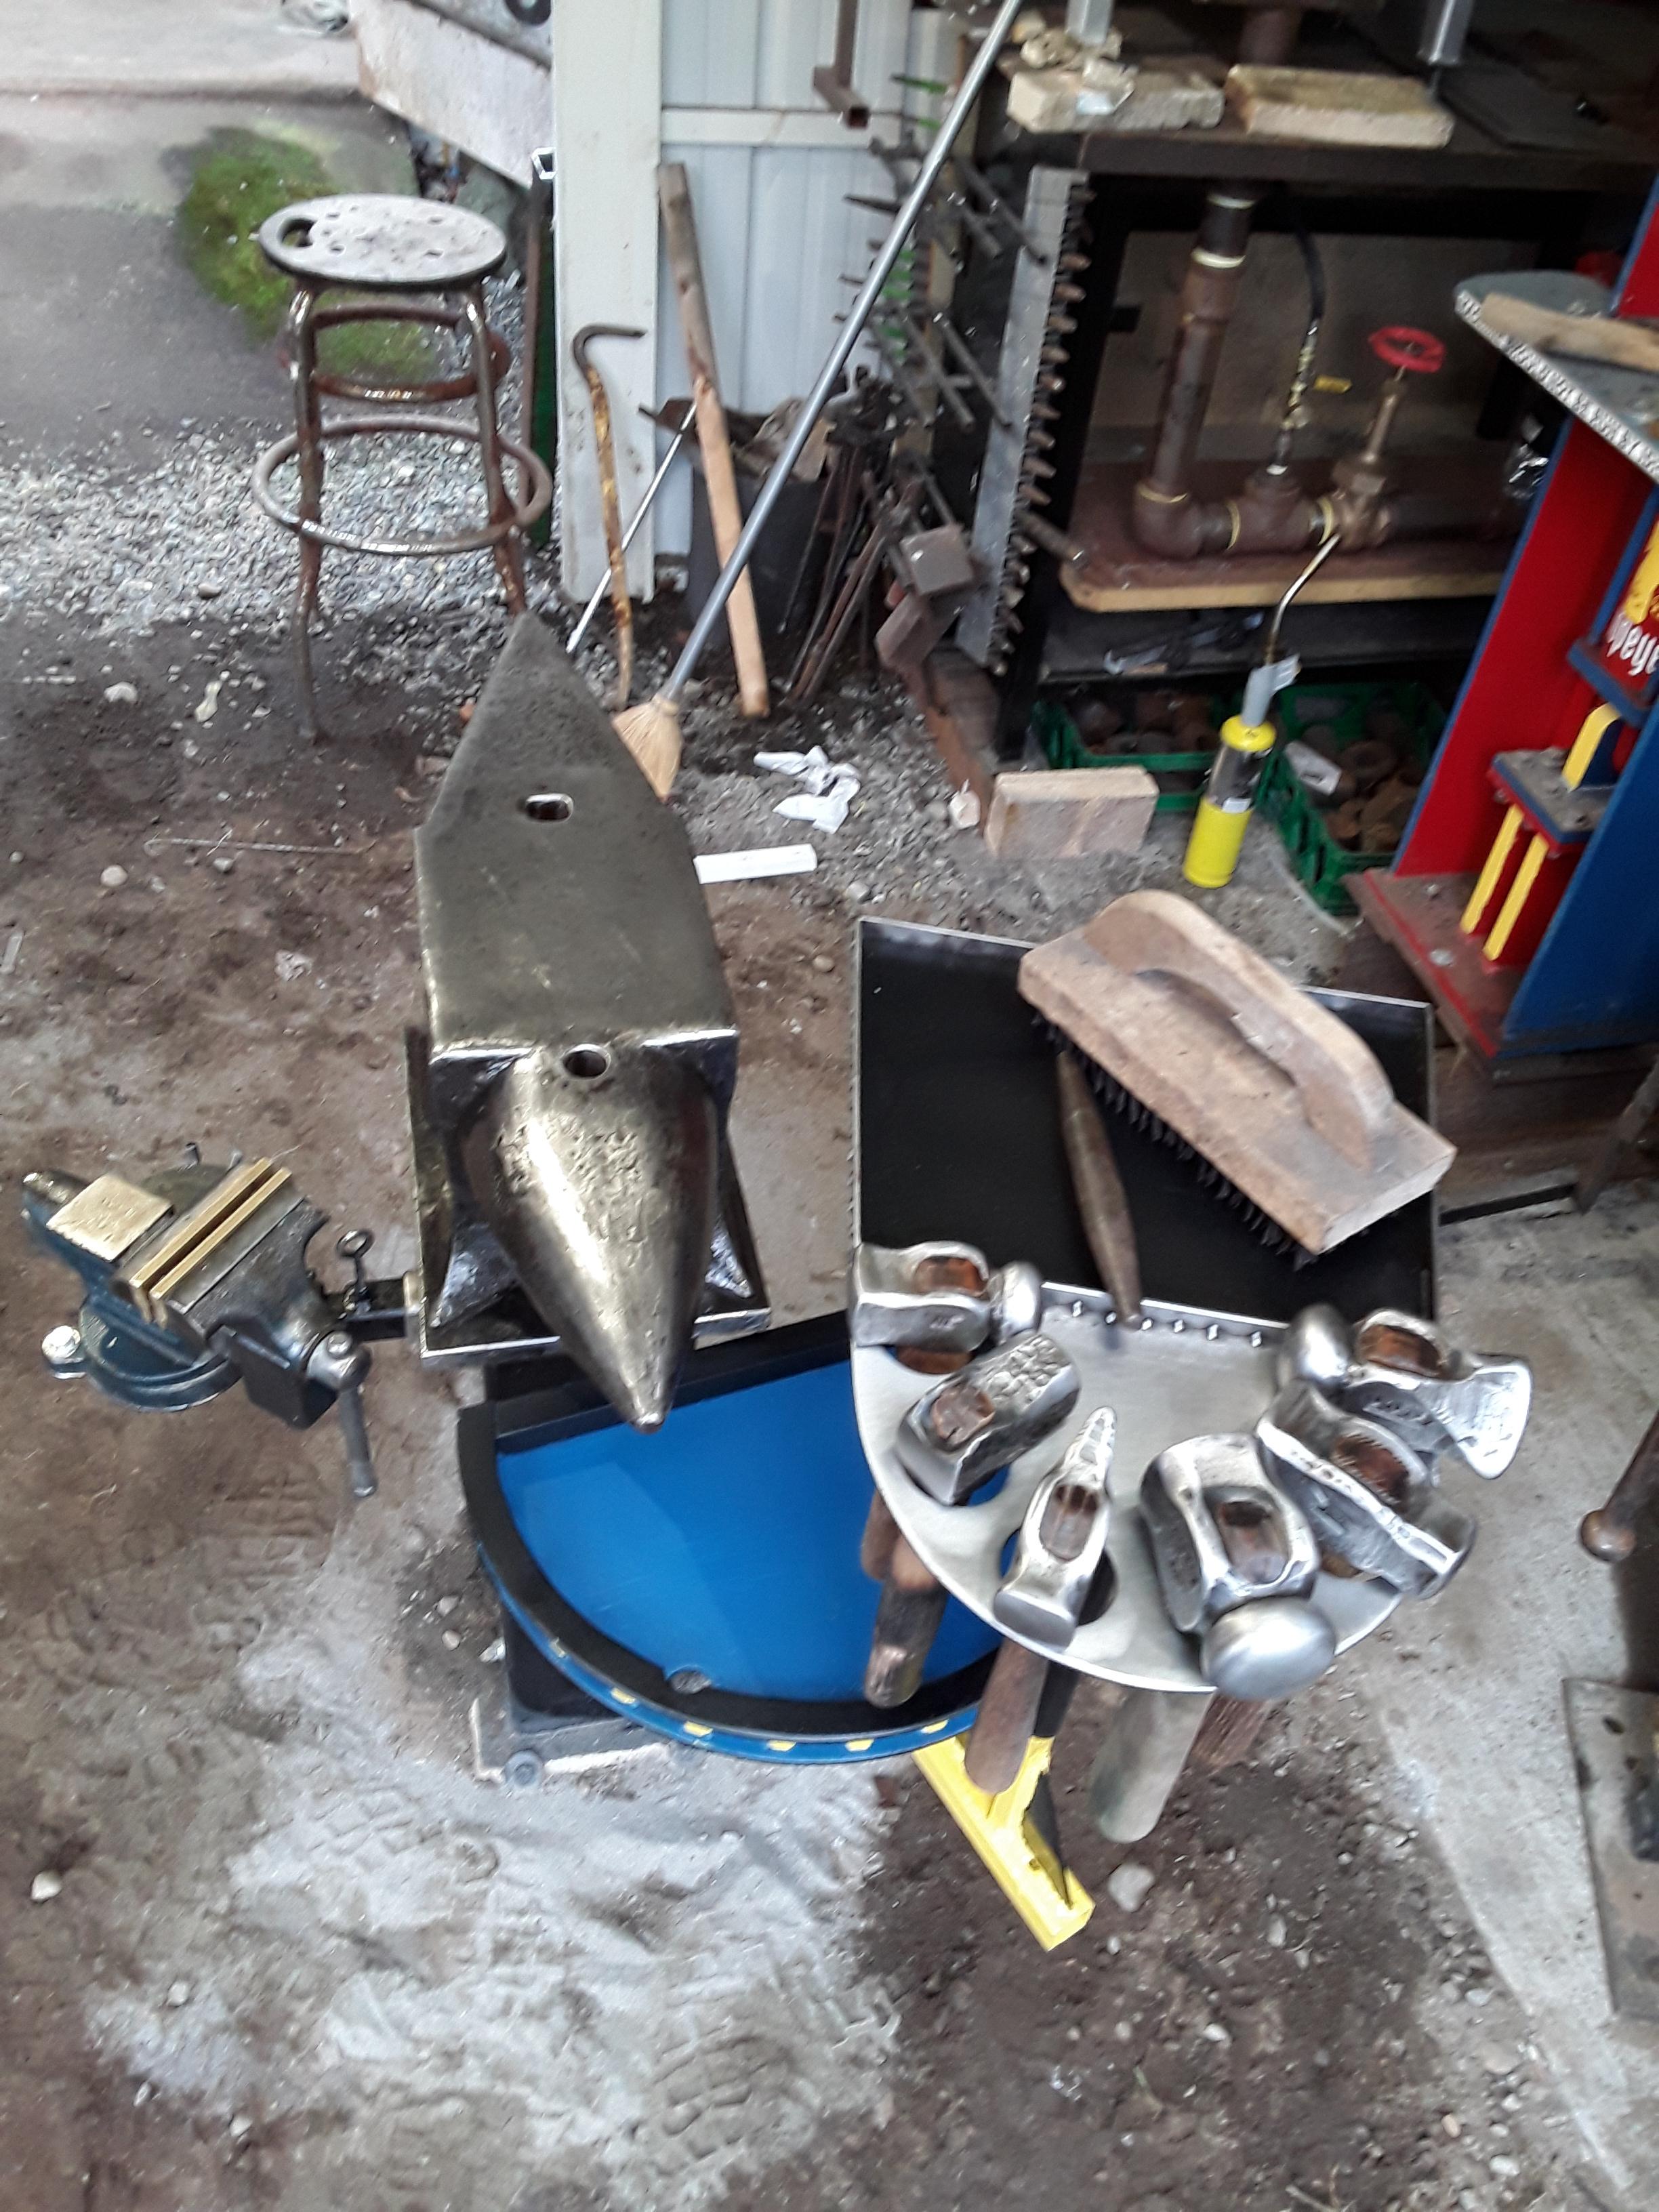
Made a couple twisting wrenches today. Large one is for 3/4" tendons. The smaller is for 1/2" & 5/8" tendons.


-
JHCC, You are giving me a headache!
-
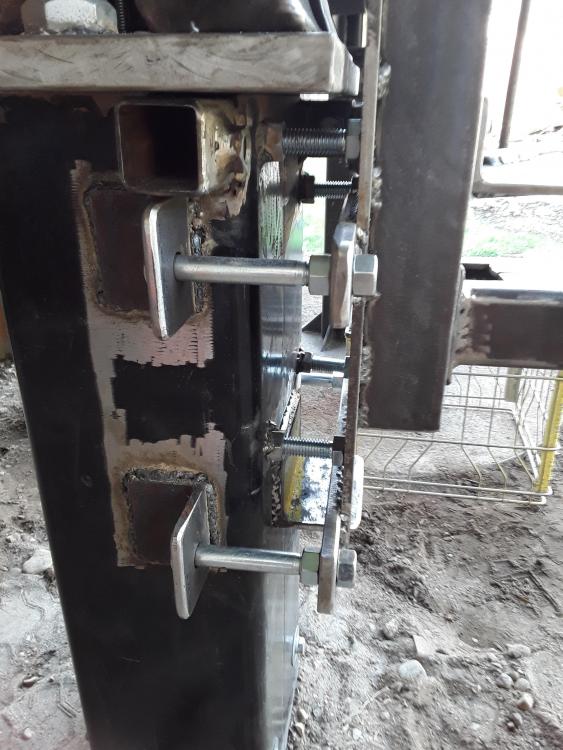
The channel is 6" wide, 1.5" tall, by 16" long. I have approx 18 hrs in the build. I work slow
Never thought to twist in the forge! Great idea!
-
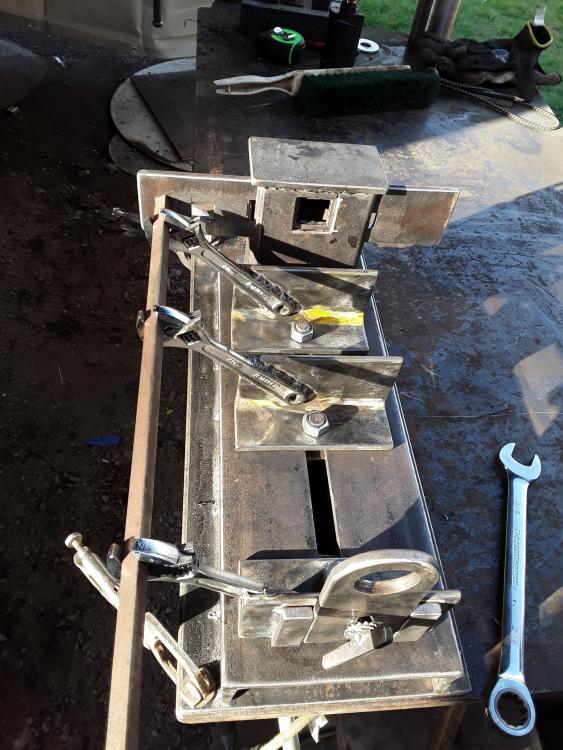
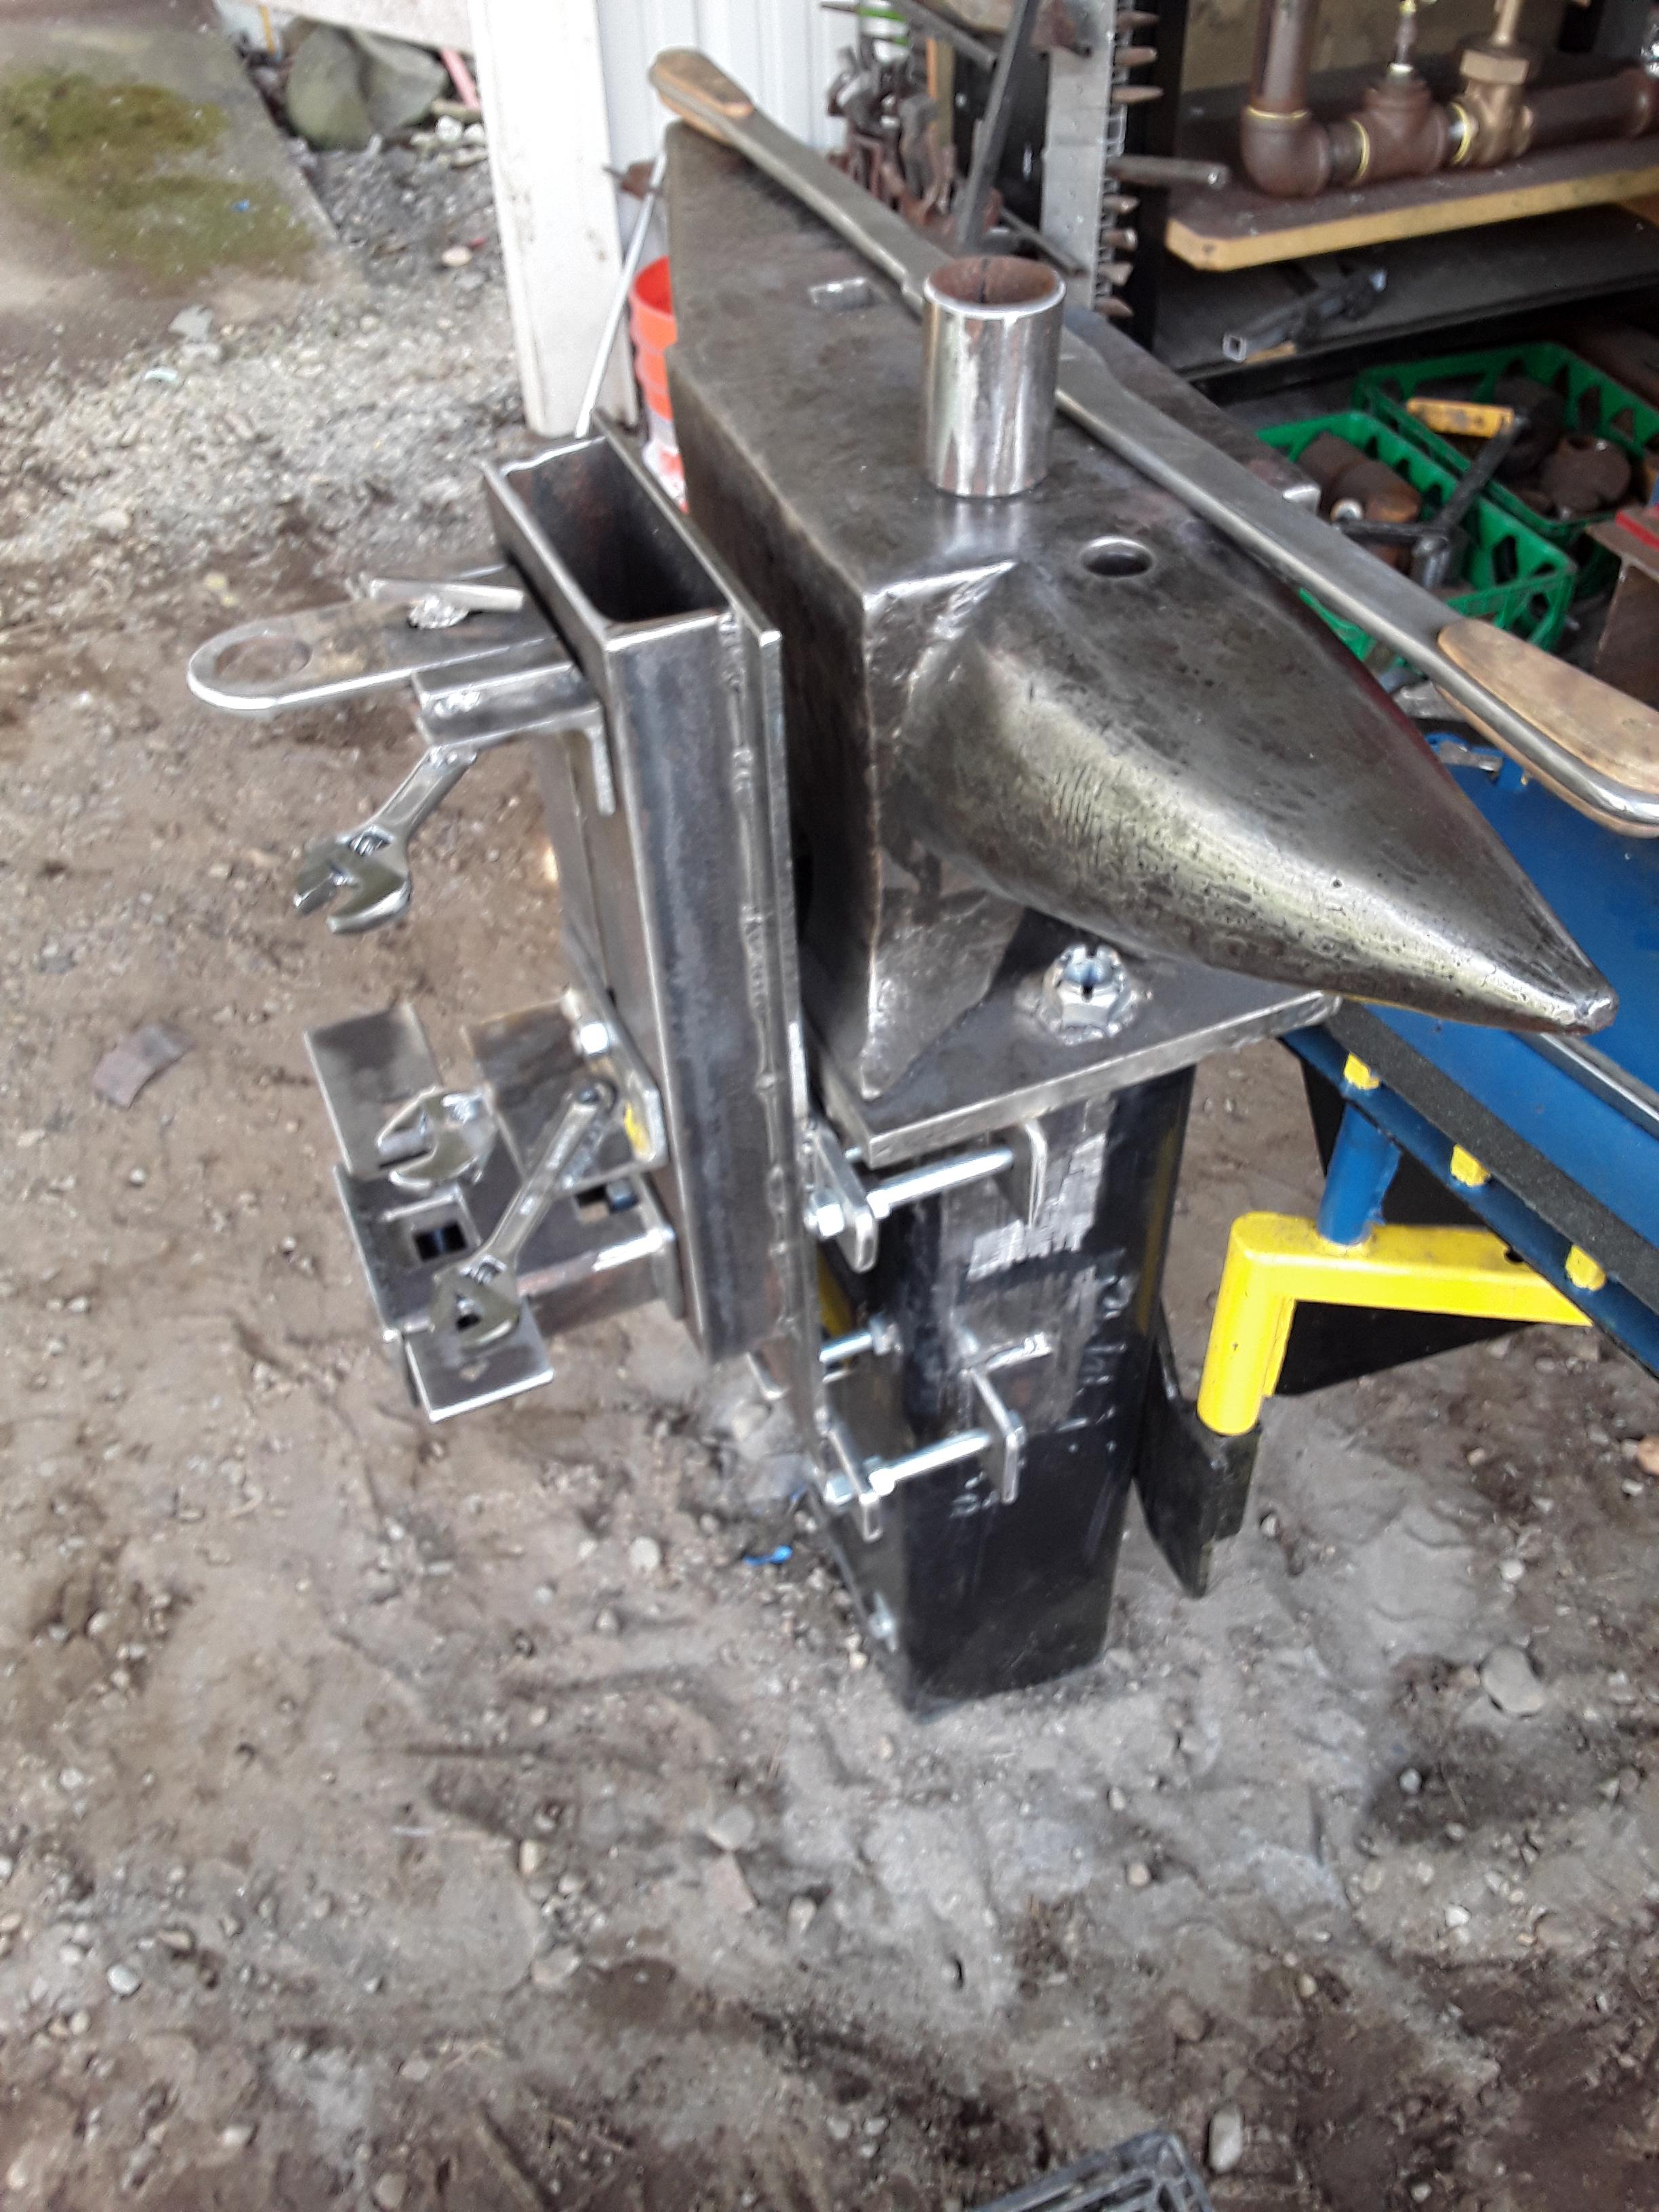
Finished up my twisting jig today. Small stock (3/8 or smaller) will twist in the crescent wrenches. Larger stock( 1/2 to 1 1/4) will fit down the center. Square tendon holder is mounted in the tower. Just slide the desired size tendon into the center and hold in place with the thumb screws.
All the wrenches, and the tower/tendon holder slide the length of the bed. They can be locked down where needed for an assortment of spaces twists.
The round hole at the end will reduce the bend in the stock while twisting thicker stock.


-
TY Les,
I got the basic idea from a local smith... but had to add my own twist.
-
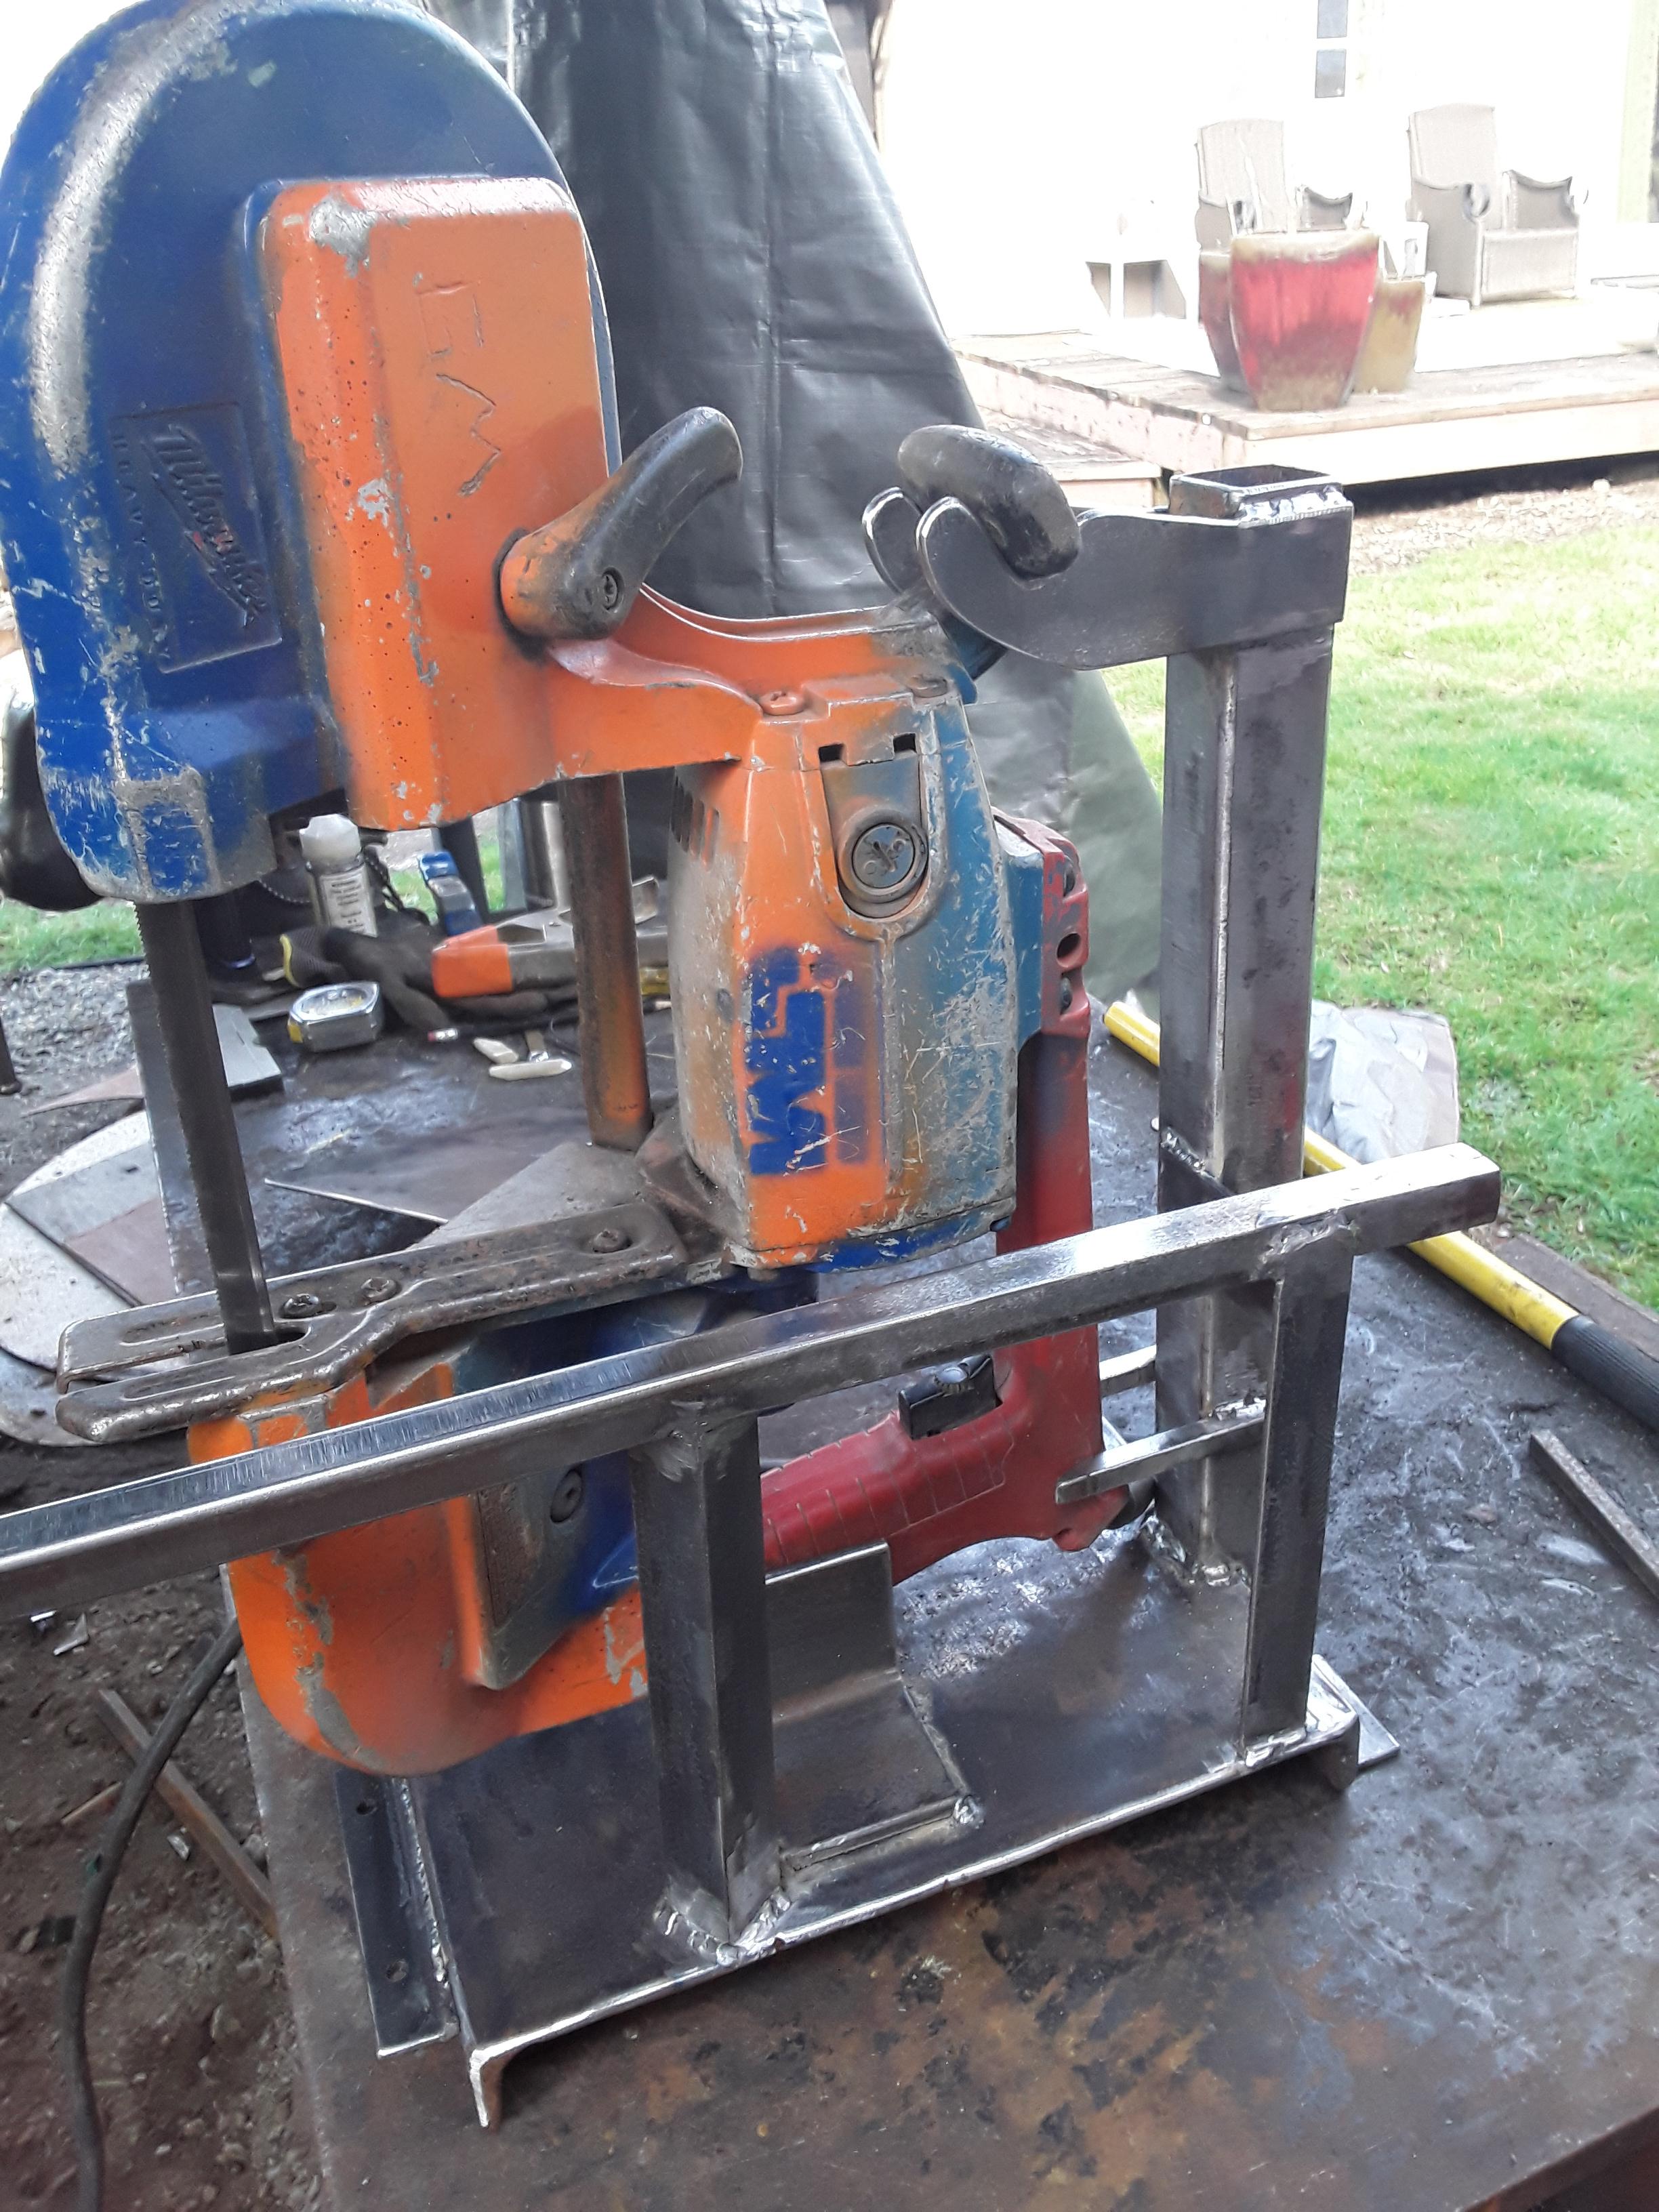
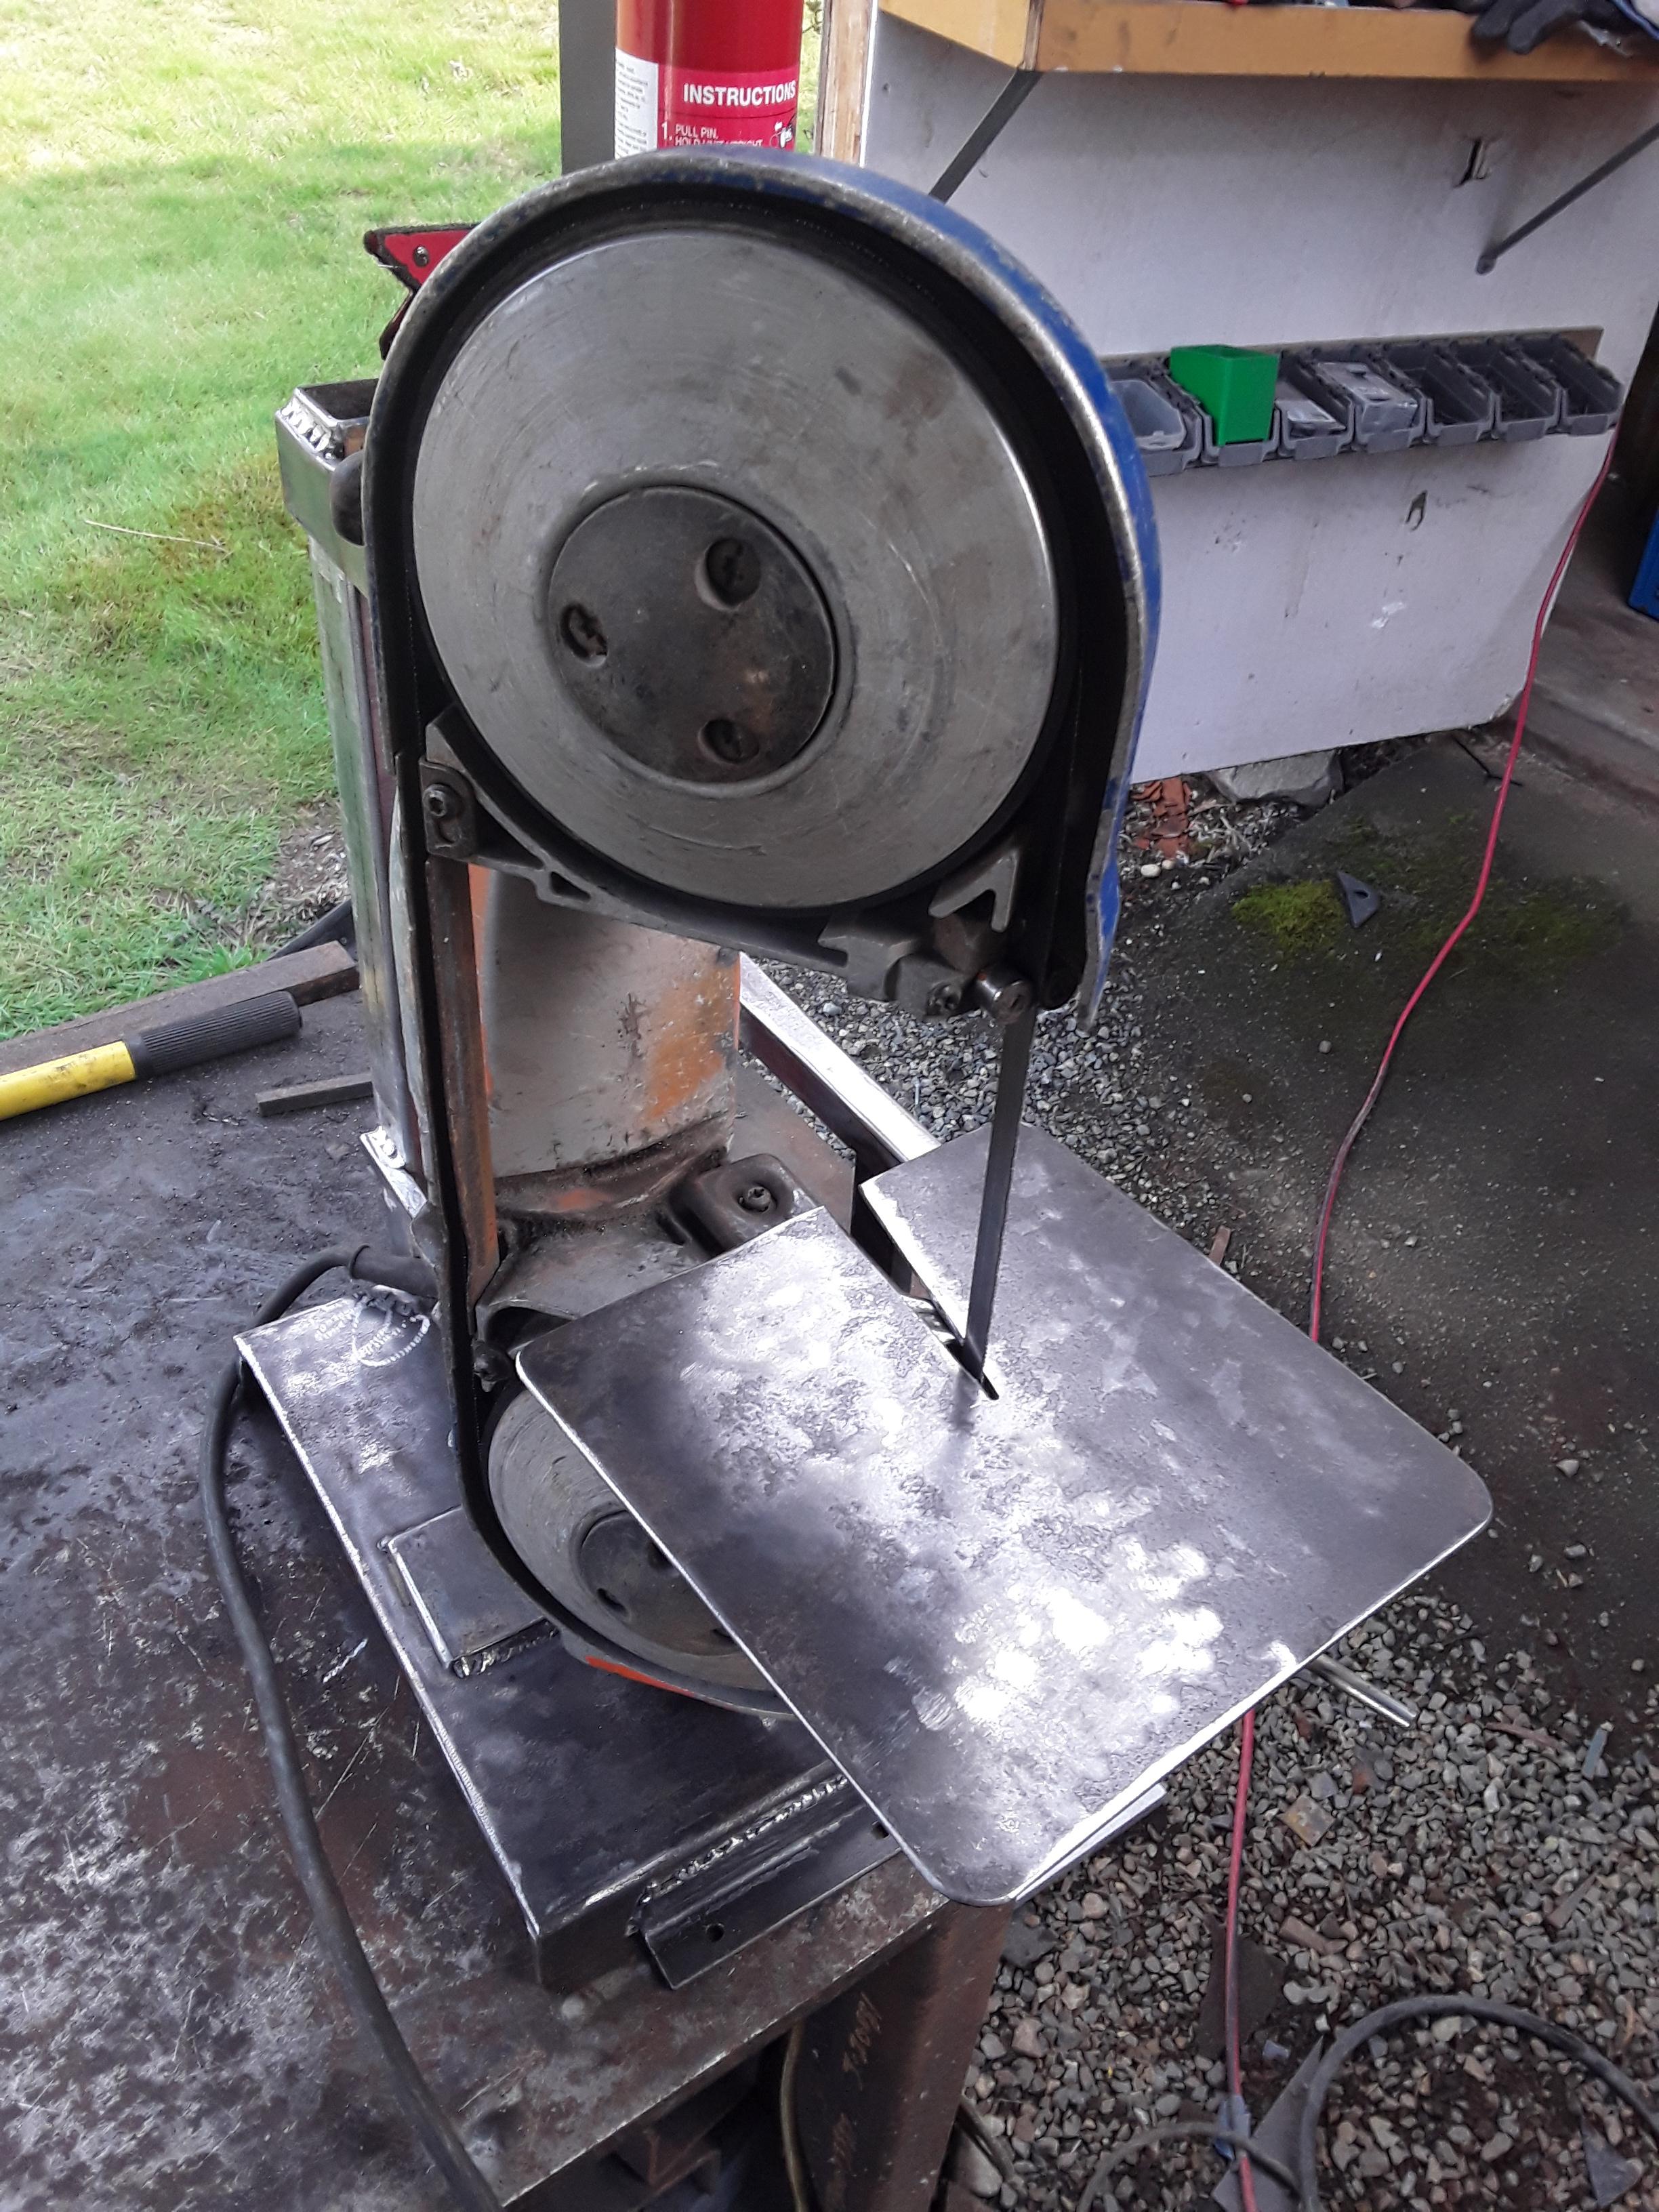
Fabbed up a tooless bandsaw table mount


-
I have 1 porta-band. I use it alot, both in a table mount, and hand held. My original DIY mount was wooden and required me to remove a band clamp , and a screw gun to remove the table. What APITA! A little thought, some material off the storage rack, and some time...this is what I came up with..
Table slides off by loosening the thumb bolt on the bottom of the support arm.


-
Caotropheus,
TY, copy all you like. Imitation is the highest form of flattery!
-
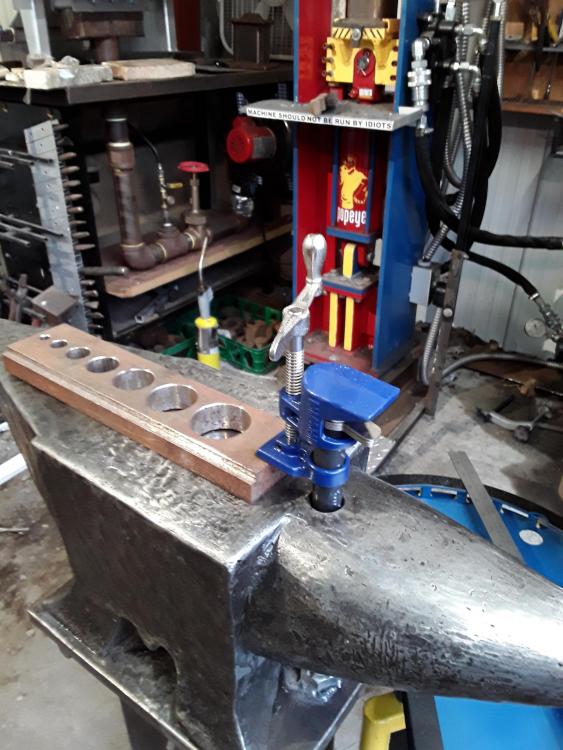
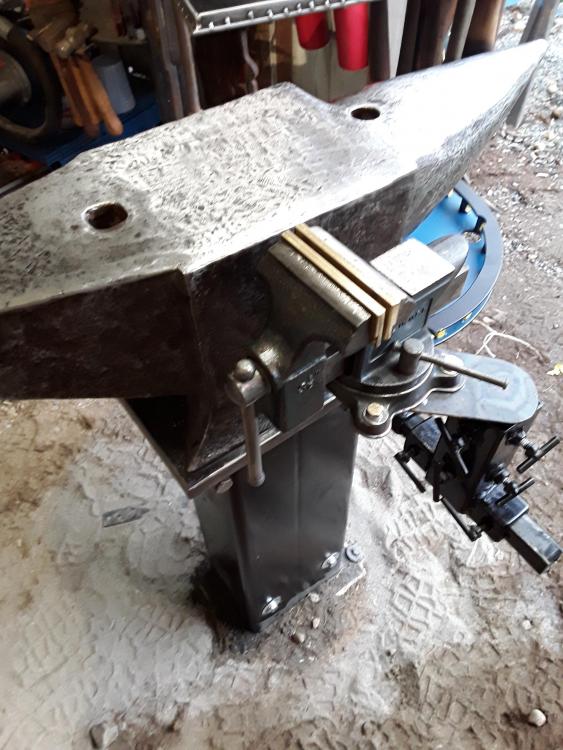
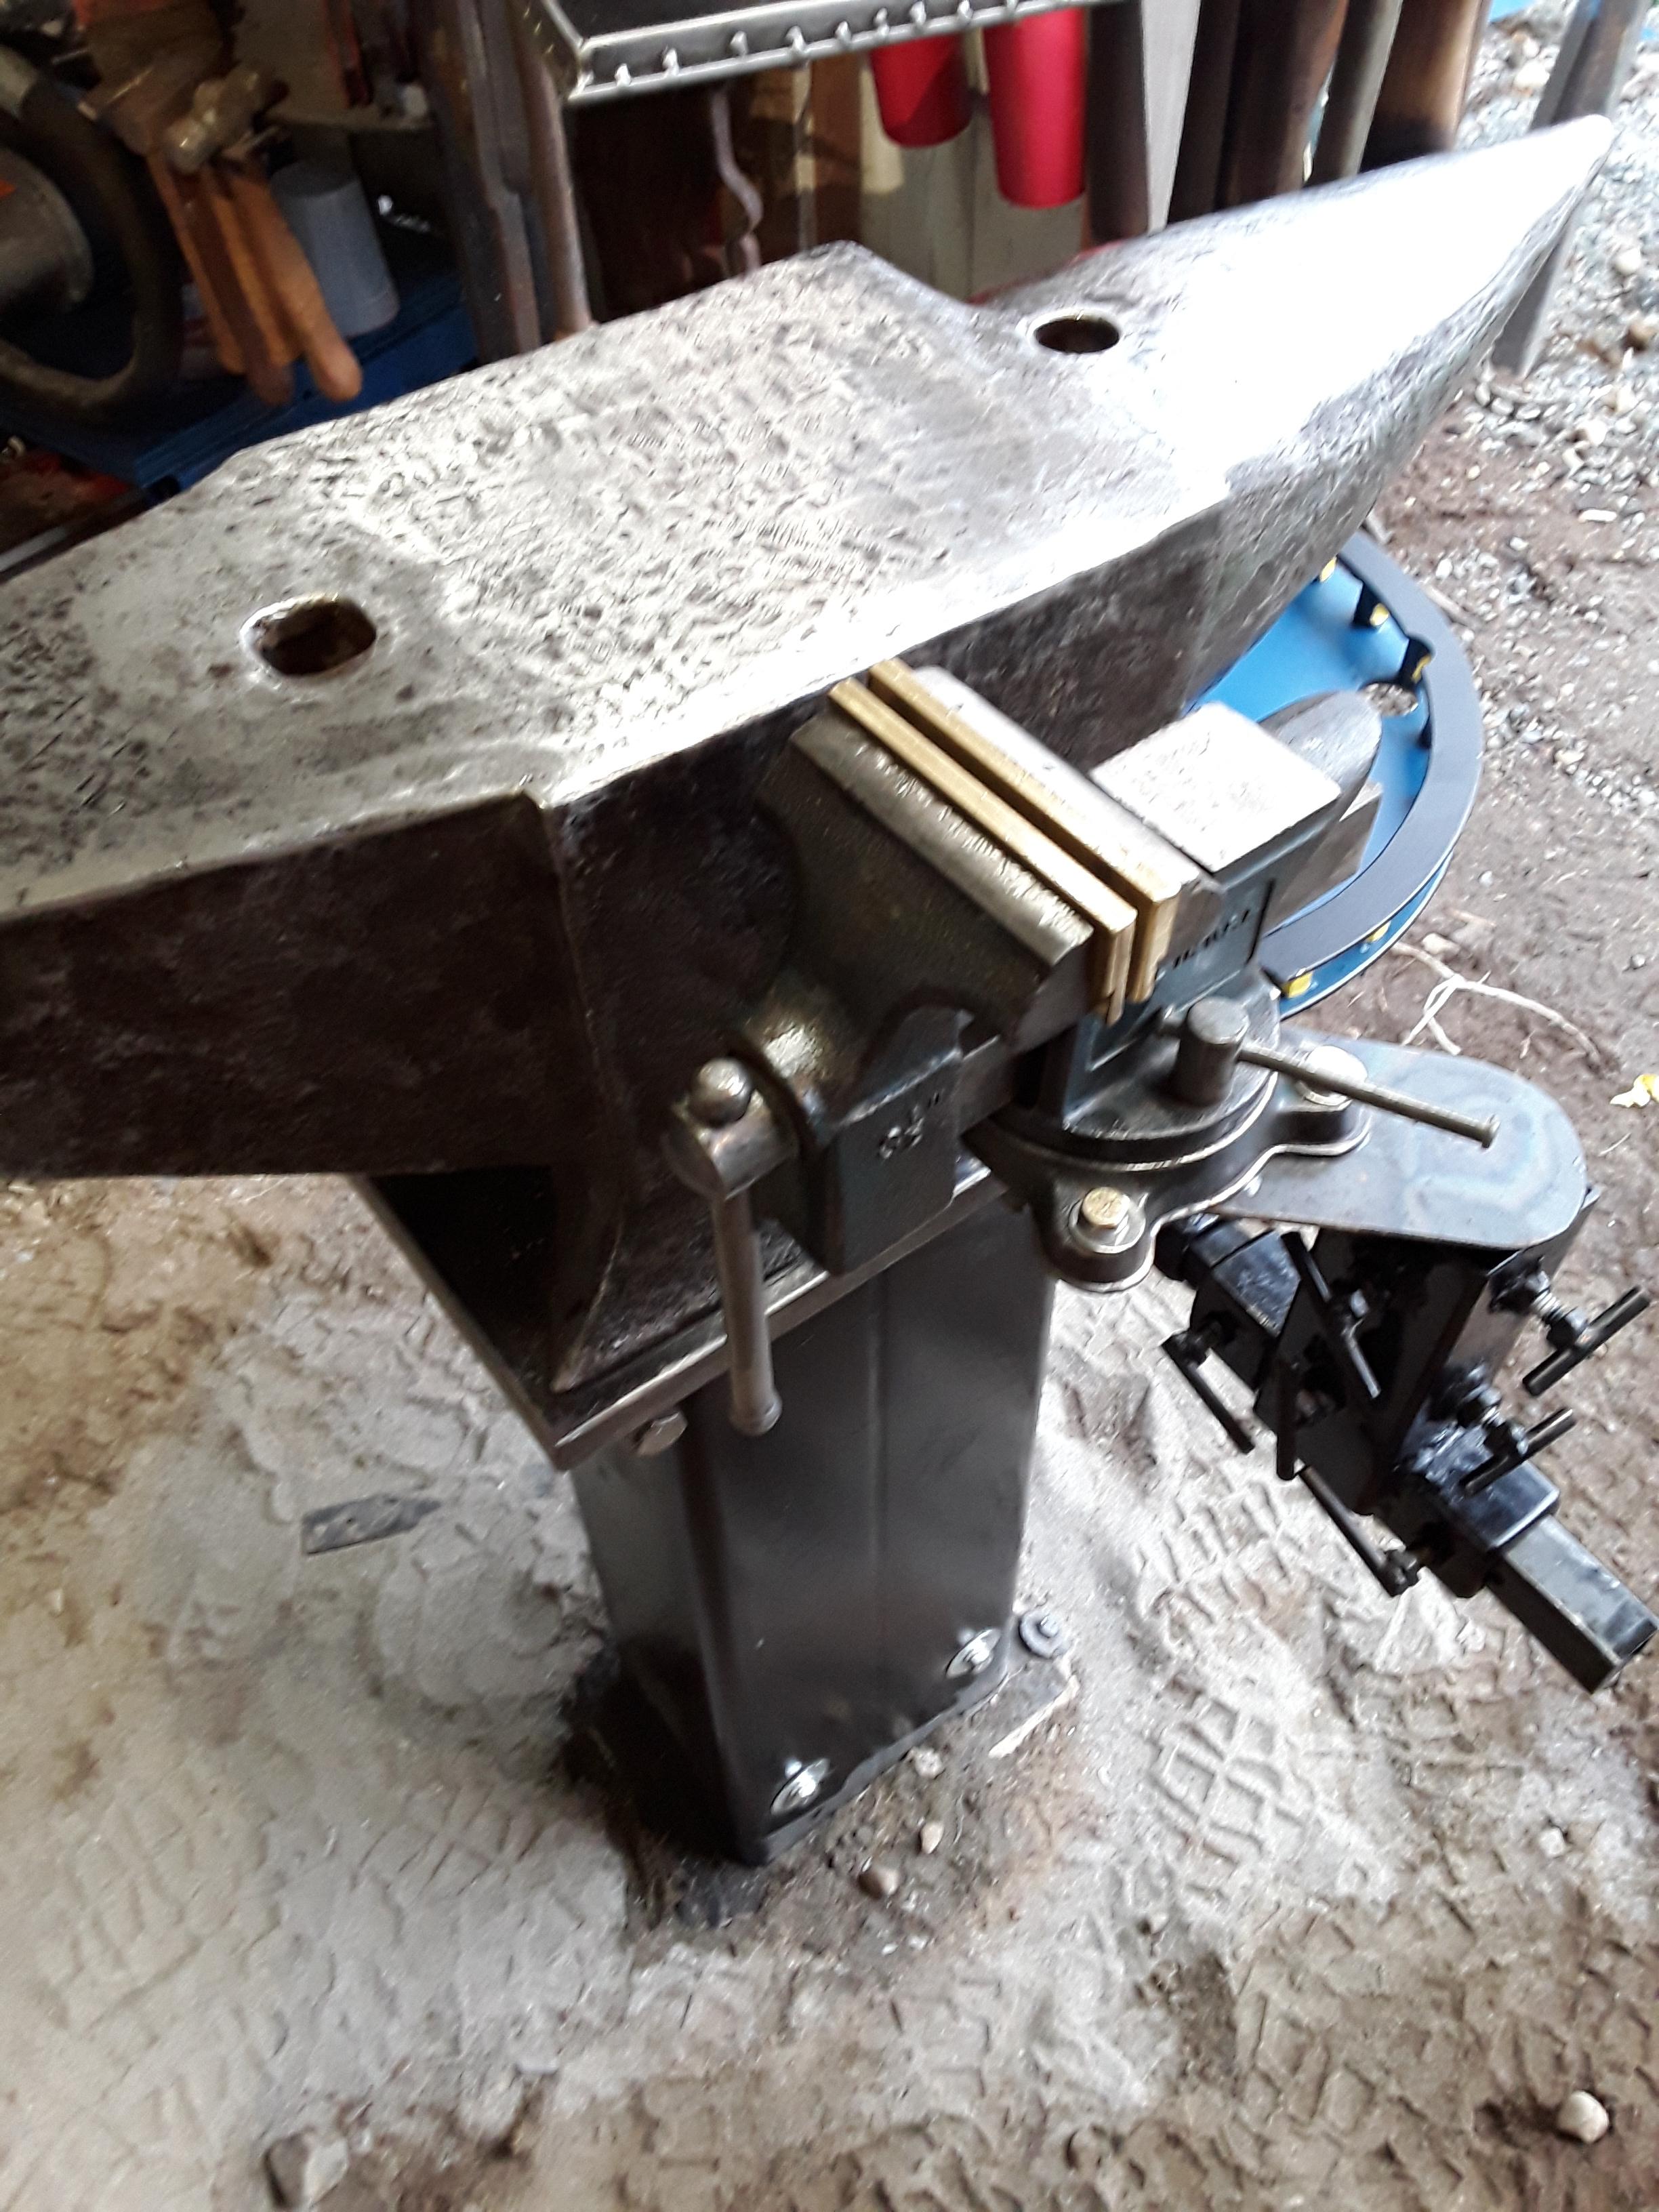
Thought it be best I had a quick and easy hold. 1/2" non threaded bar clamp end. A length of 1/2" threaded pipe, 2 , 1/2" nuts. 10 minutes to weld the nuts to the base plate. 1 under the hardie hole, and one under the Pritchard hole. Booooooom!
-
Jlpservicesinc, TY the hardie is 1". But needs some file work on the edges.
-
Swedefiddle, I have yet taken the time to dress any of the edges. Only thing I did was to wire wheel it. Followed by hand rubbing it with 400 grit paper. Then I coated it with some beeswax. Finished with a coat of BLO. The forge is covered but not inclosed. A bit of rust prevention.
The trays and the vise mount are easily removed. The trays just lift out. They also swivel independently from each other. They can be swiveled completely out of the way when working my prominent side.
TY form the 8nfo on working out the dings on the face.
-
A little light duty "to hold things in place" while I smack it with a hammer. Thing-a-ma-Bob.
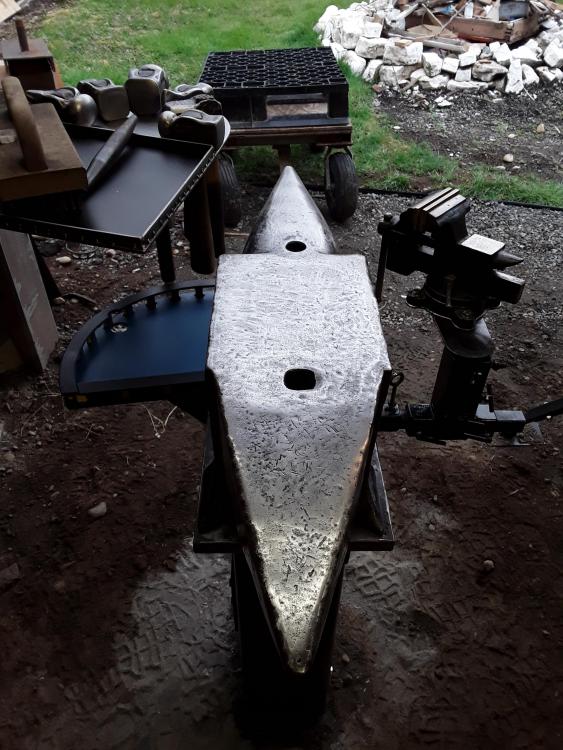
Just got the anvil yesterday. The UPS man made my day! #198 Italian Piggy!
-
How about if I just post a couple pictures of a mounted Pig? On the best looking anvil stand this side of the Rocky Mountains. (According to Frosty).

-
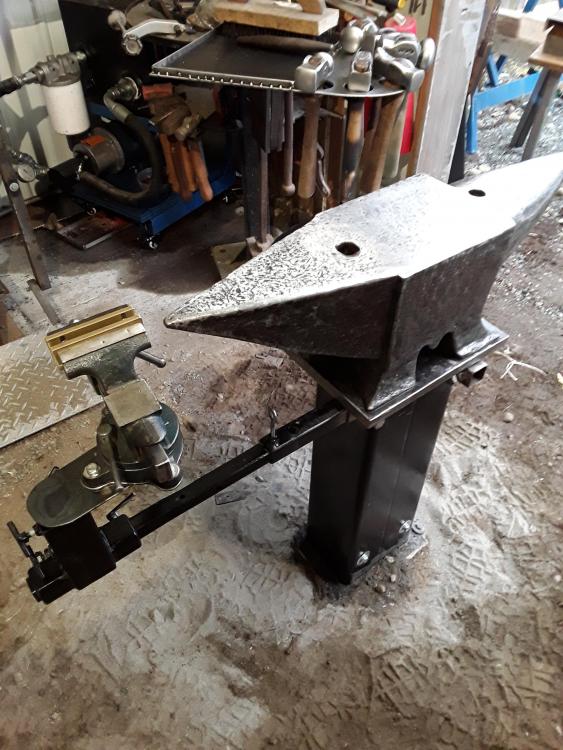
Two steps forward, one step back. Decided I needed a 3rd hand on the stand. It swivels, and had two mounting ports welded to the inside of the steel column.


-
Frosty, I have read enough of your replies to know if I were in the wrong... you would not sugar coat it and head me in the right direction.
-
Frosty,
I will be sure to delete your Soderfors off my mailing list!
Some say I 9ver do things at times, but the small details, and the commitment to do the best of your ability speaks volumes about ones craftsmanship.
Thank you for the kind words. They very much appreciated coming from an experienced craftsman as yourself.
-
Drilled and tapped the belly of my new Pig

-
UPS brought me this #198 Italian Piggy

-
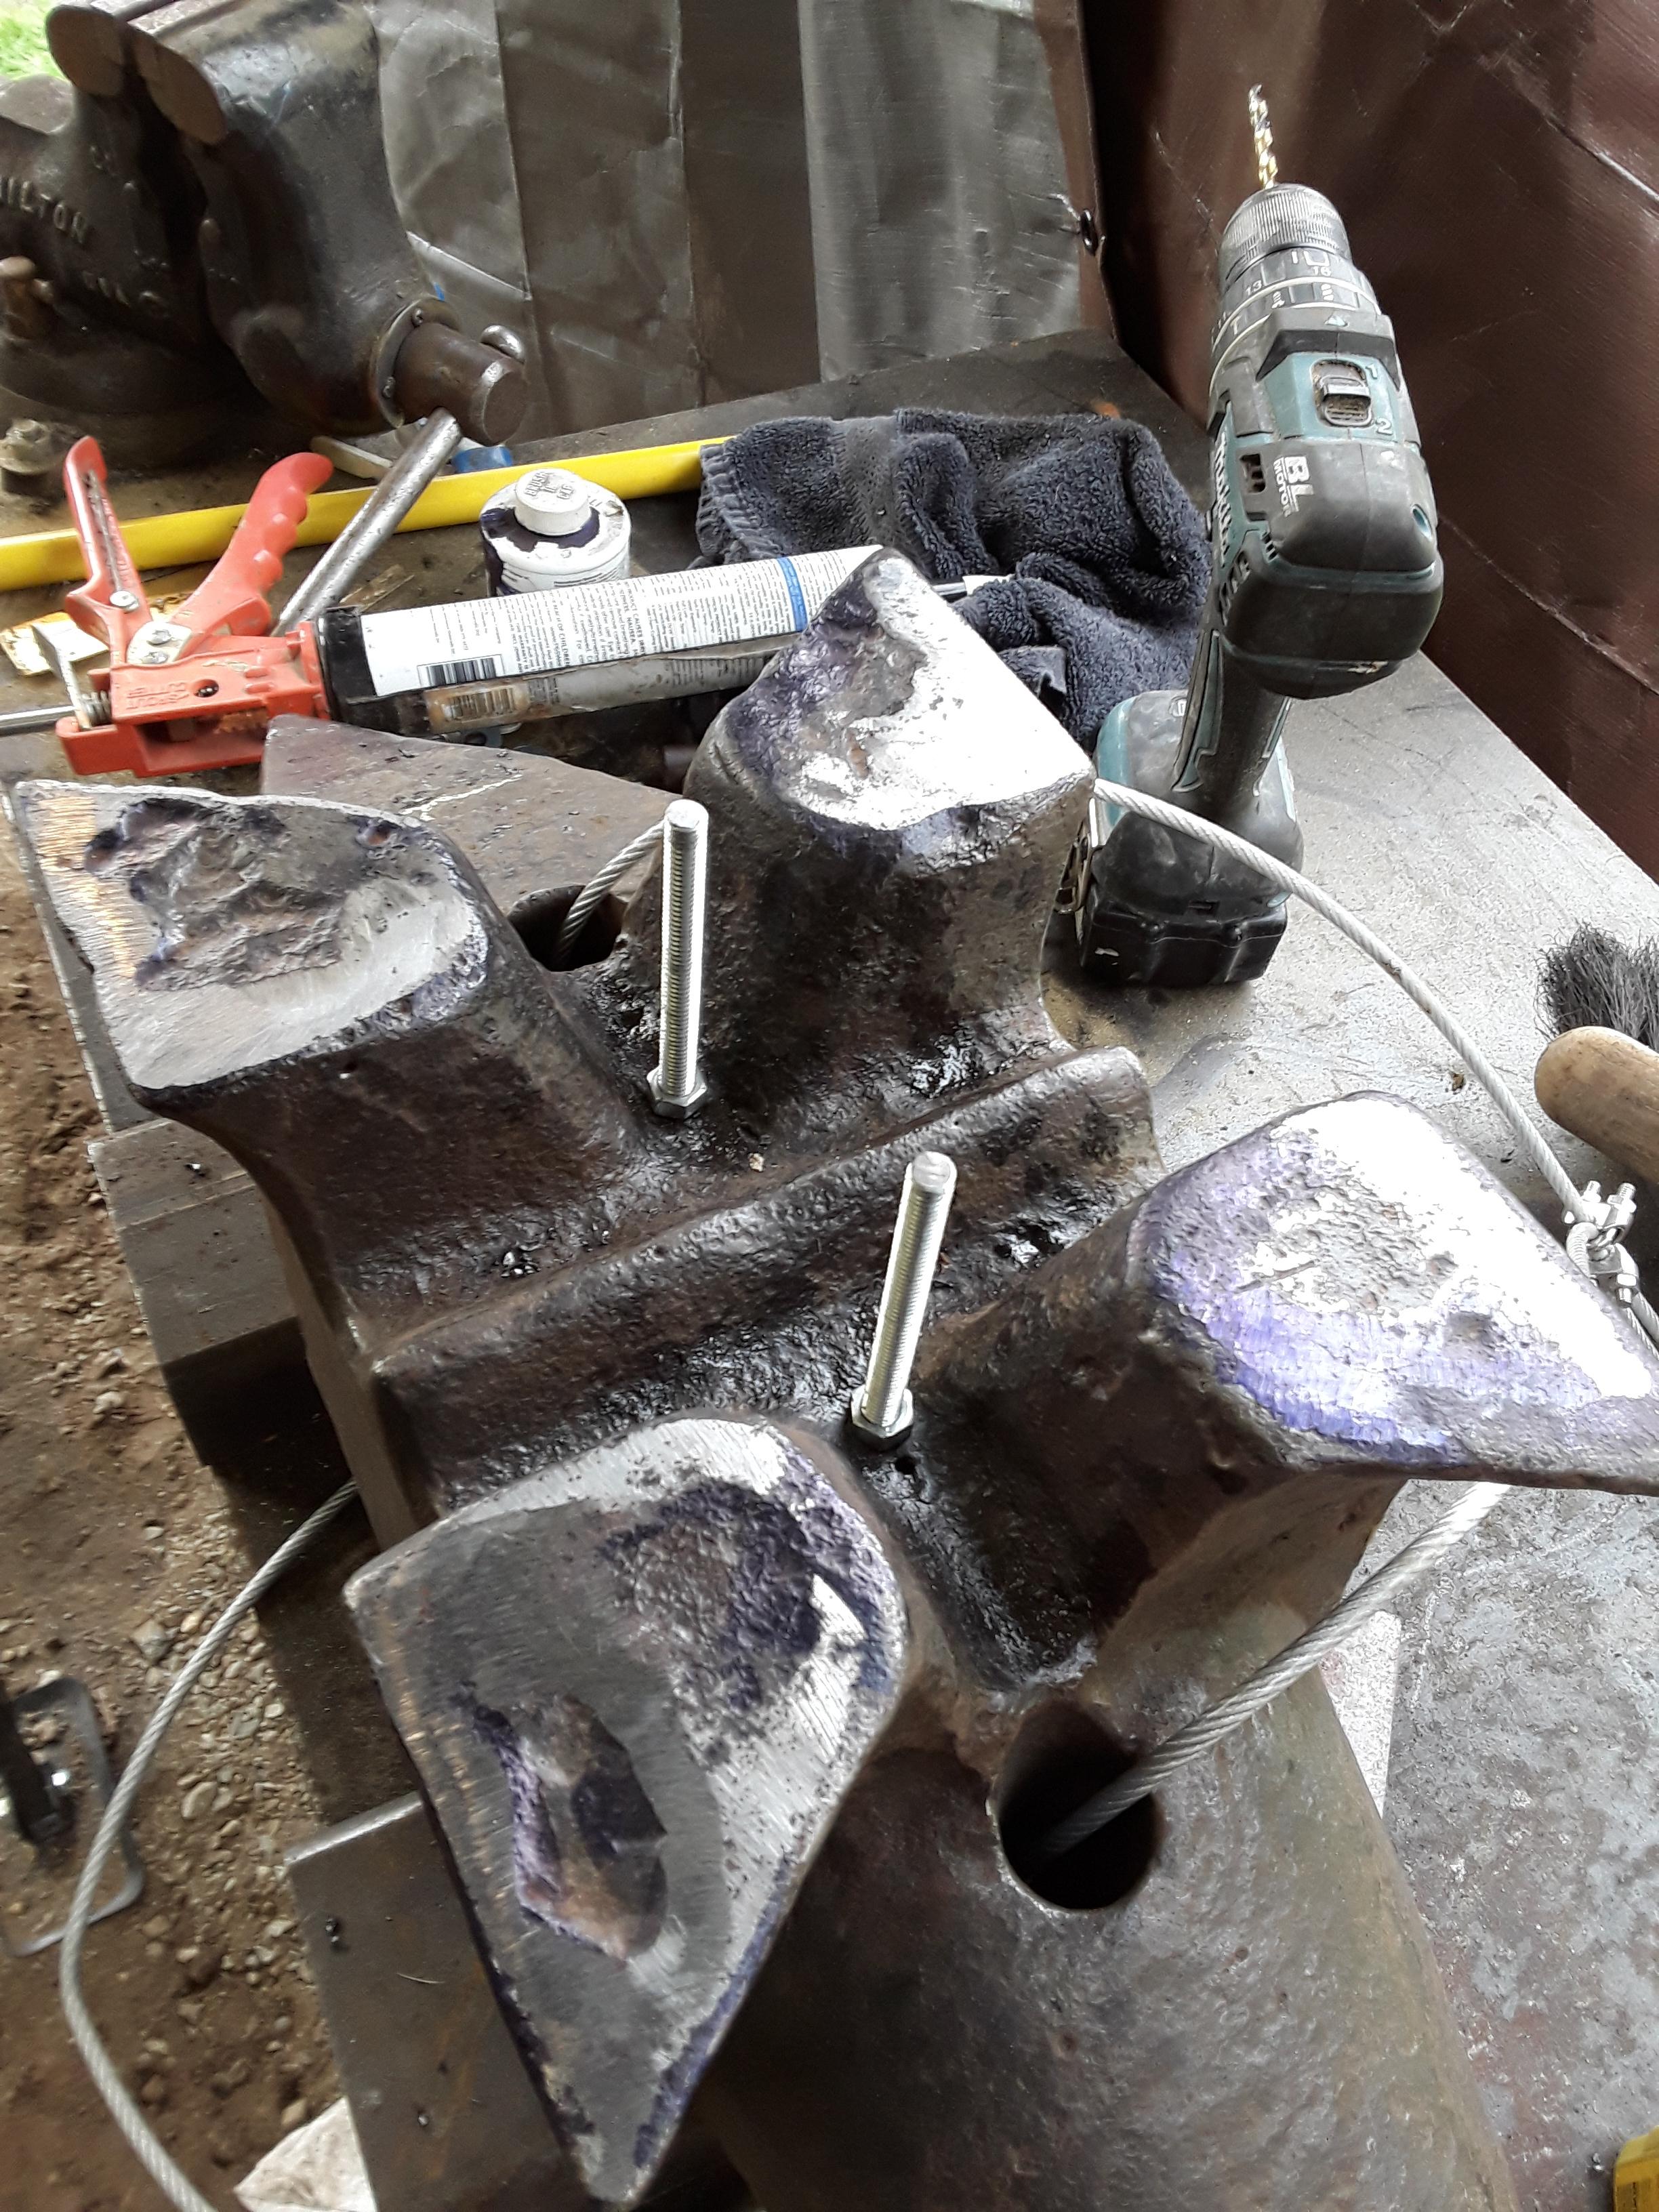
Didnt really think about using the feet that way... I am confident this will do the trick. Flatten the feet to set on the base plate was a chore. Got them all down and solid. Will place some silicon between the feet and the base platelets before she gets her final mount.
-
A pretty one at that. I was a bit Leary about buying an anvil from overseas. I couldn't see it up close, couldn't check for rebound, ect, ect.. but all in all I am pleased. The rebound in the center is not that good... but I have a power hammer being delivered in a couple of months, so I can live with it. The rebound on the edges and on the horns is about 80% that is acceptable in my book
I know some will say "you shouldn't have done that. But I feel I have not devalued or jeopardized the integrity of the anvil in any way. And the bottom line is... it is mine. This method of tie down/cinch down will prevent theft, and will not impede the look of the sexy pig feet.

-
Let the mount begin!
Dad always said "work smarter...not harder "


What did you do in the shop today?
in Blacksmithing, General Discussion
Posted
Pnut- the wrench are for smaller reverse twists, when the jig is mounted on the bench.
Marc1- that was my first twist with the jig. The round hole at the end of the jig is @ 1 1/4". What you explained is it's intended use. I will be tweaking as I go.
Chris C- TY