CactusBob
-
Posts
55 -
Joined
-
Last visited
Content Type
Profiles
Forums
Articles
Gallery
Downloads
Events
Everything posted by CactusBob
-
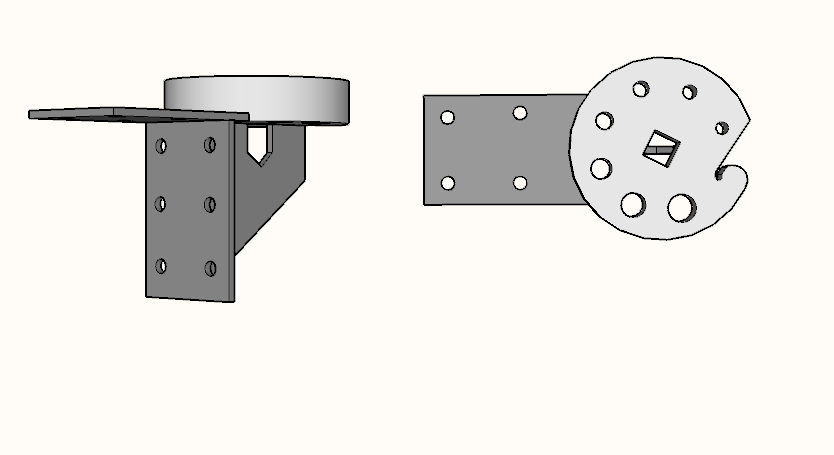
I picked up a round chunk of hardened steel at the scrap yard, (hardened enough for a file to slightly skate) 6.5" in dia and 1.5" thick. I was thinking of turning it into the drawing below. The small curl on the right side is torch cut so I figured opening that up a little more to use for bending. I am planning on drilling holes from 1" down to 1/8" in increments and having a square 1" hole put in the middle for hardy tools. The base and bracket I am thinking of using 1/4" plate and mount this behind my post vise on the same post, the vise takes up the front third or so which leaves plenty of room My question is having the hardy hole done at a machine shop the best way to go or is there an easy way to diy it do you think 1/4" plate will be strong enough for drifting/punching and hardy tools or is there a way to reinforce it so it will take some decent use My "shop" is outdoors so I have plenty of room to move around the post If anyone has any other ideas for a 6.5 X 1.5 round please let me know. These were cut out of plate and there is a bunch of different sizes plus the connecting pieces between the circles at the local scrap yard. Thanks Bob
-
Thank you for coming up with it and sharing it. I know myself and probably others wouldn't be doing this without designs and ideas like yours. The simplicity of this design is what made me realize I can build this and despite being knotheaded at times this baby will be heating steel before long. Thanks again Bob
-
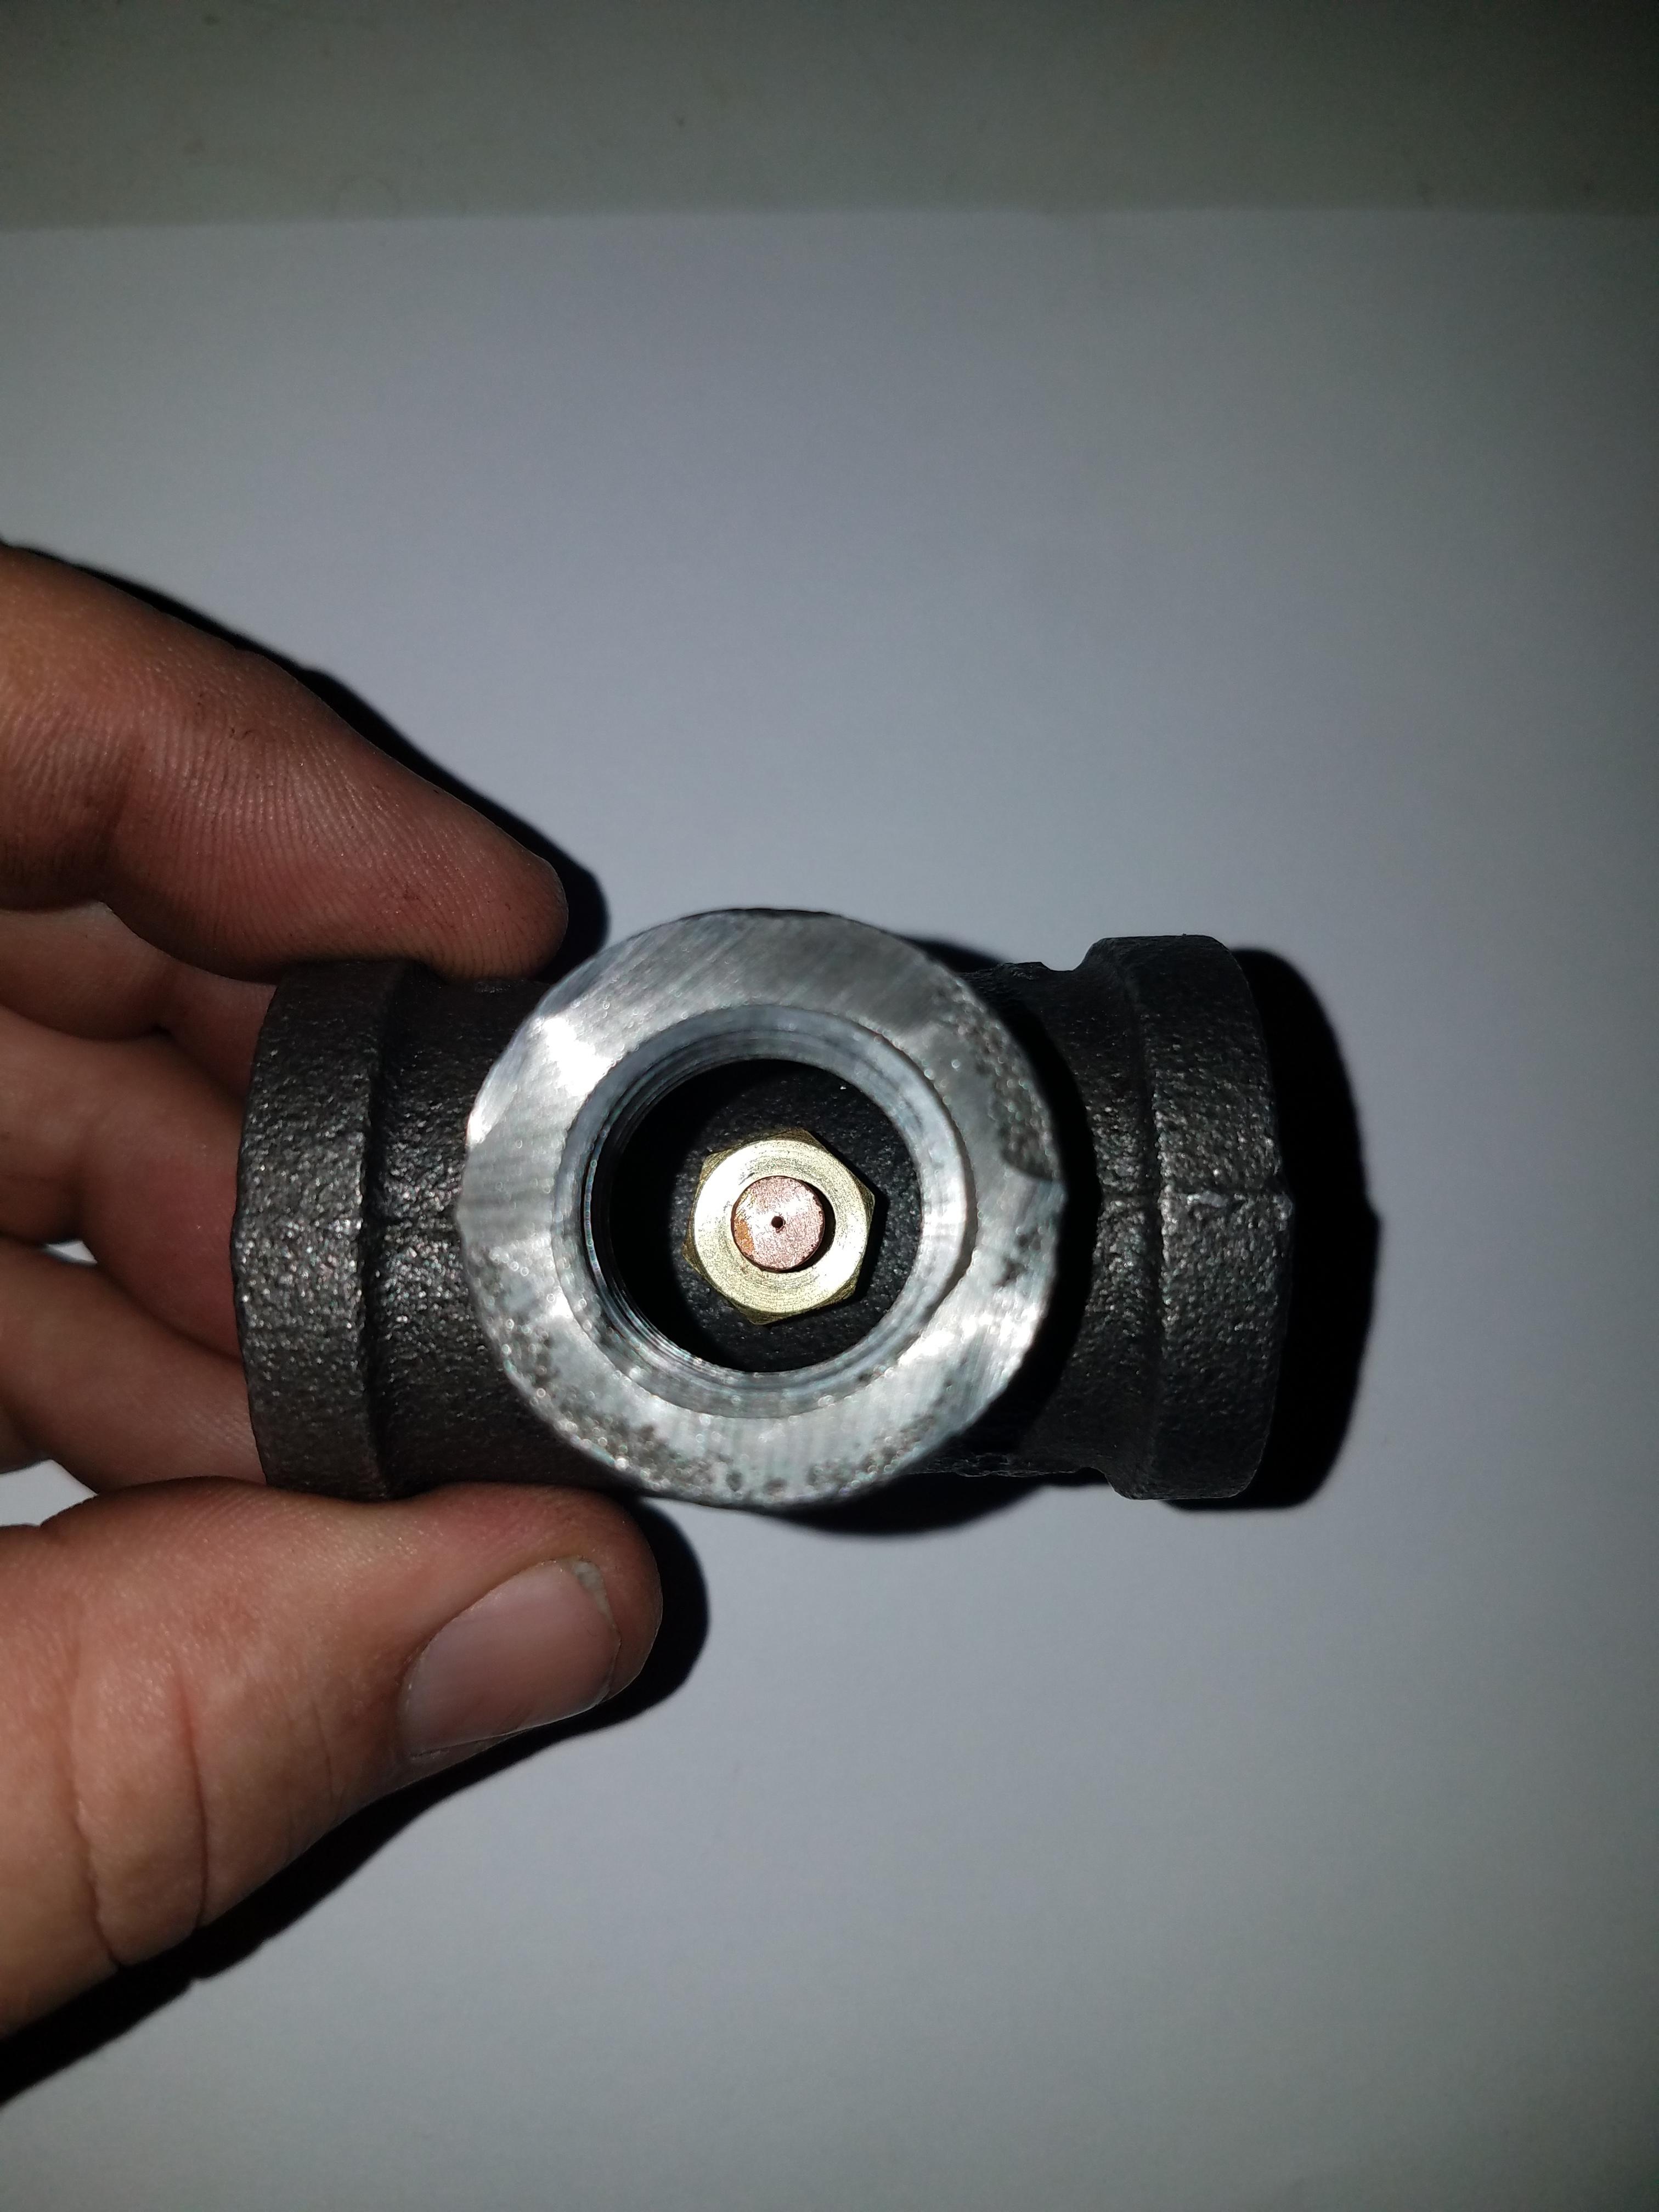
Possible, but it sat over 24 hours and daytime temps were about 80 prior to firing. I'll try again after the refractory is all in. I took my hand and covered the air inlets and it would fire and run with a roar at all most any pressure, the higher the pressure the more air inlet I was able to uncover. With the air inlet fully uncovered it would just run at max pressure 40 psi. It seems to be drawing too much air. I will straighten the tip and try it again after the refractory is dry. Hopefully with everything dry it will run better. Thanks for the info Bob
-
Strangely enough I found a 0-40 psi regulator on-line that was cheaper than a 0-30, go figure. I'm not sure about posting a link here so if you want to just message me. Mine came with the regulator, gauge, and 5 foot hose Bob
-
No sir, I'm not trying to run it at low pressure, that's just where I tried to light it. My problem is I can barely keep it lit at 40 psi. I'm just trying to figure out how to get it to run at any pressure. It seems like its getting way to much air so if I shorten the tip I would think it would pull in more air. So should I block off some of the air or shorten the tip? how would I determine which way to go The Kast-O-Lite was applied late this afternoon so either tomorrow night or Tues I'll try re-firing it
-
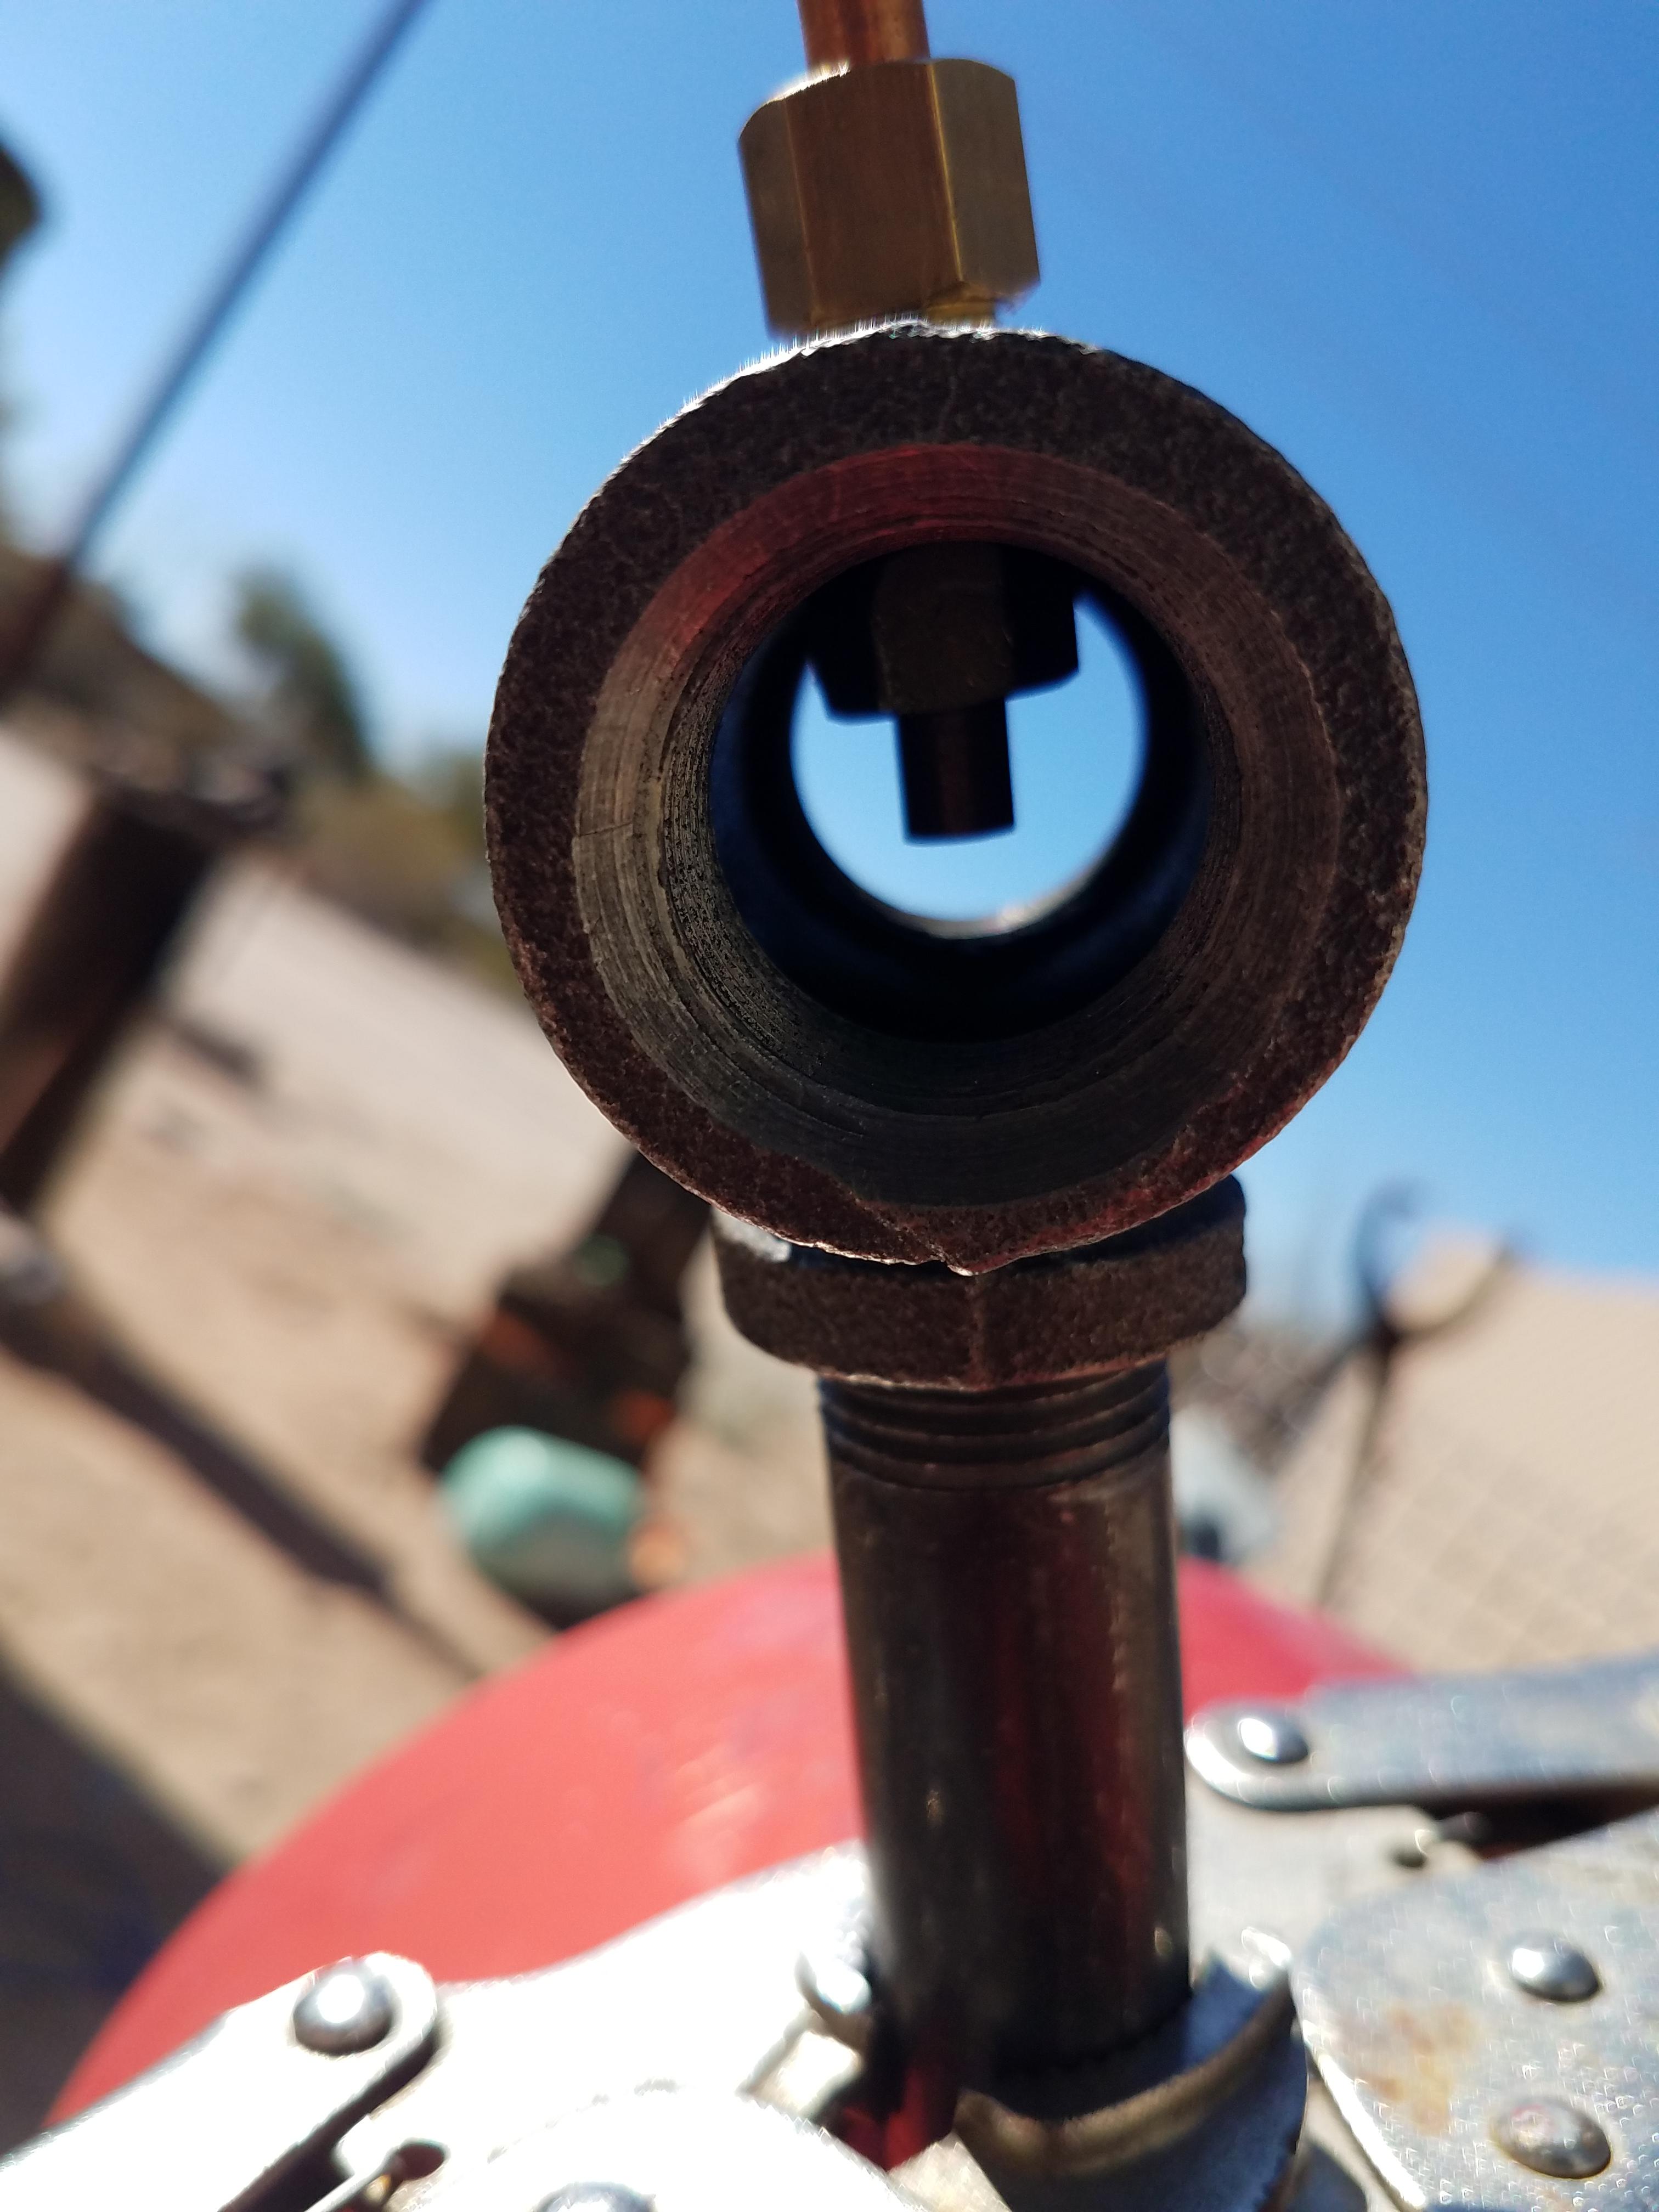
I have spent the last two or three hours looking through IFI and cant find a definitive answer to tuning. I fired up my TEE burner to fire the Rigidized wool insulation and cannot keep the burner lit unless I cover the air inlets almost completely. Completely closed at low pressure (1-3 psi) gives a gentle flame with no roar, open the air inlet up a little and it starts to roar. By turning the pressure up (I have a 0-40 psi regulator) to 40 psi I can open the air ports all the way and it will stay running. My tee is a 3/4 X 3/4 X 1/2 T, 4" nipple with a .024 mig tip If this is running too lean wouldn't shortening the mig tip cause more air to enter ultimately making it leaner? or should this issue be fixed by adding covers to the inlets and letting it run at low pressure? or a bigger mig tip? Tonight I will get some flame pics, its just too bright today to see the flame The refractory has not been put in yet, that will be tonight, this firing was just to dry and harden the rigidized wool
-
Yes there is, its the same size as the front opening That wont be a problem here in Az its 84 deg today and 54 at night I think I have a light that will work. Thanks for the ideas Bob
-
Hopefully I will get back on track with this forge build but I do have a quick question. After installing the wool and spraying with the rigidizer do I fire it with the burner or do I use a handheld torch? Thanks, Bob
-
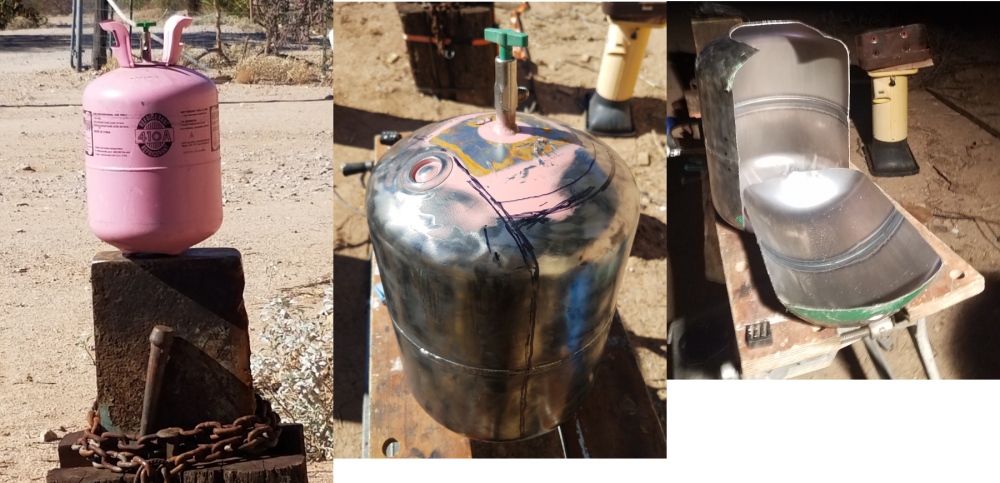
Well, I have finally been able to start, The tank was a freebie from an HVAC shop, its been wire brushed, marked and cut. I had my Jigsaw break with about 6 in to go and had to finish with a hacksaw. Now to wait for the refractory and Plistix from Wayne, the regulator and rigidizer from evilbay, and the ceramic wool from a local ceramics shop and this will hopefully be breathing fire by next week. If i'm right this should come out to about 175 cu in
-
Blacksmith Conference Question
CactusBob replied to CactusBob's topic in Arizona Artist Blacksmith Association
I guess that no matter what its like its worth a 20 min drive I hadn't thought of meeting the other smith's, That will definitely make the trip worthwhile. I'll have to look at getting some business cards before then Bob -
I see that the Az Artist Blacksmiths Assoc. is putting on Winterfest in Tucson, and since its less than 20 miles from my house I'm thinking of going. What is a blacksmith conference? Being extremely new to this I have no idea. Conference's I've been to thorough work are usually dry, boring, and you fight to stay awake. What really goes on at one of these conferences? Thanks, Bob
-
I was having an issue with sketchup trying to extrude a hole from a round surface. That was the easiest way to show the hole went thru. When I put this together the holder will be on the outside. Good catch tho, I didn't think it was that noticeable. Bob
-
I sent you an email earlier tonight, the only thing i can source locally is the ceramic blanket Bob
-
Roger Wilco Thanks again, Bob
-
Thanks for the info, so far I have the burner built, its a 1/2 Tee burner that followed most of Frosty's directions, now Im on to the forge and then I need to pick up the fuel delivery setup Bob
-
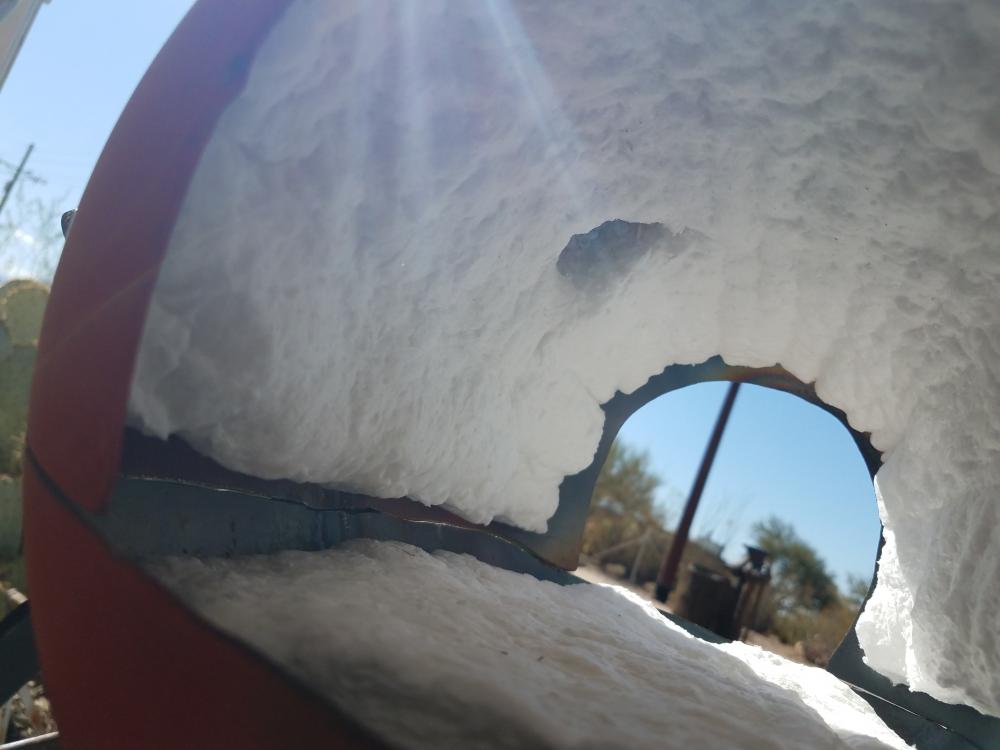
Wayne, Just to sanity check how I understand your plans I put this in Sketchup and did a cut away. Green is the shell Black is the burner holder / grey is hinges White is the insulation blanket and tan is the refractory Is that correct? I did get a little lazy and didnt model any screws or the stand Thanks Bob

-
Looking at your plans after eading the ceramic wool safety info I noticed that neither set actually called for rigidizer. Is that because all the wool is covered by the refractory clay? Bob
-
LOL, I remember one Easter we were at Church and it started to snow here, the natives Tucsonans didn't know what to do when we got about 4". Of course by the end of the day it was gone
-
When the Air Force took me out of New England and left me in Az I realized no one here knew what a snow shovel was. Here they are used for cleaning up after horses. I decided i decided I would stick around awhile.
-
Duh, I didn't think about riveting, when I started comparing the directions I kind of fixated on the welding and hadn't thought past that. Thanks for the reminder. Once I get home tonight I am going to sit down with paper copies of both plans and see which one I will have an easier time with. After reading alot on IFI i do realize I need one set of plans and I will and stick with that. Now to determine the one. Thomas even tho I'm only a few hundred miles from you , you can keep the low temps. were in the mid 60's today and hopefully warmer by this weekend Bob
-
I figured it out this morning and the gallon paint can would be about 24 cu in while the freon tank is about 150cu in. I have a freon tank and would have to buy the paint can so it looks like the freon tank won that one Ive looked at your plans and Ron Reil's plans and am trying to decide which one to go with. My biggest issue is welding, I dont have a welder and every person I have talked to in the last three months about doing some welding has flaked out on me at the last minute. Family , friends , you name it. looks like I'll end up hiring out the welding if needed. I am sure I'll be needing help somewhere along this so you will probably hear from me. Thank you Bob
-
Yes I was asking what size forge a 1/2" burner would heat. Its been a long day and I thought I wrote it the way I thought abouot it. LOL, next time I guess its think twice write once I'll have to measure the tank I have tomorrow or look at the size of a gallon paint can Thanks for the info, Bob
-
Looking through both Burners 101 and forges 101 I haven't found out what size is good for a 1/2 in burner, I did find the 350 cu in is good for a 3/4 in burner. Do you think that a freon forge or Paint can forge is the correct size? Bob
-
Once I have the regulator in hand I plan to. I just wanted to make sure I didnt go totaly off the rails with this. I dont want to build something that goes boom
-
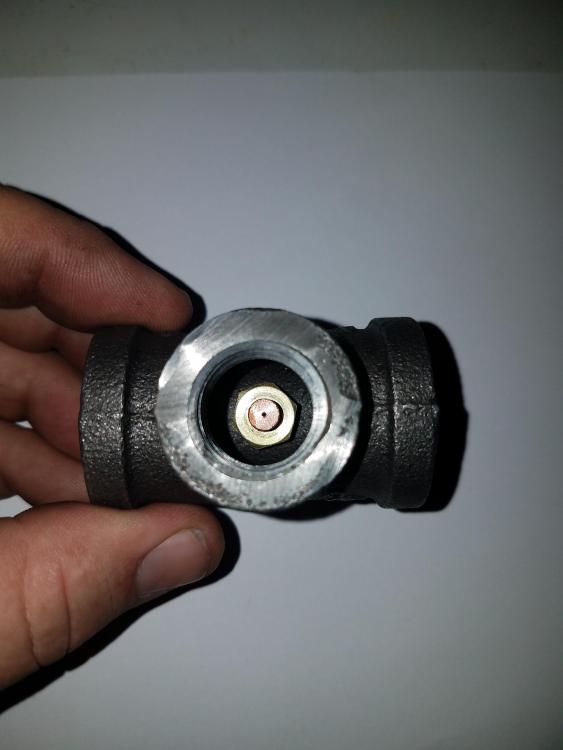
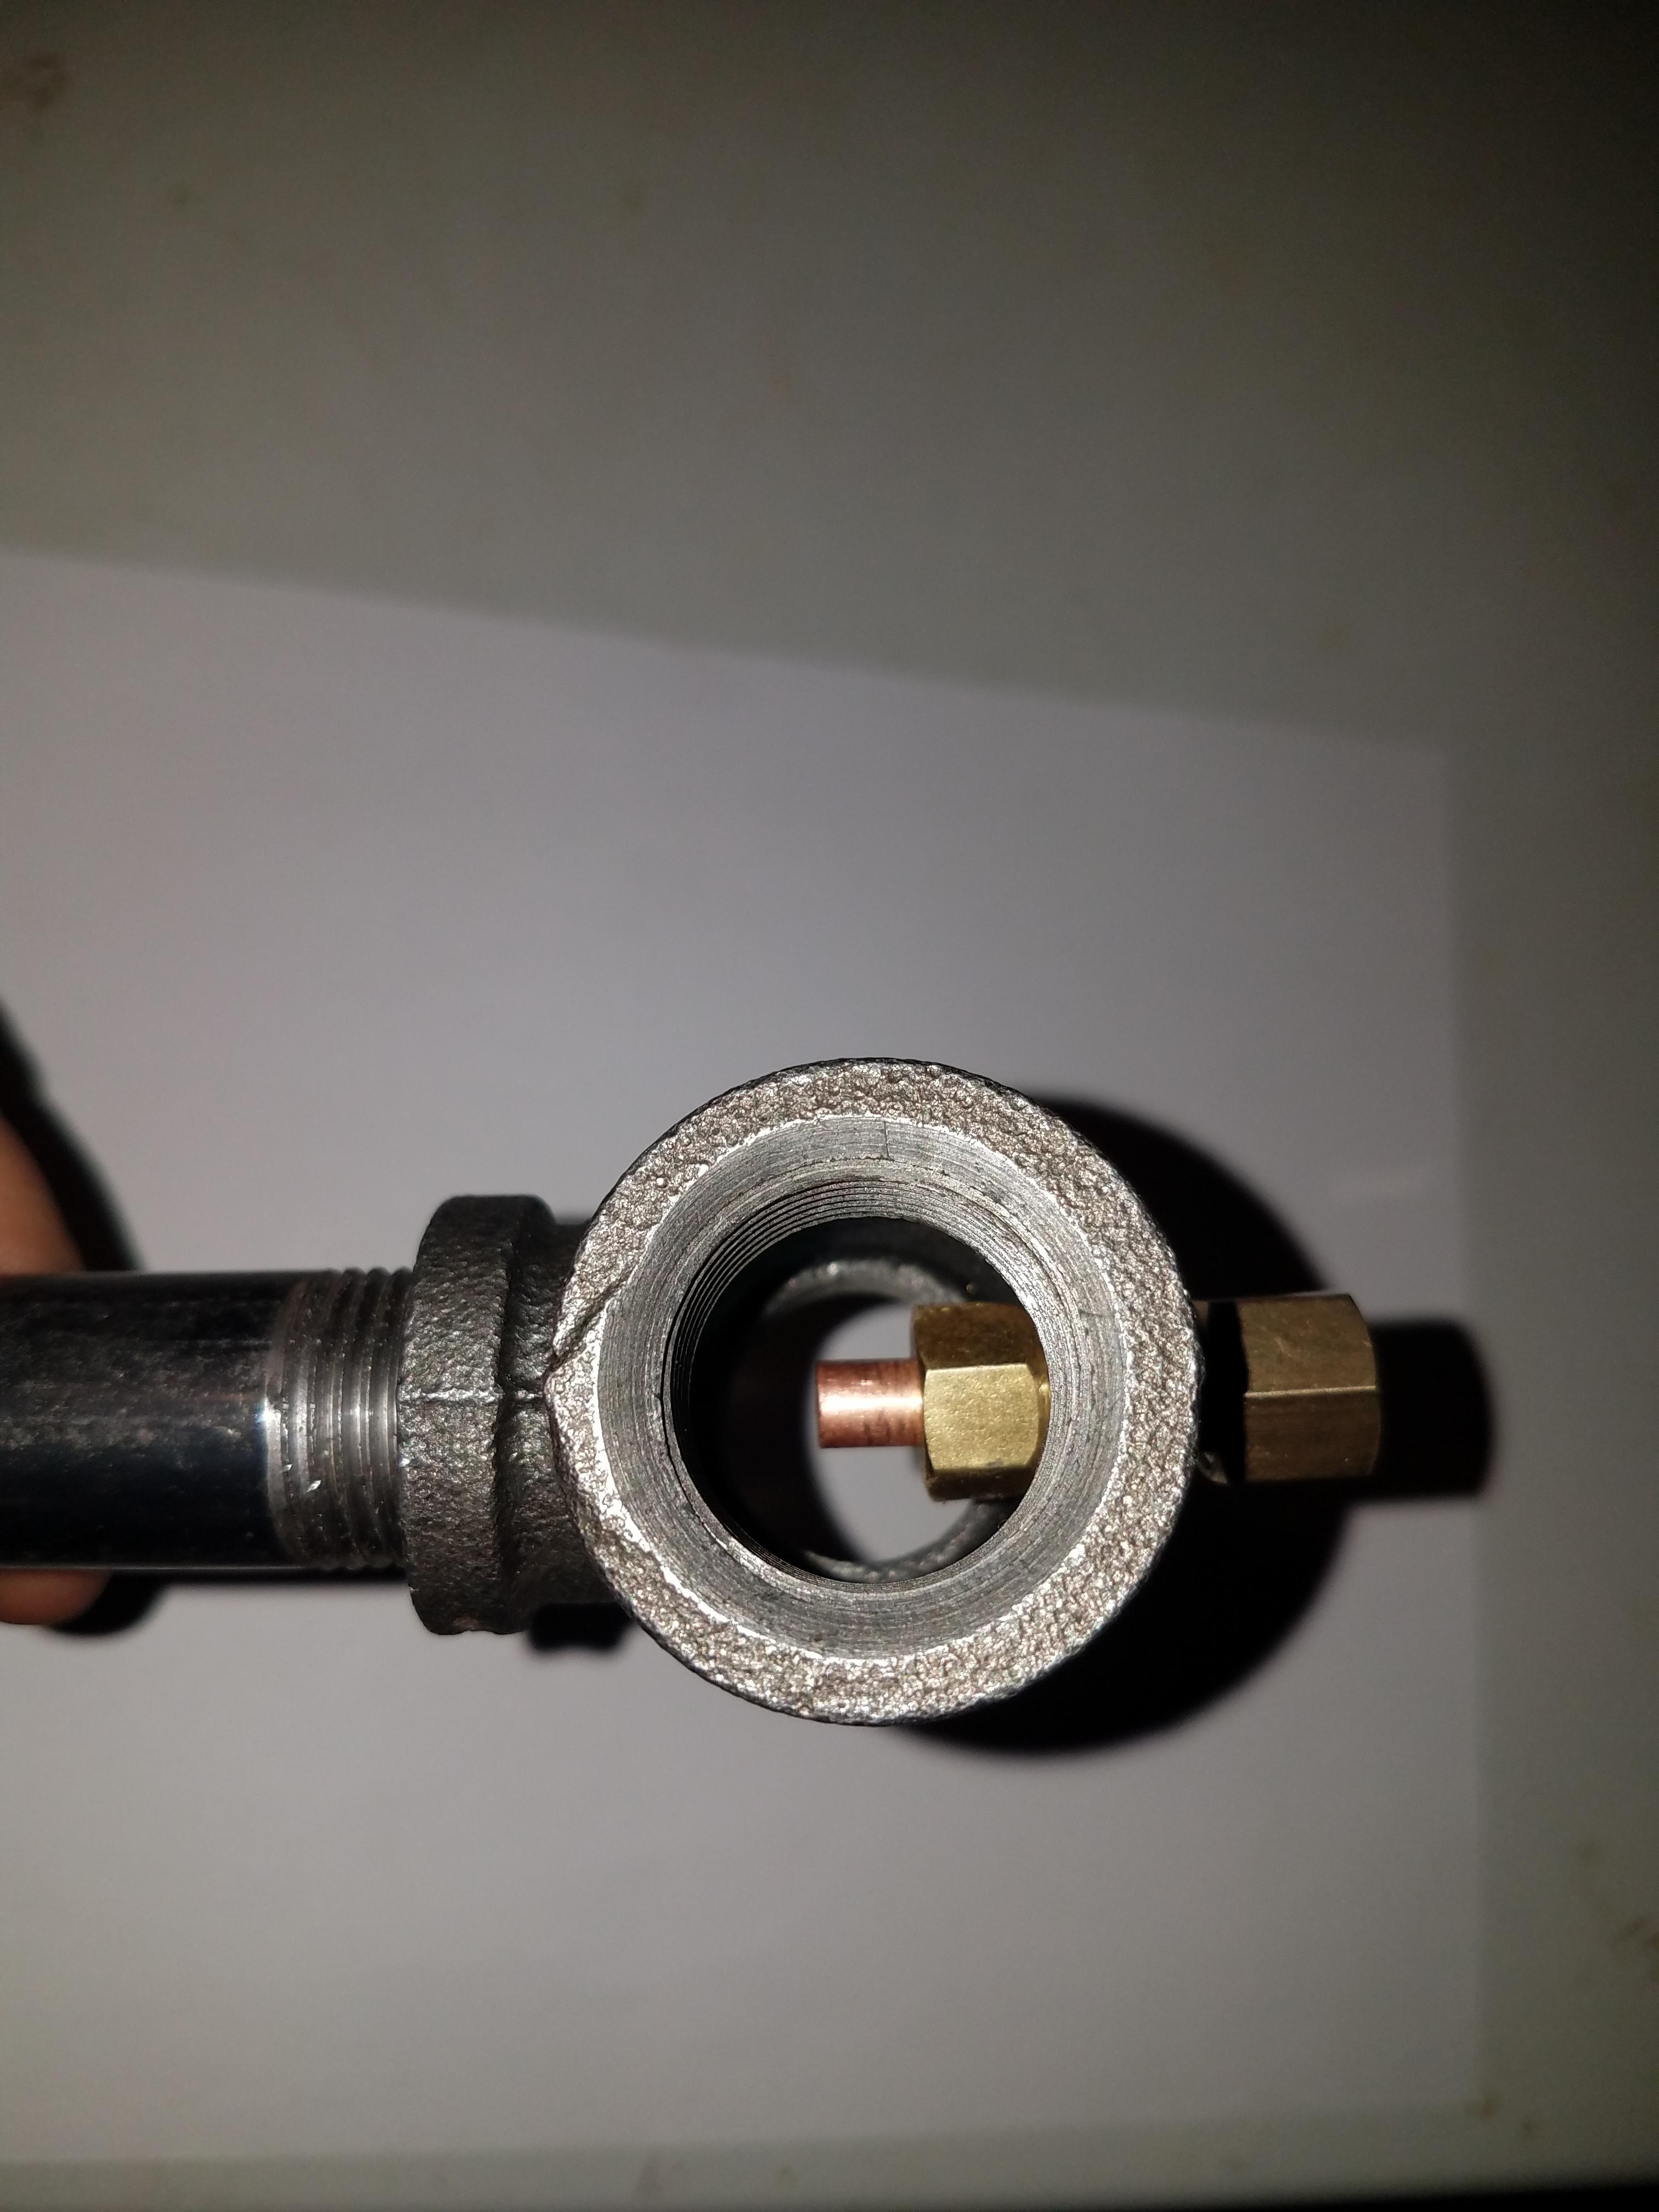
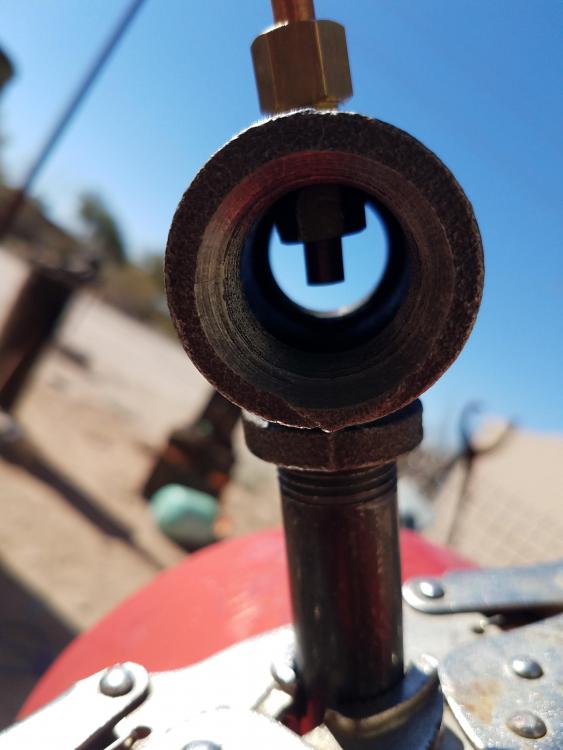
I am looking at building a propane forge setup and after a lot of reading I decided to Use a T Burner. The burner may not be the best place to start but I had most of the parts already. One thing I couldn't find was the tap for the mig tip so I came up with something a little different. Parts used 3/4 run X 1/2 chase Tee 4in nipple .024 mig tip 1/4 X 1/4 compression fitting I realized that the mig tip fit right into the compression fitting So I put it in and tightened it to compress the ring then disassembled it leaving the compression ring on the mig tip I drilled a hole the same size as the O.D. of the compression fitting in the Tee, thank you Frosty for the different ways to drill a tee straight. I put the fitting in from the outside and went crazy trying to thread the compression nut back in the inside. I did have to cut the compression nut back a little and crown it so it would fit tight and keep the whole thing straight. I marked the mig tip so it was about in the middle, disassembled, cut the tip and reassembled. My next step is getting a regulator and associated hoses and valves, is a 3-30 psi regulator good for this setup. I found a place that has a complete setup with regulators for about $70 So here's the question, did I set myself up for failure or disaster in any way or should this work? Bob