

CactusBob
-
Posts
55 -
Joined
-
Last visited
Content Type
Profiles
Forums
Articles
Gallery
Downloads
Events
Posts posted by CactusBob
-
-
this last one I used a small drill bit to ensure everything was lined up, my center punch is to big for the chuck of my drill press also I made sure that the table was low enough to change bits with out moving it. I think I cut to much off the tip giving me the flames in the last pic so I have another one that I will cut smaller sections off. Thanks for all you guys help
Bob
-
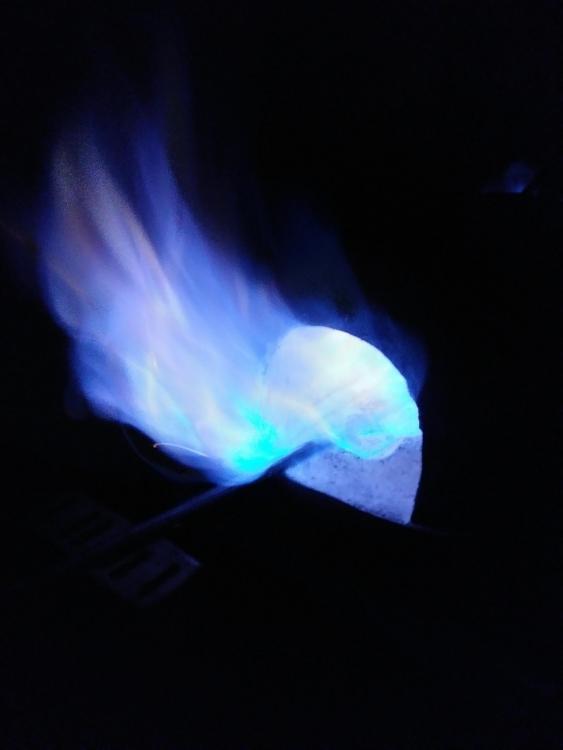
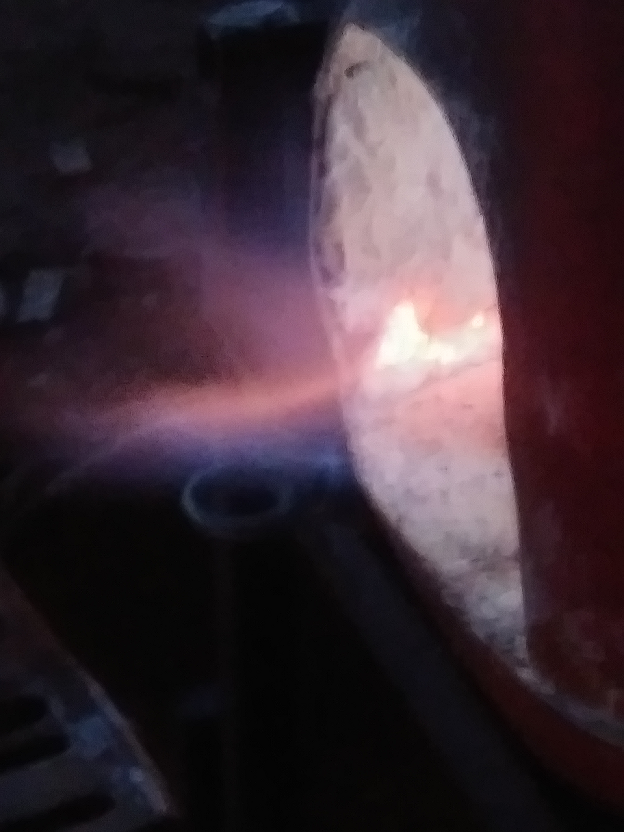
So tonight I was able to fire up the forge again. With the full length mig tip the flame was about 2 to 4 inches from the end of the tube, until the forge heated up then it pulled back to the edge of the tube. It was also pulsing pretty bad. I cut the tip back some and it seemed to smooth out.
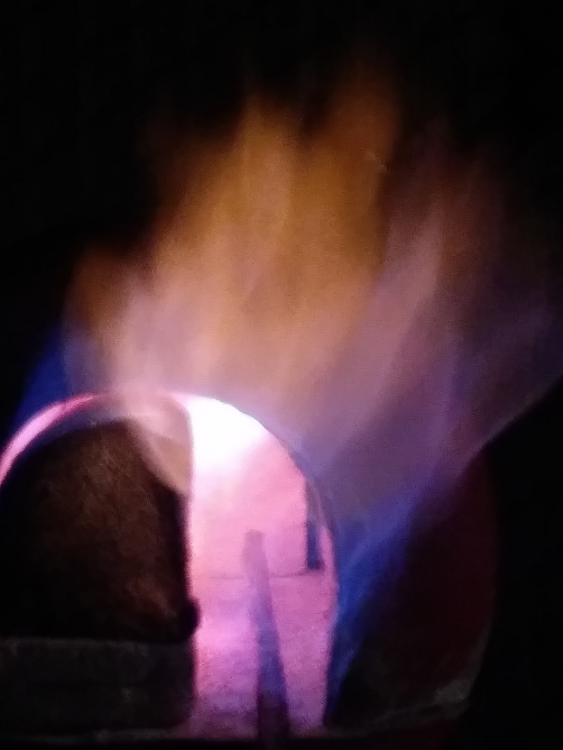
Here is where I cut the mig tip and the resulting flame and dragons breath, the dragons breath is not anywhere near as much as it was before,
Did I cut to much off the mig tip, or should I go up to a bigger one, a piece of rebar came out of the forge with rust so I am guessing this is to lean and oxidizing really bad?
Any ideas or suggestions are very welcome and very much appreciated
Bob
-
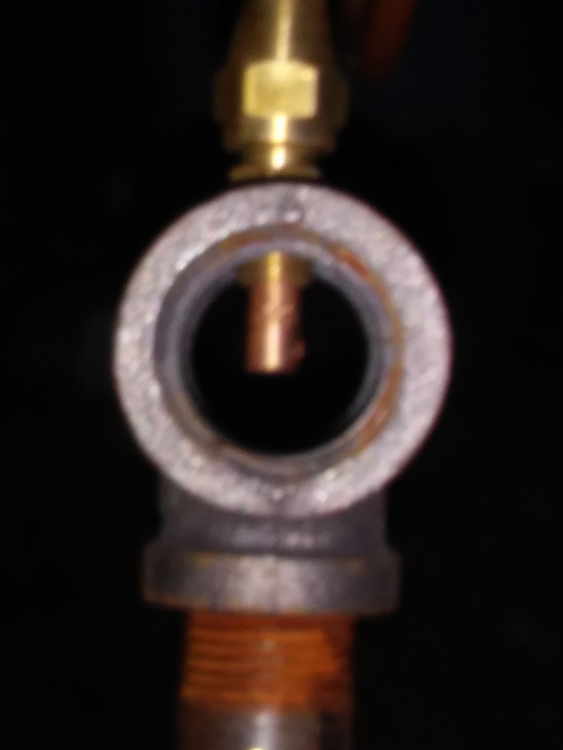
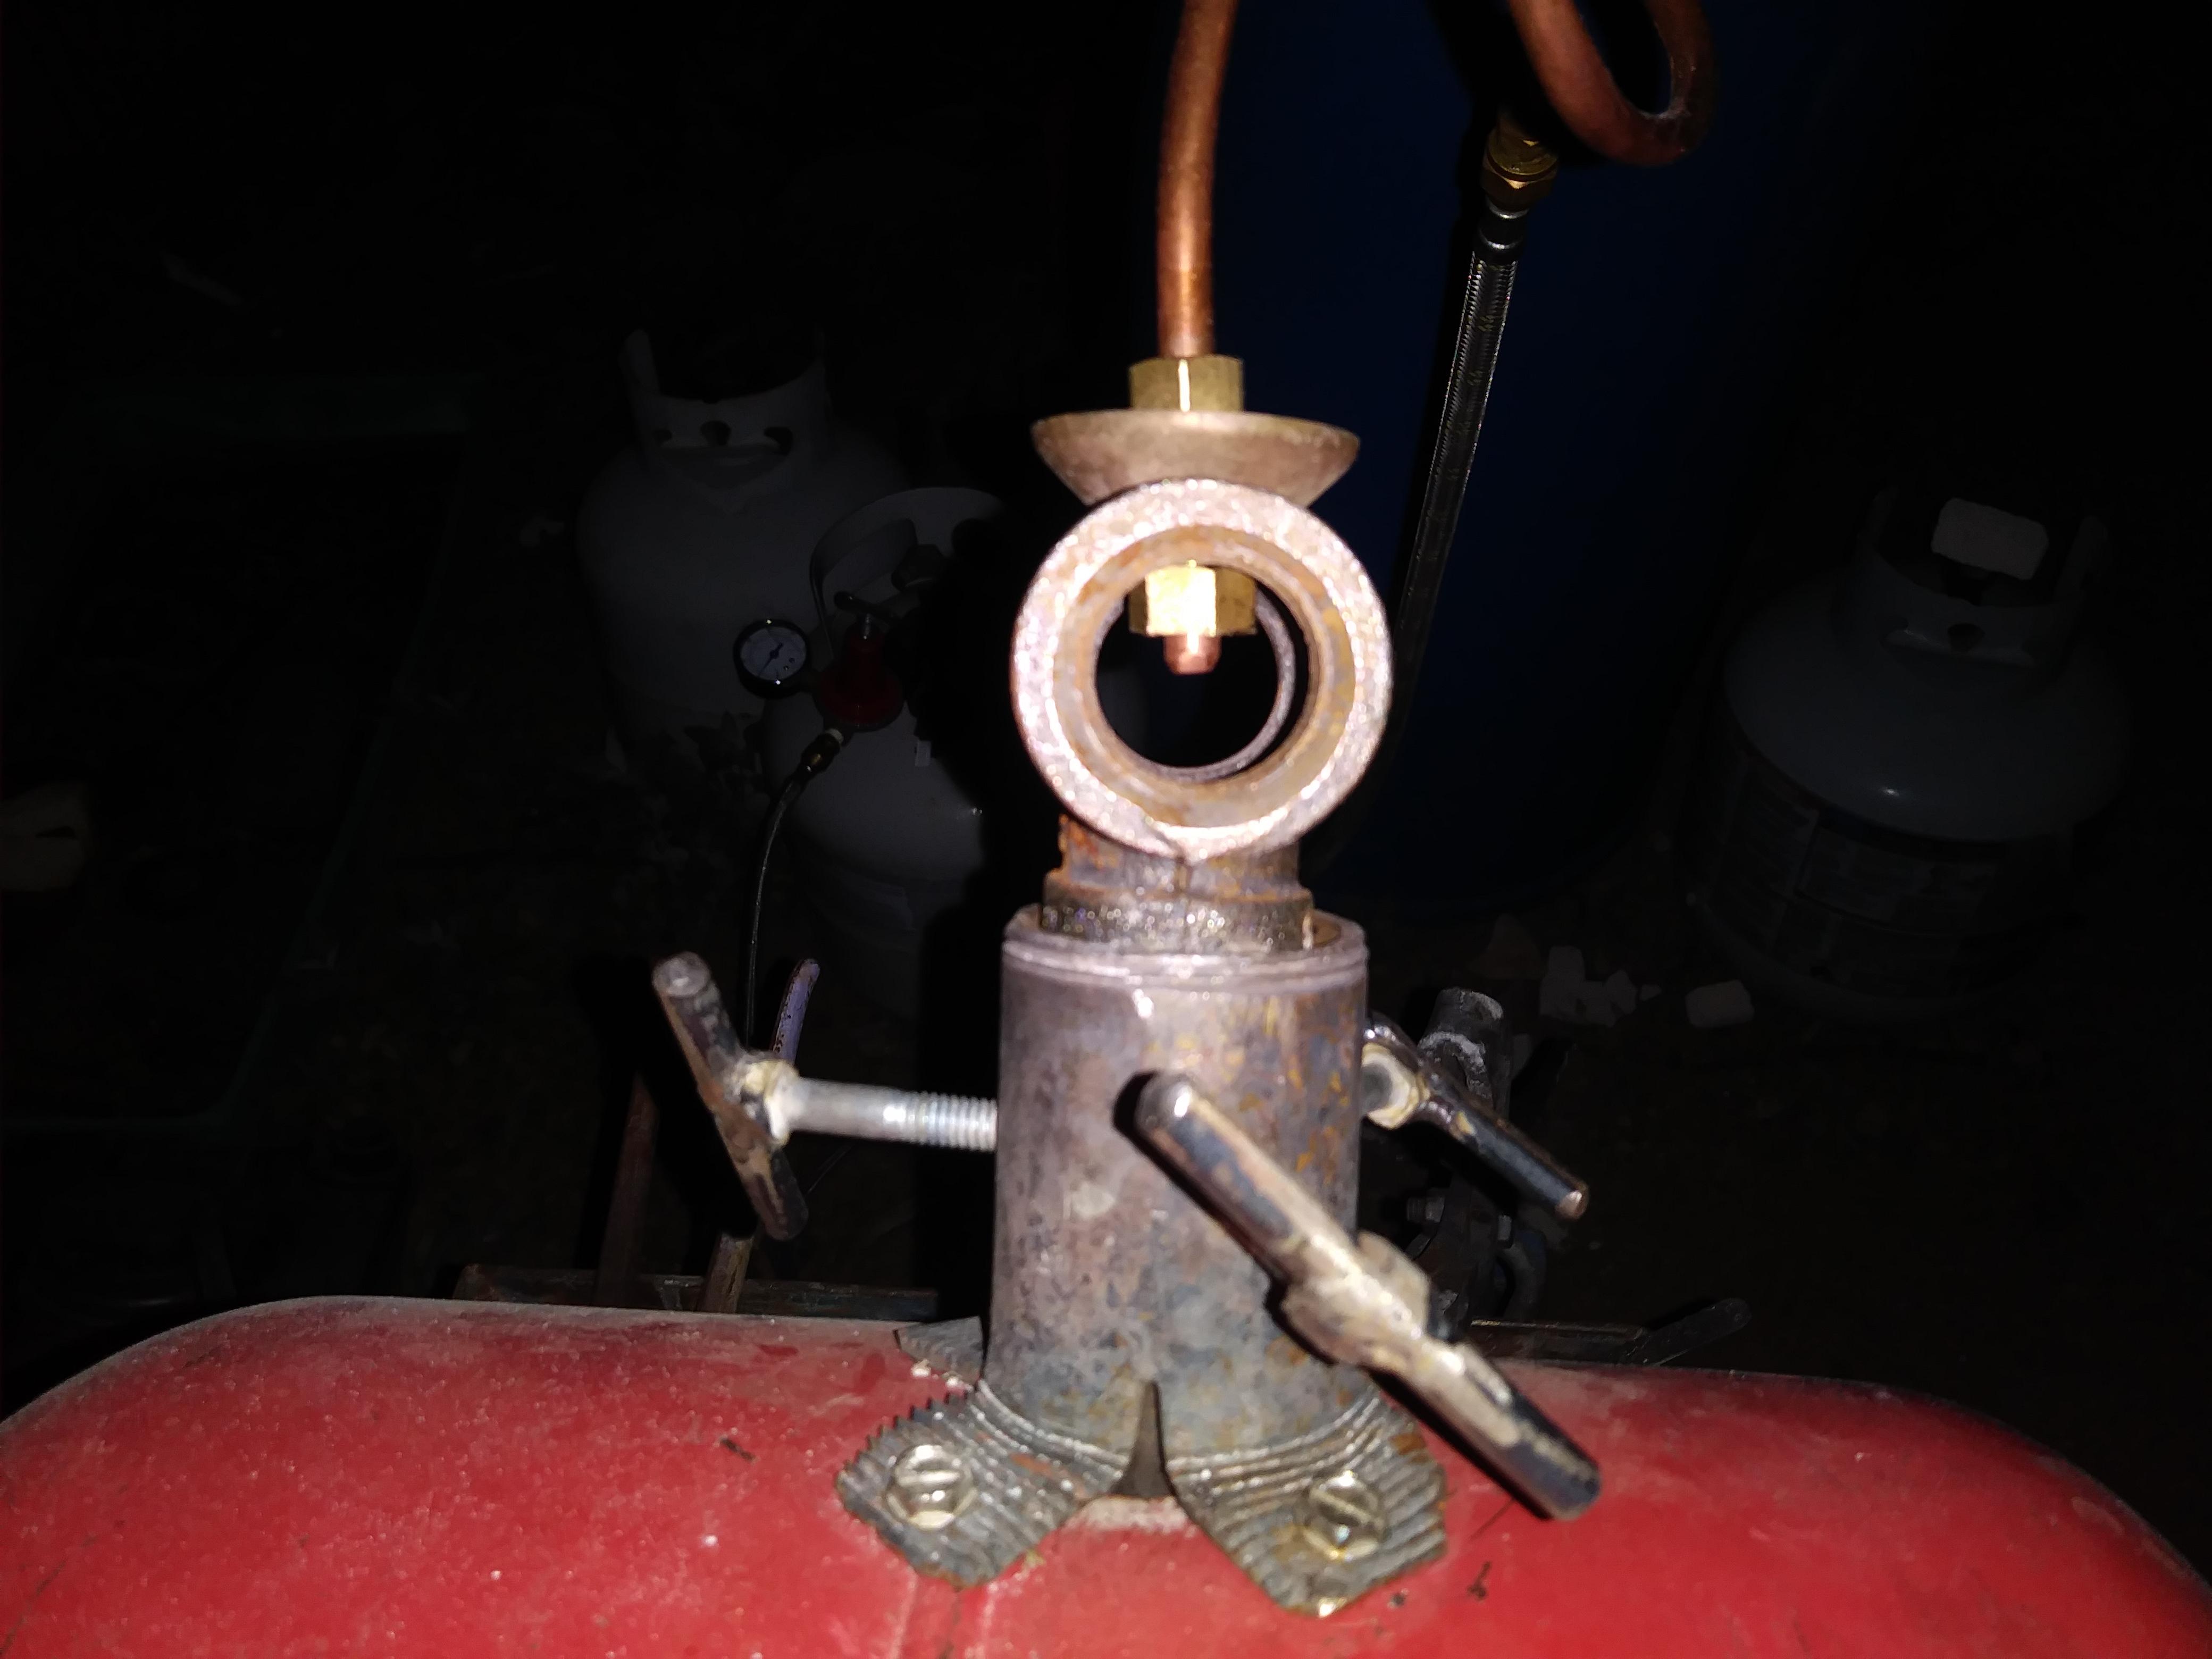
OK, so after a few hectic days I was able to get a new TEE and get it drilled and tapped, it looks extremely close to center, at least better than the last ones. The last pic is of the flame with
the full length mig tip. Now that I am at the point of cutting the tip, what should I be looking at for the flame? One thing I did notice is the flame changes and the roar changes with how far the nipple end is in the forge shell. I currently have it about a 1/4" inside the shell, does that seem right?
recap
3/4 run X 1/2 Chase tee, .023 mig tip, 41/2" nipple
Thanks for the help
Bob


-
Thanks for the input, life has jumped in the way the last couple days. I will pick up a new tee and pay better attention to lining it up both ways this time and setup a new mug tip. I found my tip files so that should be good. I am slowly learning how much I don't know. Thank you guys for all your help
Bob
-
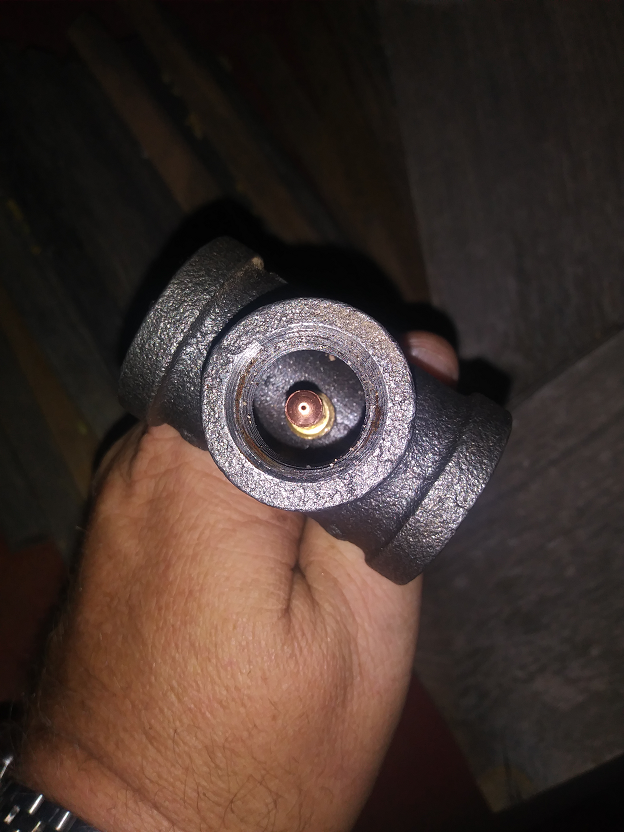
You have a very good eye, I just came back in from looking at it and yes it is off, I didn't notice until I put a new mig tip in it and although it is even across the width of the tee it is off on the length by about 1/2 a mig tip, so yes a new tee is in my future, along with a better ruler or getting my eyes calibrated. I'm not quite sure how I was off on that direction. The pic trys to show what I mean, if it makes sense.
I did put the 4 1/2 nipple in and with a new mig tip and even though it was off it was getting hotter than it had before. I also moved the tube closer to the edge of the shell and it started roaring more than it had been, enough so the roar covered the sound of air going in the tube. I will try to post the pictures tomorrow after I get them off my phone.
Thanks again for your help
Bob

-
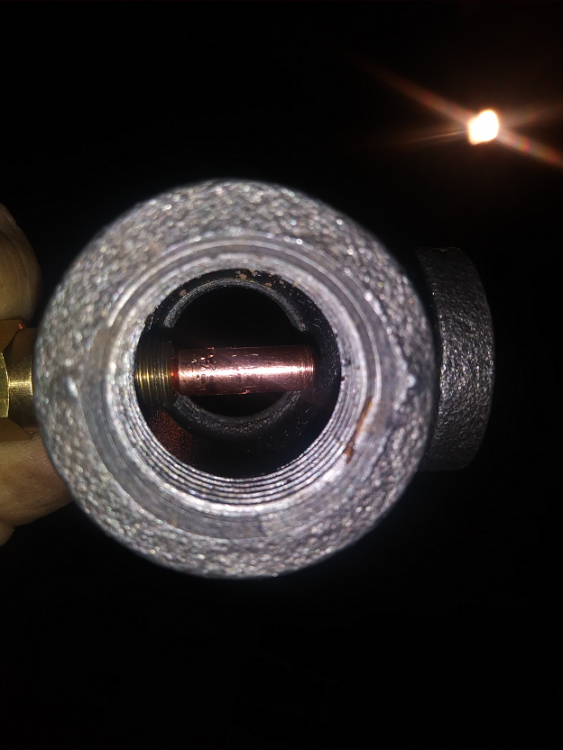
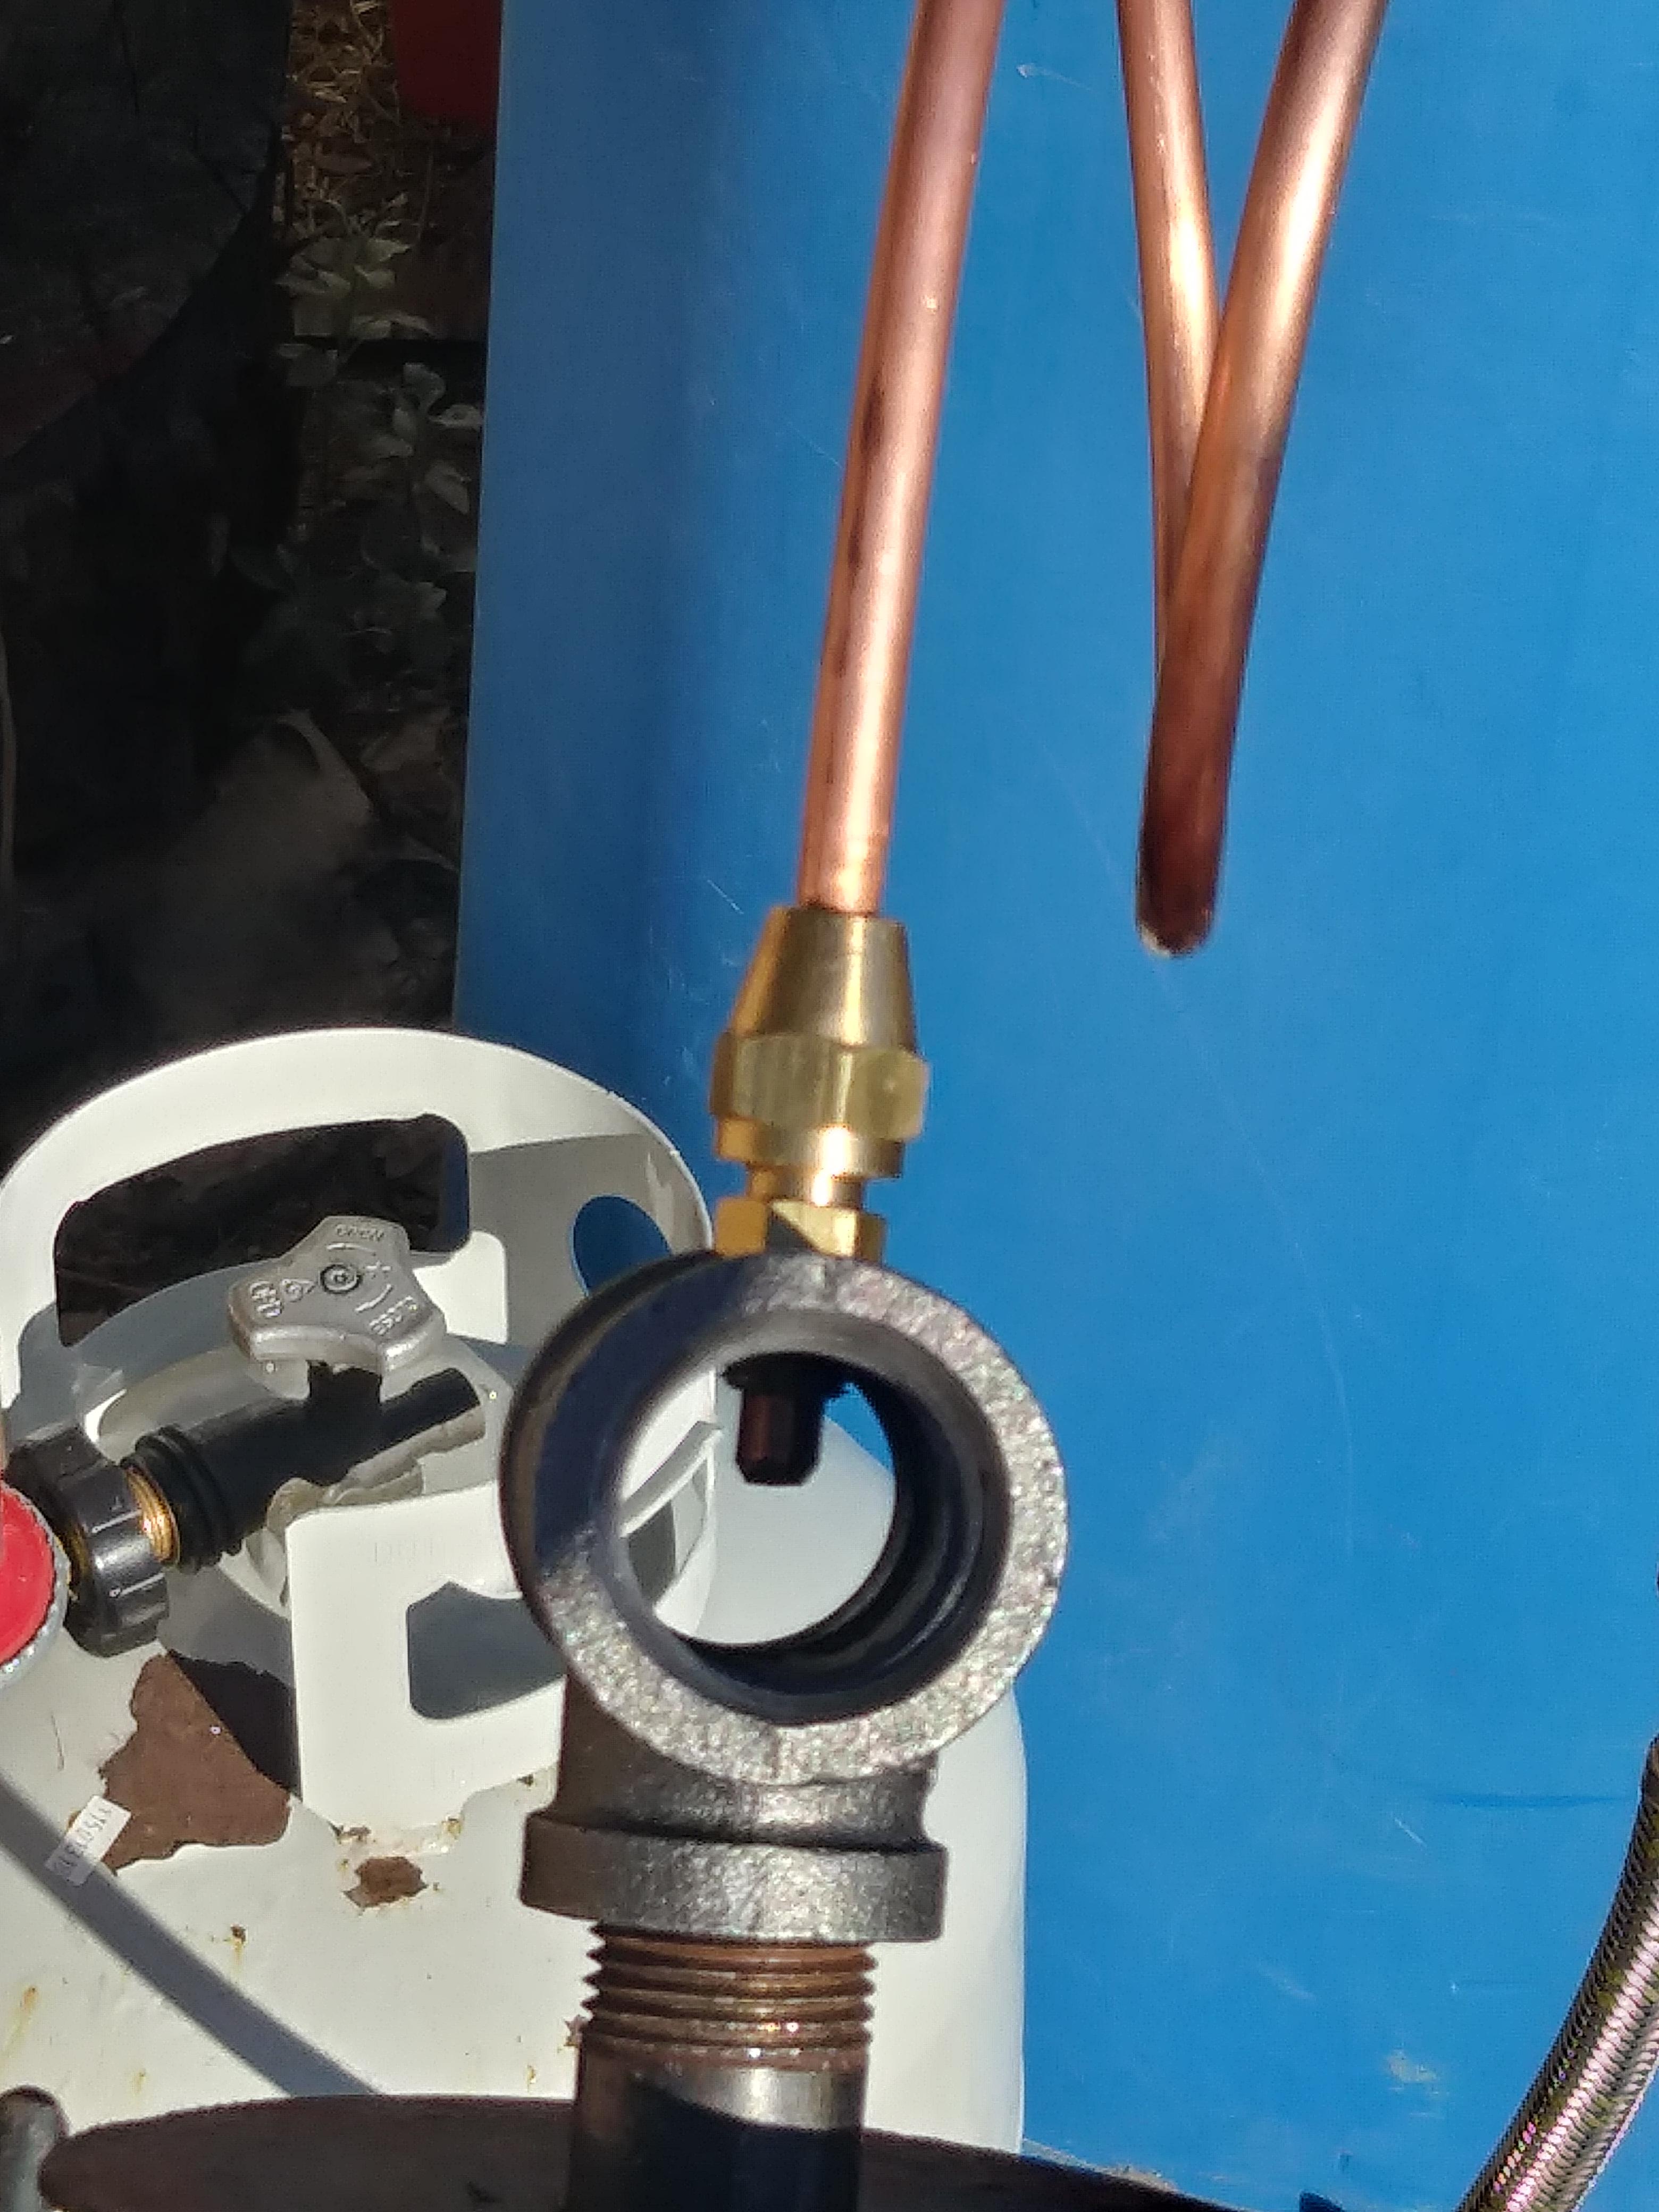
I have a 4.5 in tube so that is, as Mikey said an easy fix. This one was drilled connected to a floor flange clamped to my drill press table for the drilling and tapping. I screwed the tee off and put the 1/8 mpt fitting in upside down to thread that as well, does this one look off as well? Also is there something else I could do to get it straighter?
There are small gaps between the burner mount and shell from where I cut the pipe and bent it out and screwed it to the shell, should those be sealed?
I have a package of mig tips so if this one needs to be longer then that is also an easy fix.
The encouragement, help and advice from you folks is more than enough to keep me going.
Thank you for your help
Bob
-
I will check the flame tonight and see if I can tell where it is. Where should it be, hanging right at the end of the tube?
There is nothing stopping the airflow unless its the exhaust from the forge? Maybe?
Should there be a lip from where the tube is cut or should that be smoothed out?
Thanks
Bob
-
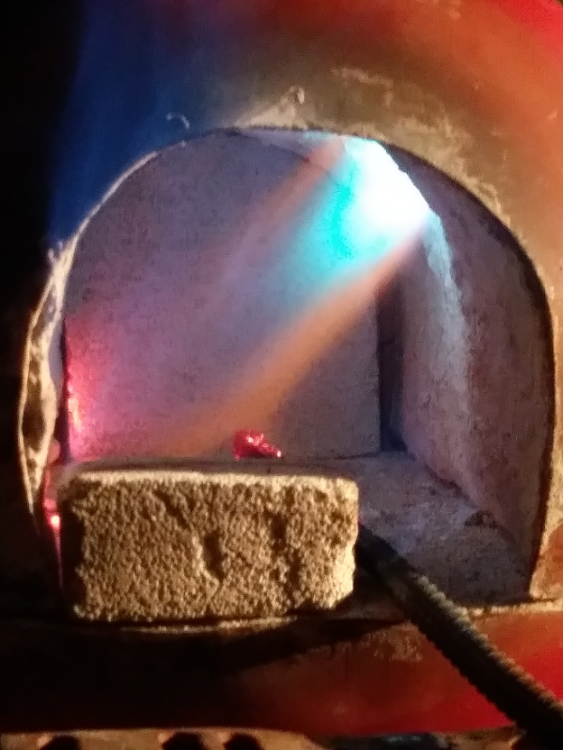
I was able to get some pictures of the forge running
here are two shots of it running at about 5psi or so this was shortly after lighting

and
This is about 10 psi
Here is two short videos the first at 5 psi and the second at 10 psi
I am still only getting to an orange heat, I can go from cold 3/8 rebar to orange in about 5 min but it doesn't get hotter
Burner is 3/4r X 1/2C reducing tee, .023 mig tip (the new ones I just bought but haven't used say .024) 1/2 X 4in nipple set so the end is just inside the forge shell. The back of the forge is mostly closed with an insulating firebrick.
Hopefully this is an simple fix, I would like to get to welding temps if possible
Bob
-
I picked up a new 3/4r X 1/wc tee today along with the new parts to rebuild the jet. I will have to wait on pics until tonight. I'm also getting some new mug tips so I can change that if necessary. The hole and threads for the brass fitting and mug tip were done while on the drill press. I don't know if I can get them straighter. Here's how it looks.its a lousy pic, I will try to get a better one later. The forge is still only heating to orange
Bob

-
I will double check the axis of the tip, I thought this one was straight, it is a lousy picture. I will pick up another tee tomorrow and fire up the drill press
the tee is a 3/4 run by 1/2" chase and has a 4 1/2" nipple. It is sitting so its about 1/2 to 1" from the inside of the burn chamber. Should this be pulled back further?
-
.23 fourney mig tip
-
Its been a few months since I have been able to run my Freon tank forge. With temps over 100 and an outdoor work area with no shade, its just no fun. The burner is a 1/2 in TEE with the flame looking like the pic. I had a 3/8ths piece of rebar that would only get to an orange heat after 15 to 20 min at about 10-15 psi. The back of the forge is almost closed and its about 150-200 cu in. Does this just need the tip shortened a little more, or did I go to far? Or could it be something else entirely?

-
If your looking for Kastolite lookup Wayne Coe here on IFI, he sells small quantities for a decent price at his website
-
When we had horses I can only wish I had farriers like you guys. We had one fairly good one that after 2 or 3 years just said sorry cant do em' any more and that was it. Another husband and wife team trimmed one of them up because we didn't ride at the time so no shoes, made an appointment for 6 weeks and when they left I found an engraved hoof pick, called them and left messages so they could get it but never heard from them again. The worst was my wife asked me to watch one of the guys we had come in to trim that had a bad attitude he got pissed when my wife's horse pulled his foot off the stand and went to hit the horse in the belly with his hammer. I stopped him and explained that he could leave the property and if he returned I would drop my hammer on him. It wasn't like he tried to kick the guy, step on him or anything, he took his foot off and put in on the ground. A good farrier is a god send, one that knows how to put shoes on is even better
Bob
-
If you watch Craigslist there is someone in Sun City that seems to get a bunch vises and tools and sells them off once in a while,. Every time I go to my sisters house (also in Peoria) I forget to go check him out. Look into the Az Artists Blacksmiths Association. They have a bunch of members in Phoenix area
Bob
-
7 hours ago, Buzzkill said:
Pictures of the flame burning inside the forge would give us more information to work with.
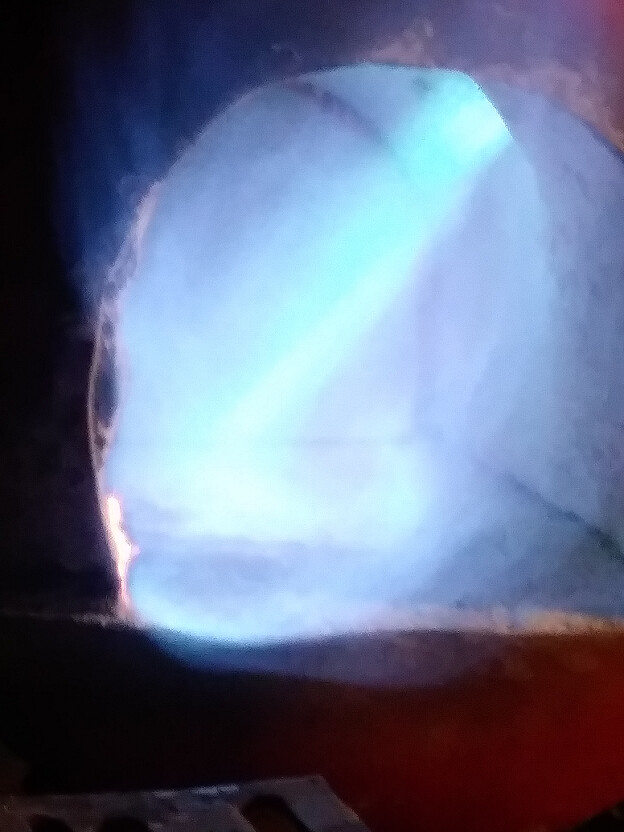
Here's a couple of the pics looking in the forge, I believe it was running about 10 psi at this time. It seemed to take awhile to heat a piece of scrap steel. I will have to time it this week and see how long it actually takes
Bob
-
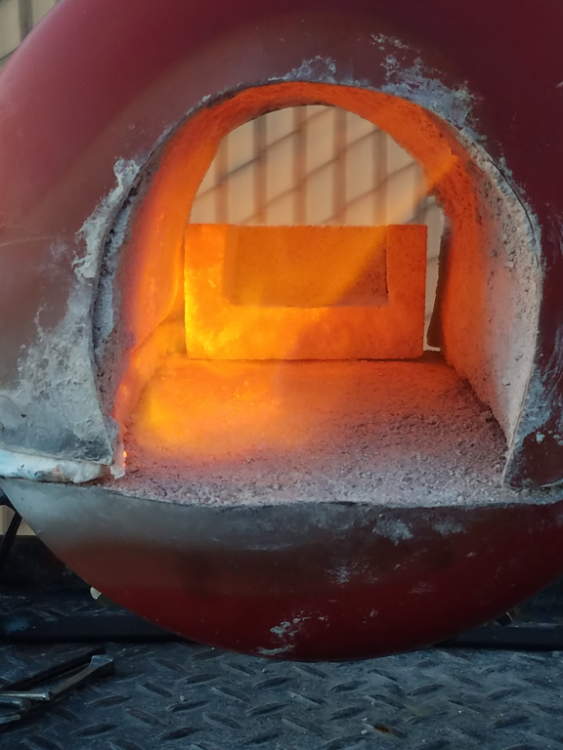
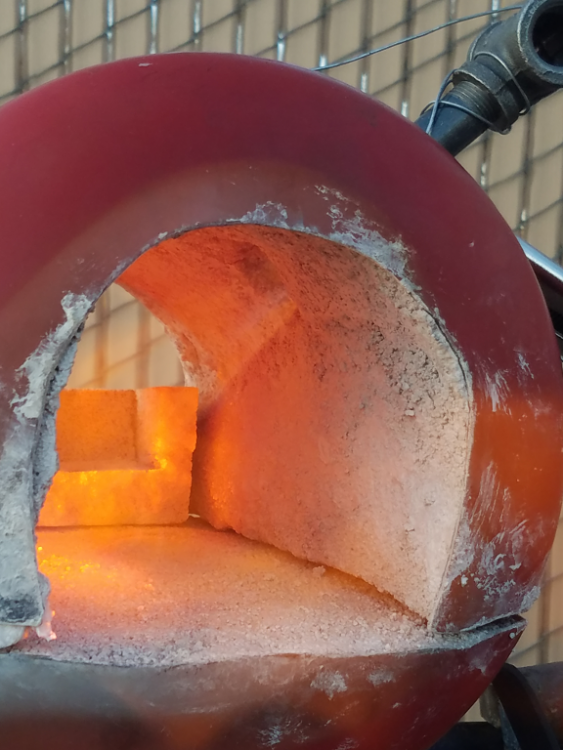
I finally have the refractory in and cured, it sat about a week before I could get back to it, ran it through a few cycles of getting hotter and letting it cool down. Yesterday I fired it and let it run for about 30-40 minutes. After lighting I noticed it started purring at about 5 psi and was definitely roaring at 10 psi, 20 was a fire breathing dragon that was not a happy camper
 , definitely a roar. Here are flame pictures at 5 and 10 psi and right after shutdown. I have to puit the IR coating on and finish the burner holder. Does this look like its running right or is more tuning required
-
On 2/17/2018 at 9:09 PM, bigb said:
My plan is to use a section of 1/4" steel utility pole (it wasn't me Cactus Bob!)
LOL!! I know, mine were wood
23 hours ago, bigb said:If you called the police where I live to report anything less than assault, armed robbery or murder they don't even show up. Phone or internet report only.
Are you in Southern Az sounds just like TPD?
-
14 minutes ago, wd&mlteach said:
I have locks on windows and doors, but locks only keep honest people, honest.
No kidding, Last week I had someone, ( a neighbor no less) come onto my property while we were gone and steal 6 utility poles I had stacked up. Even to include cutting three of them with a chain saw to fit on their trailer. Since my anvil is outdoors I will be definitely watching this thread for ideas
Bob
-
On 2/16/2018 at 7:11 AM, Buzzkill said:
Your buried pole could provide the stability you need while a sturdy leg could transfer the shock of the hammer blows to the ground rather than creating shear force on the mounting bracket.
When I was at the scrap yard I found a piece of 2 or 2 1/2 in angle iron just waiting for me so that will be the leg, Thanks for the idea
On 2/16/2018 at 7:58 AM, ThomasPowers said:Really looks like a piece of tooling for a treadle hammer to me---If you have one with the hardy hole option...
Do up a nice one for show and then sell the "blanks" at a conference!
Being so new I will have to try to get a usable one first before I can try to get a nice one, that and get a whole lot of experience.
") 4 minutes ago, VaughnT said:
4 minutes ago, VaughnT said:Being outside in the dirt isn't an issue. What we're worried about is overall usability/function. Putting it high, you're limited to using a handheld hammer or standing on an unstable box to get the height needed for sledge work. If you put it on a different support beam like you see most striking anvils, you'll still be able to do light work with a hand hammer, but it'll also be better for hammering with a sledge.
Going through all the work to make this, it seems wrong to short change yourself. Drifting thick stock can benefit from using a sledge. And if you ever decide you want to do something bigger, like make your own bottom swages, having the piece down at sledge height makes a big difference.
The smaller holes for under 3/8" won't get used much, if at all. They'll be handy for that once-in-a-blue-moon thing, but it's not a big priority.
It's all about planning ahead. Right now, maybe all you envision is using it to open the eye on a bottle opener. That's cool. It'd certainly be great for that. But what about next month when you decide you really want to drift open an eye on a thick bar.... just for giggles?
What I am learning to love about this site is the ideas and people helping you stop and think, trying to think how I could utilize this for the best of both, drifting and striking, means it probably wouldn't be great at either. Then I remembered what I said earlier, "the scrap yard has more of these". I may just pick up a second one to make it a striking height, so when that need or desire comes I will have it and leave the first solidly mounted. Nobody ever said you can only have one tool did they? Plus it will help me learn to weld
Thanks,
Bob
-
1 hour ago, caotropheus said:
Either design of the block is OK. From my point of view, the way you plan the support, makes it a bit flimsy. I think you need a support the type of a anvil or striking anvil stand. Three legged support or on top of a I beam like VaughnT said or on top of thick wall pipe... The idea is to have a support that will transfer energy of the impact directly into the floor. Not a support energy will be transferred sideways, creates a shearing force that cause side support failure.
Unfortunately my "shop" area is outside in the dirt. A three legged support or I beam would just be pounded into the ground. The top few inches are sandy and after that it starts to harden with caleche in places. The post my vise is on is already buried about 3ft deep. I was thinking that cutting the support on an angle would help transfer the load into the pole since all of this will be welded together. Is there another way to transfer the energy into the post. I'm running out of good places to bury posts

-
1 hour ago, metalmangeler said:
For sledge work lower would be better.
With this I'm looking at more of drifting and cutting
1 hour ago, MC Hammer said:Nice find, can think of a lot of good uses for it.
Please, lets hear them. The scrap yard I go to has more of these in different sizes
Thansk for the input
Bob
-
So I moved the holes away from the edge, not sure why I did that to begin with and I'm not sure I like them like this either. What I do like is changing the Support to 1/2 plate, the two 1/2" holes behind the square hole would be good for pins to a bending fork. The larger hole I tried to keep closer to the center for the support. I was thinking of using this for drifting and also something that could also hold Hardy tools like hot cuts.
The height will end up roughly a little bit higher than my anvil and this will be welded to the bracket and bolted to the top of the post, hopefully it wont move
Thanks for your ideas
Bob
-
32 minutes ago, caotropheus said:
I think you need a more sturdy support for your construction.
10 minutes ago, VaughnT said:The 1/4" support would die a quick death if you did any serious hammering on it. Plenty good enough for 1/2" and smaller, but if you tried upsetting a swage or the like, I'd expect it to buckle real quick. In an application like this, mass is your friend.
How big of a support do you think it should have? The one drawn is 6 in deep X 6in wide cut on an angle to try to put the force into the pole. The pole is a telephone pole offcut about 14 in in dia X 6 ft long. 3 feet of that is buried. Do you know how I could make it stronger without widening the support. The wider that is the less room I have for holes. Unless I try to make a rivet header out of the closed ones...hmmm.
5/8 or maybe 3/4 is the largest I can see putting on this and that will most likely be in the future if at all, I'm just starting at blacksmithing, i'll wait to forge the Golden Gate until I have a year or 40 of experience


Reloc back to New England
in New England Blacksmiths Assoc.
Posted
After 40 years of being gone I have moved back to New England and trying to get my workshop set back up. Unfortunately some stuff was left in Az including the 4X10X23 in plate steel I was using as an anvil. Does anyone know of a scrap yard in New England that will sell to the public. I have not been able to find one yet that will sell scrap, they will only buy. I do miss Tucson Iron & Steel, I could get all kinds of steel there.
Hopefully someone knows of a place, near Manchester NH would be best, but if I have to travel a bit so be it. I have heard Cohens up in Concord has cutoffs but haven't made it there yet.
Thanks in advance
Bob