rocketman_k
-
Posts
20 -
Joined
-
Last visited
Content Type
Profiles
Forums
Articles
Gallery
Downloads
Events
Everything posted by rocketman_k
-
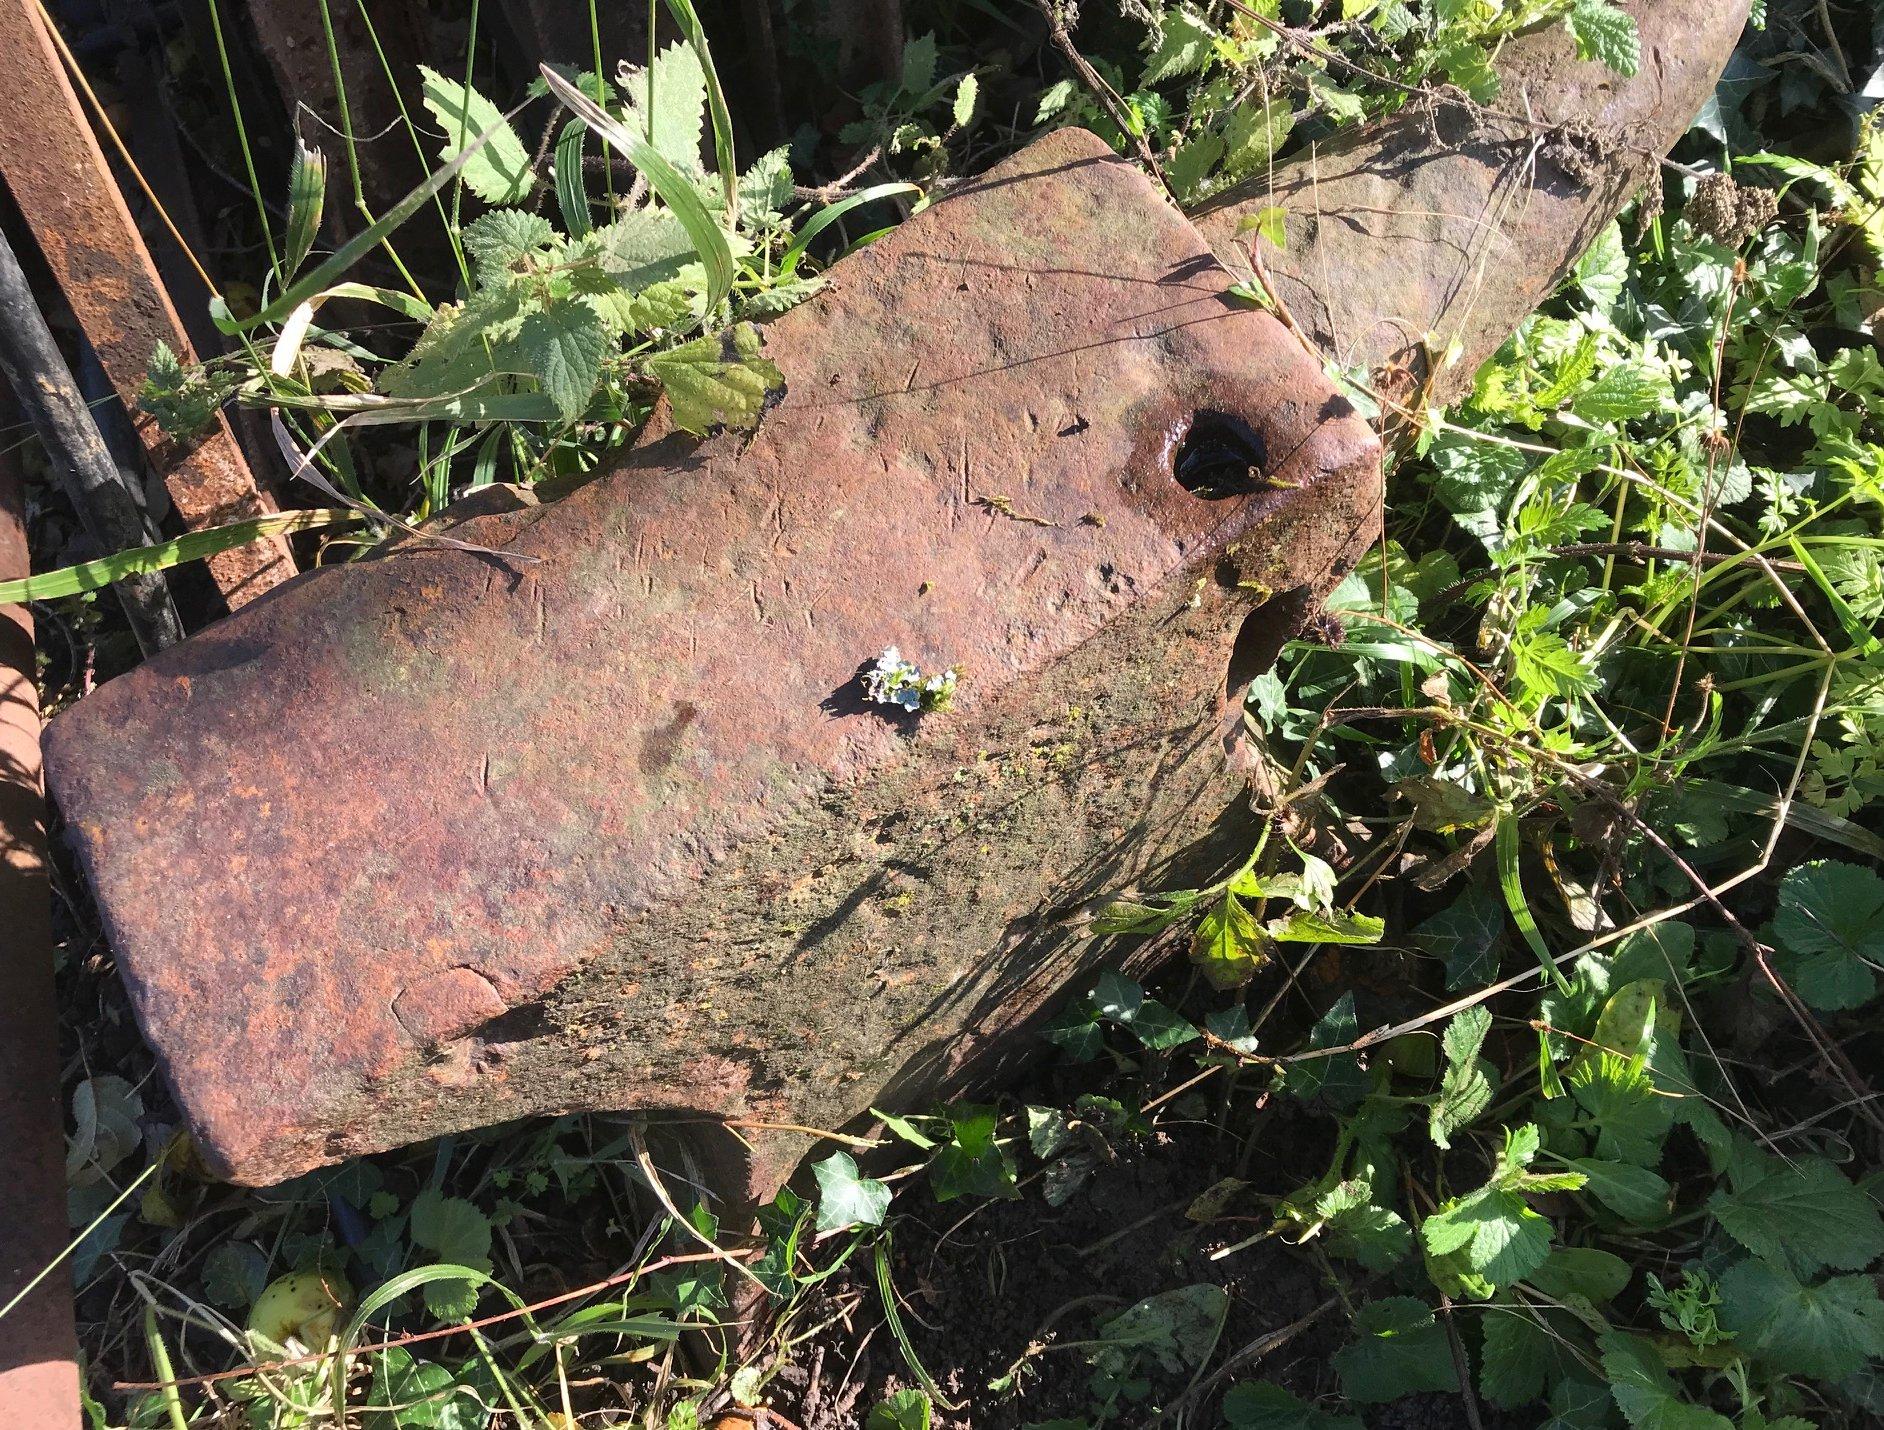
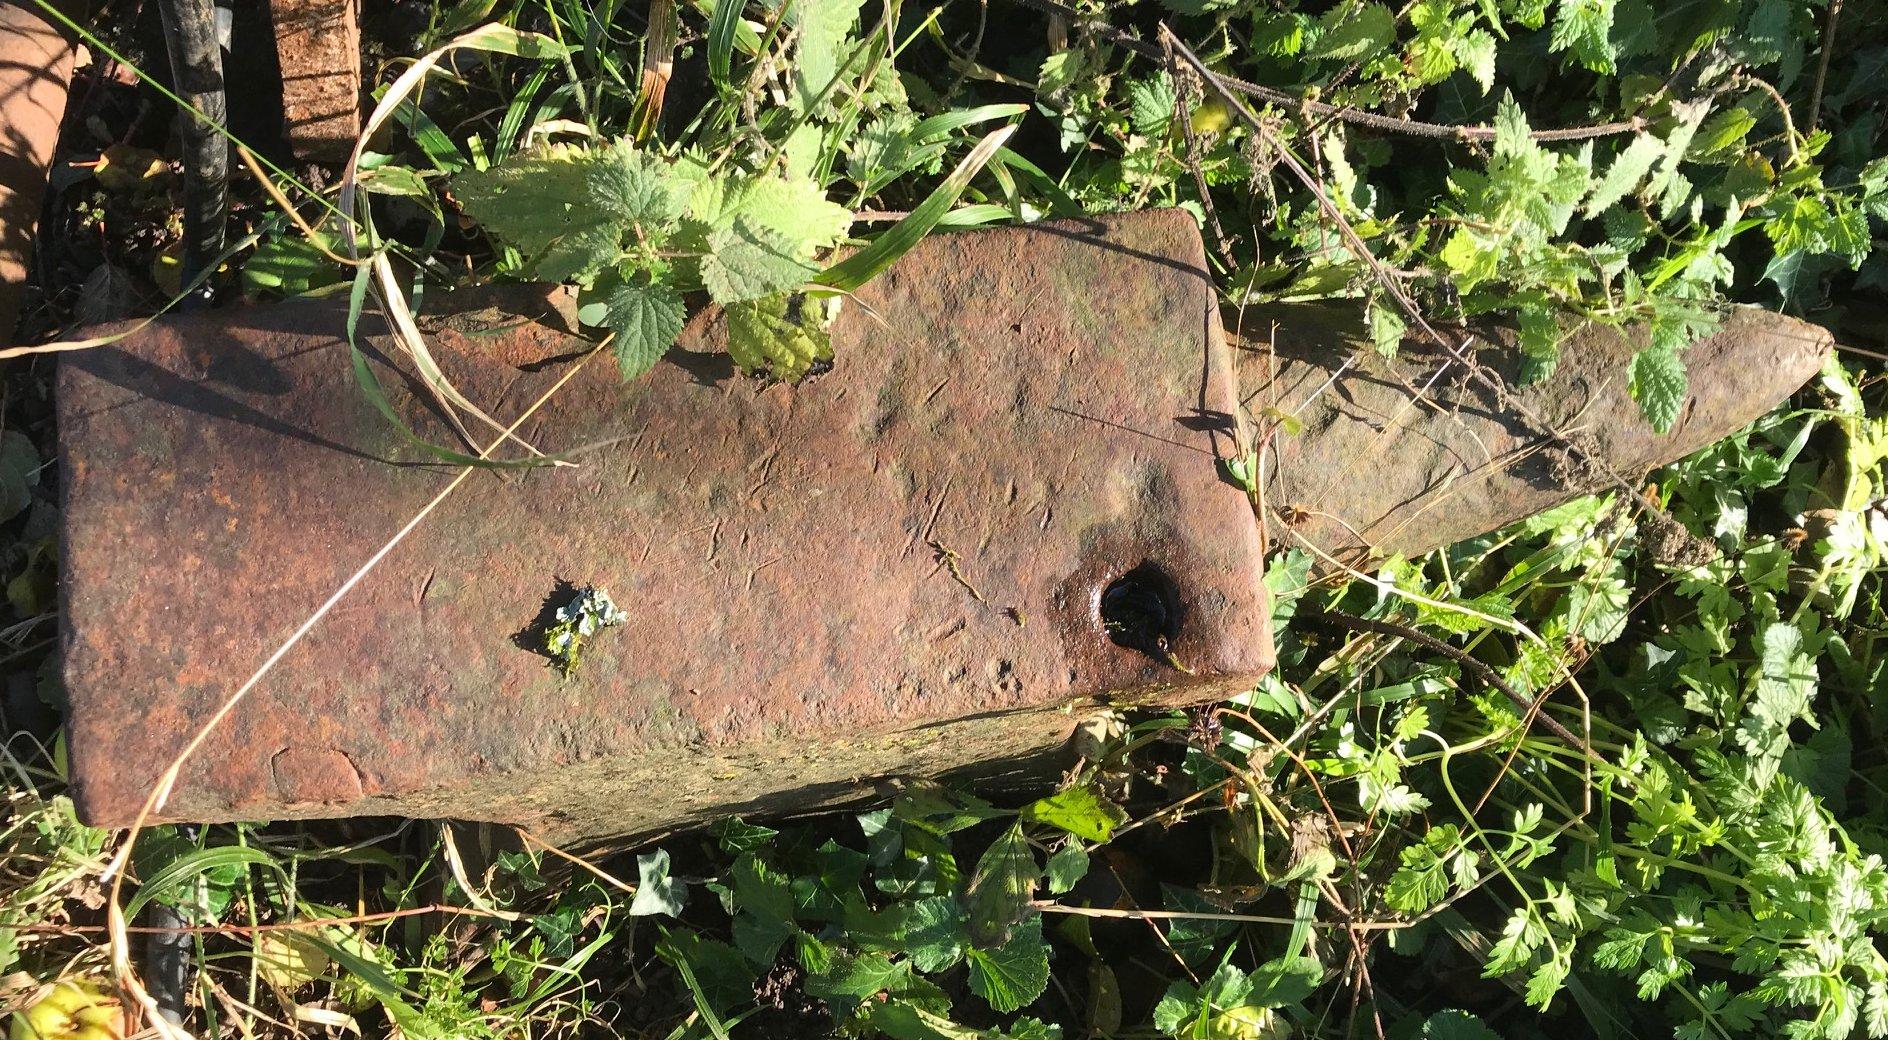
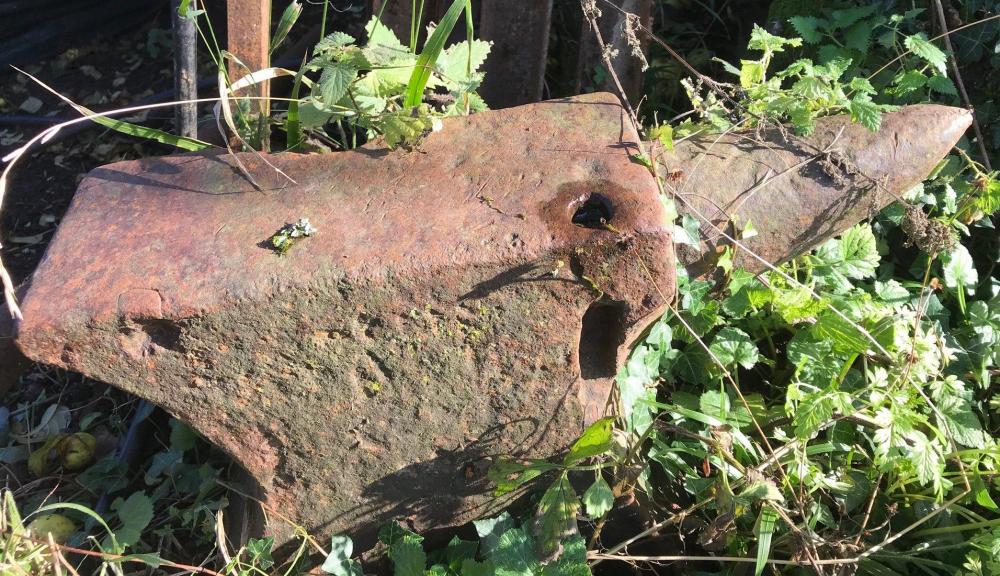
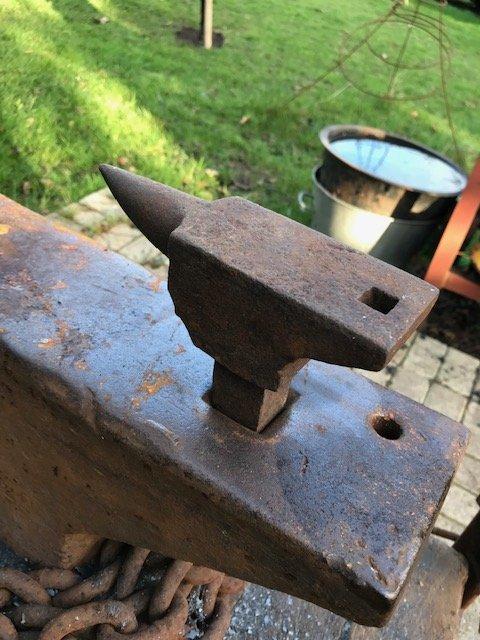
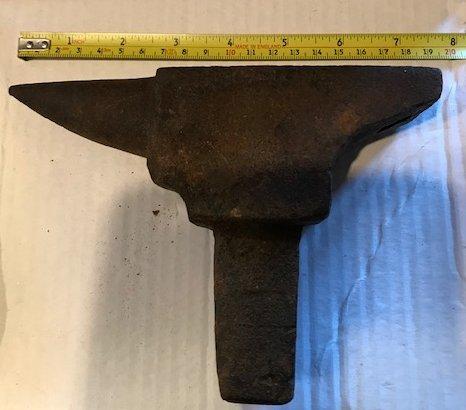
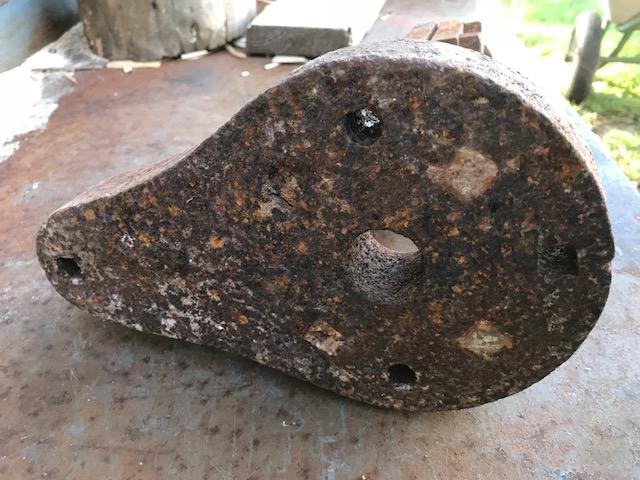
Can anyone help identify or roughly date this anvil? Sorry for the poor pictures with vegetation, I only had a few seconds to grab a couple of pictures so these were the best I could do. Location is the South West of England so I assume it is from a UK maker? From the way the pritchel hole breaks out of the side I assume it was drilled? I’ve not seen one in that part of an anvil before. The face is approximately 14” x 5.75”, the horn is approximately 7” long and the pritchel hole is 1” in diameter. The anvil is too corroded to see any markings. Not much to go in but hopefully someone may have an idea of maker and age?


-
What did you do in the shop today?
rocketman_k replied to Mark Ling's topic in Blacksmithing, General Discussion
Experimenting with electrical etching of stainless steel for labelling the hour ring of my latest sundial. Not quite there yet but results are looking promising. I don't want it too perfect as I want to keep a "hand made" feel to the finished item.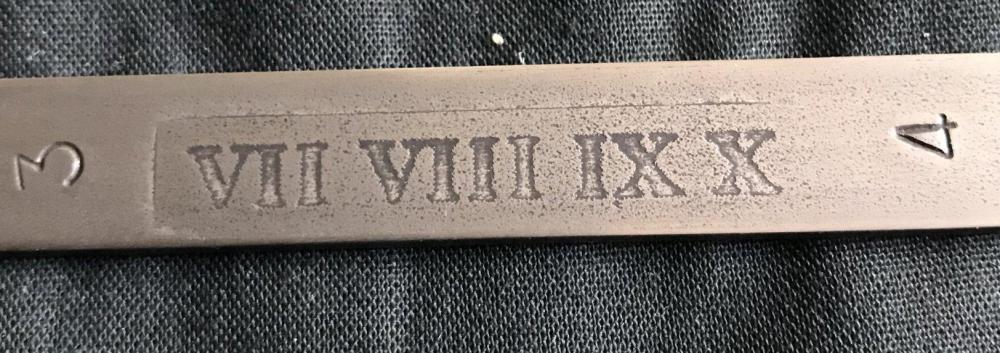
-
What did you do in the shop today?
rocketman_k replied to Mark Ling's topic in Blacksmithing, General Discussion
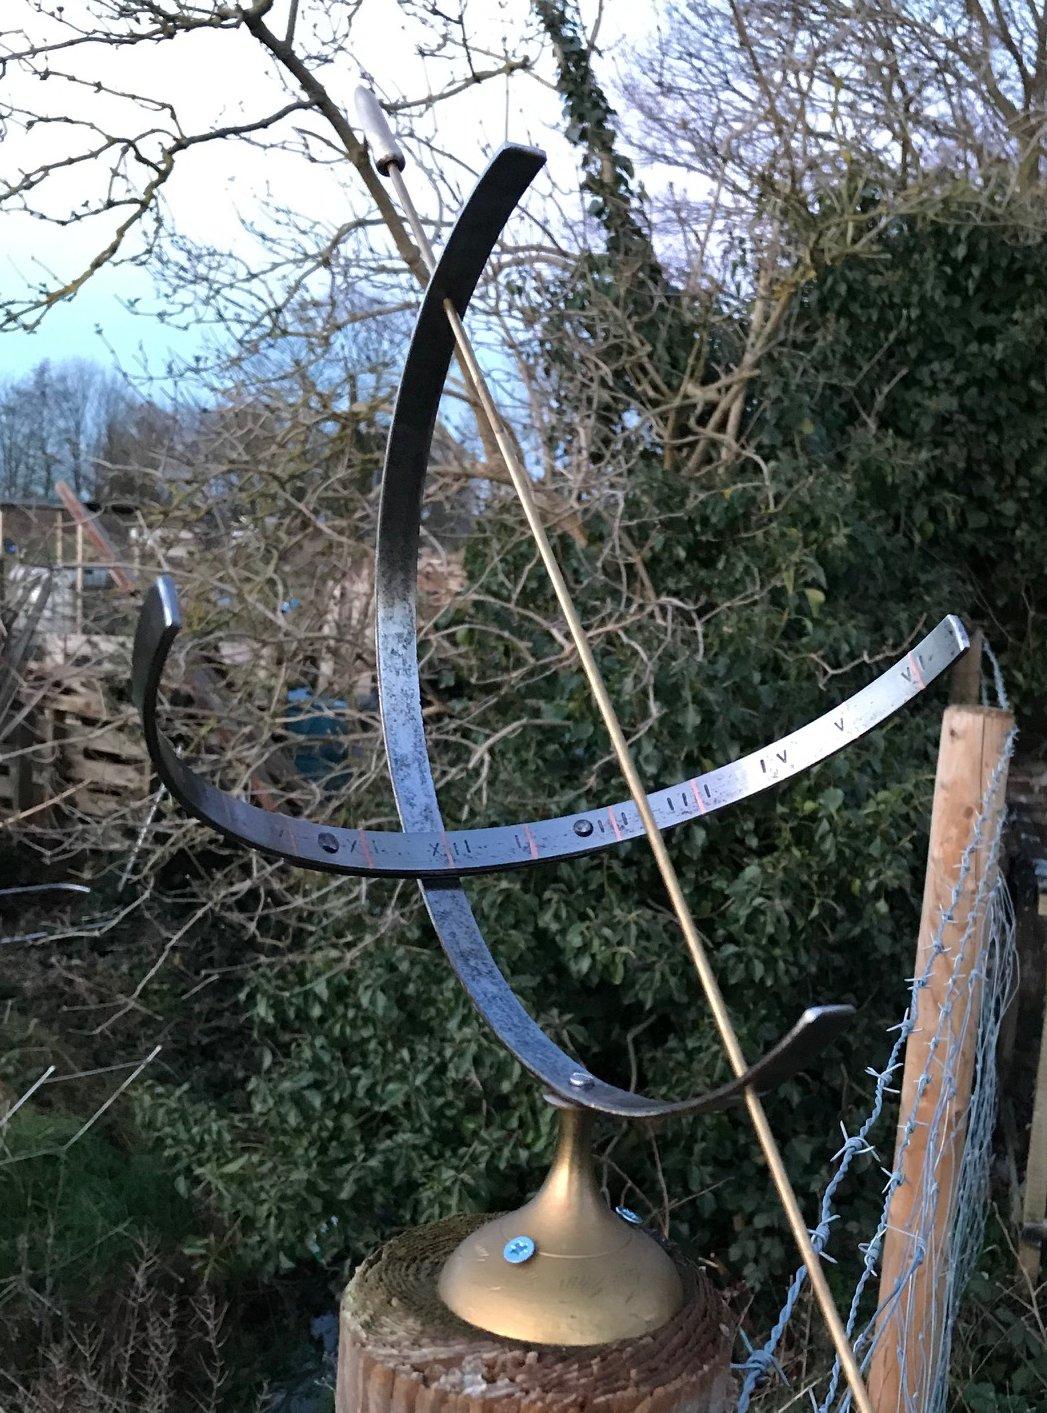
Finished the design and construction of a prototype equatorial sundial. Mild steel with copper inlay and a brass gnomon. I fixed it to a temporary mount (hence the ugly screws) on a fence post to check the accuracy (if the sun ever re-appears that is!) Also checking how well a lacquered finish stands up to the weather. I've now got some stainless steel strip to try out too. I need to find a better way of putting the numbers on, at the moment they are stamped in with letter punches and are a little too crude for my taste.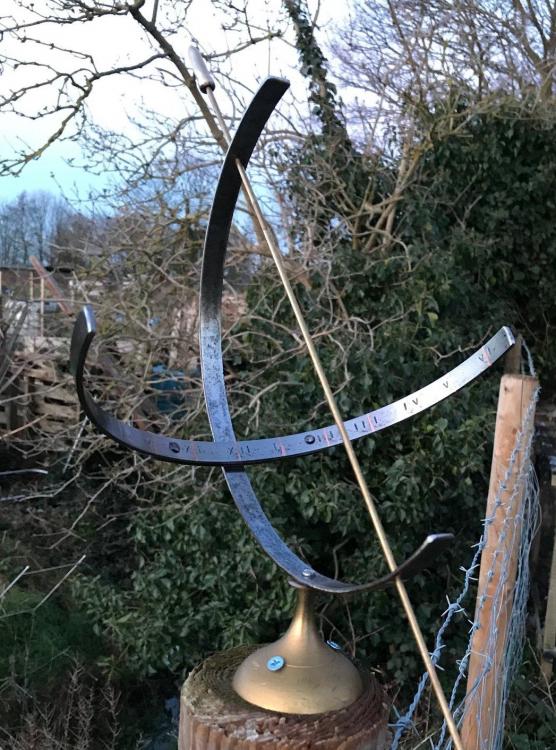
-
Not a great deal of progress over the weekend due to other projects. I dug through my steel stock and found an old pry bar and cut the ends off in preparation for forging it into the handle. I also cut some square bar ready to attempt making an octagonal punch for the hole that will be required in the handle. Also found some steel rollers from a broken overhead chain hoist carriage that may be suitable as substitutes for the missing ball weight. Nos just need a free day with decent weather so I can light the outdoor forge, 40mph winds precluded that at the weekend !
-
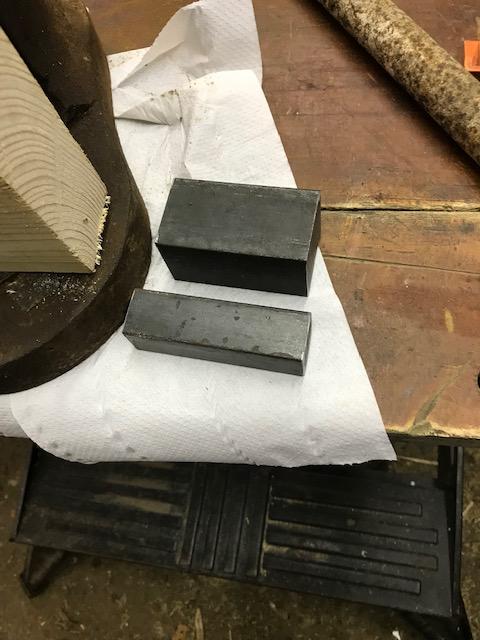
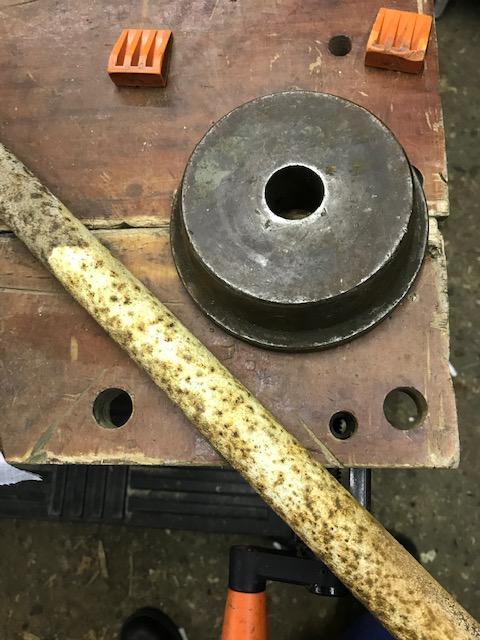
Acquired this little beauty........the very end of the bick on my main anvil was missing when I bought it which means for some work I need something smaller. I usually use a large round drift to form smaller things around but have always wanted something to fit the Hardy hole. I love the fact that this has it's own hardy hole (Now looking for a tiny anvil that will fit into a 1/2" hardy hole" I don't see any markings on it, I'll give it a light wire brushing to see if anything is revealed It doesn't go very far into the hardy hole on the mail anvil but I'll try it as it is before contemplating reducing the size of the stem a little.
-
Thomas: Thanks for the advice on making the handle....no power hammer here so I'll have to do it the hard way. (Thinking of enlisting a friend to be my striker for a few hours) Irondragon: Plus Gas is a commercially available dismantling fluid available here in UK......it's the best I've tried and has never failed yet, I find if I leave it overnight I very rarely need to use heat when dismantling rusted fixings etc. (That said I've not tried Acetone and ATF, I have some acetone somewhere so will give it a try)
-
Thanks to Thomas for your thoughts on the lead fillings. I have taken up JHCC suggestion and started a new thread in the presses section in order to document the restoration, some good progress already, please take a look.
-
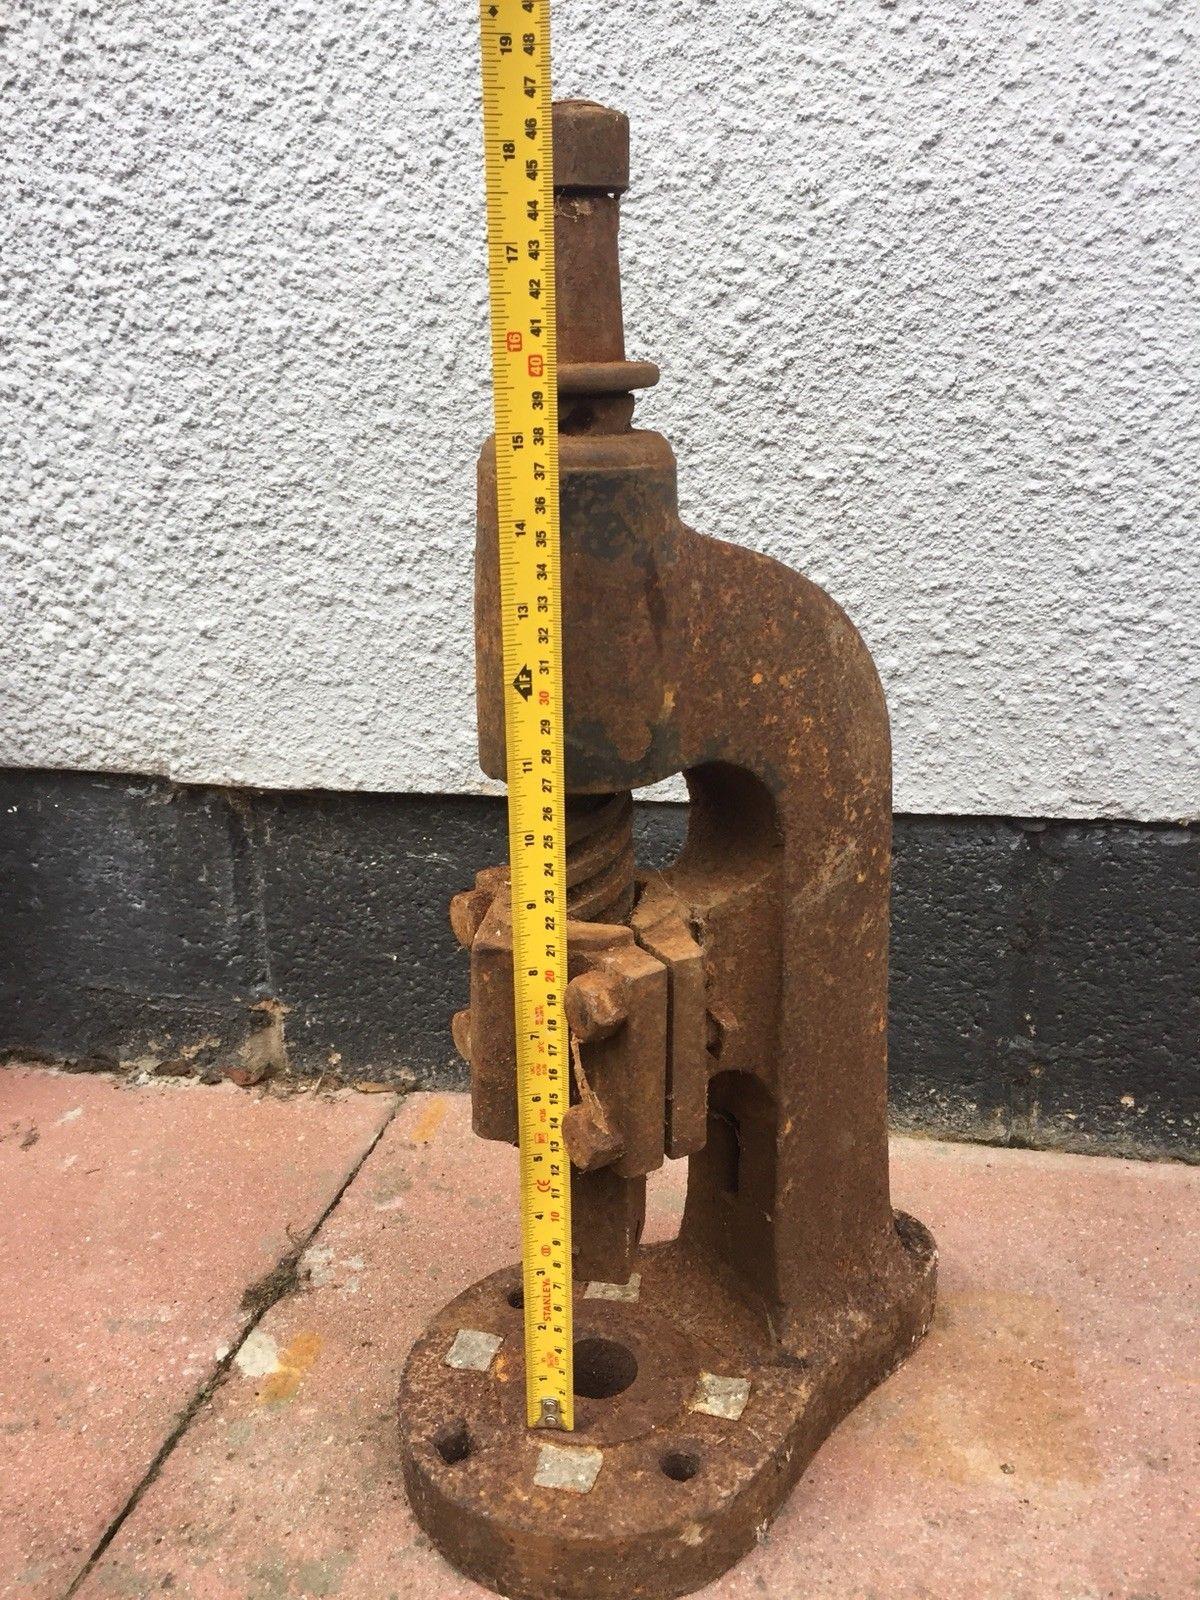
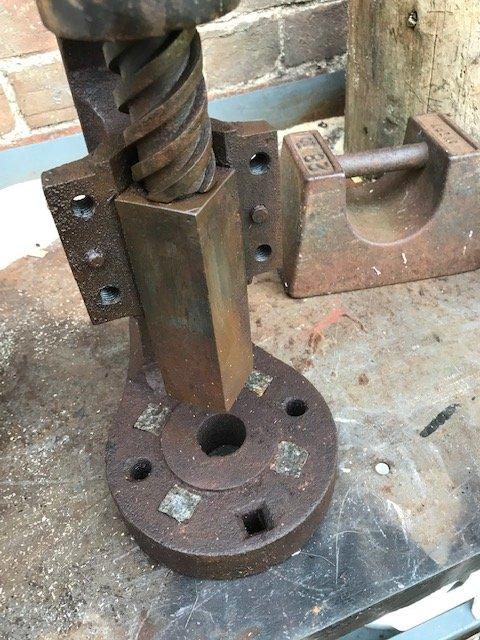
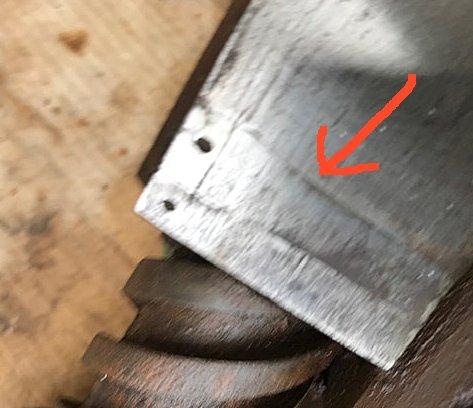
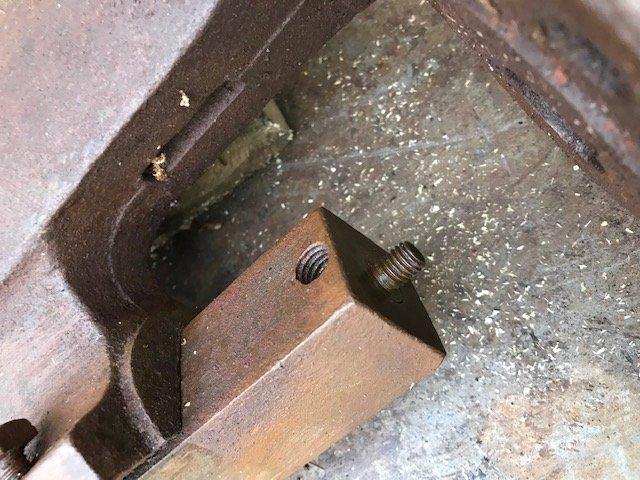
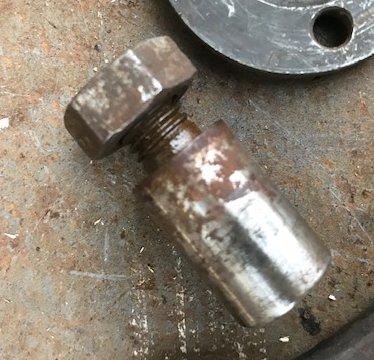
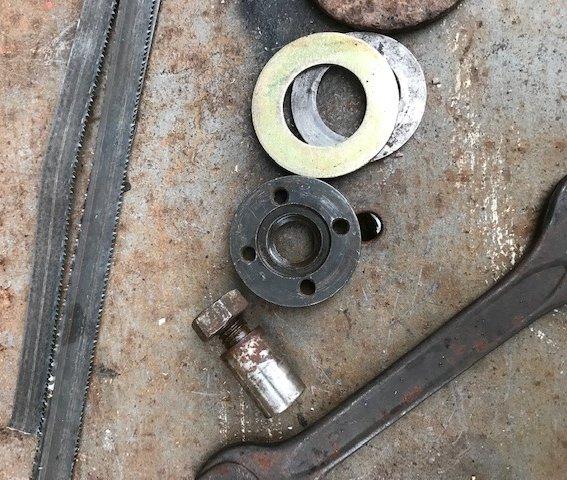
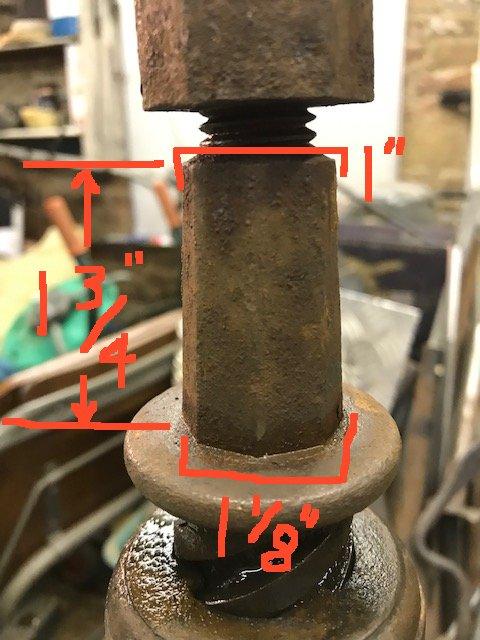
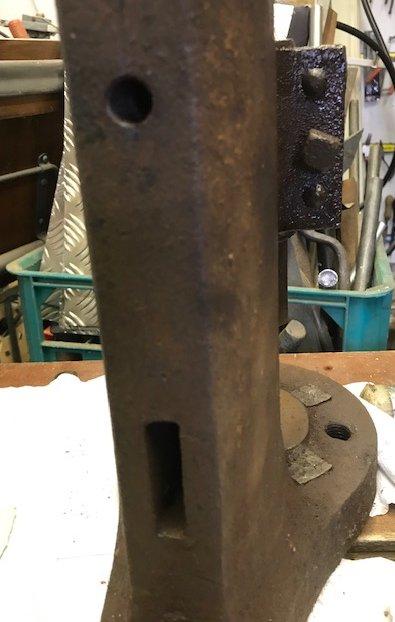
I’ve started this thread to document the restoration of a small bench top fly press I recently acquired via the usual on-line auction site. The press was advertised as a “Barn find project” and “rusty and not moving” which turned out to be a fair and accurate description. I’ve wanted a small fly press for a while and always enjoy the challenge of bringing an old tool or machine back to life (to use, not for show) The final price at the end of the auction was GBP£24, about US$ 31. I guess I spent a similar amount on fuel to collect it and a 5 hour round trip in the car. (Broke the journey in the middle with a quick trip to Iron Dwarf’s forge to pick up some coke and a quick chat with the dwarf and the copper elf, always a pleasure.) The first challenge was to remove the four rusted in bolts holding the ram guide in place. I wanted to remove these before attempting to free of the main screw just in case the ram was rusted to the guide. I don’t claim to have a lot of restoration experience but have learned the hard way that impatience when working on old stuff is a very, very bad thing that always results in broken bolts or blood loss somewhere along the way. With that in mind after a cursory wire brushing to remove surface crud all relevant parts were liberally dosed in Plus-Gas (my preferred penetrating fluid) and left overnight. Finding a spanner (wrench) to fit the bolt heads took a while, the UK went metric a long time ago but fortunately I have some imperial sized tools and an old BSA motorcycle spanner fitted perfectly and with a little persuasion with a soft faced hammer they were free. Luckily the ram was not rusted to the guide. At first I couldn’t see what holds the ram onto the screw but after a little cleanup I could see a couple of dovetail pieces on the ram, one on each side. After some thought I decided to leave well alone (KISS and “if it aint broke......” Moving on to the next challenge, there was something stuck in the tool hole at the end of the ram but fortunately it was threaded. after some time rummaging through my collection of non-metric fasteners I found a nut to fit: I filled the retaining screw hole with more Plus Gas and left it overnight then rigged up a small extractor using large washers (including a recessed one from an old angle grinder) and the nut found earlier. By steadily adding washers and/or shims made from broken hacksaw blades it came free without the use of heat or brute force. The piece removed: It is 5/8" in diameter and as can be seen there was no shoulder on it......in future nothing will be allowed into the tool hole without a shoulder! Next task was to free up the screw. As I have no handle for the press I found a wrench large enough to engage with the nut on top of the press and used it with a soft faced hammer to wind the screw inwards by a fraction of a turn. After quickly making up some soft jaws for the bench vice I inverted the whole press, (glad it wasn't a Norton #6!!) clamped up the octagonal handle spigot in the vice and turned the whole press to free off the screw......that was easy! The next job (not started yet) will be to make a handle. I'm not sure of the best way to do it yet. The handle fits onto a tapered octagonal spigot. Width across the flats at the bottom is 1 1/8", tapering to 1" at the top. The spigot is approximately 1 3/4" high. I guess I will need to make a tapered octagonal drift then slit and drift the hole on my handle stock. I'm not sure if I should drift a tapered circular hole first or go straight to octagonal? Also as it's a single use thing I am wondering if I should harden the drift? Any thoughts or advice very welcome please. That's it for now.... I've a couple of questions about this press; at the rear of the frame there is a tapped hole about 3/8" diameter and 1 1/4" deep. (So it doesn't penetrate right through the frame) Below that is a slit that does go all the way through the frame. I'm wondering what they are for.....possibly for mounting some kind of stripper? Any thoughts or ideas are welcome! Tonight I'll look through my bar stock and old bolt collection and start planning to make a few basic press tools. I'll also start making a very substantial bench for the press to sit on.

-
Thomas: Like this, nothing special as far as I can see. Irondragon: I guessed that too, interested to see what Thomas thinks.
-
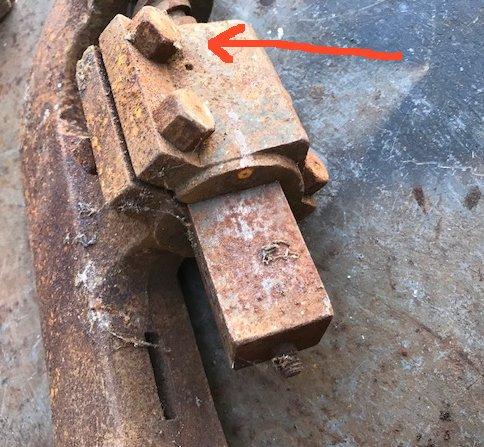
Acquired this little press via the usual auction website.....It's rusted solid and no handle or ball but I'm looking forward to bringing it back to life and using it. One thing intrigues me, there are four square holes in the base that have been filled with lead............does anyone have any ideas why that would have been done? It's on the bench with liberally applied plus-gas on the seized parts, I'll leave that to do it's magic for a day or more before applying some gentle heat to try to get things moving.

-
What did you do in the shop today?
rocketman_k replied to Mark Ling's topic in Blacksmithing, General Discussion
Inspirational work Das! Re-handled a 1.5 lb ball pein hammer.................first time I've done that but with patience it seemed easy, will put it to the (hot metal) test this weekend.

-
What did you do in the shop today?
rocketman_k replied to Mark Ling's topic in Blacksmithing, General Discussion
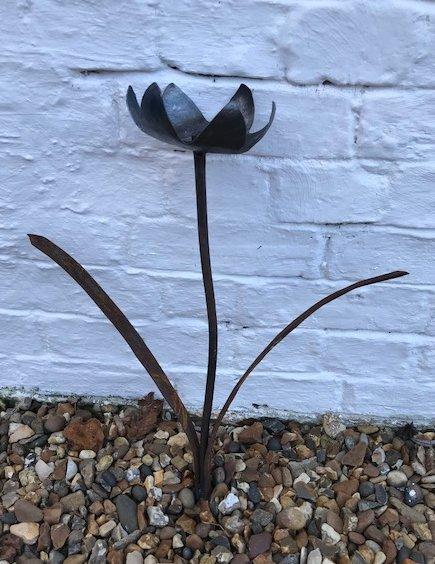
Finished a flower I've been working on for a time, first attempt at dishing anything. Don't look too closely at the welding..............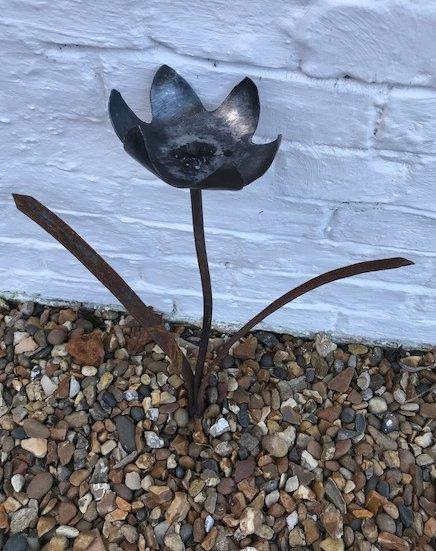
-
What did you do in the shop today?
rocketman_k replied to Mark Ling's topic in Blacksmithing, General Discussion
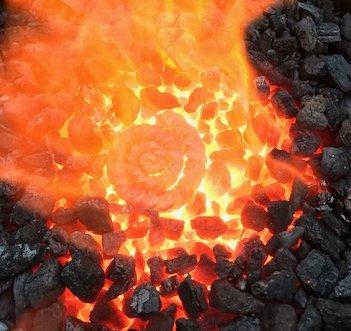
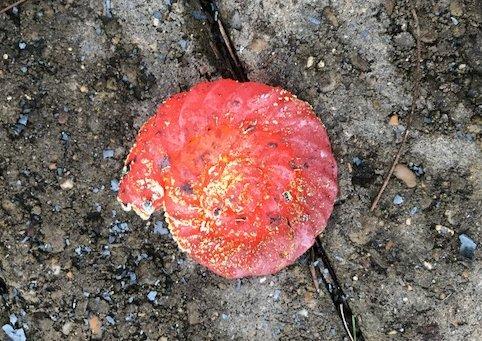
Finished an ammonite paperweight, took a pic. of it in the fire just so I could make a joke about fossil fuels! Also made some prototype components for curtain rail finials, the need more curves and some texture on the leaves.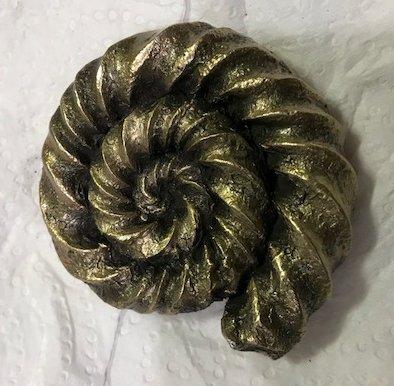

-
What did you do in the shop today?
rocketman_k replied to Mark Ling's topic in Blacksmithing, General Discussion
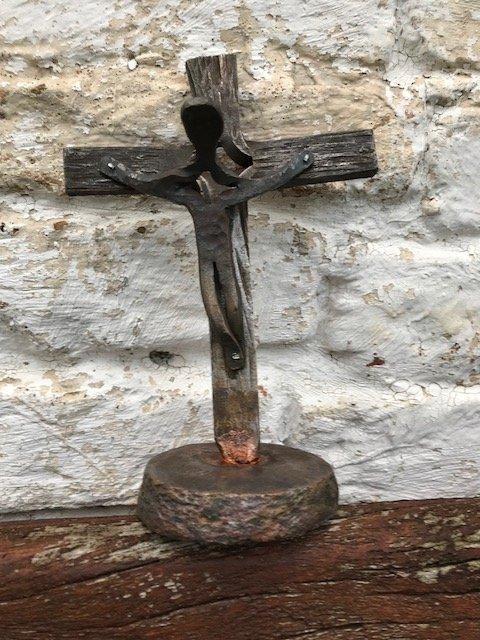
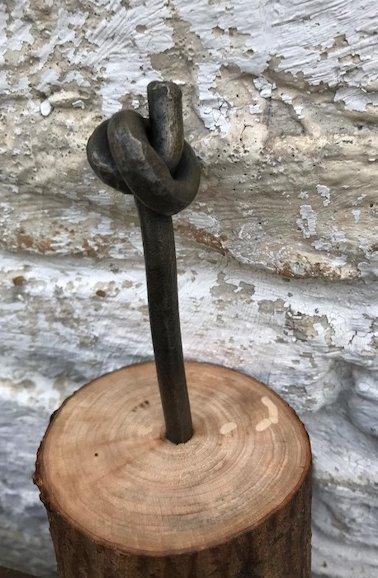
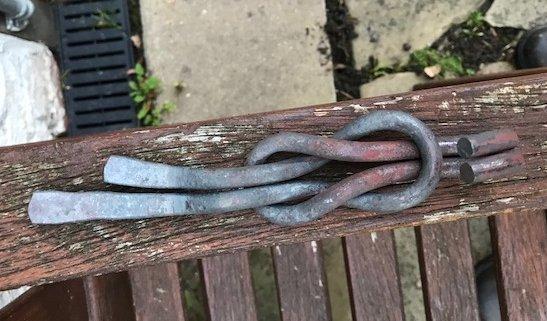
AR. Hillbilly: I clamped a thick steel straightedge (parallel to the blade) to the table of my band-saw (Used vertically) and used that as a fence to guide. The split comes out straight, not always dead central but that doesn't seem to matter once the piece is opened out and forged. Here are some of the results, not perfect but I like them: I've been trying a kind of split-cross sculpture.......very much a work in progress. My partner doesn't like it, the imagery makes her uncomfortable so not sure if I'll continue it. I also tried some knots this week.......the reef knot will become a hook for the back of a door. The other one will probably do service as a paperweight on my desk.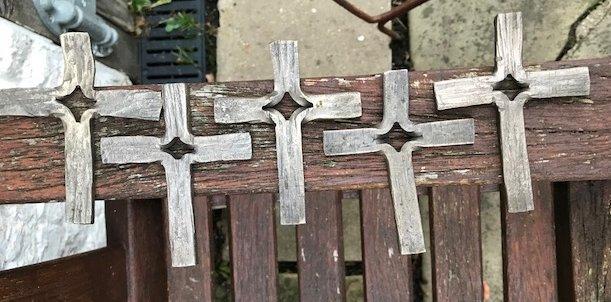


-
Show me your Bottle Openers!
rocketman_k replied to Arbalist's topic in Blacksmithing, General Discussion
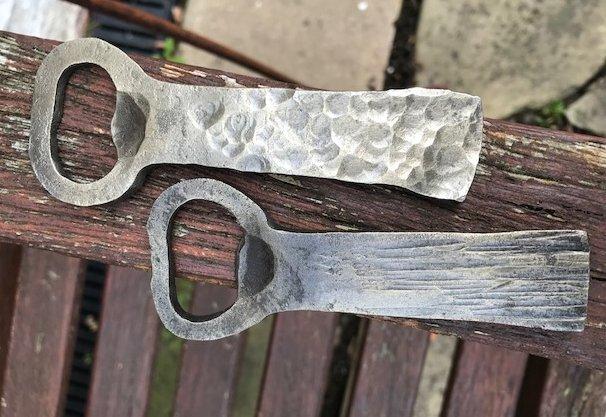
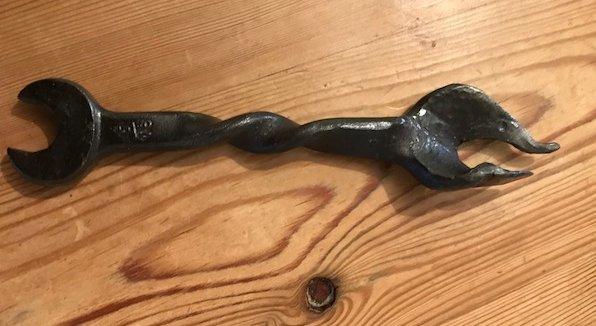
The twisted wrench was one of my first projects. The small opener was a first attempt at splitting and drifting, it won't win any prizes but it does get the top off the beer! The other pair are a more recent effort, I think there's some progression but still not 100% happy with them.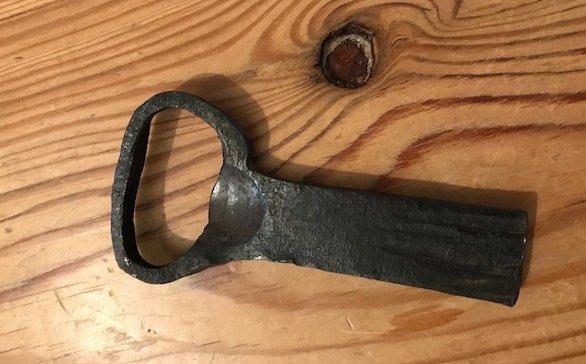
-
Some sash weights (Didn't really follow me home, they were inside an old sash window we replaced) Not sure what to do with them as they are poor quality cast iron, open to ideas and suggestions! (I may cut one down to use on the end of a chain as a hold-fast on the anvil) Also a large steel washer from the street outside, blacksmith's roadkill!!

-
What did you do in the shop today?
rocketman_k replied to Mark Ling's topic in Blacksmithing, General Discussion
Finished an Ammonite coat hook, a Christmas present for a friend.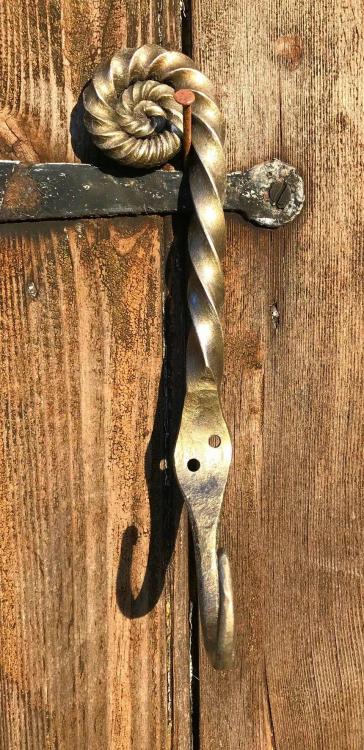
-
What did you do in the shop today?
rocketman_k replied to Mark Ling's topic in Blacksmithing, General Discussion
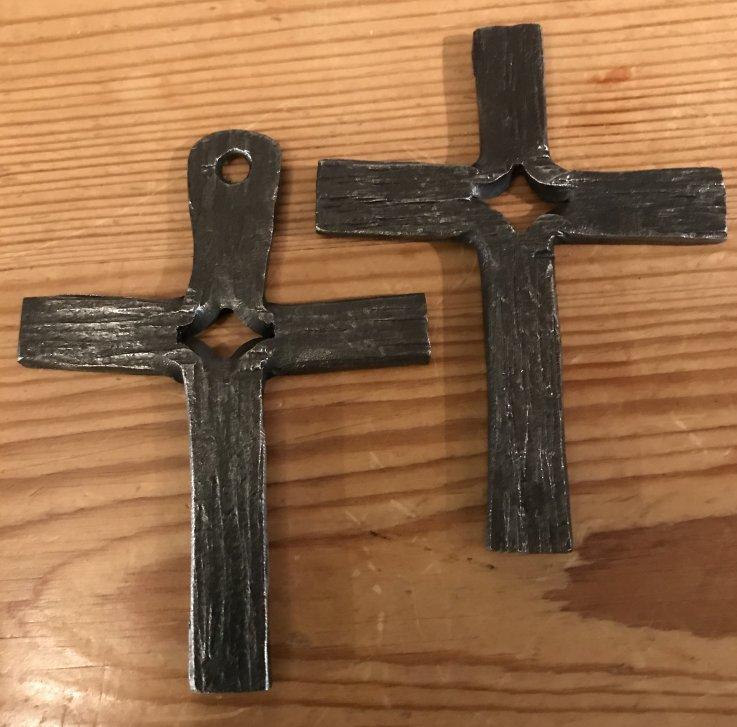
Made some split crosses, I was trying to get a coarse wood-grain texture, think I succeeded.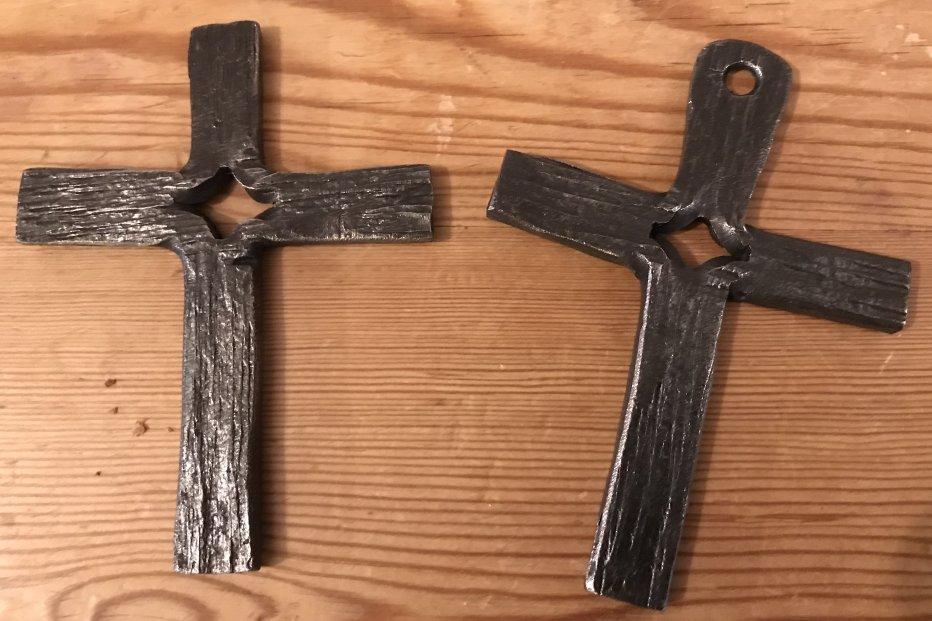
-
Glenn: That's a good point, my intention was to cut them off once I was certain the anvil was in the correct position......of course they then became "invisible" once I got used to seeing them. I'll take the angle grinder to them later this week! Thomas: From the context I take it that I should have put the anvil support timbers vertically, is this a serious mistake that I should correct? K
-
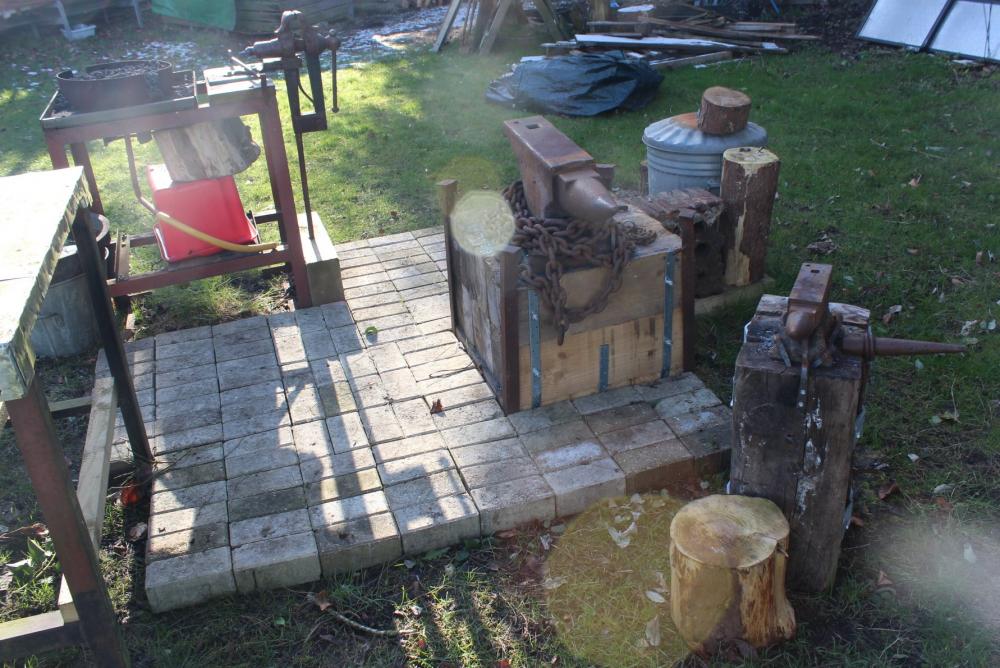
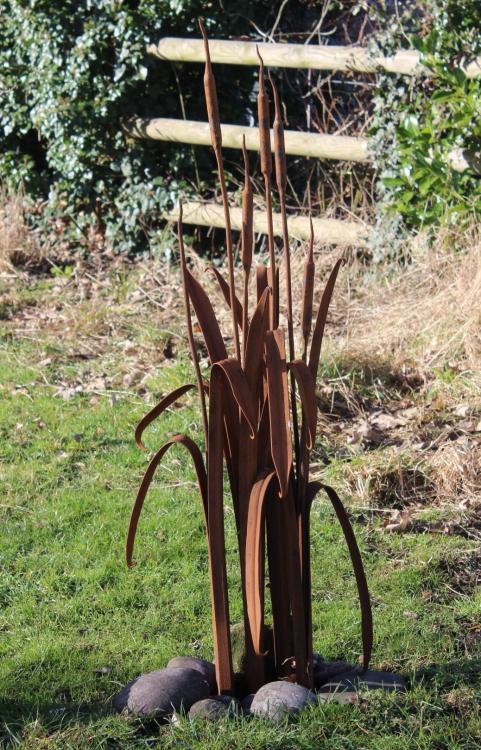
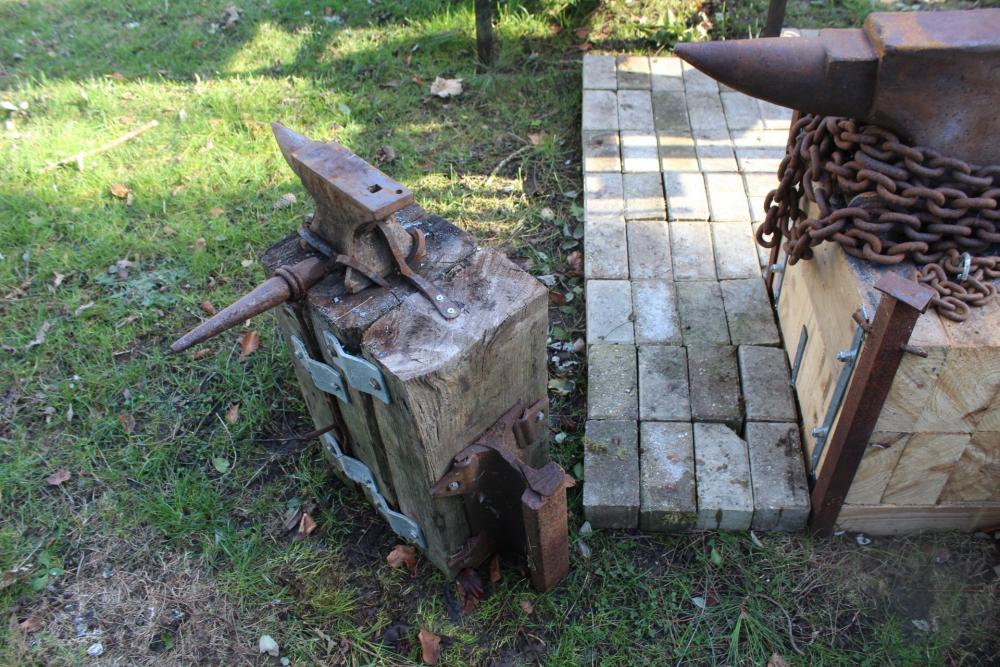
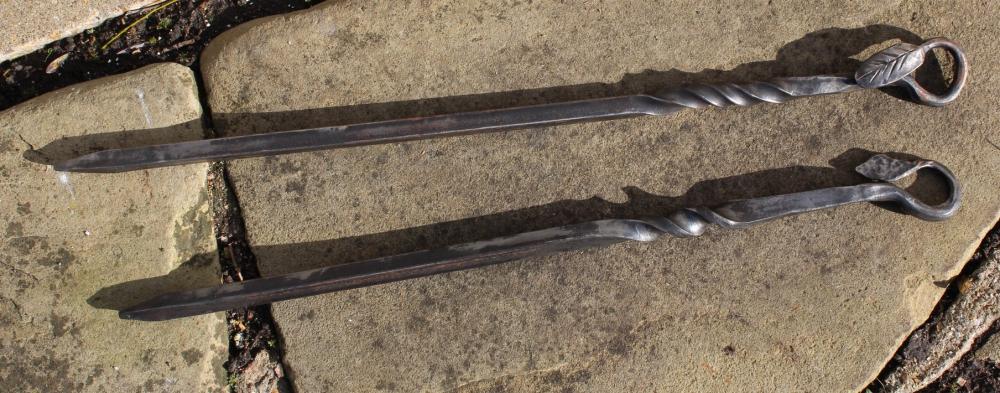
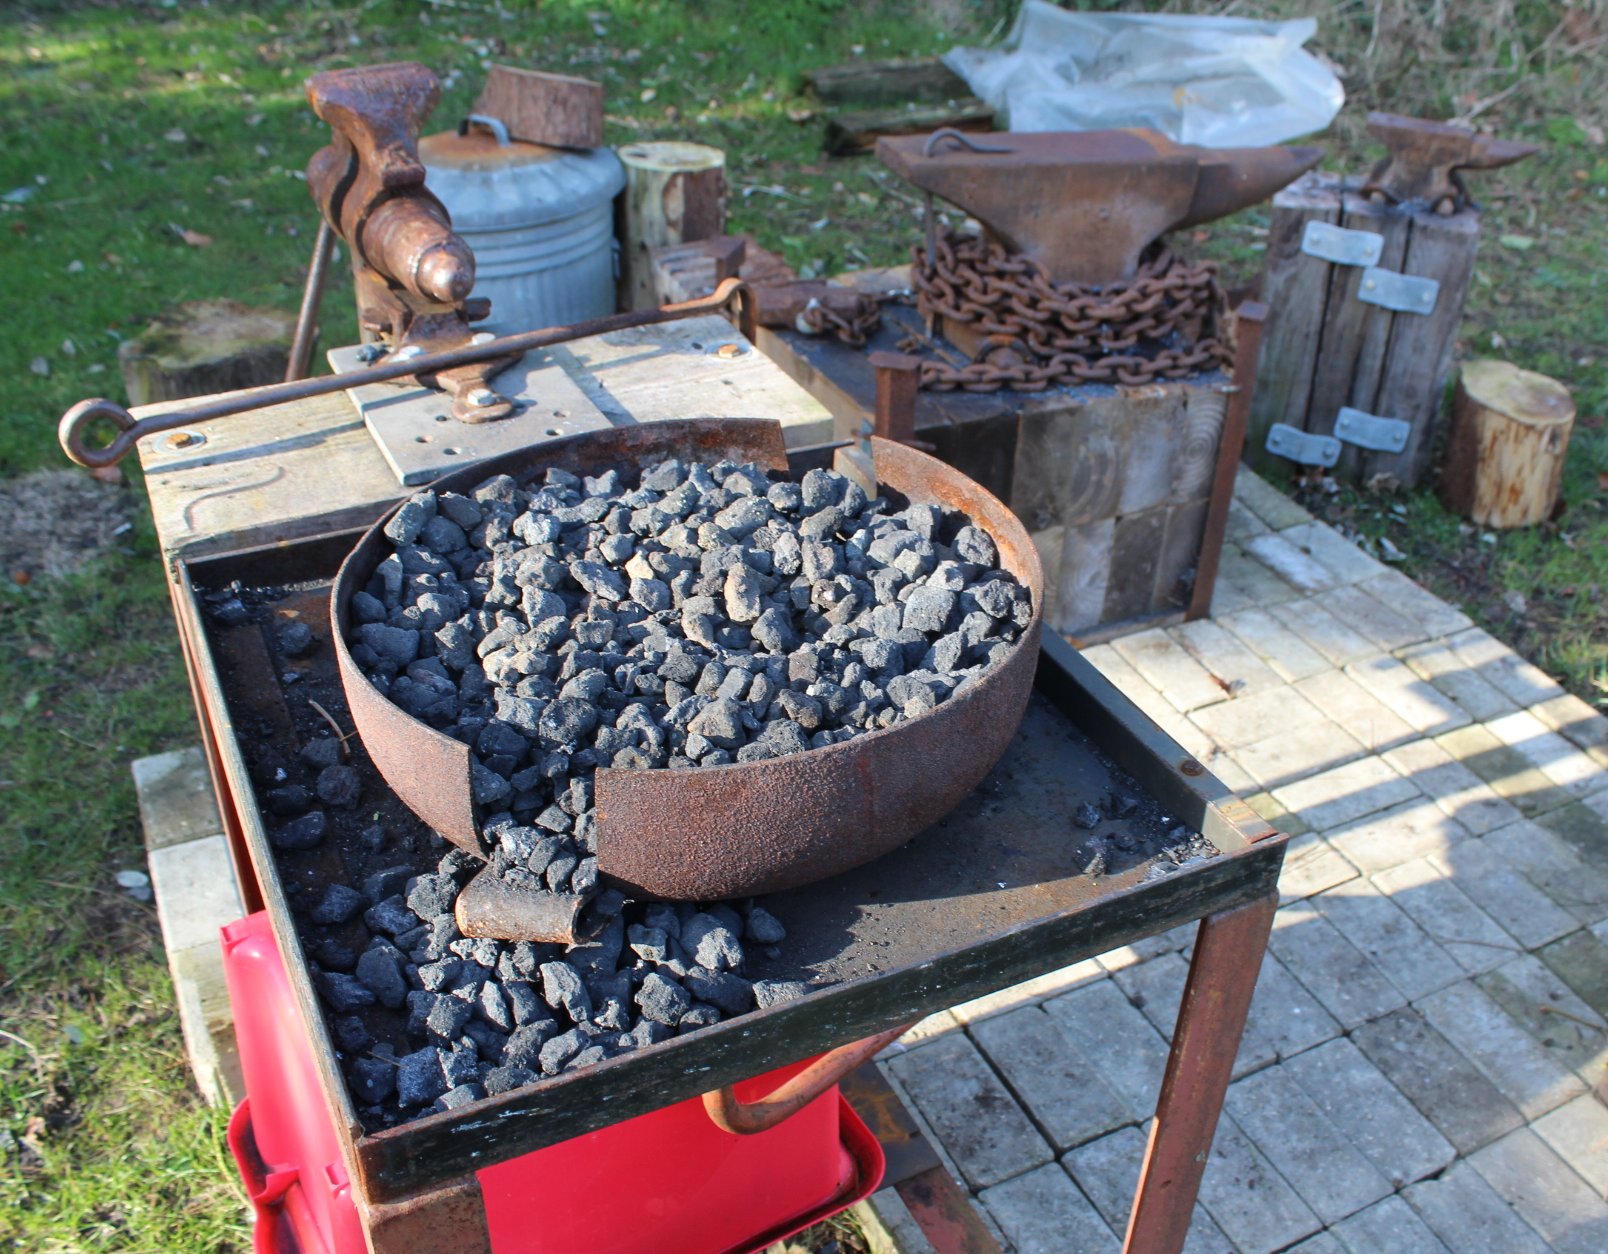
Hello from England! I’ve been reading this forum for close to a year now so thought it time to introduce myself. I’d been intending to try blacksmithing for a very long time. After dropping hints for about 3 years my partner bough t me a one day course at a well equipped forge here in UK.....I was immediately hooked. Within a day of completing the course I had finished building my home made forge (it had been a work in progress for several years) A piece of railway track was OK as a starter anvil. I tried TPAAT and soon found a small anvil on sale locally, I don’t think it had ever been used. As others have discovered, once you apply TPAAT and find your first anvil others soon follow so now I’m the proud owner of something larger, together with an ancient swage block. My forge is outdoors so I need a day without rain (yes we do have them in UK!) to operate the forge which I do as often as I can. I recently did a one day course with the Copper Elf and also met the Iron Dwarf, both of whom contribute here. I’ve included a few pictures of my setup and a few pictures of my work. (The bullrush sculpture is my own work except for the welding which was was done for me by my mentor, other items all my own work) Thanks to all for the wealth of information and advice to be found on this forum, I really appreciate it.