

Andrew Golabek
-
Posts
84 -
Joined
-
Last visited
Content Type
Profiles
Forums
Articles
Gallery
Downloads
Events
Posts posted by Andrew Golabek
-
-
Very interesting, beryllium is however very toxic, I wouldn't want to make one.
-
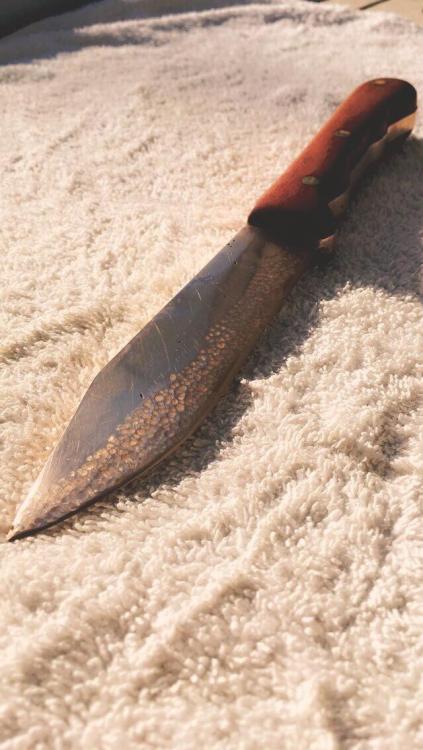
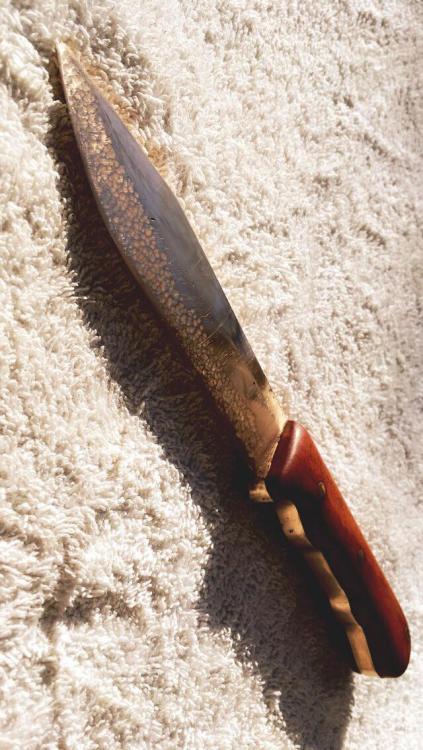
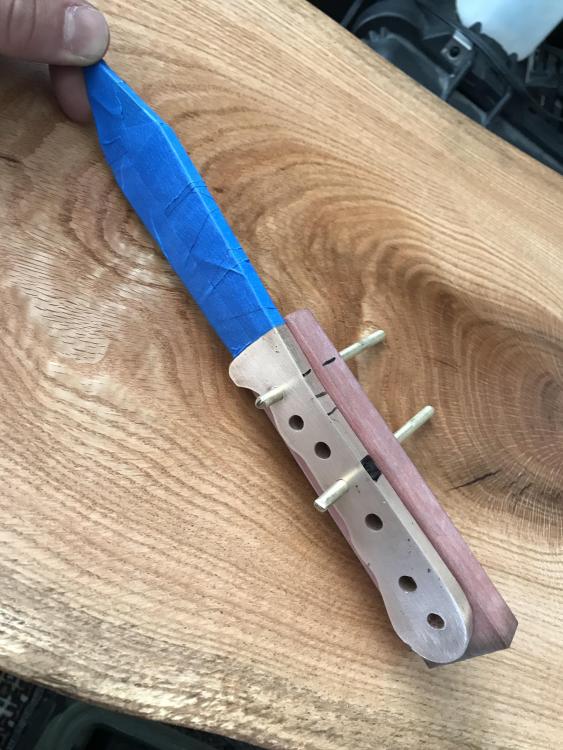
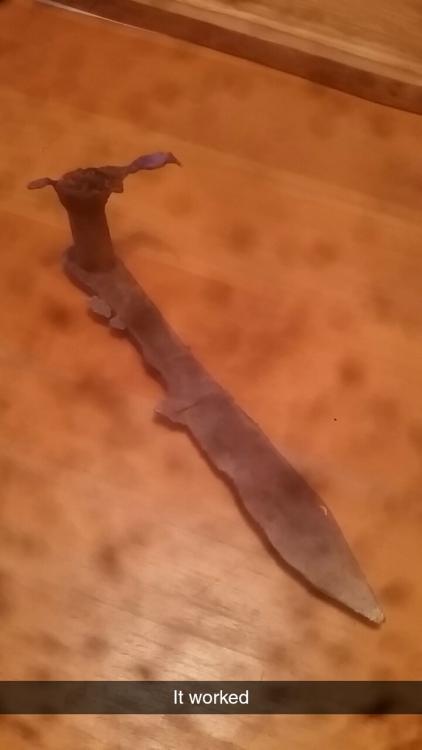
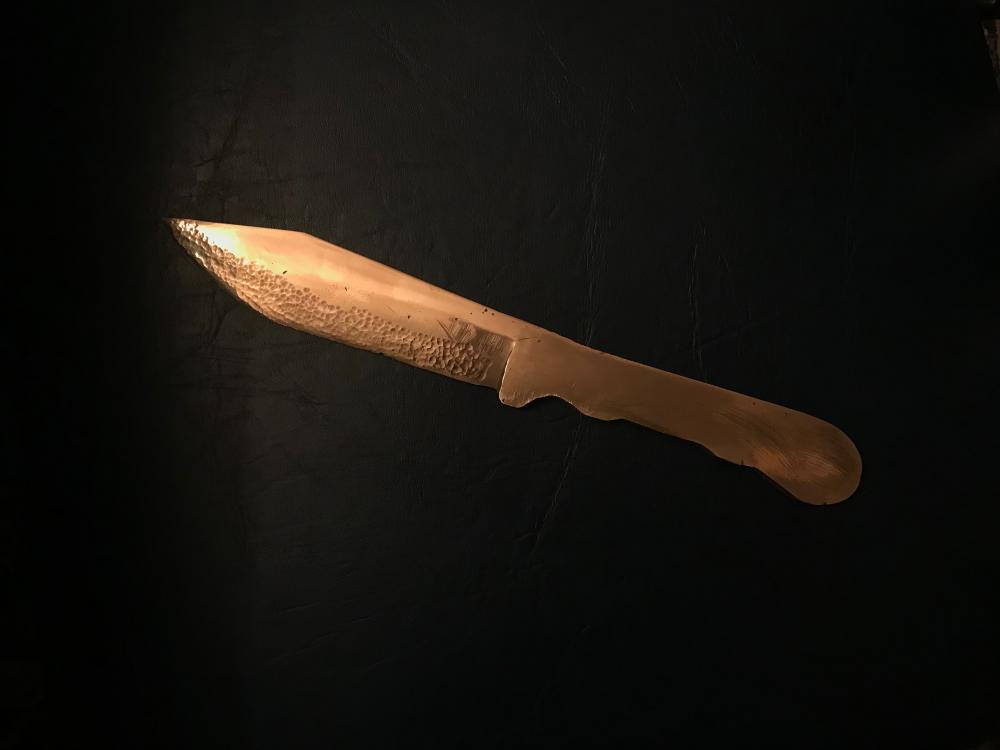
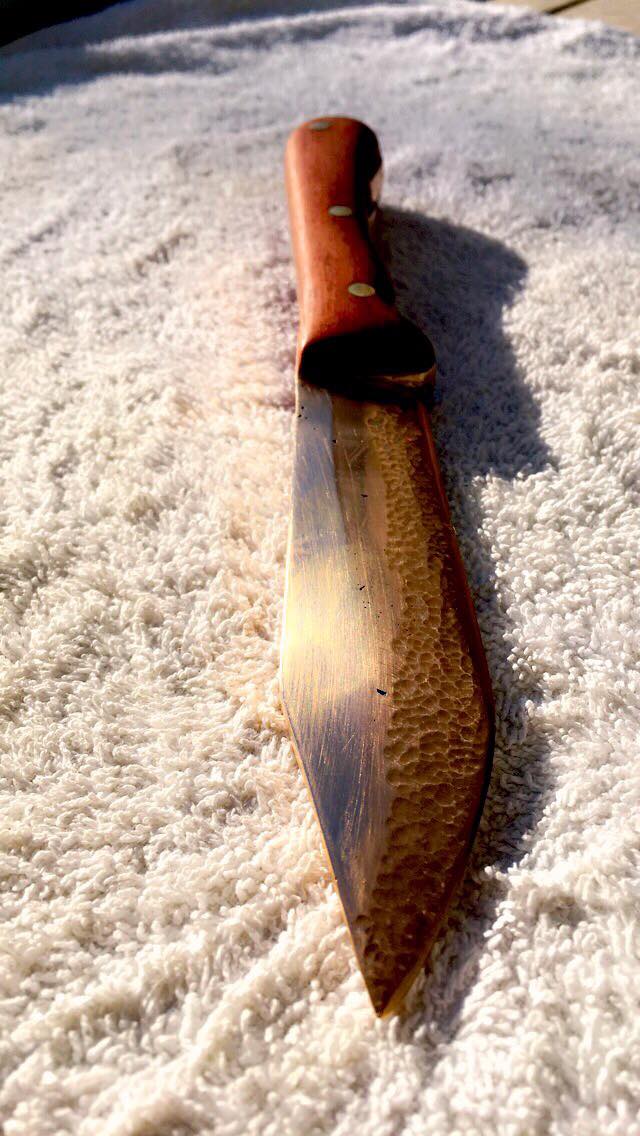
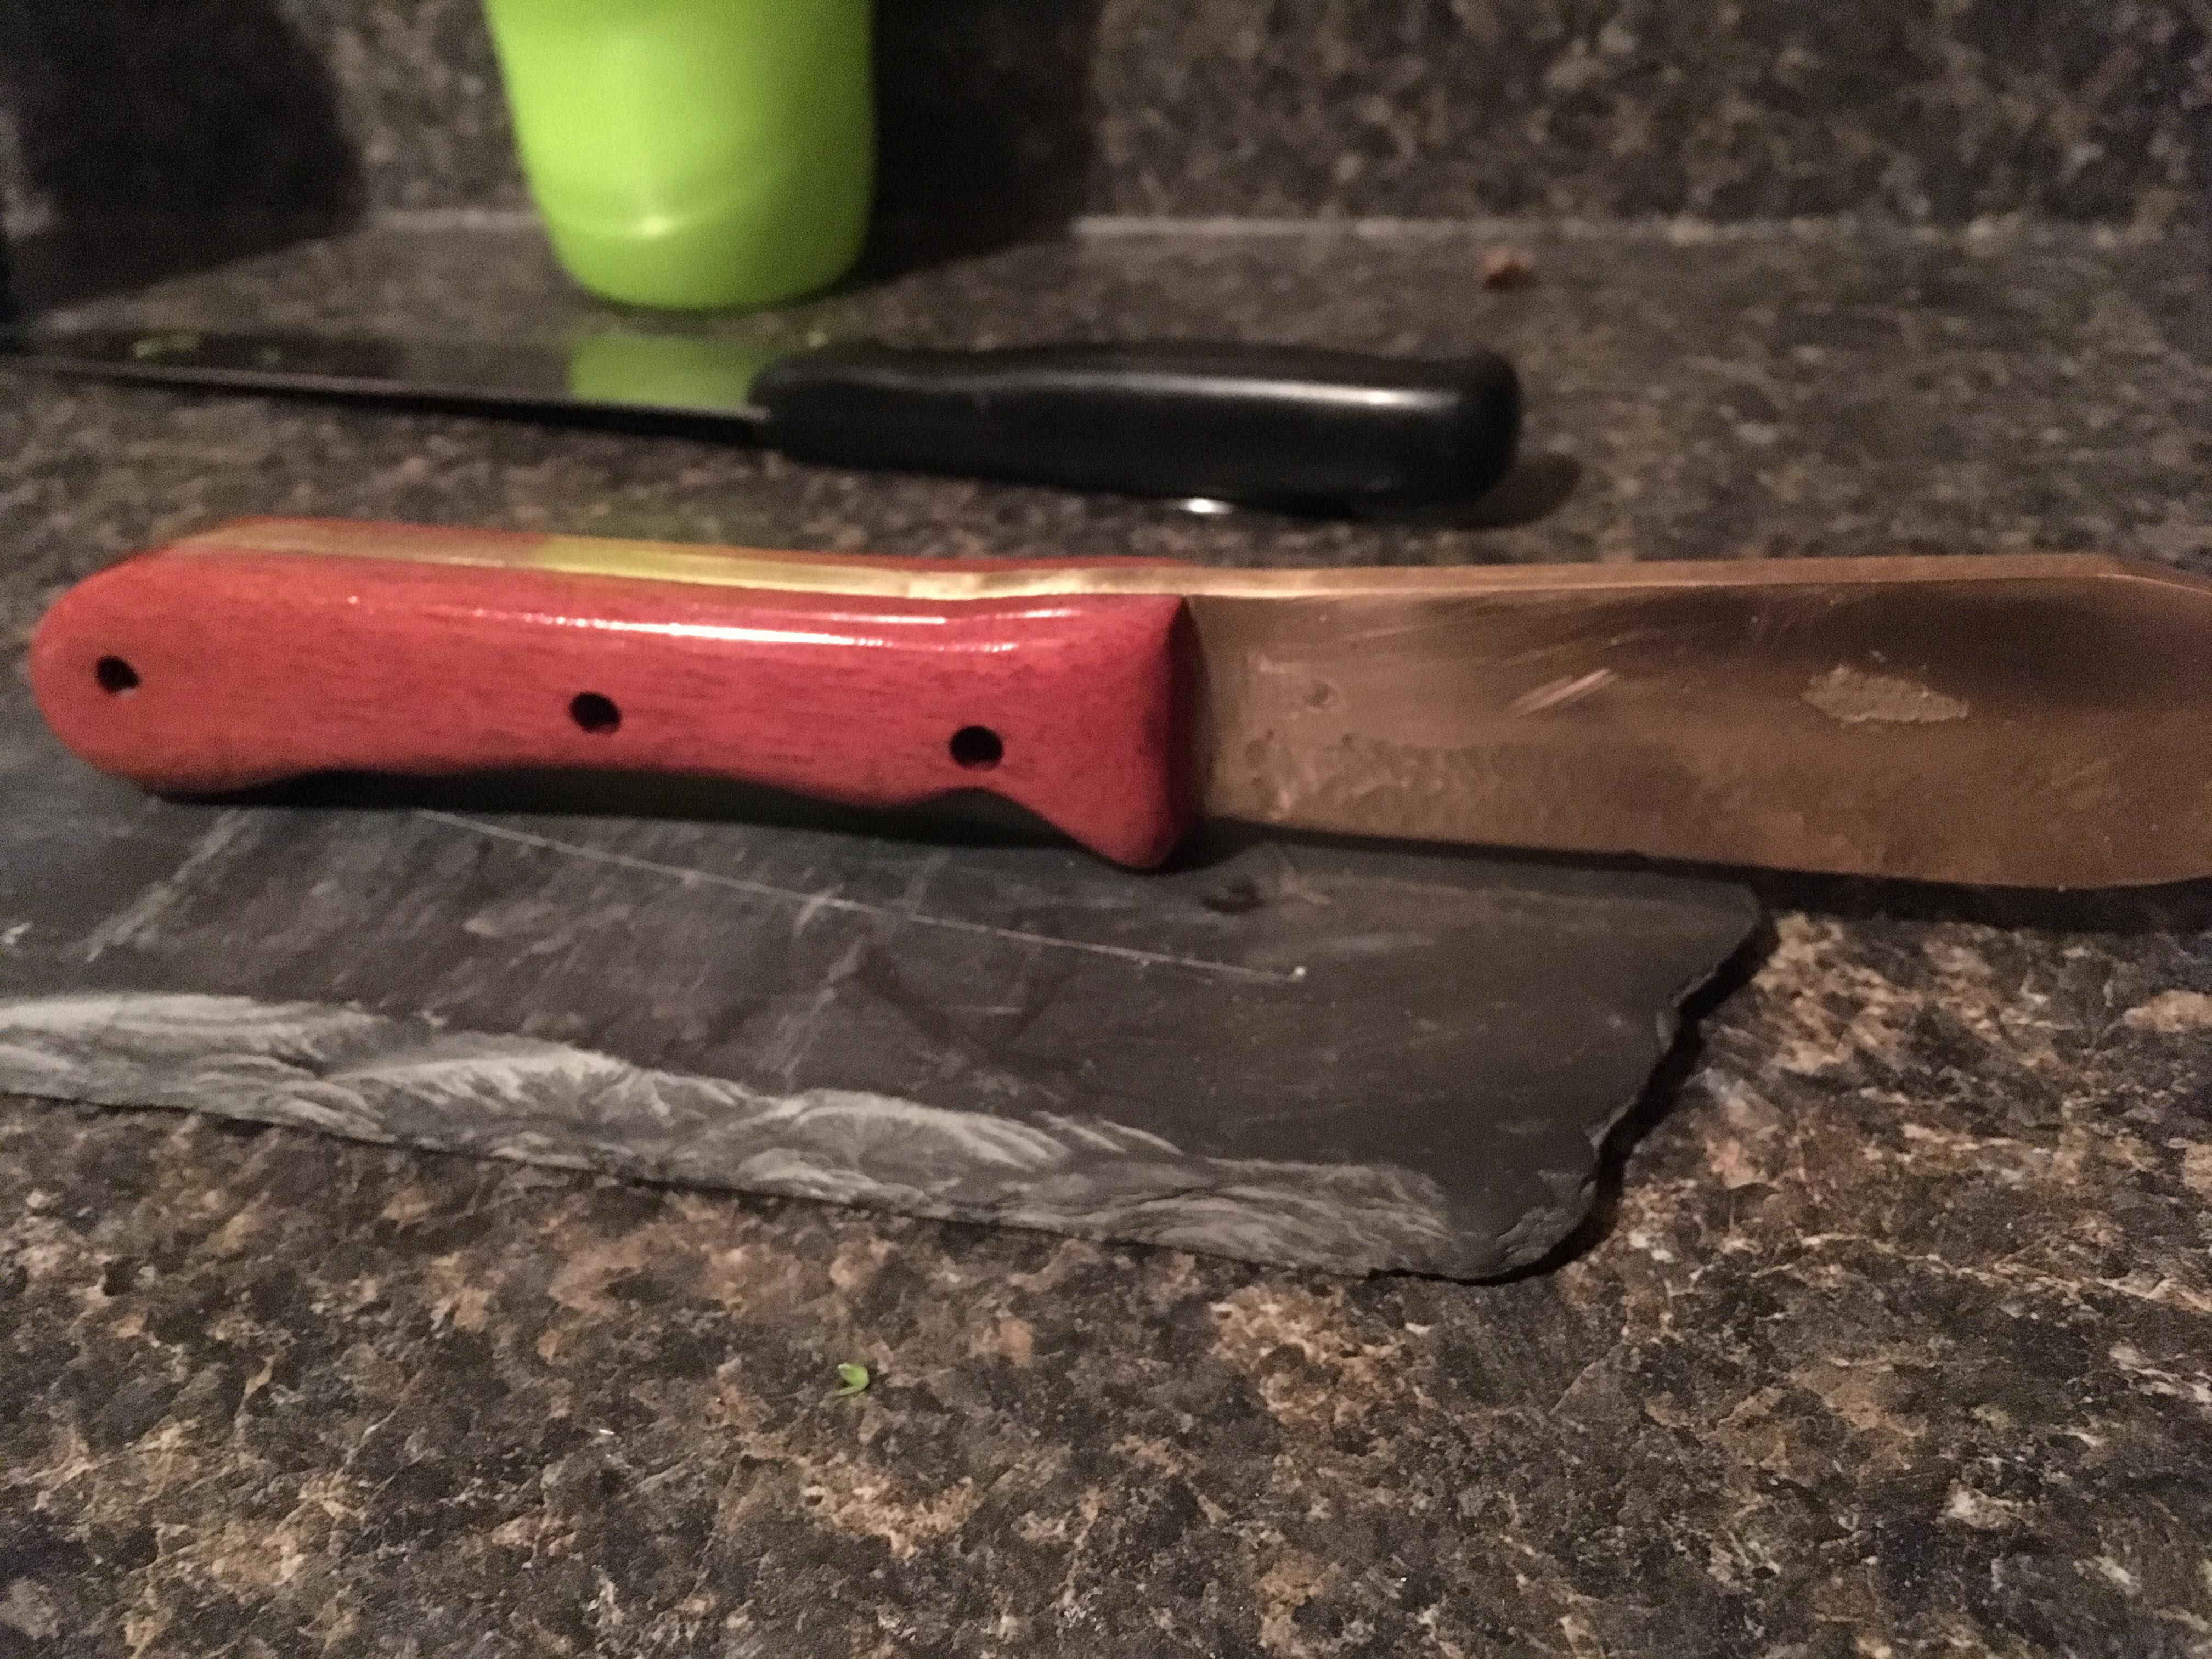
Here it is, complete with the handle finished, peened 3/16 brass pins, I'm quite happy with it as my first knife of any sort, couple of things to improve for next time though. The edge should probably be further work hardened, I'm going to try 12% tin bronze to see how much harder it is, and maybe aluminium bronze eventually. The handle finishing and flattening the tang to fit the scales was the longest part of this project for sure without any grinder except an angle grinder which isn't ideal ( was flattened by hand).
The edge is actually quite sharp, although sharpening by hand seems more difficult than steel- quick and easy to dull it accidentally, so far just been able to get it sharp enough to barely shave arm hair on a waterstone. Will try lansky to see if it's my technique
-
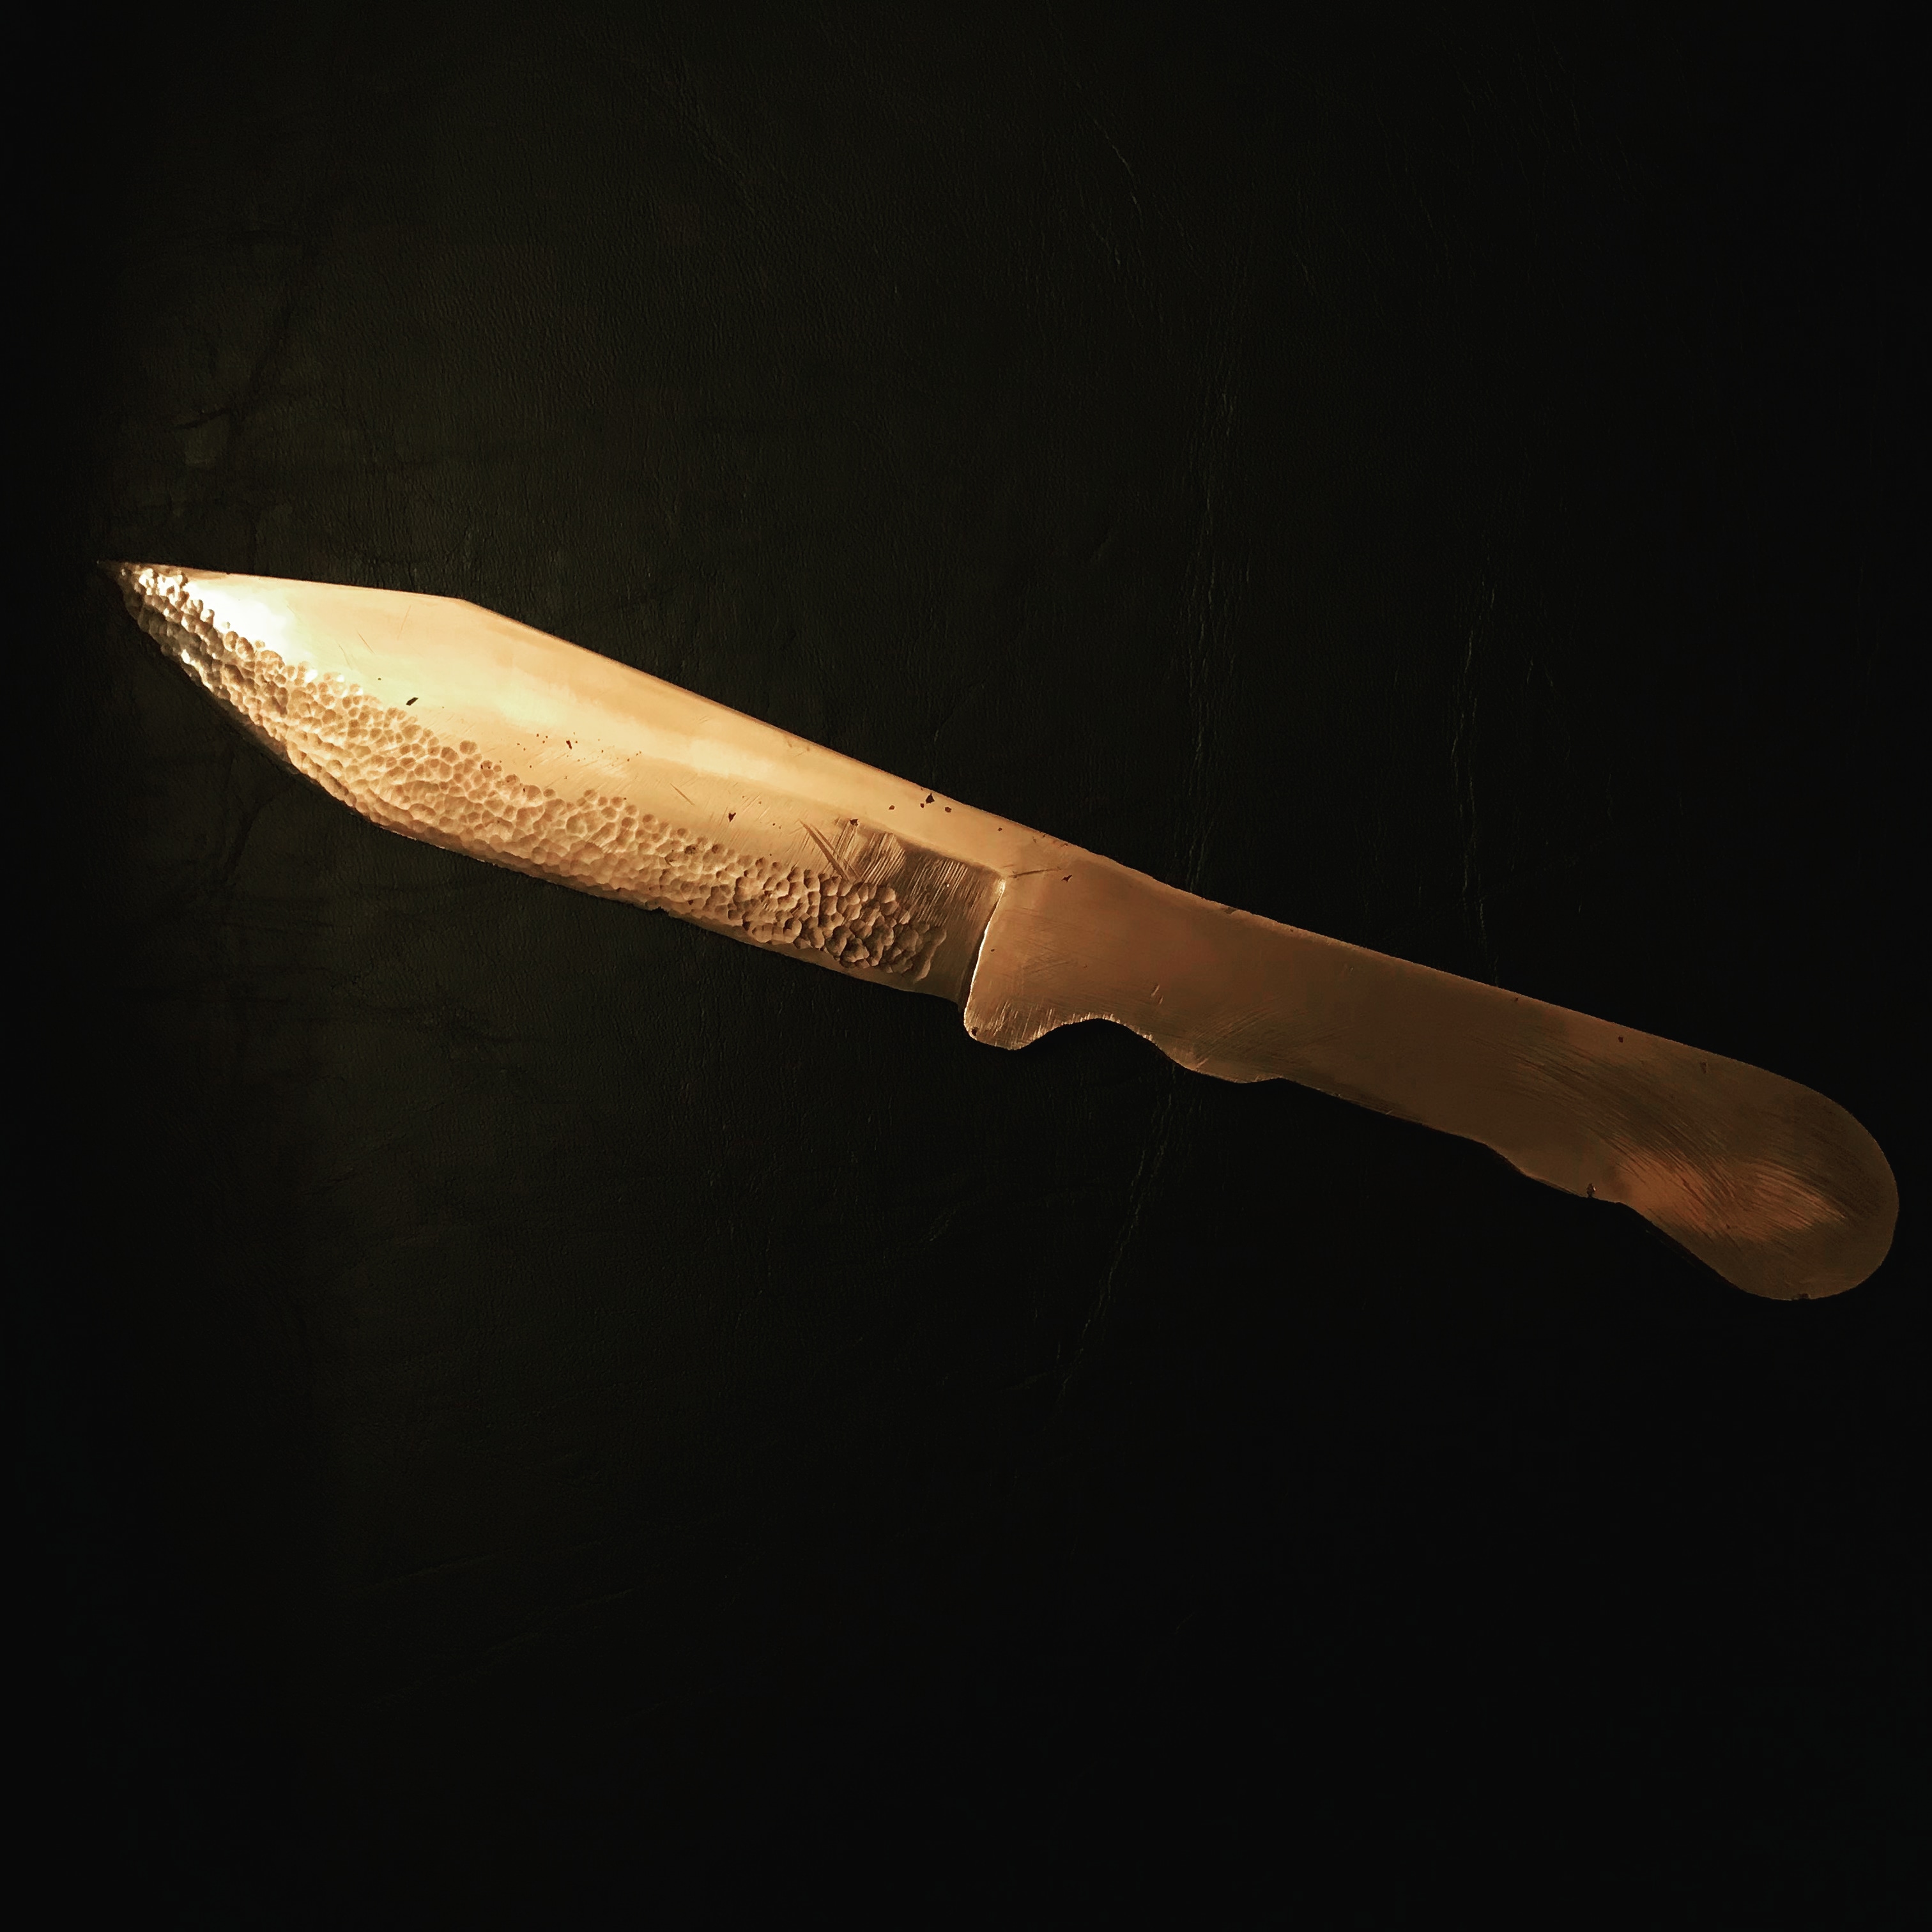
I got the copper from a nearby company which had pure copper scrap, and the tin from 97%tin solder 3% copper.
The edge is work hardened, i made a little jug which you can hammer and slide the edge back and forth to get perfect hits.
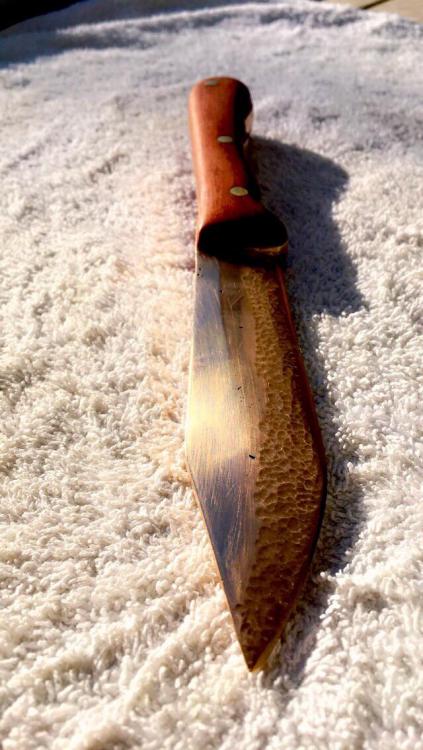
Im now finishing the handle (zapote) and planning the next one, with a very different blade shape. This one is a bit thick, weighs 318g for a 9.75inch knife. I wasnt sure how strong it would be and left some margin of error for casting.

-
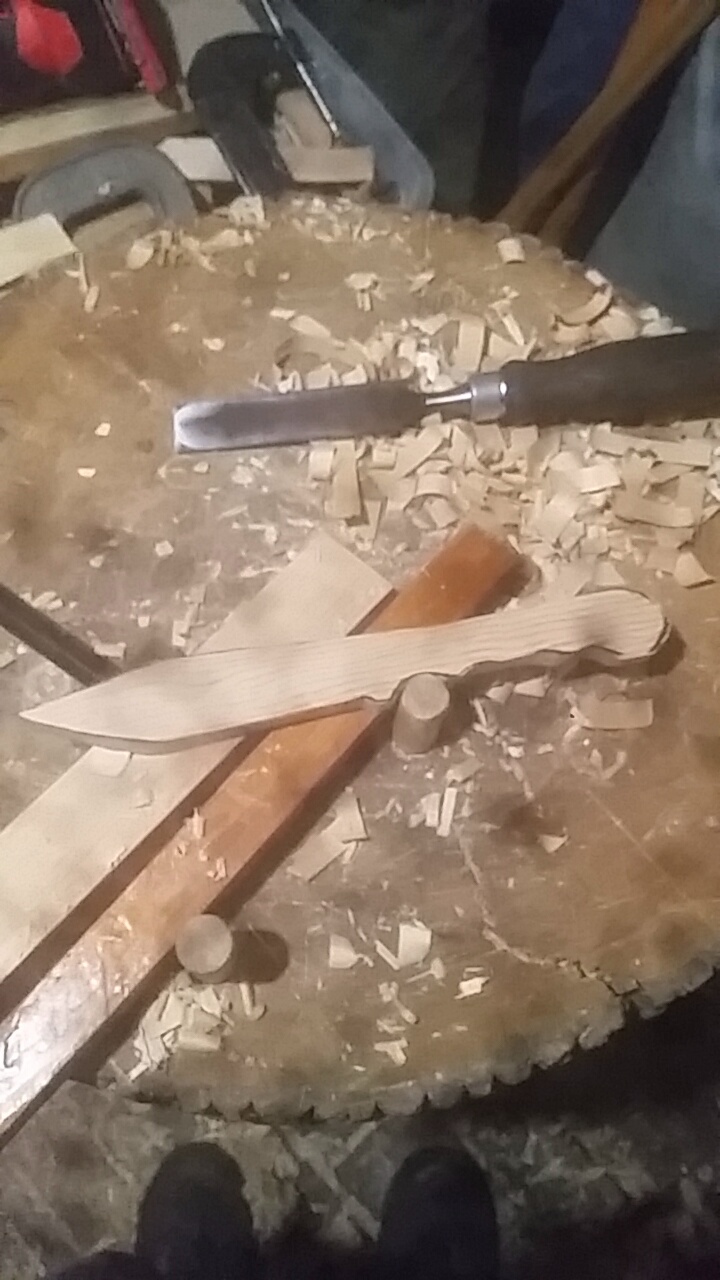
Starting from a wooden carving , to sand casting in bronze. 90% copper 10% tin


-
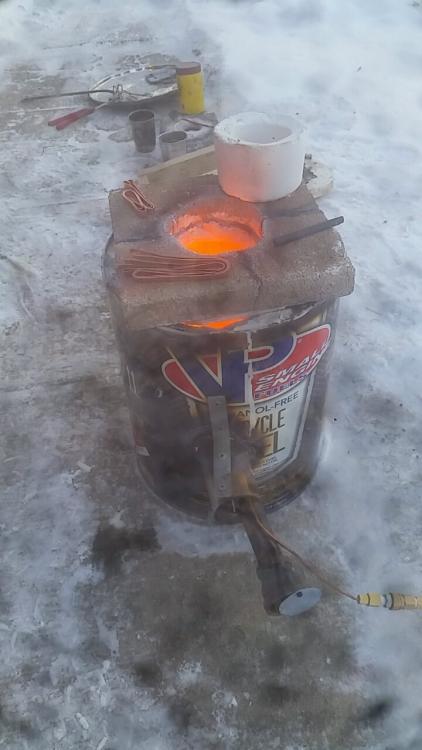
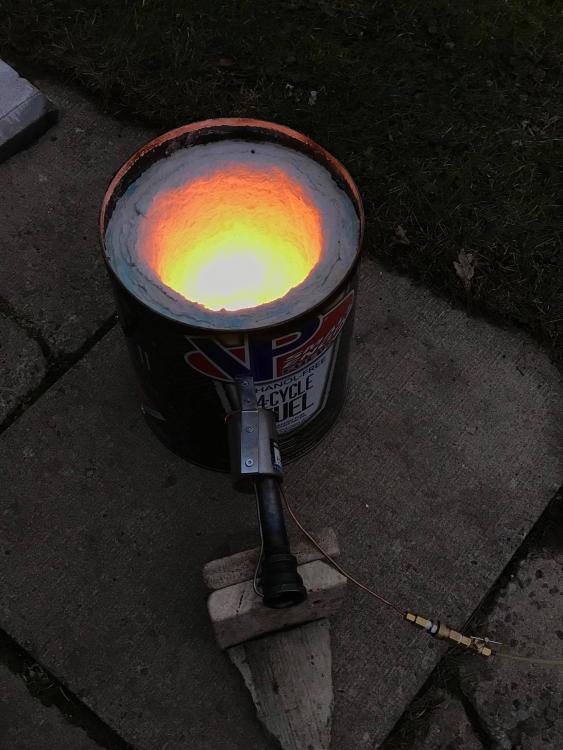
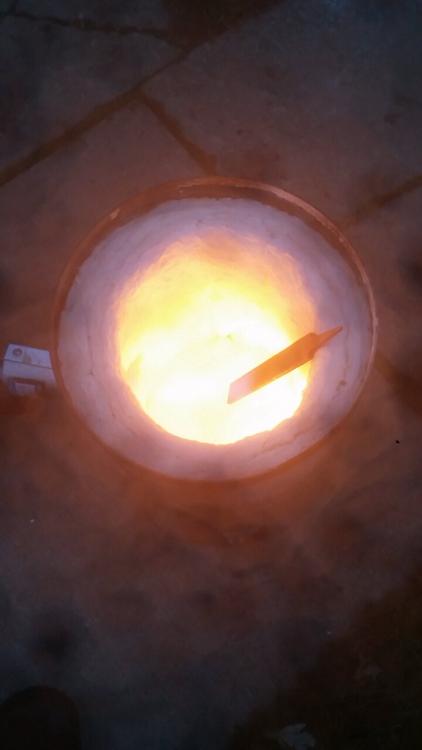
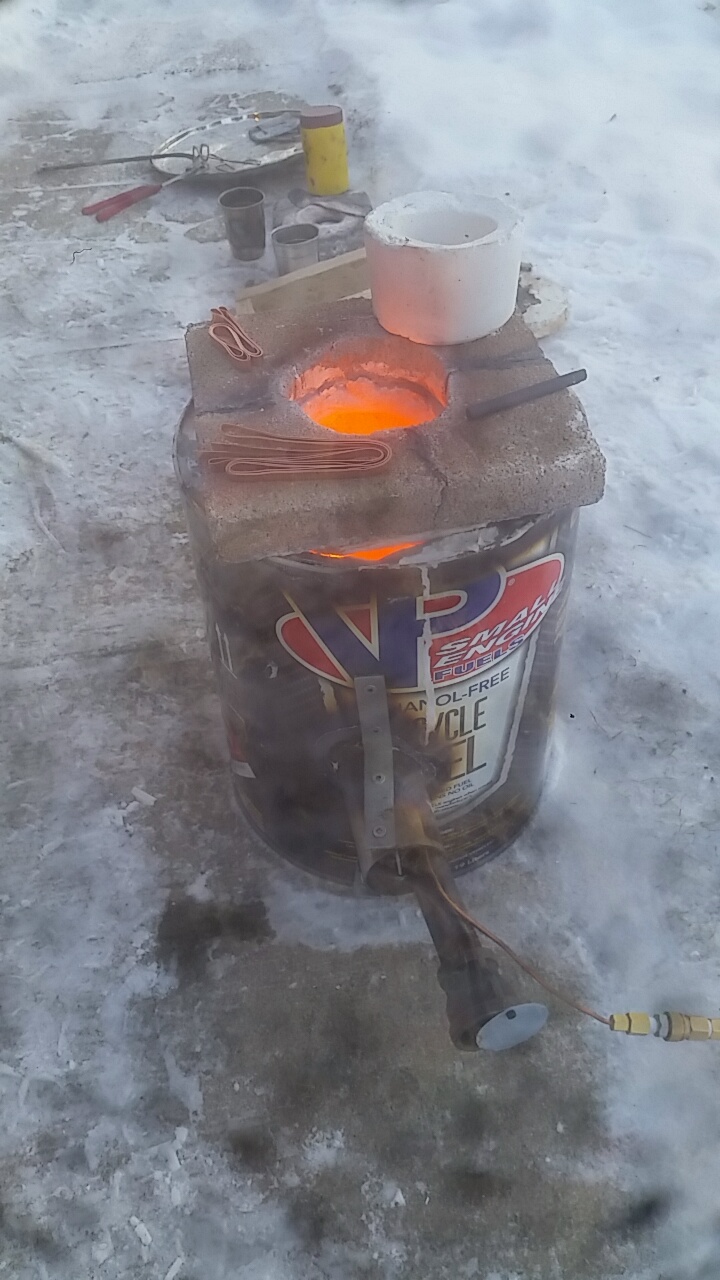
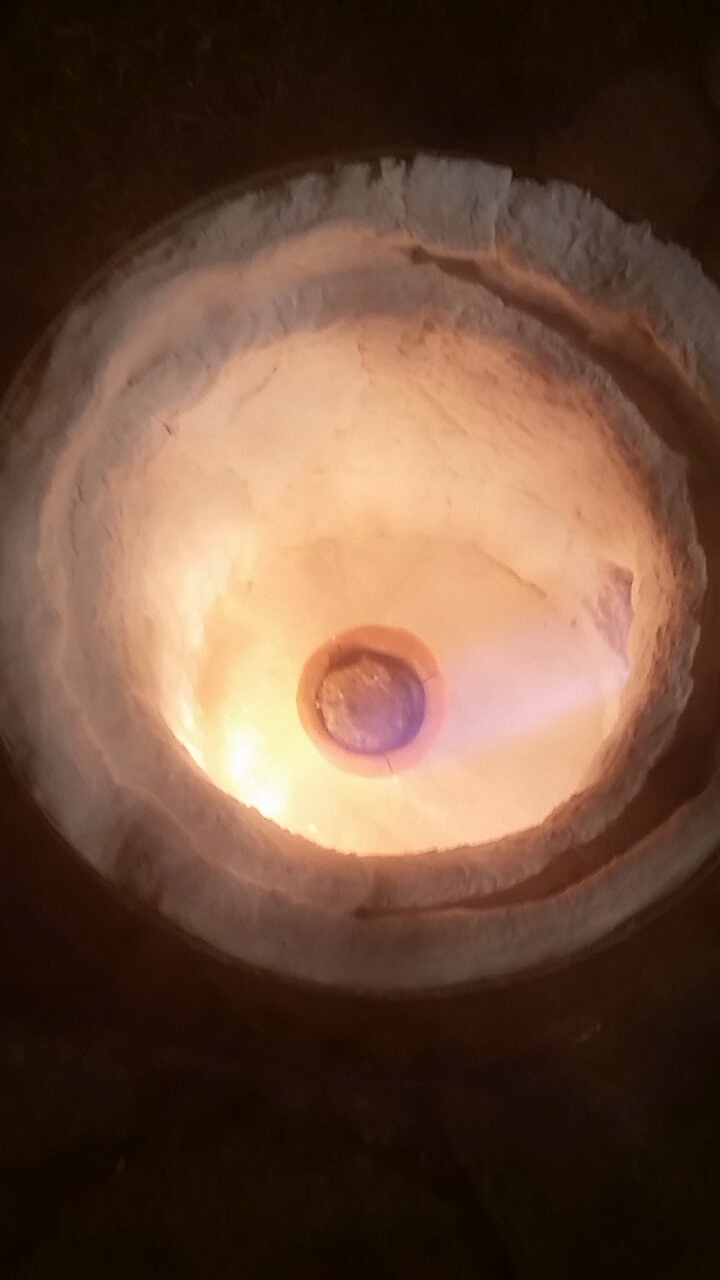
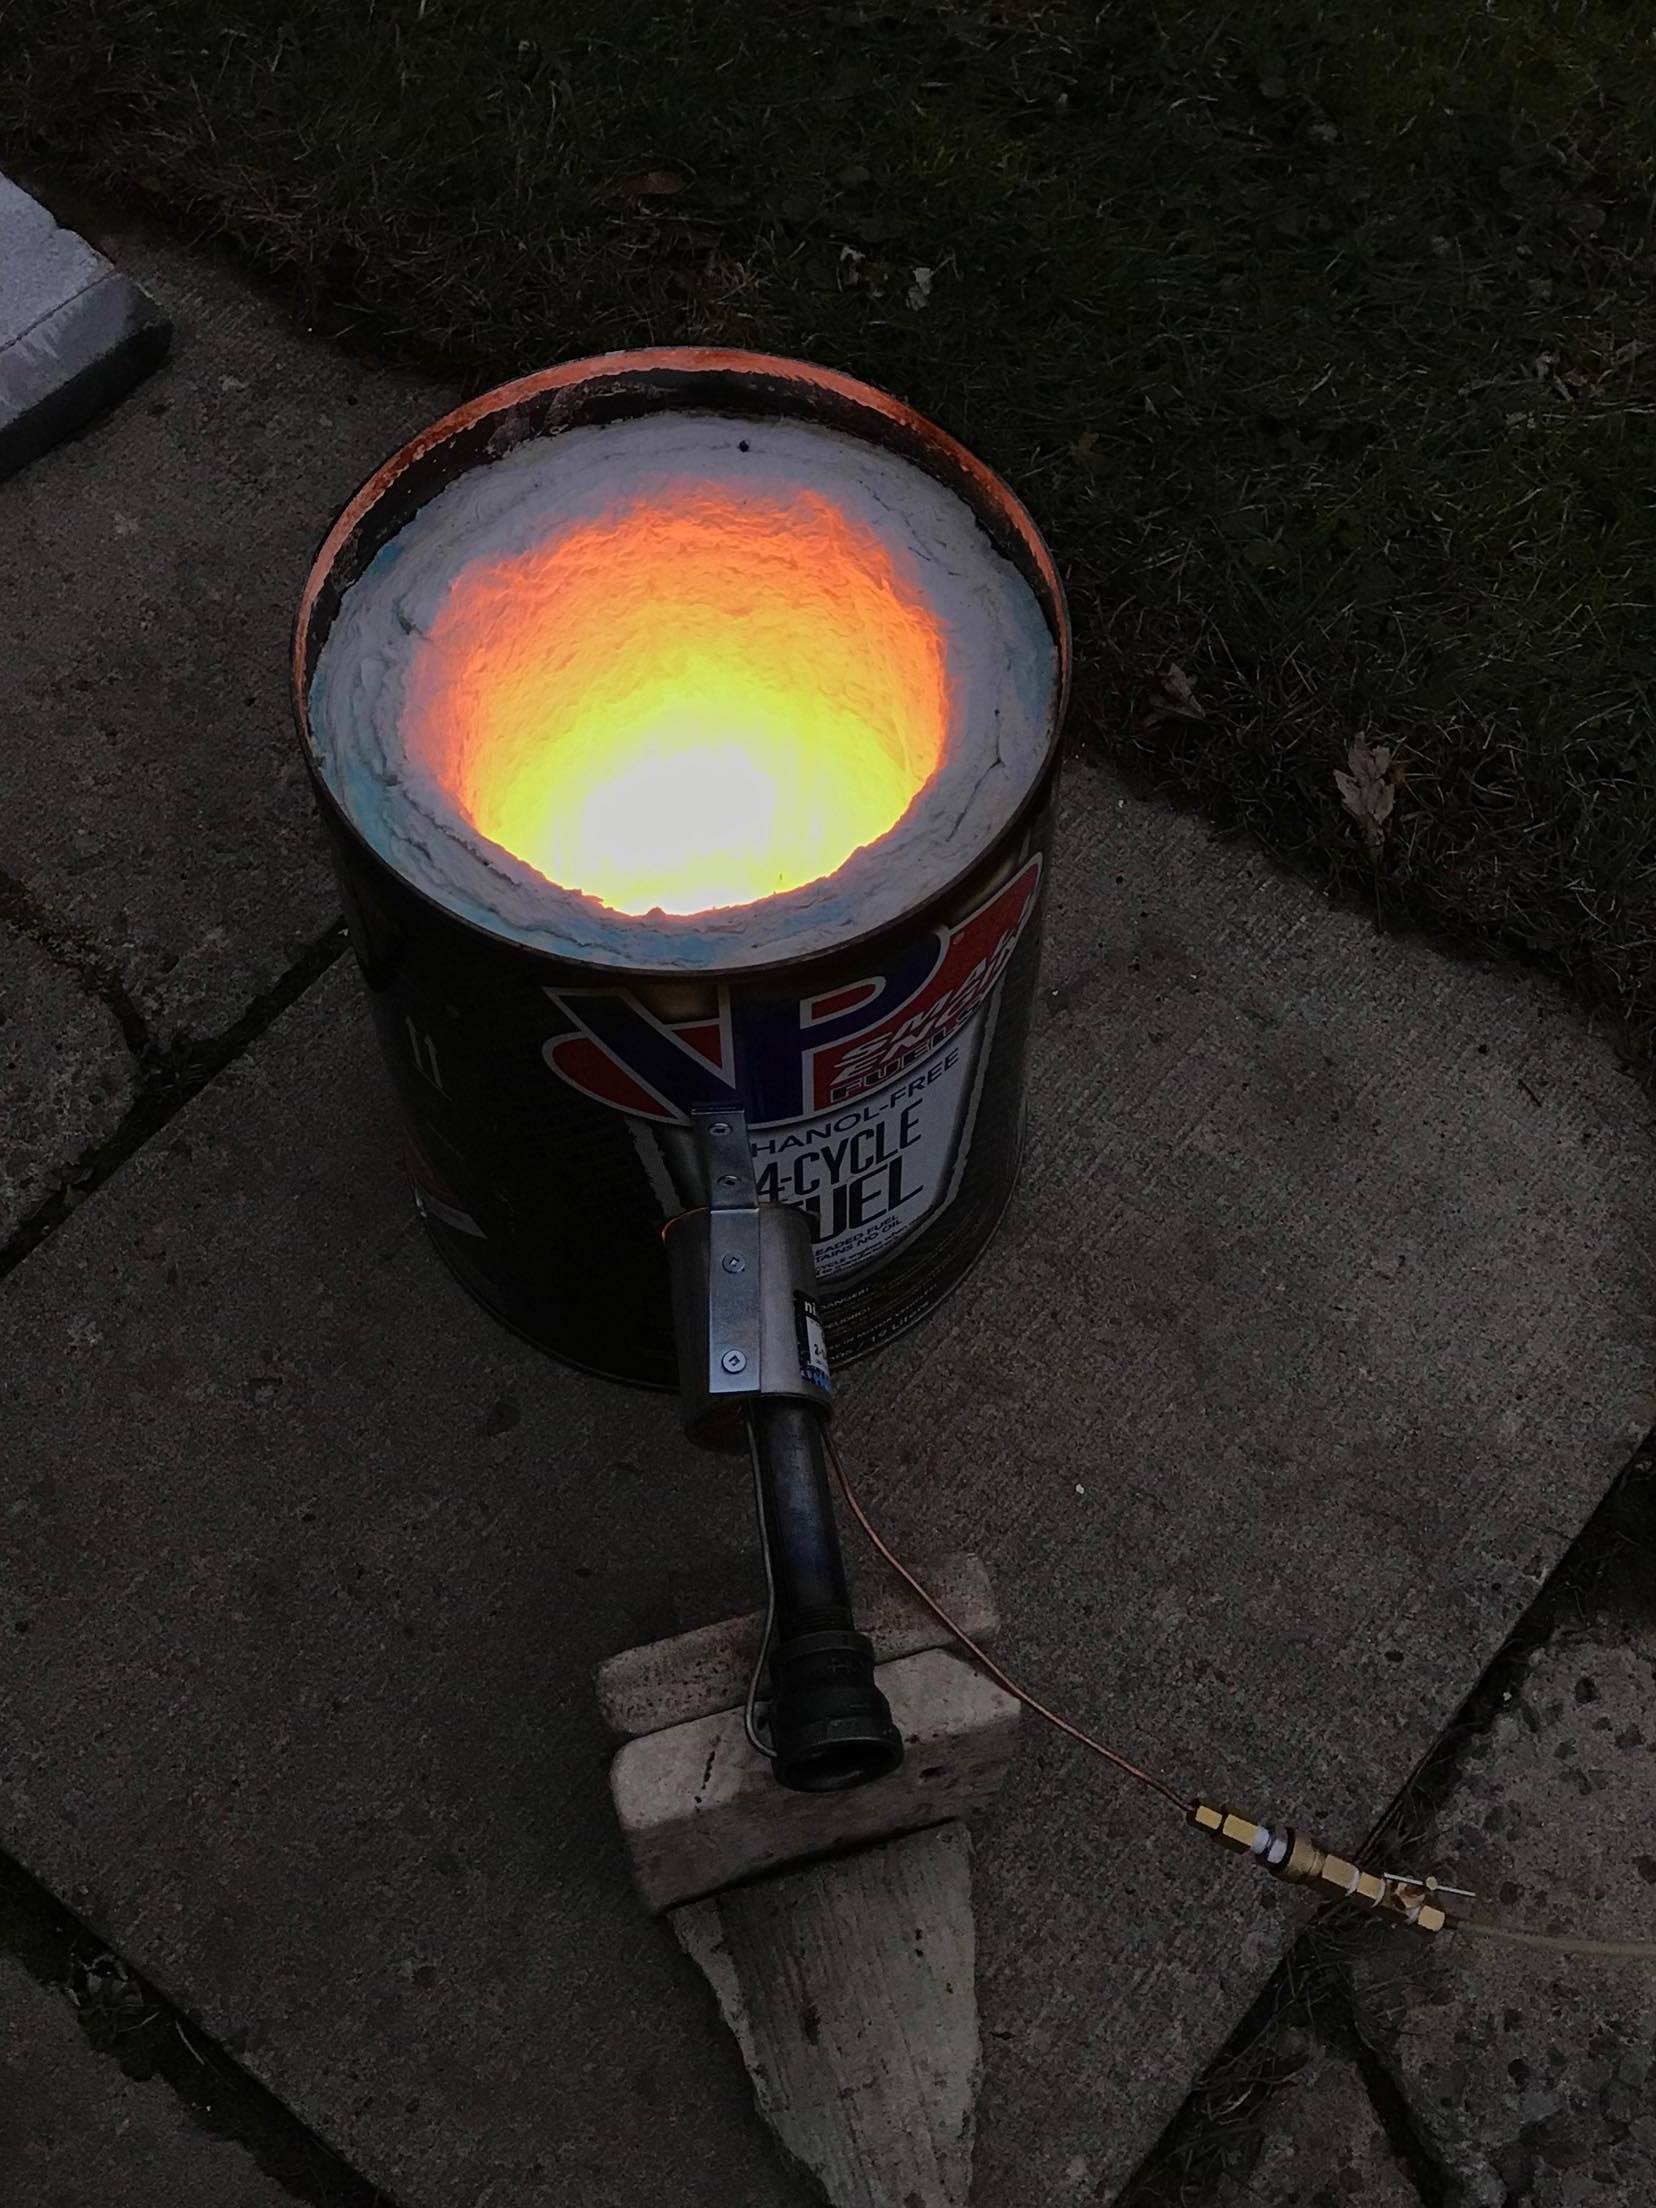
Added the mounting, and made a lid for now, as well as a choke, turns out it was running very lean, i was able to close the choke alot as shown in the pictures. The forge easily reaches temperature for casting bronze/copper
")
-
Yes mikey, that is exactly where i got the idea from, was just a bit finicky to setup.
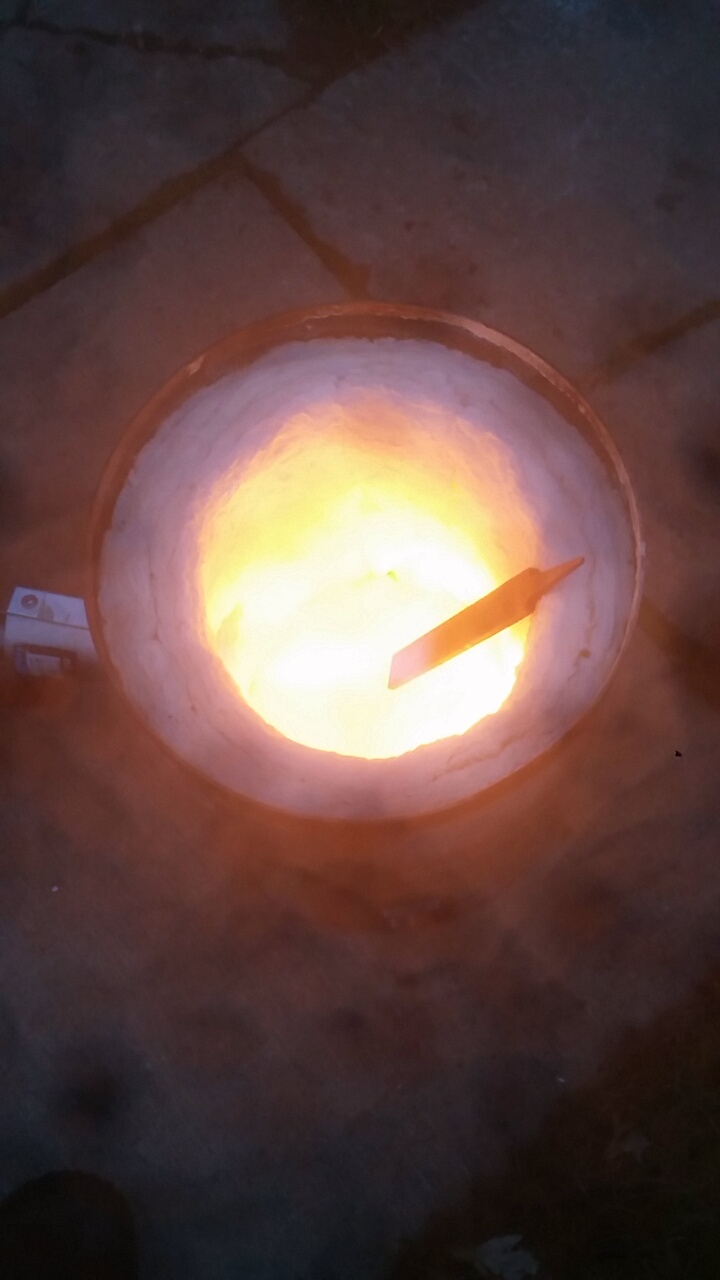
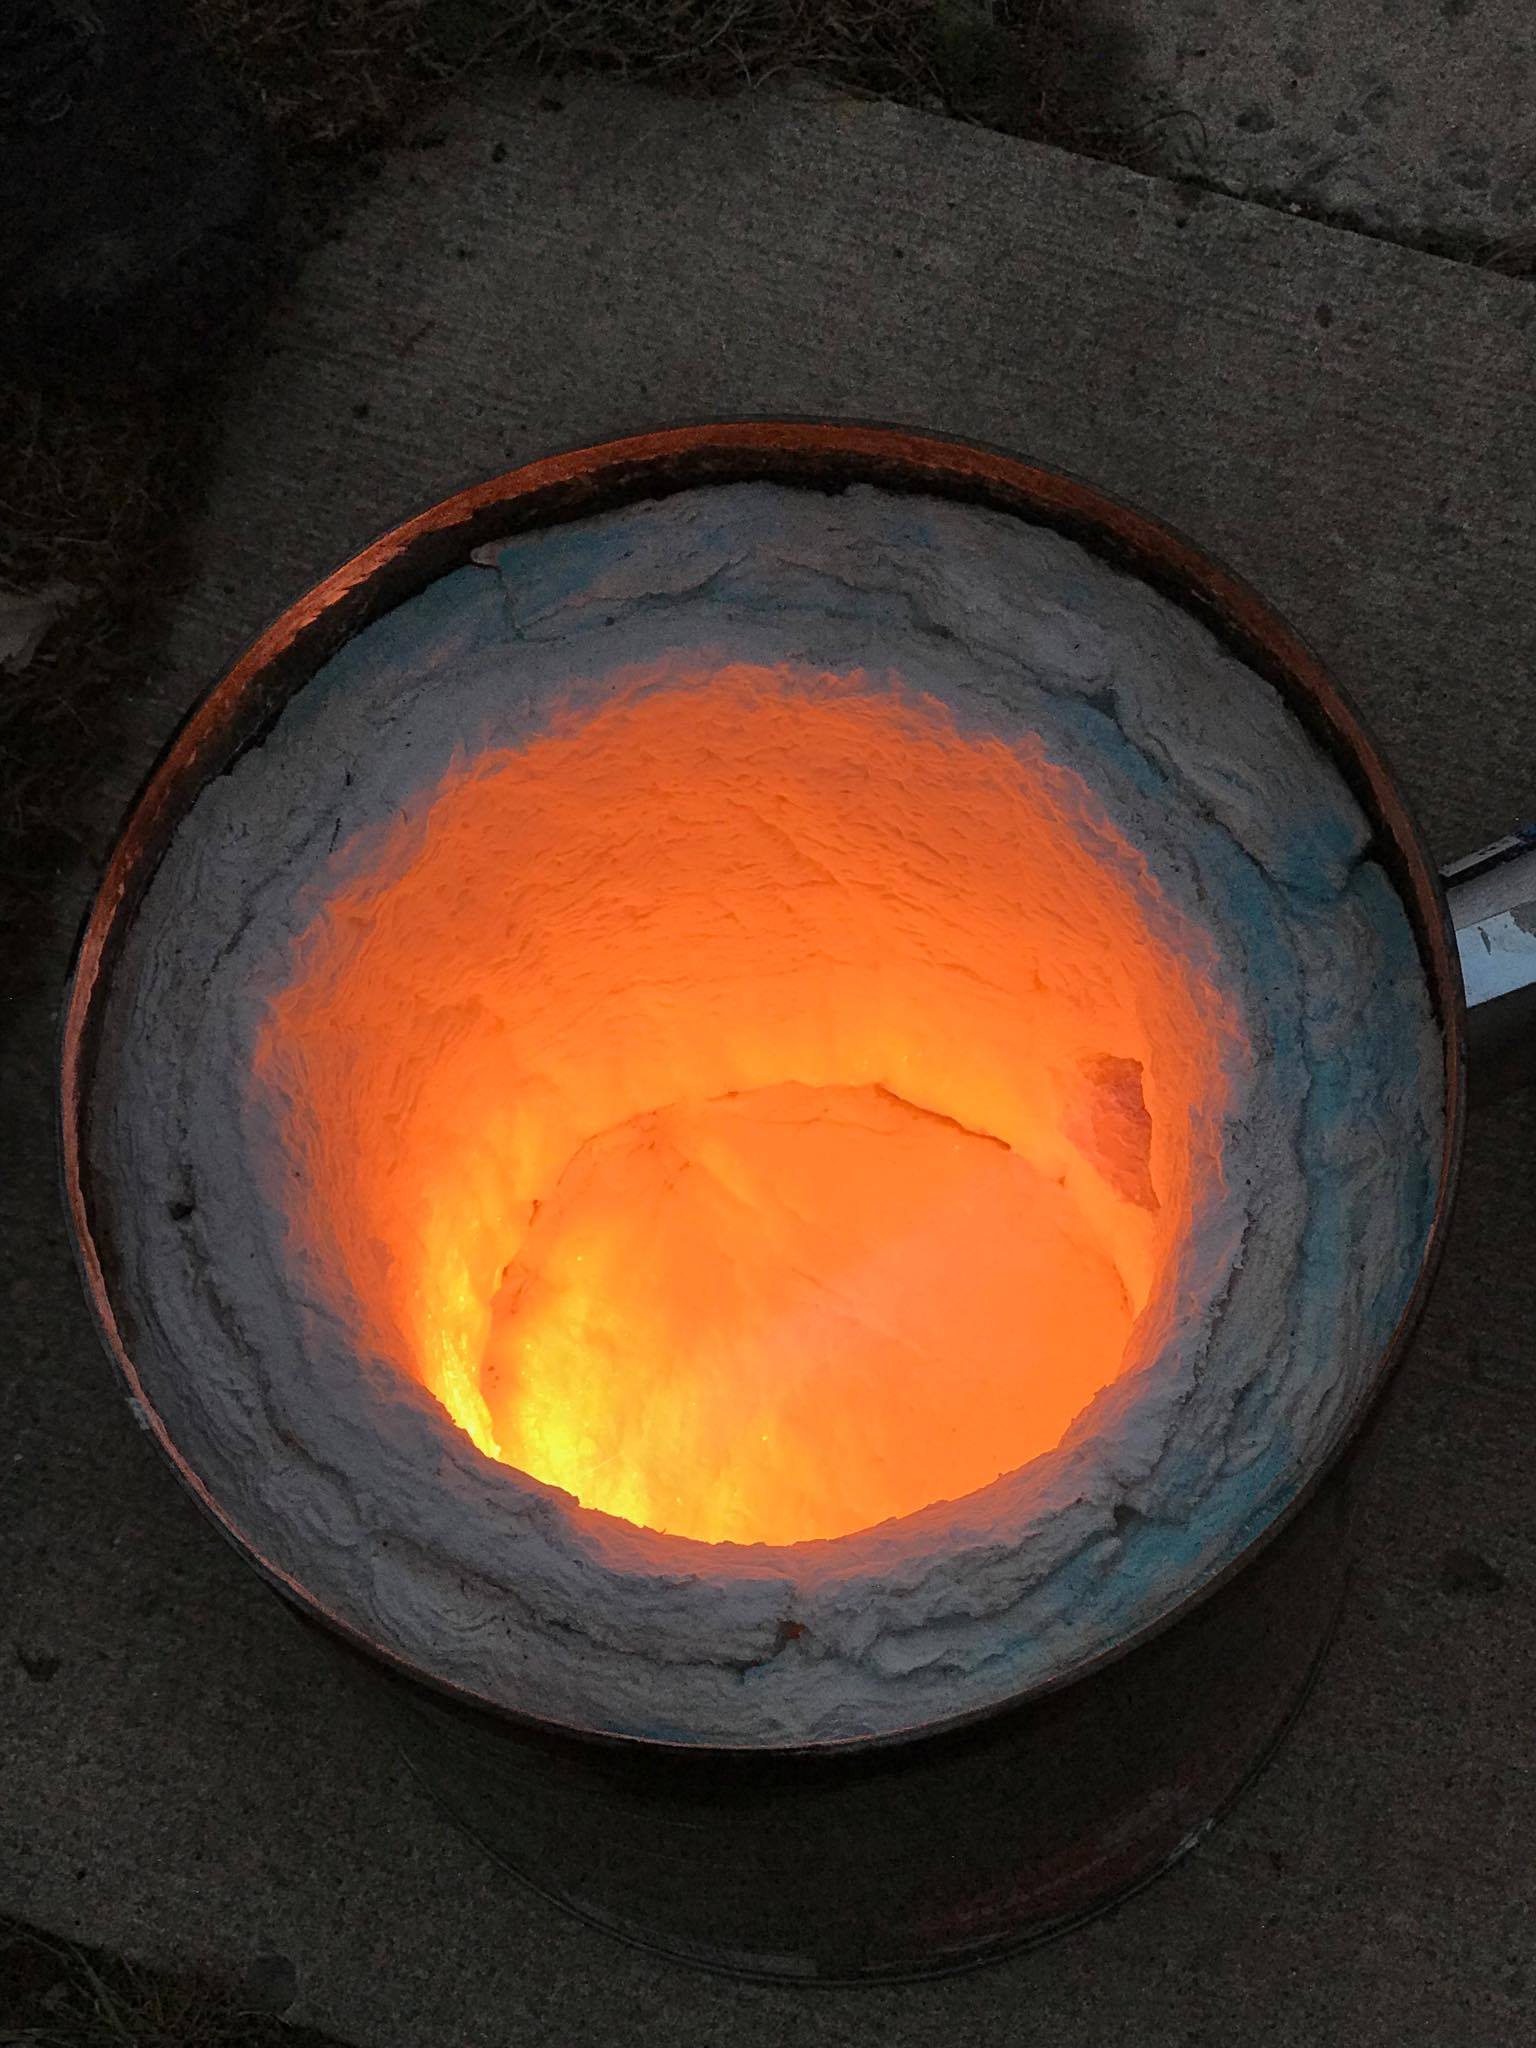
I dont know what the temperature is, but it seems to be hot enough for any of my purposes so Im happy.
-
Yep the wool has just been rigidized, that is the next step!
Yeah, probably will get a regular burner designed eventually. I do not recommend "my" type of burner, very difficult to get working well, and more dangerous, it is just a cheap temporary solution, and I'm having fun experimenting.
-
Not running on oil, havent tried oil, it is gasoline, thank you though!
-
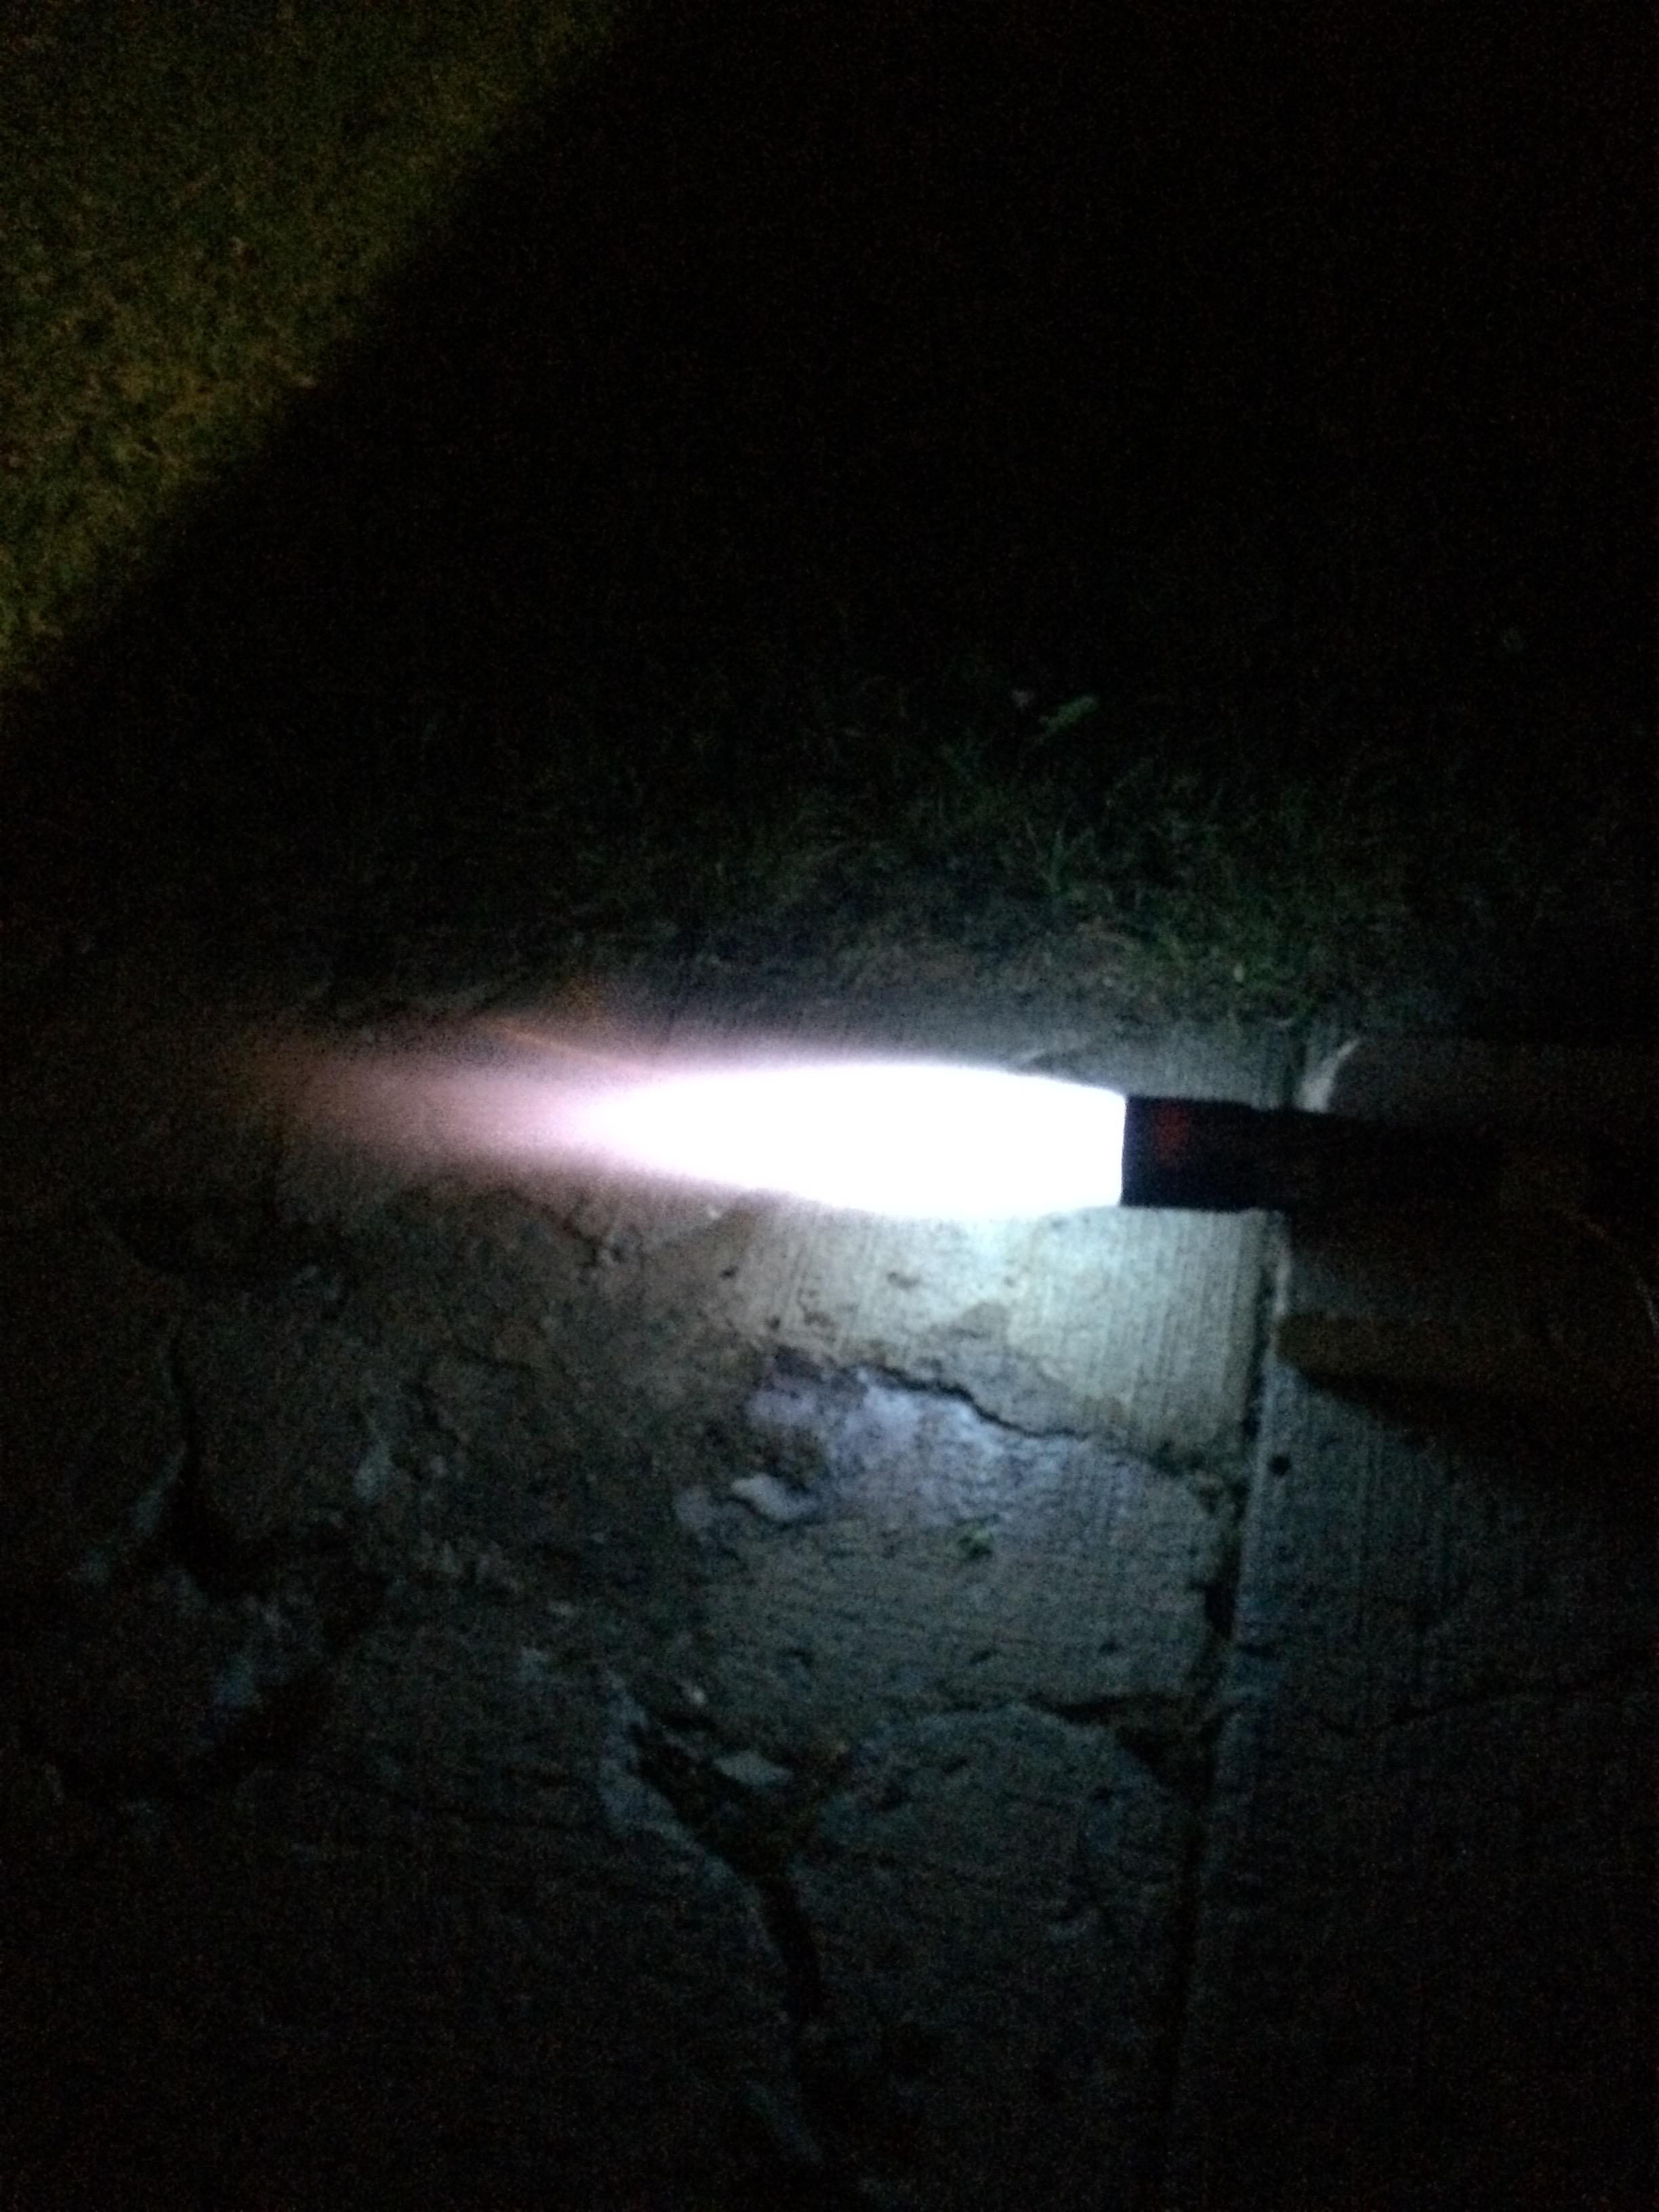
Both pictures as the forge is warming up, got to take one next time I use it. There is no "dragons breath", even with the burner port sealed around the burner.
Why does the flame seem to disappear once its heated up?
How can i seal the burner port arpund the burner effectively?


-
Now just gotta make permanent mounting screws for the burner
-
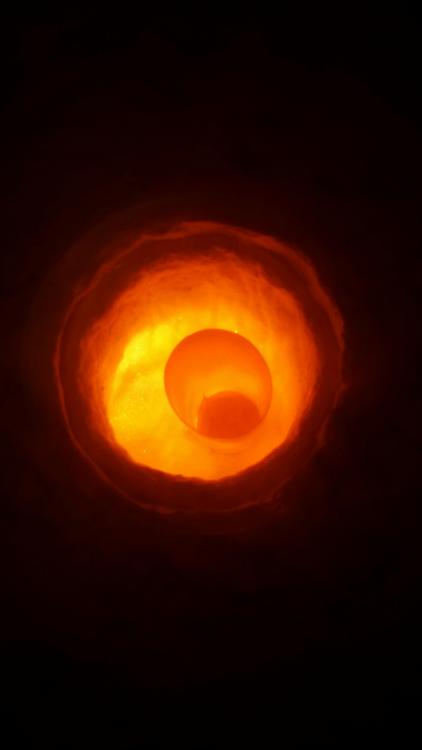
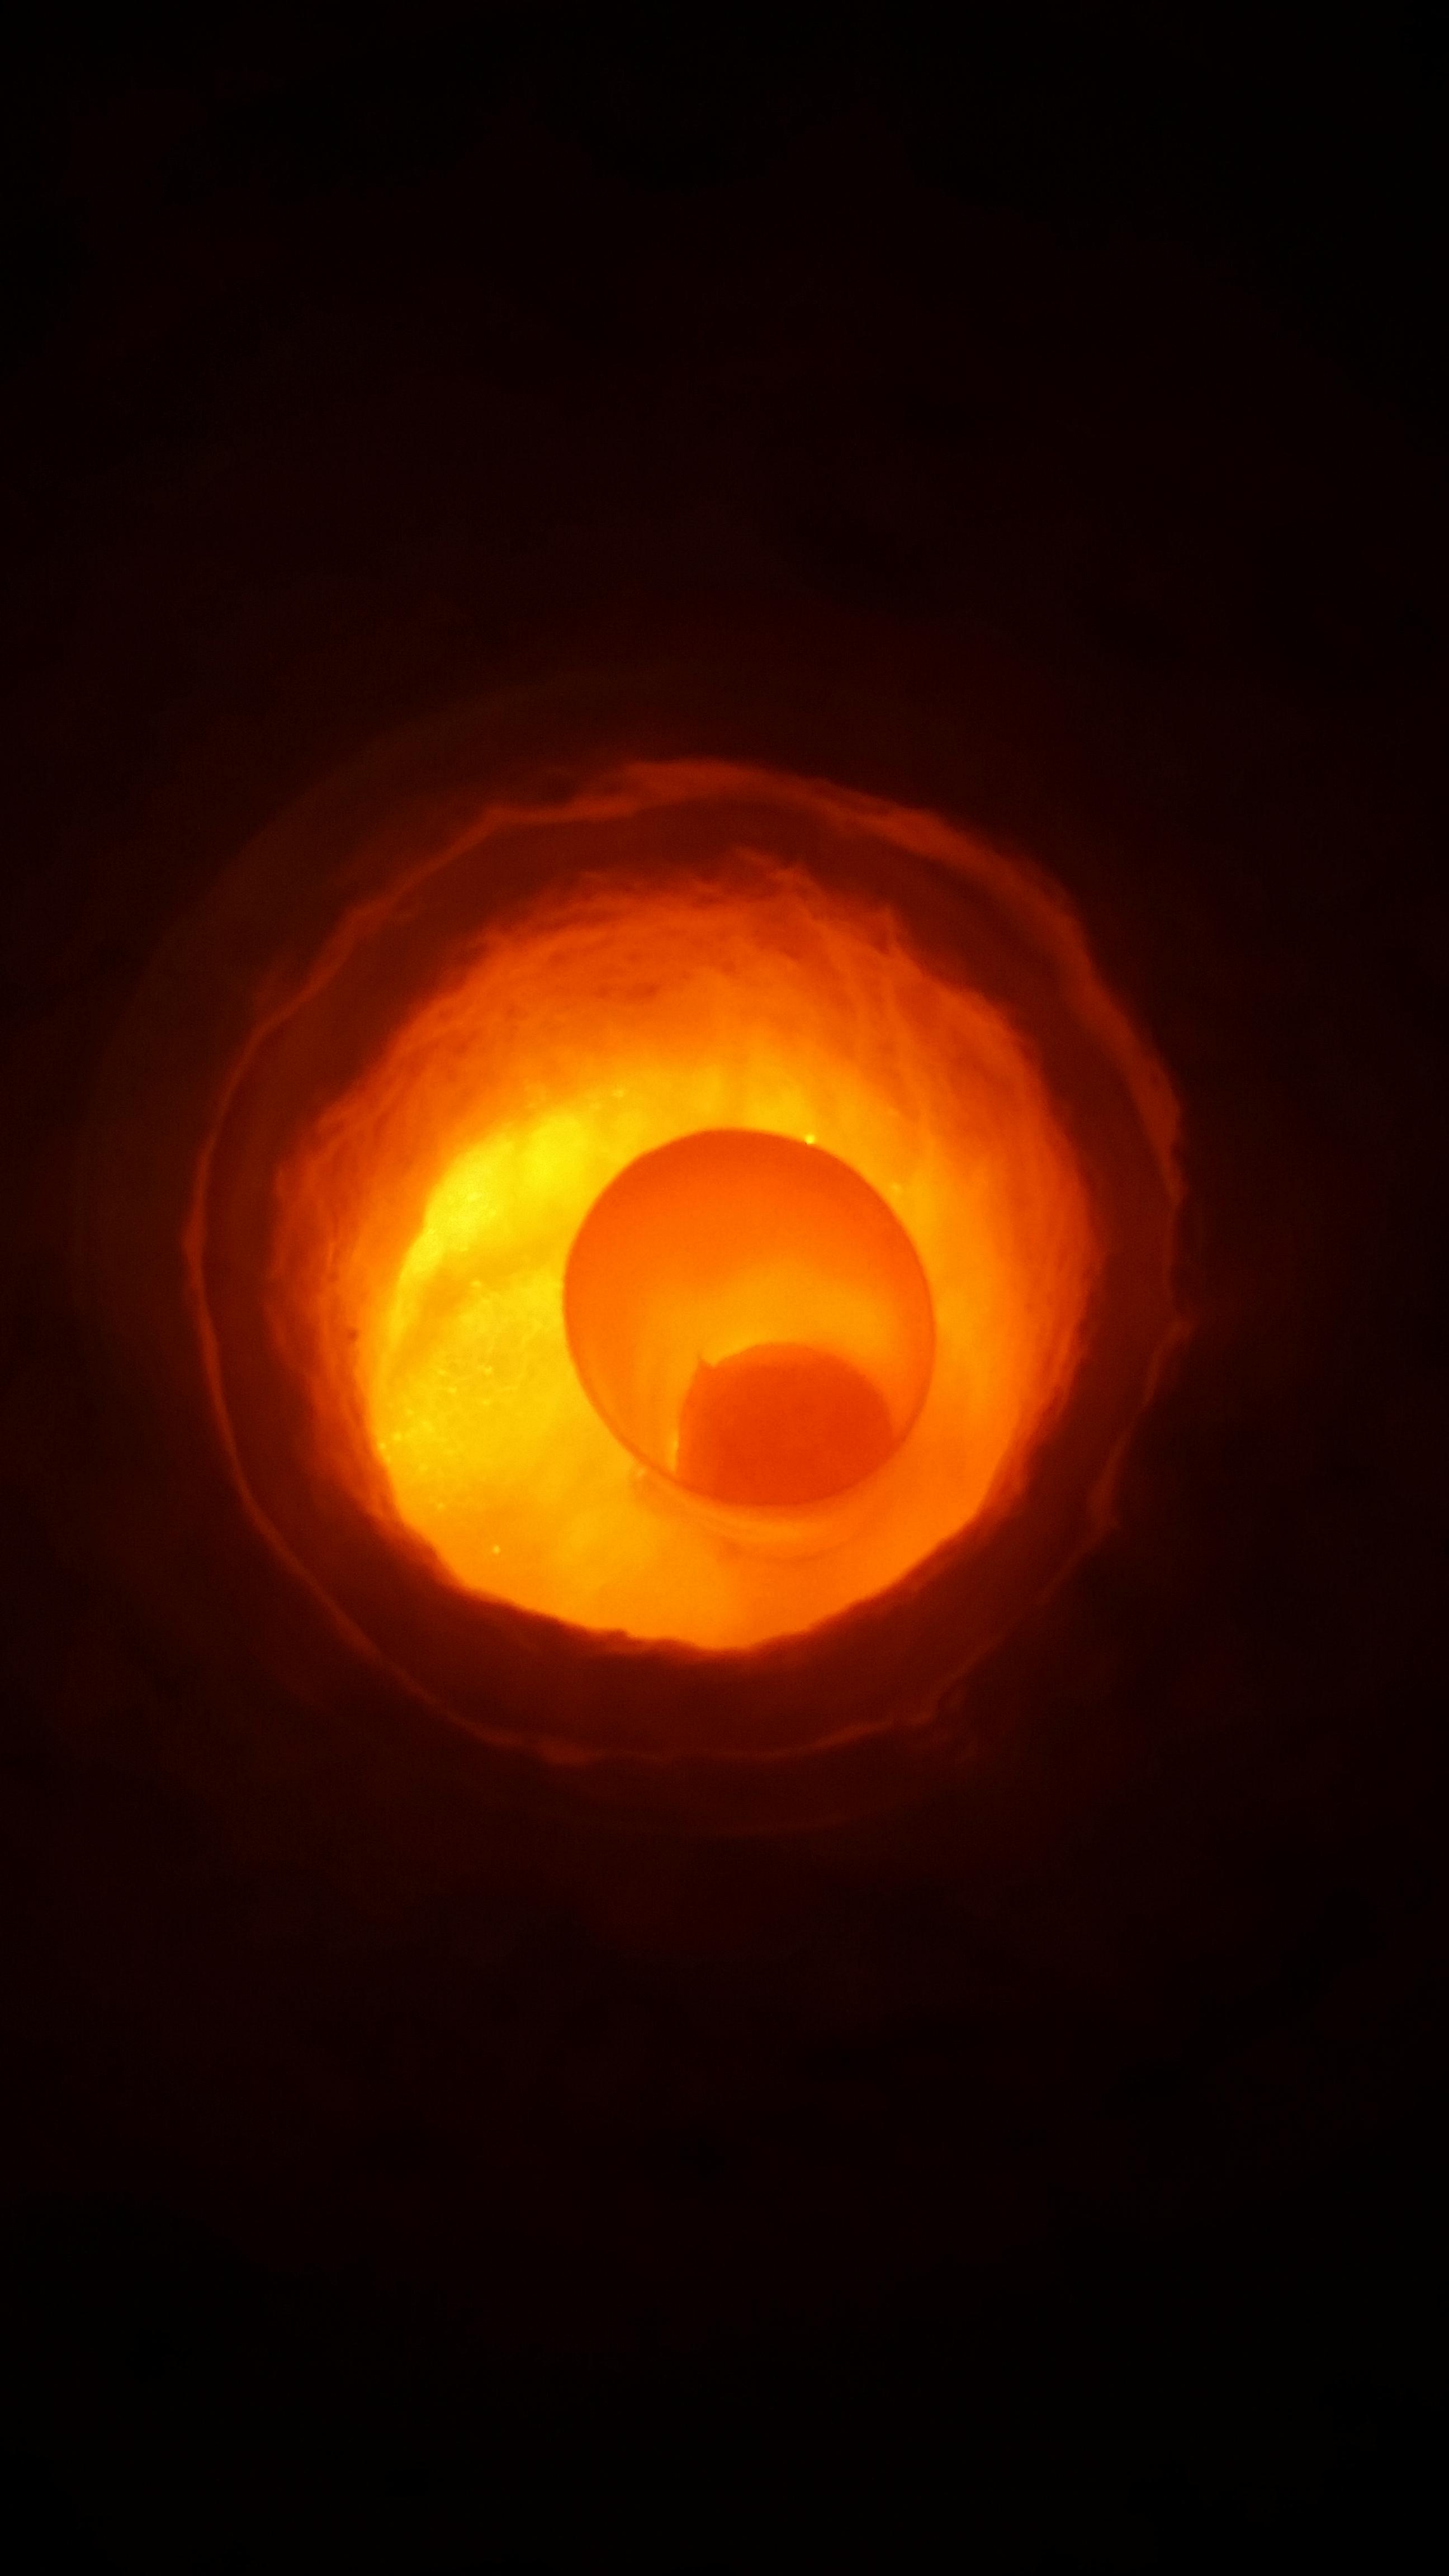
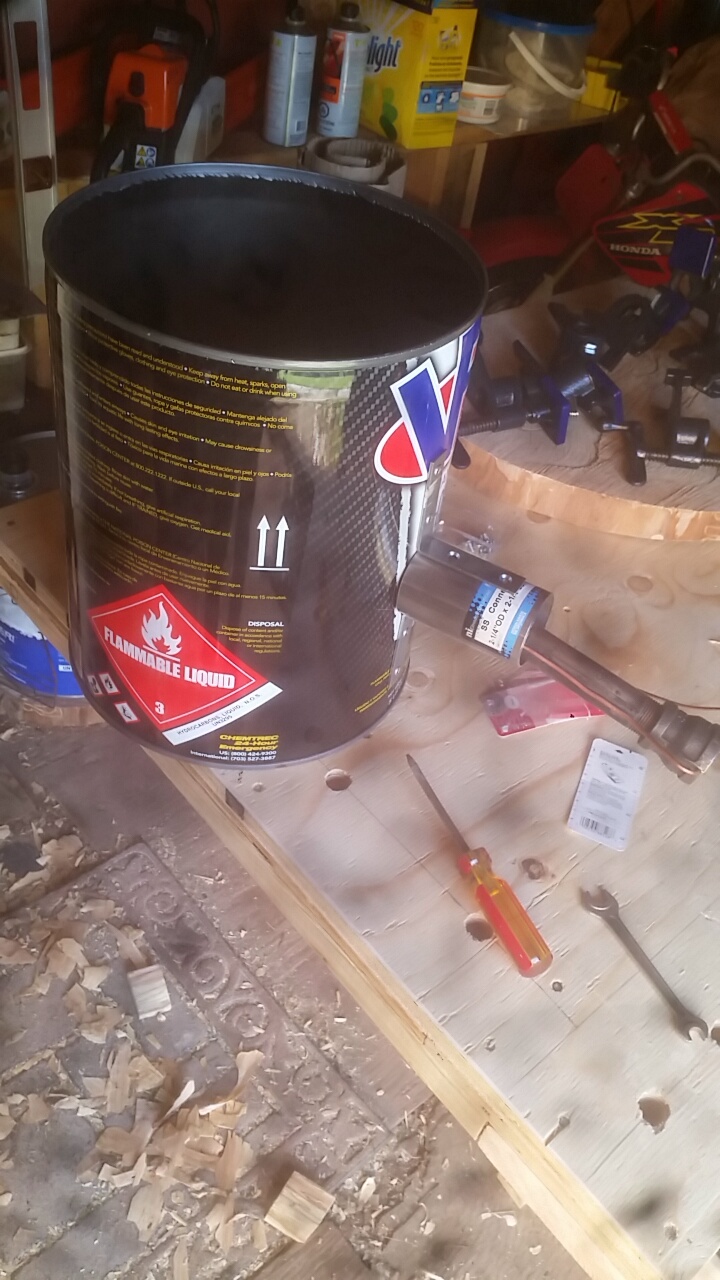
Well i got the forge together mostly (or rather foundry, since that is what i will mostly be using it for). Still needs the firebrick floor to be installed, and to be coated with zircon. This was just the first firing for the rigidizer. Stuck an old rusty file into there to see how it heated it up. Works great.


-
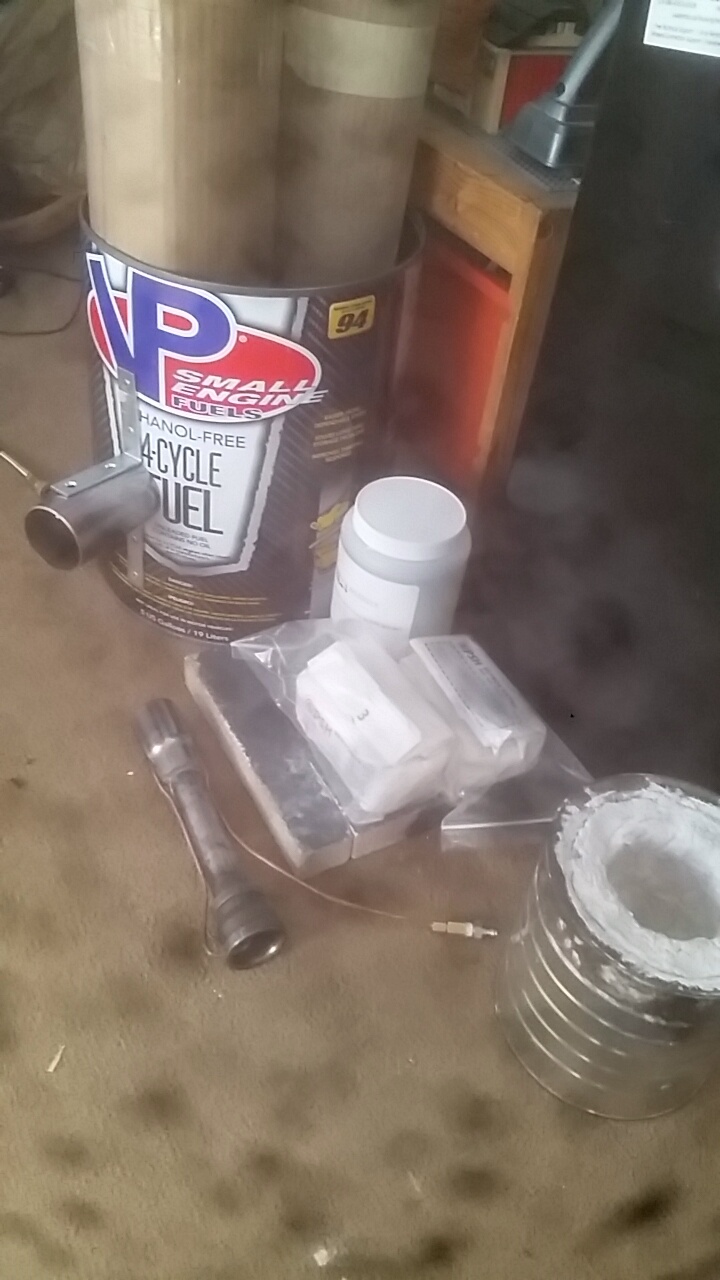
Got everything needed to out the forge together finally.
10.5 diameter by 13 inch tall steel can
Burner, mounts
Ceramic blanket, and rigidizer (going to have 2 inches)
1 inch hard Firebrick as floor removable protection.
Zircon, and bentonite for coating ceramic blanket for ir reflection


-
Should have a container to start making the forge to go along with this burner by the end of this week!
-
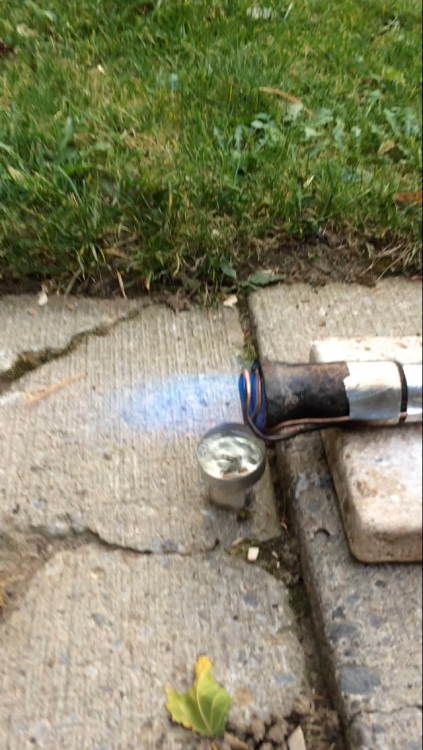
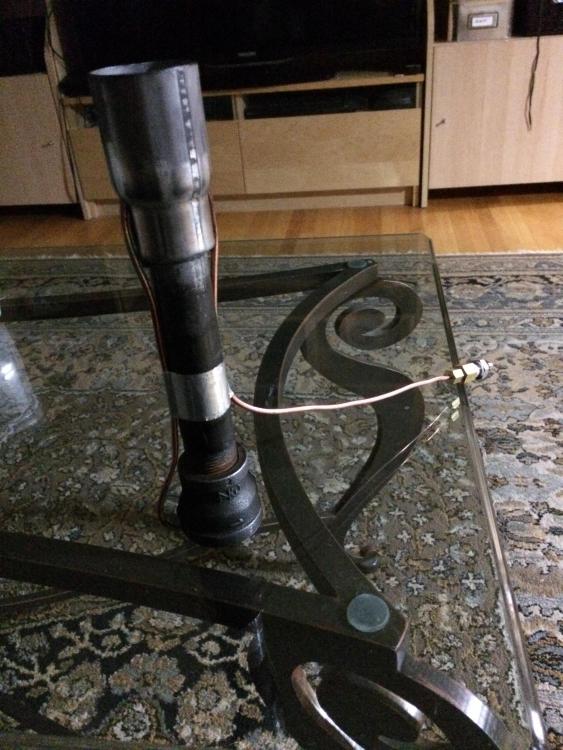
This design allows only a small volume of fuel to be heated at once, just the volume of the 1-8th inch copper tube which is used to vaporize the fuel. It also doesn't require any air source (the fuel doesn't need to be atomized, it's vaporized instead). The fuel simply needs to be pressurized like in a Coleman stove, or with a fuel pump, this can be kept away from the burner/forge. Currently the fuel is pressurized to 40 to 60psi and the rate is controlled with a needle valve. I think it might work down to 15psi, but I haven't tried since it was redesigned. In the past running the fuel at lower pressure made it huff and go out easily because it would cause vapour lock. The check valve prevents this becoming a problem, but I haven't tested at lower pressures yet.
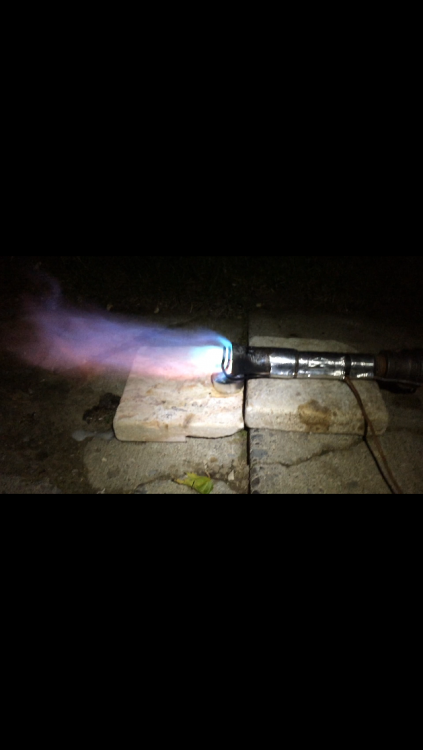
The new nozzle and other small changes fixed almost every problem it had, the flame is now very stable.
The next changes to include will be a small fuel filter, and trying the new design in a forge once my forge is built. Also polishing the nozzle in hopes it will become coloured from oxidation. Eventually a choke will be added for more control.

-
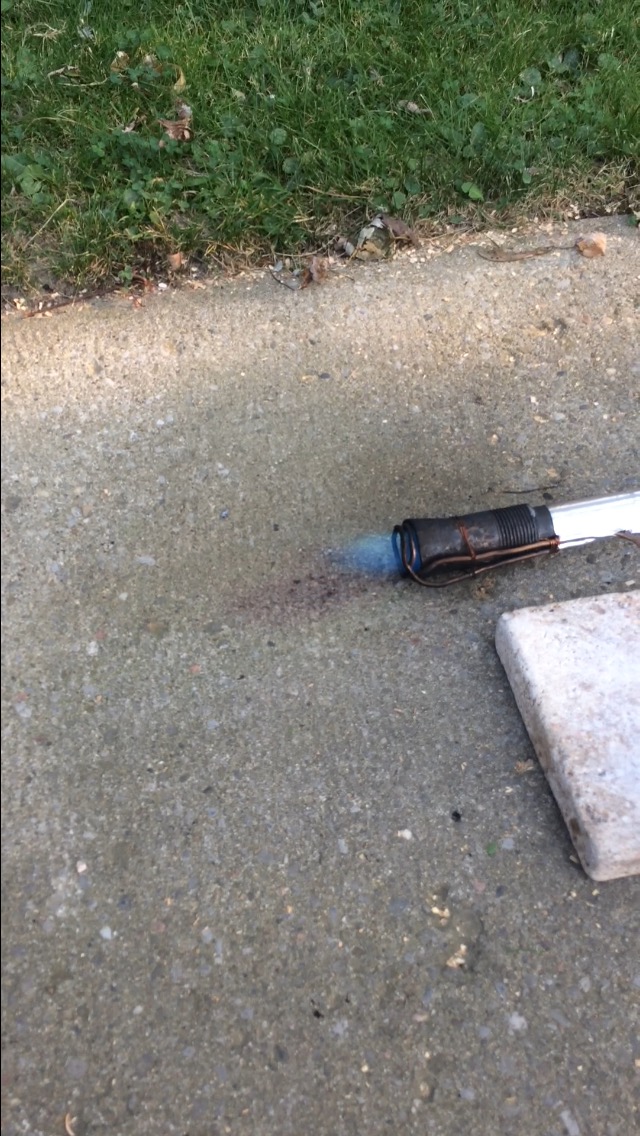
It seems to lean out more as it warms up.
-
Naturally aspirated, originally based off the modified easy burner. The fuel is simply vaporized, but only a very small portion at a time <1ml. Works exactly like a normal burner it seems.
Next weekend I'll make some adjustments to make it less rich then, thank you.
-
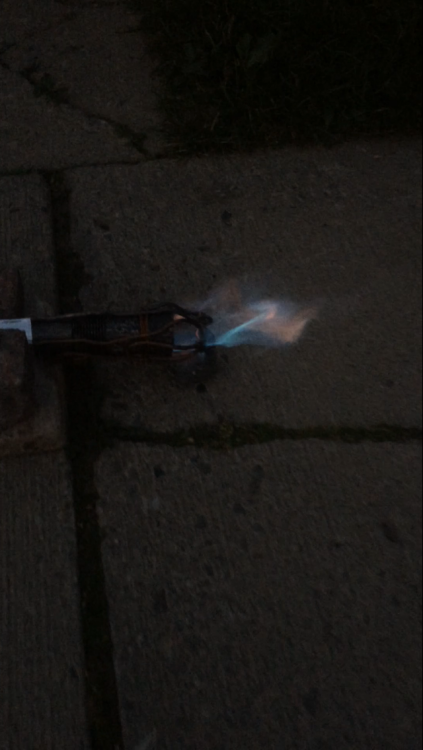
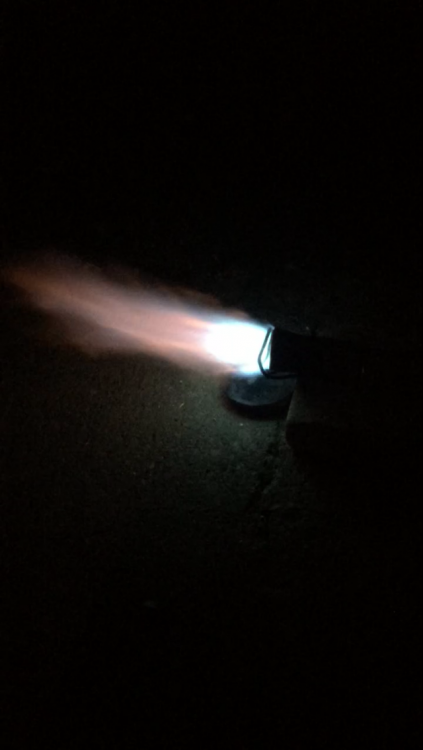
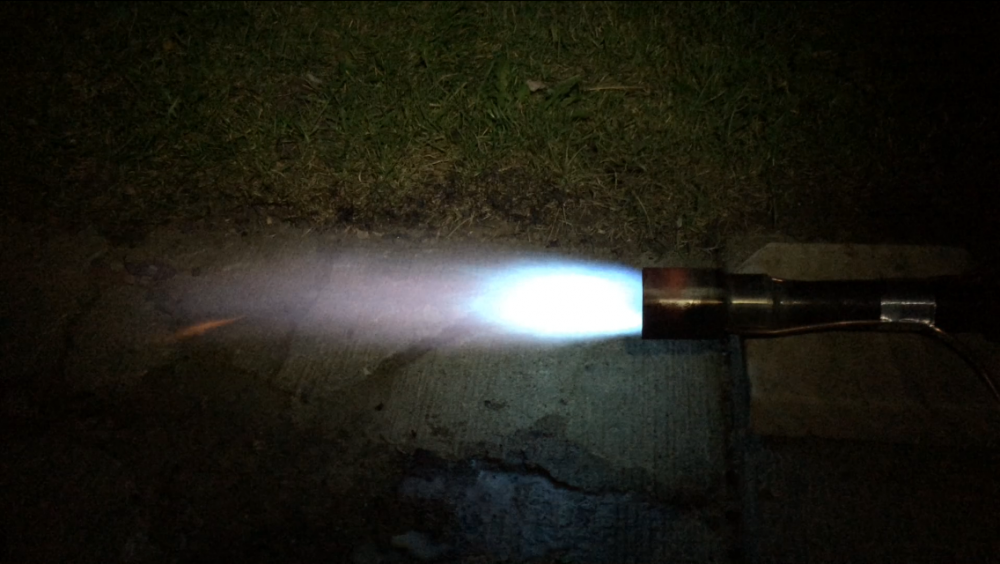
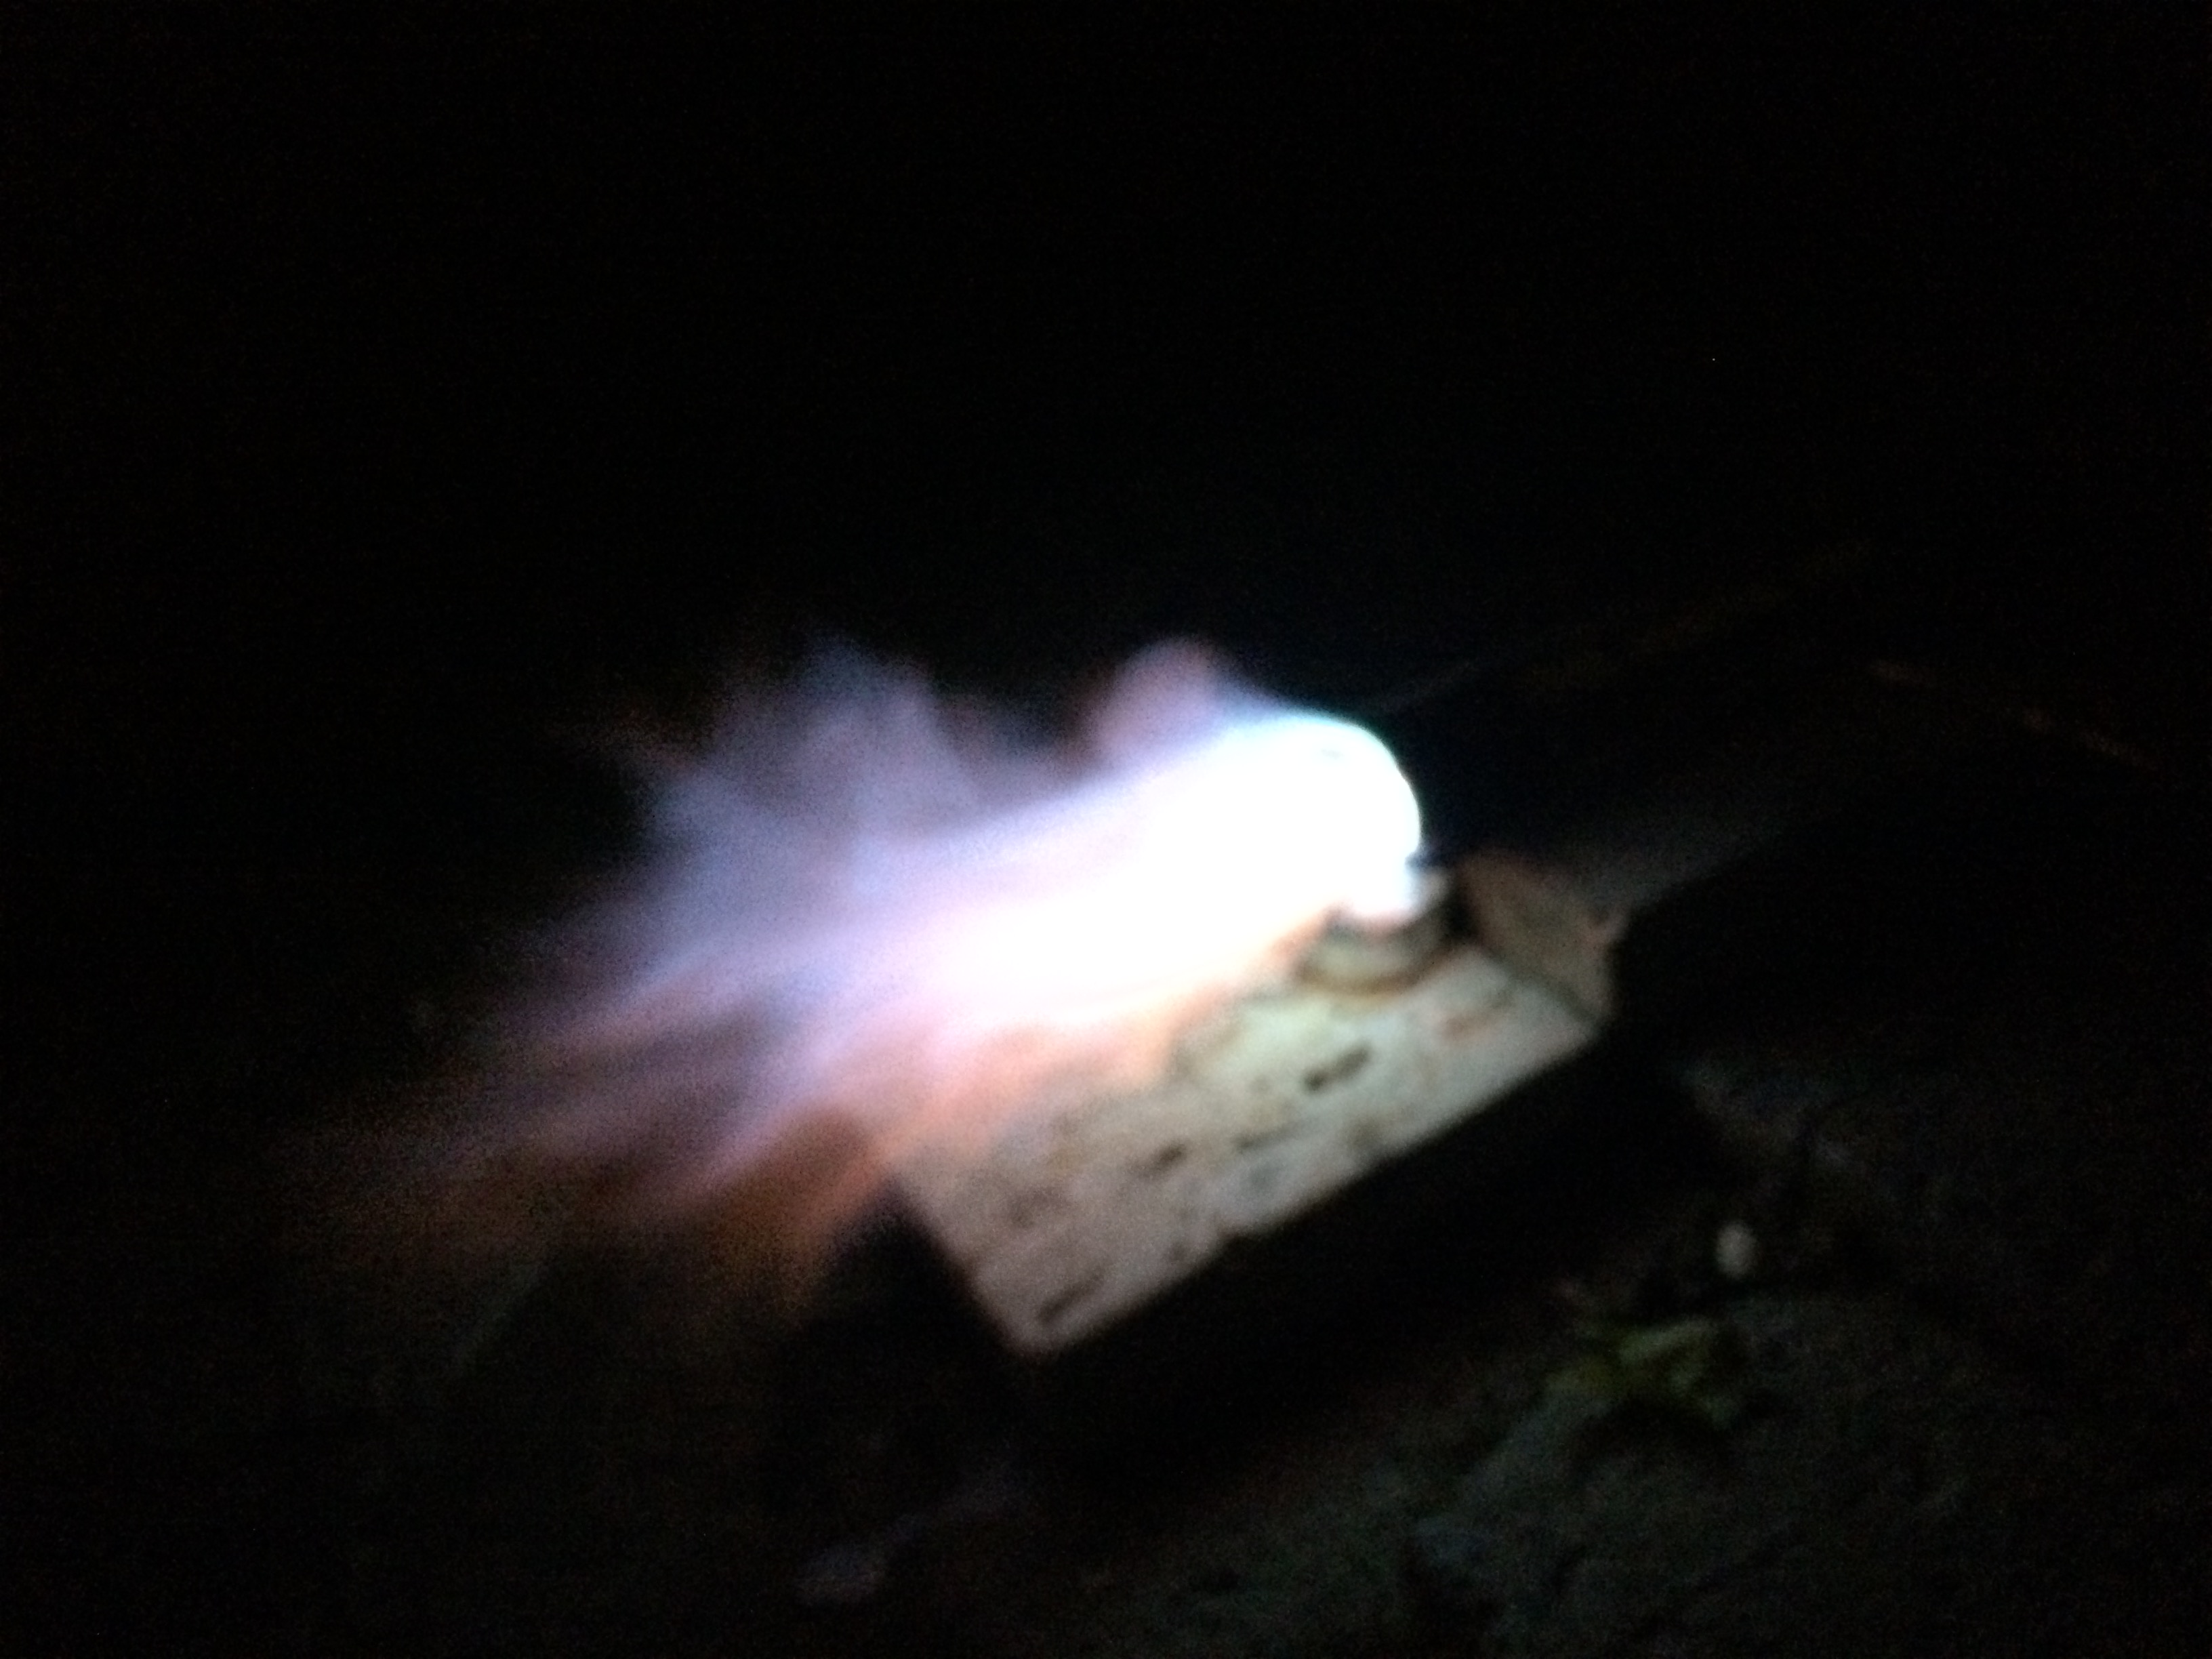
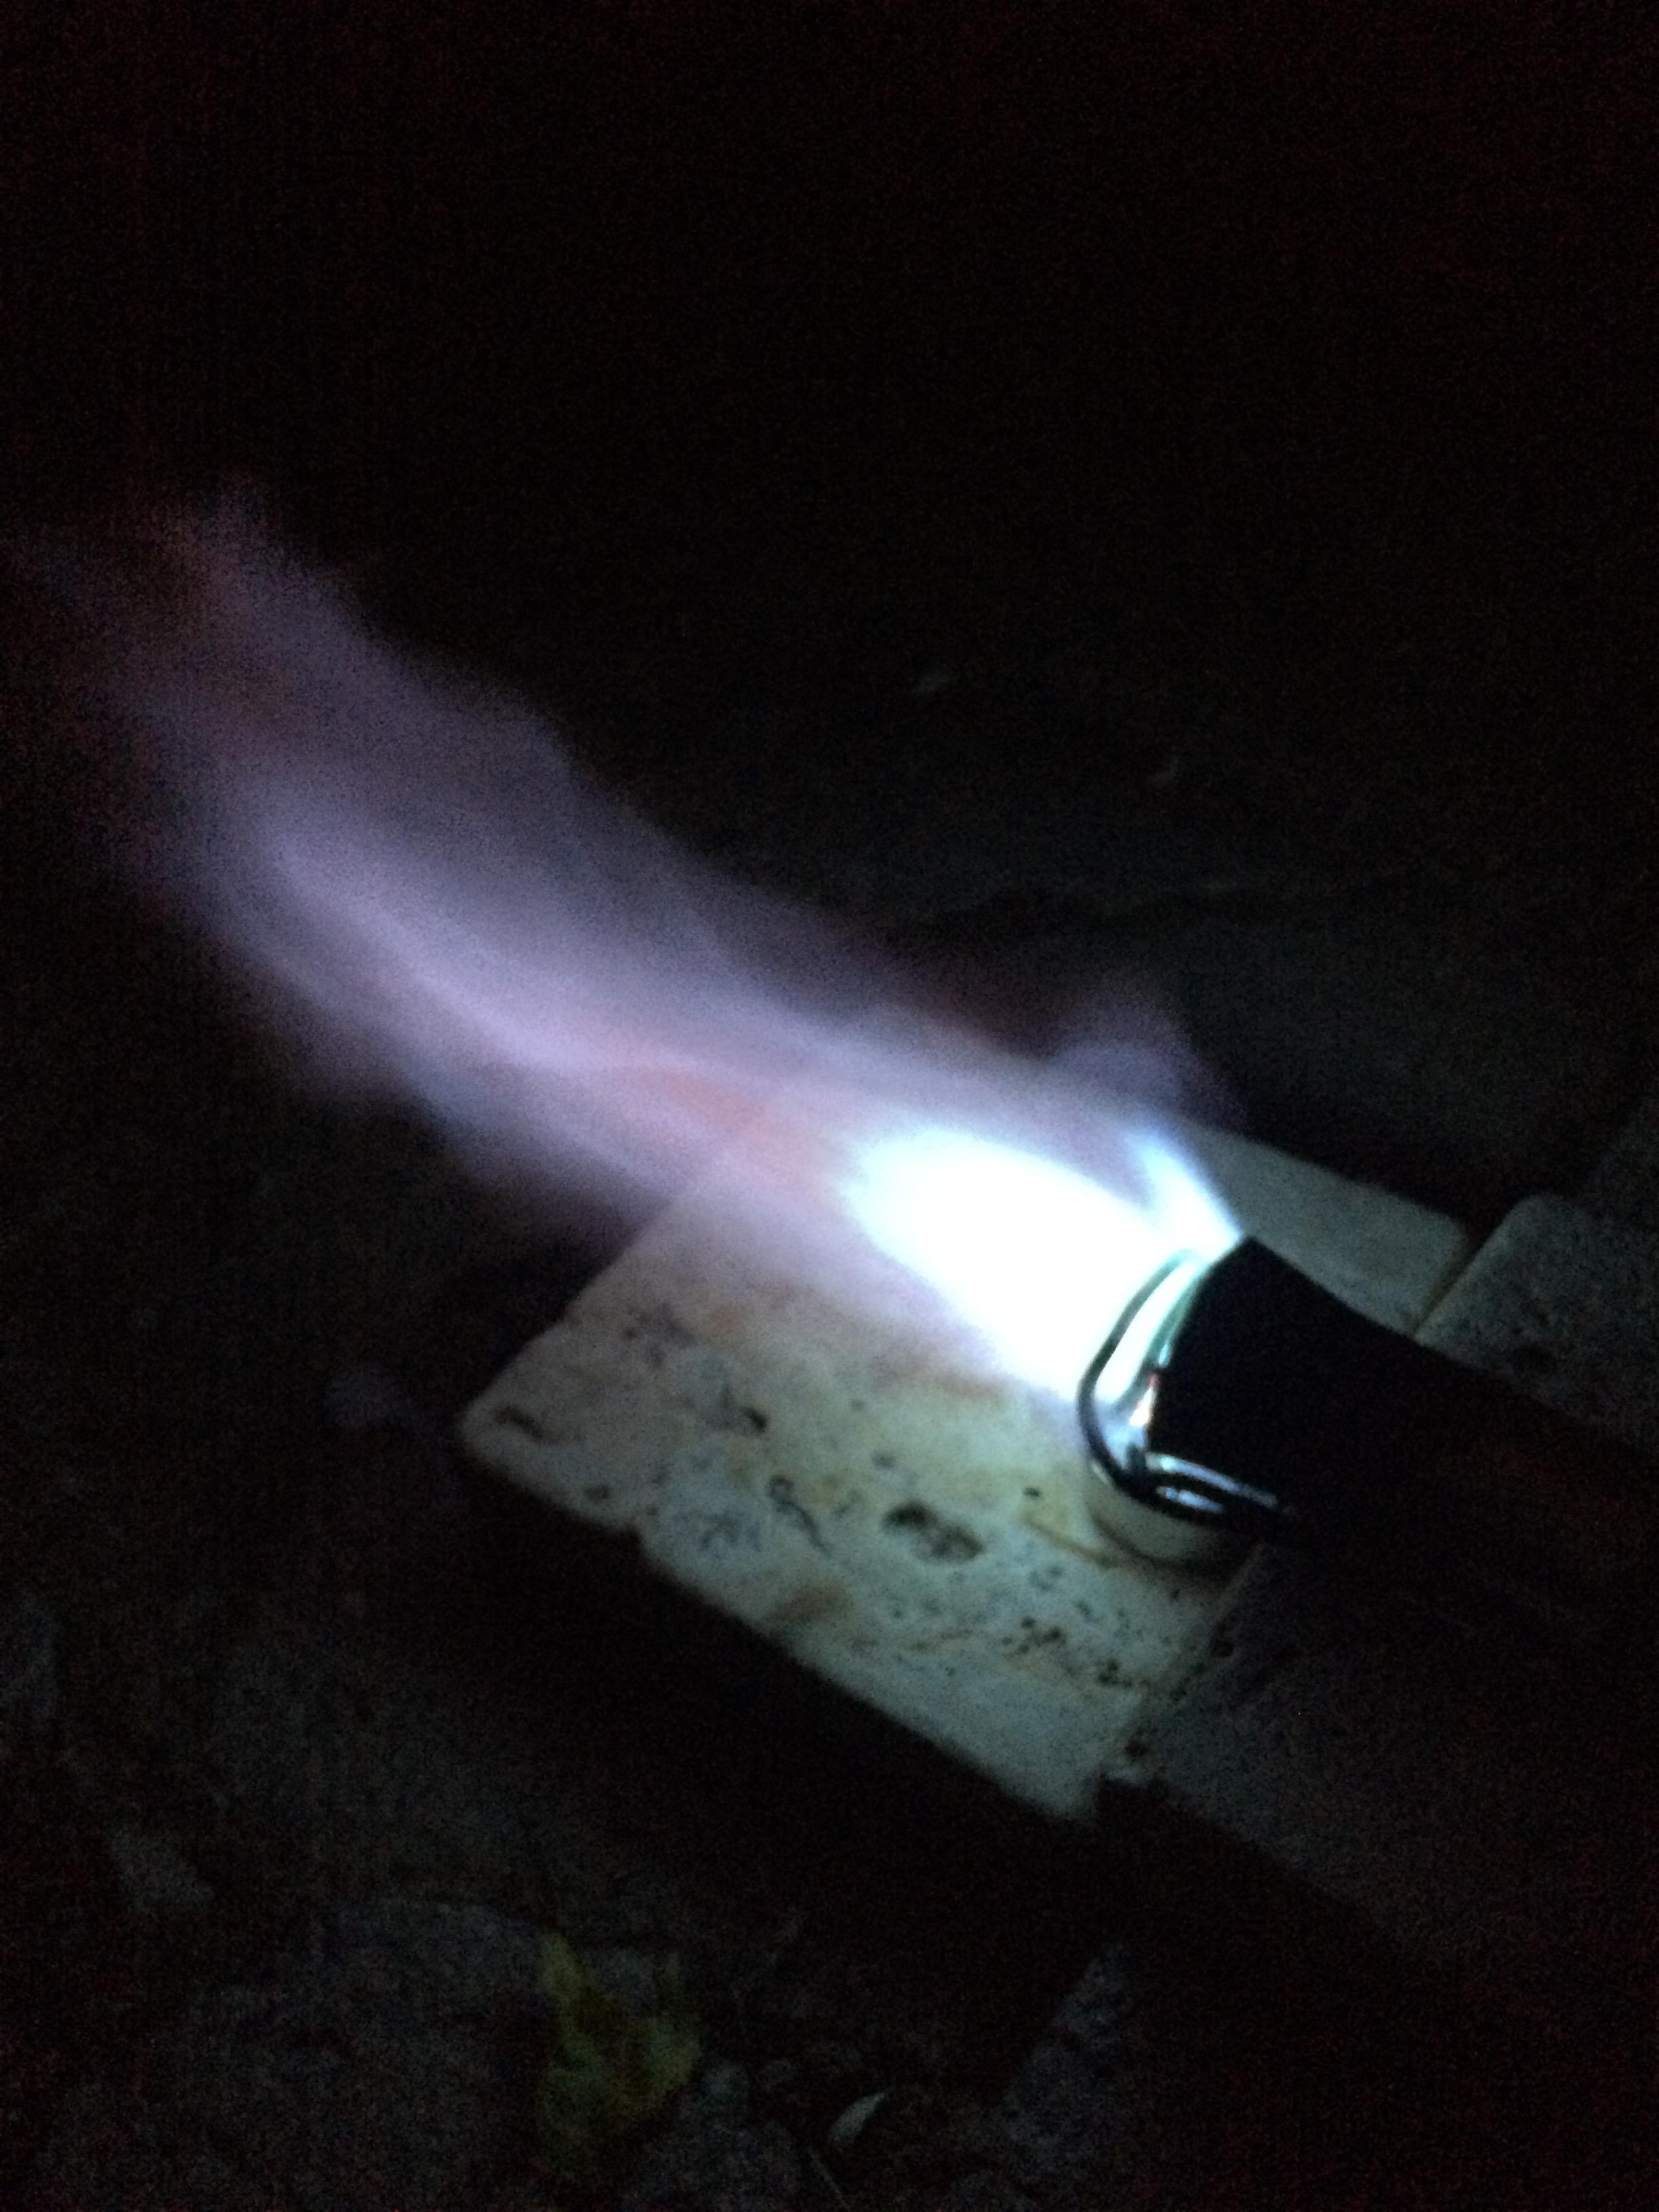
Photos in sequence of my burners flame as I made improvements, how is the last flame look?

-
-
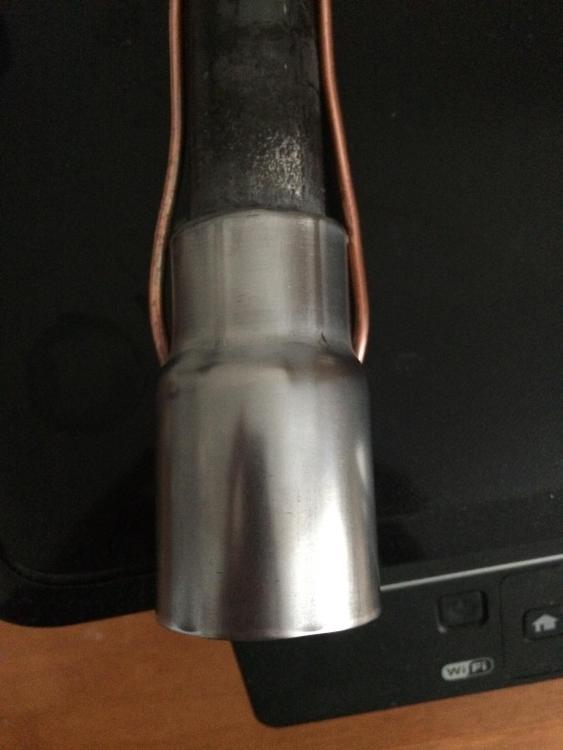
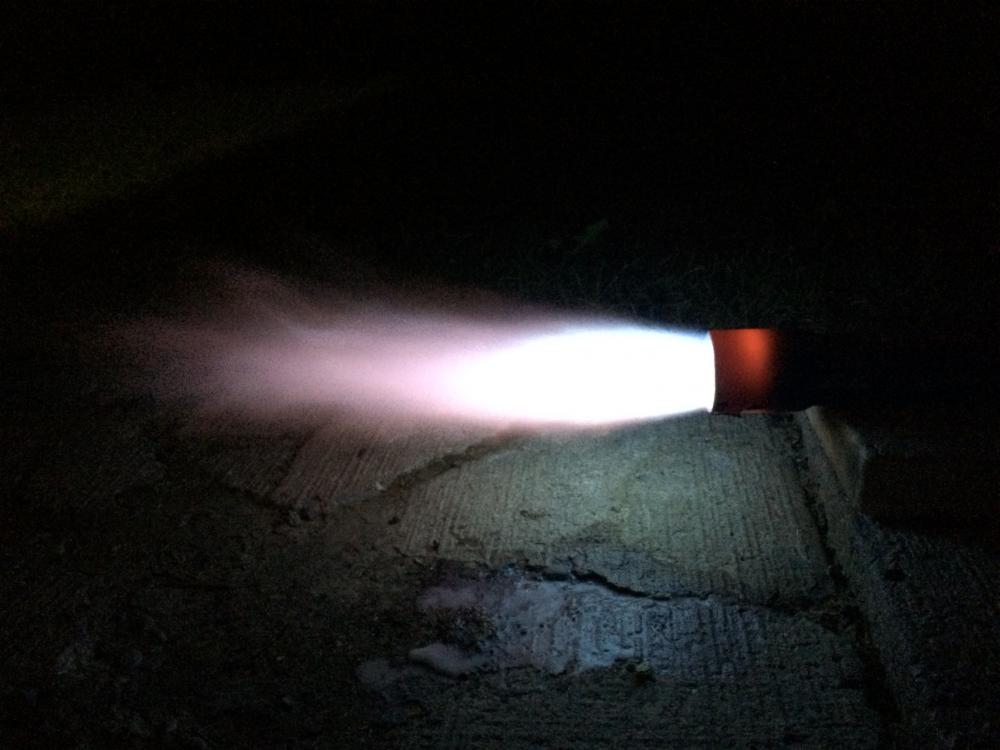
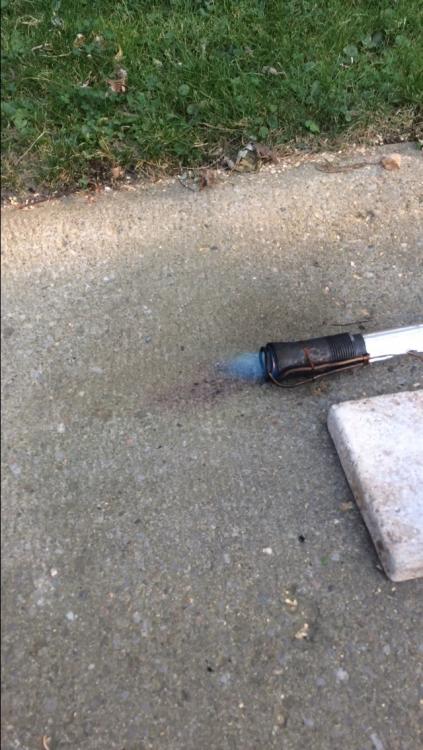
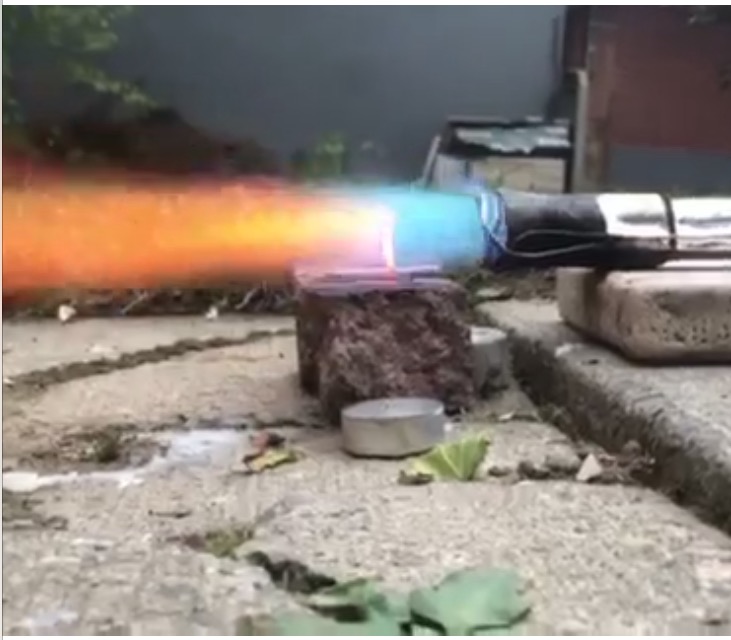
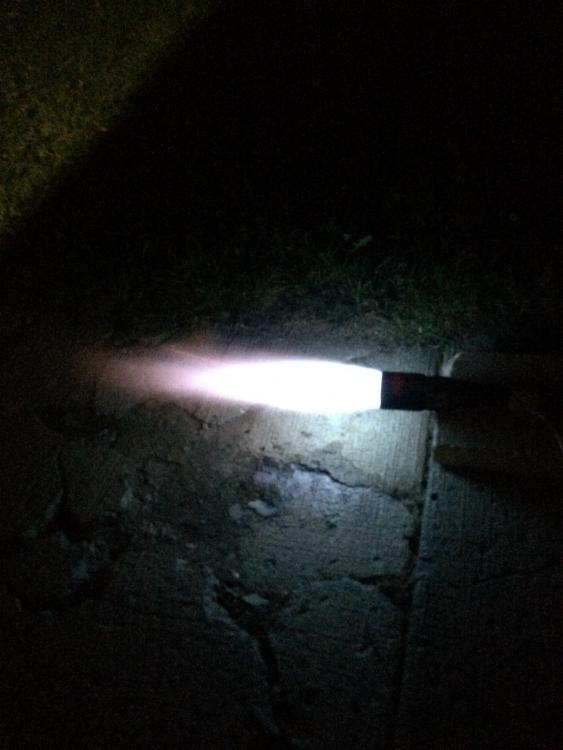
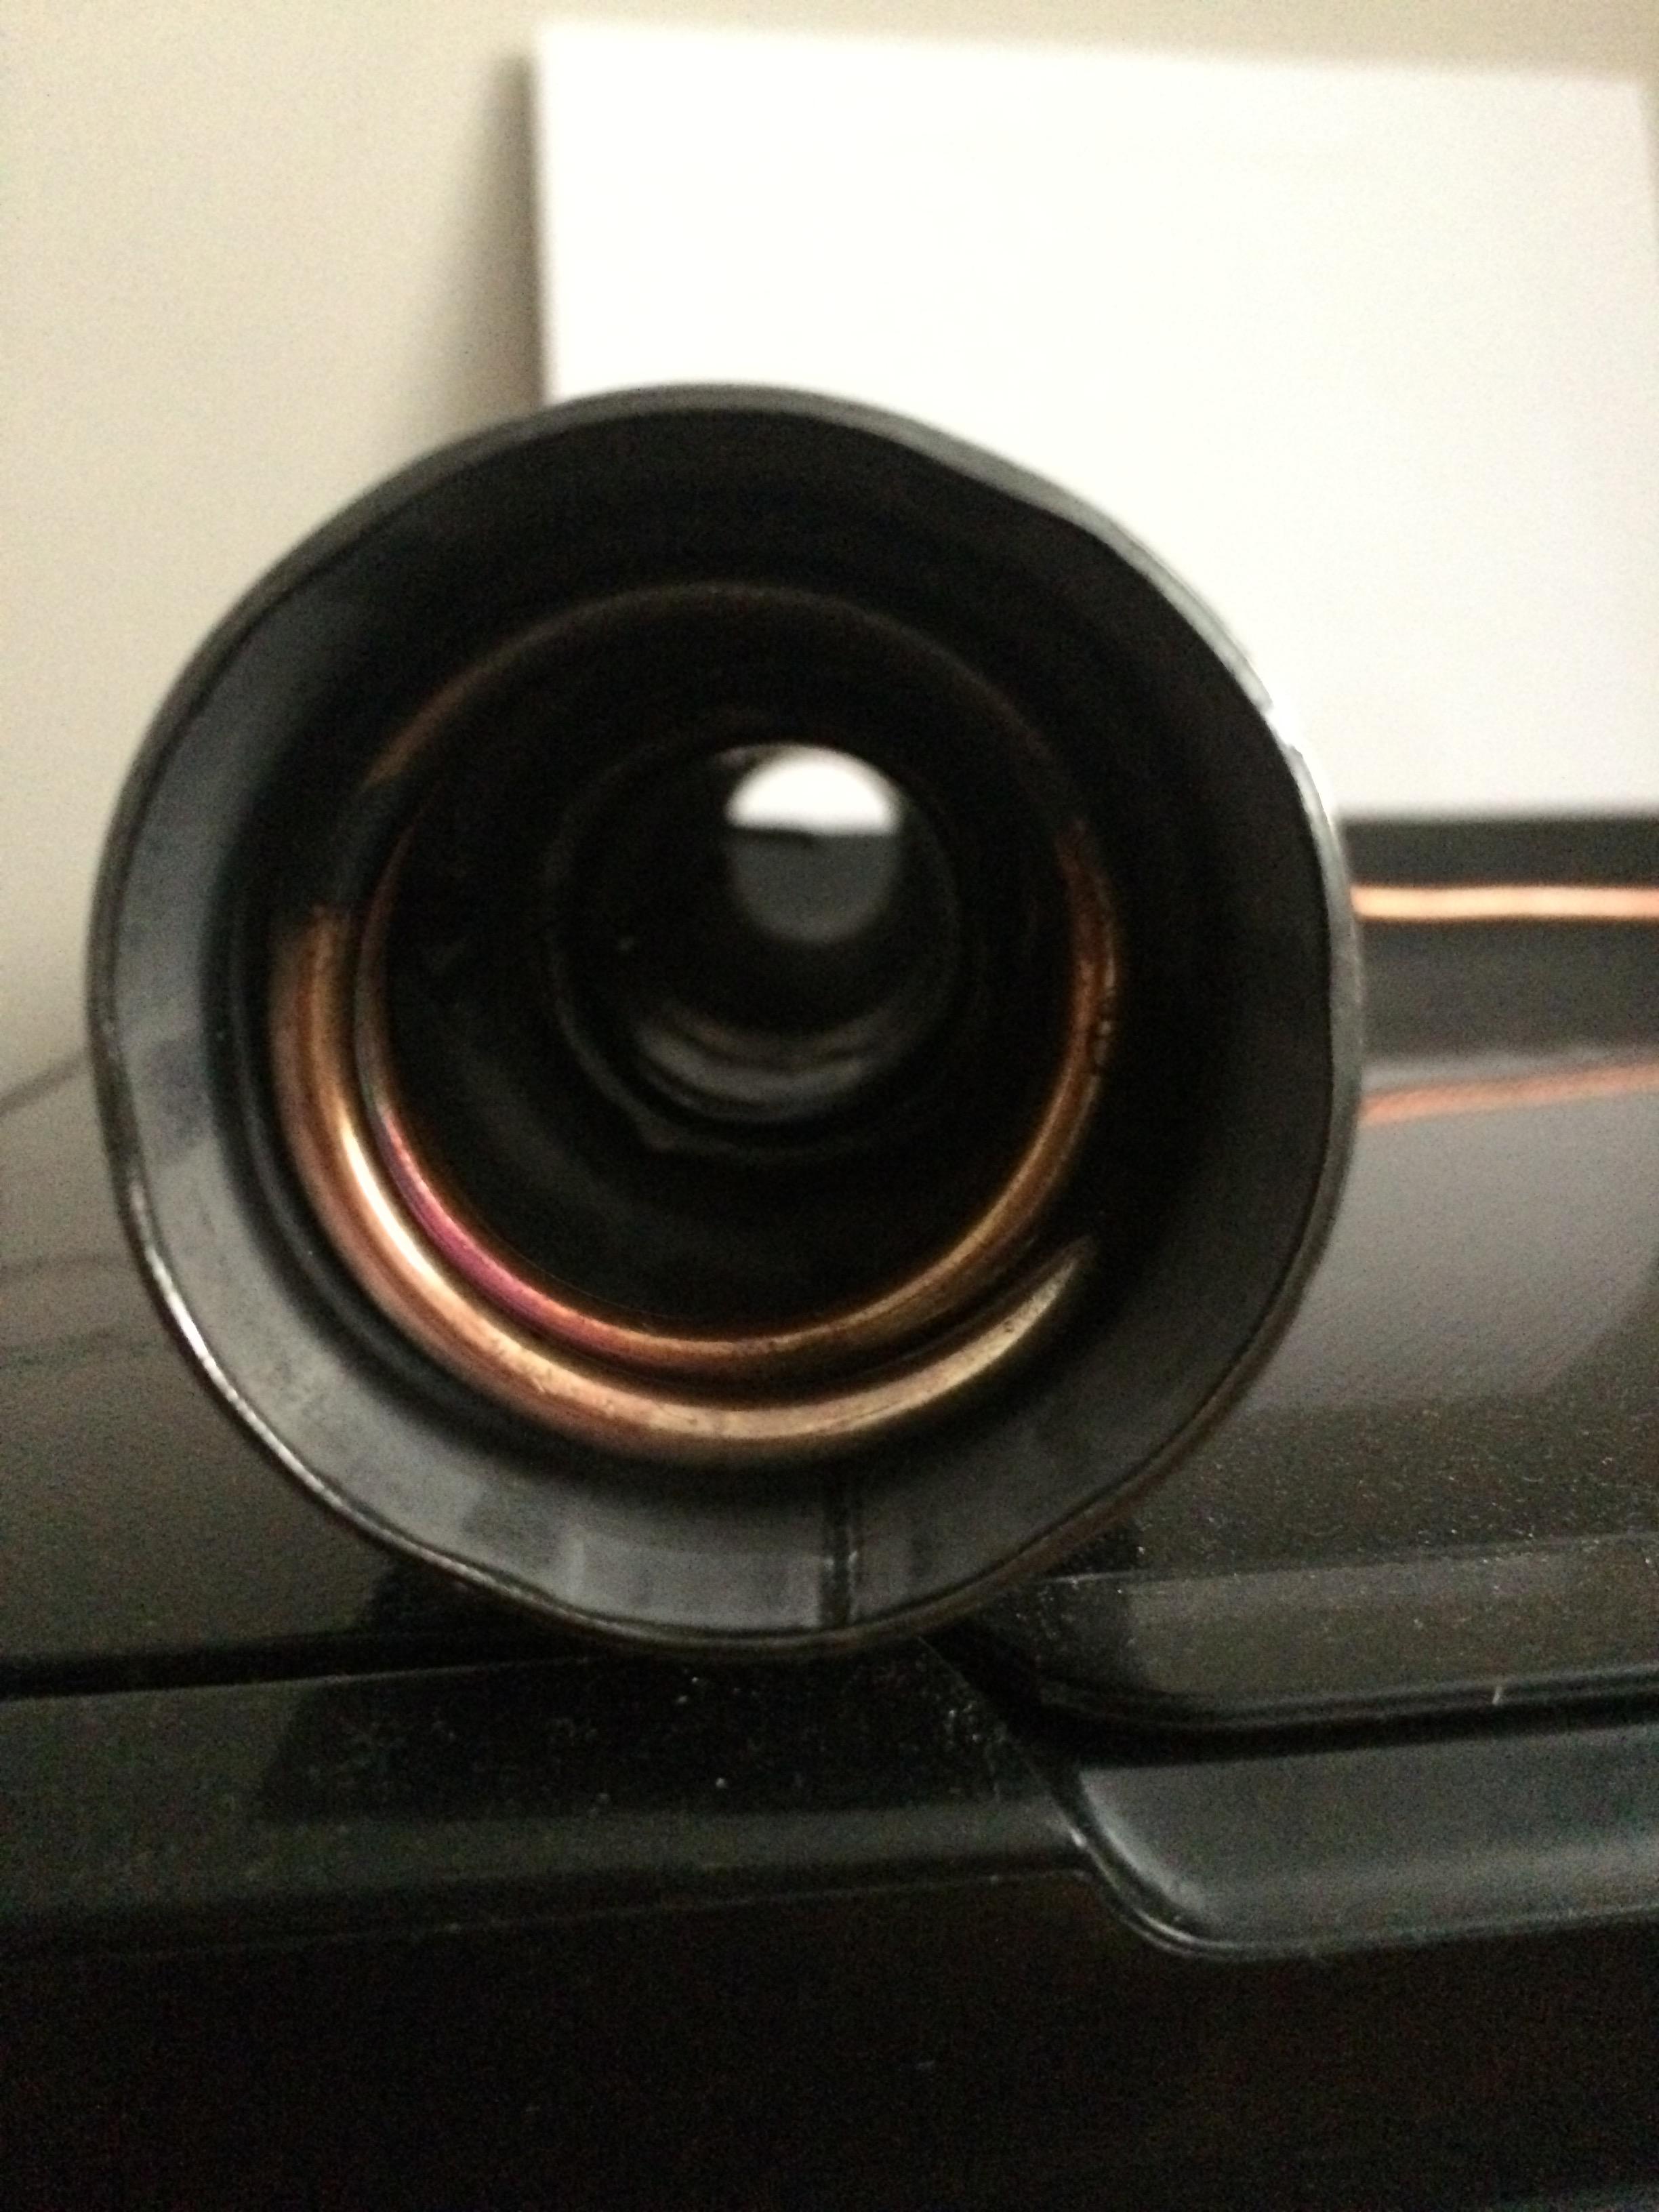
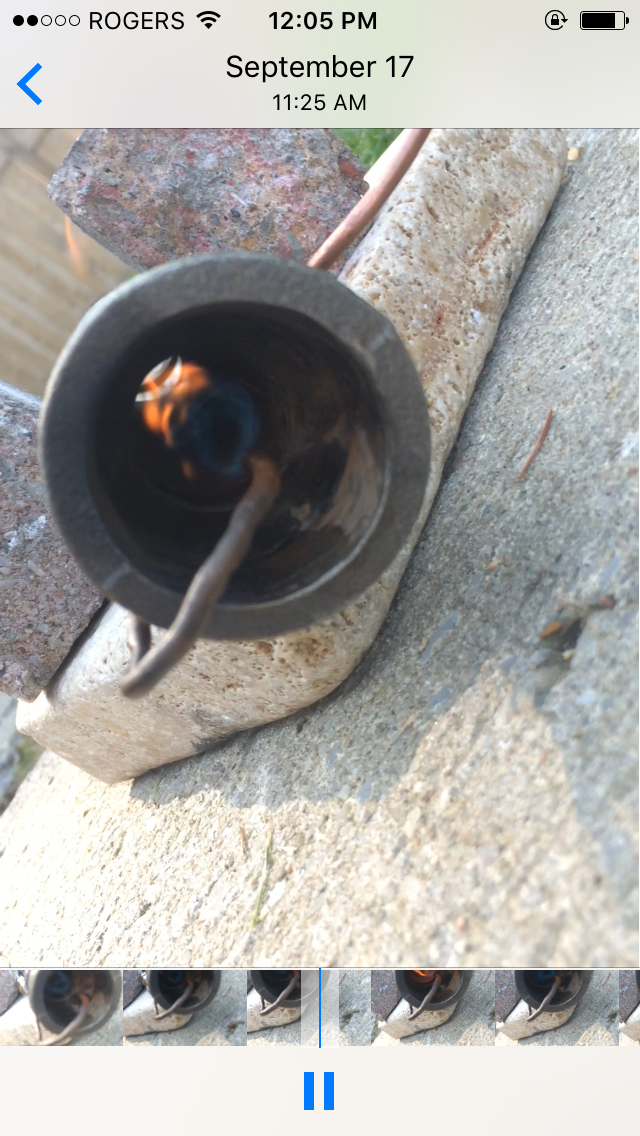
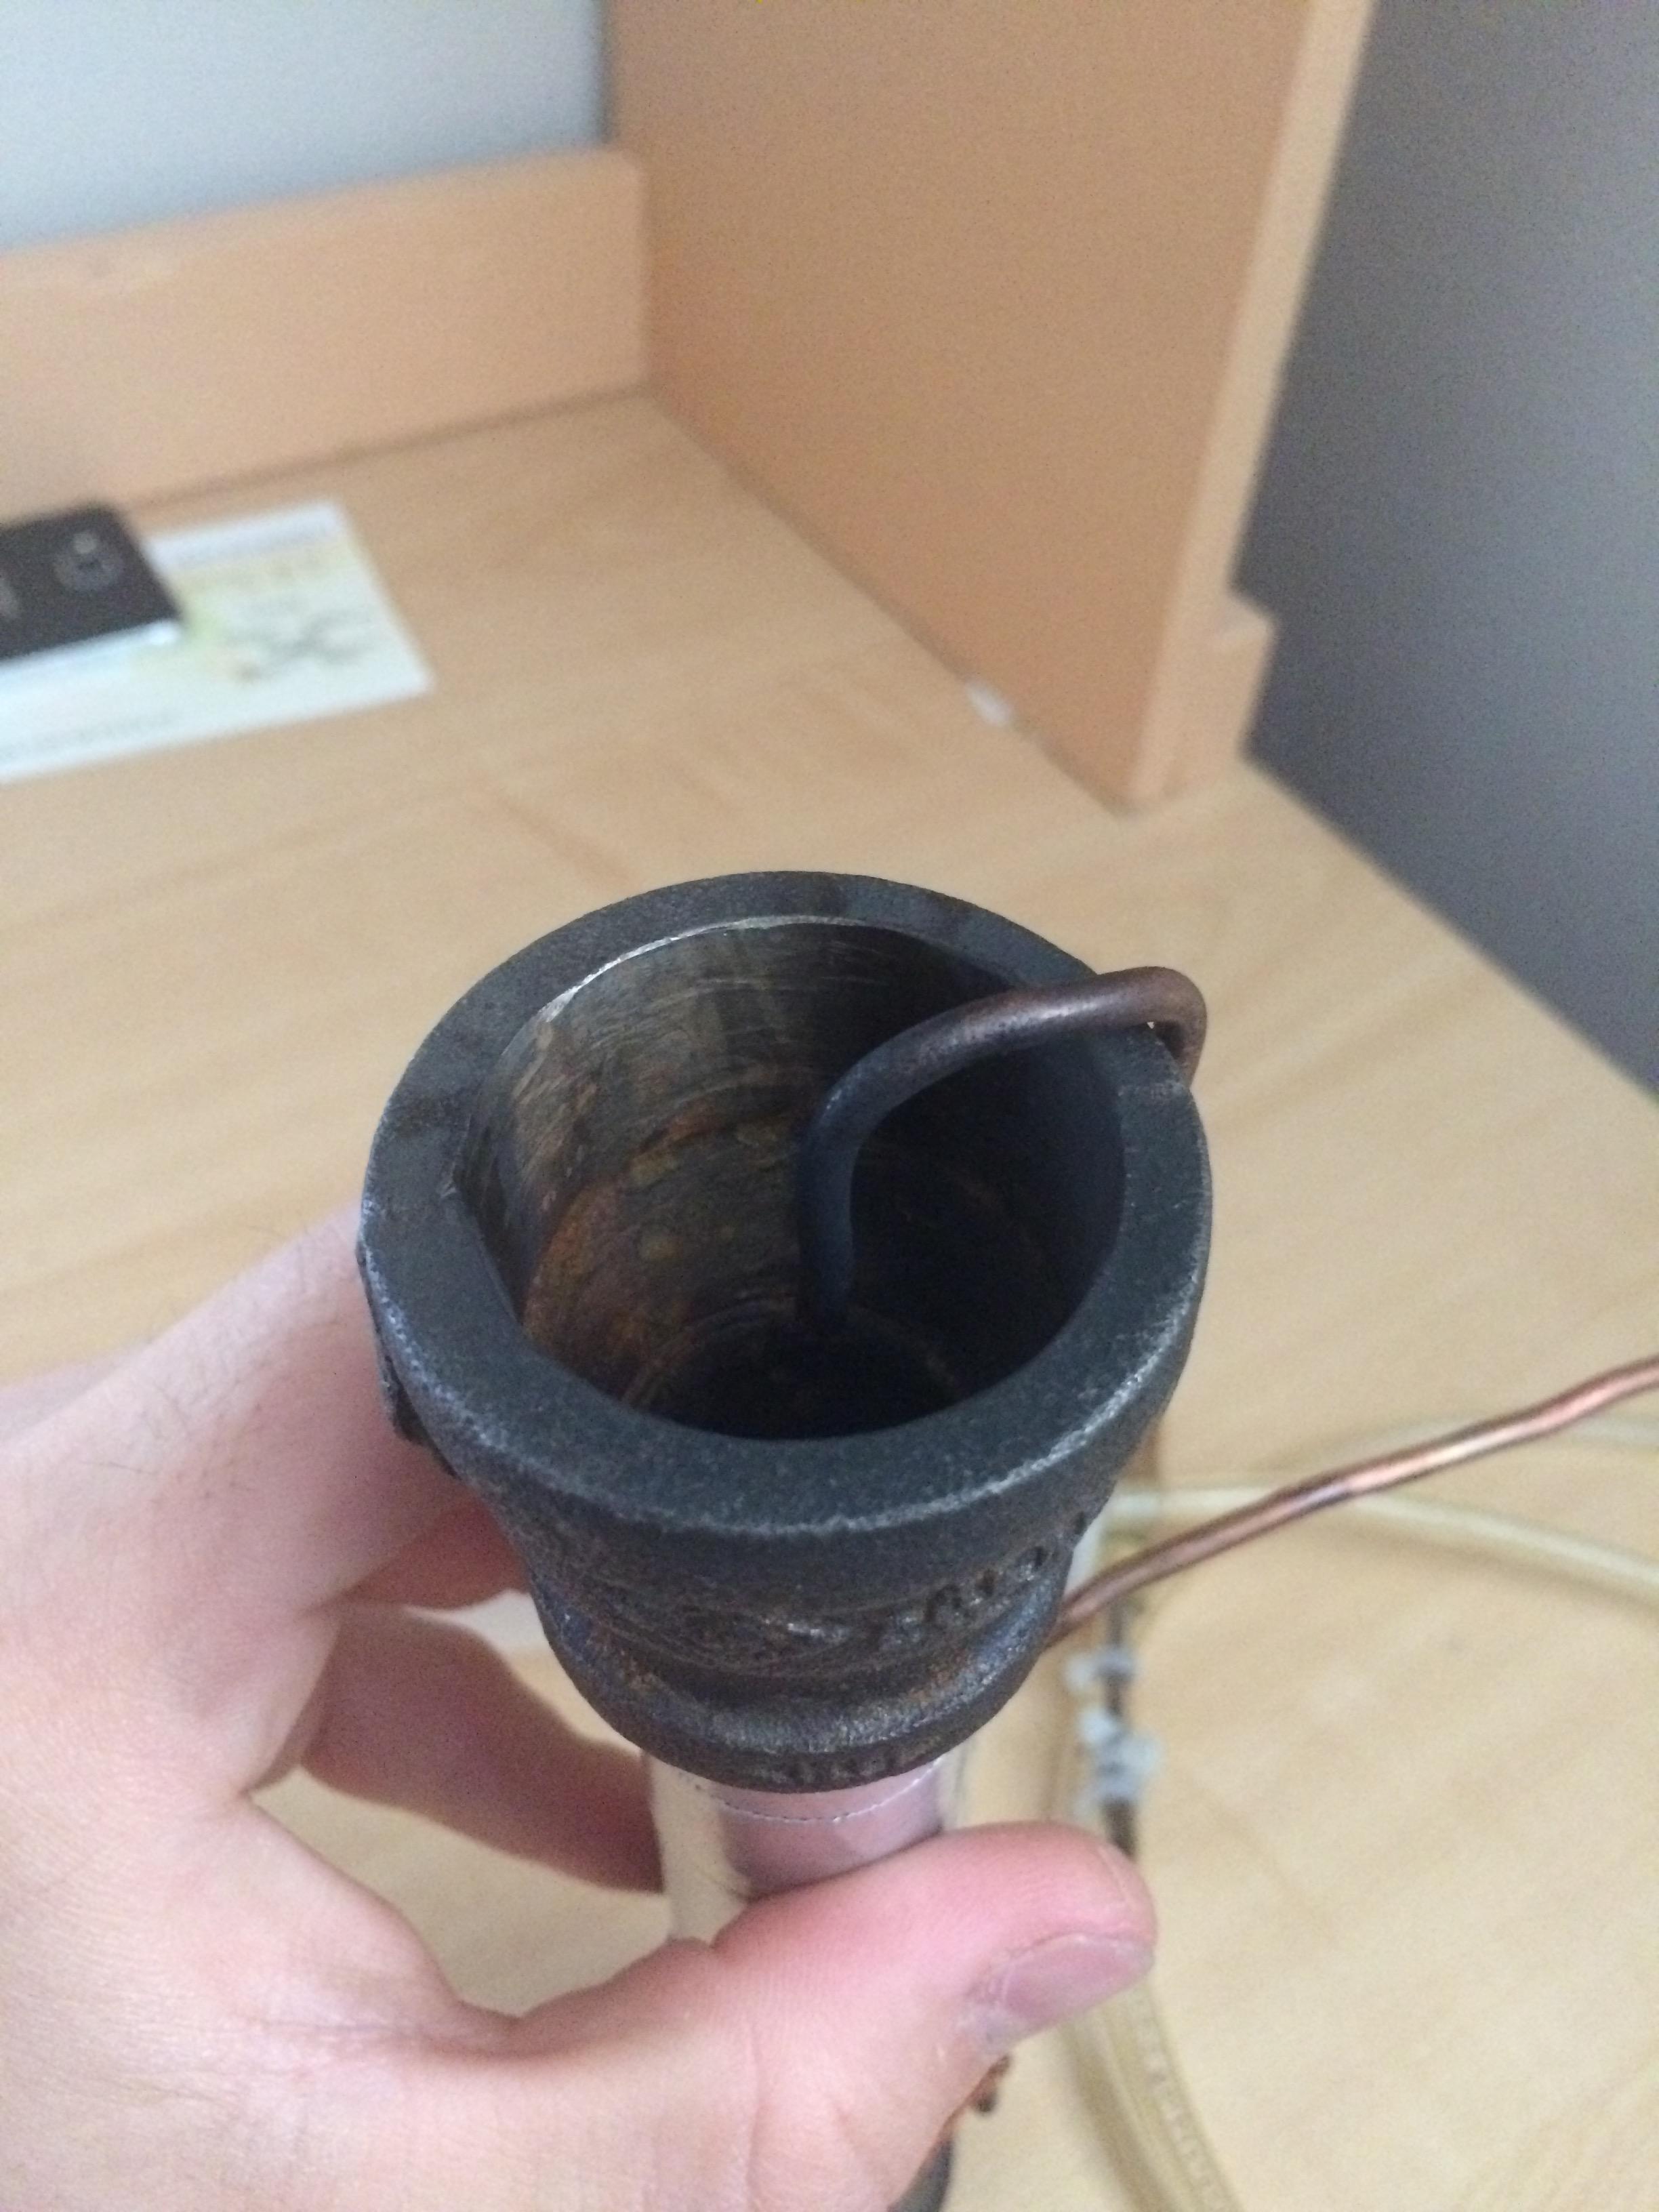
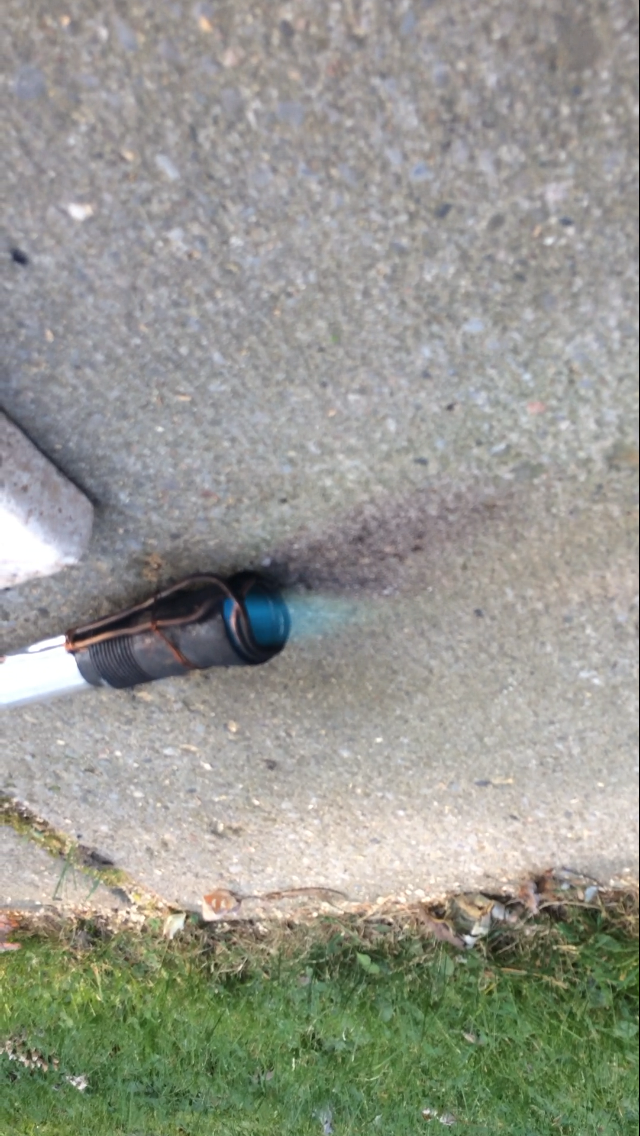
Today I got a new fuel line, and made a new nozzle which has a much larger diameter, and almost no taper (3.9cm internal diameter). The air intake was further opened, chamfered and polished, along with the exit of the mixing tube into the nozzle. The flame is what appears to me in person as perfectly neutral, and very stable. The fuel valve can be opened with no risk of the flame blowing out.
I was wondering if it would be acceptable to post some of the flame pictures in a thread on the gas forges forum, along with descriptions of what I did to improve the burner.
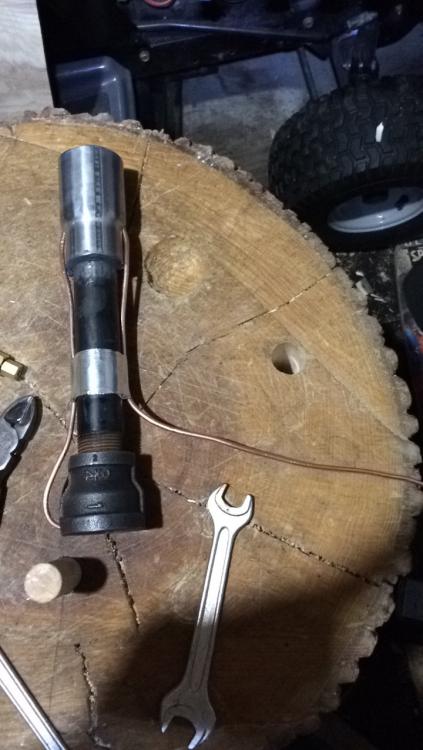
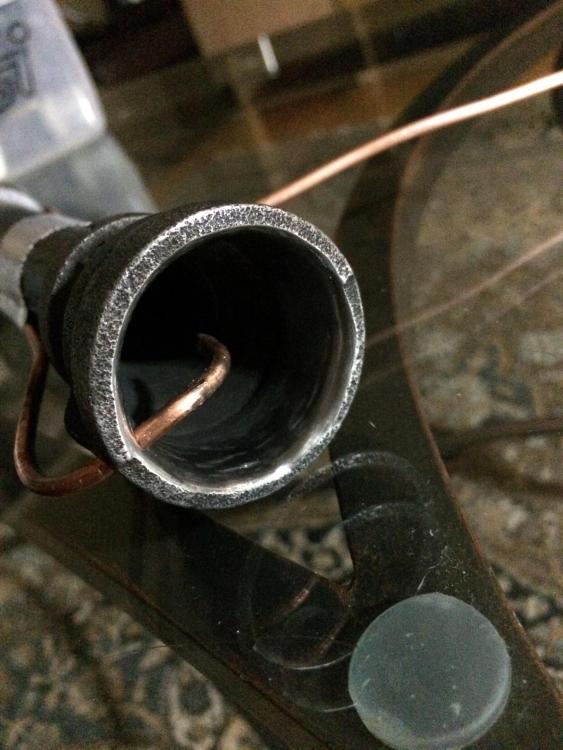
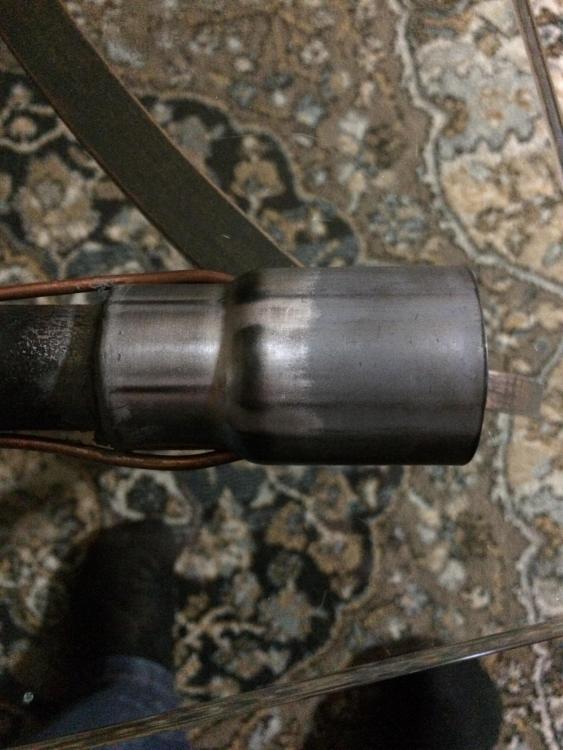
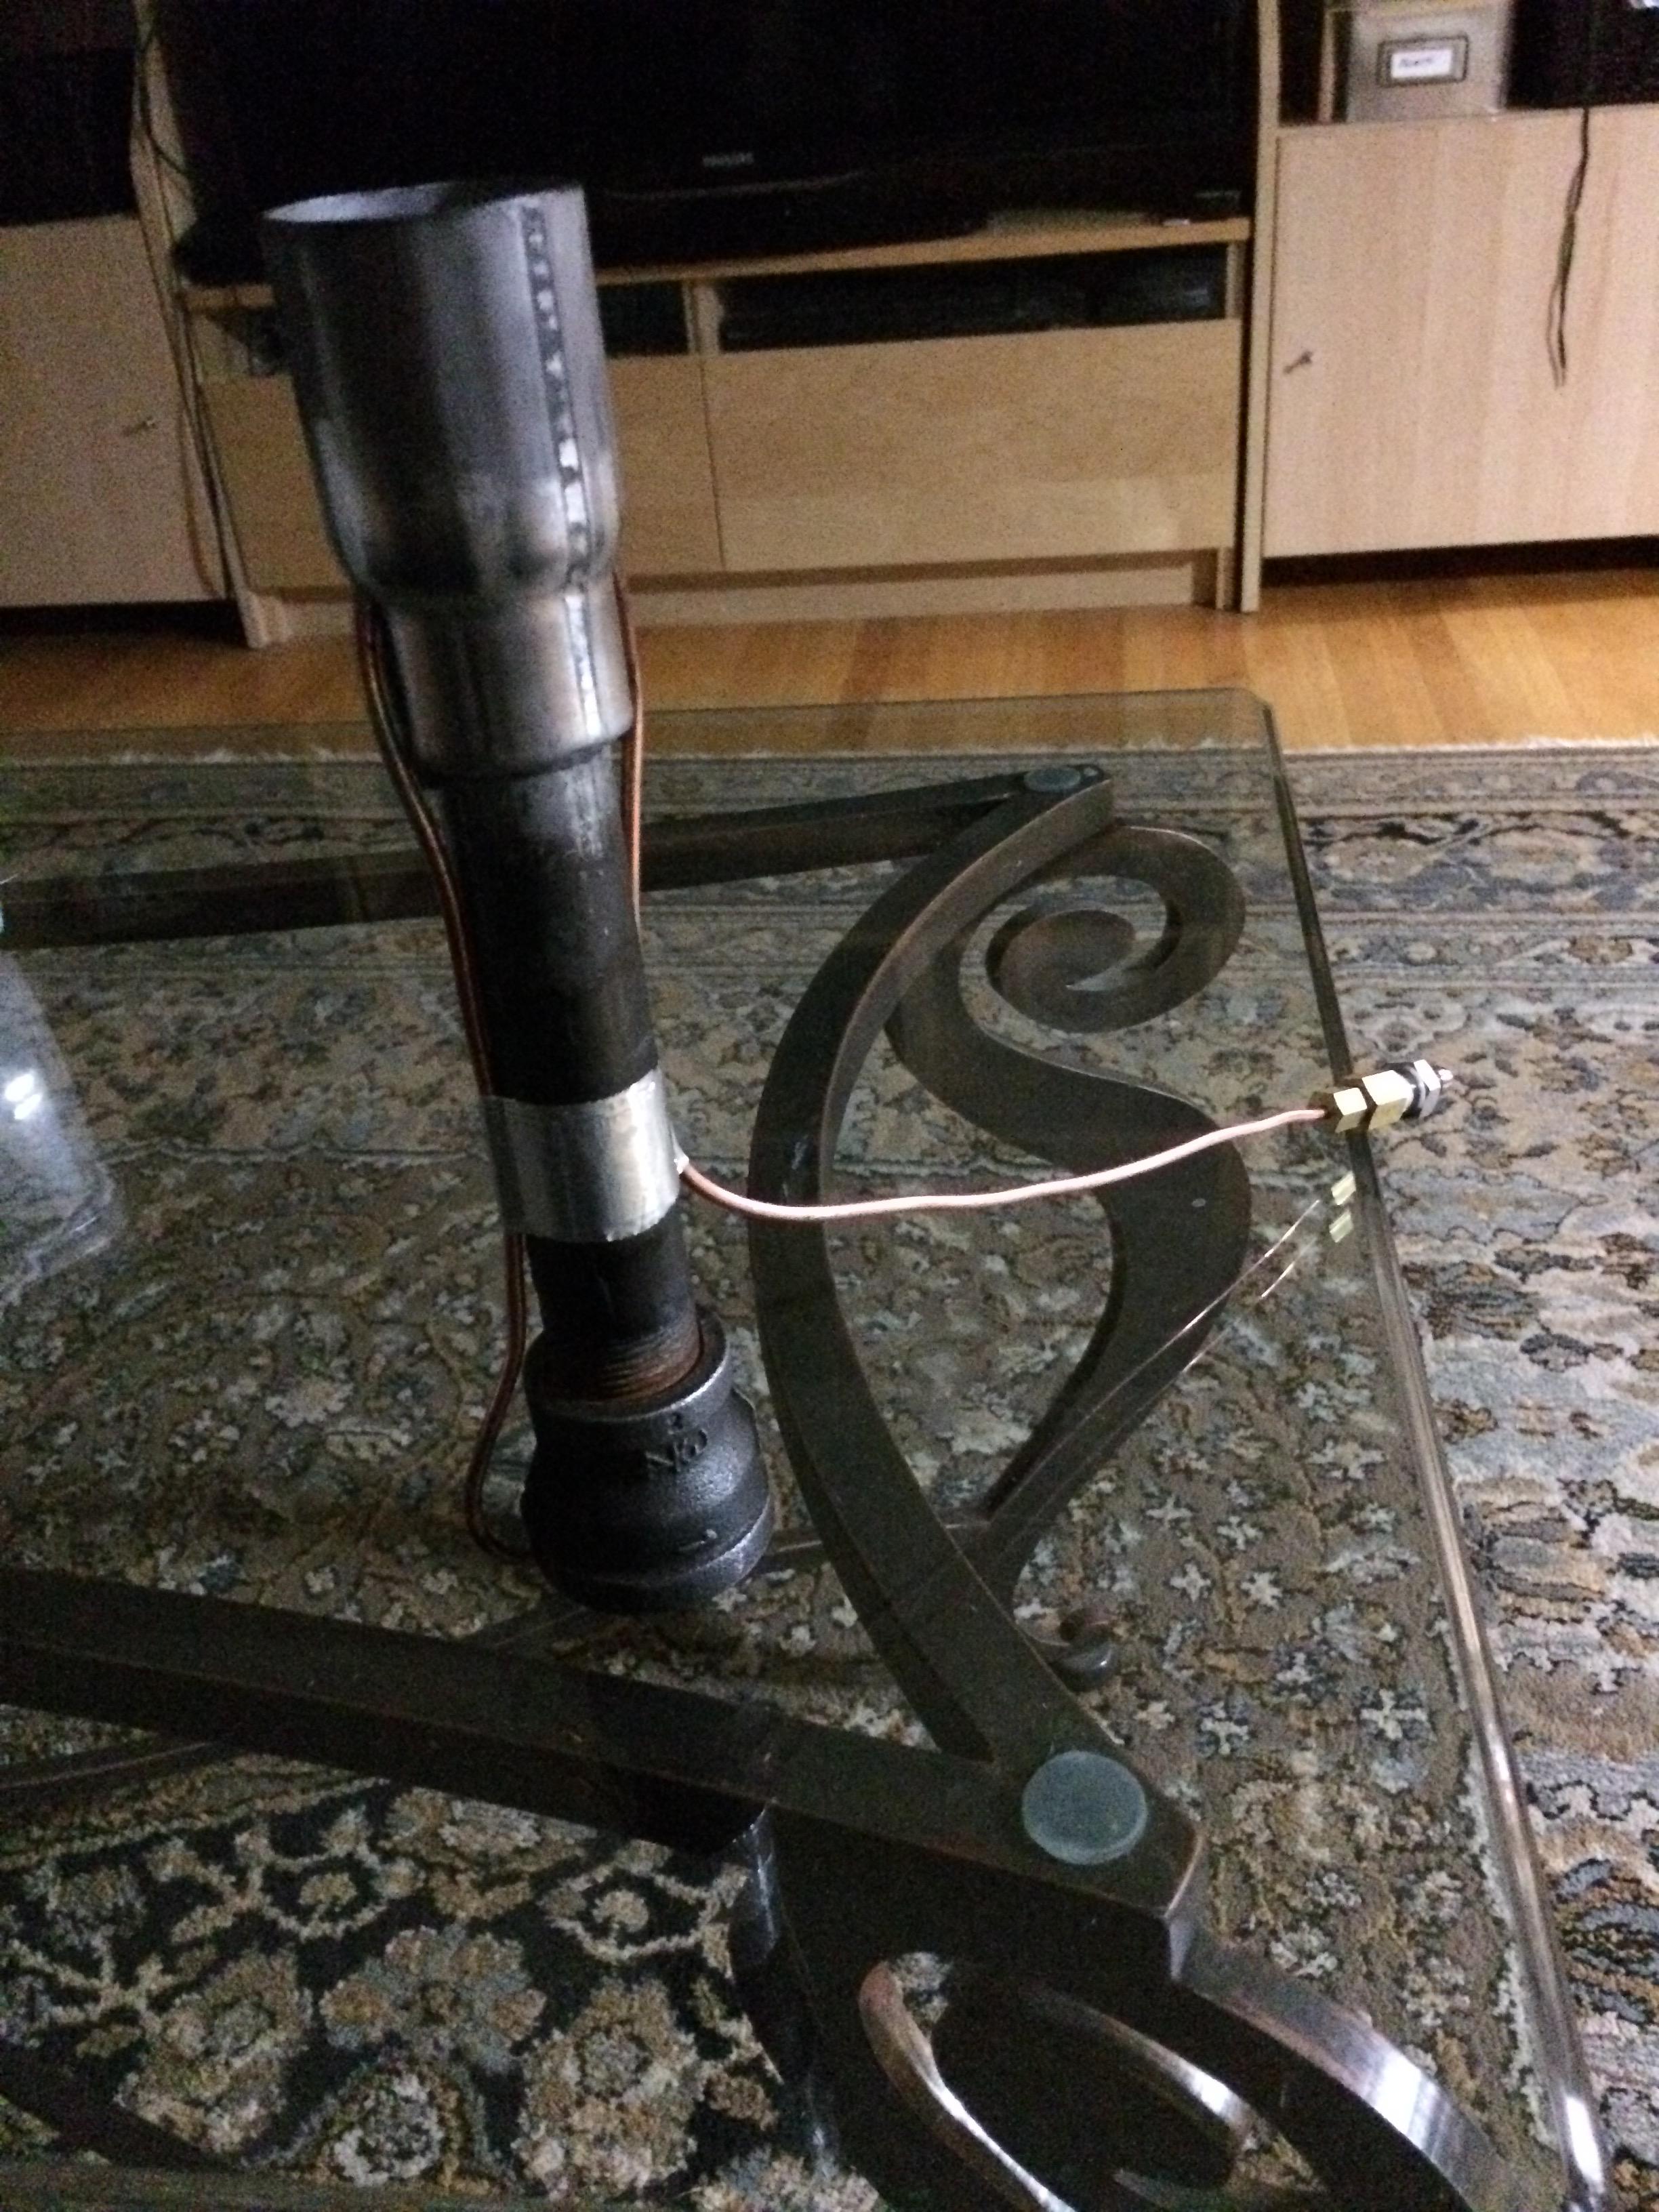
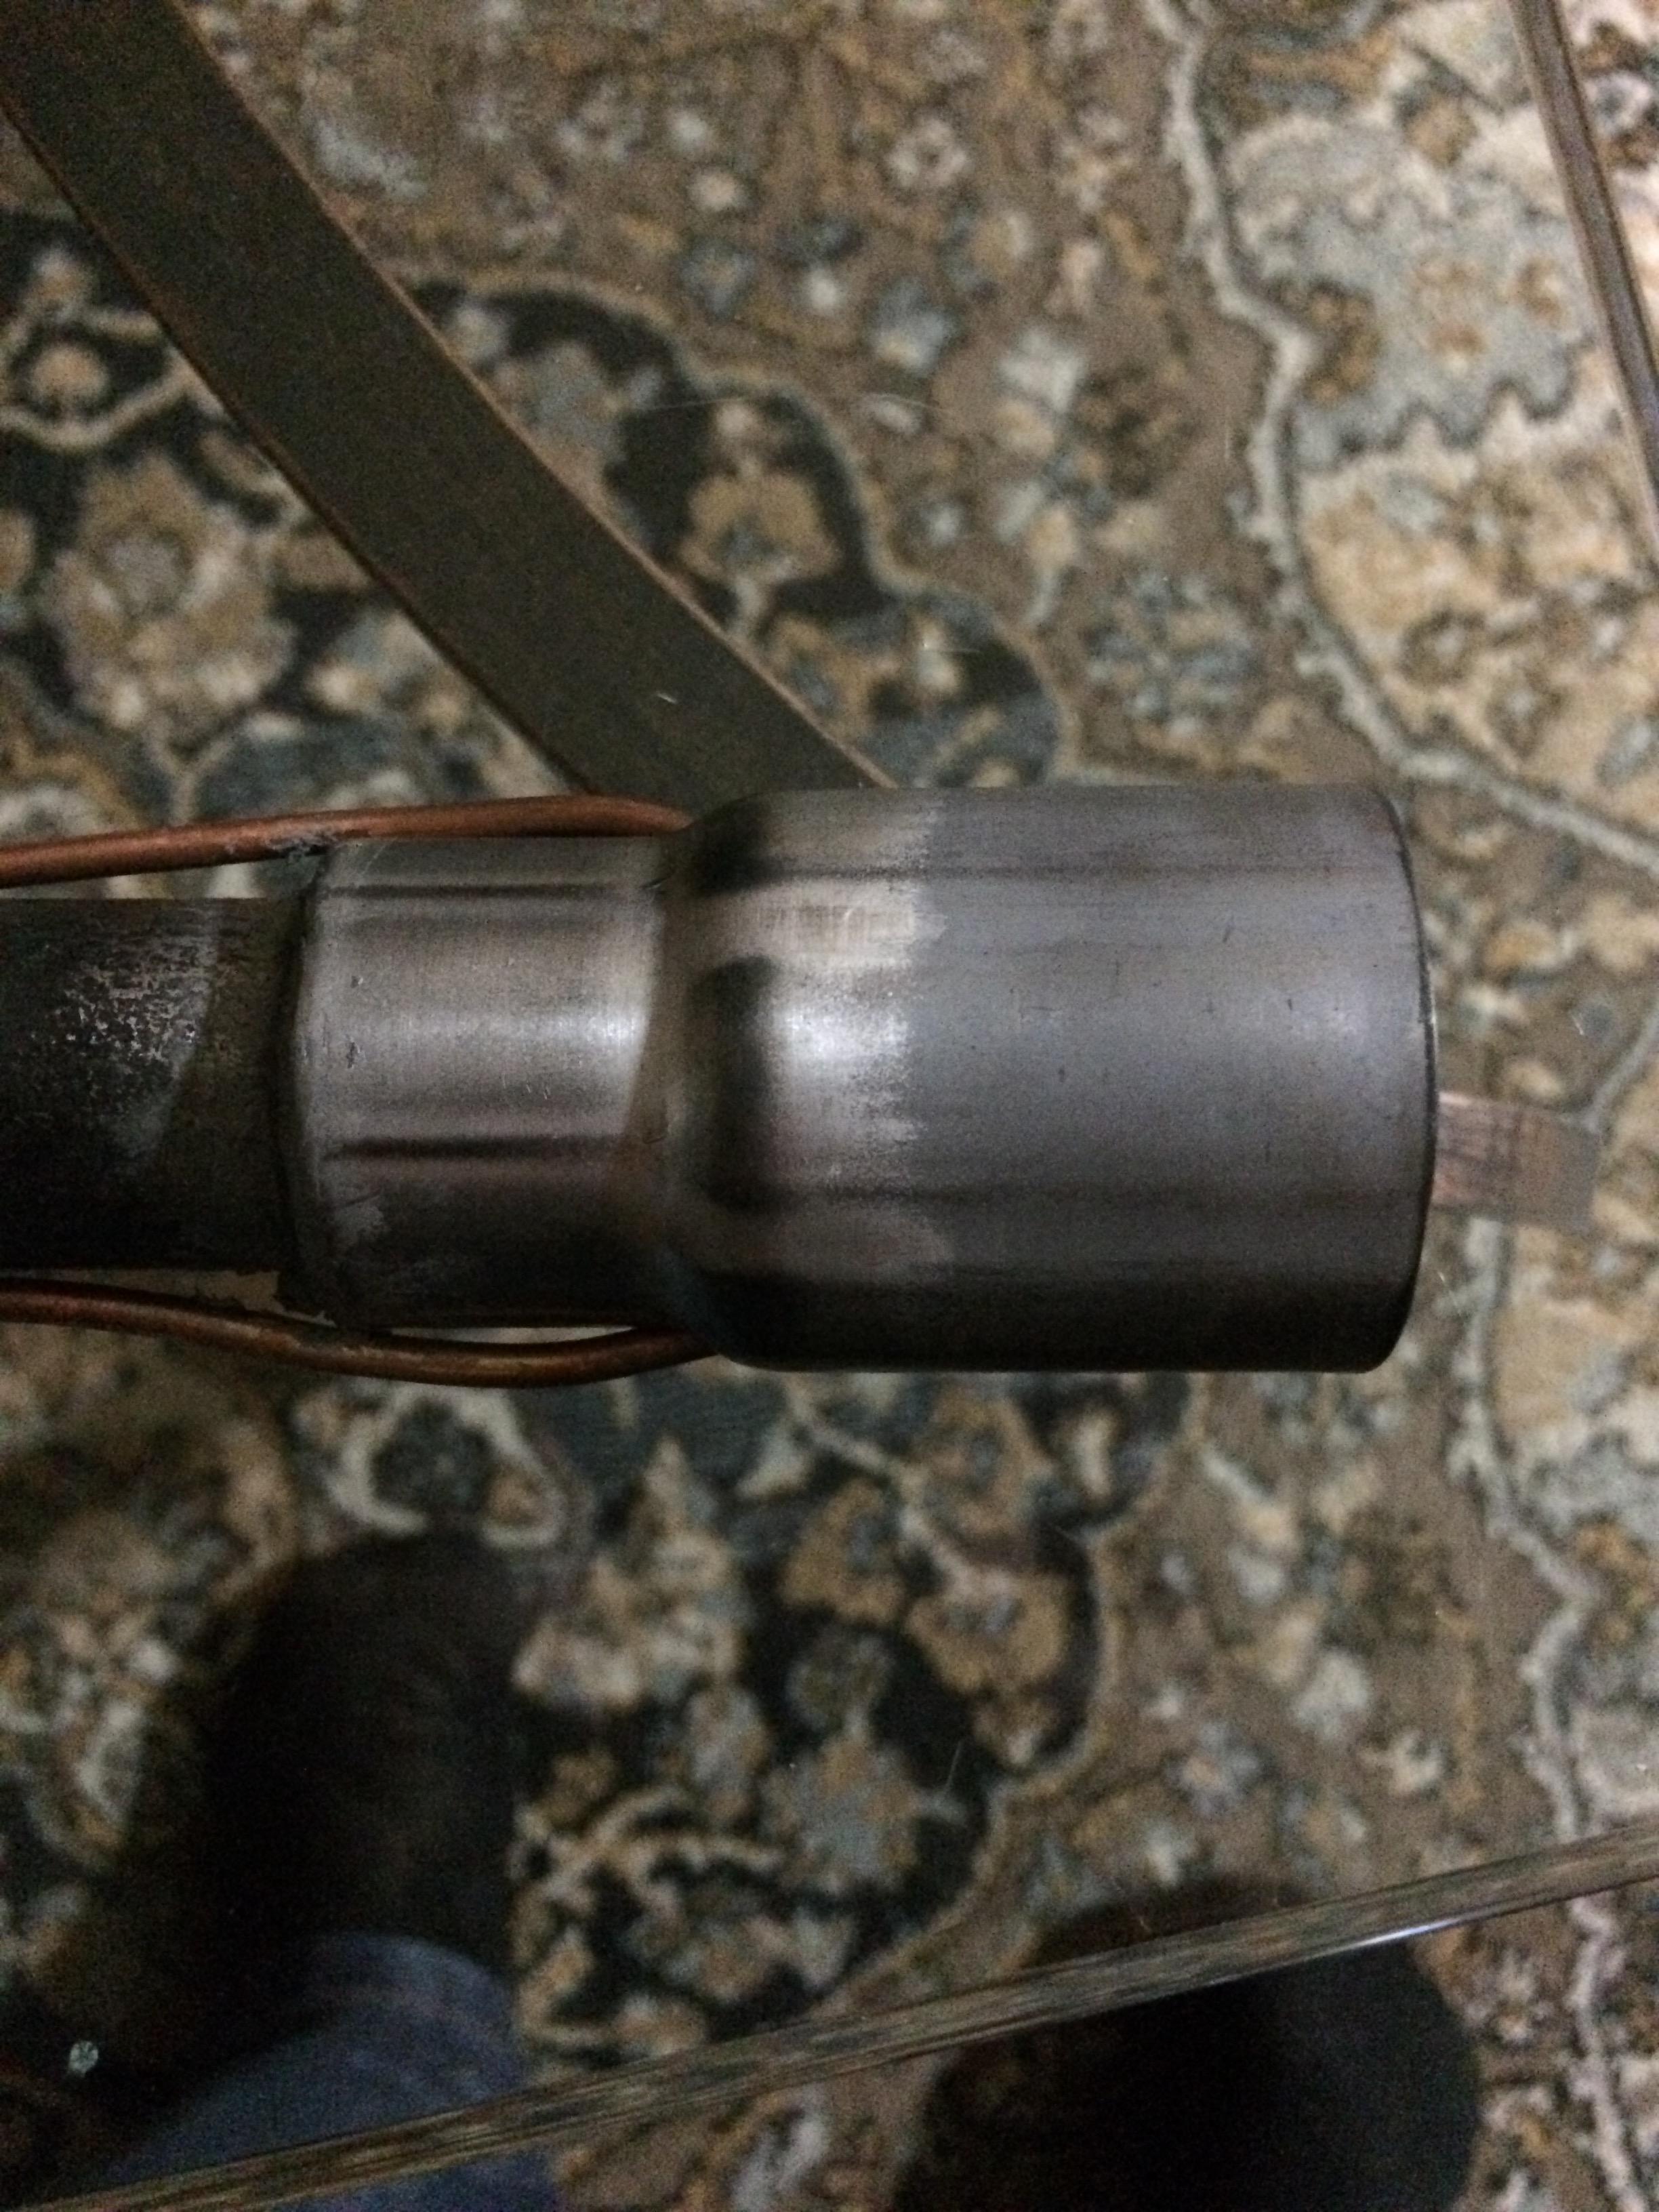
For those wondering the basis of the parts used to make the burner as is are, 6inch 3/4 black pipe nipple as mixing tube, 3/4-1inch bell reducer with the threads fully removed chamfered and polished, along with the entrances and exits of the mixing tube. The fuel line is a 1/8th inch auto meter 3224 copper tube, which directly jets the has in vaporized form. The nozzle is a exhaust coupling which was cut short and spaced on with two layers of the cut offs. The nozzle was attached with 2800f metal-metal mortar/cement. There is a check valve which is a 3000psi air valve I had spare.


-
The design of this burner is quite simple, the fuel runs under pressure through a needle valve to control the rate, then through a check valve to prevent back pressure affecting the rate, and vapour lock problems. The fuel then runs through a set of coils infront of the burner nozzle, and to the back of the burner where it exits in the same fashion as a propane burner. As of now it doesn't have a set orifice size for the gas coming into the burner, but just comes out of the tube. The gas comes out at a high velocity because it has been boiled inside the tube like a Coleman stove, and it induces its own air into the burner.
Current issues with the deaign include:
-flame easily overpowered by the fuel/air mixture velocity, the flame will lift off the end of the burner and then go out if you don't quickly reduce the fuel rate.(although I have managed to keep a lifted flame steady for up to 5 seconds before blow out.
-if there are too many coils then the fuel is vaporized to too high a temperature which causes it to become less dense, this increases the amount of air induced into the burner and makes the flame too oxidizing.
-if there aren't enough coils the fuel doesn't vaporize fast enough for the fuel rate. Enough said about that.
-there isn't a choke on the burner.
-it is very sensitive to small changes in the fuel rate when outside of the forge.
I refer to fuel rate rather than fuel pressure because the fuel is delivered from a high pressure source through a valve which controls the rate but not the pressure, this is important to prevent vapour lock and an unstable flame.
-the copper tube used to deliver the fuel is easily knocked out of alignment with the burner mixing tube.
-
Since stores aren't open right now because of thanksgiving, I couldn't get any supplies to improve the burner in any meaningful way. I just made the coil slightly larger diameter, and decided to put it in my old mini coffee can forge, to see if it would help with the problem of the flame coming off the end of the burner. It was successful, and it melted a small piece of copper in the forge with no insulation or lid. Here's a video of it running soon after I started it up.
-
Got a needle valve installed, and tested it in the dark tonight, tried both methanol, and camping "white gas". Suffice to say that methanol does not work easily in a naturally aspirated burner. The gas however seems to work very well, video up soon.
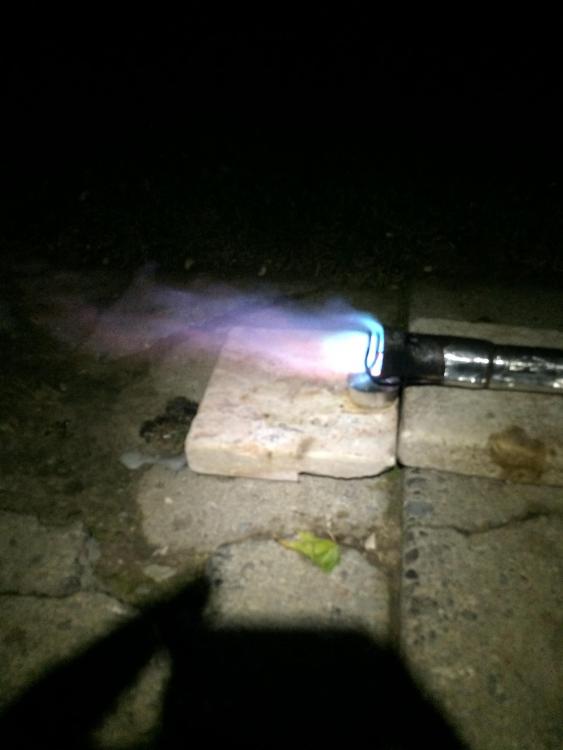
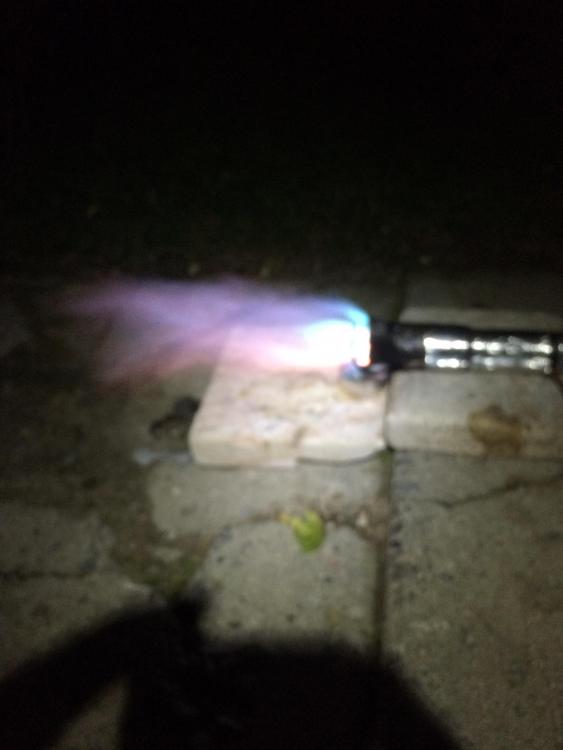

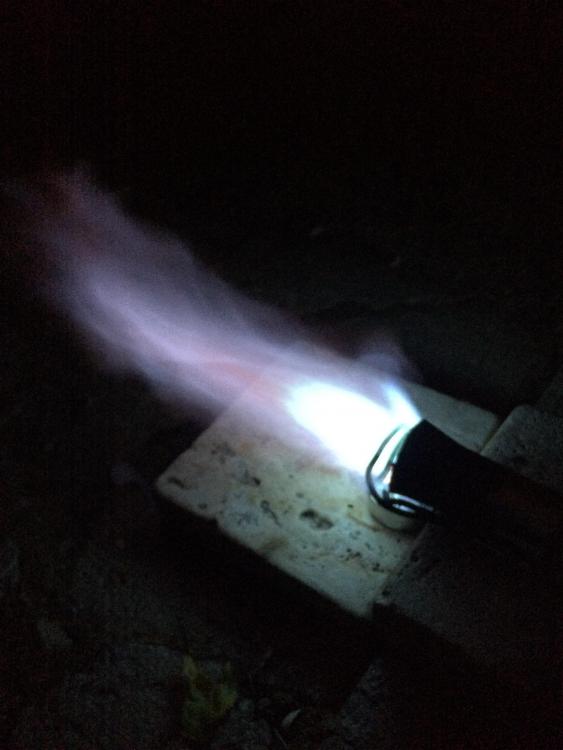
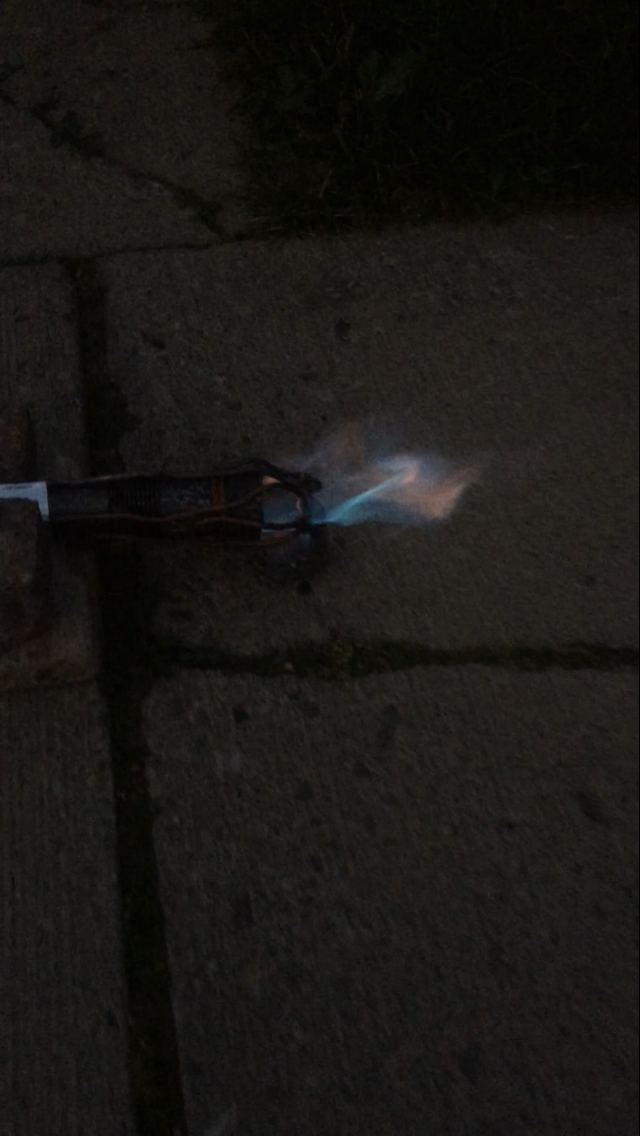
here it is running in the daytime on camping gasoline, it has many flame problems, with the huffing at lower pressures, and the flame coming off the end of the nozzle at high pressure. In person the colour of the flame transitions as well as the pressure increases, from a light blue to a darker almost purple. As I think it becomes more oxidizing. If I can I will add a larger nozzle, or add more flare to the existing one. Also something I tried to protect the nozzle (black pipe nipple), was a coating of calcined alumina with bentonite, which seems to work well, as you can see the flame is clean from oxidized iron colouring. Any suggestions to improve the burner?
-
-
Nothing new, just decided to compile all the stuff I did up until now, at the time of many of the things here I was going based off other youtube videos, so... haha, still someone might find some useful ideas from this. Two weeks until I get to make changes to the burner, and test it out, and make a new forge.


Forced air burner tube getting red hot
in Gas Forges
Posted
I dont think the steel wool is helping