

Andrew Golabek
-
Posts
84 -
Joined
-
Last visited
Content Type
Profiles
Forums
Articles
Gallery
Downloads
Events
Posts posted by Andrew Golabek
-
-
We have some proper cameras and equipment at home, these pictures were simply casual ones.
-
Not home right now but I did take a picture with a less distracting background before; when I get home I’ll take some proper pictures.

-
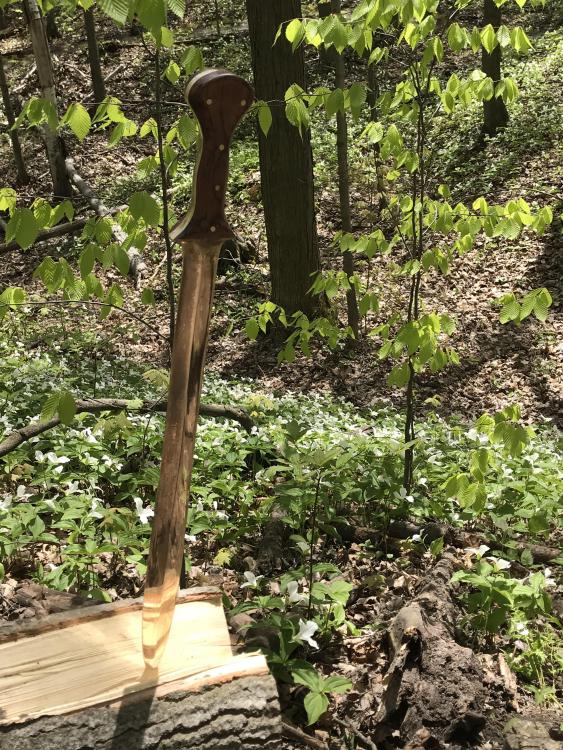
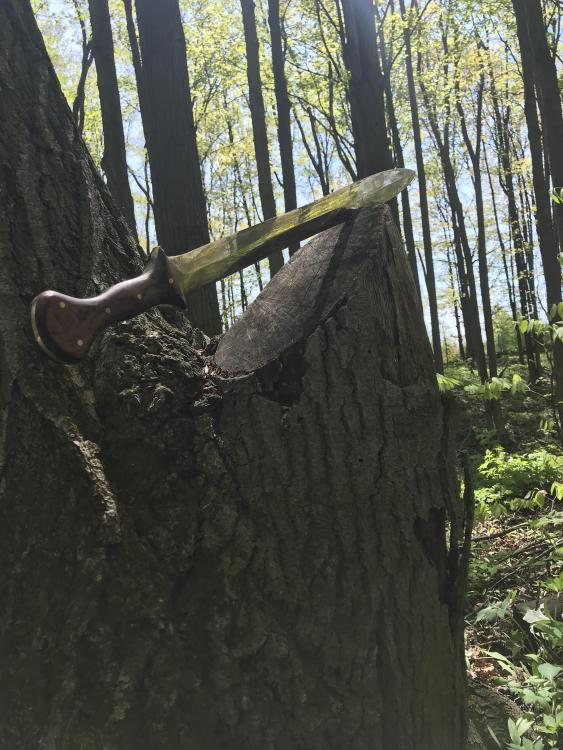
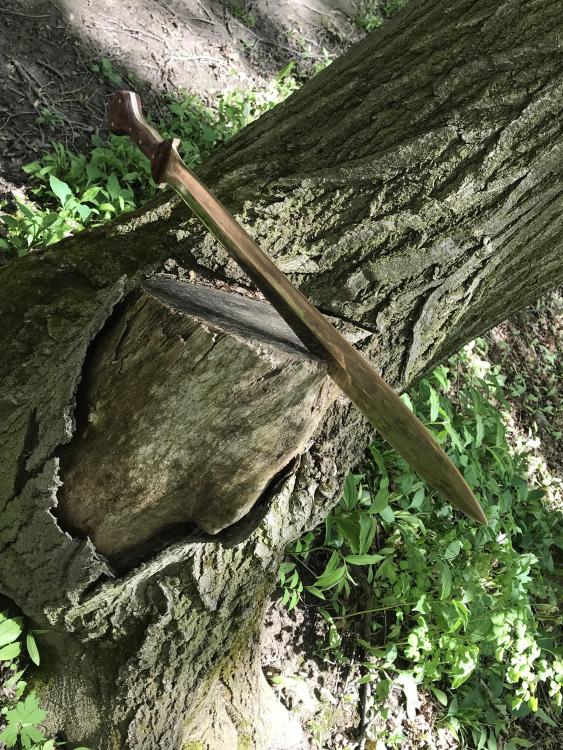
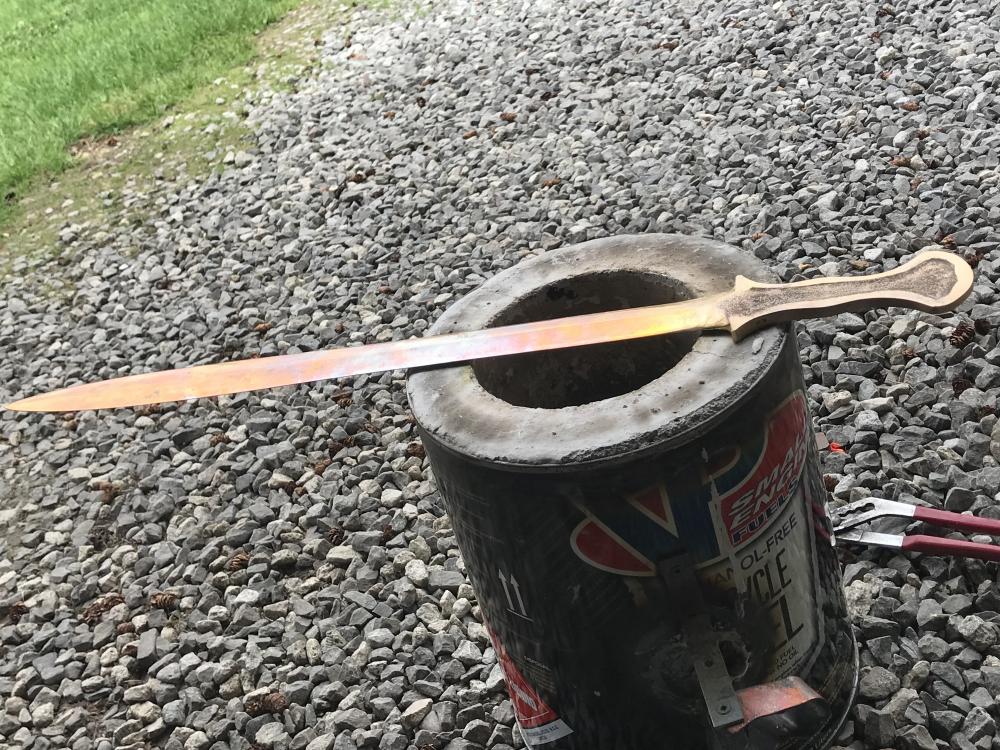
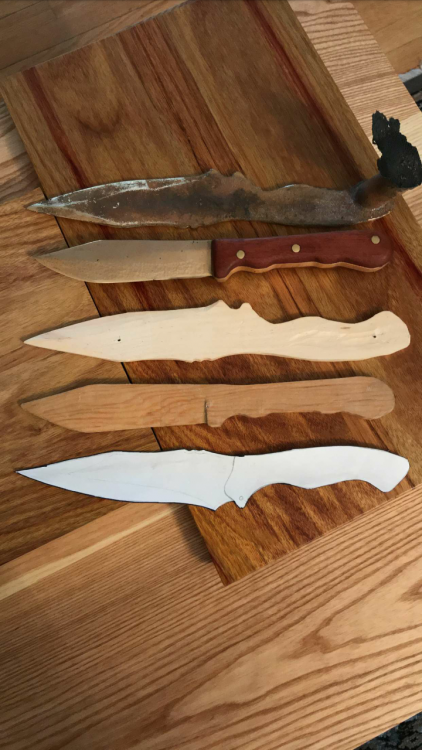
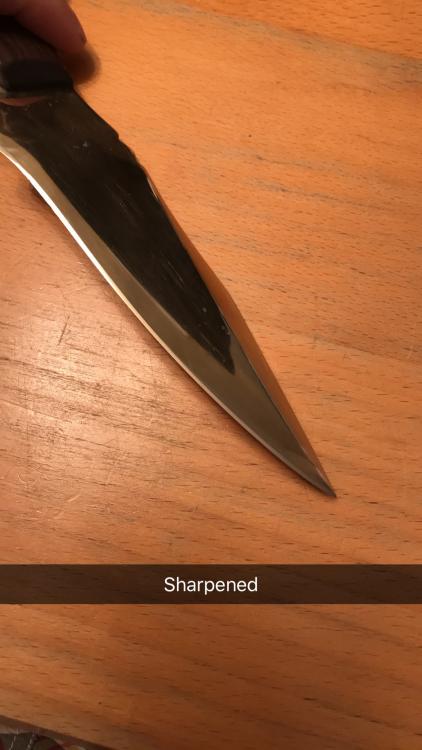
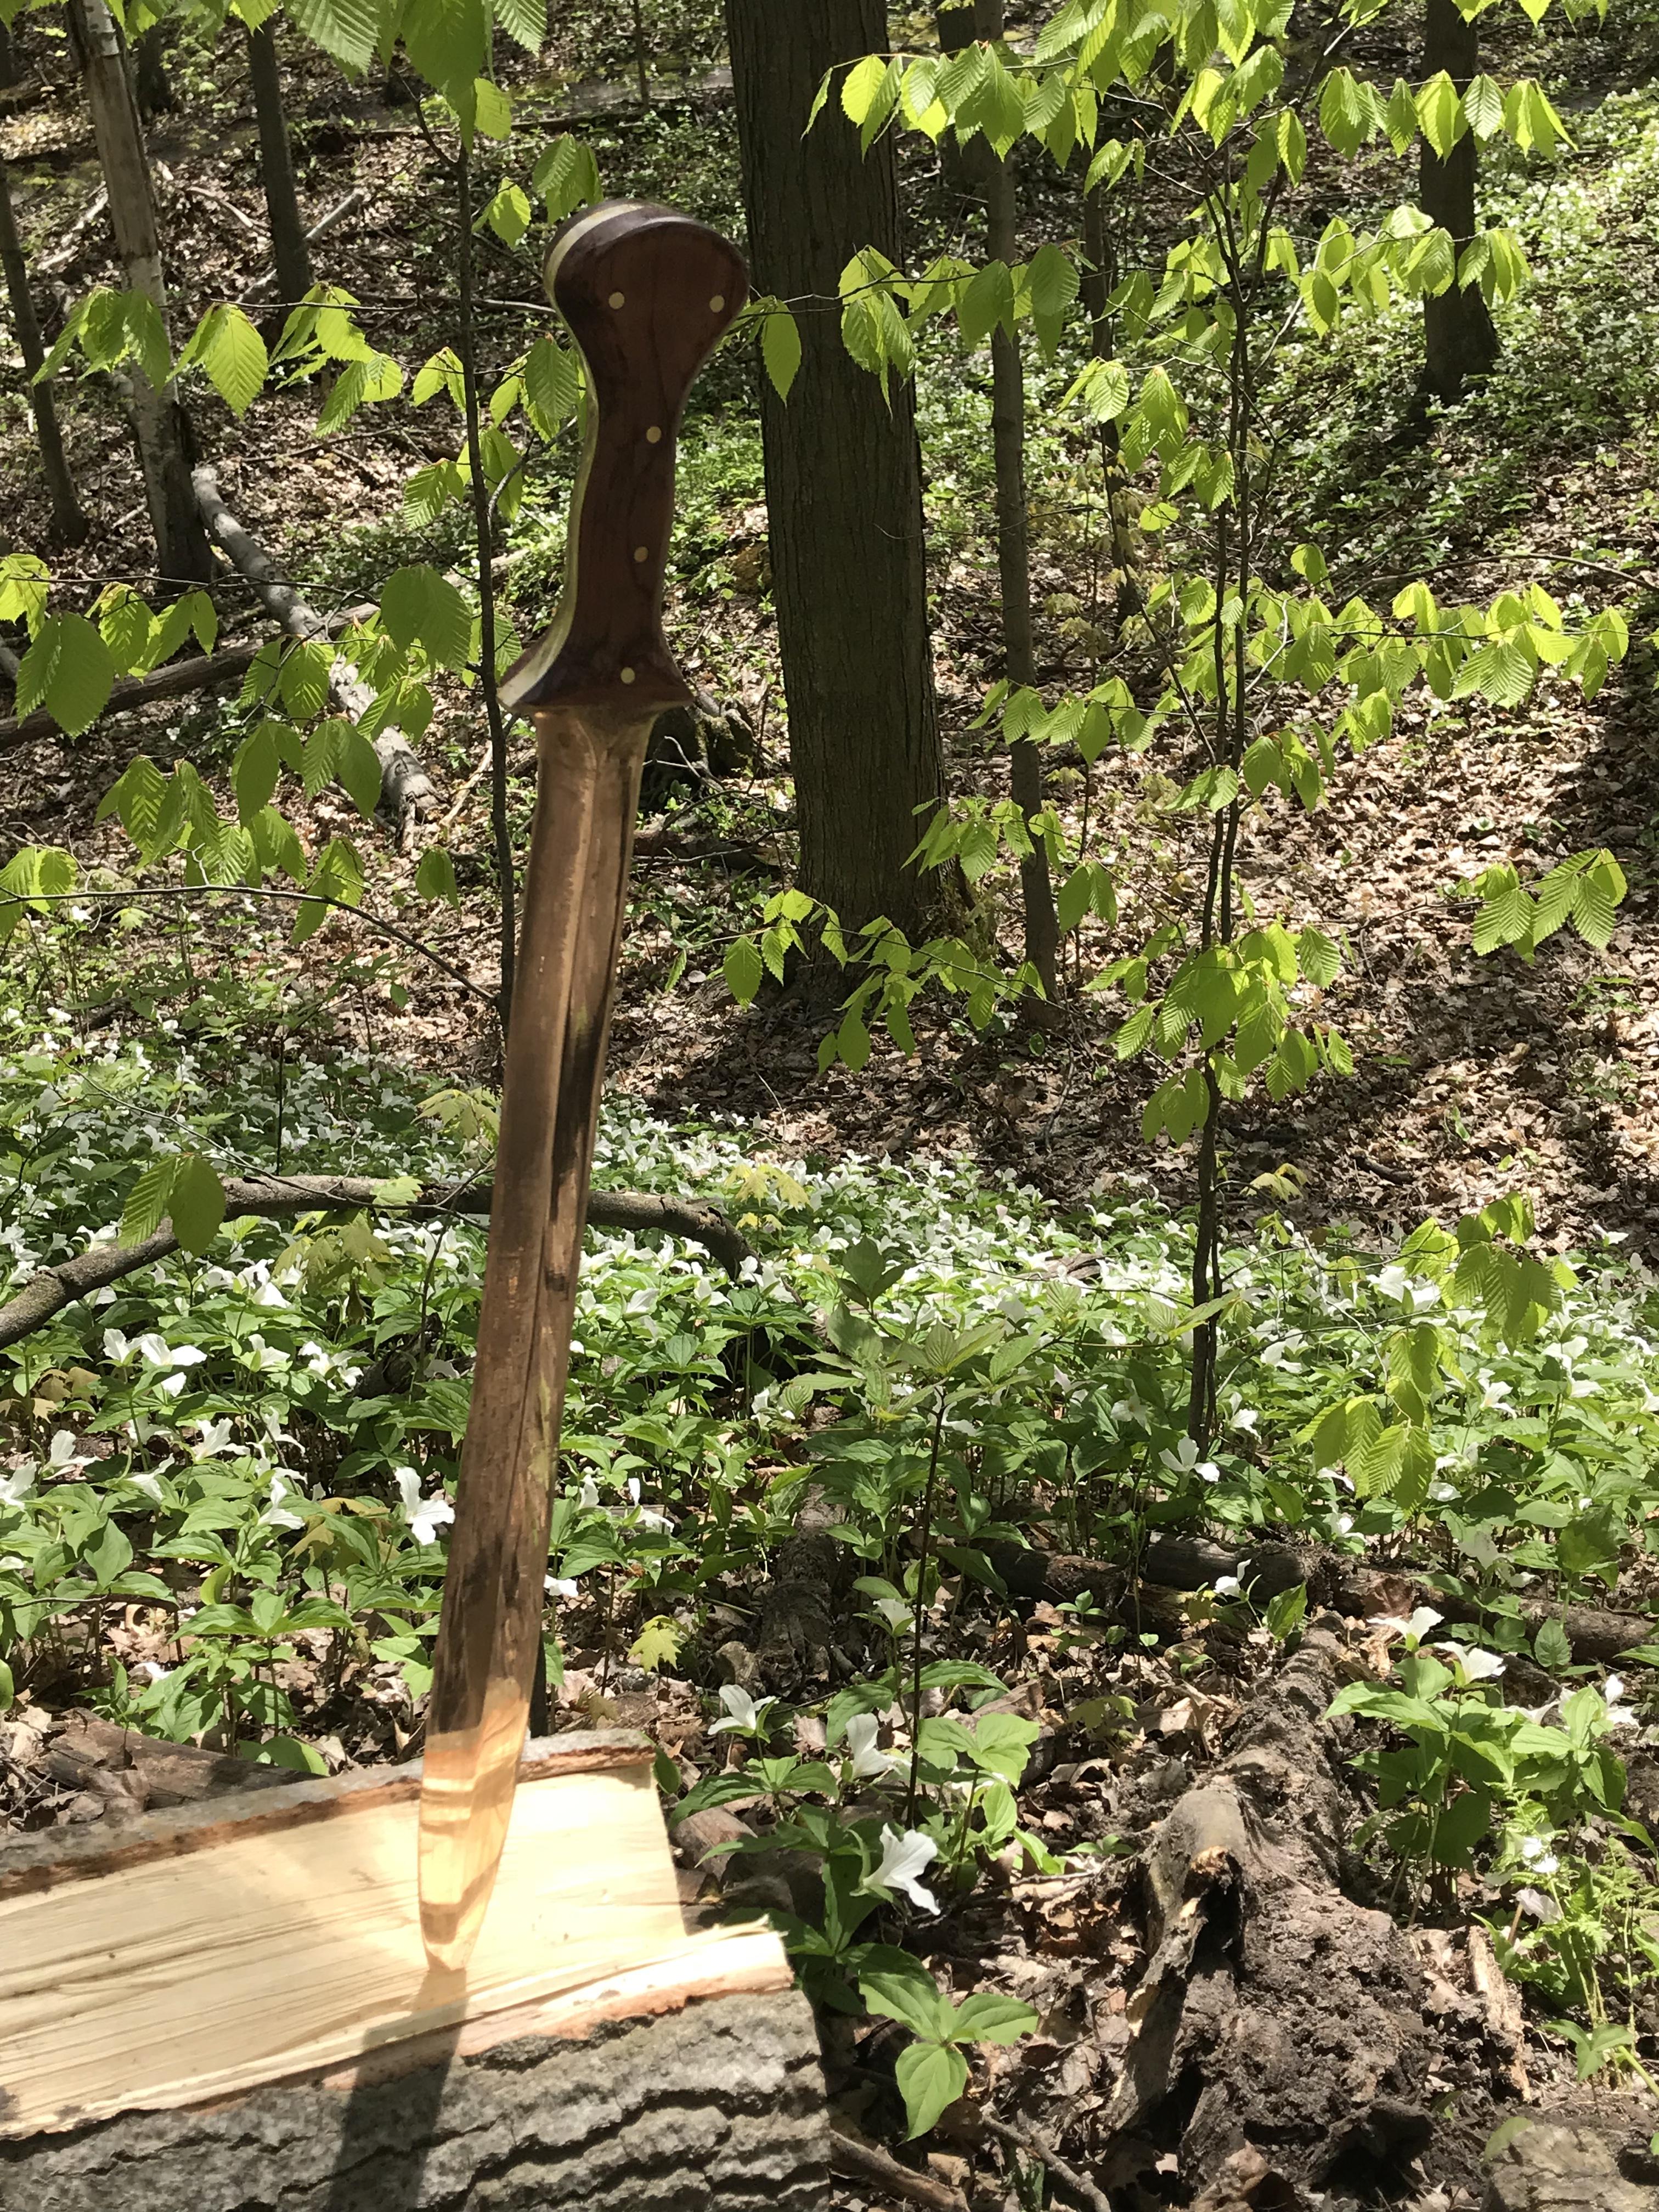
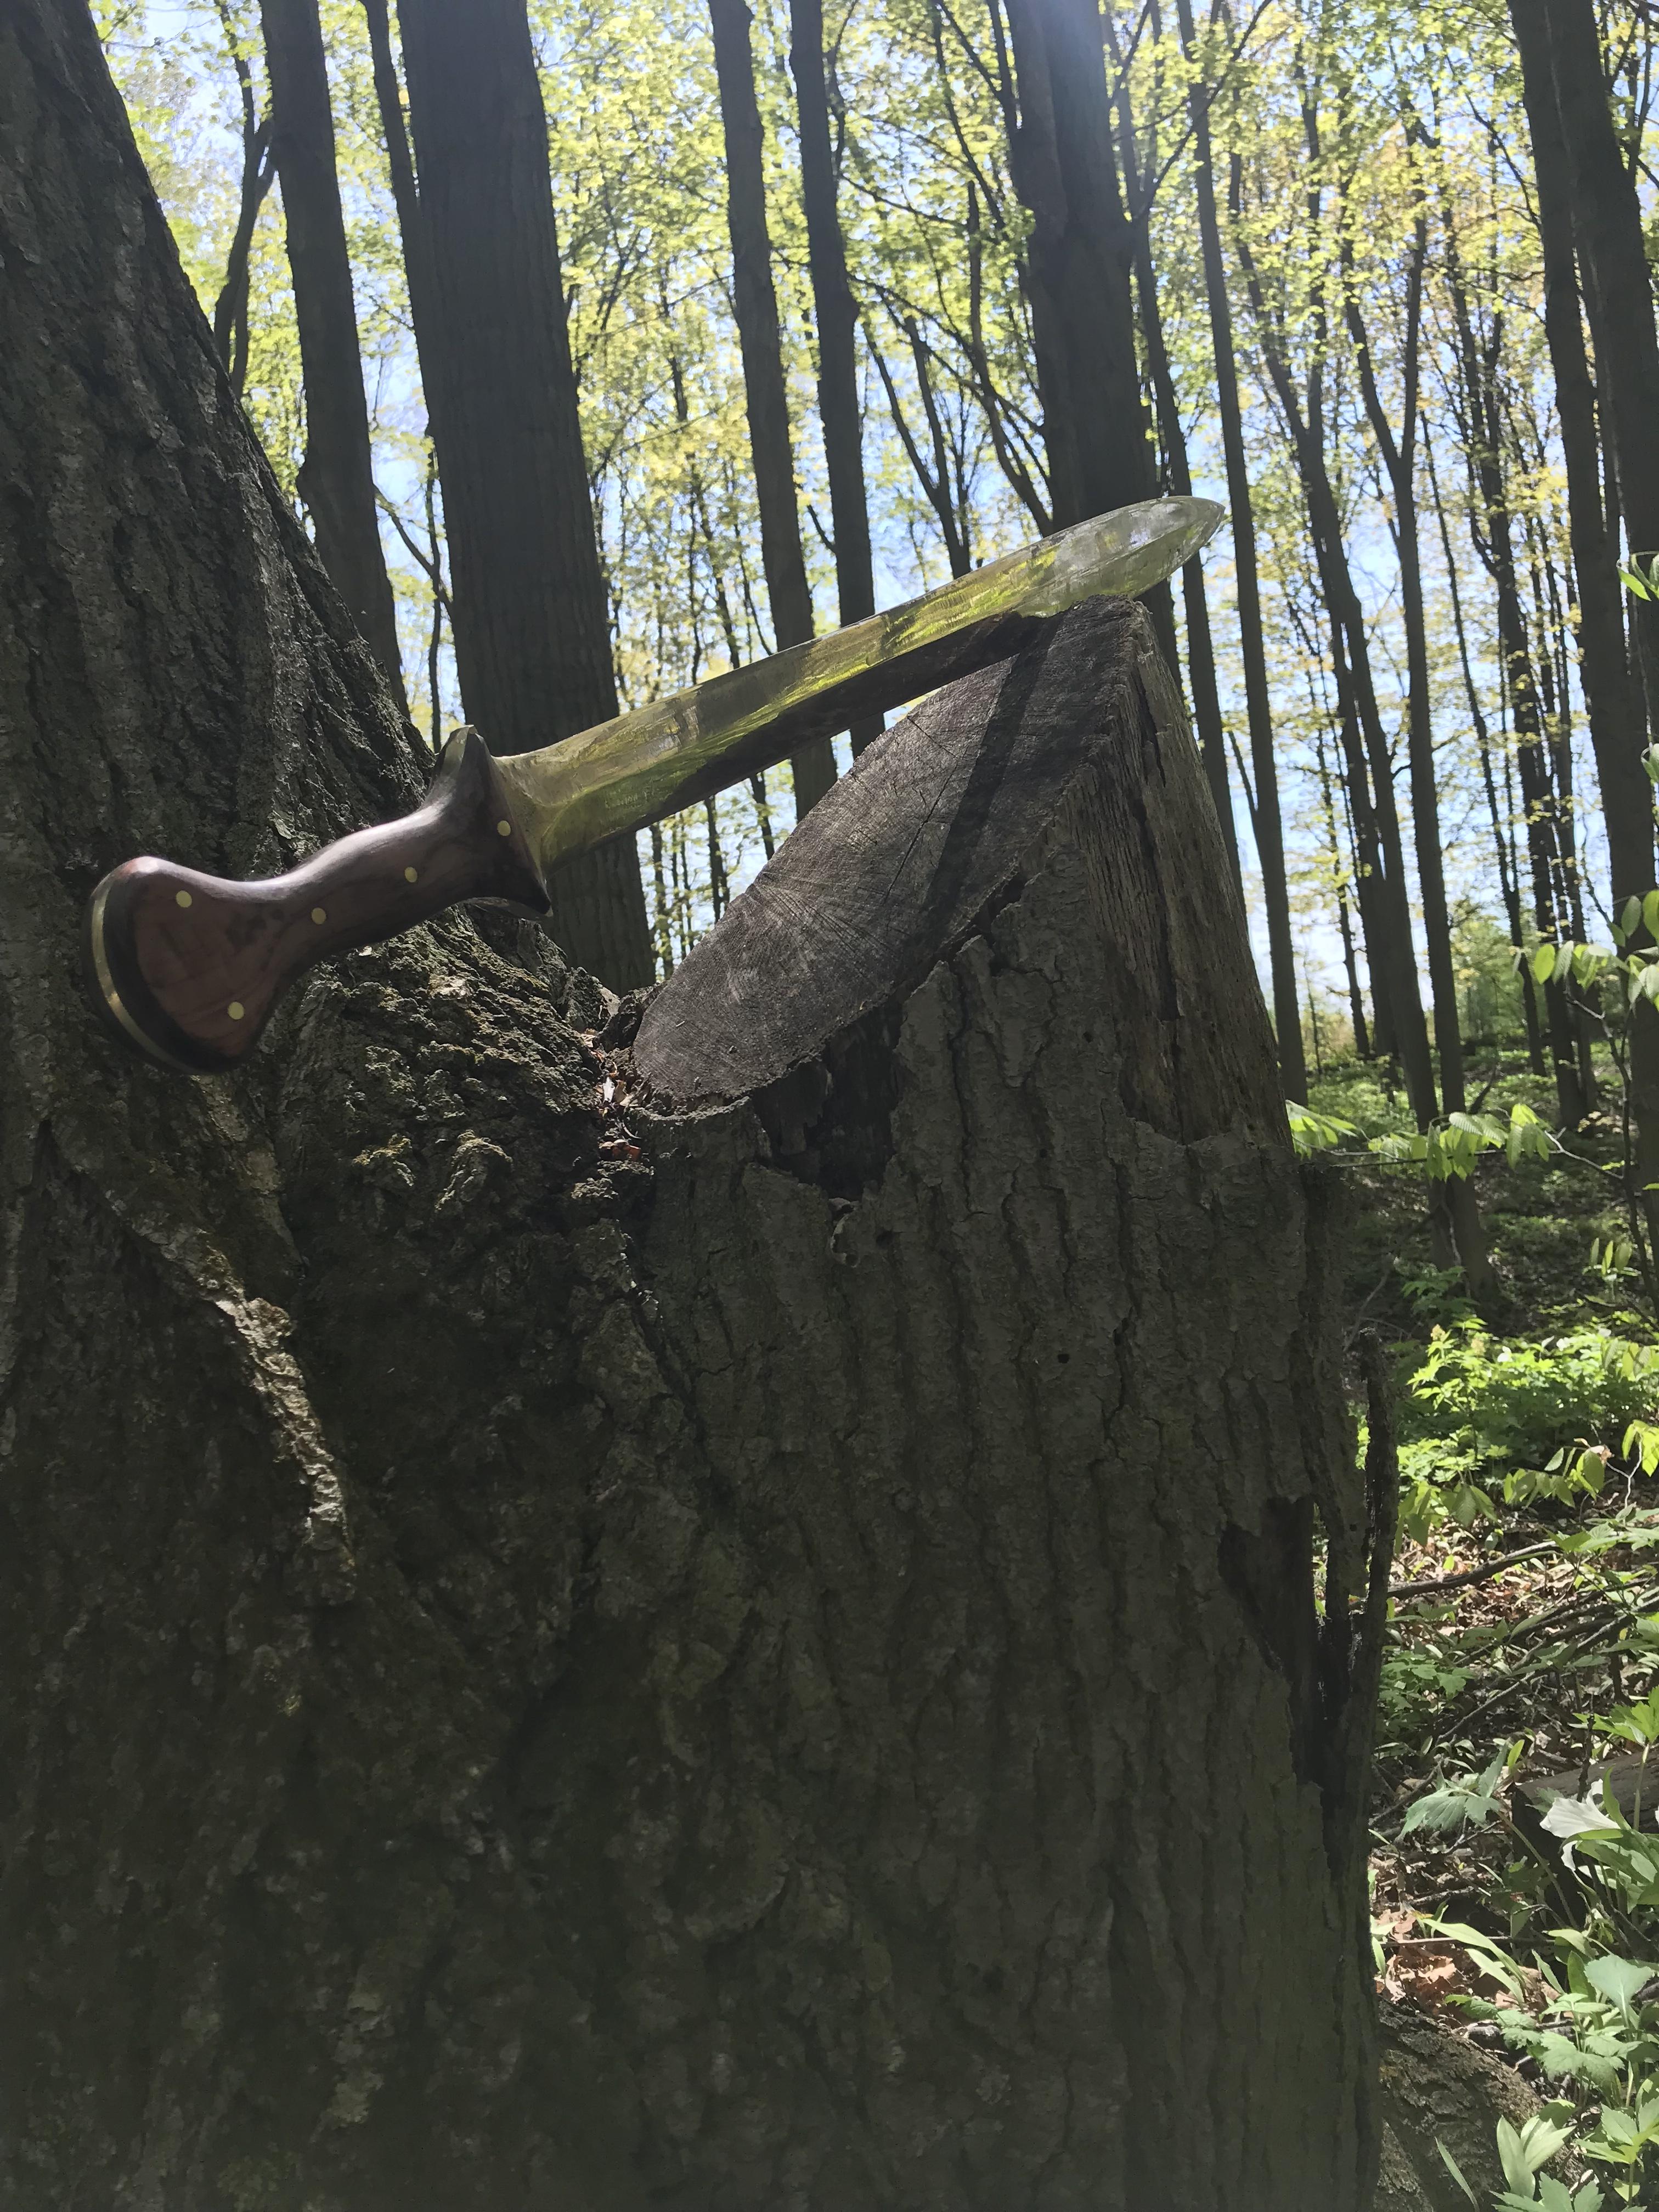
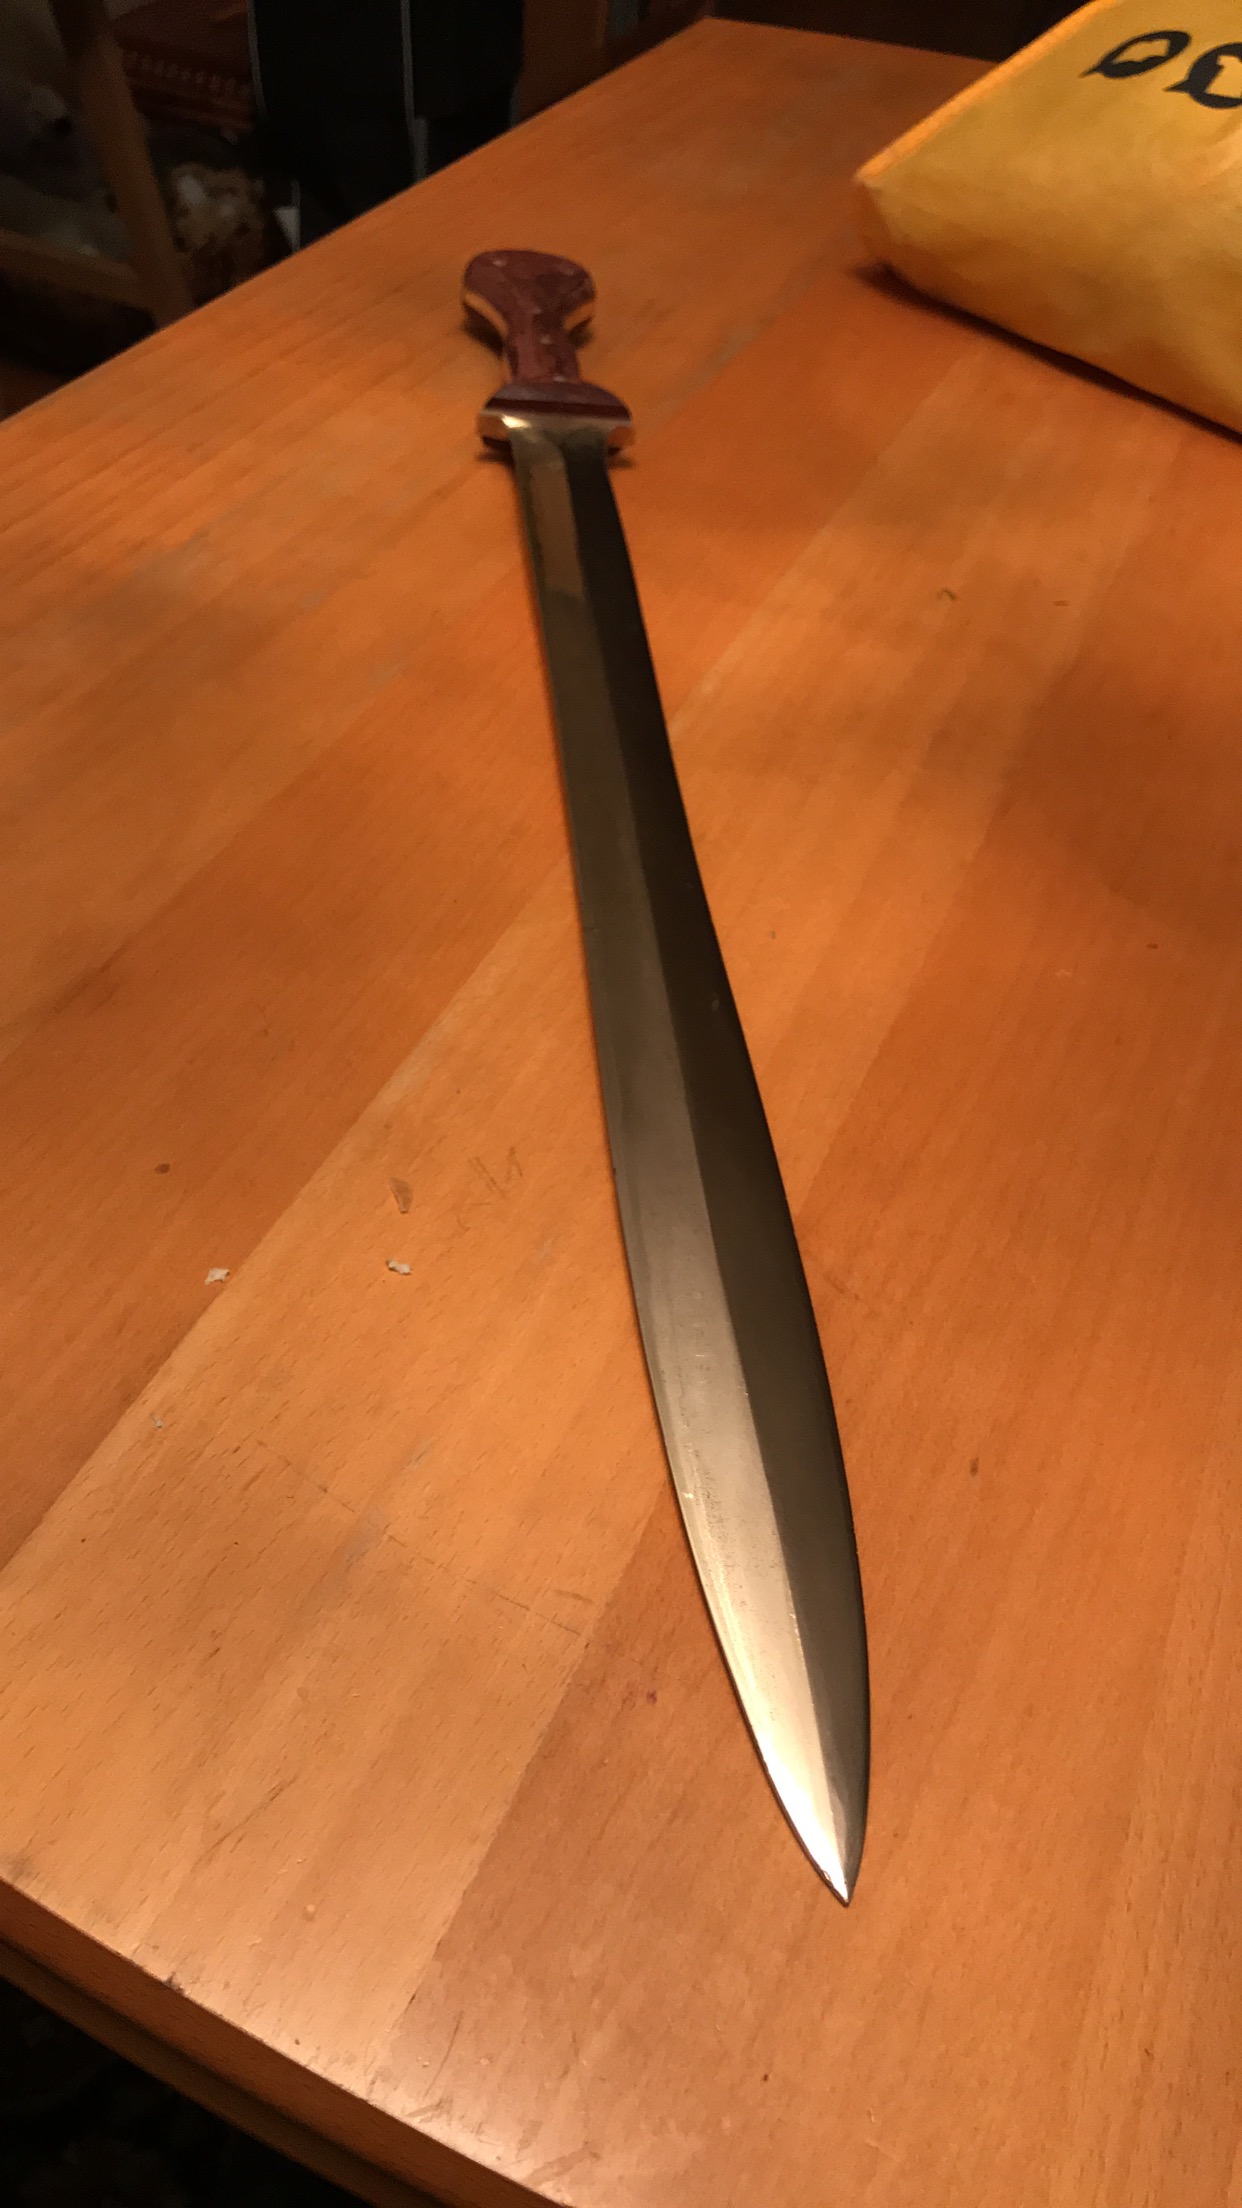
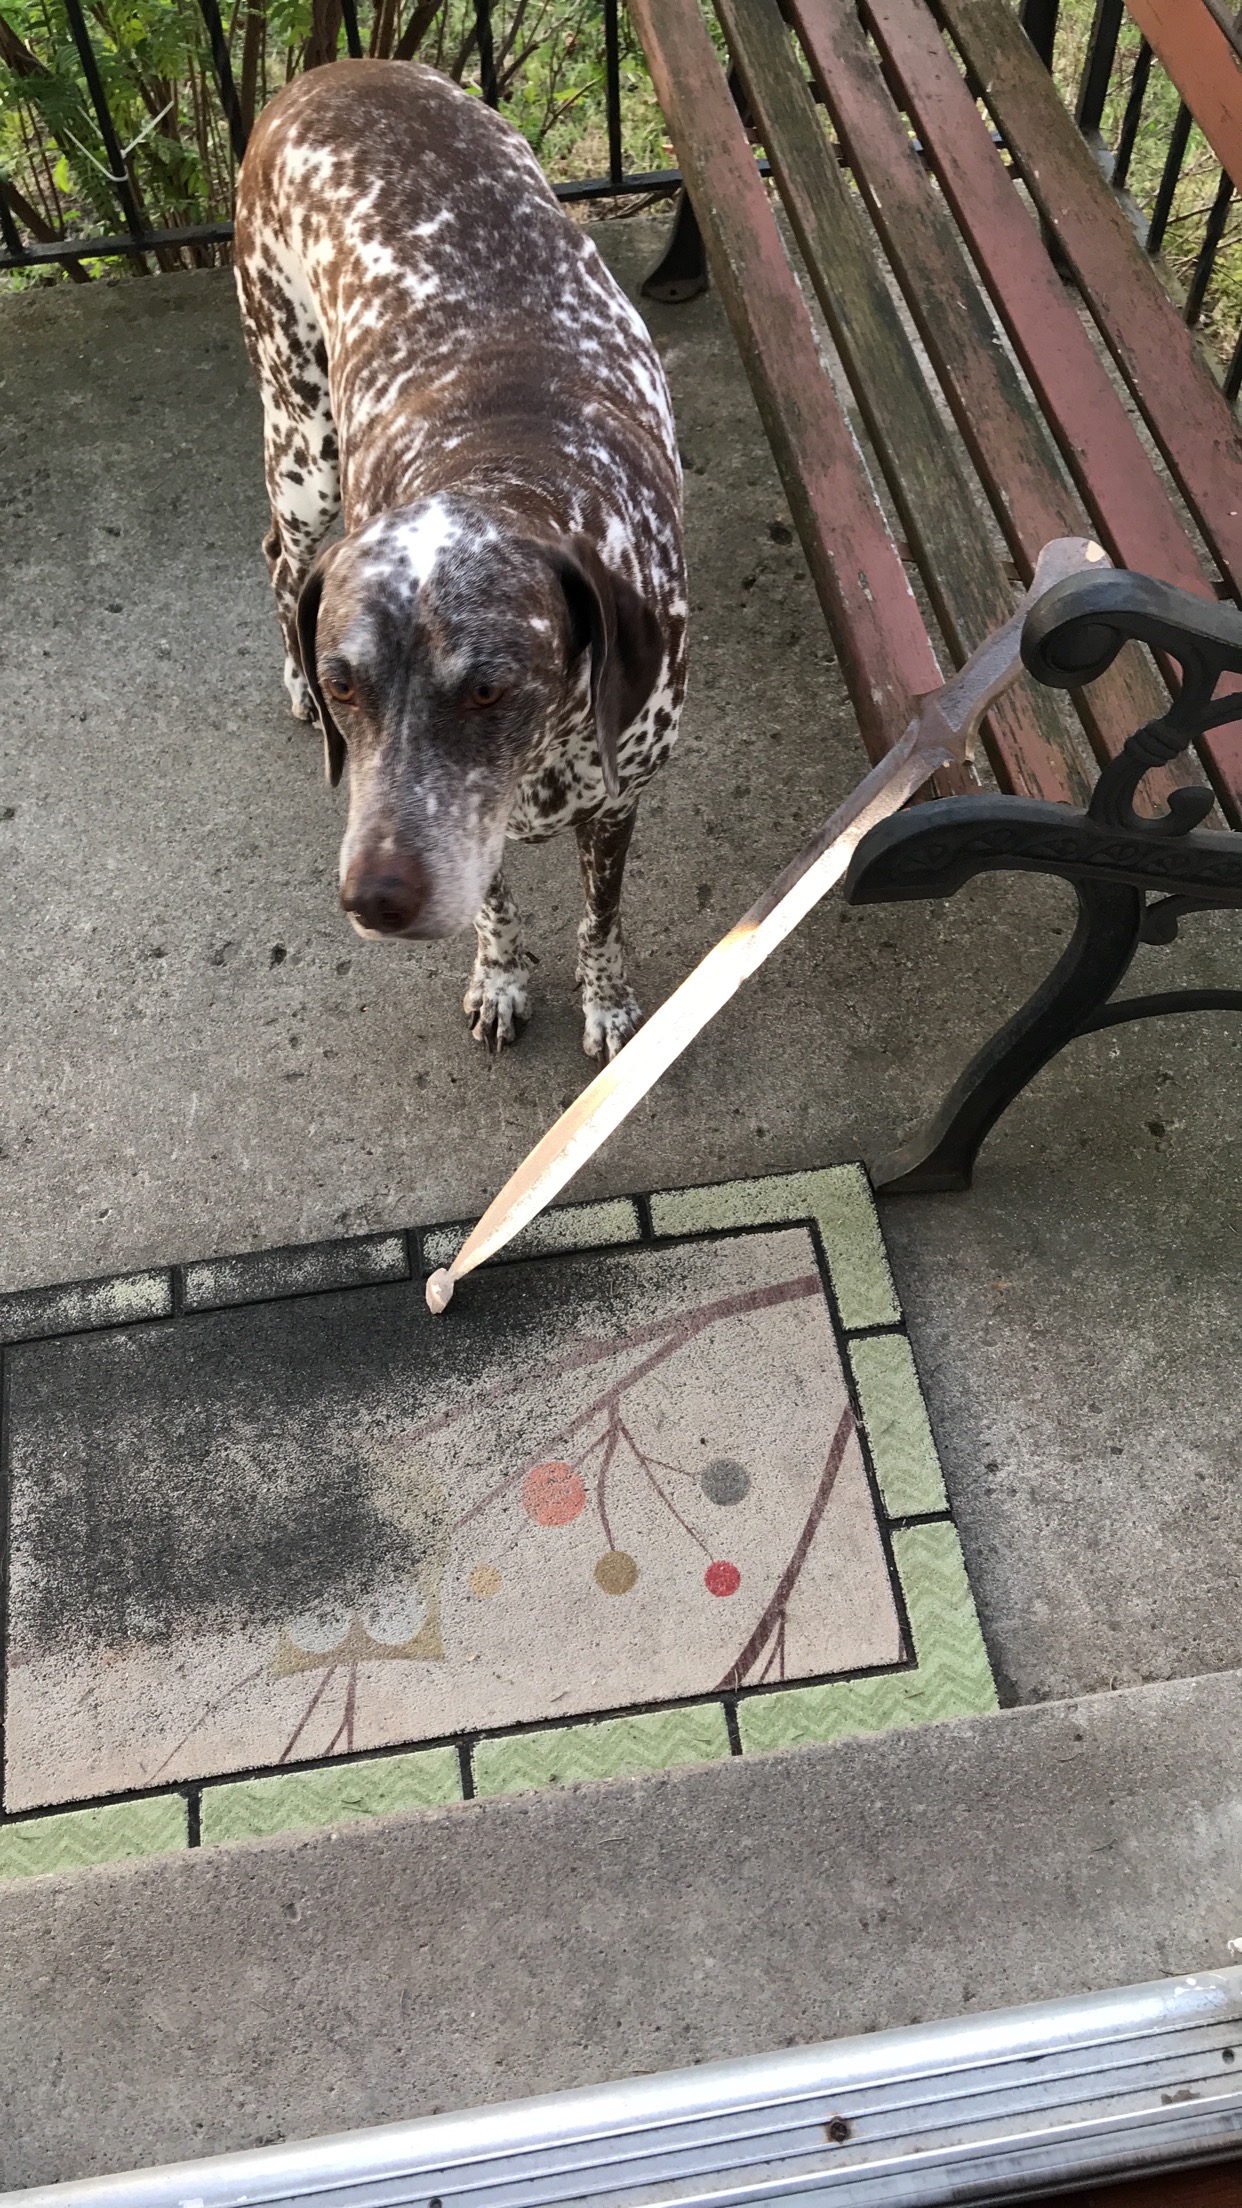
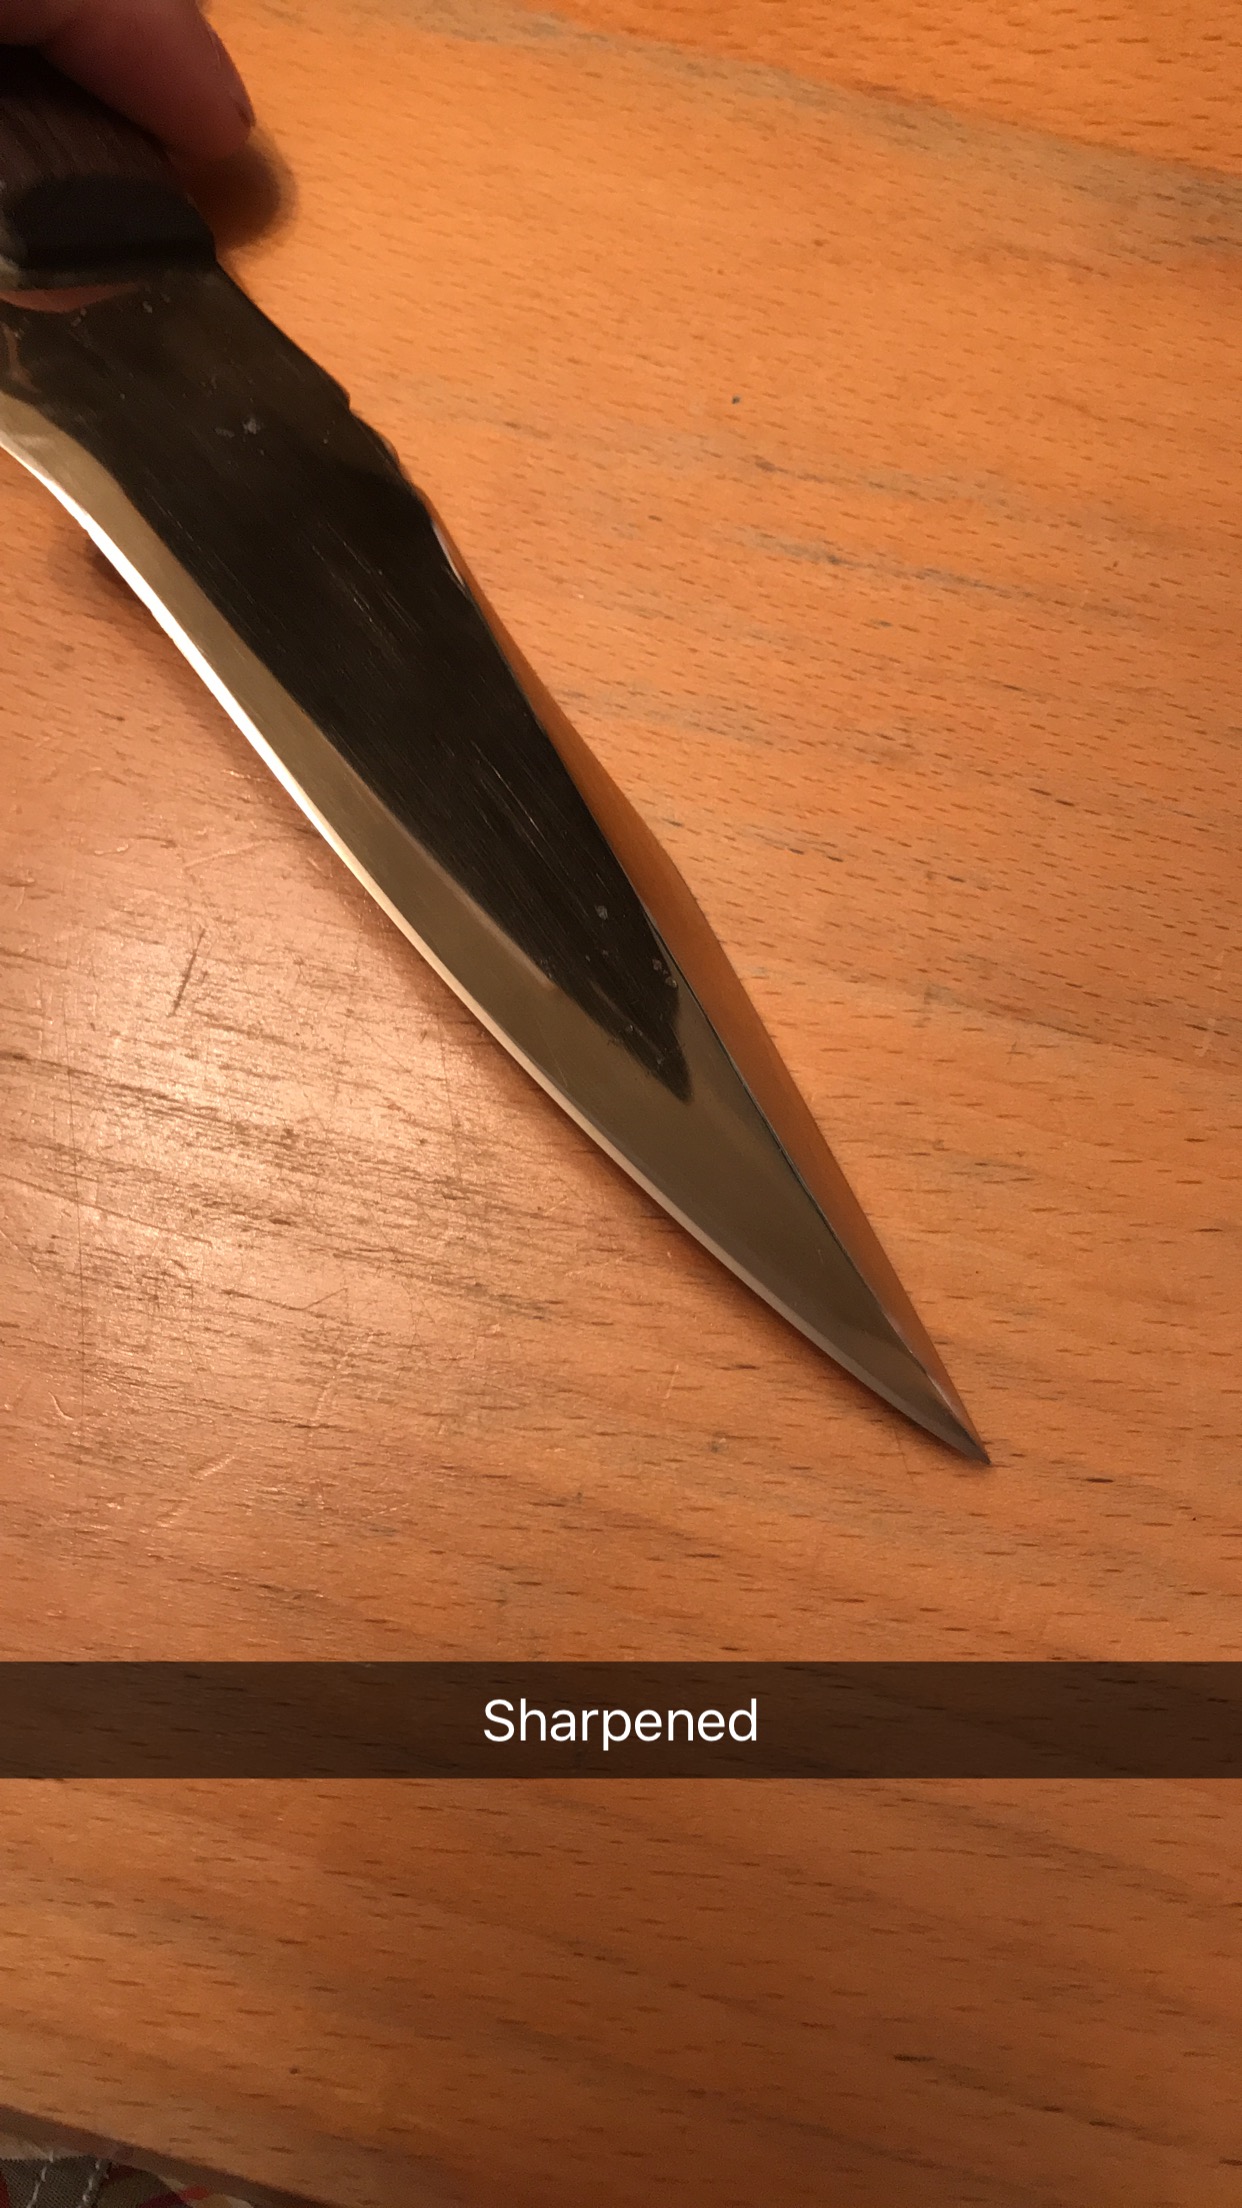
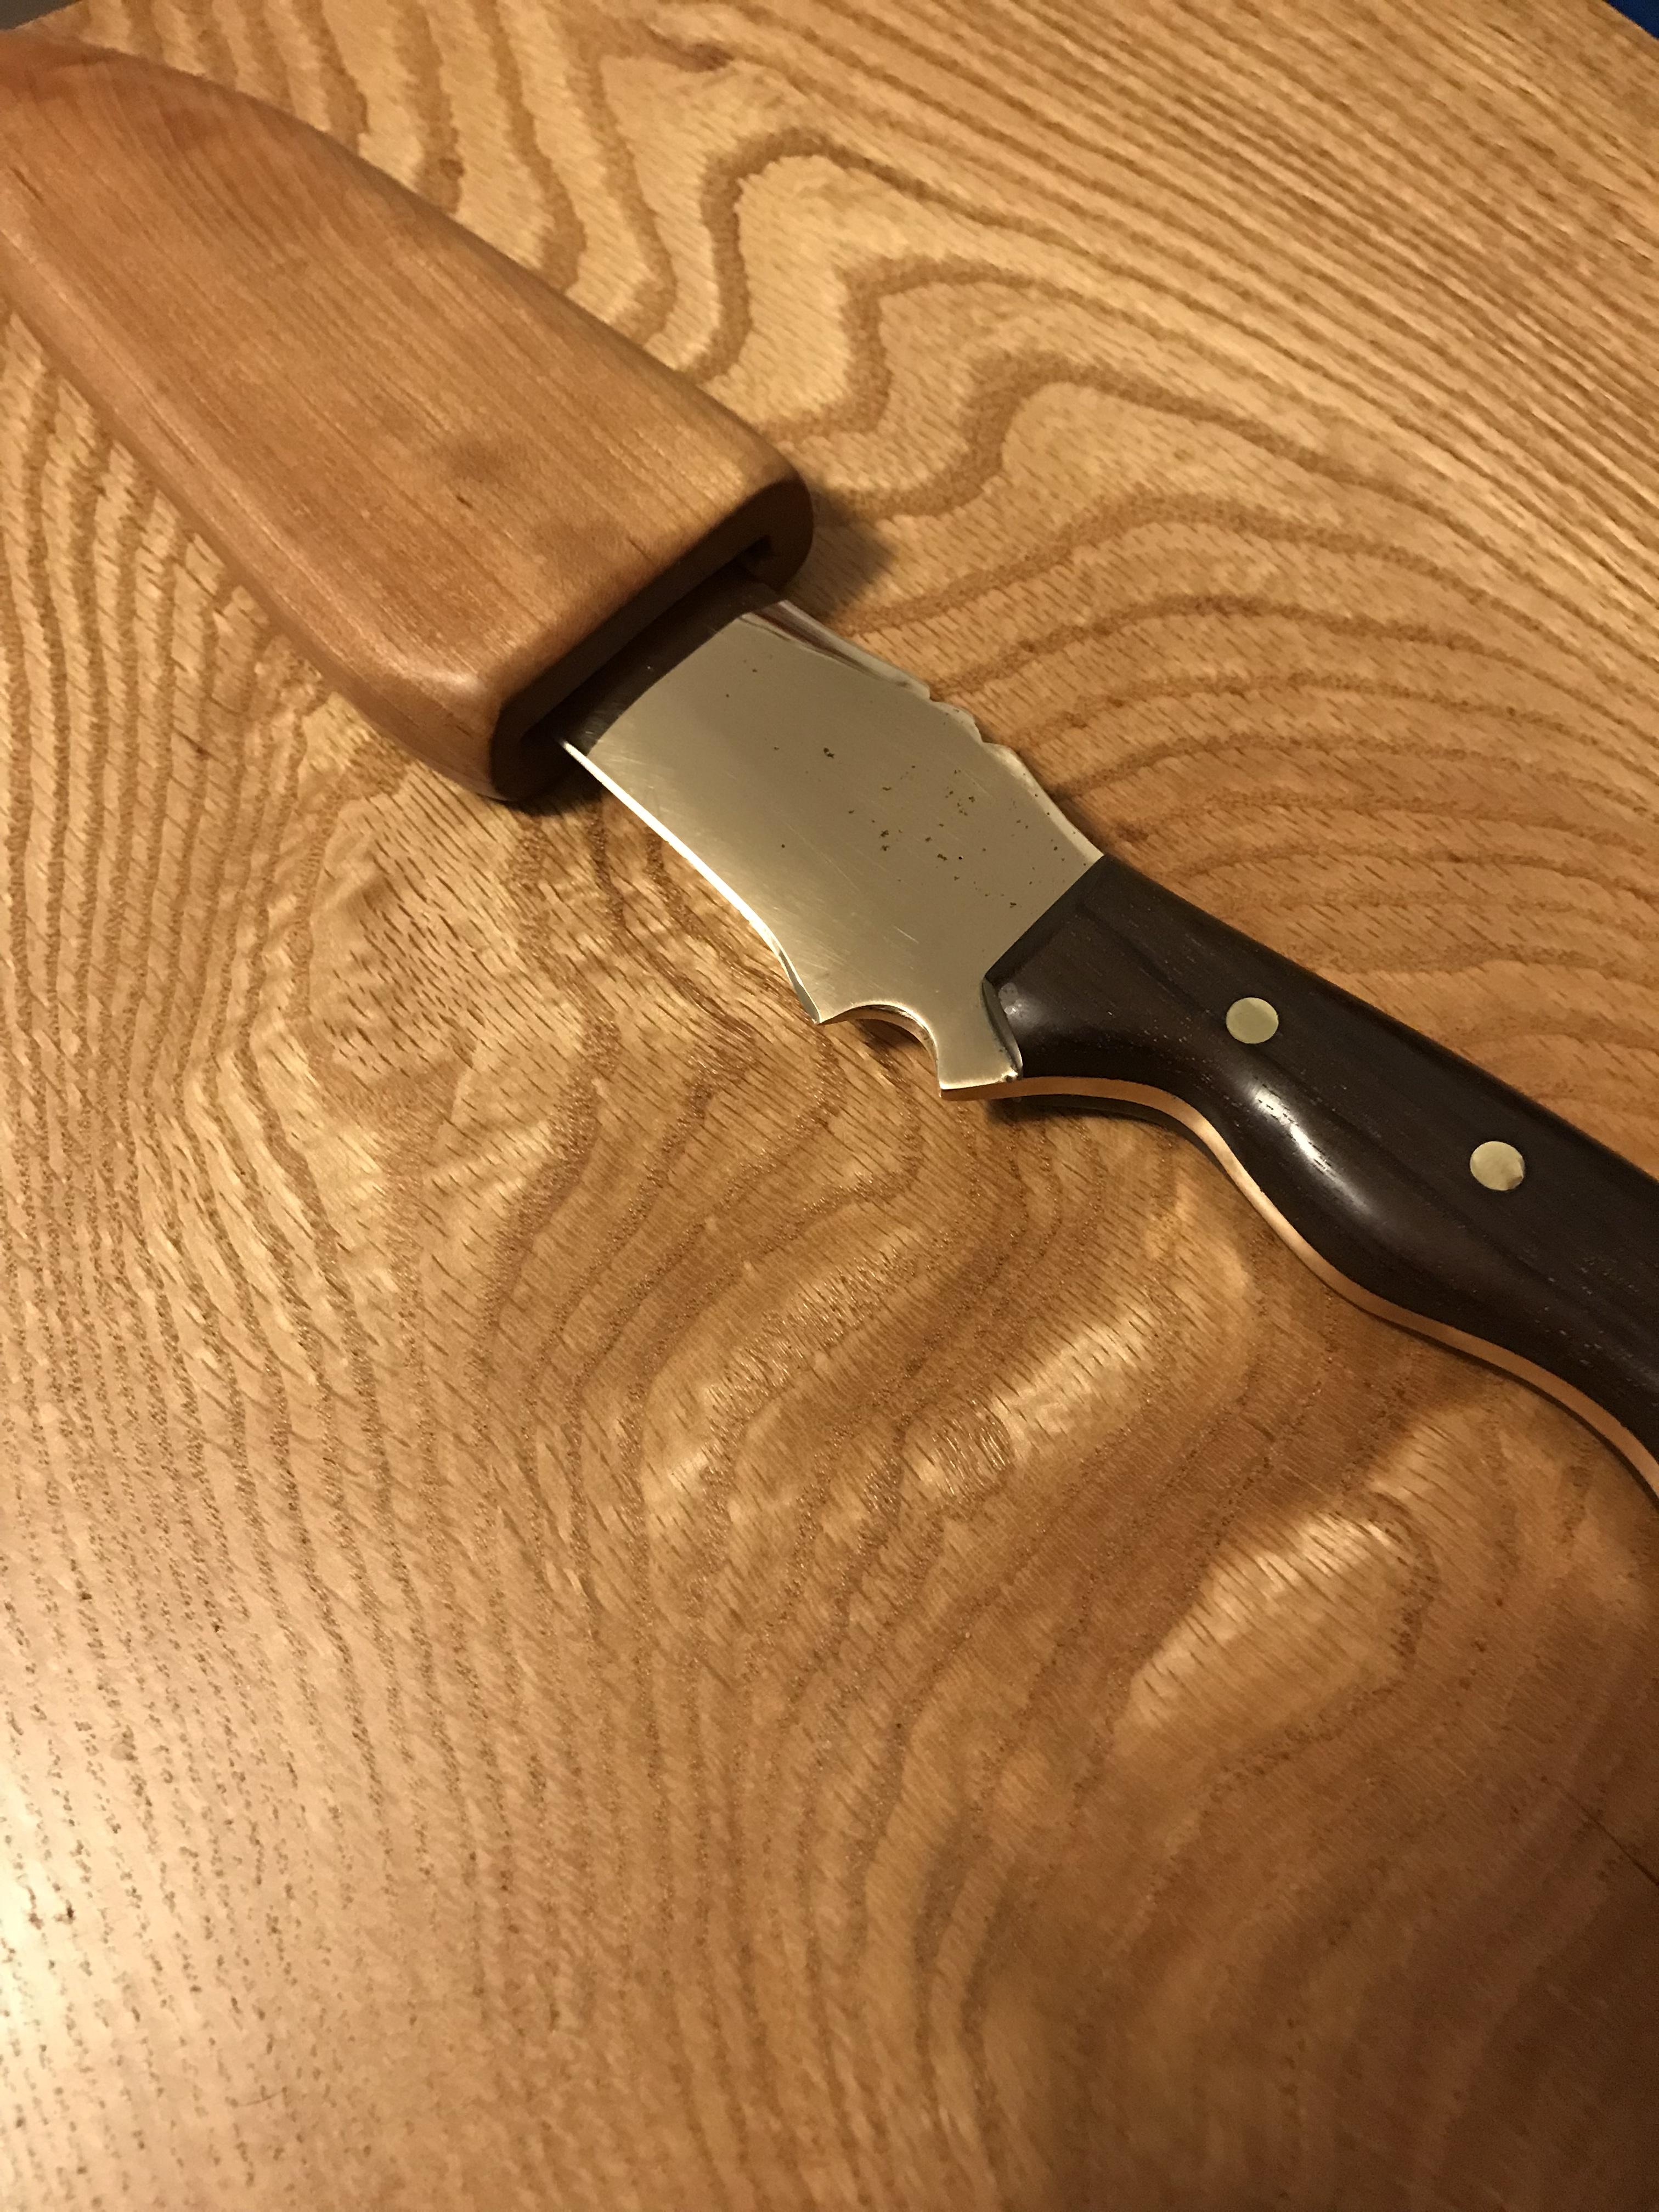
Nearly done, only final polish for the handle and oiling is left.
brought it to the forest to test chop some bushes and stuff, works pretty well, I’m going to make a video in a little while showing what it can do.
-the weight is 1.23kg or 2.71 lbs
-the point of balance is 5.25 inches from the guard now or 13.3cm.
-maximum width of the blade is 43mm.

-
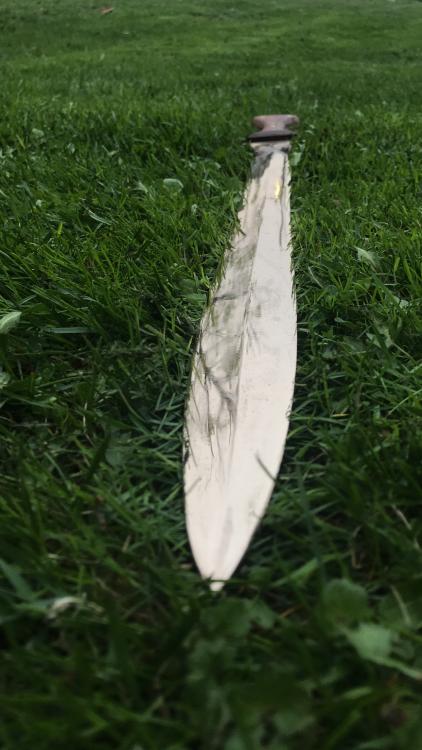
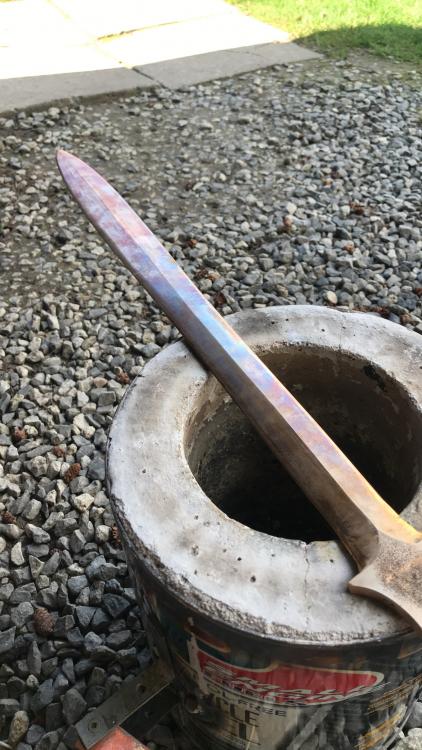
The blade has been final work hardened, ground, and polished.
The handle has been rough shaped, almost ready for final shaping and sanding, then oiling

-
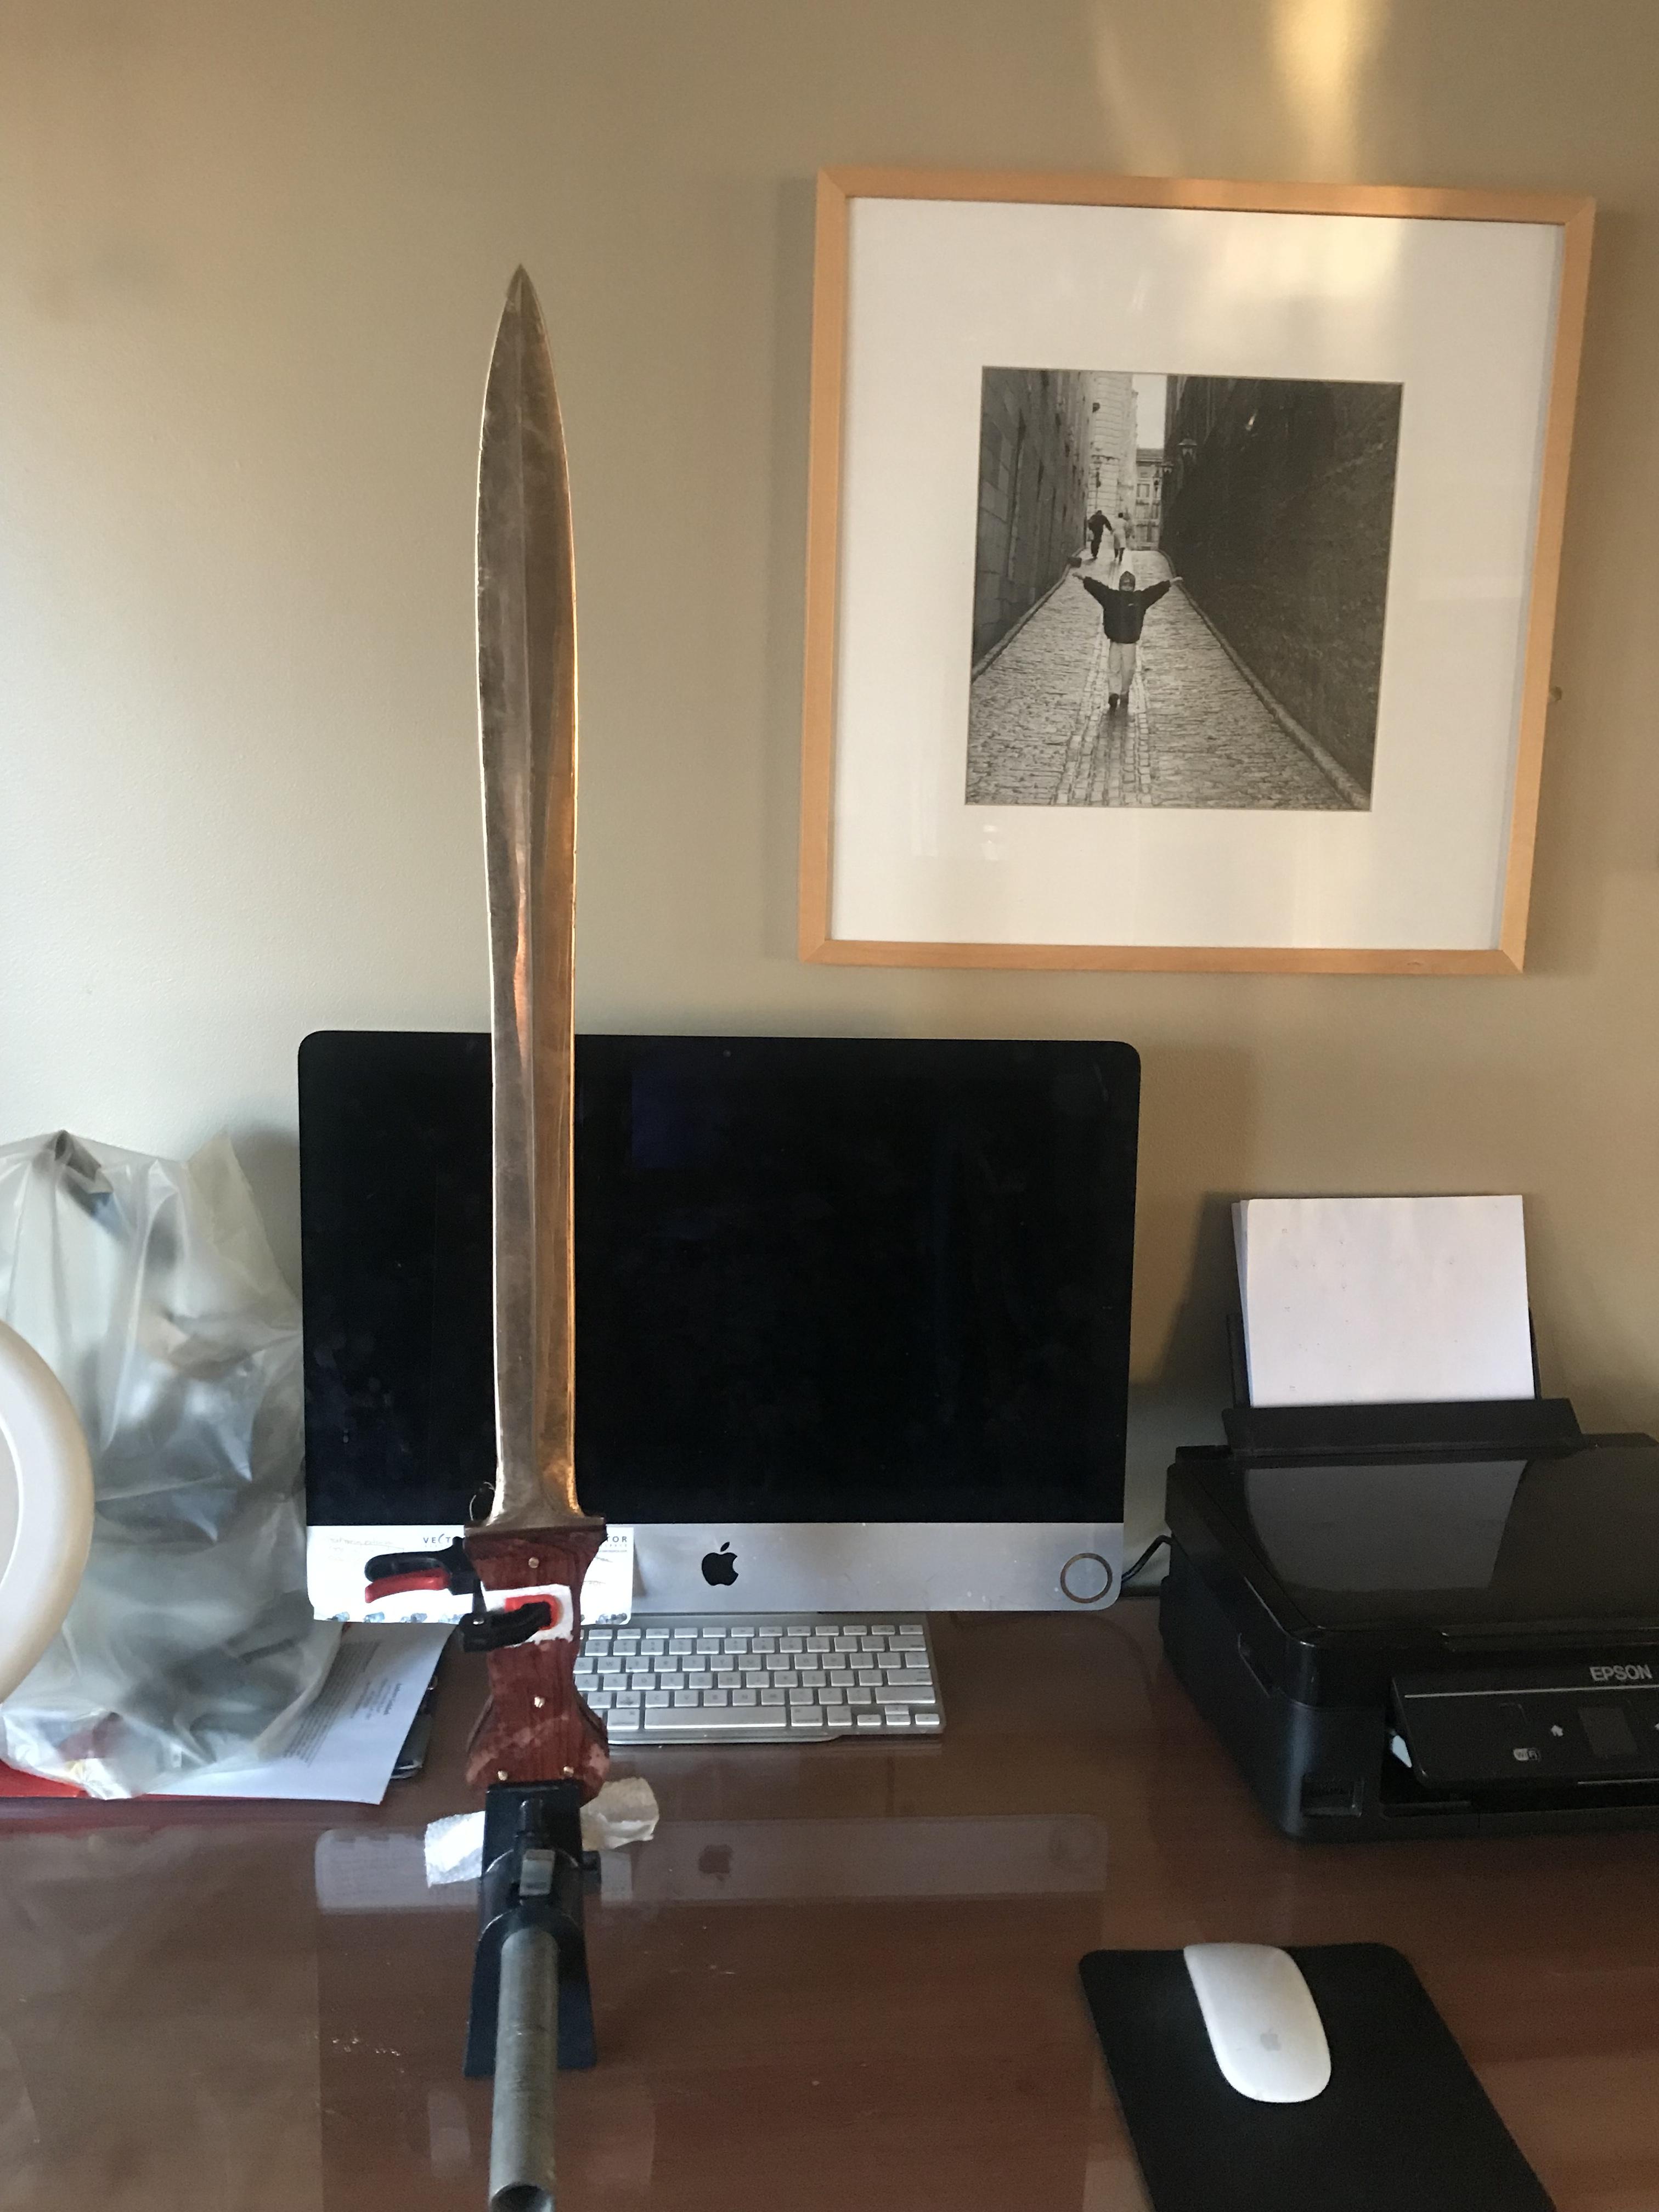
Done most of the grinding, putting the handle on now, also work hardened the edges and annealed it prior to work hardening

-
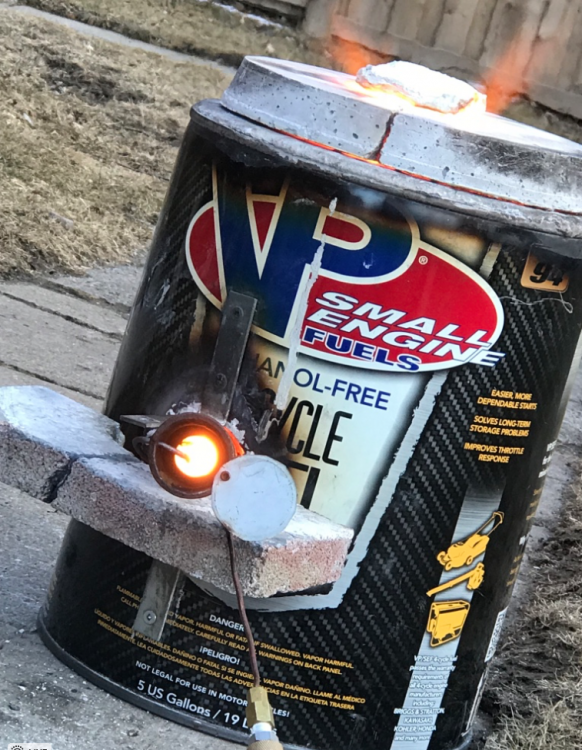
It looks to me like the burner is running way too rich, (even outside the forge) and the mounting tube is too long, preventing adequate airflow to the burner, increasing the problem when mounted in the forge
Also be sure to rigidize the ceramic blanket if not done already
-
I suppose for this casting it served as double duty, as both sprue and gate at the end of it
i don’t have any methods currently to turn it into other parts so it will probably just be used in the next melt
-
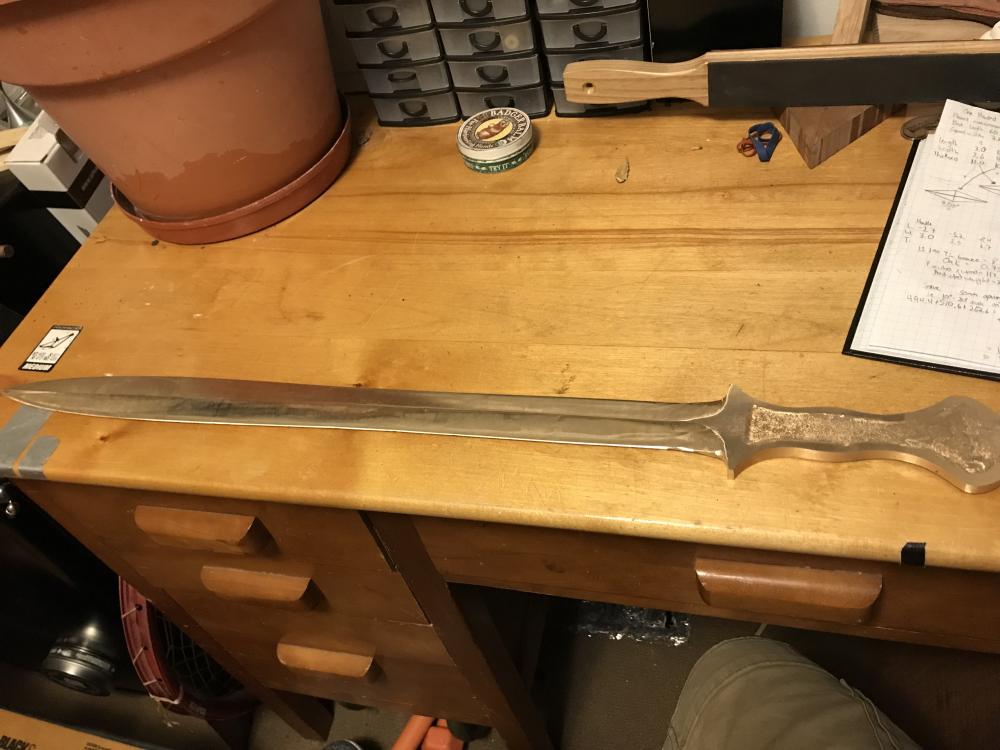
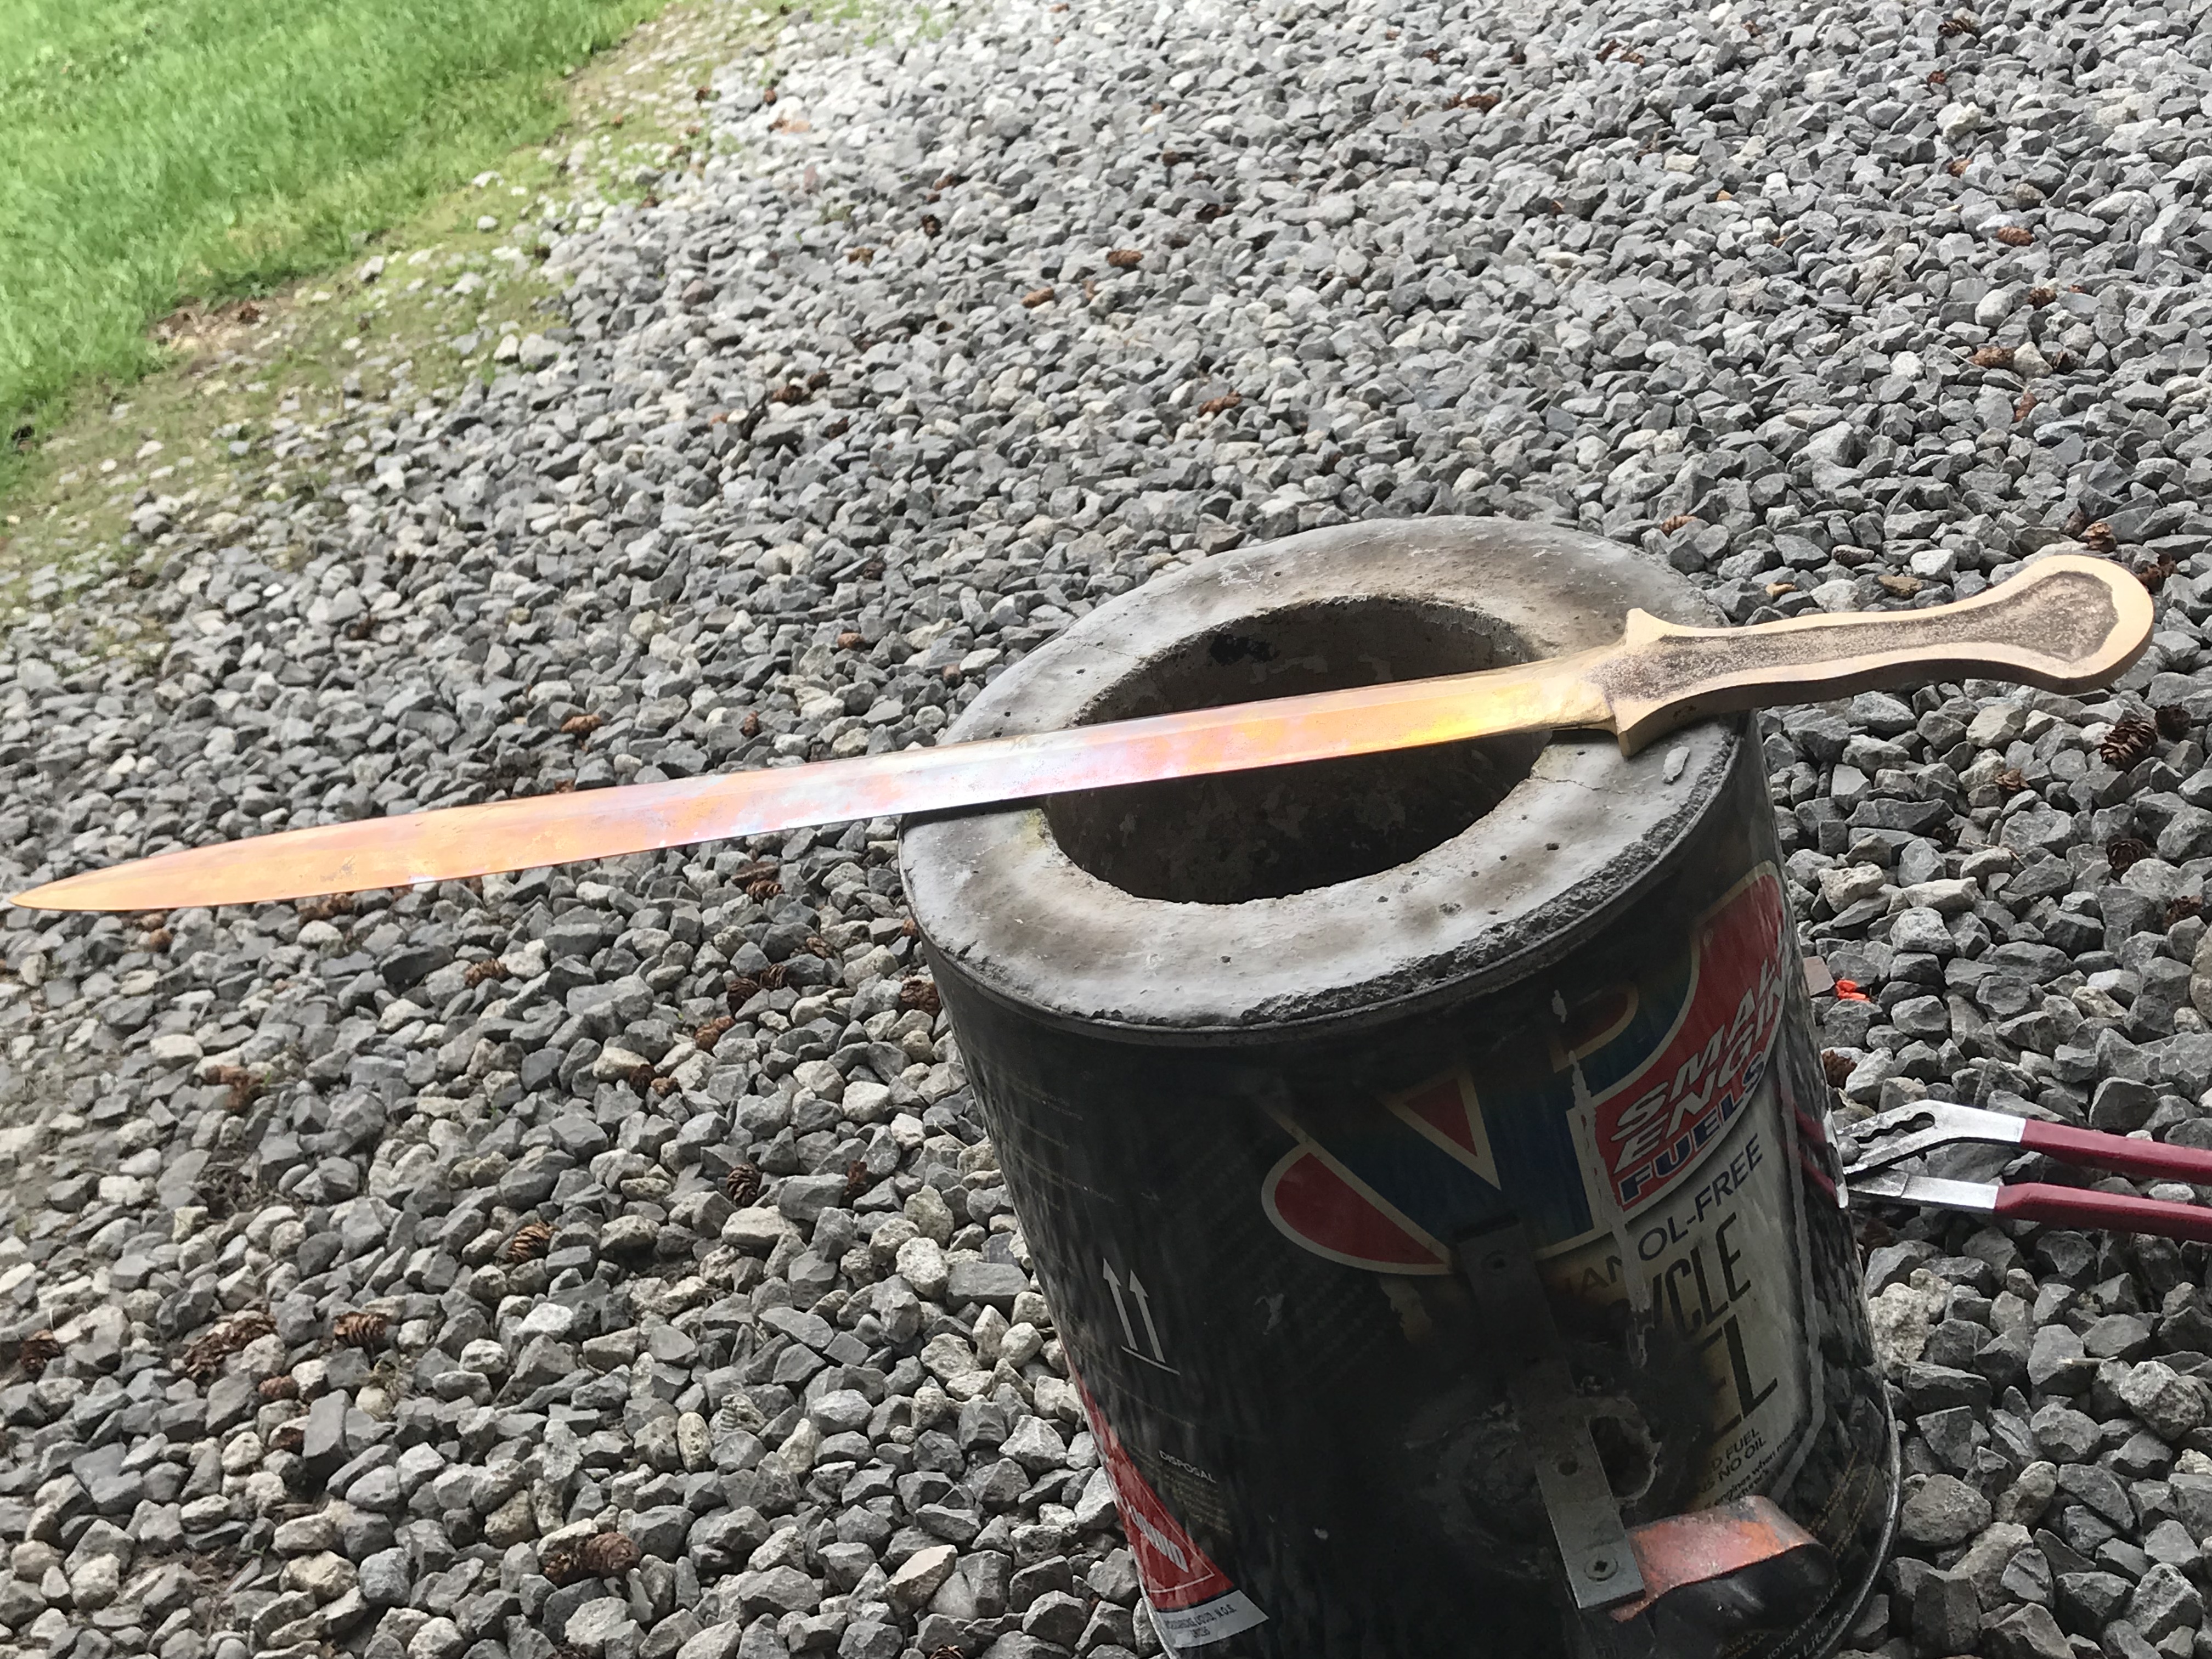
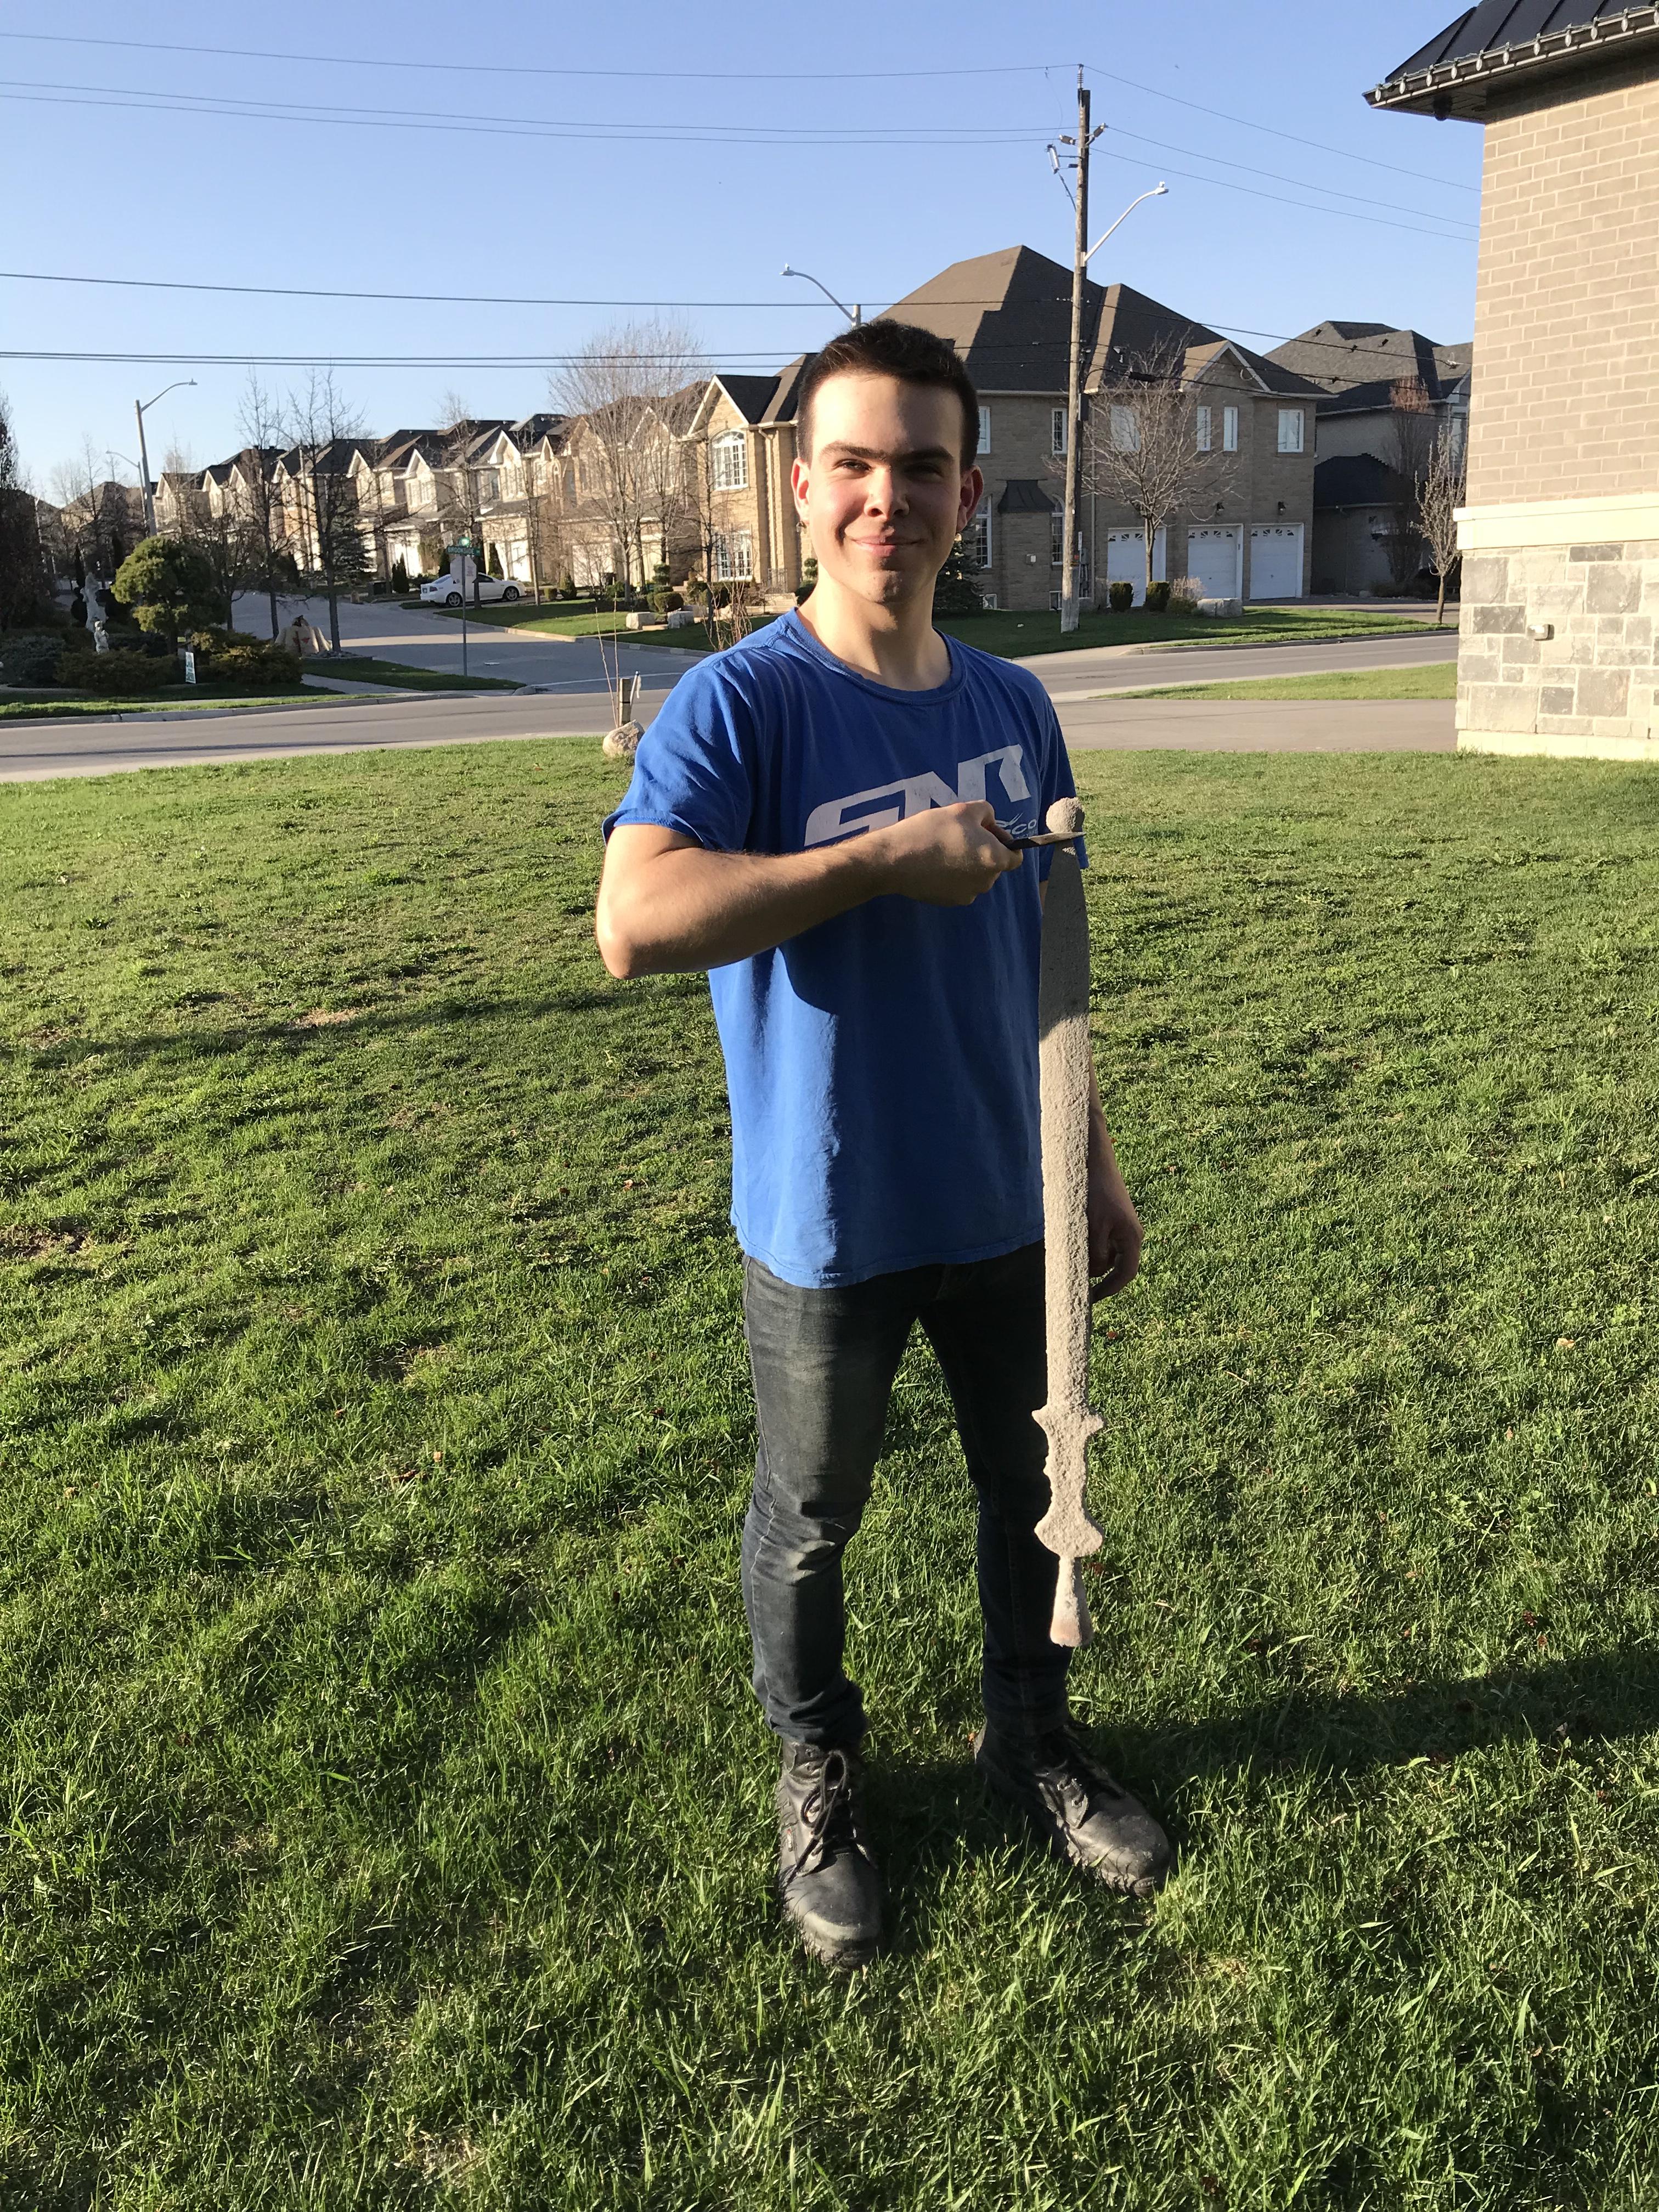
Did some grinding today;
break down of the casting
-sprue weighed 523g
-tip thing I made weighed 36g
-sword weighed approx 1250g once cleaned off
as of this picture it weighs 1151g (2.53lbs)
balance point is about 5.75 inches forward of the guard
going to lighten it up at the front some more, handle is planned to be made of bubinga wood
-
It will be work hardened, and I’m still not sure if it will be annealed or not before, it is quite stiff already, and some pieces I cast beforehand were slightly brittle, although perhaps brittle is an exaggeration as they were beat on with a sledgehammer haha
the bronze knives I’ve made so far we’re cast, and then the edges were work hardened, no annealing was done at all.
-
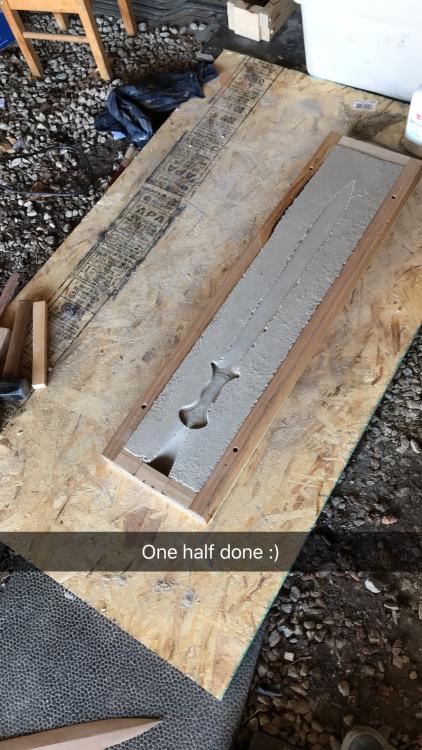
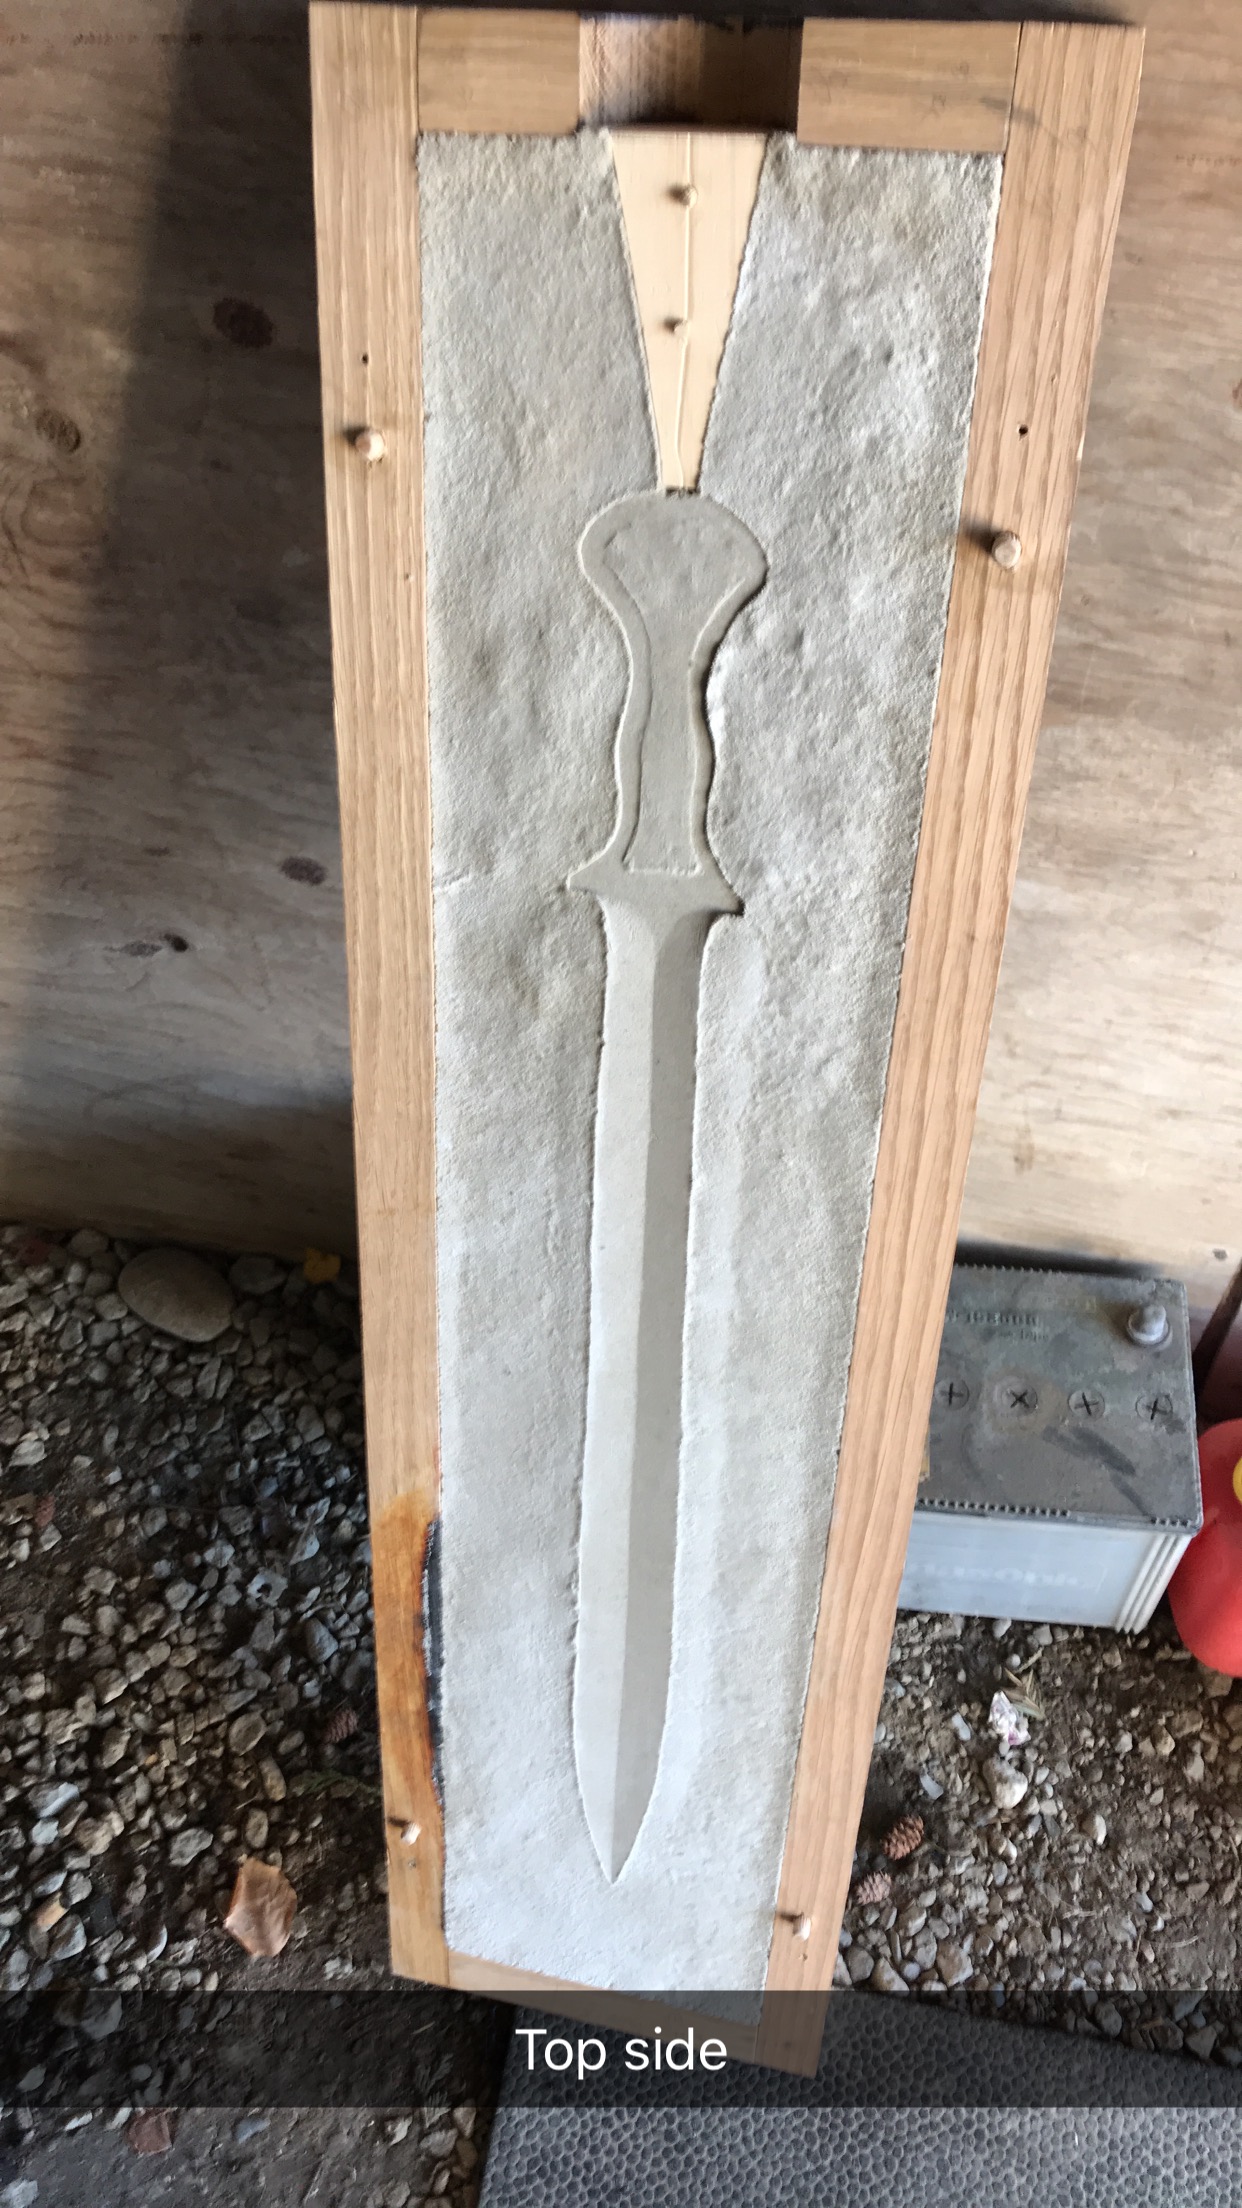
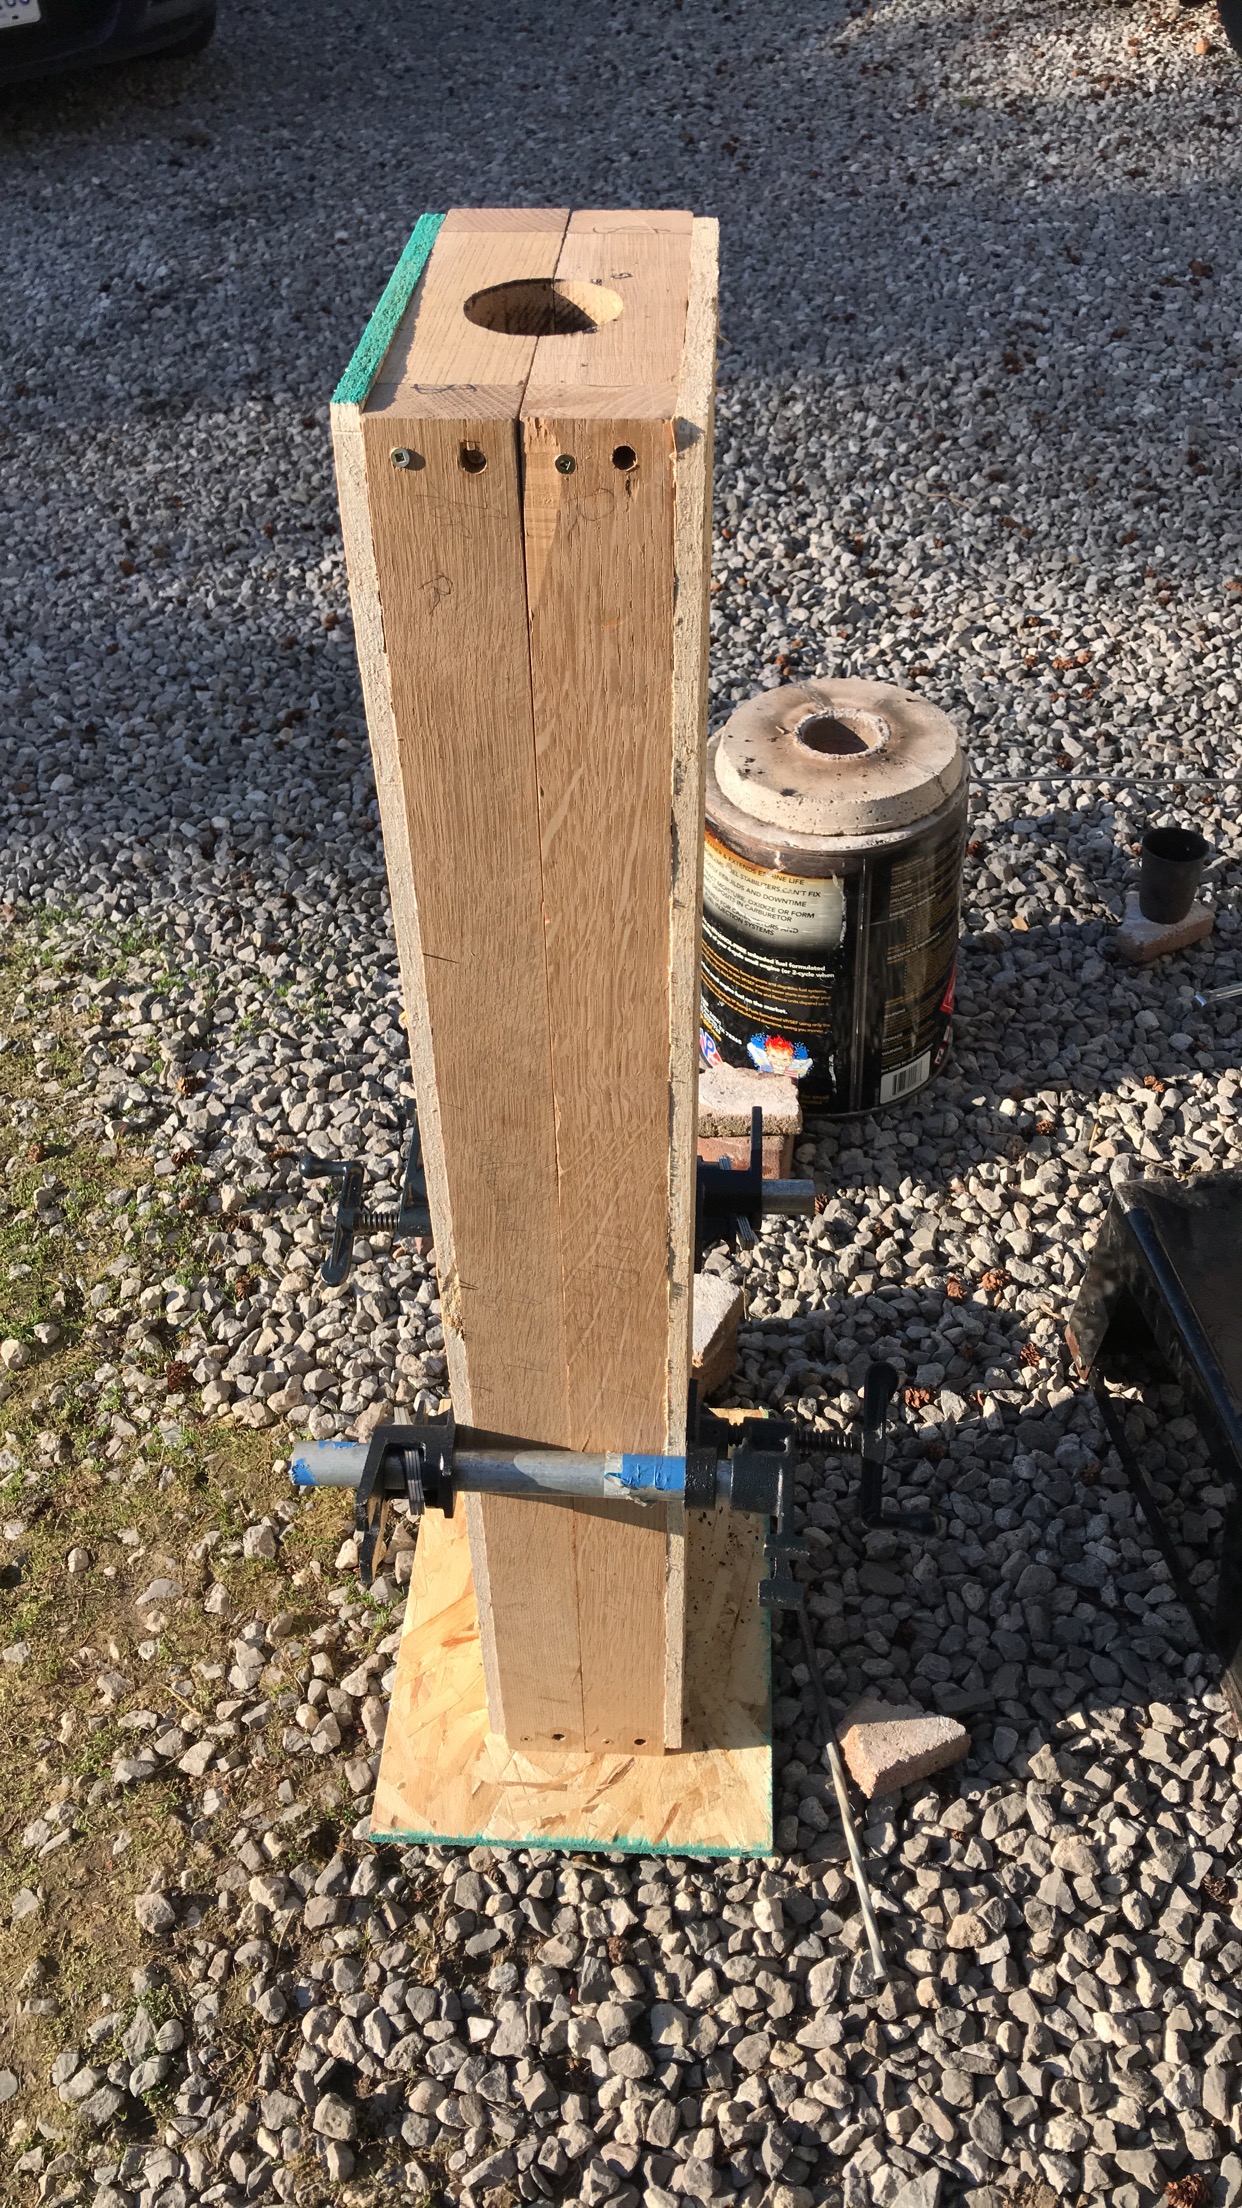
The mold is made from greensand, in an oak flask I made, with the particle board faces so the sand doesn’t crack outwards. Greensand mix was 75grit silica, 10% western bentonite, I’m guessing it was about 70-80lbs to fill the flask!! The foundry is propane fired, I used a graphite crucible, and the only flux was charcoal, both powdered and in chunk form (charcoal was made in the foundry prior in a heavily reducing atmosphere)
i used a wooden pattern that I ground out on a bench belt grinder.
this is my sixth bronze blade, although it’s about 4 times larger than anything I’ve cast before haha, I’m planning on grinding it smooth, and then annealing the spine with the propane torch (undecided whether or not to anneal yet), and then I have a little jig I use to harden the edges
whether or not it will kill remains to be seen haha, definitely planning on testing it once it’s done, perhaps a chicken is on the order


-
Today I successfully cast a bronze sword, this was my second attempt.
1.86kg of 12%tin bronze was used in the casting
Not a perfect finish, but I’m pretty happy!
will update as it is finished


-
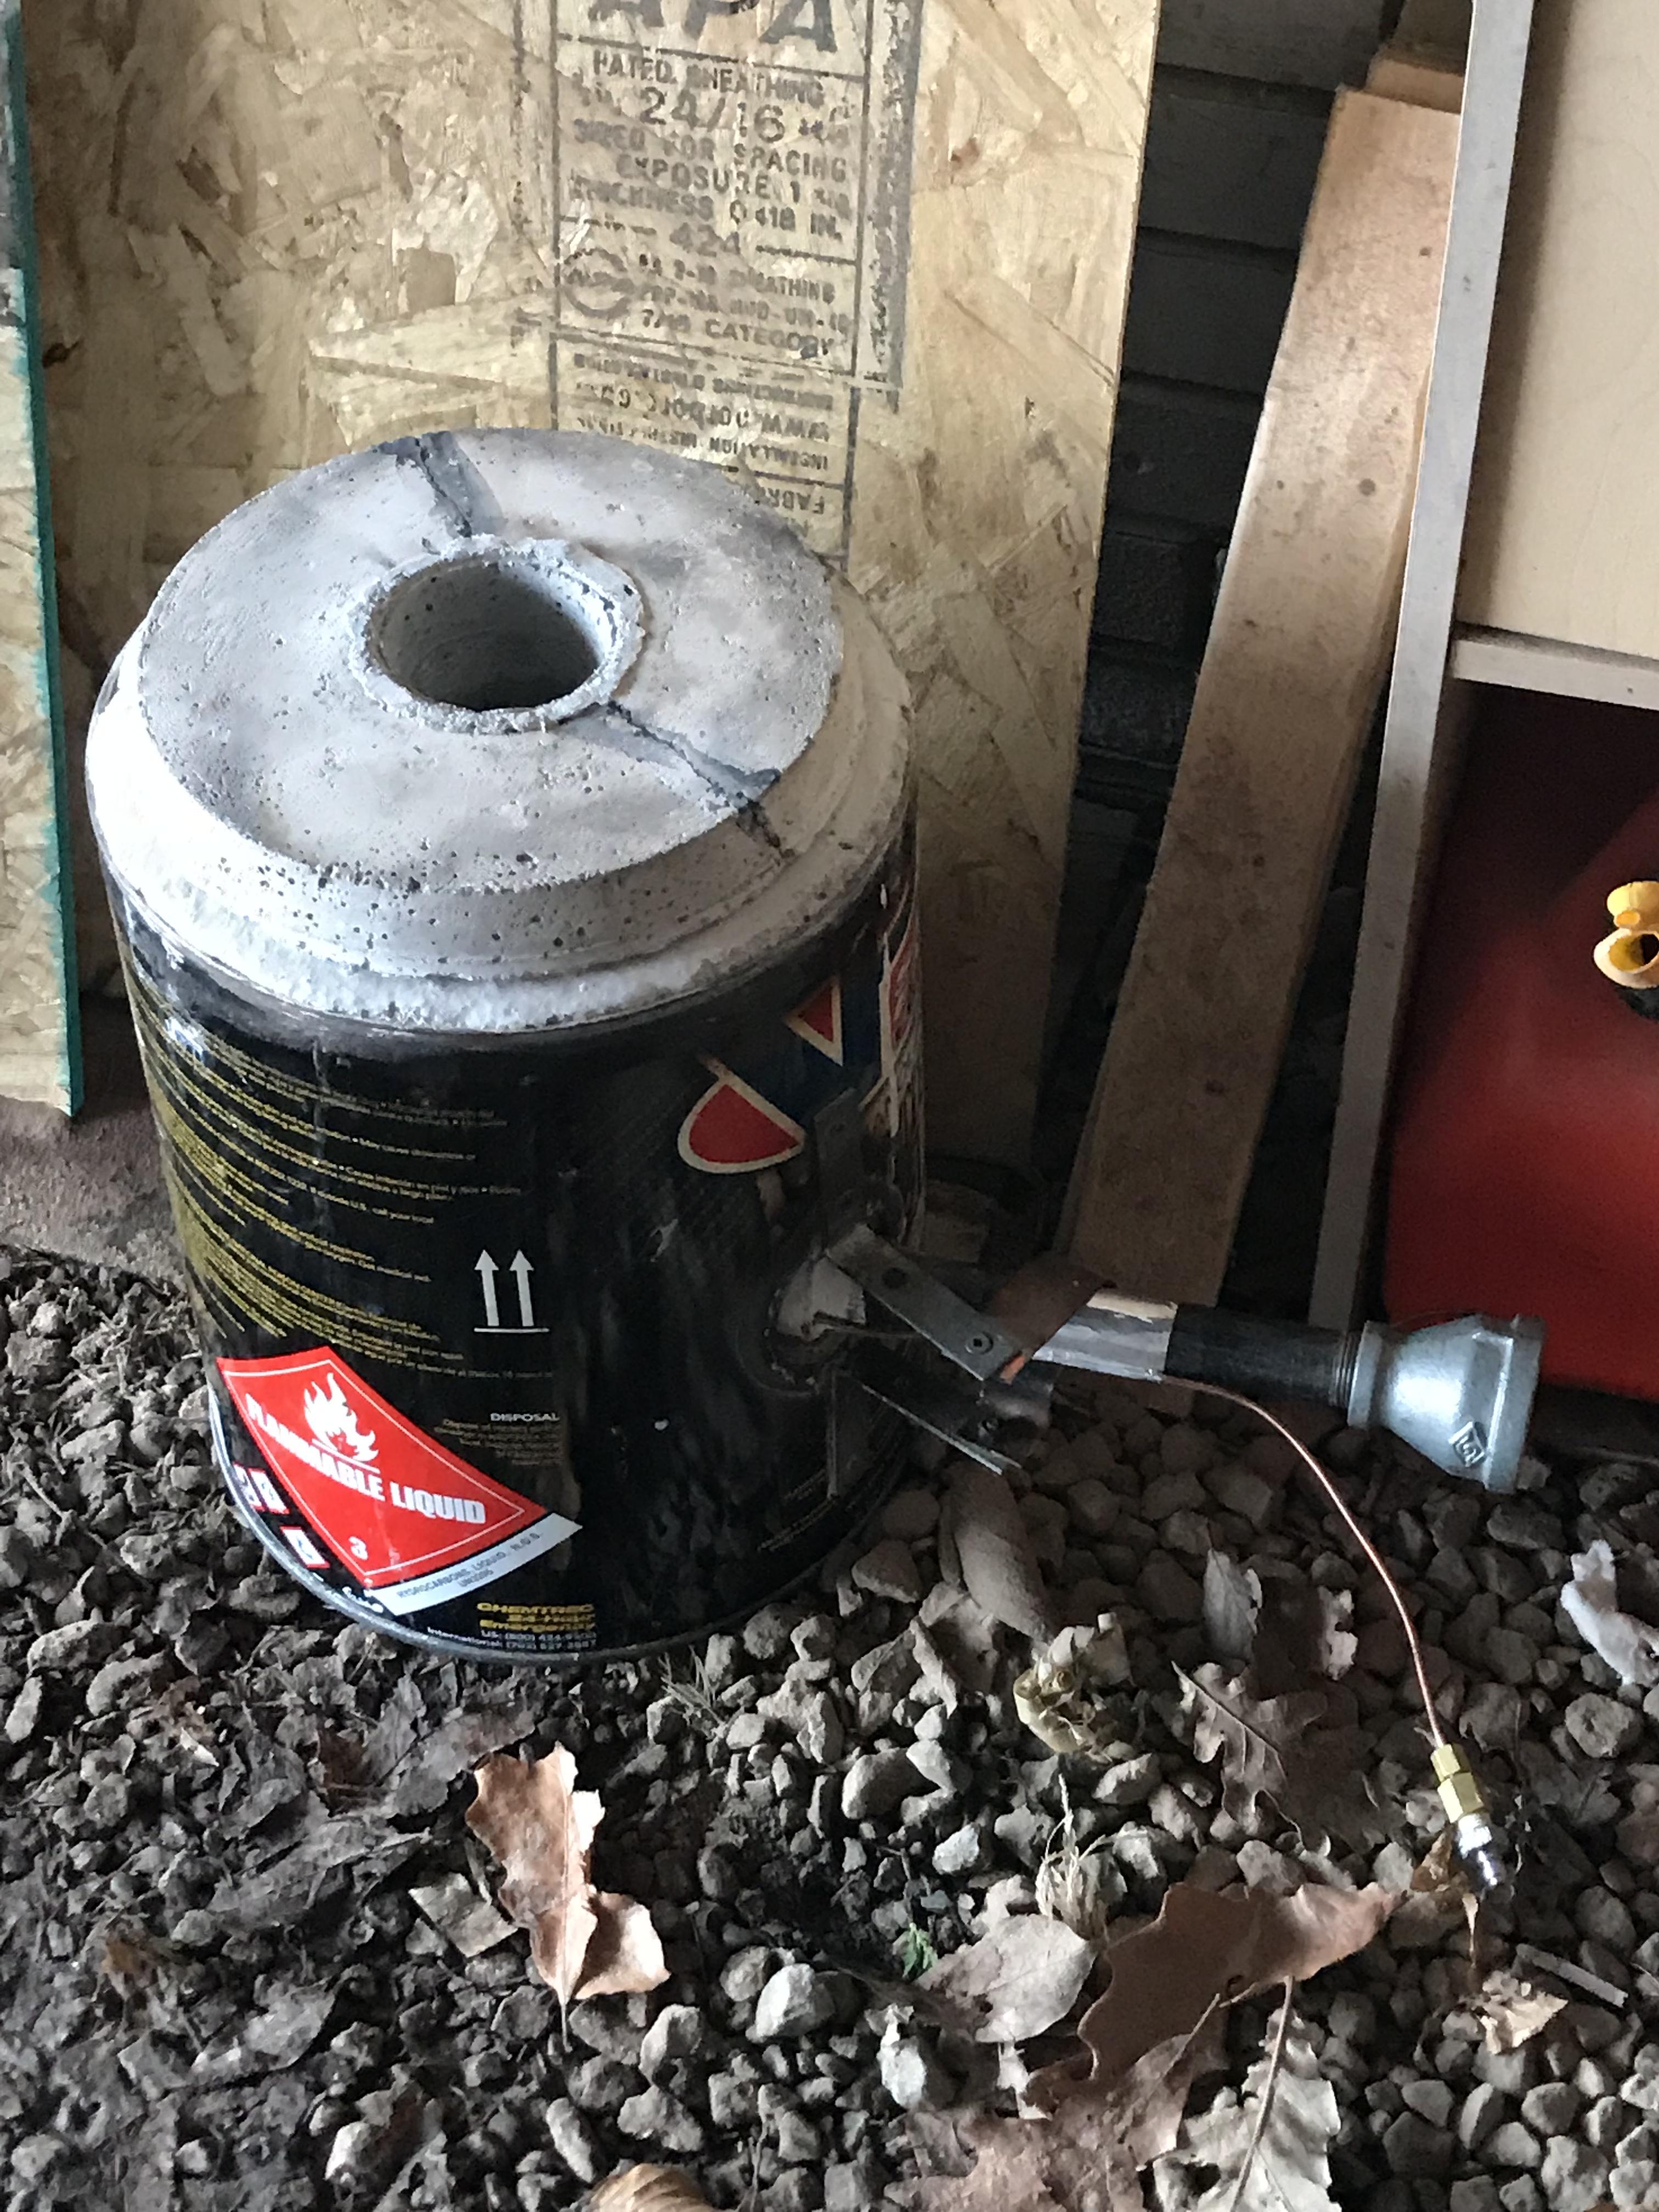
Awesome, pretty happy with my first propane burner :), tested today melting 2kg of copper alloyed to be classic bronze, worked perfectly well, although my mould making wasnt up to par haha
Yeah mikey I think thats probably what happened with the previous gasoline burner, when the fuel wasnt flowing through, the inside oxidized, leading to problems with sufficient fuel flow, So I decided to make this propane burner.
-
1 hour ago, Frosty said:
That's a better looking flame, MAYBE a little lean but not much. Make small adjustments and test after every one. Tiny adjustments the closer it gets to what you need.
1/8" is WAY larger jet than I've ever used. Can't argue with results though, that puppy looks HOT.
Frosty The Lucky.
its got a choke, so adjusting it from here should be easy :),
the actual internal diameter of the tube is approx 0.04 inches, maybe a little smaller, was hard to tell using the calipers. 8 inch 3/4 pipe for mixing, and i think 2 or 2.5 inch reducer coupling
-
Running at a lower propane pressure in this picture but I think I got it running just slightly lean now, opened up the choke and filled the intake a bit. Should have a full range from oxidizing to reducing atmosphere now for casting
")
what do you think of the nozzles which have A swell and then close narrower at the exit? I’ve seen them advertised for industry burners, not sure how it would work on one of these though
sidenote, instead of a mug tip I used a 1/8th steel capillary tubing, cutting it short left a nearly perfect sized outlet for the propane (just slightly oversized)

-
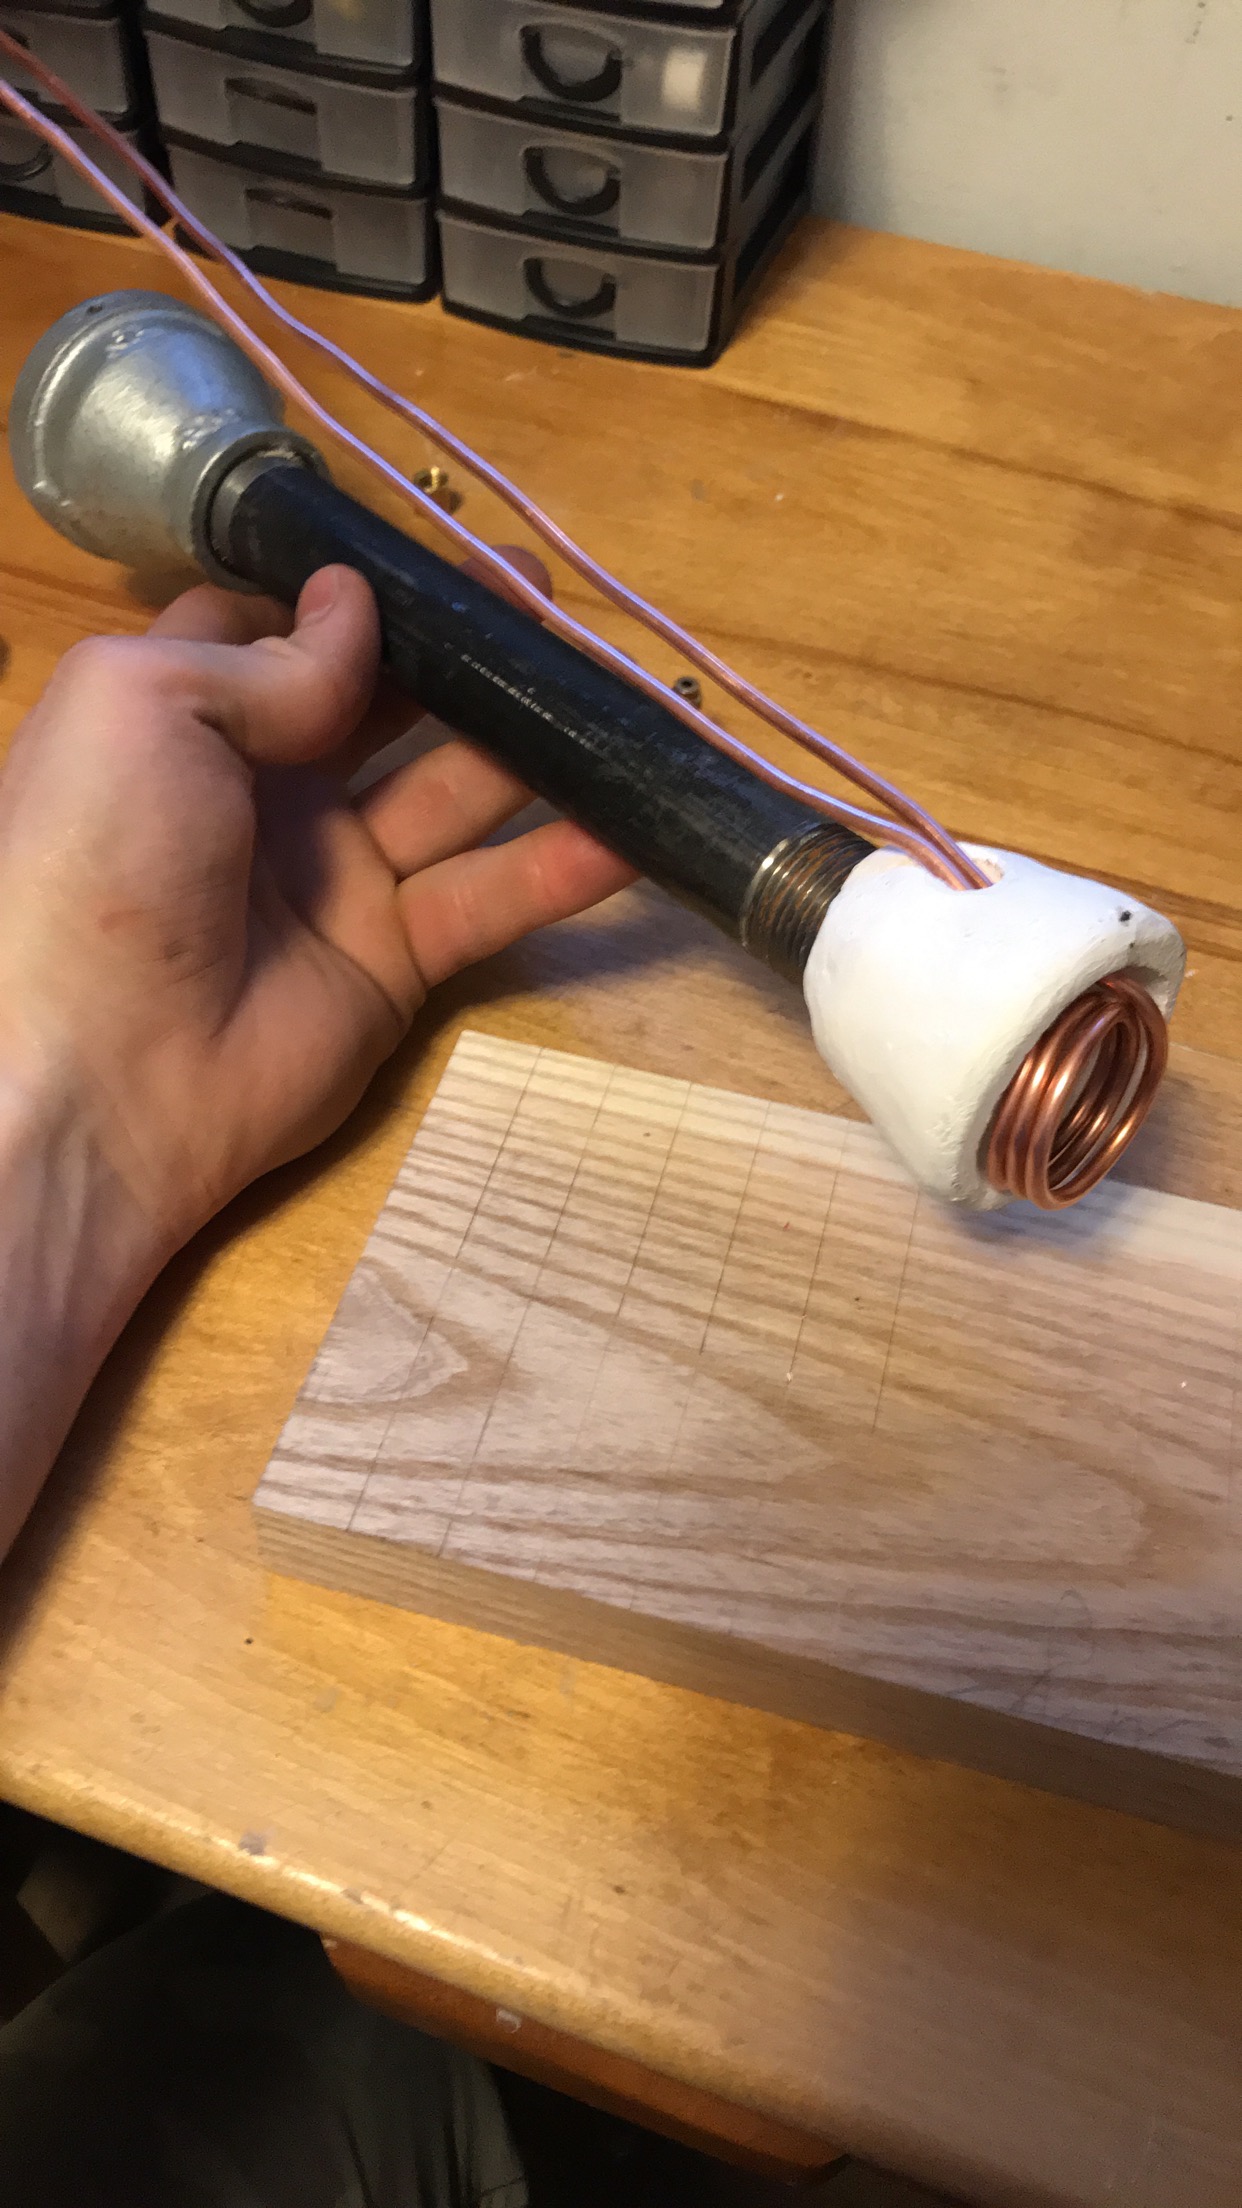
It’s my own design, I think the burner tube is a little on the long side, but I’ll try to open the entrance first, thanks
-
3 minutes ago, Frosty said:
This is your oil fired burner isn't it? I forget, what kind of oil?
Frosty The Lucky.
No this is a propane one, had some trouble setting up one of my gasoline ones, so decided to try it, had the propane tank anyways. Running with a 0-30psi regulator
-
-
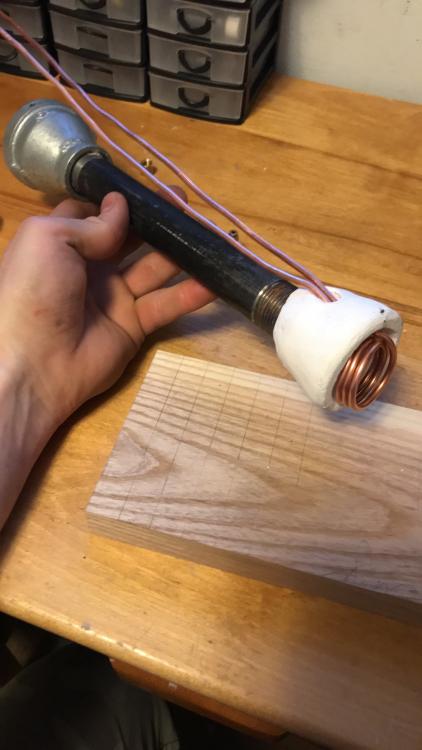
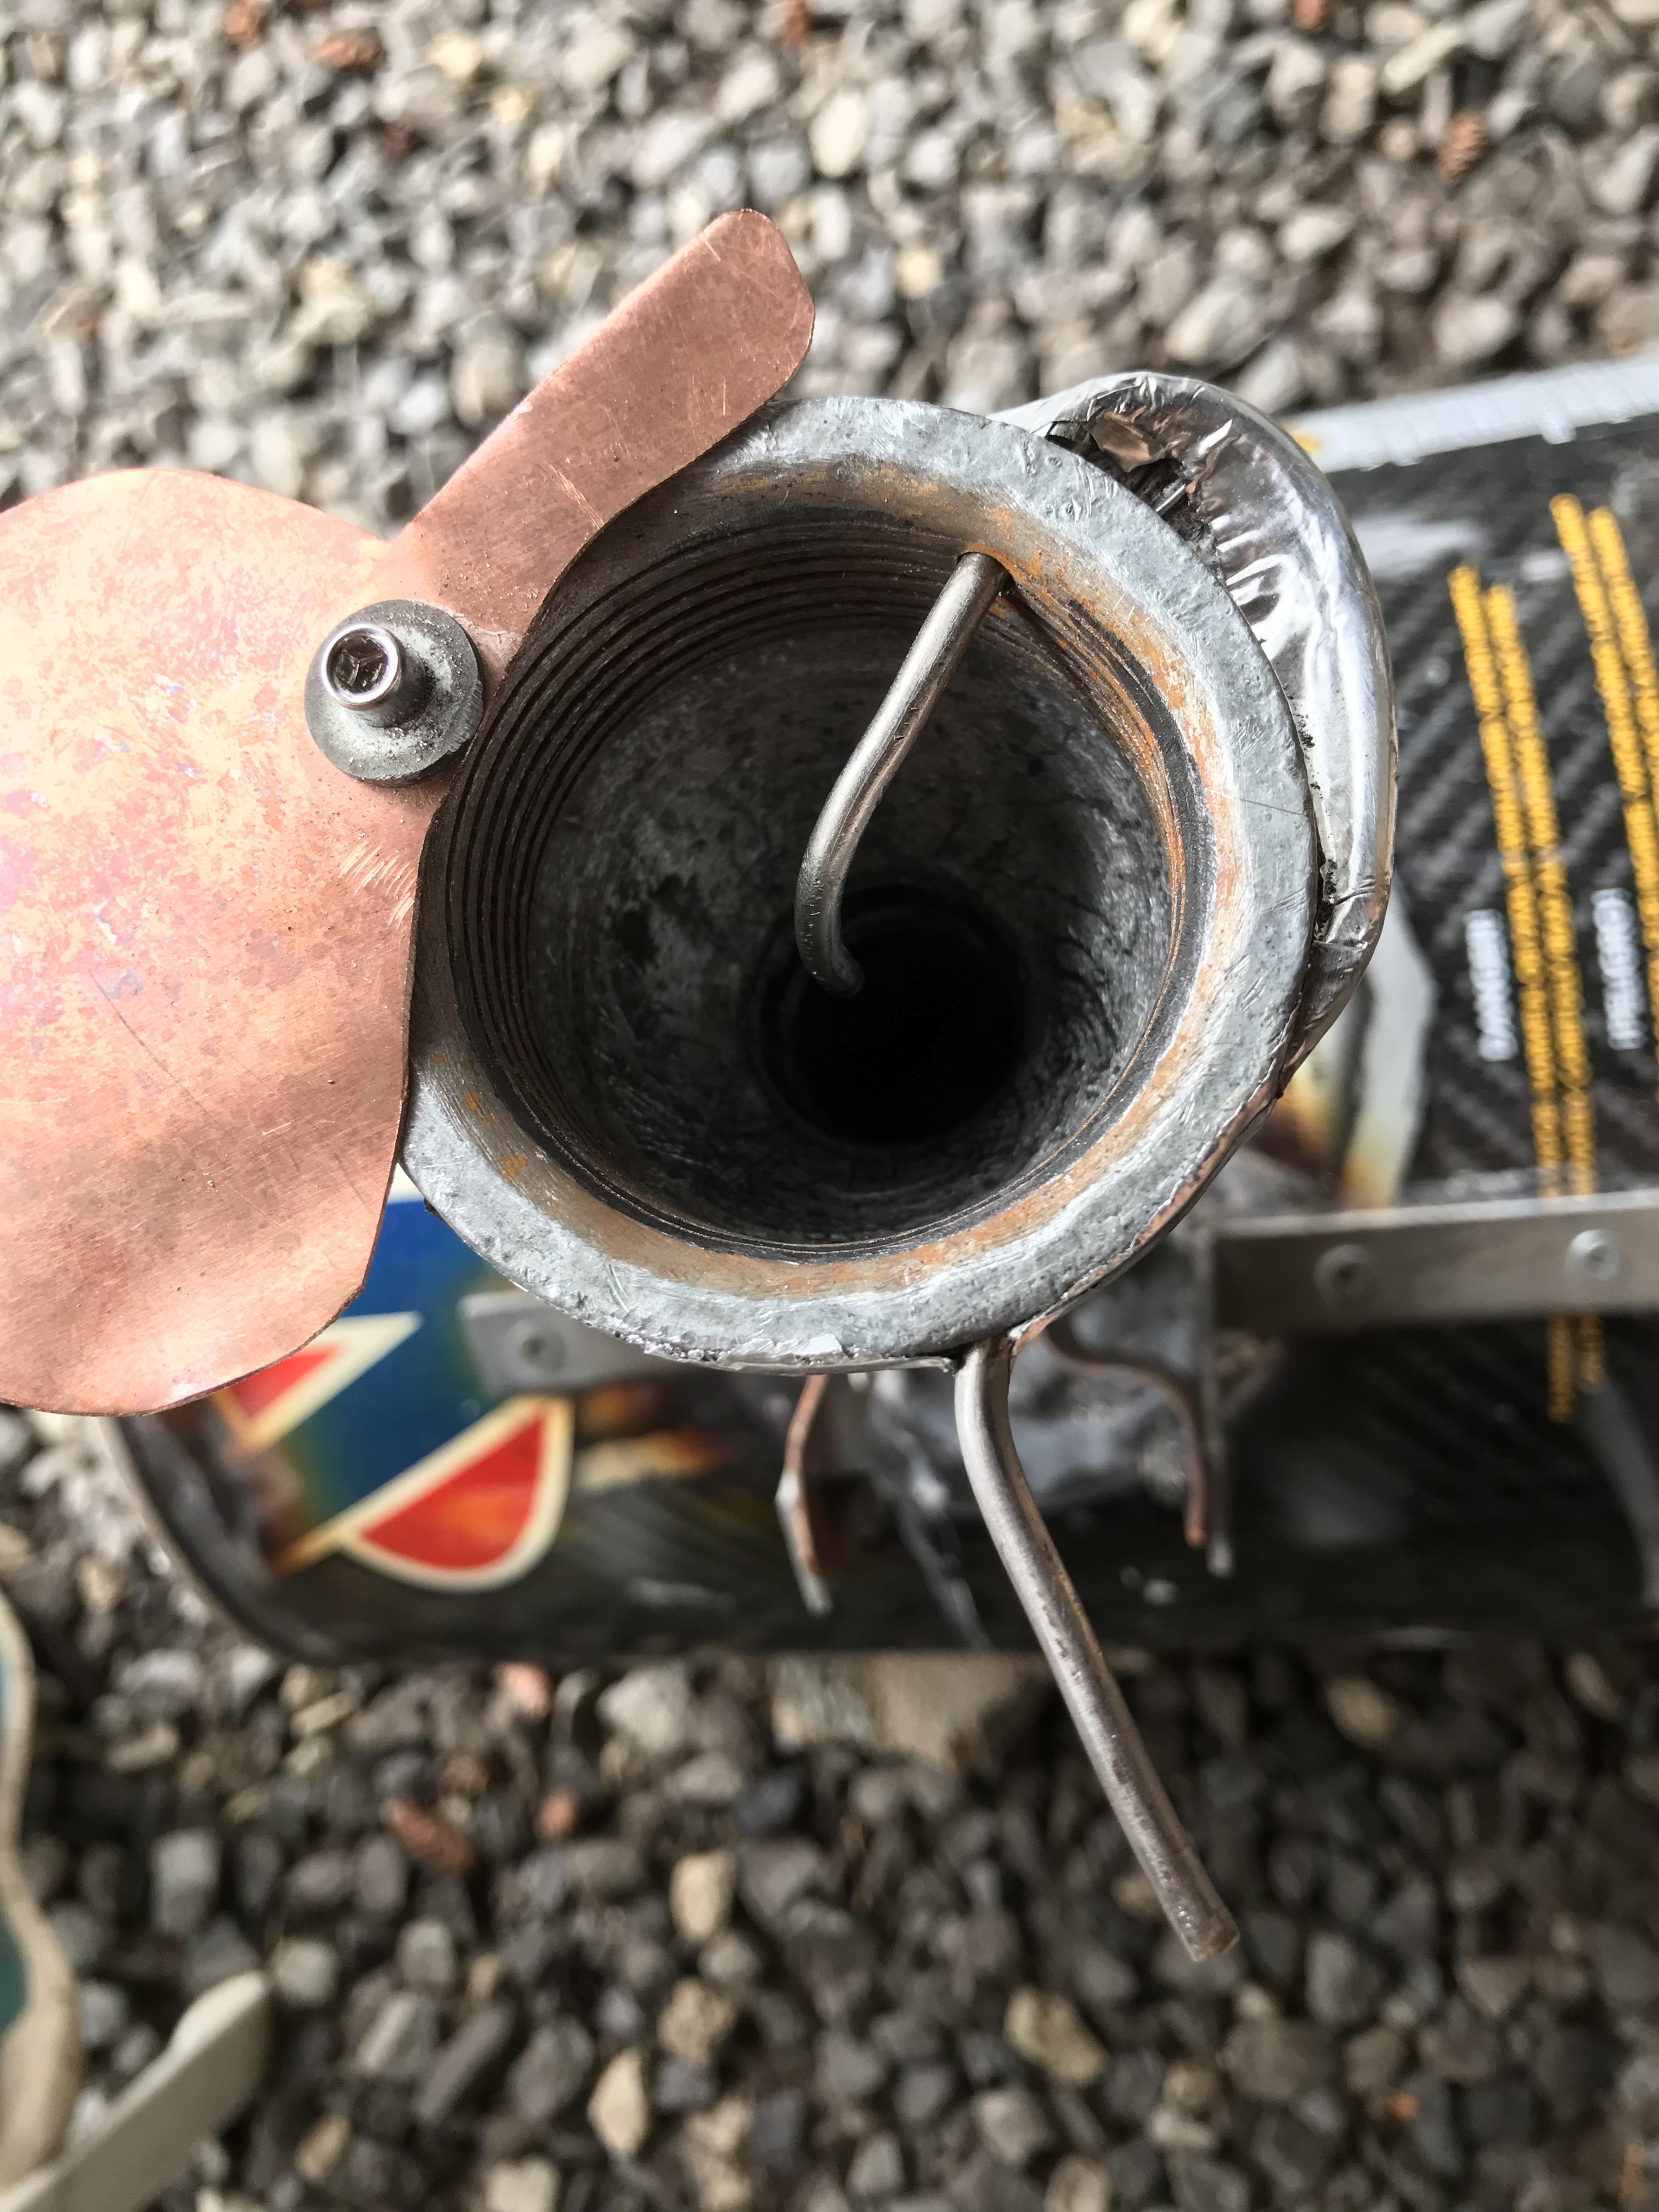
This nozzle was homemade, and fired in the foundry pictured, made of calcined alumina, with bentonite, and carbon fibre for the green state binder. Total weight when fired was 23.7grams, Internal length of 34mm, and width of 33mm.
The firing schedule was approximately as follows
-air dry until no longer cool to the touch
-dry in oven at 200f for 30mins, and then increase temp to 300f, hold at least 20mins
-transfer to forge while hot, slowly increase forge temp until red hot, and then full blast
-final temp approx 1300c, total firing time from start of 30-40mins.

-
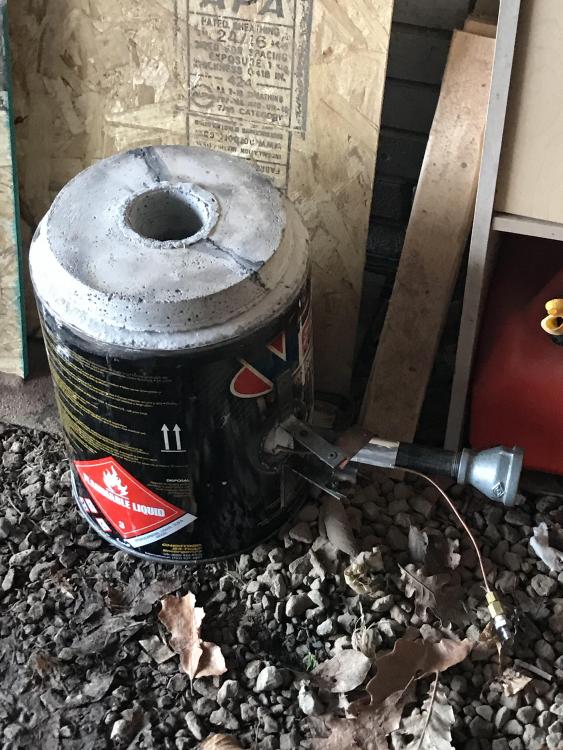
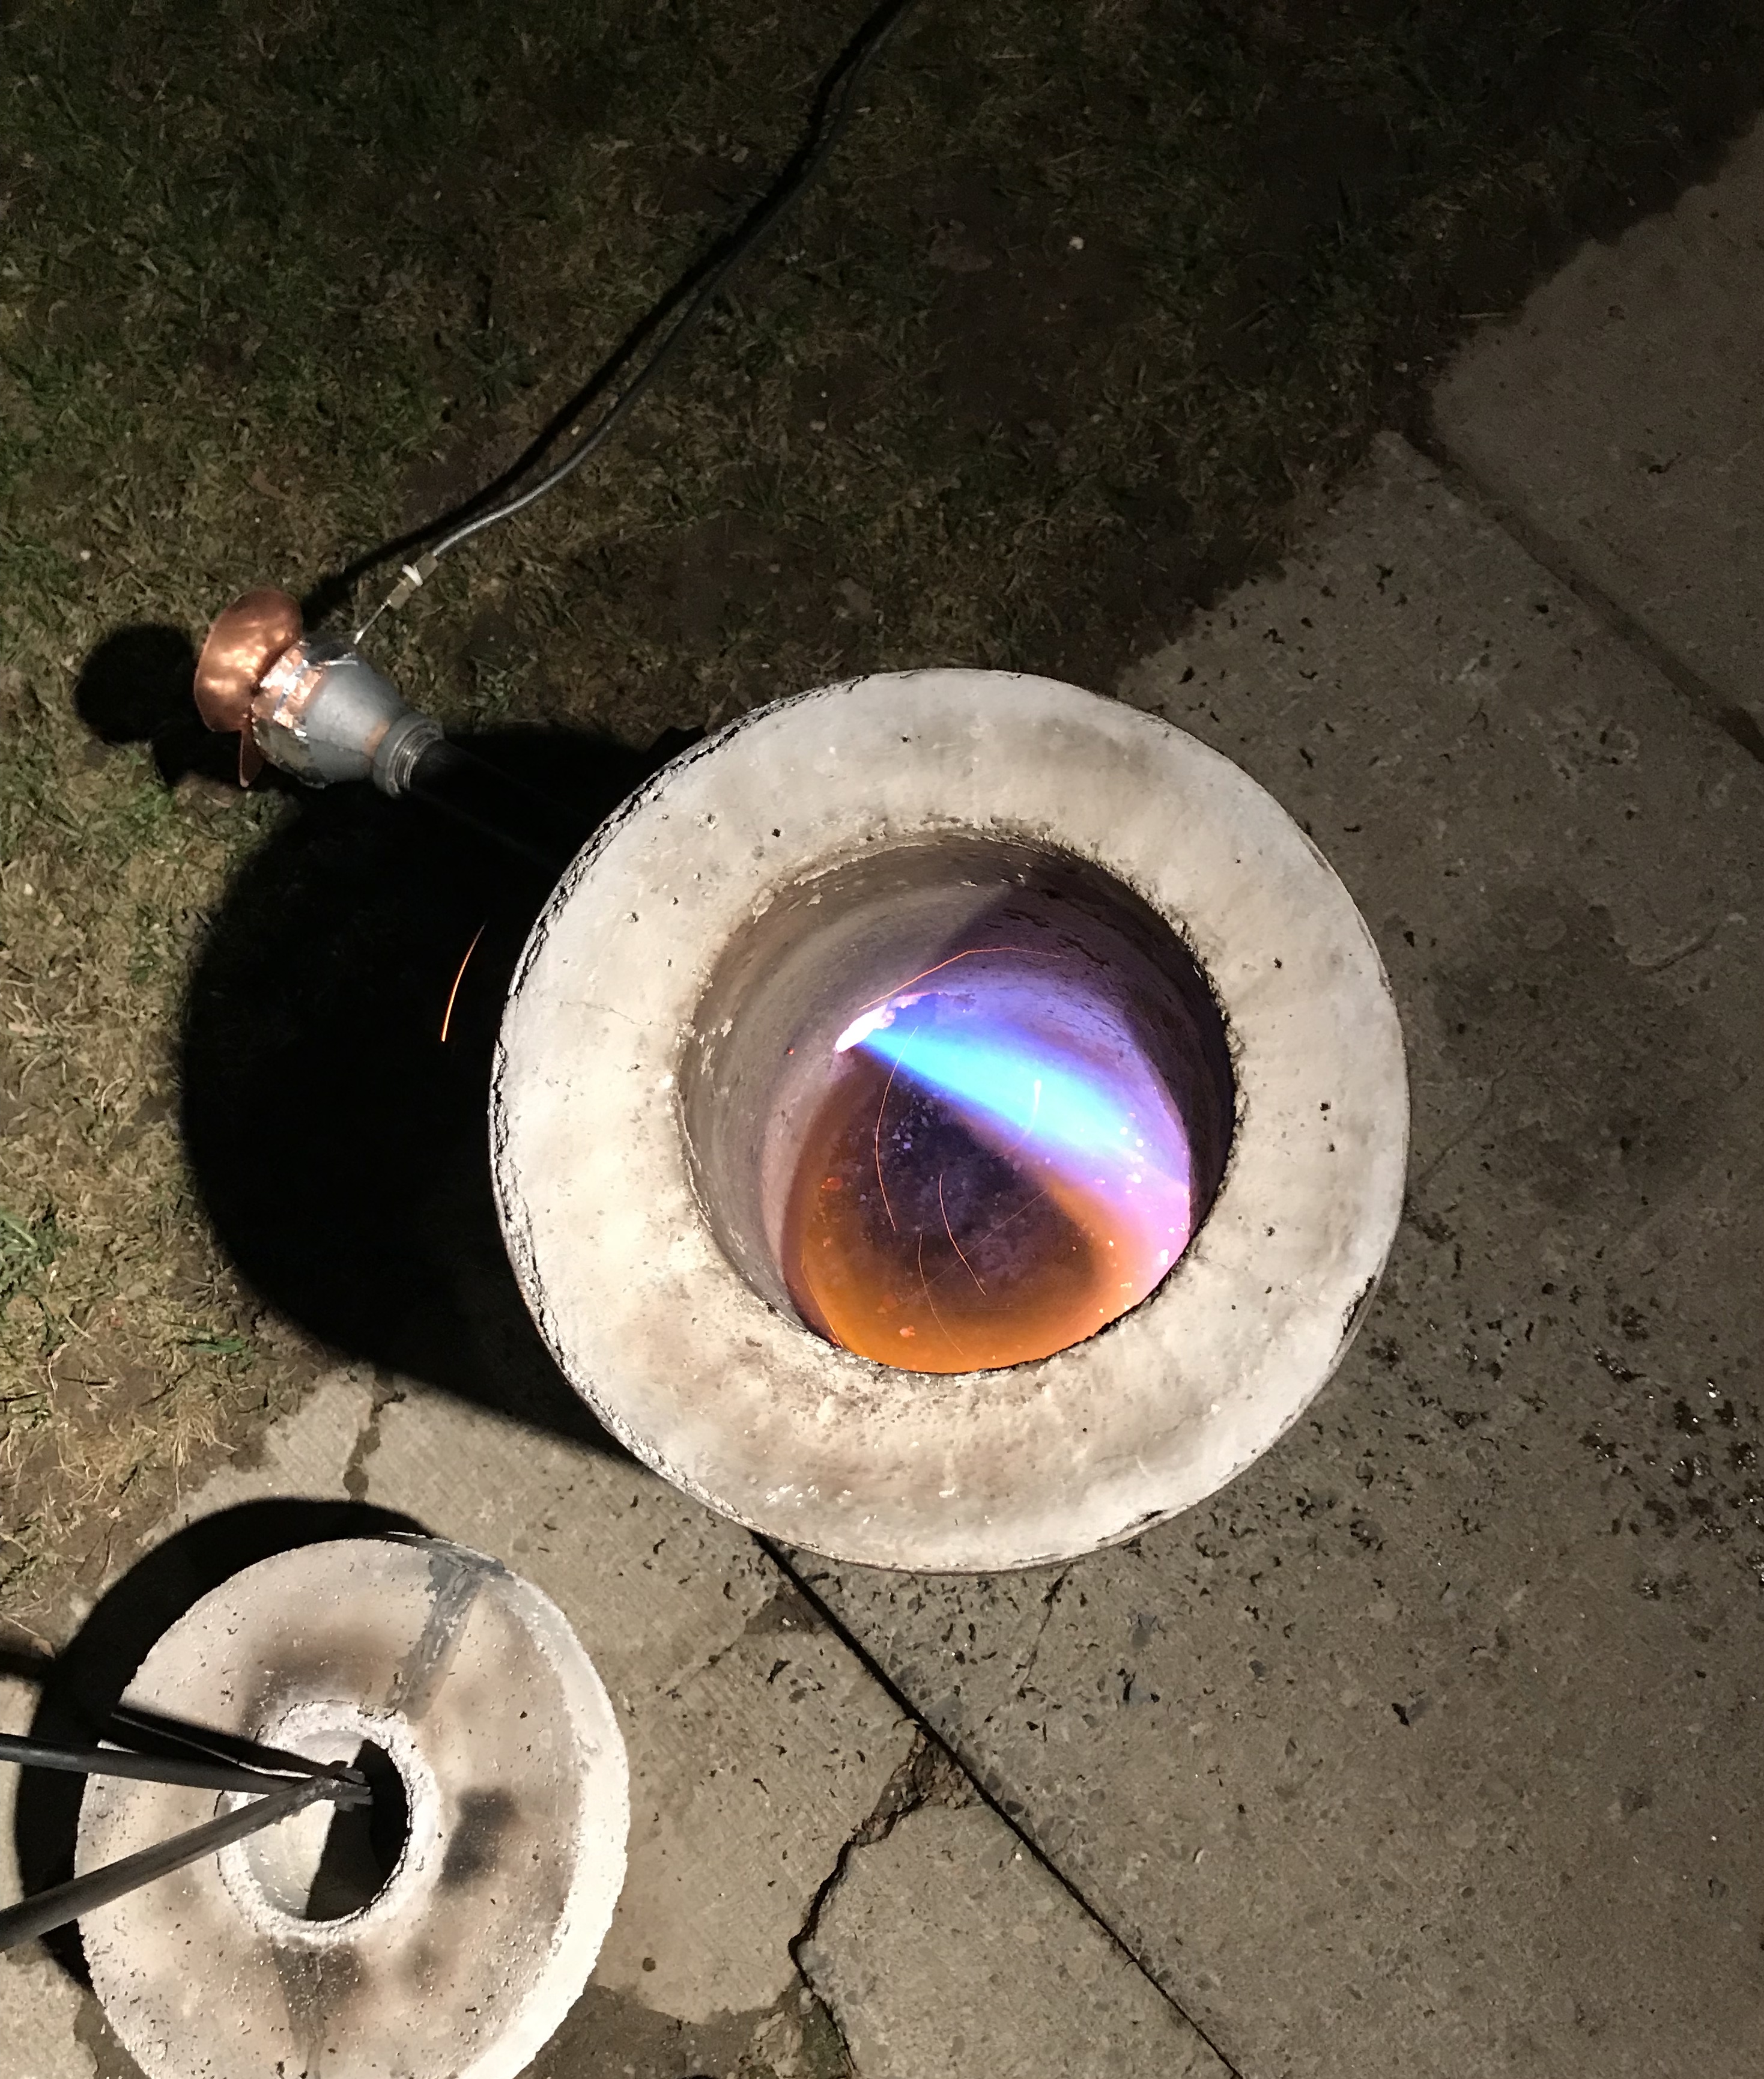
First properly successful ceramic nozzle tested today in my foundry, attached are some pictures.
-Yes I know the burner is too far into the forge, this was just a test run, and the mount isn't permanent so I had to run it like this for now.
Worked pretty well, any ideas for future nozzle shapes?

-
I formed some ceramic nozzles for the burner v2.0, and have added a better lid to the foundry, and proper castable refractory (3200f)


-
Im thinking, that if you only had one ridge at the front and back of the forge, and a kiln shelf which rested on top, and was slightly narrower than the whole forge-thus allowing the circulation of the flames around the kiln shelf, you would get the effect you are desiring without having the problem of stock falling between ridges, and it would be easy to remove and clean the kiln shelf or switch it out
-
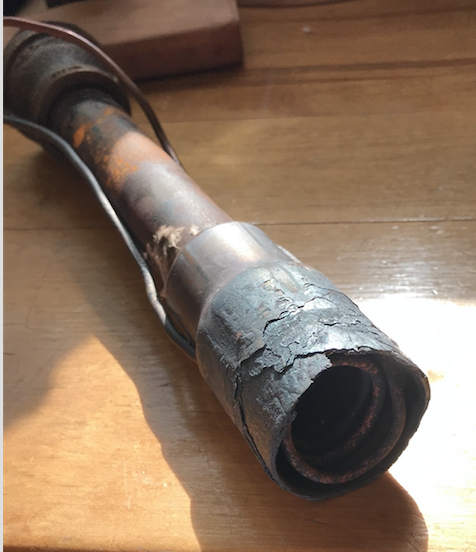
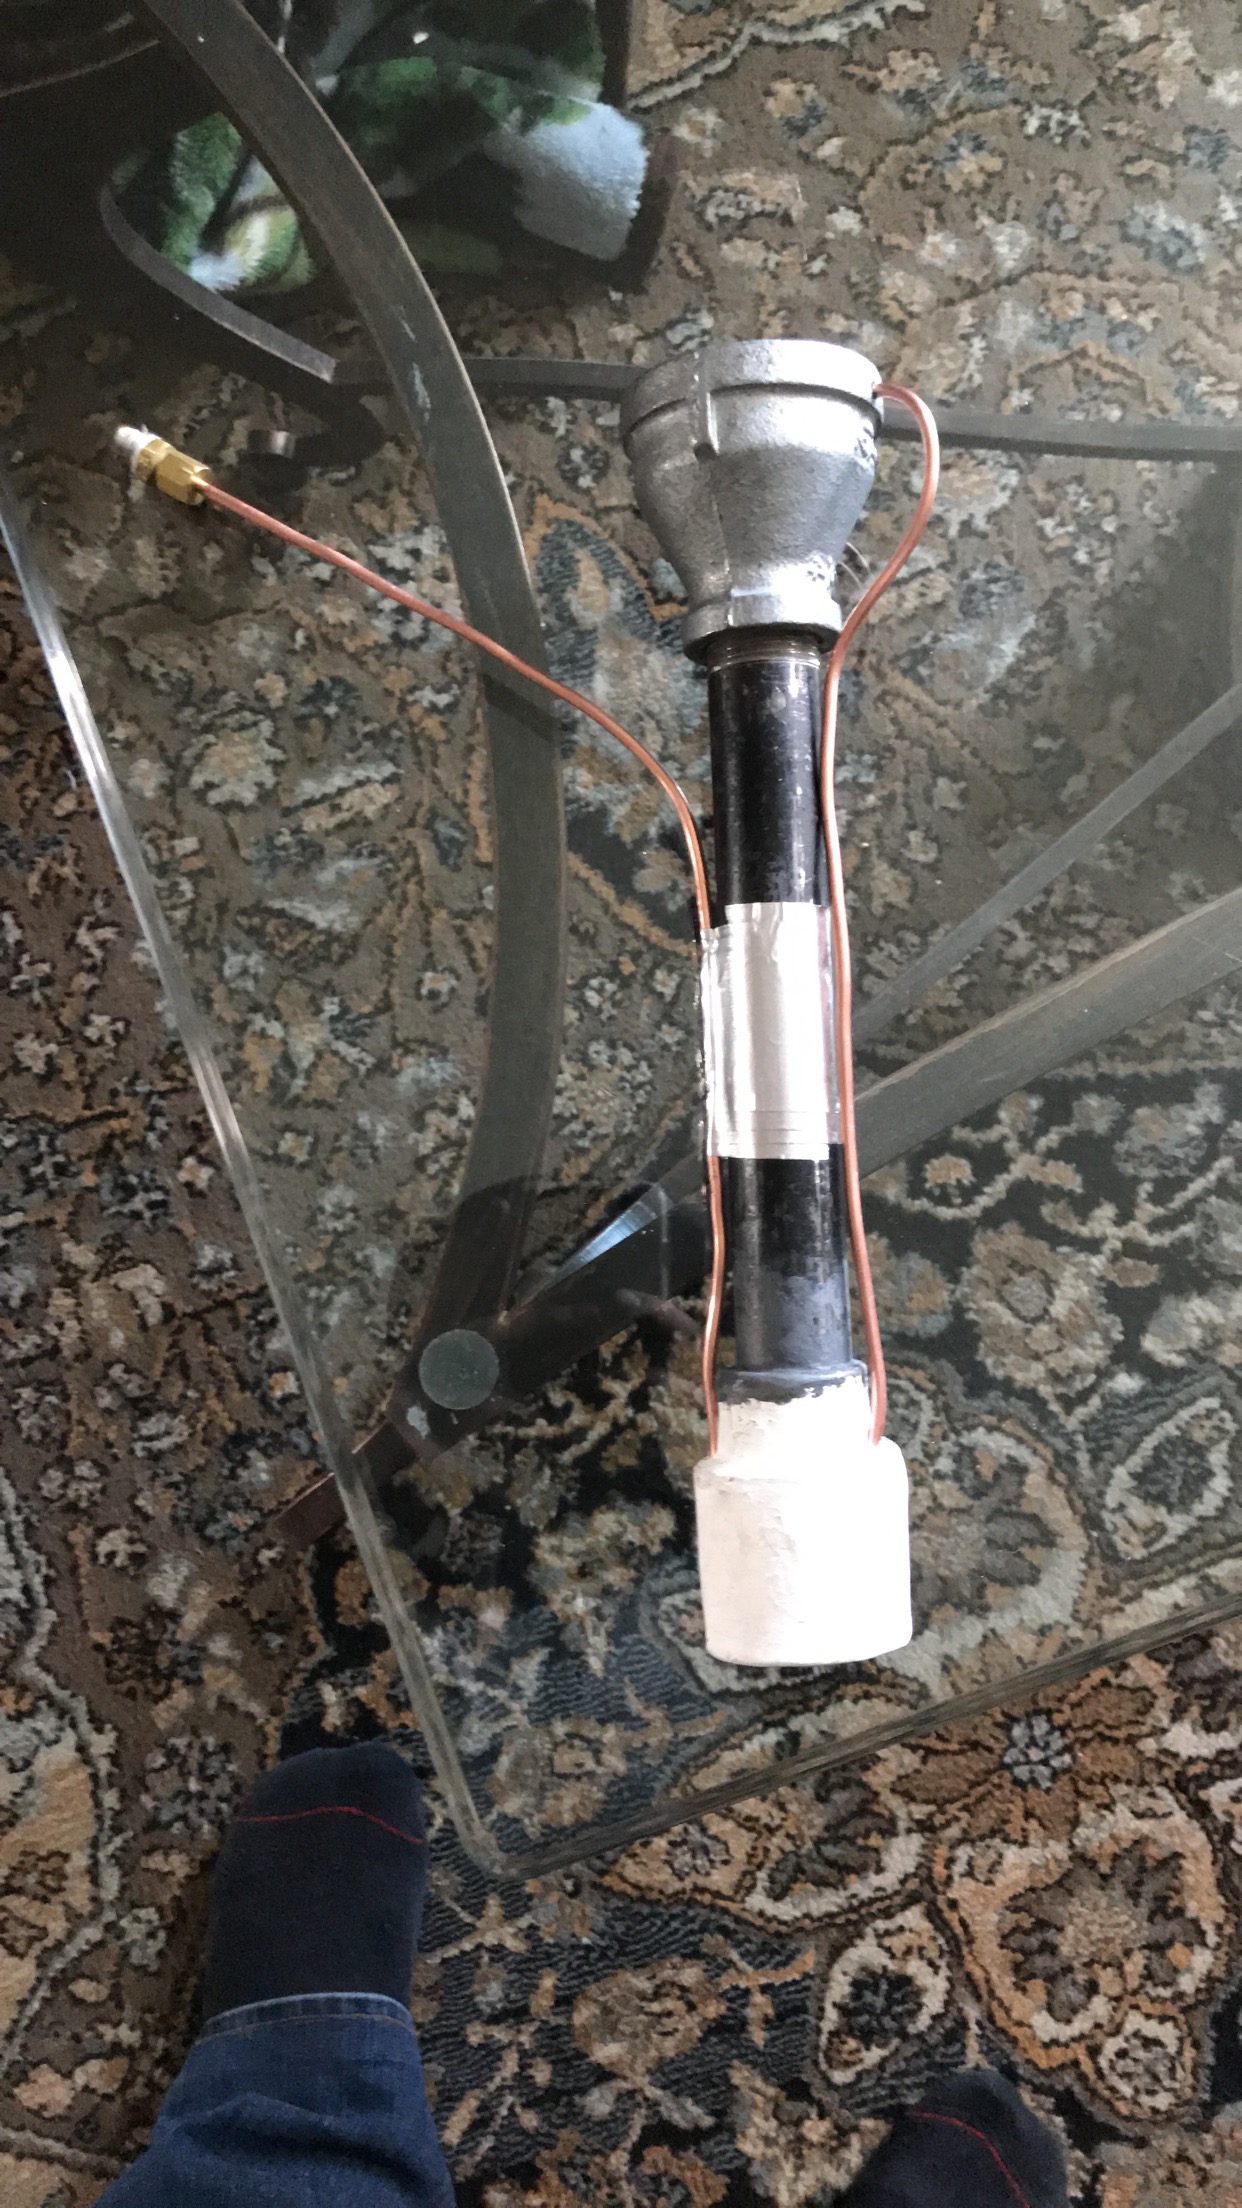
The original nozzle was steel, not brass, I'm happy with the burner as is, just wanted the nozzle to last longer.
-
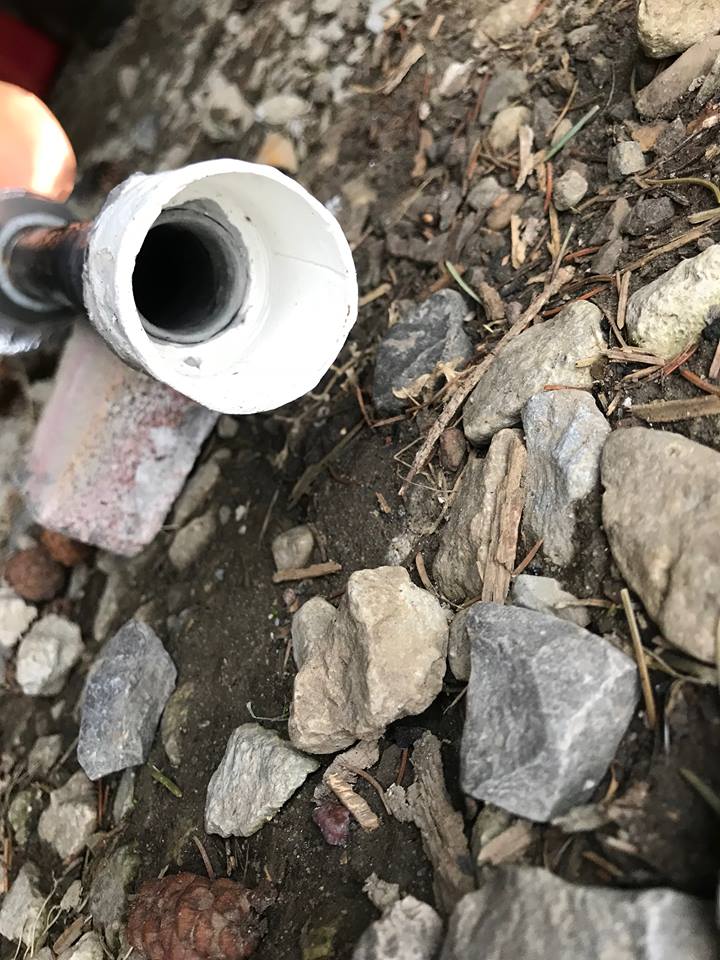
Note; this is being going to be used for a gasoline burner of my own hybrid design, reminiscent of the riel linear burner, and a coleman stove. (I've posted in the alternative gas-oil/gasoline forum on here about the details of that build.)
The reason I'm attempting to build a ceramic burner nozzle is that the original burner nozzle from my gasoline burner oxidized away quite quickly in my foundry/forge, probably this was accelerated by the slightly oxidizing conditions it was originally being run at, and the burner design caused flame in the nozzle, this excessive heat destroyed the cheap exhaust coupling I used for the nozzle within the last 3 months-probably a total of 10hours of run time.
 So after some attempts at making the forge work with an integrated nozzle, and the coils built into the refractory, (didnt warm up fast enough for this burner design), I decided to try and make a ceramic nozzle
Process
I had some calcined alumina, zirconium silicate, and bentonite left over from rebuilding my foundry.
Chosen composition was 97% wt calcined alumina, and 3% bentonite, final actual 96.9% alumina, 3.1% bentonite.-I wanted to minimize shrinking during firing, and drying because I only had a few hours to make it.
The powders were weighed out, and mixed dry, and then 25% wt water was added, this was still too dry for hand forming, so I added water until the clay was just on the sticky side of plastic.
The clay was squished, and folded until the even consistency and absolutely no difference in moisture or visual appearance was noticeable.
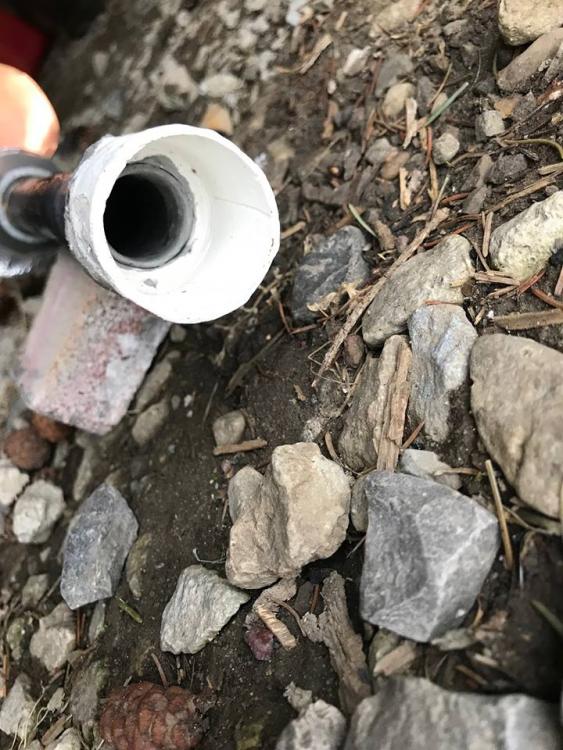
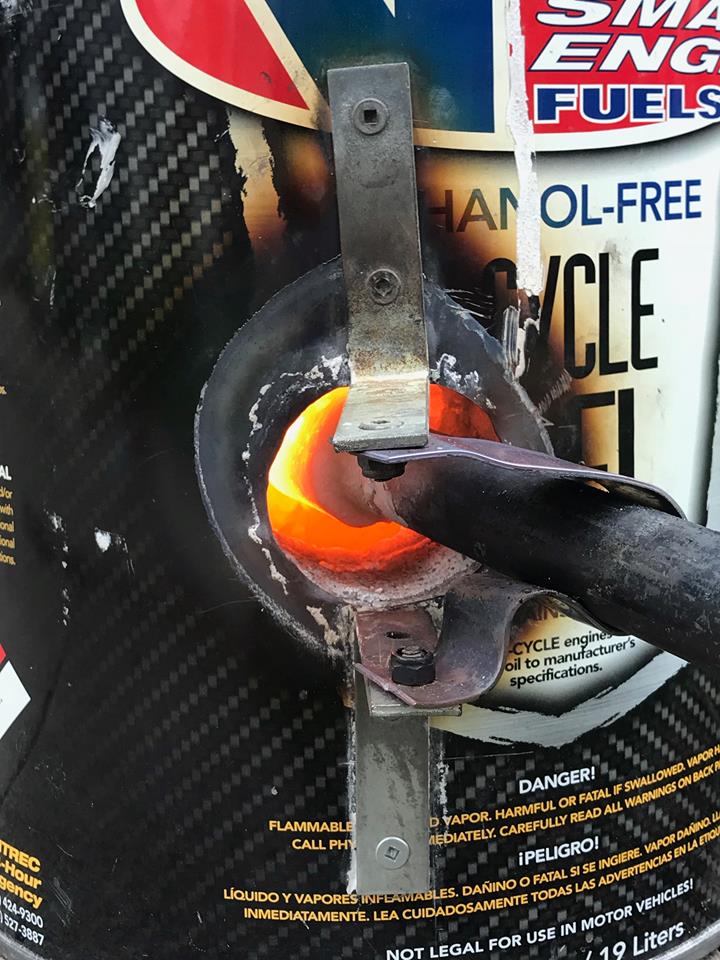
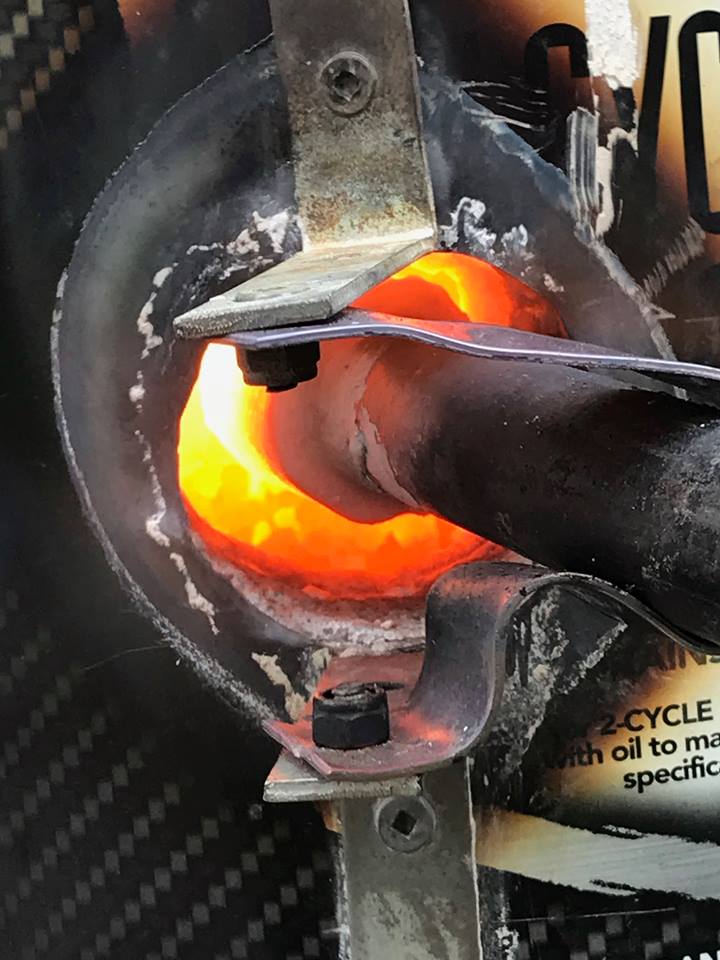
The clay was shaped into a ball, and formed into a nozzle shape on the end of a new burner pipe (8x3/4 pipe nipple), placed onto a heating vent under cover of a terracotta bowl, and dried, then dried in oven up to 400f (200c) approx 1 hour.
After this drying it was very fragile, but I threaded it onto the burner pipe to attempt to make threads on the nozzle.
Placed back into the oven, and brought to 400f, then transferred into orange hot foundry, with a steel cup covering it to prevent flame hot spots. after 10 mins the burner was put to maximum, and it was heated for 30minutes, during which that was the hottest my foundry has ever gotten.
It was cooled until orange/red, and then removed and placed onto the lid to cool.
The nozzle has a ring to it, and only one small surface crack, shrinkage approx 2-3%, it will need to be ground out slightly to fit the burner pipe
Next weekend I will test it in the foundry.
Pictures
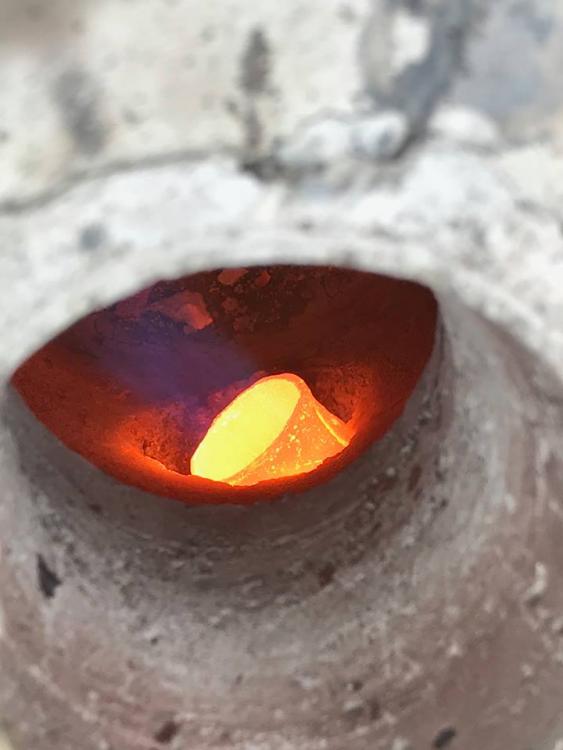
 Foundry minus the lid, with the old burner installed heating up.
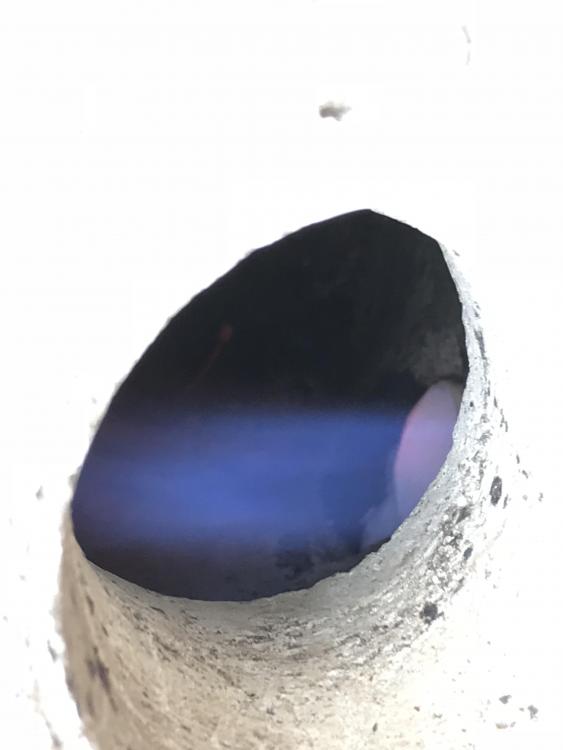
 Full blast, the old burner was not functioning perfect due to its state, however it was needed to fire the new nozzle. The view through the burner shows how hot the forge is.
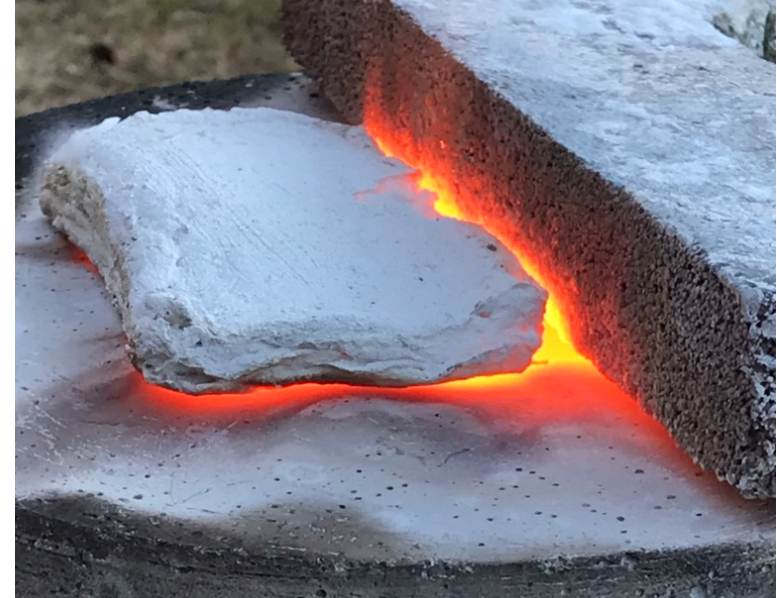 The lid along with some extra stuff I put to maximize the heat.
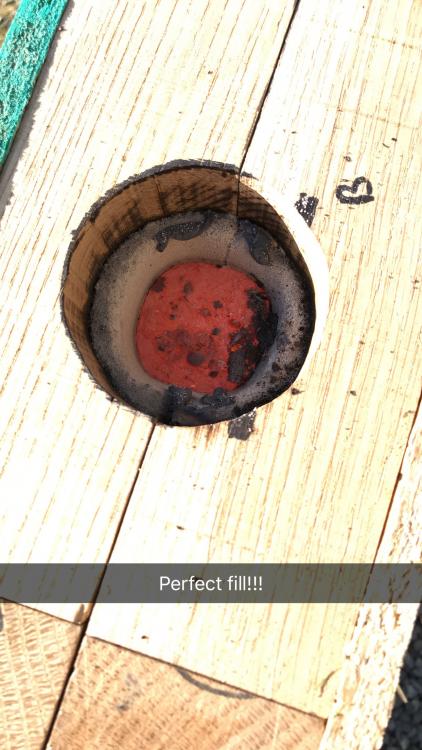
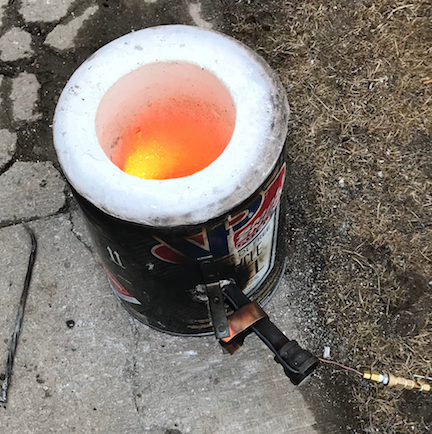
Believe it or not this picture was taken in the middle of the day, you can imagine the colour is extremely distorted, this was during the hottest part of the sintering.
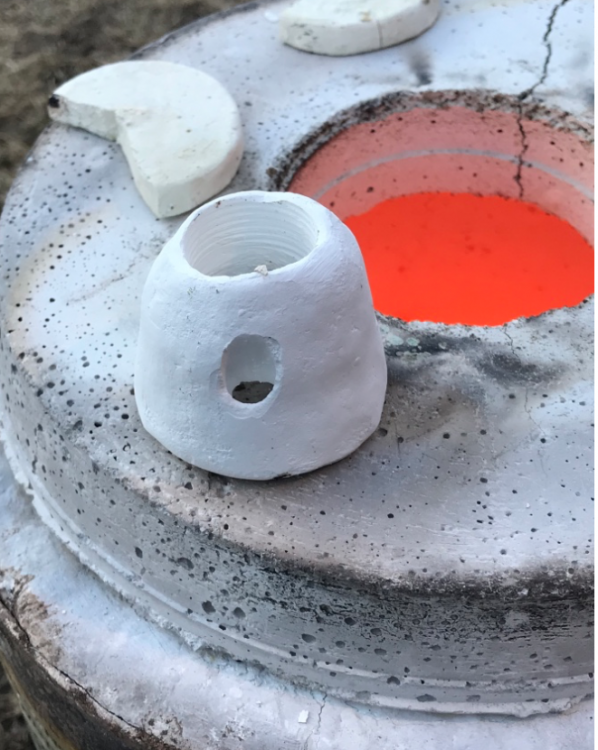
The nozzle, still very hot, cooling off on the lid of the forge.
 Complete nozzle, due to the shrinkage didn't thread all the way onto the pipe.
Testing next week :), any suggestions or comments welcome.
-
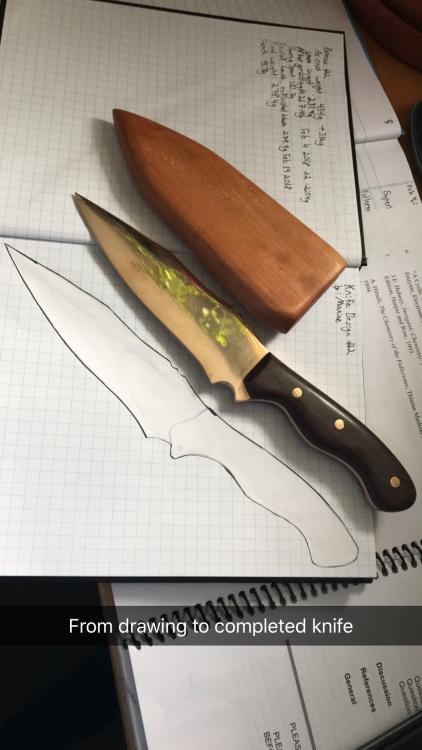
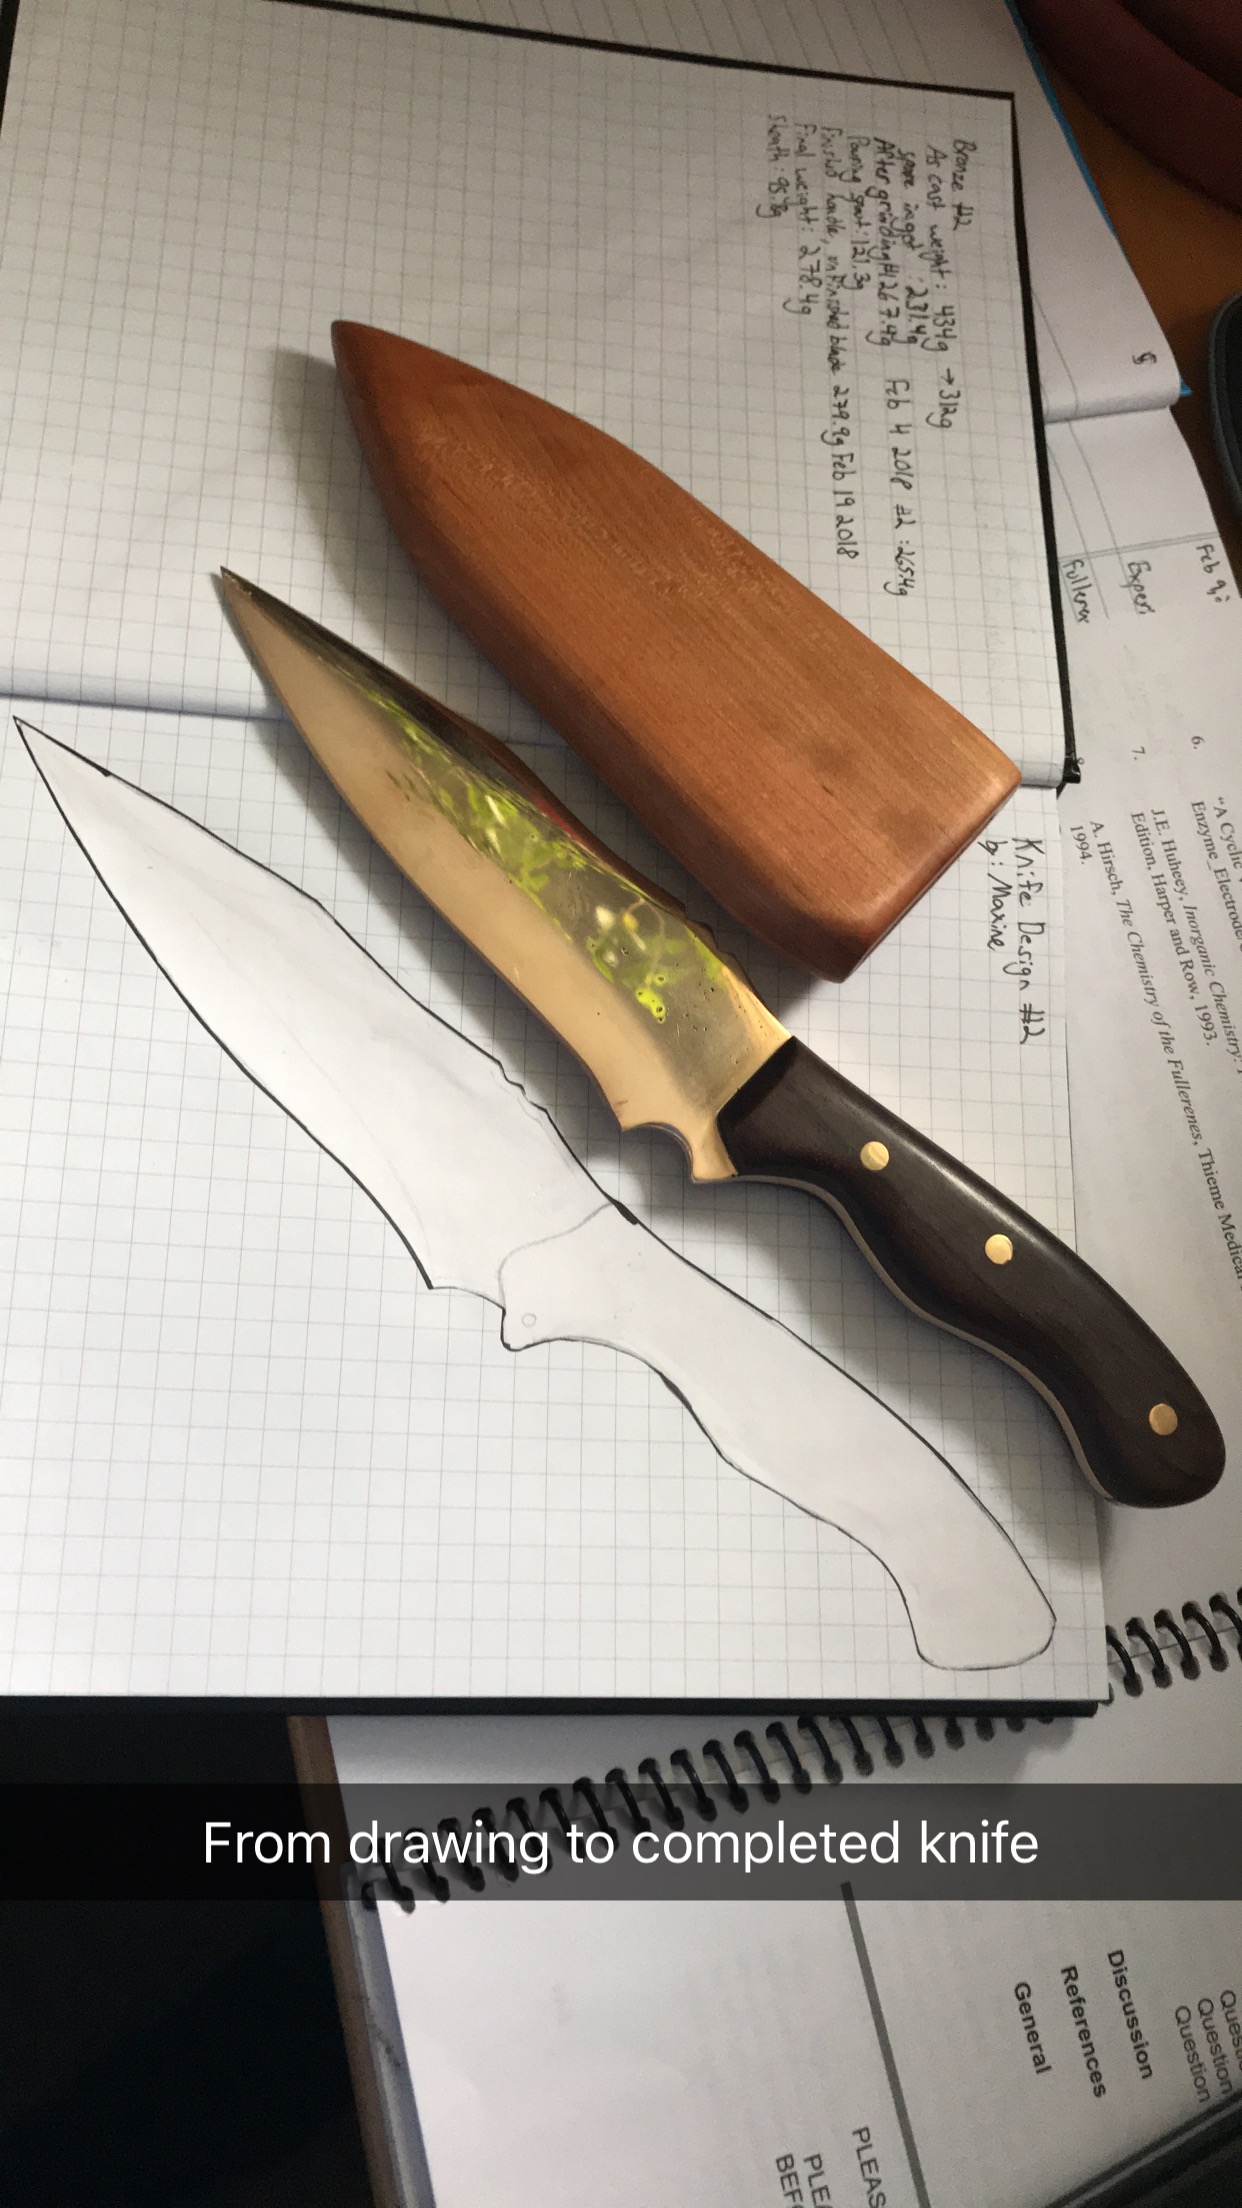
Just recently finished my second bronze knife, (bday gift for my gf).
-increased tin content to 12.4%, is certainly harder and is slightly easier to sharpen
- katalox wood handle
-currently re-lining my forge/foundry , got some 3200f refractory (unicast 70c)- should be more durable


Bronze sword casting
in Smelting, Melting, Foundry, and Casting
Posted
Search up Neil Burridge, I believe he does the closest work to ancient methods, for European bronze replicas.
Swords are cast, cleaned up, annealed, edges are cold forged, and the spine is hardened by hammering, and some bending.
One problem with many of the ancient bronze alloys is the lead that was commonly added makes it hot-short.