
Work With Nature
-
Posts
86 -
Joined
-
Last visited
Content Type
Profiles
Forums
Articles
Gallery
Downloads
Events
Posts posted by Work With Nature
-
-
Thanks guys,
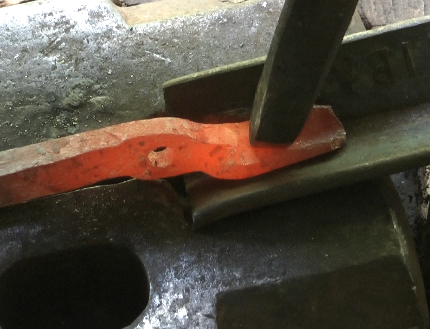
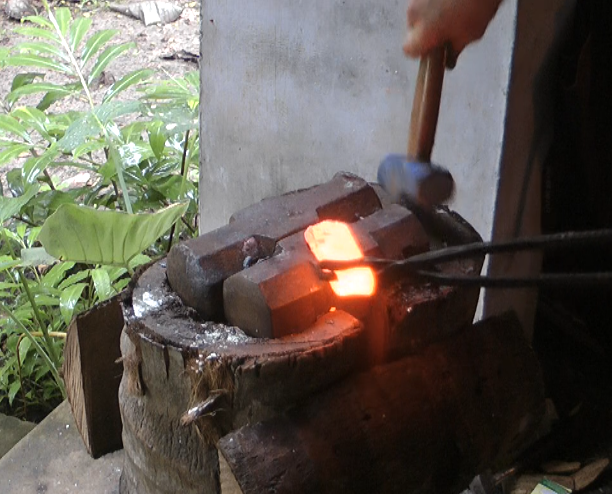
Rains could have been a wee bit longer, they are 14 inches long and hold strongly. I had cut the ends off estimating them to be what I needed. Was trying to get the ends into the forge as the force from the hammer blows kept bending the boss area. It is quite thick, but at orange heat. Could not quench the boss as I think the rods I used are made from high carbon steel and may shatter when quenched.
Got lucky and found an anvil from a JCB chisel that is on edge. But it really does make a difference having anvils on edge if the face is good.
-
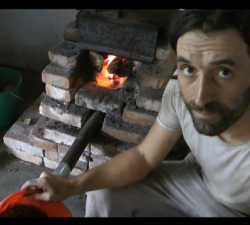
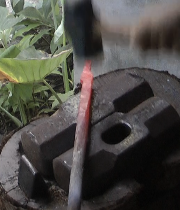
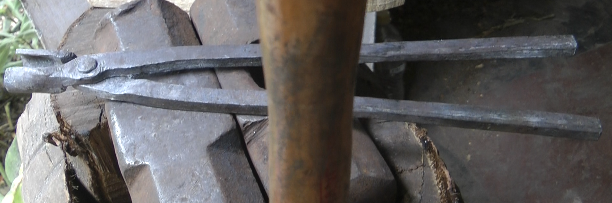
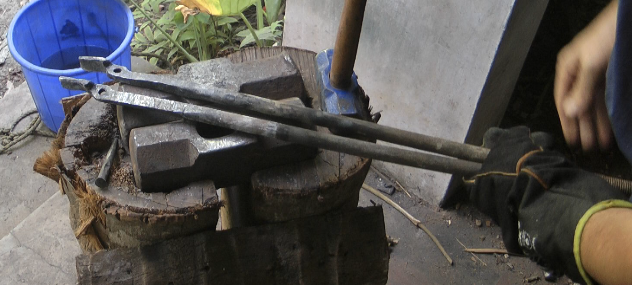
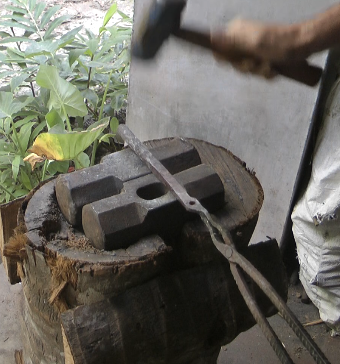
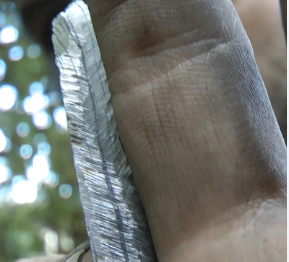
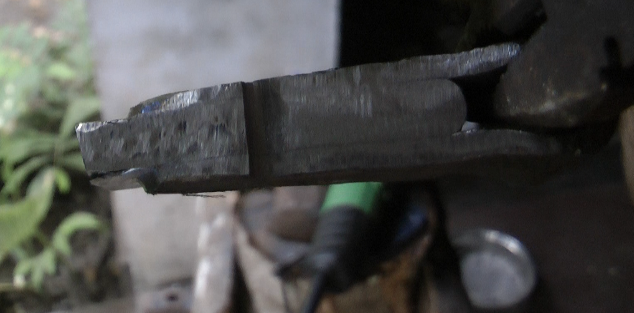
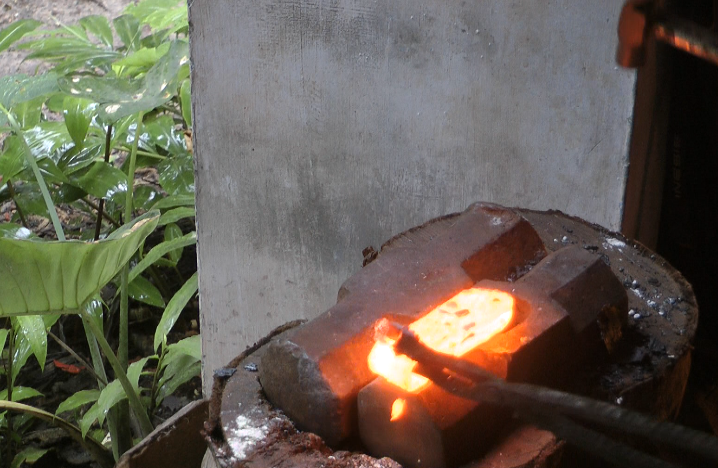
Alright so made these now over the last few days. They are made from some 3/4 inch high tensile studs. Never doing that again by hand. Is there a specific name for them? Maybe v grove tongs. Also do feel free to let me know what could be improved. Cool with that.
Cheers David.
Hope it is alright to upload several pics as I wanted to show the steps I had to do to get them done.


-
I primarily use sound and sight to determine if a weld is good. Typically if there isn't any demarcation between the two pieces then it's probably good.
First of thanks guys for all the helpful info.
Hi Iron Poet would it be alright if you explain the demarcation a little further. Did hit the "axe" and it made a great thud
") Better luck next time. Cool flower BTW.
Better luck next time. Cool flower BTW.
Obviously, different steels have different maleability at the same temperature. So one of the plates widened a little more than the other. and the previously flat edge, now had a "step". If the plates where welded, the edge would be flat or a little slanted.
Hi lyuv, Just to see if I got you right, the previously cleaned edge stays more or less in the same plane without one metal moving beyond the edge of the other.
-
Was gona make a hatched for August, but that will have to wait now for next month, as my forge welding attempt to make one failed.
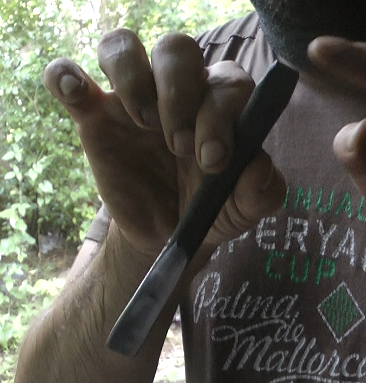
So instead thought of punching the eye instead and so needed to make a simple punch. The tip is slightly wider and thicker and tapers two inches towards he striking end. First time I did some tempering too. Was a lot of fun.

-
Thanks FoxFire,
Makes a lot of sense.
Just to update the weld actually came apart on me when I tried to drift the eye wider. Did it at a red heat. In the bottom photo of my first post it is the weld bellow. It was interesting that it was the underside when I did the welds, so turning the billet is important. You live and you learn. Dropping the darn thing and as I recently found out, not removing the scale with a wire brush at orange heat was a mistake too. Well never mind will keep at it.
-
JHCC,
Will take a closer look but am starting to get the feeling that it actually took well enough at the back area. Going by what you mention that is exactly how it looks on a picture I took. These are great tips.
-
OK the carbon does not leave the welds but migrates and equalizes out eventually across the steels. Am gona give them tests a go. What do you think them lines are? Anyone.
-
Thanks everyone for getting back to me on it. So did I understand correctly, them lines are inclusions??? Could the lines be from carbon trying to leave the steel?
-
Been googling this question now for the past hour and can not get a proper answer. Also did ask this question on a different thread here on this forum, but it is not related to the original question of that thread and not any wiser.
I am wondering how
do beginners like me know if our efforts have paid of regarding to doing forge welding and having them hold well enough, to not come apart later on. It is probably obvious that visual cracks will not work, but what about lines in the welds? I have now done three welds in total. They look and feel solid enough but them lines have me worried. First picture is my attempt at damascus (two folds in total), second is my attempt at a hatchet. The hatched has a spring steel insert and as many of you know it is very hard to move under the hand held hammer. Don't want to waist 5 hours of my time if it just comes apart later on. Am not that mad. If anyone could let me know would appreciate it. Also would like to invite people to post some pictures of their failed attempts and what a good weld may look like. I think to have some pics would be good and some detailed info on how to recognize a good from a bad one.
Cheers David.

-
I see so you make a taper at the end of the v to create a scarf joint for it to not cut into the spring insert. Al right then as this is just a test on how my weld is doing I will convince myself under those circumstances that it is alright to further draw out the piece and see if that will work. Thanks for getting back to me on it.
-
On 9/16/2017 at 11:51 AM, Charles R. Stevens said:
Did you repeat the weld 3 times? You need to get what the welders call "penitration"
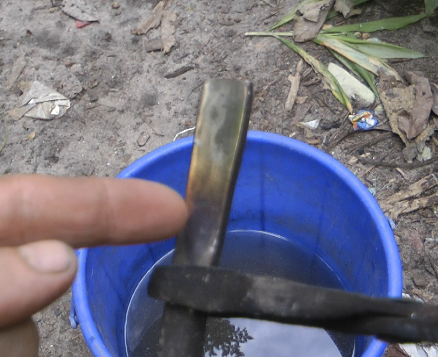
I think you may be right. Did the weld 5 times with the first two perhaps not being hot enough. Piece kept sliding around. Plus I did drop the piece just before the very first weld and the insert that was up in till that point stuck in there by the bolt clamp thing came out. I used WD40, but as soon as it dropped out I got some boric acid on the piece. On the third it stuck at the back.
Then spend the next two trying to close the front bit and hammering on the back as well and think I got some of the front to stick eventually but not all. That is why I ground the front away. I found some gaps that I could see with the naked eye. But to be honest I did not wack the mild steel into the spring steel as I was busy with getting the front welded and it was getting late. So ended up normalizing the piece three times. But what do I know. Thought it might be a good idea.
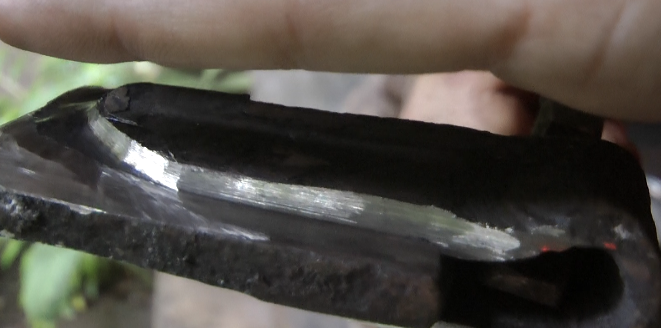
Do you think those very fine lines are OK? They go around the entire weld. You know the dark lines between the welds. Will the weld hold. Am worried as I dropped the piece that I had scale build up from the very first weld and those may be the dark lines?.
-
Don't throw it away or cut it up.. It's best to have ample material rather than to little.. I can't tell from the photos which parts are welded or not.. Take some closer up pictures of where its' welded and then go from there..
besides that if you are making an ax it needs to be a lot thinner than what i could see in the photo..
Hi I uploaded the photos if you don't mind and could let me know if those welds are workable? Was planning to draw out the material into a small hatchet.
-
will52100,
What you were trying to say was very clear from the beginning to be honest. Easy to grasp and thanks for making your point. If you have noticed a difference in size once you get up to those numbers then it is reasonable to assume that one can take your word for it. Especially if you have done many such billets. In the back of my mind I will file that info away and at least take it into consideration once I get to that stage. Nothing is written in stone. Depends is usually the word!
-
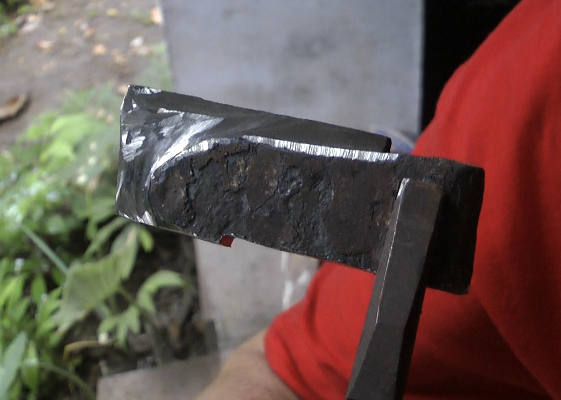
OK got a wee bit carried away with the grinding
First picture is before grinding and cutting of the bolt area the rest is how it looks now. You will notice a very fine line that is around one quarter of the width of a hair, going around the weld area. Is that normal or did I mess up the weld now after all? The front part where the bolt was, needed most of the grinding, as am sure there was a gap between the pieces. This was on both sides. Still need to drift the eye, as it is a bit small, I think I made the insert too long. Am pleased though by what I may still be able to do with it.

-
That is some great advise guys and Charles R. Stevens that about the lignin in the wood is amazing bit of info. Have seen the African axes that have a knot just behind the head. Now that would be a fun project too and I would have a good axe. But will plough on with what I got just to learn from drawing it out and seeing if I can get the proportions right. Fore sure will take some pictures as am heading to the farm now. My plan would be to wire brush it all up and get some close ups. Then spend some time grinding bits of the sleeves away that are over leaning the insert. The piece did move. Will hold my horse so on the cutting part till I get some feedback from you jlpservicesinc. Just a quick question, was that piece in the video from a propane forge or from a coal fire. The borax does keep it very clean alright. The axe head as far as I can tell did get welded together as I did feel a difference to how solid the piece got. But will get some closeups.
David.
-
Ah yes know what you mean with welding the eye shut first and putting in the bit later. The reason why I picked an axe was I asked meself what do I need to forge that I need right now. Axe / hatchet it was. Well since I do have most of it welded up now am gona cut of were it did not take and draw the rest out. Don't know seems like an awful waste to not turn it into one that I got this far now. For me this was difficult alright. Lots to pay attention to at the same time.
-
The only thing I can think of is I watched a video some weeks back by a guy doing a damascus billet using 15n20 and leaf spring. 15n20 has nickel and carbon in it as far as I know. Here is the link might help you out.
-
Ah good to know
")
-
14 hours ago, ThomasPowers said:
How did the weld go?
Did a small update on the thread where we talked about it.
I think I actually pulled it off. Mostly anyways
-
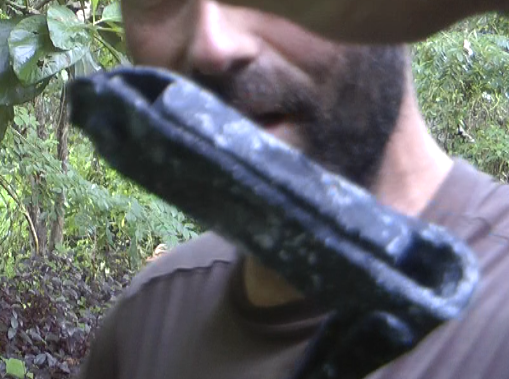
Just wanted to do a follow up on the axe and the weld.
Today I planned to use just as mentioned before, the WD40 and clean well mated surfaces to do the weld by bolting the sleeve (like a clamp see picture) and holding in a piece of leaf spring. I went for leaf spring in the end as it is one solid piece and I have had some experience with heat treating it. Making sure I had some boric acid on hand encase the hole thing did not work though. It might be also important to mention that the bolt does not go all the way though the spring steel insert (last pic). What happened was that as soon as the piece was yellow / white hot I dropped the whole thing. The spring steel came flying out and my mind was made up for the boric acid. The first three welds went bad, the piece just kept sliding around inside the sleeve. Kept putting more boric acid into the weld. In the end it finally stuck, well at least two third of the way from where normally the handle would be attached. Could not get the end near the bolt to weld even though I finally banged the bolt out of the way on both sides. I then hit on the side to see if the weld was solid also noticed some dark spots where the weld was not solid. You might be able to see that in the second last pic. Thinking now of cutting the ends of the sleeves off, that did not take. In order to draw out the exposed spring steel into an axe shape and forge the sleeve into the spring steel? But all in all should probably be able to make a small hatchet now from the piece. Will have to see. This is way harder than it looks from the videos anyways.


-
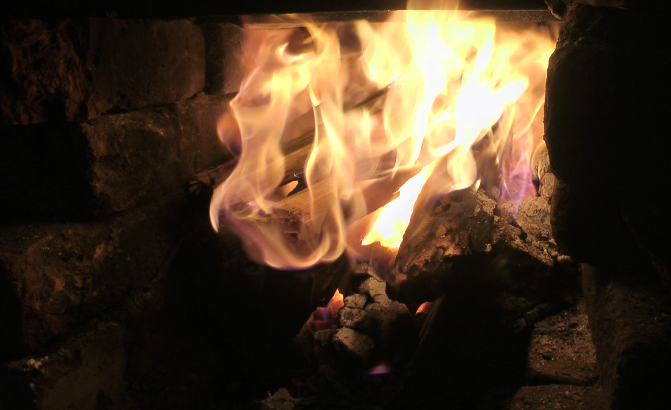
Just thought to post the wood fire I did today, here on this thread if you guys don't mind. I let it burn without any air from the hairdryer for 15 min and build up a lot of embers that way. See first picture. Just to say though that I did pile some new wood on top and it may be difficult to see from the pic that there is a 10 inch by ten inch blob of embers in the middle of the fire. The next couple of pics after that are the hairdryer on and some heat I got for a weld I was trying out.

-
That is interesting that the charcoal from soft woods burns faster and hotter. Does make sense and would not have thought so. The coconut husks we have are mostly air though, as it is a mesh like material to begin with. There is a 1 mil outer shell that encases the husk that is hard. It burns very fast as a charcoal and is hard to make into charcoal because of the shape and some funky substance that burns it slow. Traditionally here in Kerala they use the hard inner shell, what we know in the west as the actual coconut shell. That is what I was told. One tries alright to get hands on material were possible, but yes you just end up using what you got if you can get it to work that is.
-
Did a lot of willow coppicing back in Ireland meself. Here we use the funnel shaped pit method to make charcoal. You just keep layering new material on to the fire and it excludes the O2 as it burns the top most layer. Having the funnel shape is important to allow the air to get into the pit though. Every thing is easy enough, but it all depends on what you have available. For instance I have 5 big mounds of coconut husks (minus the inside shell) available. It does not burn very hot when it is made and also I would wager that it makes not such a good charcoal for use in a forge. It is a very soft wood. What are your opinions on charcoal made from soft wood vs charcoal made from hardwood.
-
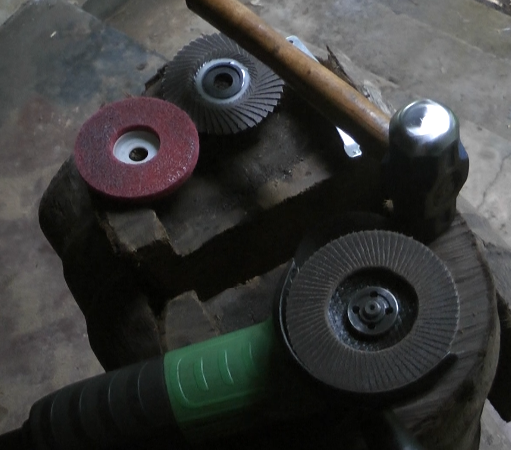
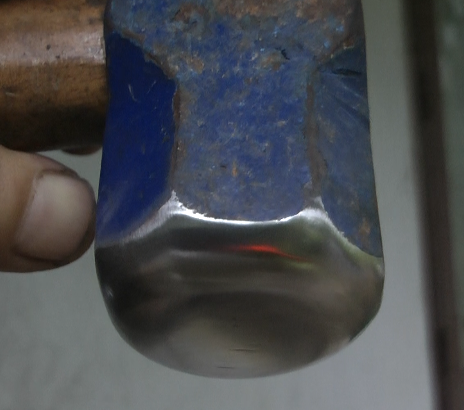
Did some grinding on my 3 pound hammer and got one flat and the other head round. It is mad how careful you got to be to get out all the tiny kinks. Anyways here is my hammer.
Made some tongs but don't quite know if they have a specific name?
in Tongs
Posted
Daswulf Cool thanks for the feedback on them. You are right and did just that on the bottom half of the tongs. Might not be obvious from the picture. The reason I am looking for some feedback is because they are my second set and need to find out if proportions are right. Well and we all love showing off a little from time to time. But from what you guys are saying they are alright. Will keep making them like that. One thing that had me stumped was the length of the rivet. Mine was to long at first and I had to grind the mushrooming sides away. Any tips welcome.
ThomasPowers, ha yes let me know where your local flee market is. But honestly am a wee bit attached to them now after all the work :).