Nate Thiessen
-
Posts
31 -
Joined
-
Last visited
Content Type
Profiles
Forums
Articles
Gallery
Downloads
Events
Everything posted by Nate Thiessen
-
 Luckily I am in Montana so there is no sales tax. I do have a record for my online sales with proper invoice, but I do not have specific record for my booth at the town fair.
 -
Setting up shop in a 12x7 shed
Nate Thiessen replied to CHUCK M's topic in Building, Designing a Shop
I have one very similar to this, except the burner is on top. The only issues I have run in to is heat loss, heat treating larger knives, and doing projects that require a wider opening. The heat loss can be somewhat prevented by placing a fire brick against the opposite opening. If you are looking to drown out some of the noise, nail egg cartons around the room. The part that holds the eggs works as a sound dampener. I once had a quiet room that had egg flats checkerboarded on the walls and ceiling. Also I have found that neighbors tend to be more tolerable of late night shop noise if they get a free item and an apology note. I have worked till 2 am and have had no complaints from neighbors, and all it cost me was 4 of my first horseshoe hearts. -
I have been wanting to sell some items online through etsy and facebook, as well as go to a couple of farmers markets, however I am not sure about where the line is between selling items to fund a hobby, or when it becomes a business that the IRS can put their hands in to. According to a FAQ (or one of the discussions, can't find it now but when I can I will post the ling) on etsy, it is still constituted a hobby so long as the income does not exceed cost, and is not used as a primary income. If I wanted to have a booth at a farmers market or at a fair do I have to have a business license? What is the line between hobby and business for blacksmiths who are selling items?
-
Things I learned from my first craft show
Nate Thiessen replied to Derek Melton's topic in The Business Side of Blacksmithing
This is a perfect example of where "special show price" really matters. I ran in to a similar issue this summer at my first show where the only things that sold were the items under $10. I had table with my blacksmith items, my wifes cakes, cake pops, and face painting, and a buddy of mine who does wood burning using 2000 volts of electricity. We made back what we spent to even have a set up thanks to my wife's face painting. I had made a bunch of horseshoe hearts, garden trowels and bbq meat flippers, and all that sold for me was one heart. If I do it next year I will probably make a bunch of smaller items and sell the hearts for $10 instead of $20. Typically when people go to a market they are there to browse, see the talent, and pick up a few small things (usually for a friend who would really like that). -
Liability
Nate Thiessen replied to Ethan the blacksmith's topic in The Business Side of Blacksmithing
So I have had a couple of buds ask if they can come over and swing a hammer. Should I have them sign some sort of liability waiver and take them through a training session before they pick up a hammer? -
Thank you all for your responses. I will score the face up a bit more and try heating it up and giving it a scotchbright treatment. As for Ferriers I have to wait for a couple weeks for when our horses get their hooves taken care of (never been shoed so that's why I don't have naturally stressed ones). Thank you all again for your suggestions and I will be sure to give them a try to find the best method that works for me for future orders.
-
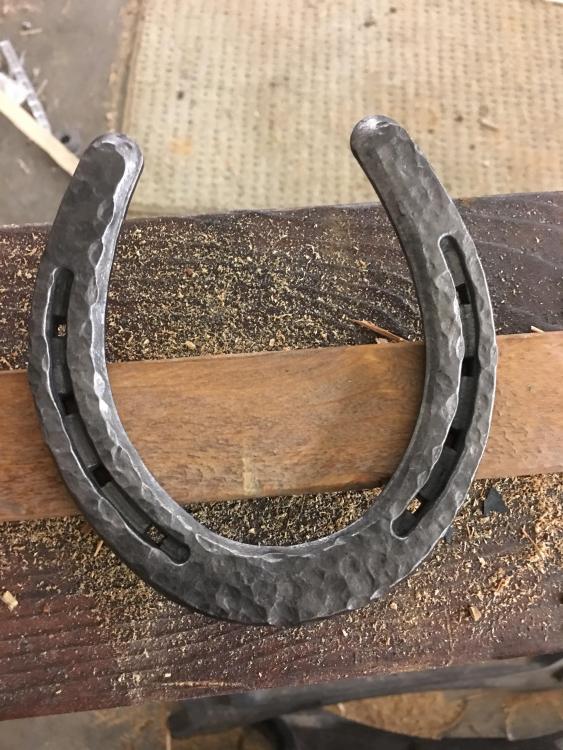
I have had a customer request a stressed metal horse shoe. As I understand she is looking for the dark scale hammer marks and for the metal to be weathered. So far what I have done is take a ballpein to the shoe to texture it, and then heated the whole thing as hot as my propane Forge could go and quenched it. From there I used a wire wheel to clean off the loose scale. I sent a picture to the customer and they want it to look even more weathered. What method am I missing to give the shoe a more stressed and weathered look? Acid bath perhaps?
-
Looks like it is going to be a great shop! Hope it doesn't get too hot in there for you though.
-
I've worked with Fjords for a number of years and learned that they tend to favor their right (at least my few have). One stud in particular though favors his left since he has poor vision in his right eye. Once you work them evenly though then they don't really care.
-
Paint Can Forge with BBQ propane injector
Nate Thiessen replied to Nate Thiessen's topic in Gas Forges
Upon receiving my new forge from Devil Forge, I realize that my issue with the paint can was forced air. The small vents that are built in to the tubes are not meant to draw in the amount of air needed in order to get the heat required. Anyway, the image is of my current shop set up. Have to start somewhere right?!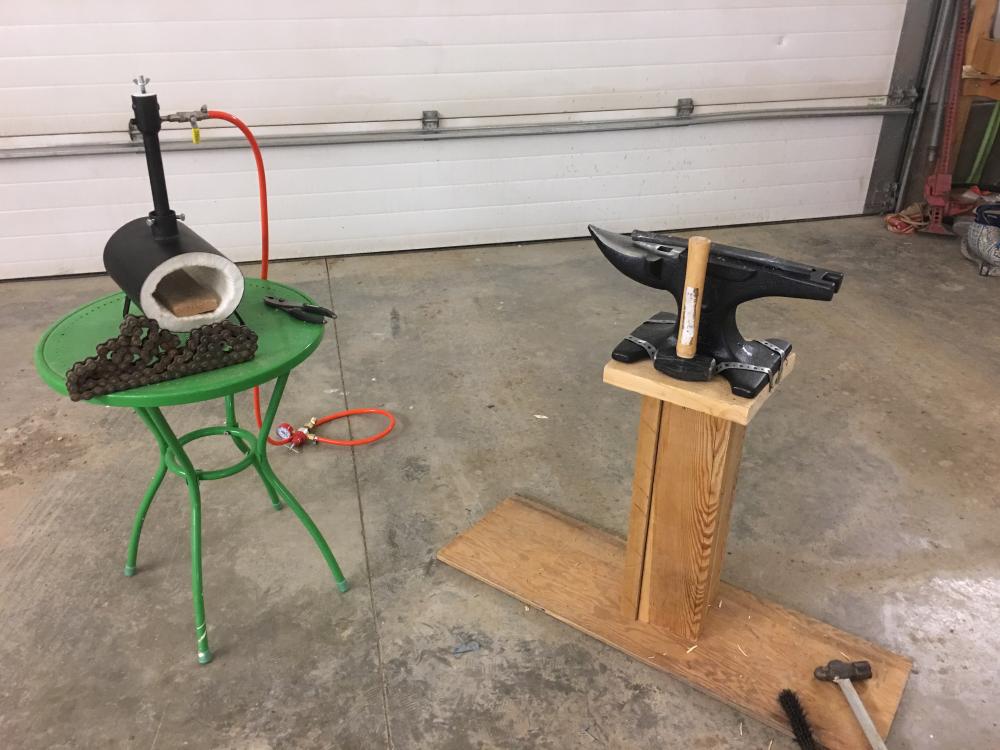
-
Paint Can Forge with BBQ propane injector
Nate Thiessen replied to Nate Thiessen's topic in Gas Forges
I would assume however, that if I was to remove the current regulator on the hose, that would eliminate the fuel restriction so that I could get a hotter flame. I will give that a try so I can have it operational at least. Oh well, either way I broke down and picked up a forge on eBay for $180. I figure if I'm going to spend money on a burner, it might as well come attached to a pre-made and tested unit. Thank you for your input and investment Frosty! I am looking foreword to moving on to where I can actually work metal and stop fiddling around with just trying to get a heat source! -
Paint Can Forge with BBQ propane injector
Nate Thiessen replied to Nate Thiessen's topic in Gas Forges
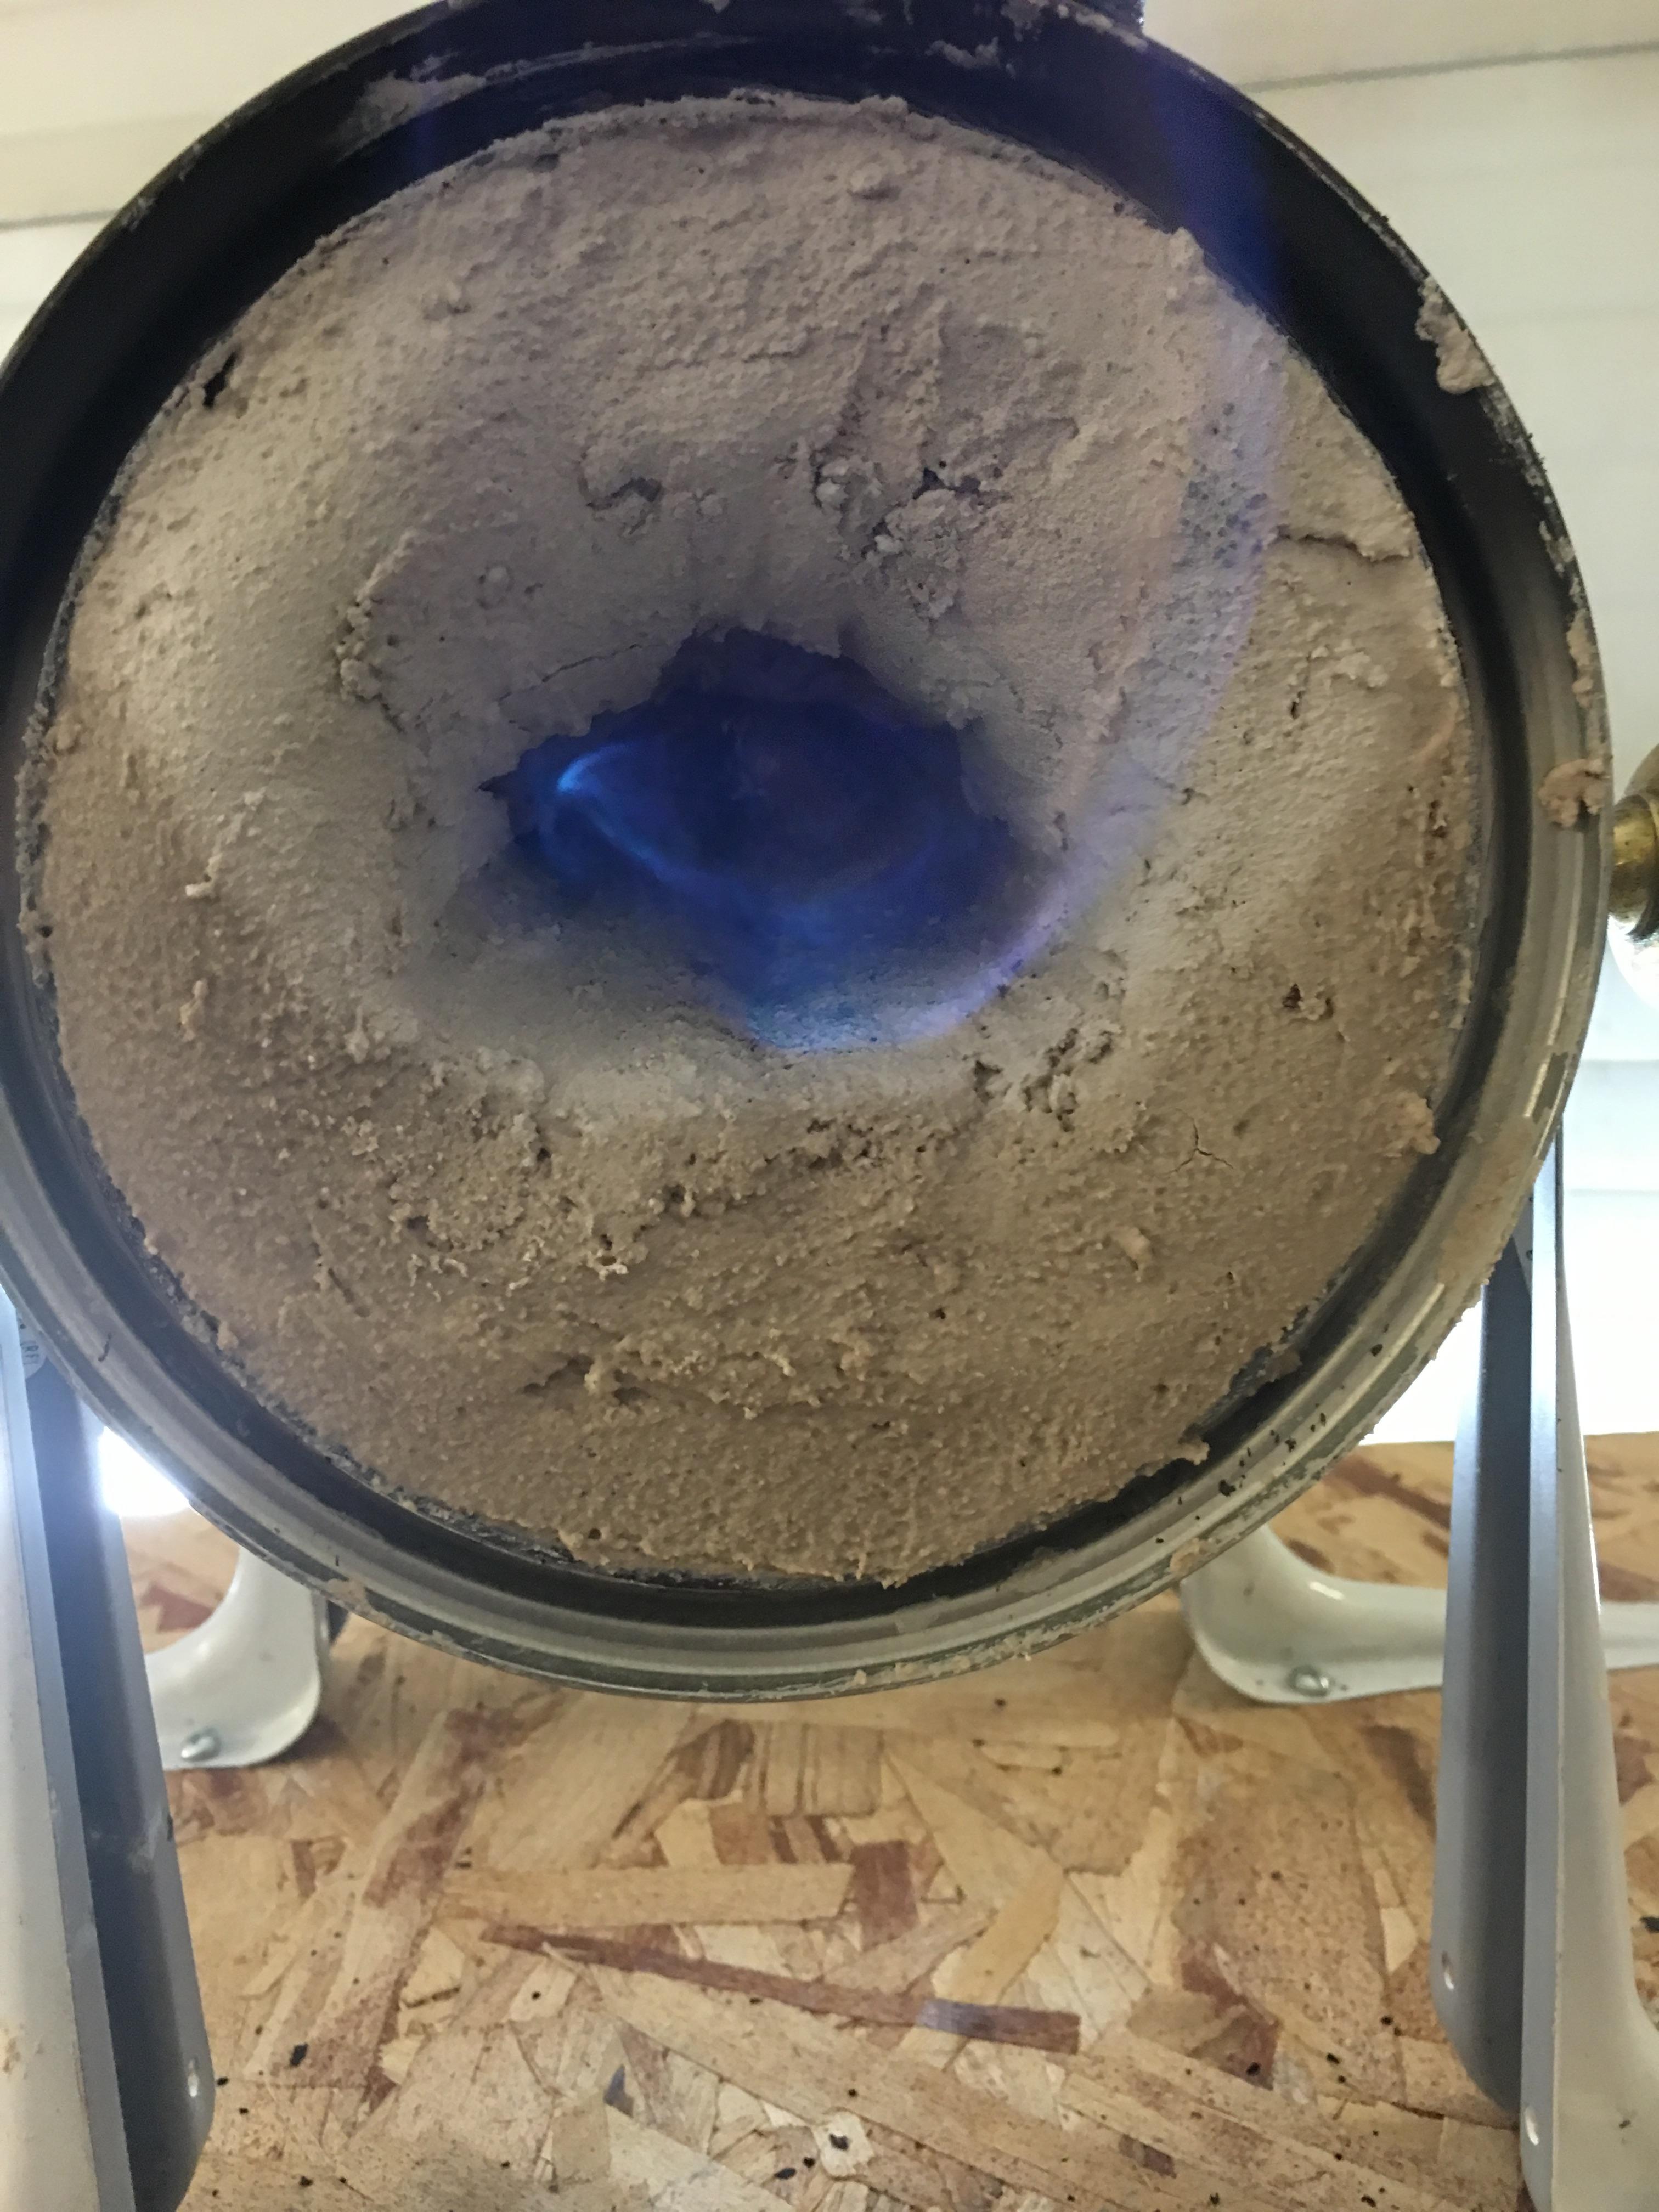
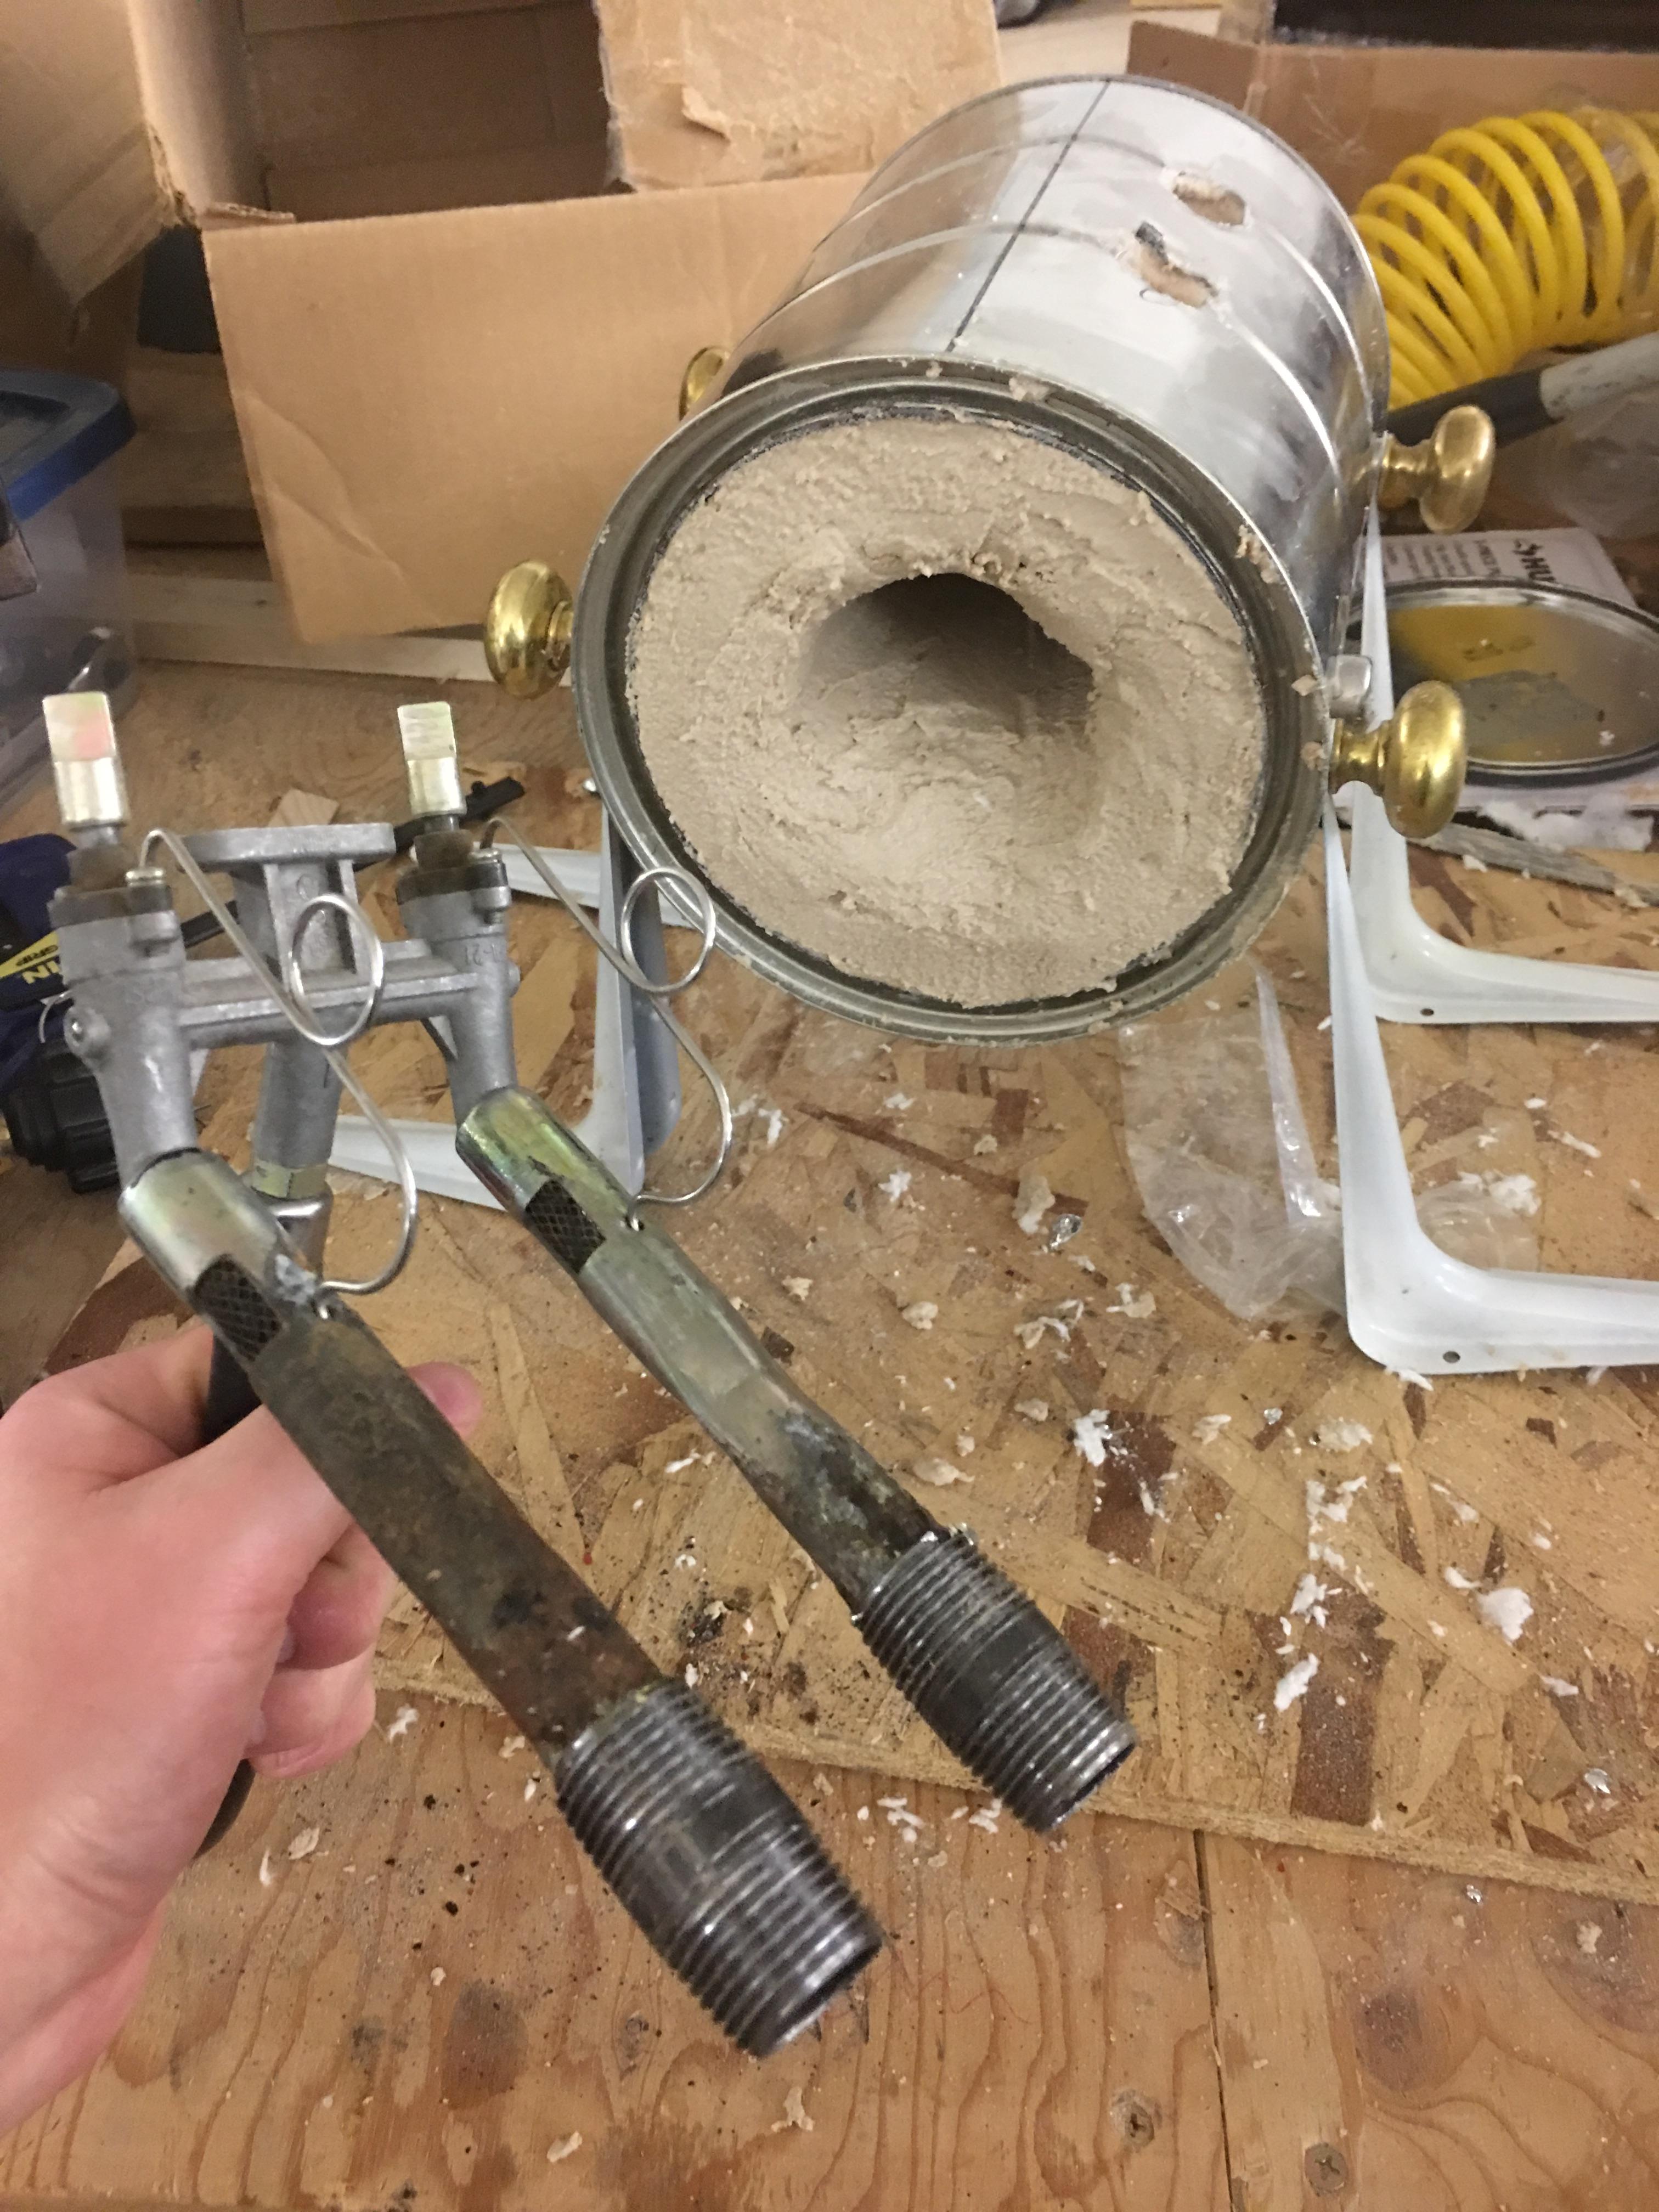
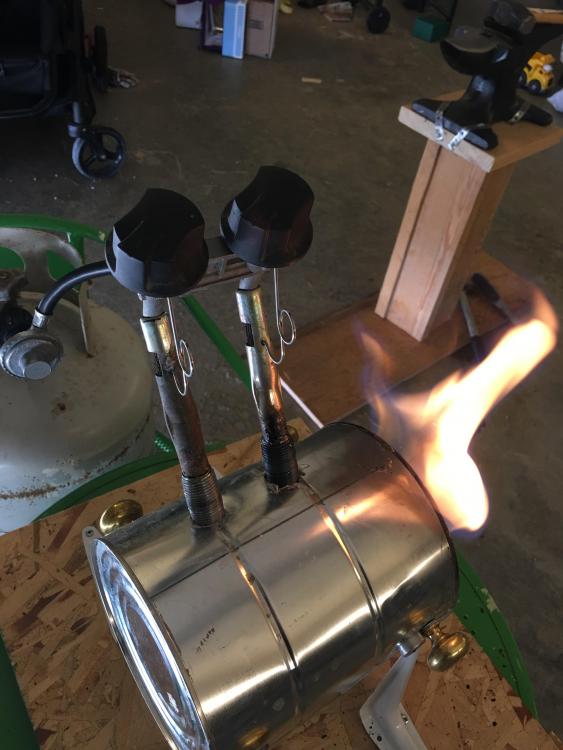
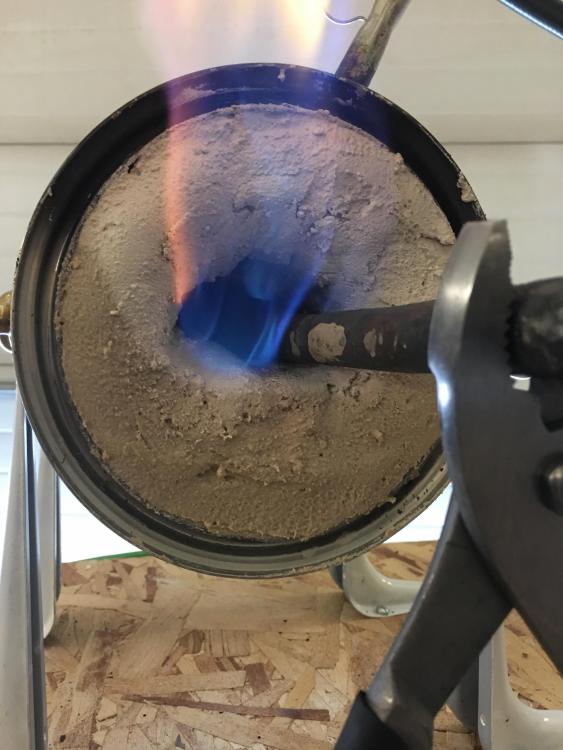
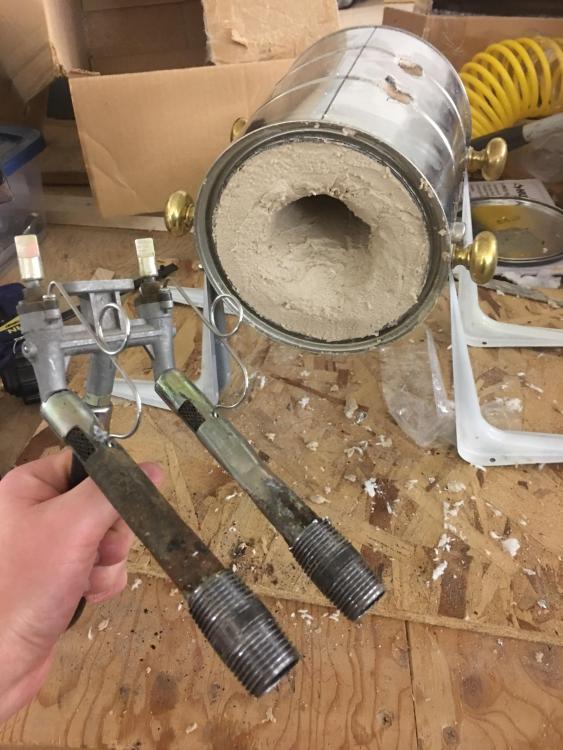
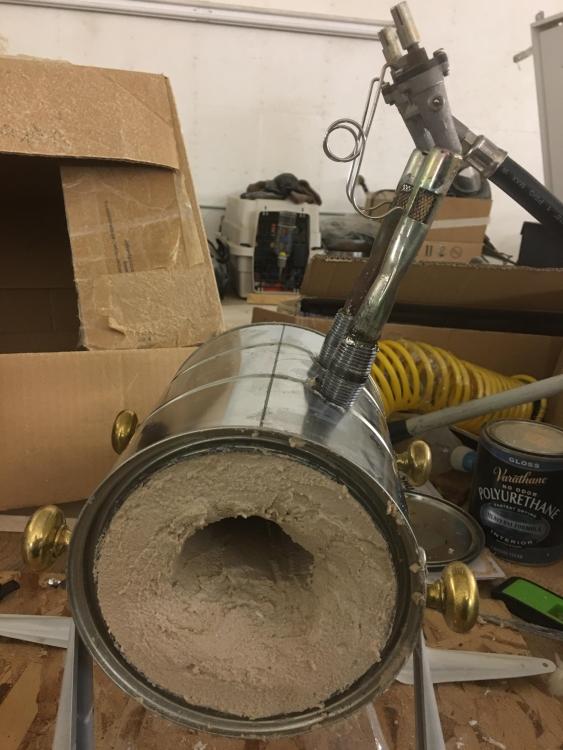
So I have a few concerns with this build. The first is the amount of flame that is flaring out of the opening (I only have an opening at the front). It comes out enough that it licks the air holes on the front tube. So because of that I don't use the front burner since that sends up a red flag for me. I will make note that the hole where the front burner goes in is not as snug as I would like as I had some metal jump on me when I drilled it. I am also not getting the heat that I need in order to move metal, and that is with both burners on full (had a makeshift shield on the front for a bit but it kept falling off). Would anyone have any suggestions? I have noticed too that my mortar has bulged after having the forge on, so my original semicircle design has become a grotesque oval, almost tight butt hole like. Third picture has both burners on full. The other thing I am thinking I may have to do is remove the BBQ regulator on the hose and replace it with just a hose extension and bottle hook up.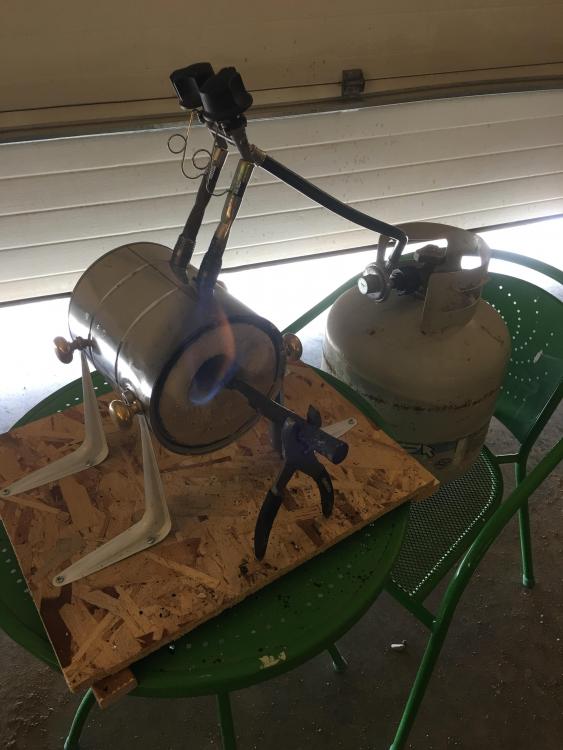

-
Paint Can Forge with BBQ propane injector
Nate Thiessen replied to Nate Thiessen's topic in Gas Forges
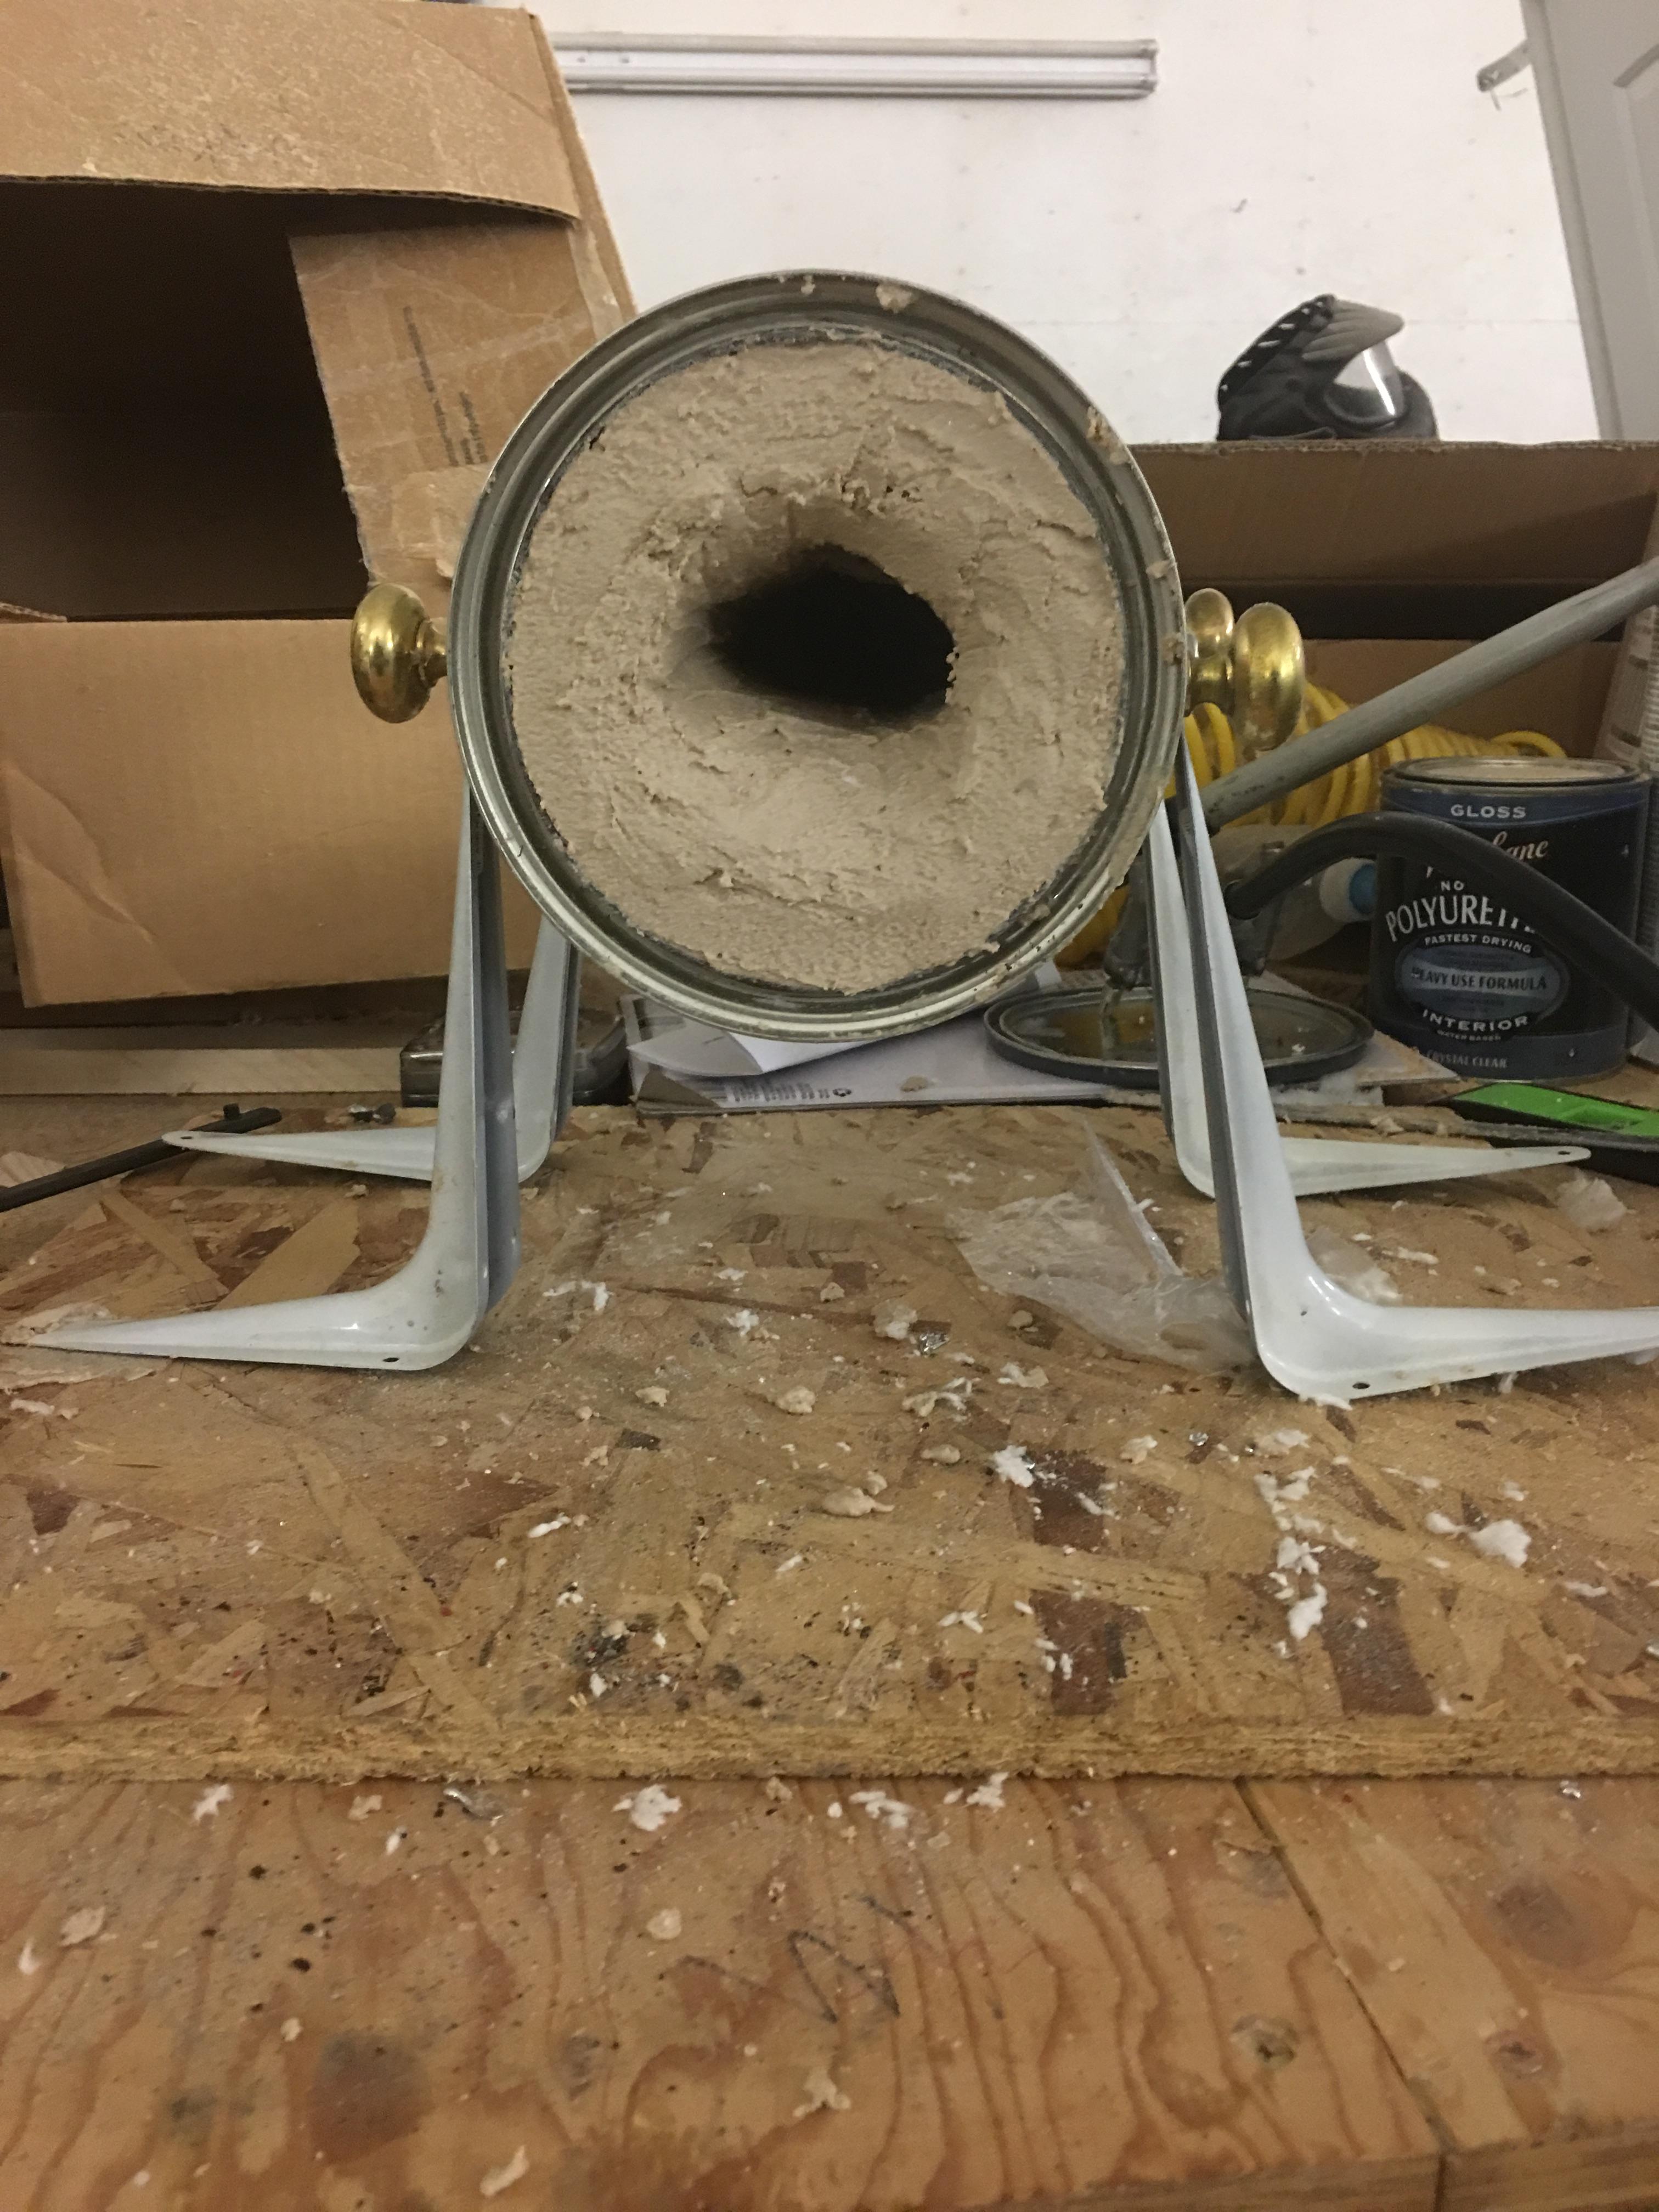
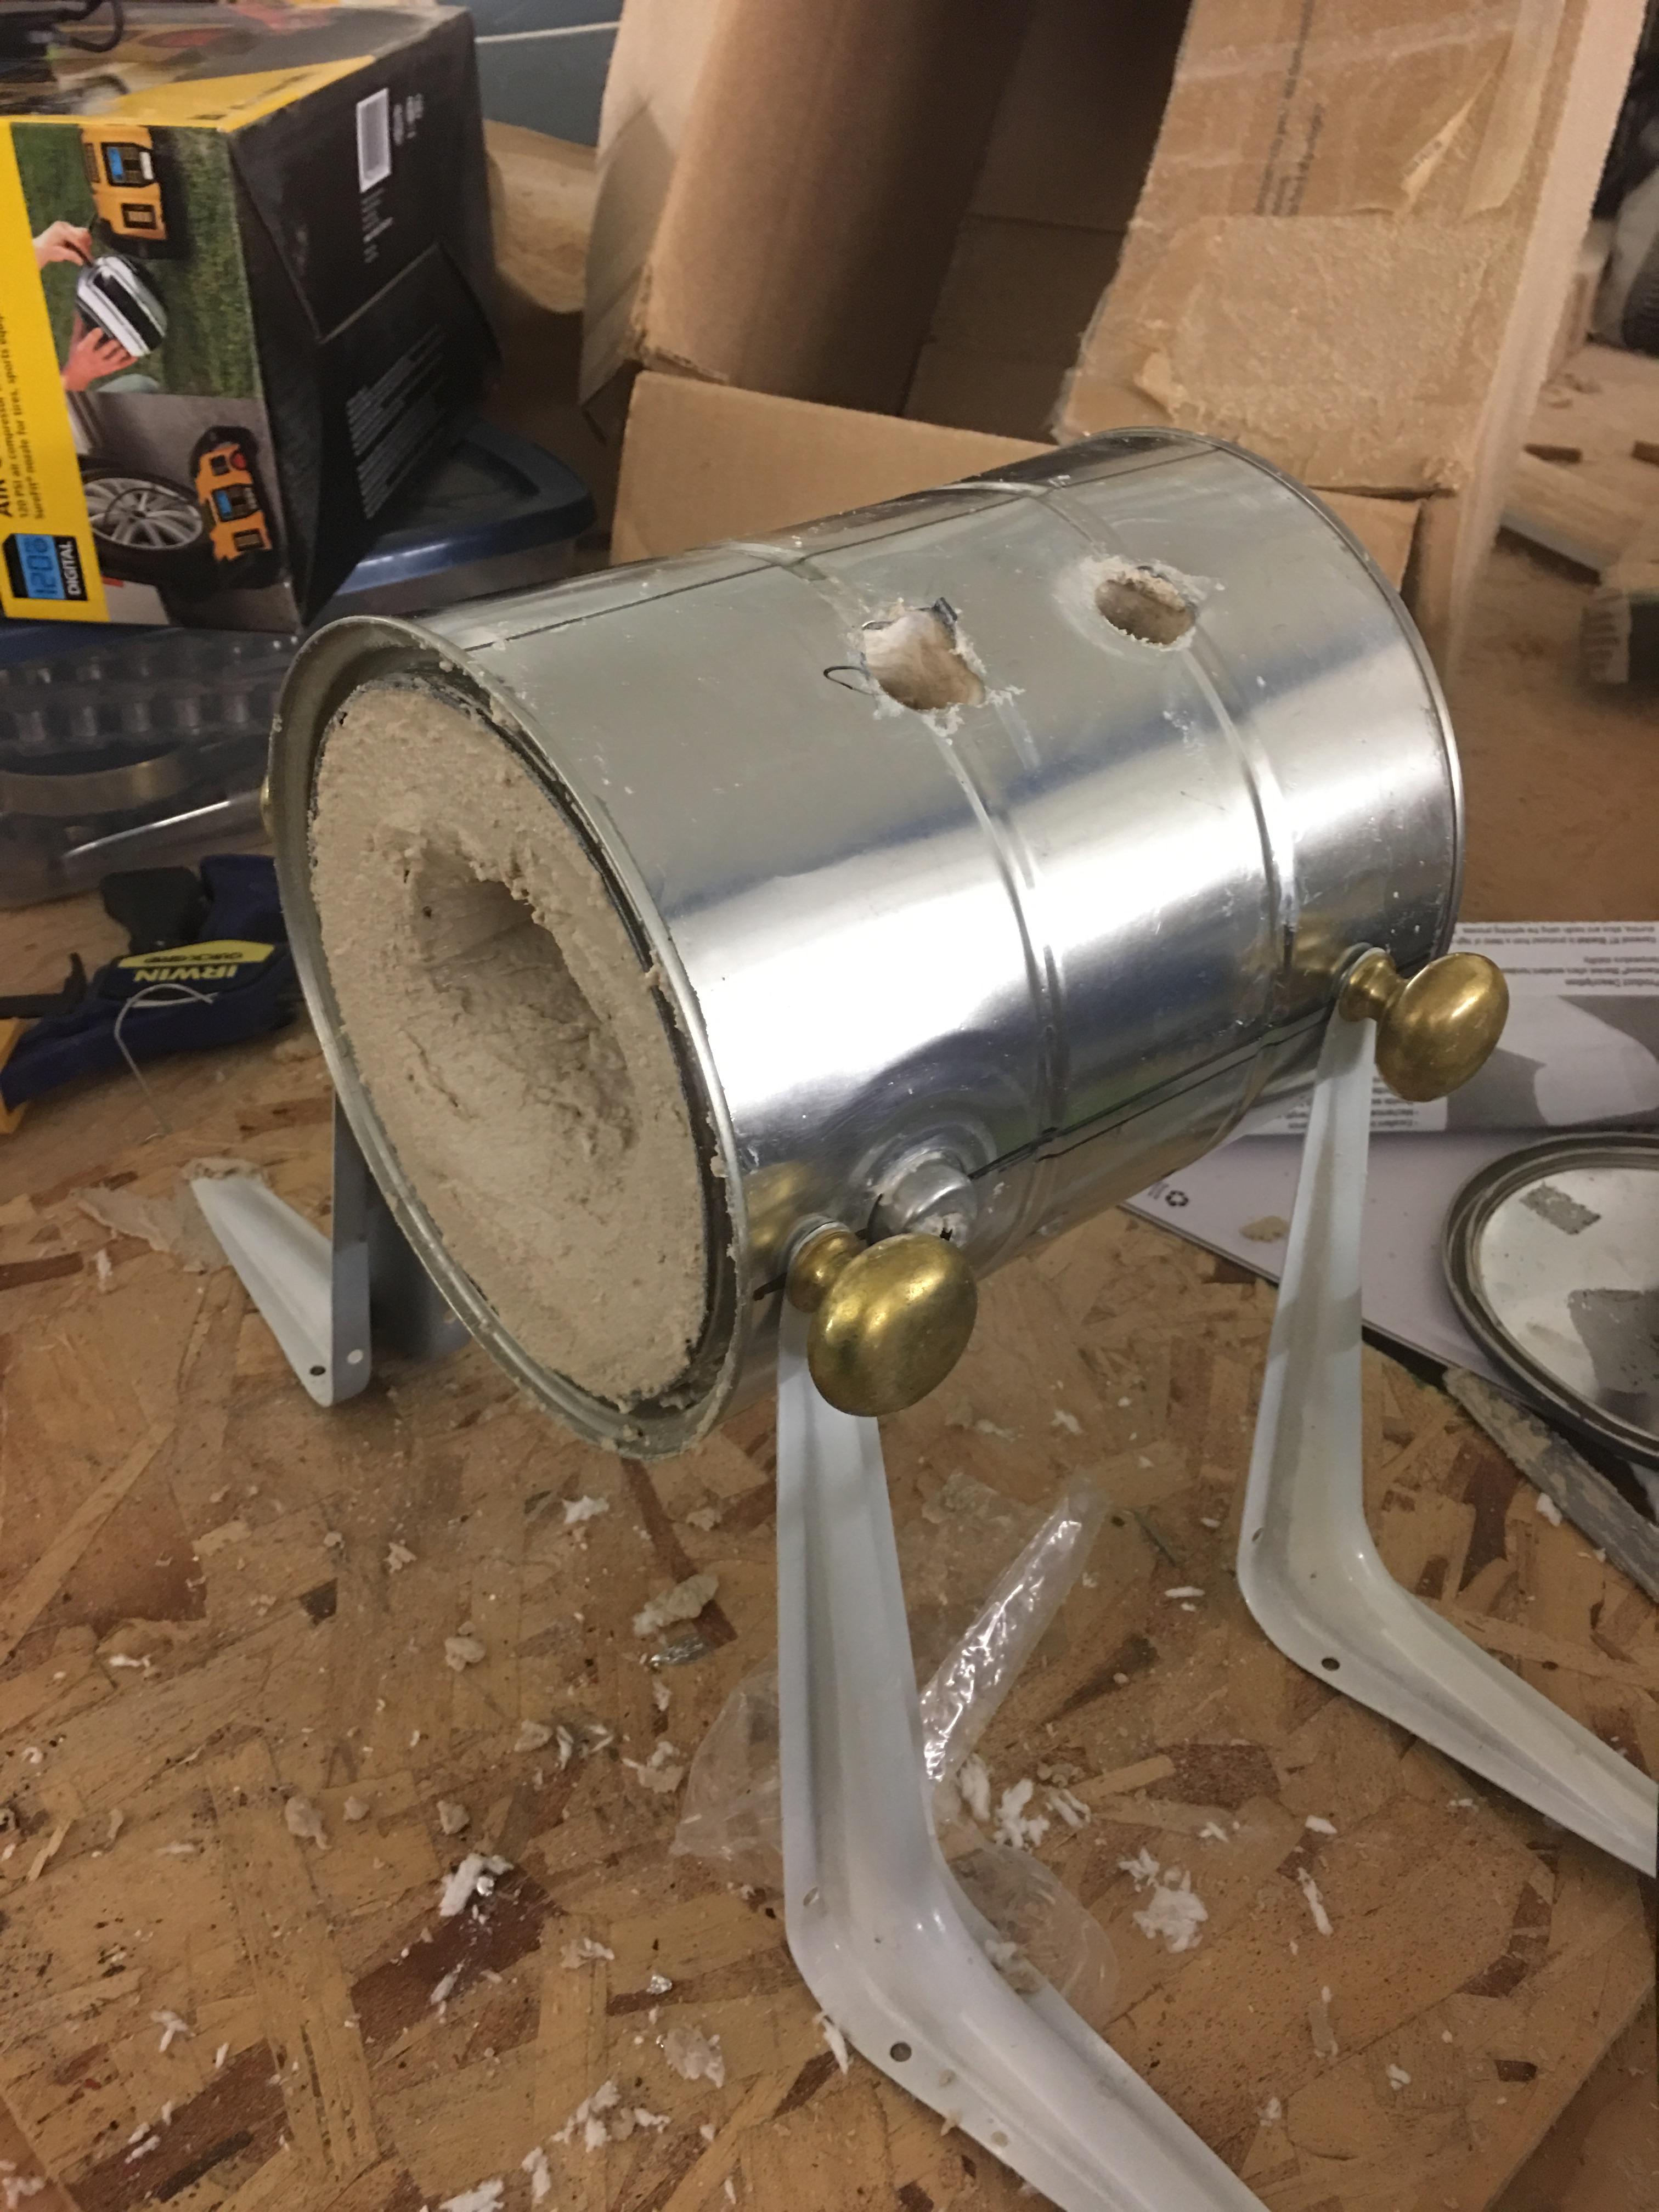
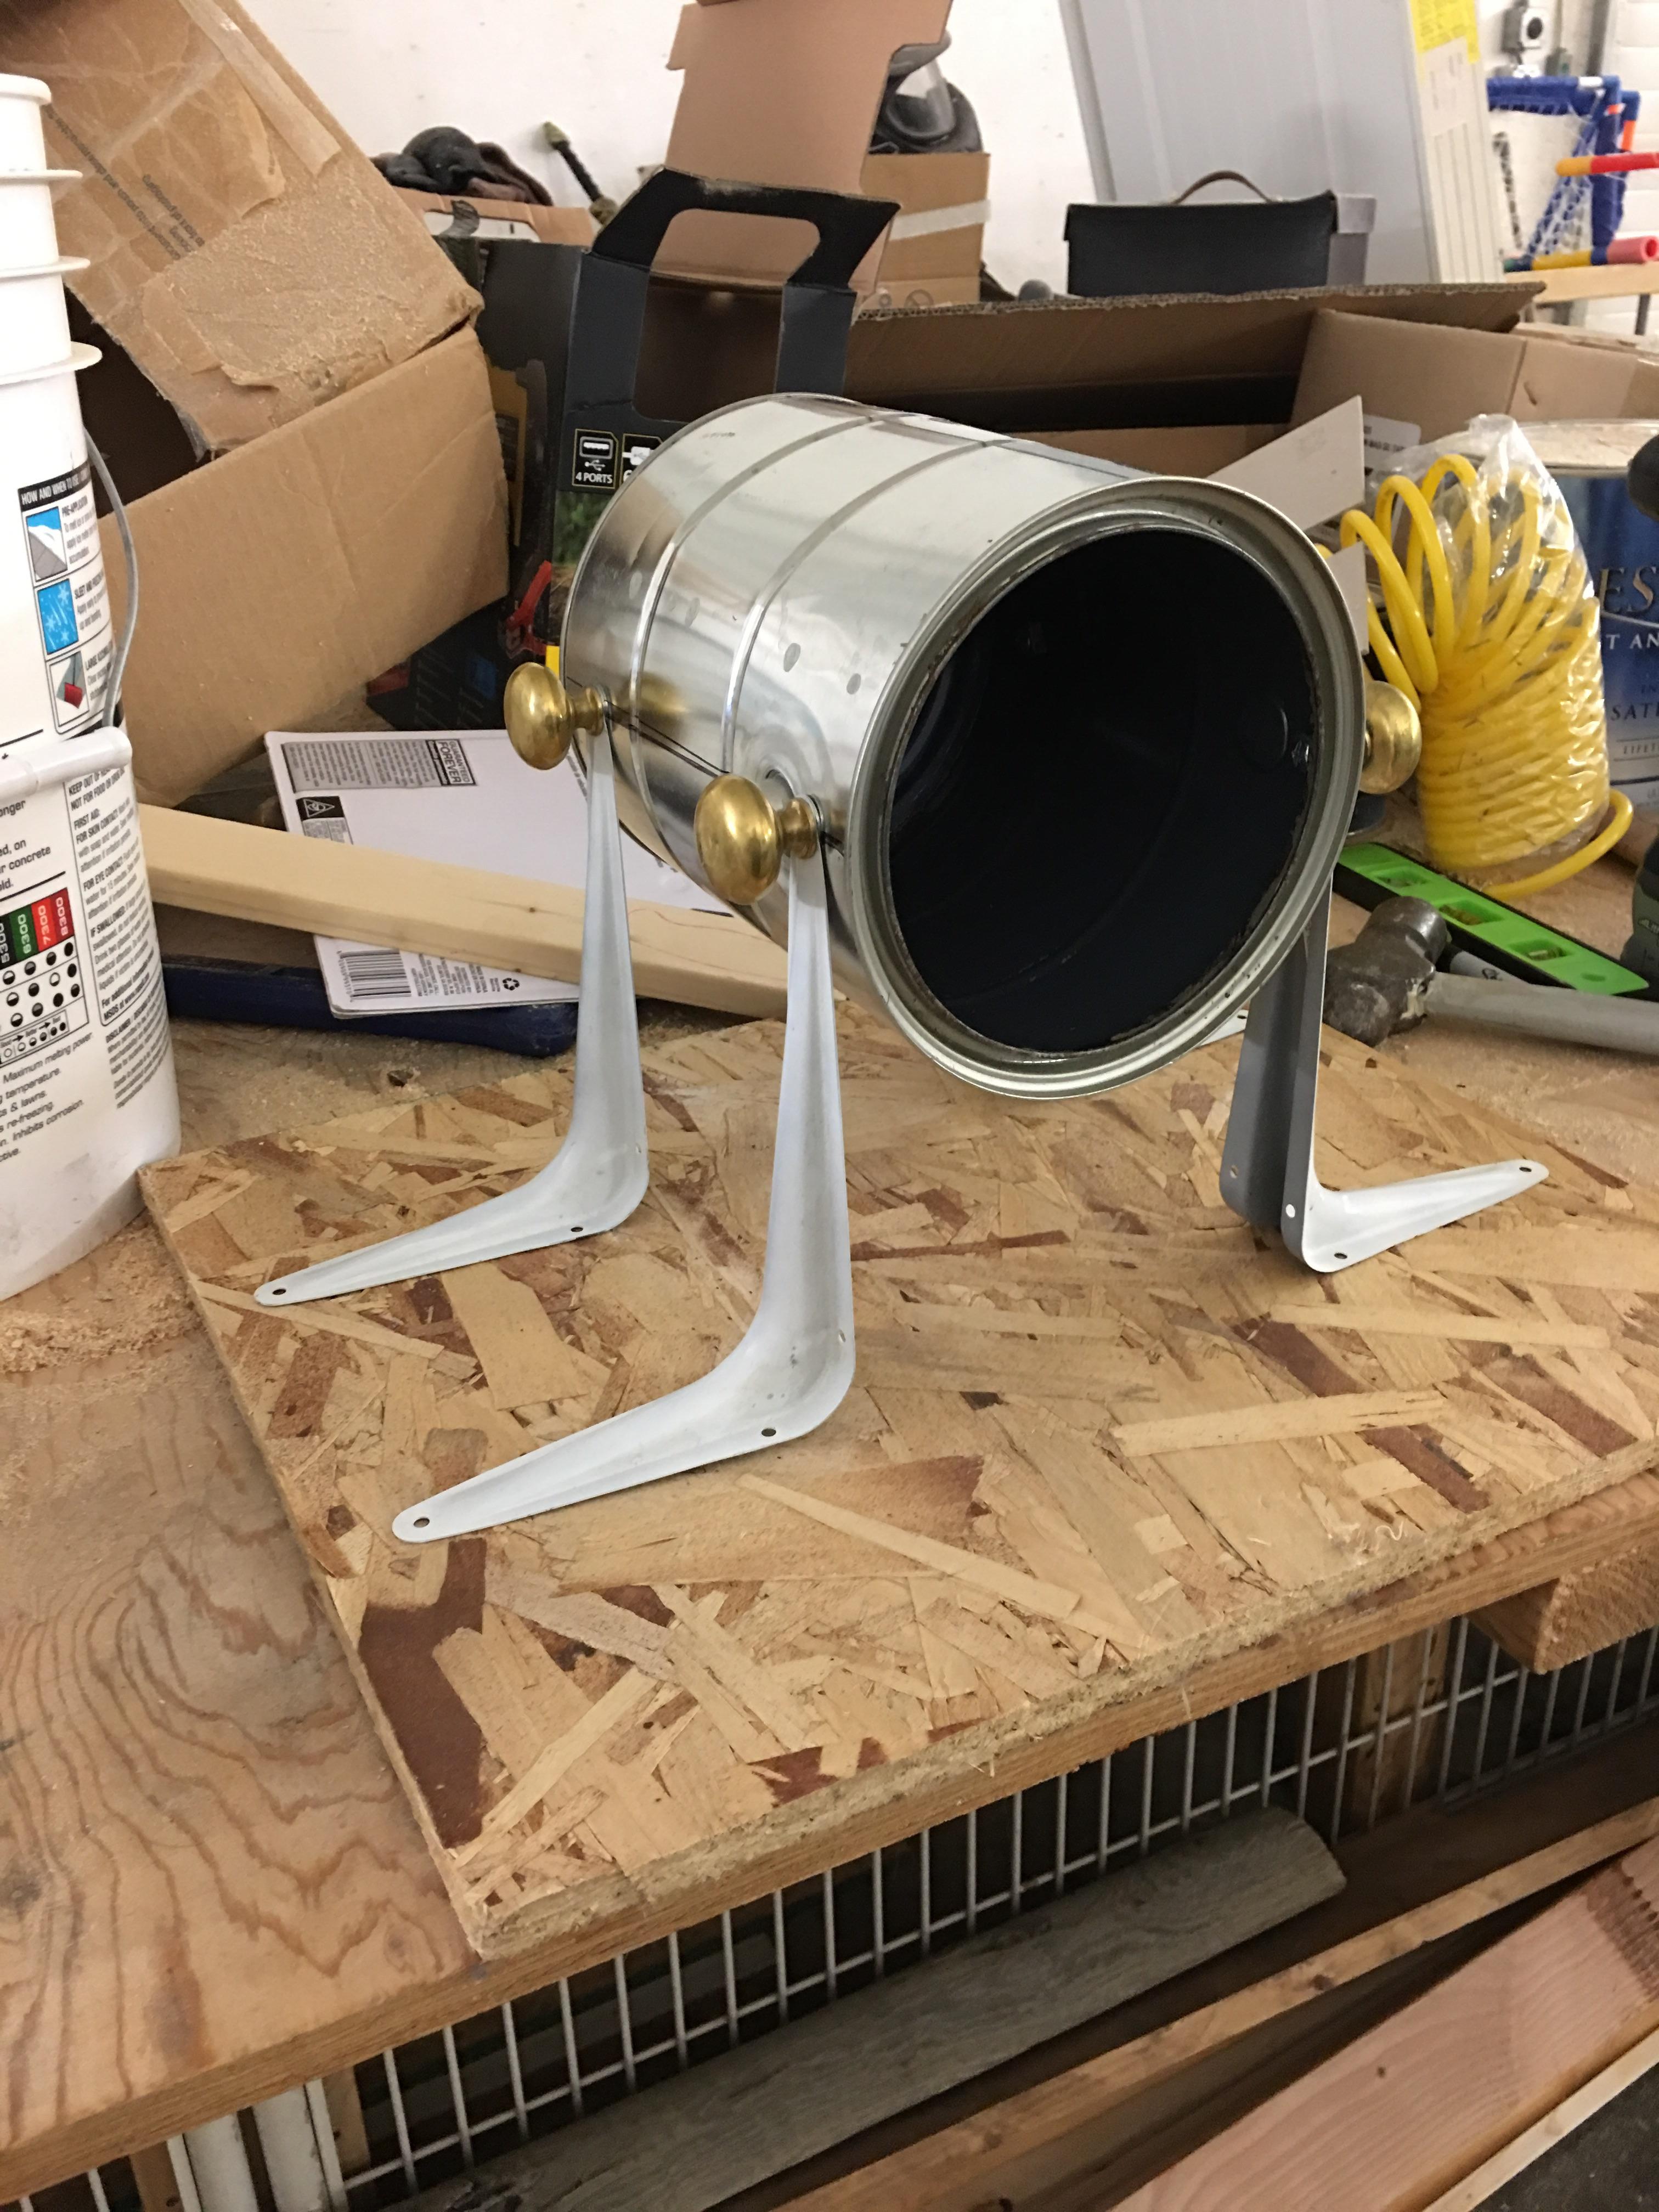
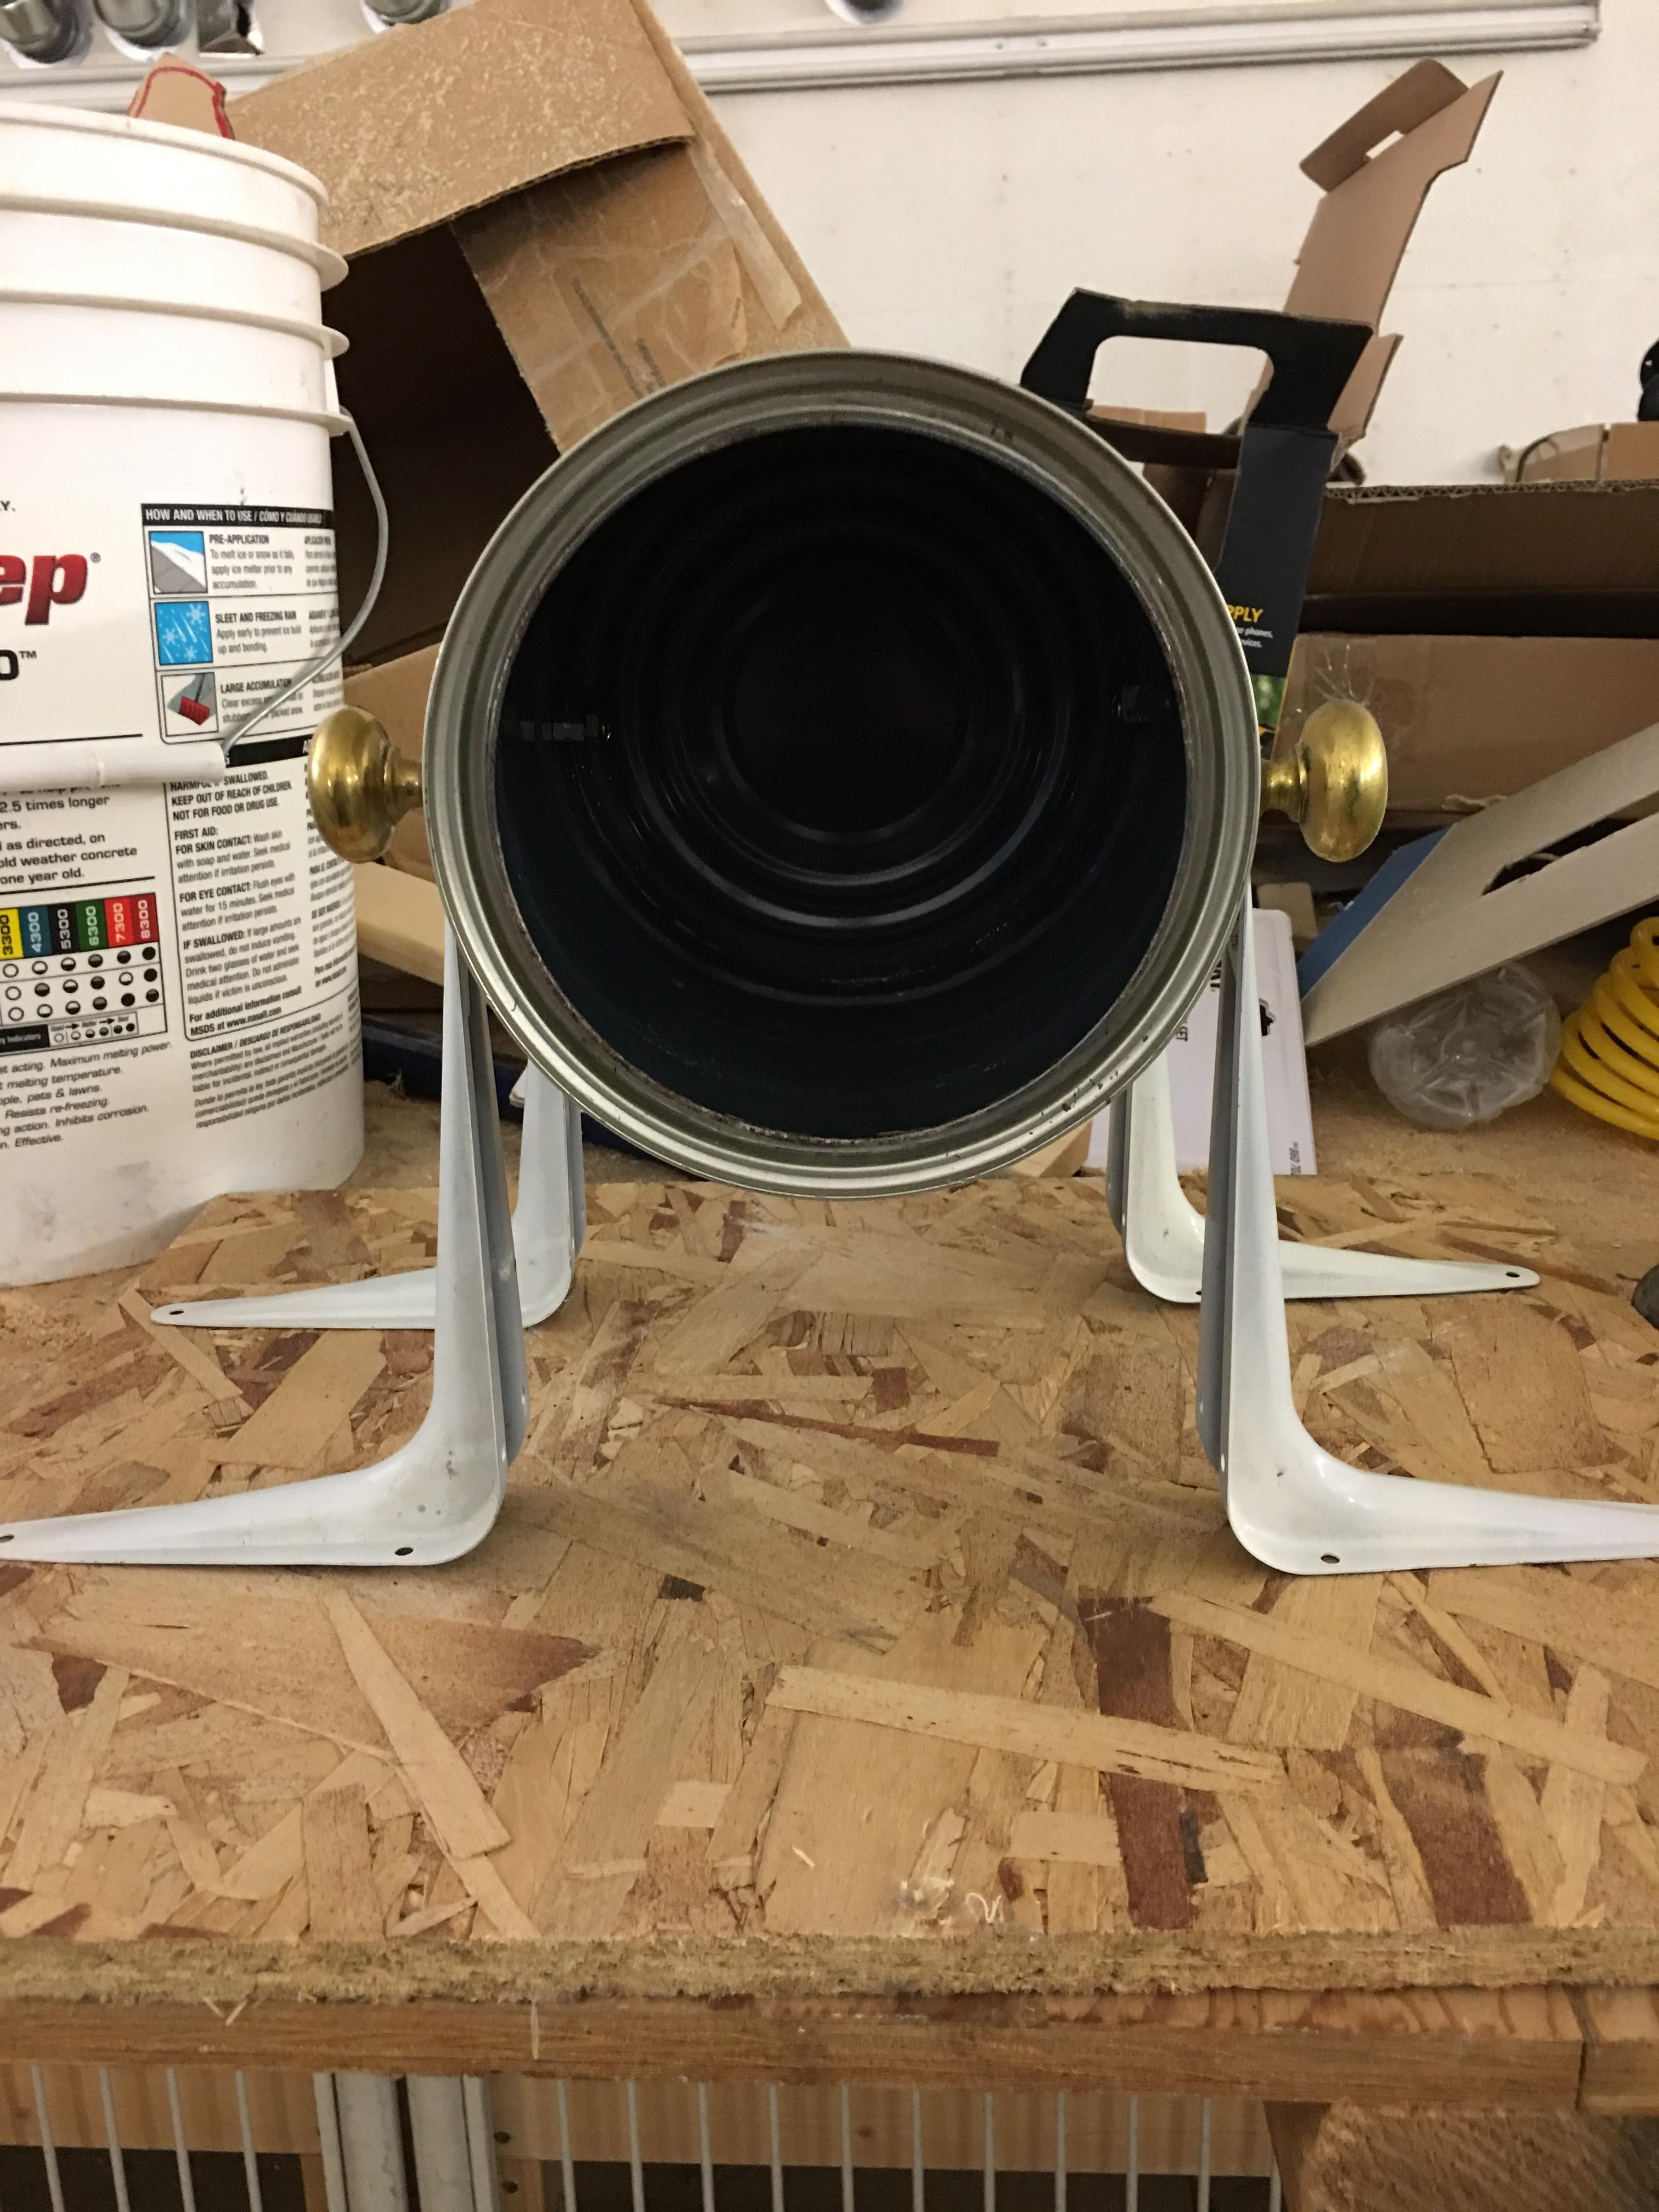
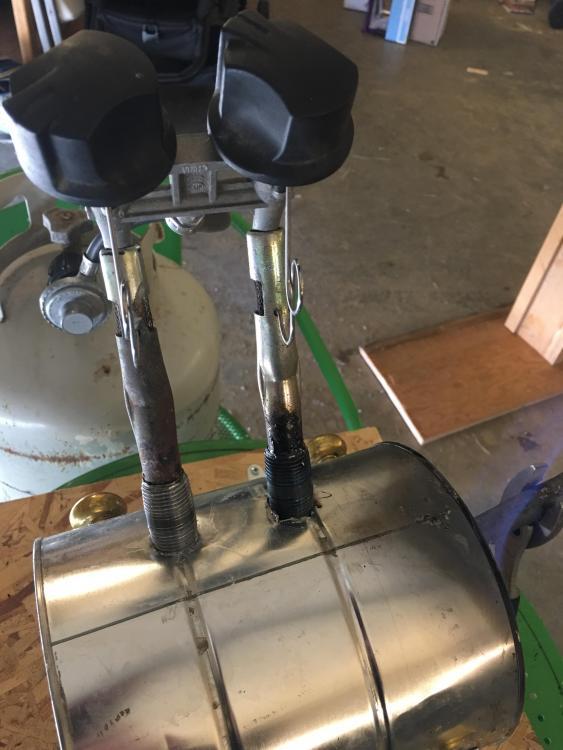
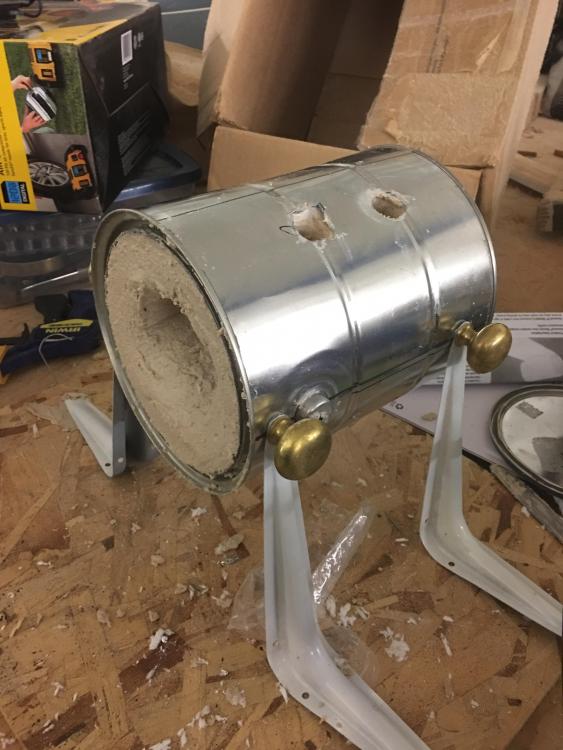
Thanks Frosty! I just had them loose so I could get the wool and cement in. When everything is finished it will be mounted on a portable fire proof base. Haha the door knobs were from spare cupboards and I didn't have a set of 4 nuts and bolts, but the knobs ended up working perfectly! -
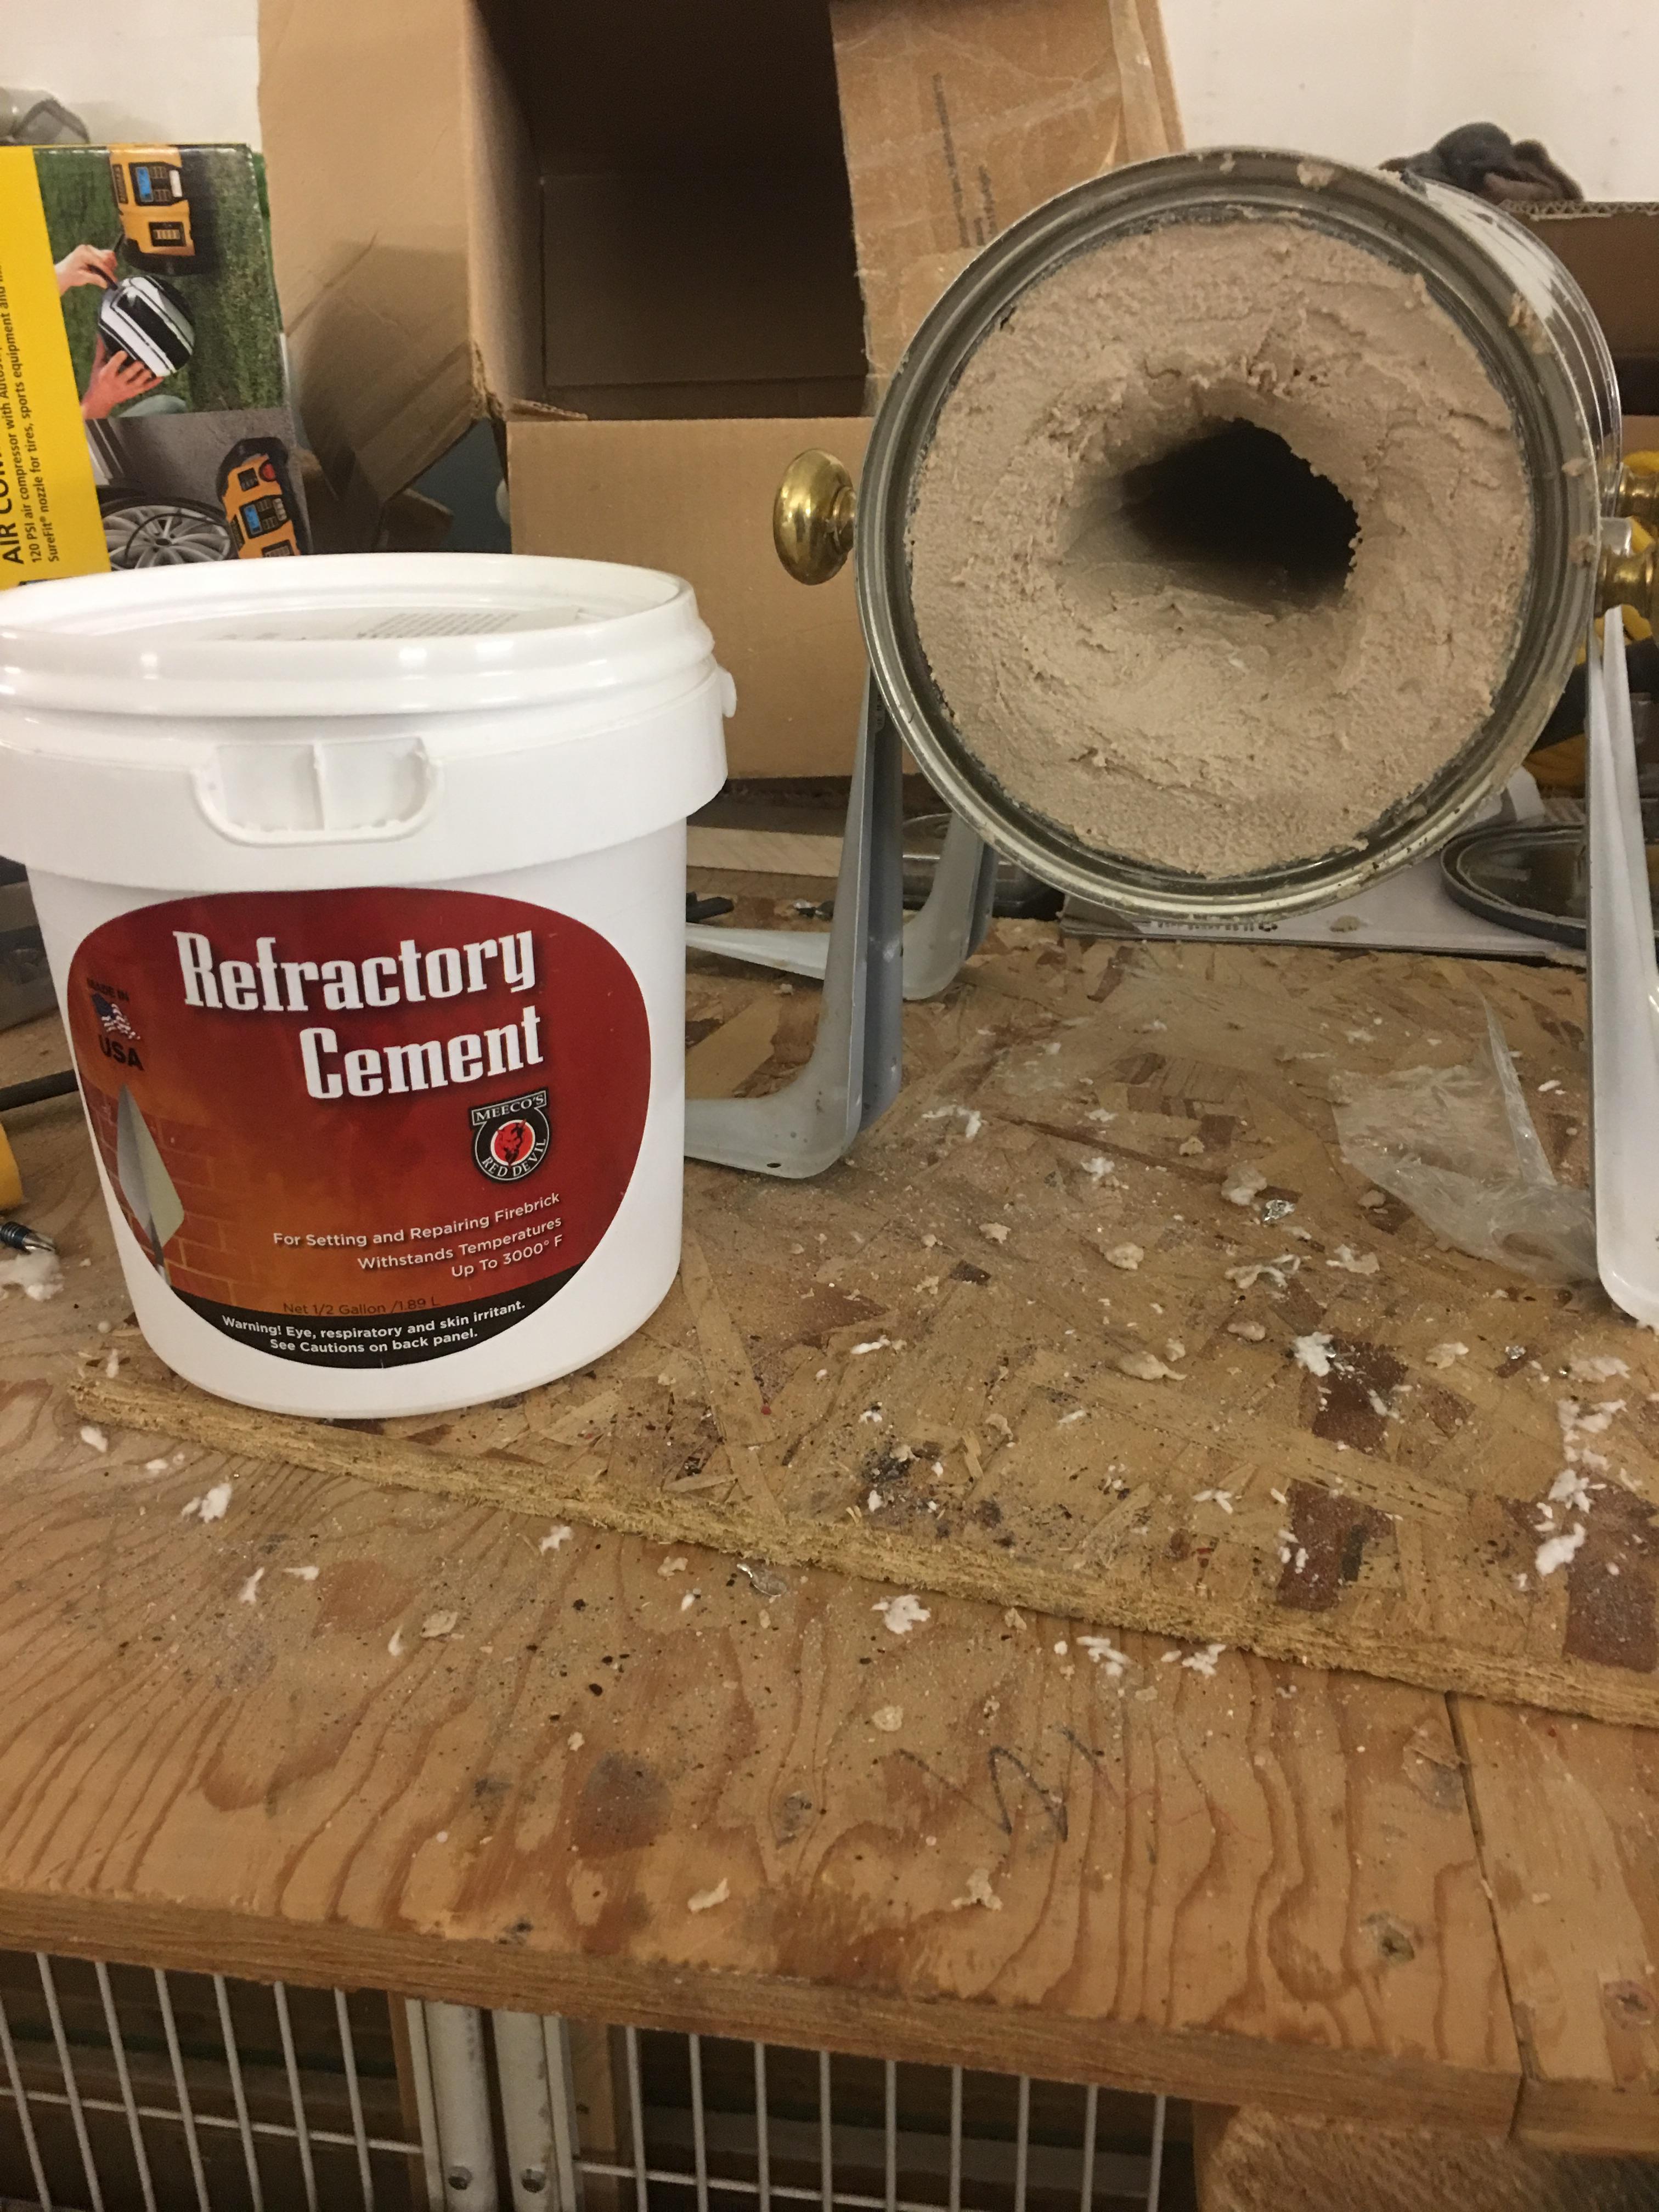
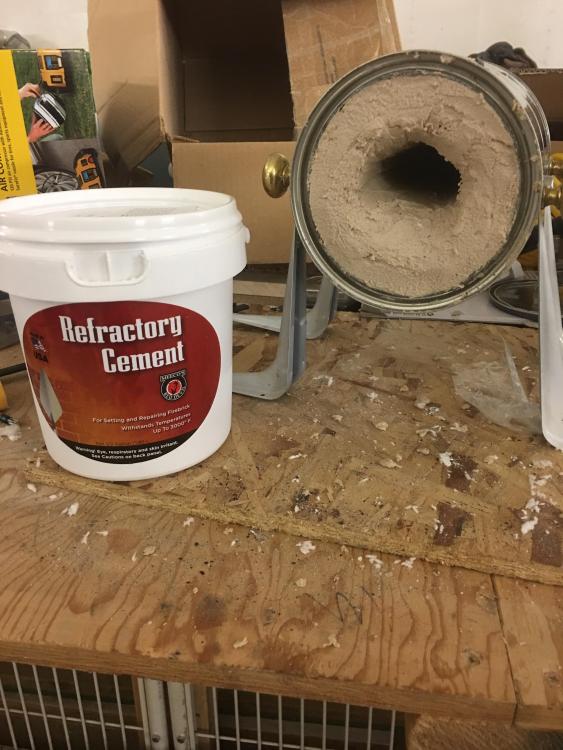
I have just finished laying the refractory cement in my paint can forge, and it is now sitting out to dry for the night. So far I am only $51 in to this forge: $27 24"X12"X1" Ceramic wool from Amazon, $21 Refractory Cement from Amazon, $4 1/2" black steel nipples, and $1 for BBQ burner. Originally I was going to use a Benzomatic burner which would have cost me around $20, plus those little camp BBQ propane tanks which in town are about $3.50. That was the plan till I went scrapping with my buddy who is teaching me how to blacksmith and we came across a BBQ that was still in good condition. So I grabbed the hose and burner from it as well as some spring steel all for $1. We figured "hey, it's a burner, I can get two jets out of it, and it has all the necessary requirements (propane nozzle, a place for air to be induced, and a tube that can withstand heat)... Why not?!" As you can see from the video below it actually works pretty darn well! We shall see how it works tomorrow! IMG_2068.MOV

-
First forged rose for Valentines day
Nate Thiessen replied to BeaverNZ's topic in Metal Sculpture & Carvings
That is beautiful! How long did it take you to make? -
So here is my forge so far. I have not had to spend any money building this part luckily as everything was found lying around the shop from previous projects. Just waiting on tax return to order kaowool and refractory mortar. This is the video that I am using as reference for this forge. 24" X 12" X 1" 2400 F Ceramic Fiber Insulation 8# Morgan Ceramics with CM-Ceramics Knife. Includes Product Data Sheets and Safety Instructions. https://www.amazon.com/dp/B015GD0QCW/ref=cm_sw_r_cp_api_JB2OybH88ZS50 MEECO'S RED DEVIL 610 Refractory Cement - Indoor Use Only https://www.amazon.com/dp/B00ACIWN9Q/ref=cm_sw_r_cp_api_vC2OybK1JVZZV That is what I am planning on ordering for this forge. Unfortunately I do not have any HVAC companies around me with scrap wool. Has anyone used these two products before?


-
Will do. It is a lead right now, but I be able to get in contact with them by Friday. There is a local plumbing and heating company here in Conrad Montana that may have some for me.
-
Thank you all for the advice. I found contact info for where I can pick up some wool. Will have to wait till the end of the month to build, but in the mean time will be meeting with some one to apprentice under.
-
Well that's why I posted to the forum first before doing anything. Thank you for the advice. so the Kaowool will not burn then when there is a torch on it?
-
I am planning on using the plaster of Paris+sand mix. As I understand it is a 1:1:1 ratio of PP, sand and water. This is the video that I was planning on using as a reference. Video link removed due to content I have read on the forum that ceramic wool is also a good option for a forge, however, it is not something that is supplied in town. According to internet pricing (Home Depot, Amazon, Ace Hardware) it will be cheaper for me to do the 1:1:1 mix. The wool will certainly be an option for me down the road when I upgrade. I have also been in contact with a local smith who is willing to teach me. How much of an issue are we talking? Those folgers cans have a convenient handle already built in, and the lid could easily be used as a lid to help keep the heat in! Not to mention if you add in a handful of coffee grinds to the plaster mix, it will create a pleasant aroma and infuse your steal with caffeinated energy!
-
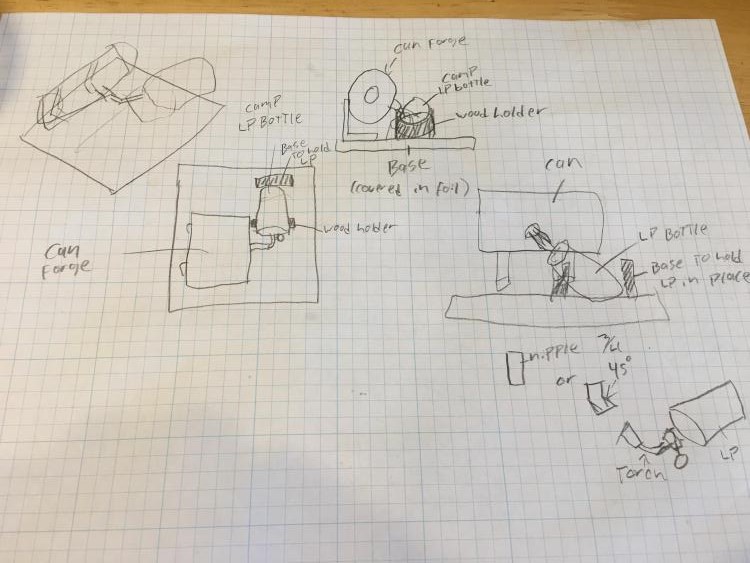
Thanks for the heads up about the frosty T burner, I will use that for my next forge. The sketch was more to justify my thought process behind the 45° elbow, but you confirmed my suspicion of the danger. Nipple it is, and a new platform layout. Thank you for your feed back Mikey! From what I have priced out here in town, I can get started for just under $50 which according to the boss (wife) is my max budget until I have proven that this hobby is worth the investment.
-
I am planning on building my first can forge this weekend and I had a question I have seen that using camp propane bottles are the most economically friendly way to go. In order to accommodate the wider can on my base (see rough sketch) I am considering using a 45° galvanized 3/4 joint instead of a nipple so that I can place the bottle on the base board without wasting too much space. Is that going to cause me to lose too much heat, or become a safety hazard in the future? We all gotta start somewhere right!
-
Thanks for the heads up about the anvil vice combo! I will take a closer look in to the soup can propane forge too. As for the books, I have looked at the $50 knife making, but have not heard of the others. Thank you for the lead on those!
-
Thank you Stockmaker! At the moment my wife and I are renting an apartment on the property, so for any forge it will have to be small, portable, and economically friendly. I have been considering putting together a coal forge as gathering the materials for one will be easier and less expensive (at least from what I have read on the forum and from other sites). I do wonder about the amount of smoke that a small brake drum coal forge would put off, and how obtrusive that smoke may be. Before I make any major investments, my wife has requested that I find someone who is willing to let me apprentice under them so that I can learn proper safety techniques; and to make sure that this isn't just because I binge watched Forged in Fire recently! I do have access to scrap metal as there is a couple of good junk yards and weld shops in town. From what I have read, spring/coils are a good starting point, as well as leaf brakes, old wrenches, and crowbars.
-
Hello everyone, my name is Nate, I live in Conrad Montana. I am looking in to fulfilling a childhood dream of bladesmithing, and have finally gotten to a point where I can. So far I have only ever made one knife from a cut out of a band saw, and experimented with a nail, blow torch, and a hammer. As far as equipment goes, I have a couple of hammers, an anvil with a built in vice grip, and a grinder. I am hoping that in the next couple months I can put together a forge and work station and start working with some scrap metal to learn some basic techniques. I always welcome advice, tips, and leads on how to best start out and what to look for. I look foreword to learning from everyone here!