C-1ToolSteel
-
Posts
1,193 -
Joined
-
Last visited
Content Type
Profiles
Forums
Articles
Gallery
Downloads
Events
Everything posted by C-1ToolSteel
-
What to look for at auctions
C-1ToolSteel replied to Birksy's topic in Anvils, Swage Blocks, and Mandrels
Man, I should've overpaid a long time ago... -
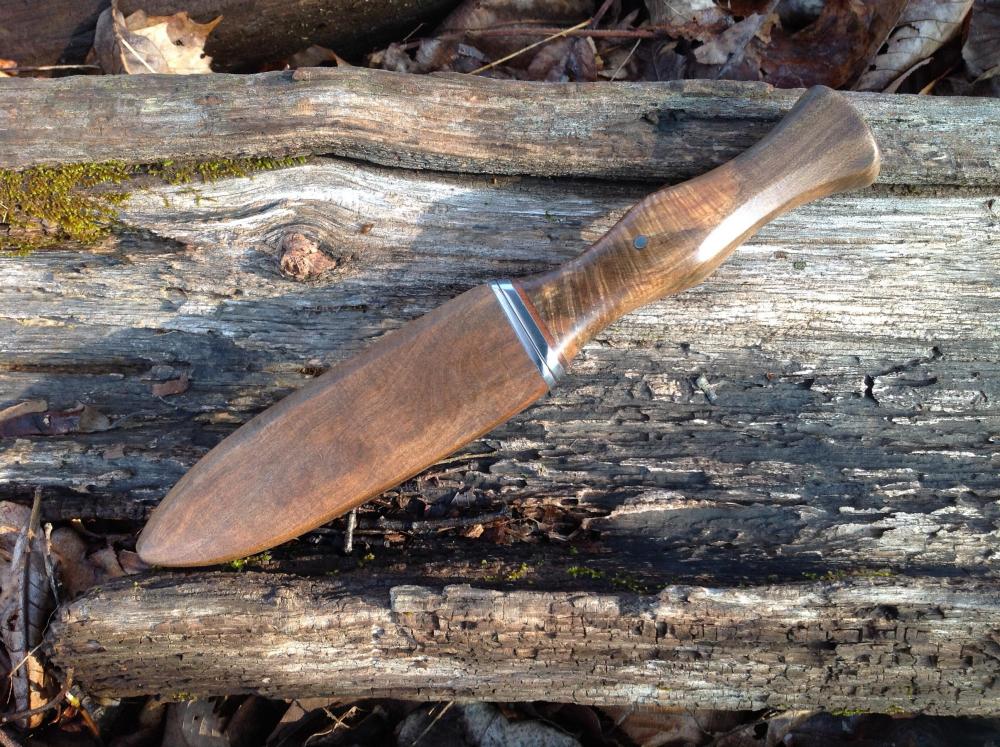
Next one I make, I need to etch a "skyin' dude" on the blade, and maybe people will stop asking how to pronounce it.
-
Thanks y'all! TP - Interesting. Any particular kinds of leather that do that? I used soft upholstery type leather with the bottom grain facing in. Of course, veg and oil tan is commonly used on sheaths, though I have heard people say not to store your knife in its sheath. Never known anyone that does it, though. Please educate me.
-
Stick with it. I've tried to cut corners with anthracite before and had to start over. Not the end of the world. Ever started a campfire? Start your forge the same way. First, you need something that you know will light. Newspaper, cardboard, dryer lint, etc. work just fine. Once you get that going, you need something slightly bigger (very small twigs) that your tinder can catch. Keep just adding bigger sticks or chunks of wood until you get to pieces roughly 1/2" in diameter. By this time, you should have a good little pile. Now turn your blower on, and keep adding short sticks until you reach say 3/4"ish diameter. Now sprinkle some small pieces of coal over the fire. Once those stop smoking and catch, you can throw a good sized pile of coal on. Keep the blower on, and watch the coal go from smoking violently, to flaming violently, to glowing bright orange in the center. This is the slow way to start your fire. There are certainly faster ways to get one going, but when all else fails, this one will get you hammering. Coal is different than wood. It can be a little tricky and frustrating at first, (especially when trying to learn things like hammer control at the same time) and sometimes it helps to just slow down or even call it a day, if you are really bogged down. That said, If you want to learn even the most basic blacksmithing, (ESPECIALLY bladesmithing) you will have to learn to suck it up and keep going when things aren't going the way they were planned. You will encounter things that are more frustrating than having trouble getting a fire started.
-
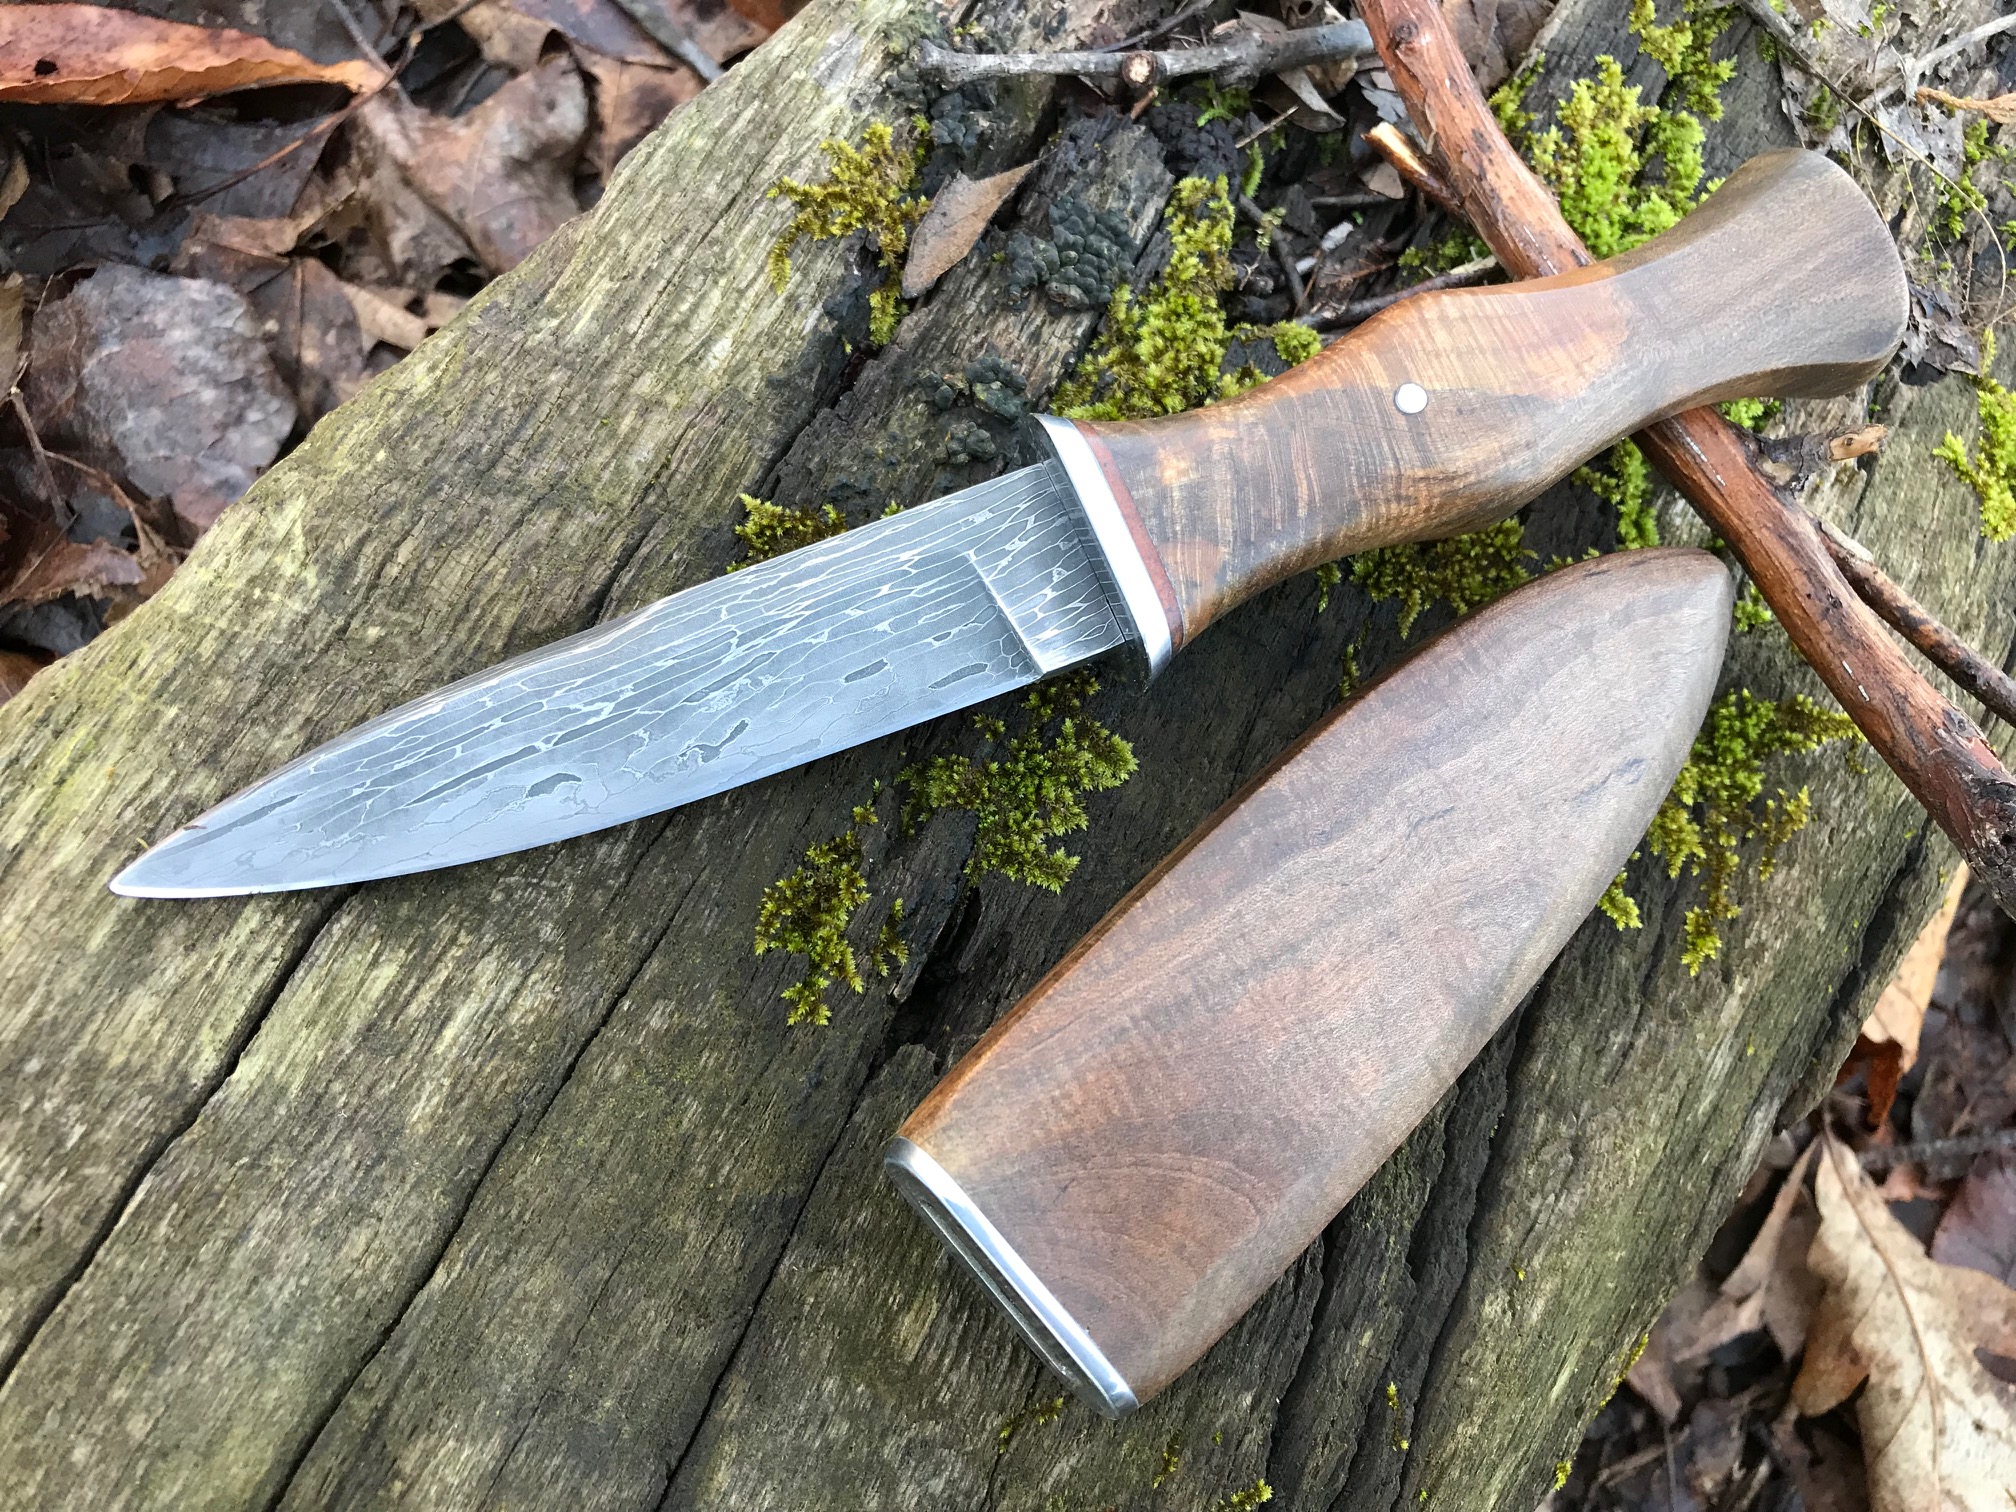
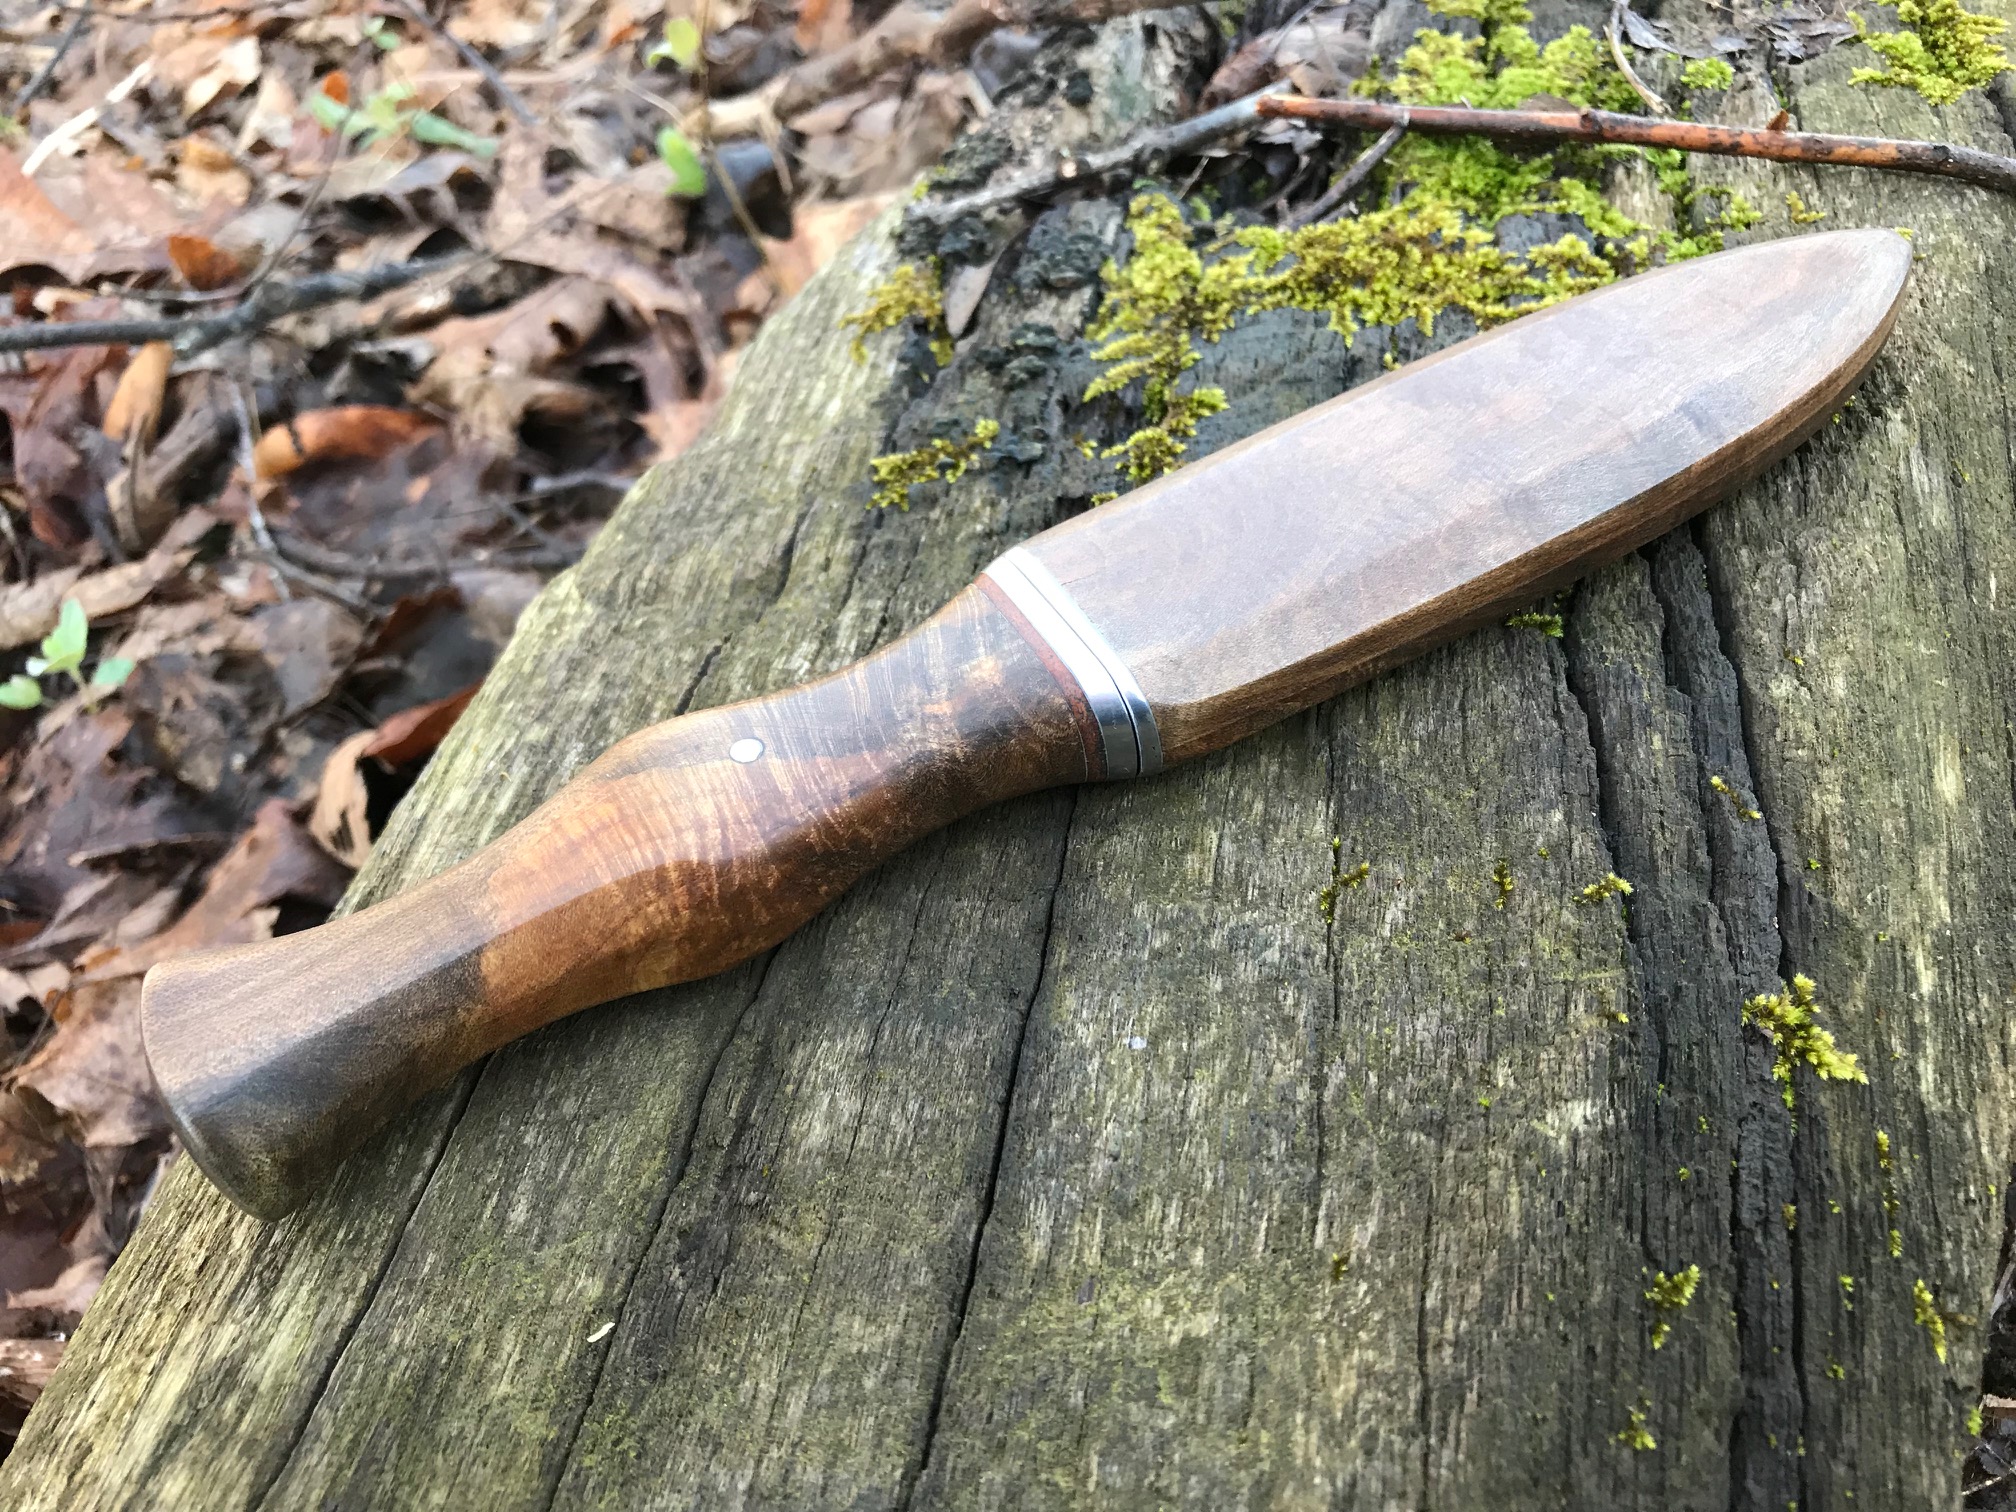
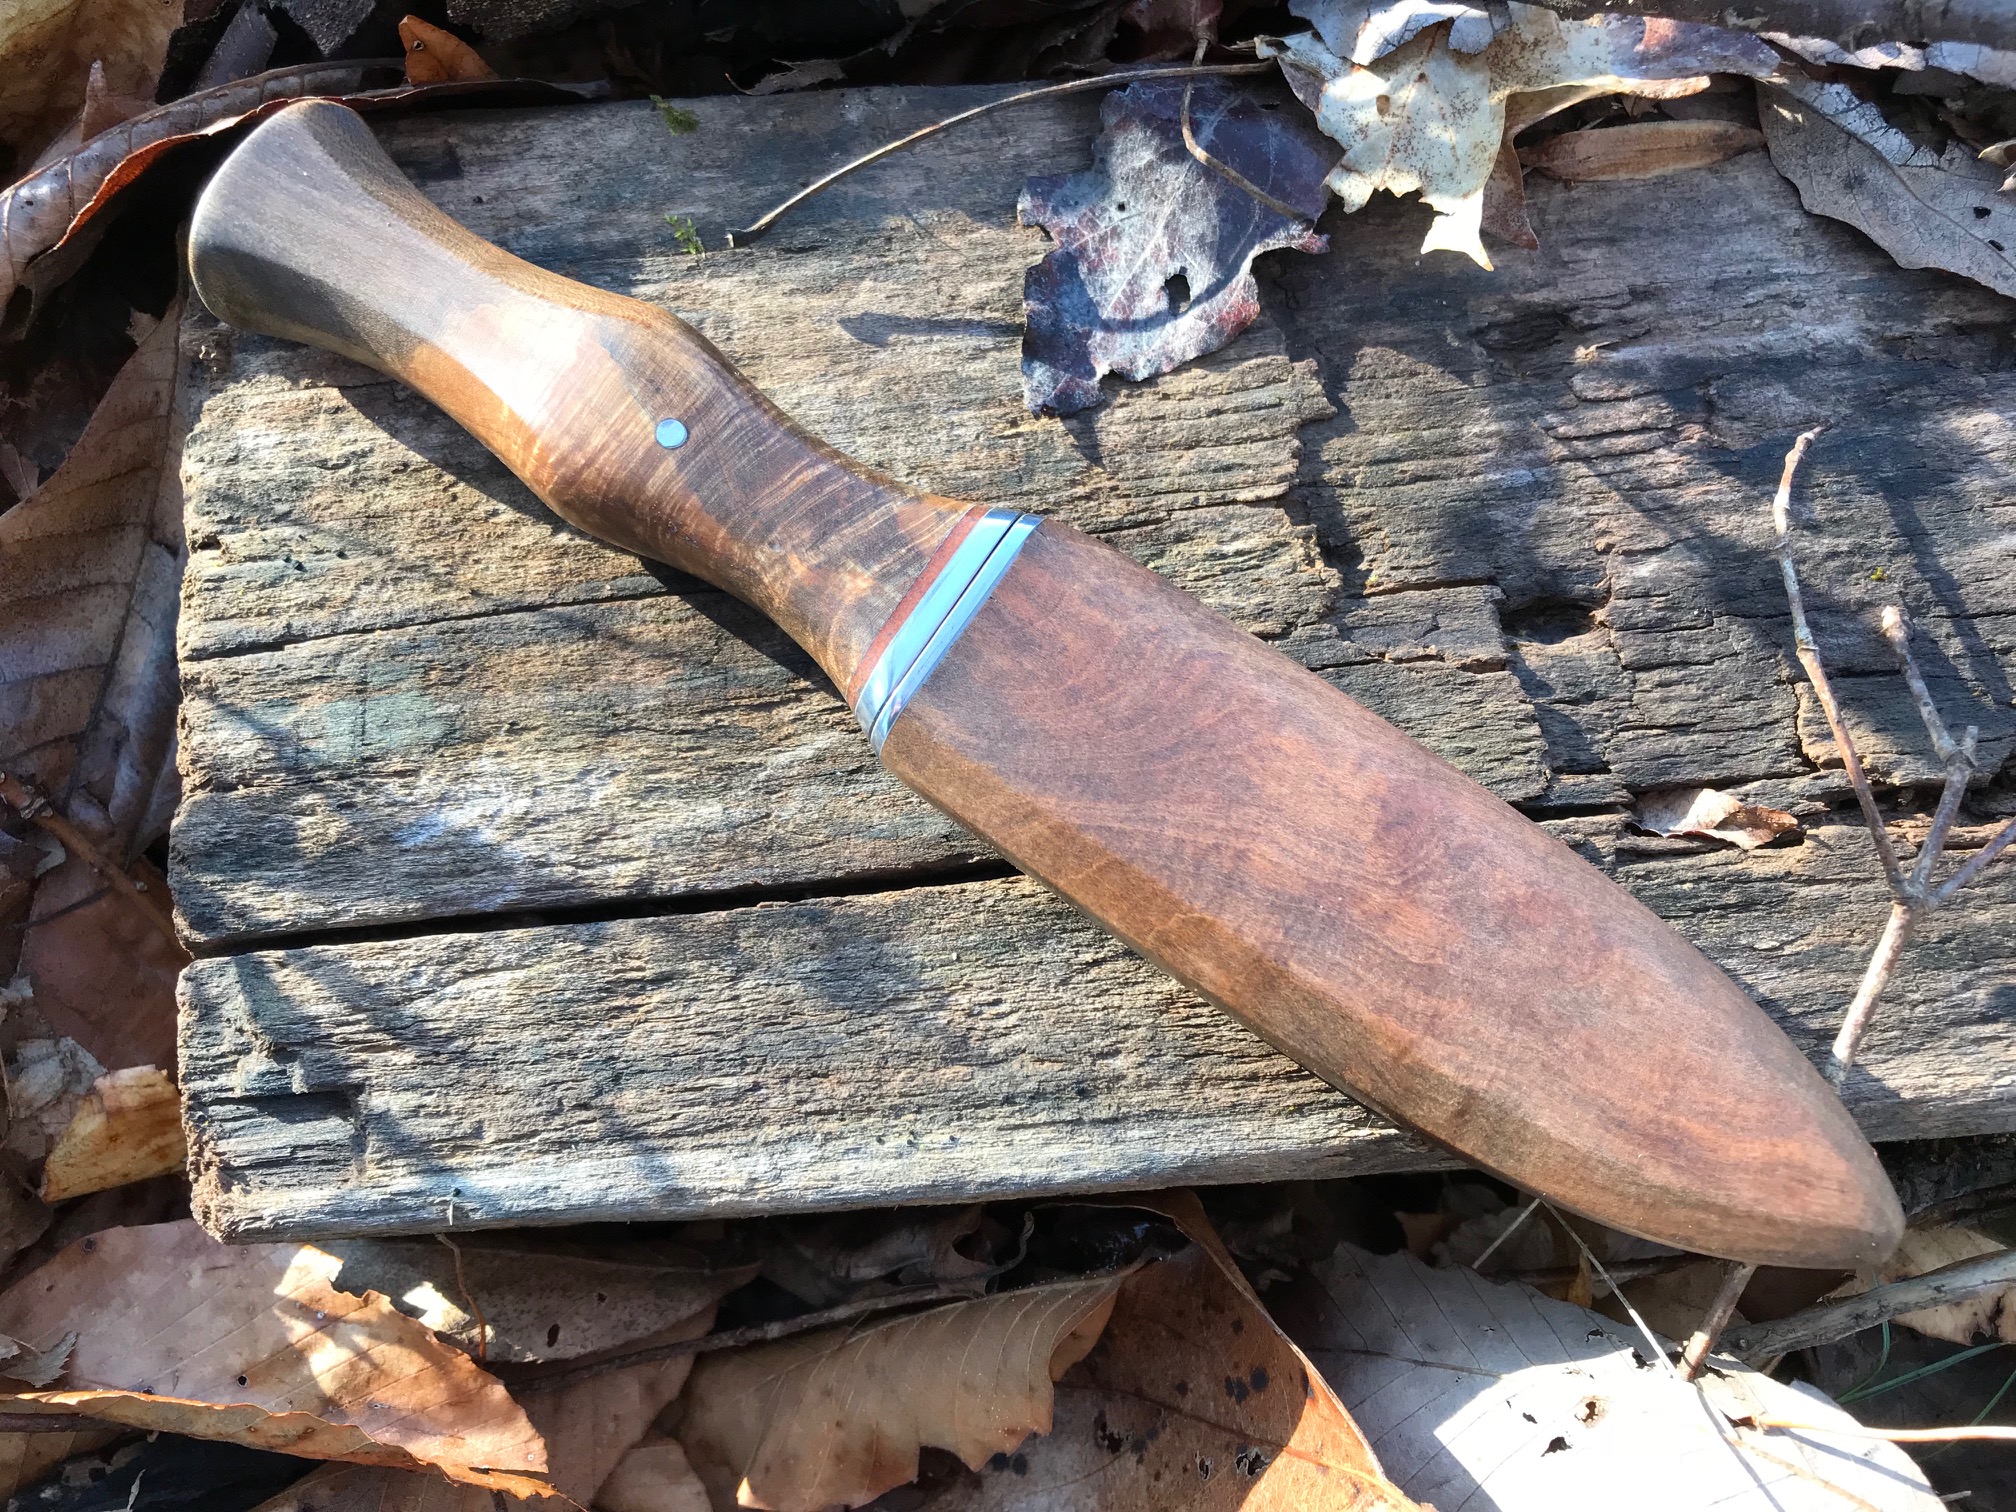
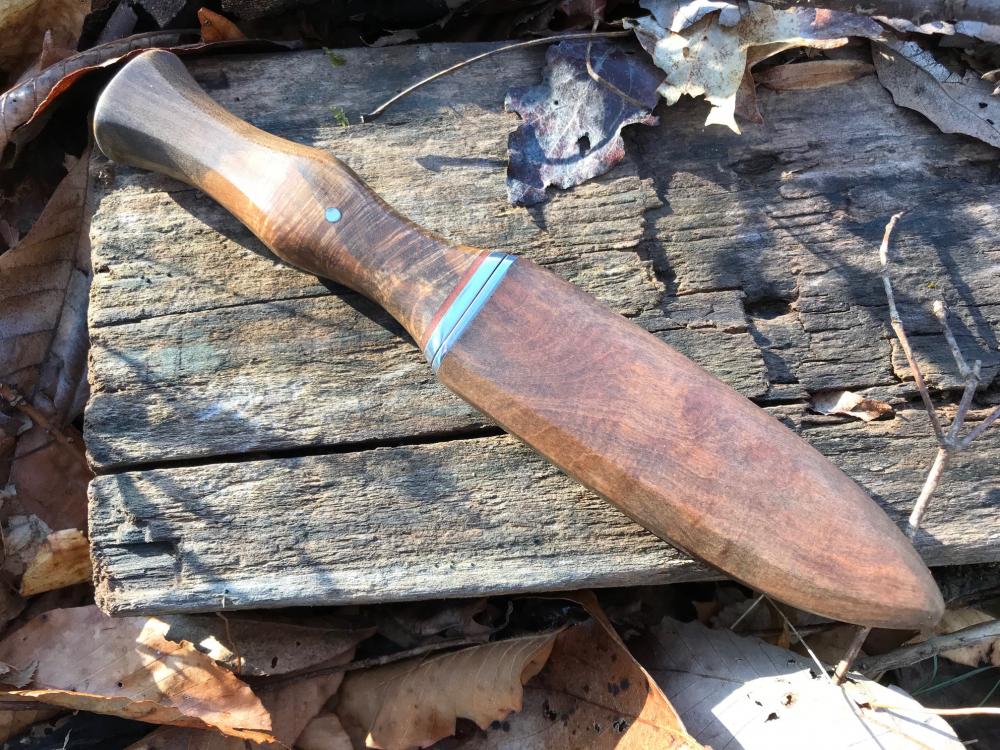
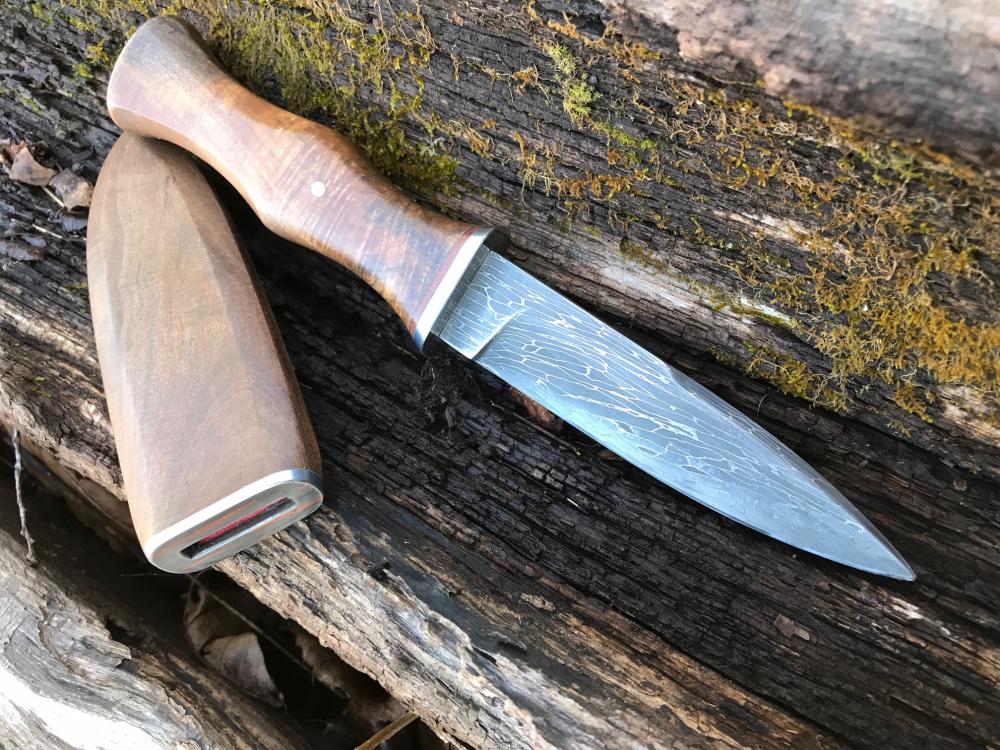
Thanks guys. Das - The way I did the sheath sounds like what you described, just with the added step of cutting a piece of soft leather for each side. You can check the fit by clamping the two haves together around the blade and leather. To tight, more chiseling. To loose, you can sand the un-chiseled face of the wood down. About the filework... I was going to do that but I forgot. Of course, I remembered it as I was doing the heat treat. The false edge isn't very traditional either, so I guess it may be more of a Sgian Don't.
-
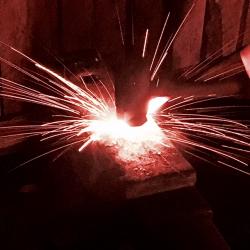
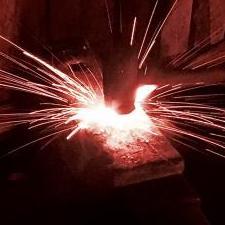
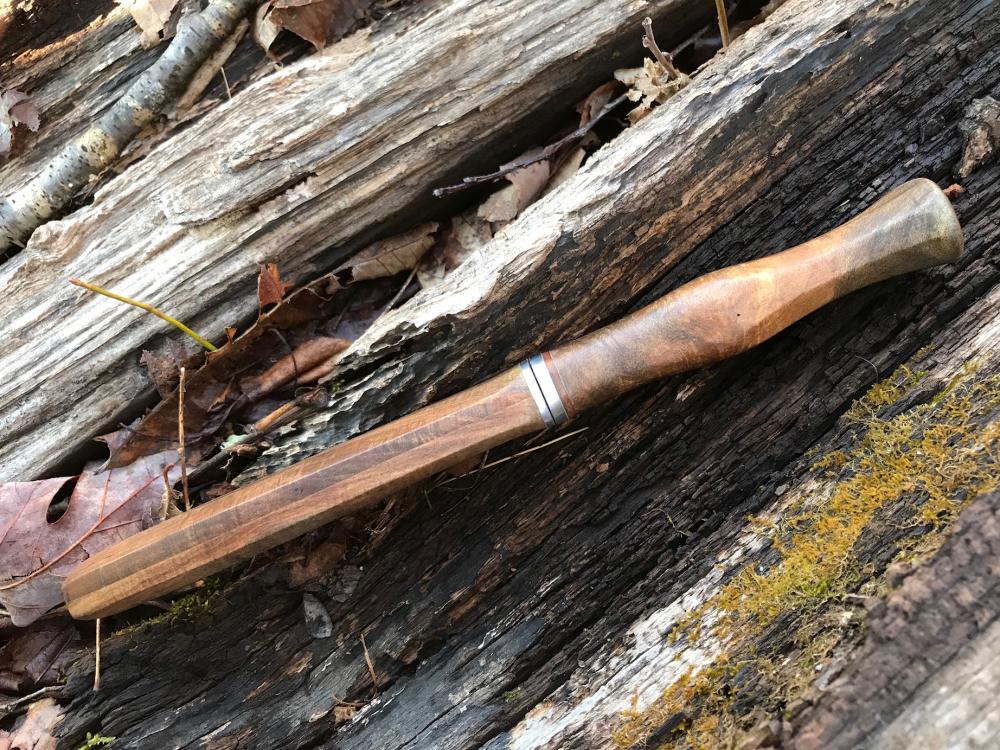
Been a while since I've made any knives, but I just had to do this one. littleblacksmith sent me some cable Damascus he made and asked me if I wanted to do a collaboration. First time working with cable Damascus, but it was a blast. The handle is a pretty piece of maple that I cut a couple years ago. Sheath is more maple with leather lining on the inside. Tubalcain2 - thanks for the pointers on doing the sheath! I'm happy with the way it turned out, for being by fist wood sheath, and I hope to more of them. Critiques always welcome!


-
Mine's red....but it could be its 20th paint job. Seen bright (almost neon) green, before..
-
And if it is, in fact, embossed right on the pan....don't listen to what I said about not needing to.
-
Love all of your work. Your folders always say "simple and masterfully executed'' to me.
-
Talmonium loptrensic Chloride....just a few squirts of that, and she should be good as new. Just kidding -- Tender Loving Care
-
Nice little rivet forge you have there. A little TLC, and She should be good as new. Small forges like that were easy to take to a jobsite back when hot riveting was still commonly being used for structural applications. You don't need to line it with anything, and it was designed to be used as is. However, most folks (myself included) prefer a bowl-shaped firepot, so they will line it with dirt, and form it into the desired bowl shape.
-
What to look for at auctions
C-1ToolSteel replied to Birksy's topic in Anvils, Swage Blocks, and Mandrels
Too many good brands to list, but read this: Good luck on the hunt! Let us know if you get one, and show us some pictures. Just remember to set your price BEFORE the bidding begins, and don't hesitate to just sit and let the unwise folks waist their money, if they are going too high. -
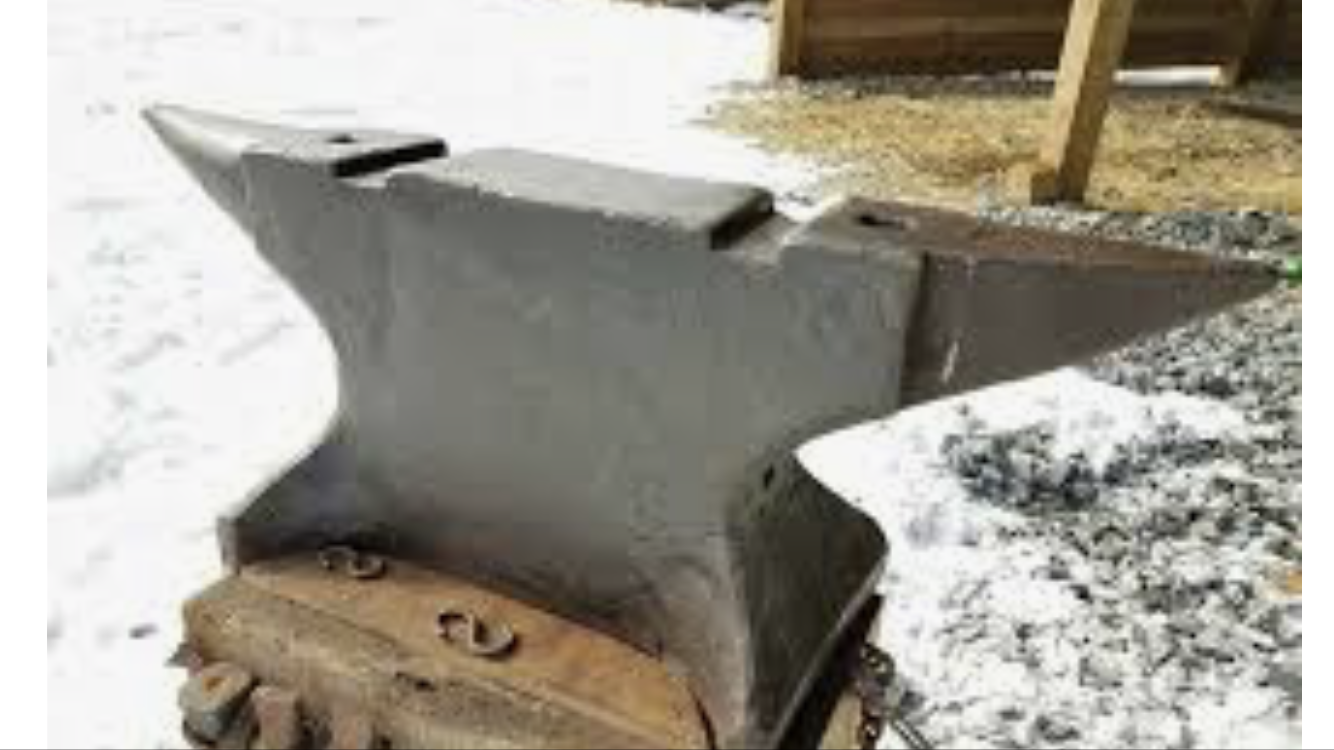
Gotcha. Wow, that silver dollar in the second pic sure puts it in perspective! Thanks for yet another manifestation of your insane amount of anvil knowledge. I'm jealous...
-
Black Frog - Were the rounded ''old English'' style feet something seen on earlier Vulcans? This one certainly has them.
-
...so, just to clarify, they are saying YES. The short soak time still applies as do all the other procedures for heat treating 1095, except normalizing and annealing, which was already done before you bought the steel.
-
I went to make a leaf recently on someone else’s anvil. The edges were sharp, but I figured I had plenty of experience to be able to work around that issue. Not so. The dreaded cold shuts that I had plagued my newbiness so long ago had come back to haunt me! After several subsequent failures, I finally found the radius block... Dress your anvils!!!
-
First cable knife from the thunderdome (pic heavy)
C-1ToolSteel replied to Jclonts82's topic in Knife Making
Nothin' like a good win-win! -
Correct.
-
Beautiful work!
-
Grinder brands. Whose is the best?
C-1ToolSteel replied to Hayden H's topic in Grinders, Sanders, etc
That's what I figured. When mine finally goes the way of all flesh, I will opt for the higher amp version. Check out this thread about rail anvils, if you haven't already. -
Grinder brands. Whose is the best?
C-1ToolSteel replied to Hayden H's topic in Grinders, Sanders, etc
Agreed. I also prefer the paddle switch, as it gives me a little better control. Can't go wrong with good ol' Dewalt. I have a 4 1/2'' that I have used until it got too hot to hold with leather gloves, a good handful of times, and it is still going strong. I recently used a side-switch type Dewalt 4 1/2'', though, that didn't overheat after a full day of constant grinding. -
If it hardens up, it is capable (with proper method heat treating) of being made into a blade. You are the only one who can test your blades, which means that you are the only person who can tell us if they will work. Need more be said? You asked for general feedback on a general question, and that's exactly what you got. Do it. If they have zero value, selling them won't do you a whole lot of good. It's not like we don't experiment with unknown steels ourselves. Cut a little piece off, and play with it. See what works and what doesn't. Known steels make life easier, but experimenting is one of the best ways to educate yourself. Go for it, and post the results. I'll be interested in seeing how it works out for you.
-
Big Anvil i bought, no marking, help id
C-1ToolSteel replied to phxfirefighter's topic in Anvils, Swage Blocks, and Mandrels
Very interesting German anvil. Can’t help with ID, but I think it may be a type of cutler’s anvil. Looks fairly similar to this one:
-
Nice!
-
Another good thing to ask yourself before making an expensive purchase is "What is some random tool, jig, storage rack, etc. that could I make in _____ amount of time that would come in handy just as much as this expensive item? Today's modern technology makes it so easy to go "shopping" without a list. We see something and go ''hey, I might could use one of those'' instead of waiting for a true *need* to arise. If you find yourself asking the question "I want this, but is it really useful?'', you probably don't need it badly enough to spend the money on it.