Derek Melton
-
Posts
94 -
Joined
-
Last visited
Content Type
Profiles
Forums
Articles
Gallery
Downloads
Events
Everything posted by Derek Melton
-

Ideas for putting a finish on multiple small items?
Derek Melton replied to Derek Melton's topic in Finishes for Metal
Yeah, if I was starting over, I'd probably do that. I've got them all forged and wire brushed now. This is one option that I've thought of a good bit. I may lay them out on a board, spray them, flip them spray them again and call it done. -
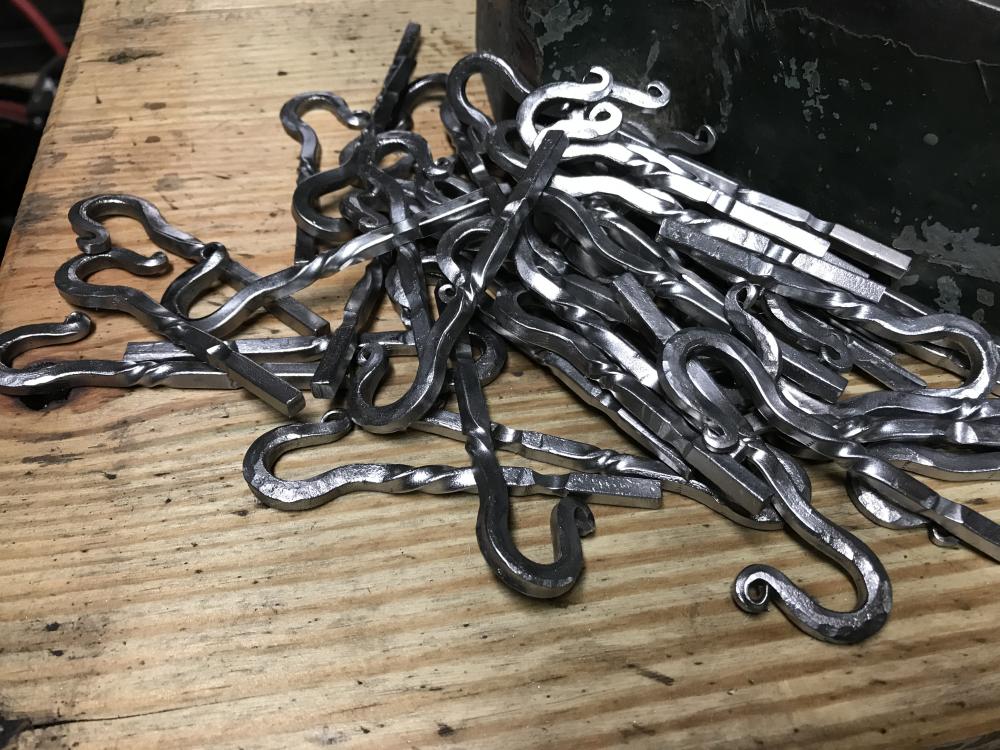
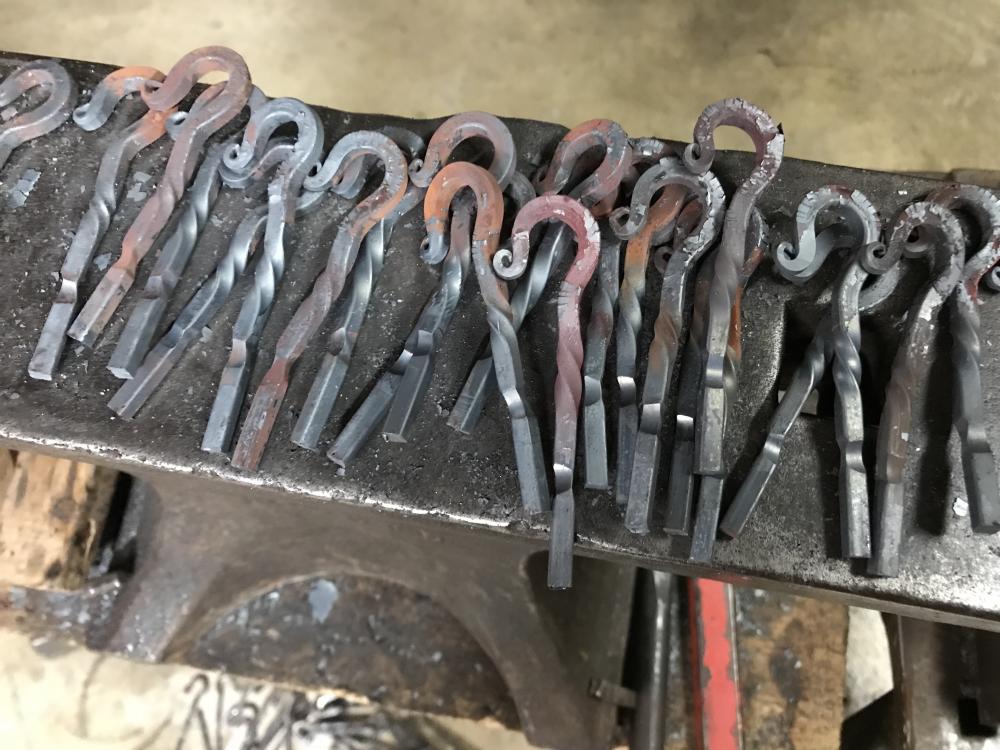
I've been working on an order of key-chain 'Shepherds Crooks' for a local Bible college. They contacted me about the idea for a campaign they're running so I sent them a sample and they asked for 150 of them with the possibility for more down the road. I've delivered 20 and they're happy with them so I'm almost done with the remaining 130. I've worked up my tooling and forging steps so that I can turn them out fairly quickly, after all they're just little hooks. I've soaked them in vinegar and wire-wheeled them and they came out nice and bright. Now I'd like to put a finish on them but the problem I'm running into is how to best go about finishing them in a manner that doesn't take forever to do but still leaves them with a durable finish. I've thought of putting them into an oven, getting them hot and then dumping them into oil but I'm not sure that will really 'take' very well. My primary forge is a small affair, an 8 inch diameter 12 inch deep propane job. In the past, to finish small items I typically hold them in the forge for a few seconds and then dip them in oil, beeswax or a blacksmith goop mixture of paste wax, linseed oil and shoe polish. If anyone has any good ideas, I'm all ears. =) I don't necessarily want to shortcut quality, even though they're small simple items, they're coming from me so I want to do my best but I would like to save time if possible too. Thanks!
-
Minimum effective time to spend at the forge
Derek Melton replied to Meadowgrove's topic in Blacksmithing, General Discussion
I had some scrap 1/4 inch round bar that I cut into 18 inch sections a while back. Whenever I get time at the forge, I try and start by taking a piece of this scrap round and making either a hook, or an S-hook. When I'm done, I hang the hook on a rail on the side of my forge cart and get to whatever project I initially started the forge up for in the first place. This takes me about 15 min, from the time I start the gas forge, to hanging the hook on the rack. Sometimes I turn the round into square bar before making the hook, sometimes I use a bending jig, sometimes I free hand the bends, sometimes I put a twist in it, sometimes I put a fuller here or there but every time I make one, I try and think to myself "make this the best hook you have ever made." It keeps me mindful and even then, some of them are terrible. I think I have 'good times' at the forge and 'bad times' at the forge. Some days the hook comes effortlessly, some days it seems like I never made one, not sure how to explain that other than because it's a hobby, and not my full time endeavor I do better at times than others. I think any time at the forge is good time spent as long as you stay mindful and have a goal in mind. Making a hook helps me with those two because no matter what happens with the project I came out to work on, at least I made another hook for a craft show down the road. -
The material I have is 26lb bricks of pure lead that were removed from a power plant. Since it's pure, it should cast and form easily. Any idea what the weight of the original ball weights on a Denbigh 4 would have been?
-
Oh. Yes.
-
I would most likely remove the top arm bar and make a cast of plaster or something else. I wouldn't wanna try and cast it in place either. Talk about awkward!
-
I have a rather large supply of pure lead. I wonder if I could take a cast of the hexagonal post and then make a lead mold for the balls?
-
Yeah, he's got an impressive collection. It's a VERY good thing he's a good, long way away from me.
-
I did! It was too good to pass up.
-
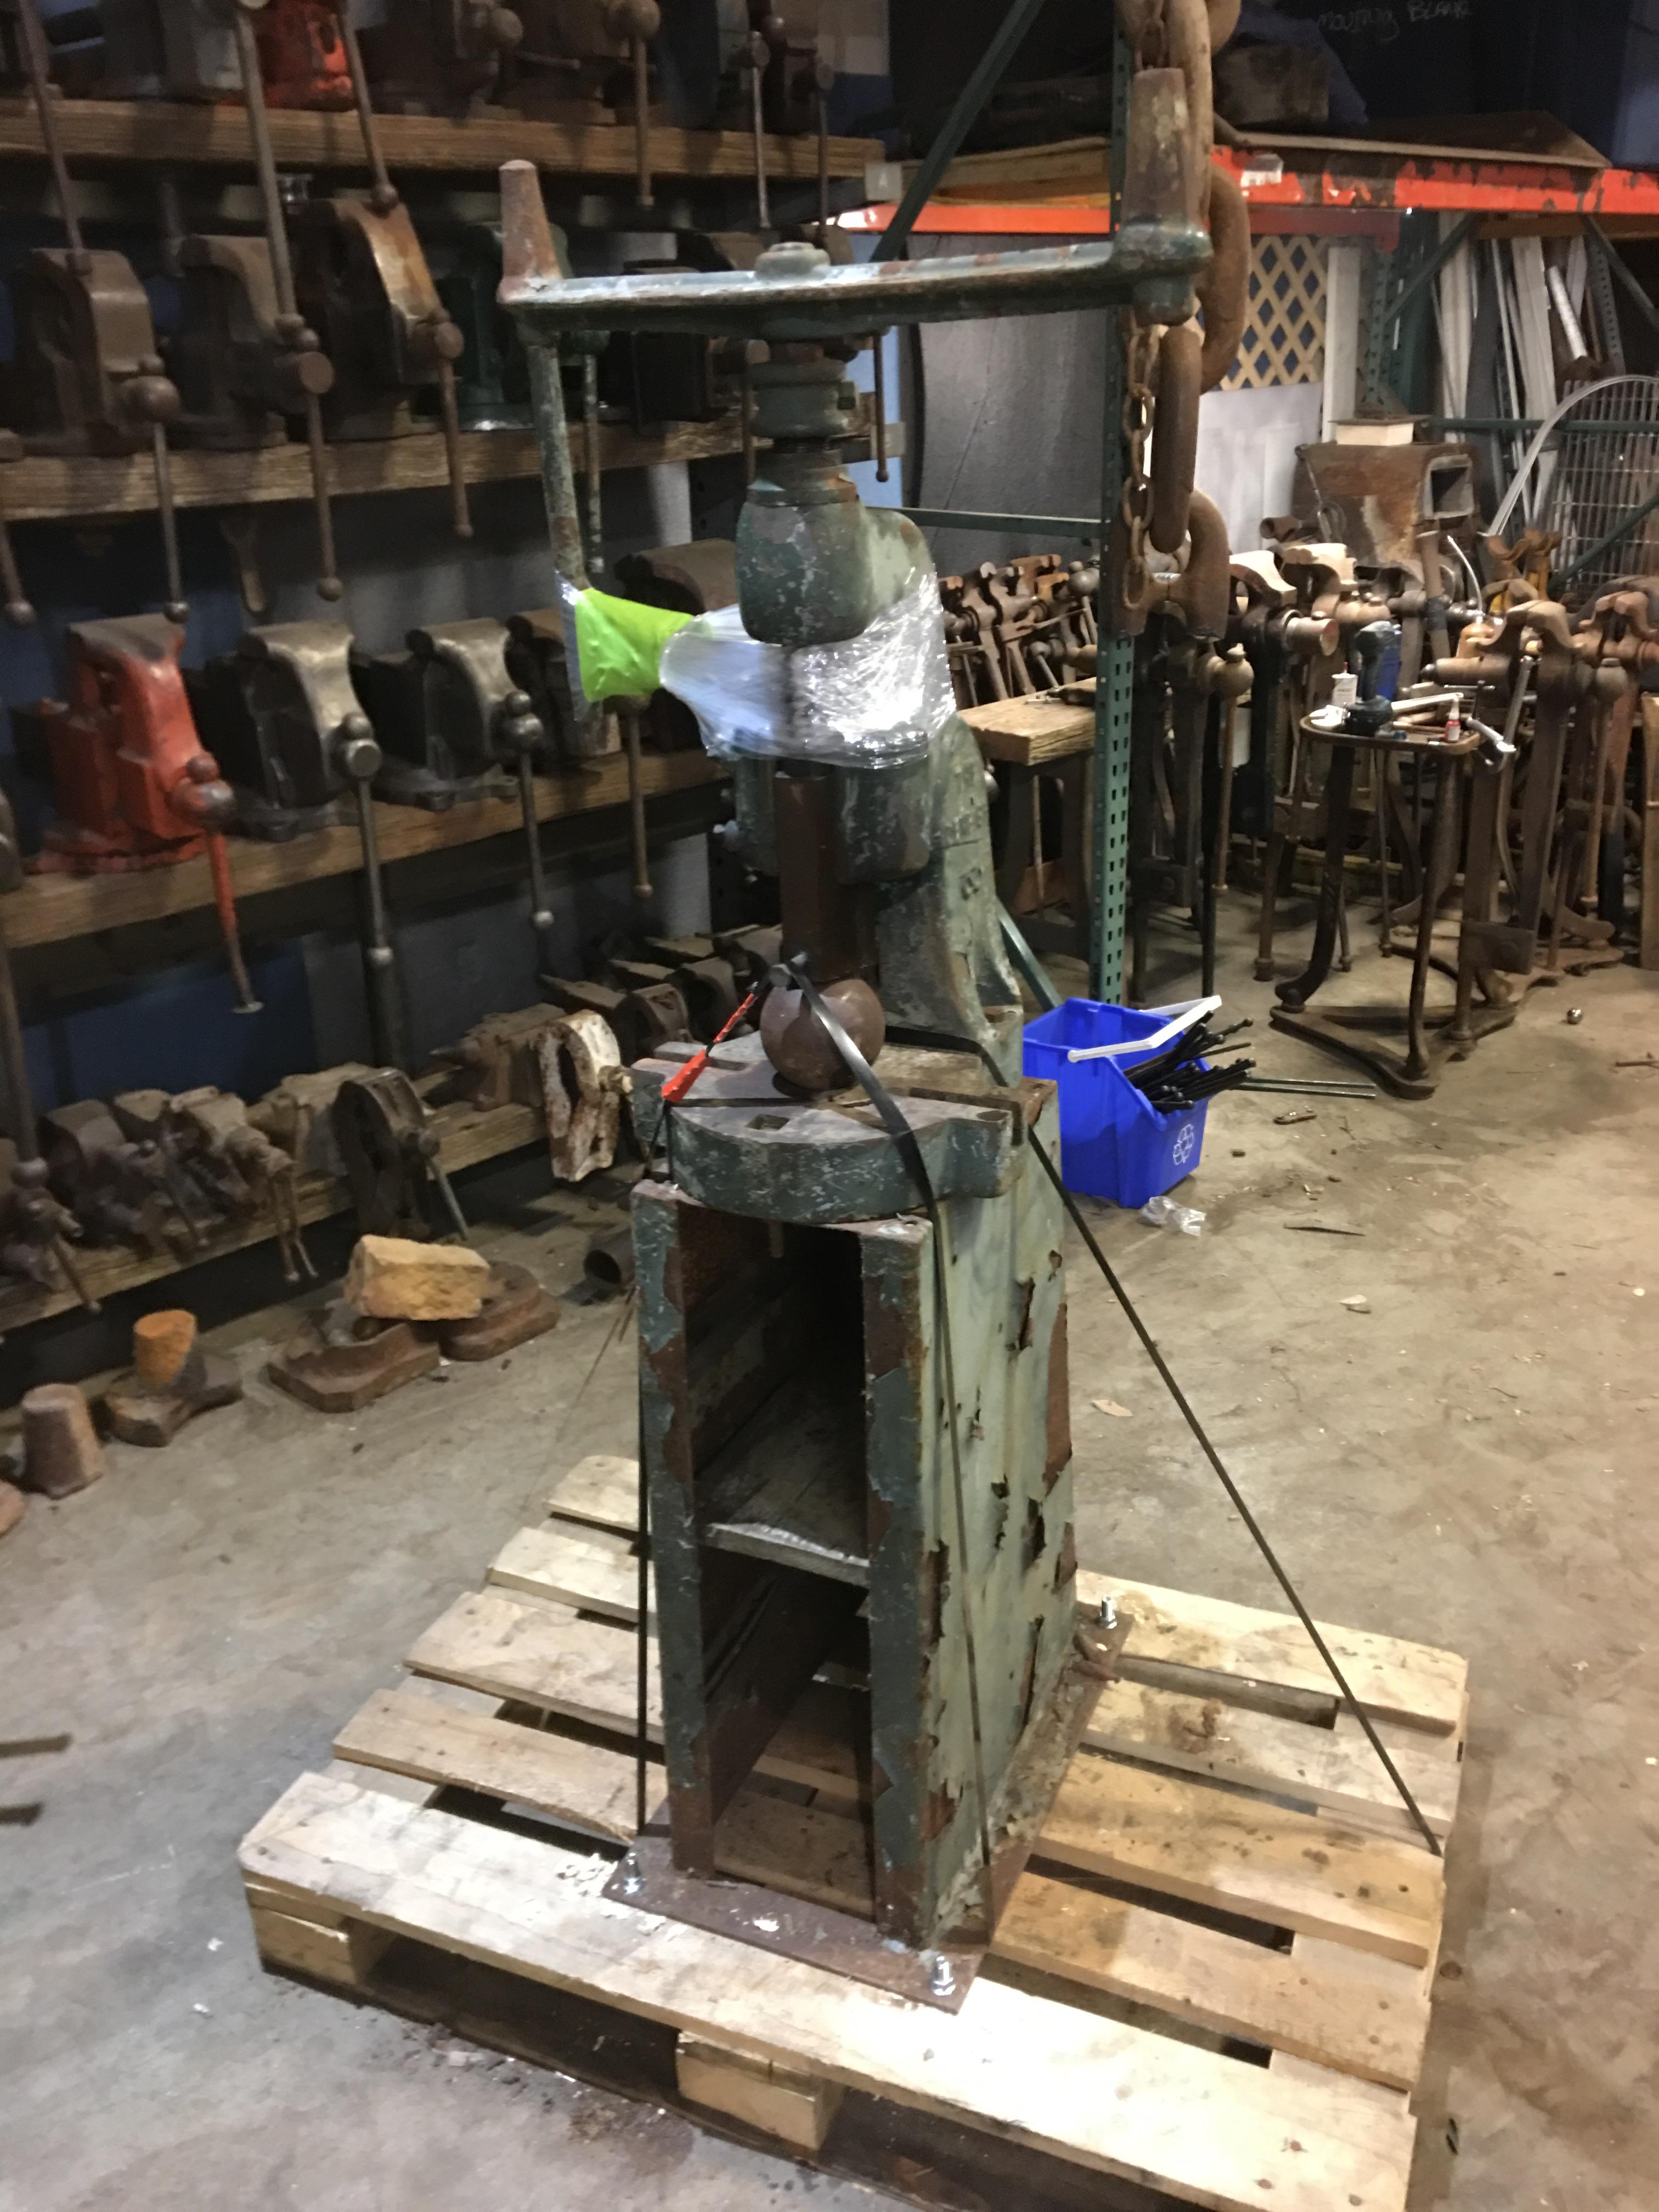
I just bought a Denbigh #4, it's on the way to me now. It's a tad crusty as far as paint is concerned but it's mechanically sound. It does need a counterweight ball added, which is being shipped with it (a large ball bearing I believe) I'm not sure how the counterweight should be mounted, I assume it's just a ball with a tapered hole in the middle? Anyone have any experience with "The Denbigh" presses? Anything to be aware of? I plan to tear it down, clean/strip and re-paint it. The table is a bit narrow but has a large plate with mounting holes to be secured to the floor. So far, this year I've added some great tools to the shop including a much nicer Swedish anvil, an Inline treadle hammer and now the Denbigh flypress. Super excited!

-
Thanks guys, I'm still learning!
-
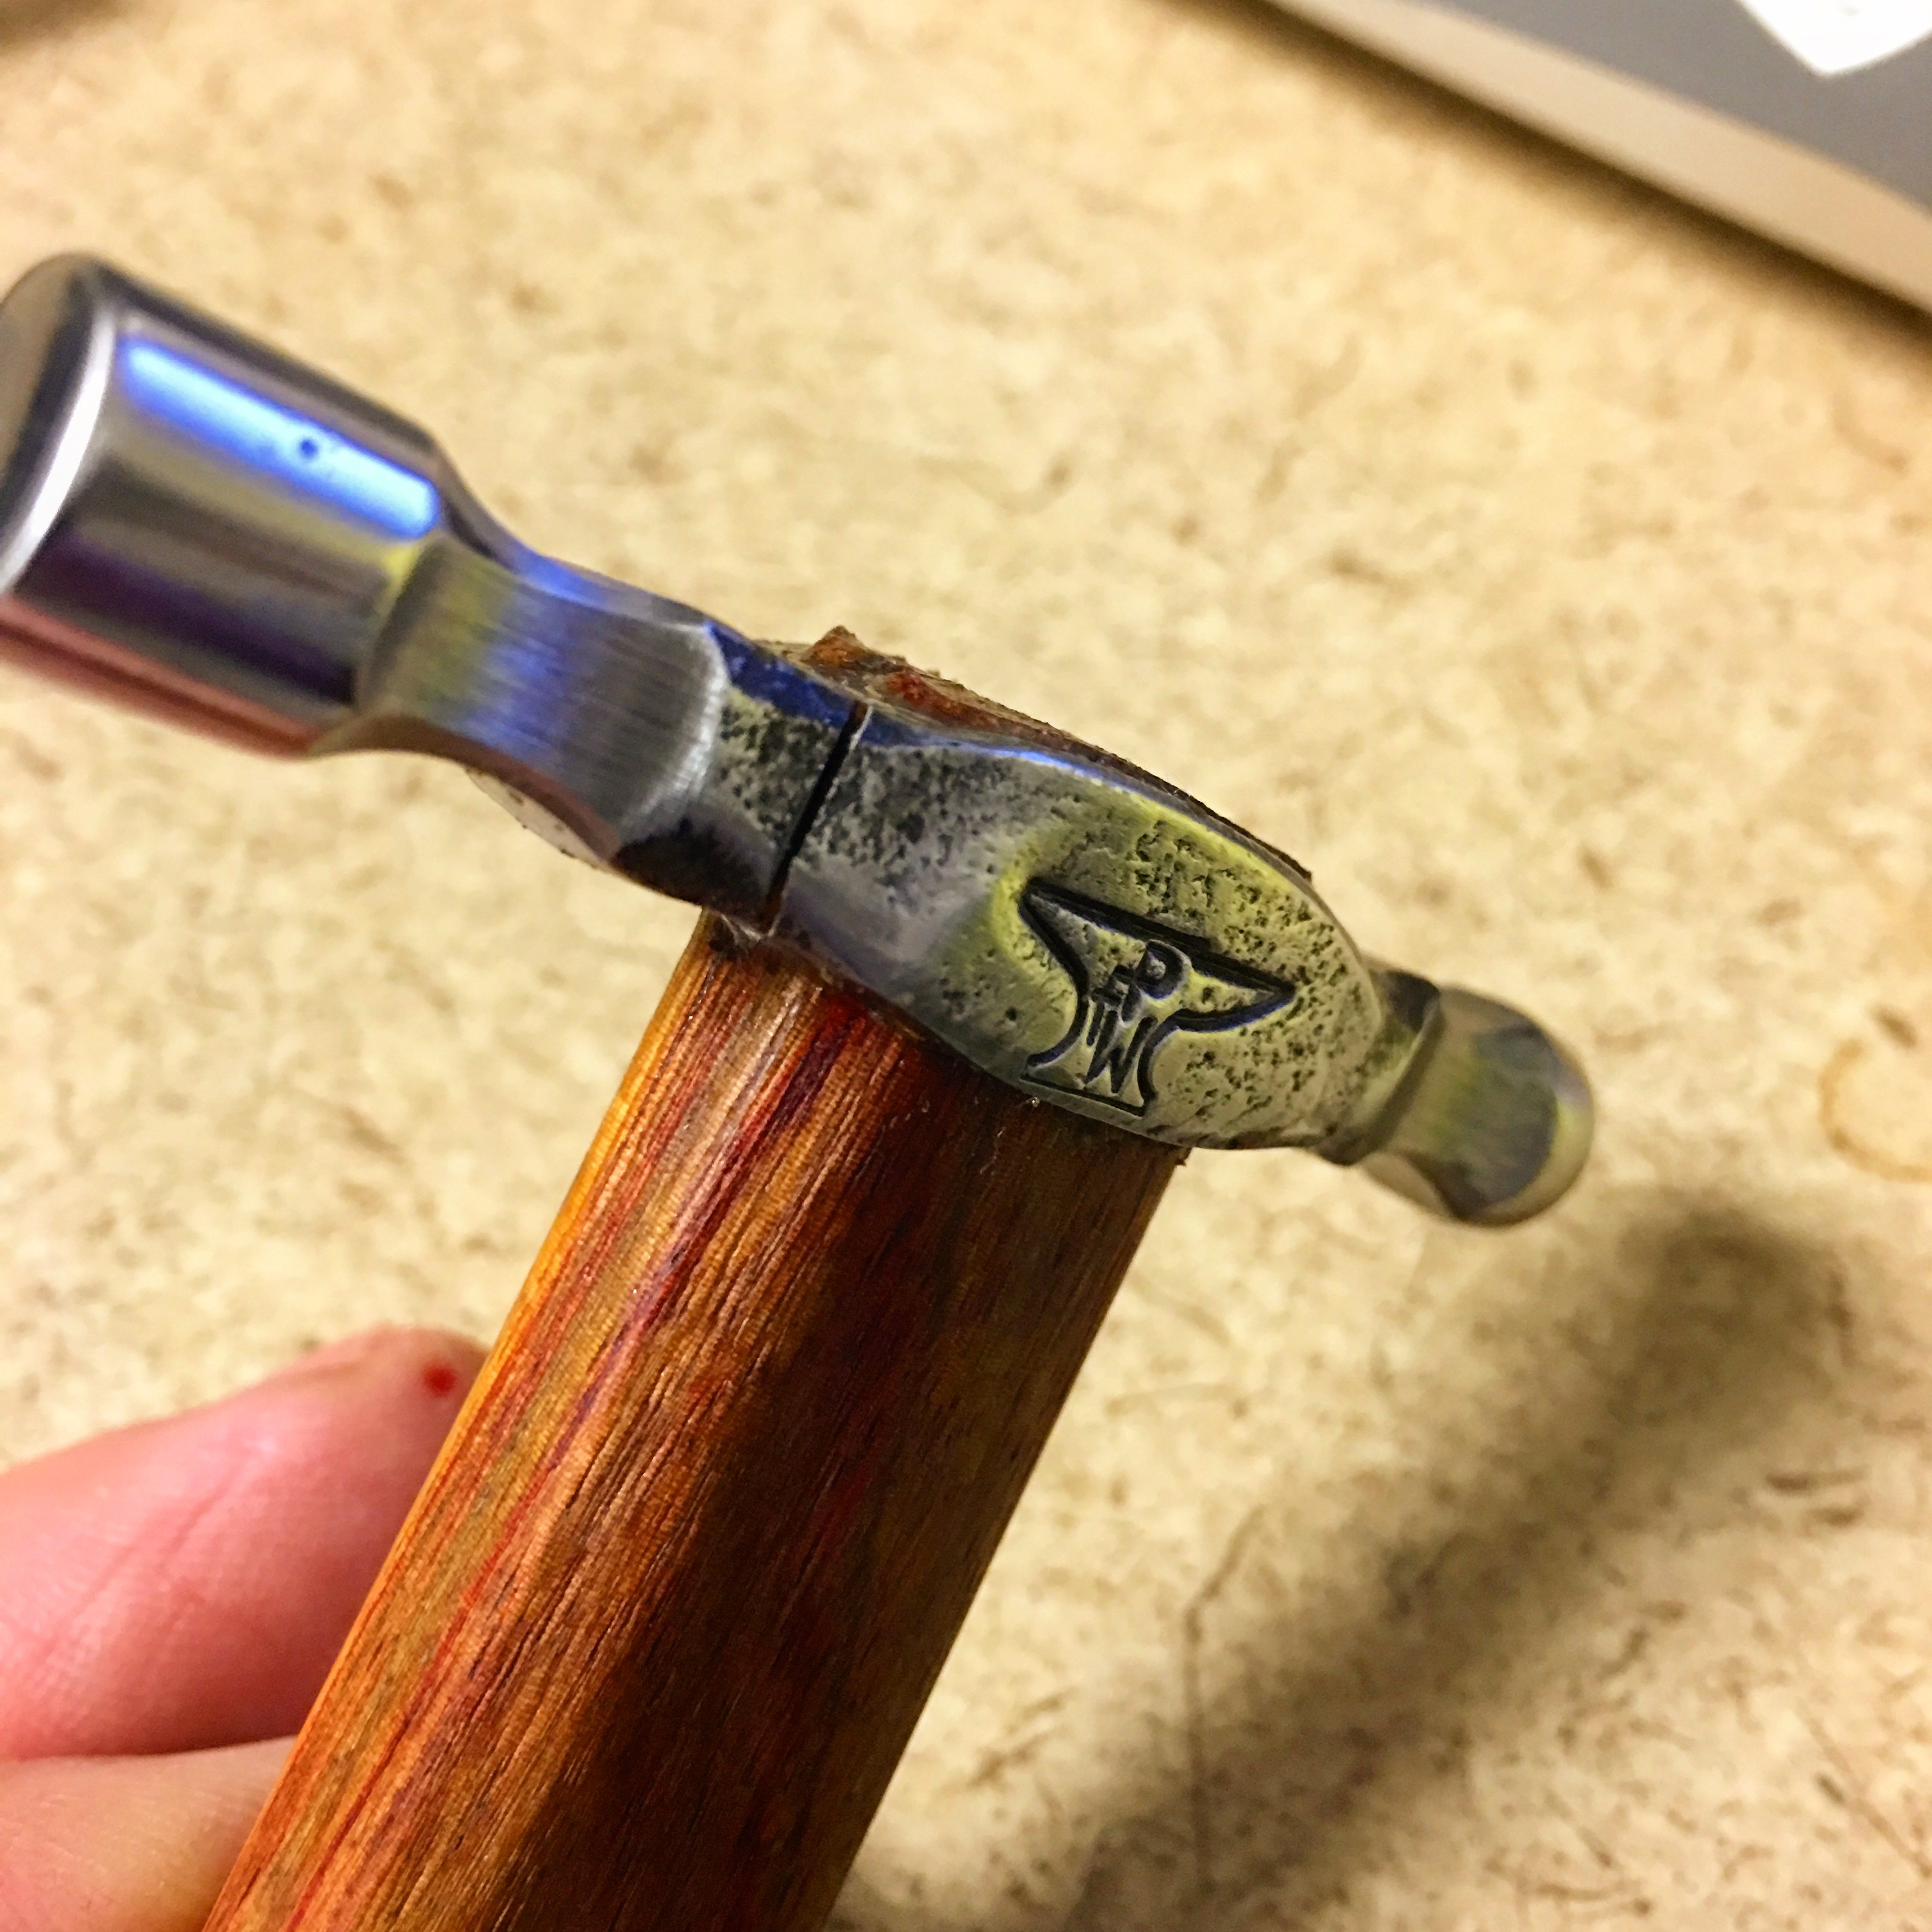
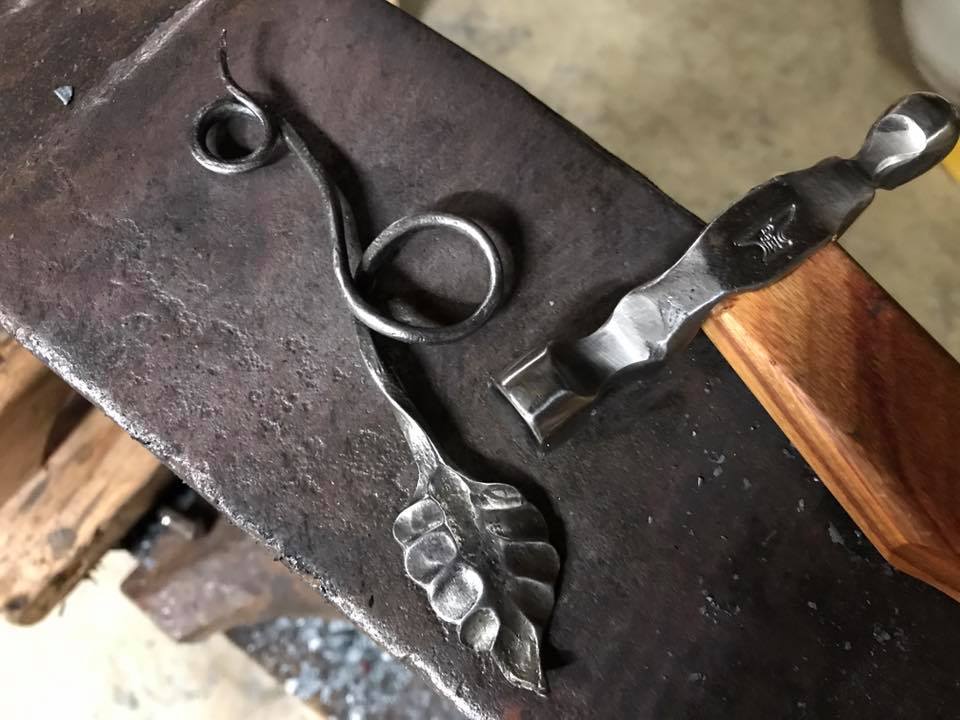
A forged fullered leaf and a small ball pein that I made from 1/2 inch 5160 and Canarywood.
-
Power washing a little giant?
Derek Melton posted a topic in Power Hammers, Treadle Hammers, Olivers
I may have the opportunity to buy a 25# Little Giant in the near future. It was in running condition last I'd heard just a few months ago. I've seen some pictures of it but have not seen it in person, yet. The pictures show that it seems mechanically sound but it is nearly completely covered in heavy black grease and bits of scale. It looks like it would be difficult to determine the true mechanical state of it, any cracks, etc without doing something like a hot power wash to it. Is there any danger of doing so? (besides the danger to the 110v motor attached to it) Thanks! -
Punching an eye in SMALL round stock
Derek Melton replied to Derek Melton's topic in Blacksmithing, General Discussion
Good eye! -
I just spent 3 weeks recovering from scale that popped into my eye when I was twisting some small barstock. It got embedded in my iris and had to be removed and then a small area of my eye had to be drilled to remove rust-infused eye tissue. I do not recommend it. It was not pleasant and I'll never go in my shop without eye protection again.
-
Punching an eye in SMALL round stock
Derek Melton replied to Derek Melton's topic in Blacksmithing, General Discussion
I've sold only one so far but I've given several away to close friends and asked them to use them and report back any shortcomings, etc. so far, this is the only one that has failed and it failed before it left the shop so, it's served a pretty valuable purpose already. -
Punching an eye in SMALL round stock
Derek Melton replied to Derek Melton's topic in Blacksmithing, General Discussion
Thanks! I love doing it and while I'm still a rank amateur, I want to learn and make each one better than the last. I think this is hammer #11 so I've got a long way to go. =) -
Punching an eye in SMALL round stock
Derek Melton replied to Derek Melton's topic in Blacksmithing, General Discussion
I probably answered my own question there, I probably should just heat treat the working faces, temper by color as I do with other 5160 hand tools. Once I get the next hammer finished, I'll test it on the anvil too and I'll know if my process is working or not. =) -
Punching an eye in SMALL round stock
Derek Melton replied to Derek Melton's topic in Blacksmithing, General Discussion
Yeah, 99% of my experience with 5160 has been with knives. I've made some punches and hand held drifts/fullers with it but I usually temper those by color. What would you suggest for a temper? Just bring it to a straw and quench or pop in an oven for a particular time/temp? -
Punching an eye in SMALL round stock
Derek Melton replied to Derek Melton's topic in Blacksmithing, General Discussion
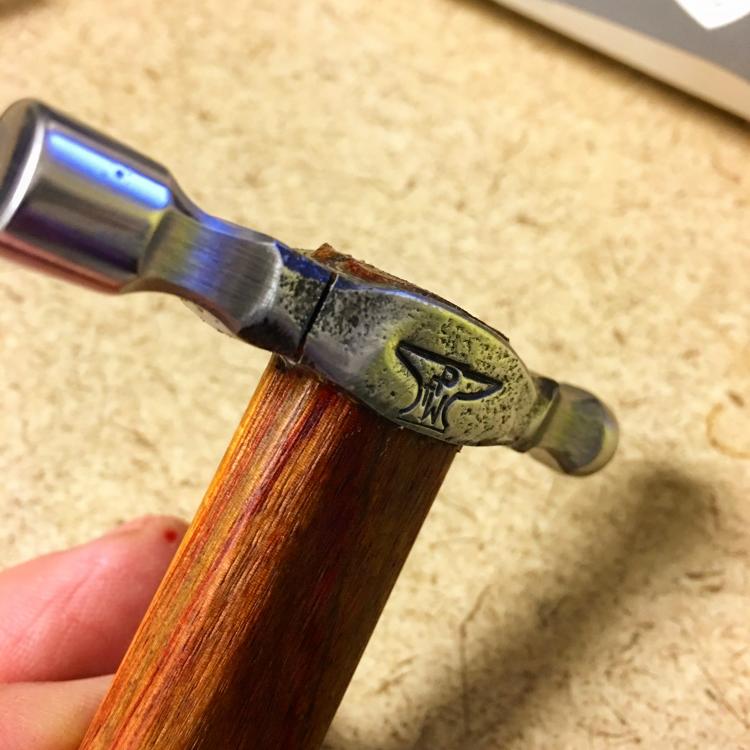
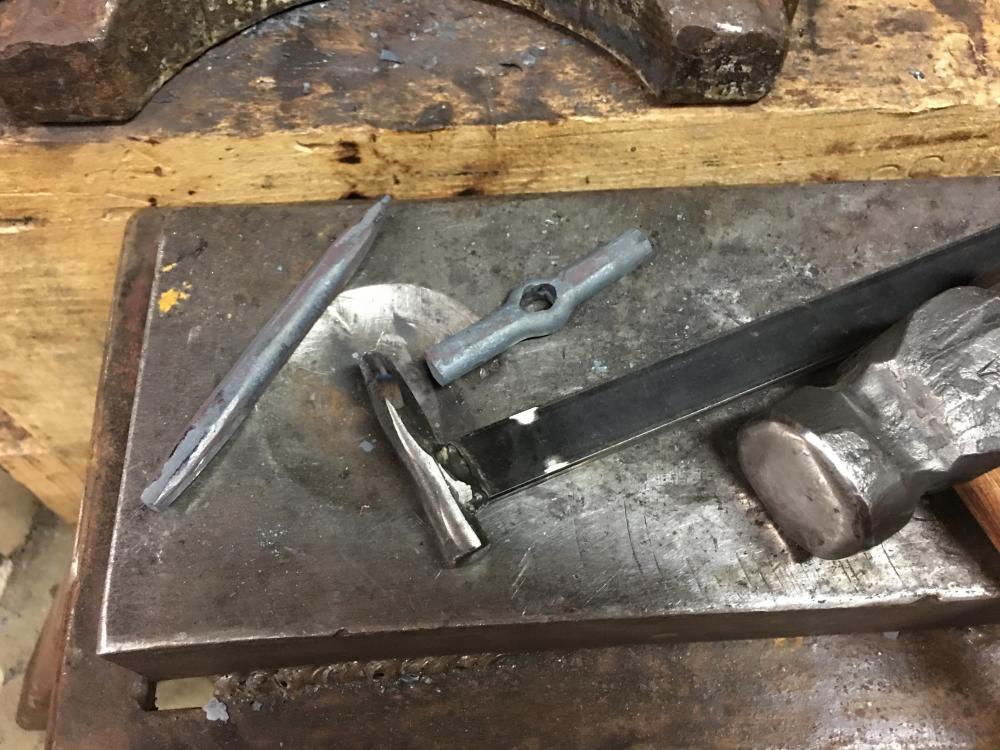
I agree, larger stock forged down on the ends would work better, I was just curious as to how one would turn out, somewhat as a novelty, from such small round bar. I was really pleased with it. Until it broke. This was my first attempt at the tiny hammer. Being 5160, I just heat treated it as I always had, heated to critical, quenched in oil, tempered at 400. The grain structure of the steel where It broke looked just like a file, kinda creamy and fine. I think it was just too brittle and my temper didn't work out. I worked on a new slit/drift combo for the 3/8 round bar last night. It worked well, I really appreciate the suggestions from Alan Evans regarding the proper diameter of the drift in relation to the stock. I'm going to make the same kind of tiny hammer, this time I'll keep the eye a little smaller and I'll only heat treat the working faces, not the eye material.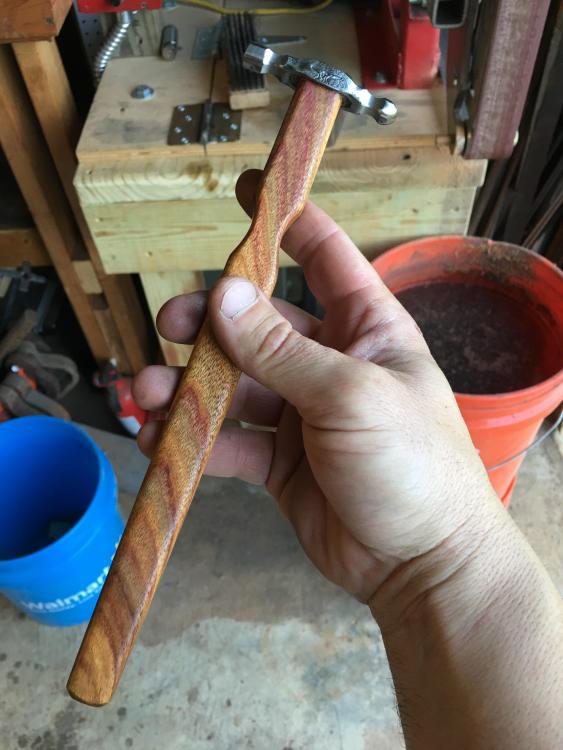
-
Punching an eye in SMALL round stock
Derek Melton replied to Derek Melton's topic in Blacksmithing, General Discussion
Wow, thank you! I made a new slitter/punch last night that was the same 3/8 diameter. I forged the end down to a typical slot punch shape and then I cut it about 3 inches short and welded it to a 14 inch section of 1/4x3/4 for a handle. I plan on trying it tonight. I'll post here with results. -
I've been making some small hammers for jewelers and knife makers who need small, delicate hammers for detail work. I've been asked to make them even smaller, so I'm considering some from 3/8 inch round bar. Anyone have ideas for tooling, techniques for punching eyes in small round bar? It's kinda tricky. =)
-
I do like that Batson design with the heavy angle, seems like the fabrication would go fairly quick. I think I'd probably go with a single cylinder for cost reduction though. I think 1500$ is the sweet spot and I want to get as close to that as I can and still have a press comparable to the 3500$ commercial models like the Coal Iron works and Uncle Al's
-
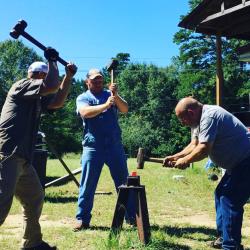
Those questions are still being tossed around right now. Personally I don't want to make anything less than 30 tons and favor the H frame for strength.
-
We have at least a couple of professional welders in the group I believe. I won't participate in a build project that doesn't have adequate welding. Thanks! That is an amazing looking press. What made you decide to go with dual cylinders?