

jlpservicesinc
-
Posts
5,754 -
Joined
-
Last visited
Content Type
Profiles
Forums
Articles
Gallery
Downloads
Events
Posts posted by jlpservicesinc
-
-
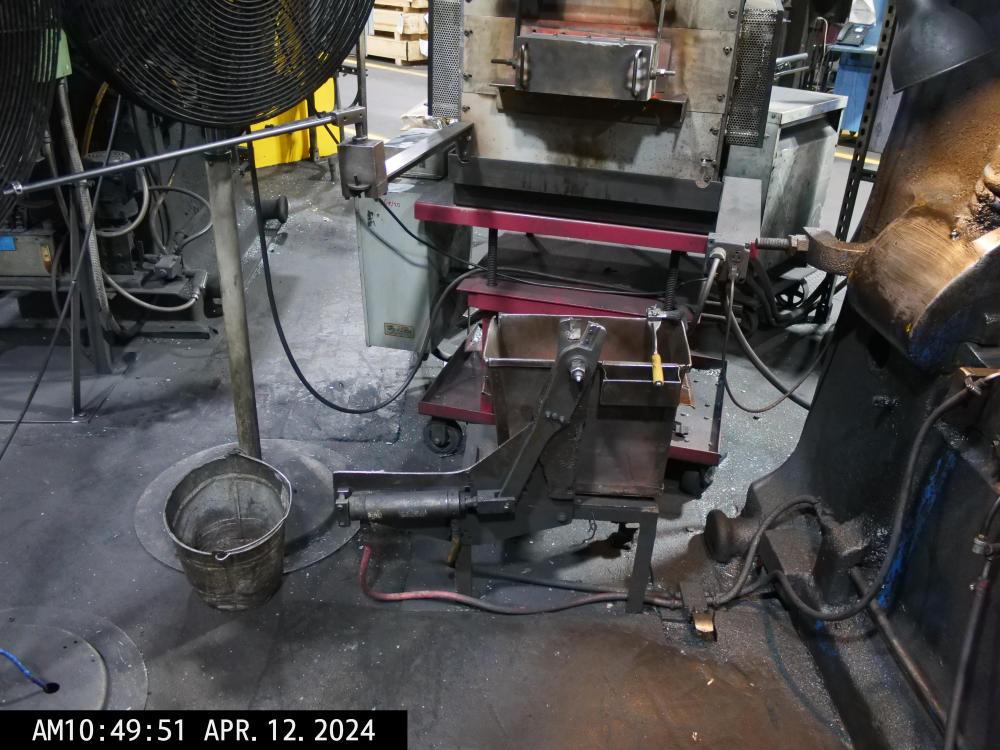
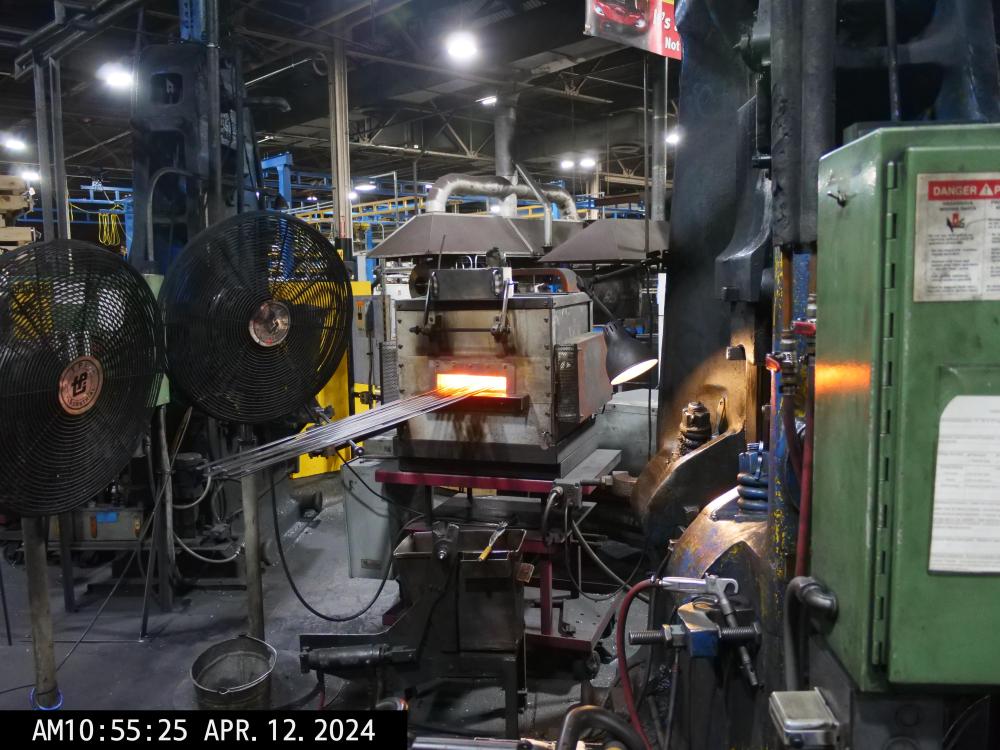
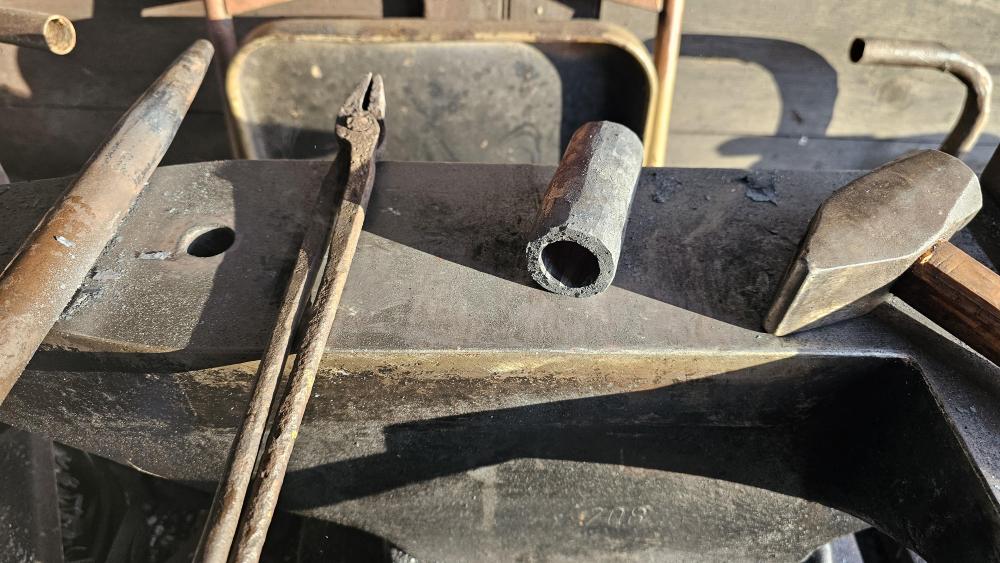
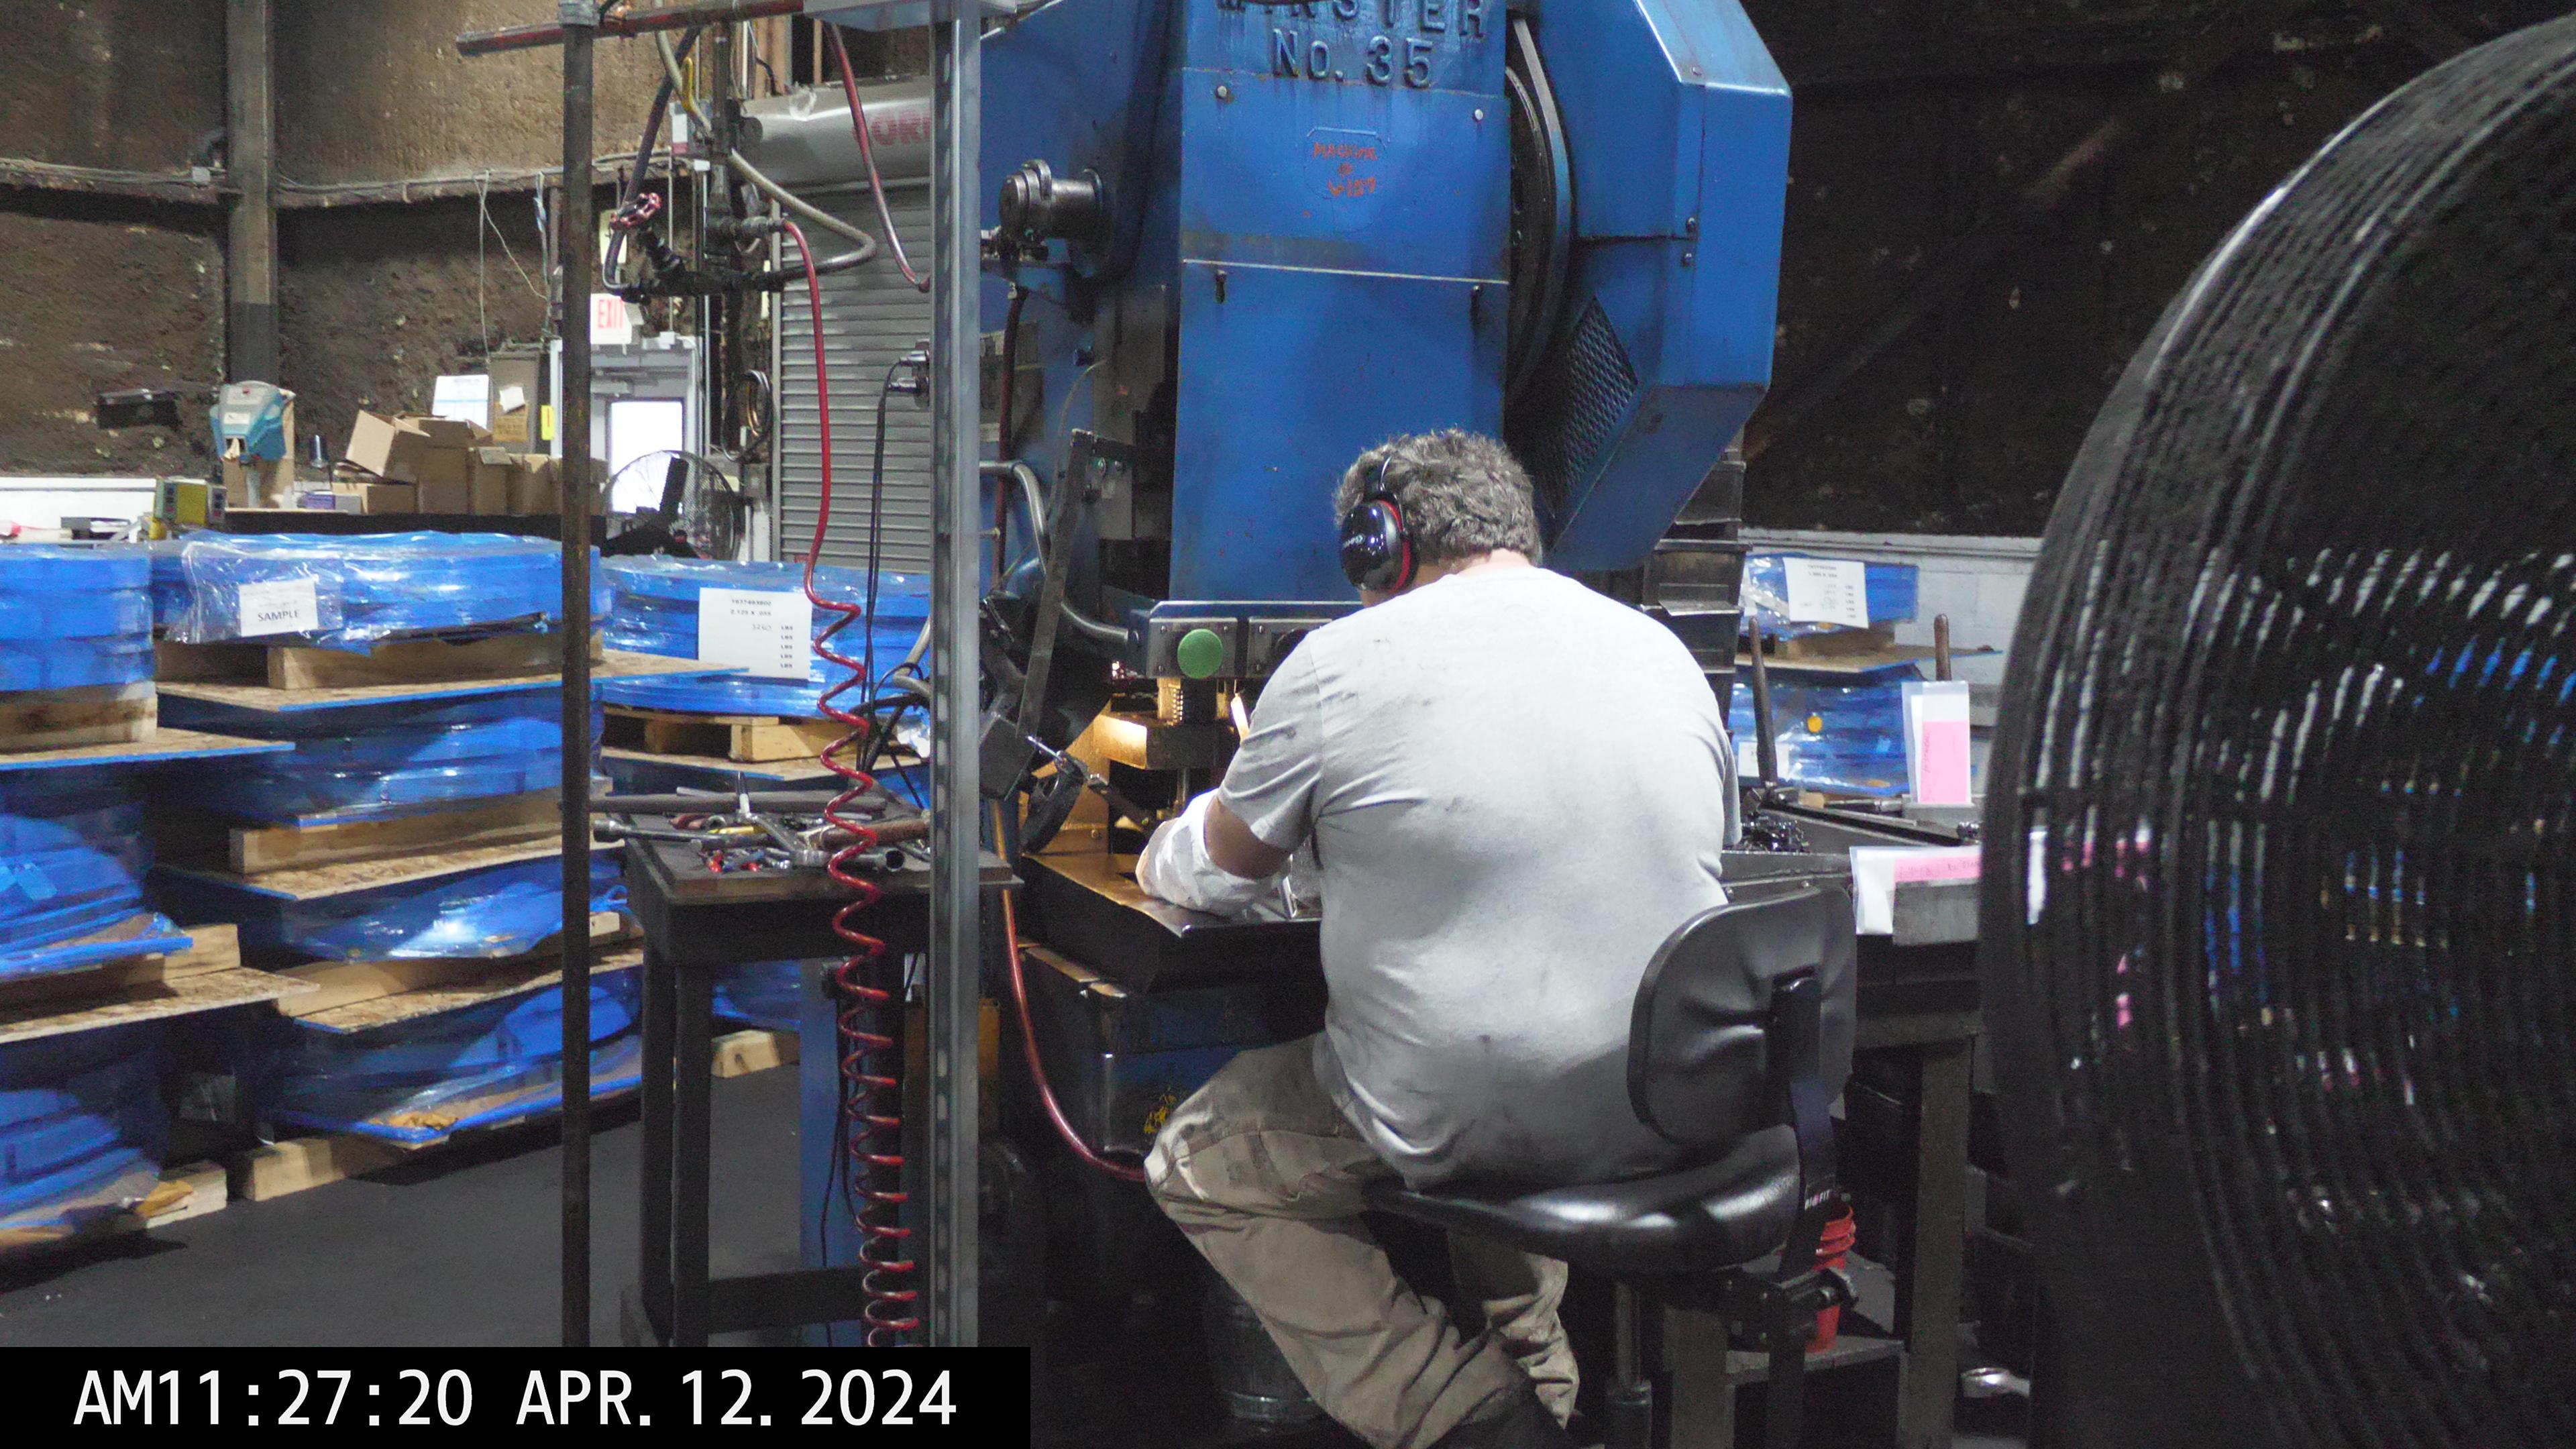
Frosty, that is the air shear. They forge 4 bits at a time.. they cut them into 2, 2bit sections before the bar goes back in the electric oven.
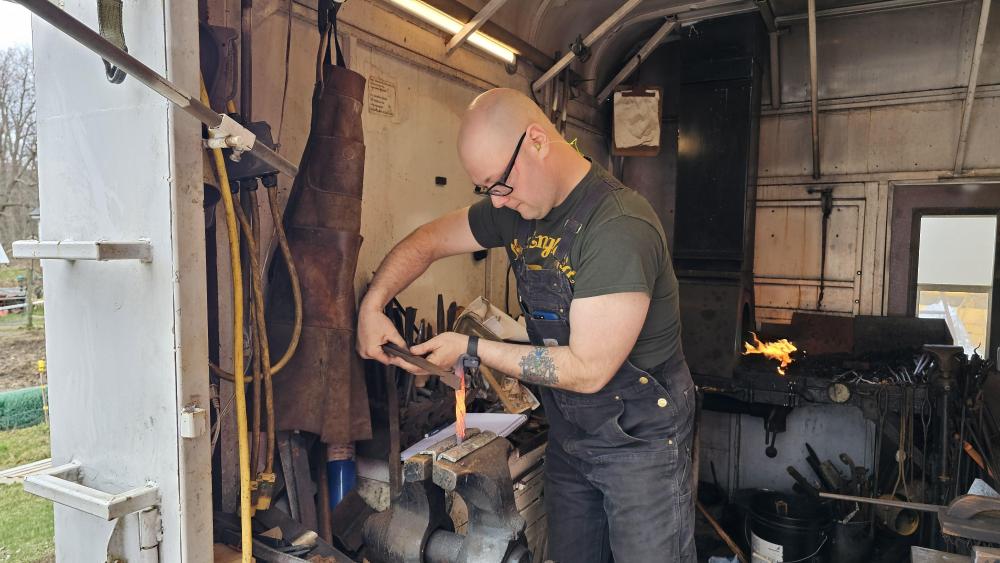
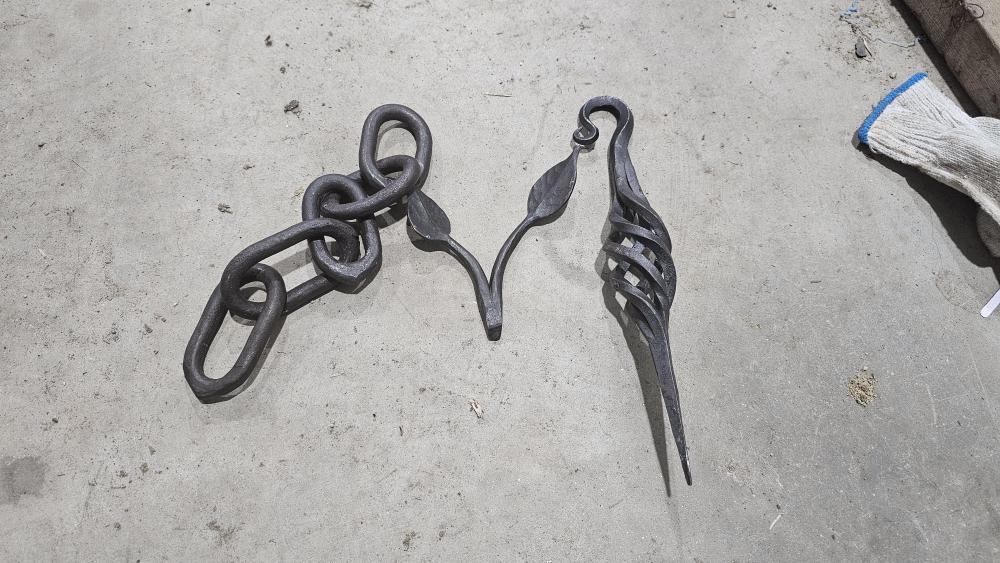
I'm teaching a "forge welding" class up at Haystack Mountain Craft Center in a month and member Hikerjohnson here, is going to be my assistant..
So Saturday he came down to go over course outline and to show him how I work these projects out.. I made the item, then HikerJ's turn.. These of the sample pieces I forged.
We made really good time.. Hiker (AKA Eric) is a smith on his own right and runs a shop up in Maine

-
You bet..
Not really sure which photo you are referring too.. There is a pneumatic shear that is in one photo.
On the right side of the hammers, The shrouded foot pedal is the electric/pneumatic activator on the hammers.. No foot treadle.. (Foot treadles are not osha approved)
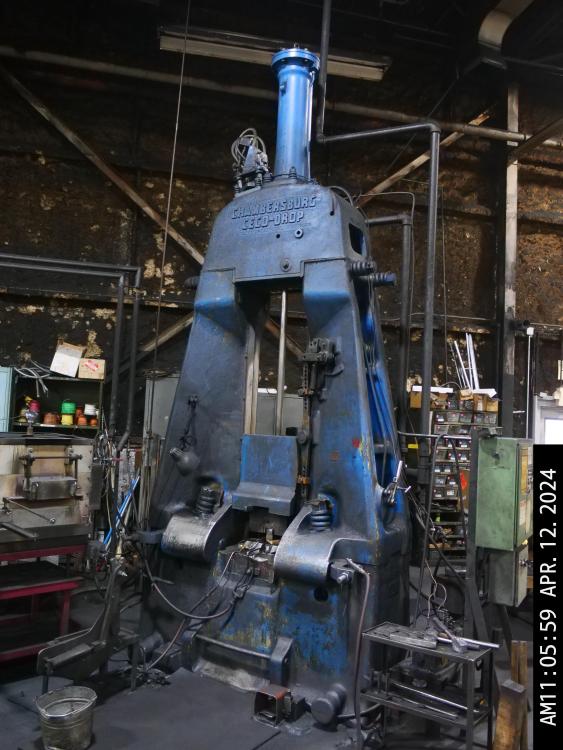
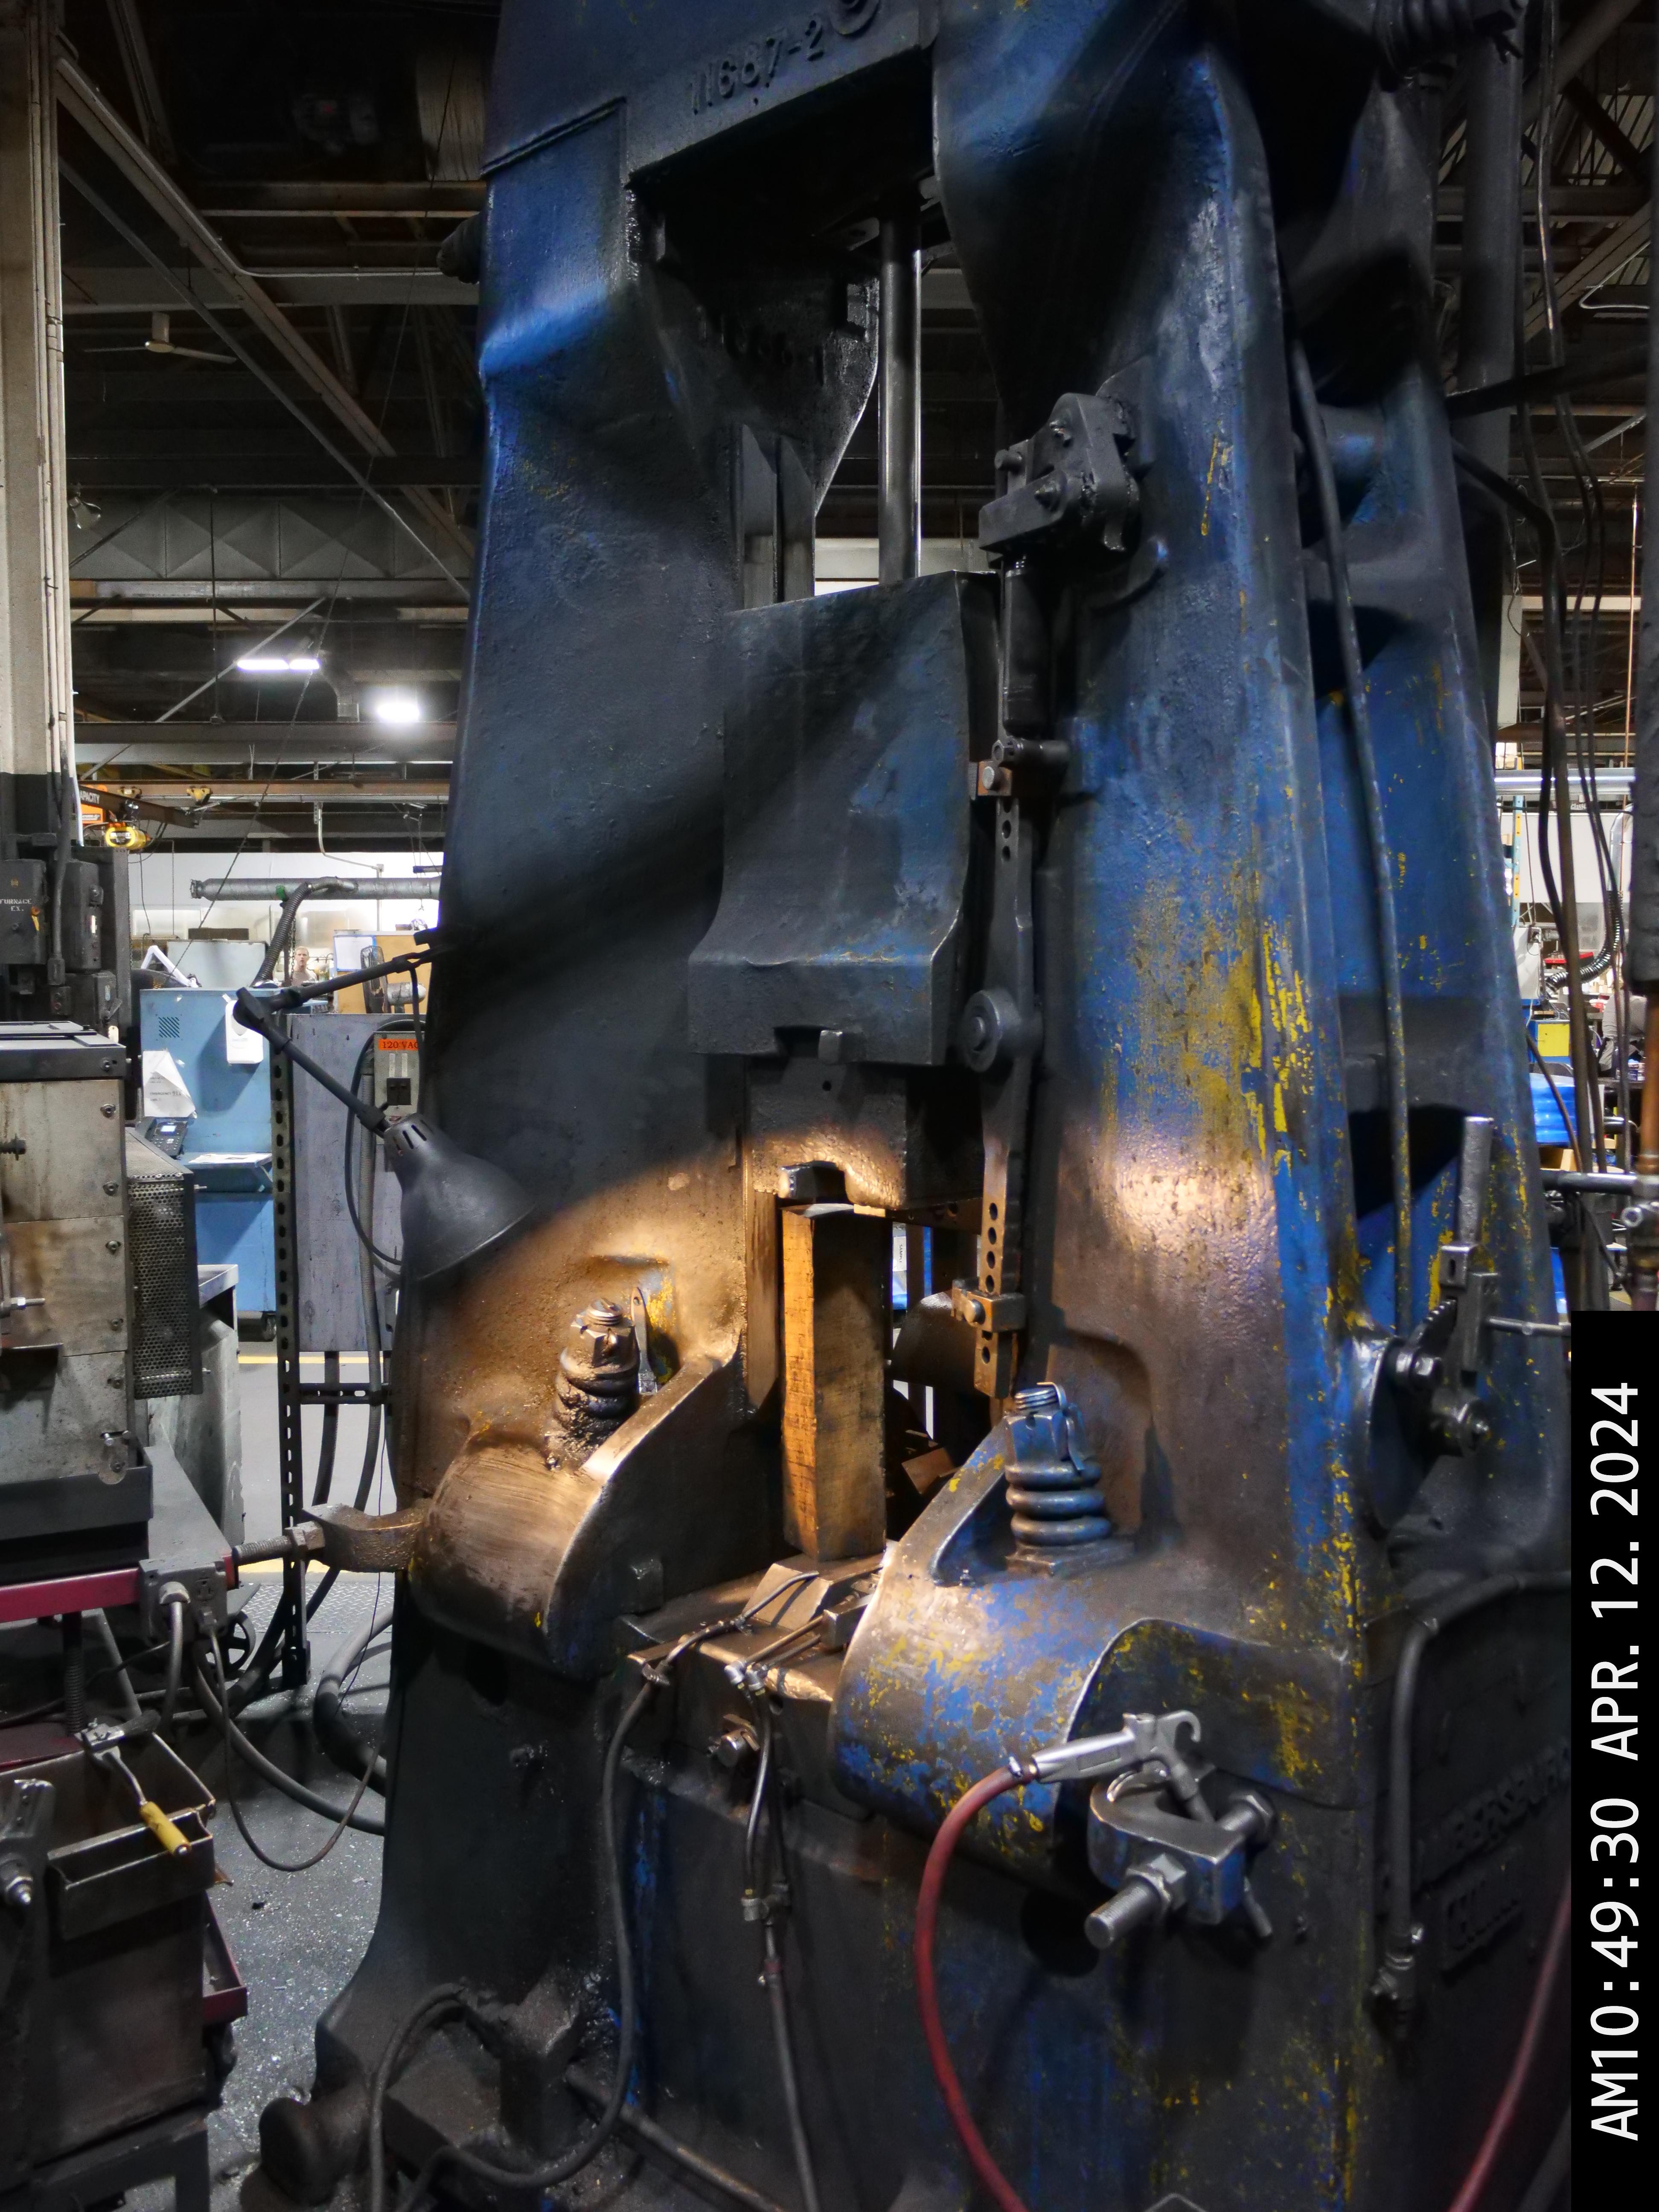
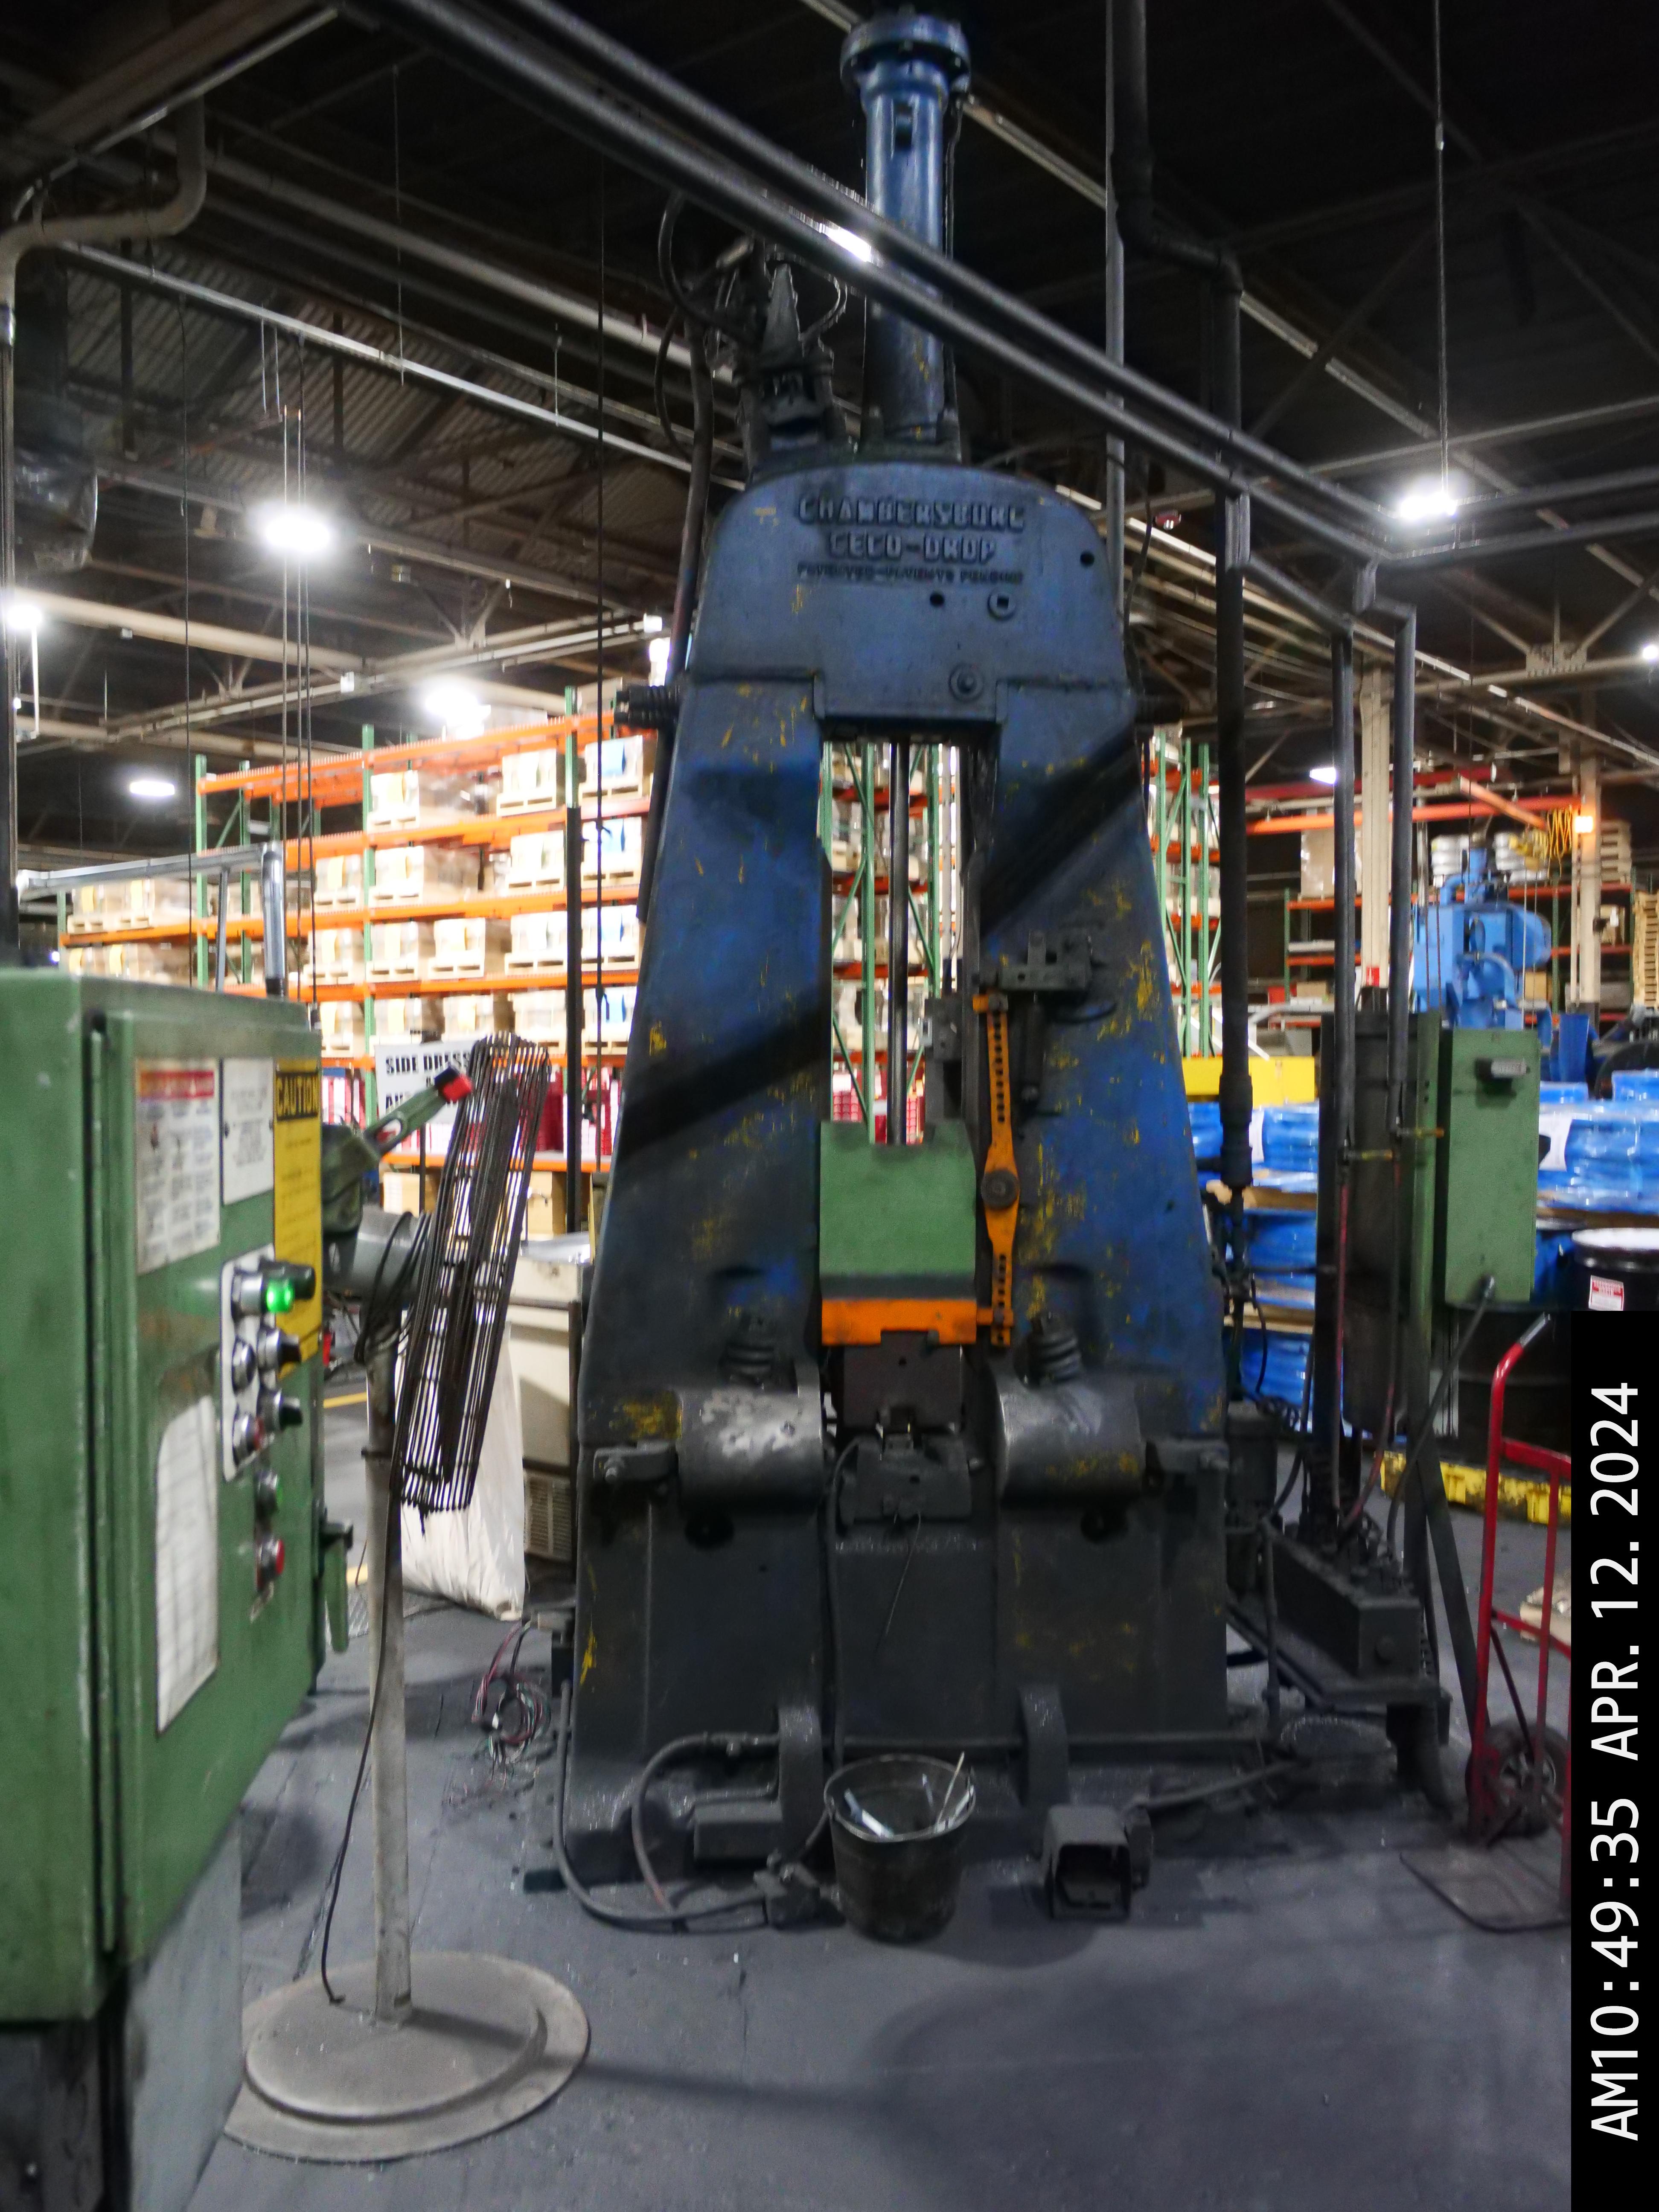
Was very interesting.. I was told that most of the hammers are worn out.. This was before I saw the operation..
Closed die hammers need a very tight running tolerance.. Open die hammers not so much.. I mentioned this to the engineer..") I'd be happy to have one of the hammers show up at the school..
I'd be happy to have one of the hammers show up at the school..
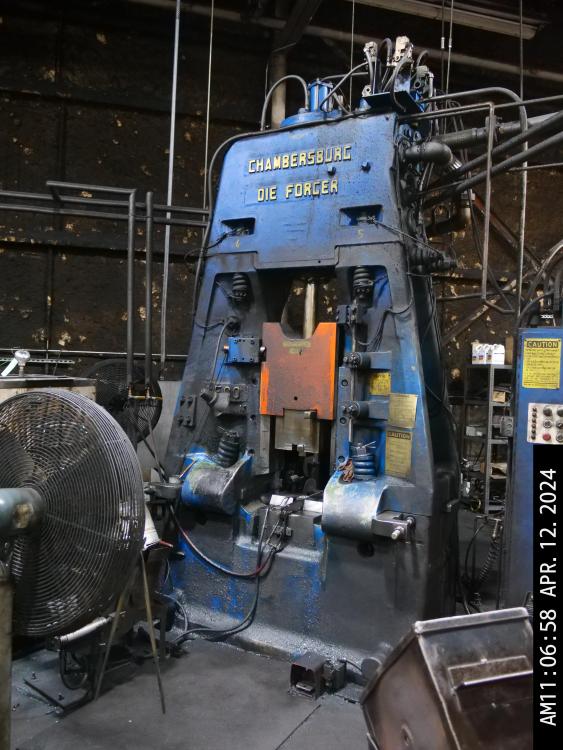
These are drop hammers power up only.. The really big hammer is a hydraulic/pneumatic hammer and has power up and power down. -
Few days back I went to what is left of the Simond's forge shop. Simonds was a huge company.. Not so much now.
Like many American born and raised company's who found a footing and lost their way.


-
Hey, in todays market it might be a good move to pass it along.
Your journey has been pretty amazing and have done such a great job at setting up your shop..
I still have my first real anvil HB 175lb and have had it nearly 40 yrs.. -
Rojo pedro that looks great..
-
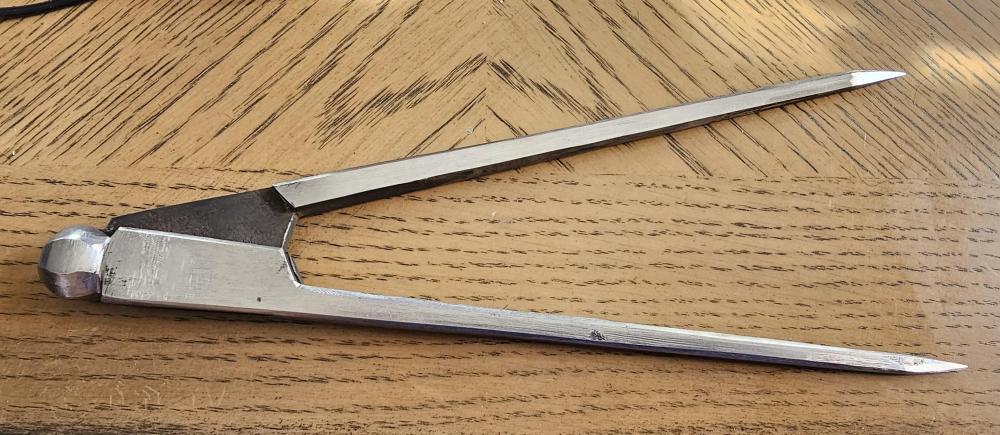
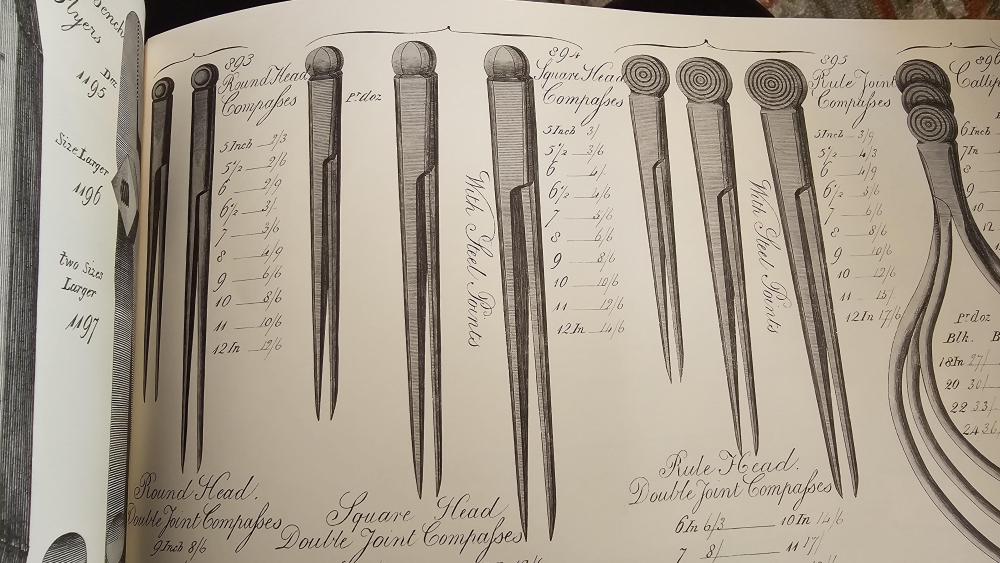
Thanks for the nice compliments on the Compass..
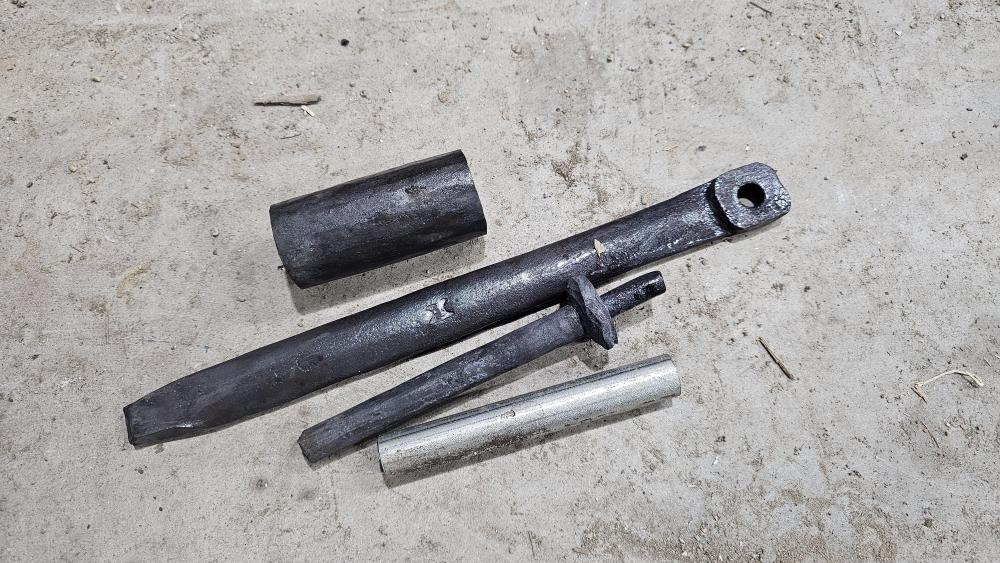
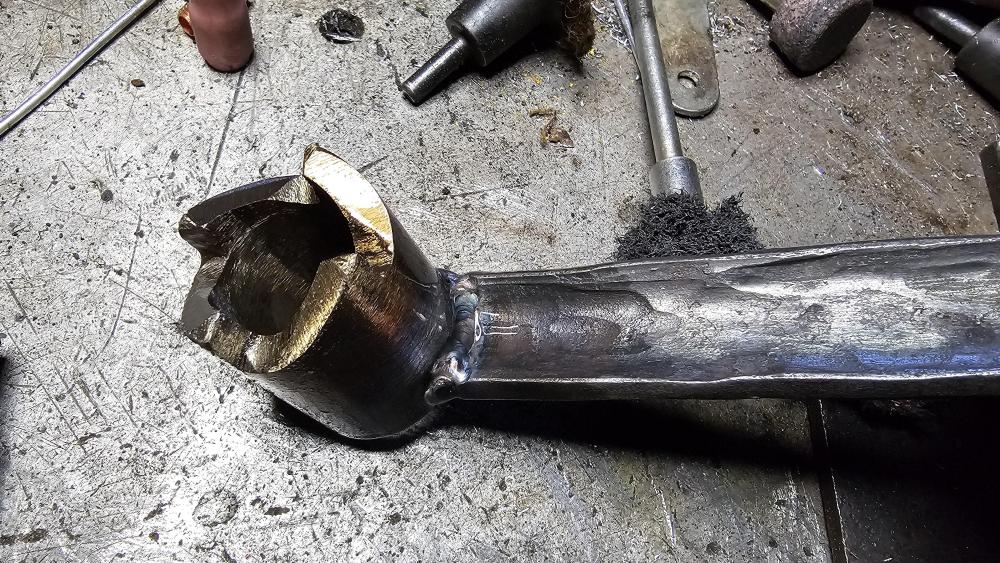
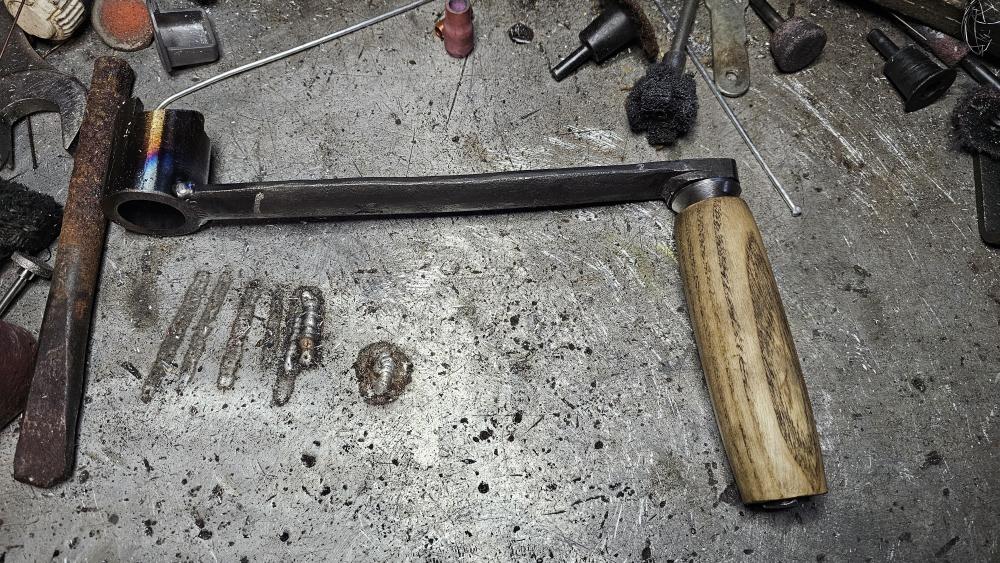
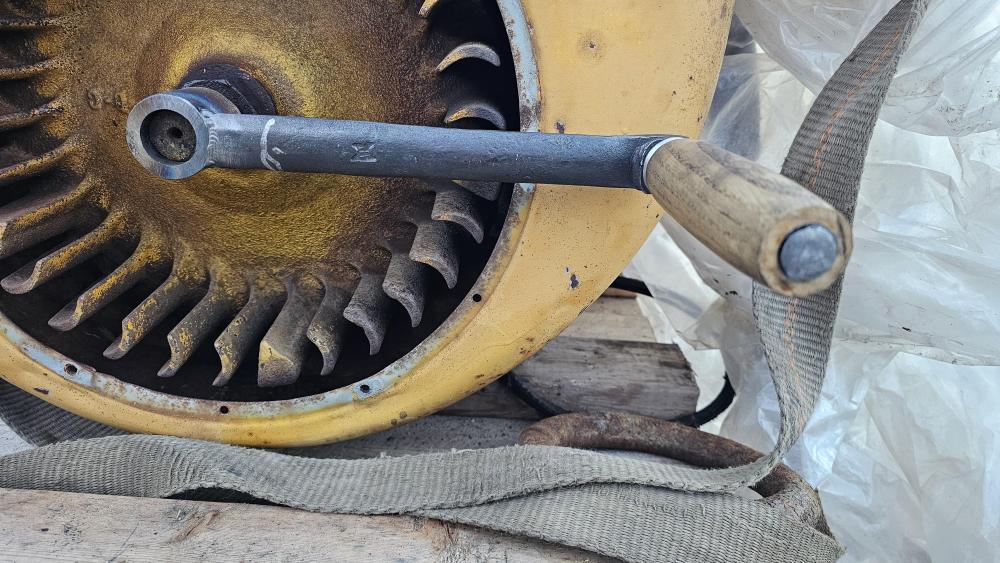
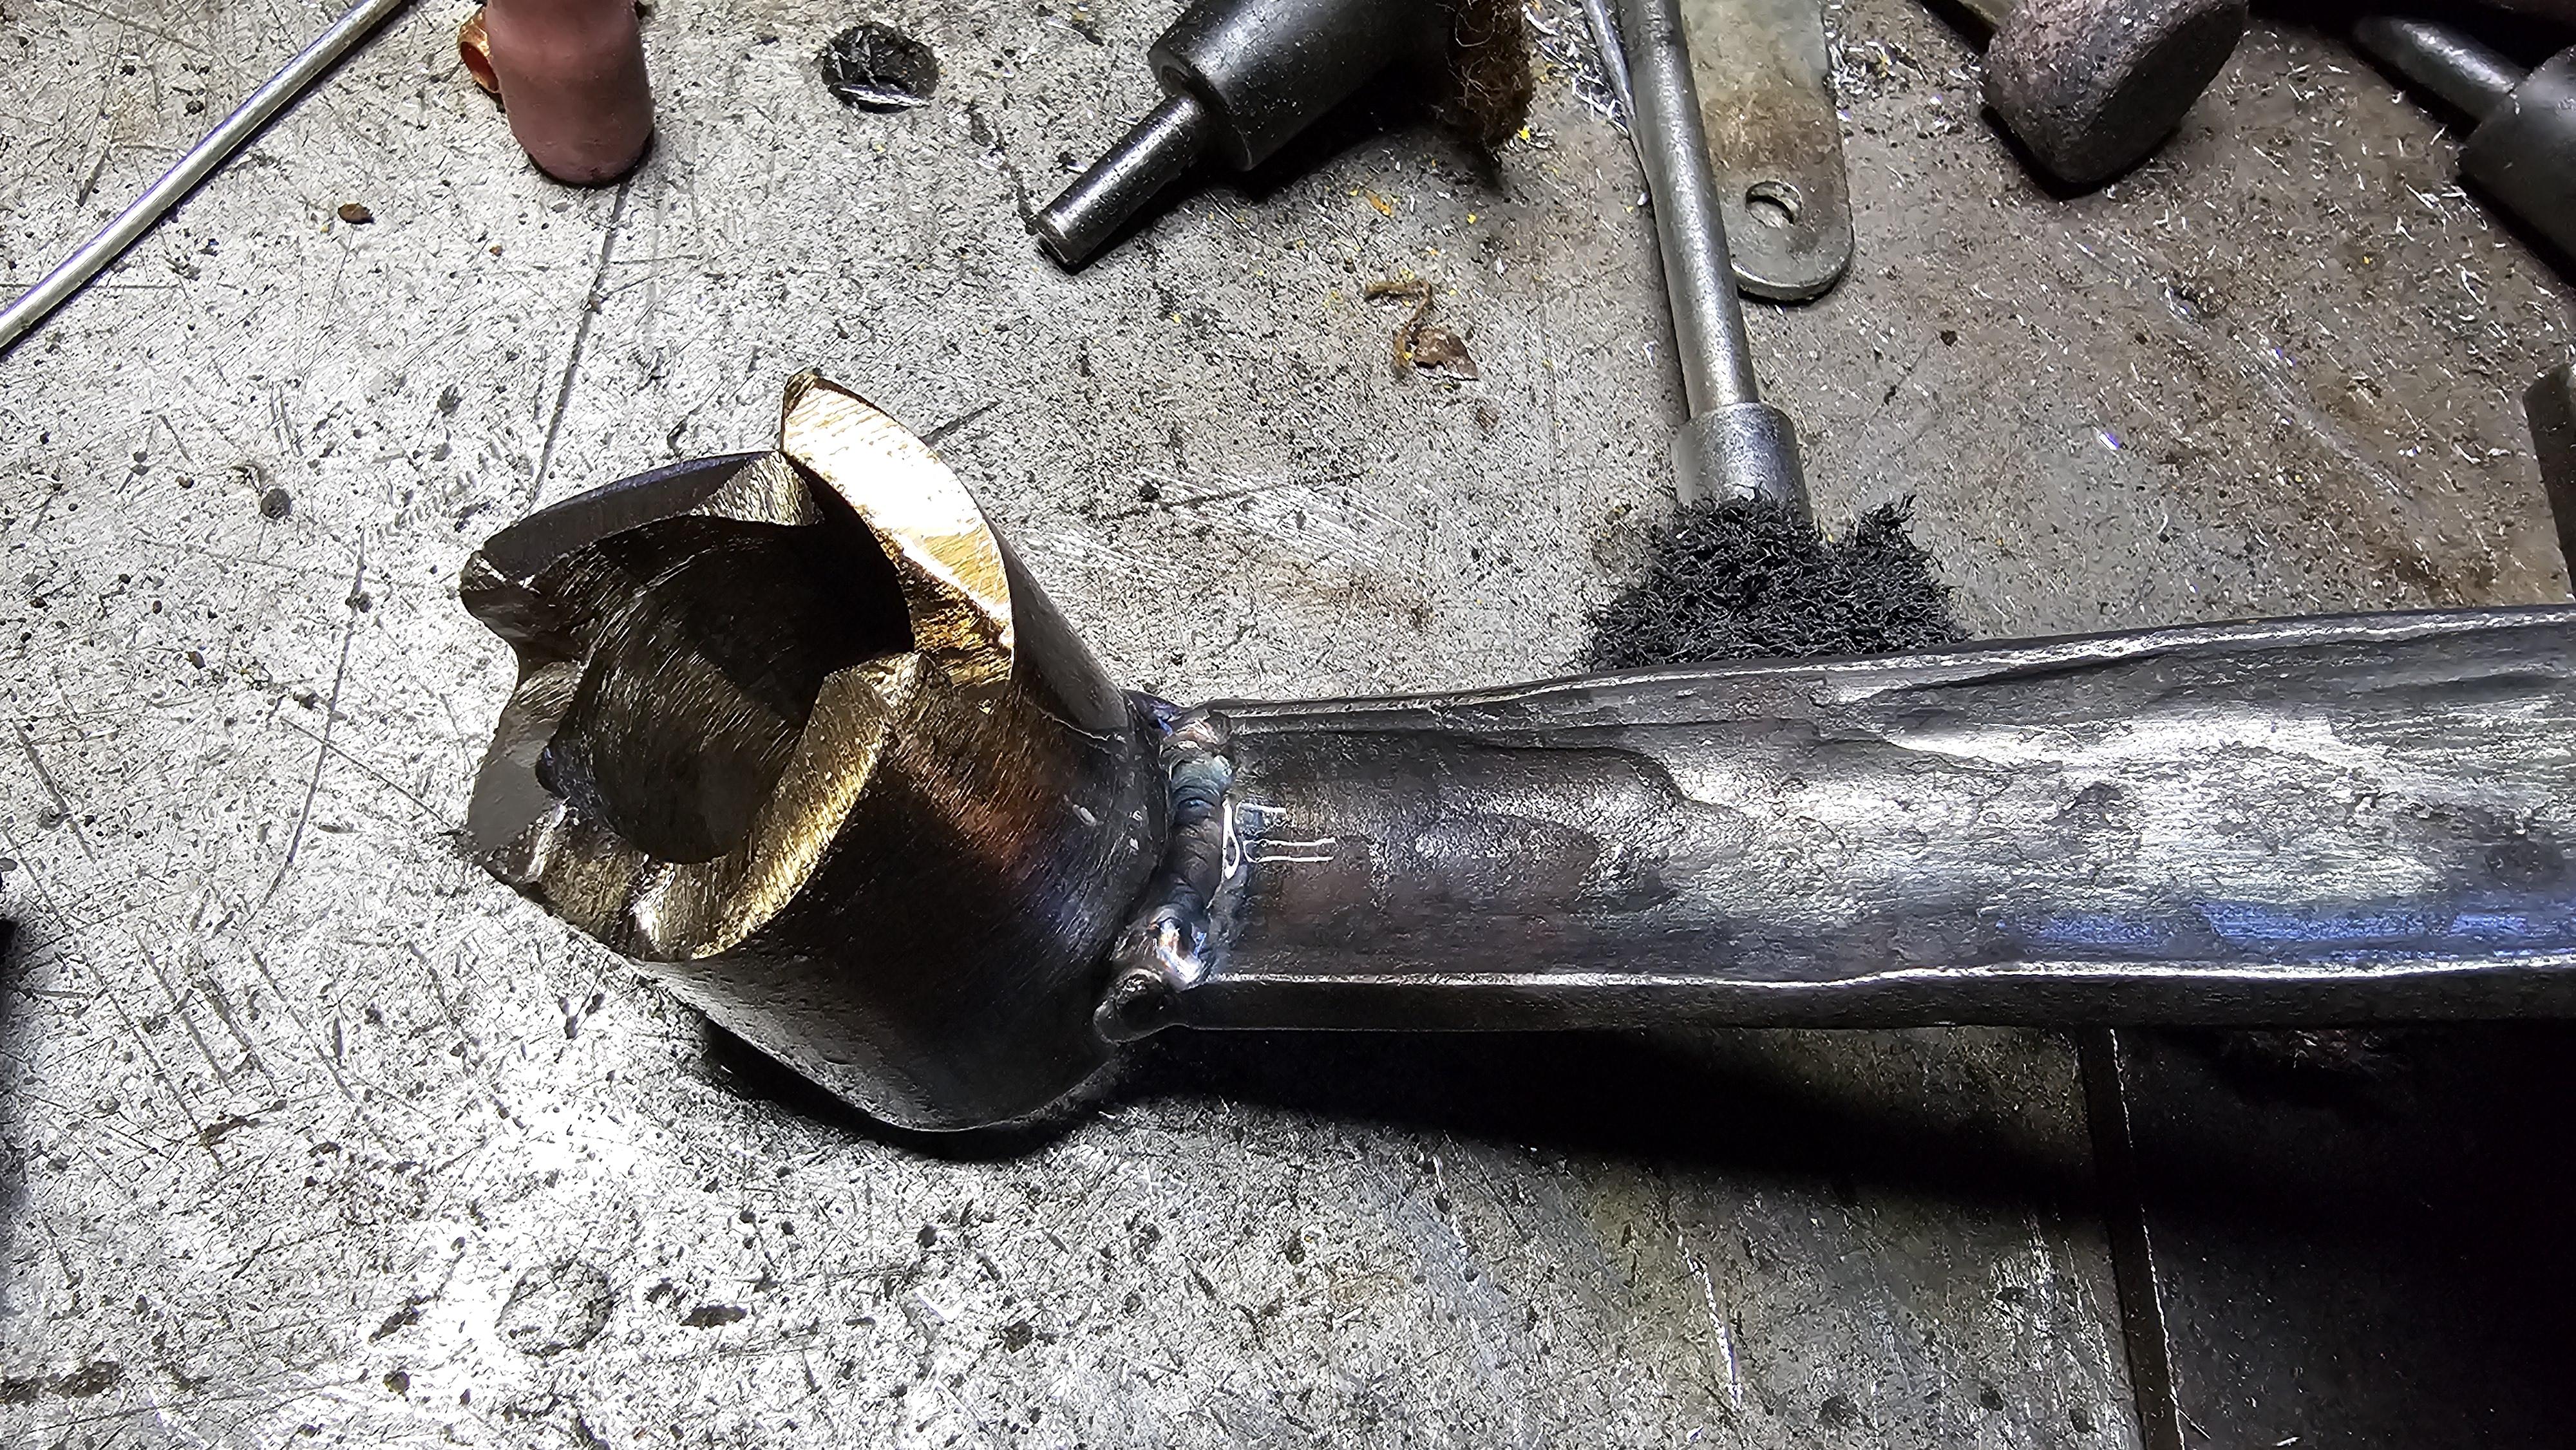
I needed a hand crank for my Wisconsin engine.
At the filming session the owner was kind enough to turn a wooden handle to go over the steel sleeve.. The sleeve was then glued into the wood.

-
Great idea there Mr Frosty with the pig tail..
-
John, Looking good.. I wasn't sure where you were going with those pads with the hooks on them but it all came to light.
Looks great.. Your getting good at the woopytydoos.
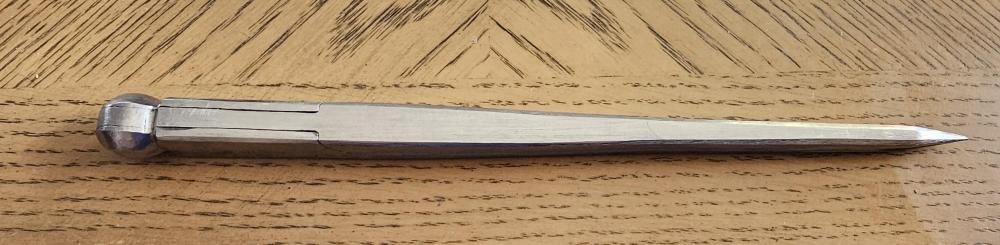
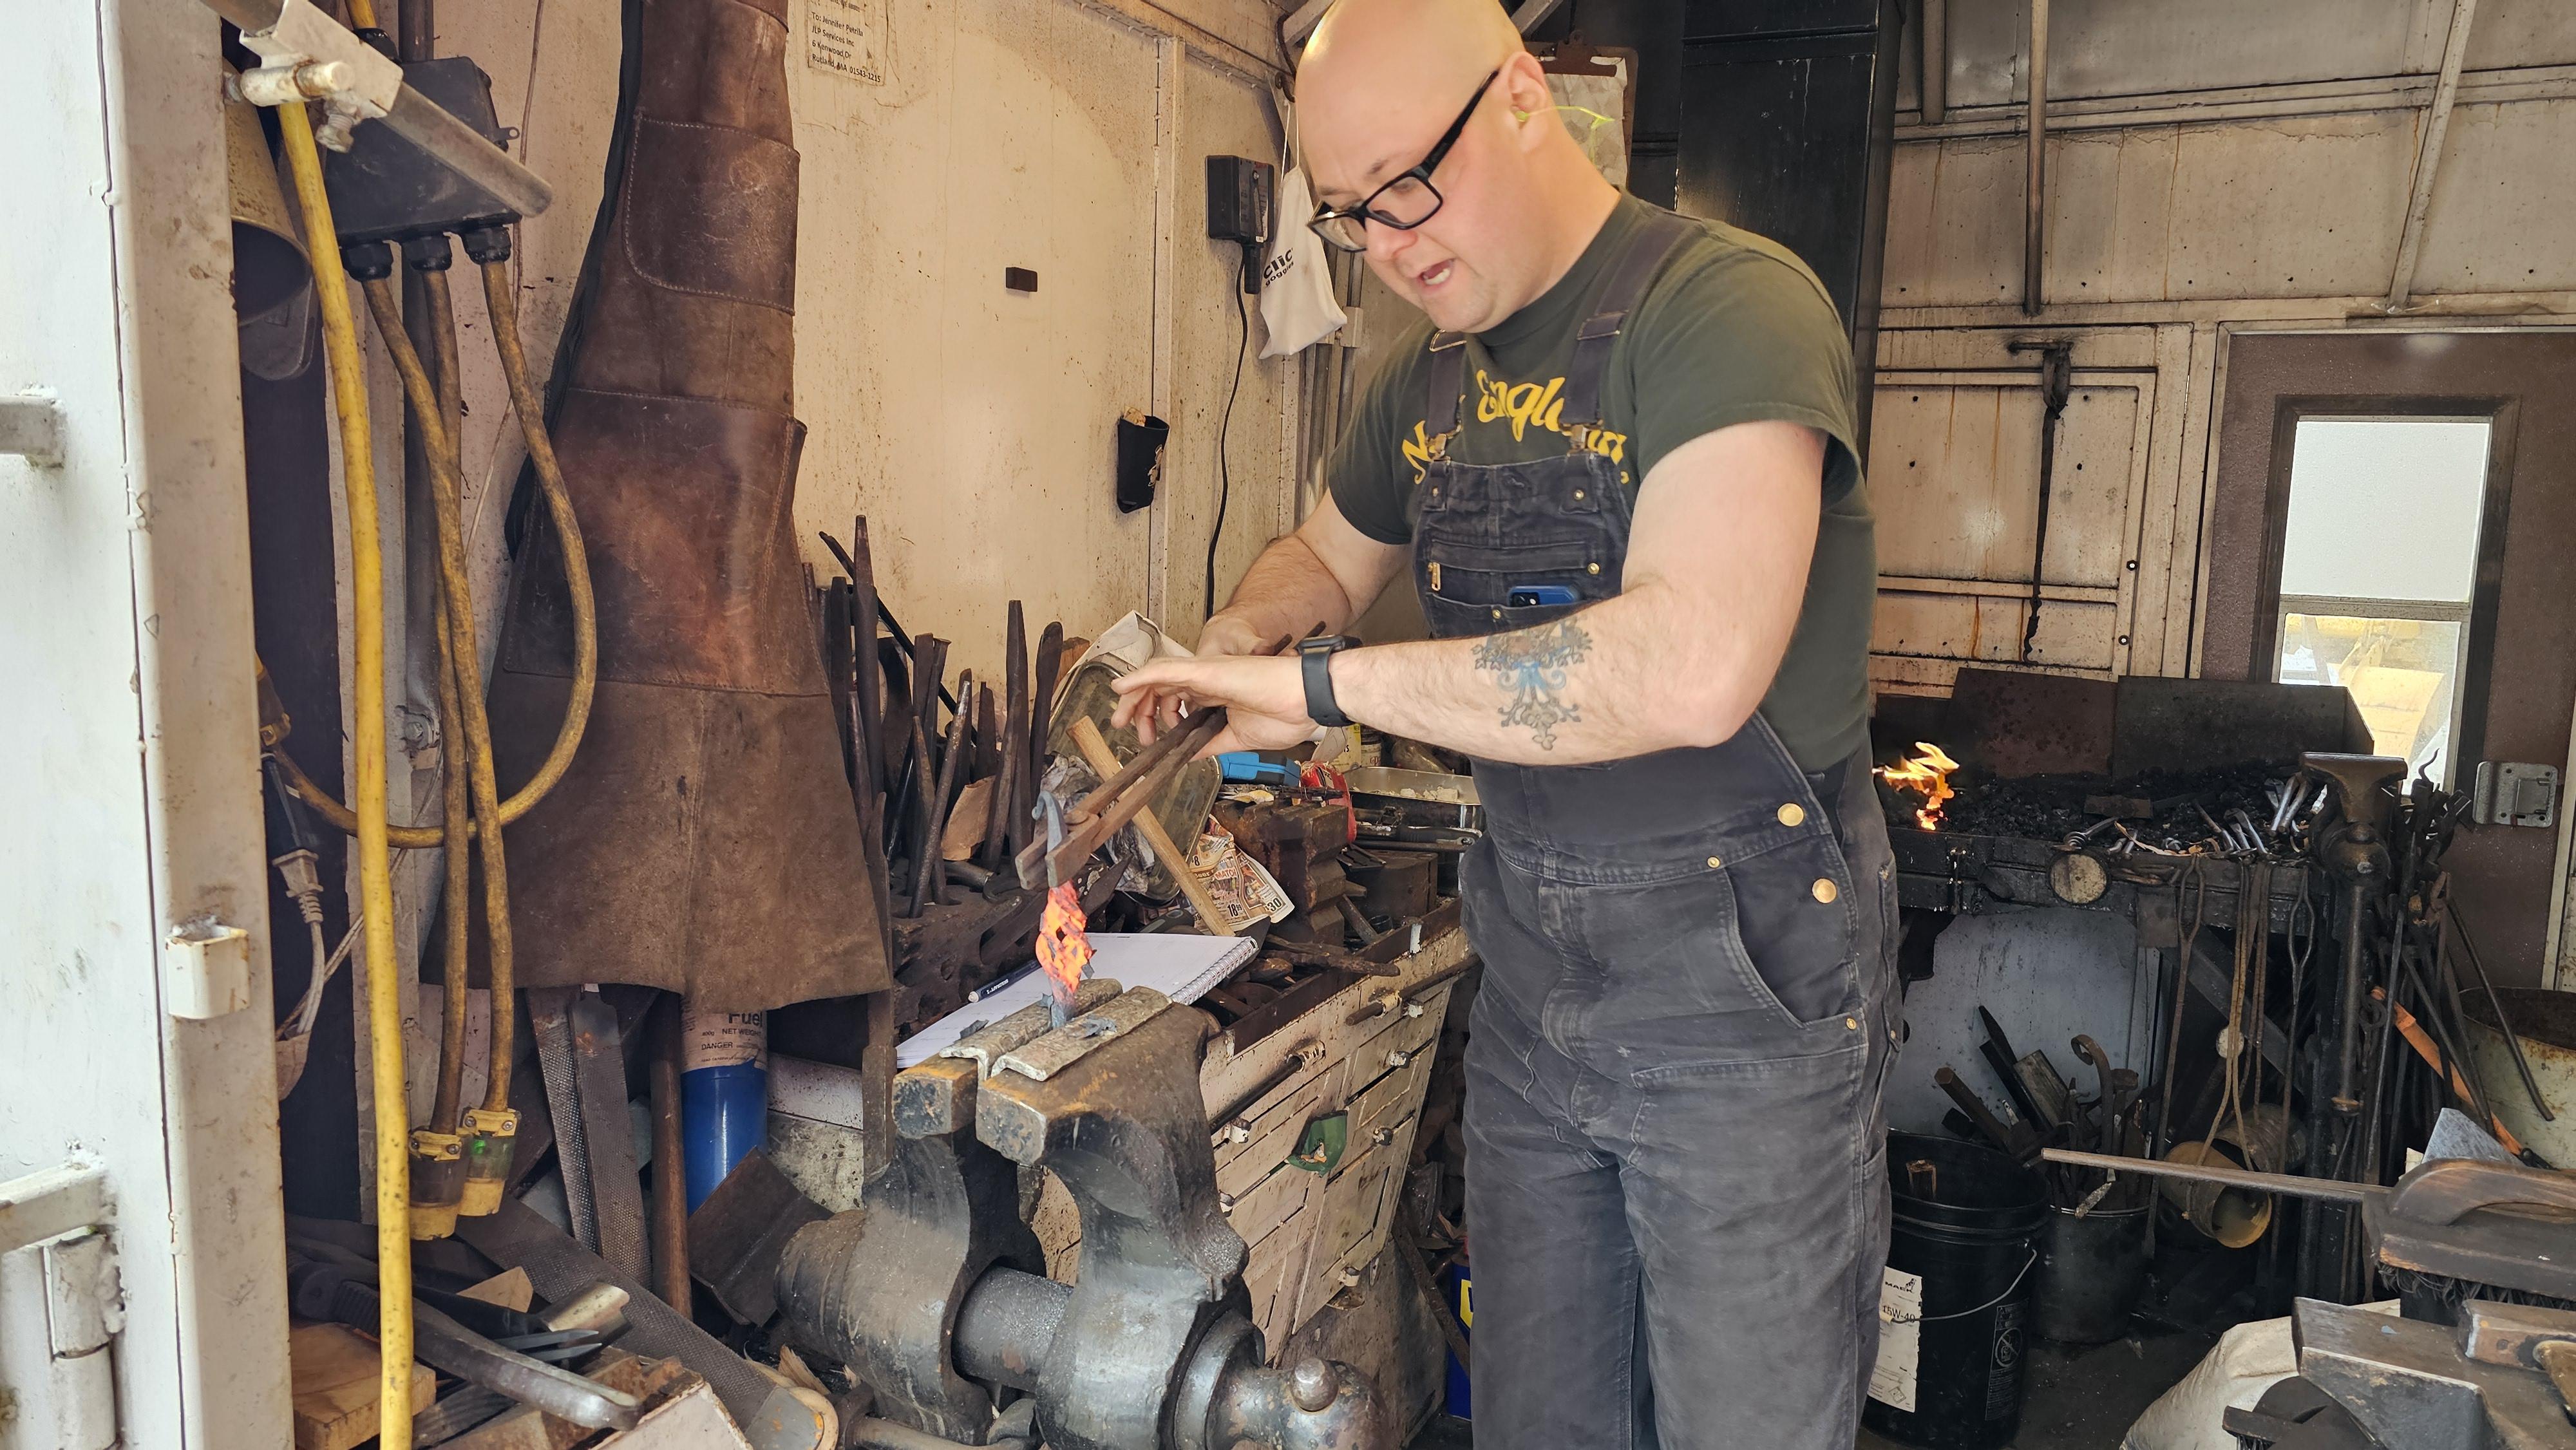
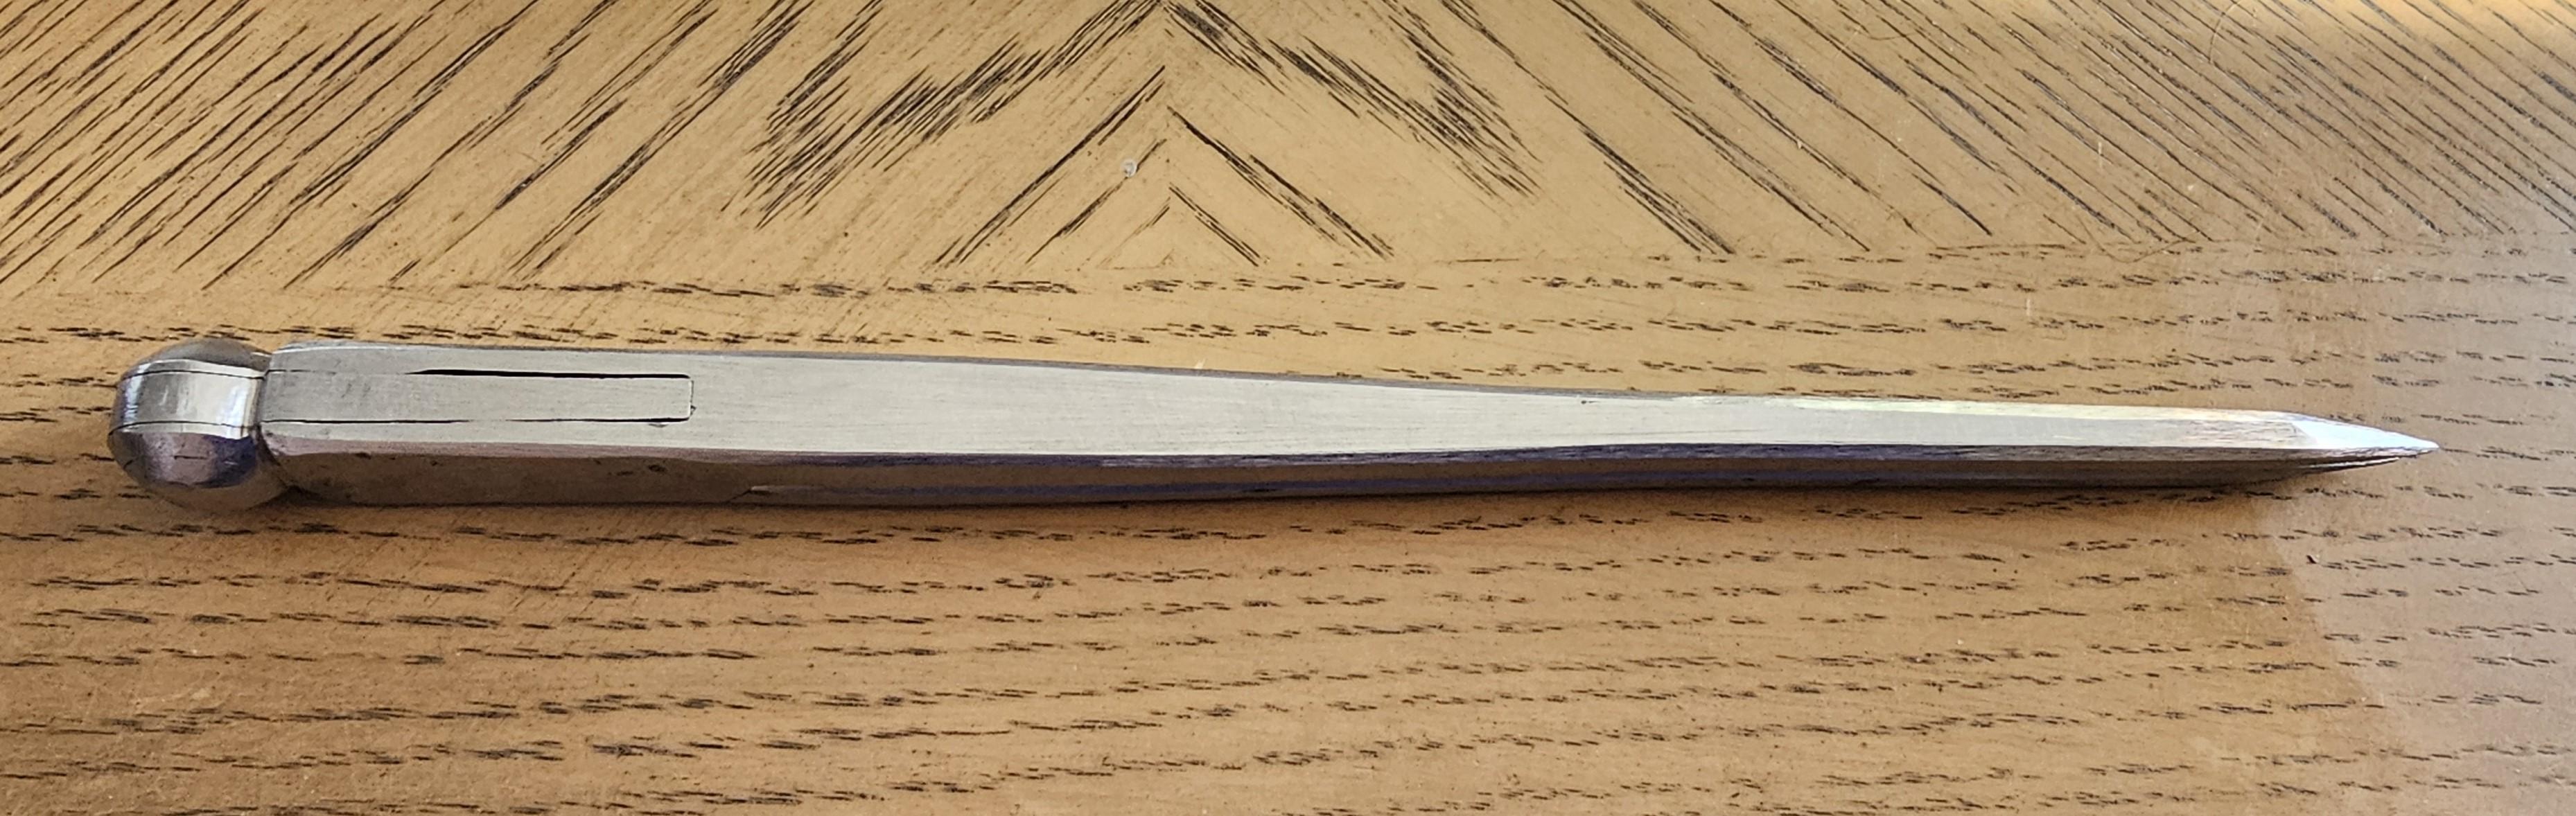
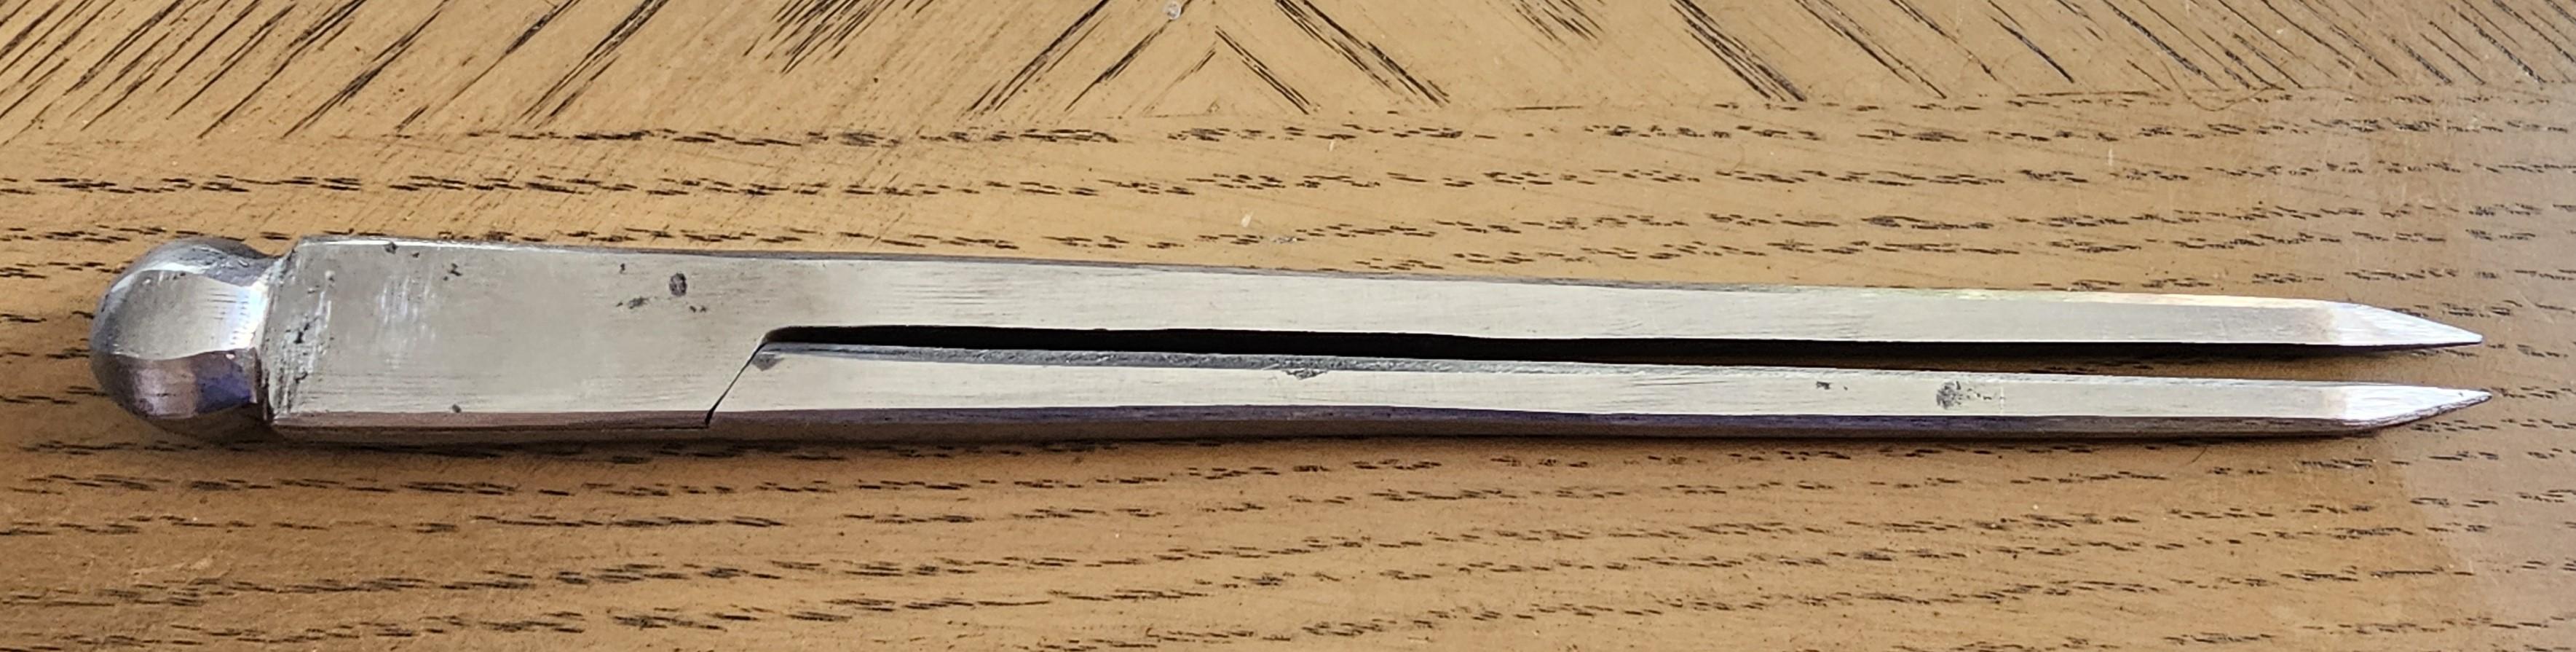
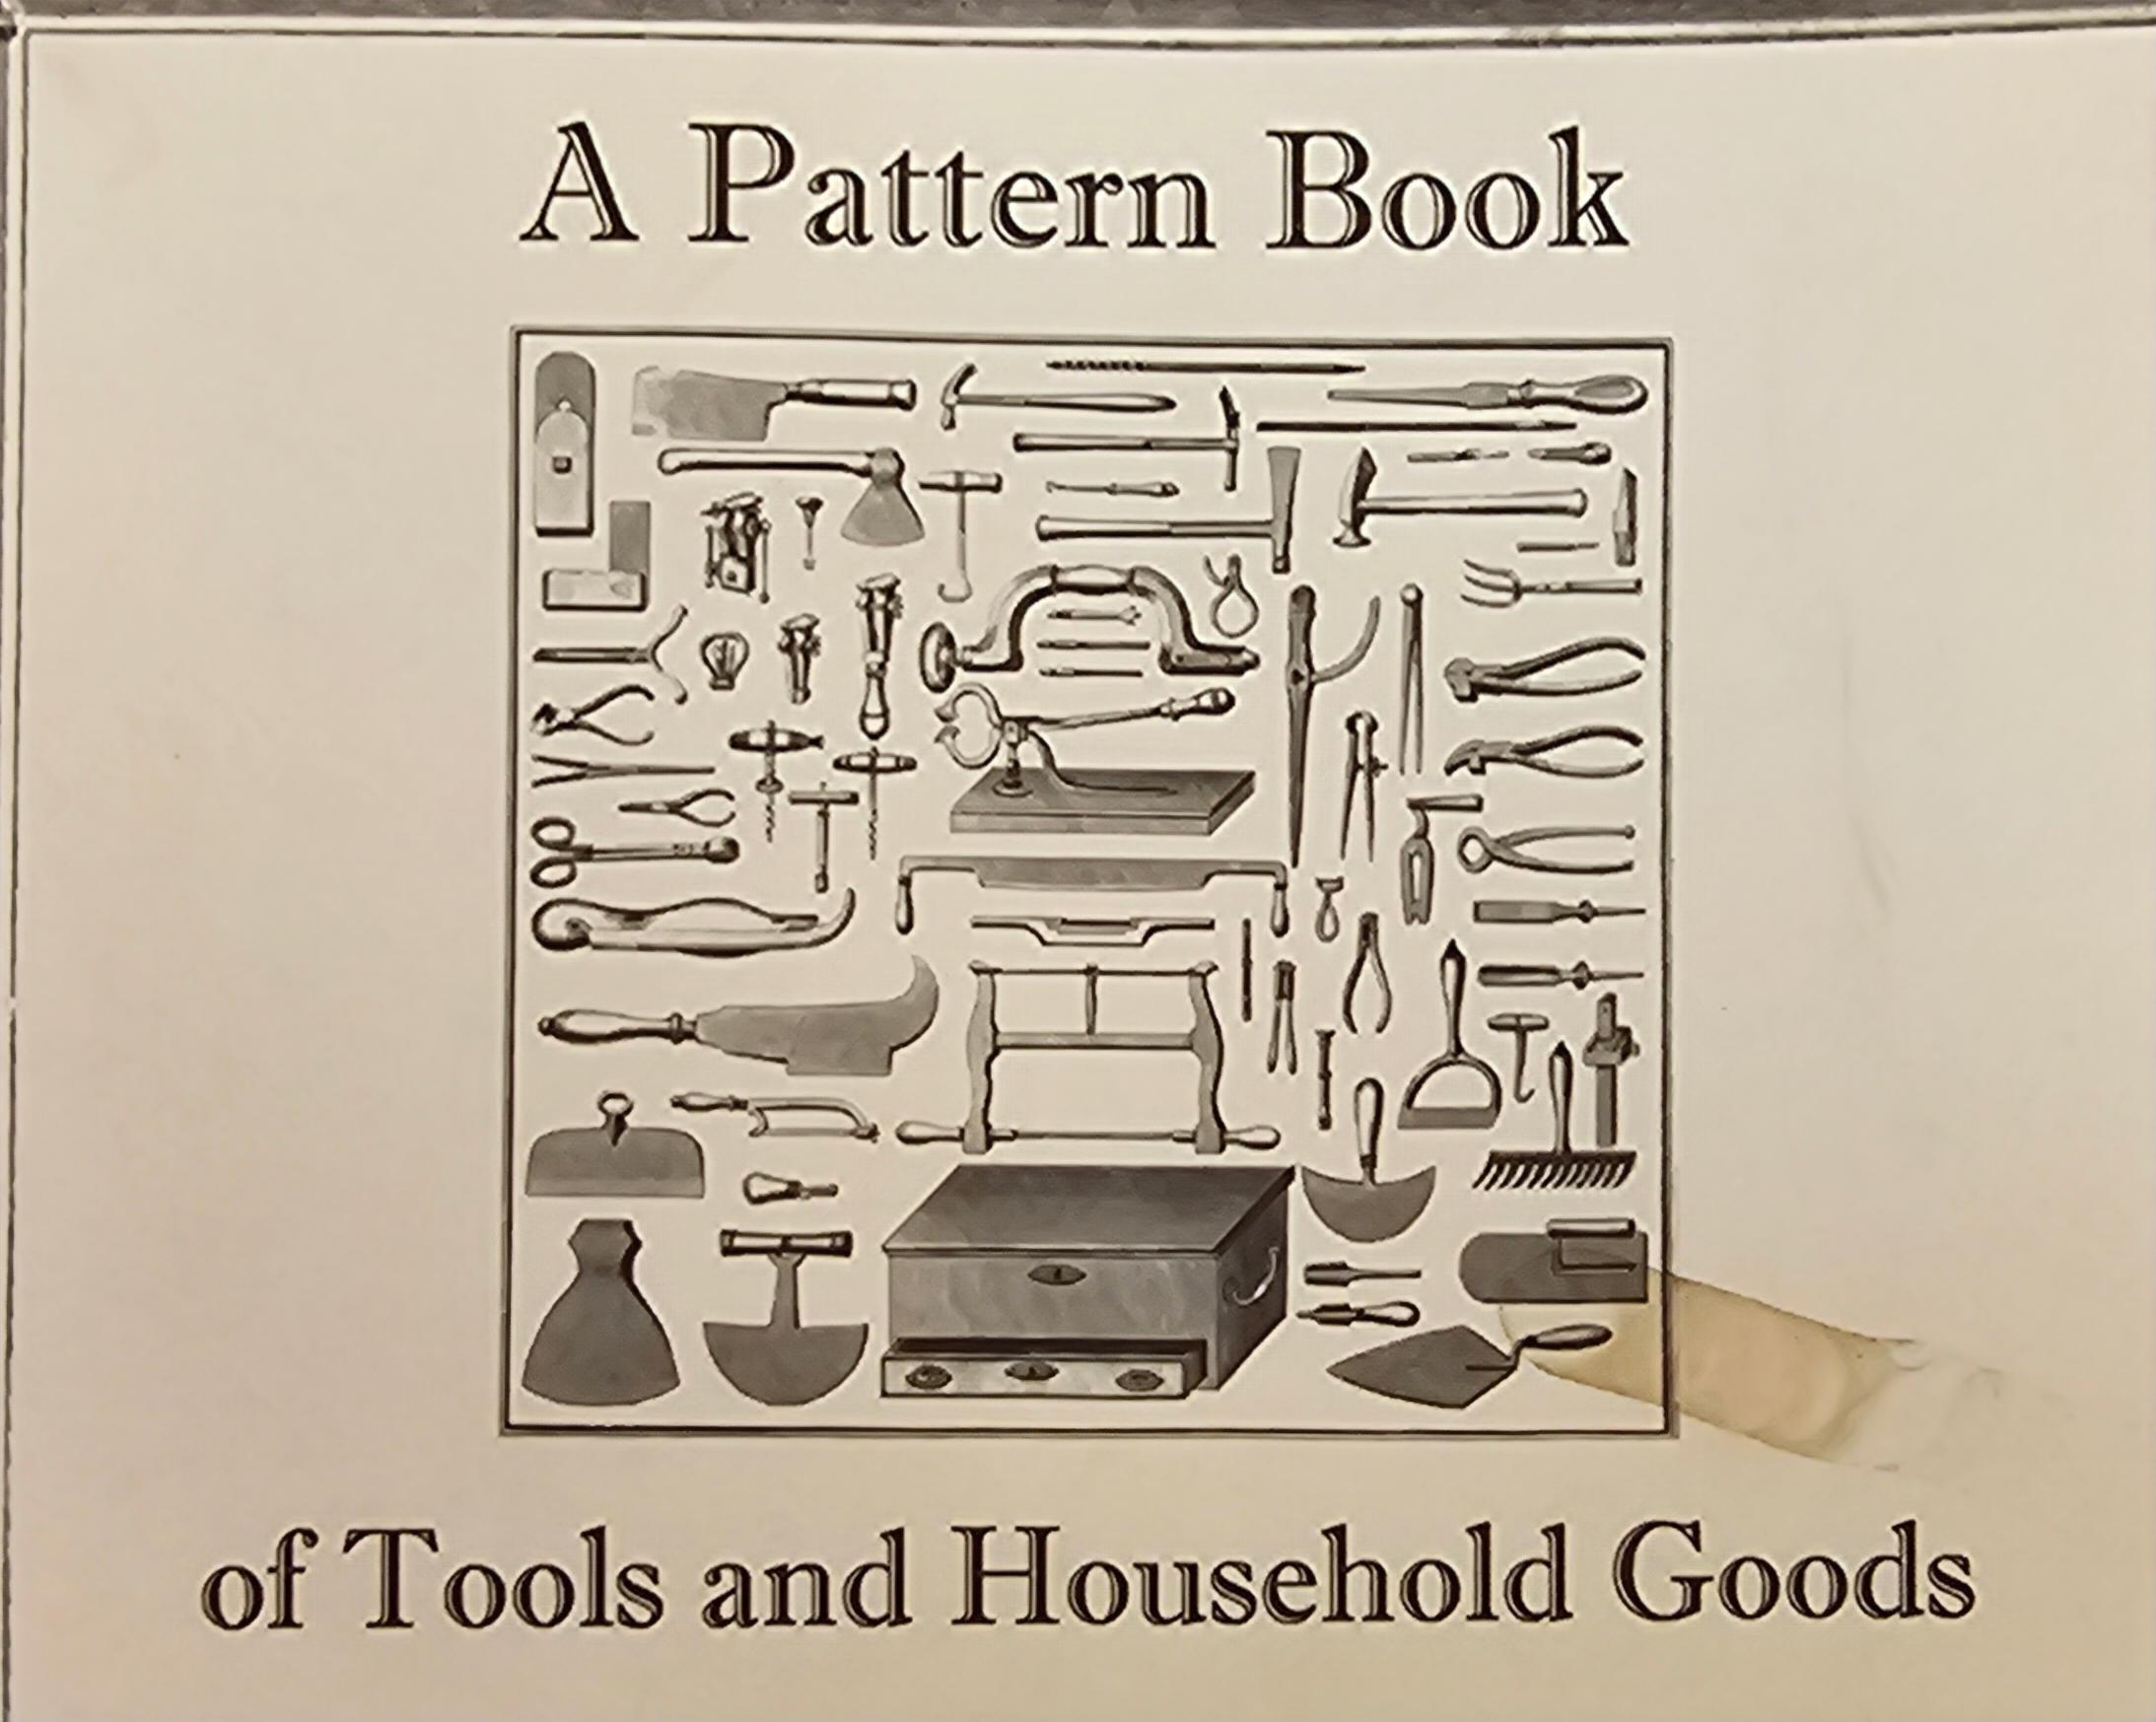
I spent some time again at the "Moses Wilder Blacksmithing shop" in Bolton MA filming for the EAIA on compasses out of the Patterns book.
My first one is complete.. I made a few pieces trying to figure out how they were commercially made but once that was done it went pretty well..
Wrought iron with rasp steel tips. I should throw it in the acid while it's still so clean.. Never thought about that till now.
Not my cleanest work. Decent for number1.


-
Gewoon Ik, Hey, your making some progress.. Very nice.. 6mmX 20mm starting stock?
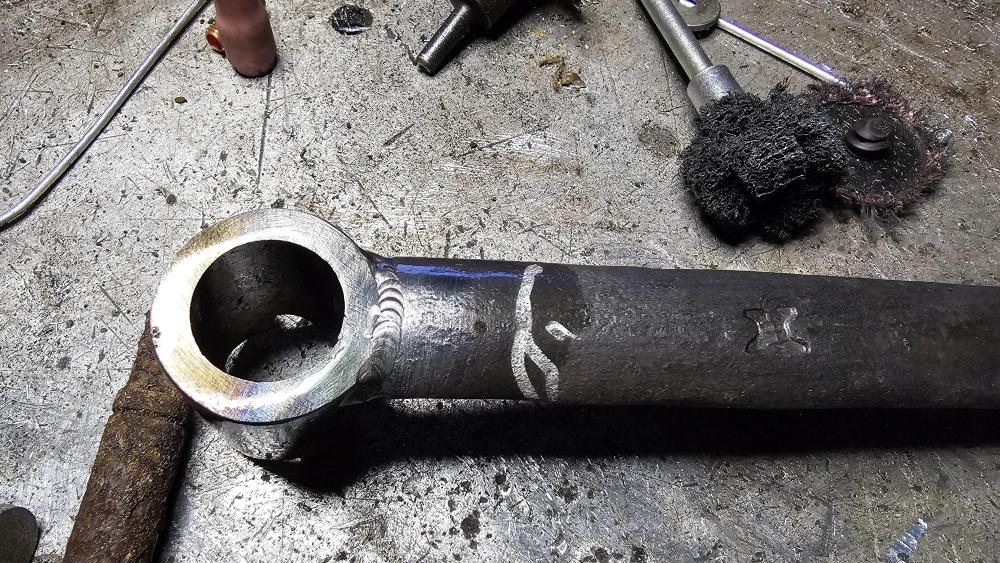
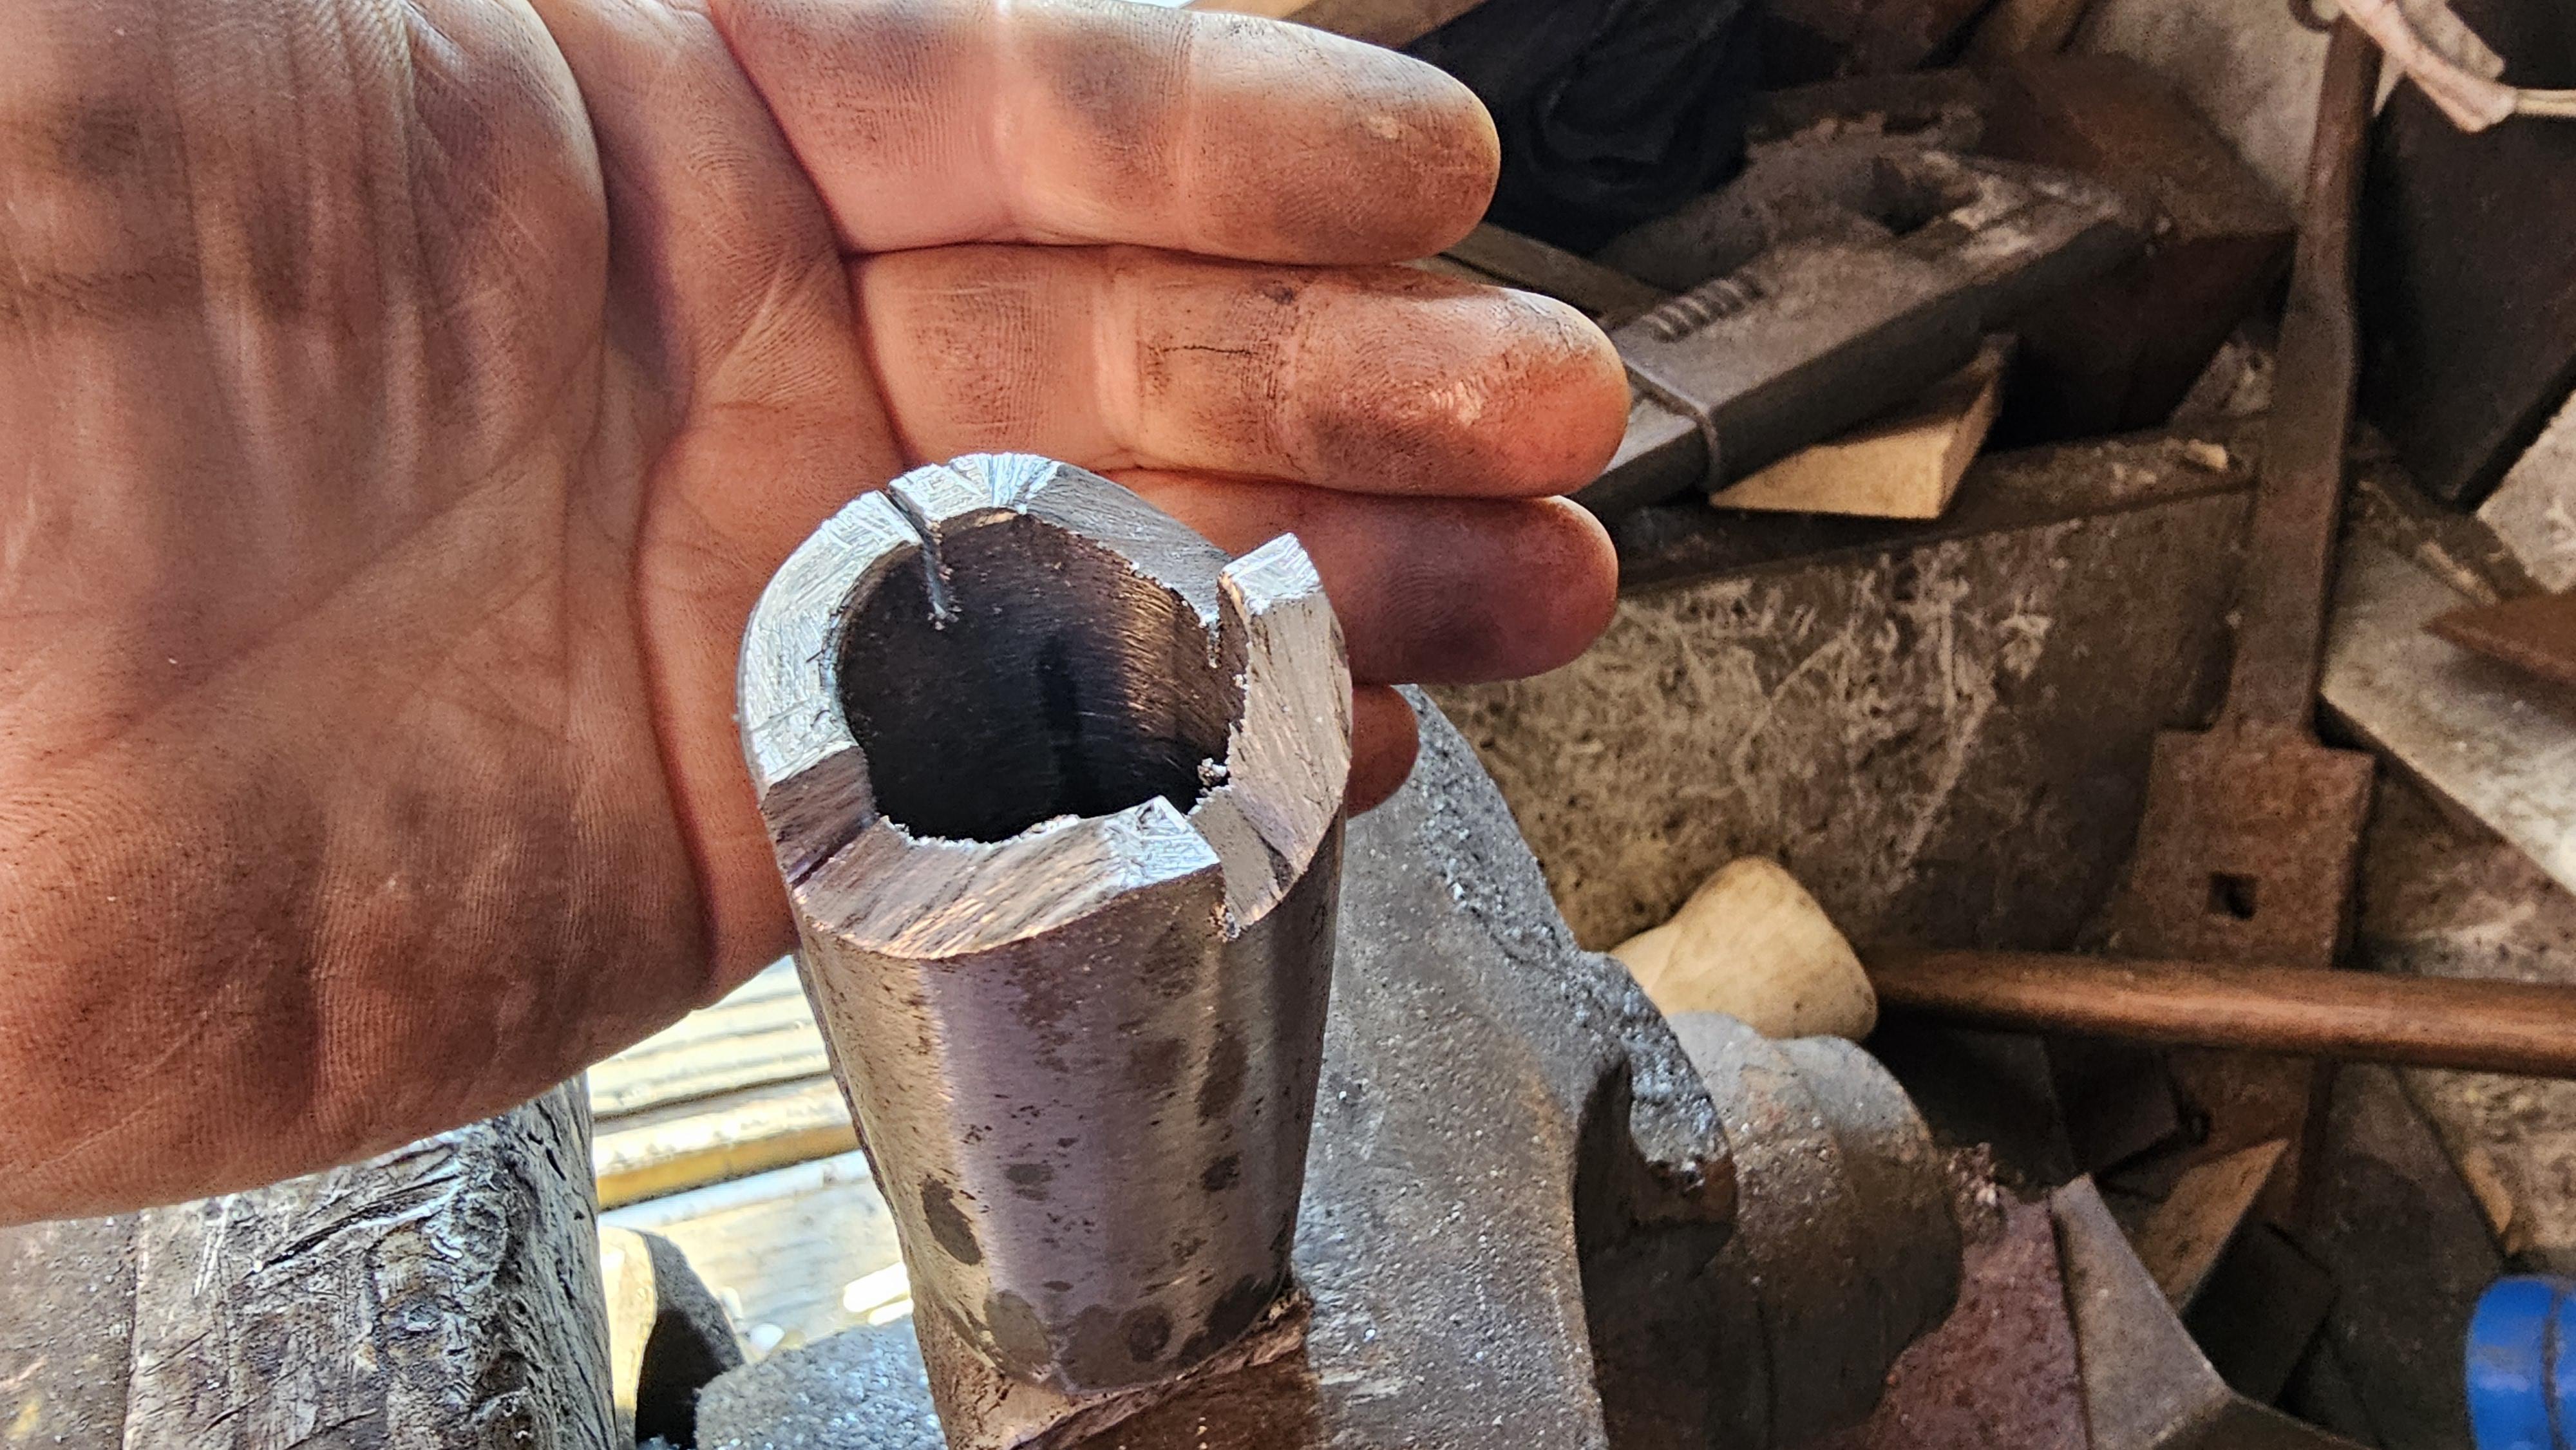
I forged out most the parts for an Air cooled Wisconsin hand crank start lever.
Was only going to forge the socket (1" ID) but then was having too much fun..


-
David is this unit going to be use to Baton thru bone also?
Years ago when I was "into" knives I had looked into cleavers thinking there was only 1 type.. 14/15yrs old.
I soon learned there were many types..
I had gone to an old meat processing place and seeing their cleavers and the edges was educational.
They would saw thru larger bones.. The cleavers were used for joint separation and any soft to hard tissue junction. (knees, hocks, shoulders, ribs).
I'll be super interested to hear how the 8670 holds up against the cutting of the bones..
-
gewoon ik, very nice pineapple handle.
-
David, love the shape and handle. Is this a thick cleaver for processing large pieces or a thin blade?
-
Any course is a good course..
The ABANA course is based on the CBA course layout but reworked slightly. It's a great course and covers nearly all the bases for an Artist blacksmith.
The course outline is on the ABANA website which has been upgraded fantastically over the last few years.
https://abana.org/education/
There are a lot of talented and skilled smith involved with ABANA... The reason why I said it that way is because of how approachable these longer term/skilled smiths are.
The next ABANA meet is in JUne. -
Sound or reverb depends a lot on how the anvil is resting..
If the reverb when struck is dampened it won't ring much. It's the reason people put magnets and such on anvils.
-
The guy who owns the place can be hard to get a hold of.
Your best bet is to FB message him, or email him at the work email address..
This time of year he travels..
He is a really great person..
You can also try to message him here on IFI. -
Swedefiddle, you beat me to it.
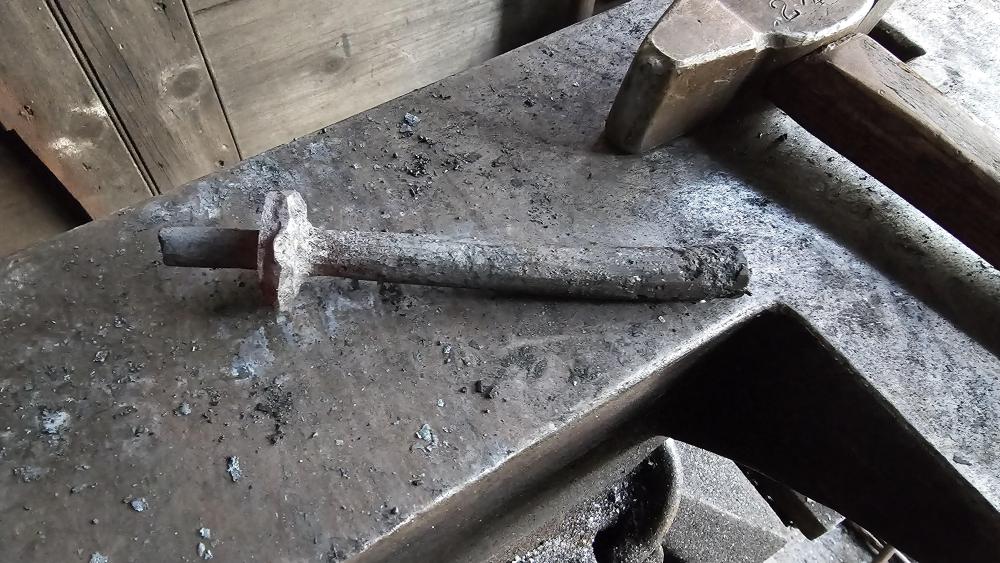
Wanna forge a hammer.. Watch the video on making a Hot set or Handled hot chisel.
Forging an accurate eye in is not difficult..
The hardest part is where to place the hammer eye hole for weight balance.. But if you forge the peen first it becomes a no brainer since one should ideally know what they want for balance in the hammer.
I have great respect for "Brian Brazeal" and his method of hammer making popularized by everyone and their Grandmother..
I'm not a huge fan of slot punching unless its needed for thin metal. Unless you are using thin metal slotting and punching for hammer eyes is way over rated and you need a lot of extra tooling.
If you punch the eye round and ovalize it, it's a 2 step process and can have a finished hammer in just over an hour depending on hammer size..
There is no reason to drill multiple holes.. Draw out the peen to the desired size, cool off the piece slowly, drill one smallish hole (THE SIZE OF YOUR FIRST PUNCH)where you want to run your first punch thru, then follow it up with larger sizes until you see the hammer handle eye size you like..
-
1 hour ago, Goods said:
To me it looked like the AI lost track of you when you moved to fast across and out of it’s field of view. I did like the effect/feel of the video while it was performing well.
I’m always impressed how you produce such clean forgings so quickly. Even breaking down/drawing out that 1-1/4” 4140 without even having to dress back any fish mouthing. Could really be miss leading to a new blacksmith, but I know how much work and skill that takes!
Thanks..
The Obsbot tail is supposed to be able to film sports and such so fast movements are not much of a problem when working right. Not sure what the deal is..
Ok, so keeping the good tracking footage in is ok? Not to long of a video? Those extra 2 to 5min reheat times do add up in overall video length..
David, there are a bunch of things I learned over the years.. Seeing them implemented in person can help see a different experience. There are a lot of things I learned I don't have to do if I do X first.
Not sure if it was clear in the video but pulled the long sides in as a preform before thinning the blade itself. Pinching the metal from the inside out eliminates the tendency to fish mouth and the preform helps minimize corrections to width.
yes, it could be misunderstood or help the newer smith see there is a way to do it, without all the prep most do.
There is a good reason to take classes with schooled and knowledgeable people.. It can really open a new understanding.
I like seeing effective and efficient forging. I'll keep working at it.Frosty I'm not skilled enough to clog and forge at the same time..
I have no idea how the camera tracks.. I do know this was a new thing vs the original model which never had this problem.. This newer model is very fancy compared to the original Tail camera.
The video tracking was good to about 35min then it drifted.. I caught it and eliminated it by 41min in.. But since this camera was in charge of sound the sound dropped off and the volume has to be raised..
Your tolerance for shaky camera footage must be low.. Visual disturbances can be tough.. You might do better with a single camera position without the switching.. -
3 hours ago, LarryFahnoe said:
Sometimes I live under a rock (even though I have a background in IT), so your mention of AI tracking piqued my curiosity. While it was behaving itself I thought it was quite effective, providing much more of a sense of the space you're working in. If you had a static camera then I think the reheats would get tiresome, but with the tracking it really provided much more of a sense of just how much time goes into this particular project. One of your youtube commenters notes that you make it feel very approachable & I'd guess that leaving the reheats in might reinforce that for her. For me though, just thinking about what that chunk of 4140 weighs, I have a tough time visualizing myself taking that on. That said, you do make it approachable by giving the sense of continuity with (what appears to be) minimal things edited out. I think the camera tracking also mimics what a viewer might do if they were in the trailer with you, following you around rather than being constrained to a single perspective.
Out of curiosity, what were you fiddling with up on the wall above the hammer rack? It appeared that you were using your phone to control the Obsbot camera.
--Larry
That's great feedback right there.. Thanks.. I have a tough time judging and not sure what people would want to see.
I'm not exactly sure how Obsbot does it.. I do know they have something mounted in the side of the lens and it has to be open.. So a filter has to have an open section so as not to block it.
What I was doing was turning on the upper camera.. The front camera is mounted nearly on the ceiling at the corner..
My anvil is mounted lower than knuckle height so I do not have to hold the bar up with a bent arm.. Basically, my arm is nearly straight, and just have to hold onto it. 31" is my anvil height. -
Thanks Larry.. Your feedback is much appreciated.. And your welcome.
It did go wonky and it would not track or stay locked on target.. I sent footage to the company and hope they get it resolved.. I bought the cameras for doing live streams..
The trailer is very cool maybe 55F that day.. it is possible though that the cameras themselves getting hot from use can be the problem.
Somewhere around the time of the first fade off, the camera took on a mind of it's own much quicker.. I gave up after 4 corrections..
Was having the reheat times in the video a good thing? I've left them out previously because I thought no one wanted to see me standing there.. The reheat times don't warrant a song and dance intermission.. -
Well I needed a new cold set. Been getting ready with a group of smiths for the upcoming ABANA group forging competition and wanted to bring my tool design to the table. This is more or less the design I like.. I like a blade with a very narrow cross section and a () profile.
.. Not my best video job but trying something new with an AI tracking camera and instead of wasting the footage figured I'd put the video together.
I did not watch the video in it's entirety so if someone finds a glitch please let me know. Yup, I"m a slacker.
-
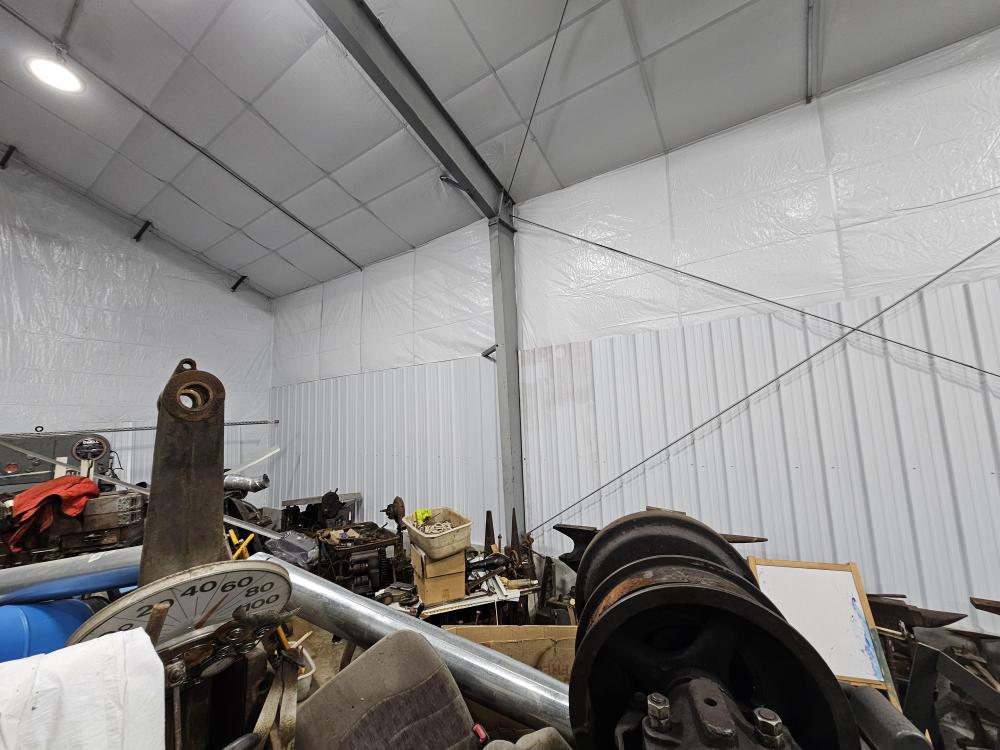
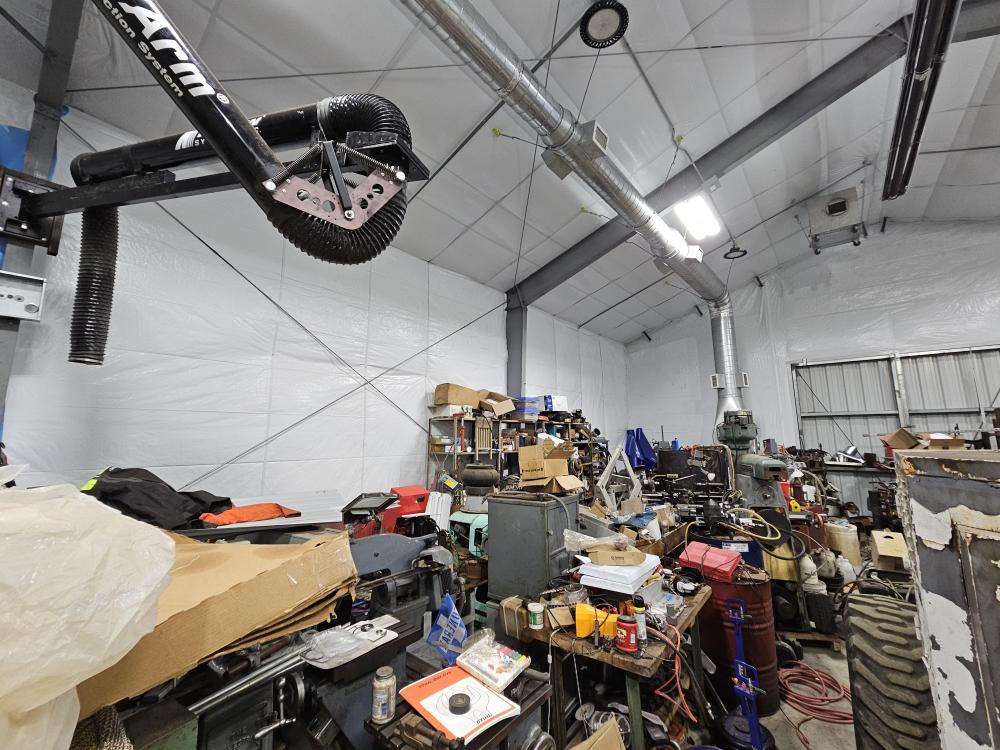
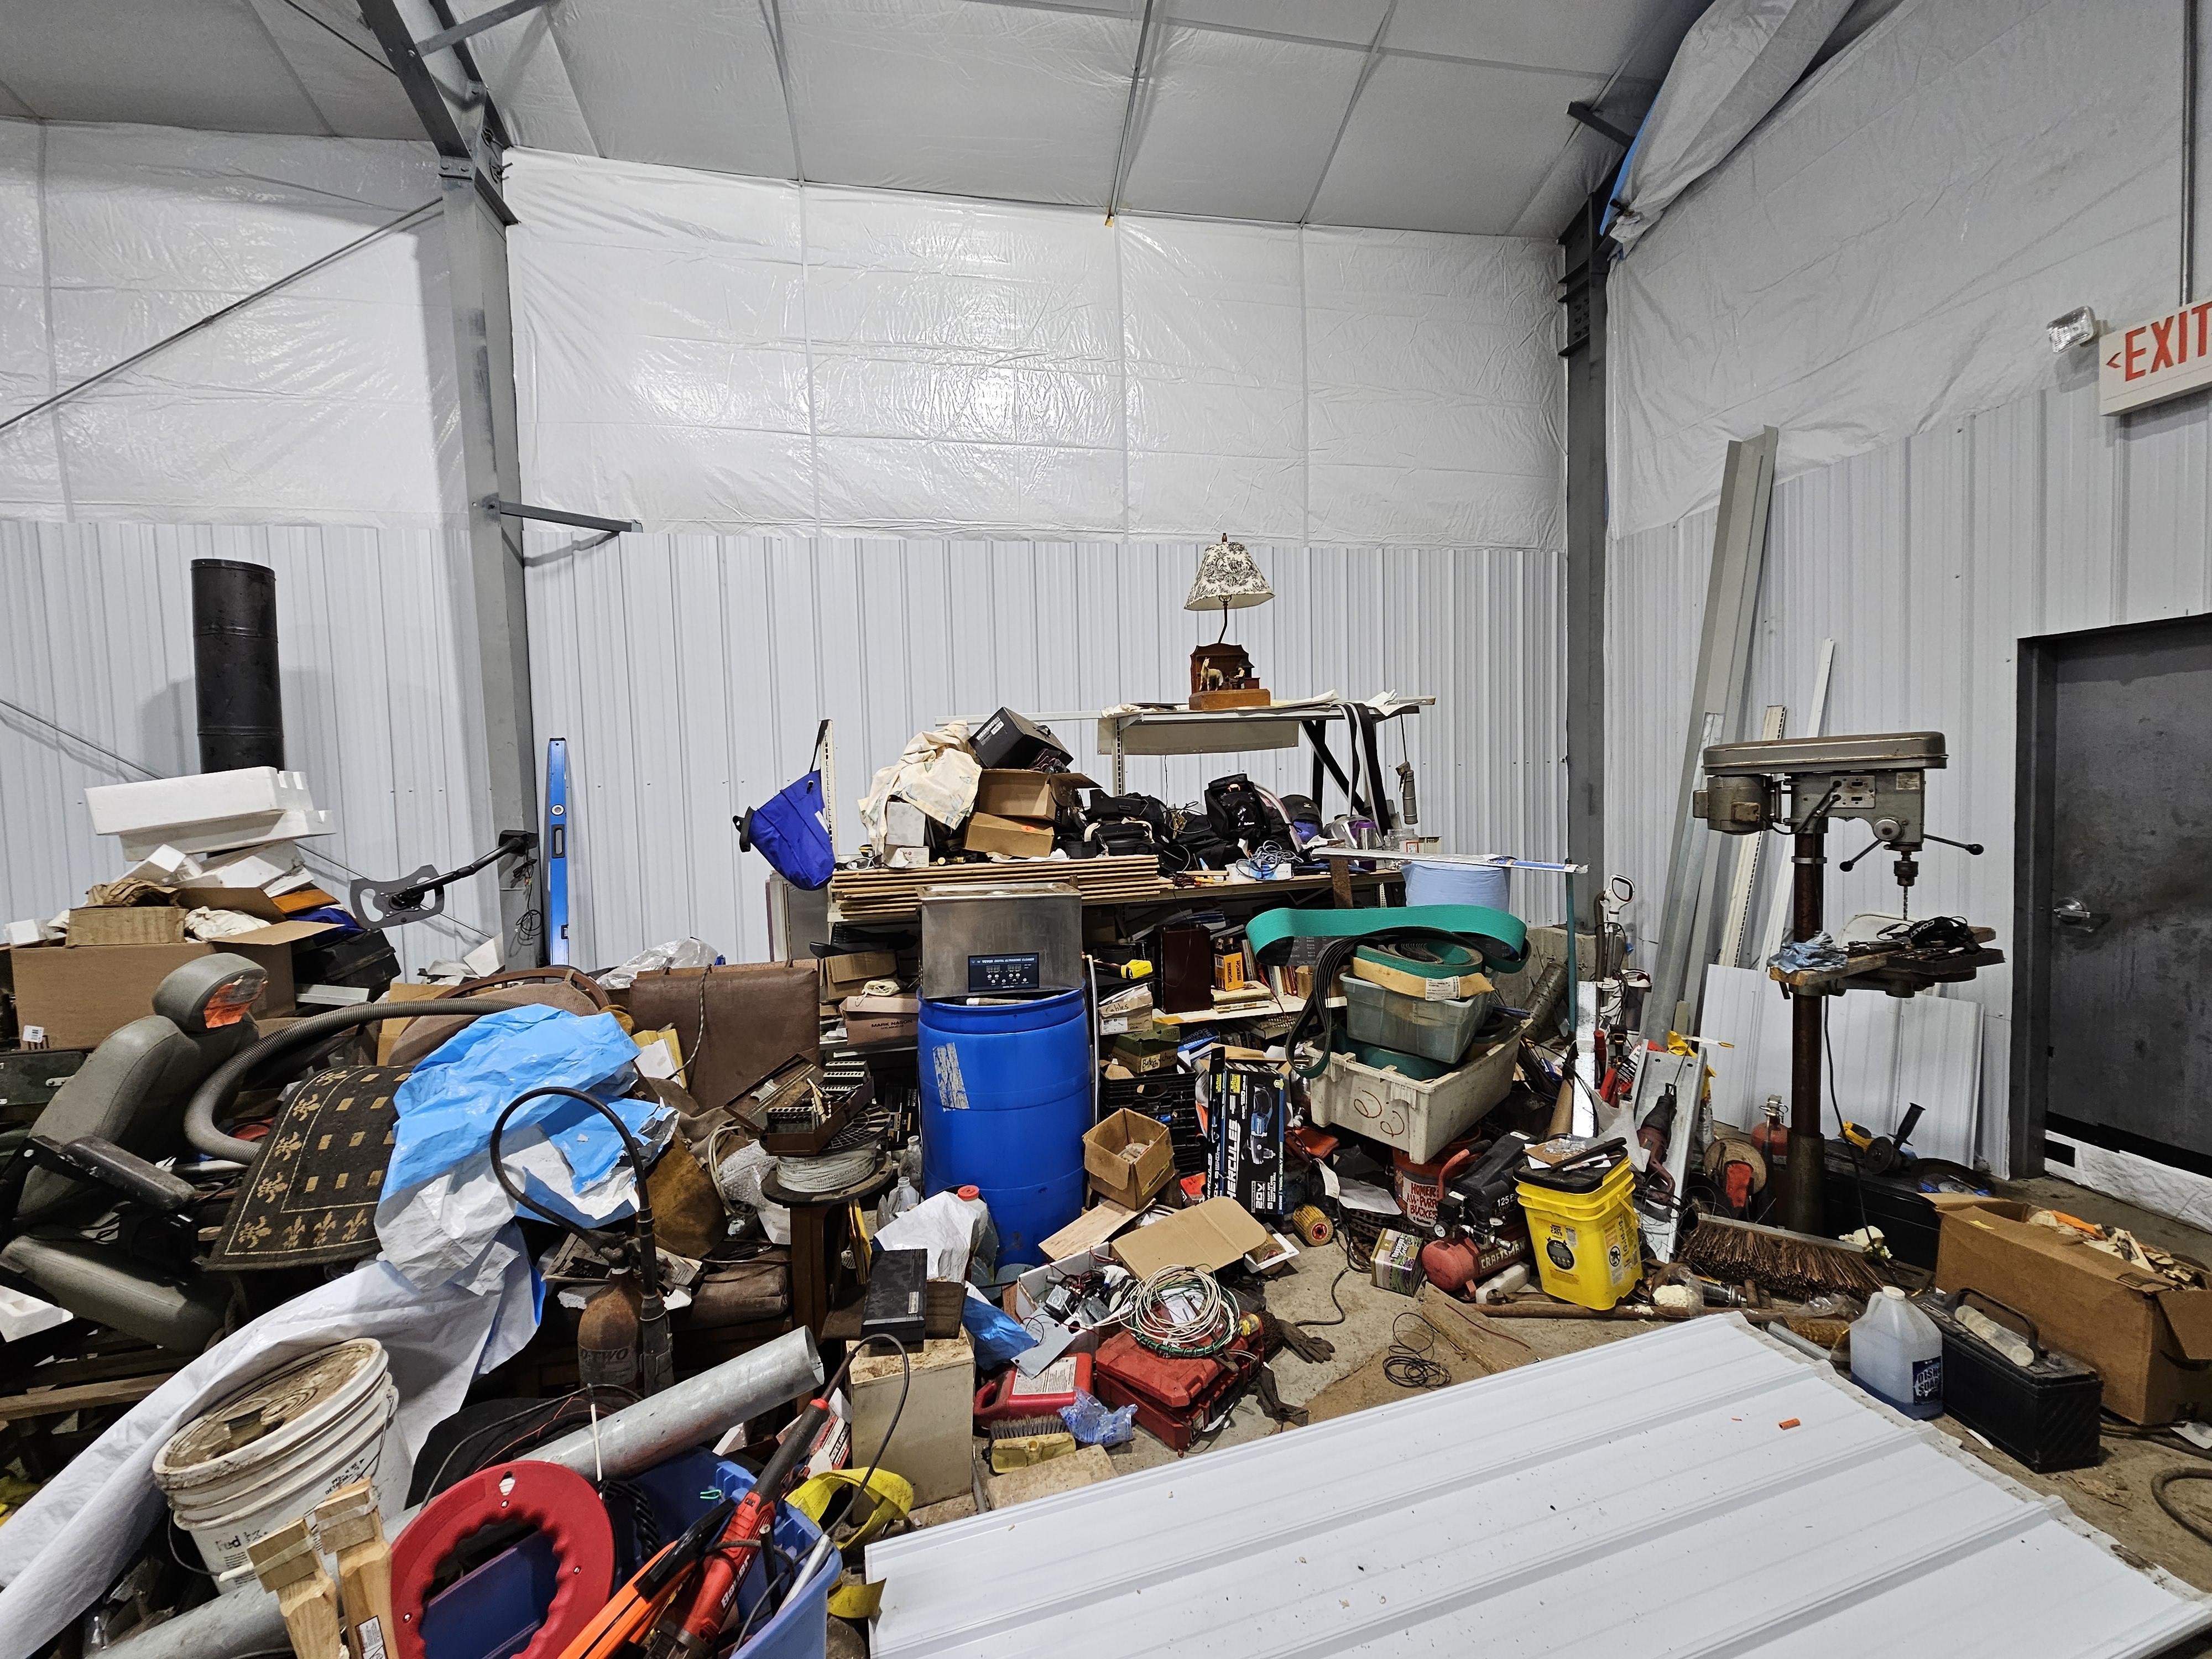
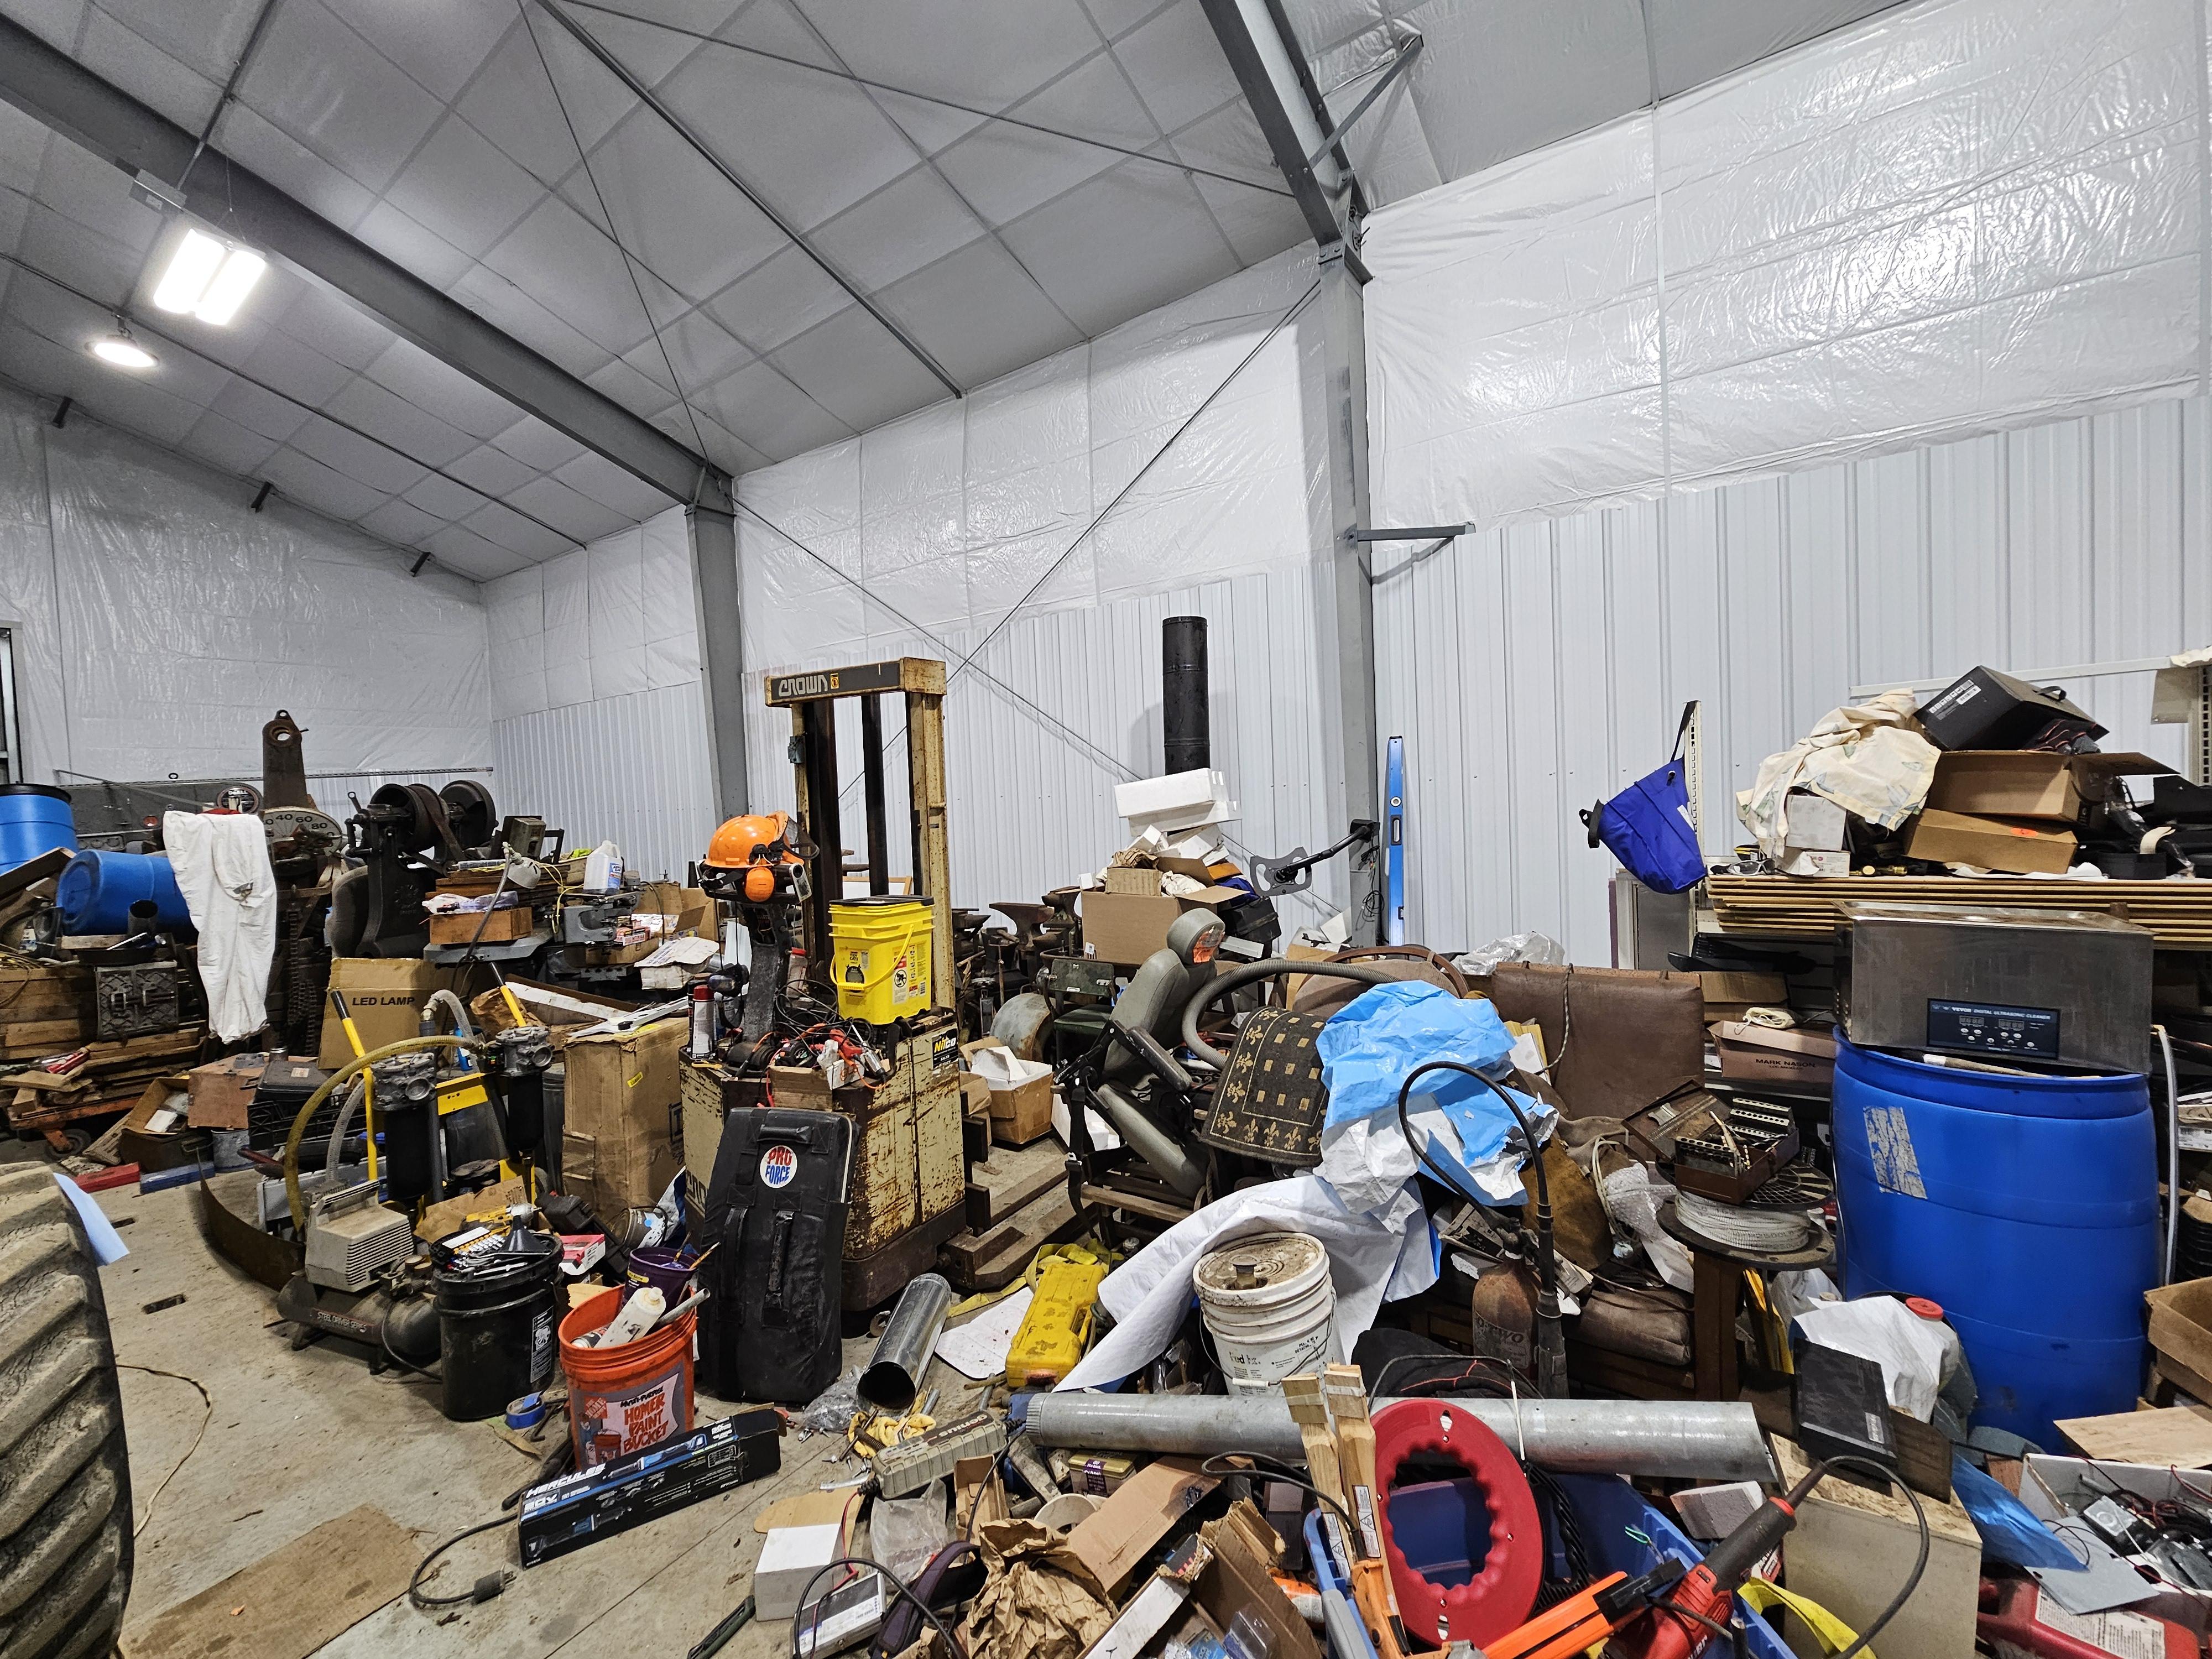
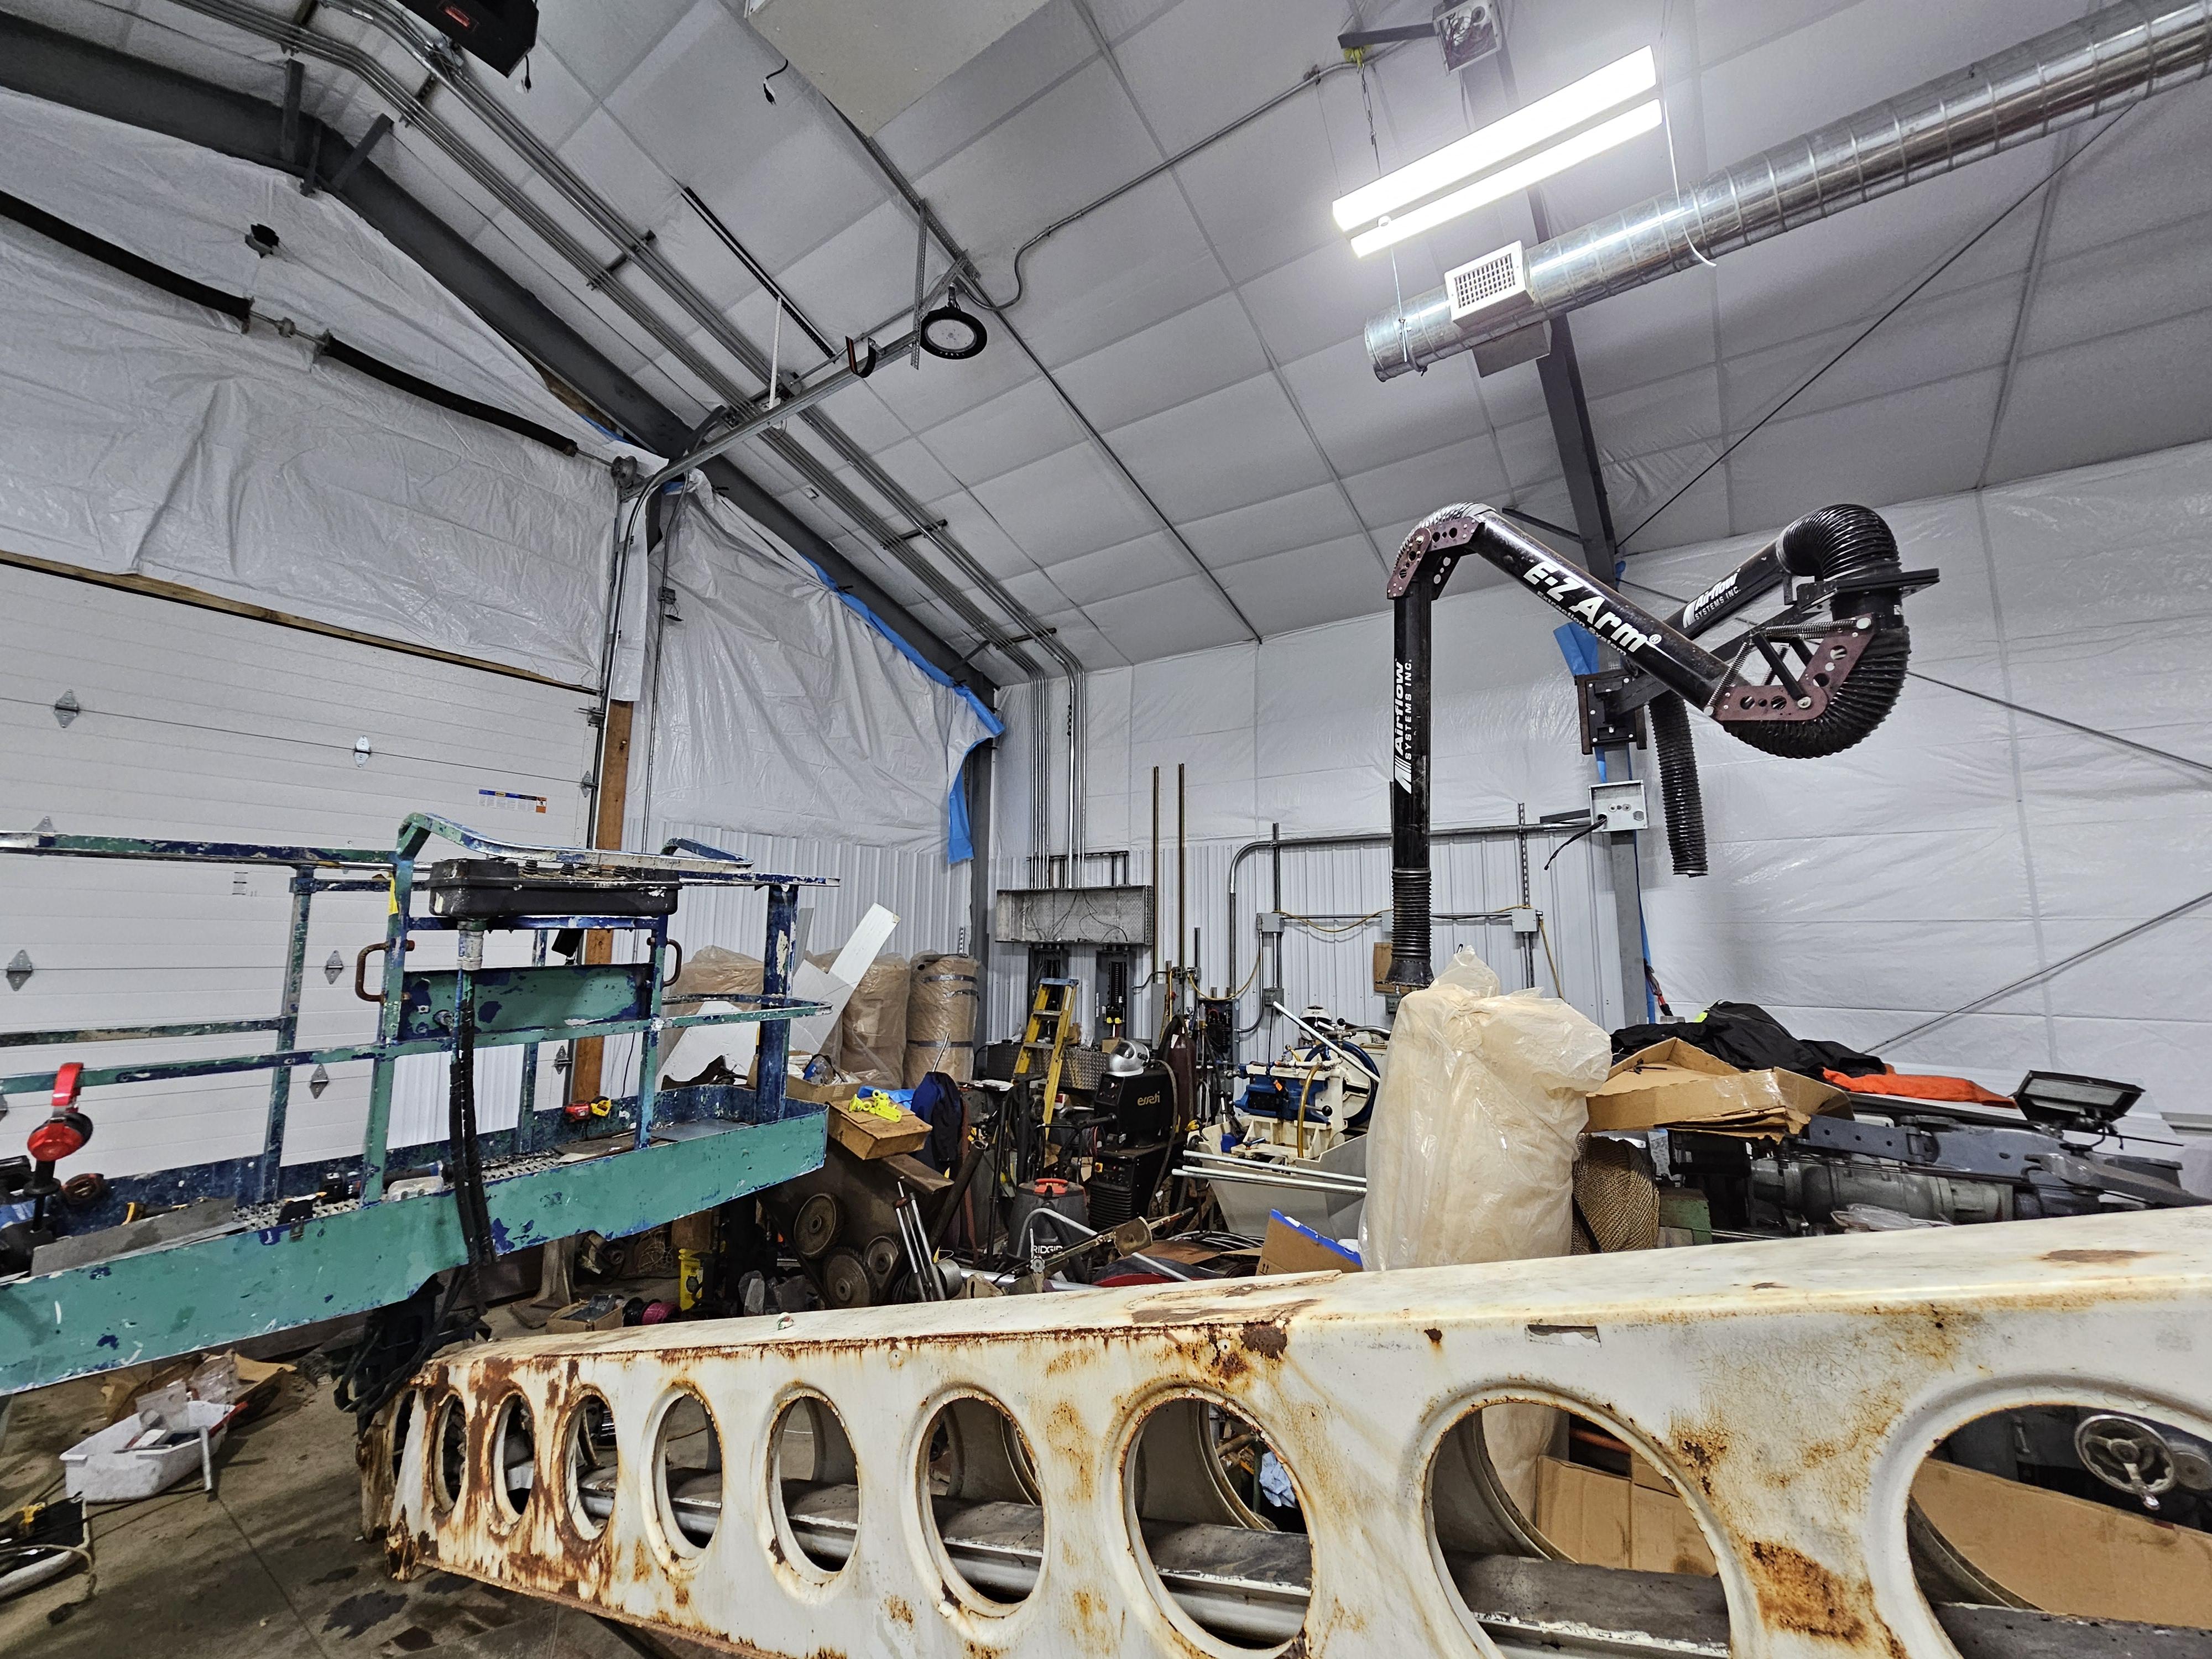
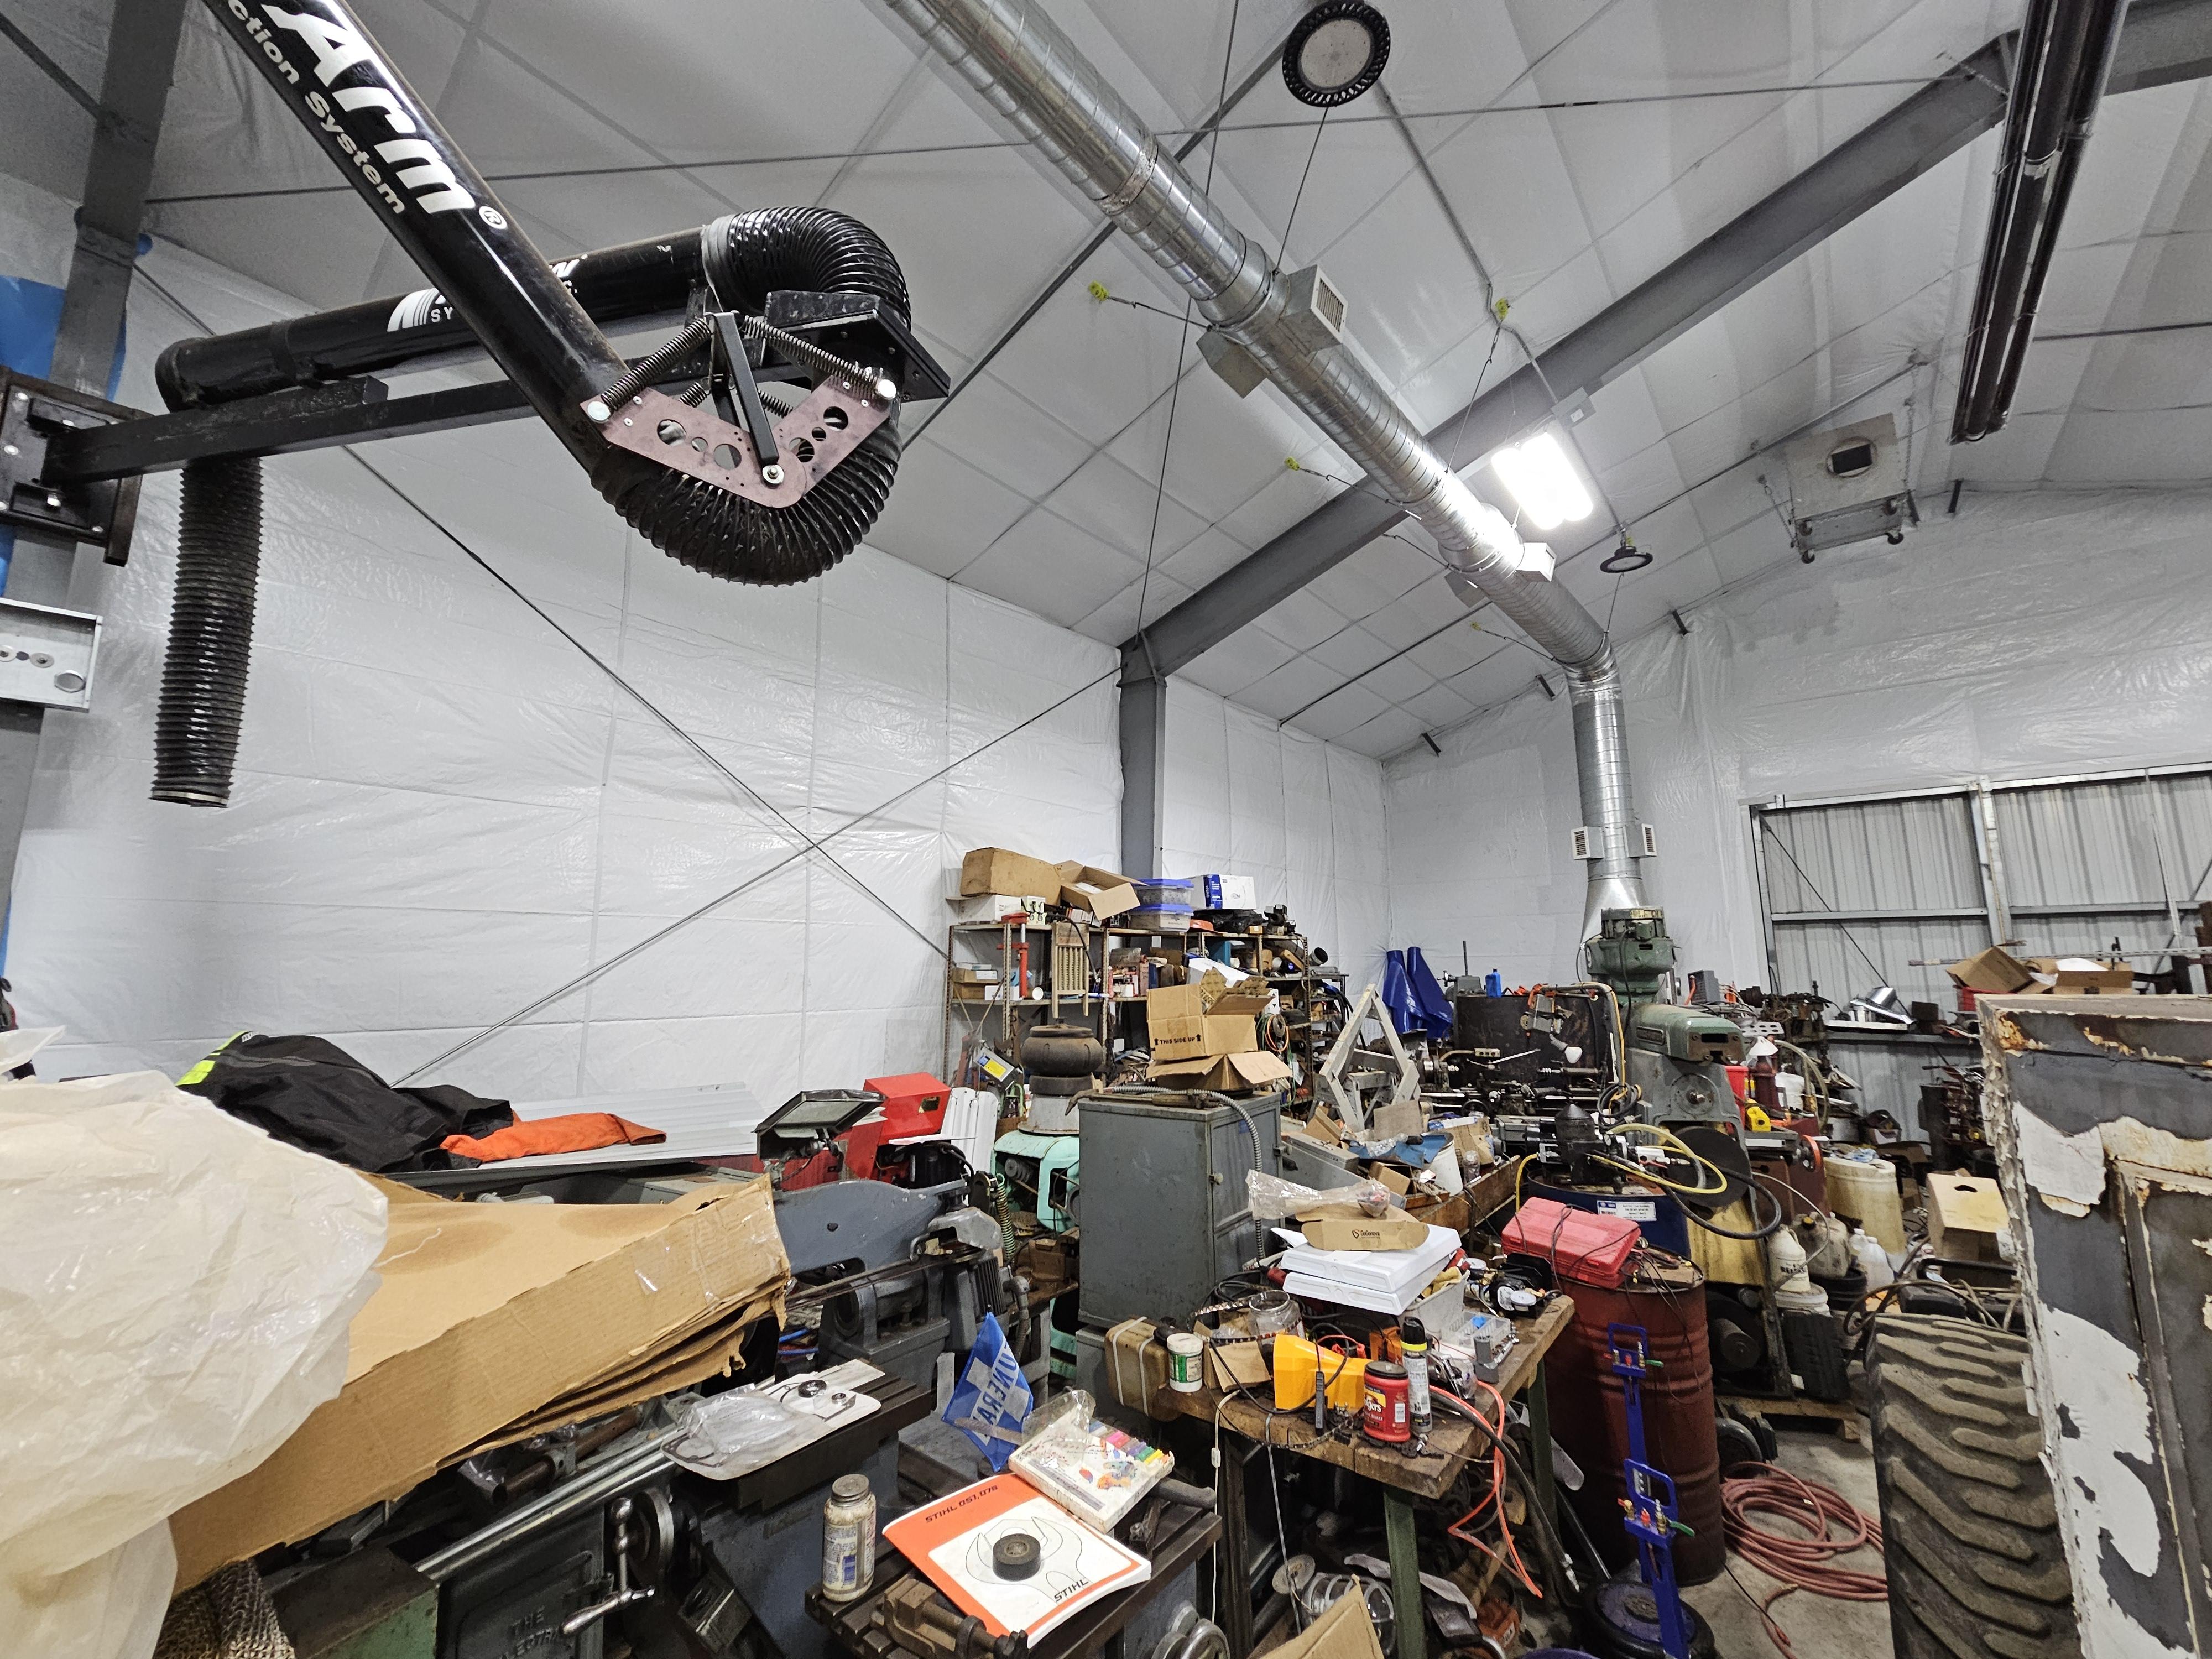
Frosty and gang.. when the building was being built the front shed areas foundation and spacing were setup for walls to seamlessly match the main building..
So can add 20ft when the time comes..
As for time and finished.. I think so.. I mean I do think there will come a time when the inside is finished and items are in their organized areas..
Because of the extent of "trades" Foundry, machining, blacksmithing/bladesmithing/ wheelwright. I'm still not sure how to store the items that are not in use..
I have an idea to stack the machines on pallet racks at the end of the building and pull them down for use...
But again these are just ideas.. The hardest part is coming up with installing the smoke stacks and is the last major hurdle.
While the photos make it look extremely cluttered most of it is just camera flash.. Meaning only seeing what is in the forefront of the photo.. There is a lot of empty space behind everything.
The smoke stacks will mean having to move the manlift outside and machines into their working areas..
So the simple answer is "yes" it will be completed sometime and soonish.. Time goes by so quickly now. -
David, Steve it's hard to believe july 15 2019 is when the site prep started.
That's a lot of years to add equipment that were to good of a deal to pass up on in the hopes of potential use.
In some places you need to be mountain goat for sure.
I keep telling myself it will be ok...
I do so many things to support what I do, oil burner tech, auto technician, machinist, lumberjack, plumber, etc, etc. And nearly all the tools that go along with that trade.
It makes for a lot of stuff.
If I just did blacksmithing/bladesmithing it would be so simple.
-
got another bay of siding up. These only leaves 4 bays left. The 2 on the side walls on the left side. and 2 at the end wall.
The end walls are 1.5" thinner in the centers so they need to be shimmed to the full outer which you guessed it is the level steel framing..
Who would design a building that you have to put 1.5" shimms in the middle of a wall to make it level with the perimeter?
2 weeks from today my buddy Eric is coming down and we are going to start with organizing and sorting..
I see a couple of scrap runs in my future.
Also some equipment sales..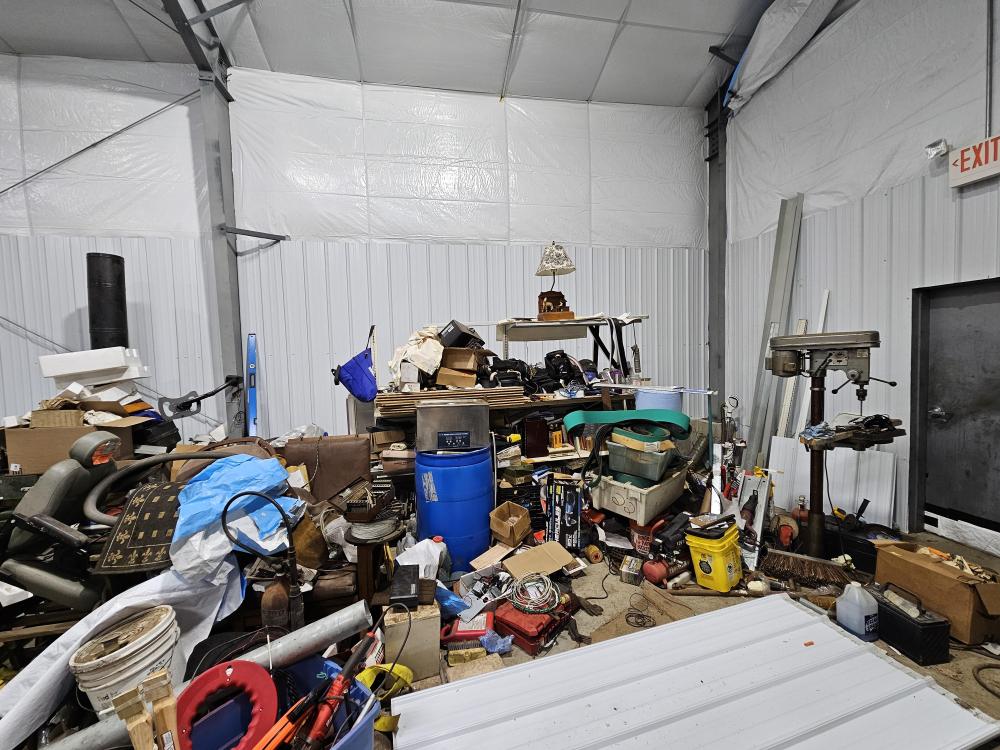


-
VoldemarDemid that is a very nice shop.. The new anvil looks very much at home and love the stand as well..


JLP Blacksmith Teaching Center.
in Building, Designing a Shop
Posted
Well it's been some time since an update.. Been busying with other things in an attempt to get caught up some with other things on the list.
")
Hikerjohnson came down last weekend for some course instruction on an upcoming class he is assisting with. While here he mentioned that I might really want to look into pallet racks and to do it sooner than later..
I asked him how he was stack the shelves I have and he laughed and said he would not recommend it..
I've picked up several new to me pieces of equipment of note was a "Cincinnati Monoset Tool Grinder". This is a very good tool grinder.
It started when I wanted to use the pantograph thinking I had bits and I did not have the right sized ones.. So I went online to look for a tool sharpener for the pantographs.. Deckel SO were in the 2-4K range..
I then searched FB market place and this grinder I had seen at 3k and dismissed it. When I looked again it was half that.
I spent about 40hrs cleaning it and the work holder drive motor.
Ordered some of the missing parts..
Today was the first time running the machine and I have a lot to learn.
Worked on sharpening this drill bit that had nearly 3/8" off of one side. I then tried to split point it. Lots to learn.