Donniev
-
Posts
189 -
Joined
-
Last visited
Content Type
Profiles
Forums
Articles
Gallery
Downloads
Events
Everything posted by Donniev
-
Interesting, thanks for the responses everyone, you learn something new every day!
-
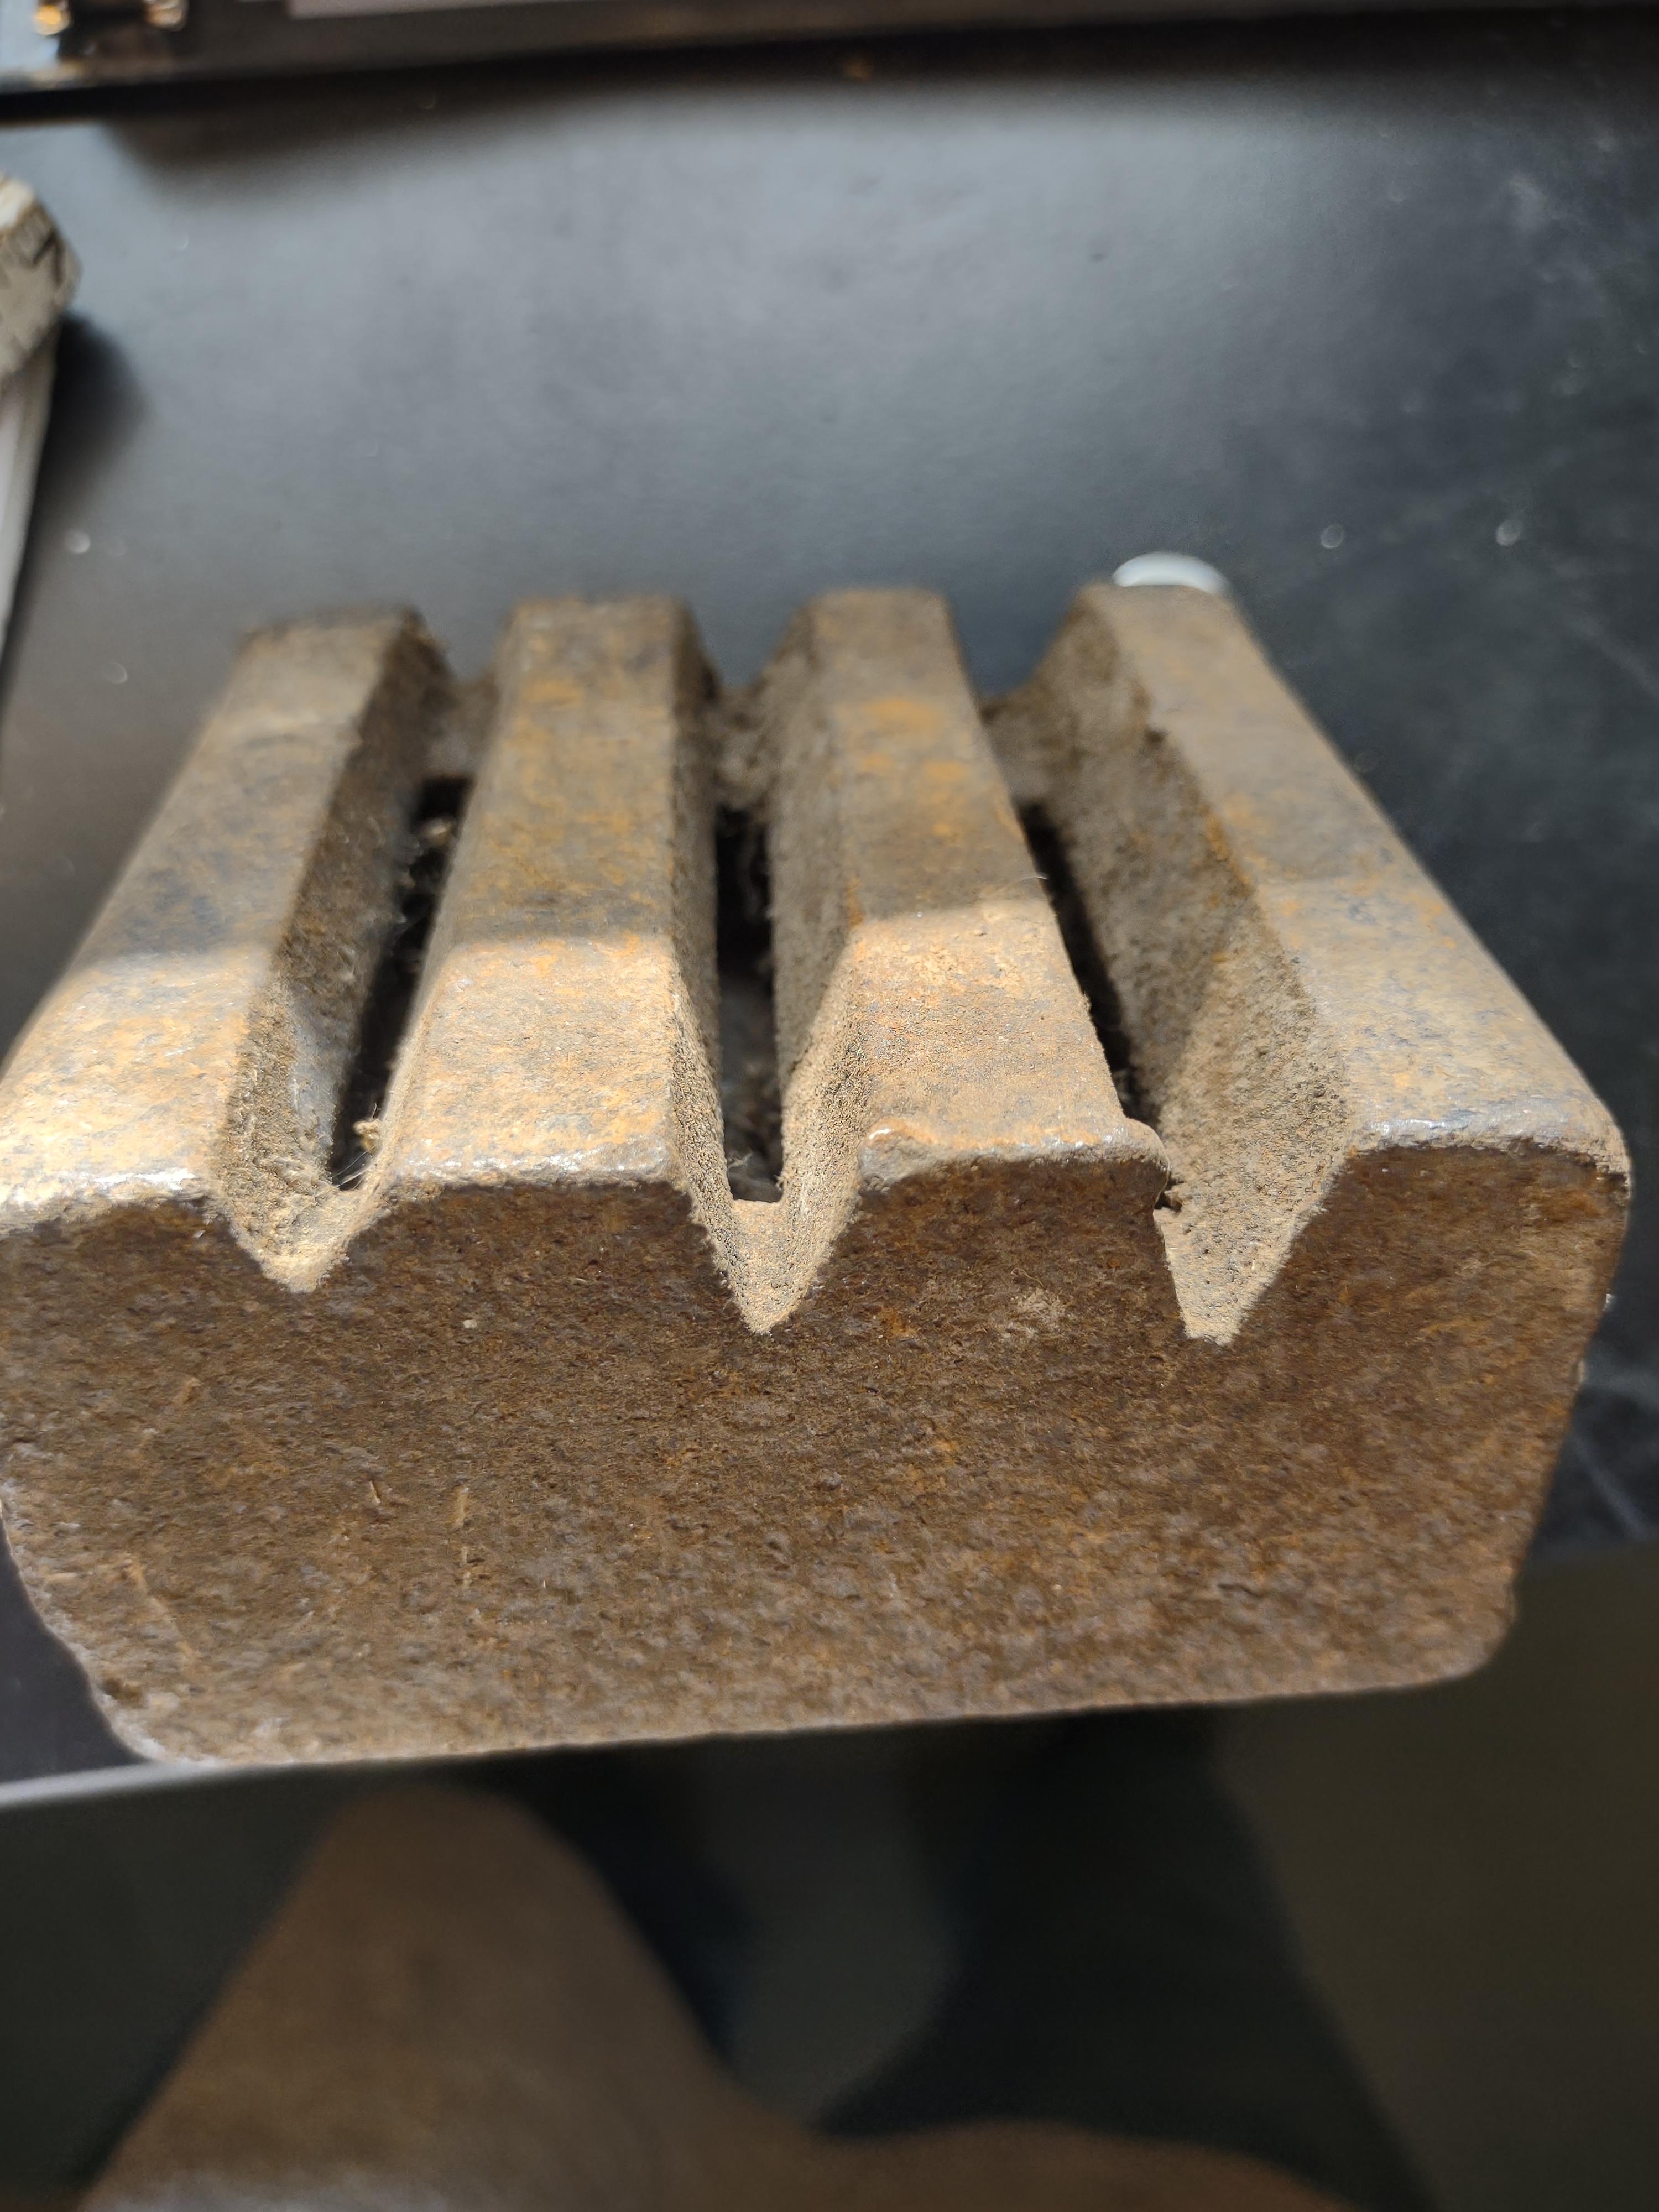
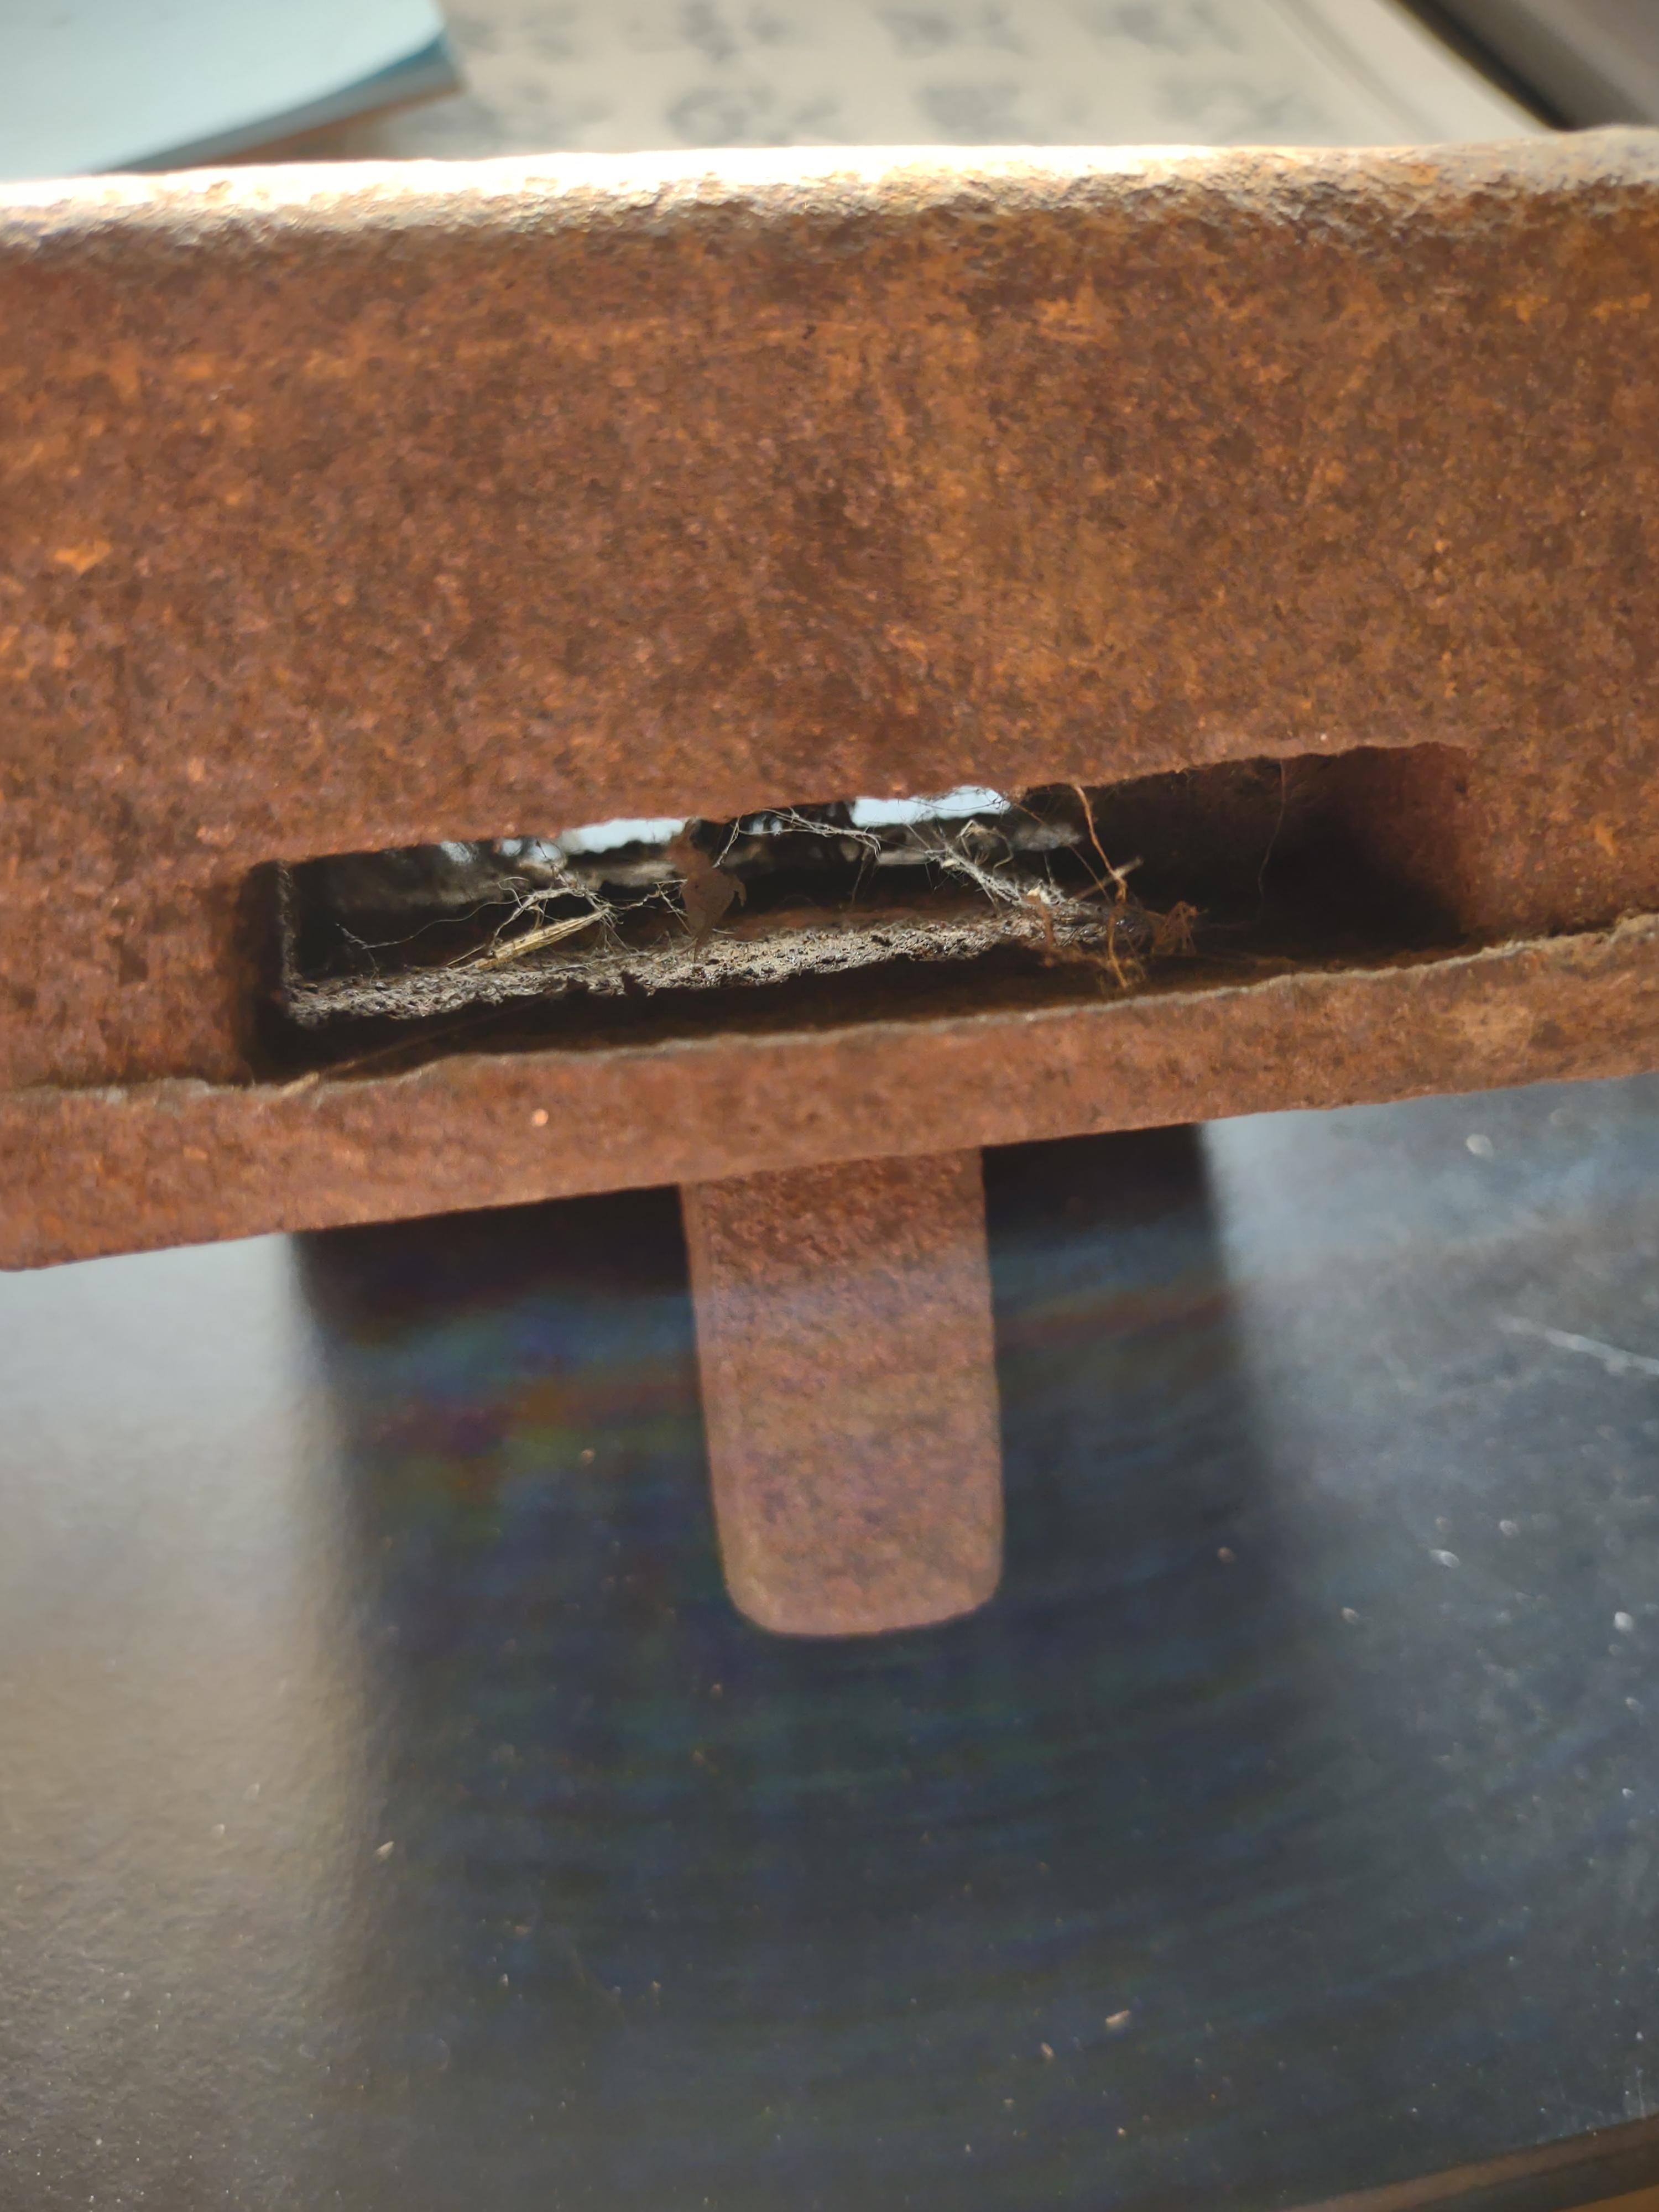
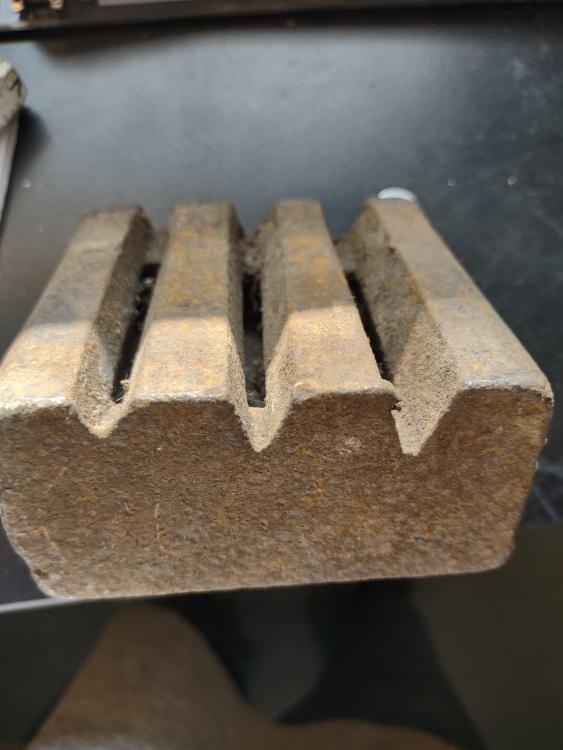
This came in a small lof mini swages I bought at auction yesterday, trying to figure out why it's hollow in the center. It has a hardy shank of it so it's meant for the anvil, just trying to figure out why it would be hollow, any ideas? Measures about 3.5"*3.5"

-

What did you do in the shop today?
Donniev replied to Mark Ling's topic in Blacksmithing, General Discussion
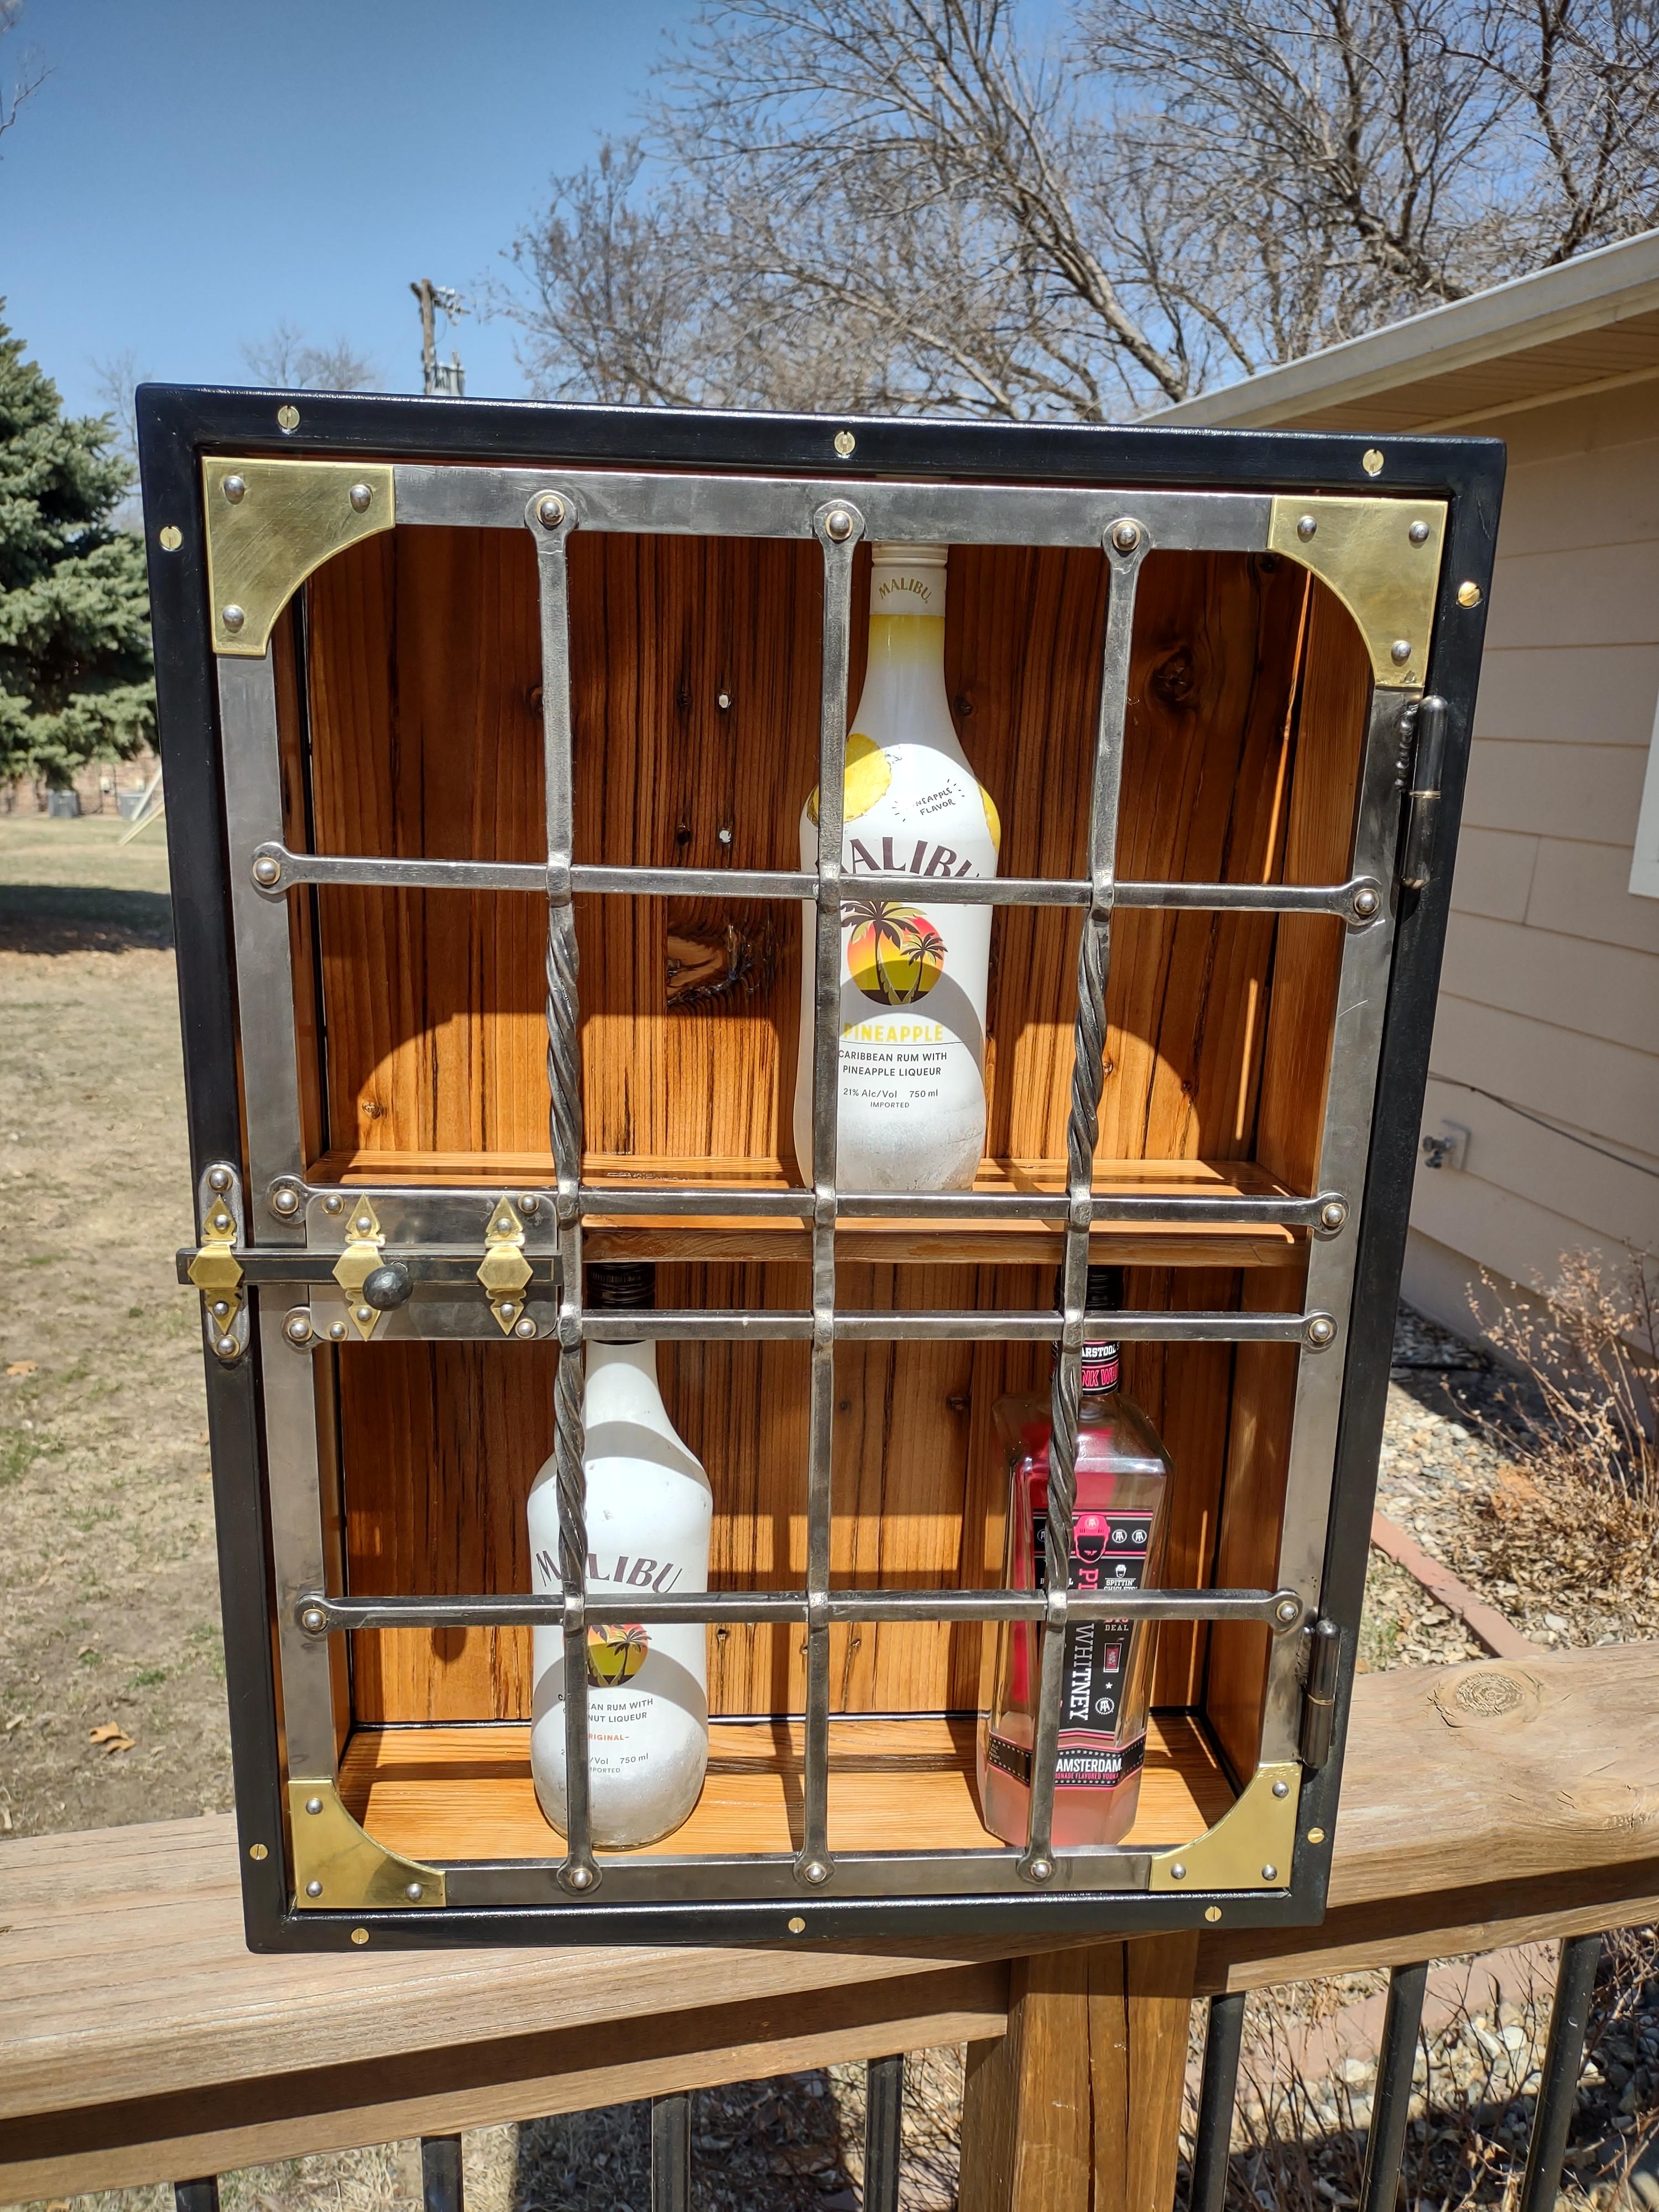
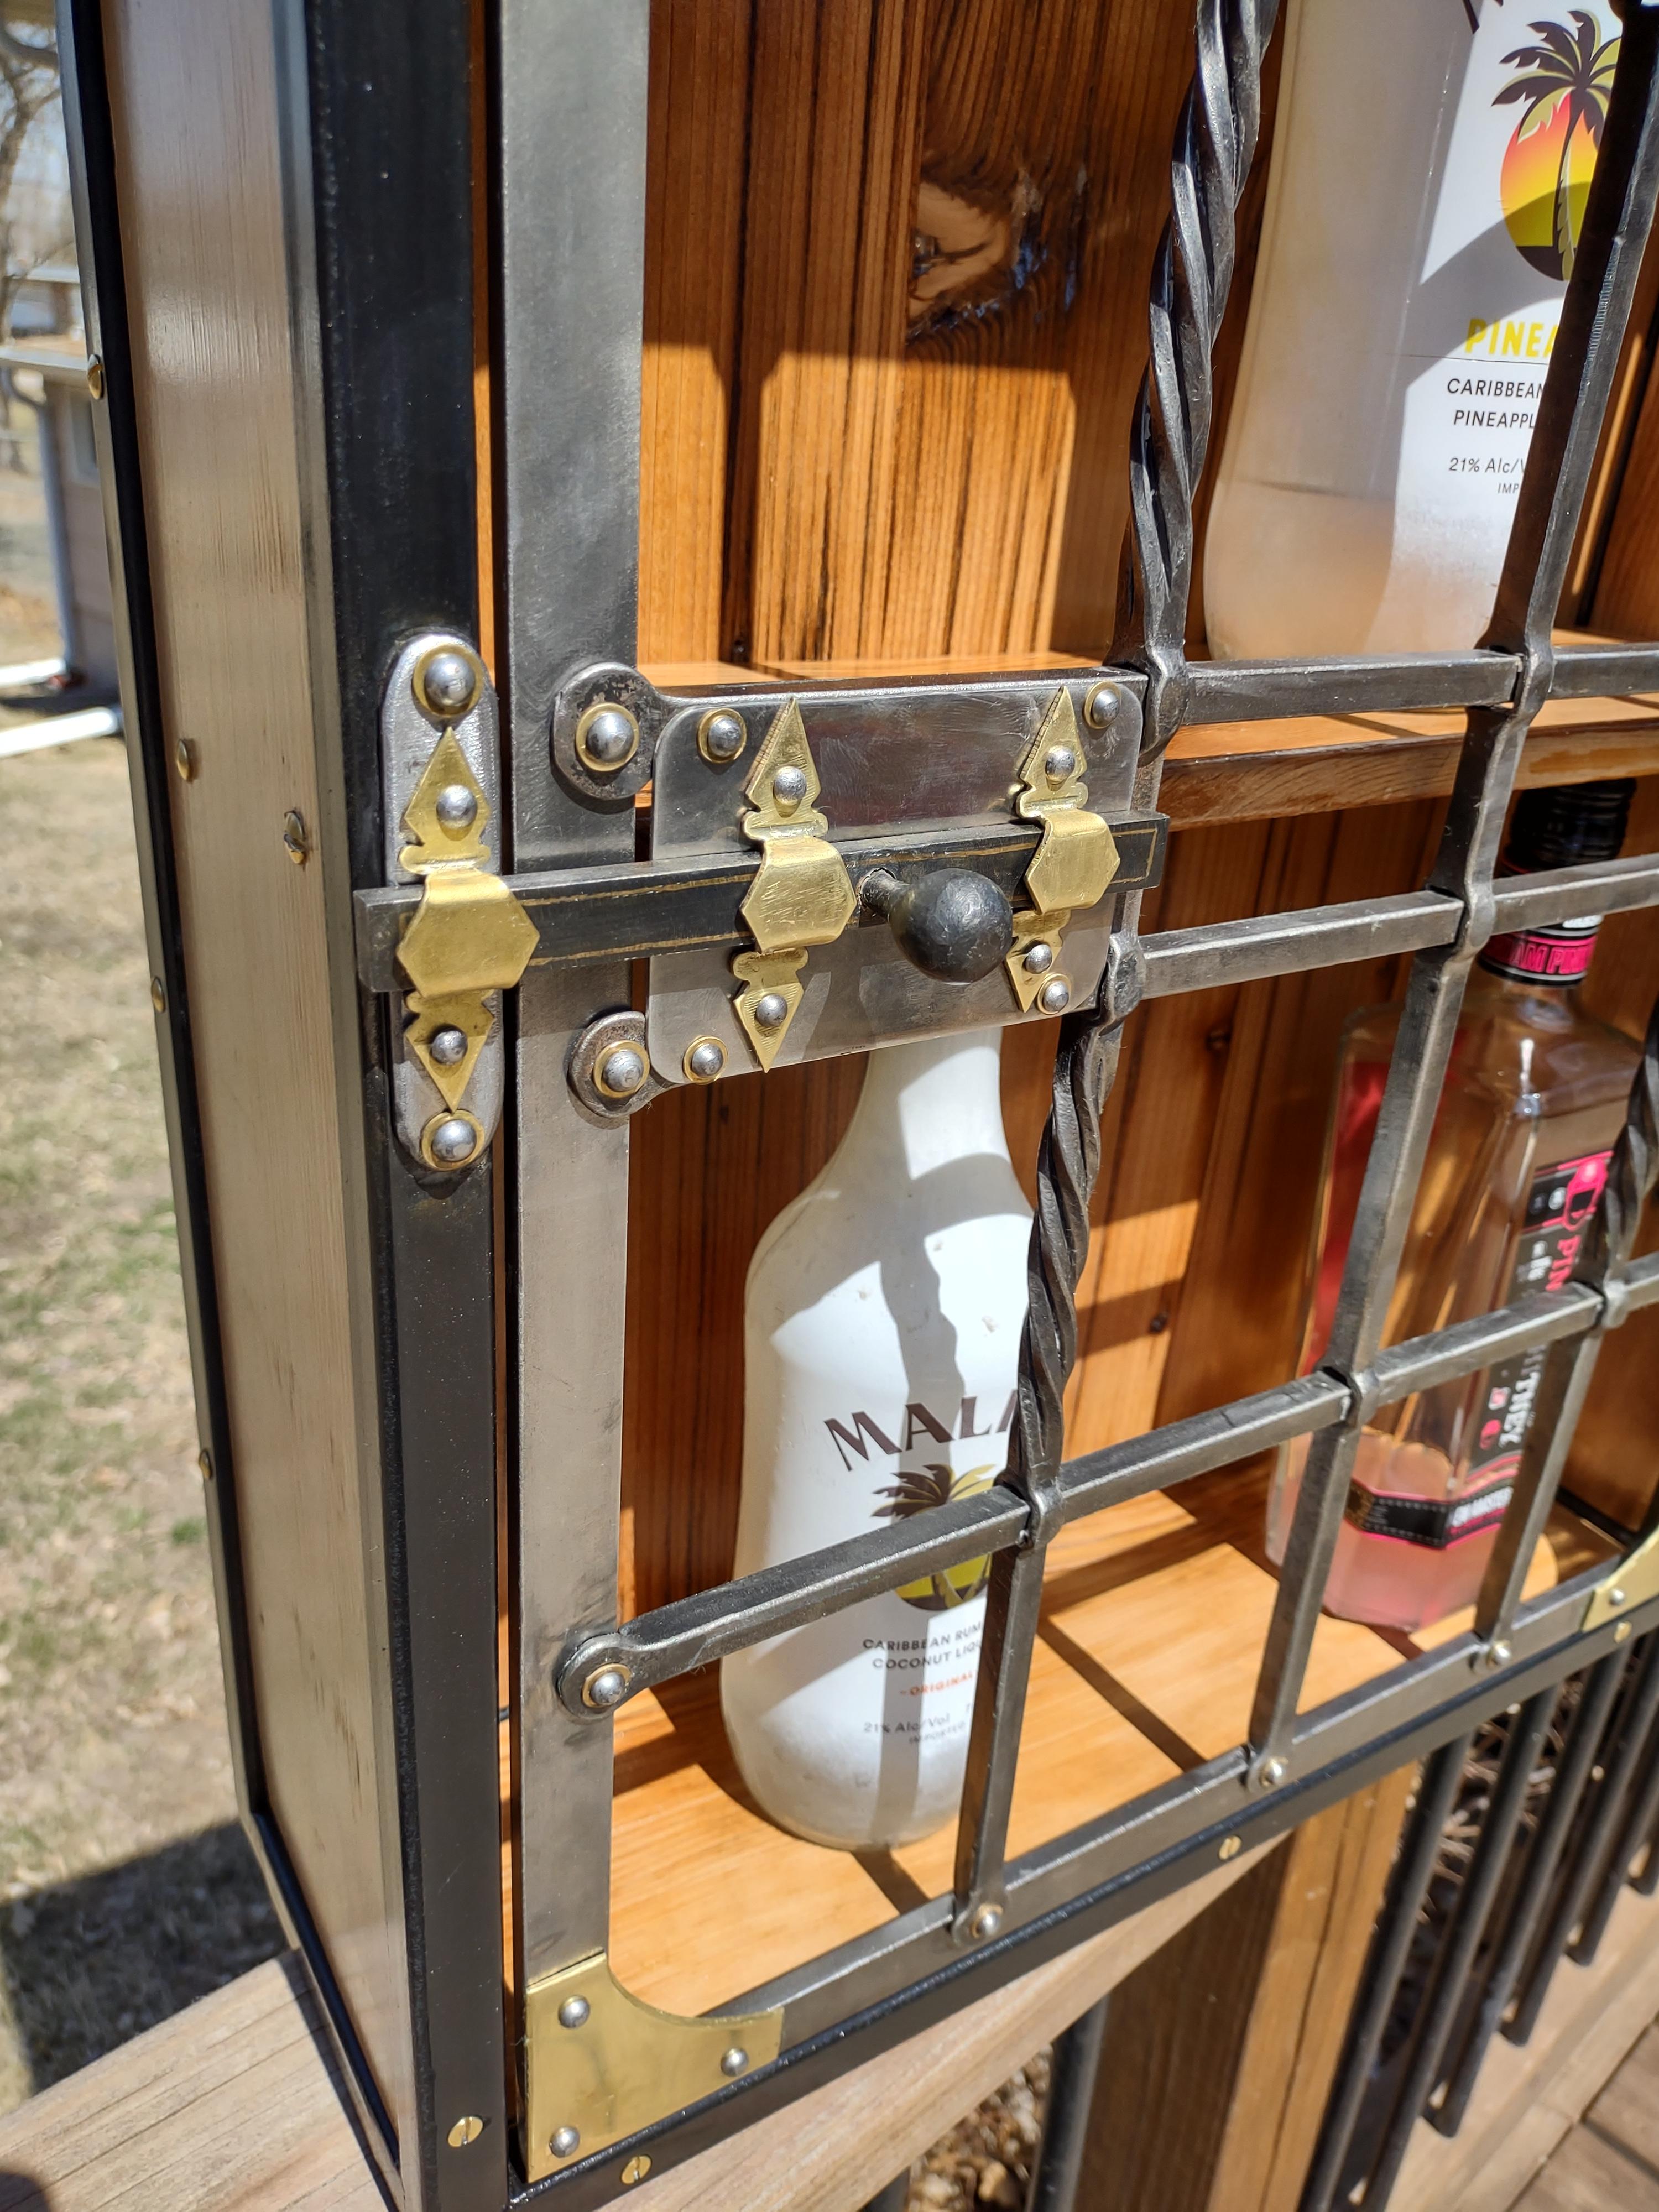
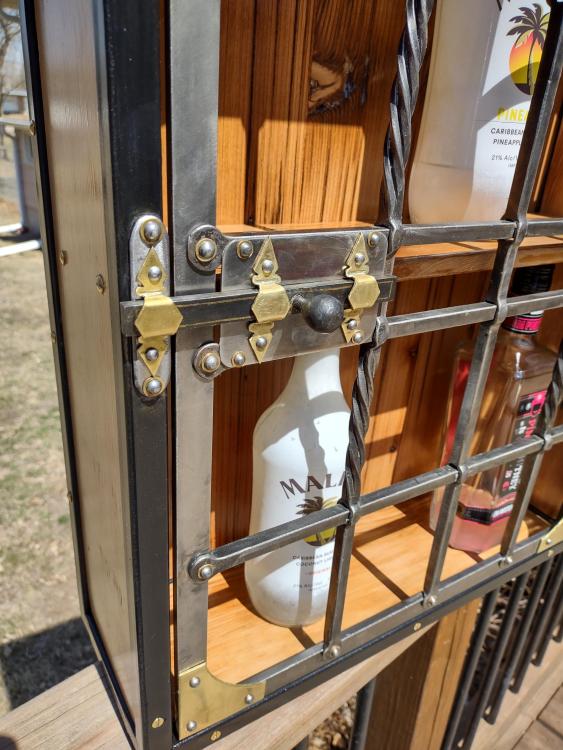
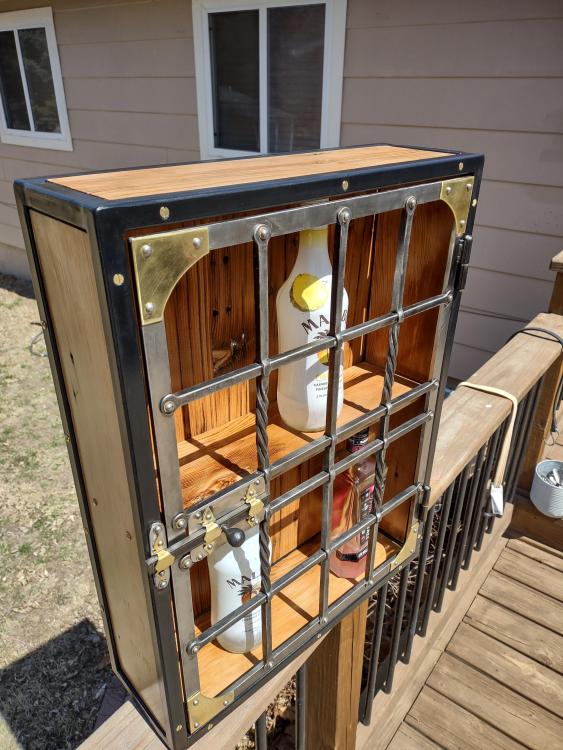
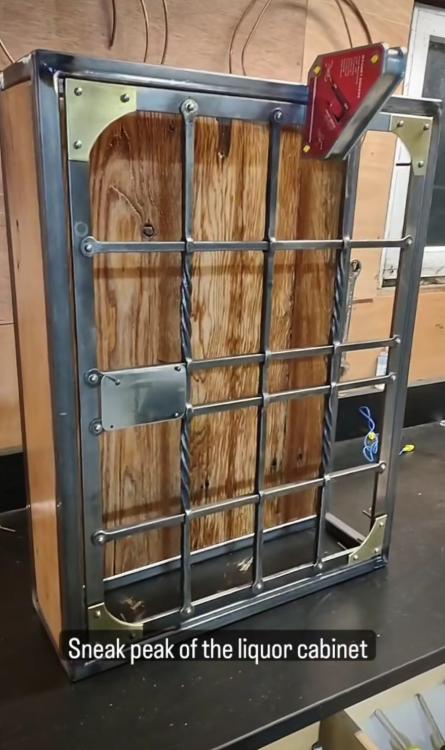
Finally got the liquor cabinet I've been working on forever finished today. There's a few spots that still need touching up but that won't take too long. Really like how the brass came out on this
-
What did you do in the shop today?
Donniev replied to Mark Ling's topic in Blacksmithing, General Discussion
Got some drawer pulls done recently, really fun to make and they don't take a lot of time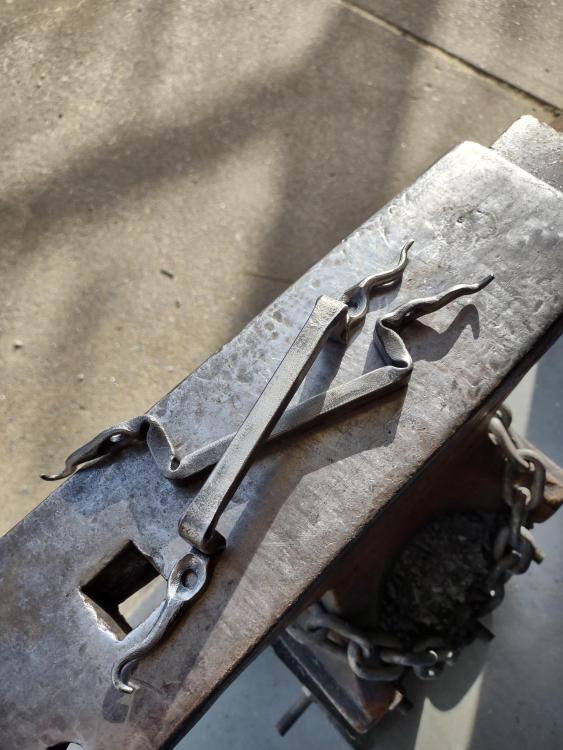
-
What did you do in the shop today?
Donniev replied to Mark Ling's topic in Blacksmithing, General Discussion
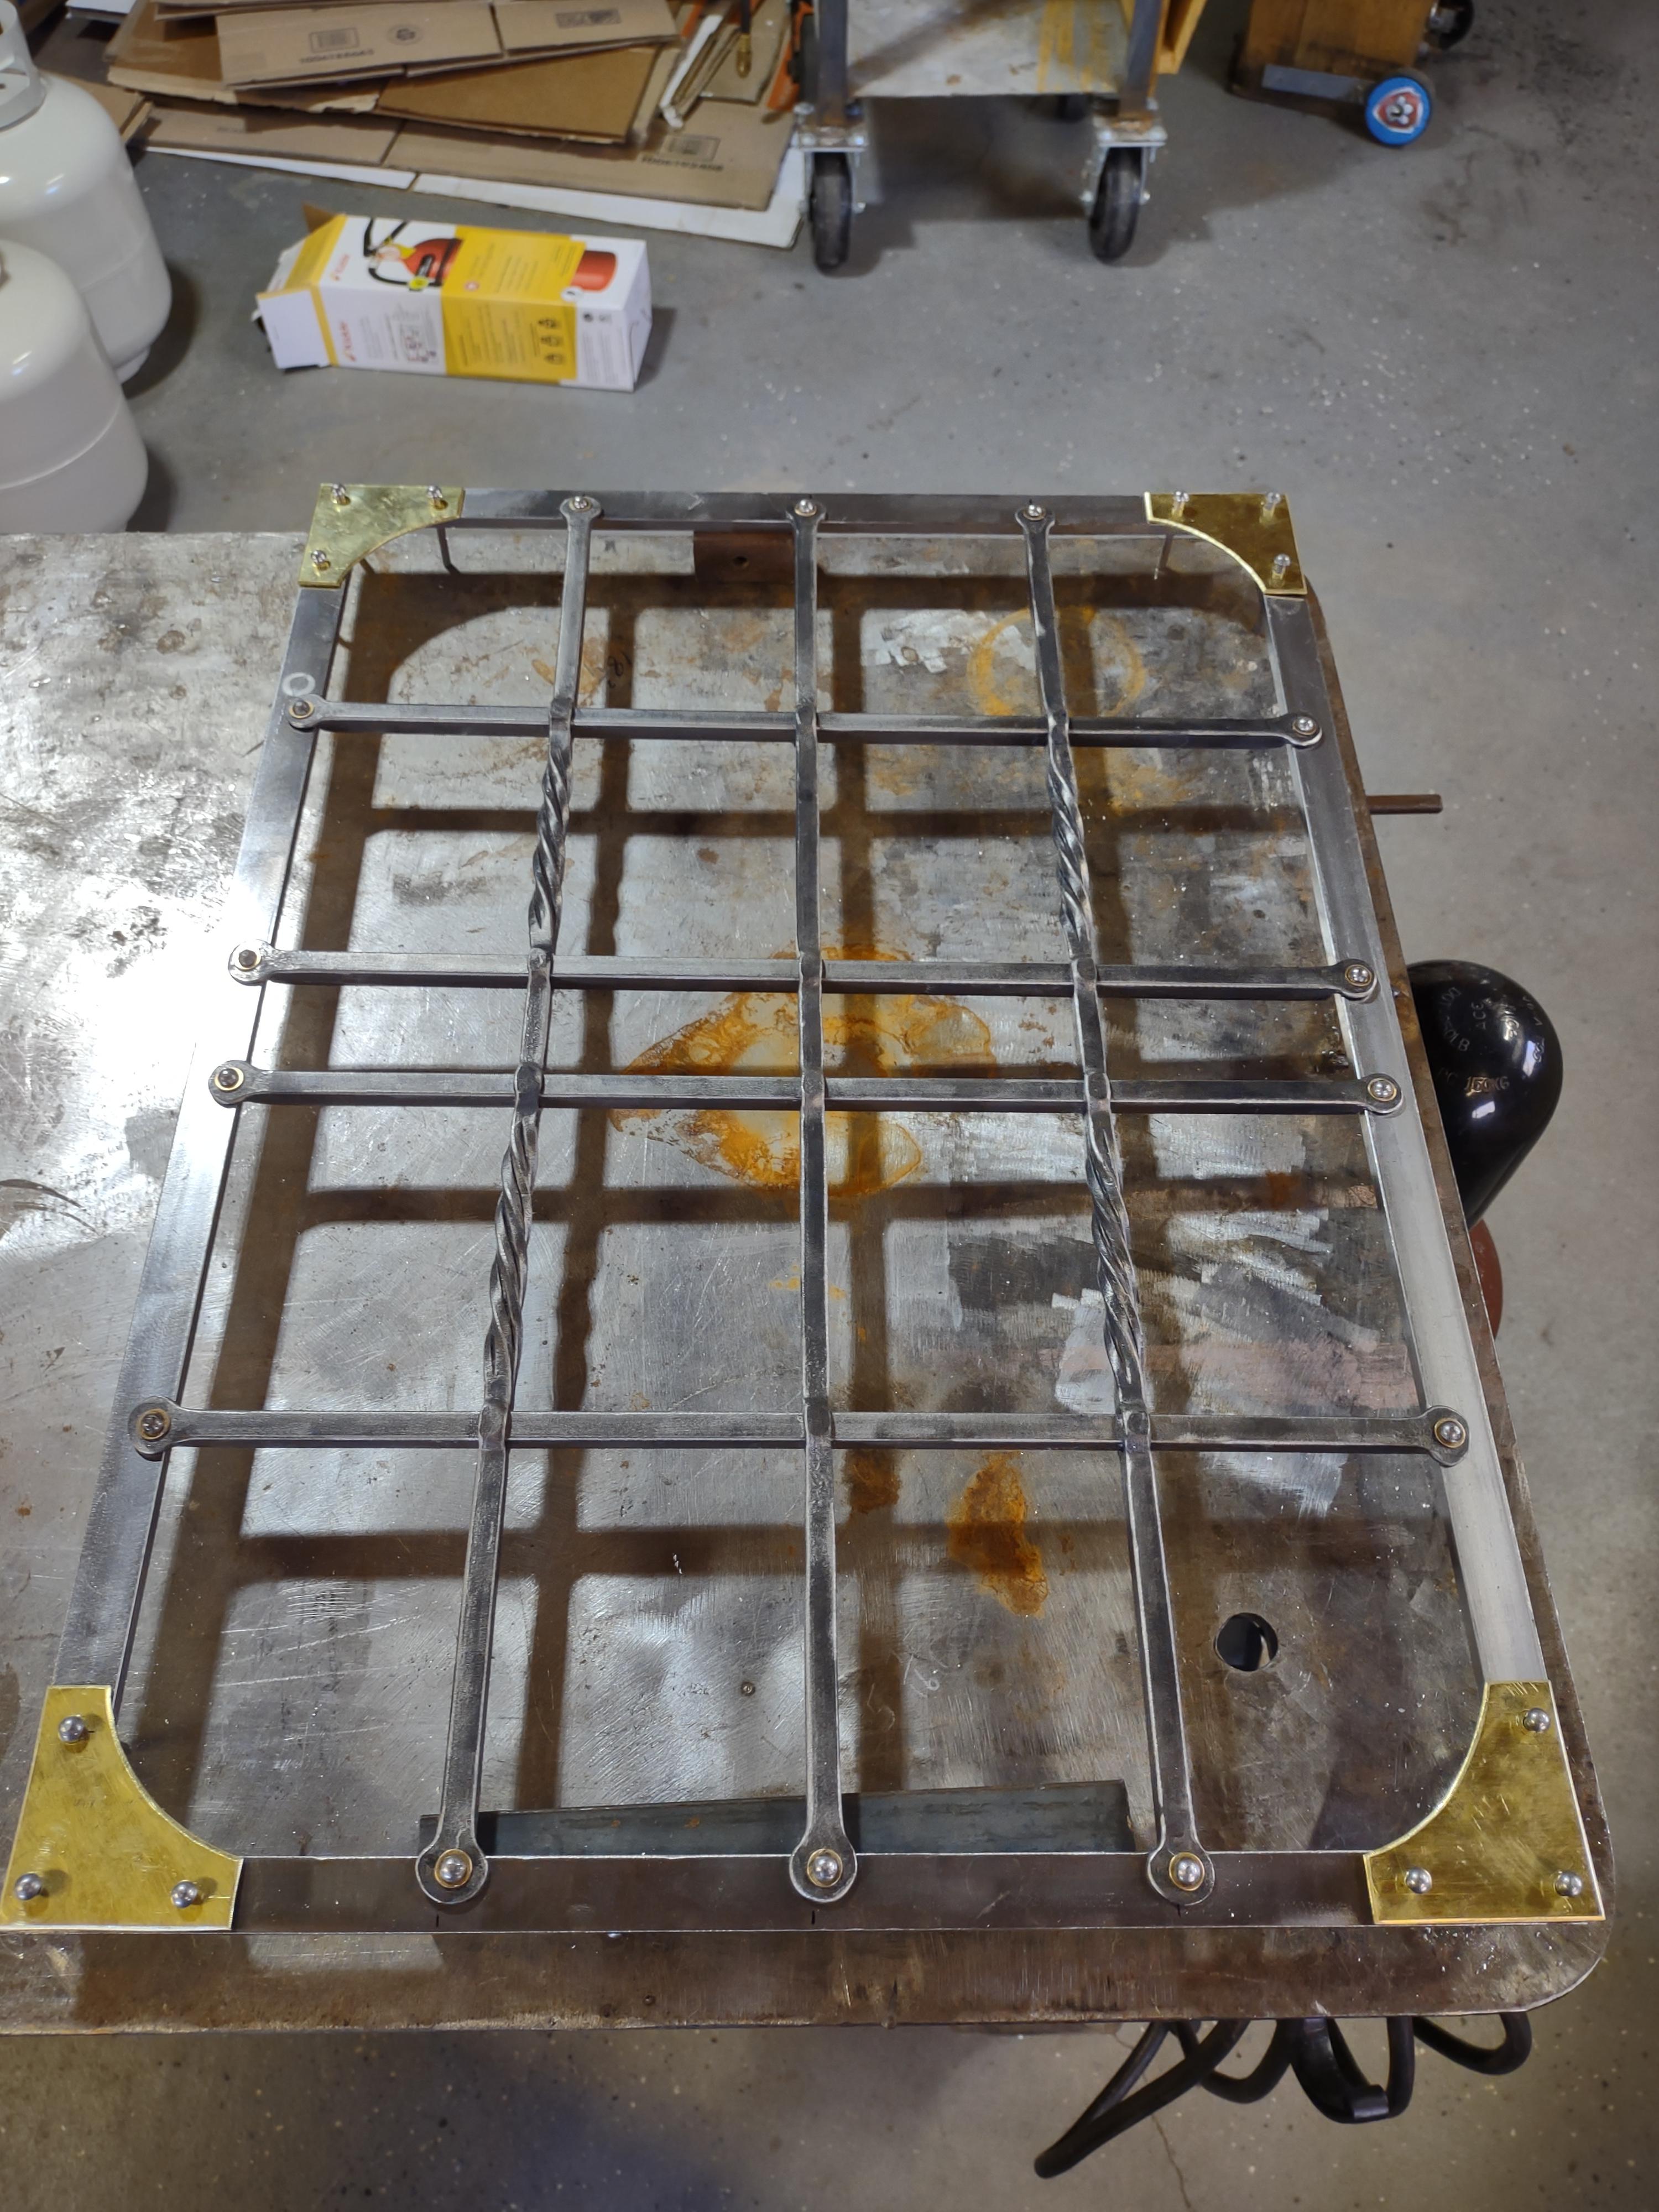
The pieces for the door are all 3/8" square bar, I slit and drifted them to size. I did 2 practice pieces with the lines and twist to see how much everything would move and did a little math to figure out where exactly the center that I needed to slit was -
What did you do in the shop today?
Donniev replied to Mark Ling's topic in Blacksmithing, General Discussion
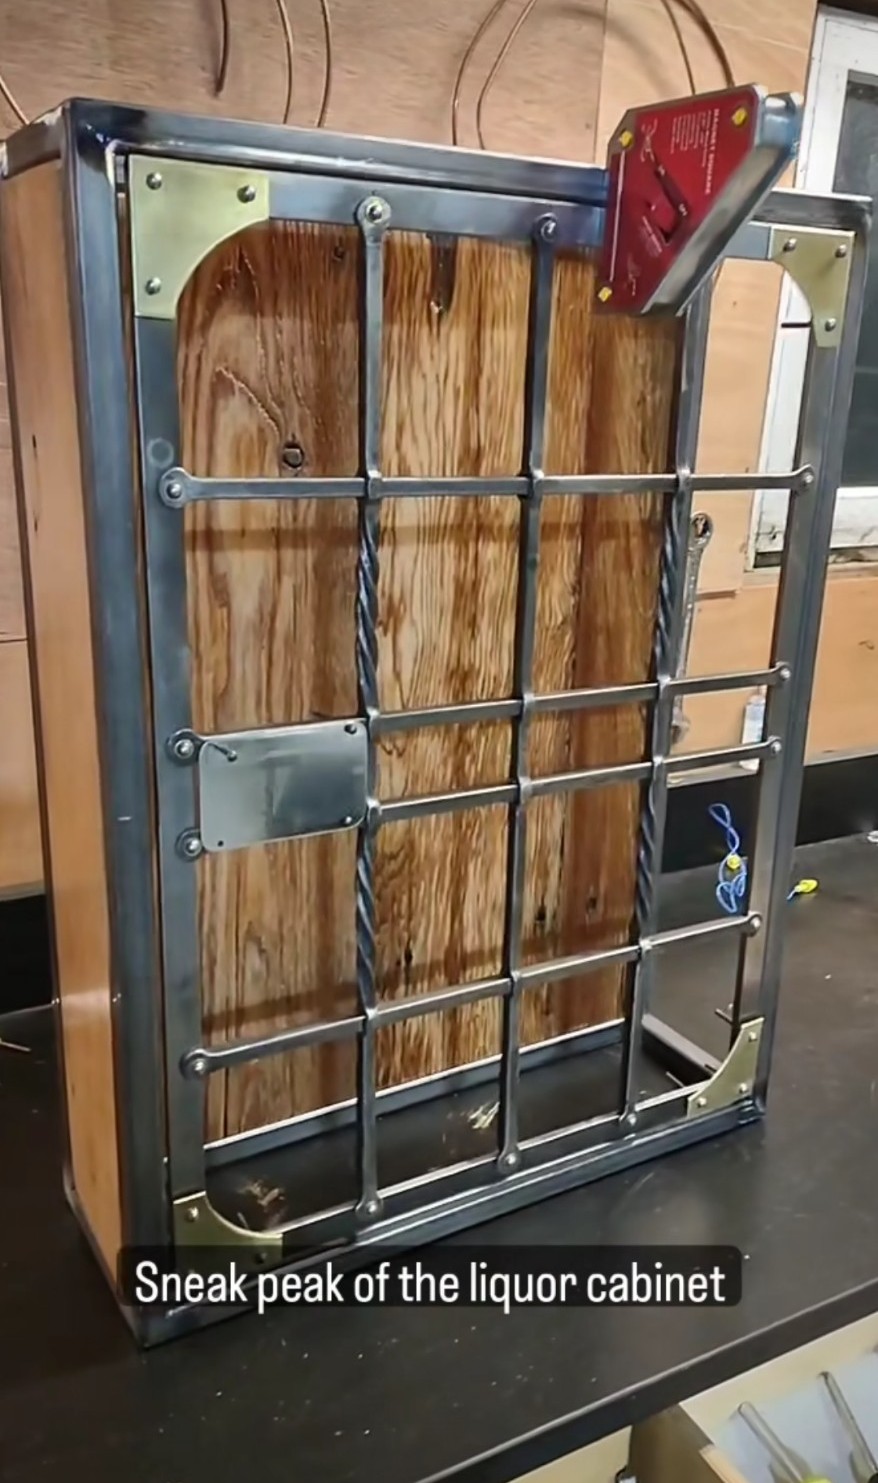
This is going to be the door on the front of a liquor cabinet I'm making. I made a frame out of square tubing that will have finished reclaimed wood, have to wait for it to warm up a little so I can finish another back piece- I made a catastrophic mistake on the first one I'll post the finished piece when it's done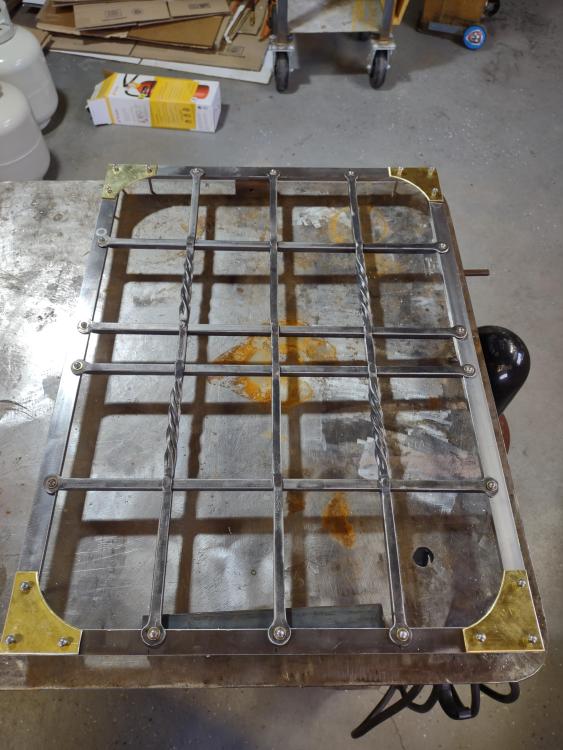
-
O you from Nebraska?? Never fun when something unexpected comes up and annihilates your fun budget
-
I'm a pipe welder and I worked at a chemical plant for 2 years, 95% of our work was stainless, and we ran miller 161s every day. We beat those things up and they keep right on rolling- not sure how many hours those 110s had when I showed up but we used em almost every day for 2 years when I was there and had no issues. It's actually why I bought one myself. You can probably get most of your welding done off 110 with it but in the rare case you need more amps it comes with an plugin adapter for 220. Just keep in mind that it's going to be exclusively for TIG unless you use it on 220. You can't really use it to stick weld on 110, it doesn't have the xxxxx for it I considered buying a welder off Amazon since they're about 1/2 the cost but based on reviews 1/10 was a lemon out of the box and an absolute nightmare to get sorted out. If nothing else at least I know Miller will stand behind their product if a board goes bad or something
-
What did you do in the shop today?
Donniev replied to Mark Ling's topic in Blacksmithing, General Discussion
Got this coat hanger done last week, got some old barn wood a while back and have a bunch leftover still. I don't think it looks terrible but there's a few things I could have done better
-
I'm going to be in Nashville for a few days in early December and was looking to see if there's anywhere I could wander and find a hot forge! Its always fun to meet others that do this, so just looking to see if anyone is around that area with a little free time that would be open to hang out with me
-
What did you do in the shop today?
Donniev replied to Mark Ling's topic in Blacksmithing, General Discussion
Another candle holder, thought I'd try a simpler one this time. Candle holders are TIG welded on the bottom side, I've gotta get better at making small tenon's before I use that method instead of welding them on. I didn't leave quite enough on the bottom rivet holding the legs to the center piece when I cut it, 1.5 times the rivet material diameter doesn't quite work with a domed head, I'll play around with it later this week.
-
What did you do in the shop today?
Donniev replied to Mark Ling's topic in Blacksmithing, General Discussion
I'm personally not a fan of the spikes. I drilled through the center of the candle holders and plug welded them on with TIG. It wasn't my intention for it to necessarily look like scales, this is just the design I had in my head, and honestly this was a lot of work for my admittedly limited skills this far -
What did you do in the shop today?
Donniev replied to Mark Ling's topic in Blacksmithing, General Discussion
Got a candle holder I've been working on for a while finished today. I see a lot that I could have done better but overall I'm happy with it- it was a learning experience to say the least (I wanted to post a pic of the center wedge joint but I gave up fighting the site..."problem loading the file")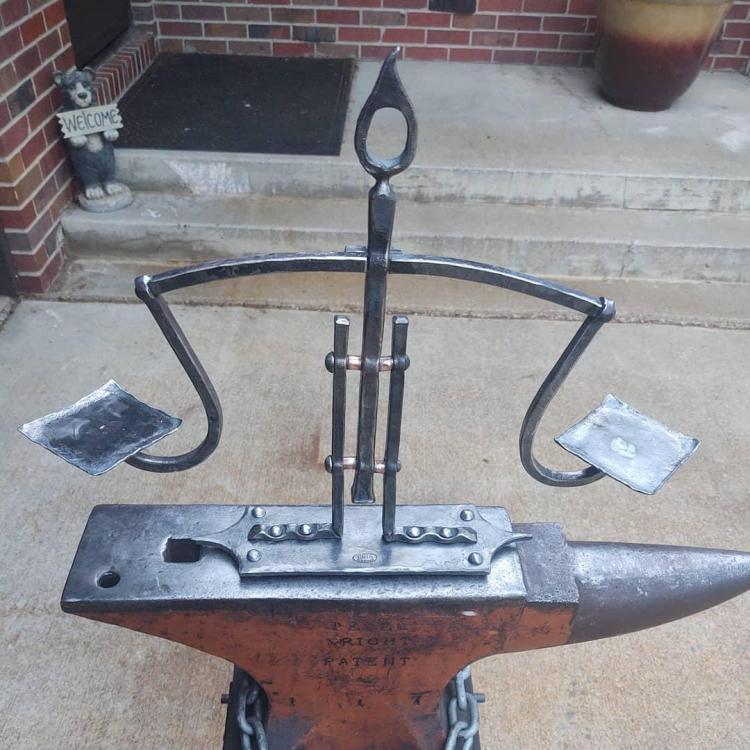
-
What did you do in the shop today?
Donniev replied to Mark Ling's topic in Blacksmithing, General Discussion
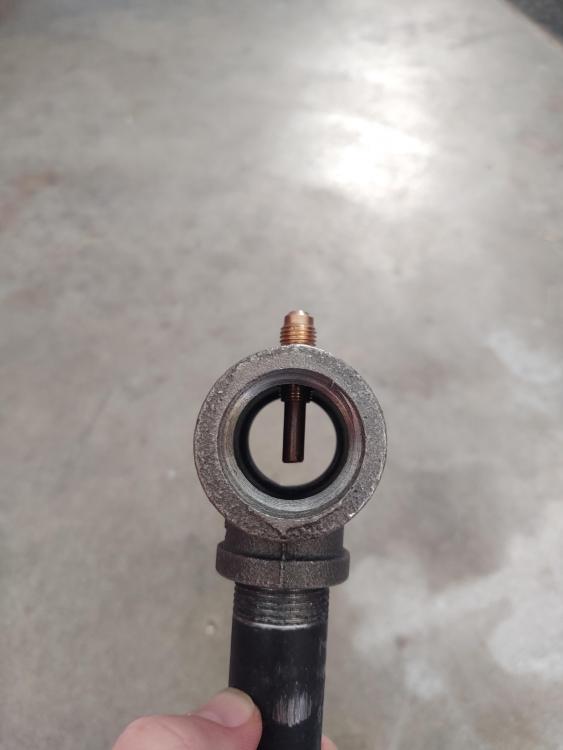
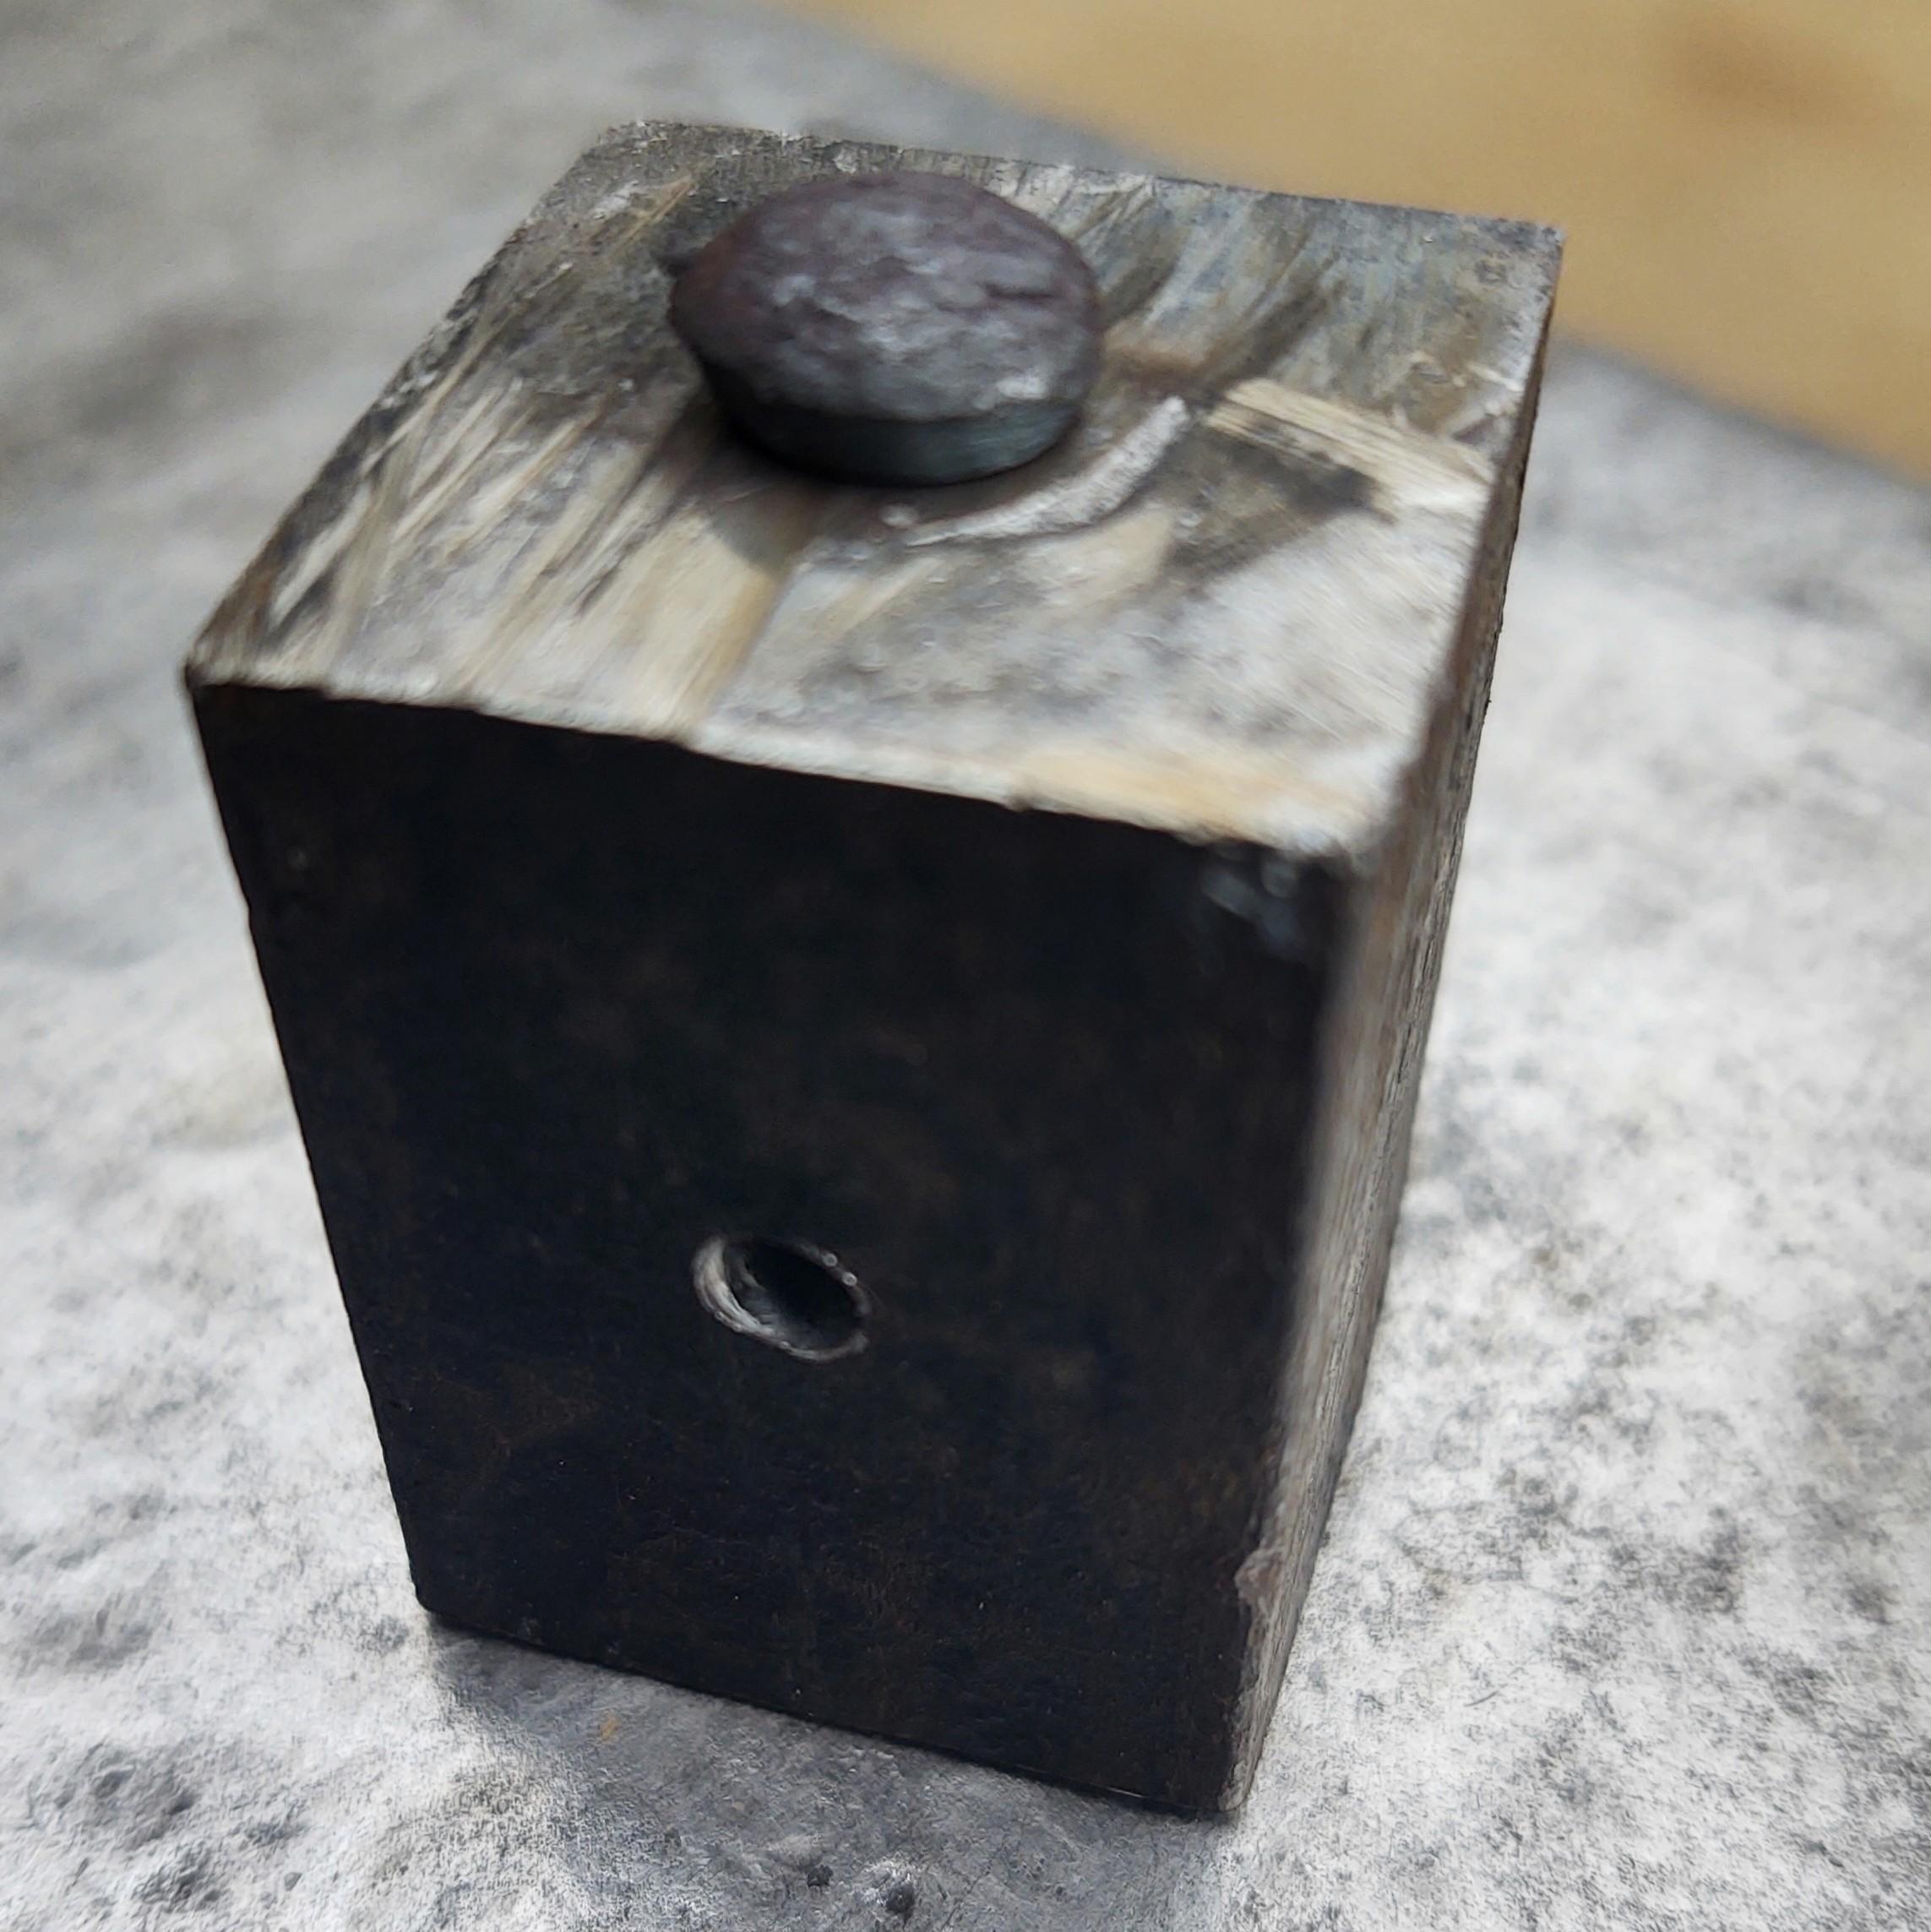
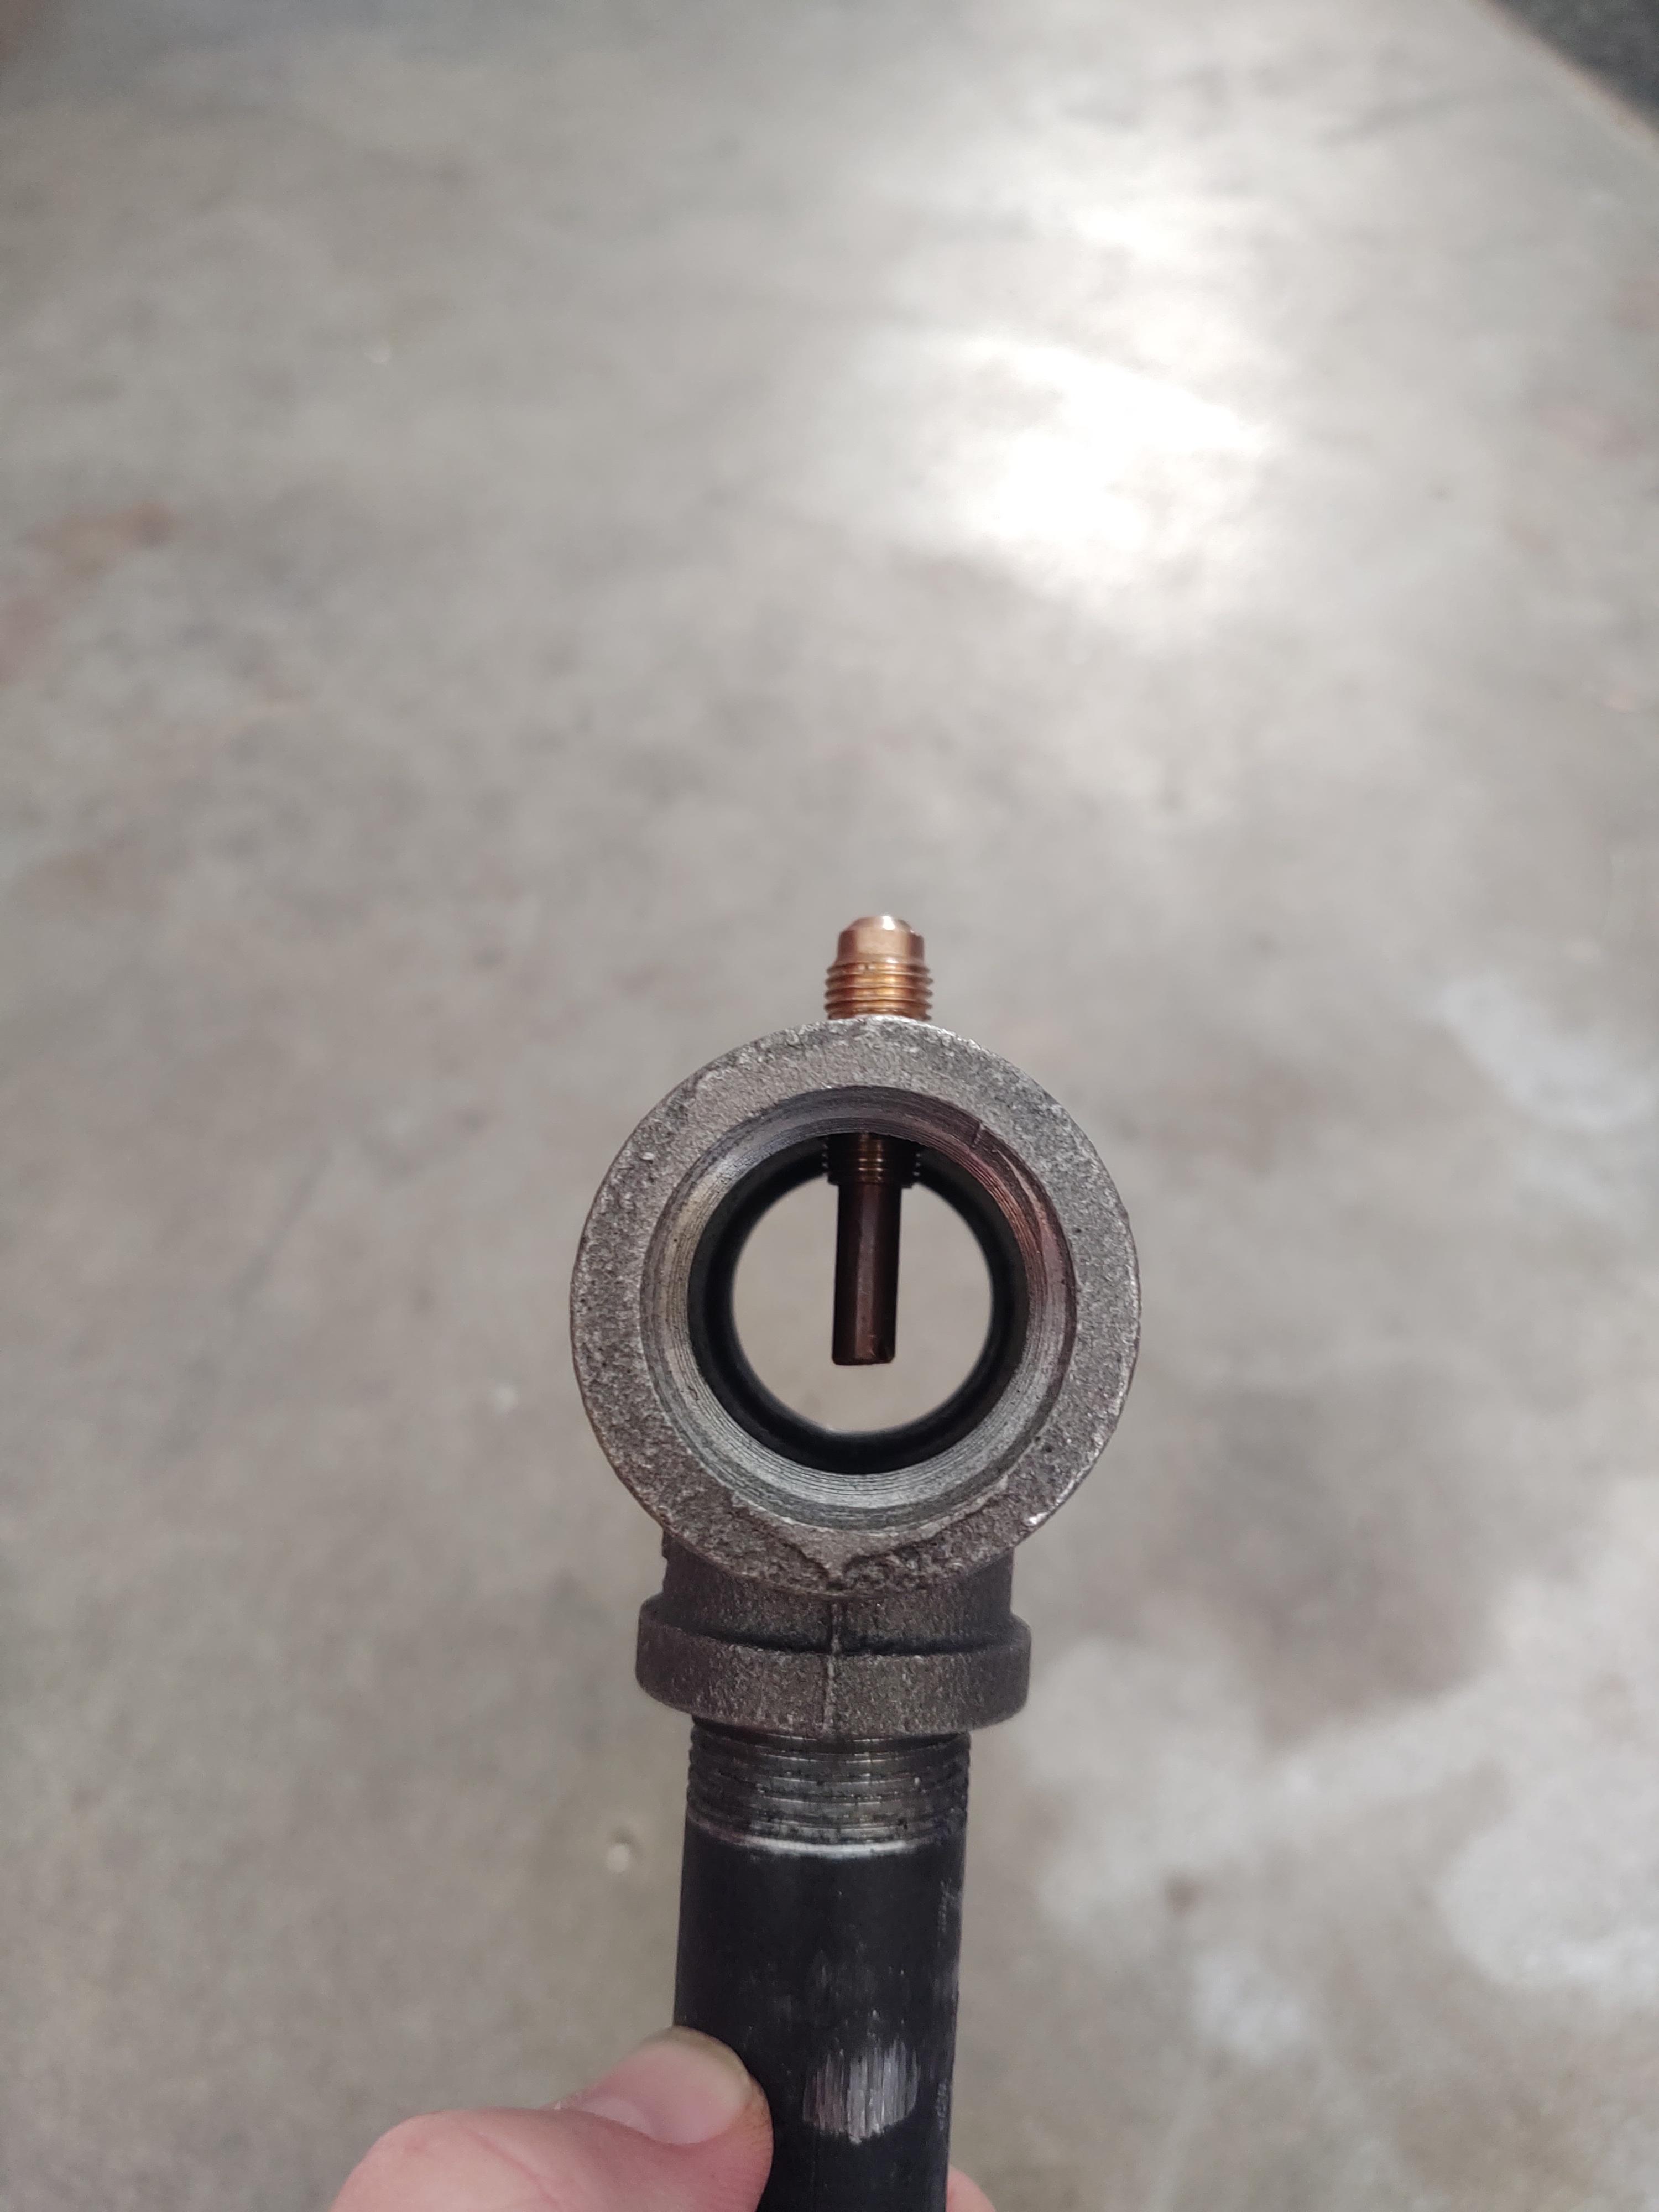
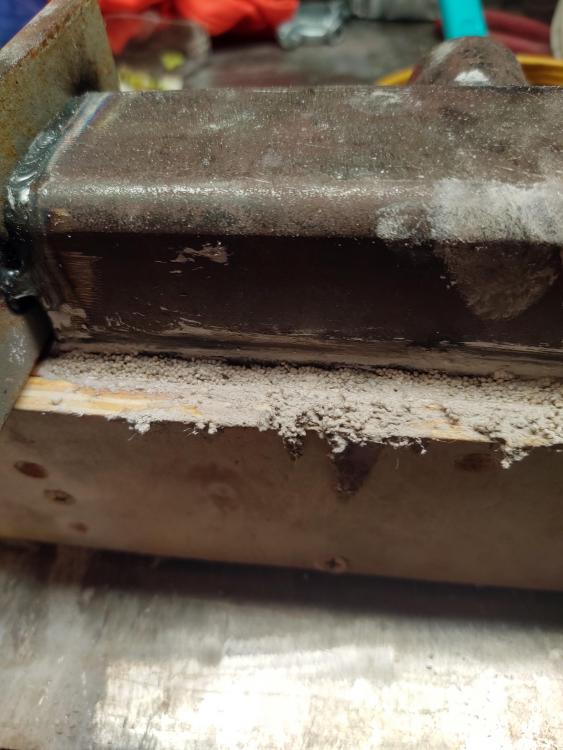
Thanks for the suggestions everyone, the hole goes all the through that piece of 1" but it's stuck. I've got some sway bar from a car I can cut down that should work just fine, I'll cut it to size then drill through for the shank. I just used 1" mild cuz it's what I have on hand but uh...yeah it doesn't work lol -
What did you do in the shop today?
Donniev replied to Mark Ling's topic in Blacksmithing, General Discussion
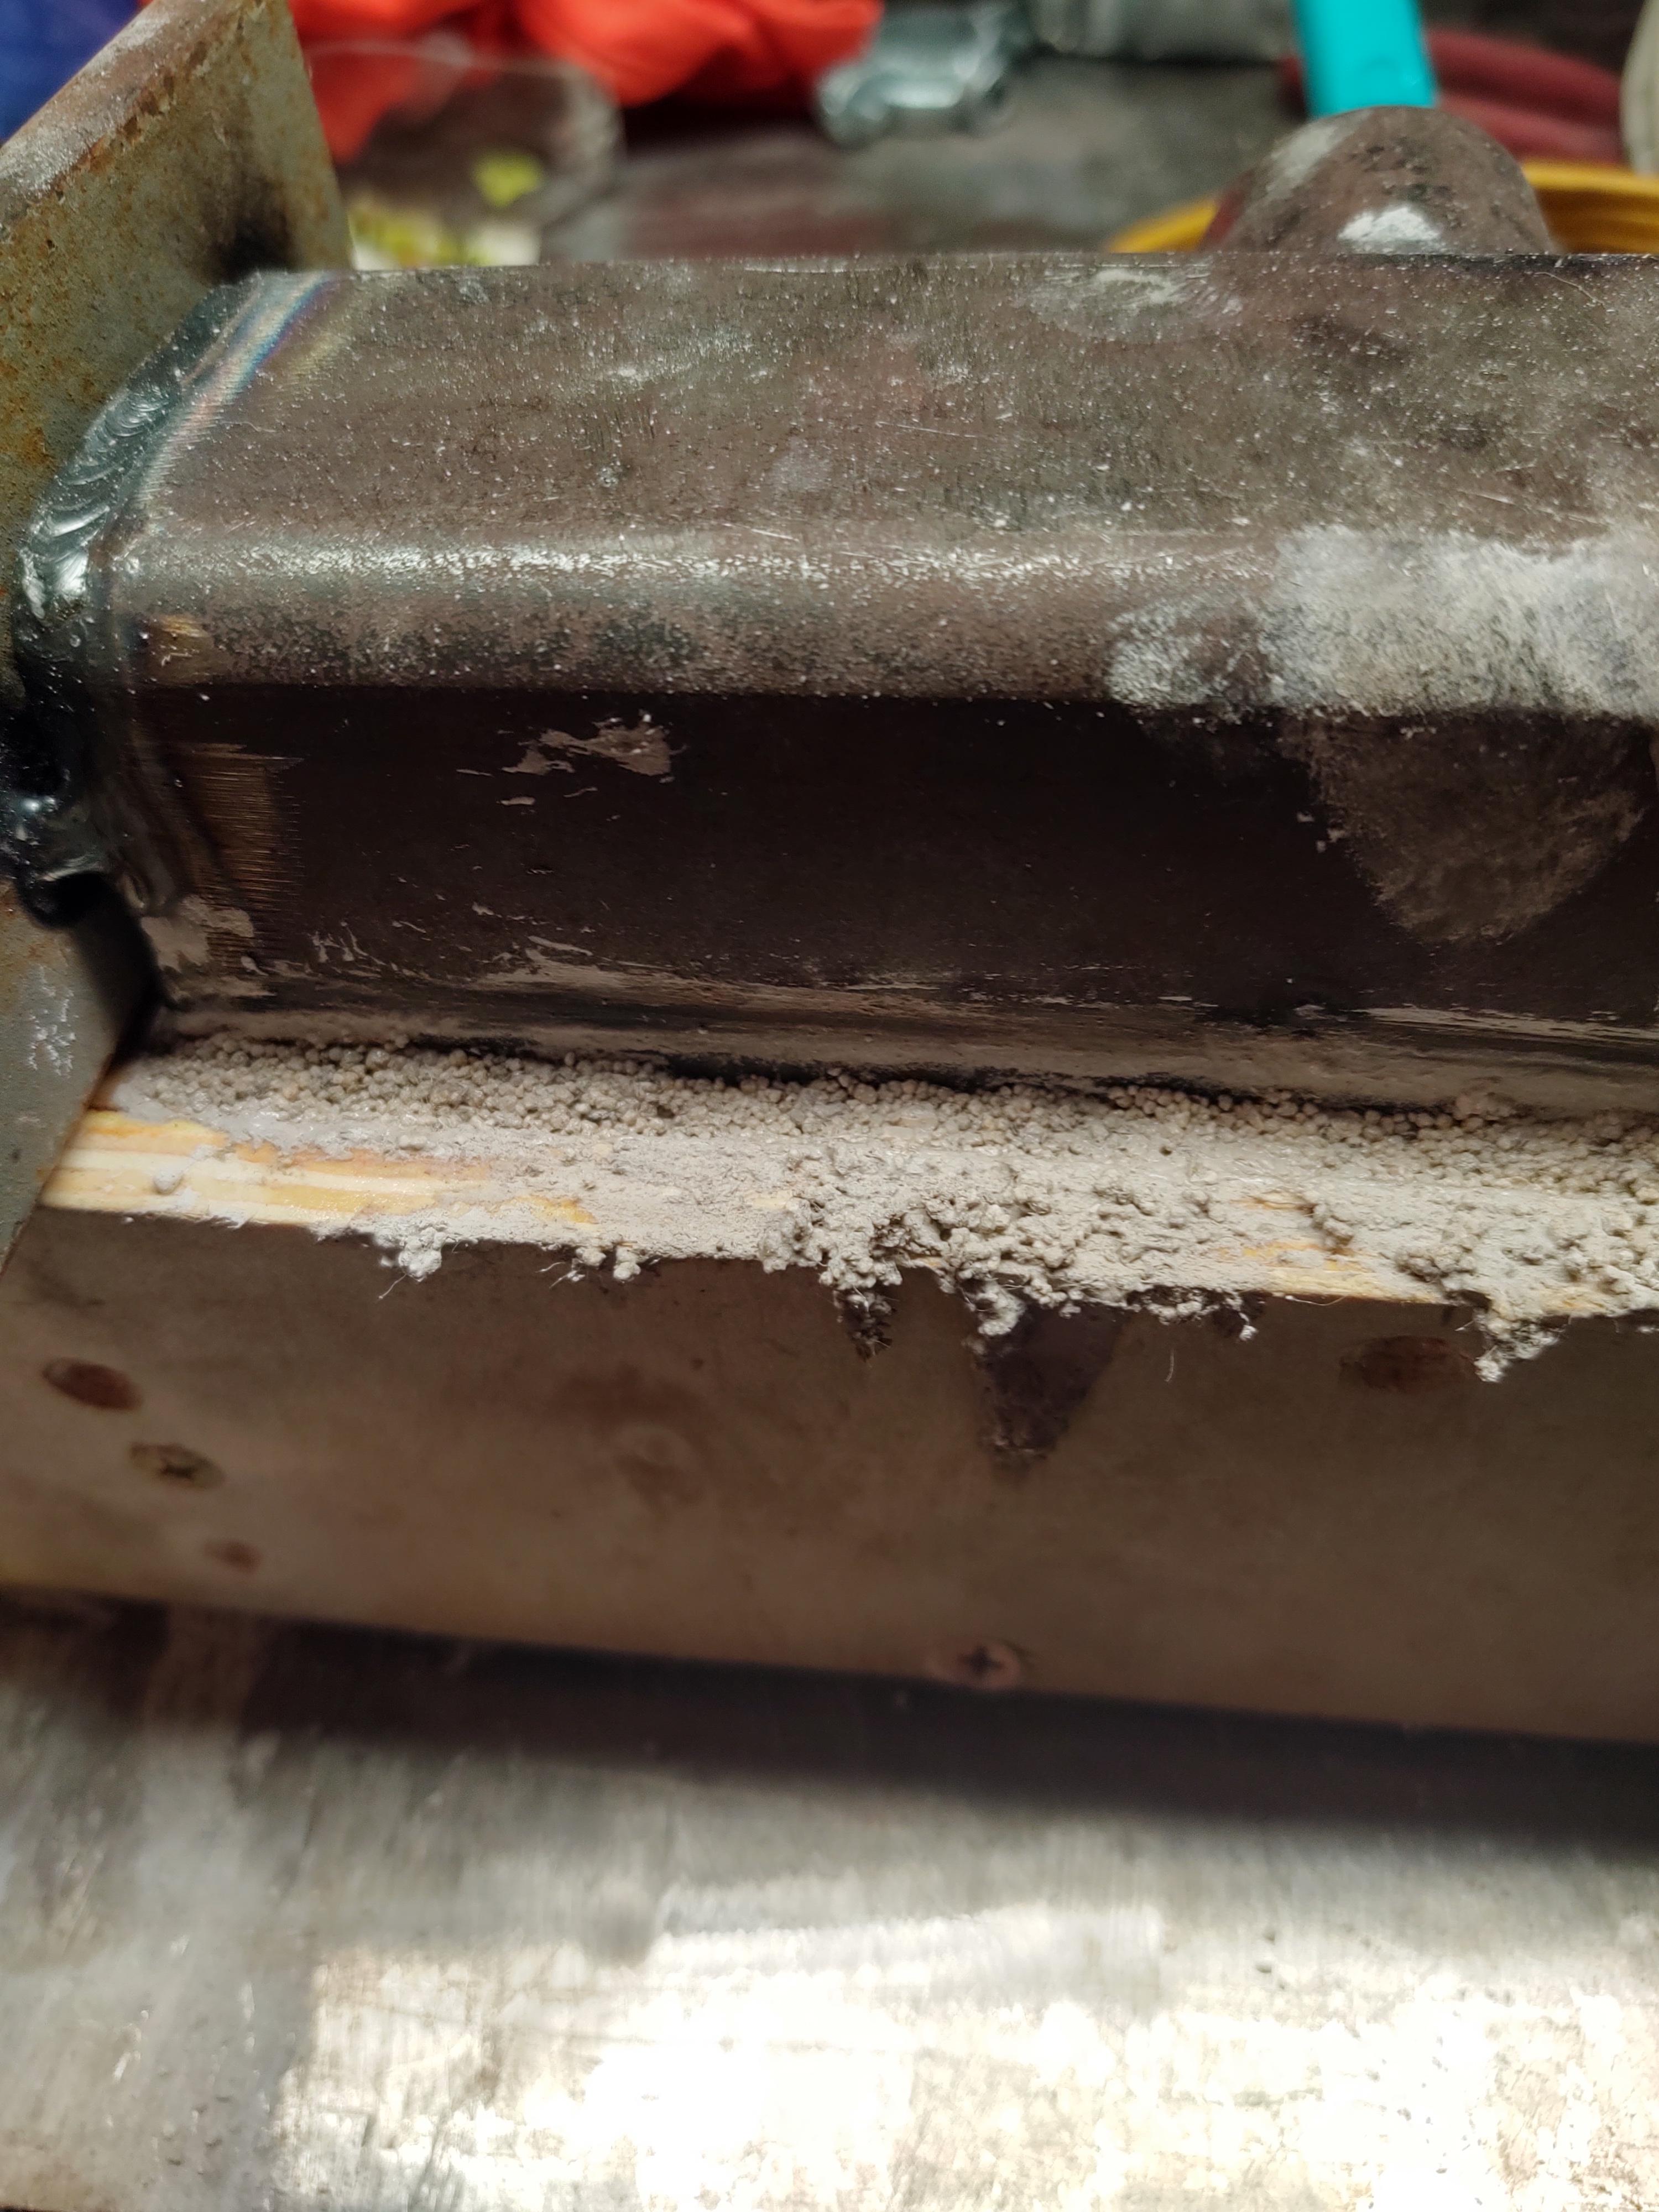
Got a couple of rivet blocks made. I used 1" square with a 1/4" hole drilled through it for my rivet, and the rivet is completely stuck. I drilled the first one out and took the time to clean the scale from the rivet before putting it in on the 2nd try but it's stuck and won't move as well. Anyone know what I'm doing wrong here?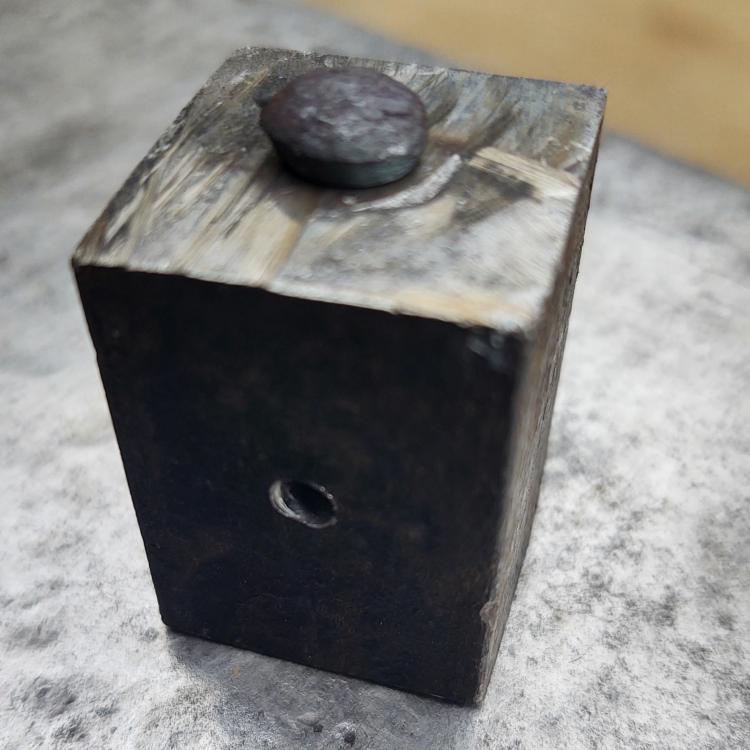
-
Dangit. I don't know how many times I read through the ribbon burner build and forges 101, of course I forgot an important step. Buttered everything when I rigidized....I'm gonna order more KOL and get it right this time.
-
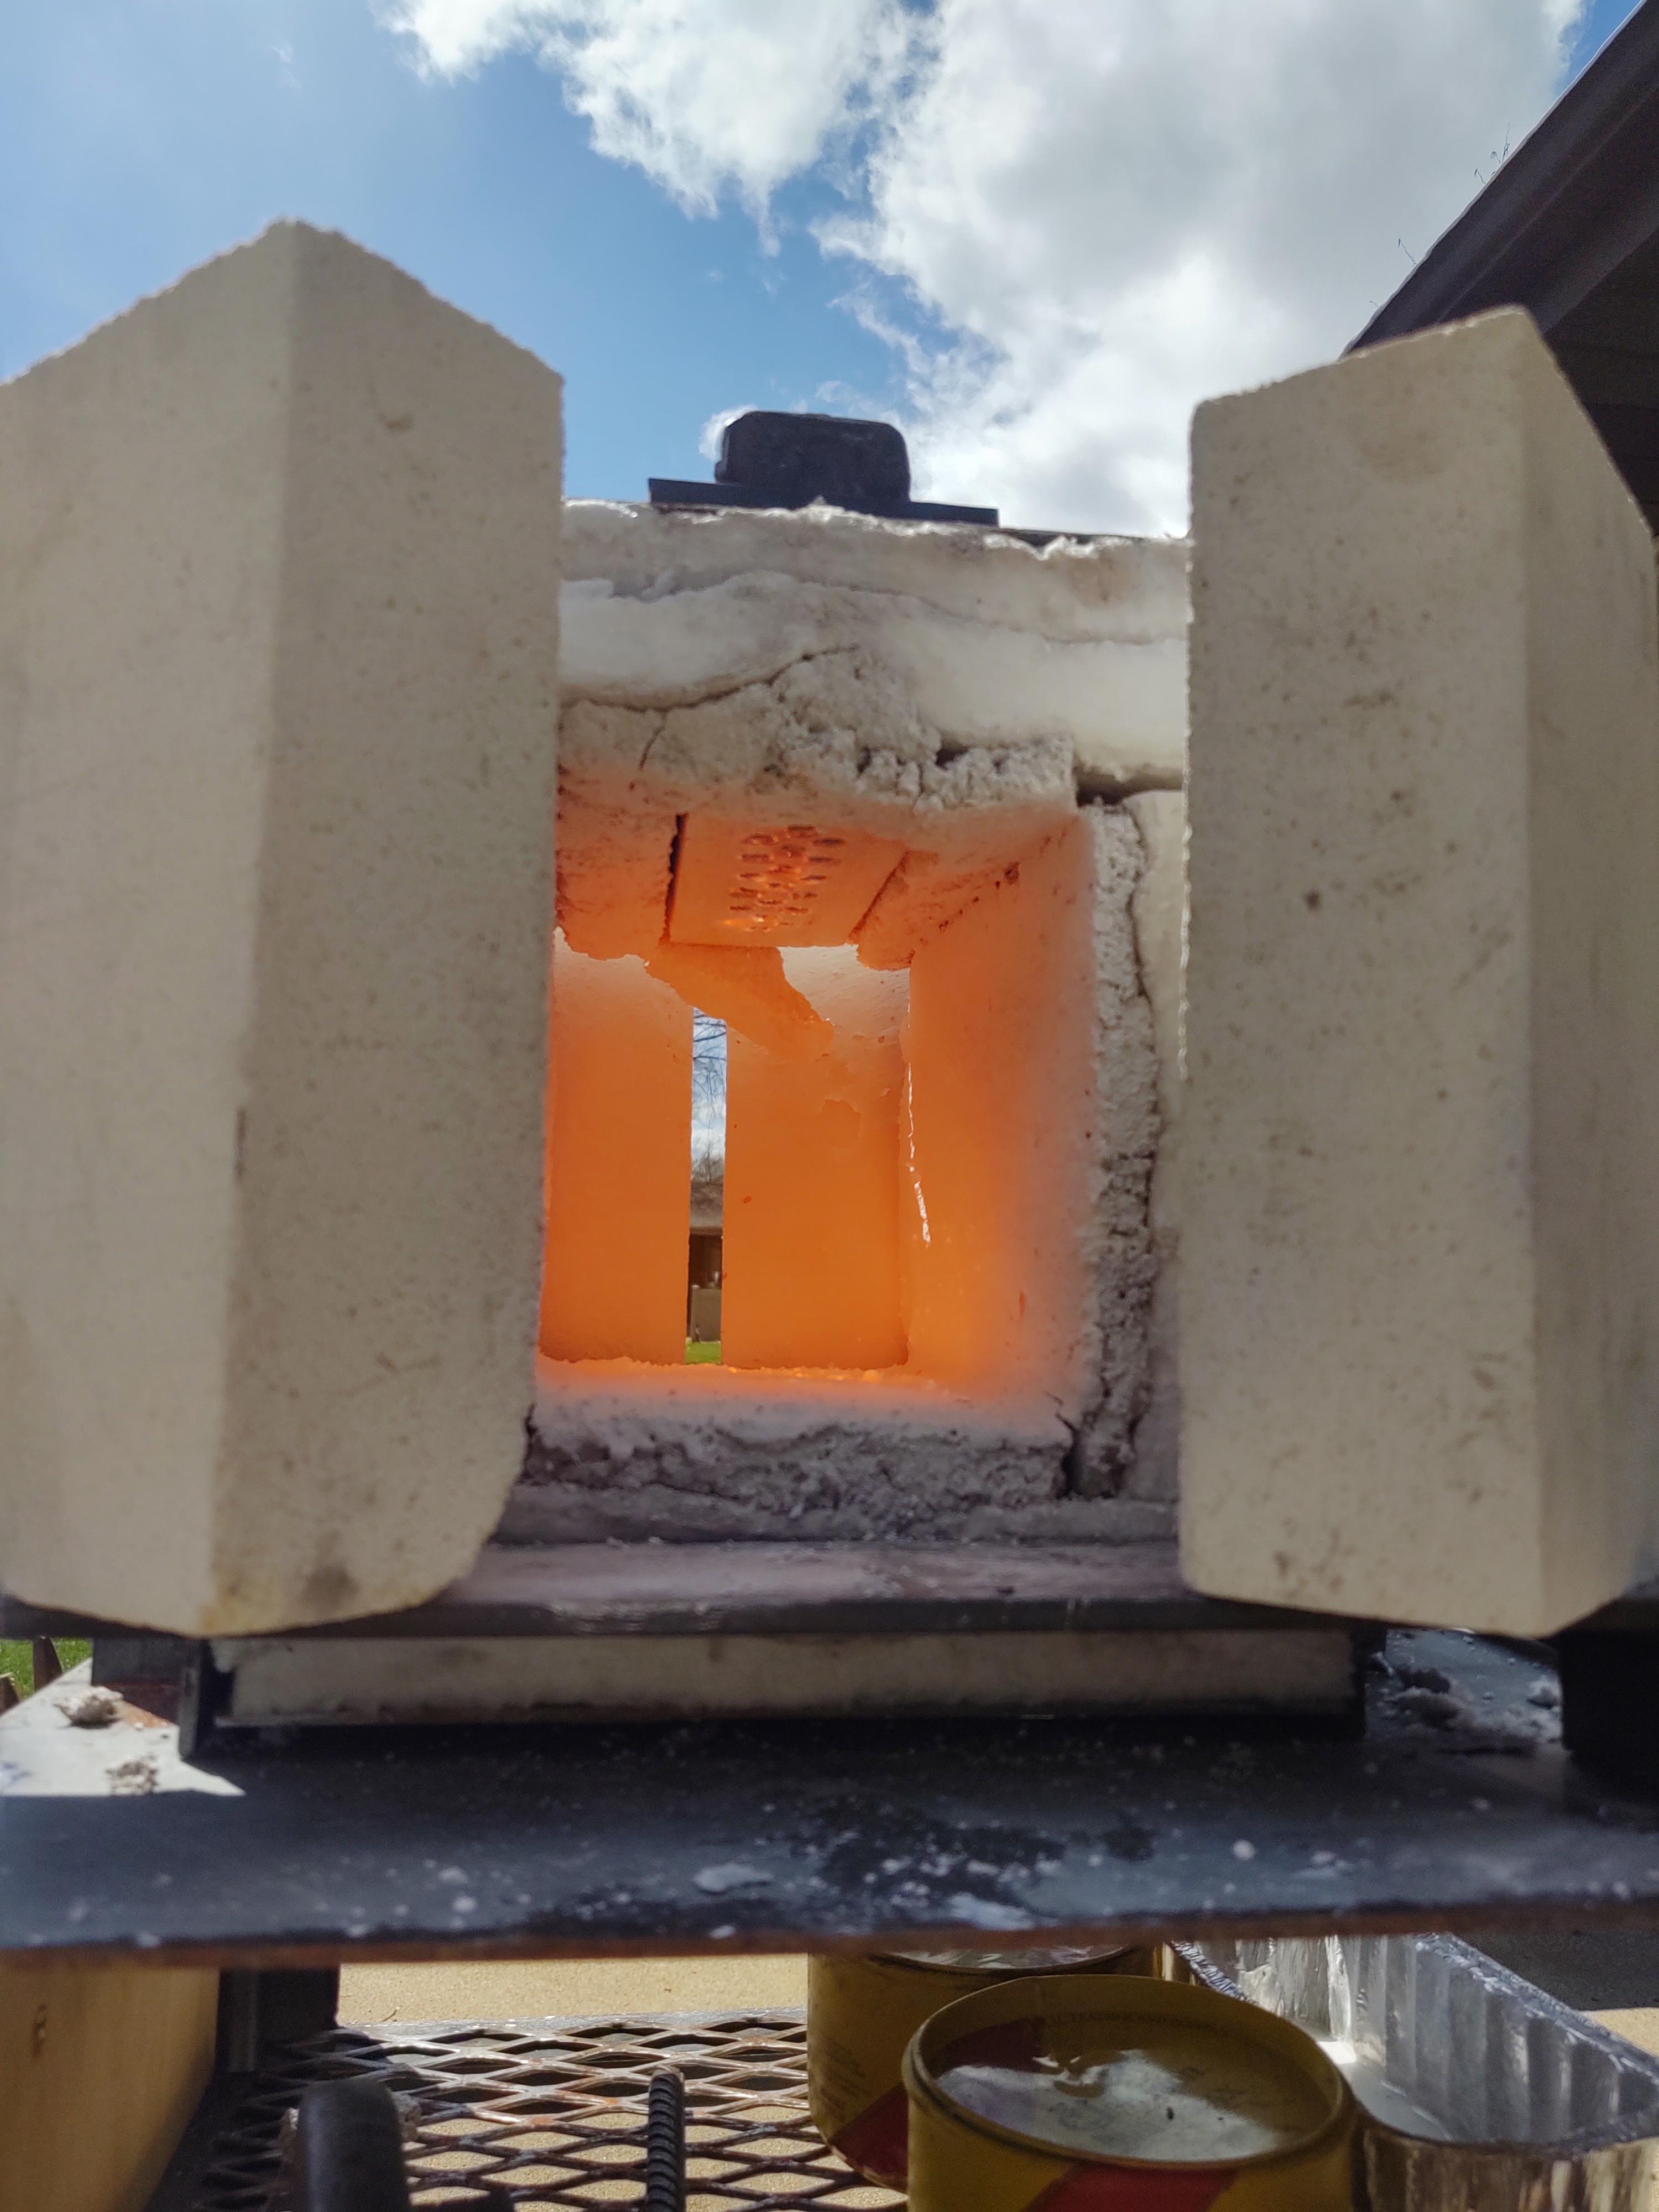
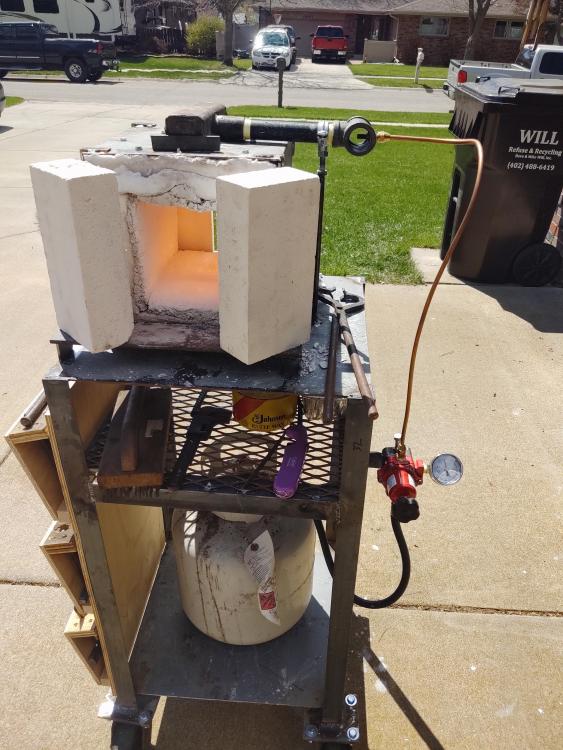
I got everything done, I think I'm going to add a small piece of steel on the top of the forge about 1-2" tall on the front and back so it sits in front of the plenum with a single layer of kaowool rigidized to it. Like you said before frosty, you can see the heat coming out and just completely washing over the top of the forge, and I think would help with that? The plenum was too hot to touch after I shut it down, ran it hard for about 30 minutes and got a piece of 1/4"*1" hot in about 4 minutes. Unless I change something I imagine it will start igniting in the plenum I also have a problem with a chunk of the KOL you can see in one of the pictures having busted basically free. Not sure if there's a way to "glue" that back up with something or not. On the top of the forge where the burner block goes in I cut the heads off of 1.5" wood screws and threaded them into the wool by hand until there was only about 1/8" of thread sticking out in an attempt to give the KOL something to hold on to. I'm guessing I'll have to order more KOL and do the same thing to the piece that broke off. There's also a very small gap between the burner block and kastolite, it's barely 1/16" probably but I can see the bottom of the forge looking down over the forge. If anyone has any suggestions I'd like to hear em

-
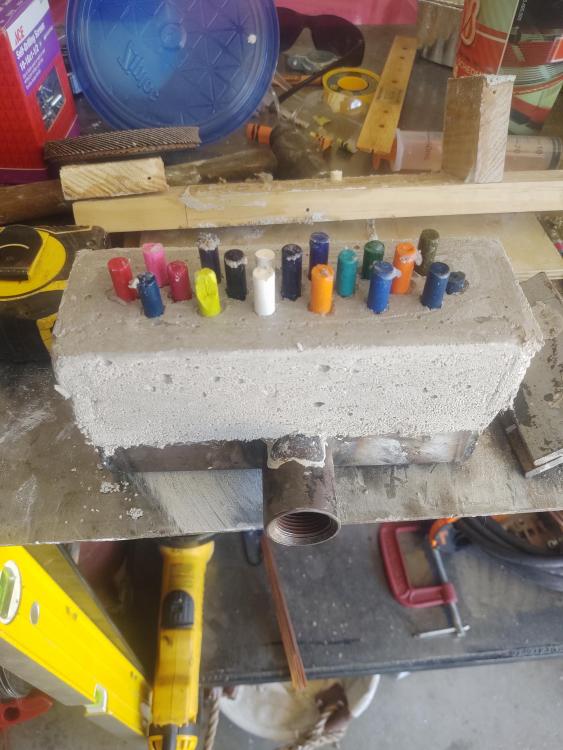
Thank you for all your guidance on this frosty! Got the crayons melted out (darn things would turn in the block but I couldn't pull em out) and both layers of kaowool rigidized this afternoon. Waiting on the kastolite to cure overnight now. Because of the way it's constructed I had to take the sides and top of the forge and laid them flat on the ground to apply the kastolite. I have a feeling when I put it together tomorrow I'll have to touch up the corners with the rest of the KOL I have and wait another day for curing before I get to the kiln wash. The box forge seems like a lot more work as far as lining it with KOL but like I said, I got a ton of plate on hand and no empty cylinders.

-
Thanks frosty, busted it loose and it looks good to me! I've seen you say it's weird stuff, and that is a fact. I was just nervous I'd mess it up- it's in a bag with a wet rag now, I'll melt the crayons out and start on the forge liner tomorrow
-
I'm wondering if I'm going to end up breaking this up and recasting it. The aggregate balls made it difficult to even really tell the consistency of the kastolite. Have I gotta go through the powder and break it all up?
-
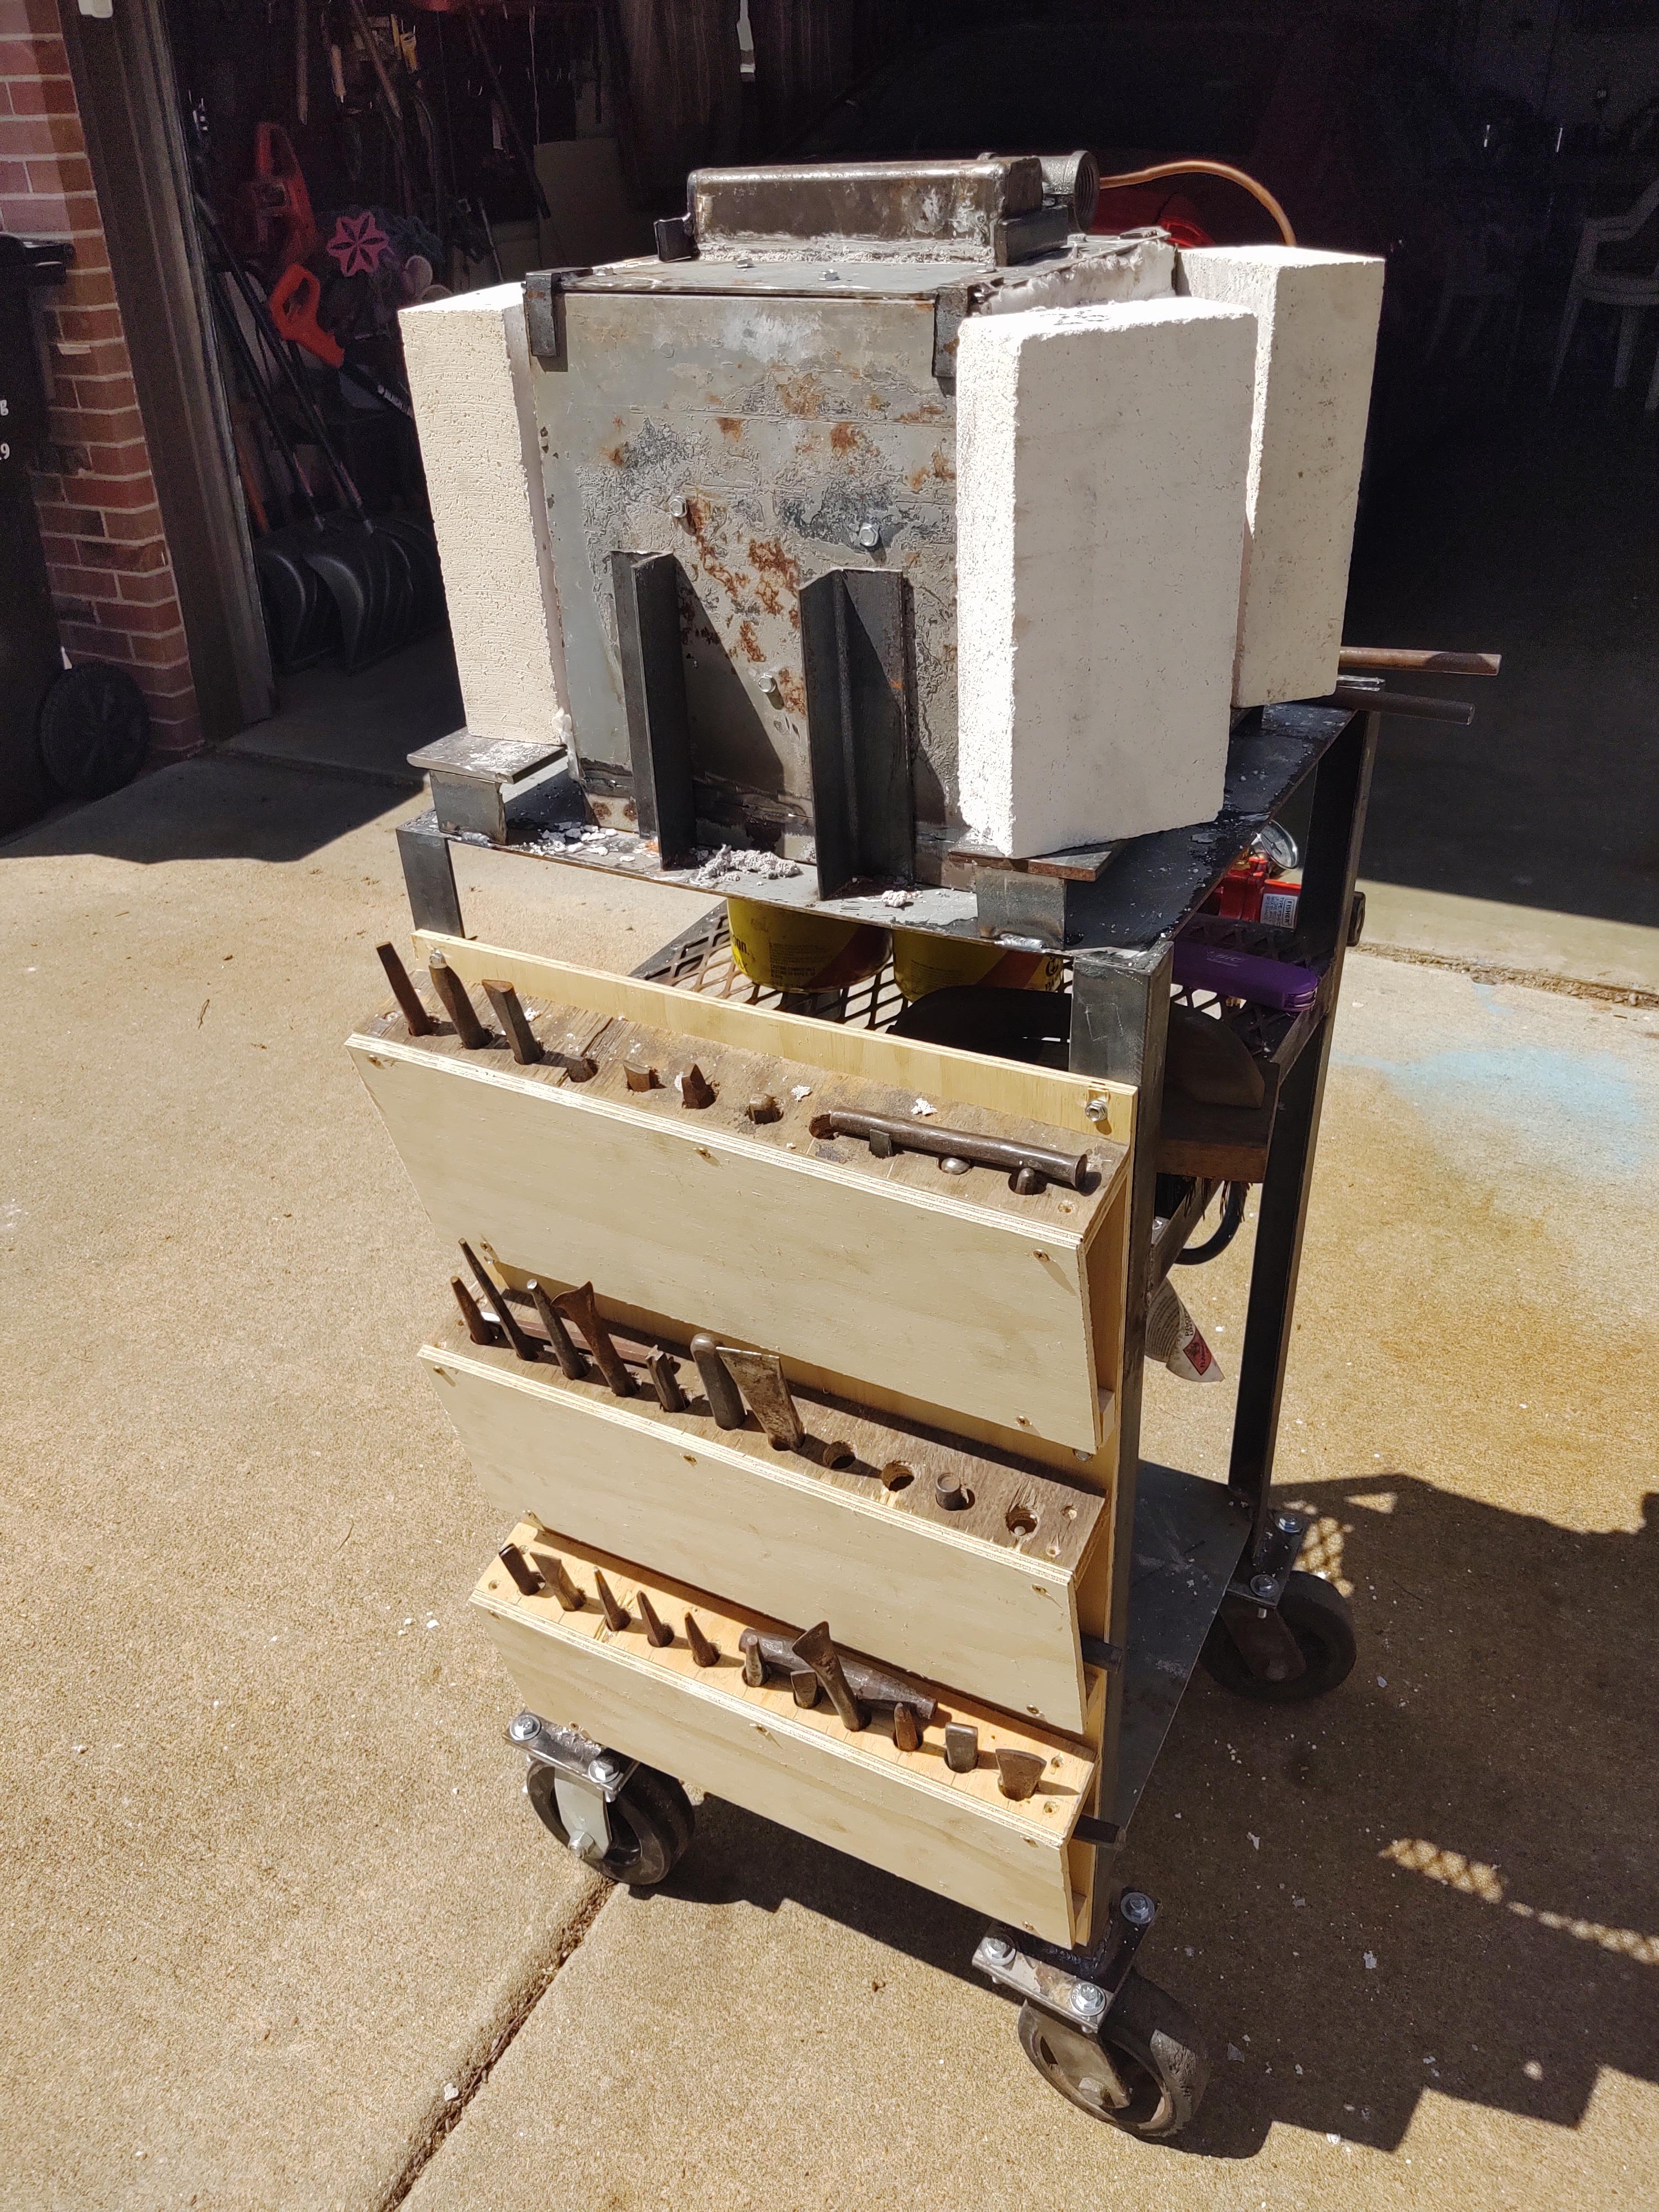
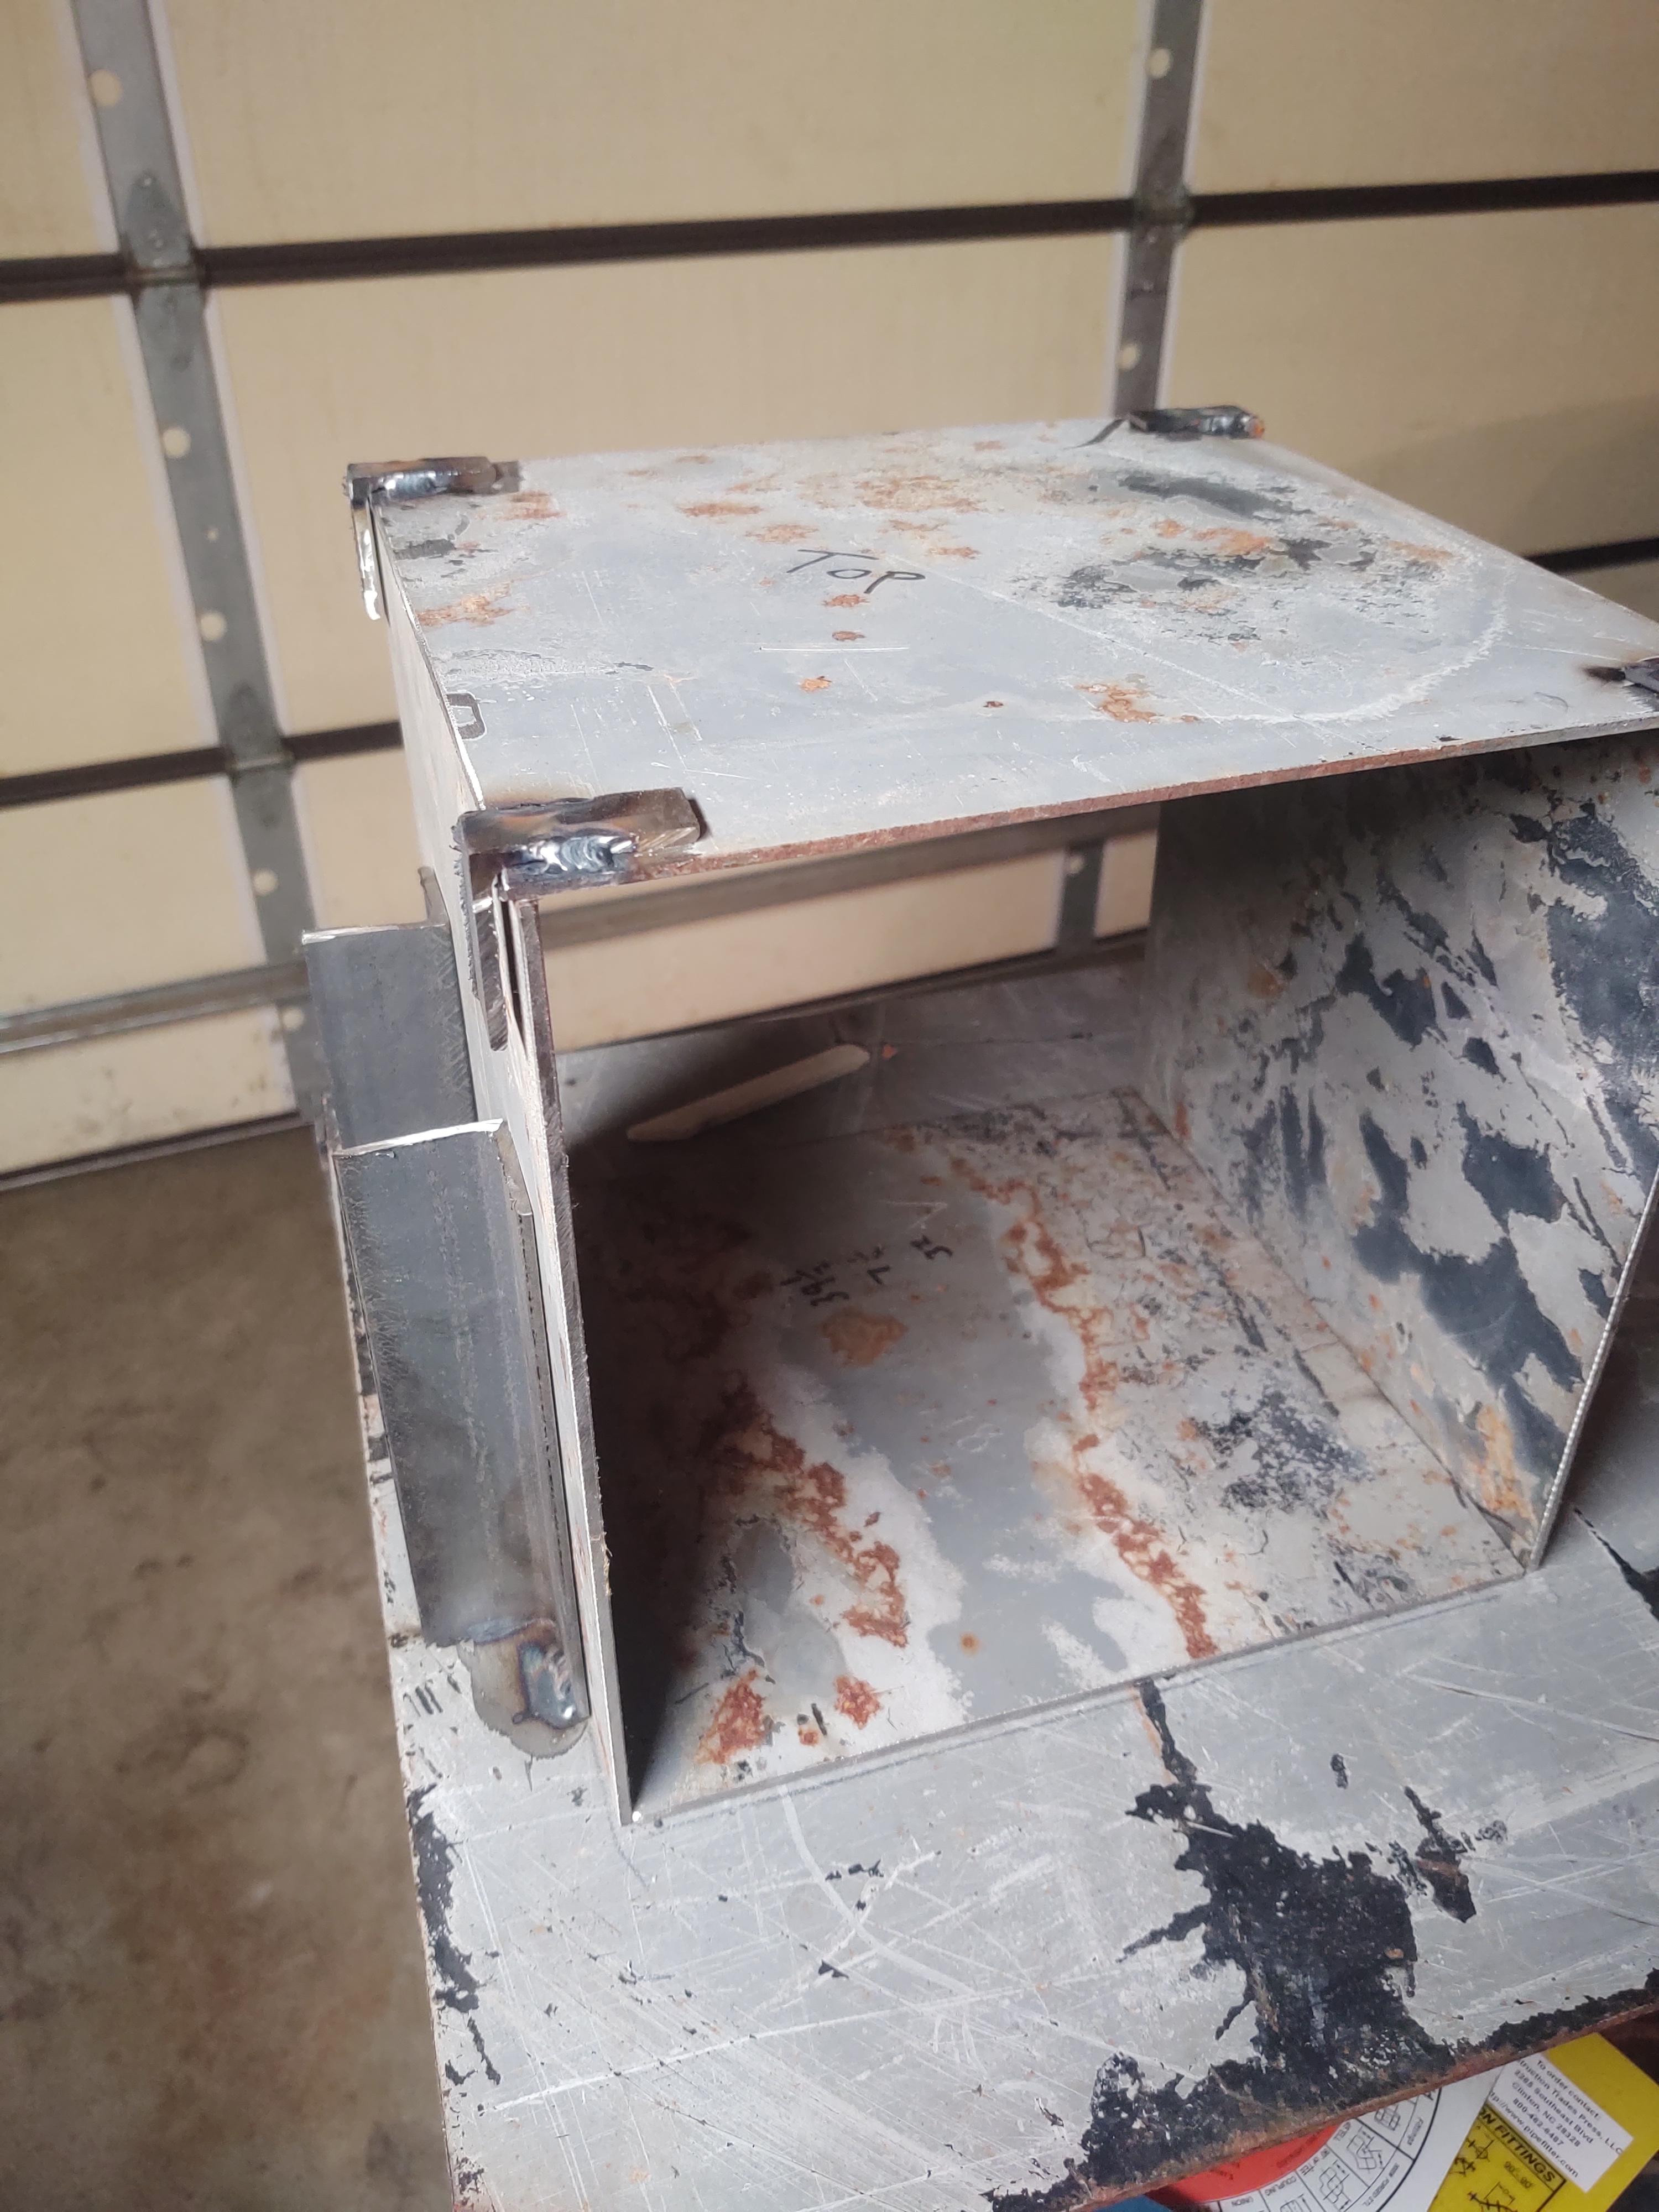
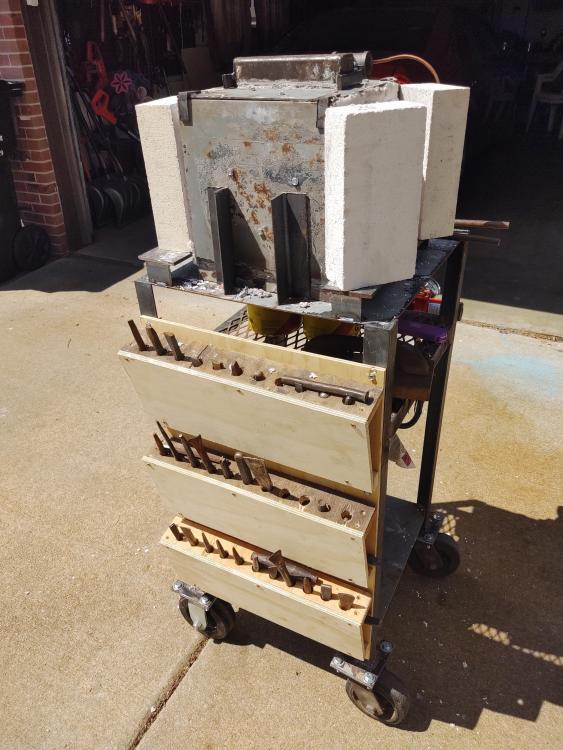
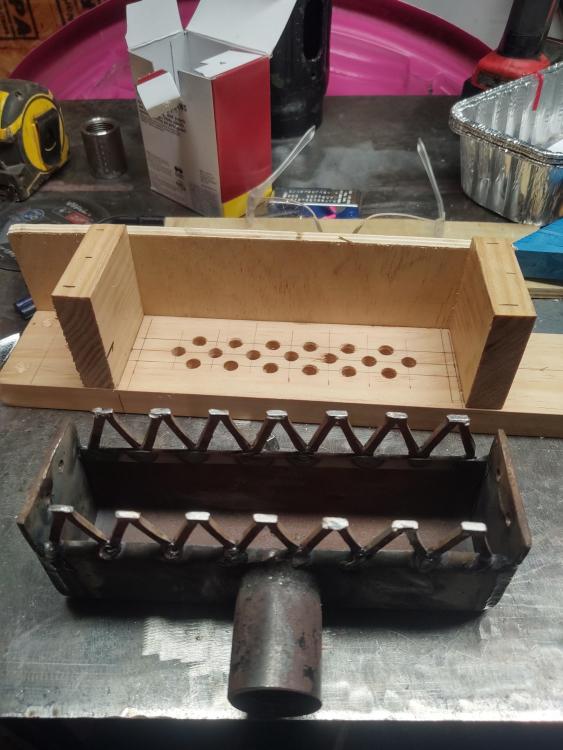
I am going with a box style forge because I have a lot of 1/8" plate on hand already. Mikey and frosty have both mentioned that welded box forges do not do well because of expansion and contraction so this is my solution. The box isn't welded, but held in place as shown by the angle welded to table top and the angle tabs on the top plate. My initial plan is to use Morgan k26 bricks with a kiln wash for the doors. I have several ideas on how I would construct actual doors but I think I'm just going to use the bricks initially and go from there. Currently waiting on my package from IFI, I ordered everything I could from Glenn. If this is not a good way to go about a box forge I'm not married to the setup I have now. I am curious if the 1/4" kastolite layer in the forge will crack badly along the corners. Final inside dimensions will be 10*5.5*5.5, 302 cu in total. When I first started this I had a very long forge but after some thought I decided to listen to frosty about a lot of people building a monster first for their 1st gasser and regretting it.

-
Look up some of Joey Vandersteeg's videos on YouTube. He forge welds on quite a lot of his projects, and he takes the time in some of them to really explain in detail what he's doing. Obviously not as good as learning from someone firsthand, but from watching his videos I learned forge welding early on. I still mess it up sometimes, but when all goes well you can't see where it was welded
-
Thanks frosty, it's an 035 tip. I followed the t burner instructions, I'll trim that tip back some more and report back with pics of it in the forge shell. Also, I'm wondering if I should cut the hole in the forge shell and insulation before I rigidize it or if it doesn't matter. I know I've seen it talked about before I can't find it again tho. Thanks for everyone's help, I'll be leaning heavily on advice here since this is my first gas forge.
-
I've trimmed it up pretty close to that halfway point jhcc mentioned, flames are not as yellow as before, does this look better? 5 psi

-
I'd say it's roughly 3/8" back from the bull head on the T. Have I taken too much off the mig tip?