jjhend28
-
Posts
26 -
Joined
-
Last visited
-
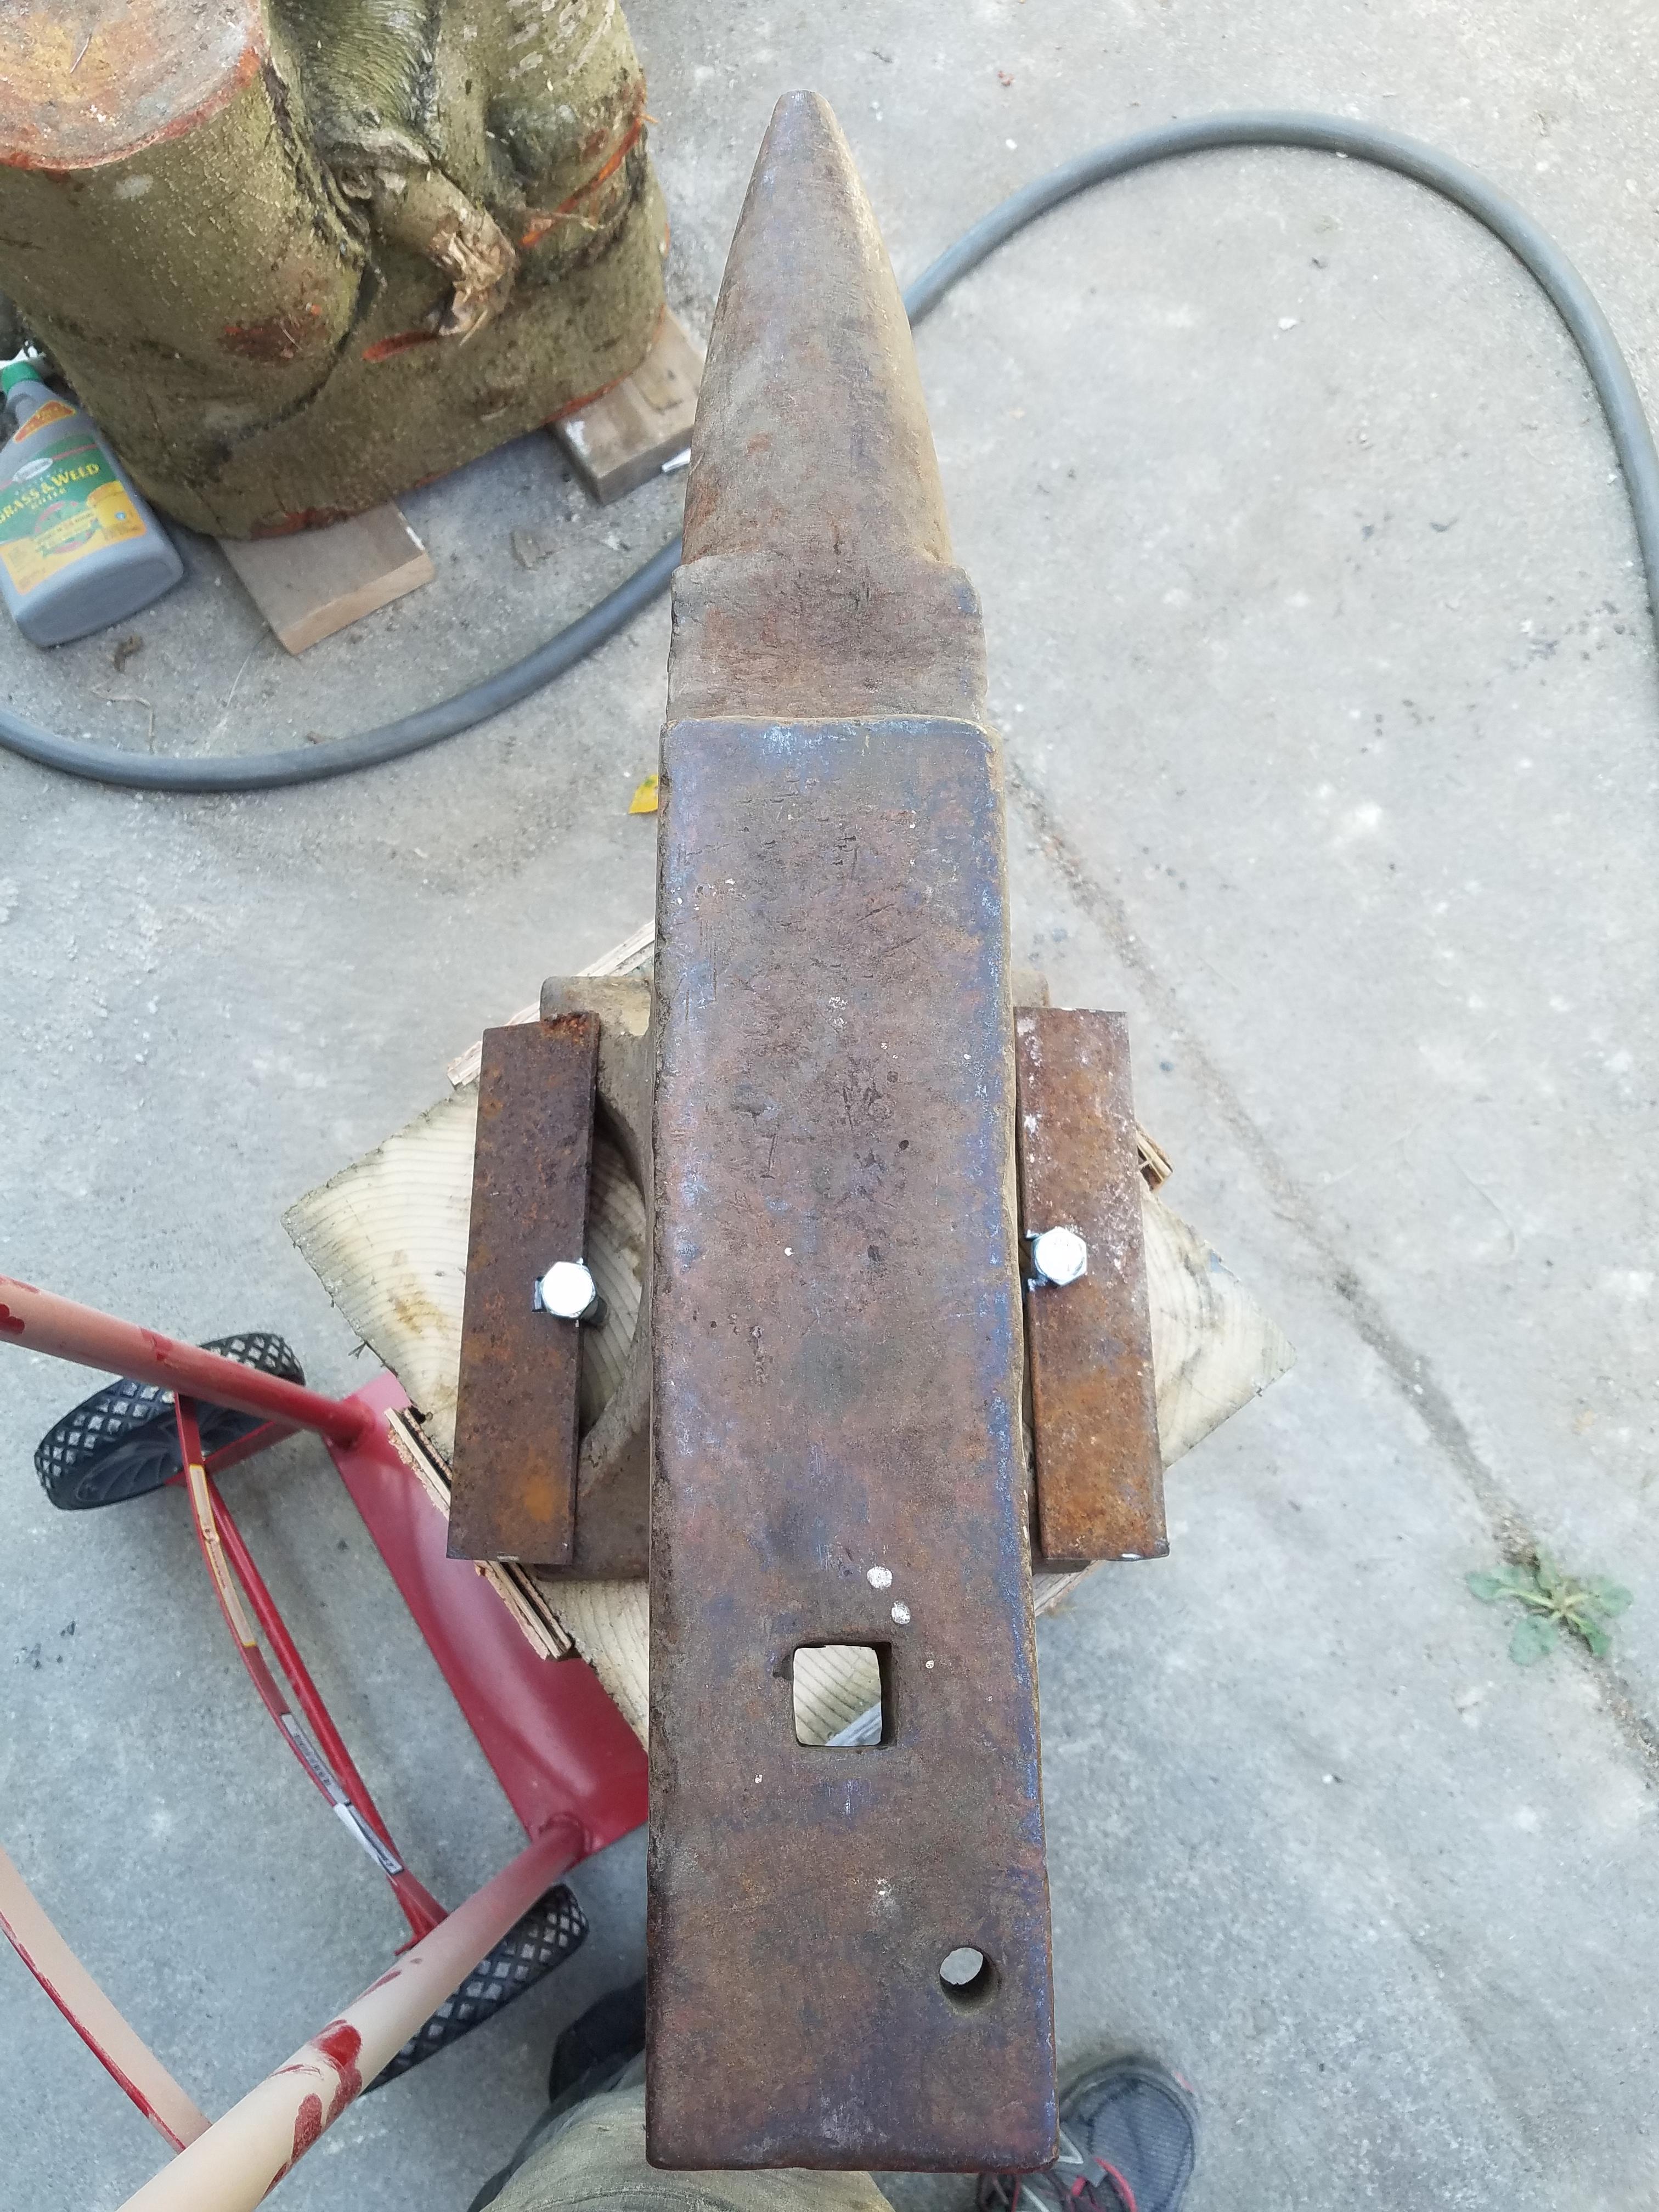
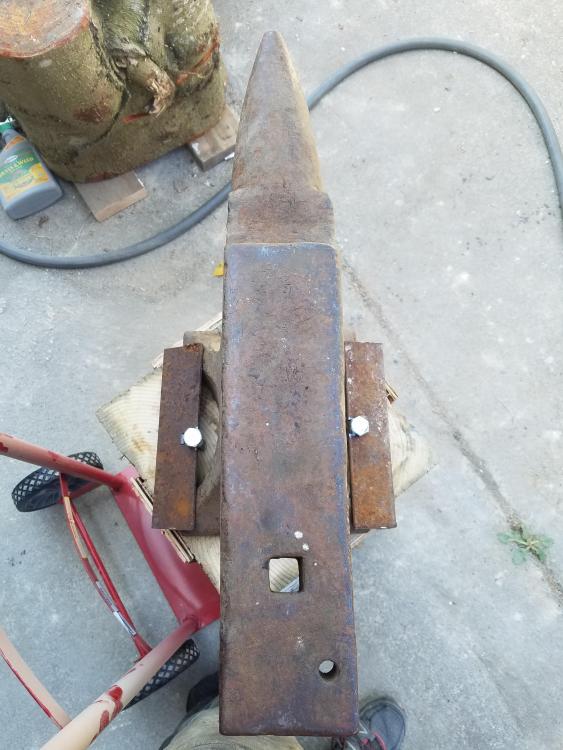
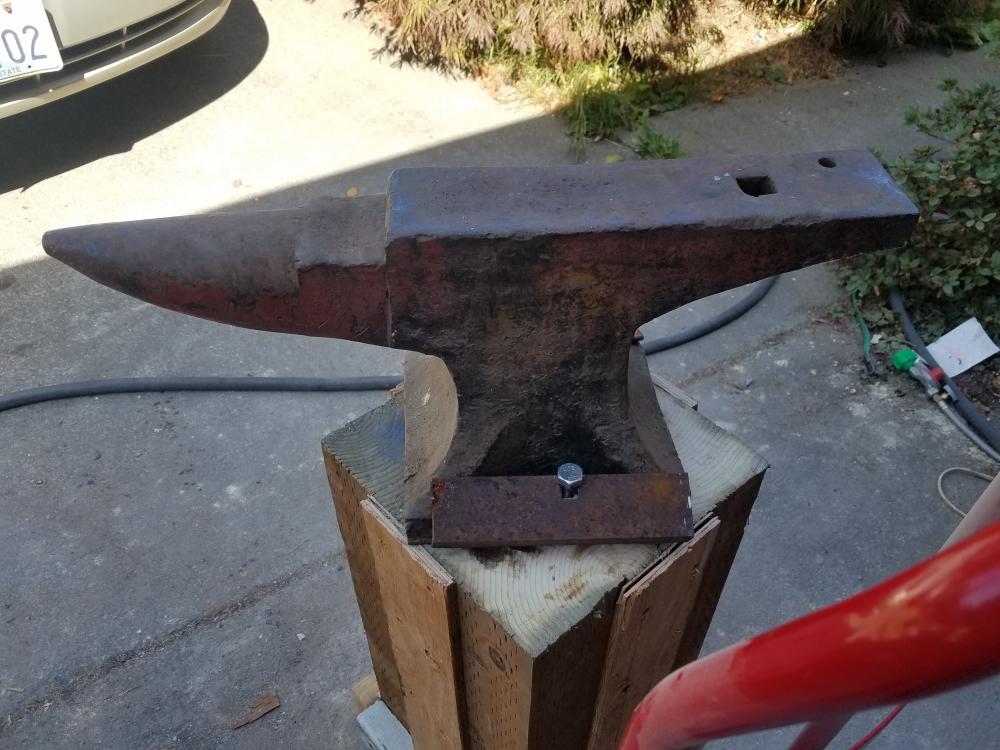
Been a while since I posted anything on here, school and work has me busy! But I just made this sweet little acquisition. Got it for a sweet low price of 0 dollars. As far as I can tell this is a 107lb Haybudden blackjack anvil made for Simmons hardware in St. Louis.
.thumb.jpg.3cacd20e54e595db17fa395ba8a2461b.jpg)
-
My experience isn't with wood forges, and I have very little coal forge experience. So my 2 cents would be to post some pictures of what you have built. and make sure you get one with the fire going. It just helps to see what you have going on vs. reading what you have.
-
Thanks for the kudos Frosty! I'm always happy to help people avoid the mistakes I've made.
-
Frosty pretty much covered it all, add some more wool, and cover it with some ITC-100 and you will notice a huge increase in how your forge runs. I did notice one thing in your pictures though, you burner is sticking way to far into the forge. I have one of those little forges like that, but I run my burner about 1/8 to 1/4 inch inside the wool. To make it easier to understand, put the burner flare even with the wool, then back it out a bit. Its pretty hard on the burner flair to have it in that far, eventually the forge heat will burn it out. Not to mention it will just get in the way of moving your projects in and out of your forge, other than that, I would get some soft fire brick and make some "Doors" to help hold in the heat and a porch out the front of it, a lot of work happens on the porch of a forge.
-
Just getting into blacksmithing
jjhend28 replied to RLG's topic in Blacksmithing, General Discussion
Haha, I will repeat what everyone else is saying, read read read read read read.... ALSO... Since you are just getting into metal working and black smithing, find a local area smith, or a nearby Blacksmith association and talk them, get a time to go and see their forges, their shops, and see what you like and don't like. Also as an ending note, as you are just getting started, I would suggest to try and keep your costs as low as you can get (This is an expensive hobby) but just in-case you end up not liking it (It is also hard work and can be dangerous) then you don't have 4000$+++++++++++++++++++++ worth of tools and equipment you aren't using just sitting around. There are many simple and cost effective forge builds and alternate anvil ideas and plans you can find on here, just hunker down, chug the coffee, make sure you have a comfy chair and something to take notes on, and read until you can't read anymore, and then keep reading..... -
I'm with Frosty on this one, Wyomingforger97, make a big pot of coffee, grab a comfy chair, and bunker down for hours upon hours of research. The forge dimensions you posted sounds like a huge forge to build. Is this your first build? If it is, I would recommend building a smaller one to start. My go to forge is the freon tank design you can find all over the internet, I have a 5 burner majestic forge I bought when I was getting started forging thinking "Bigger is better", and believe me, it isn't. Unless you plan on making Scottish Claymors, a simple 2 burner forge will cover most forging needs.
-
Thanks for the info on that. I am new to forge welding and can use any insight I can get. I did a bit of reading, and the plan I came up with was to alternate layers of the spring steel with some 1095 (That's what I have on hand), and then work it and fold it a few times and see how it comes out... I'm not expecting much except to learn a bit more so I can get better at it.
-
Damascus pistol grips
jjhend28 replied to Austin Ferraiuolo's topic in Gunsmithing, Muskets, Flintlocks etc
I think that would be a cool idea, and would look awesome, I want a set for my 1911! if you make a set and it works out let me know! -
Nothing complicated to be honest. It was just 2 pieces of 01 tool steel I had left over from making a few wrenches I needed. I really just wanted to see if I could even get a weld in my forge. Then I figured I would just make it into a knife as I have never made one. I'm thinking about cutting up a leaf spring I have and trying my hand at a another one before the week is out.
-
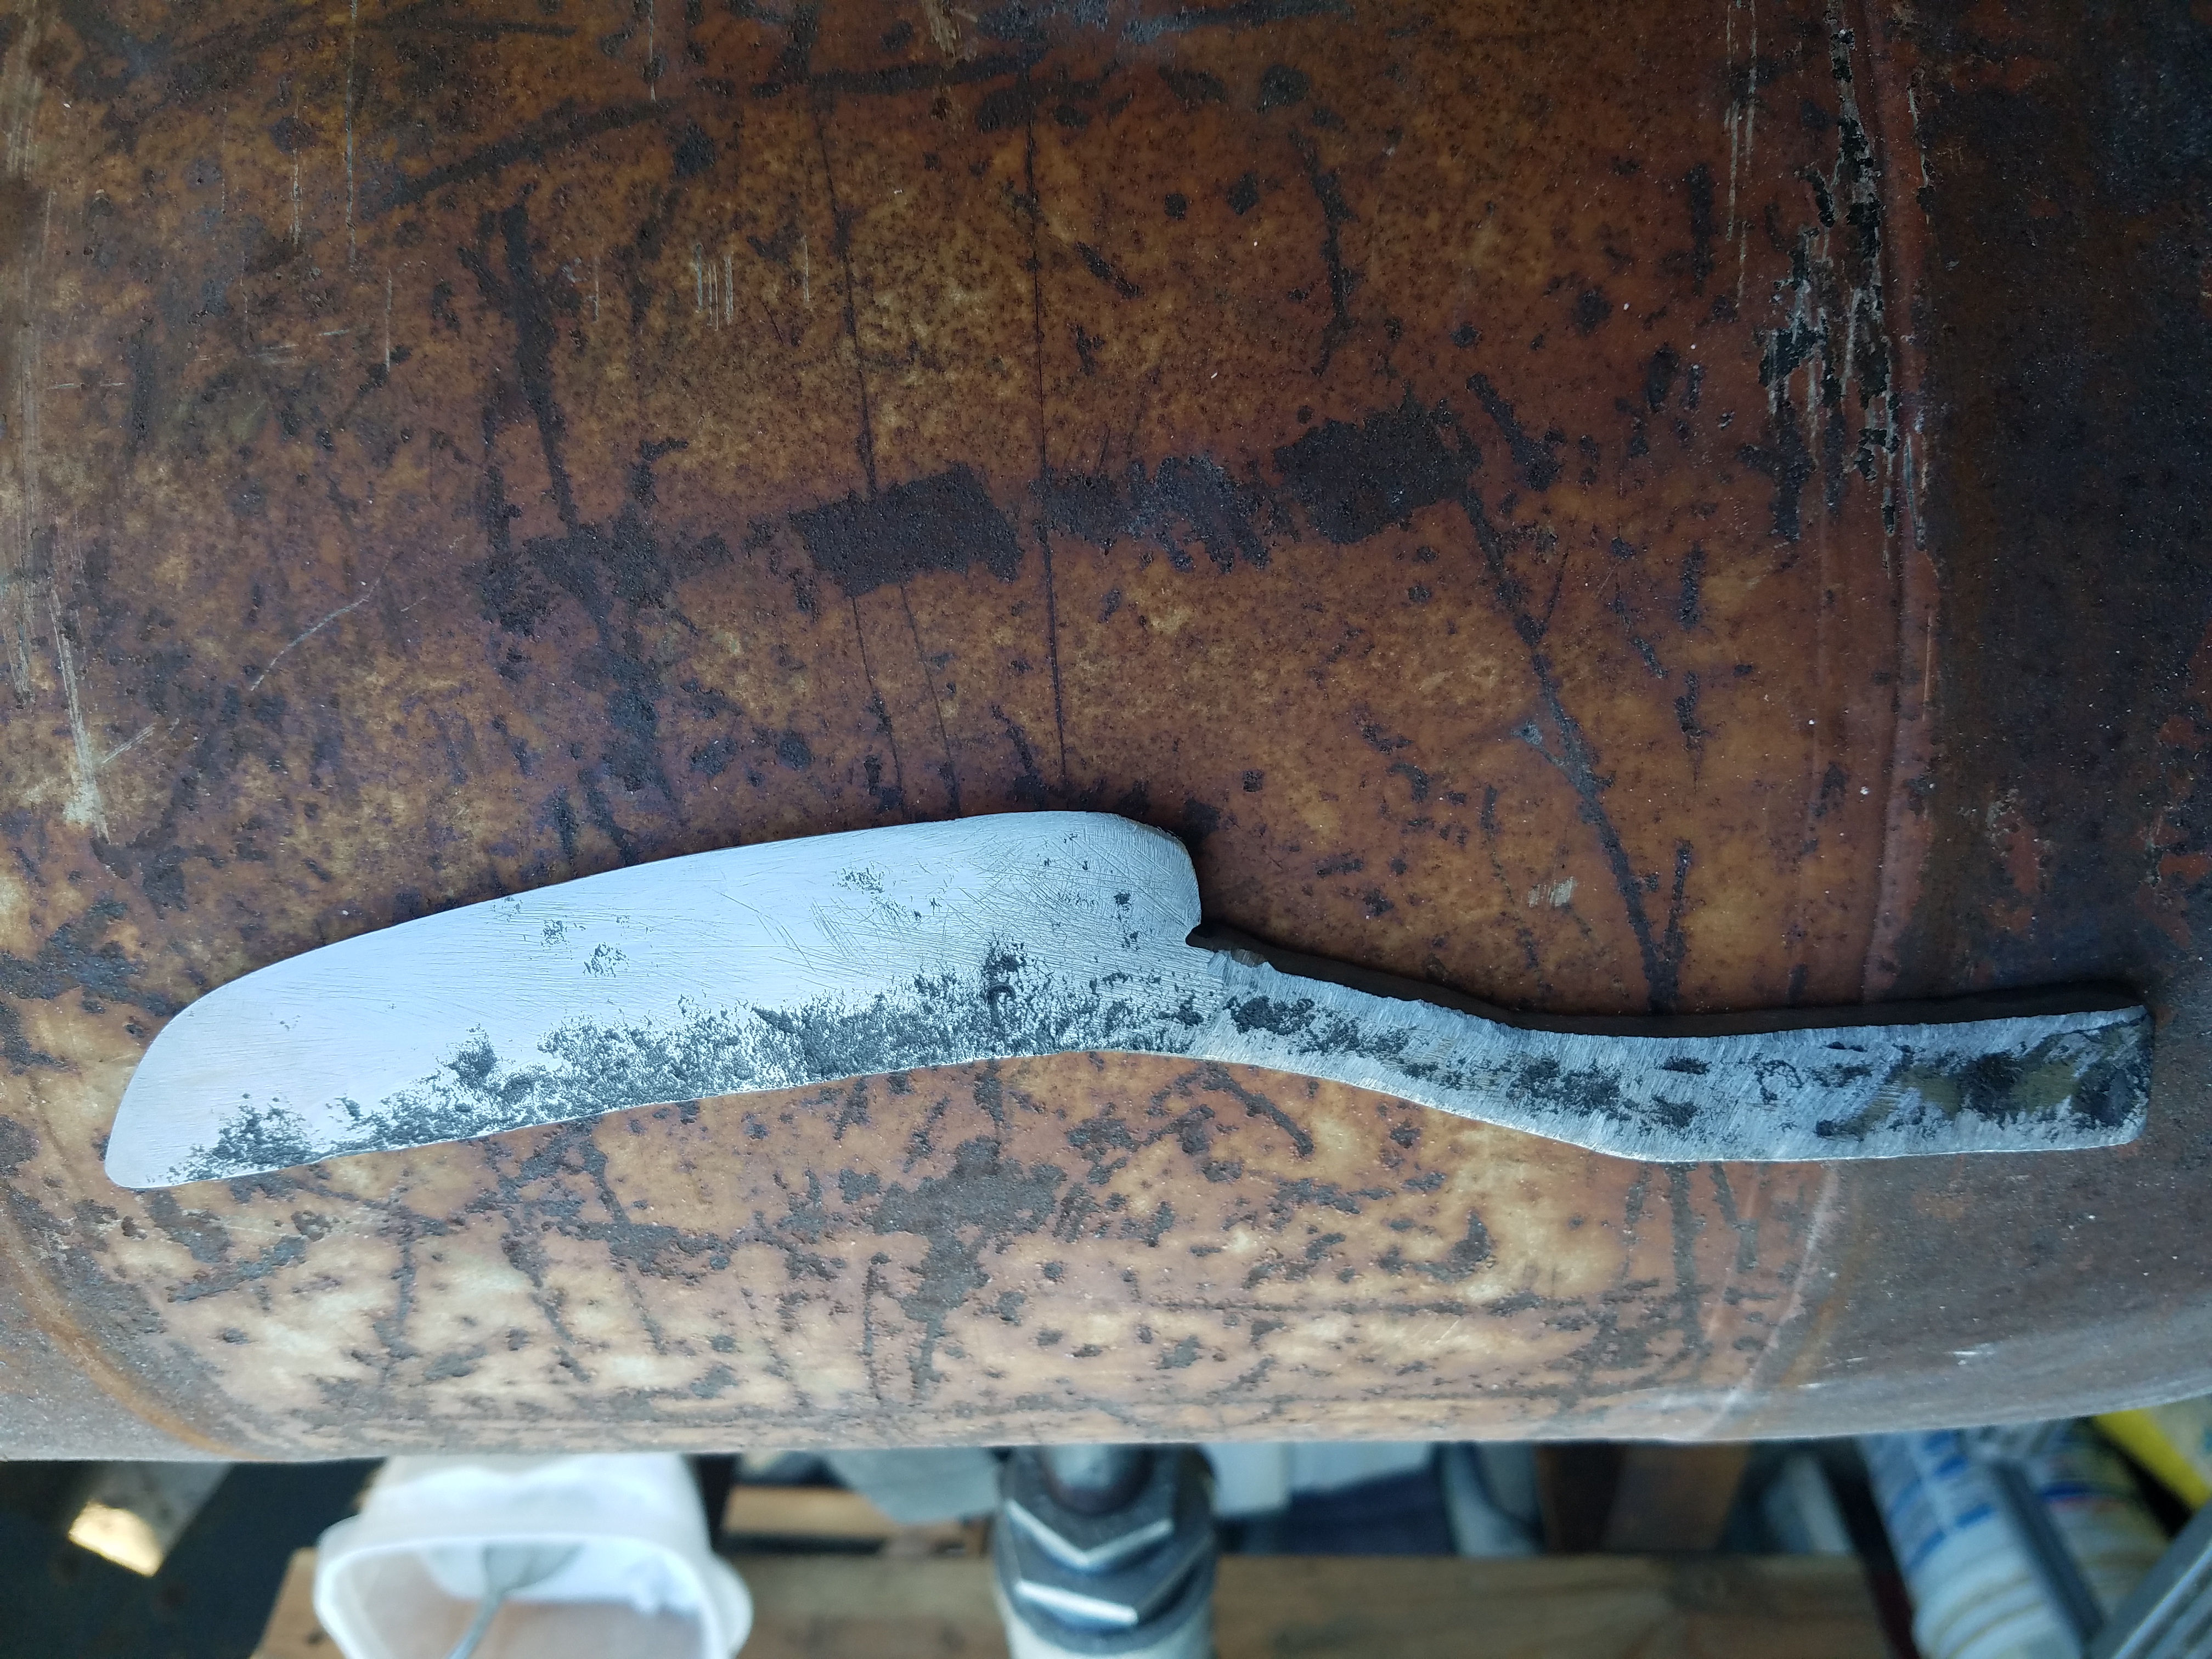
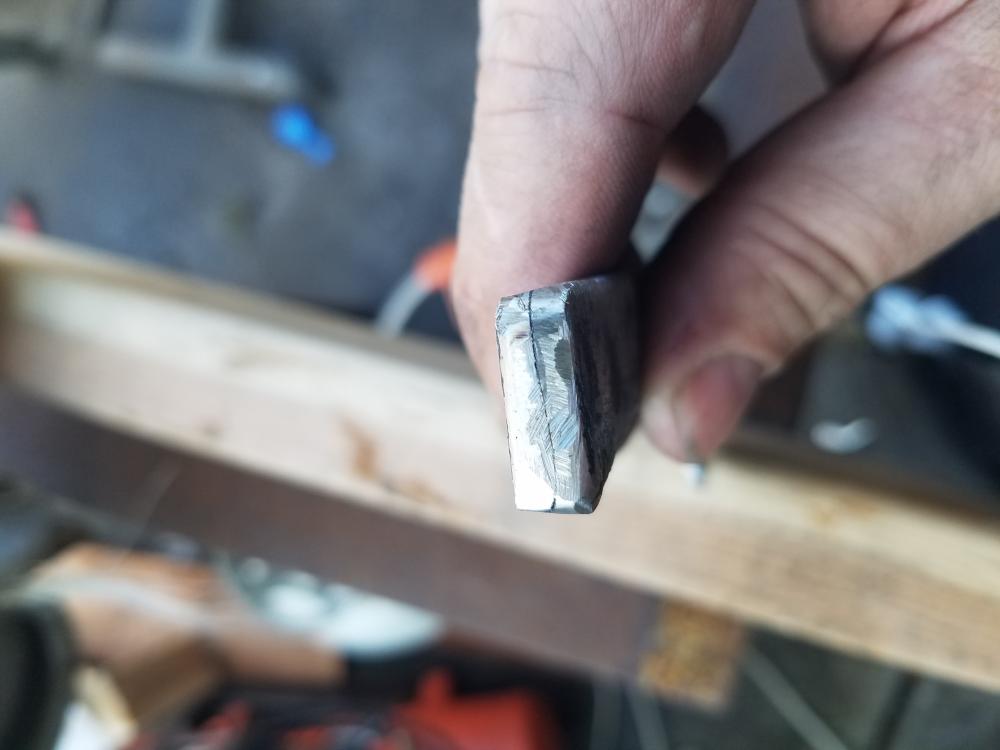
So, two firsts for me today. I did my first successful forge weld, and my first blade. I have been making random things for a while, and never got around to learning to forge weld or make a knife. Today I did both. This first picture is my first knife blade, its ugly and rough but it is my first, I haven't gotten a handle on it yet, that will be tomorrow. The second picture is the back of the tang where the weld didn't take all the way, but I should be able to cut that little bit off and still have room for a handle. This was all done with just basic tools... a forge, hammer, anvil, and hand files, nothing fancy. I am planning on making a basic wood handle tomorrow from either maple or oak, as it is what I have on hand.

-
I doubt you will have an issue getting your tools across, just make sure you don't have any flux chemicals. They might mistake the white borax for something it isn't! Just have all the papers in order (Birth Cert, or Enhanced DL), and you should be golden to get across. I go into Canada a lot, I live less than an hour from the border in Washington and it makes a great day trip, just be honest and don't act funny and you will be fine!
-
I had this issue on a propane forge I built a while ago, part of it was that the AF burner I built needed to be run at such a high PSI that the tank had freezing issues causing the flame to die off and come back like that, when I sunk the tank in a bucket of warm water it fixed the issue some, The real fix was upgrading to a larger tank that could keep up with the demands of the burner. The other issue I had was already mentioned, oxygen depleted air was being sucked into the burner because it was vertical right above the forge. I hope this helps some.
-
They could be a better quality cast iron, but more than likely they are the same as "Heavy Duty" cast iron. What I am getting at is that they probably added a power word in front of cast iron to boost sales. Just a manipulation tactic most likely. But at that price you could have a few decent boat anchors for yourself.
-
The kaowool is a but thin but you can't argue with free, just put a few layers in, I generally go with 2 inches of kaowool and kast o'lite 3000 as a coating, and I cast a brick for the bottom to replace every once in a while as flux will eat it up when you get into welding. Are you going to coat some ITC 100 or some plistex or something on the inside? I recommend doing so, it helps with fuel economy, I went from 11 minutes to forge welding temps down to 6 minutes to forge welding temps. You don't really need much for a forced air blower, an old hair dryer is how I got started, from there it was just over the counter pipes and 3 gas fittings, less than 30$ to get it all if I am remembering right. But to know if your T-burners are going to put out enough heat you will need to know the volume of the area you are going to be heating. I don't remember the math for that, but google will know. Then you need to build a burner that is adequate to heat that area. You might want to consider building 2 smaller burners for the forge to get up to the heat you need, using ball valves to turn them off and on, then you can run one burner or both depending on you needs for the project you will be working on. And its awesome to meet a fellow smith from the PNW!
-
Is a $140 hammer really that much better than a $40 hammer?
jjhend28 replied to Pancho07's topic in Hand Hammers
Daswulf said it best, The craftsman makes the tools, the tools don't make the craftsman. I have found some cheap tools to be great, and some expensive tools to be less than great. I personally like my 45$ cross peen more than the 100$ one I bought. Its all about what feels right in your hand, and knowing how to use your tools to the best of your ability. I have seen some serious craftsmanship all on simple homemade tools, hammers and all.
.jpg.2f6532c0c611bb2efbc38d7ff7b1c49f.jpg)