

AdamG
-
Posts
106 -
Joined
-
Last visited
Content Type
Profiles
Forums
Articles
Gallery
Downloads
Events
Everything posted by AdamG
-
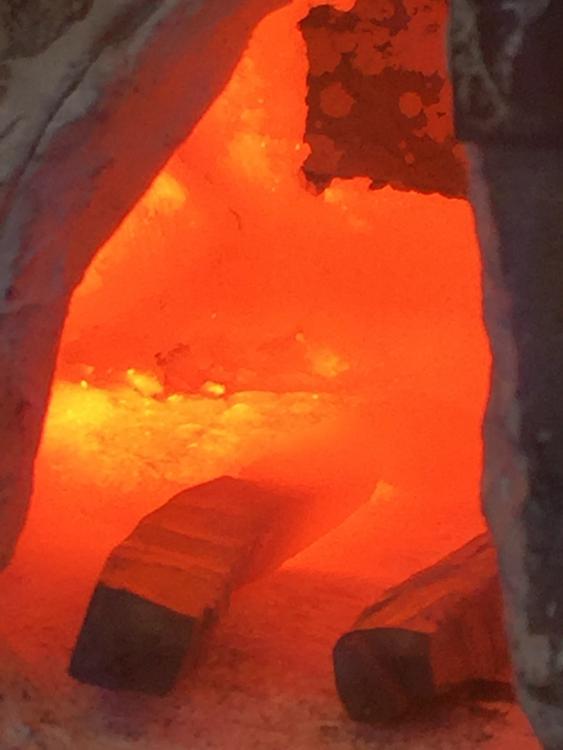
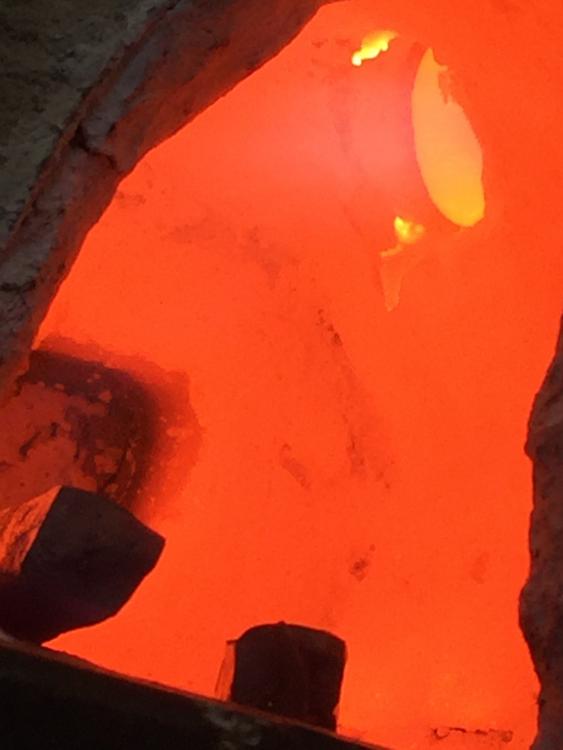
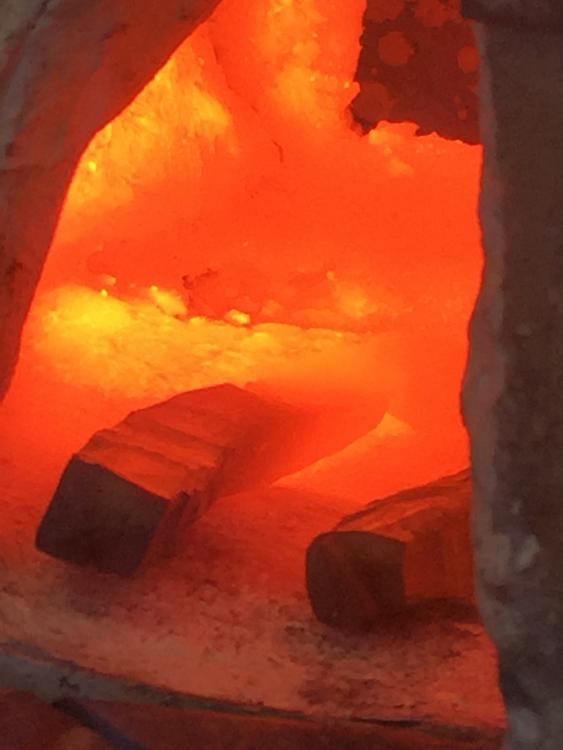
The inside is roughly D shaped (flat on the bottom) with a volume of about 375 ci or less I think (about 6" wide by not quite 6" tall inside, by about 10" long inside). The front doorway is sloped down a bit before the opening, and then closed off by the hard fire brick door. The back door is about 2"x3" and closed off by the same hard fire brick painted with Metrikote. I found most of my parts at a ceramic supply and a plumbing supply shop but the insulation wasn't kaowool, it was another brand. I'm guessing the 6 lb version. I would like to line the bottom with ceramic kiln shelf brick so it doesn't wear out too badly if I flux with borax. I may try another burner design (Frosty T) but I am trying to focus on forging rather than shop setup.
-
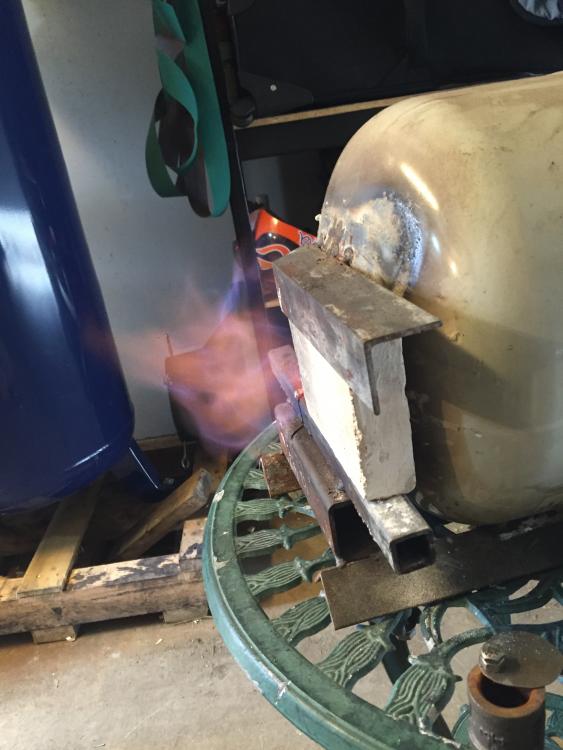
Uh, ok, I'll have a look and read some more. I started this forge and the burner before coming across this forum. This adventure started with an interest in straight razors and some other bladesmithing. Now I'm forging blanks and learning some blacksmithing (tongs etc). I'm in Calgary, Alberta, Canada (3,000 ft altitude or so). See http://straightrazorplace.com/forge/126398-finally-getting-going-again.html The burner was based on Zoeller's sidearm design but I couldn't find exactly the same parts so I used what I could find. I guess what I was looking for was feedback on whether it looked likely to be lean/rich/restricted, or general feedback on what you could see. Yes, that's a compressor running in the background. I have been building a small air hammer as well, and was trying it out that day.
-
I've been trying to upload a video that shows more, but each time it seems to fail. Part of my reason for asking is that it seems I have a good hot zone where the flame comes in (left side) but the rest of the forge wasn't as hot as I'd like it to be. https://youtu.be/h0jrRDTapT8
-
Hi all, I'm just getting my garage going, with a typical 20 lb propane tank forge, tiny 50 lb anvil and some other stuff. I know there are a few things to fix up on this forge, but it's a start. I haven't been able to weld in it at all (couple of failed attempts at san mai). It's got a layer of perlite and waterglass, covered by 2" of ceramic wool, then fire clay and Metrikote. The inside volume seemed big so I put another layer on the ceiling and re-coated it. There is also a back door on a top hinge (lined with hard fire brick and Metrikote) and the front door is a sliding hard fire brick painted with Metrikote. The burner is homemade (8" 3/4 pipe, with T fitting and MIG tip (35 I think), no blower. The air flow was feeling a bit restricted, so today I took off the T side and it roared! However, it might be a bit lean now, but I'm not sure. I haven't run the burner outside of the forge. Previously it had a 3" nipple and coupler with a cover/door that rotated to block the intake. The flare tip is stainless and after I shut down the forge, the flare tip 'tinks' as scale flakes off from insideIMG_4506.MOVIMG_4506.MOV. I haven't sealed the burner against the tube, which is probably important too. I was able to forge well enough, but I'm wondering if you guys can suggest any changes (other than or in addition to a T-Rex burner, but they are expensive to get from Canada). Cheers, Adam

-
control circuit for pneumatic hammer
AdamG replied to ironmutt's topic in Power Hammers, Treadle Hammers, Olivers
Here's what I learned (including my schematics): http://straightrazorplace.com/forge/122144-air-hammer-4.html -
control circuit for pneumatic hammer
AdamG replied to ironmutt's topic in Power Hammers, Treadle Hammers, Olivers
I am building a hammer and had similar thoughts (because somebody basically gave me a spring return solenoid 5-way 2 position valve). The only way I could think to run it was to put an electrical switch half-way across the travel and have it act like a normal Kinyon, or put one switch on either end of the tup travel and use what's called a 'latching relay' which holds the relay in position one until the other switch is triggered, then holds in position two... then back to one, and so on. I'm still only getting close to finishing my hammer, so I'm no expert, but I figured it might have made sense. I have since switched to a dual air pilot valve because I wasn't sure I wanted the hassle of plugging it in and troubleshooting two systems (and I think the solenoid valve was siezed - thanks buddy!).


