
D.C.
-
Posts
207 -
Joined
-
Last visited
Content Type
Profiles
Forums
Articles
Gallery
Downloads
Events
Everything posted by D.C.
-
Please identify this power hammer
D.C. replied to D.C.'s topic in Power Hammers, Treadle Hammers, Olivers
Unfortunately not. Currently it belongs to a 90 year old woman. Her father in law worked as a full time smith until his death. This was in the early 50s. Her husband pulled his dad's model t inside and closed the doors. The family has done almost nothing to preserve or promote this awesome piece of history. The pieces outside came from a shed that collapsed. In the owners words "they had to do something with all the junk". The neighbor who made introductions for me was surprised how pleasant the owner was. Apparently she has run multiple people off the property. I'm looking forward to going back. I only asked to document the shop, and am NOT actively pursuing the contents. It would feel wrong at this point. -
Please identify this power hammer
D.C. replied to D.C.'s topic in Power Hammers, Treadle Hammers, Olivers
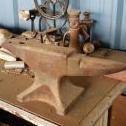
Unfortunately I just missed the owner this evening, so I didn't get to go inside today. I guess I'll just keep trying. I think you are right Judson, I managed to get a shot from the side and it looks homemade. Anyway, I'll post pics of the whole shop when I get the tour.

-
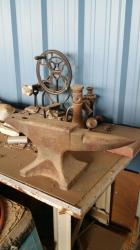
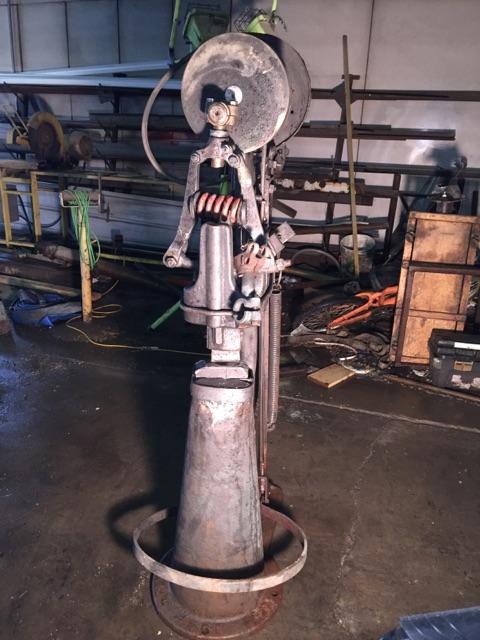
Saw this little guy in an old shop here in Wyoming. I'll hopefully get better pics later, but it appears to be only about 3.5/4' tall. The base doesn't look like any little giant I've seen, so any ideas?
-
looking for trenton 258 information
D.C. replied to Brian Evans's topic in Anvils, Swage Blocks, and Mandrels
I would not hesitate... deals like that can disappear quickly -
So you think YOUR anvil's broken. ...
D.C. replied to D.C.'s topic in Anvils, Swage Blocks, and Mandrels
Thanks Irondragon. Been beating on it for almost a month now. I wanted to test it before I even bothered to take a pic. A part of me is always gonna be waiting for something to go wrong. -
So you think YOUR anvil's broken. ...
D.C. replied to D.C.'s topic in Anvils, Swage Blocks, and Mandrels
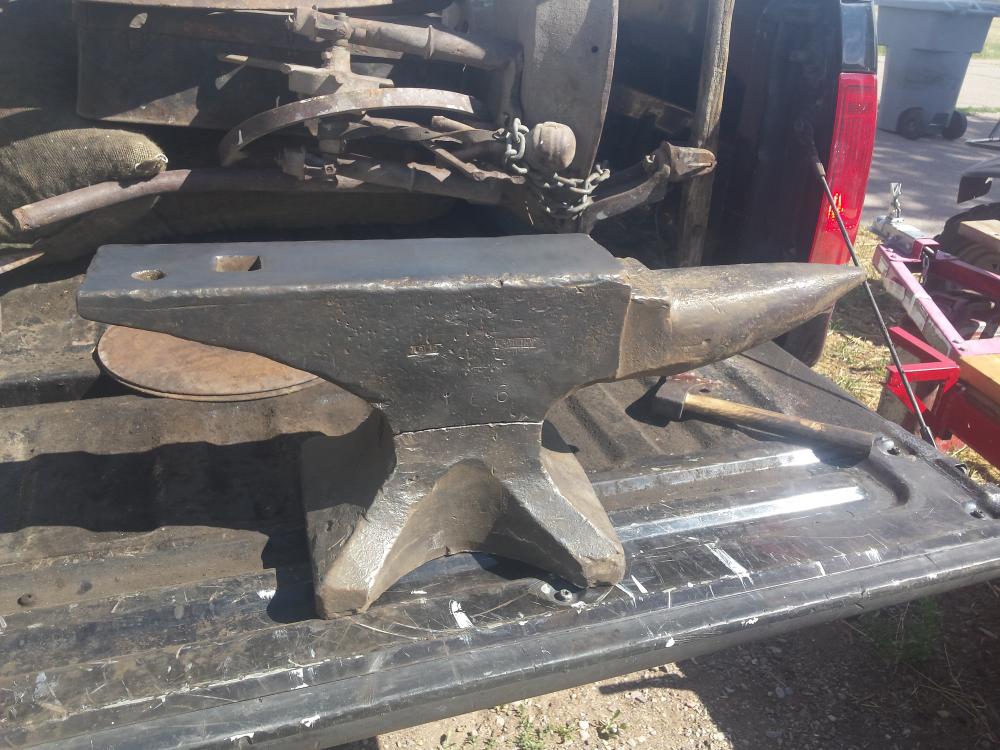
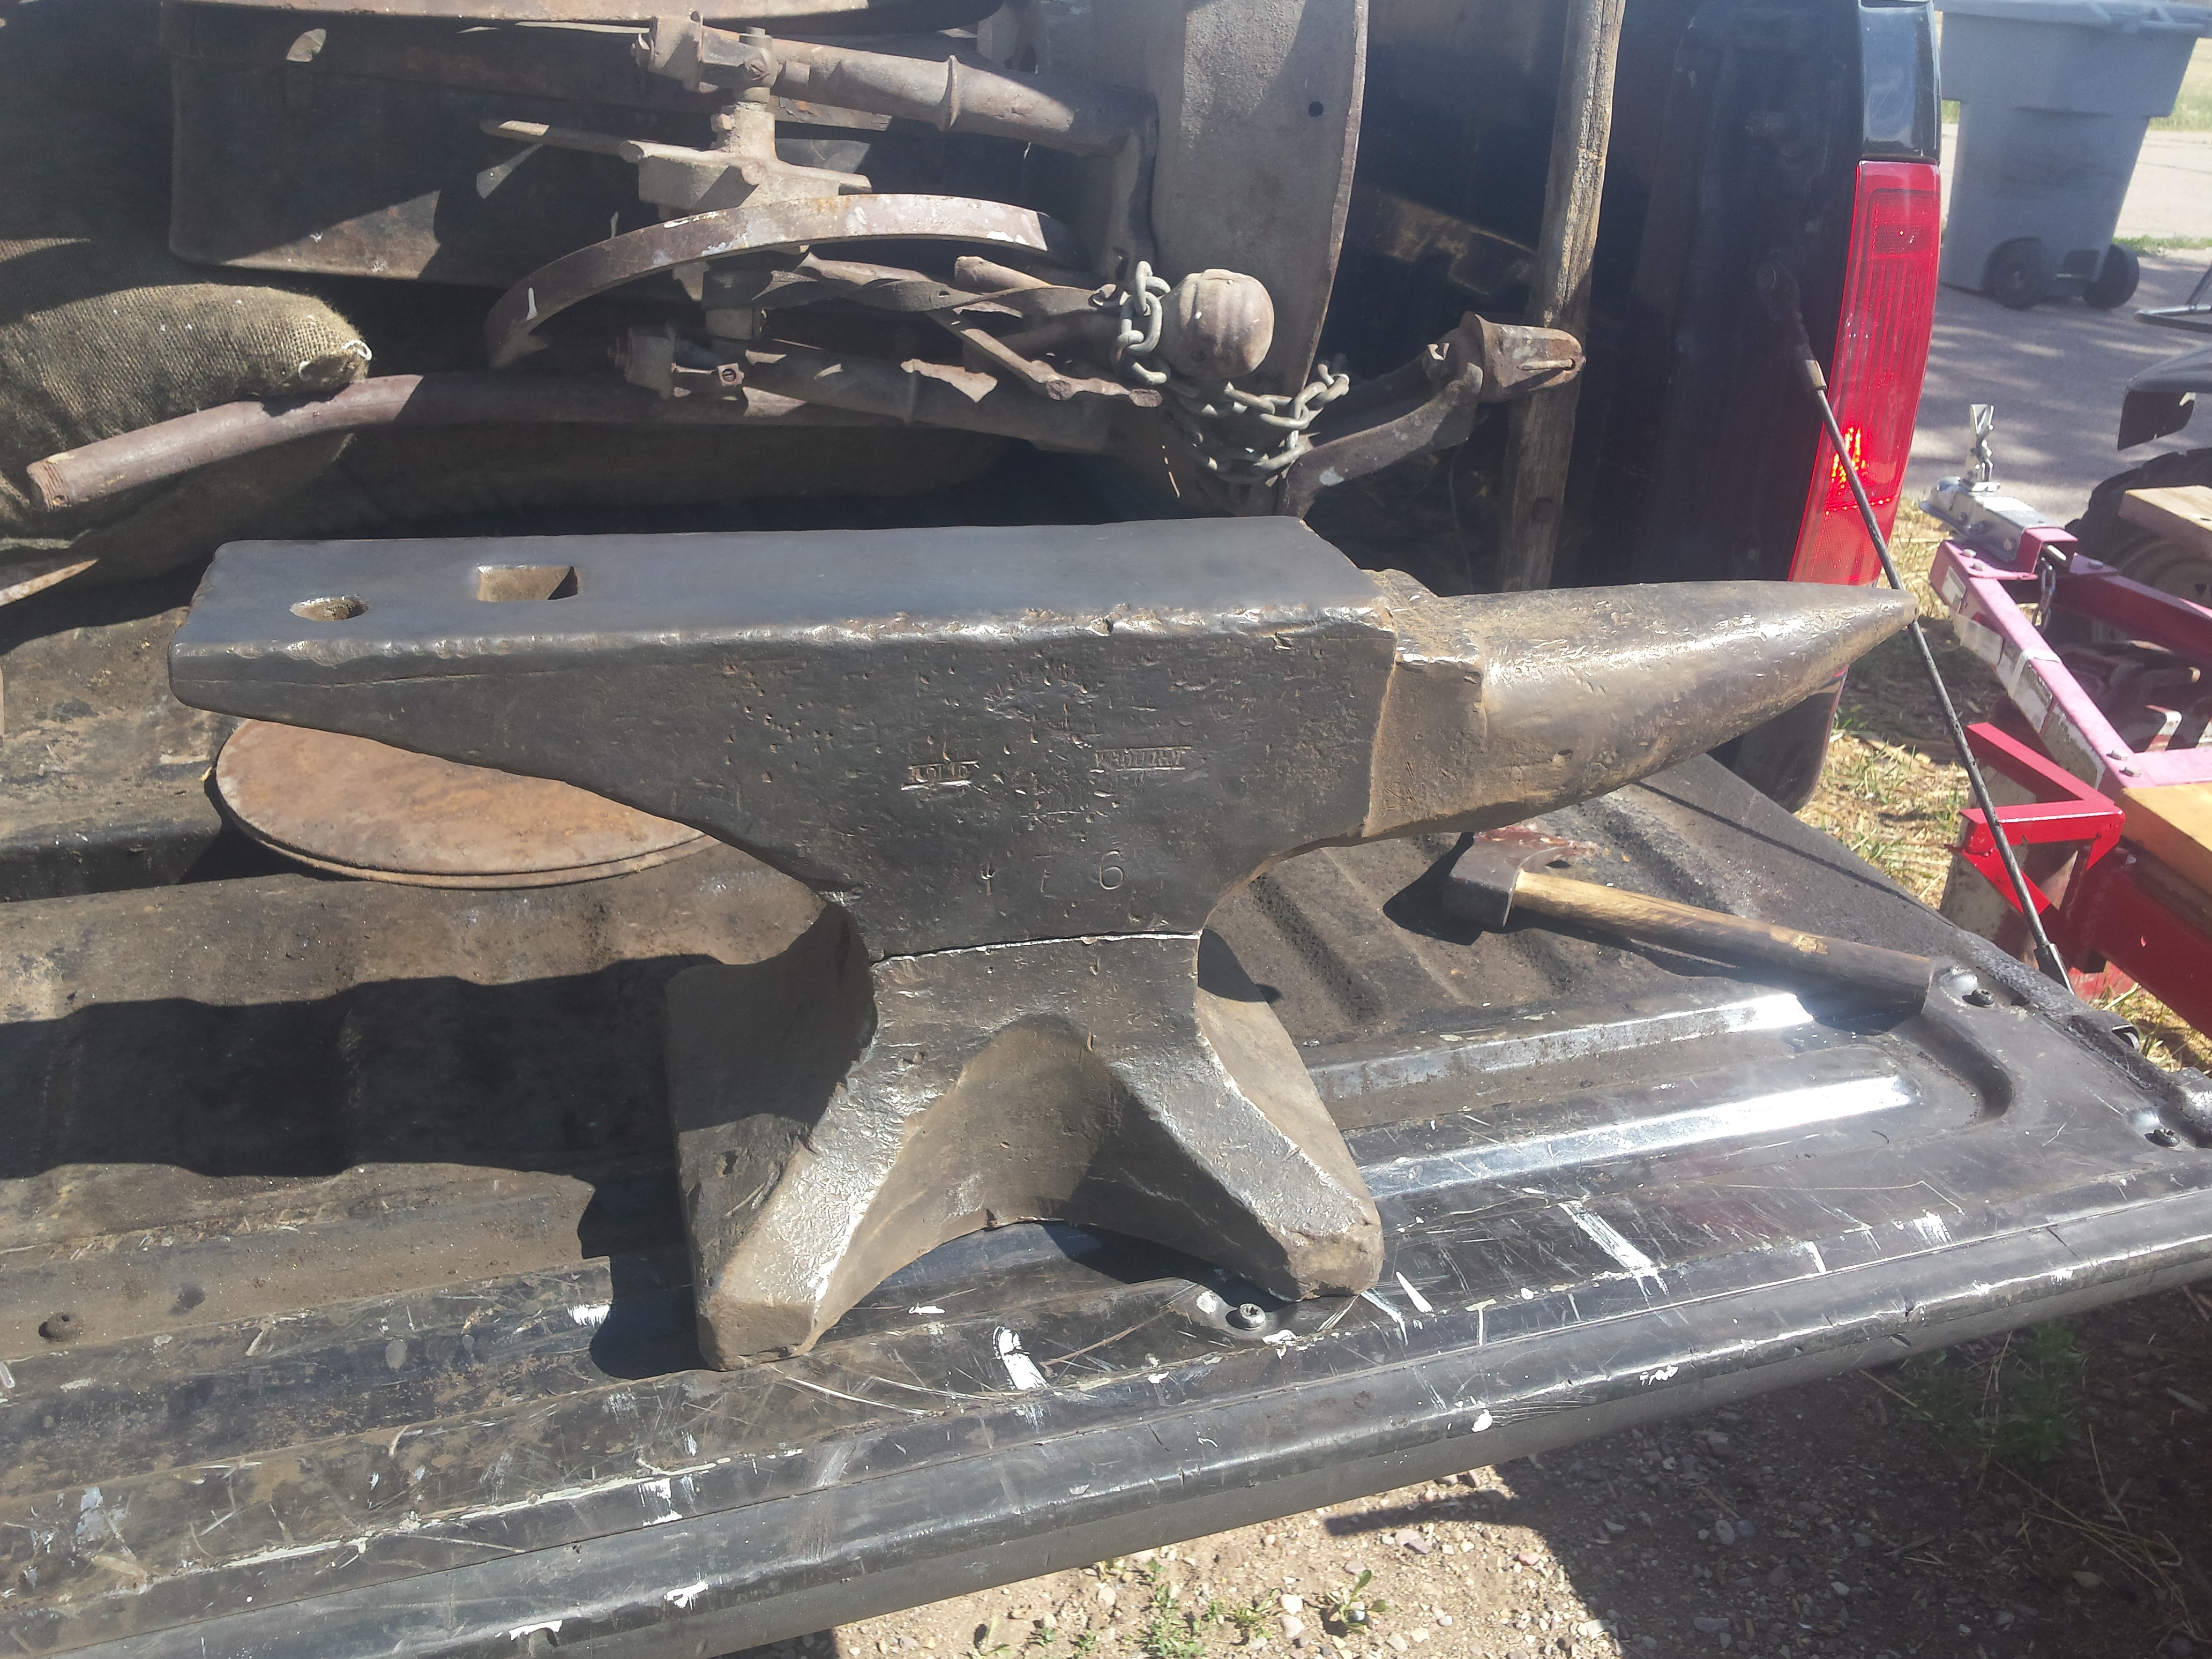
So after quite a time debating in my head, I finally just started in. I beveled the edges, tacked a 3/8 round rod between the two halves as a spacer, and started preheating before welding. I used 5/32 8018 (what i had on hand) and tried to work all sides evenly. I foolishly stopped half way through the project however and the next day discovered i hadn't worked both sides as evenly as i thought. She popped the weld on one side and had a distinct "tilt" to the face. It's not all that bad, only about 1/8" , but it was annoying. I ground back to solid weld, and carried on. THERE WAS NO STRAIGHTENING IT short of grinding COMPLETELY through. Anyway, here she is in her imperfect glory. Ring is clear, and sounds even when tapped from below or above the weld. I burned appx 14lb of rod, so she may be a little heavier than the 176# she claims....but only a fool would ask such a fine old girl to hop on the scale Please ignore the messy shop, I could make excuses, but it always looks like that!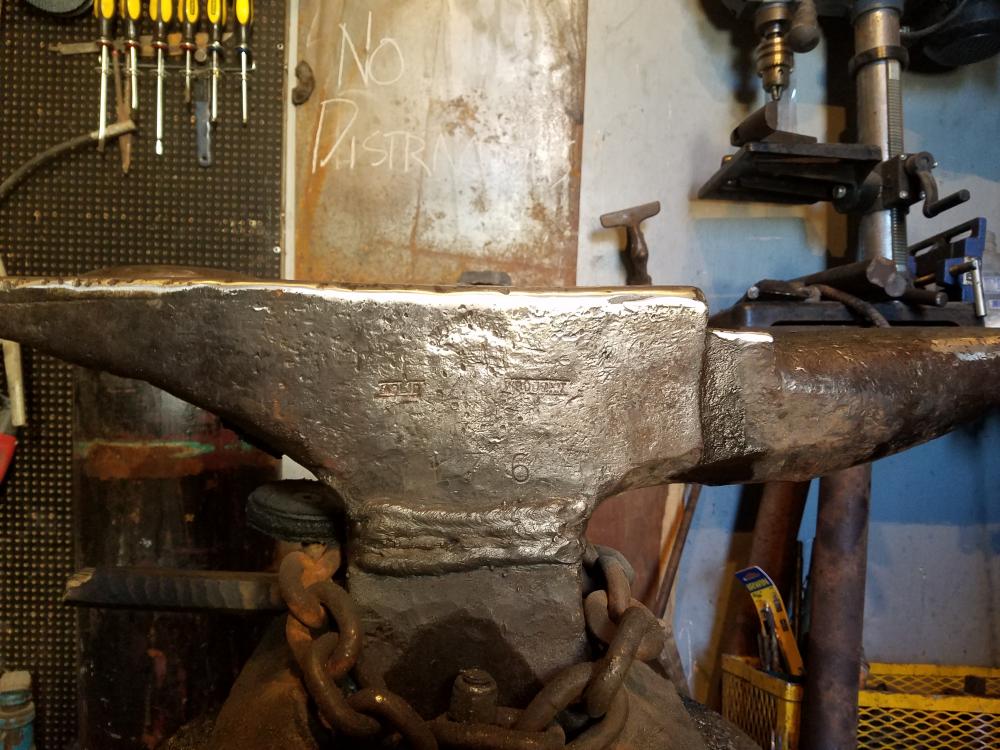
-
That is possibly the most hammered Brooks I've ever seen. Still, she has lots of life left!
-
What did you do in the shop today?
D.C. replied to Mark Ling's topic in Blacksmithing, General Discussion
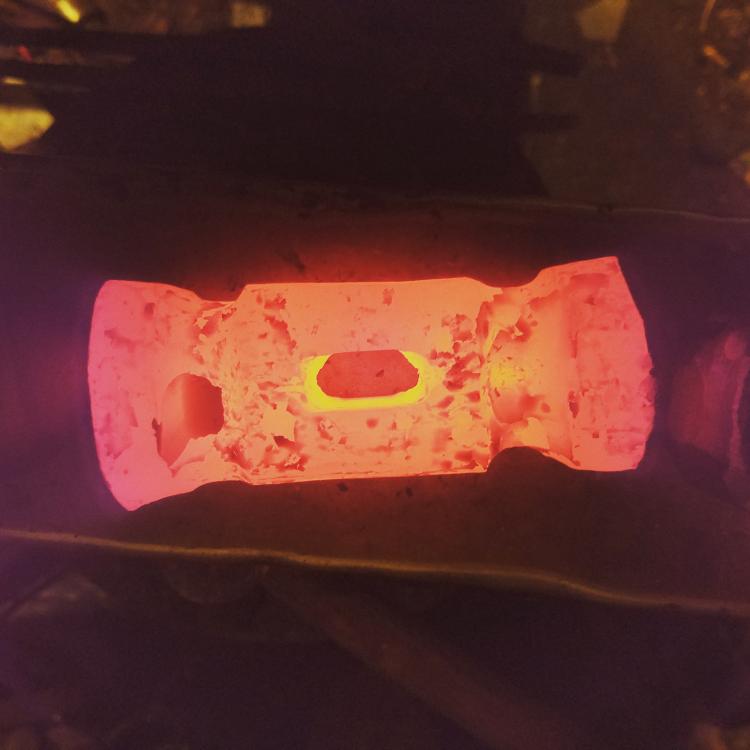
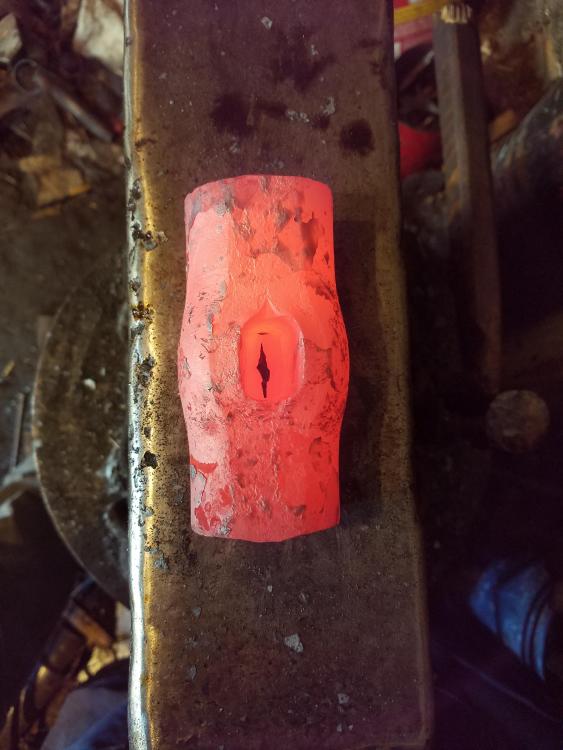
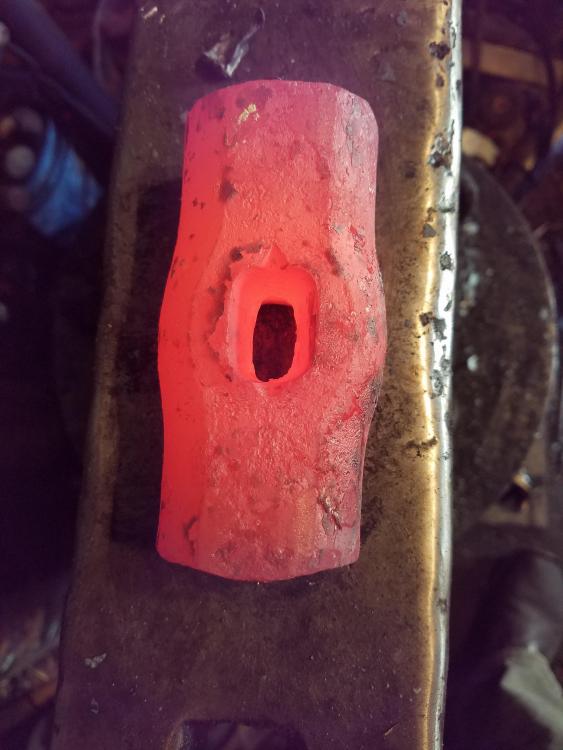
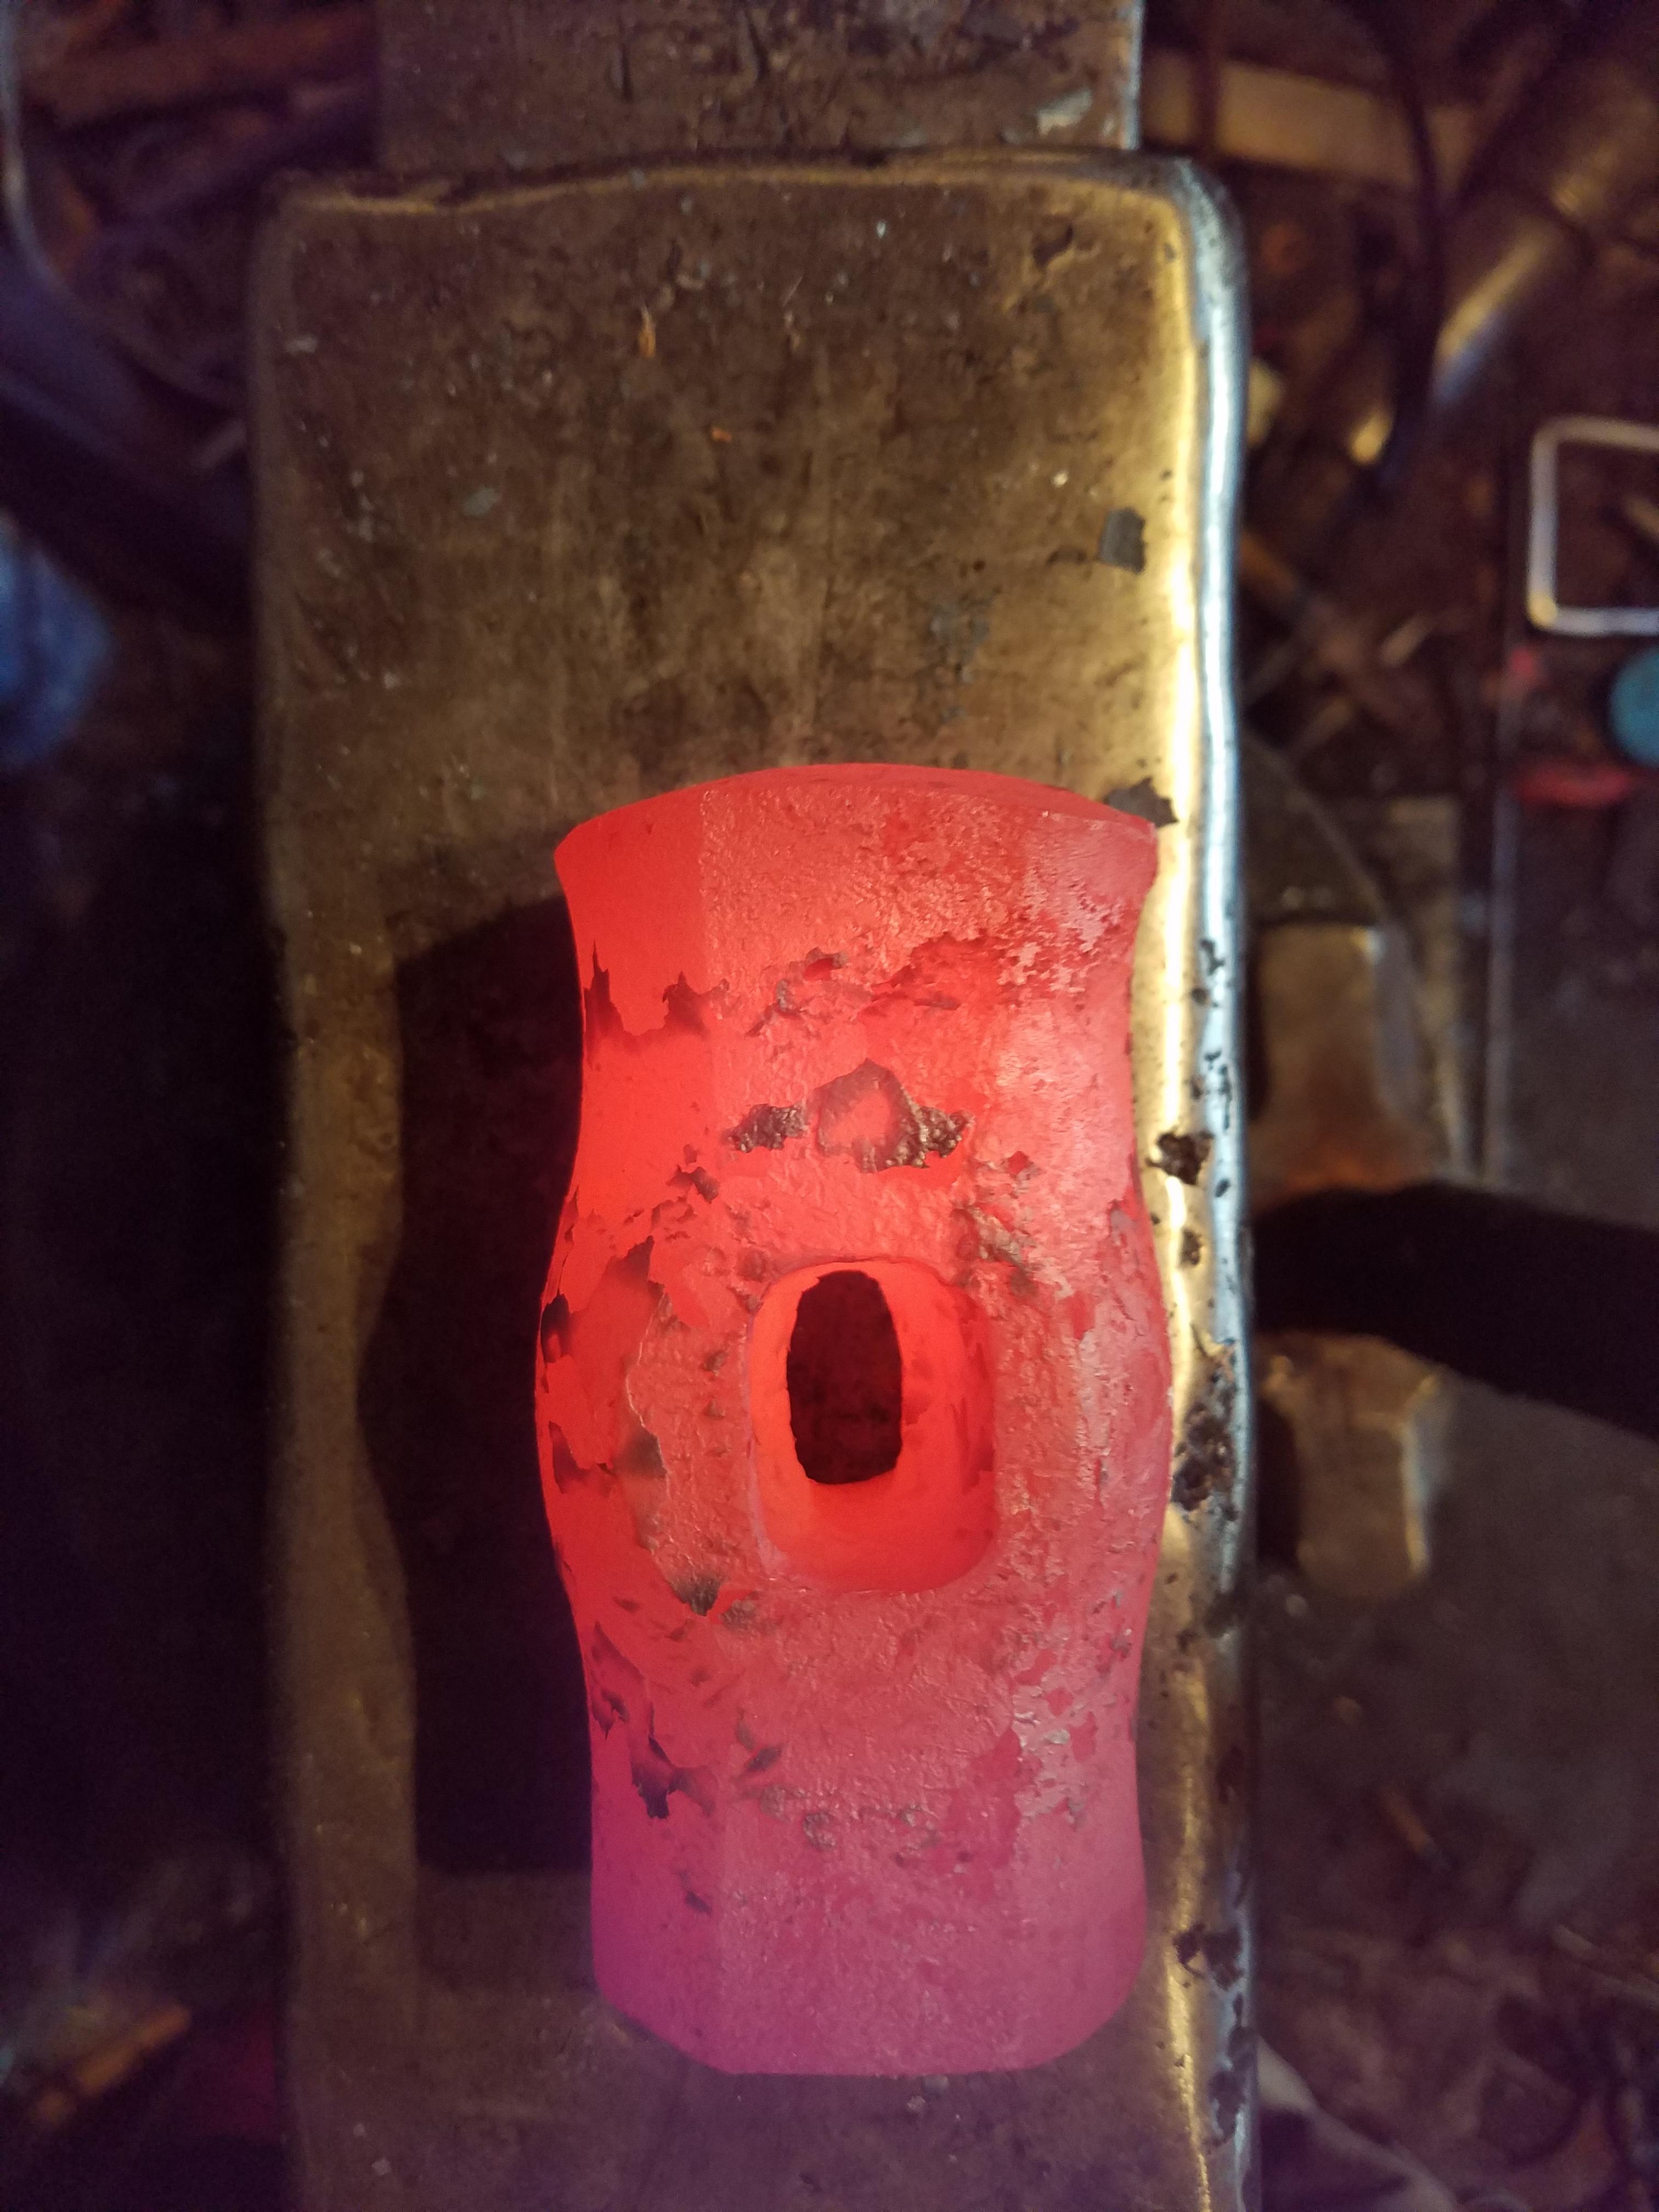
Spent a couple hours in the forge last night roughing out a hammer. All done by hand, with no striker. Total time was 2 hours including forge warmup. I'm trying to streamline this process a bit, so I'm curious how long similar progress takes you more experienced smiths. Starting stock was 4" of 1 7/8".
-
I've used Kohlswa, Soderfors, Columbian, Peter Wright, Mousehole, GE (Daniels), and Trenton. Wrought with steel faces can have tremendous rebound. ..but it doesn't seem as consistent as solid cast steel anvils. Every cast steel has been a champ. ..like ausfire says. ..borders on perpetual motion with a ball bearing. Even the 70# Kohlswa was a workhorse. It moved metal incredibly well. But my 148# dannemora Soderfors is still my baby. I have yet to use a Continental pattern, but I see some serious advantage to the tapered heel and thick waist. But for size, 120-170lbs of cast steel would cover most smiths needs and wants IMHO.
-
It's the kind of problem I'm HAPPY to endure. I spent a decade getting the basics together before I even started hammering. ...time wasted. Then it was 2 years before I got a "real" anvil. Now, TPAAAT is second nature and it's paying massive dividends.
-
These two beauties followed me home from our local rendezvous. It pays to do public demos! The rear one is 156# Trenton (with the stylized n that looks like an x) Supposedly it came out of our local railroad roundhouse, but it seems small for a shop like that. Also. ..I cannot seem to find ANY marking other than Trenton. Front and rear feet are blank. Not even a weight marking. Here's a shot of the logo for BlackFrog. The front is a 111# Columbian. It is the closest I've seen to "new" condition. Those edges are SHARP. Both were from visitors who were wandering the Rendezvous who struck up conversations. This makes 3 anvils in 3 months that were literally dropped in my lap WITHOUT me actively pursuing them. So for all those guys hunting their first anvil. ..be patient. Once you find one. ..they really do attract more.

-
So cool
-
So you think YOUR anvil's broken. ...
D.C. replied to D.C.'s topic in Anvils, Swage Blocks, and Mandrels
I have an idea. However I've finally gotten to the point where I NEVER start a project thinking it will go according to plan. Mr. Murphy and I have a history! But like most things in this craft. ..it will be a labor of love. And that's always worth doing. -
So you think YOUR anvil's broken. ...
D.C. replied to D.C.'s topic in Anvils, Swage Blocks, and Mandrels
Frosty, that is an EXCELLENT description of what I hope to do. It has the advantage of not having to grind away at the joint, and tying the halves together completely. Thanks for the tip on weld depth penetration. I burn many, MANY pounds of 7018...but usually no bigger than 1/8. Looks like my old Hobart is going to get a workout! So Mel, I guess there's my decision. It's not to say that any of the other options are wrong or wouldn't work. I have truly appreciated the input. For me, I would rather put in the extra work now. So that 10 years down the road I do not have to wonder if I could have done a better repair. To me, it's just spending a little bit of money/time for peace of mind ☺ -
Very cool Anvil Das!
-
So you think YOUR anvil's broken. ...
D.C. replied to D.C.'s topic in Anvils, Swage Blocks, and Mandrels
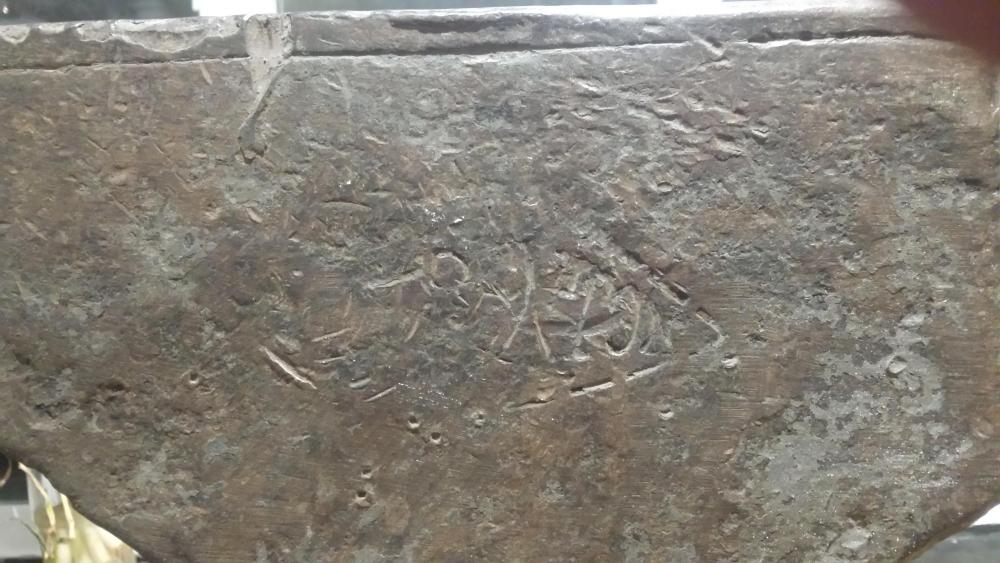
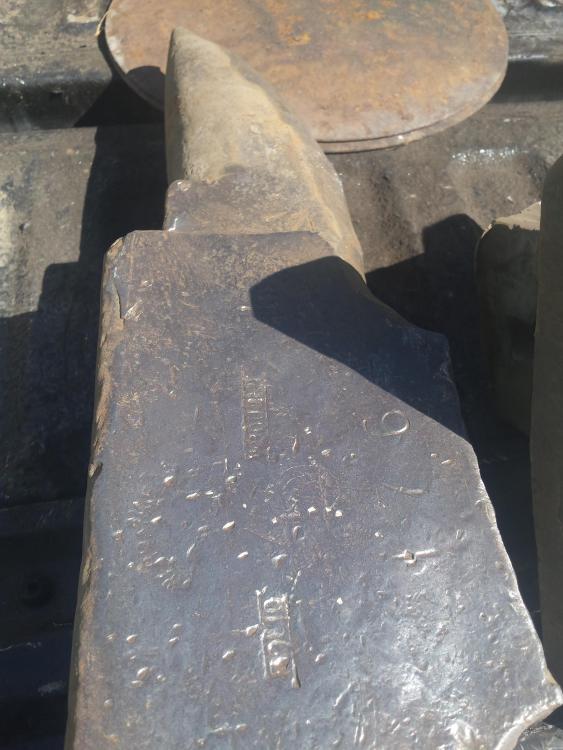
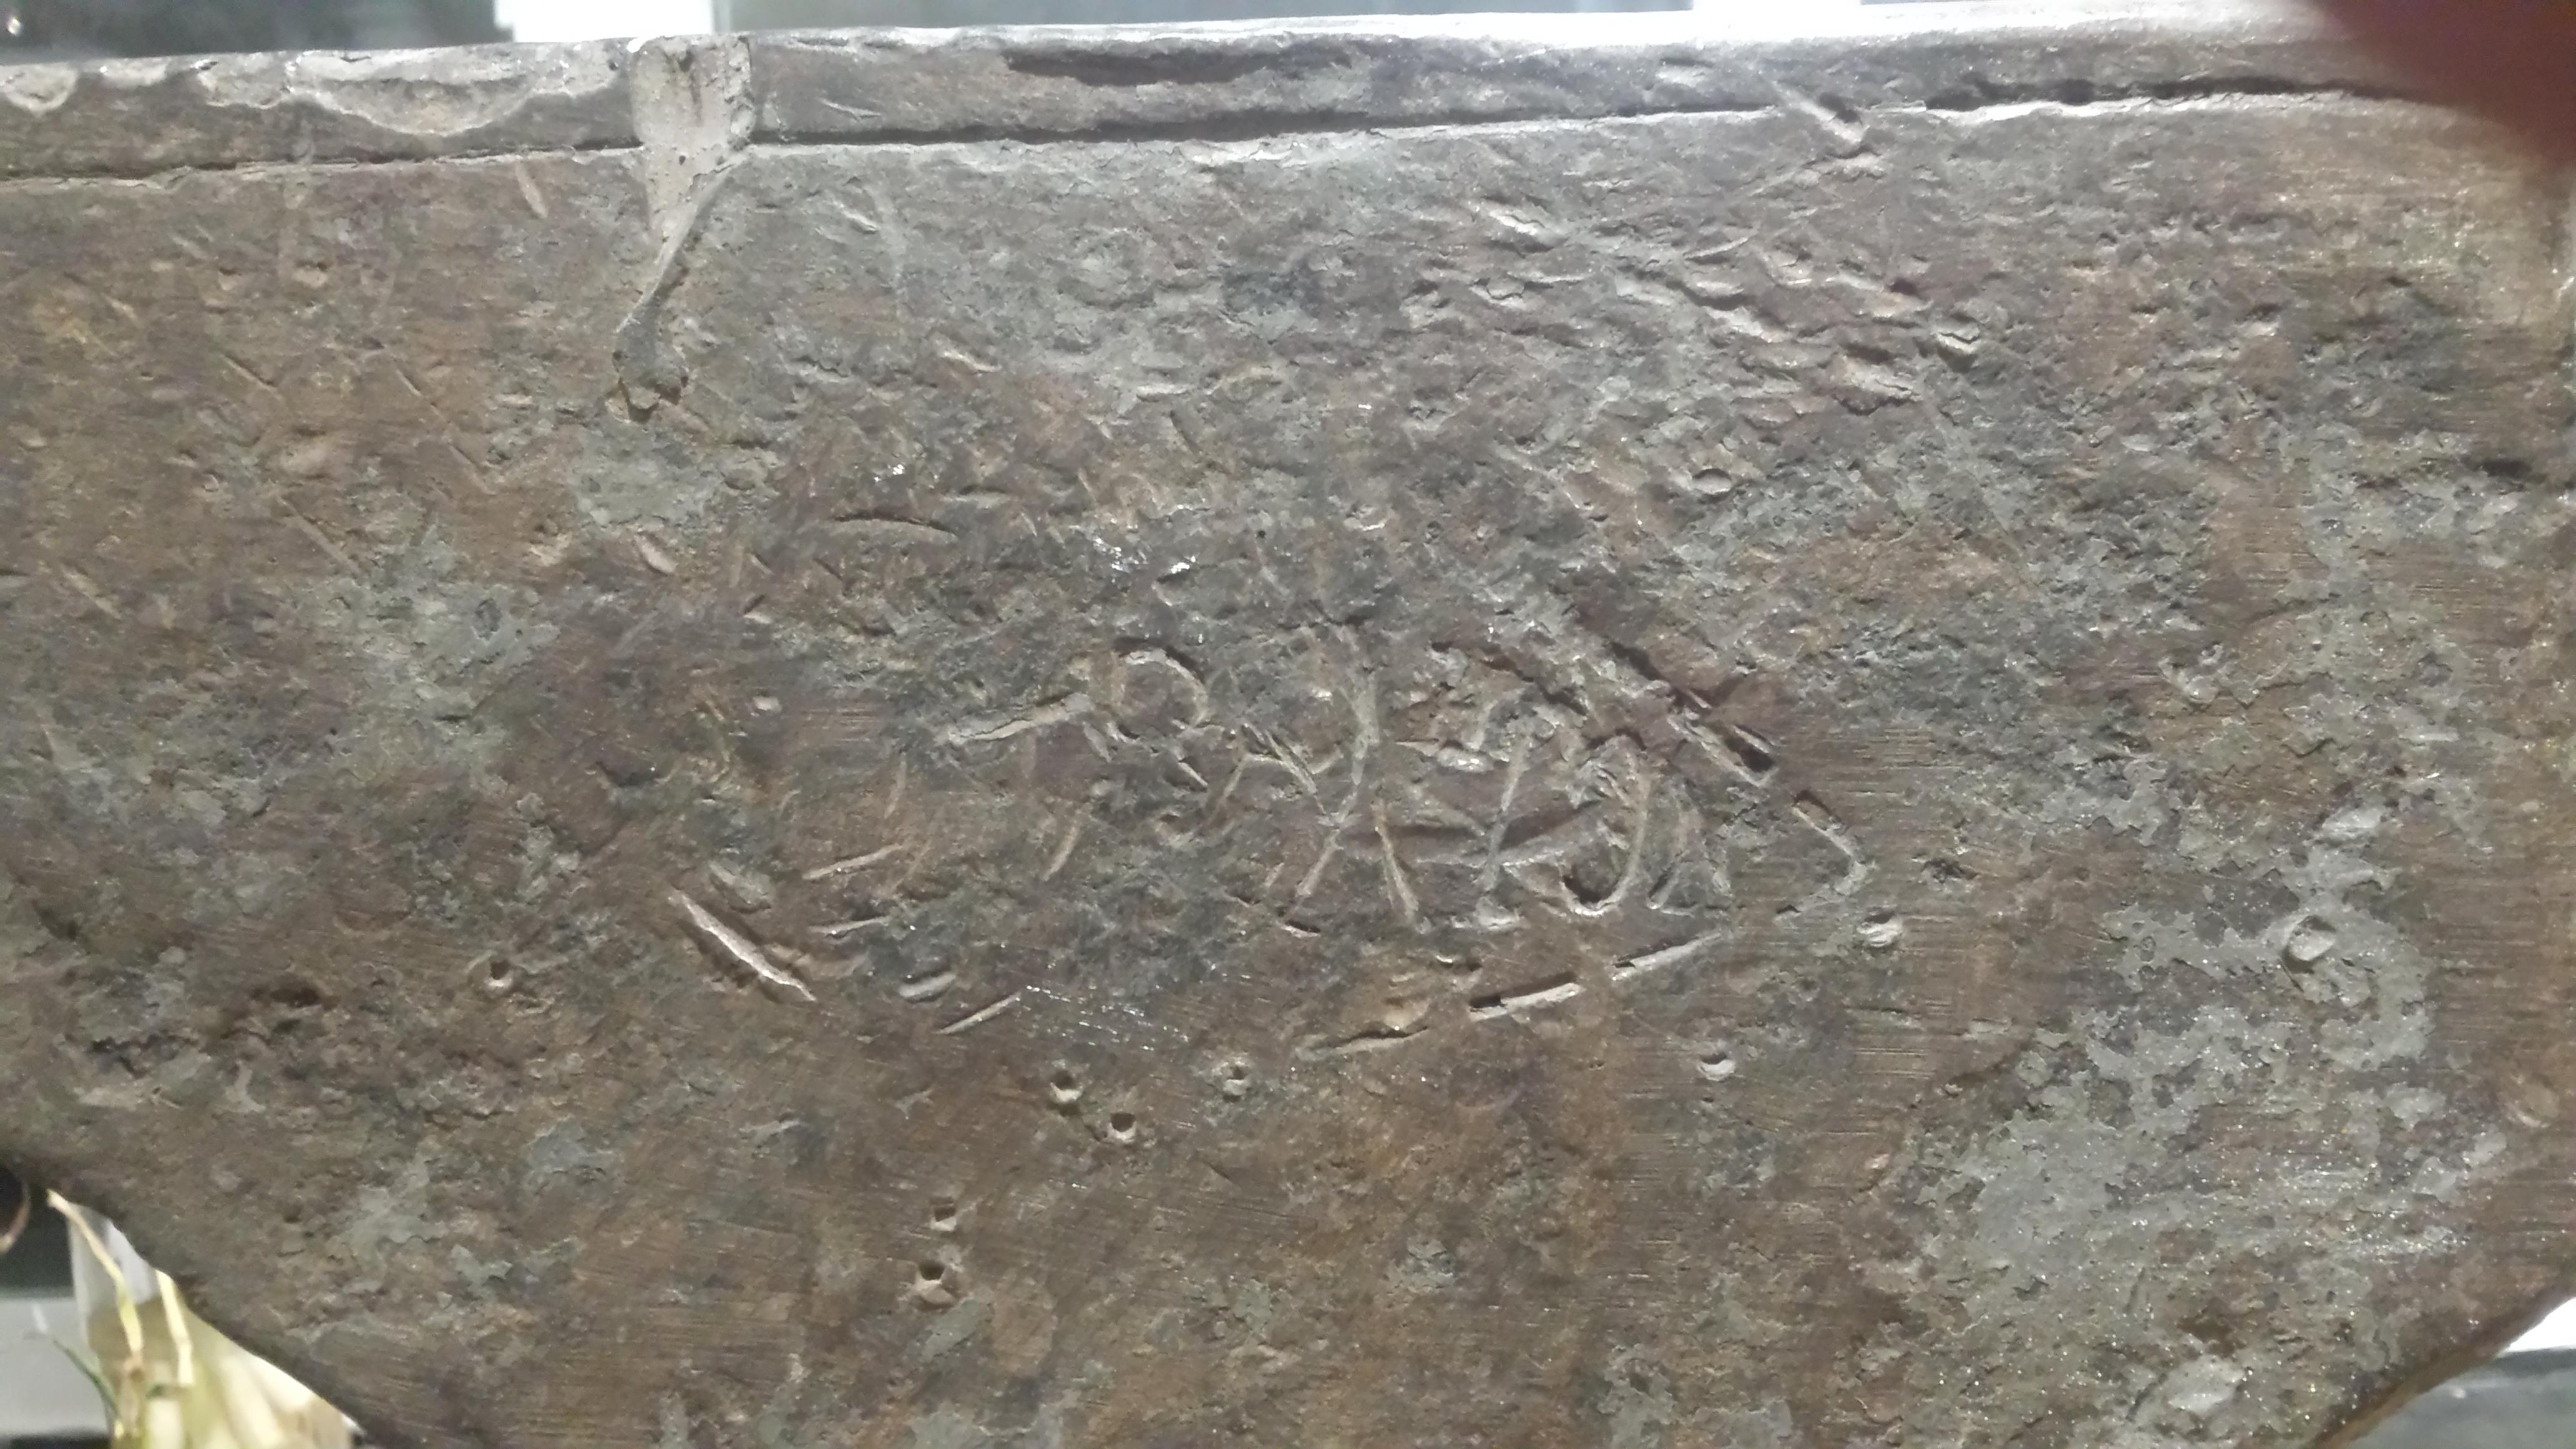
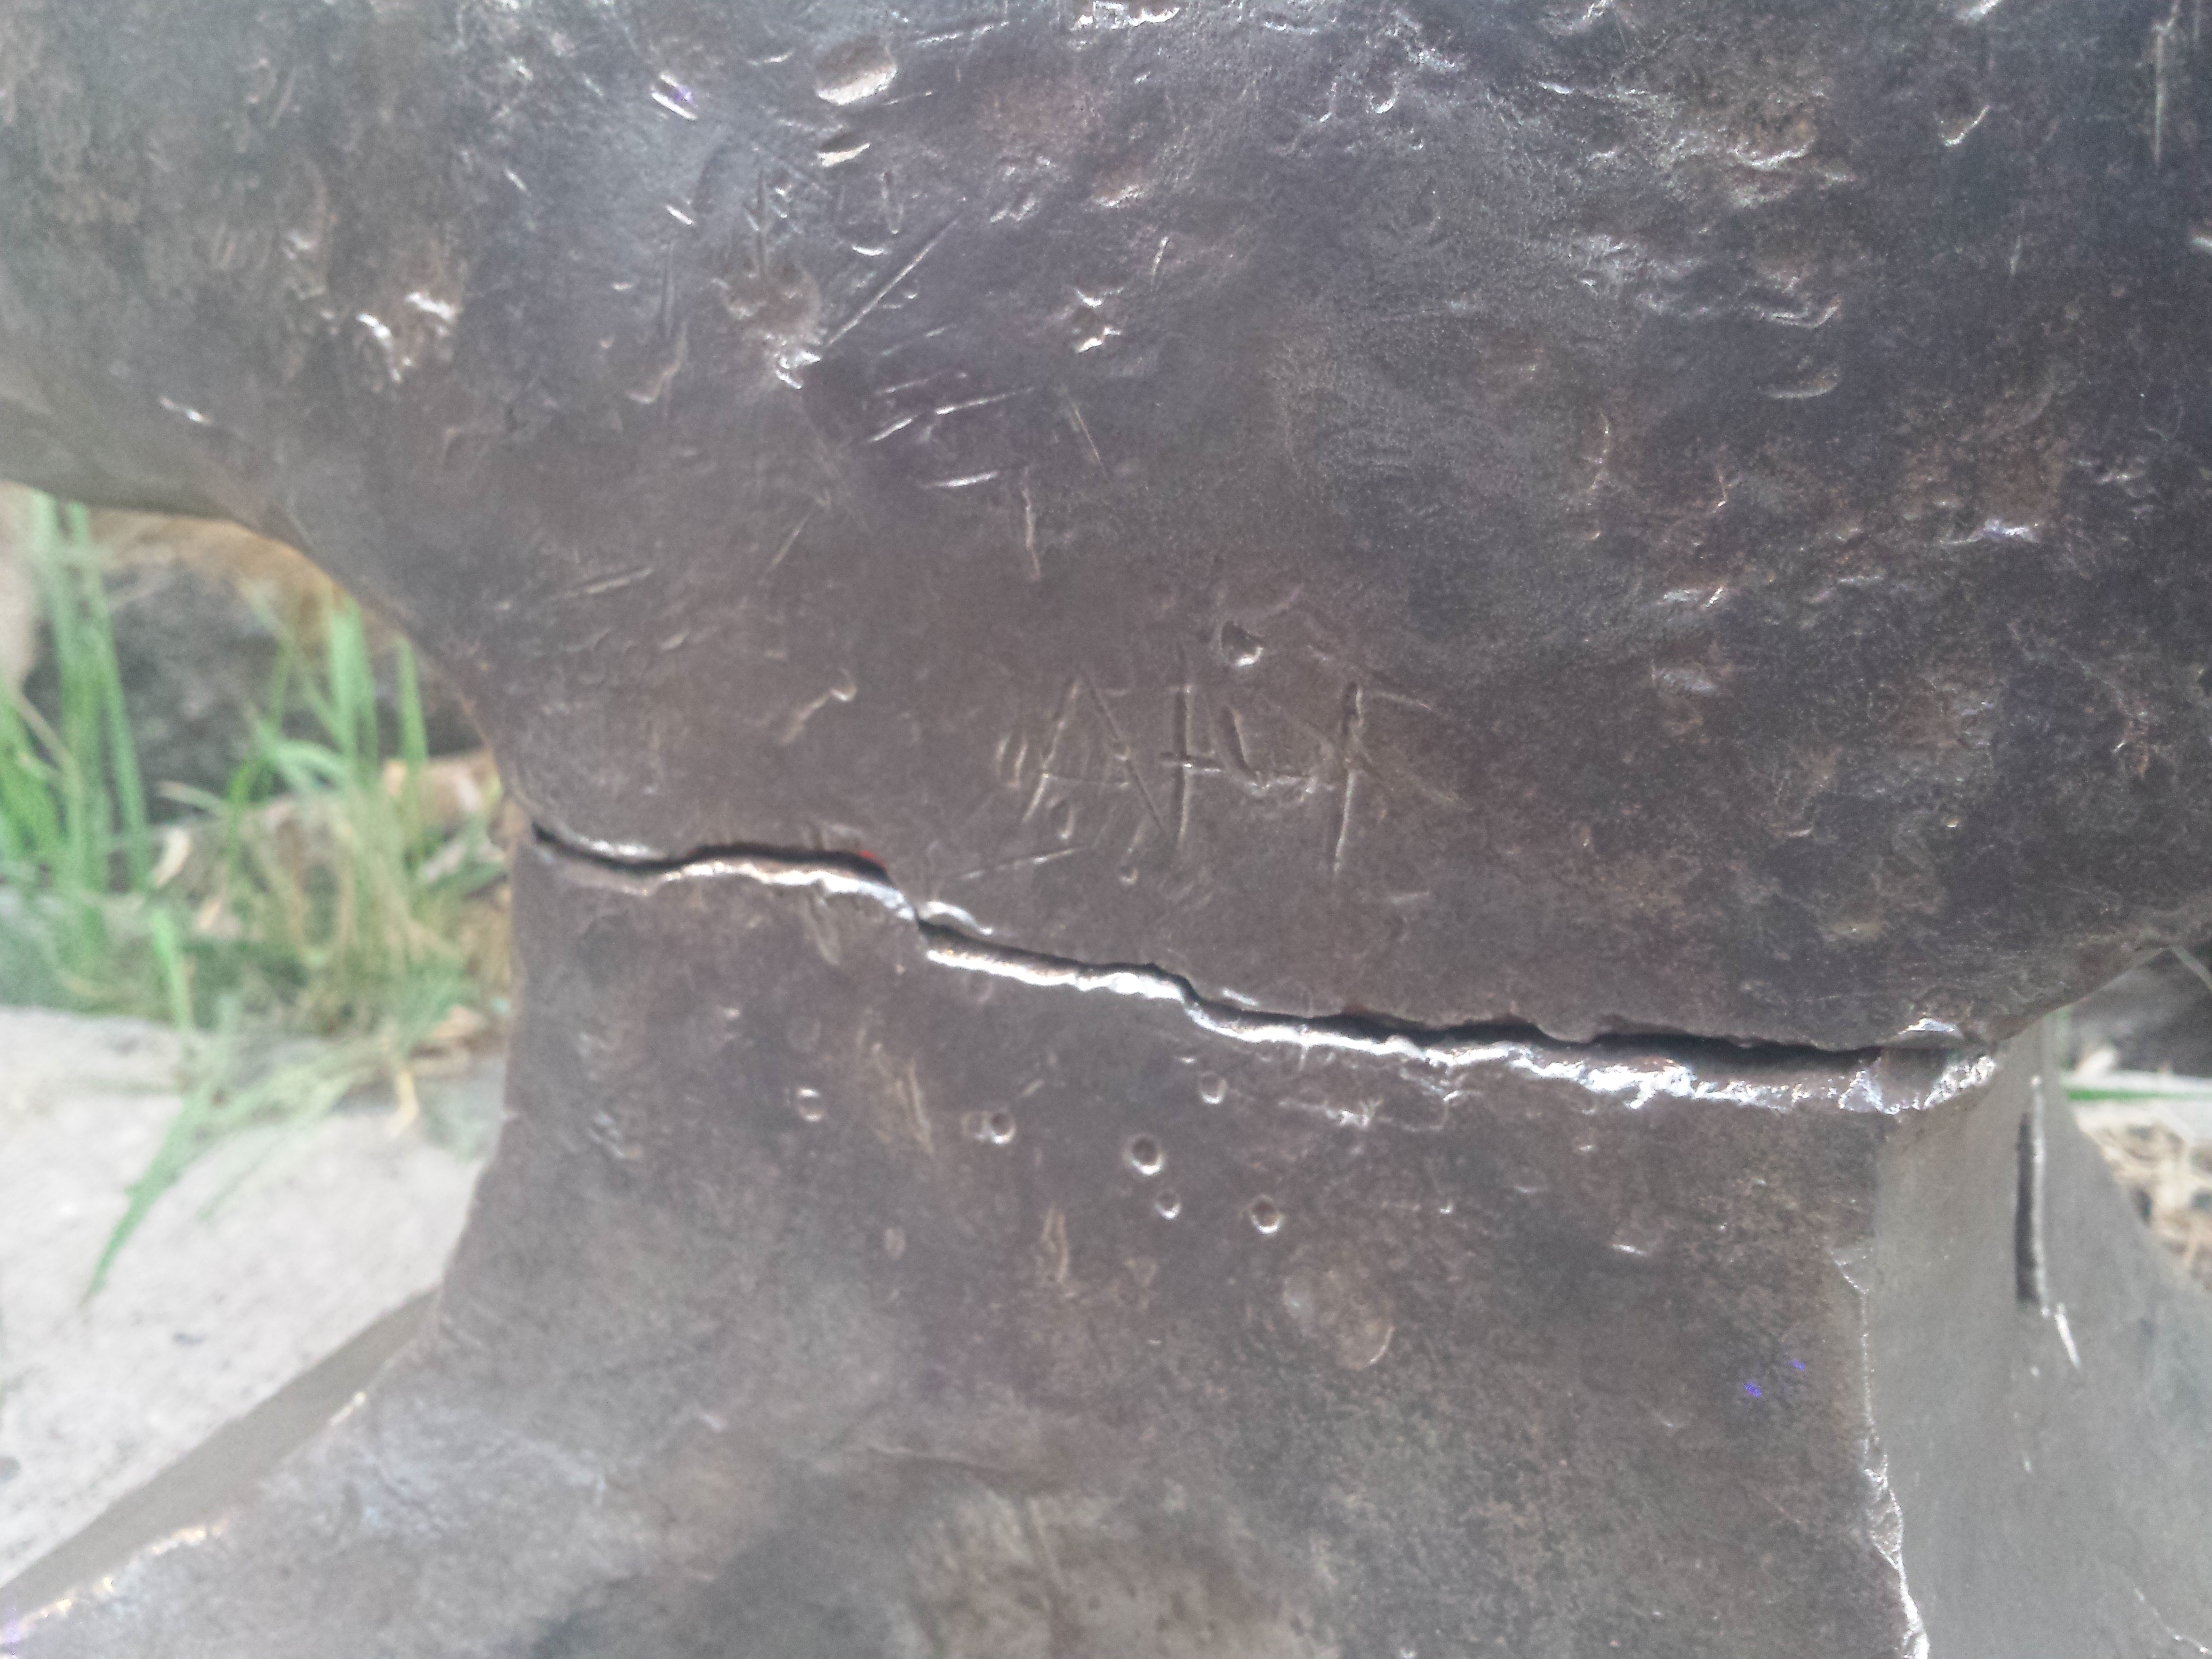
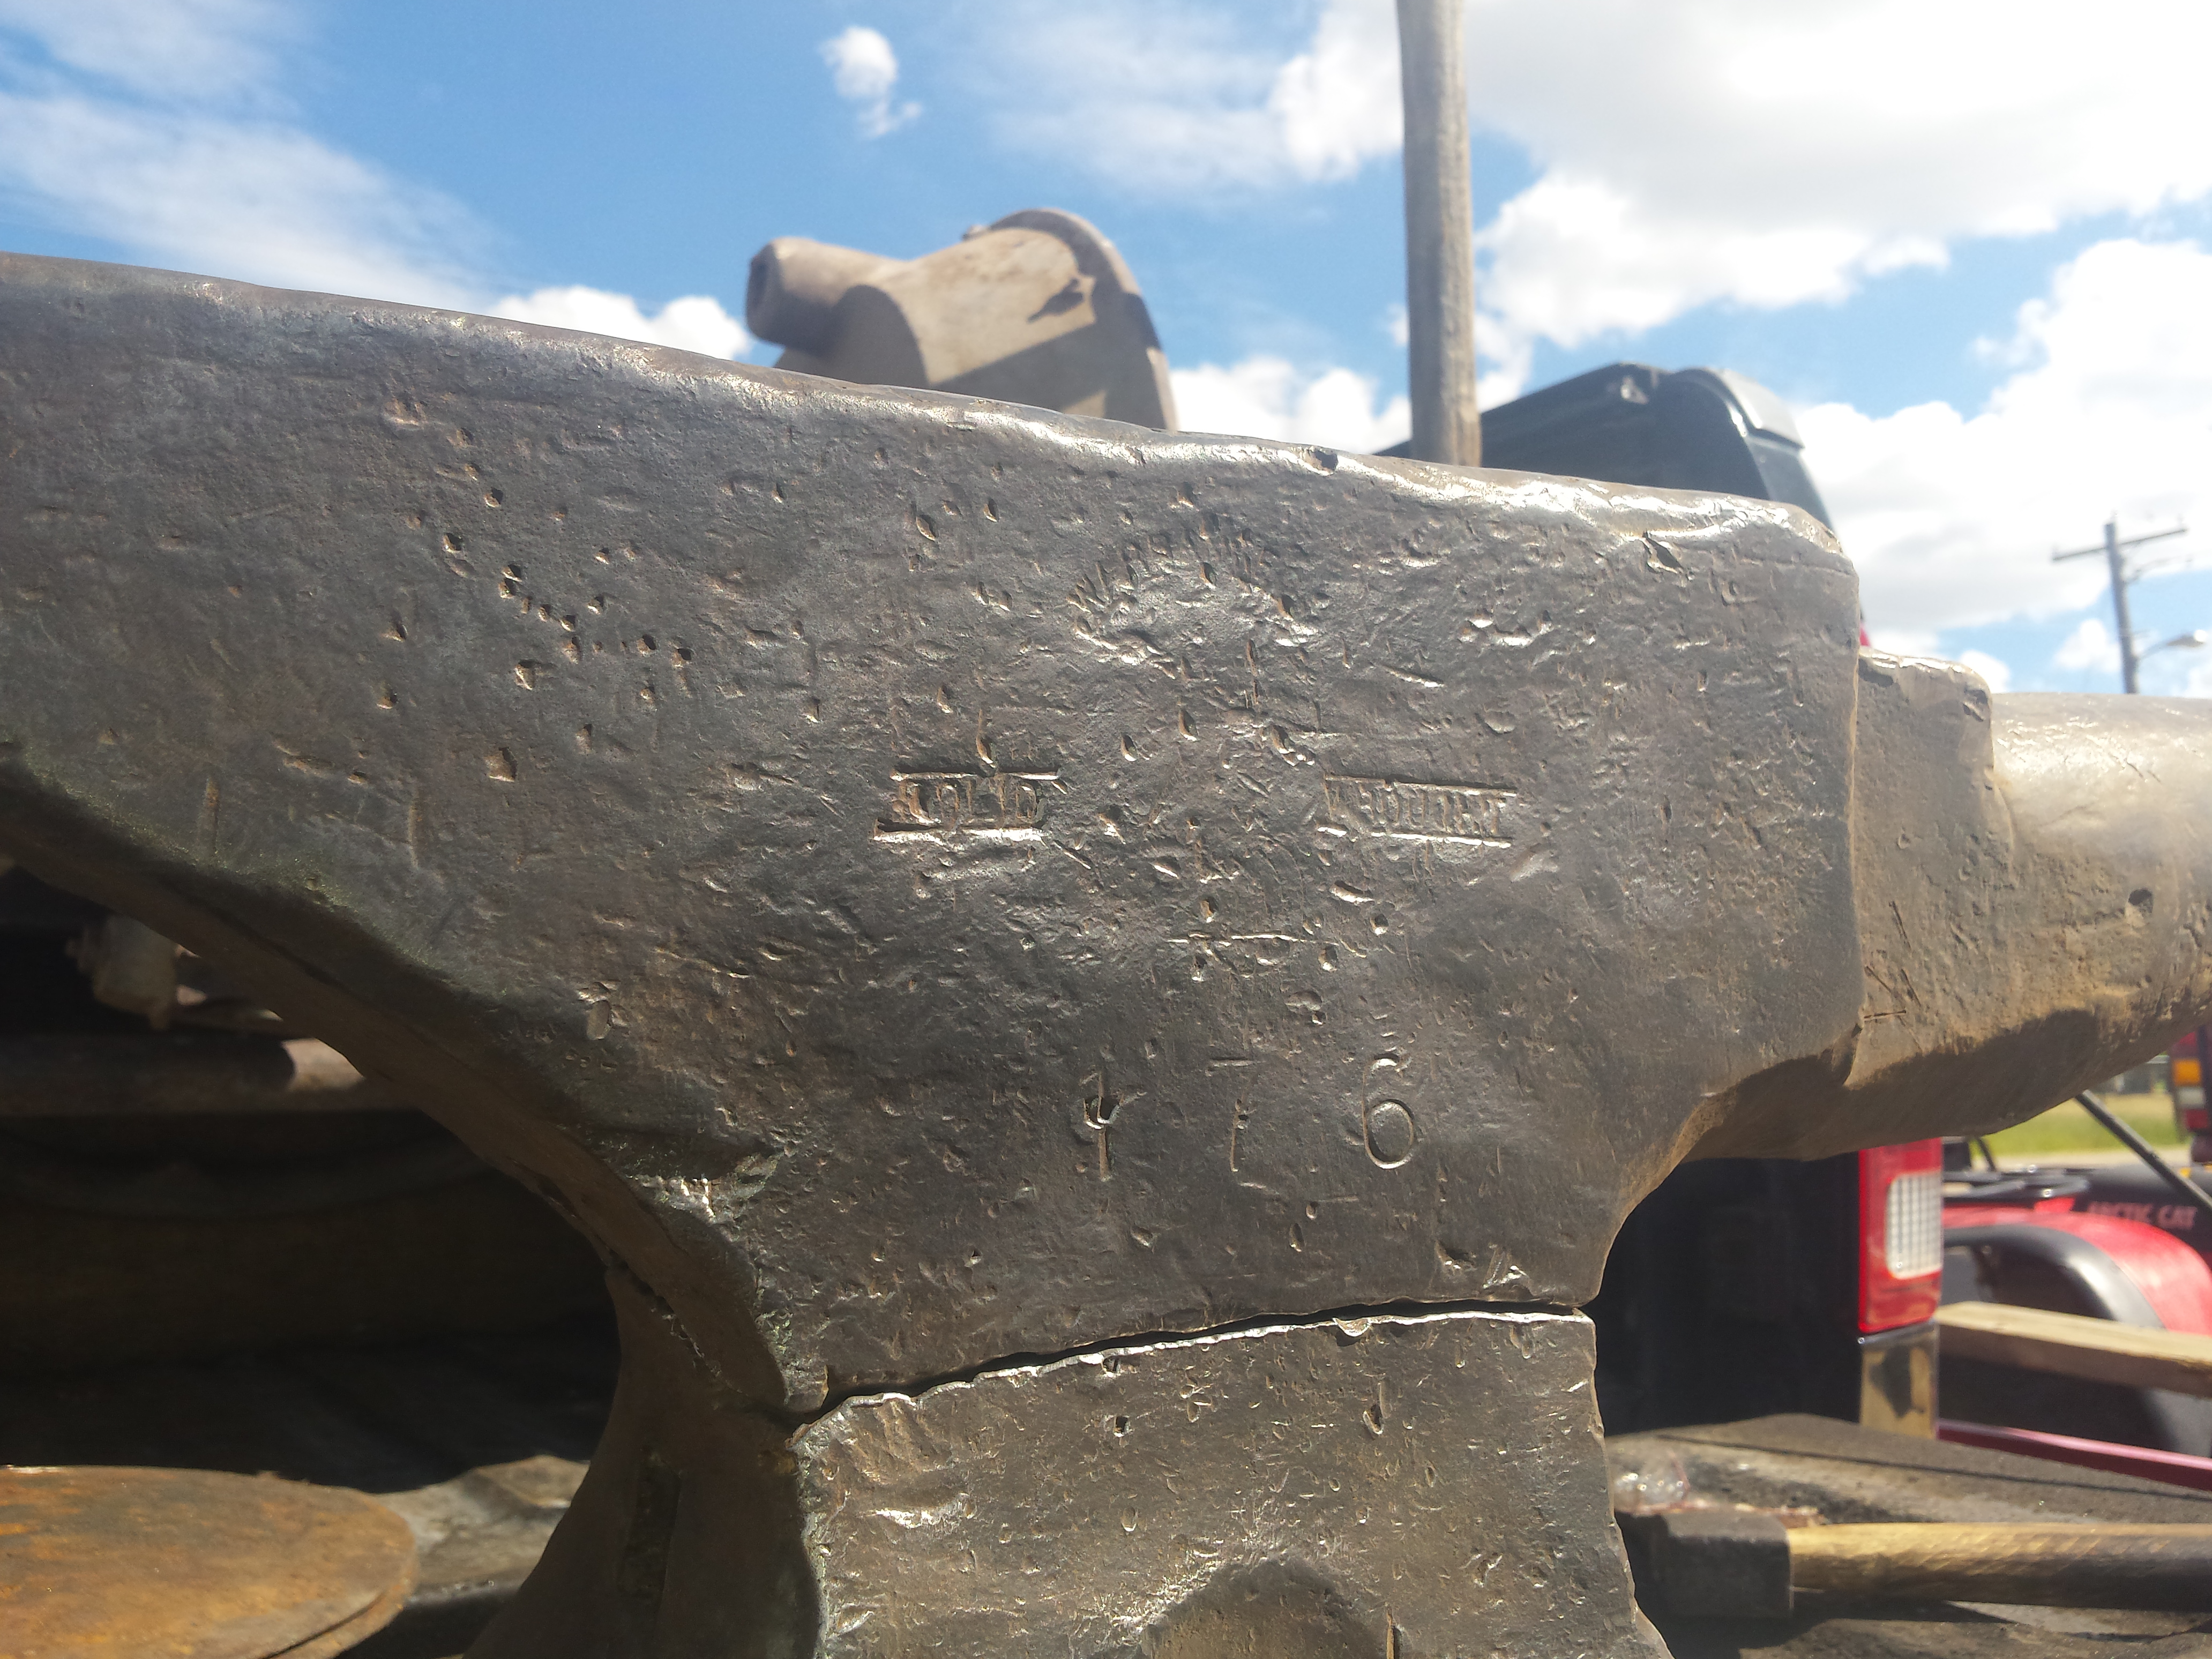
So here's a pic of the face. ..the "spots" are from the sprinkler, not pits. It's shockingly good for being face down on a dirt floor. Thankfully Wyoming is VERY dry. Spotted this while messing with it today. I can't tell if that's original or added. Doesn't match the name of any of the smiths who owned the shop. BLACK FROG, have you ever seen this on an A&H? JLP, here's the joint. It's hard to get in the pic, but it looks like someone tried to weld under the heel, but that could just be an odd shape in the way it cracked.

-
So you think YOUR anvil's broken. ...
D.C. replied to D.C.'s topic in Anvils, Swage Blocks, and Mandrels
I had thought about that method, though I didn't realize the welds were so shallow! I have a good older dc pipeline welder (powered by a flathead willys engine) that lays down beautiful welds...and despite the risk of slag inclusion, that is at least a smaller void than leaving the the whole center of the waist. You are right, it will work, it will be faster, it will be cheaper, and it won't significantly reduce its ability. It's just hard not to think of it as a band aid fix -
I started a thread here on the anvil. I'm planning on doing a PROPER repair. I'm going for full penetration or nothing. Wow.....that just doesn't sound right.
-
So you think YOUR anvil's broken. ...
D.C. replied to D.C.'s topic in Anvils, Swage Blocks, and Mandrels
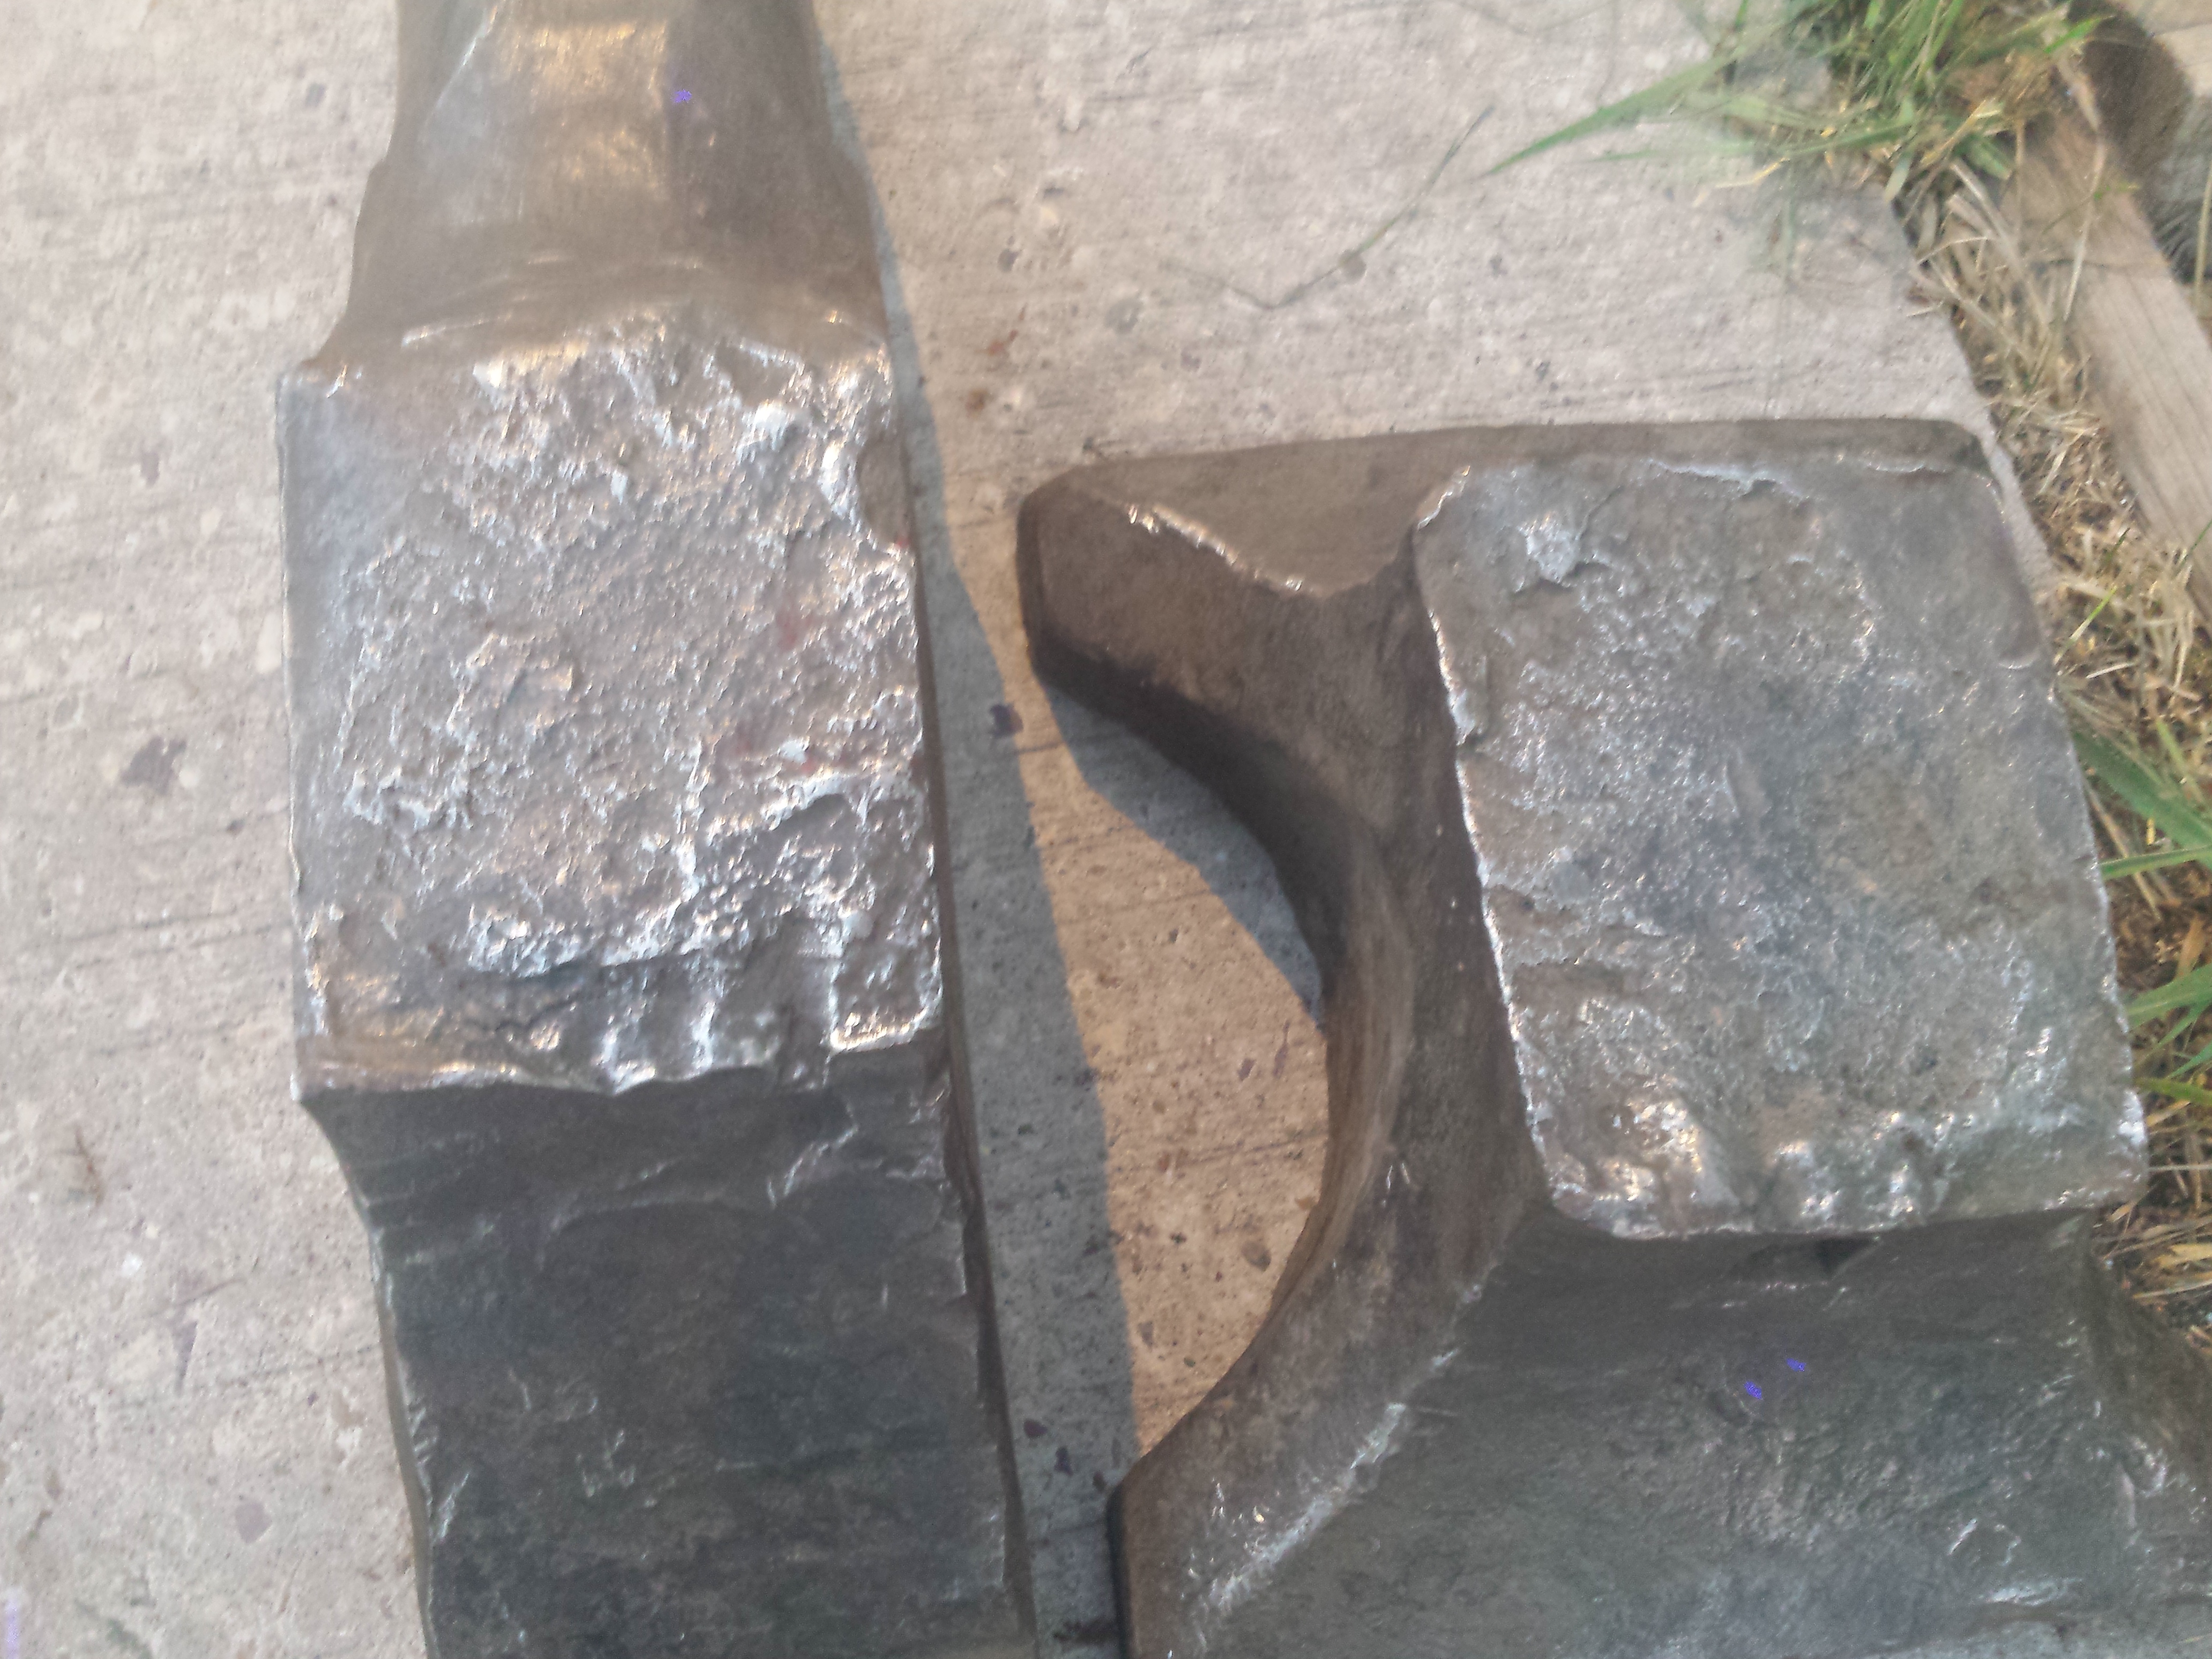
That's the whole serial number. 2420. I couldn't remember if you were doing just Trenton or A&H as well, Black Frog. Any idea of a manufacturing date? I set the two halves together, wire wheeled the crud off the face, and did a 5/8 ball bearing drop from 3'.... 90% or better. As good as my 148# Soderfors, and that's been the benchmark for my previous tests. This is the first anvil to match it. Now the debate is whether to put in a small spacer between the halves so I can start in the middle and do a full penetration weld....or grind like crazy to v out enough for full penetration. I like the 1/2" spacer and minimal v grinding idea better. -
So you think YOUR anvil's broken. ...
D.C. replied to D.C.'s topic in Anvils, Swage Blocks, and Mandrels
I'm hoping/planning to fix it. I've got the equipment, supplies, and just enough knowledge to be dangerous =)...I'll post progress pics for critique -
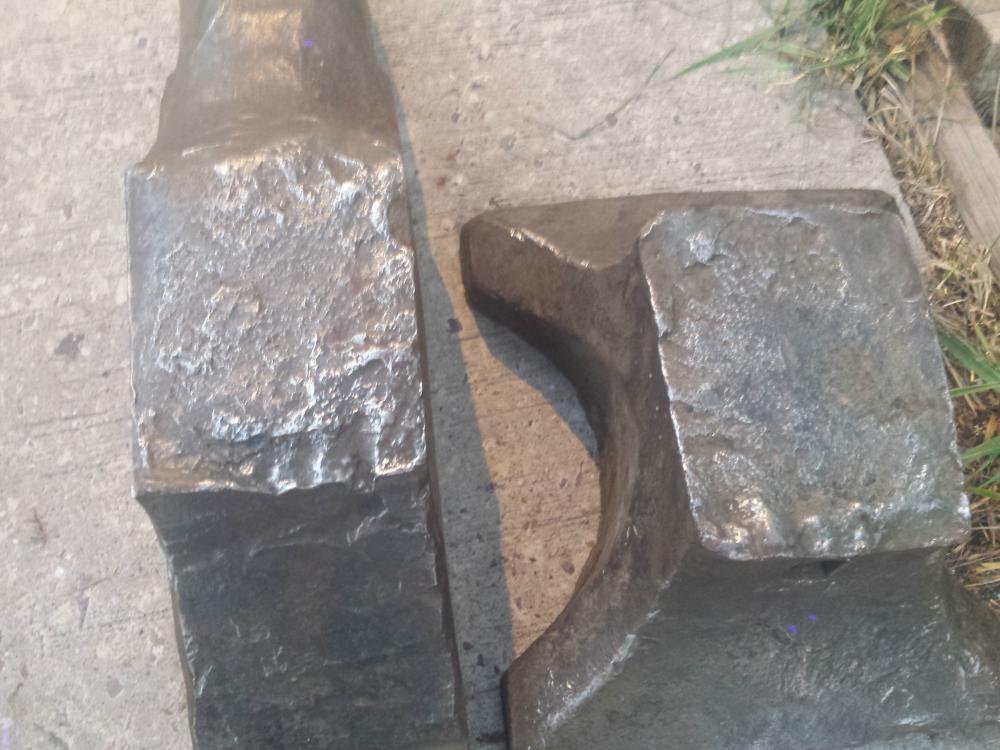
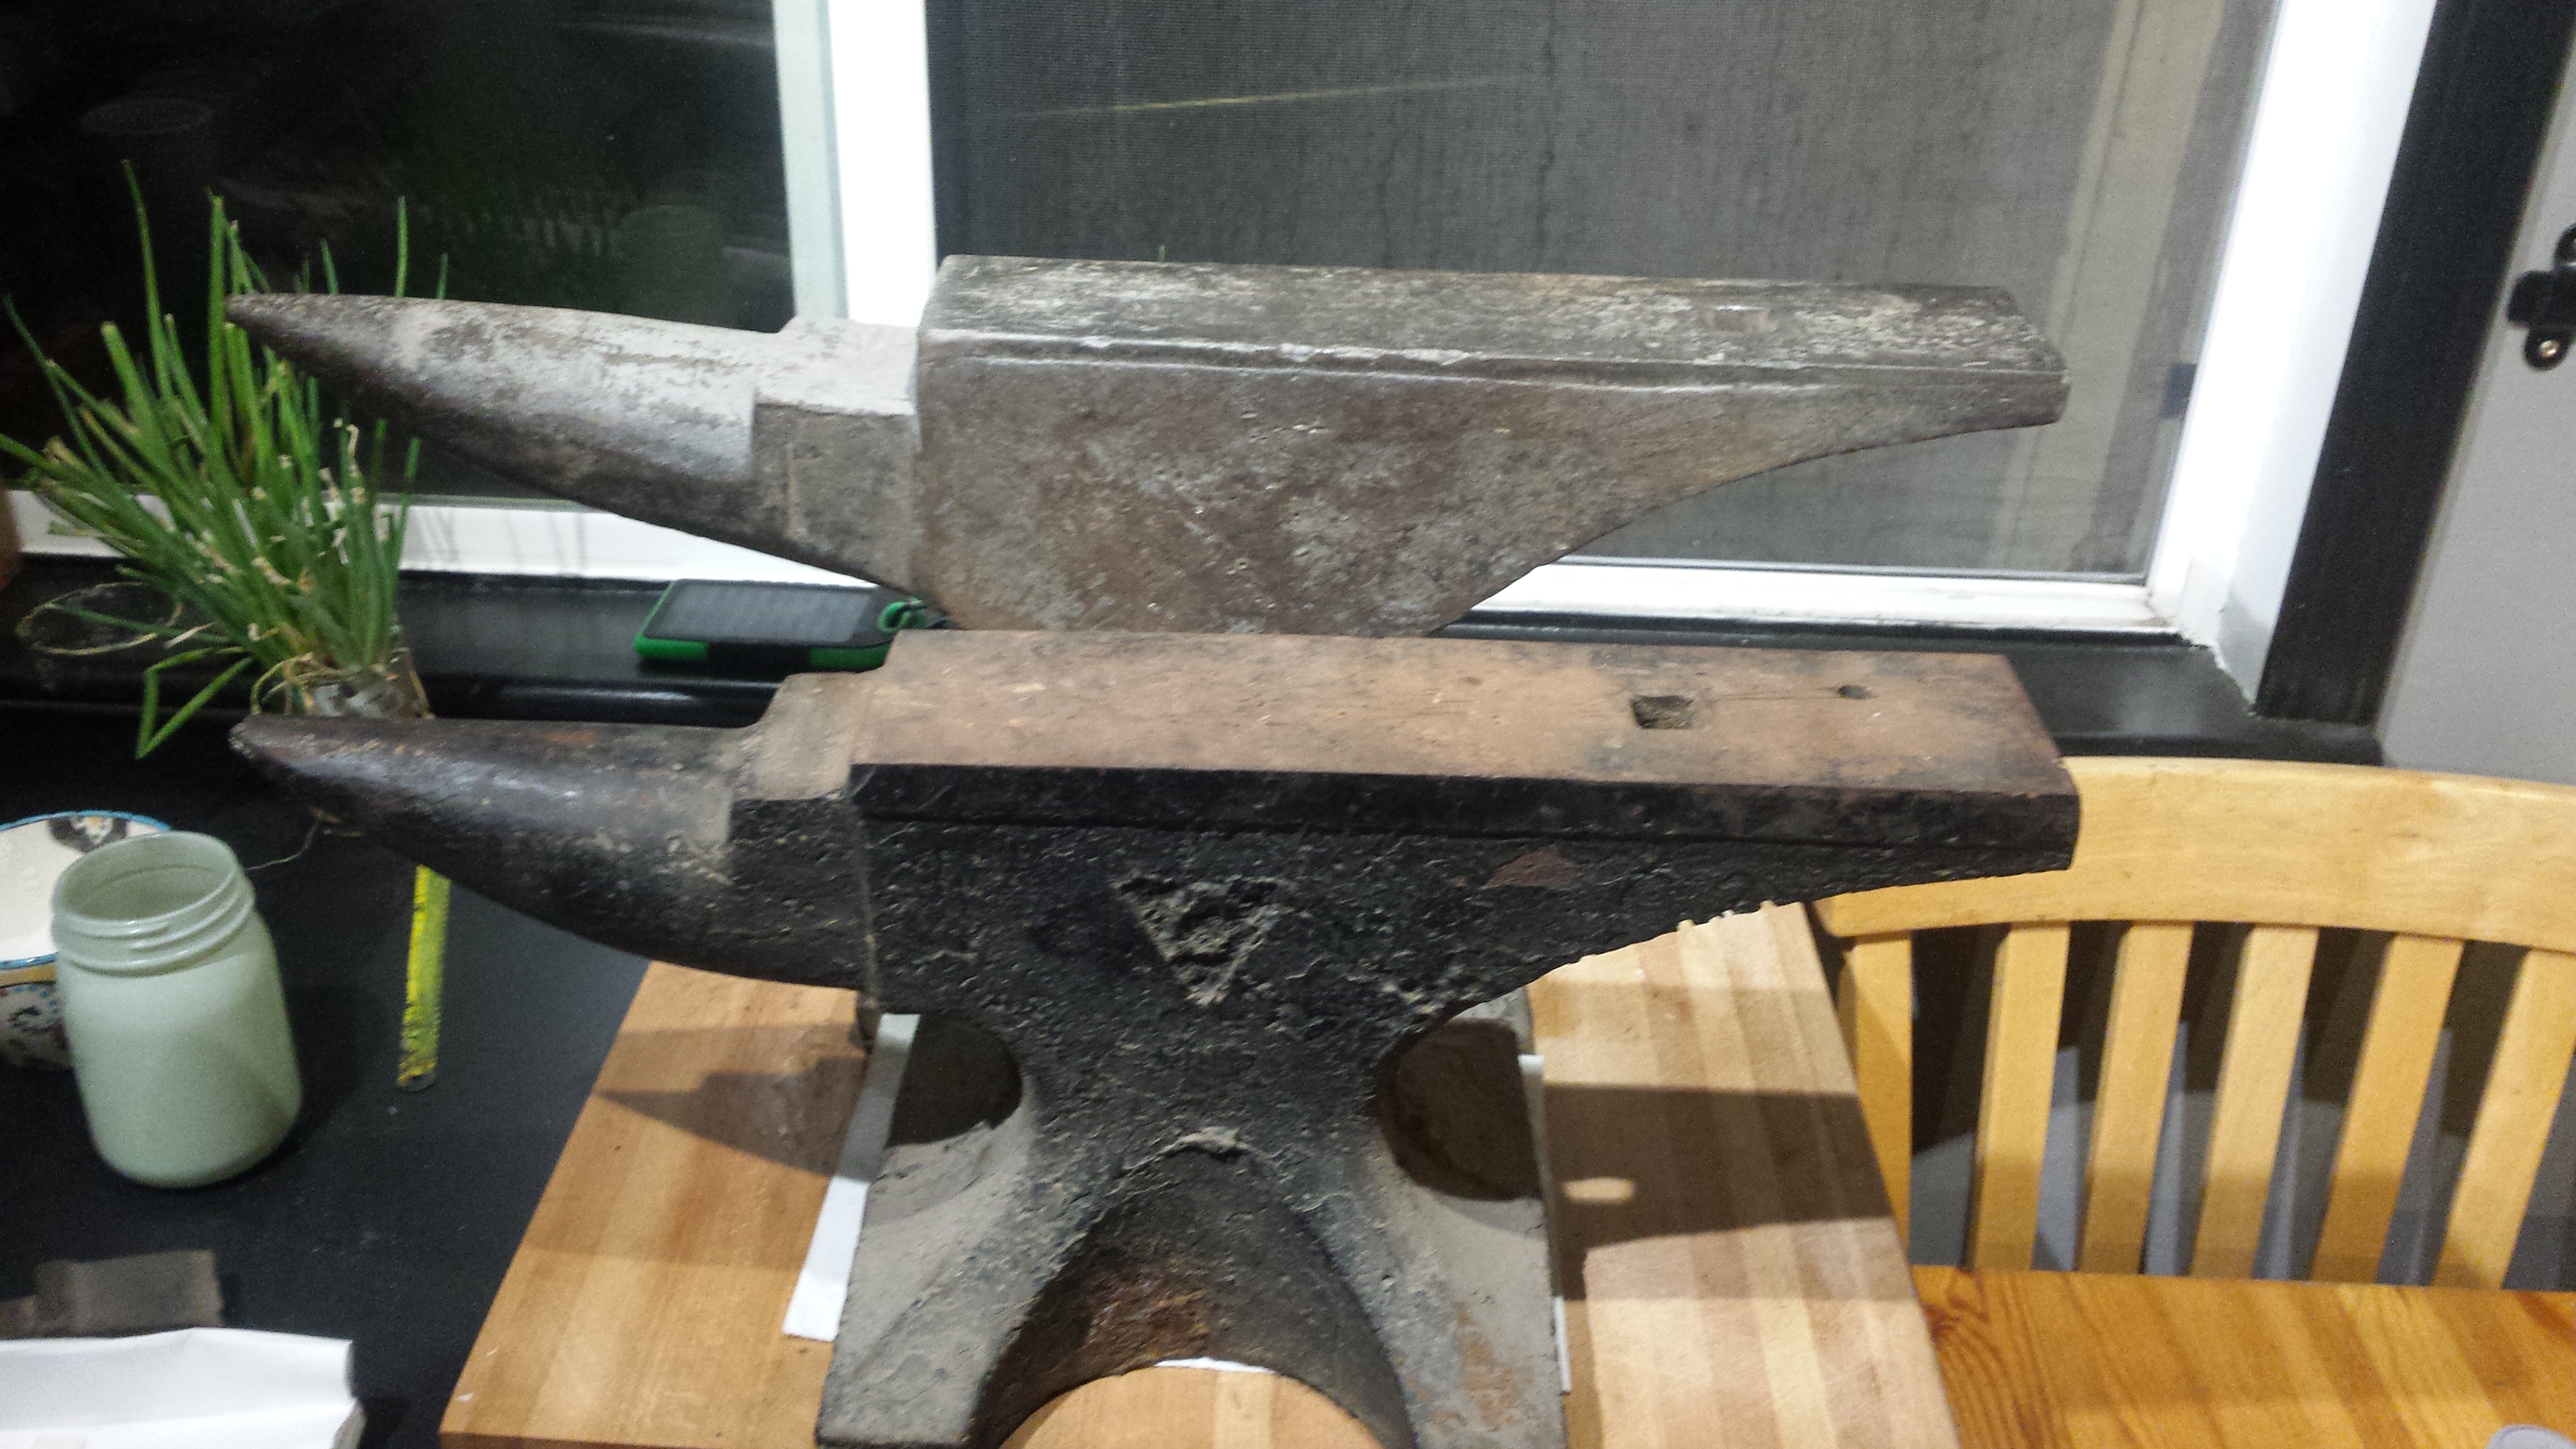
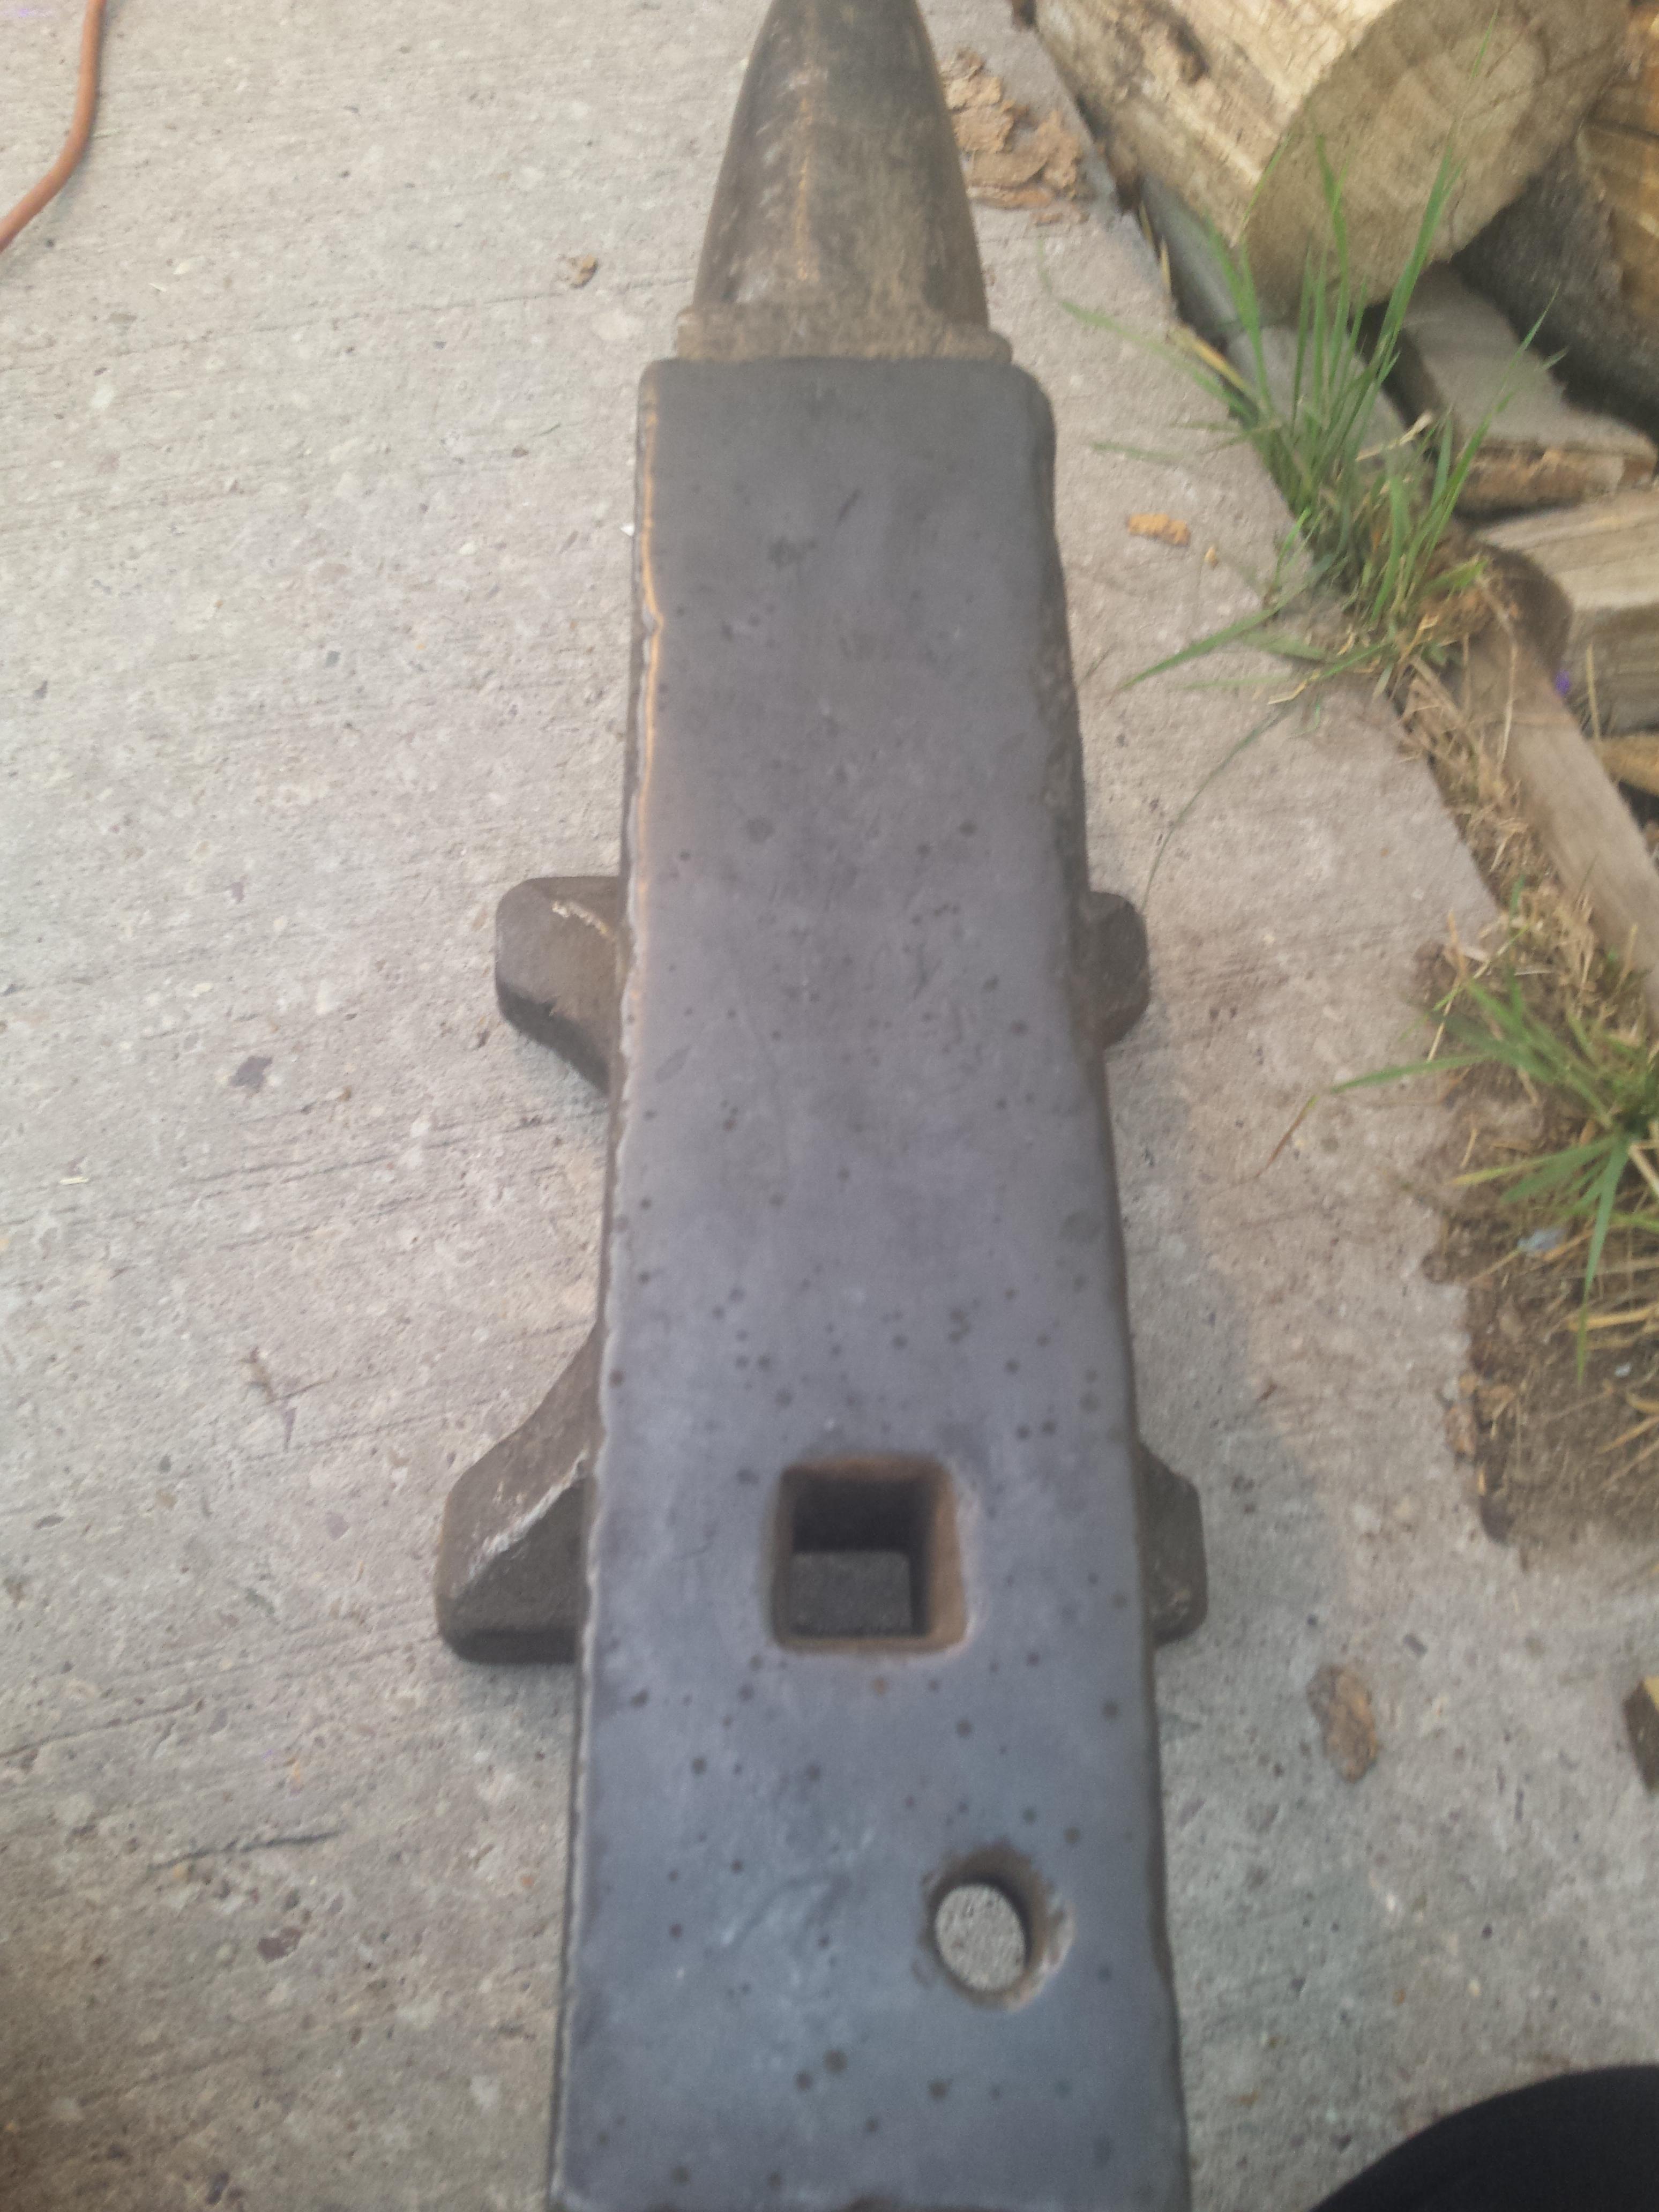
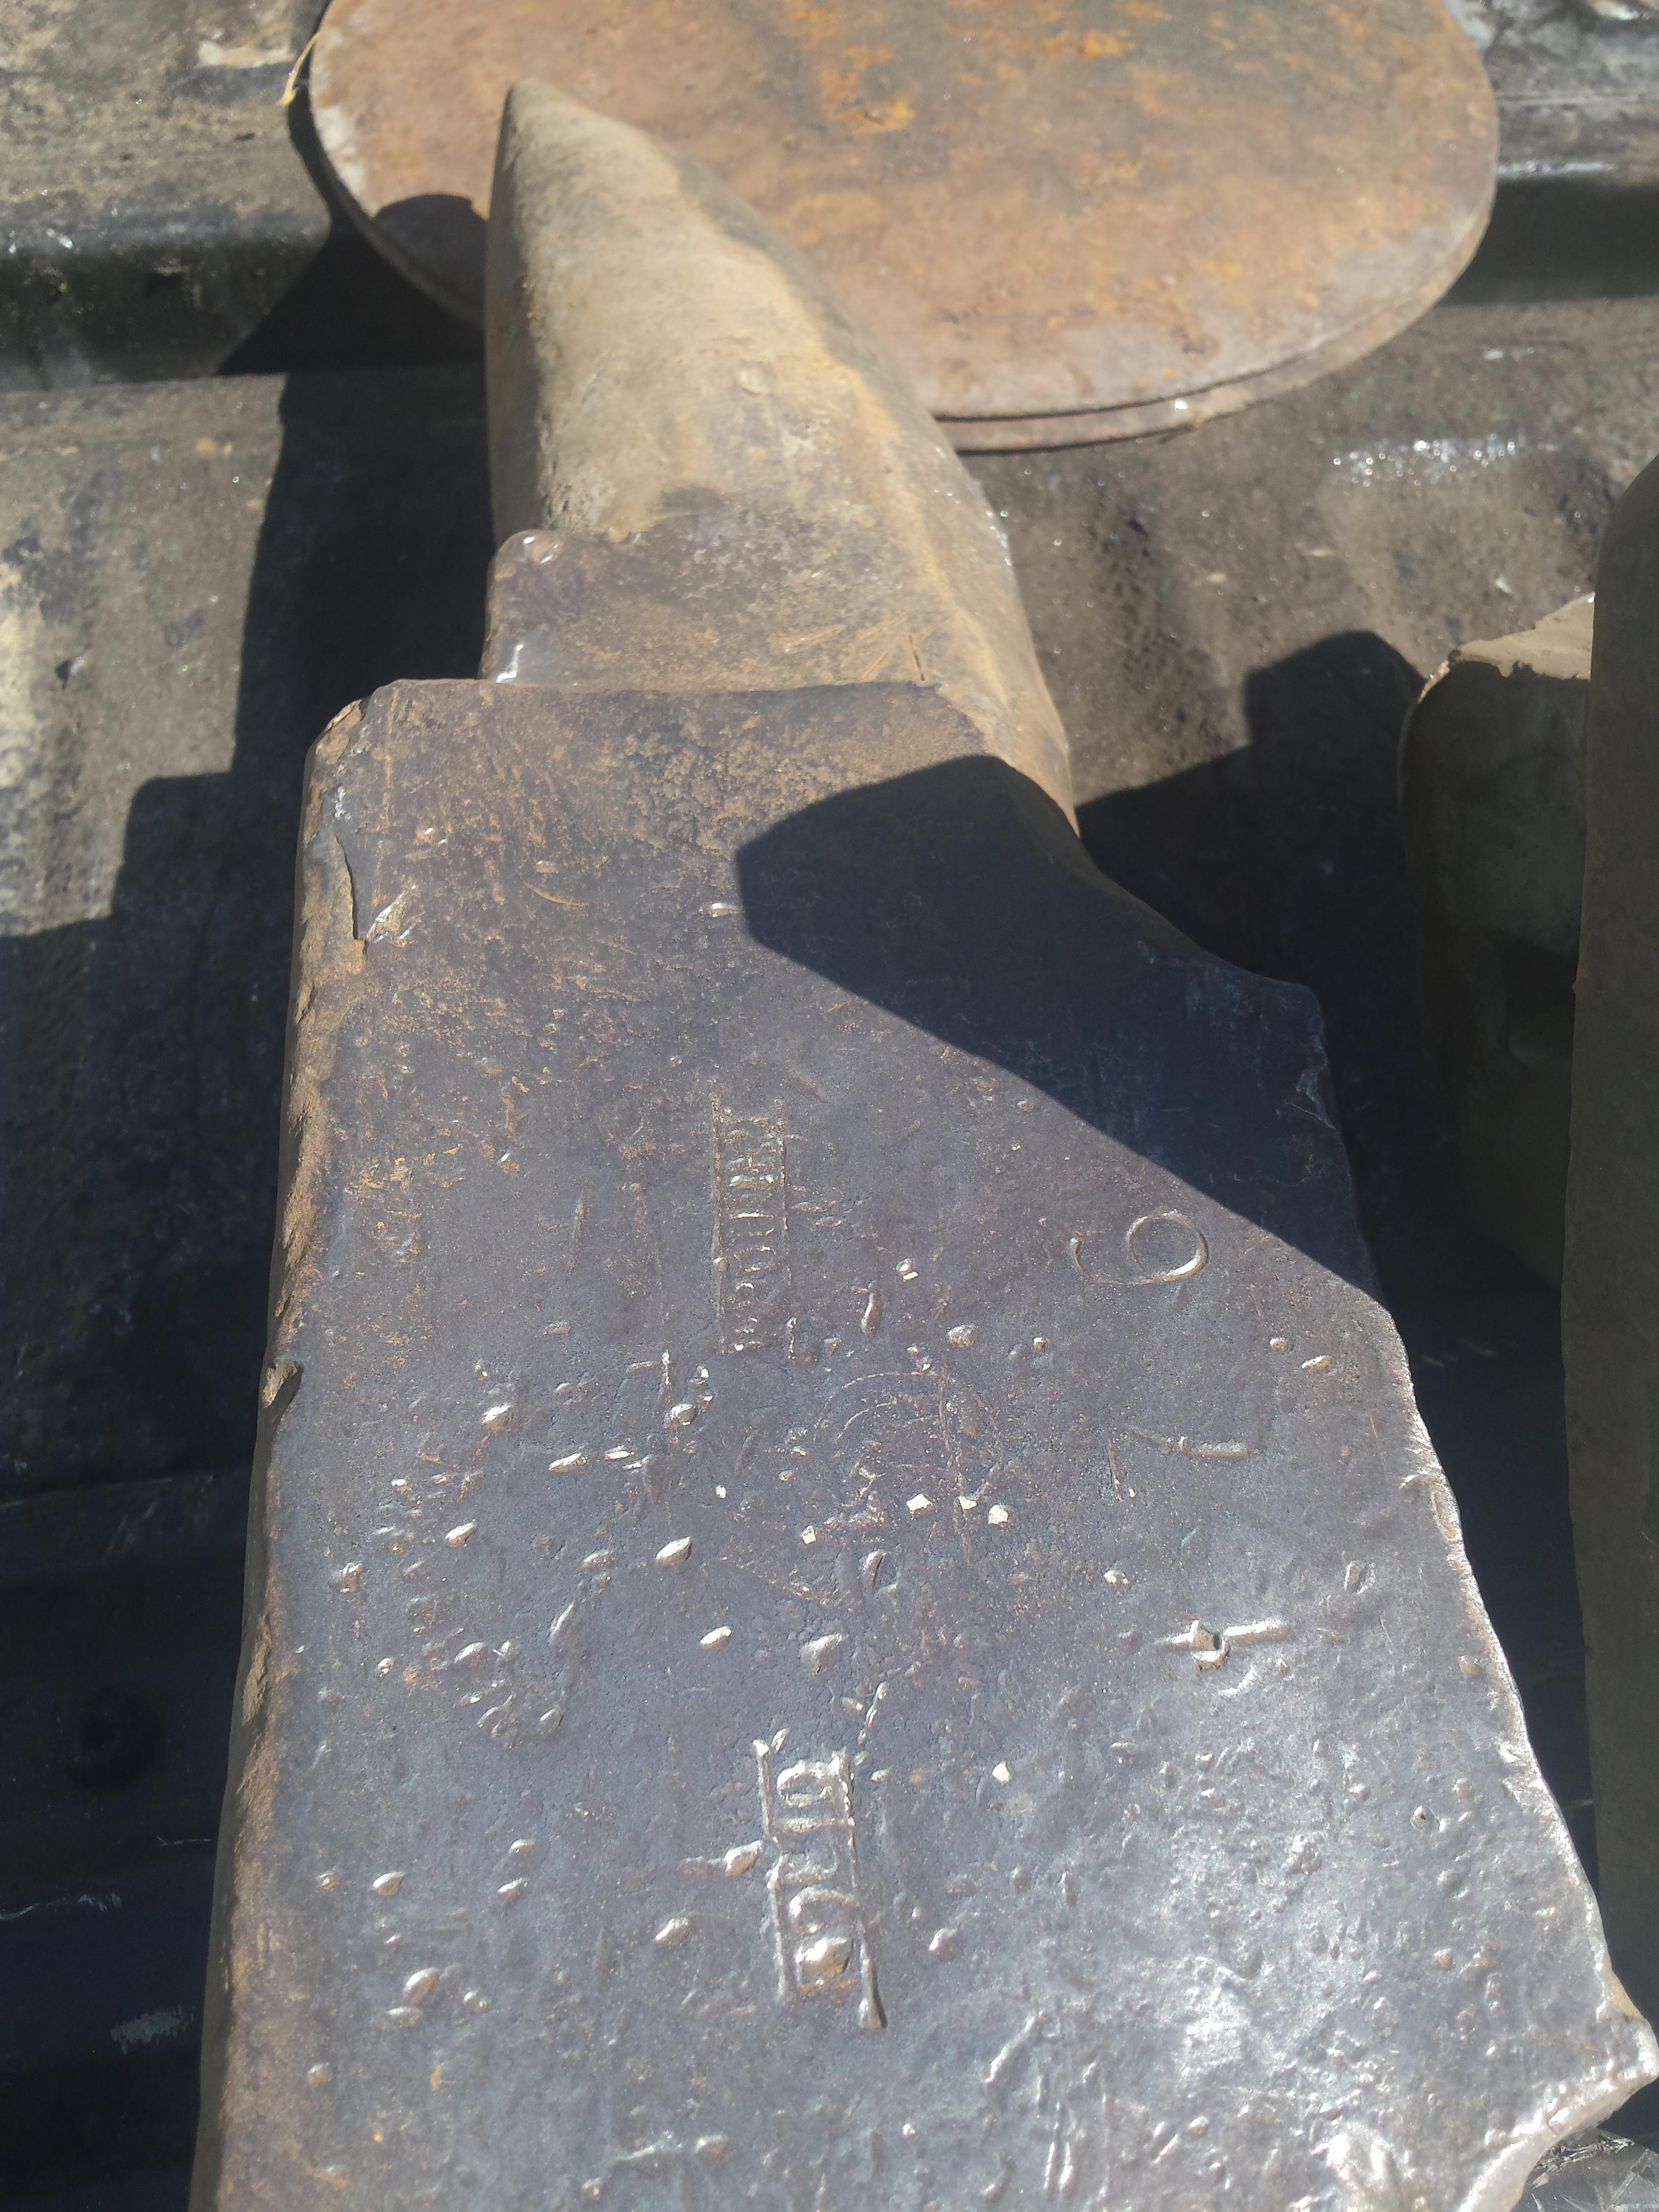
Found this little guy under 300# of forging coke in an old Blacksmith shop. It's a pretty clean break! After wire wheeling, it looks like it started life as a 176#......maybe Arm & Hammer? Rough forging under horn/heel, the shape, and what's left of the logo made me think A&H....I'm sure the experts will chime in soon =)


-
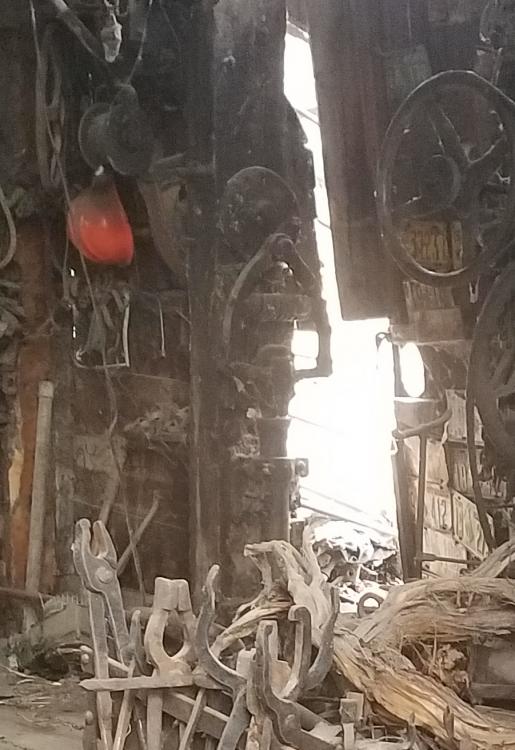
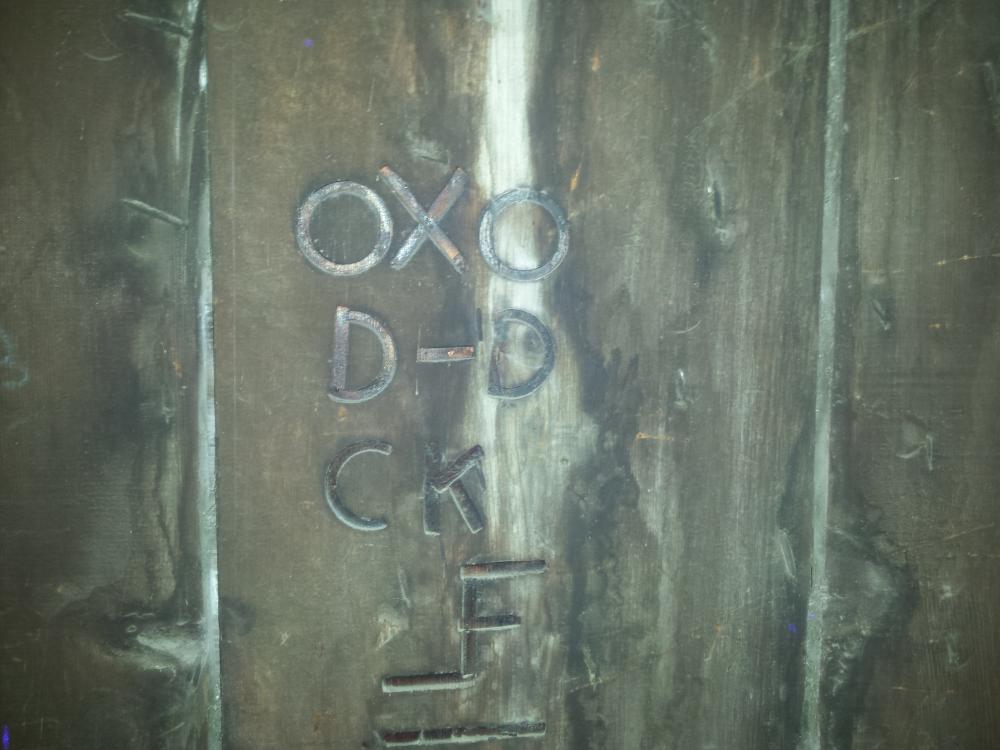
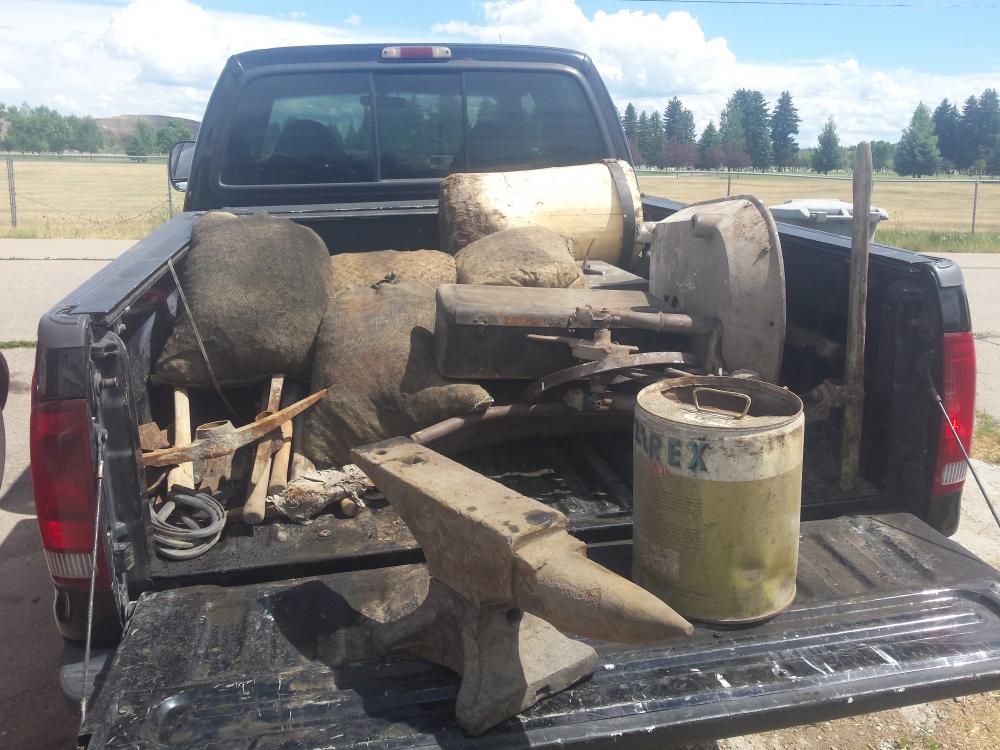
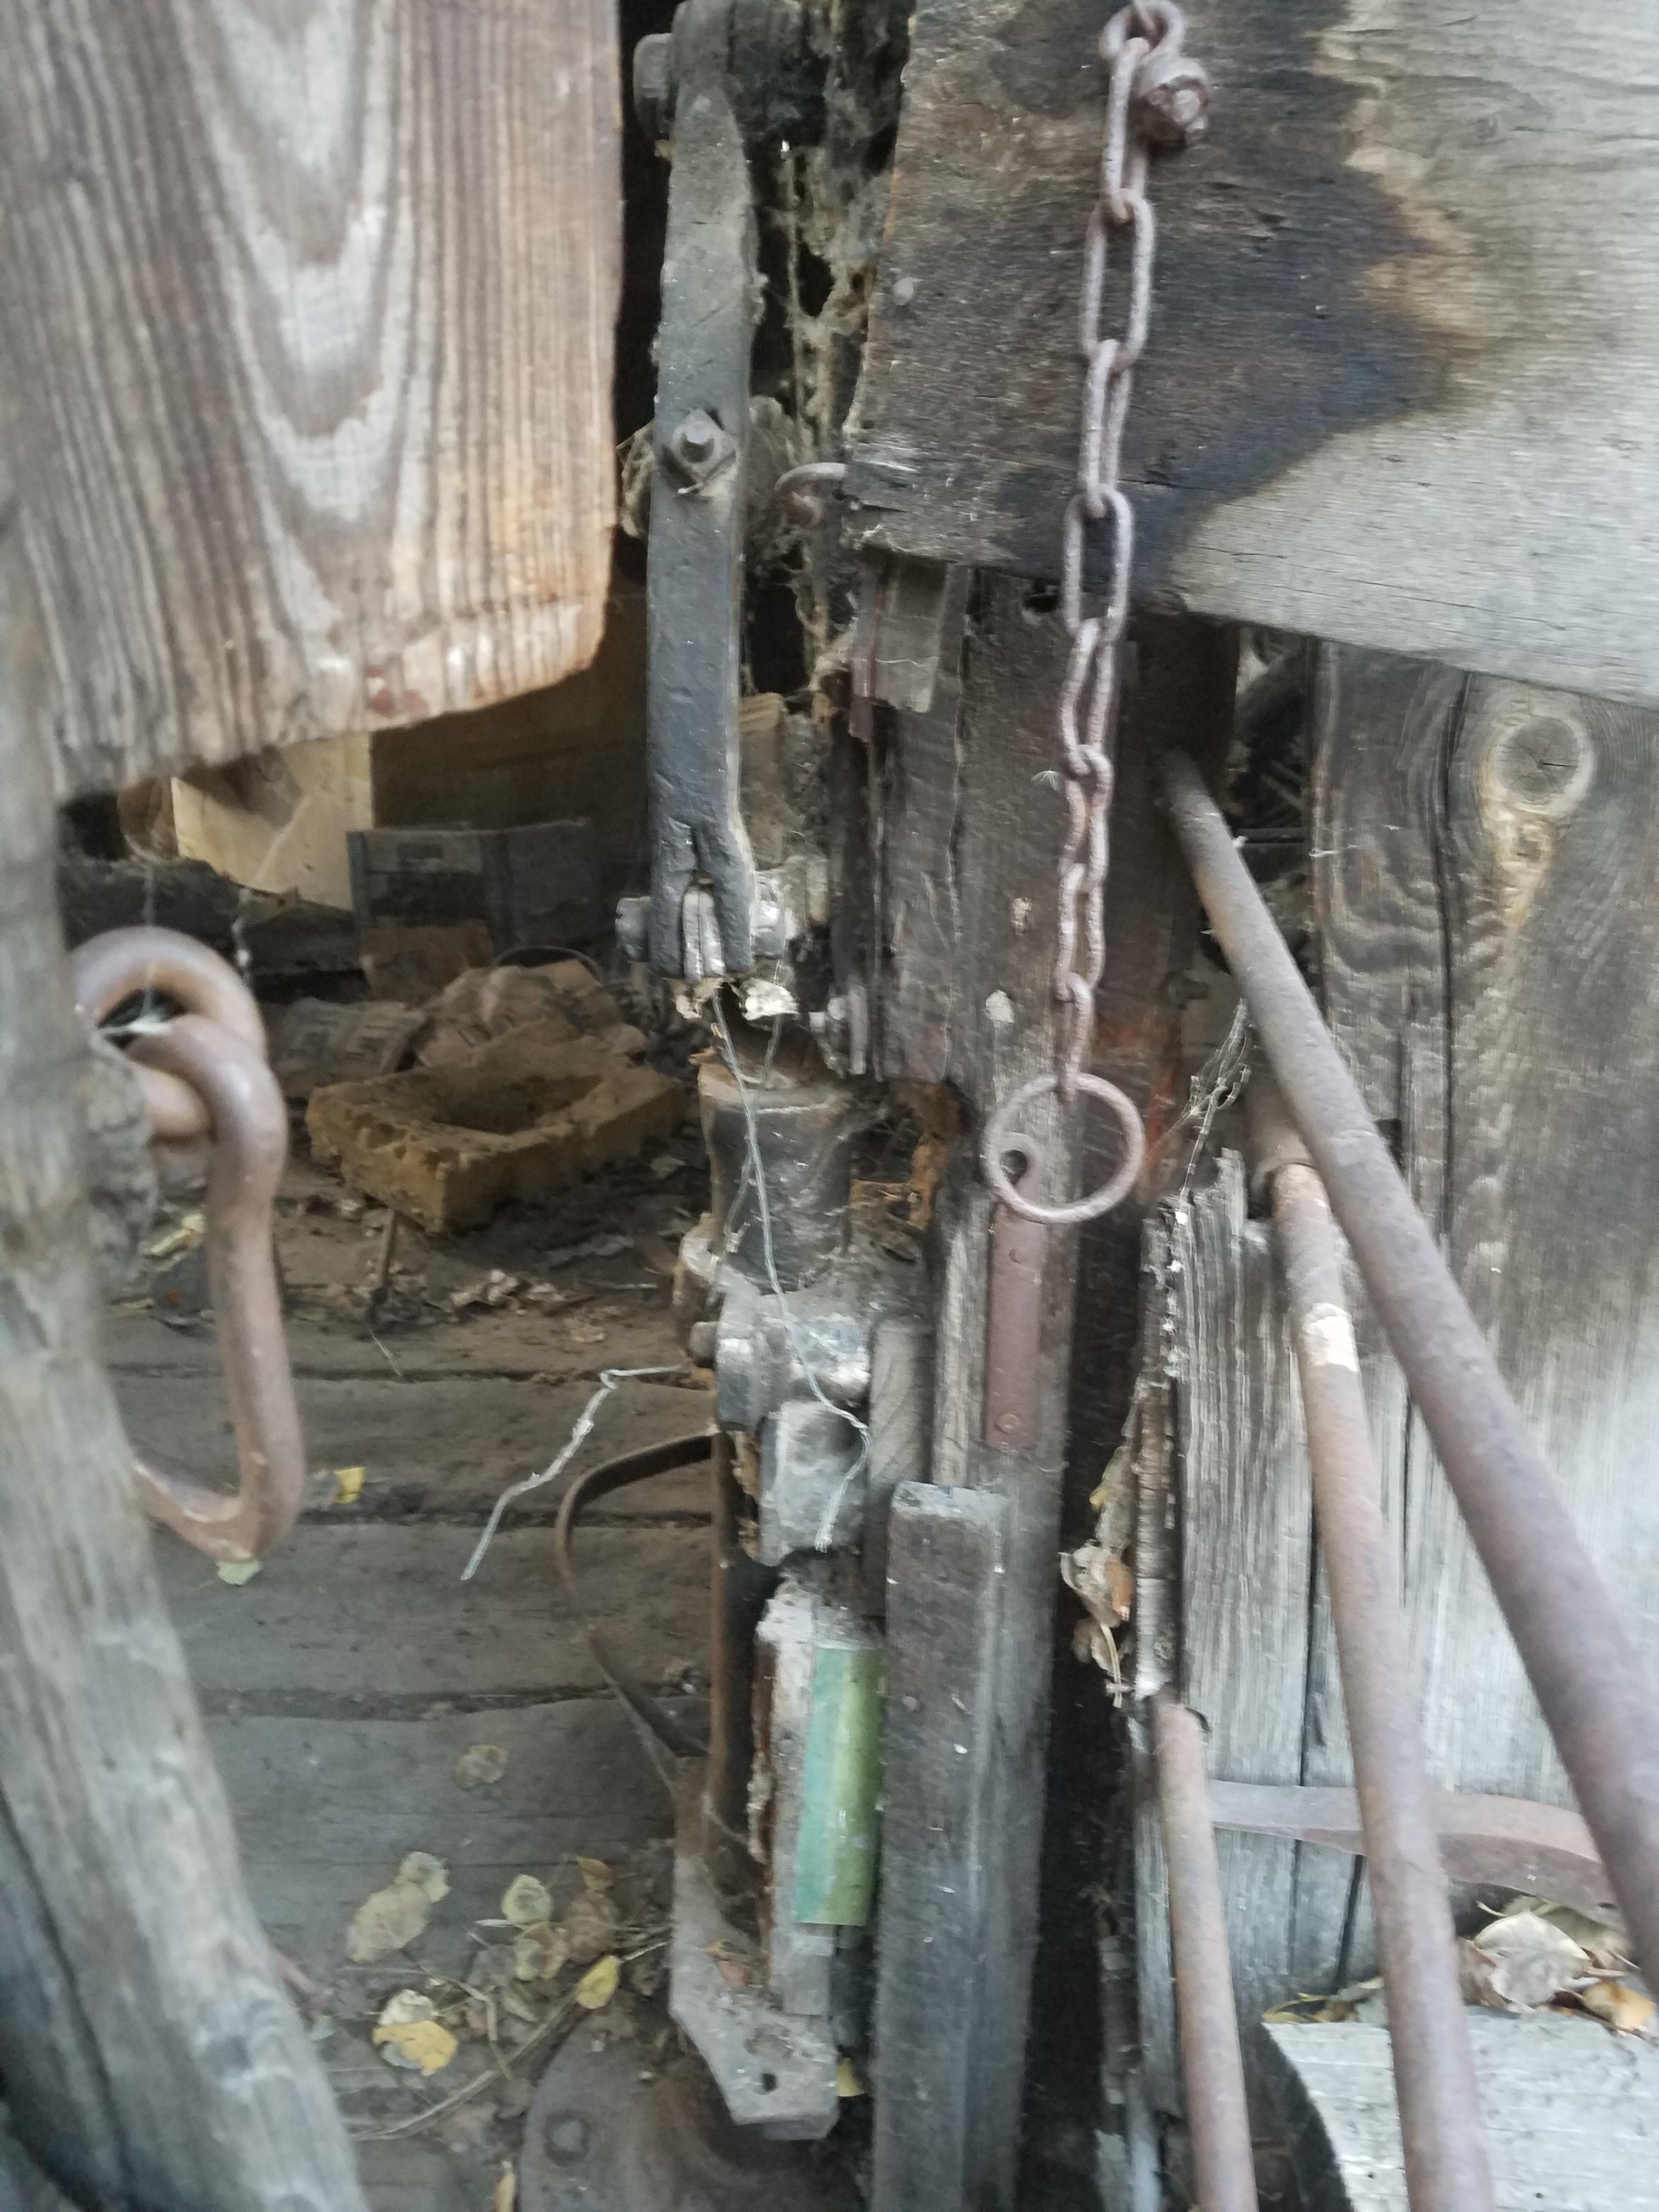
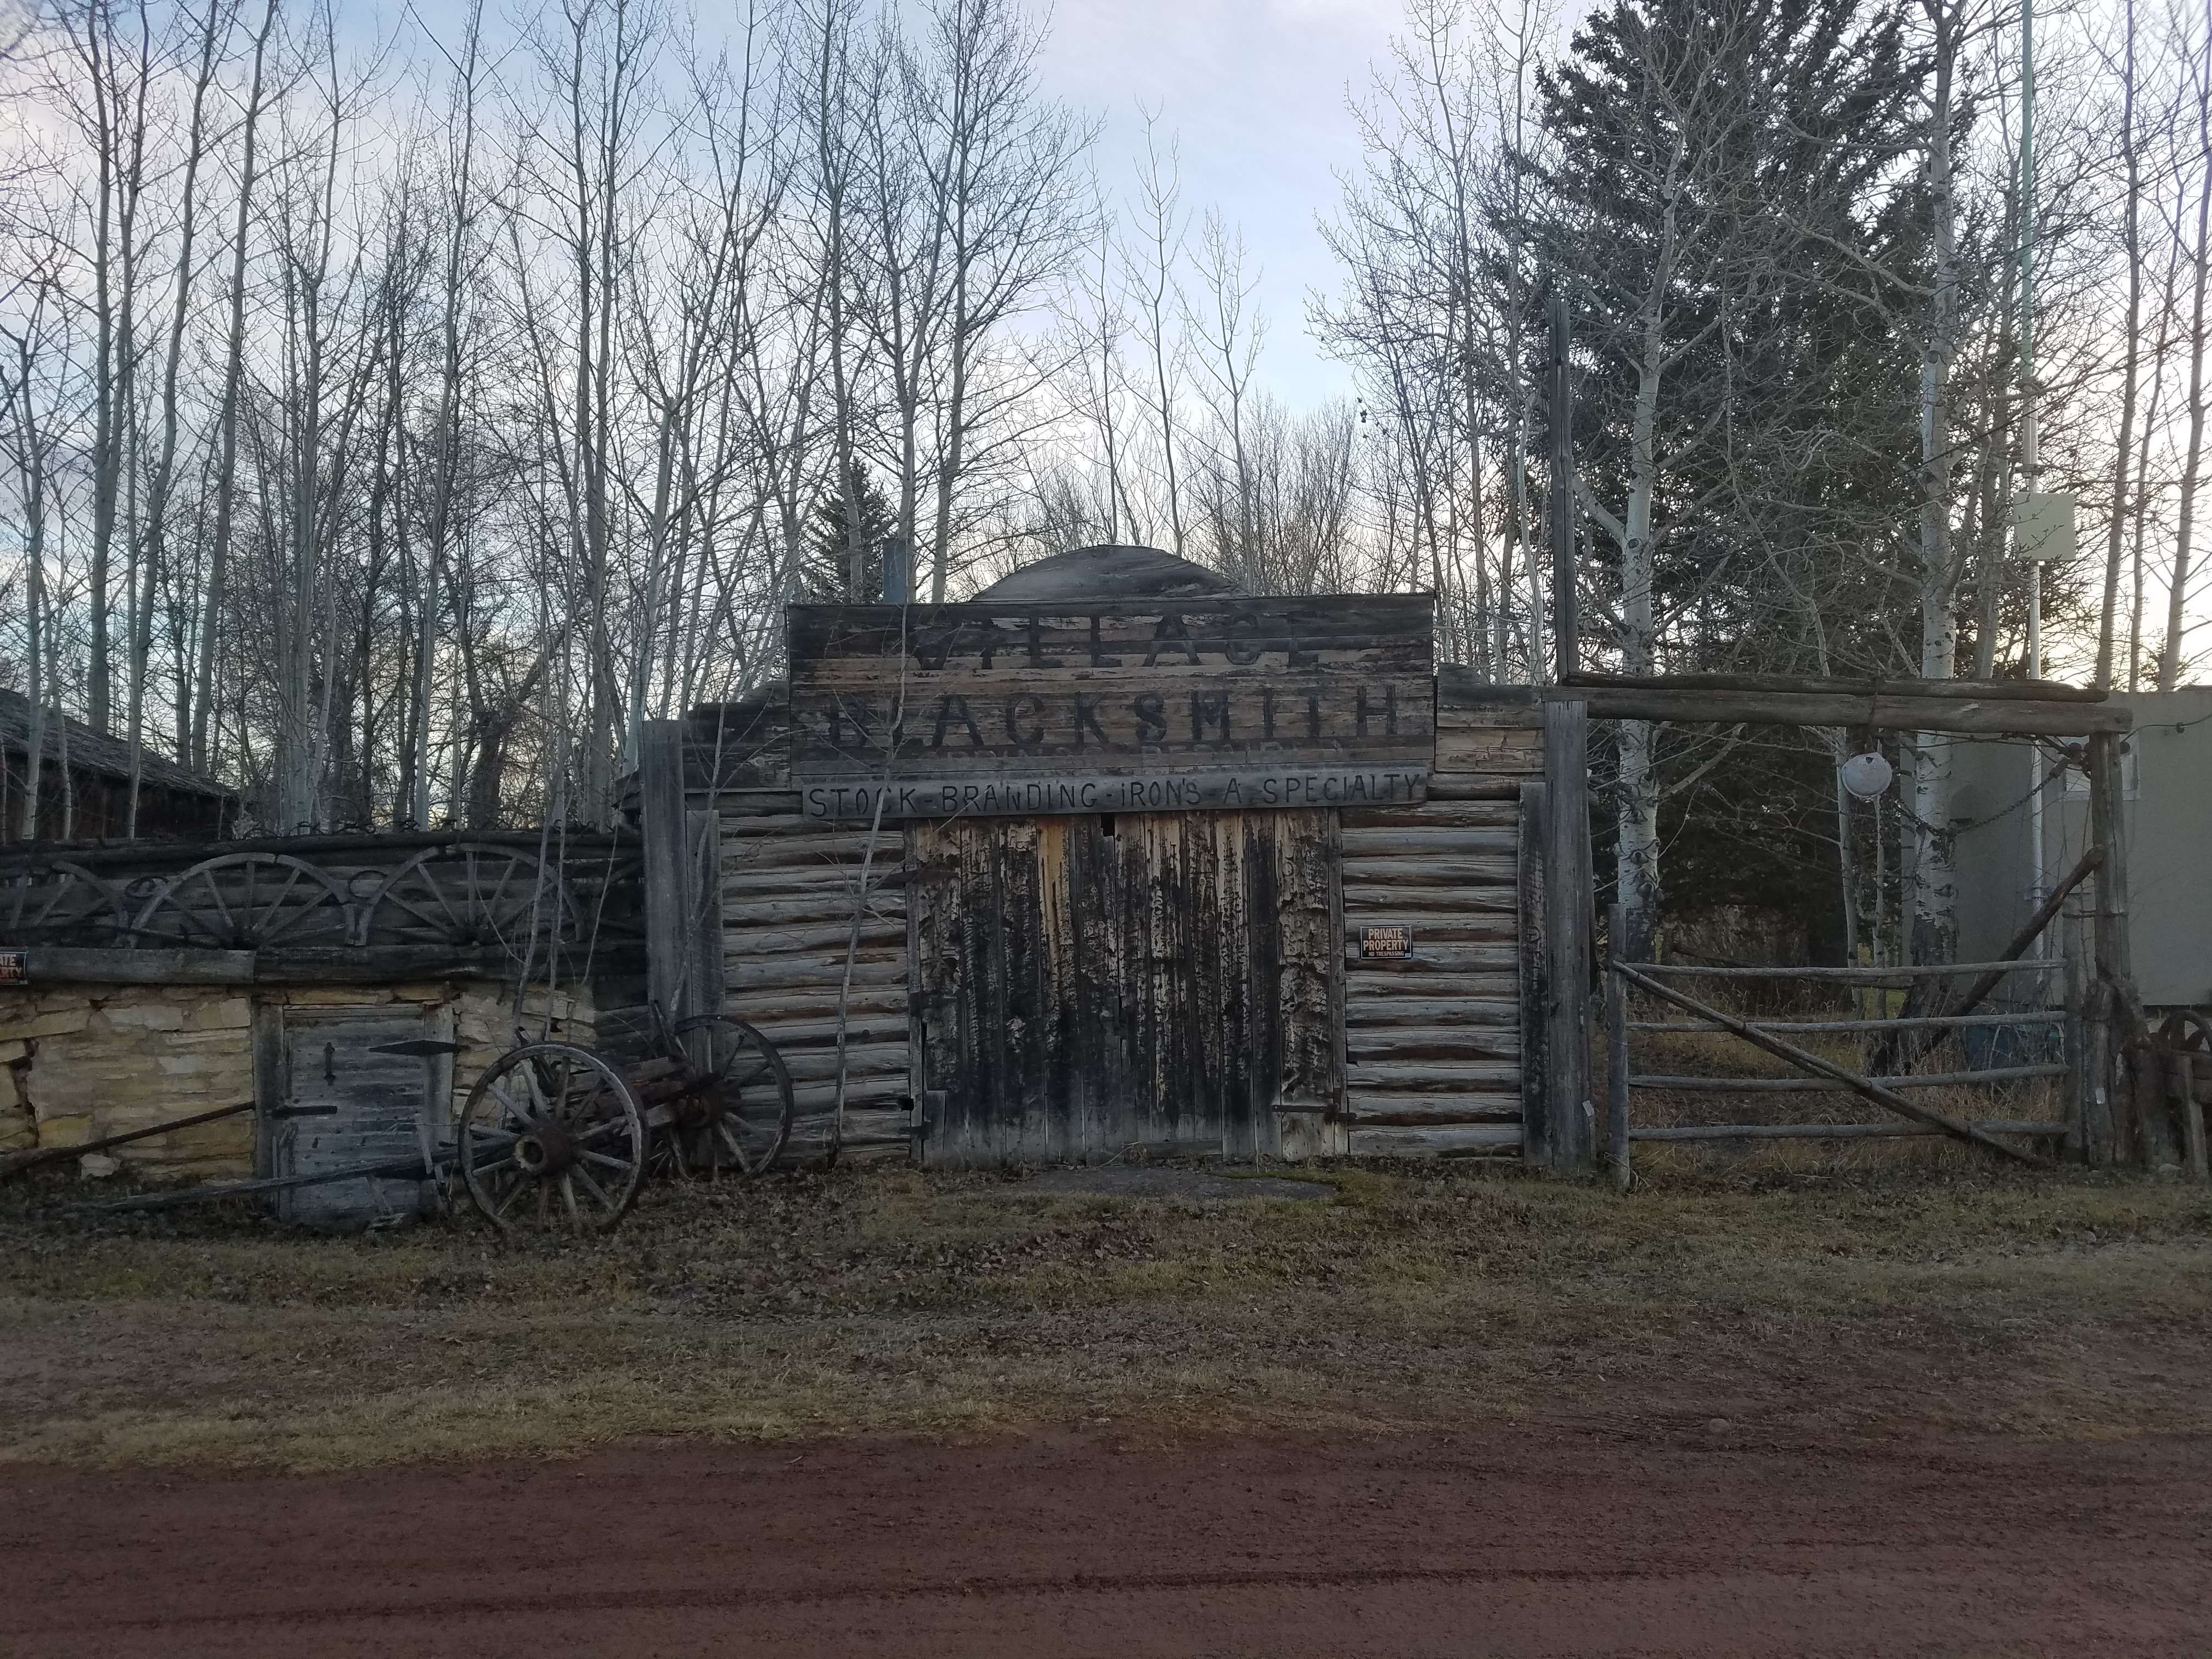
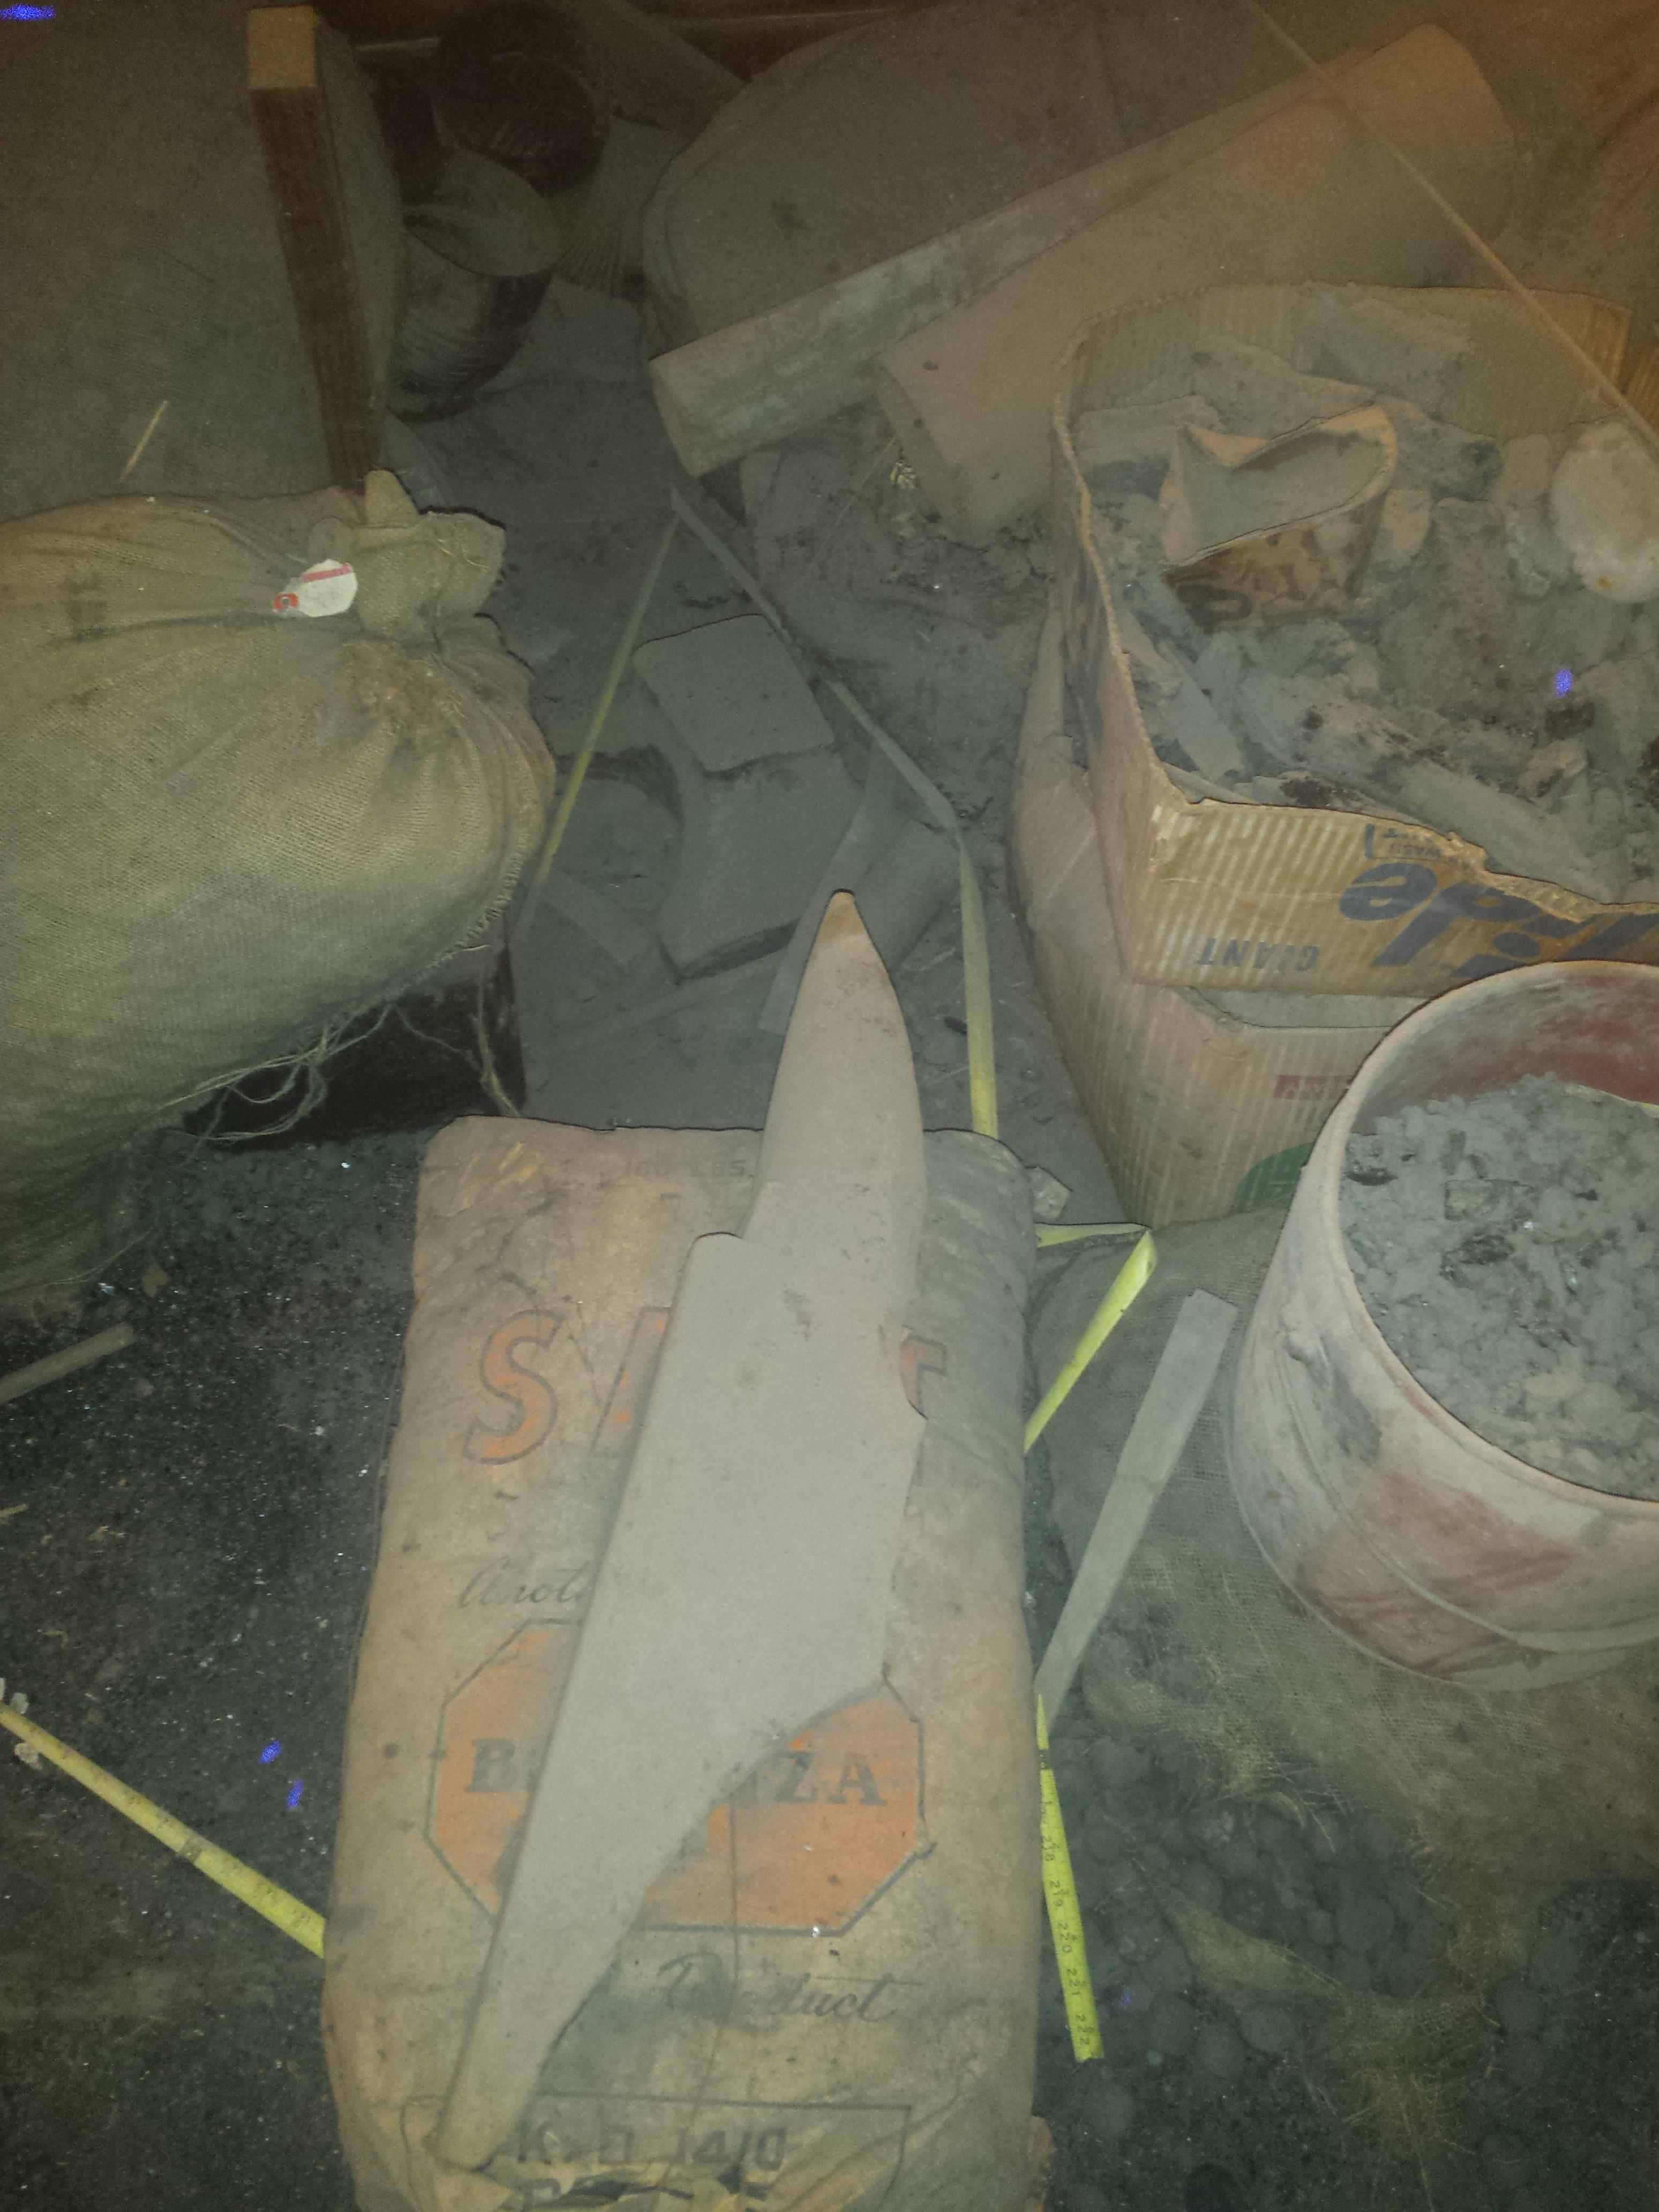
And now today's haul!!! I stopped in to take a few pics of an old Blacksmith shop in a town near mine. Ended up talking with a neighbor, who put me in touch with the owner. The owner had purchased the fully equipped shop from the son of the Original Blacksmith, a gentleman who immigrated from Italy and set up this shop around 1910. The current owner had pictures of himself as a child pounding away in that Smithy. So I of course asked if I could take pictures and document the now abandoned shop. Unfortunately he had sold everything inside and said it was "cleaned out". But he decided to show me around anyway. Inside the front doors are the test marks of the various branding irons that were made there. The Motto "By hammer and hand, all arts do stand" was chalked high on each wall. The brick forge had been dismantled, and it was indeed pretty cleared out. Except for ALL of the strap iron,bar stock, coal, bagged coke, the old anvil stump, a cast forge, old pickaxes,and finally, under the coke. ....a broken at the waist 176# Anvil!!! This is the first truckload. I'll be going back later to bag up the loose coal and the metal. The owner wanted to GIVE this all to me and kept saying he was sorry I didn't show up a couple months earlier. I ended up paying him for this load and agreed to buy the rest when I get back up there.


-
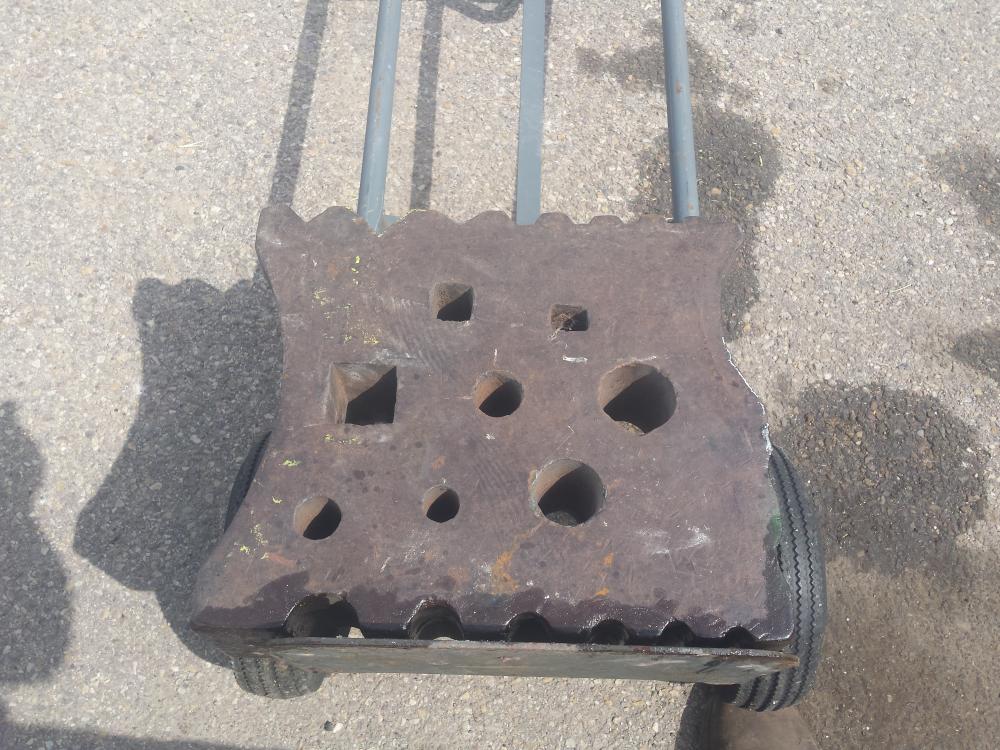
First I thought I'd post what I brought back from my last trip up north. 25# Canadian Giant. It's in rough shape and has "repairs" on both toggle links, the ram guide, the front bearing cap, the lower dovetail, and the upper die in welded in. But I couldn't just leave it there. ..so slowly I will try to bring it back to operational. I was literally getting in the truck to leave when the owner asked if I was looking for anything else. I was so excited about the giant I hadn't even asked what else he had!!! So the swage was added to the load. It is 200#(+/-), measures 4.25"x16.25"x14".
-
Hah! Geez...I never knew coffee could come out my nose. thanks for that Thomas.
-
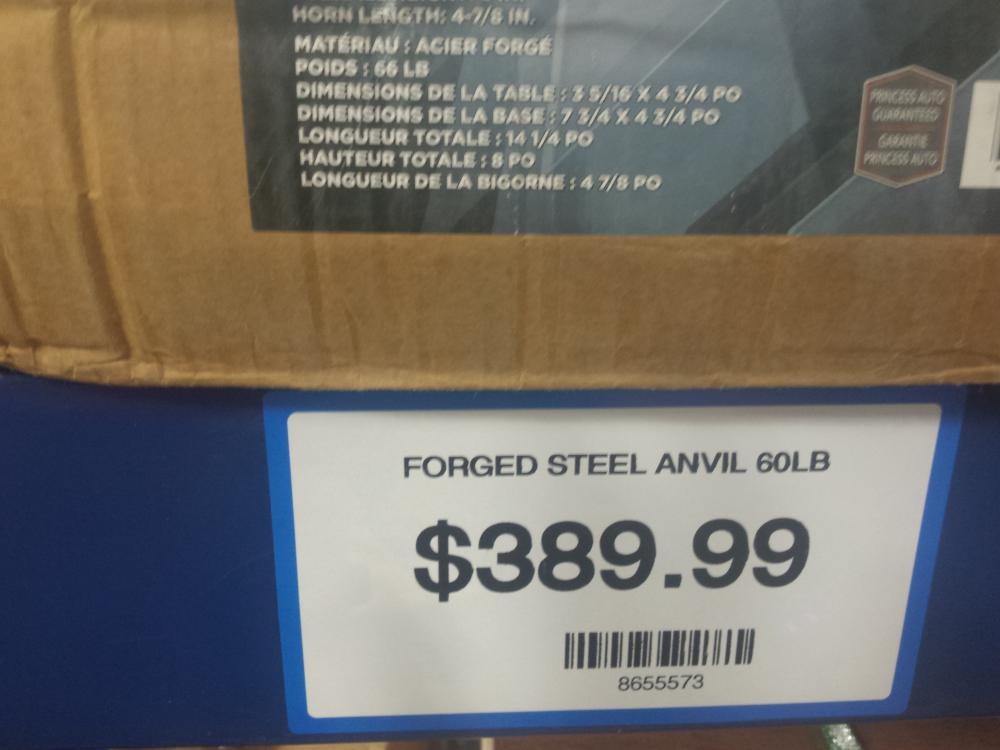
Quick disclaimer I AM NOT RECOMMENDING NOR LOOKING TO PURCHASE THIS ANVIL. Just wanted to document it and see if anyone has personal experience with these. So I'm traveling through Canada and decided to swing into Princess Auto to browse. It's like the Canadian harbor freight on steroids. Lots of imported "tools" but also excellent trailer building supplies, hydraulics, and some surplus. In any case, this is what I found. It claims to be a 66# STEEL anvil. I was ready to write it off as another cheesy Chinese cast iron ASO, but I couldn't help myself. I grabbed a hammer and gave her a tap. And another. Then, with it sitting on concrete I did a rudimentary rebound test. Consistently it was 60-70%. And it rings. I think this might actually be a STEEL anvil. Note I didn't say HARDENED STEEL. But steel in any case. And now the downsides. The "pritchel" is as big as my thumb and drilled only 2" deep. Same for the hardy. Neither pass through. The working area is ridiculously small for an anvil this size. And the price. Nearly 6$ Canadian per lb Anyway, an odd addition to the list of Chinese anvil attempts. At least there were no visible casting lines, and the machining was pretty clean. Also, I wish I had photographed it, but the bottom features 2 threaded holes....for mounting maybe?

1628901152.thumb.jpg.d0ec8077a1a56e796aa30c15e1252b3d.jpg)


1628901152.jpg.685bf35e501bc0d3c01bd1812589829d.jpg)
